Brutalform
-
Posts
2,830 -
Joined
-
Last visited
Content Type
Profiles
Forums
Events
Gallery
Everything posted by Brutalform
-
Some of my T Bolts I’ve built over the last year or so.

-

Phil Bonner / AL Means Ford Thunderbolt
Brutalform replied to gtx6970's topic in WIP: Drag Racing Models
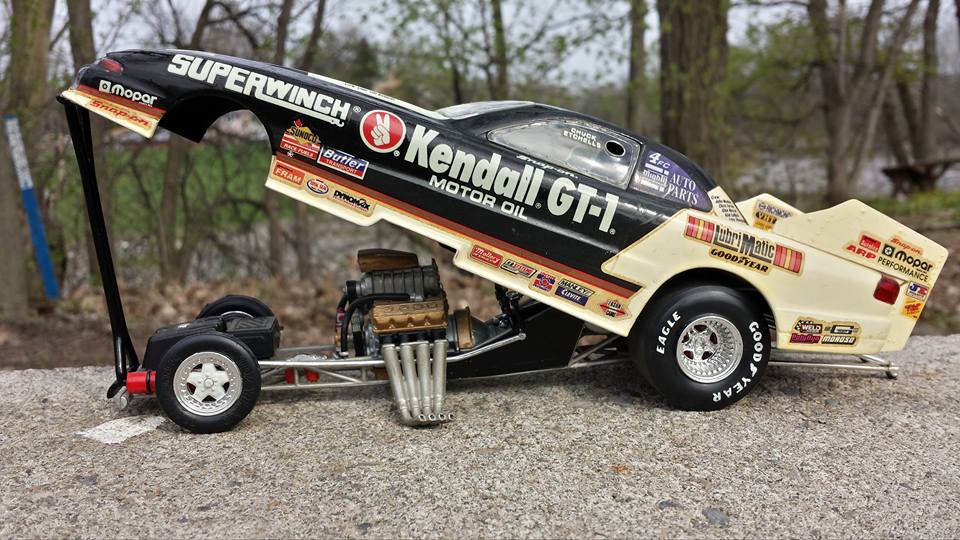
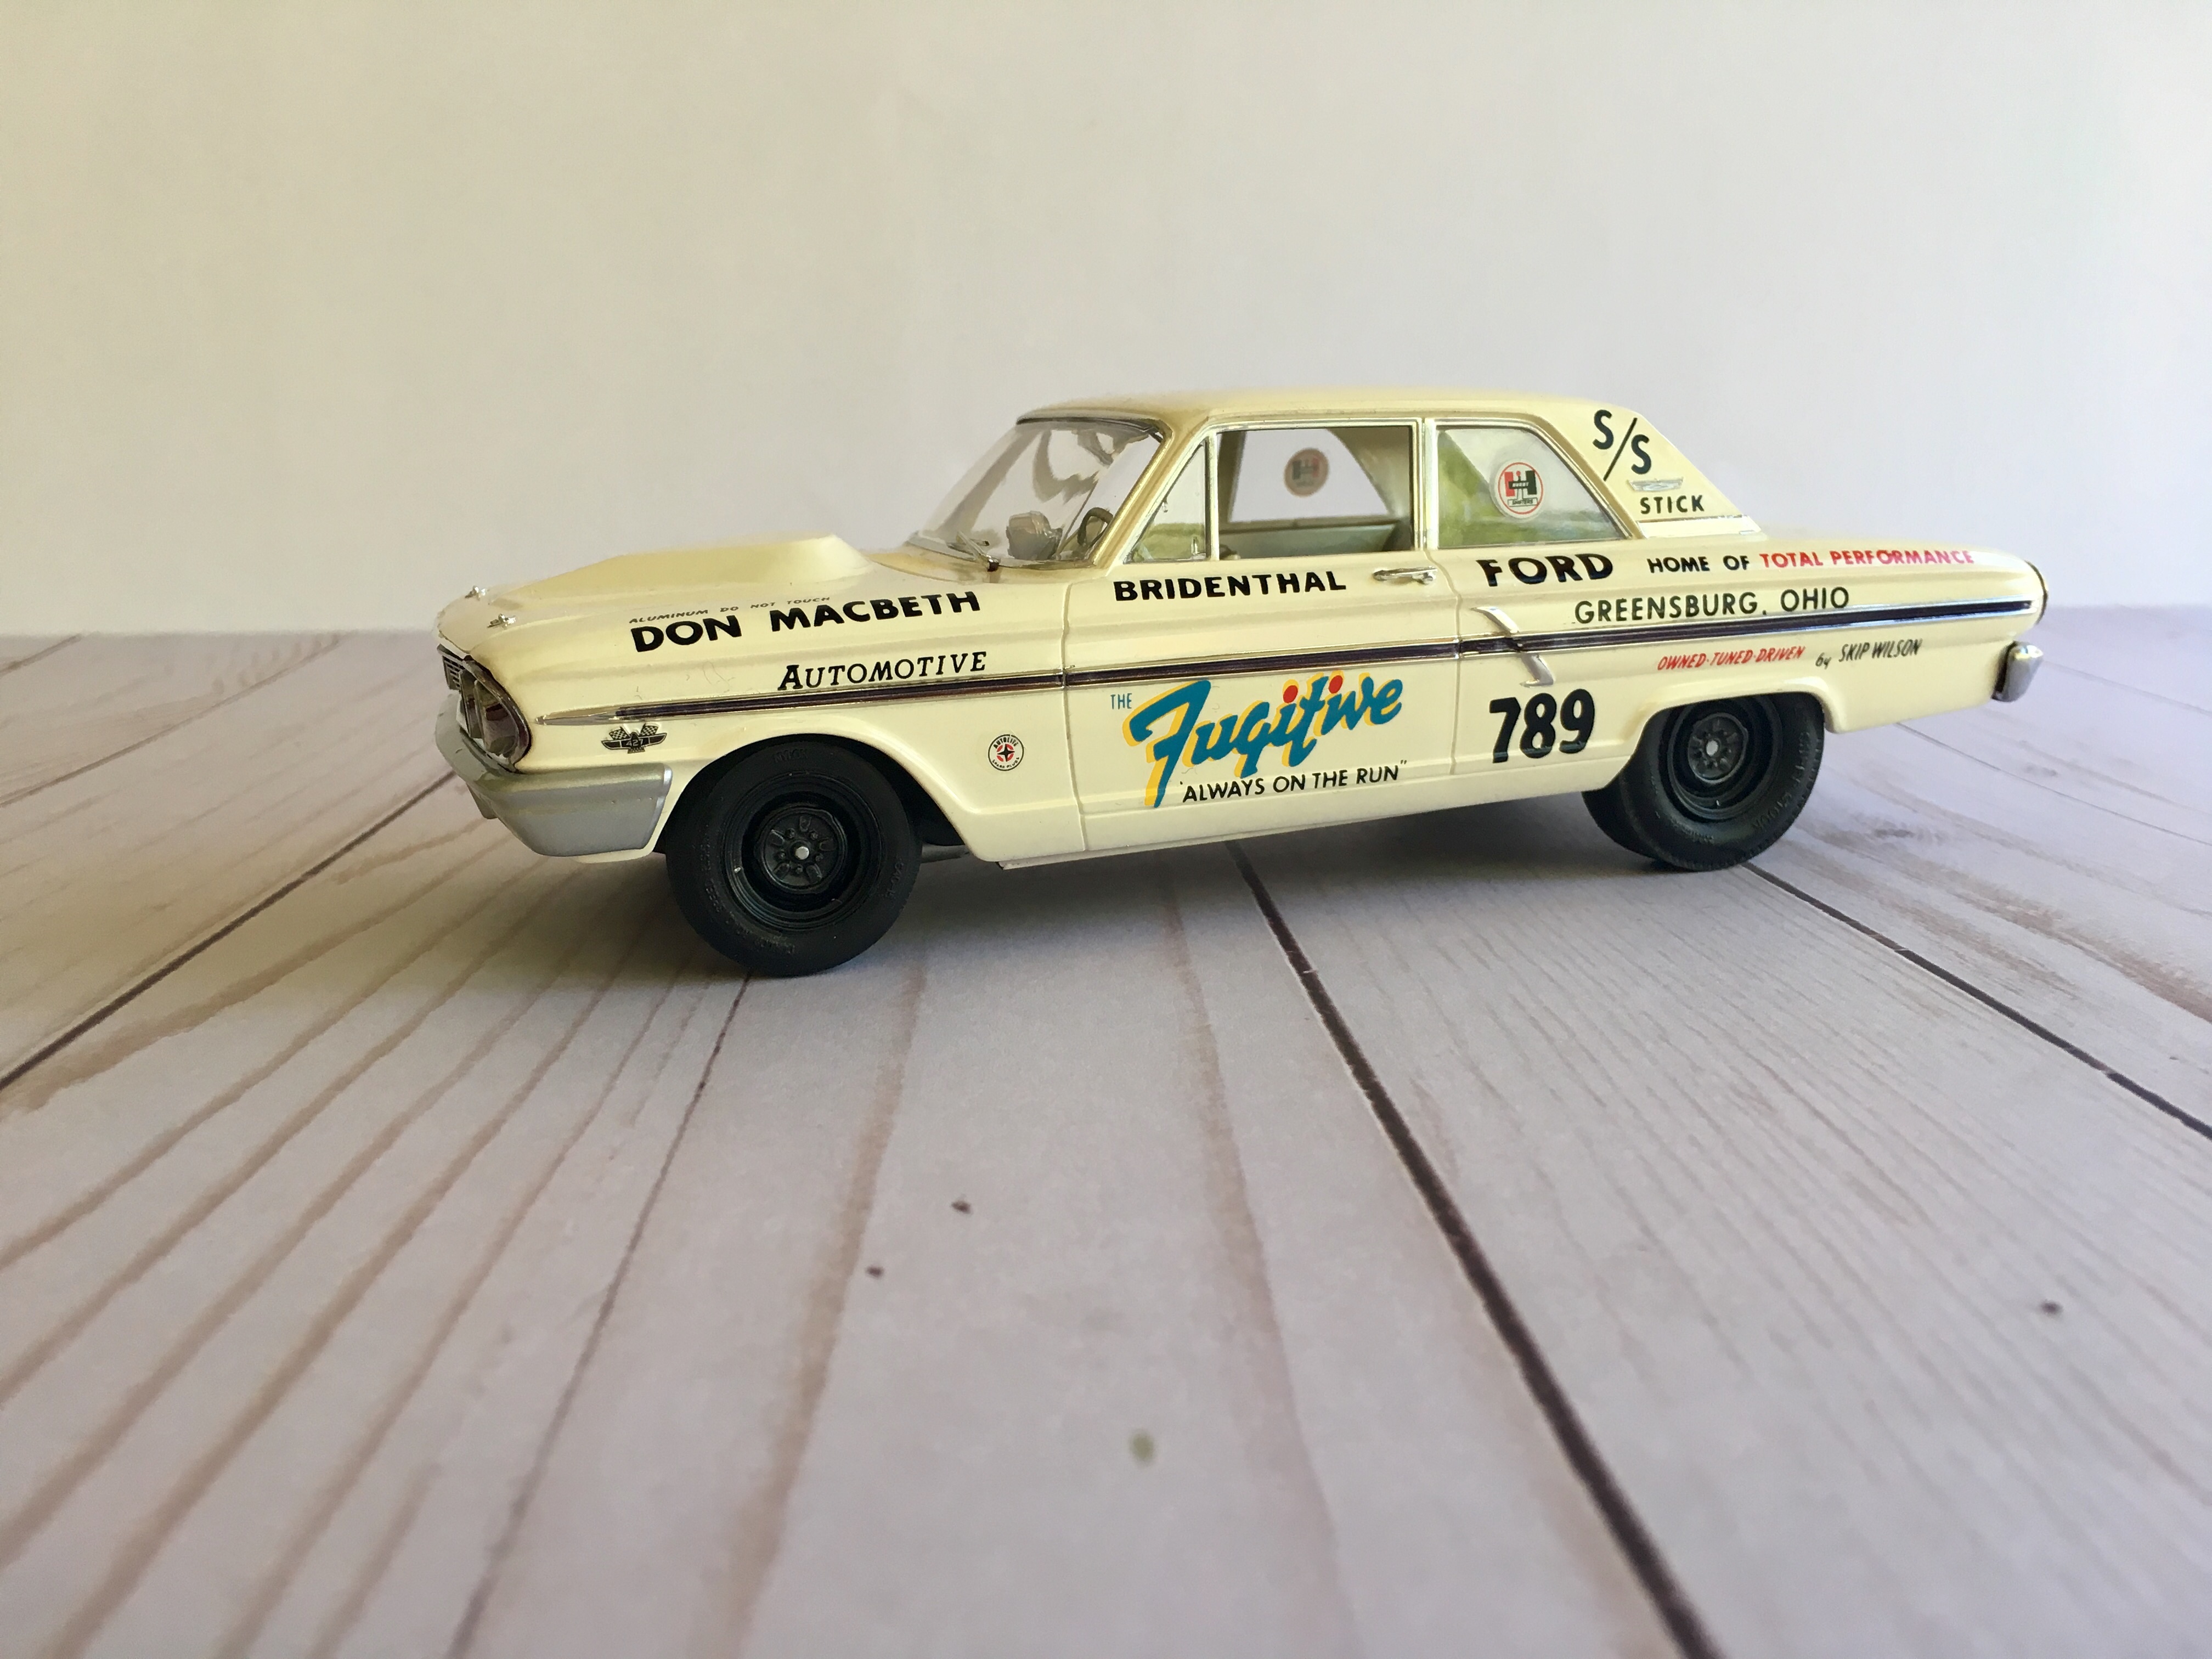
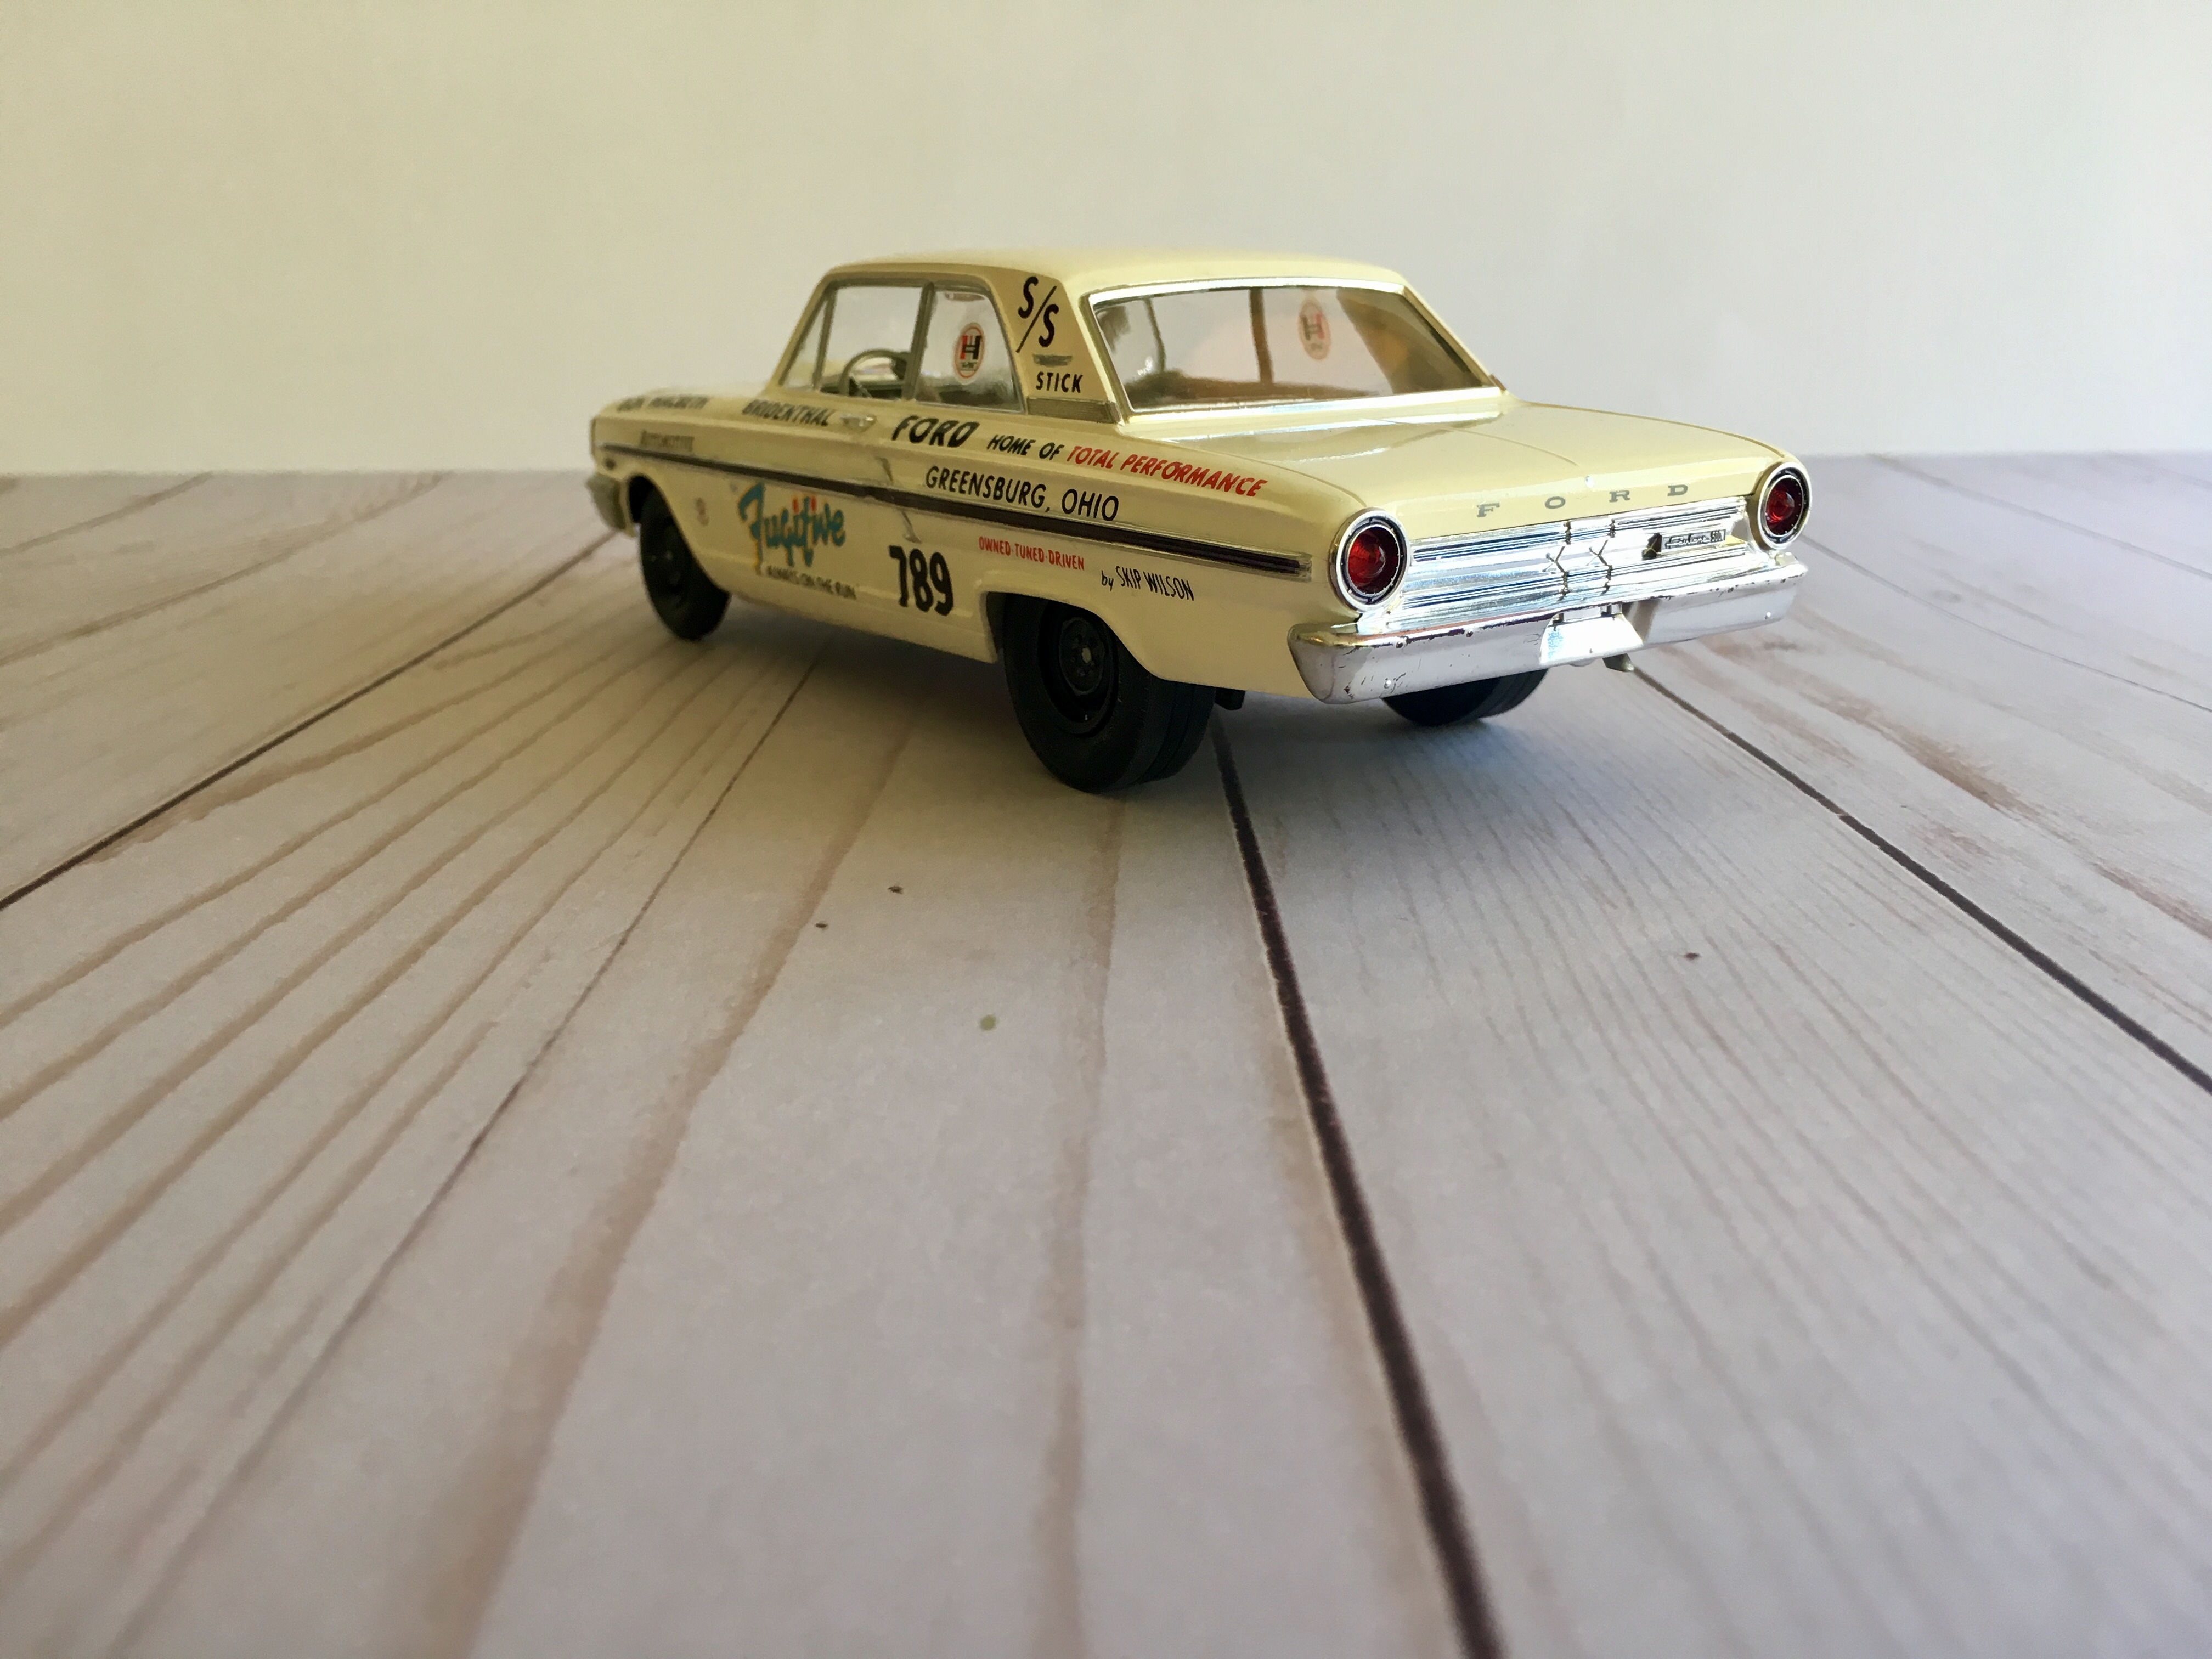
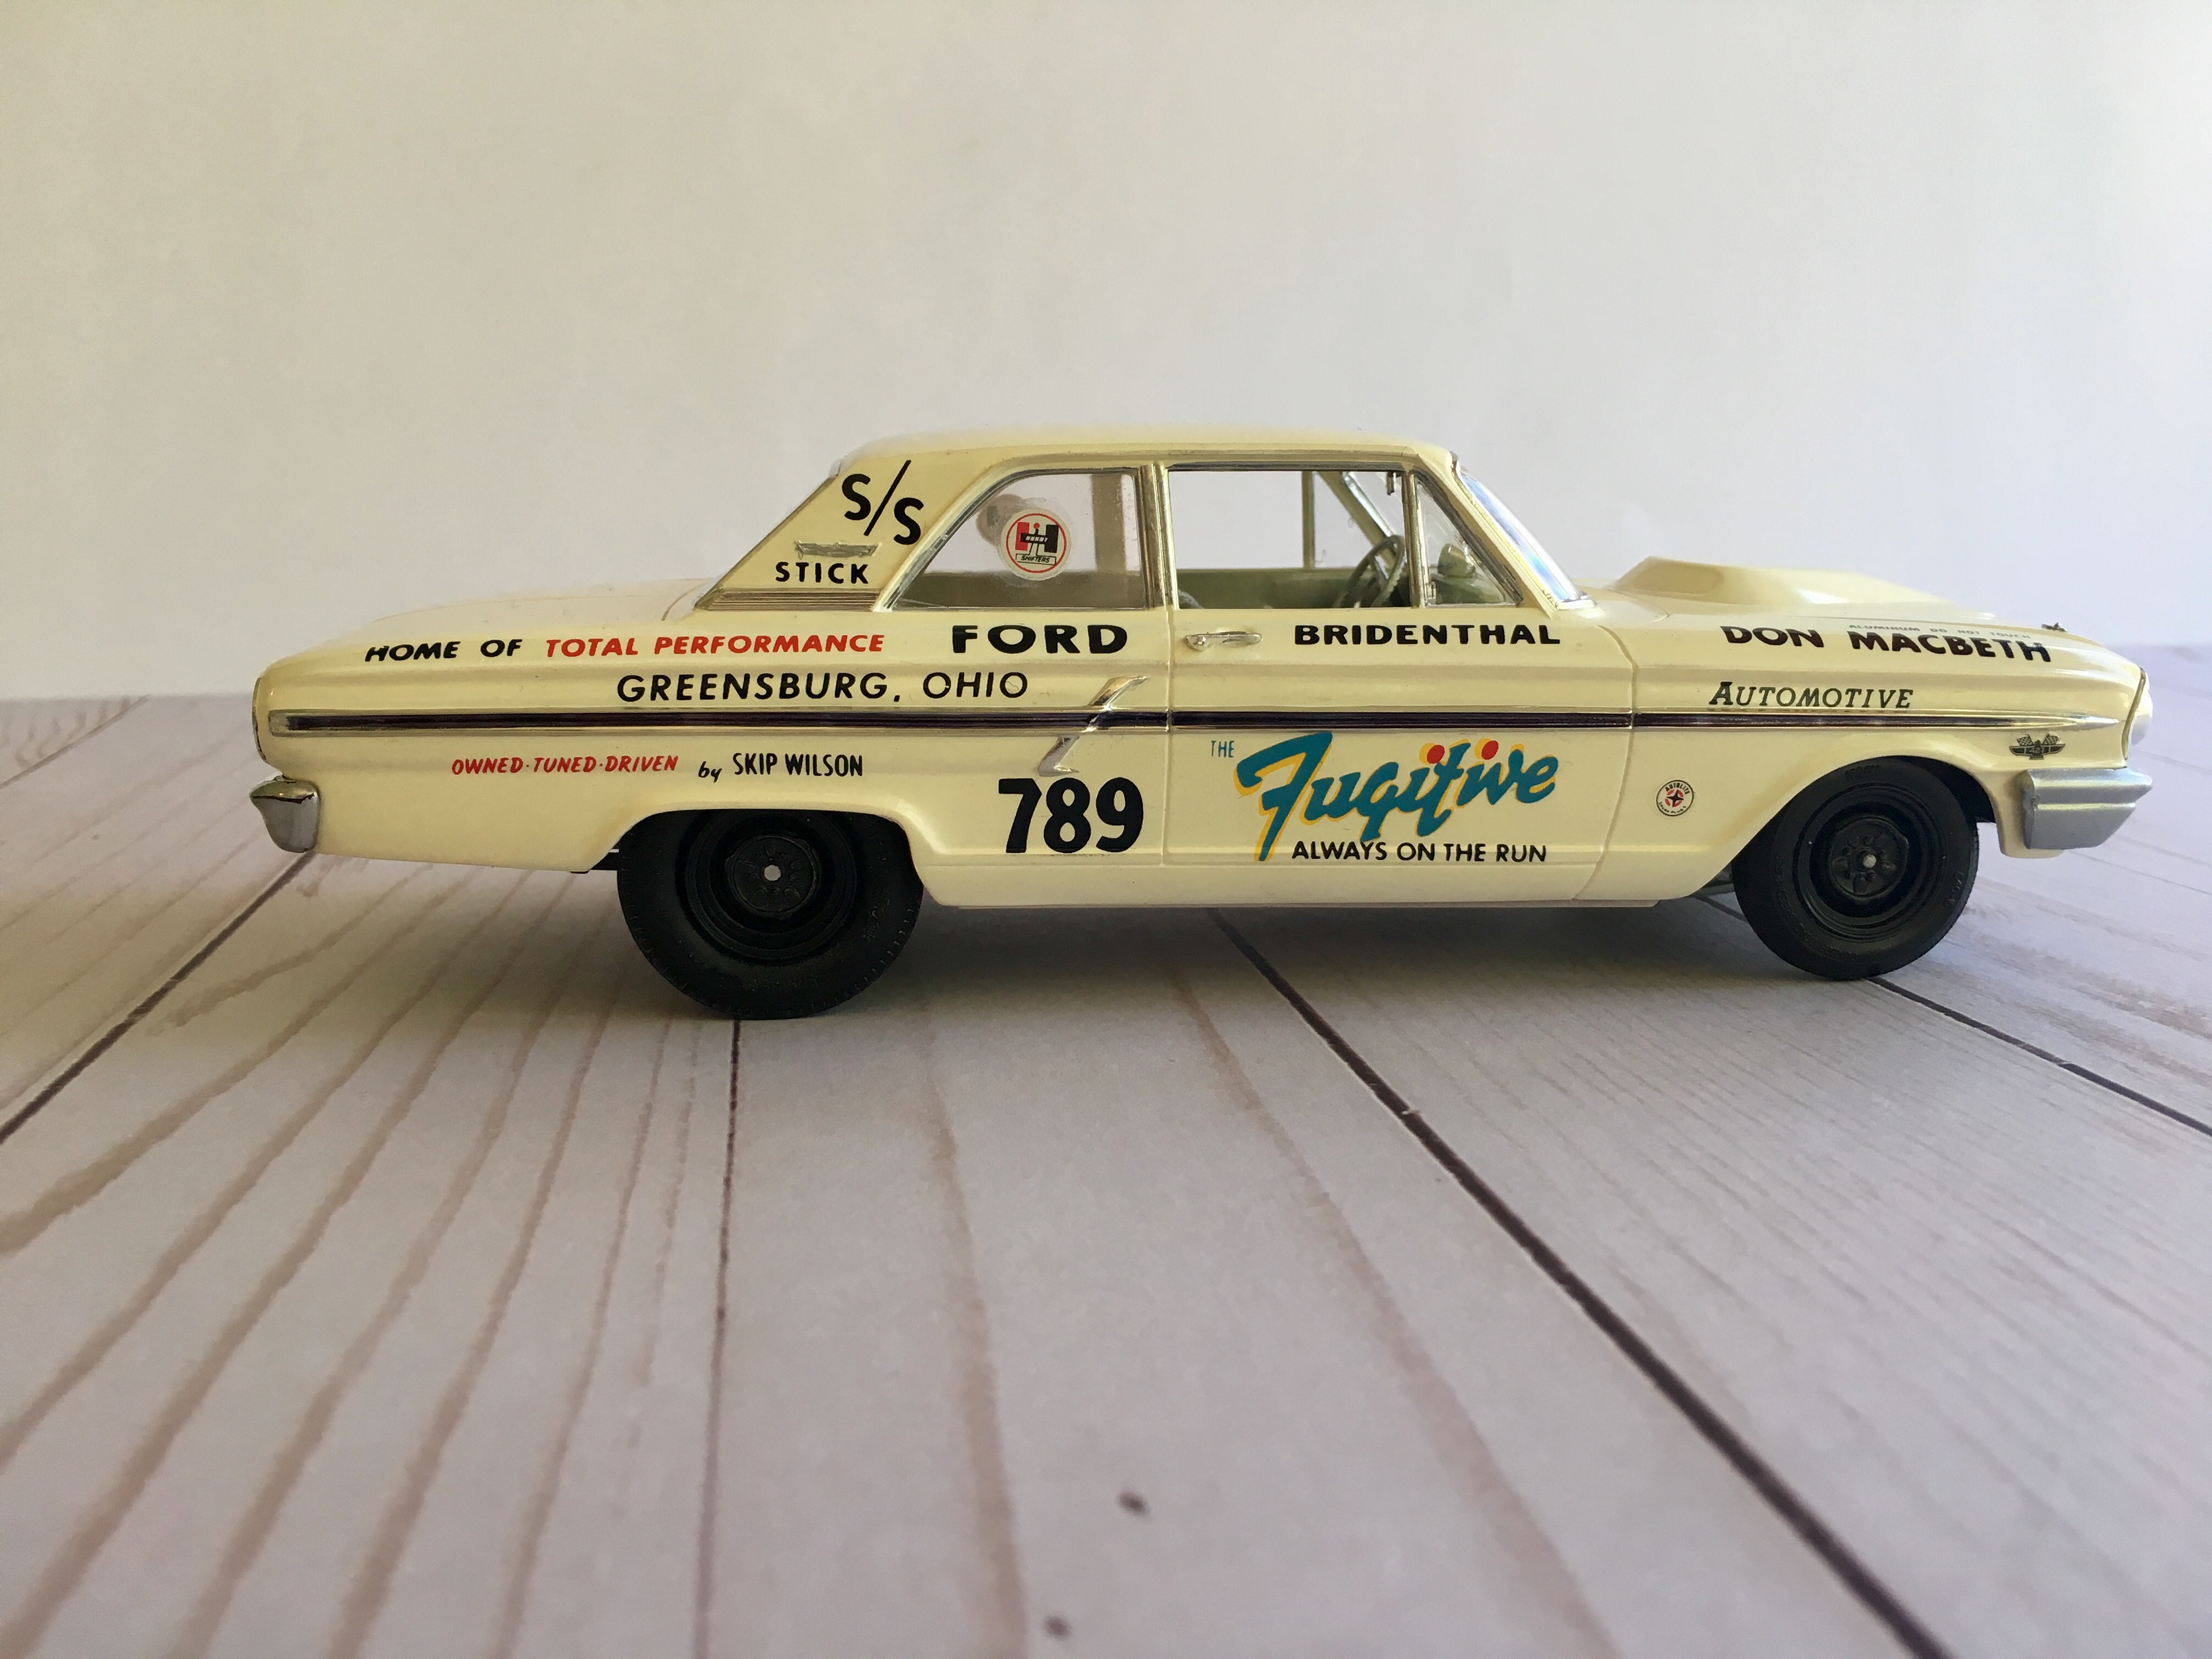
Good luck on the moving. That can be rough. Yea, I’m still waiting for a reply from Jack.,I do have the Revell decals for the Phil Bonner car, except the two rear quarter “THUNDERBOLT “ decals. I was going to see if the extra Brannan decals I have in my stash are close enough to use. I would like to have the correct ones. Just finishing up The Fugitive now. I’m going to post all of my T Bolts later on. -
Phil Bonner / AL Means Ford Thunderbolt
Brutalform replied to gtx6970's topic in WIP: Drag Racing Models
BTW... what cars do you have decals for that you plan on building??? -
Phil Bonner / AL Means Ford Thunderbolt
Brutalform replied to gtx6970's topic in WIP: Drag Racing Models
Im addicted to the Thunderbolt. I recently sent an email to that person you got your decals from... (Jack Smith). Just waiting for a reply. I’m currently working on the Bonner car, The Fugitive, and the M/T car... which took some cutting up, in order to fit the Hemi heads in the bay. I got a lot of info from your thread “ Thunderbolt Colors” btw.... thanks... -
Phil Bonner / AL Means Ford Thunderbolt
Brutalform replied to gtx6970's topic in WIP: Drag Racing Models
Bill, I really enjoy looking at all of your thunderbolt builds. Your attention to detail is impeccable. I currently have nine completed and have two more on the bench. This kit is by far, my favorite kit to build. -
Superb build. Nothing like a big car that is that fast.
-
Plastistruct has hex shaped rod in various sizes. A mitre box for cutting small diameter tubing helps, but it can be done carefully with a #11 blade.
-
-
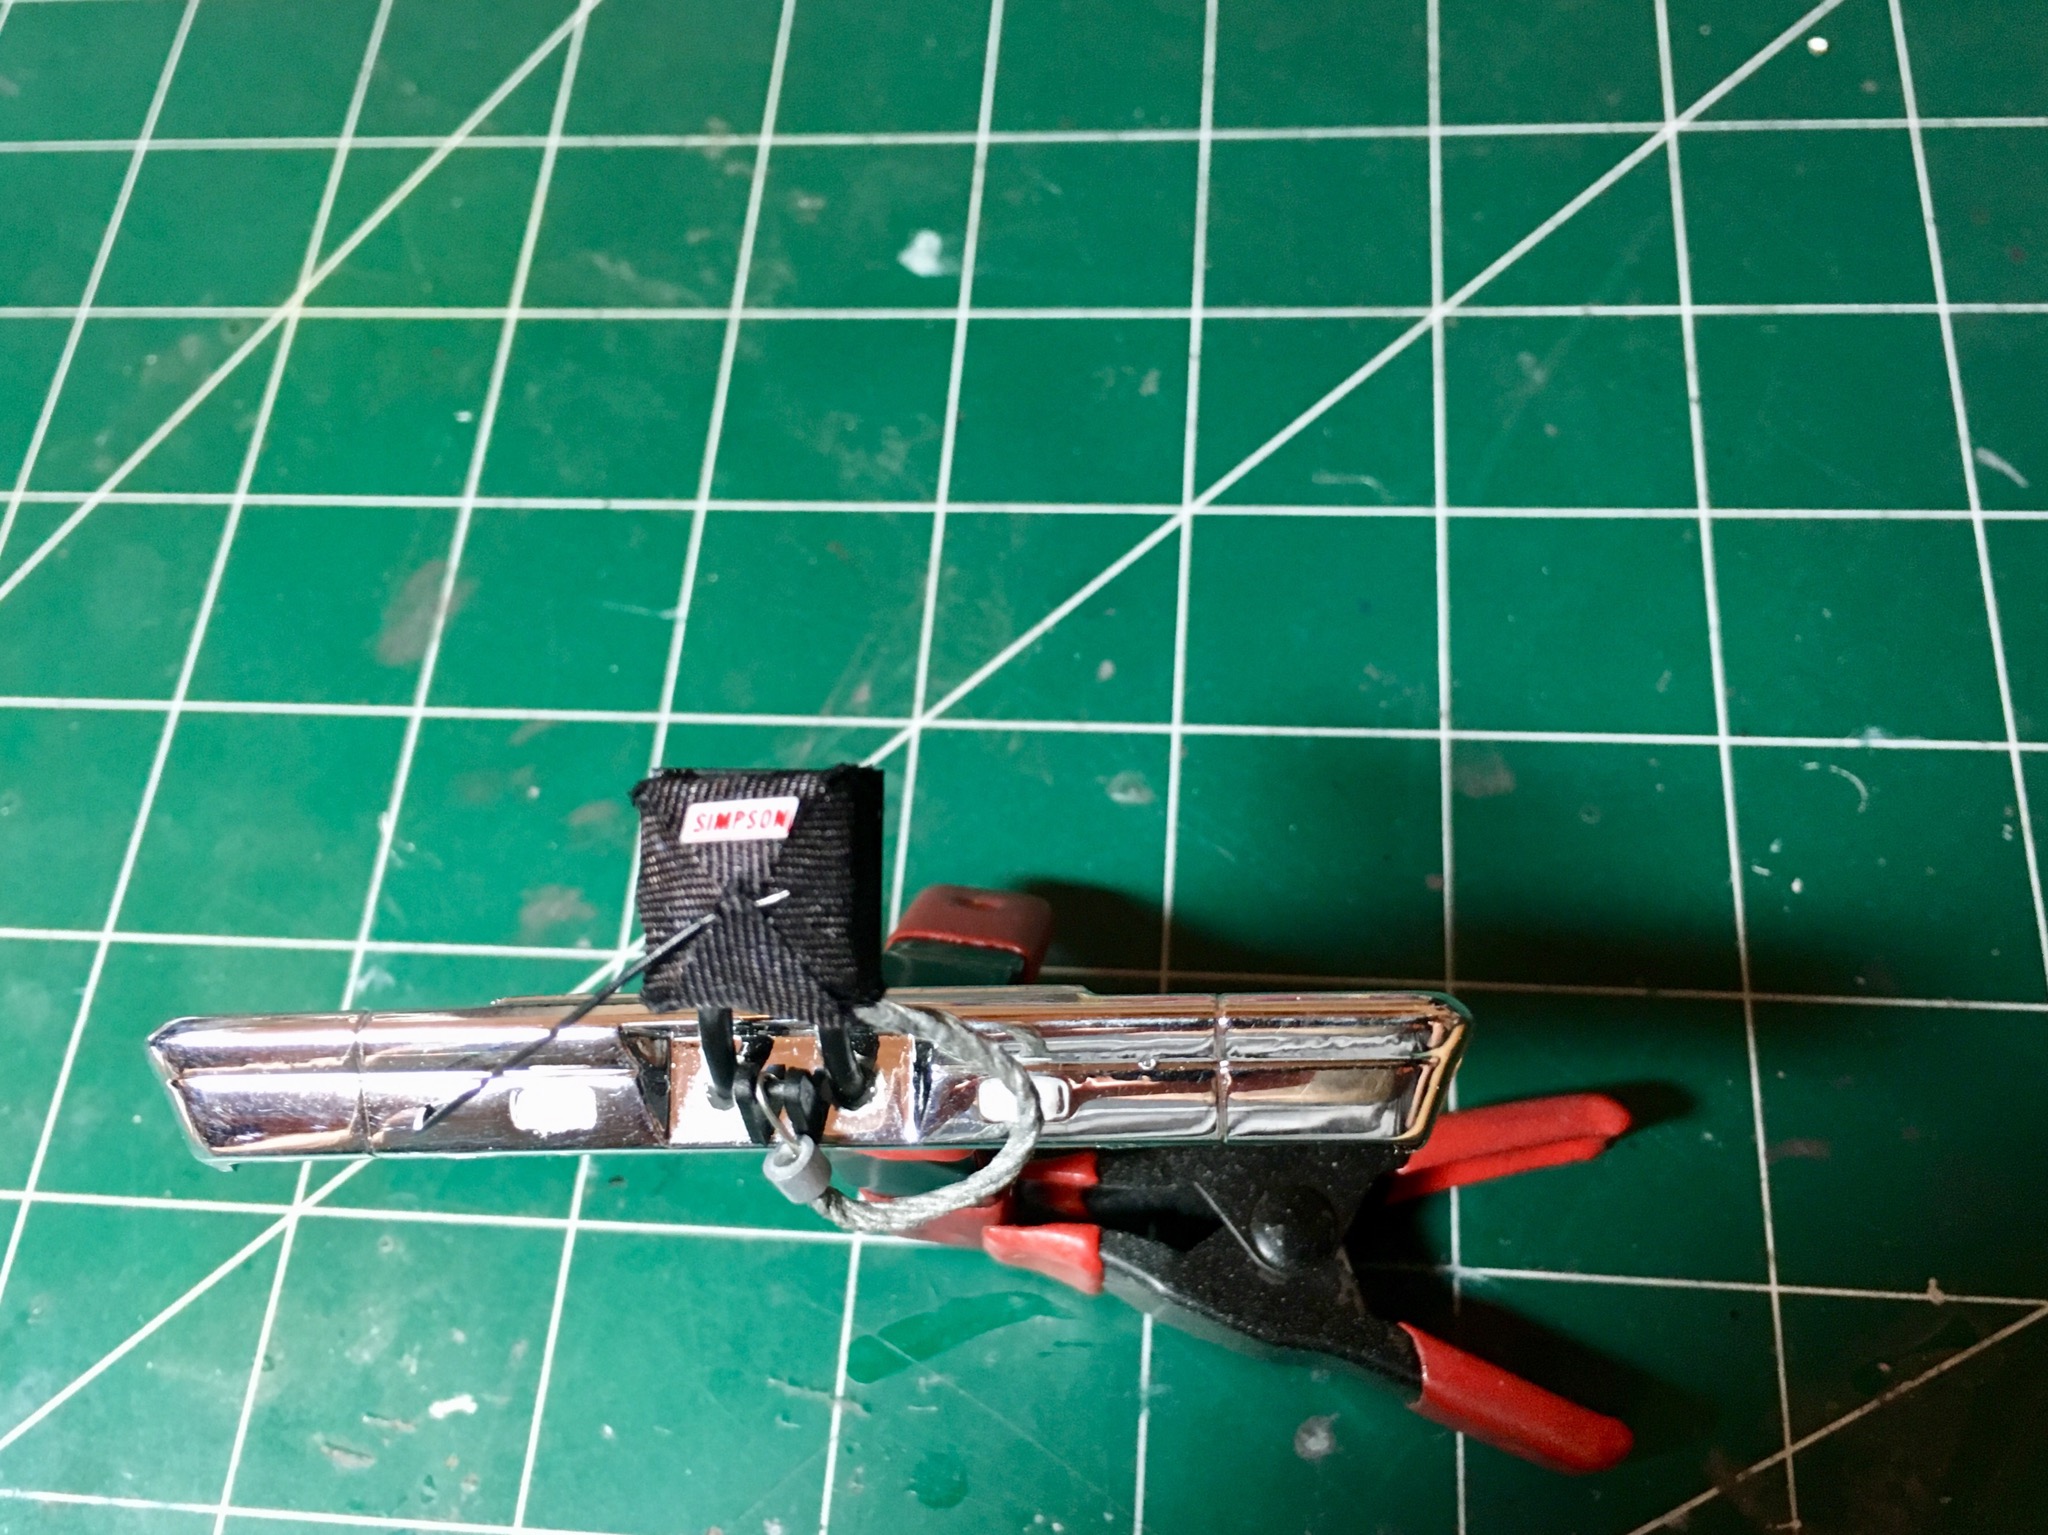
Yes it is. I also have an SFI decal on the bell housing of the TH400. Slixx decals is where I got it. They have goody sheets that have many racecar decals, from nostalgia, to modern styles. NHRA, chassis cert, chutes, blowers, NOS. Check out their website.
-
Thanks for the positive replies everyone.
-
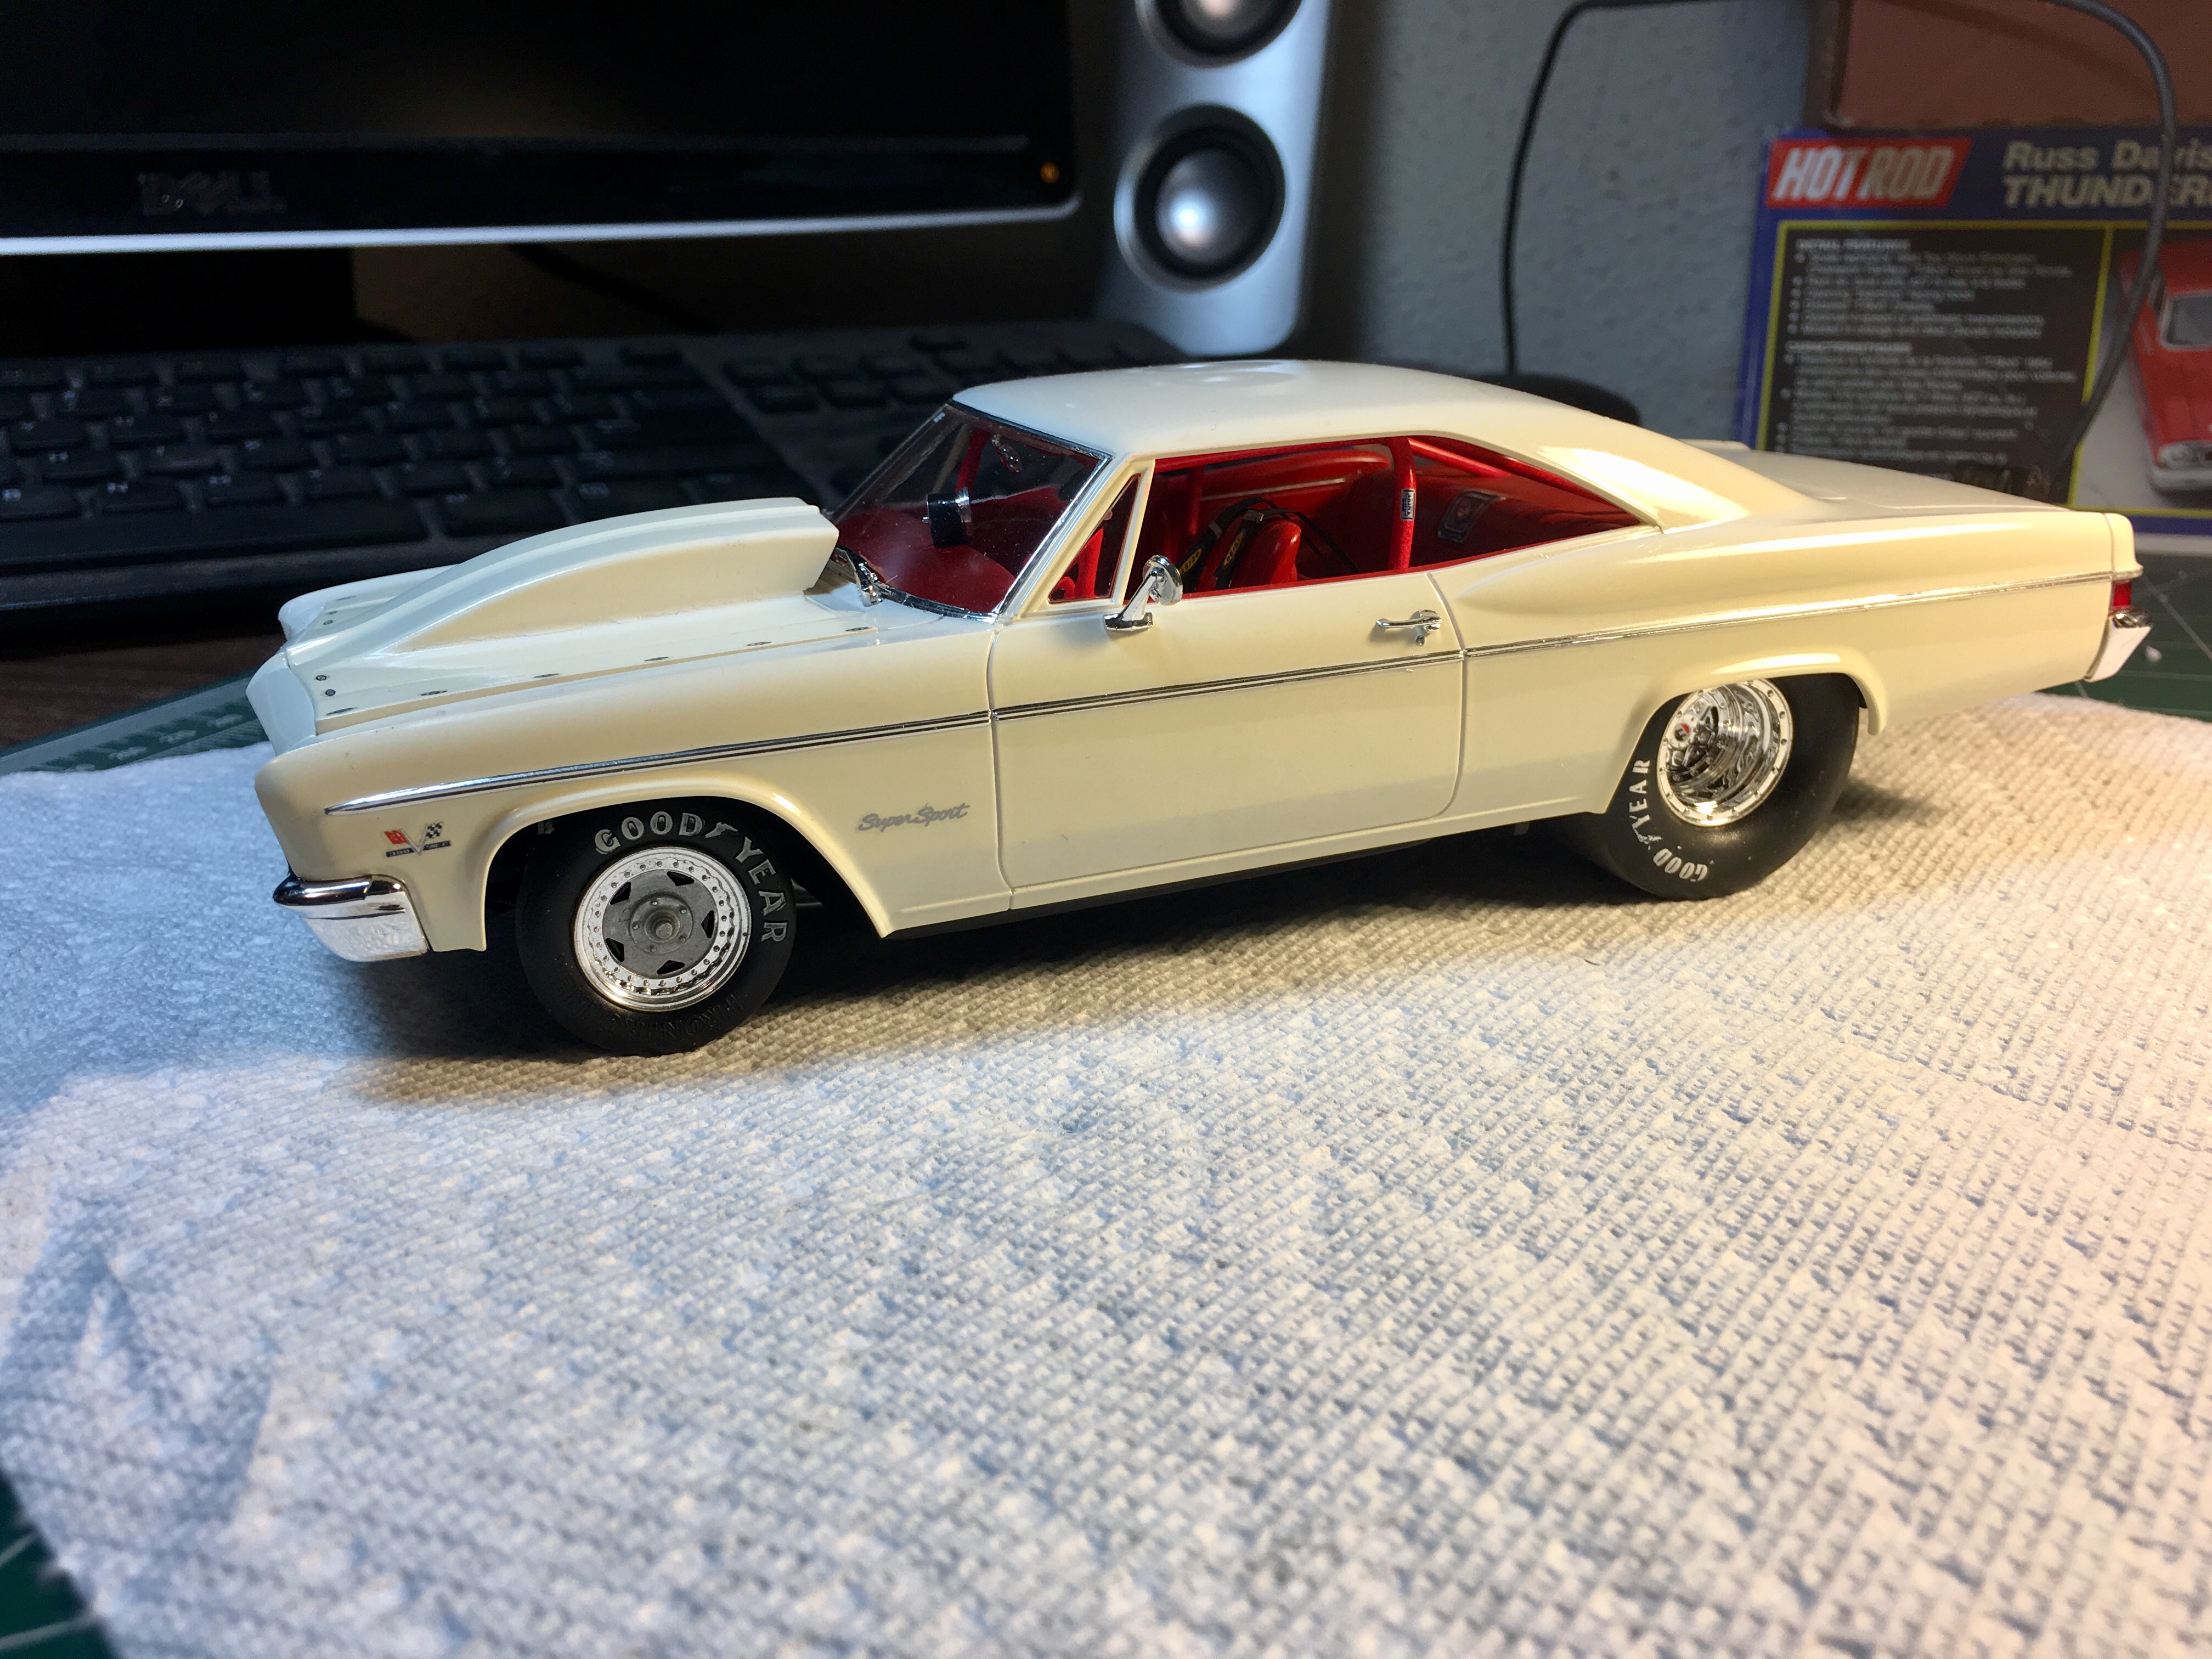
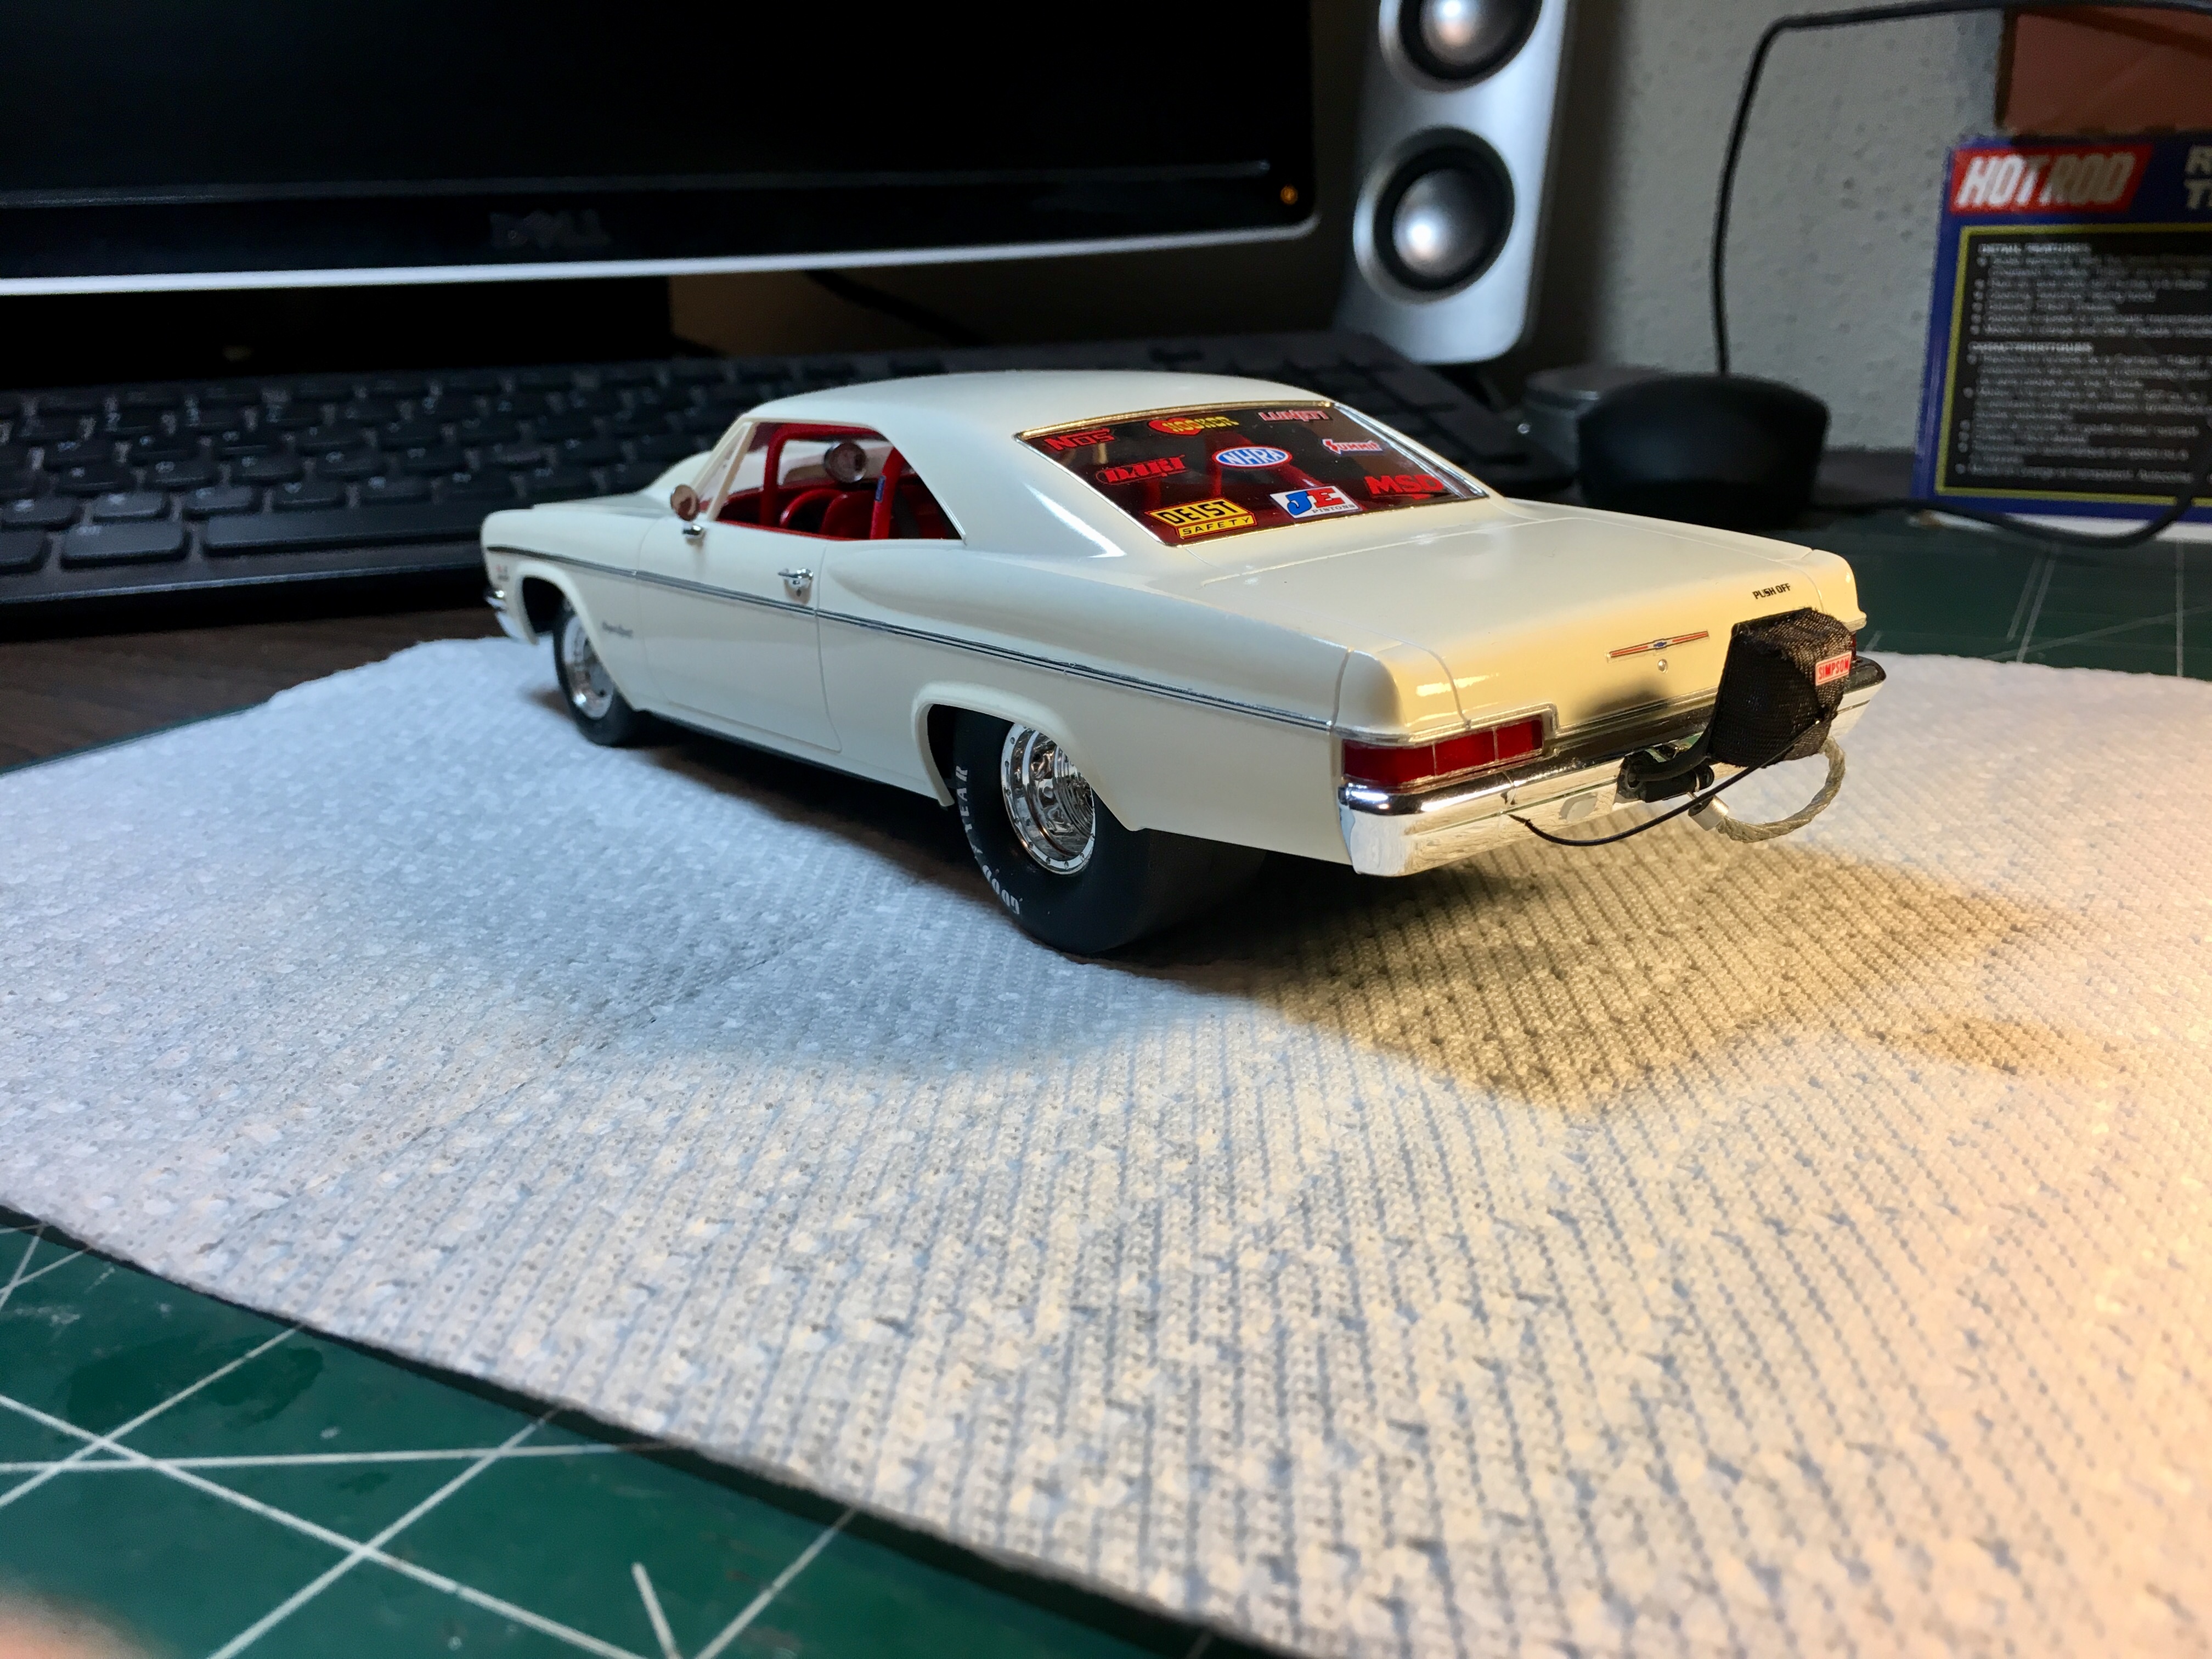
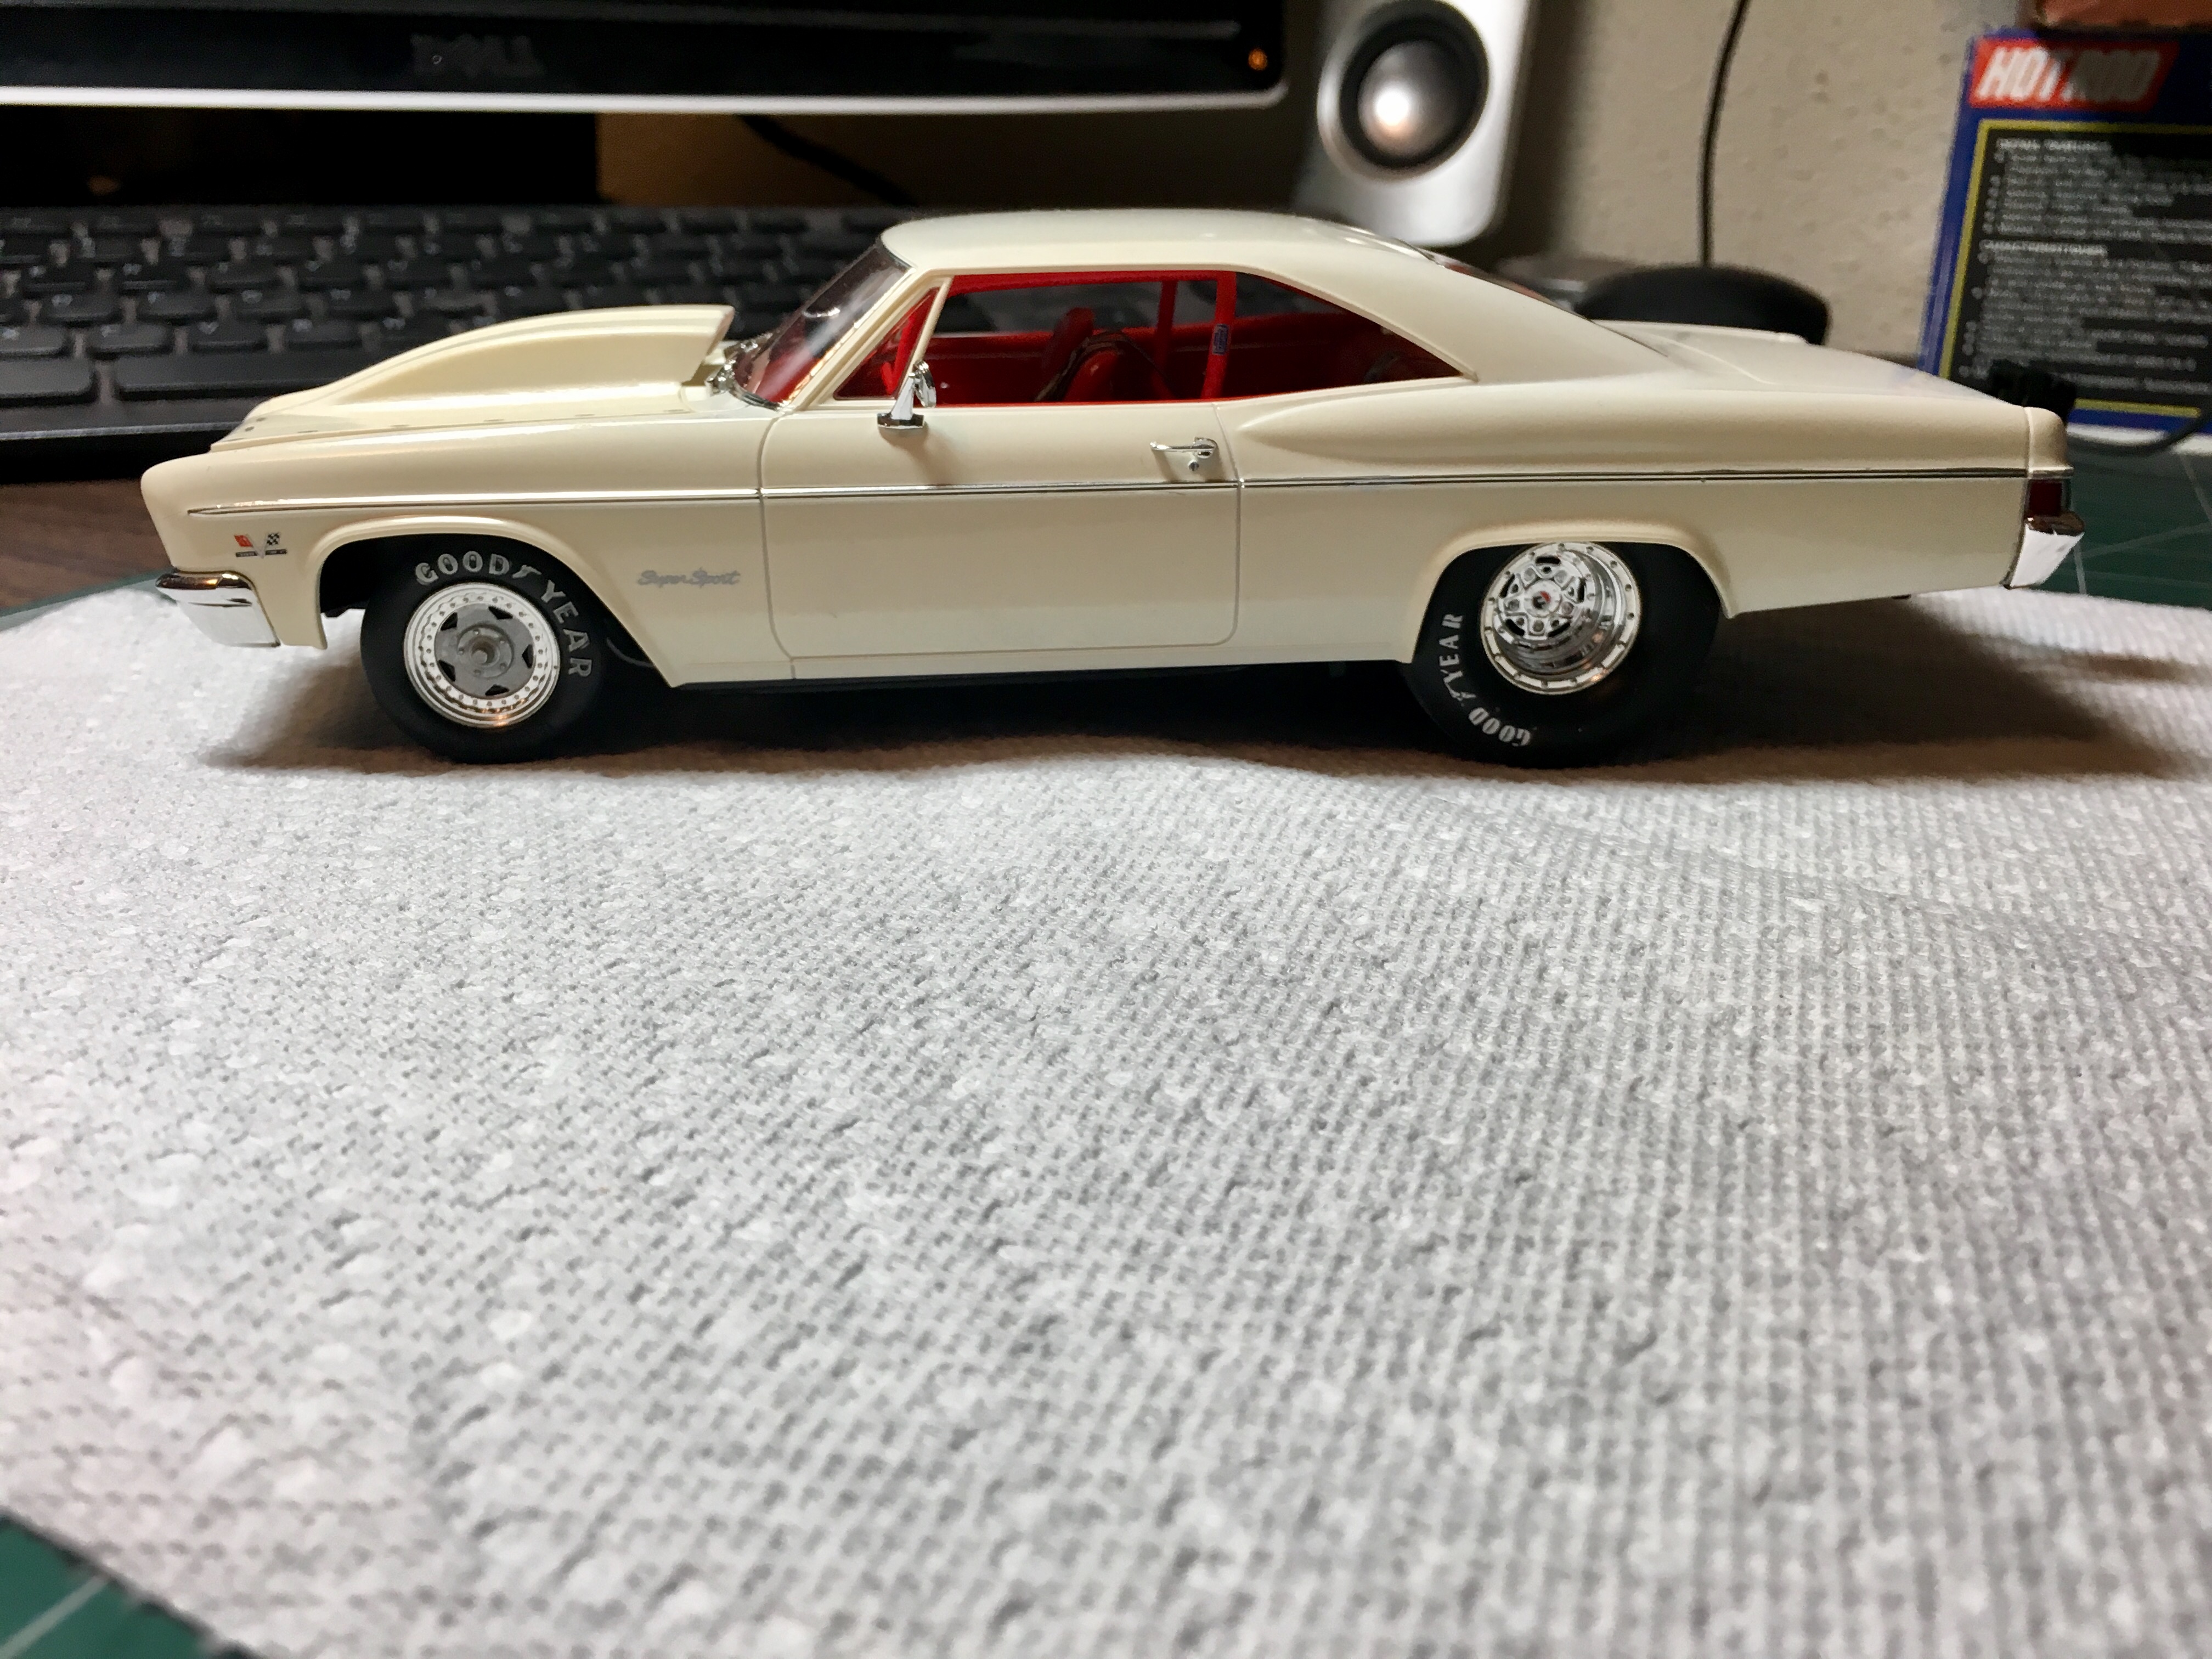
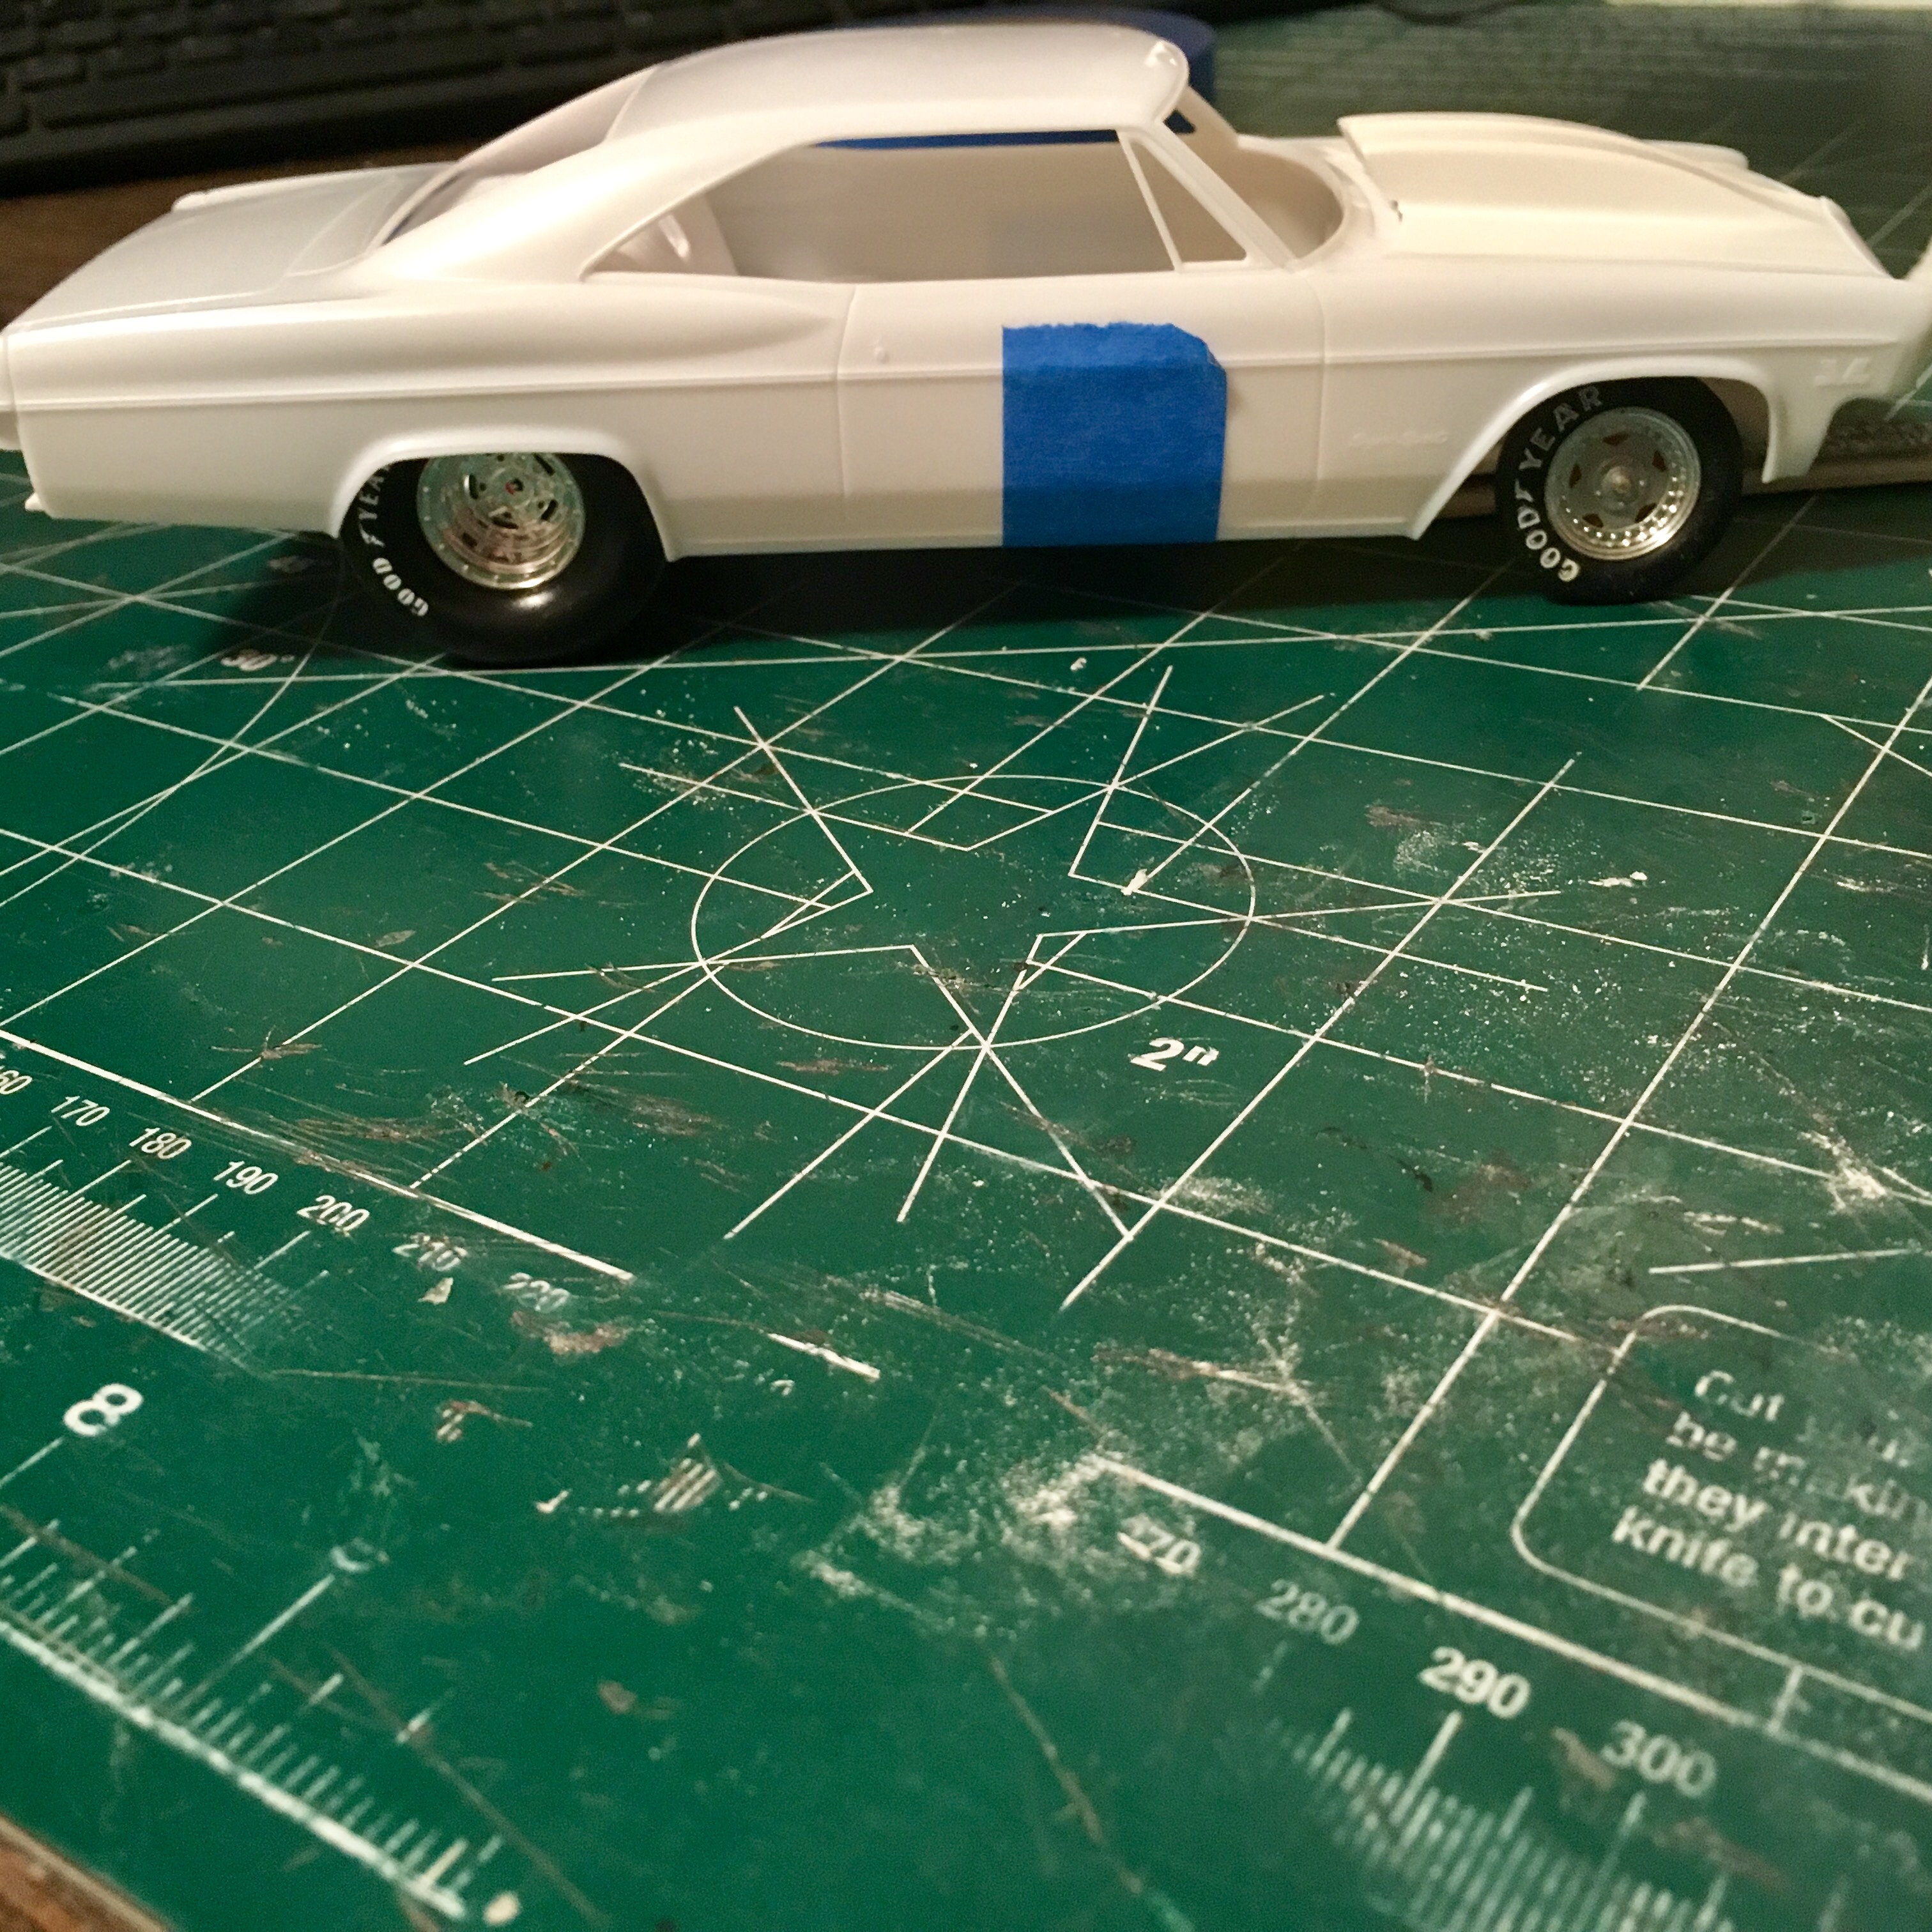
Finally finished the Impala. Now to move on to one of the eight other cars on the bench.
-
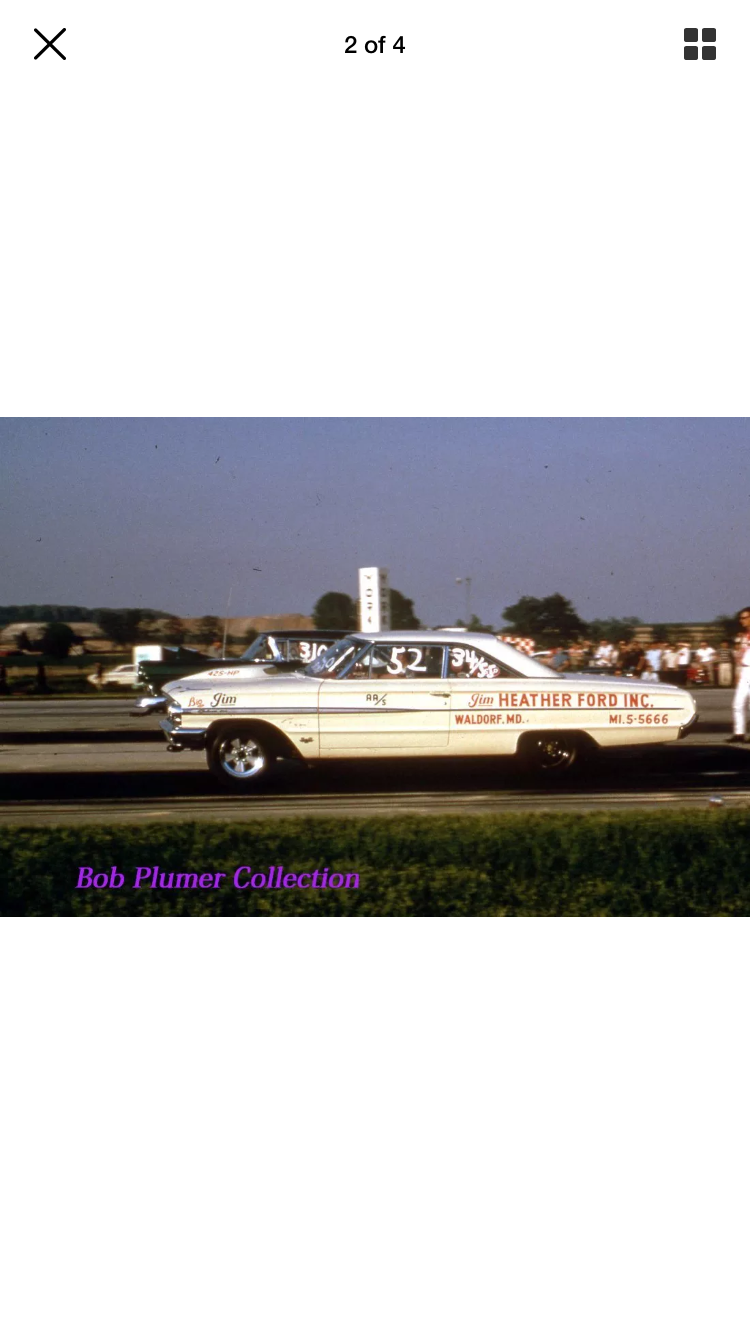
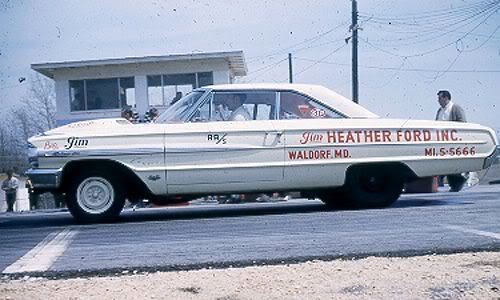
Heather Ford 64 Galaxie info anyone??
Brutalform replied to Brutalform's topic in WIP: Drag Racing Models
You helped a lot, especially suggesting the Klass page. I appreciate it. You know more about these old race cars than I do. I can look at them all day. I must have spent an hour looking at the pics on the Klass site. The Bob Plumer Collections has a lot of cars too, but I couldn’t believe all those pics on the Klass page. -
Heather Ford 64 Galaxie info anyone??
Brutalform replied to Brutalform's topic in WIP: Drag Racing Models
This is how I want mine to turn out. Looks like a T Bolt front rim, and I’ll use a Speed City 7in treaded slick with a steel rim out back. I have the decals left over from the blue Bob Ford tribute car I built a while ago. I’m using a Starliner chassis, and undecided about putting a MCW lightweight 63 interior in it. BTW... that George Klass site is pretty cool! Thanks for the info. -
Heather Ford 64 Galaxie info anyone??
Brutalform replied to Brutalform's topic in WIP: Drag Racing Models
I found this one. This site has a lot of cool S/S cars also. Looking at this pic, it appears to be red. At least the dash does anyway. Still tough to tell.
-
Heather Ford 64 Galaxie info anyone??
Brutalform replied to Brutalform's topic in WIP: Drag Racing Models
Thanks for the info. I was reading that all the 64 lightweights were Wimbledon white with red interiors. Finding pictures of some of these cars can be difficult. -
Just a few quick questions to anyone who might remember seeing this car. Was it white, or wimbledon white? Also was the interior red? Bench or buckets? Thanks...
-
Brush some white paint on an old CD, and press the tire onto the paint, like a rubber stamp.
-
I’ve used flexi straws painted with Tamiya Rubber Black and have had great results.
-
You got this. Your Galaxie build has inspired me to do the Brannan car.
-
This is going to be fun to watch. I would have thought they would have used it to tow the race cars, but it actually was a racer itself. Very cool project, John.
-
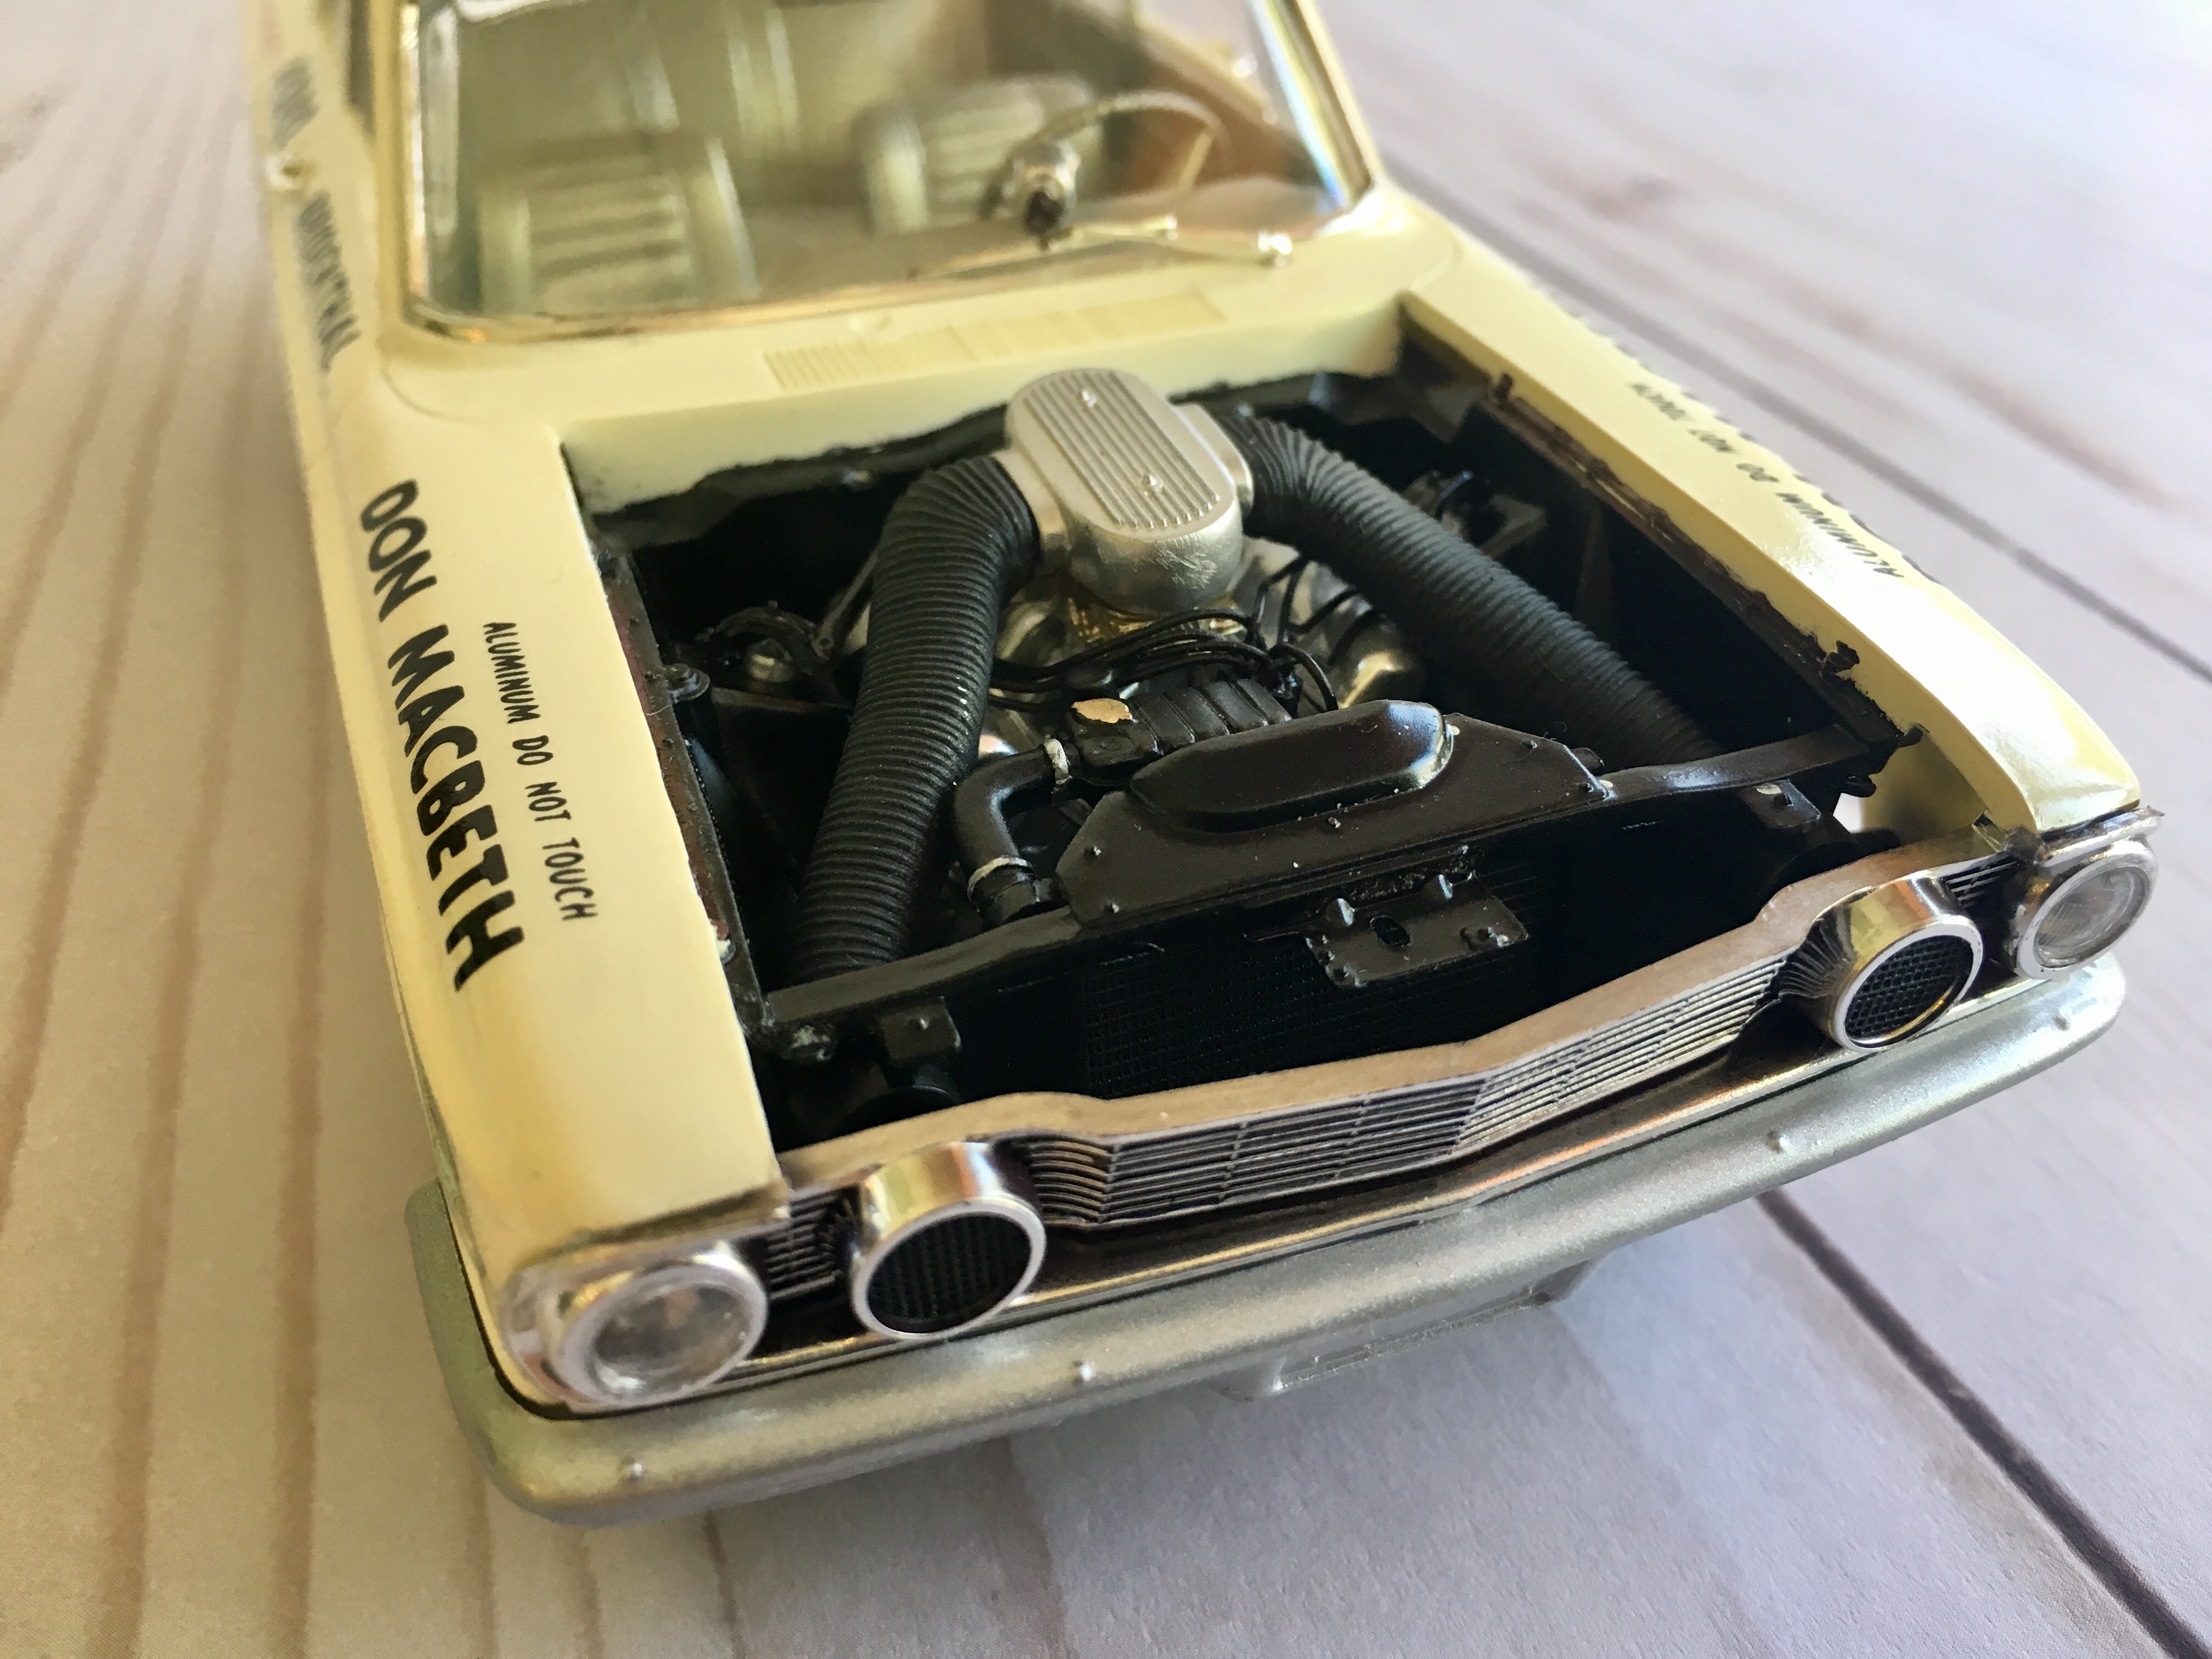
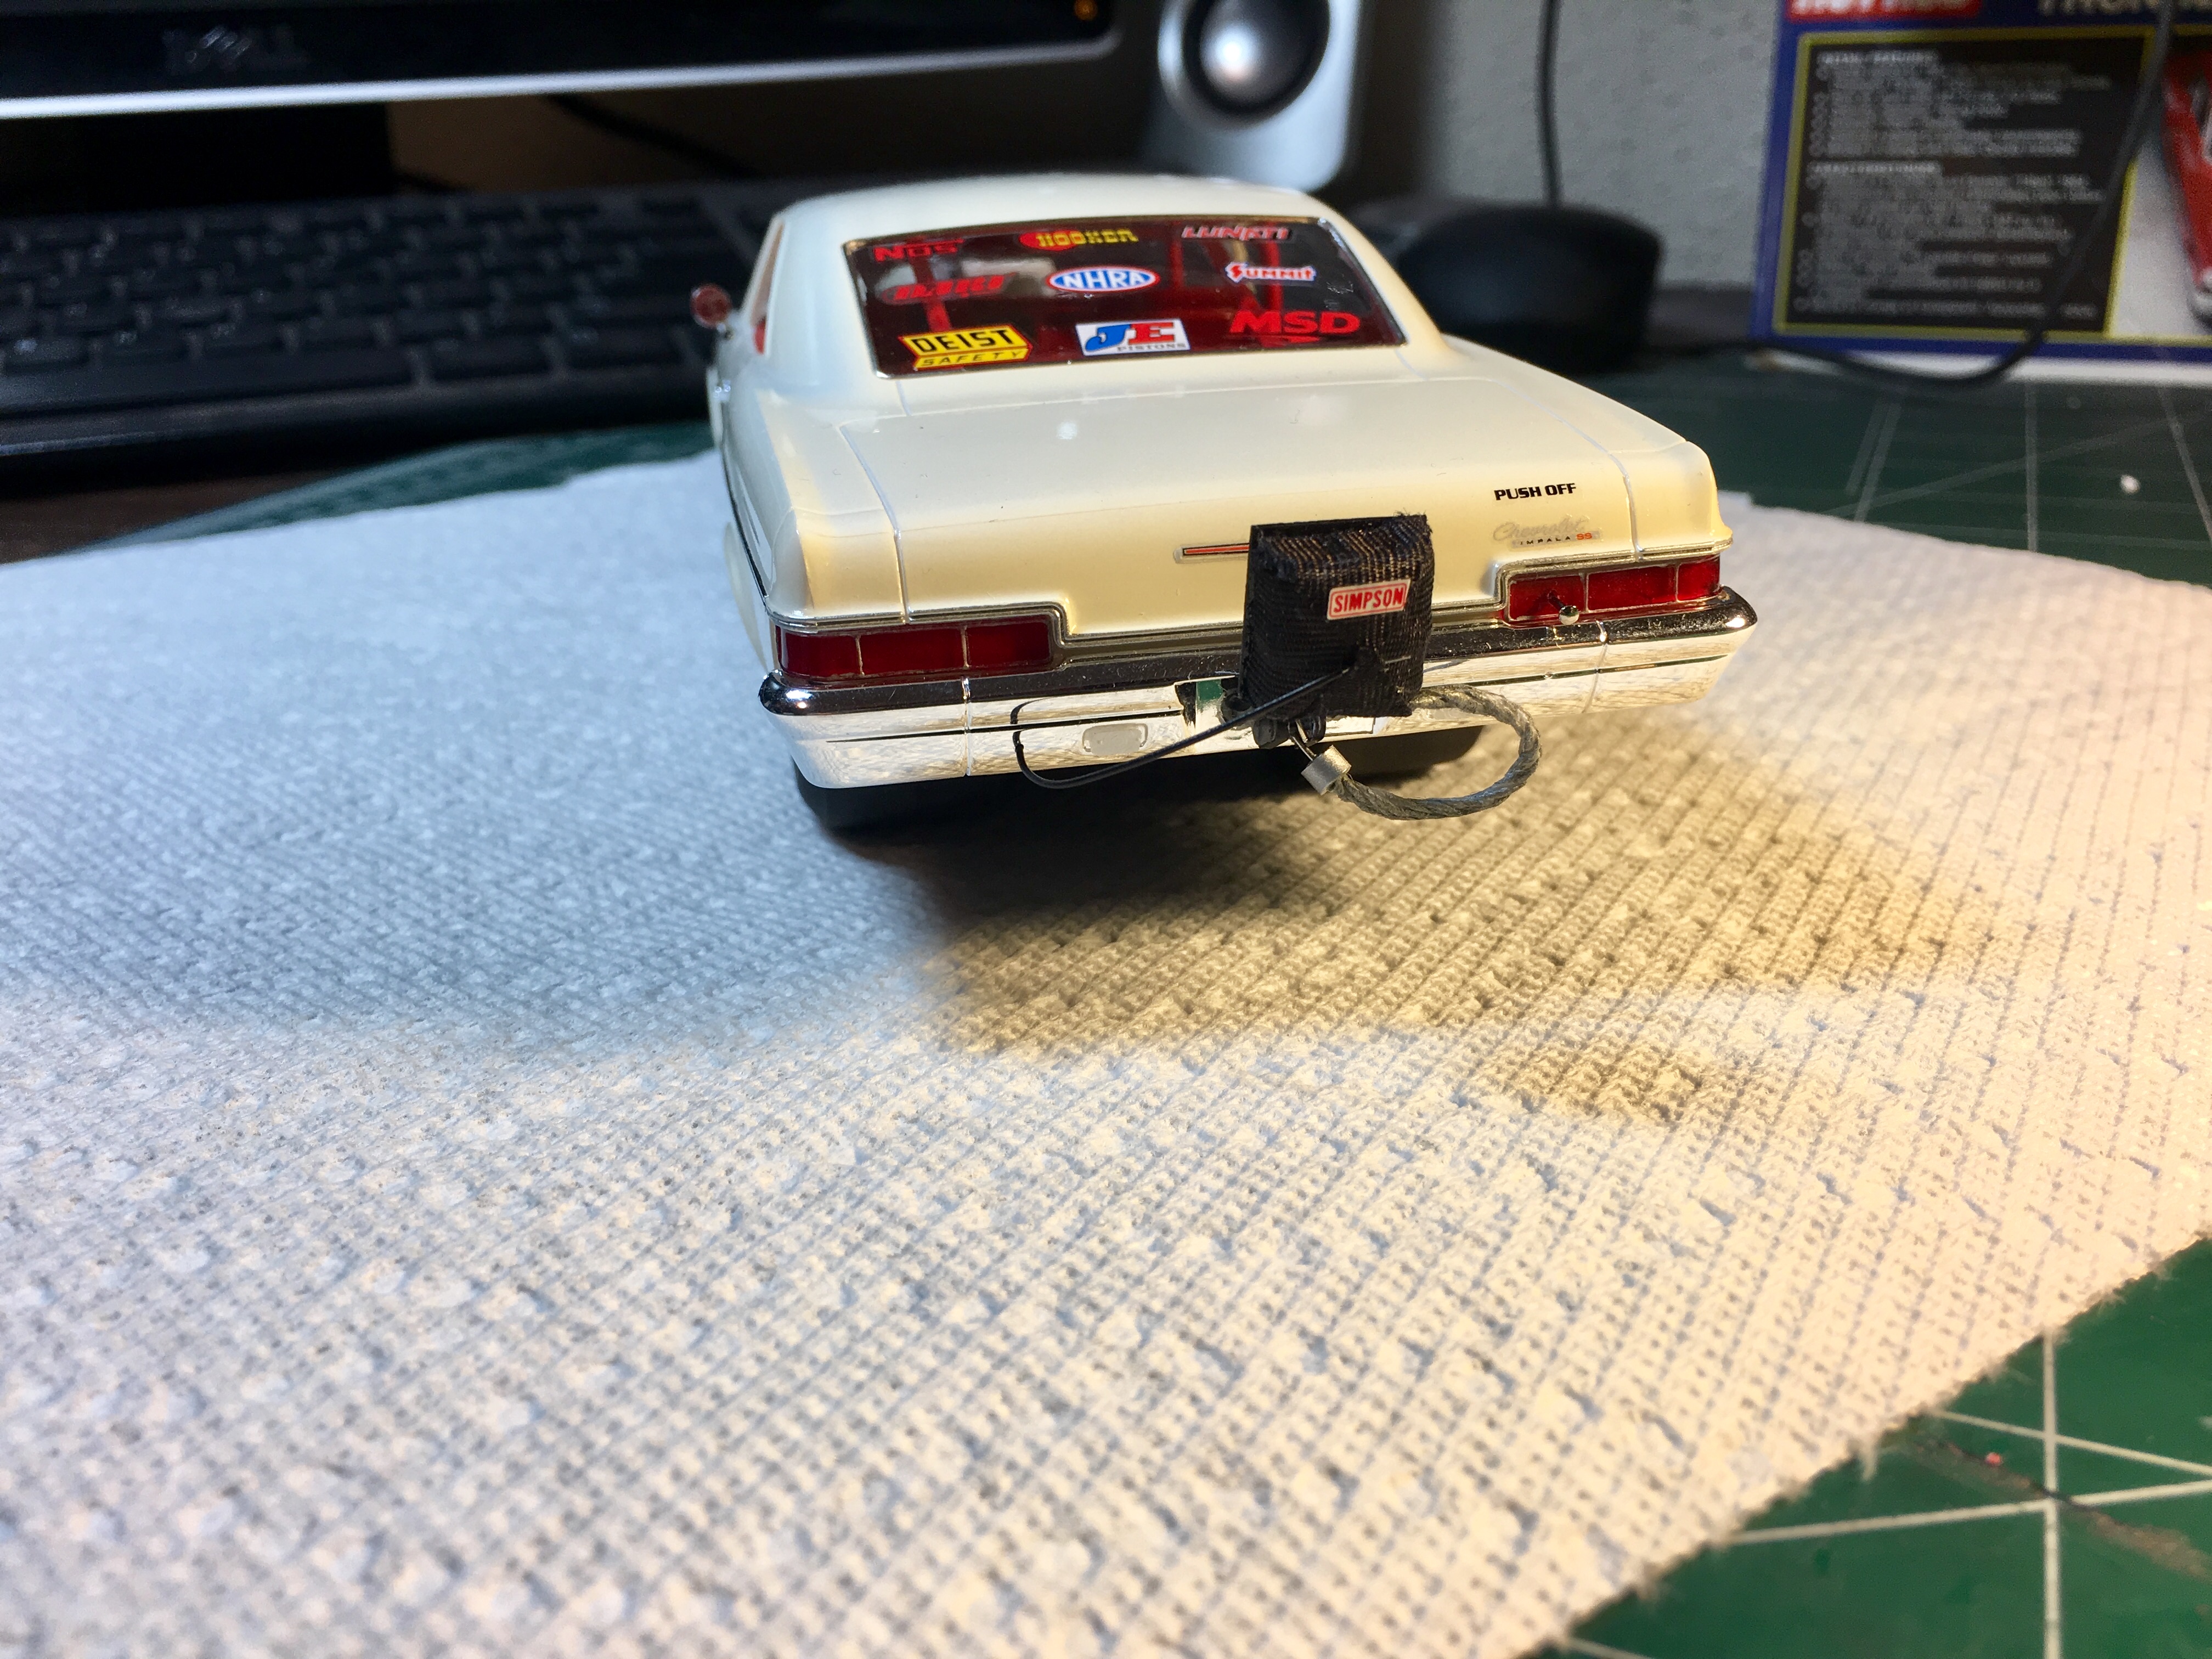
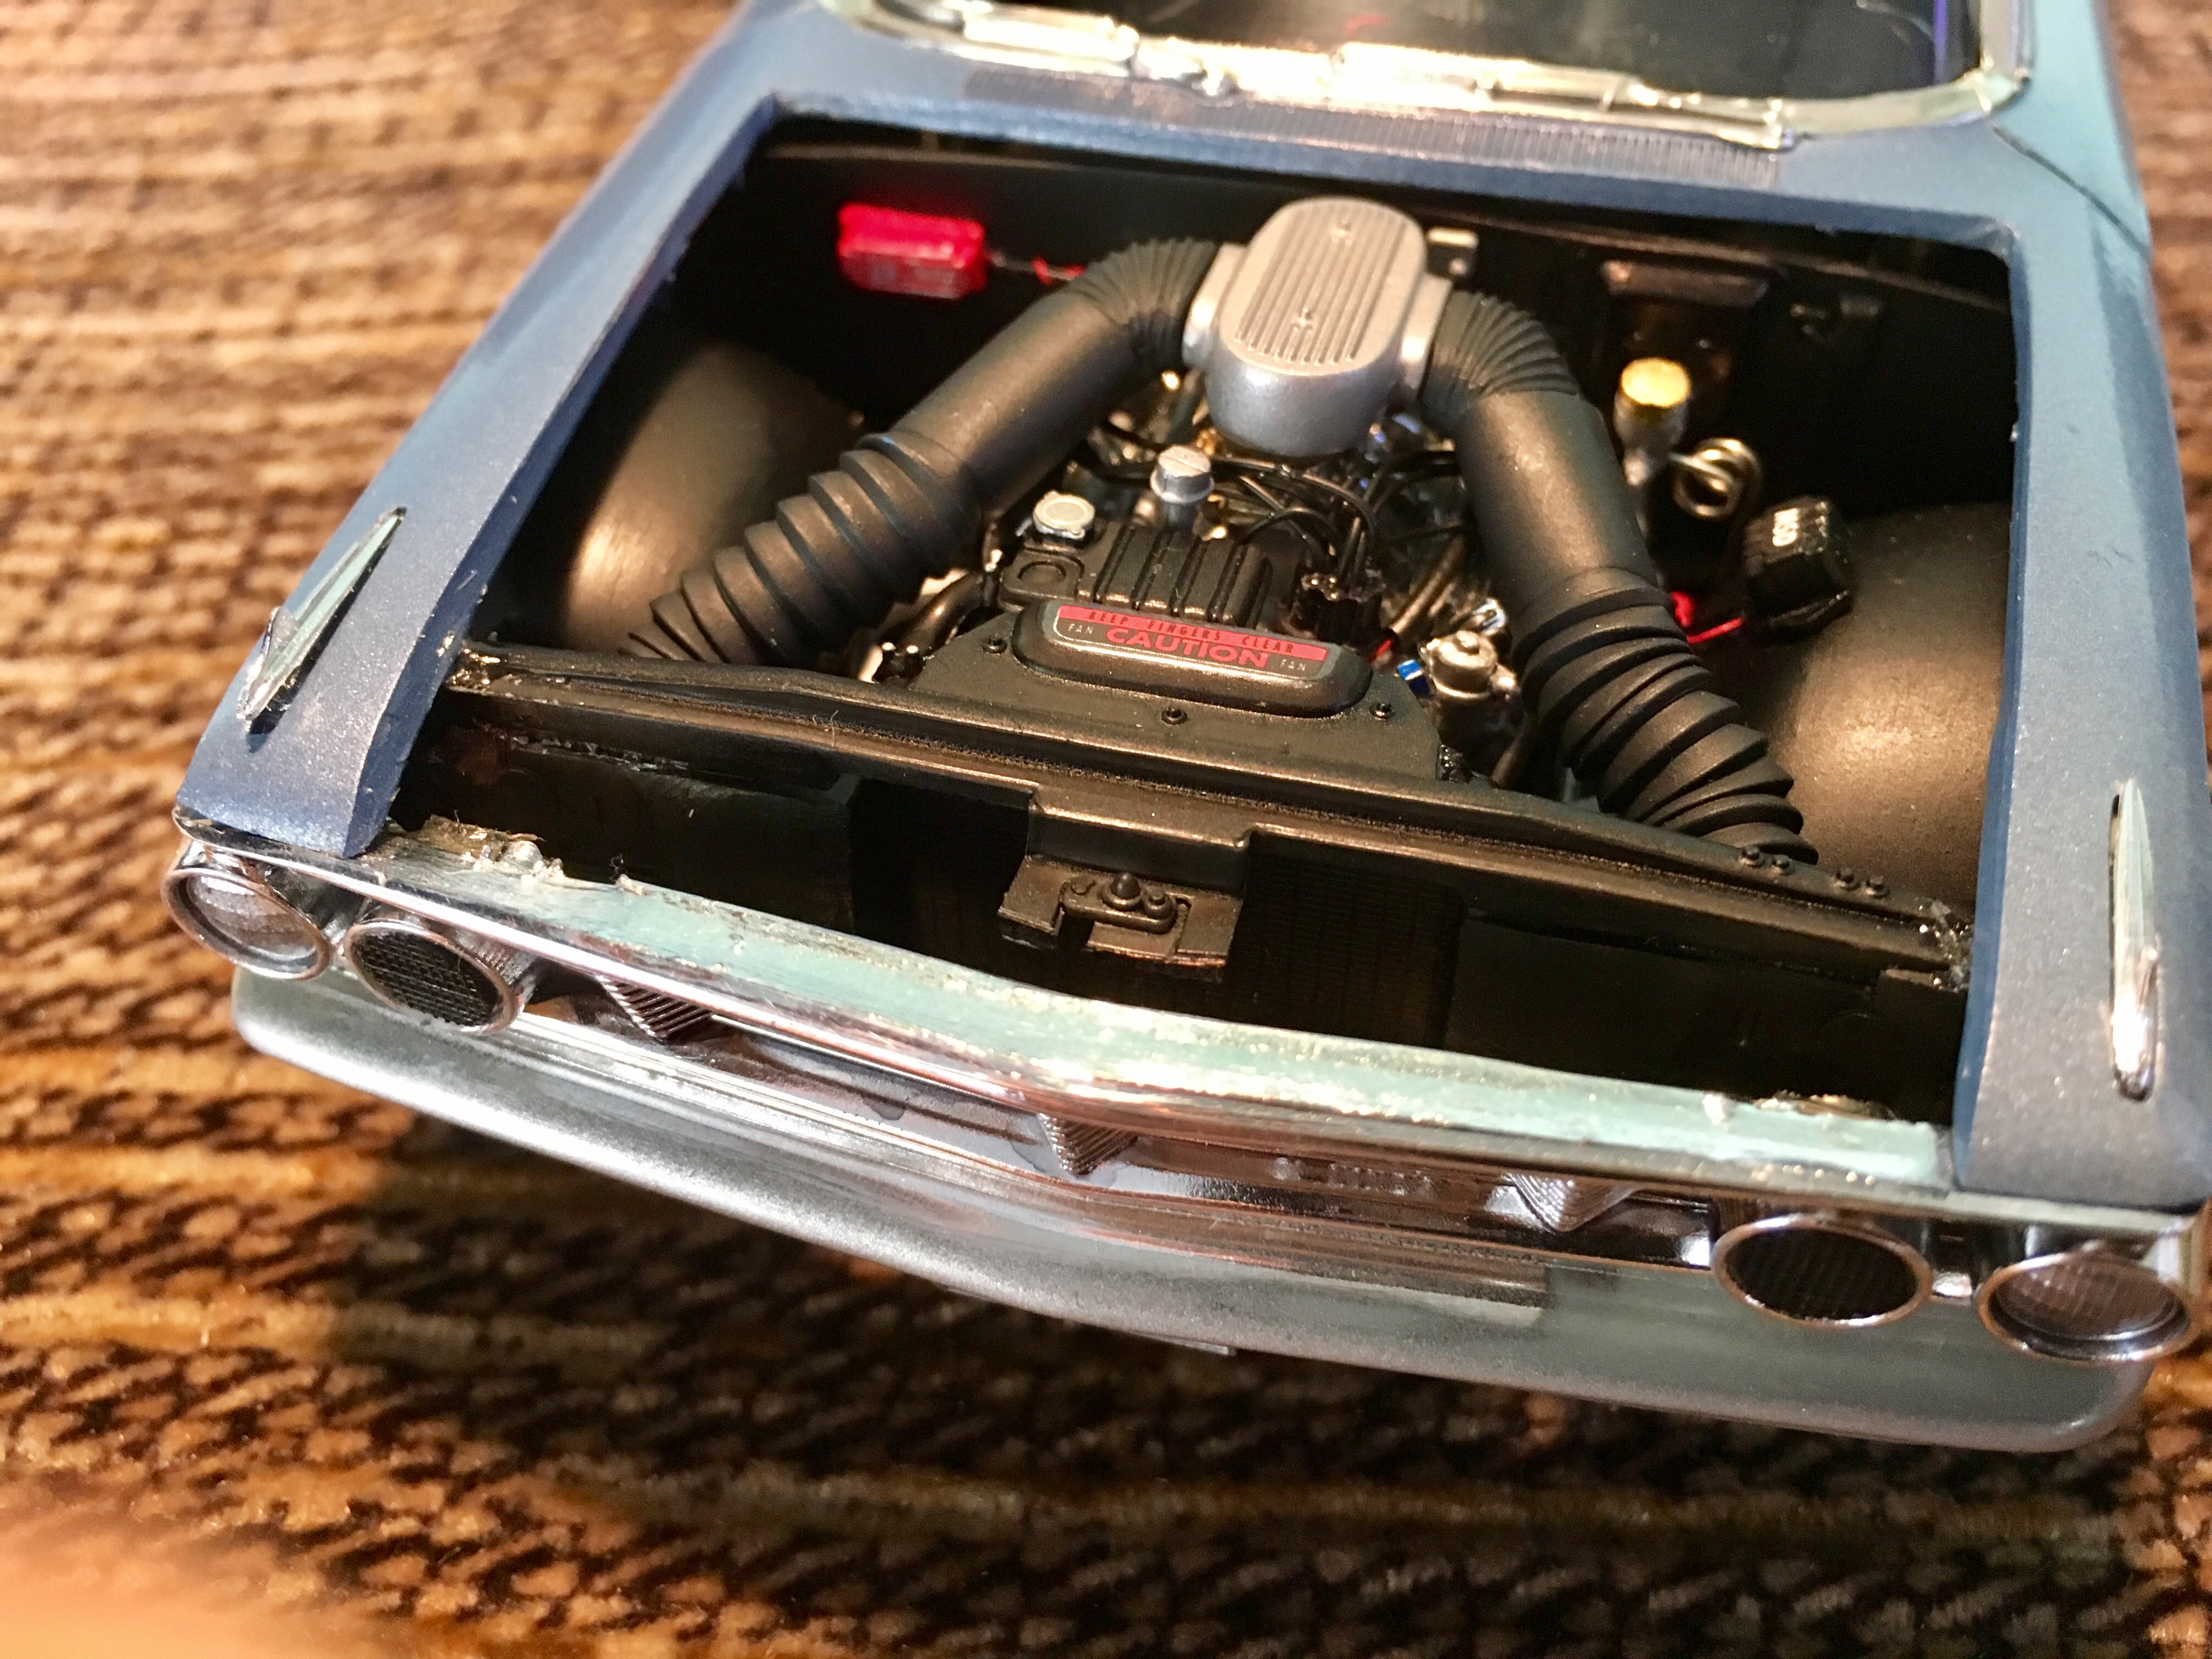
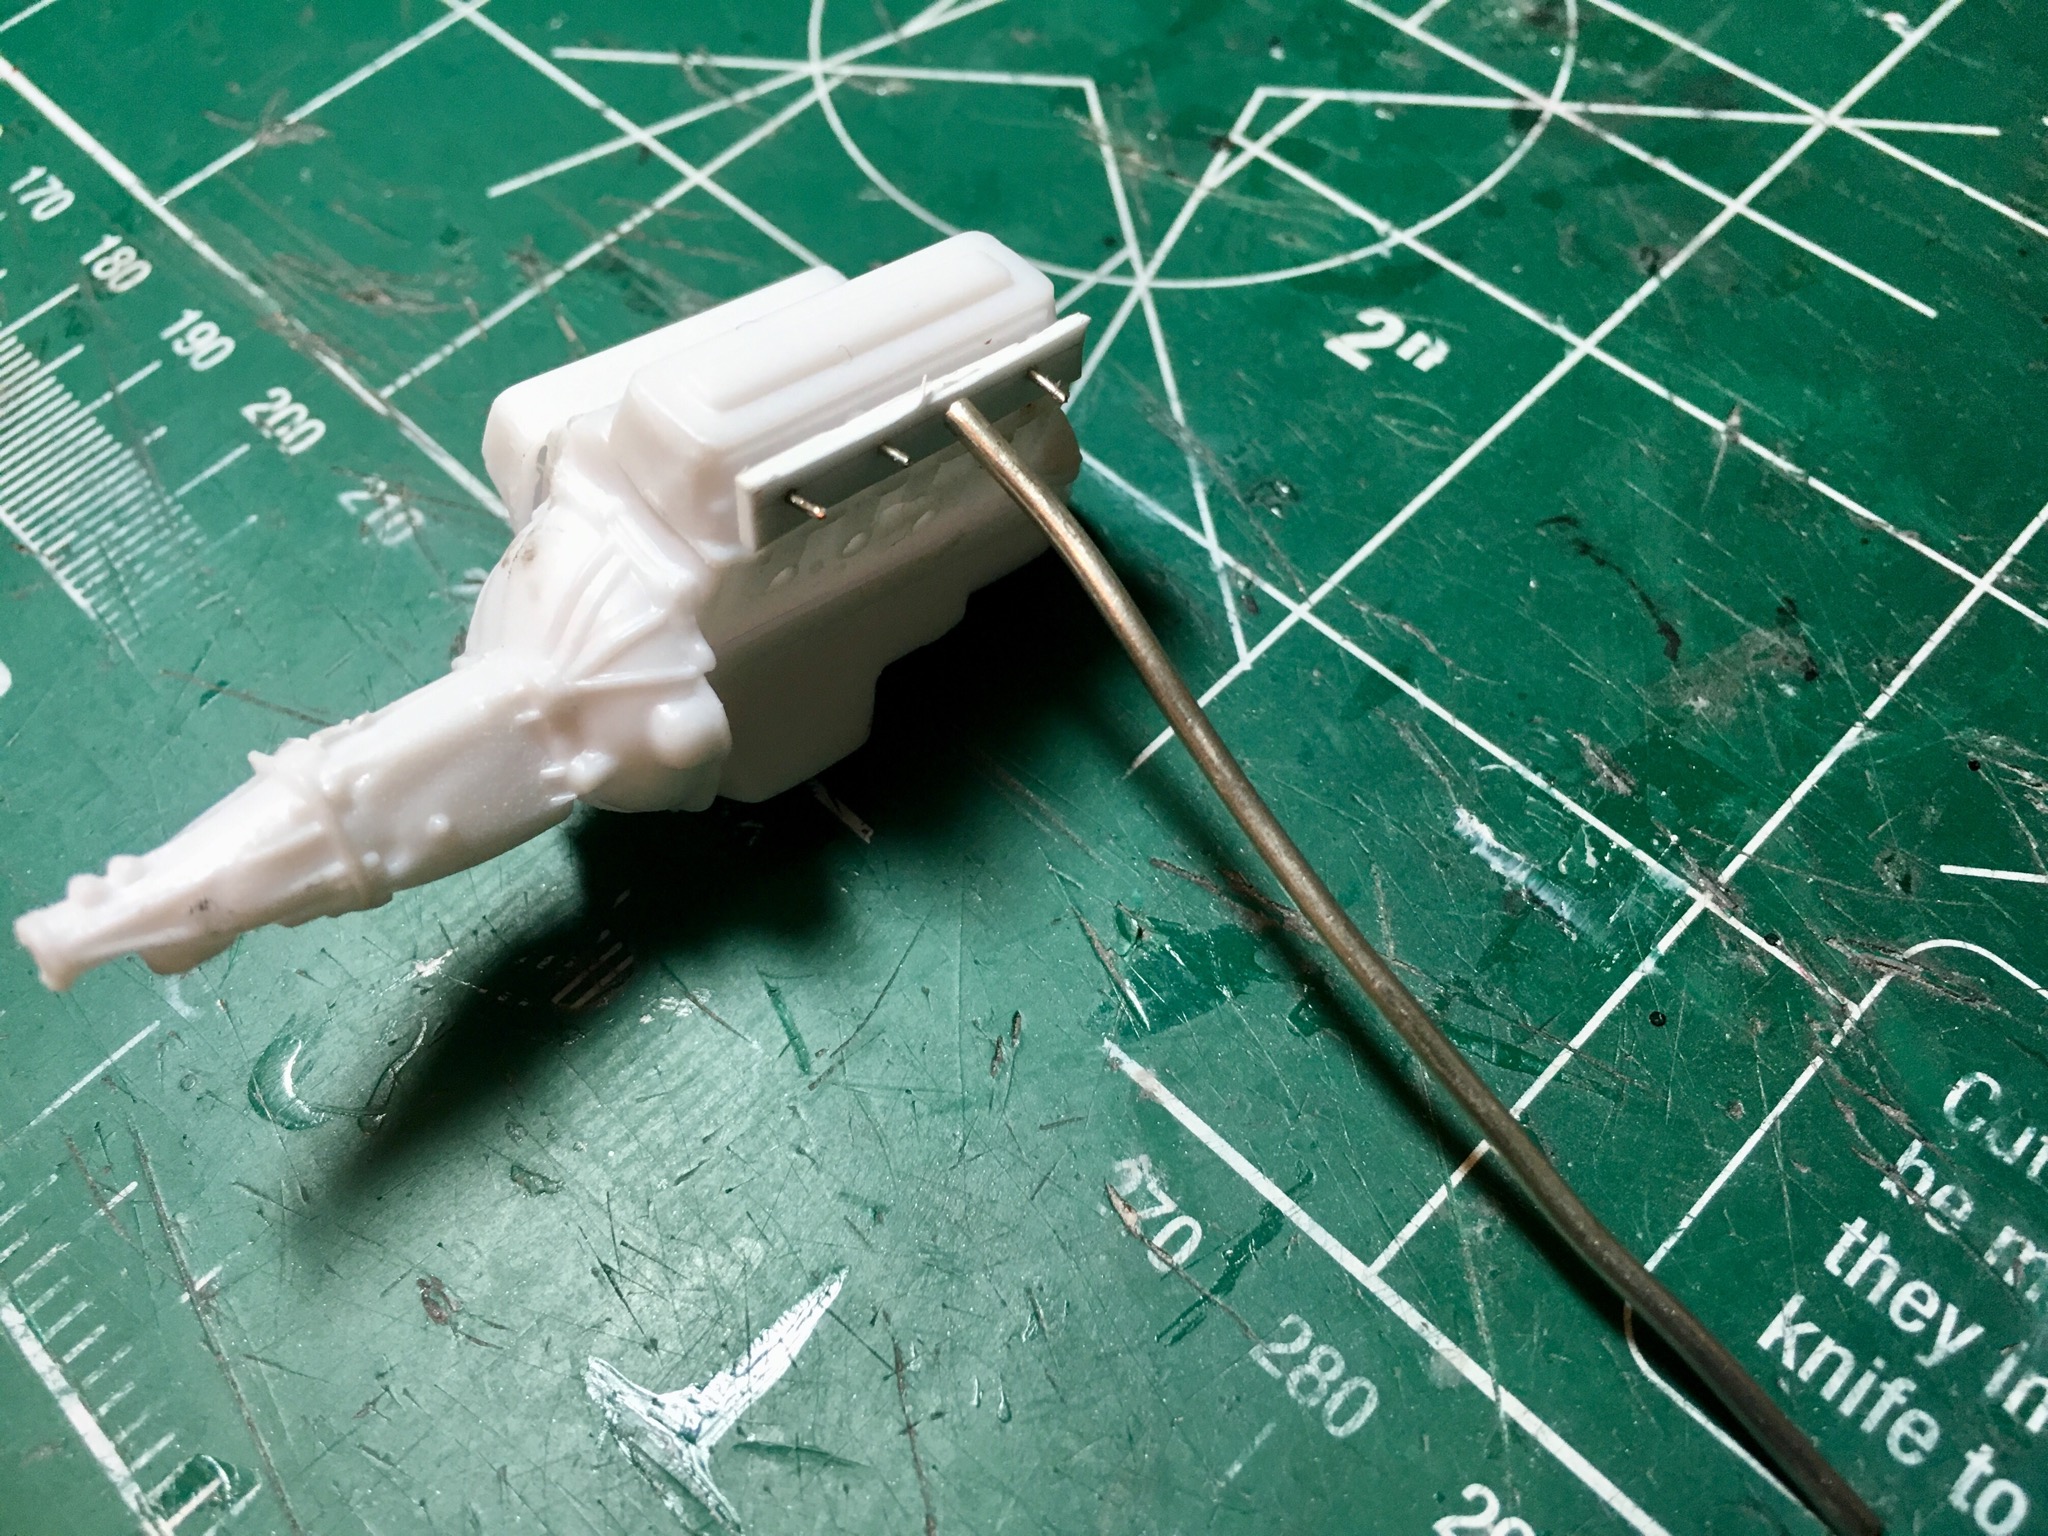
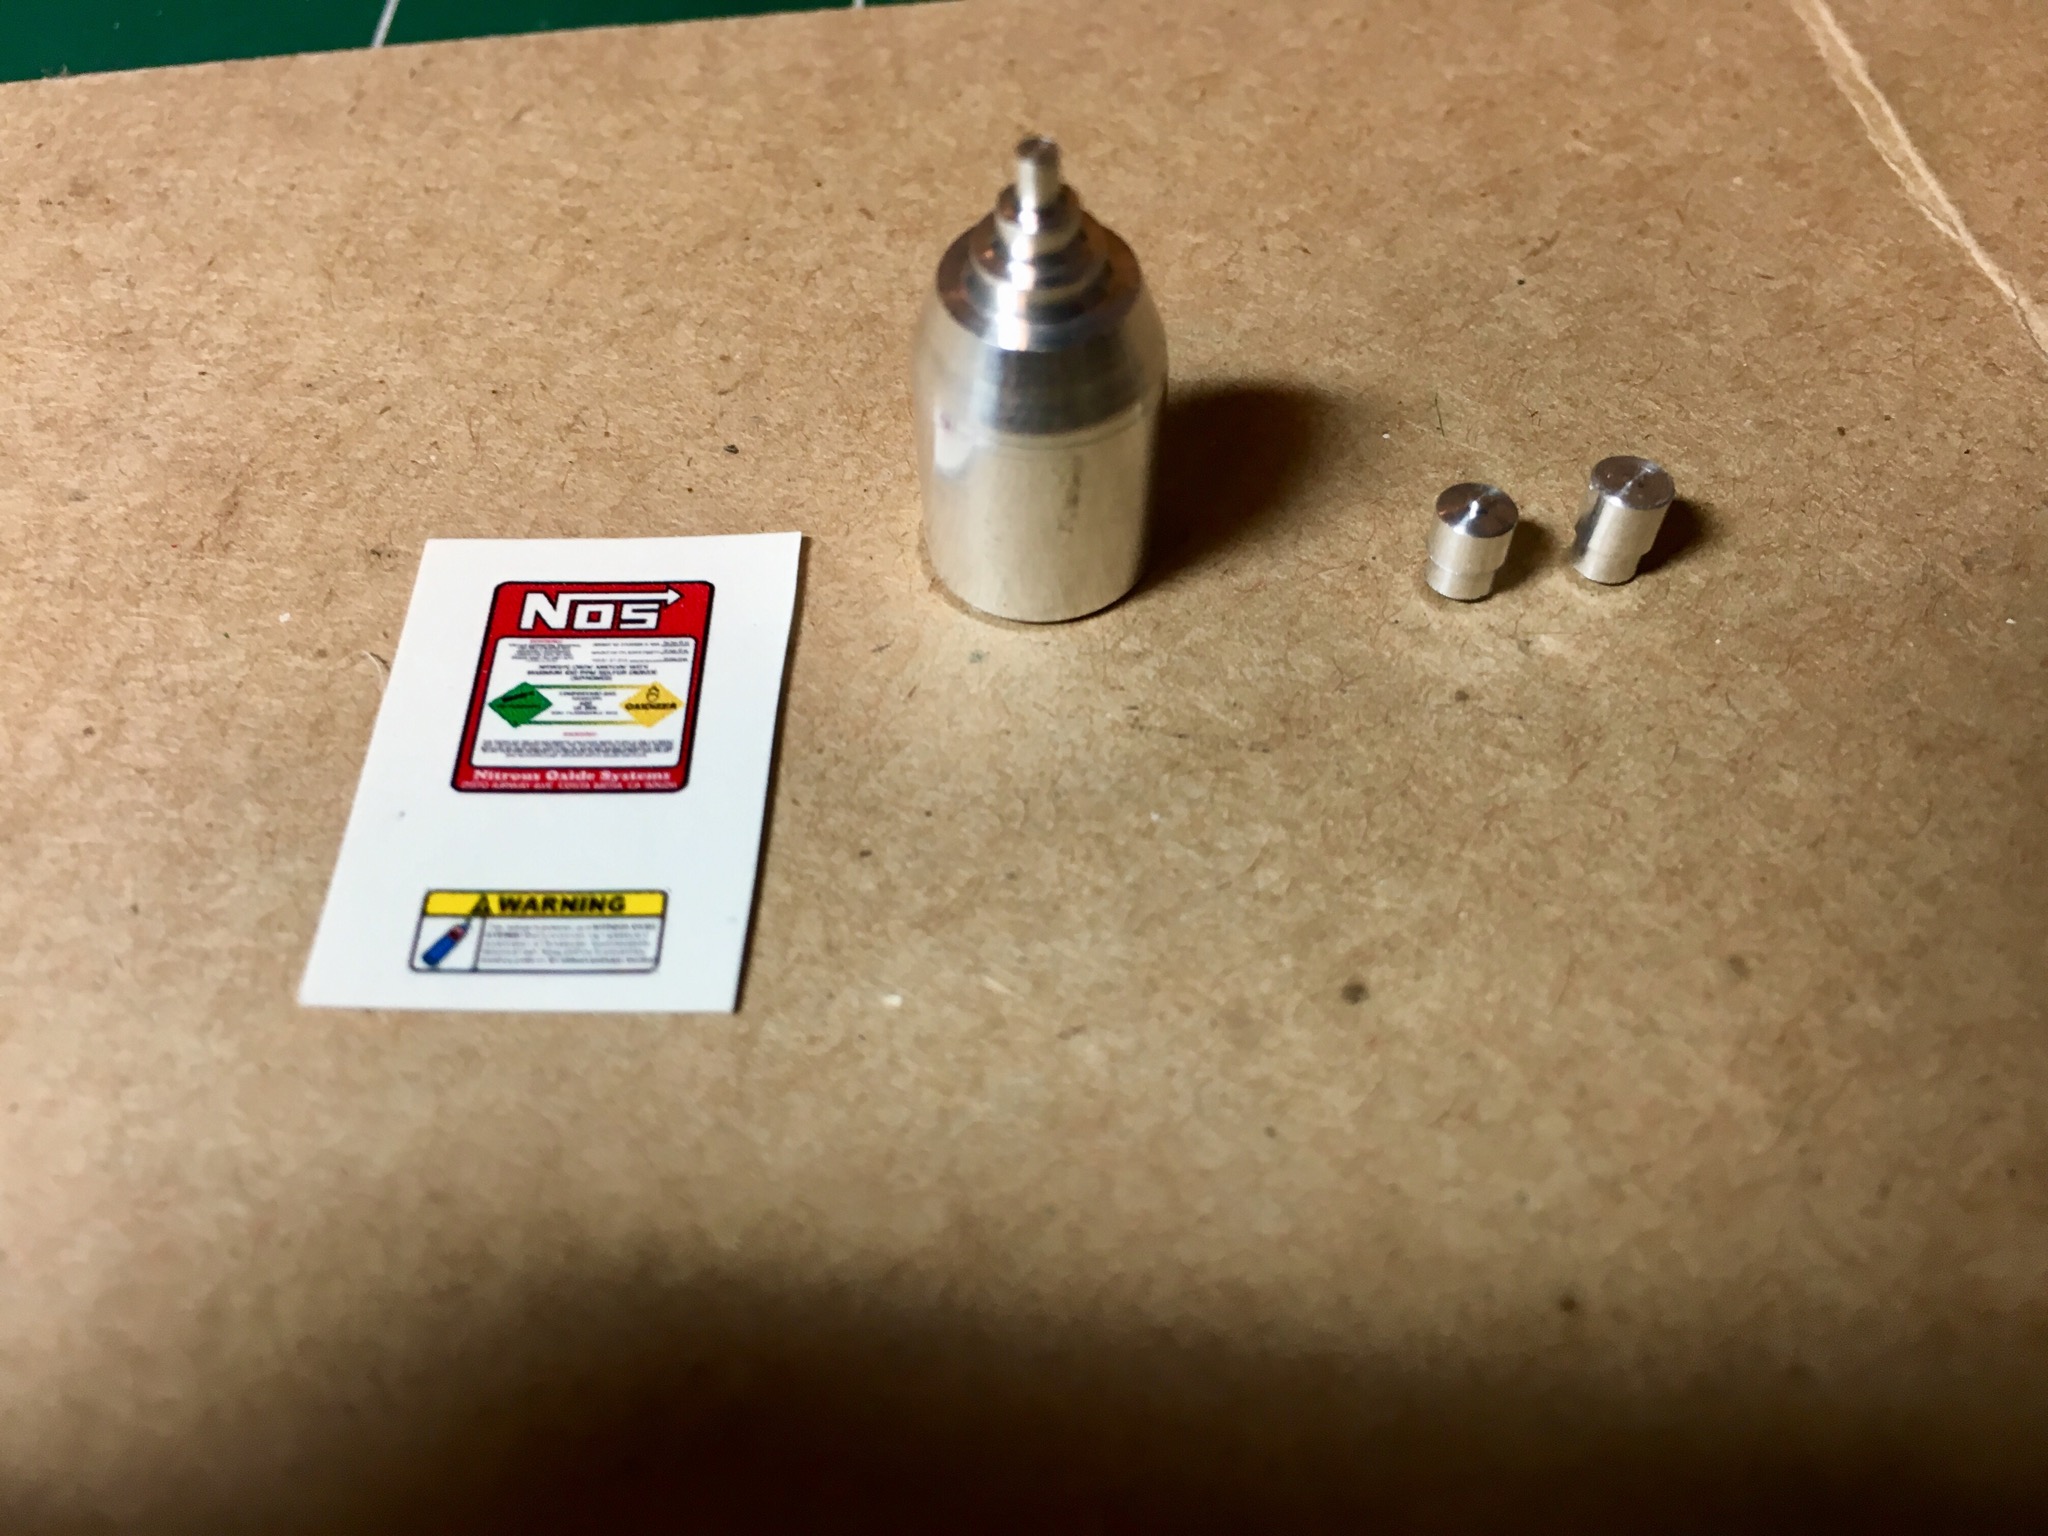
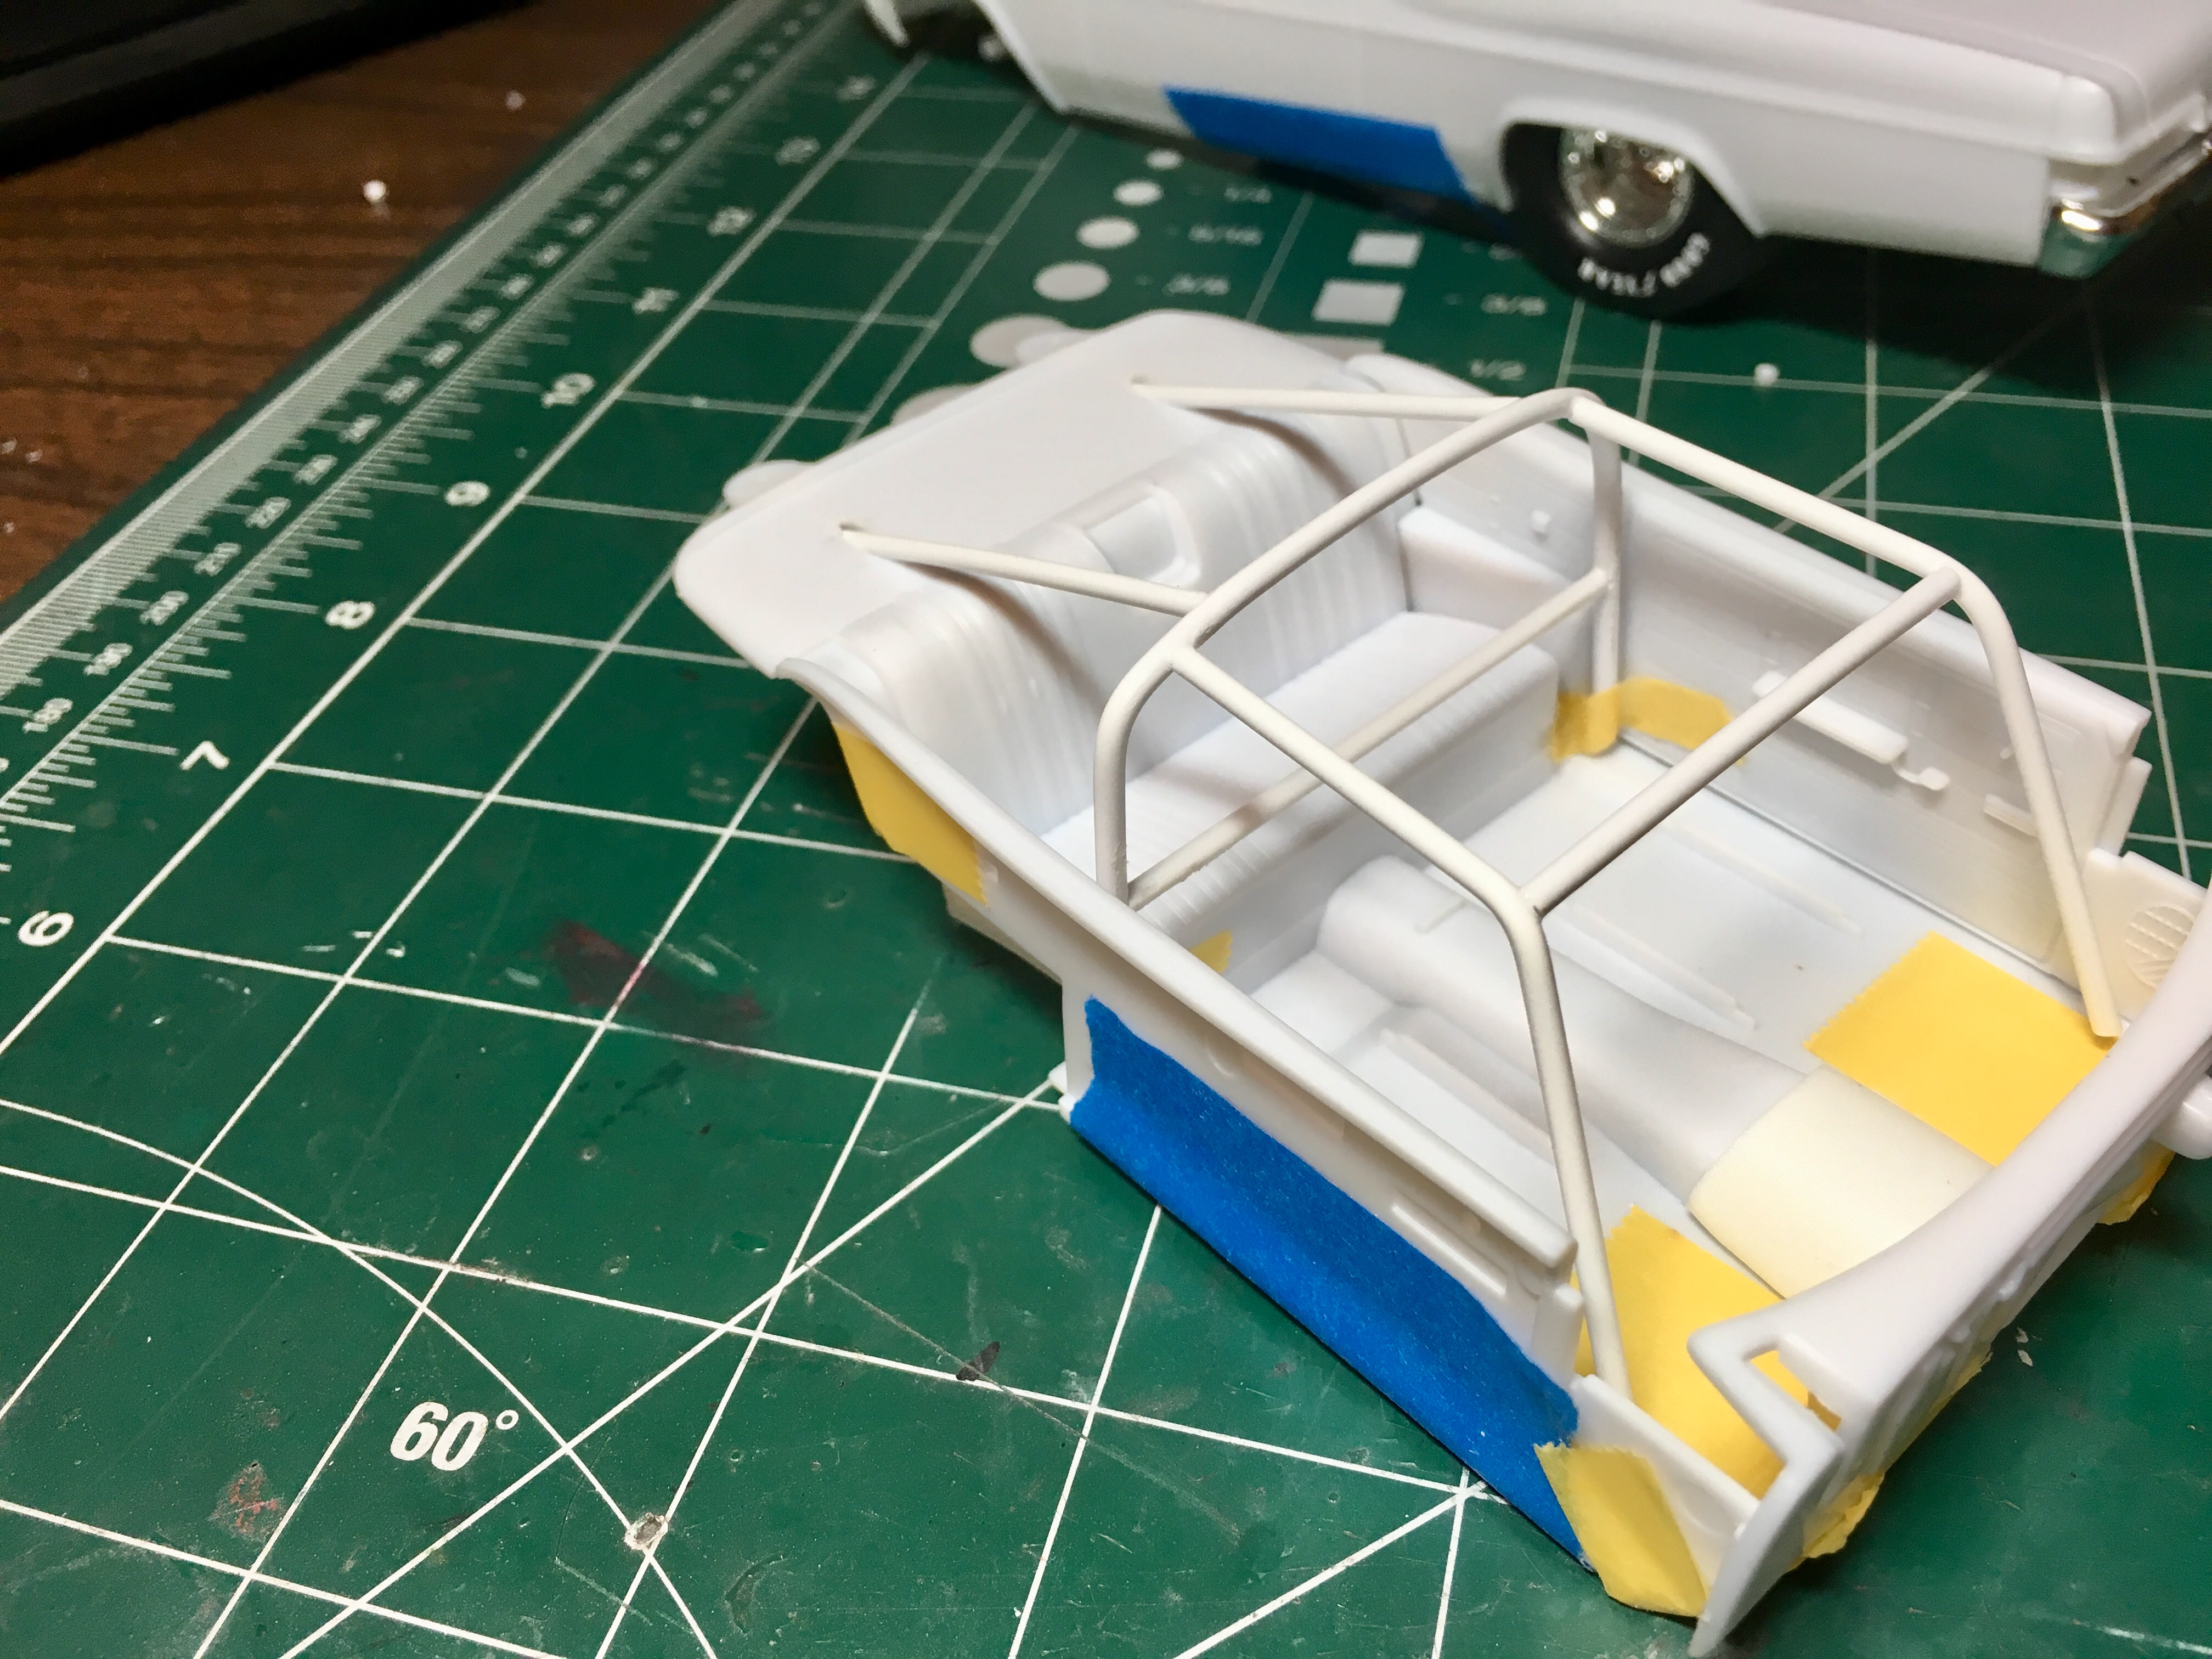
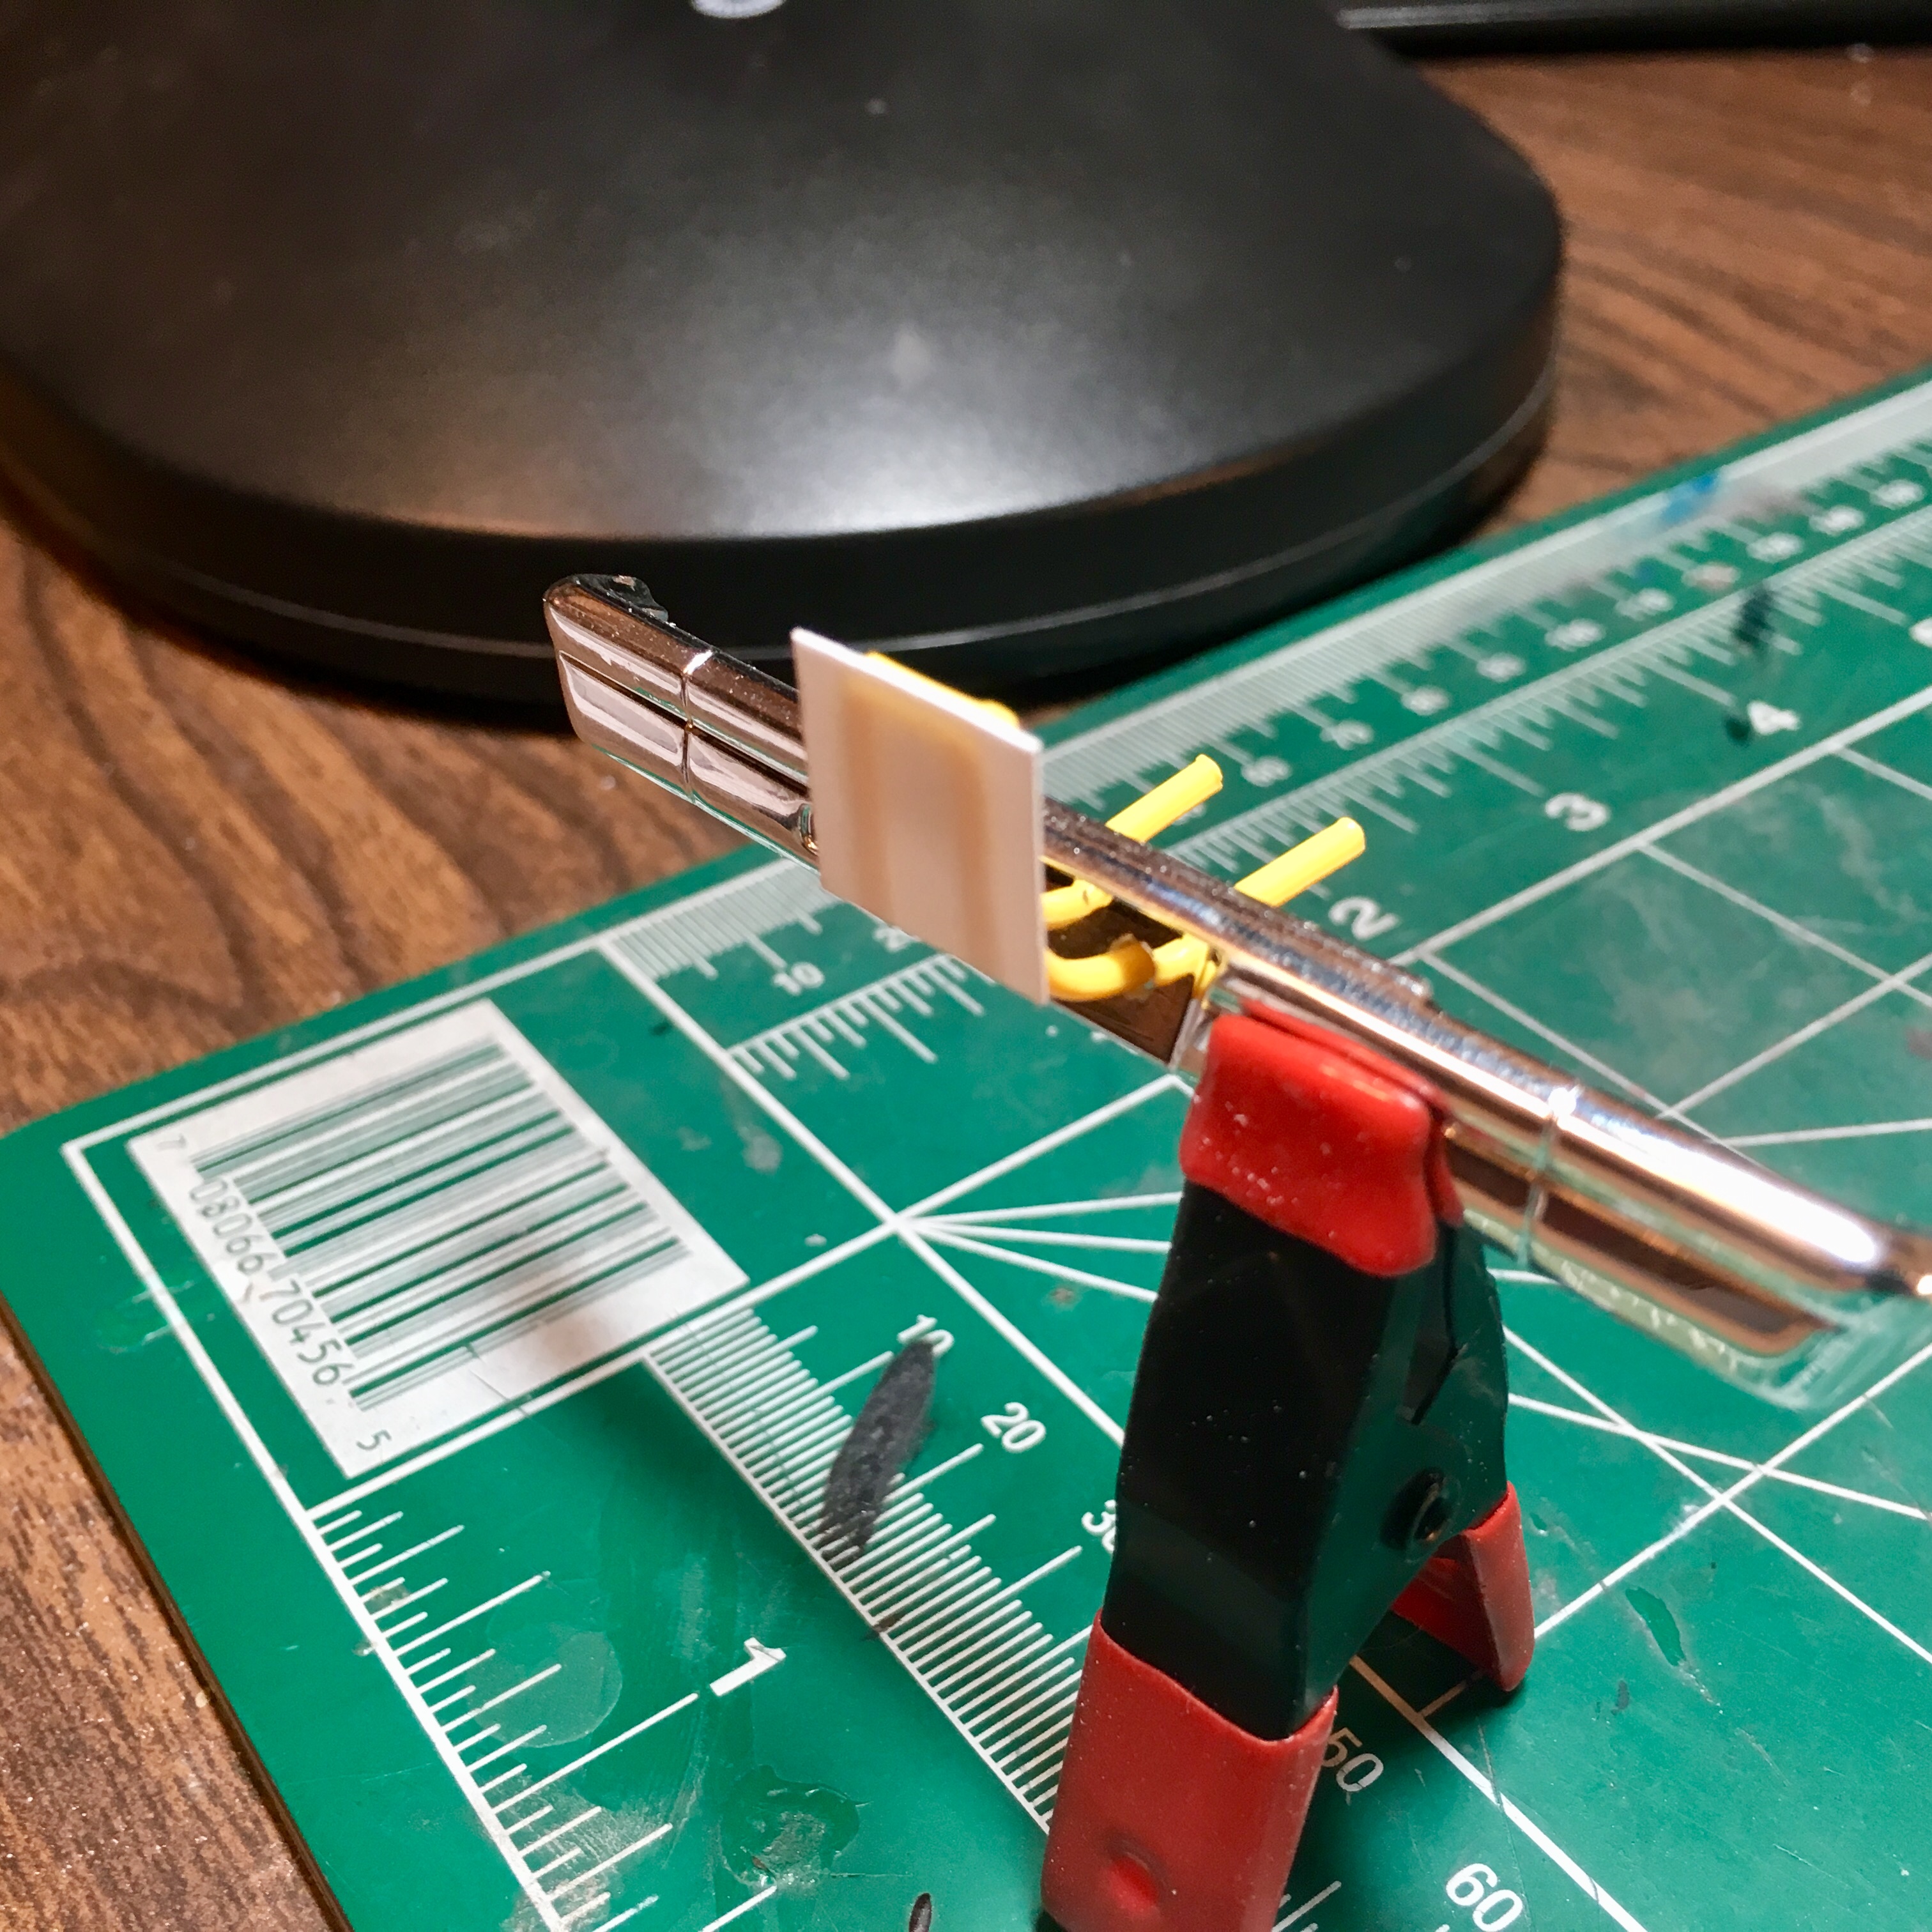
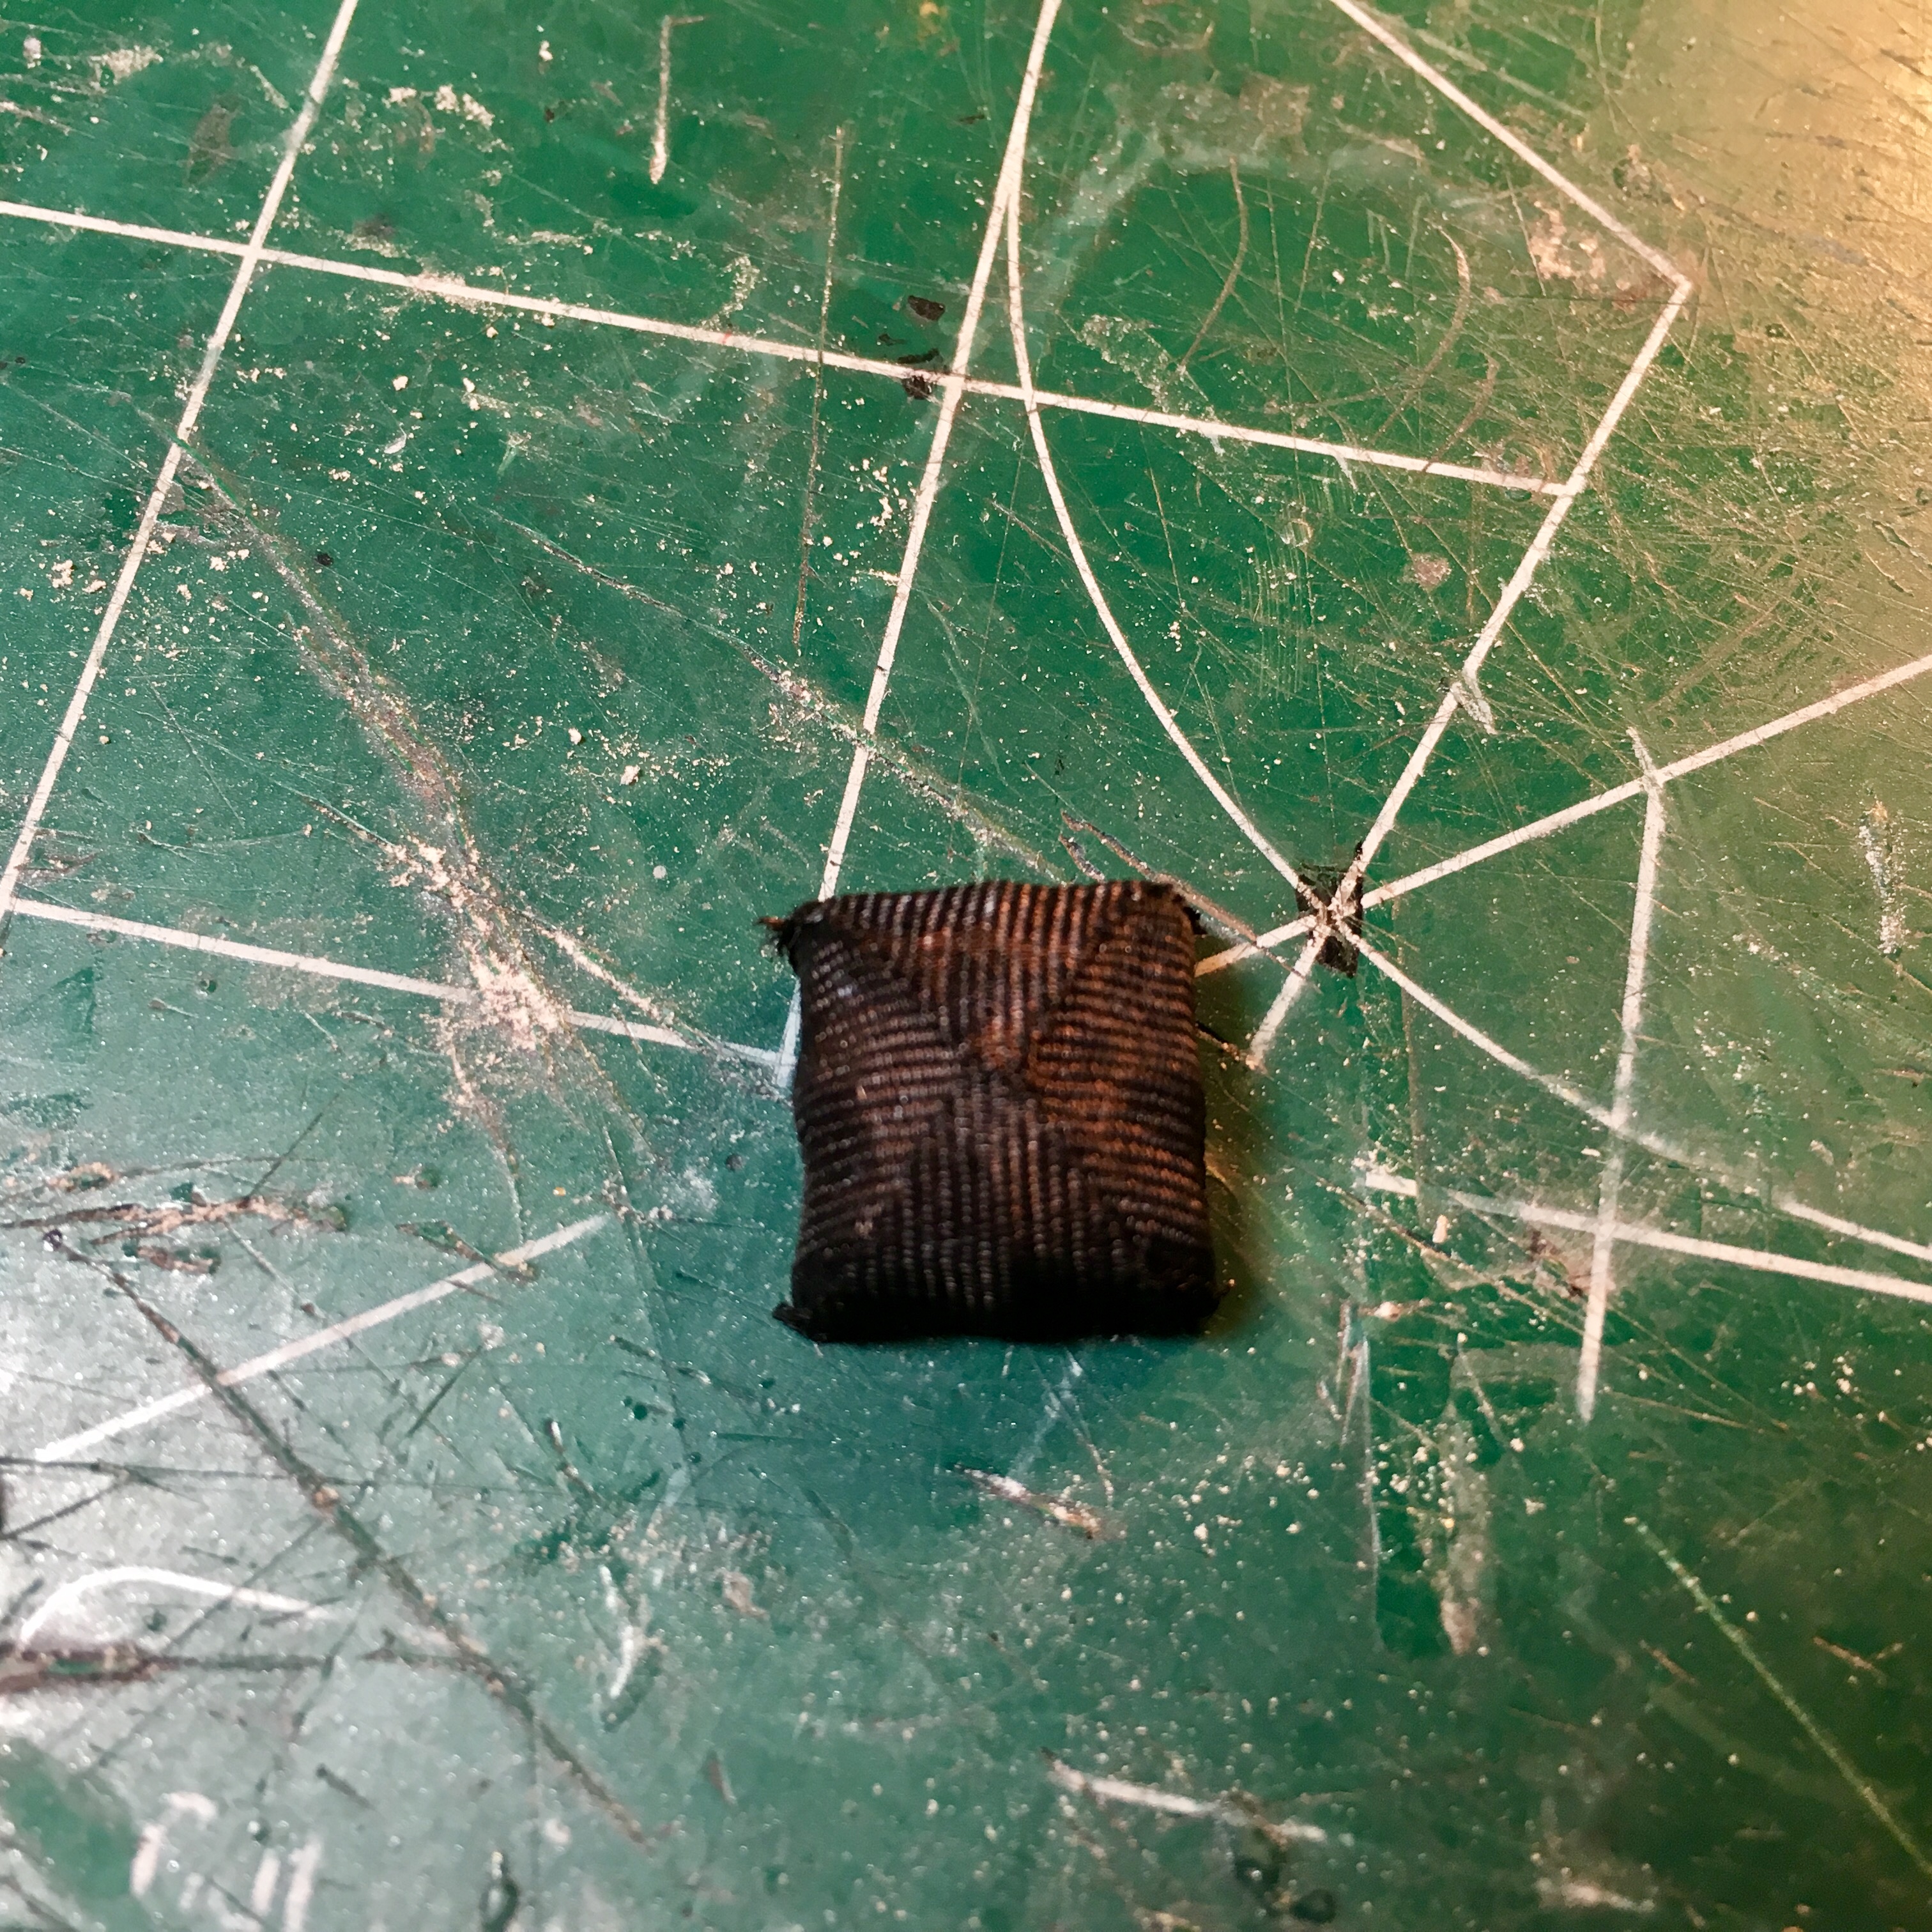
Worked on the Impala today. Got the chute mounted on the bumper. Did some work on the roll bar. I started to play around with solder headers on the kit 396 engine. Wanted to practice before messing with the resin engine, since I’ve never done solder headers before. I have .062, but it looks kind of small for a big block, so I’m going to get some .093 solder, and see how that works. Also scratch built an auto shifter, and a couple of pics of the electric fuel pump, and NOS kit I’ll be using from VCG resin.
-
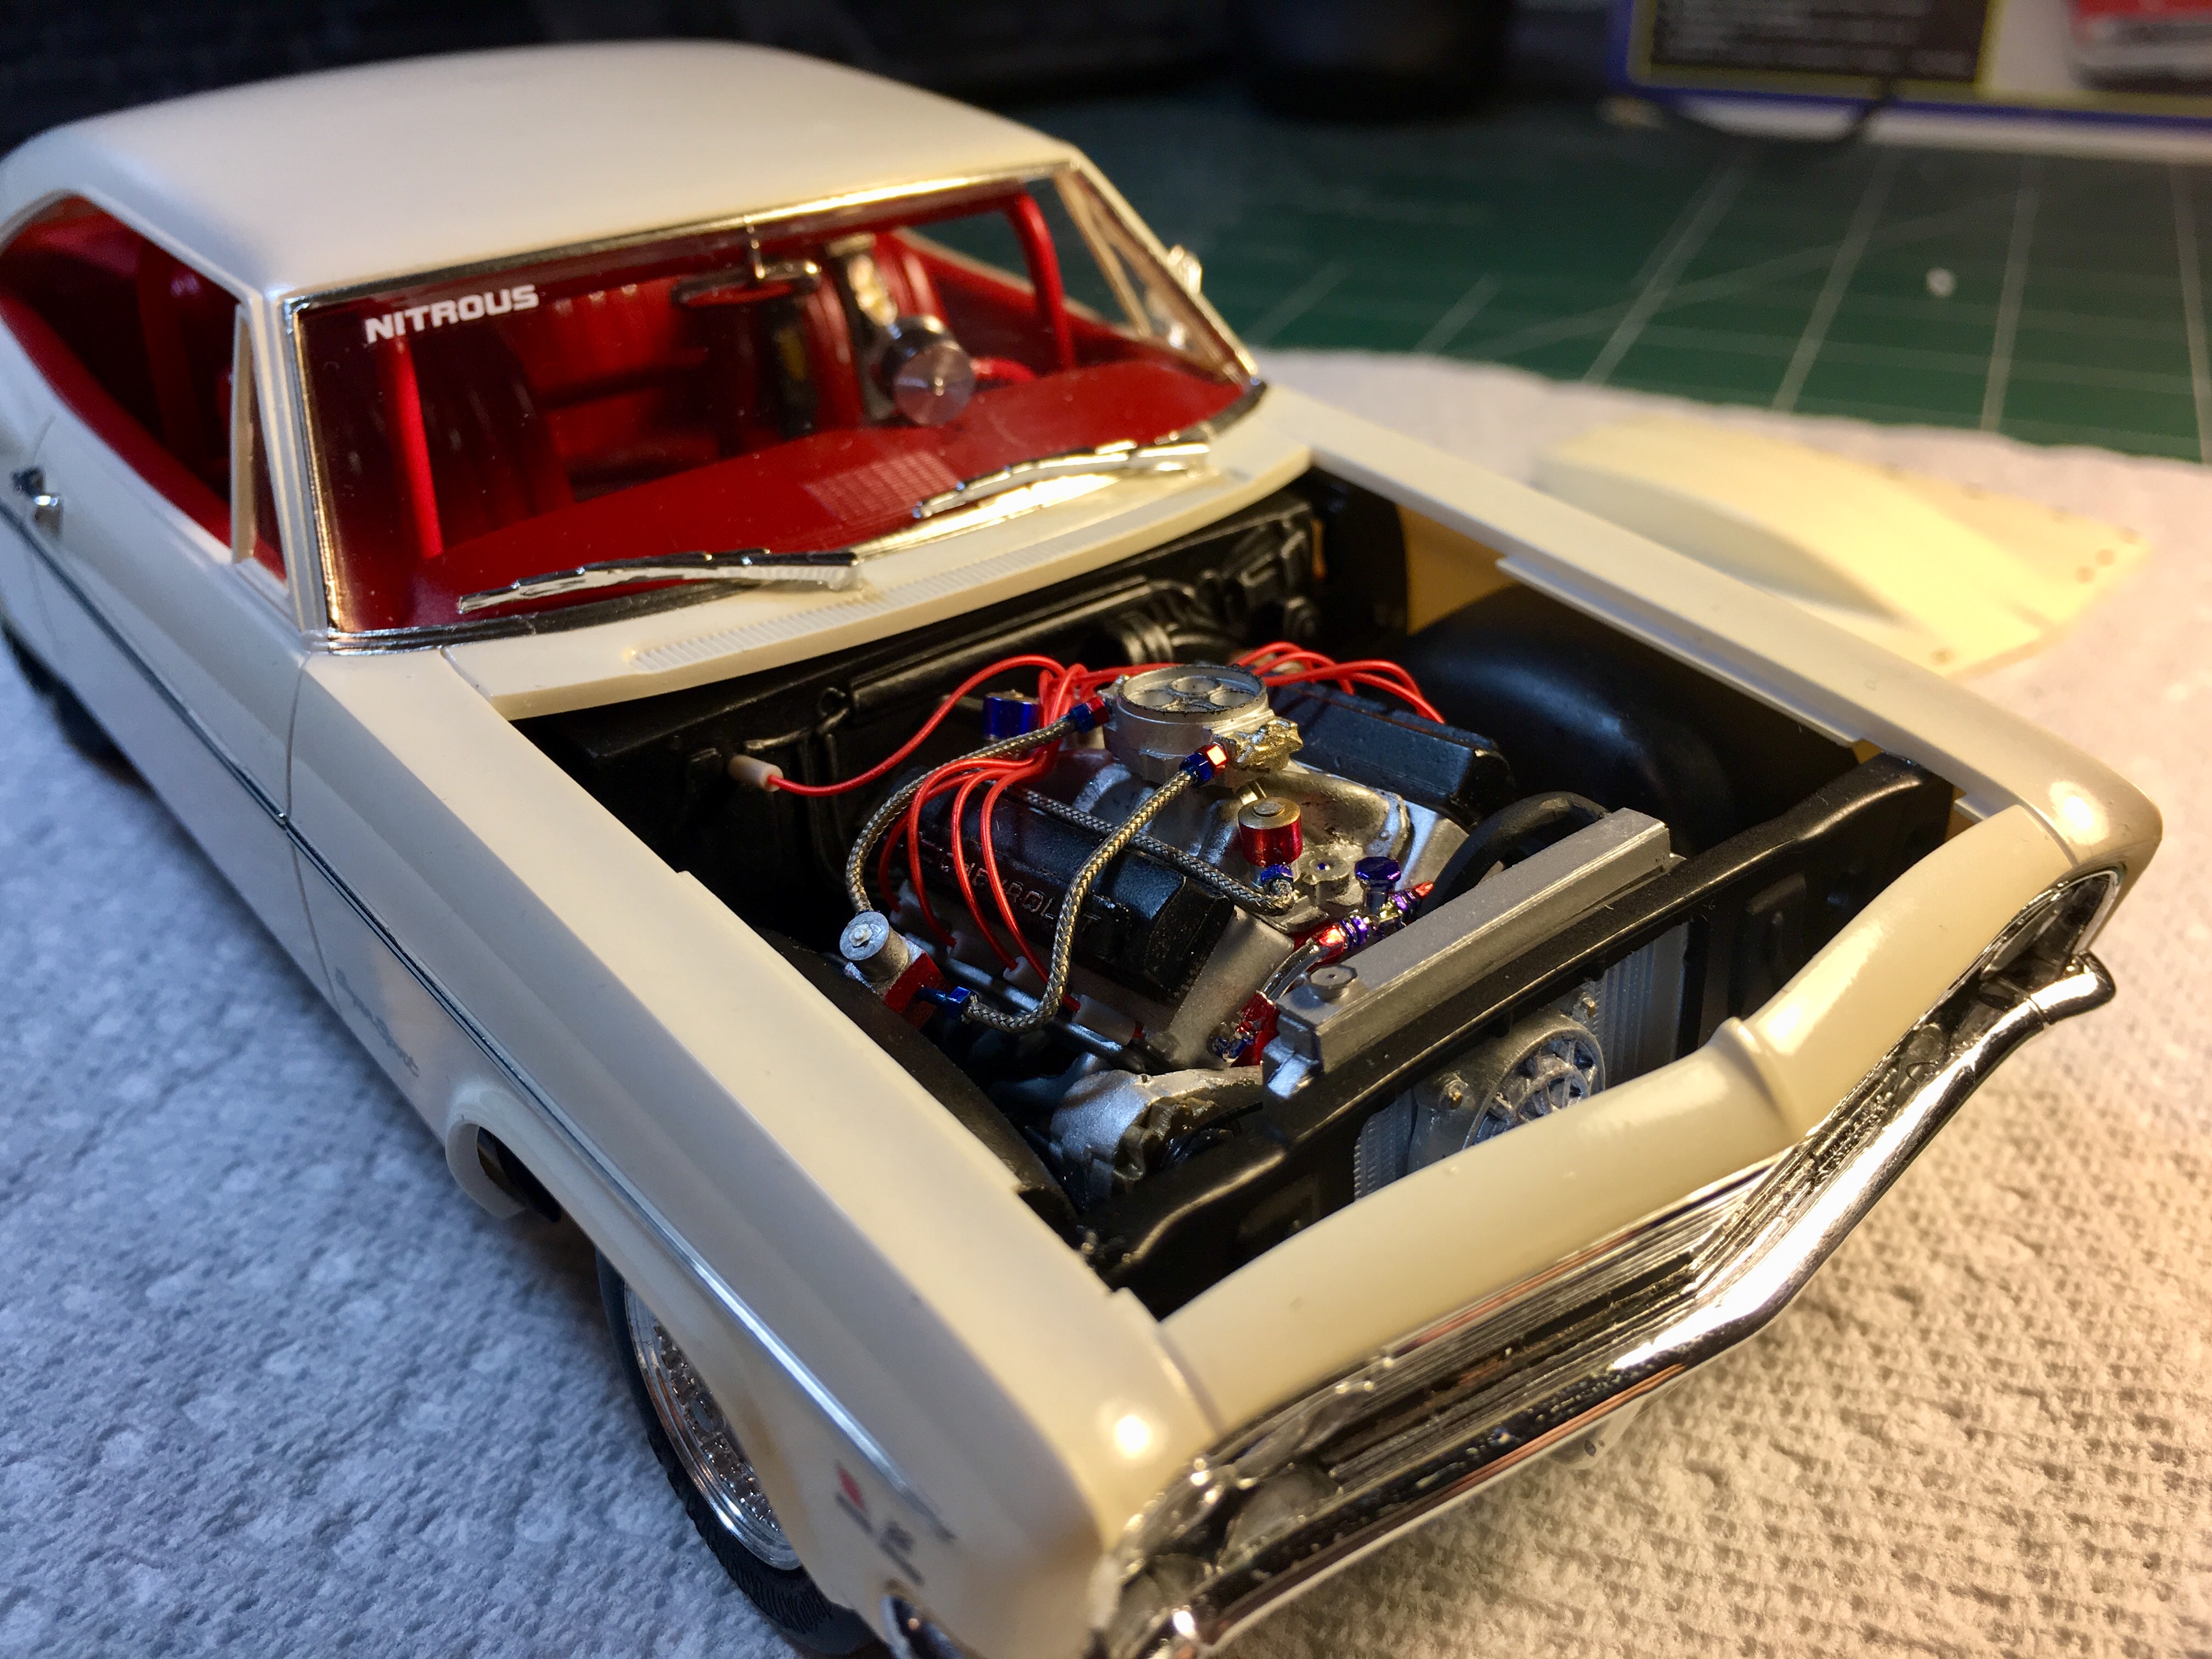
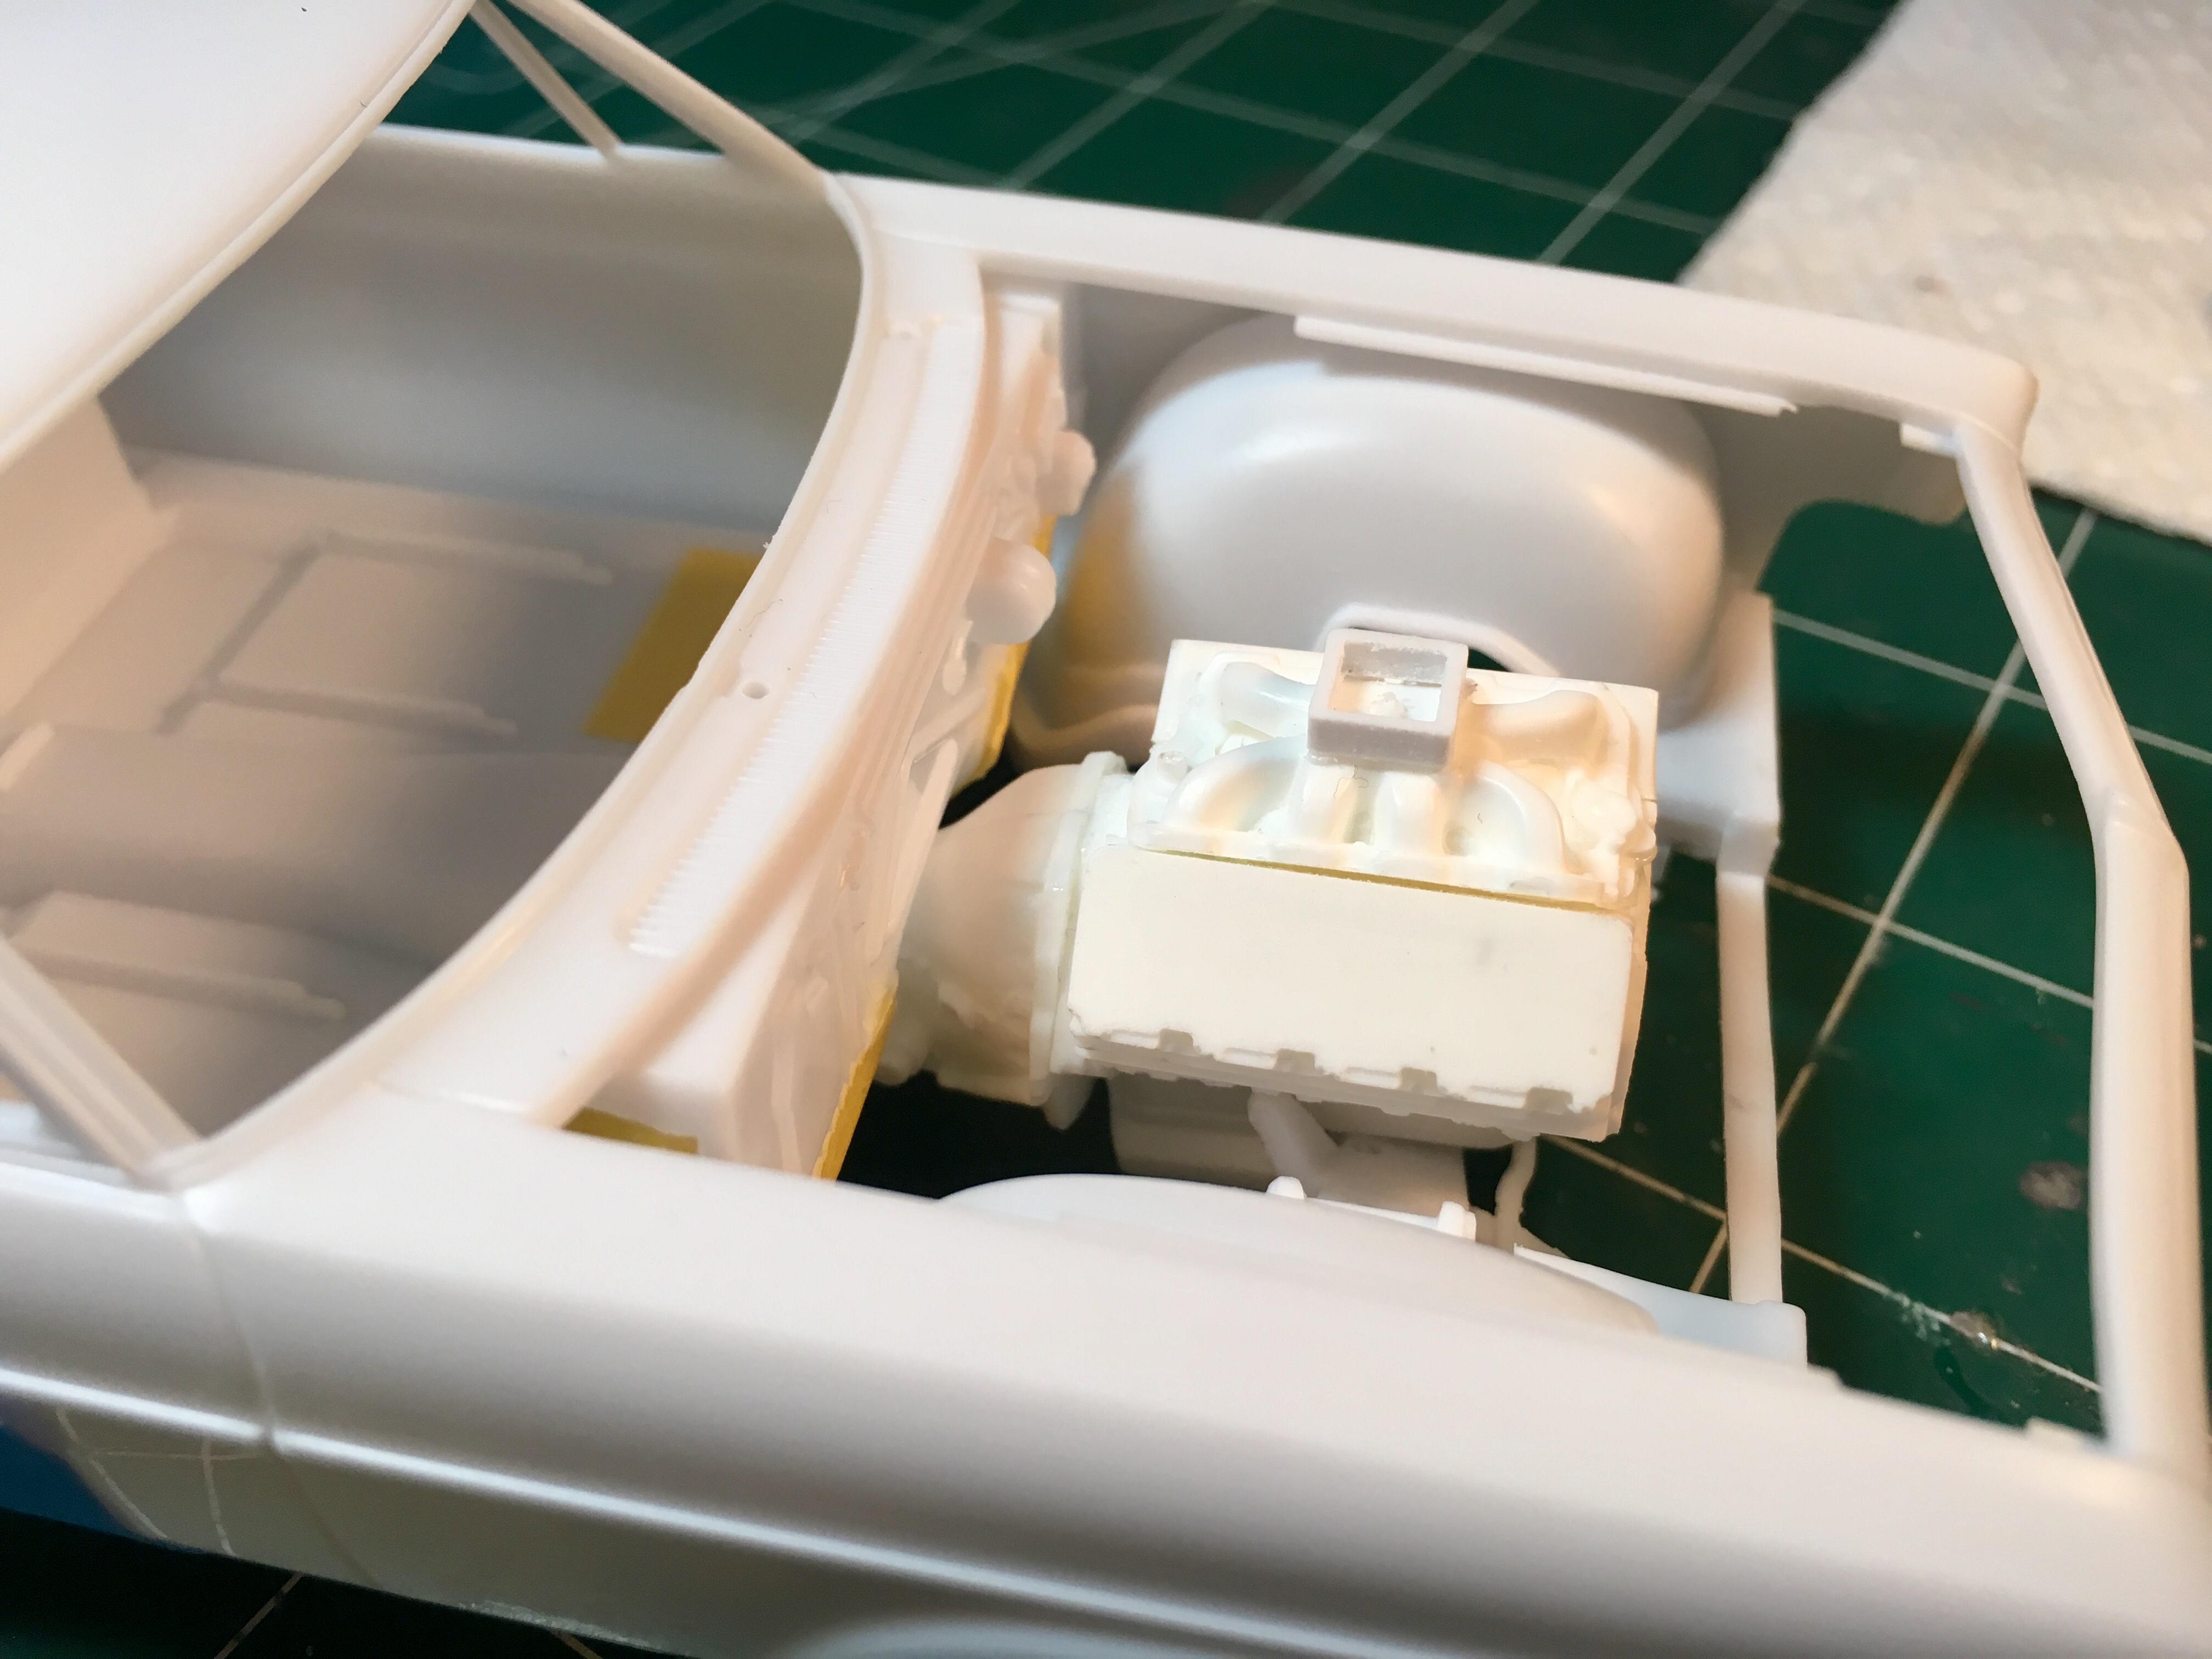
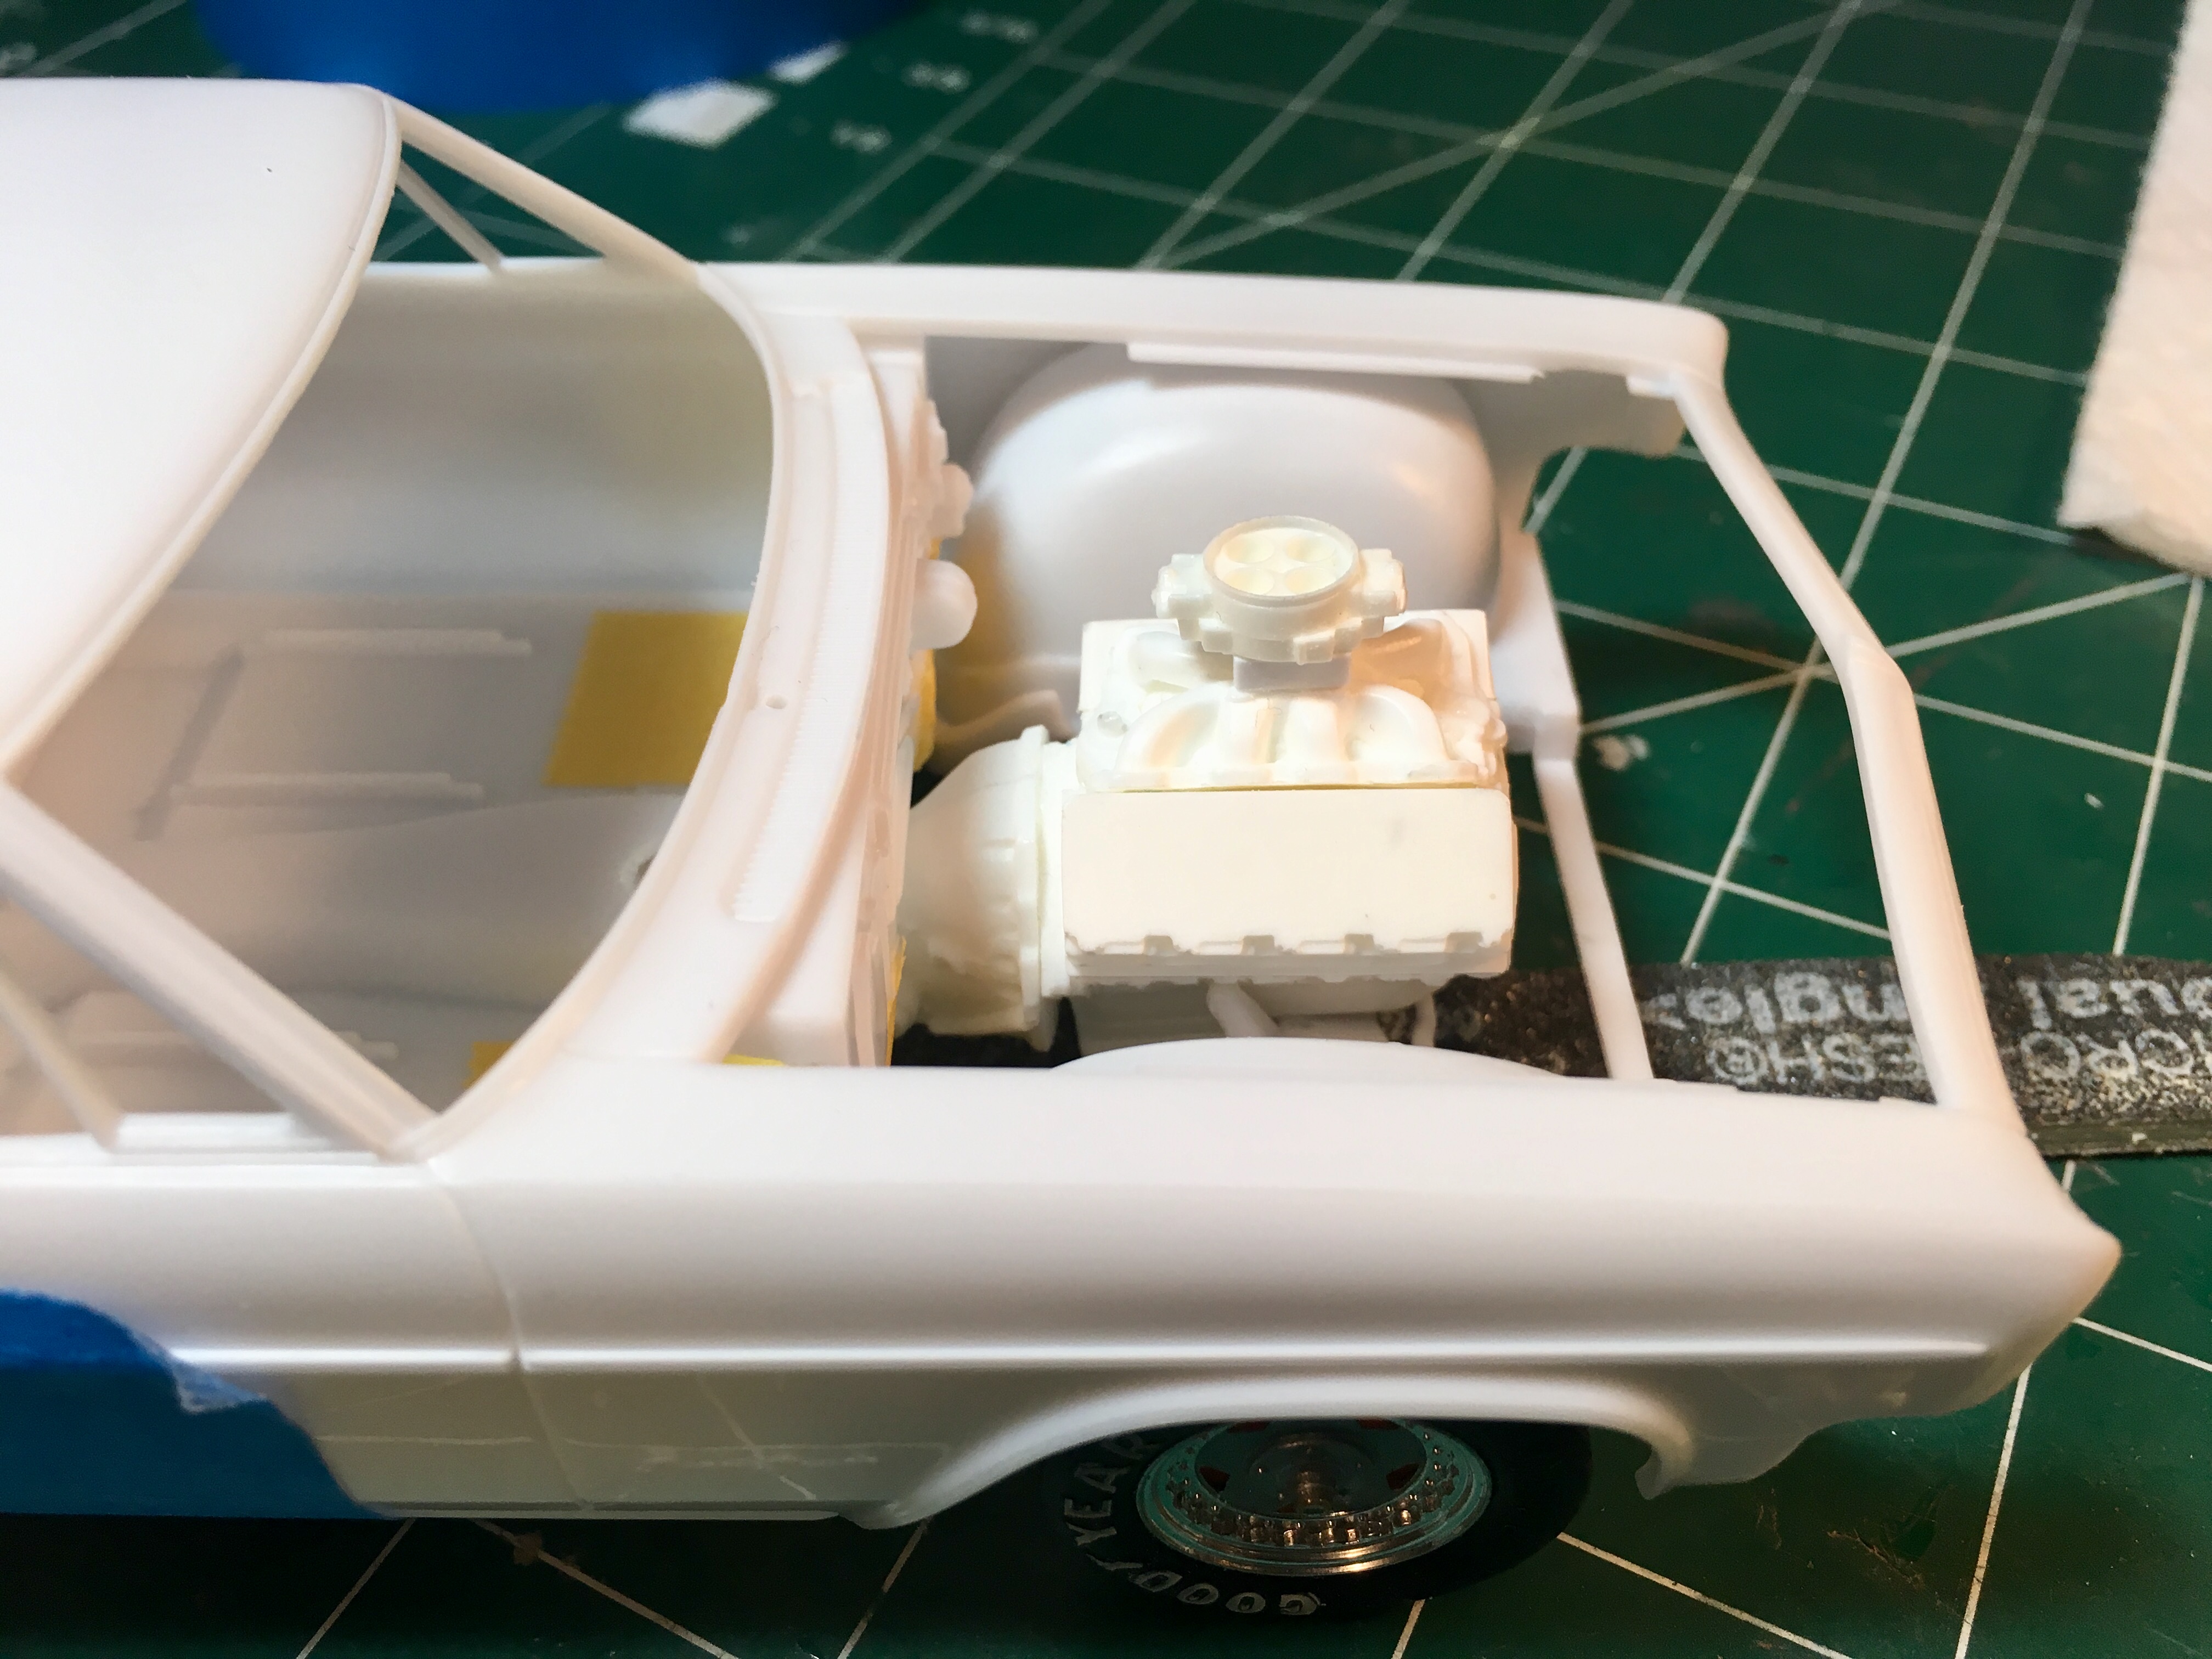
Dominator carb, with some square styrene stock for the nitrous plate. Also the home made chute. Nice detail on the valve covers.
-
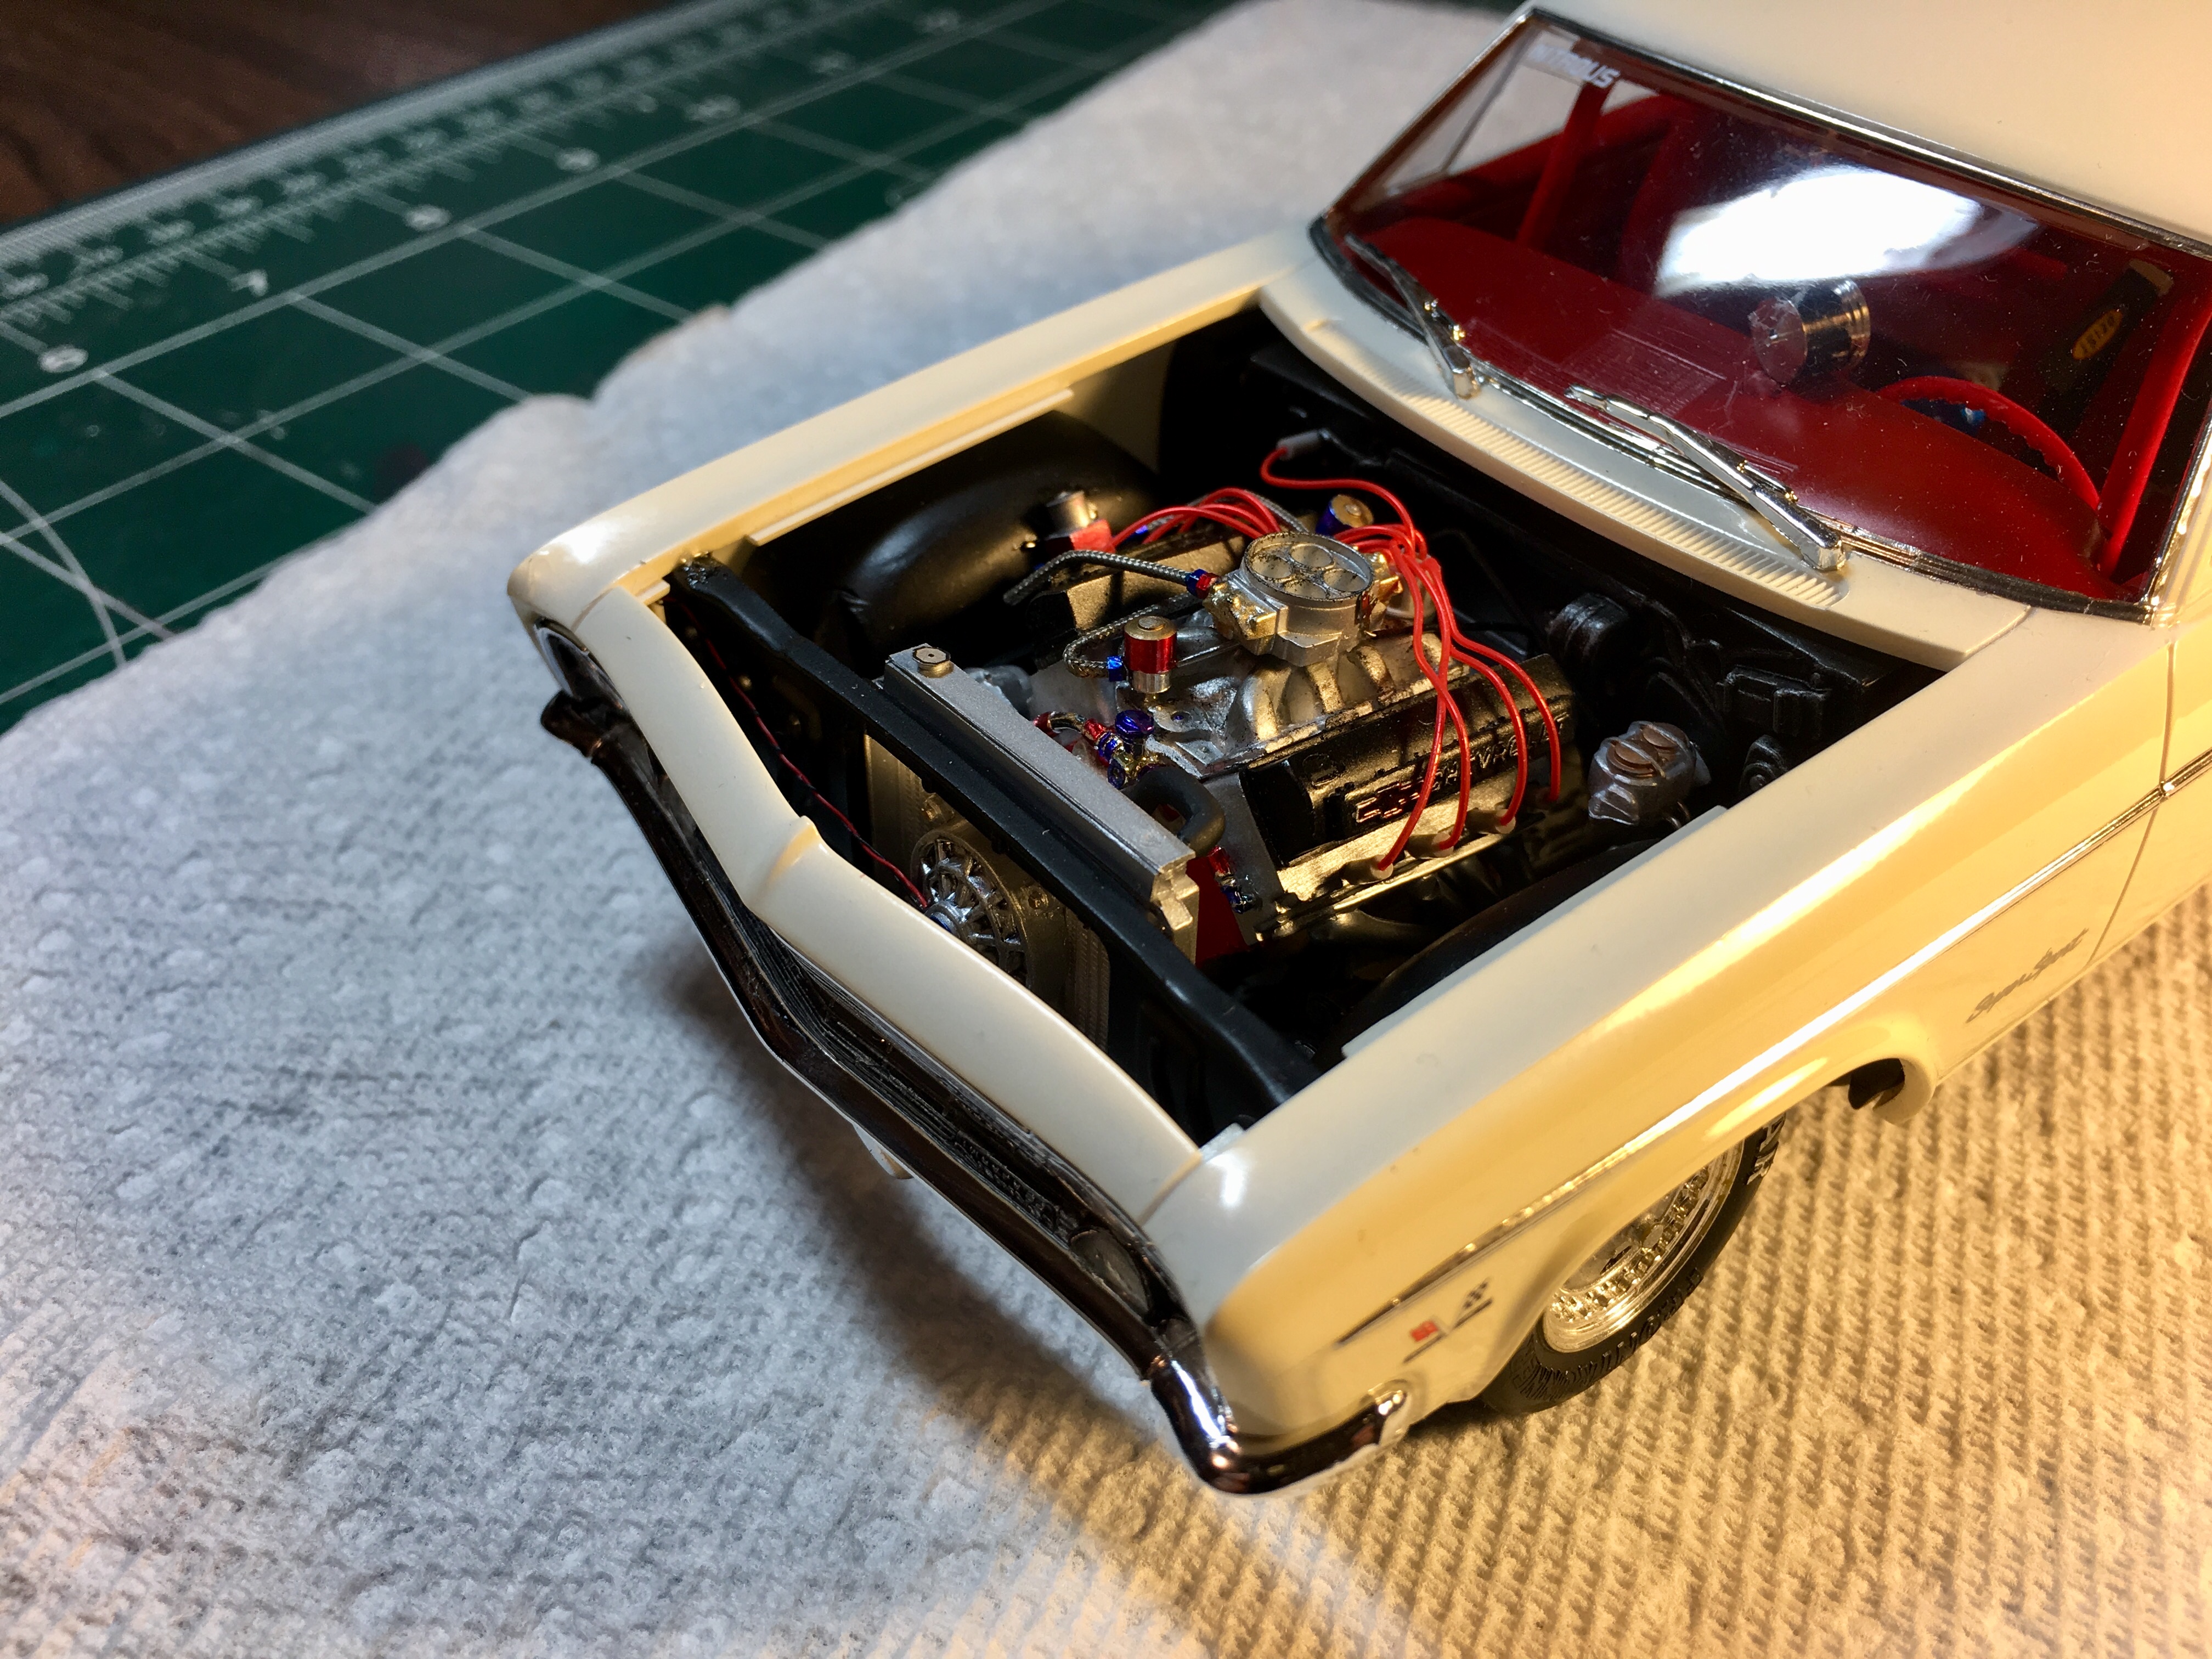
Decided to build a chevy since I’ve been on a Ford kick lately. Was going to turbo the car, but decided to go with nitrous. Back halved the car, using a BNL resins BBC, with an auto trans. Got it mocked up except for the headers. Once they are out of the way, time to build a roll cage.
-
Tamiya clear question.
Brutalform replied to Brutalform's topic in Model Building Questions and Answers
Thanks for the replies everyone. It’s been a few days now but it rained here where I’m at, so I’ll wait for a day without the moisture. I have several cans of the clear, but was always reluctant to use it, without waiting a long time. It does seem a bit weird that the two products by the same company would have a negative action with each other. -
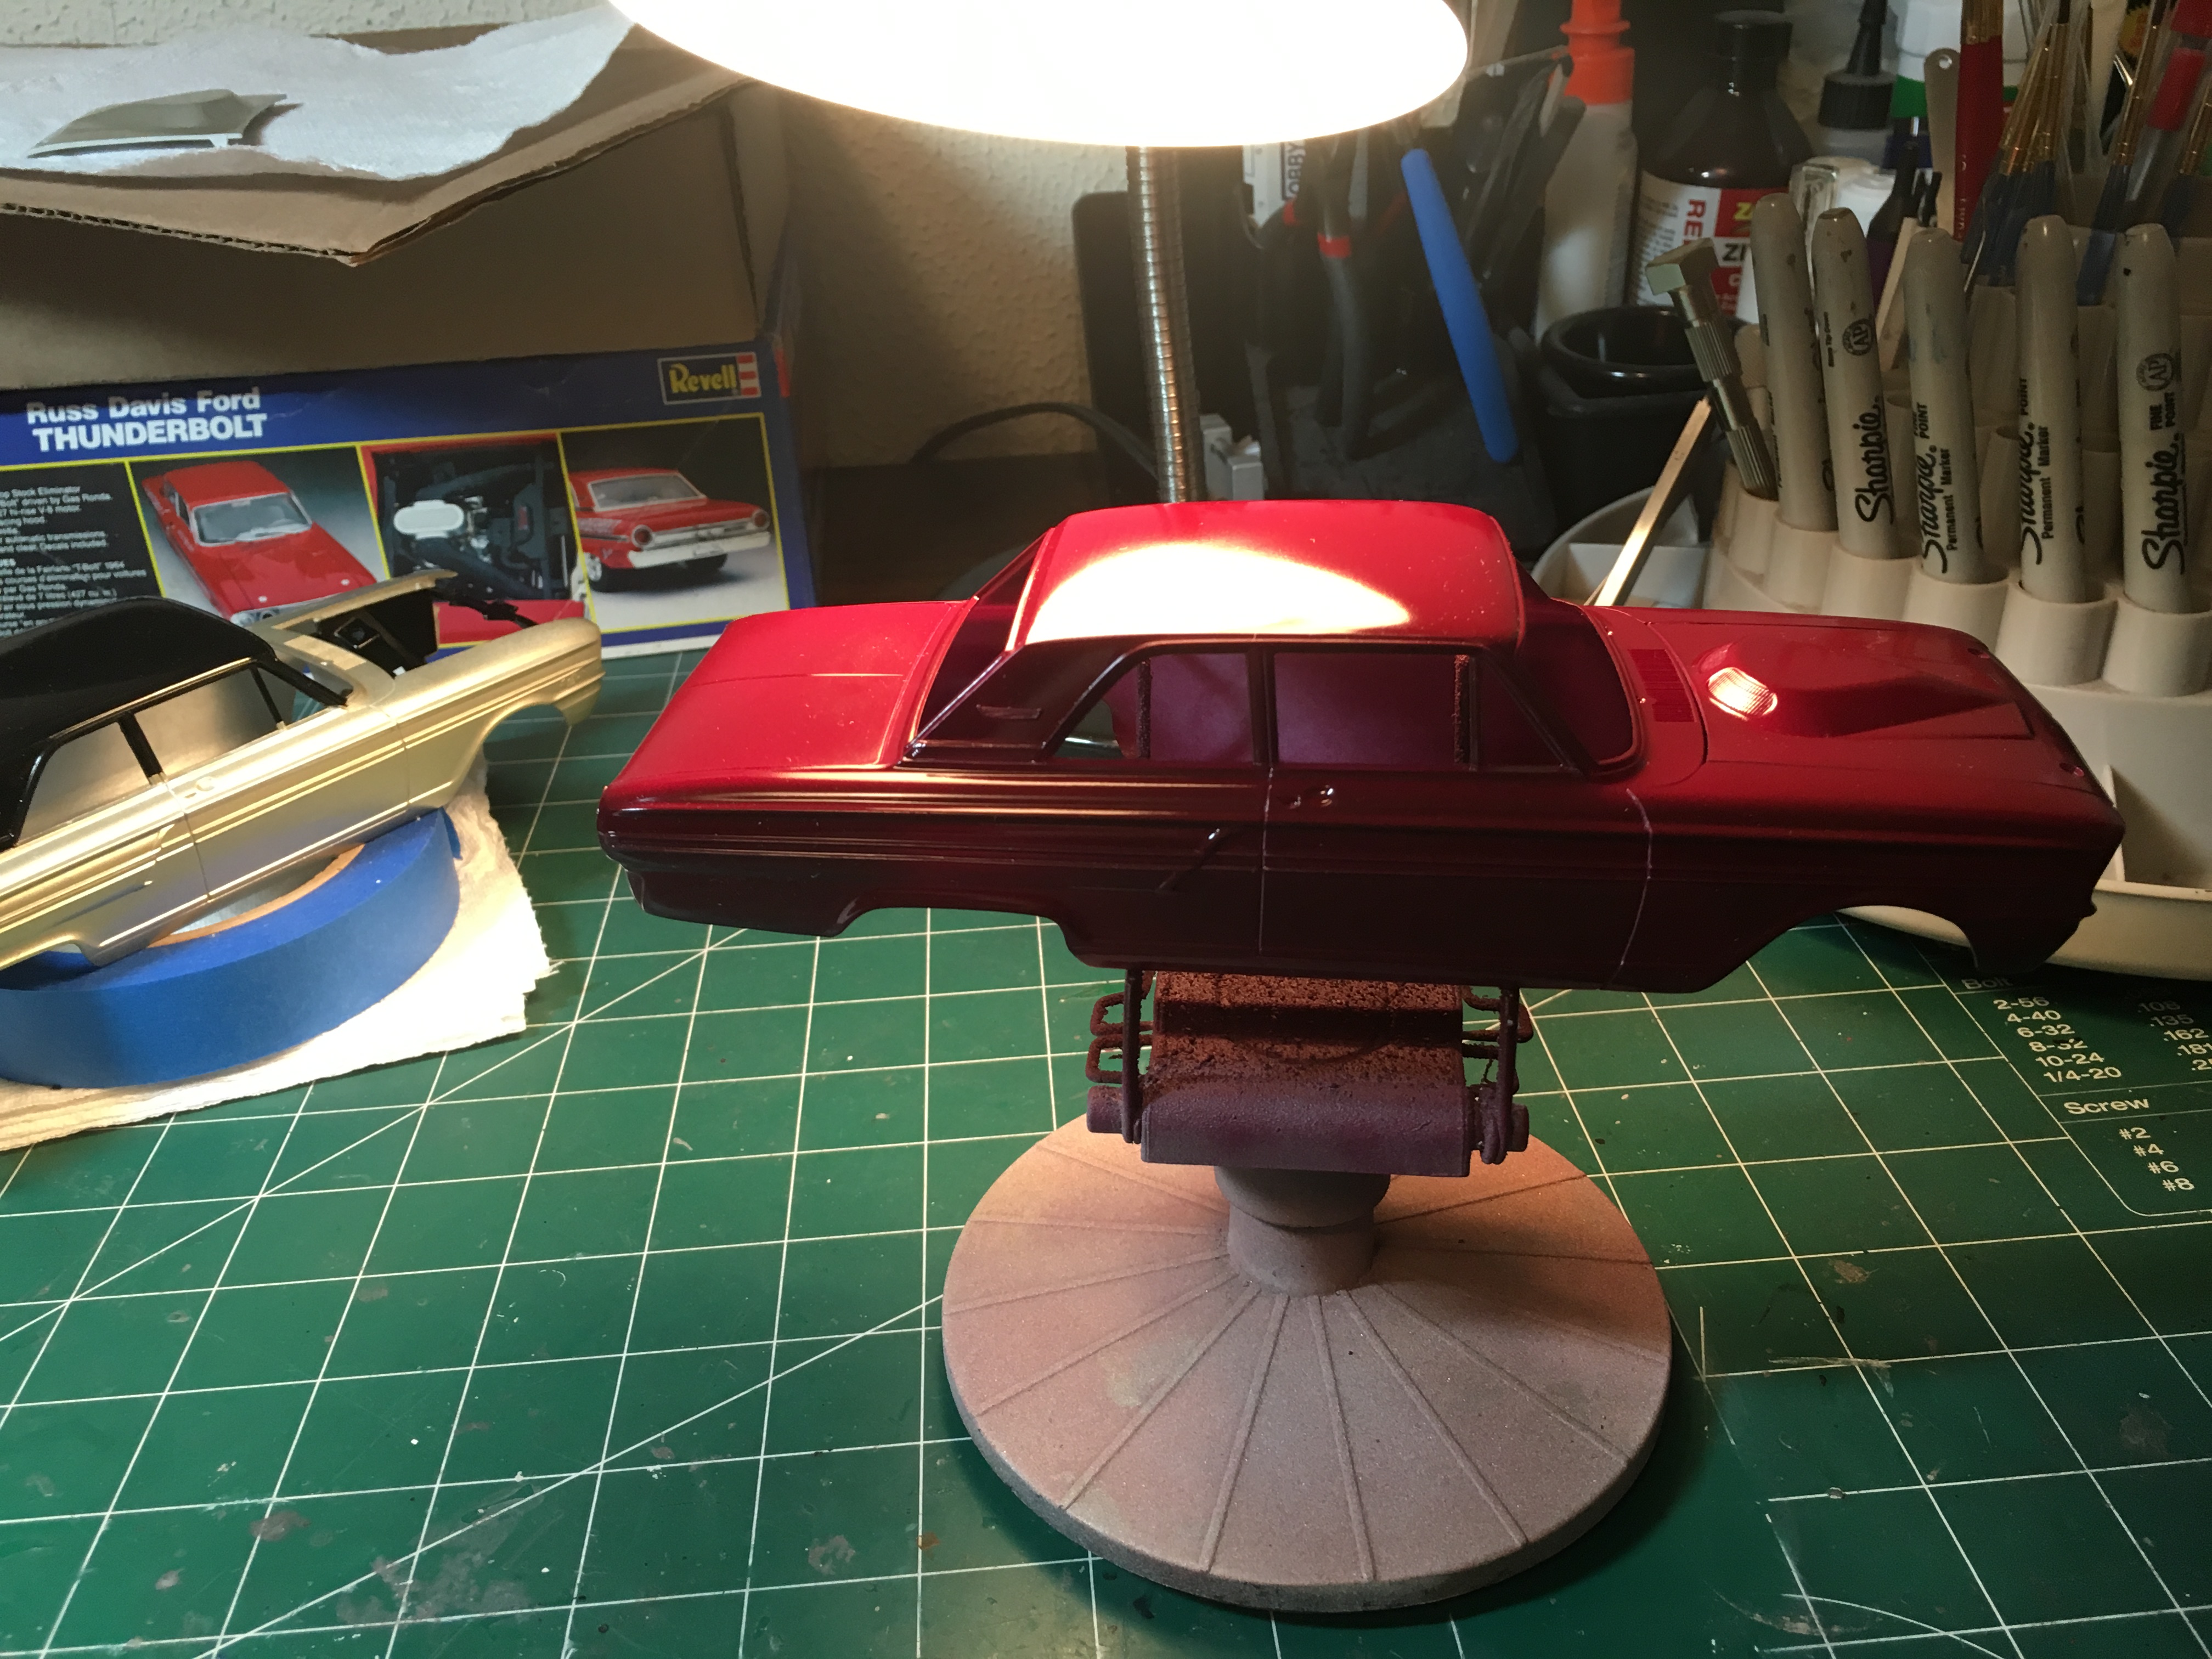
I’ve ran out of my Model Master clear, and Testors one coat lacquer clear. I’ve used these with no problems whatsoever over Tamiya lacquer sprays. I have several cans of Tamiya clear I’d like to use up, but I’ve heard that if you don’t clear immediately after you lay down the Tamiya color, you should wait a few weeks due to the curing and gassing out at different rates. On this particular body, I used Tamiya gray primer, then a few coats of Tamiya maroon. Can anyone provide any info on this? This body was sprayed with color two days ago. Thanks.