av405
-
Posts
1,202 -
Joined
-
Last visited
Content Type
Profiles
Forums
Events
Gallery
Everything posted by av405
-
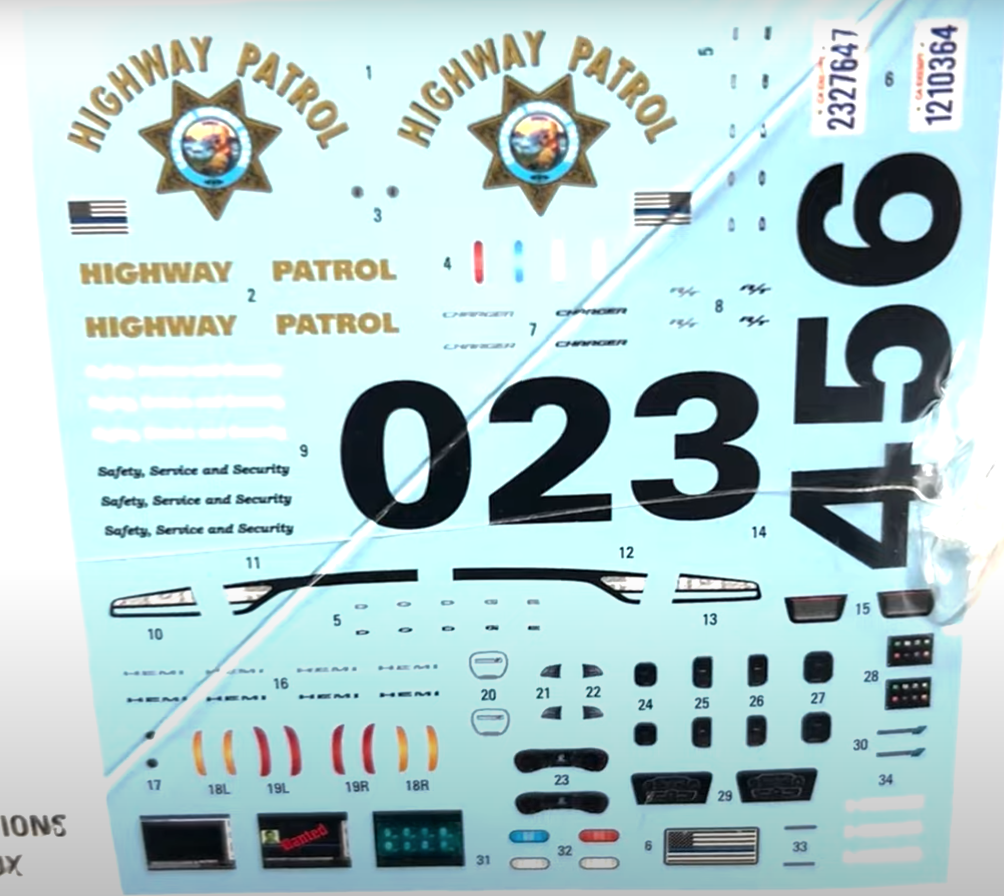
A screenshot of the decal sheet:

-

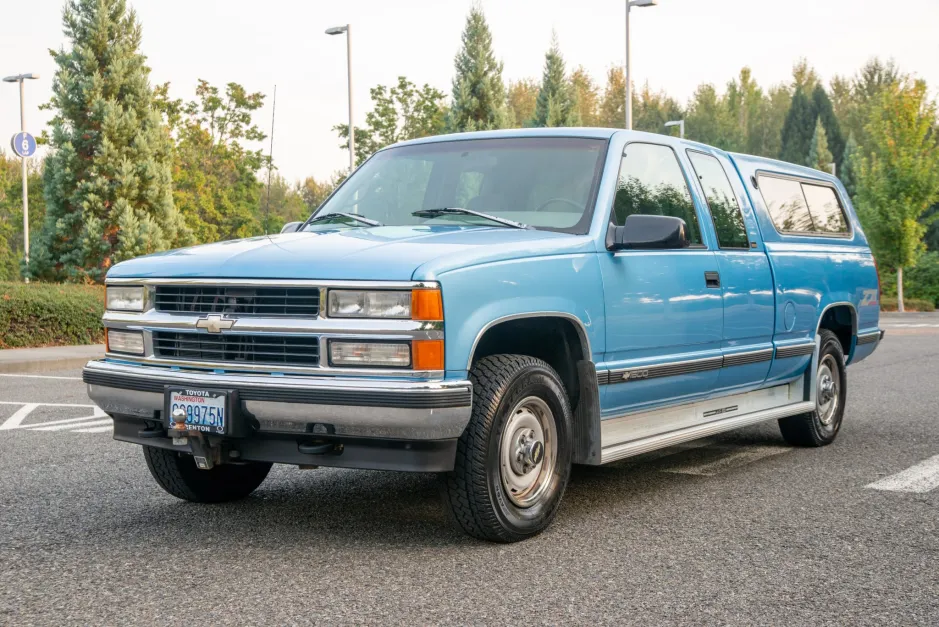
1996 Chevrolet C-3500
av405 replied to av405's topic in WIP: Model Trucks: Pickups, Vans, SUVs, Light Commercial
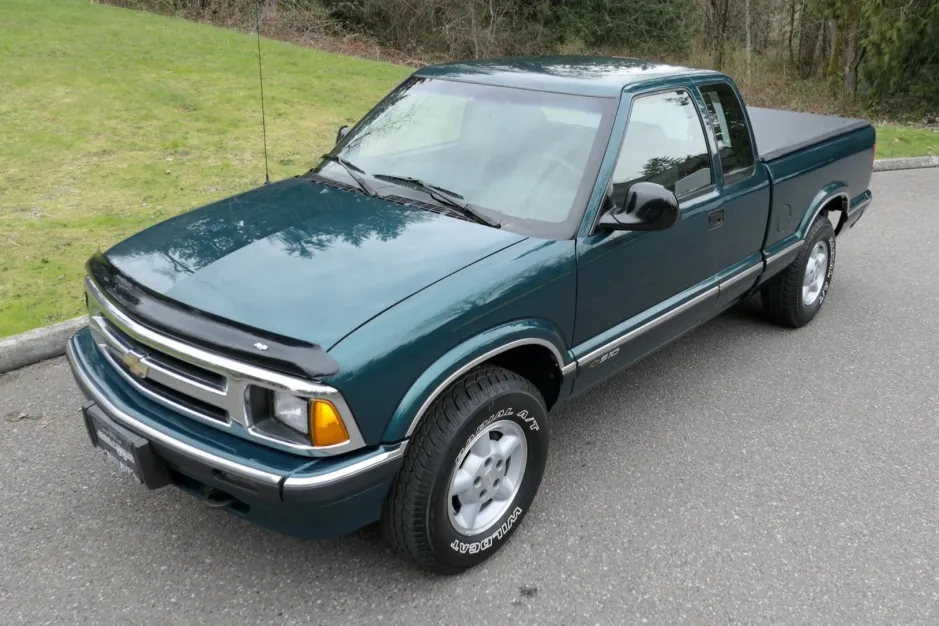
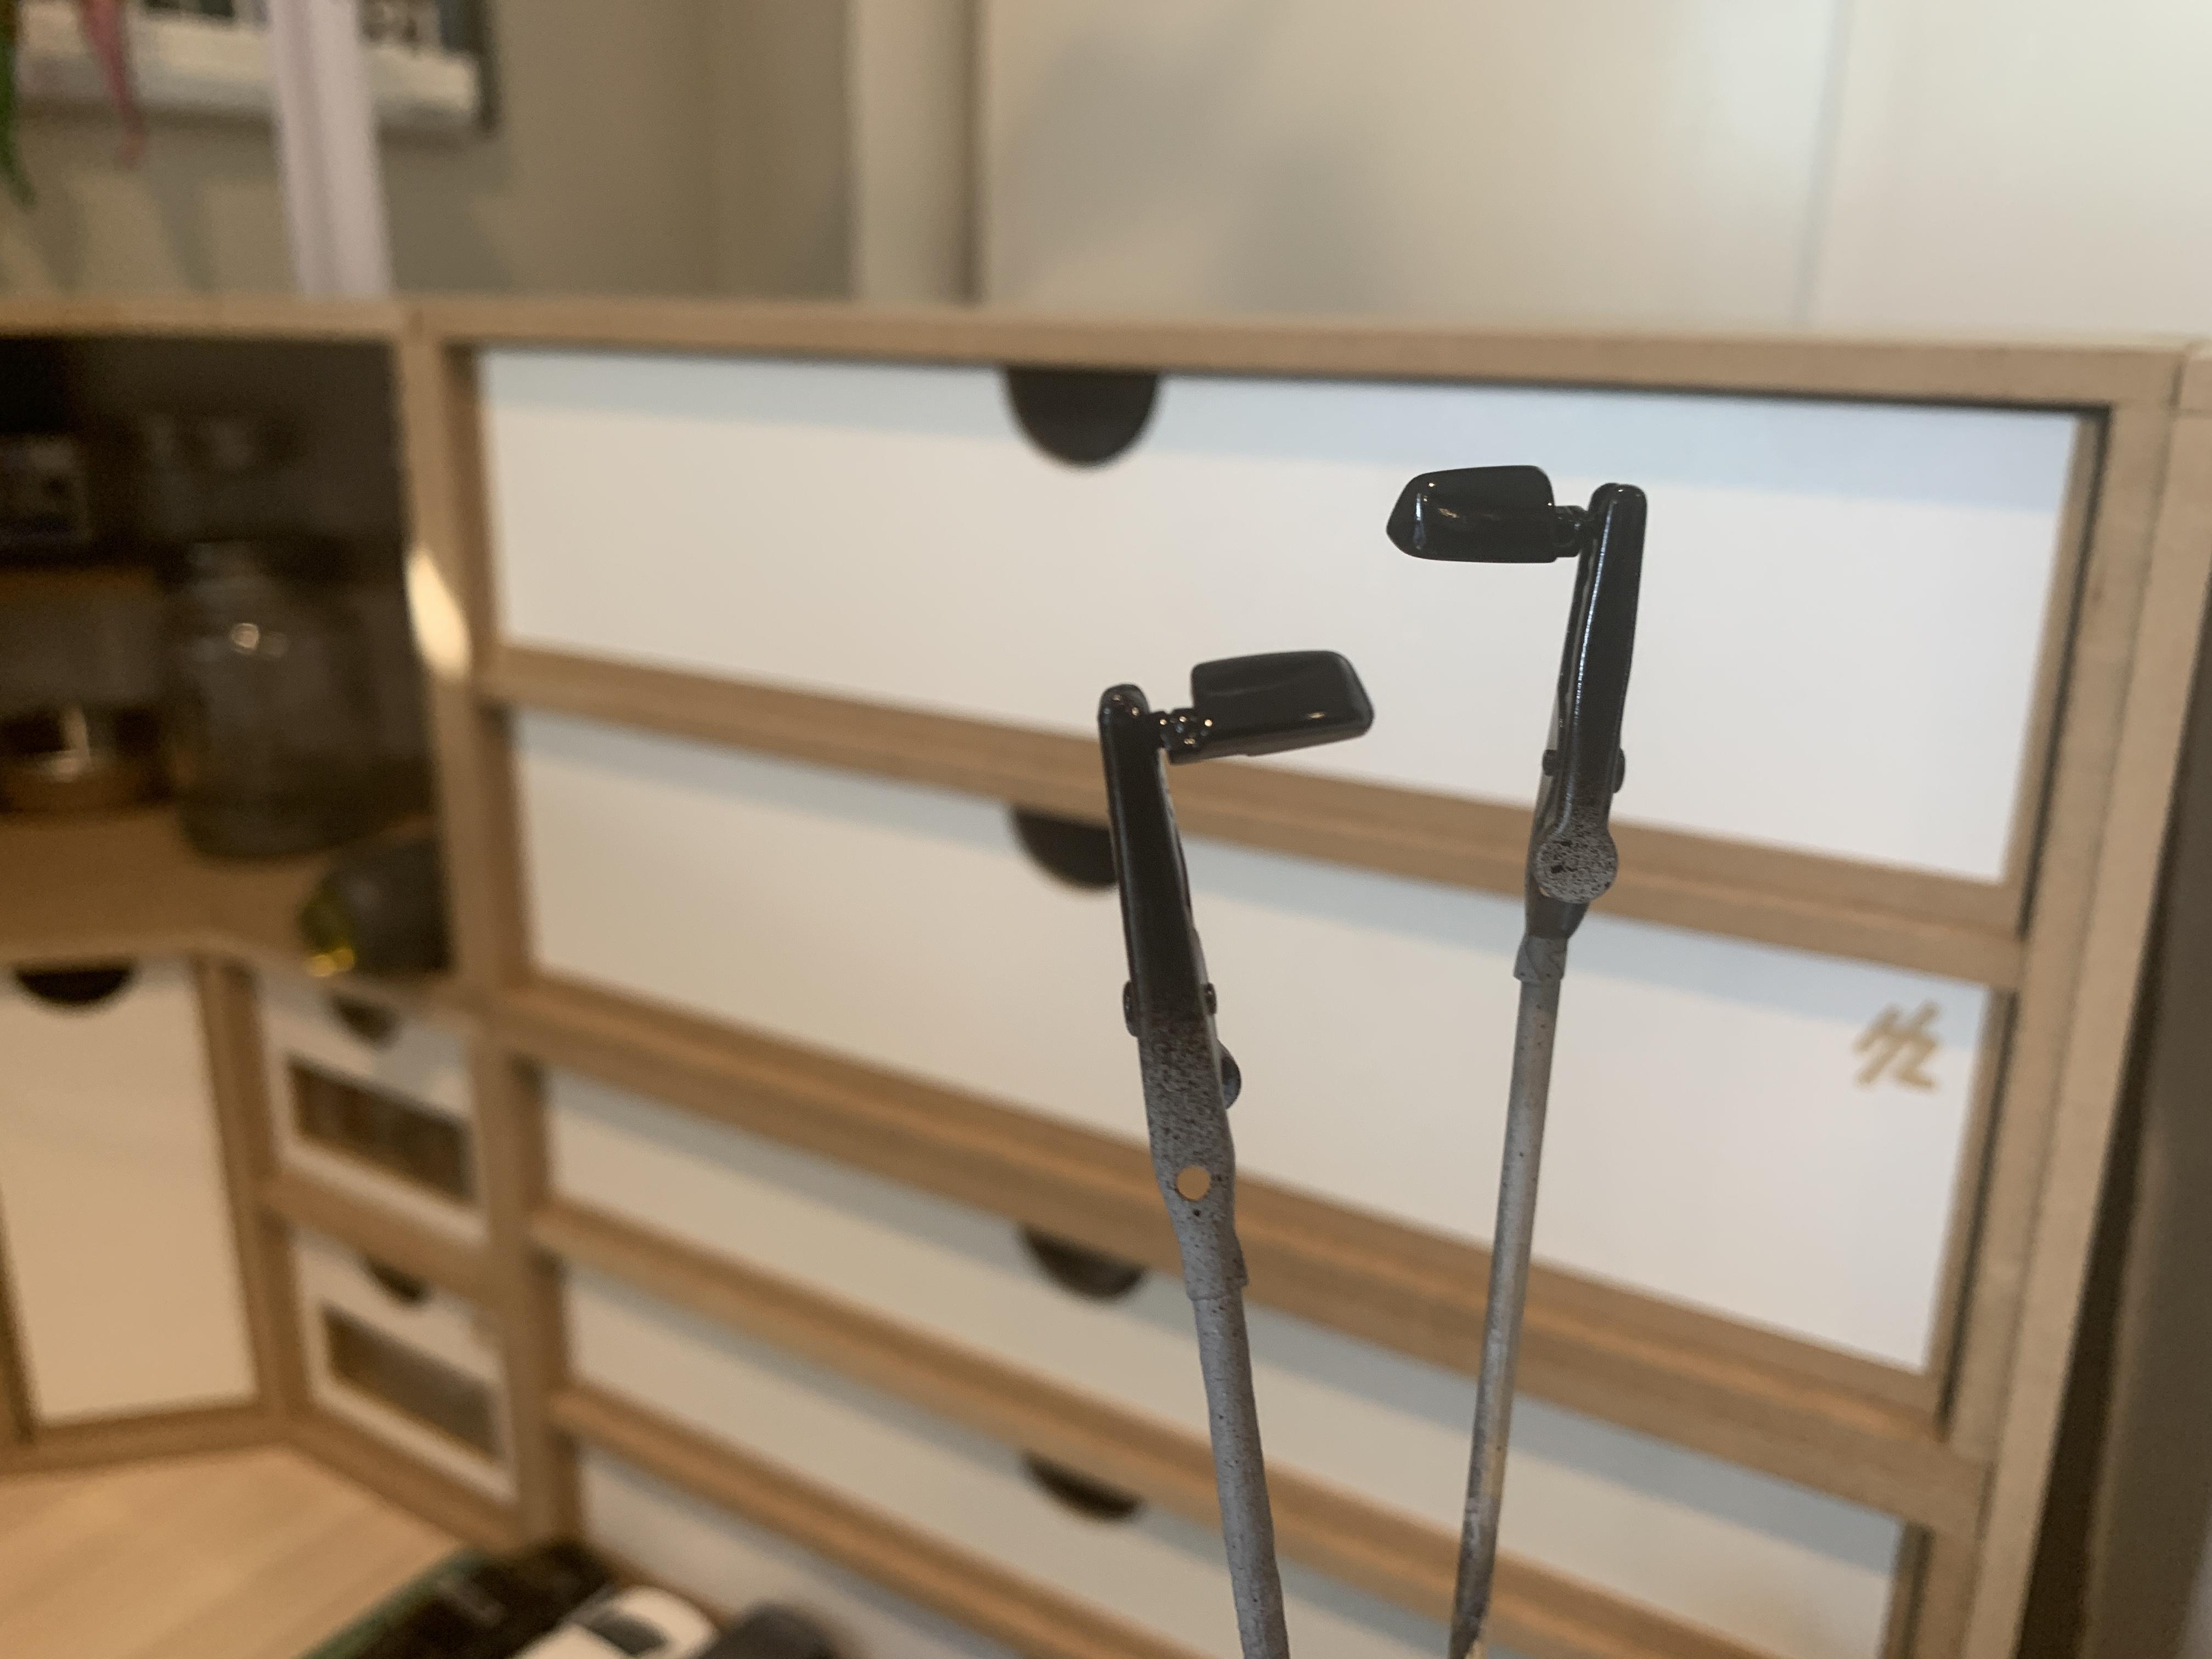
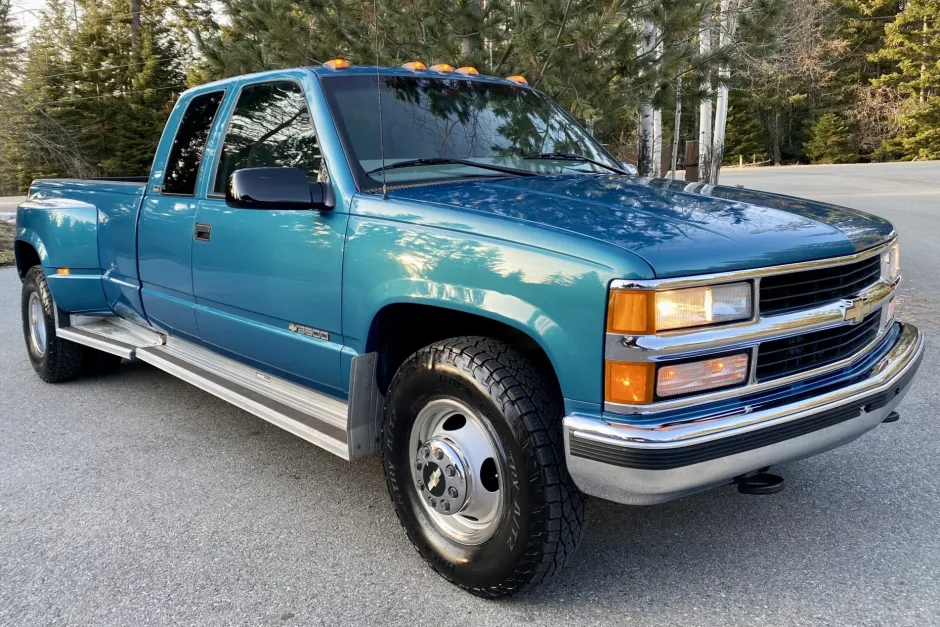
Some more progress, sort of. I moved on to the side mirrors. For the life of me, I cannot understand why AMT decided to once again use incorrect S-10/Sonoma side mirrors on the dually kits, just like what they had on the 90's versions. You would think that a newly designed kit would have solved that. This is what the kit comes with: And this is what I need: Luckily, the AMT 1992 C-1500 Silverado companion issue to the C-3500 has the correct "aero-style" side mirrors: Some primer and Tamiya TS-14 Black and voila, I have the look I'm going for: I never intended on using the aero mirrors for the project I have in mind for the C-1500, so no big loss there. Next up I moved on to paint, and this is where the "sort of" on my progress comes in. In my initial attempt to go for something close to Light Stellar Blue Metallic, I went for Tamiya TS-10 French Blue: The blue was a little too dark and rich to match the real thing: I don't want to paint the truck white or black, so I looked at my existing paint collection and found what looks like a winner: Tamiya TS-33 Dull Red with a clear coat to make it shiny. This looks like a fairly close match to GM's Dark Garnet red color for 1996. There's rain coming my way this upcoming week. When it lets up, I'll paint the truck.
-
68-72 Suburban scratch build
av405 replied to 64SS350's topic in WIP: Model Trucks: Pickups, Vans, SUVs, Light Commercial
Thanks! Too bad it's unavailable now -
68-72 Suburban scratch build
av405 replied to 64SS350's topic in WIP: Model Trucks: Pickups, Vans, SUVs, Light Commercial
Very nice work so far! Sorry if I missed it, but what color did you use for the body? -
1996 Chevrolet C-3500
av405 replied to av405's topic in WIP: Model Trucks: Pickups, Vans, SUVs, Light Commercial
That sounds great, thank you. Thank you! I might try a non-metallic color again in the future. The duplicolor clear laid down beautifully. -
1996 Chevrolet C-3500
av405 replied to av405's topic in WIP: Model Trucks: Pickups, Vans, SUVs, Light Commercial
Thank you, Carl. Thank you! I feel the same way about the OBS trucks and also have a sizable collection of the old and new kits. I do agree with you on the interior. I did not see a noticeable improvement from the previous generation of OBS kits and I thought AMT could have done more with it. The lack of a front bench seat (particularly on the C-1500) is a MAJOR draw back for me and has prevented me from jumping head first into certain projects I want to do. What are the 3D options for the bench seat and dash? -
1996 Chevrolet C-3500
av405 replied to av405's topic in WIP: Model Trucks: Pickups, Vans, SUVs, Light Commercial
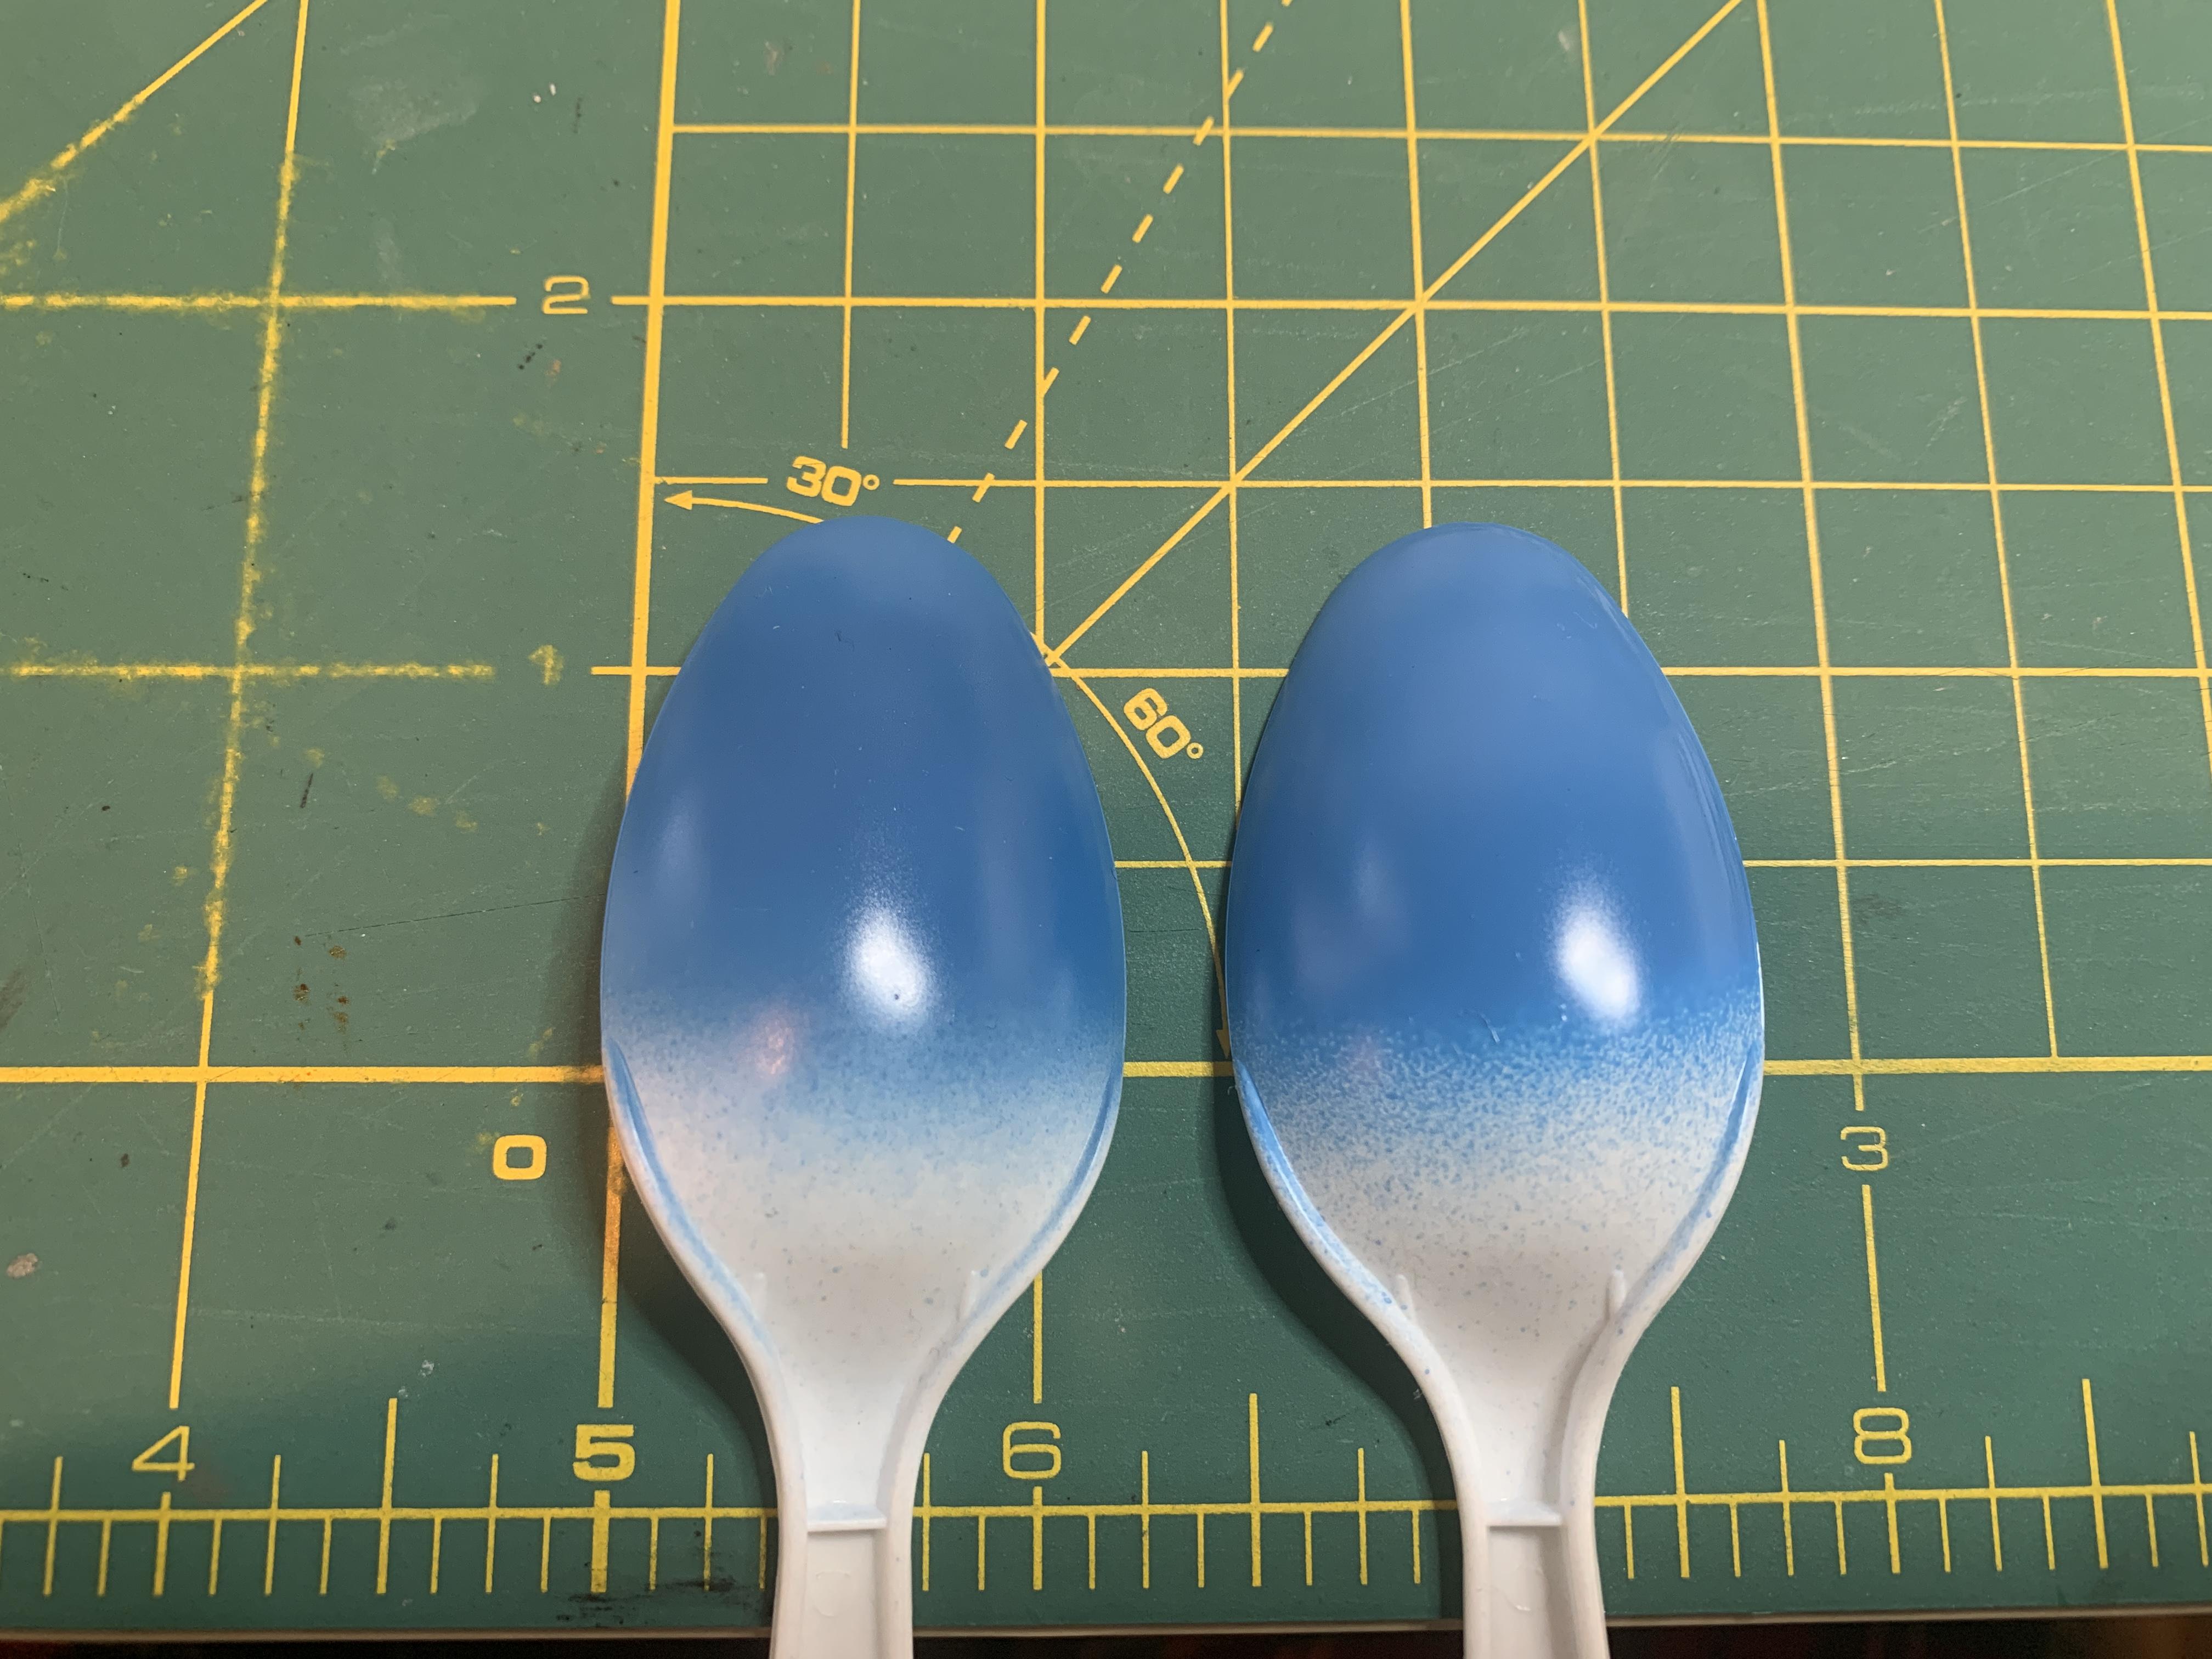
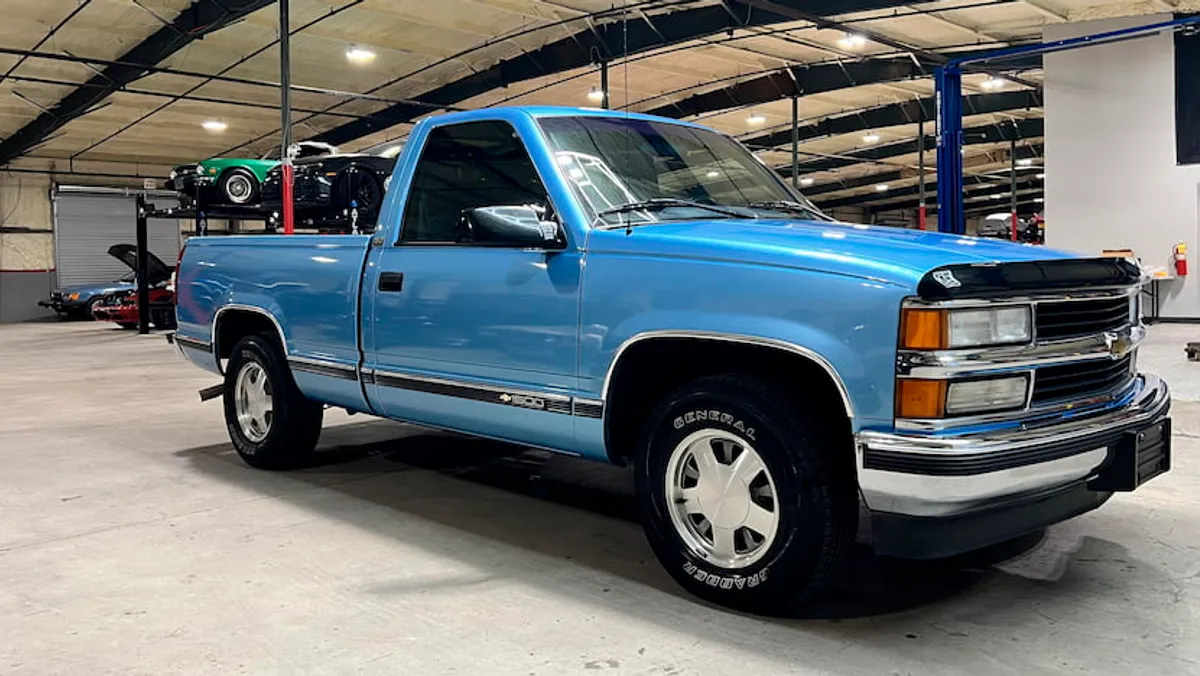
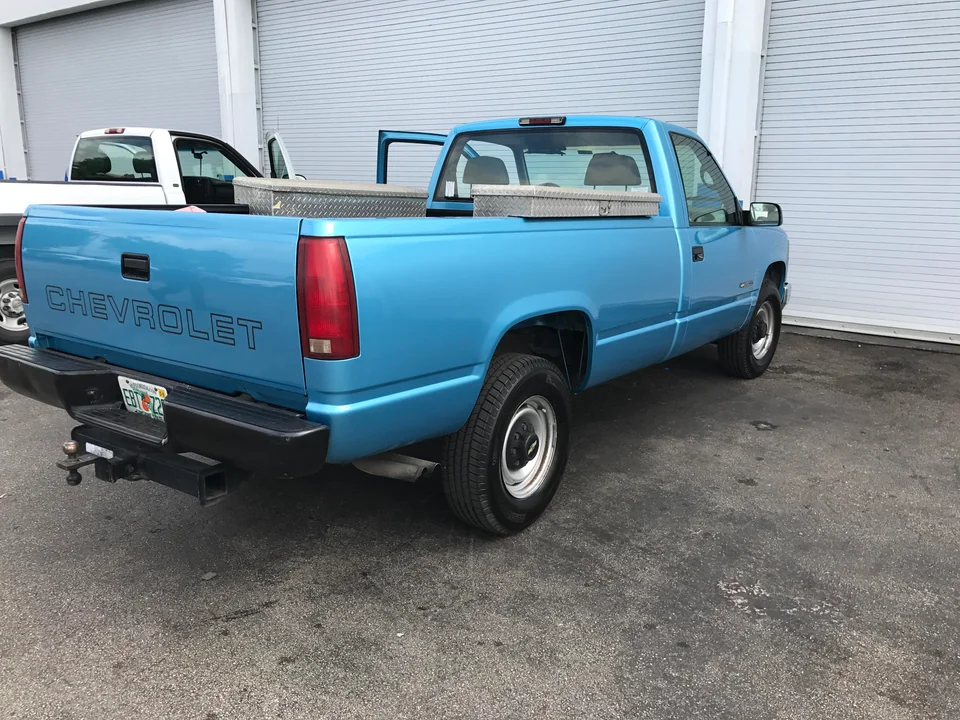
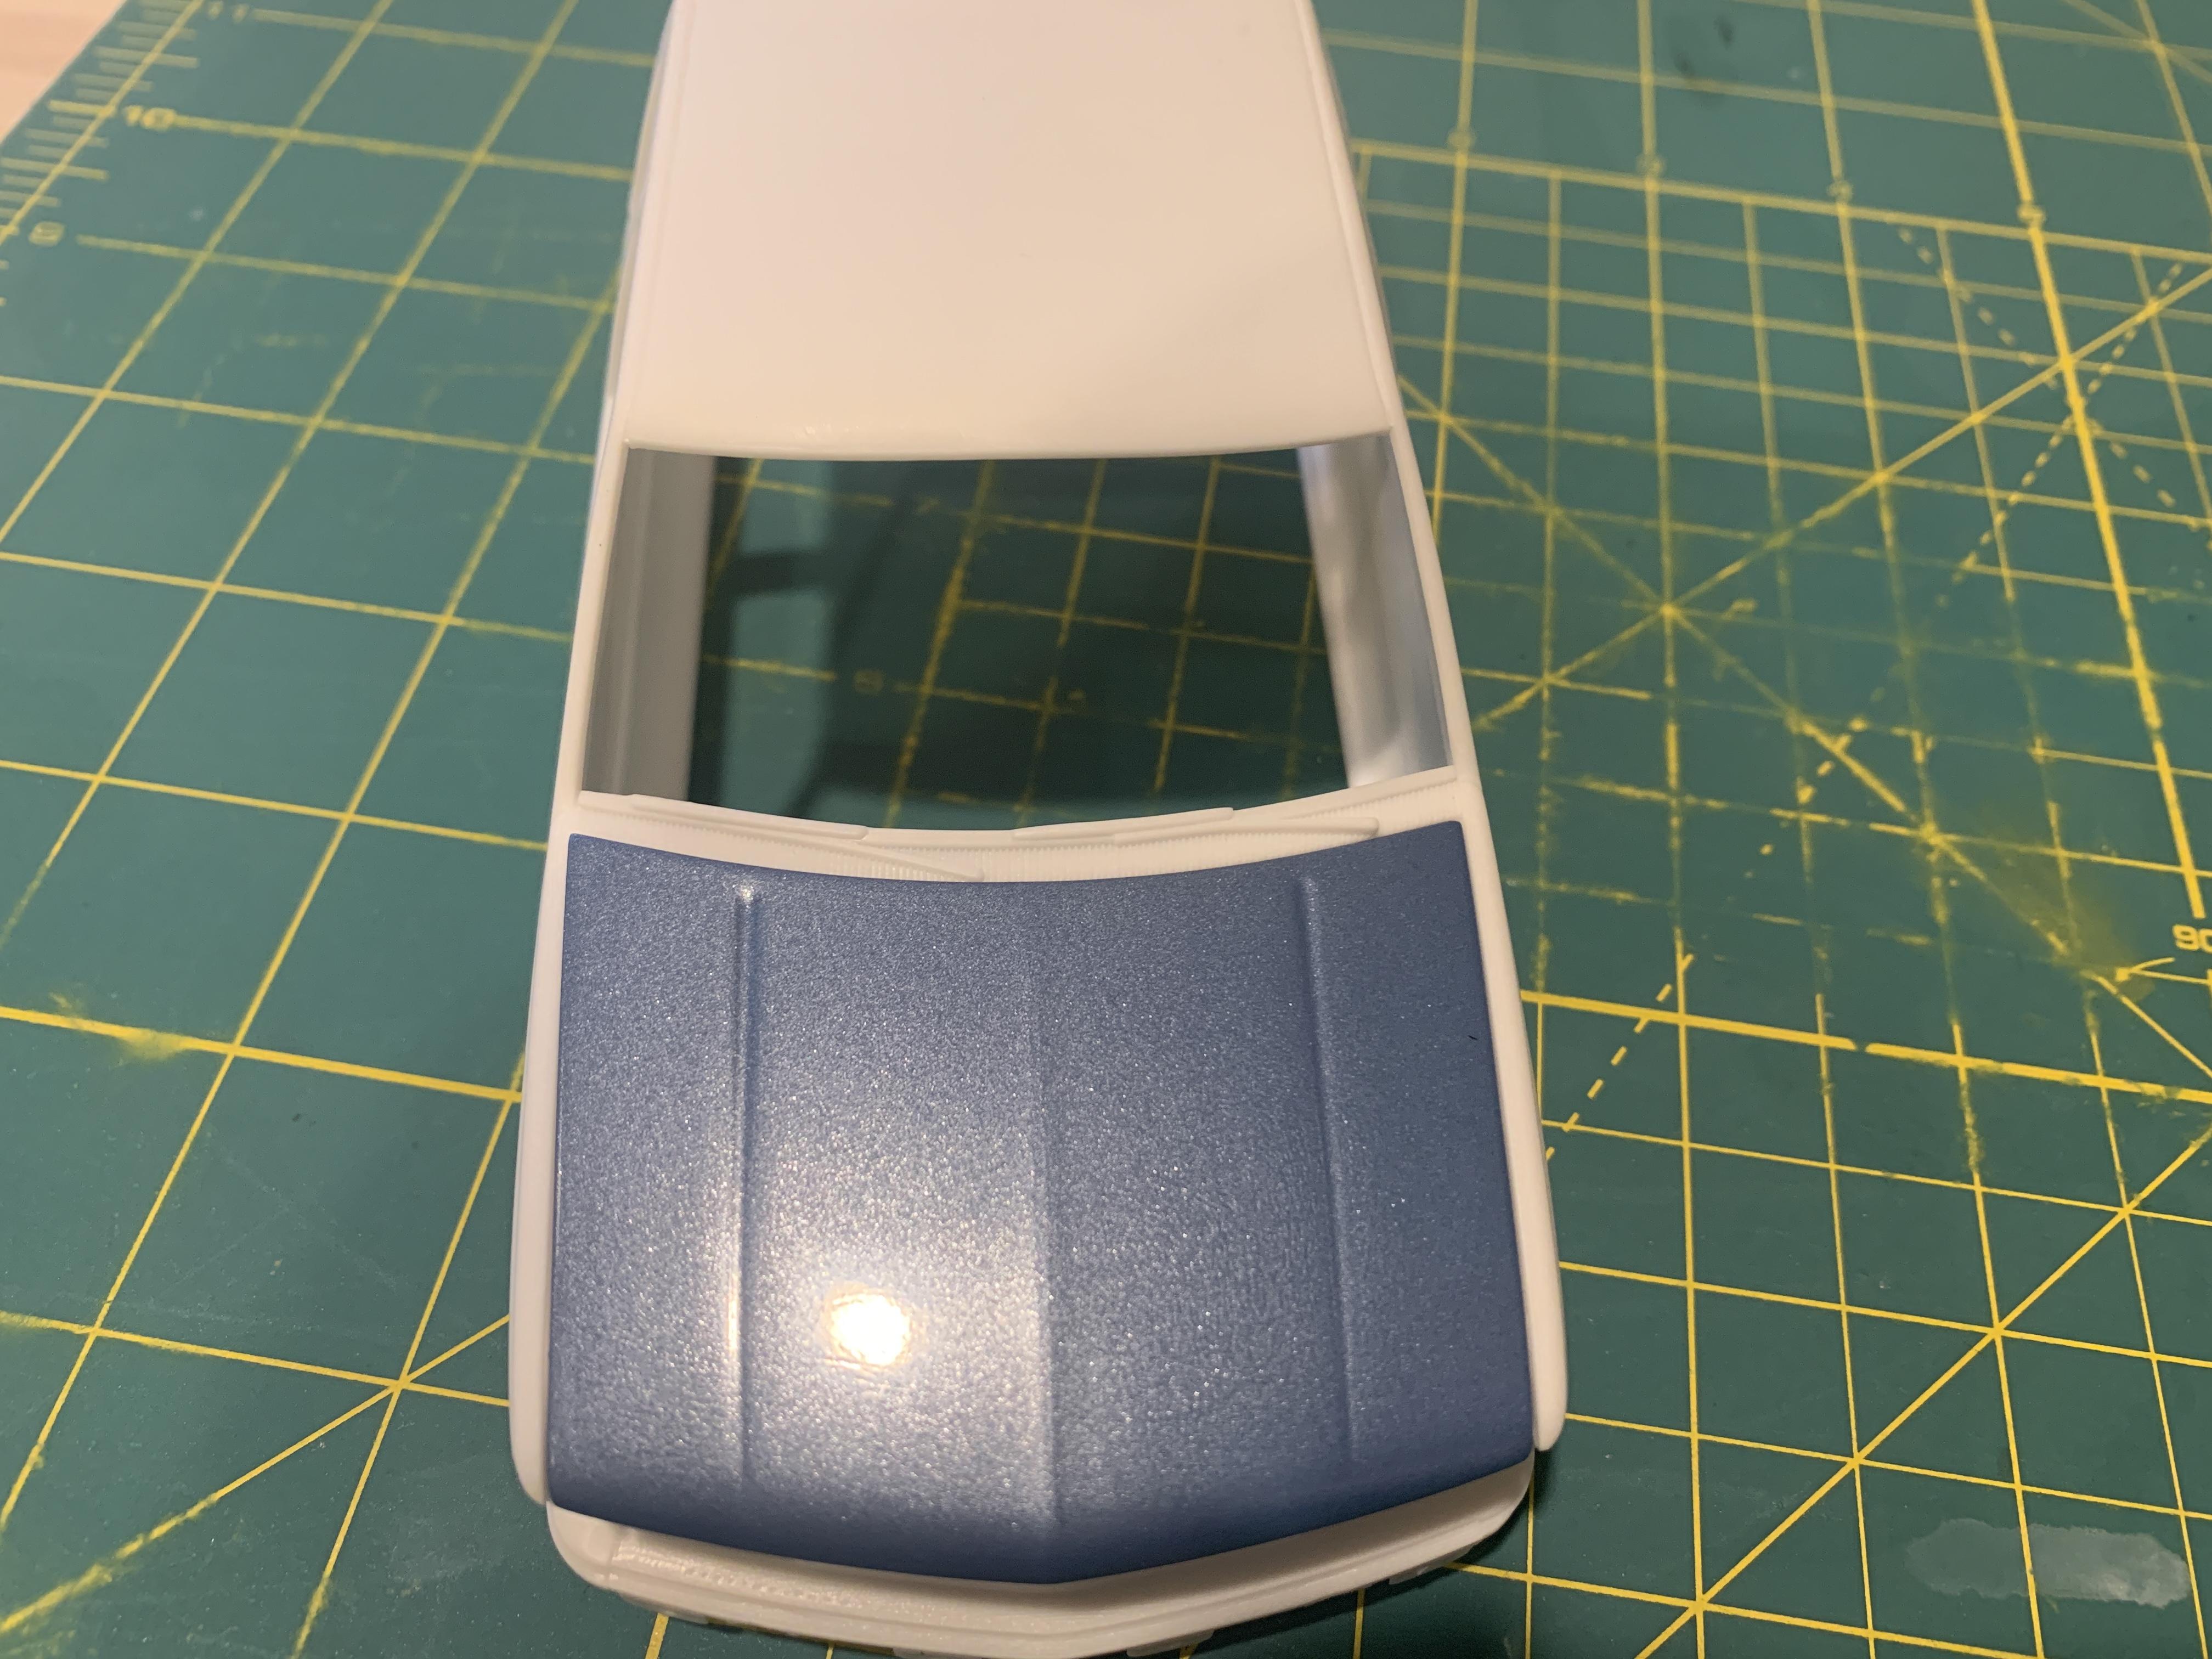
I hit a snag as far as my plans for the paint went. I typically use Tamiya paints, but for this project I decided I would use Duplicolor's GM Light Blue Metallic. I did a test on the hood, in this order: Tamiya grey primer, Duplicolor Perfect Match GM Light Blue Metallic, Duplicolor Perfect Match clear, wet sanding, then compound and polish by Meguiar's. This was the result: I liked the Duplicolor paints and how easy they went on and quickly they dried. However, I did run into 2 issues. The first is that there is a slight bit of crazing in the plastic. I didn't get as much as I thought, but just enough to bother me. Next time I use Duplicolor paints, I will spray Duplicolor Primer Sealer between the Tamiya paint and the first color coat. The second and most important issue is that I just don't like how big the metallic flakes are. I shouldn't be surprised since this is automotive paint, but it just doesn't fit the look I'm going for. All around a good learning lesson though. I'm currently in the process of stripping the hood in Super Clean, but so far it hasn't budged in 18 hrs. I still want to go for a blue color, so I will see if I can find a suitable Tamiya replacement. I'm hoping to find something close to the Light Stellar Blue Metallic finish: Onto better news. I primed the rest of the body with Mr. Surfacer 1000. As usual, this primer was a joy to work with. I spotted no significant imperfections so I will follow this up with a light 3000 grit wet sand to smooth the surface. I also painted the bumpers with Tamiya TS-29 Semi Gloss Black to simulate the rubber strips. I started off by sanding the raised edges to be painted with 600 grit to give the paint a better bite. Various Tamiya tapes were used for masking:
-
molded in headlights question
av405 replied to Tom Kren's topic in Model Building Questions and Answers
I typically use flat white and then scuff it a bit after. Pearl white sounds like a good option. Do you have pictures of this? -
Stripping tamiya paint off resin body?
av405 replied to grt222's topic in Model Building Questions and Answers
I've soaked resin in 91% rubbing alcohol and it hasn't been an issue. I just kept an extra eye on it and made sure that it didn't soak too long. Every once in a while I would remove the piece, give it a clean with a brush to assist in the removal of the paint, and put it back in. That way I wasn't prolonging the amount of time the piece had to soak. As for your second point, I agree 100%. -
1996 Chevrolet C-3500
av405 replied to av405's topic in WIP: Model Trucks: Pickups, Vans, SUVs, Light Commercial
Thank you! I'm currently doing some paint testing since it'll be the first time I use non-hobby paint for the body. -
Nothing further as far as I can tell. And believe me, I've been looking.
-
Chevrolet to GMC conversion..
av405 replied to michaelbaskett's topic in Truck Aftermarket / Resin / 3D Printed
I contacted VCG but they only said they may release some OBS grills in the future. Do you happen to have any photos of the grills Scale Speed Garage has? -
Looking for this sheet:
-
1996 Chevrolet C-3500
av405 replied to av405's topic in WIP: Model Trucks: Pickups, Vans, SUVs, Light Commercial
Nice, sounds like an amazing find. I've known some families that have a dually for very specific towing purposes. Having a crew cab would have been better, but an extended cab would also make sense in the mid-90s. -
Alaska State Troopers Ford Expedition
av405 replied to av405's topic in Model Trucks: Pickups, Vans, SUVs, Light Commercial
Thank you, Alan! -
1996 Chevrolet C-3500
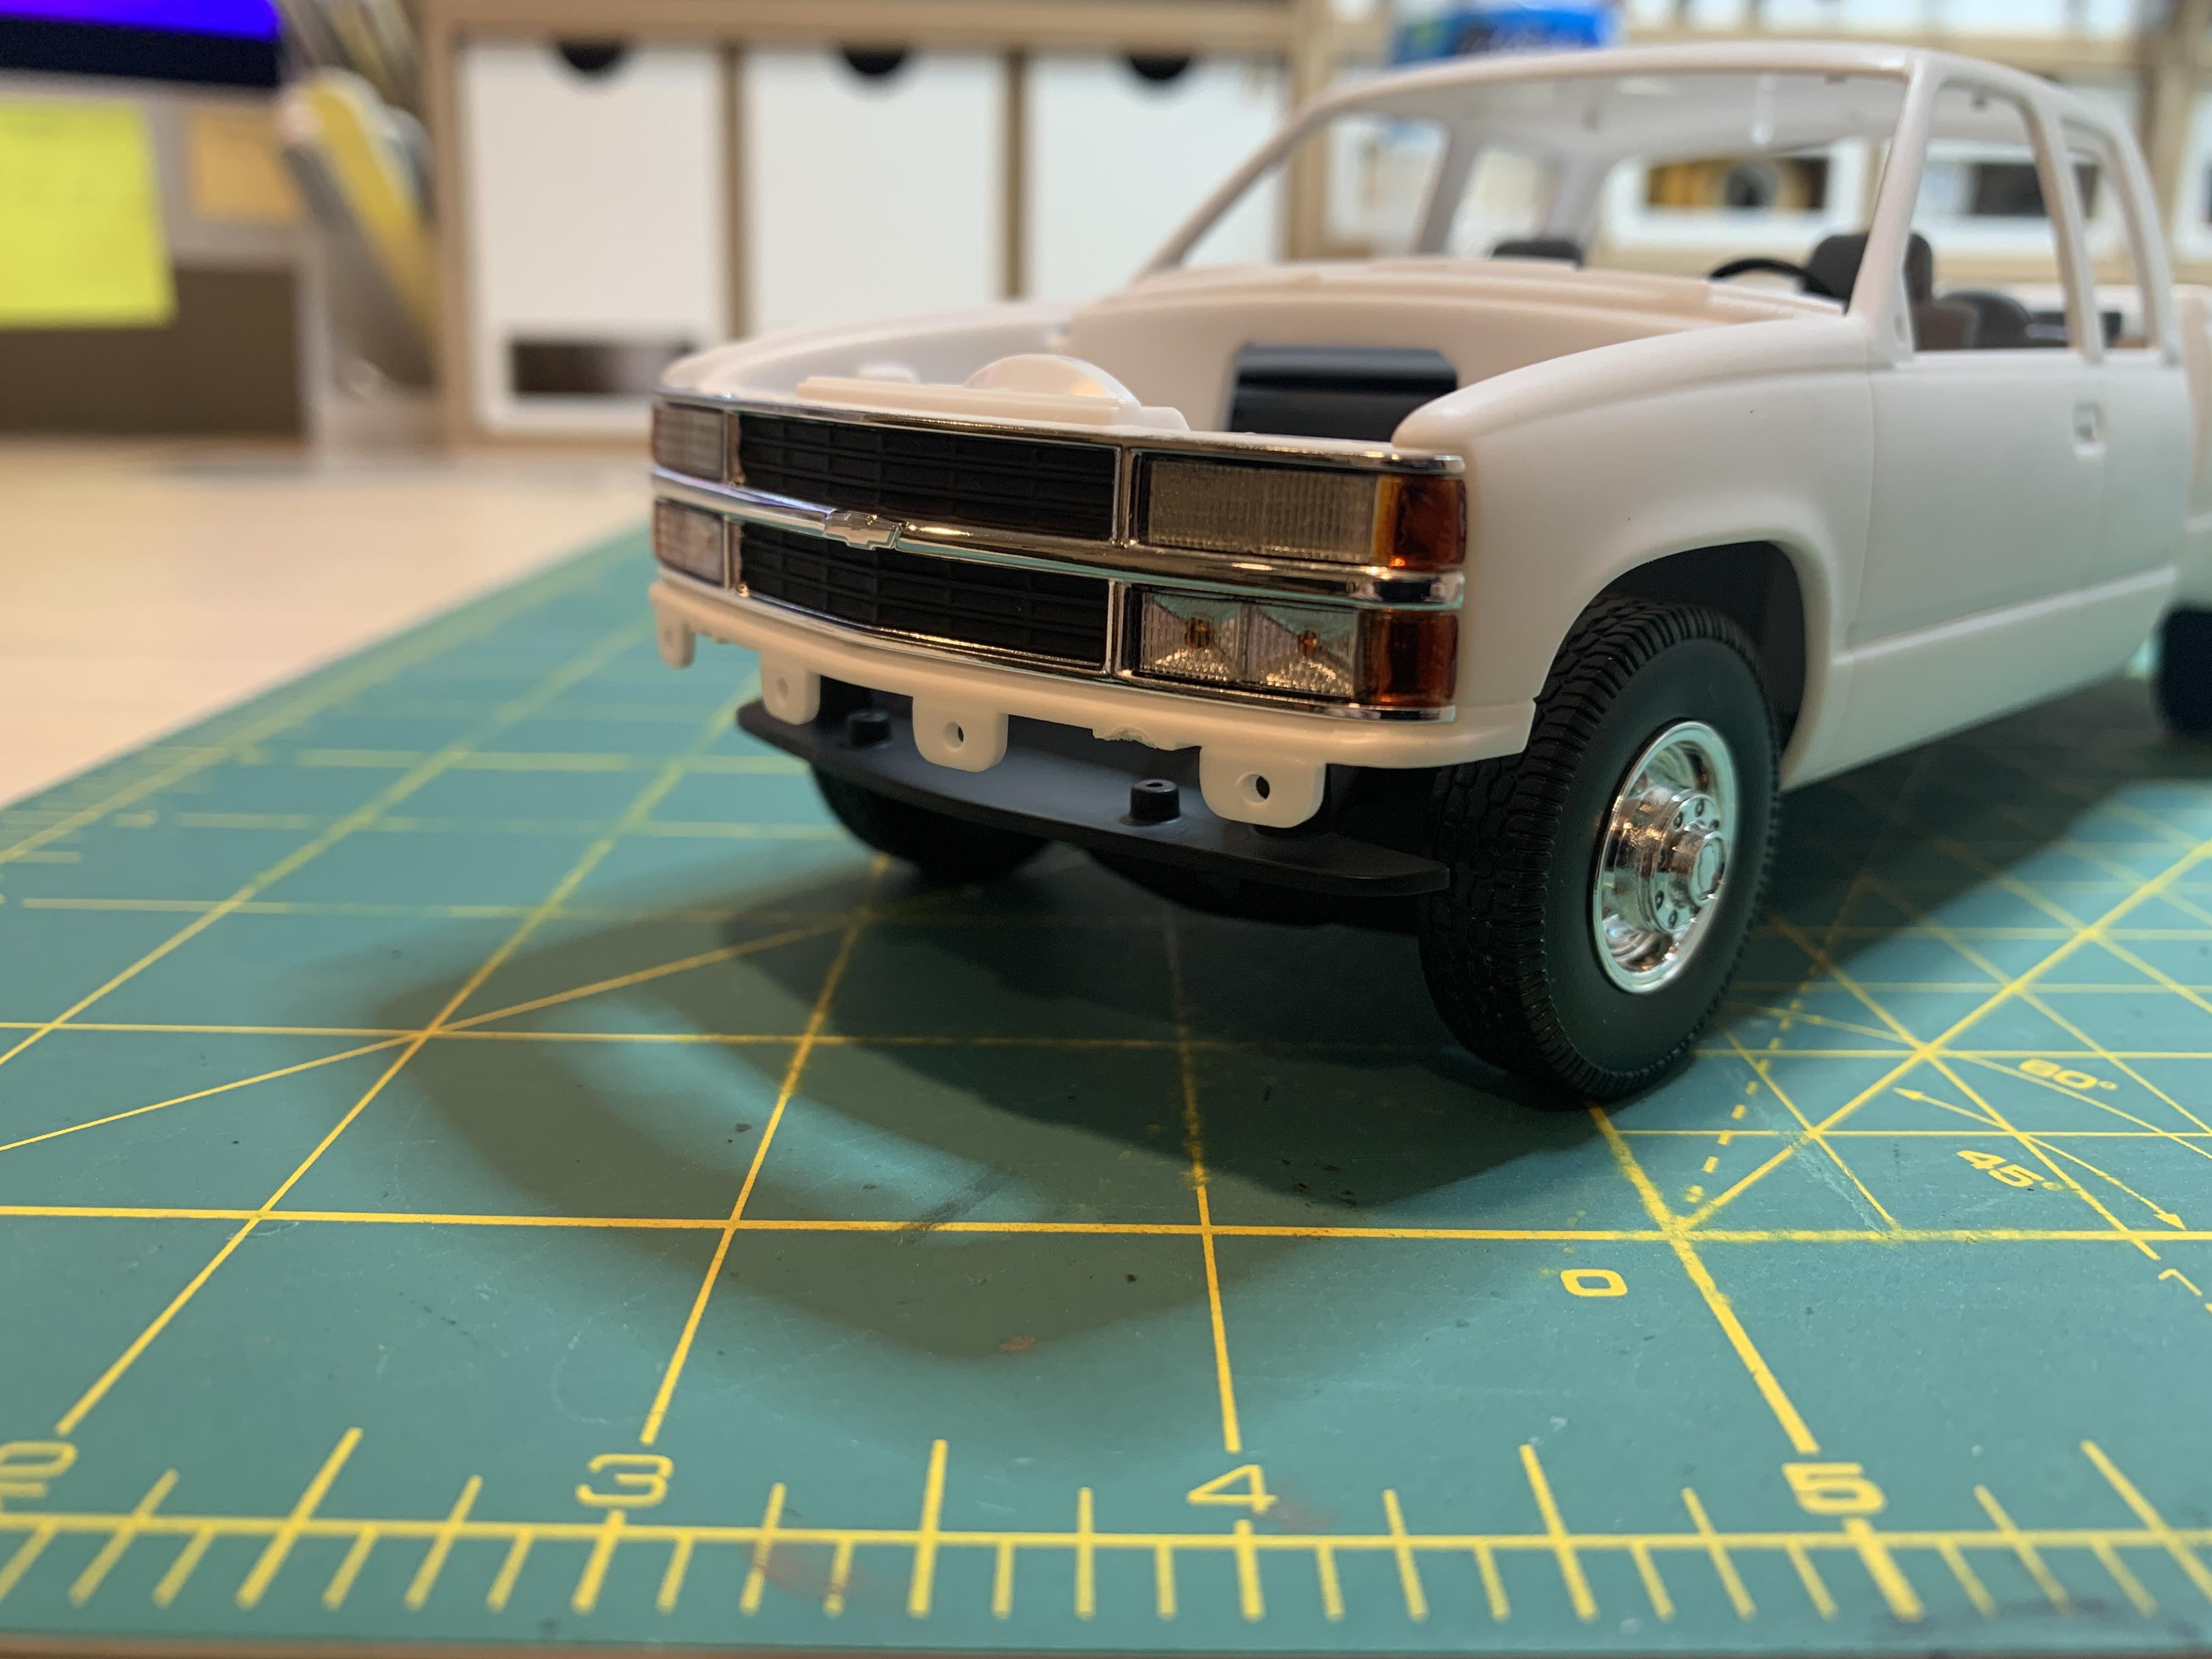
av405 replied to av405's topic in WIP: Model Trucks: Pickups, Vans, SUVs, Light Commercial
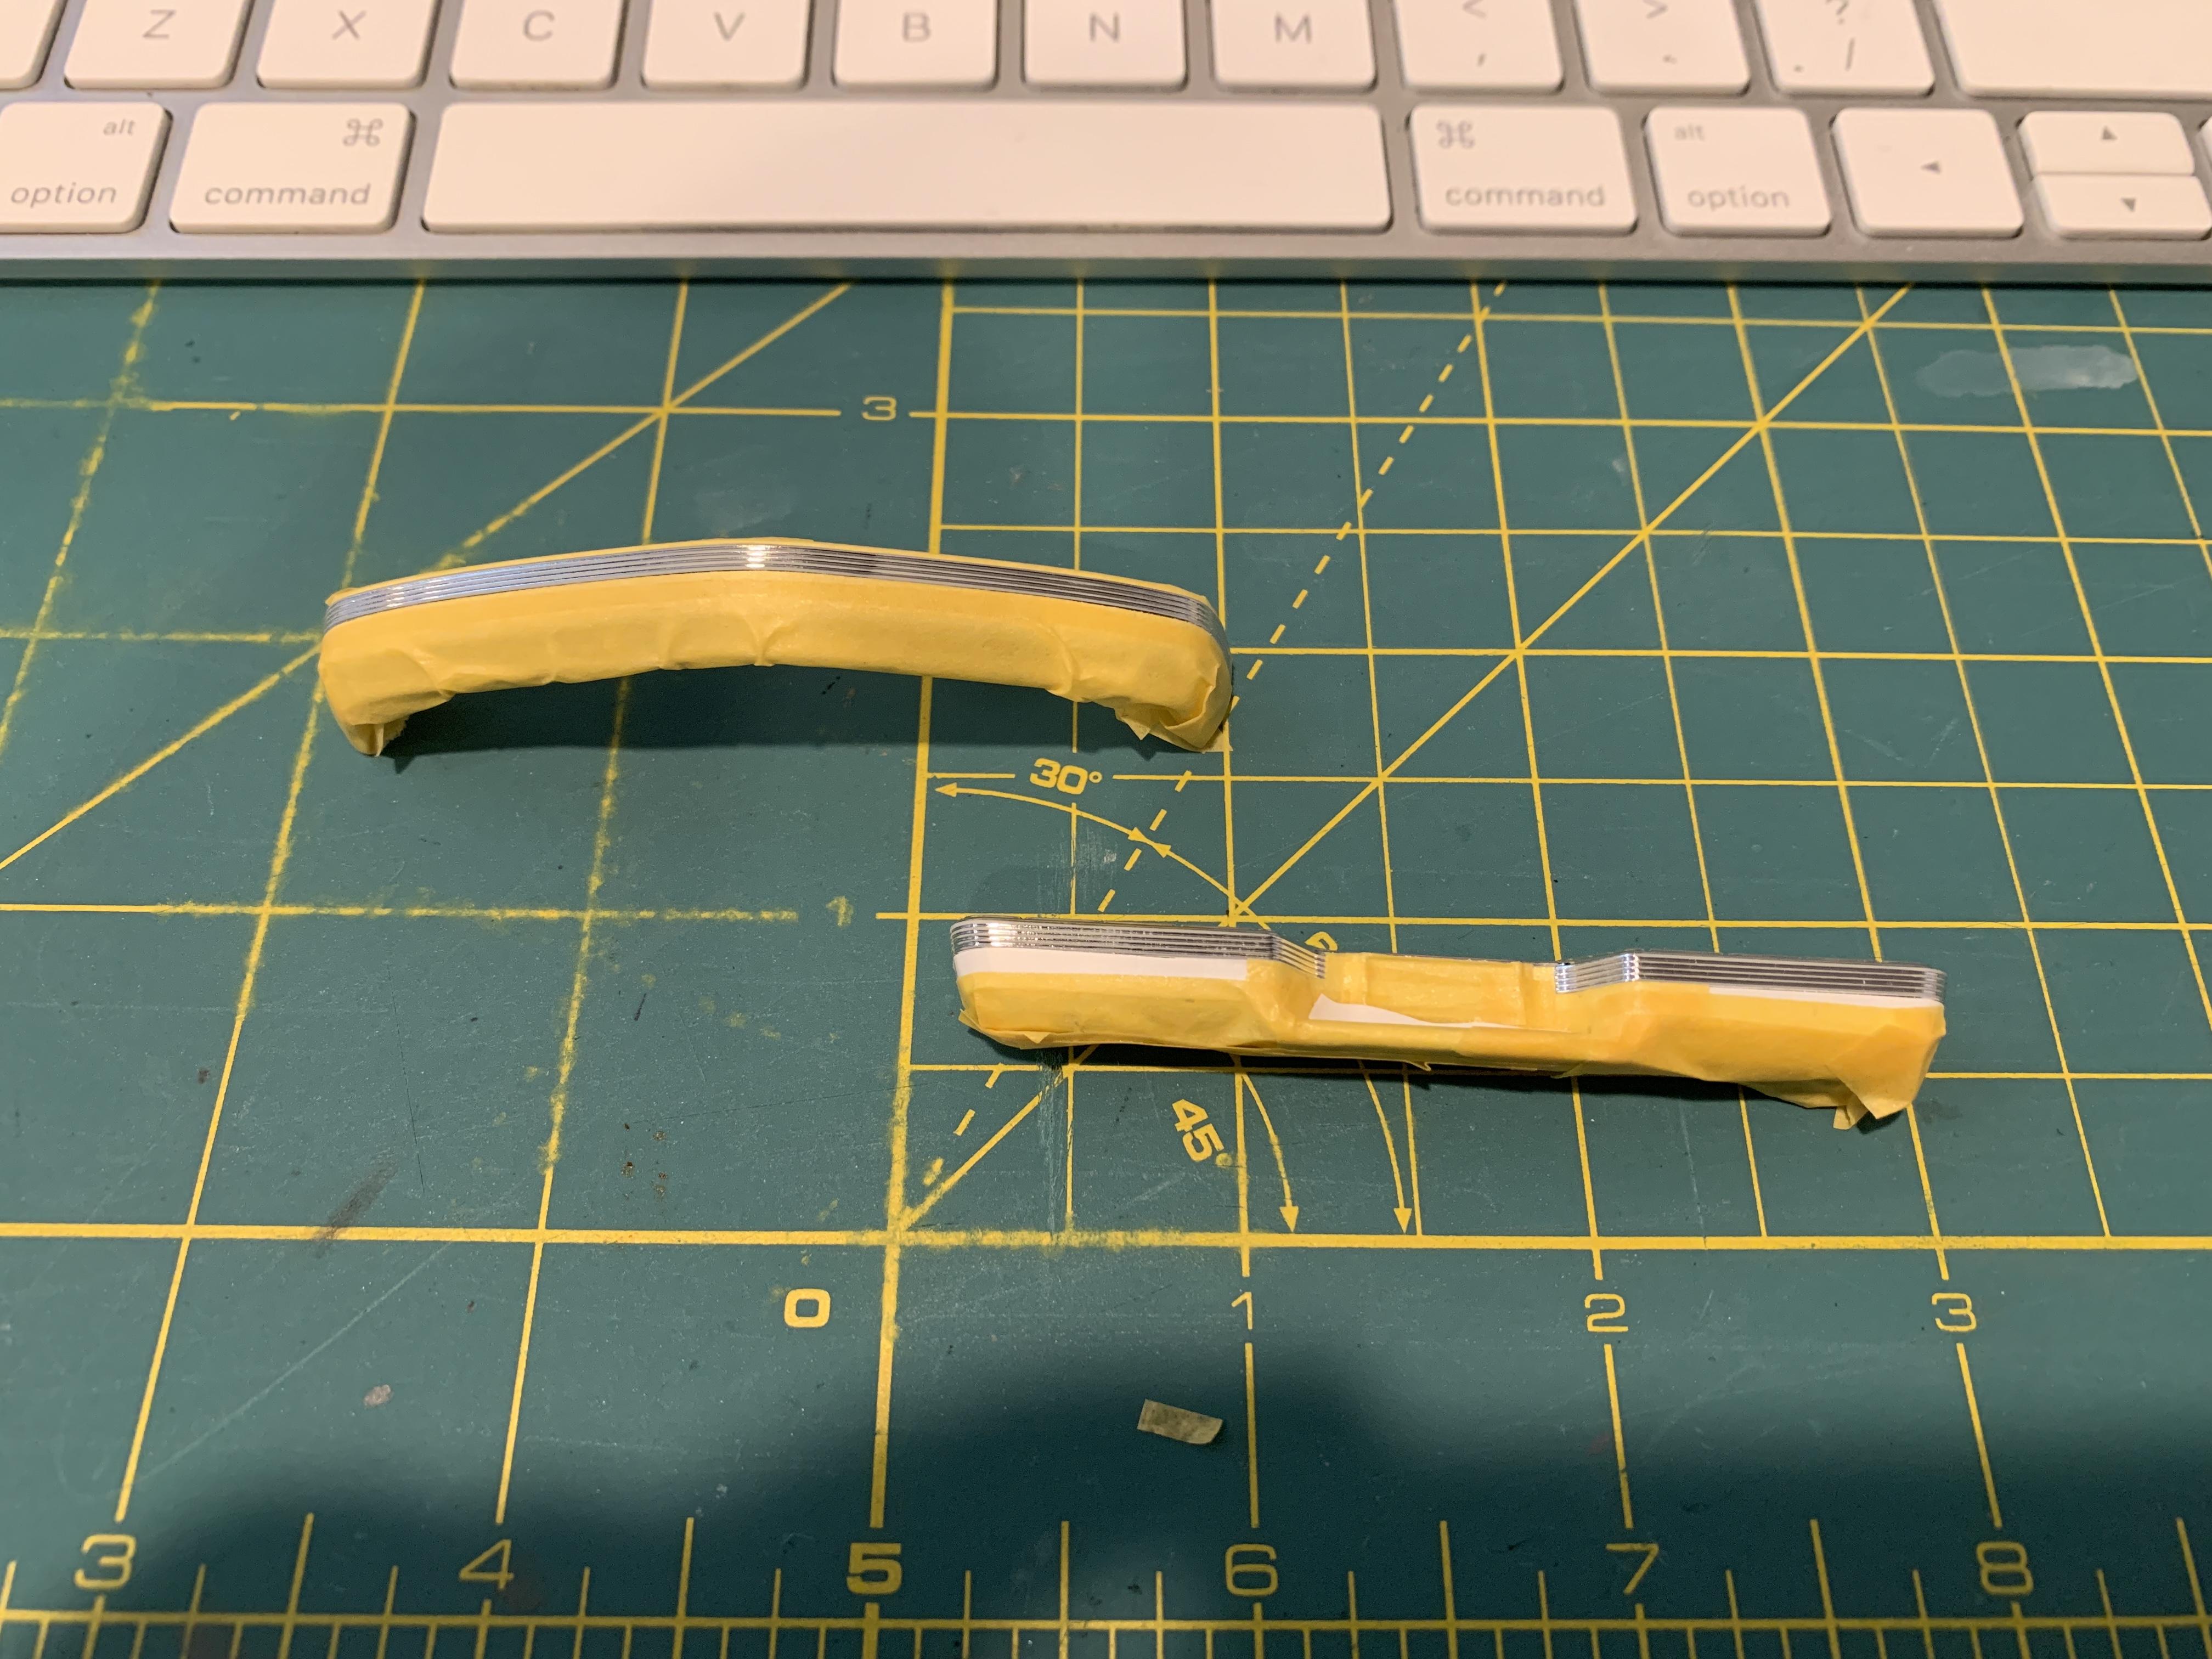
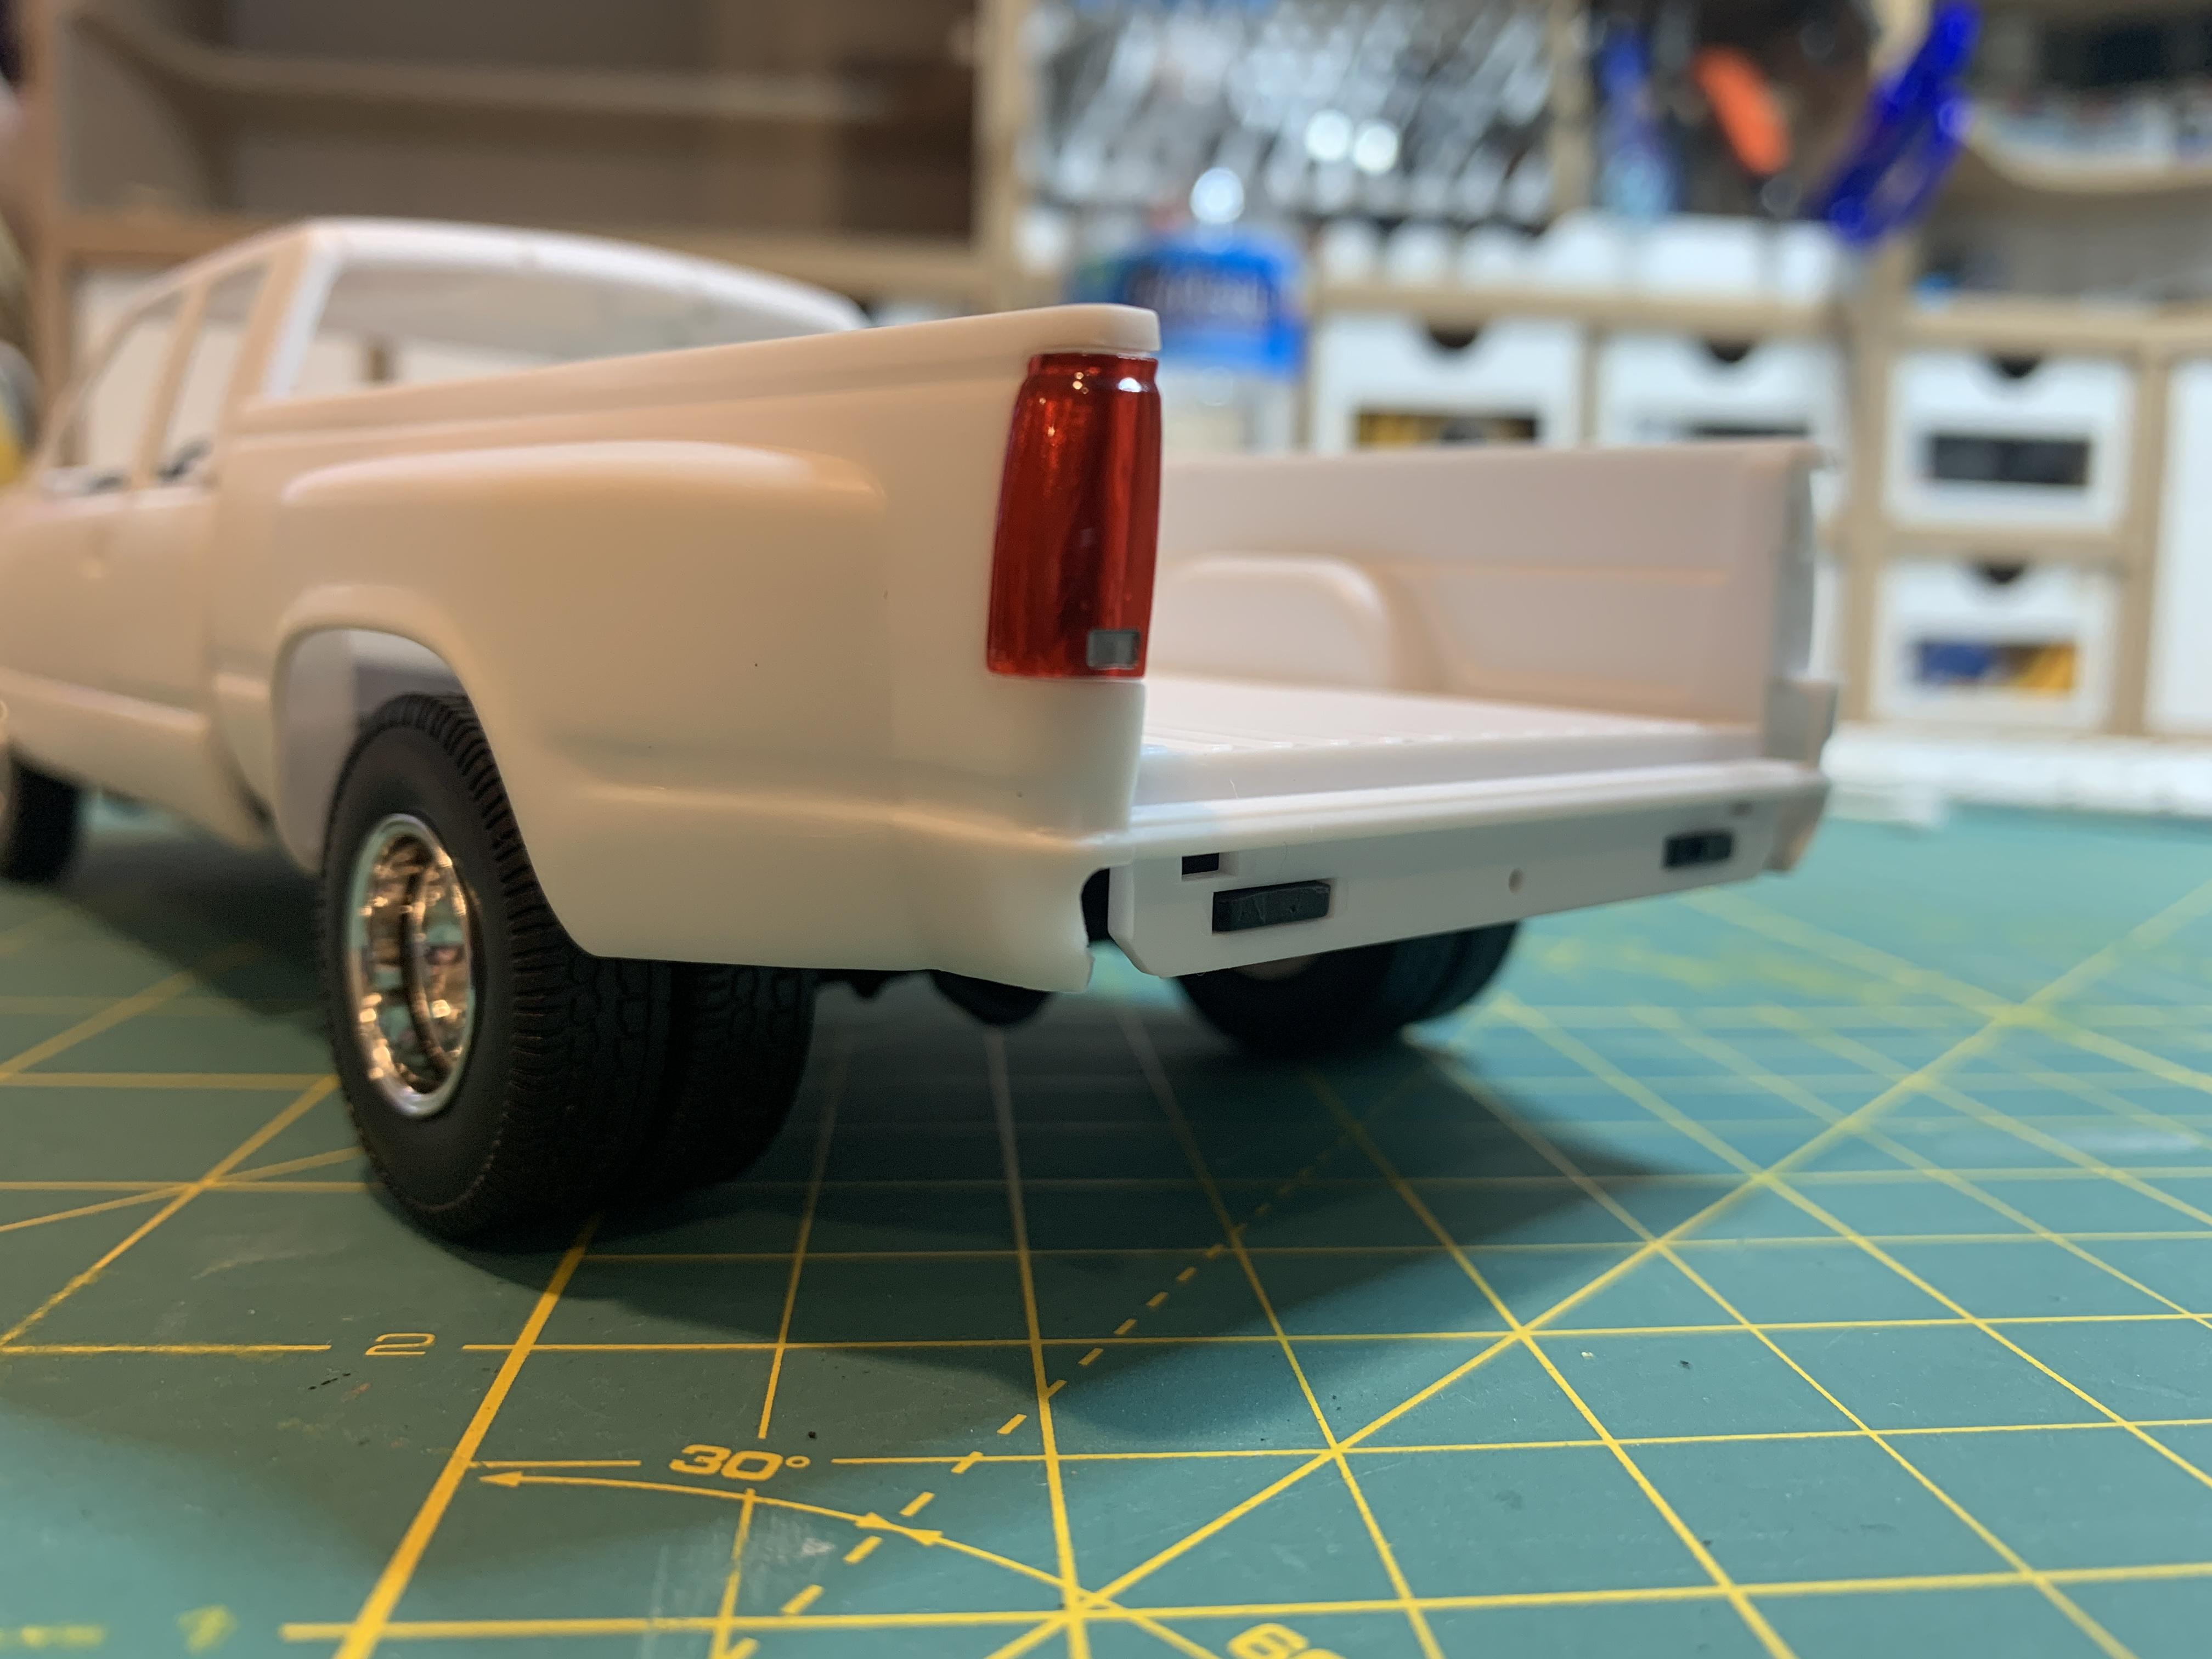
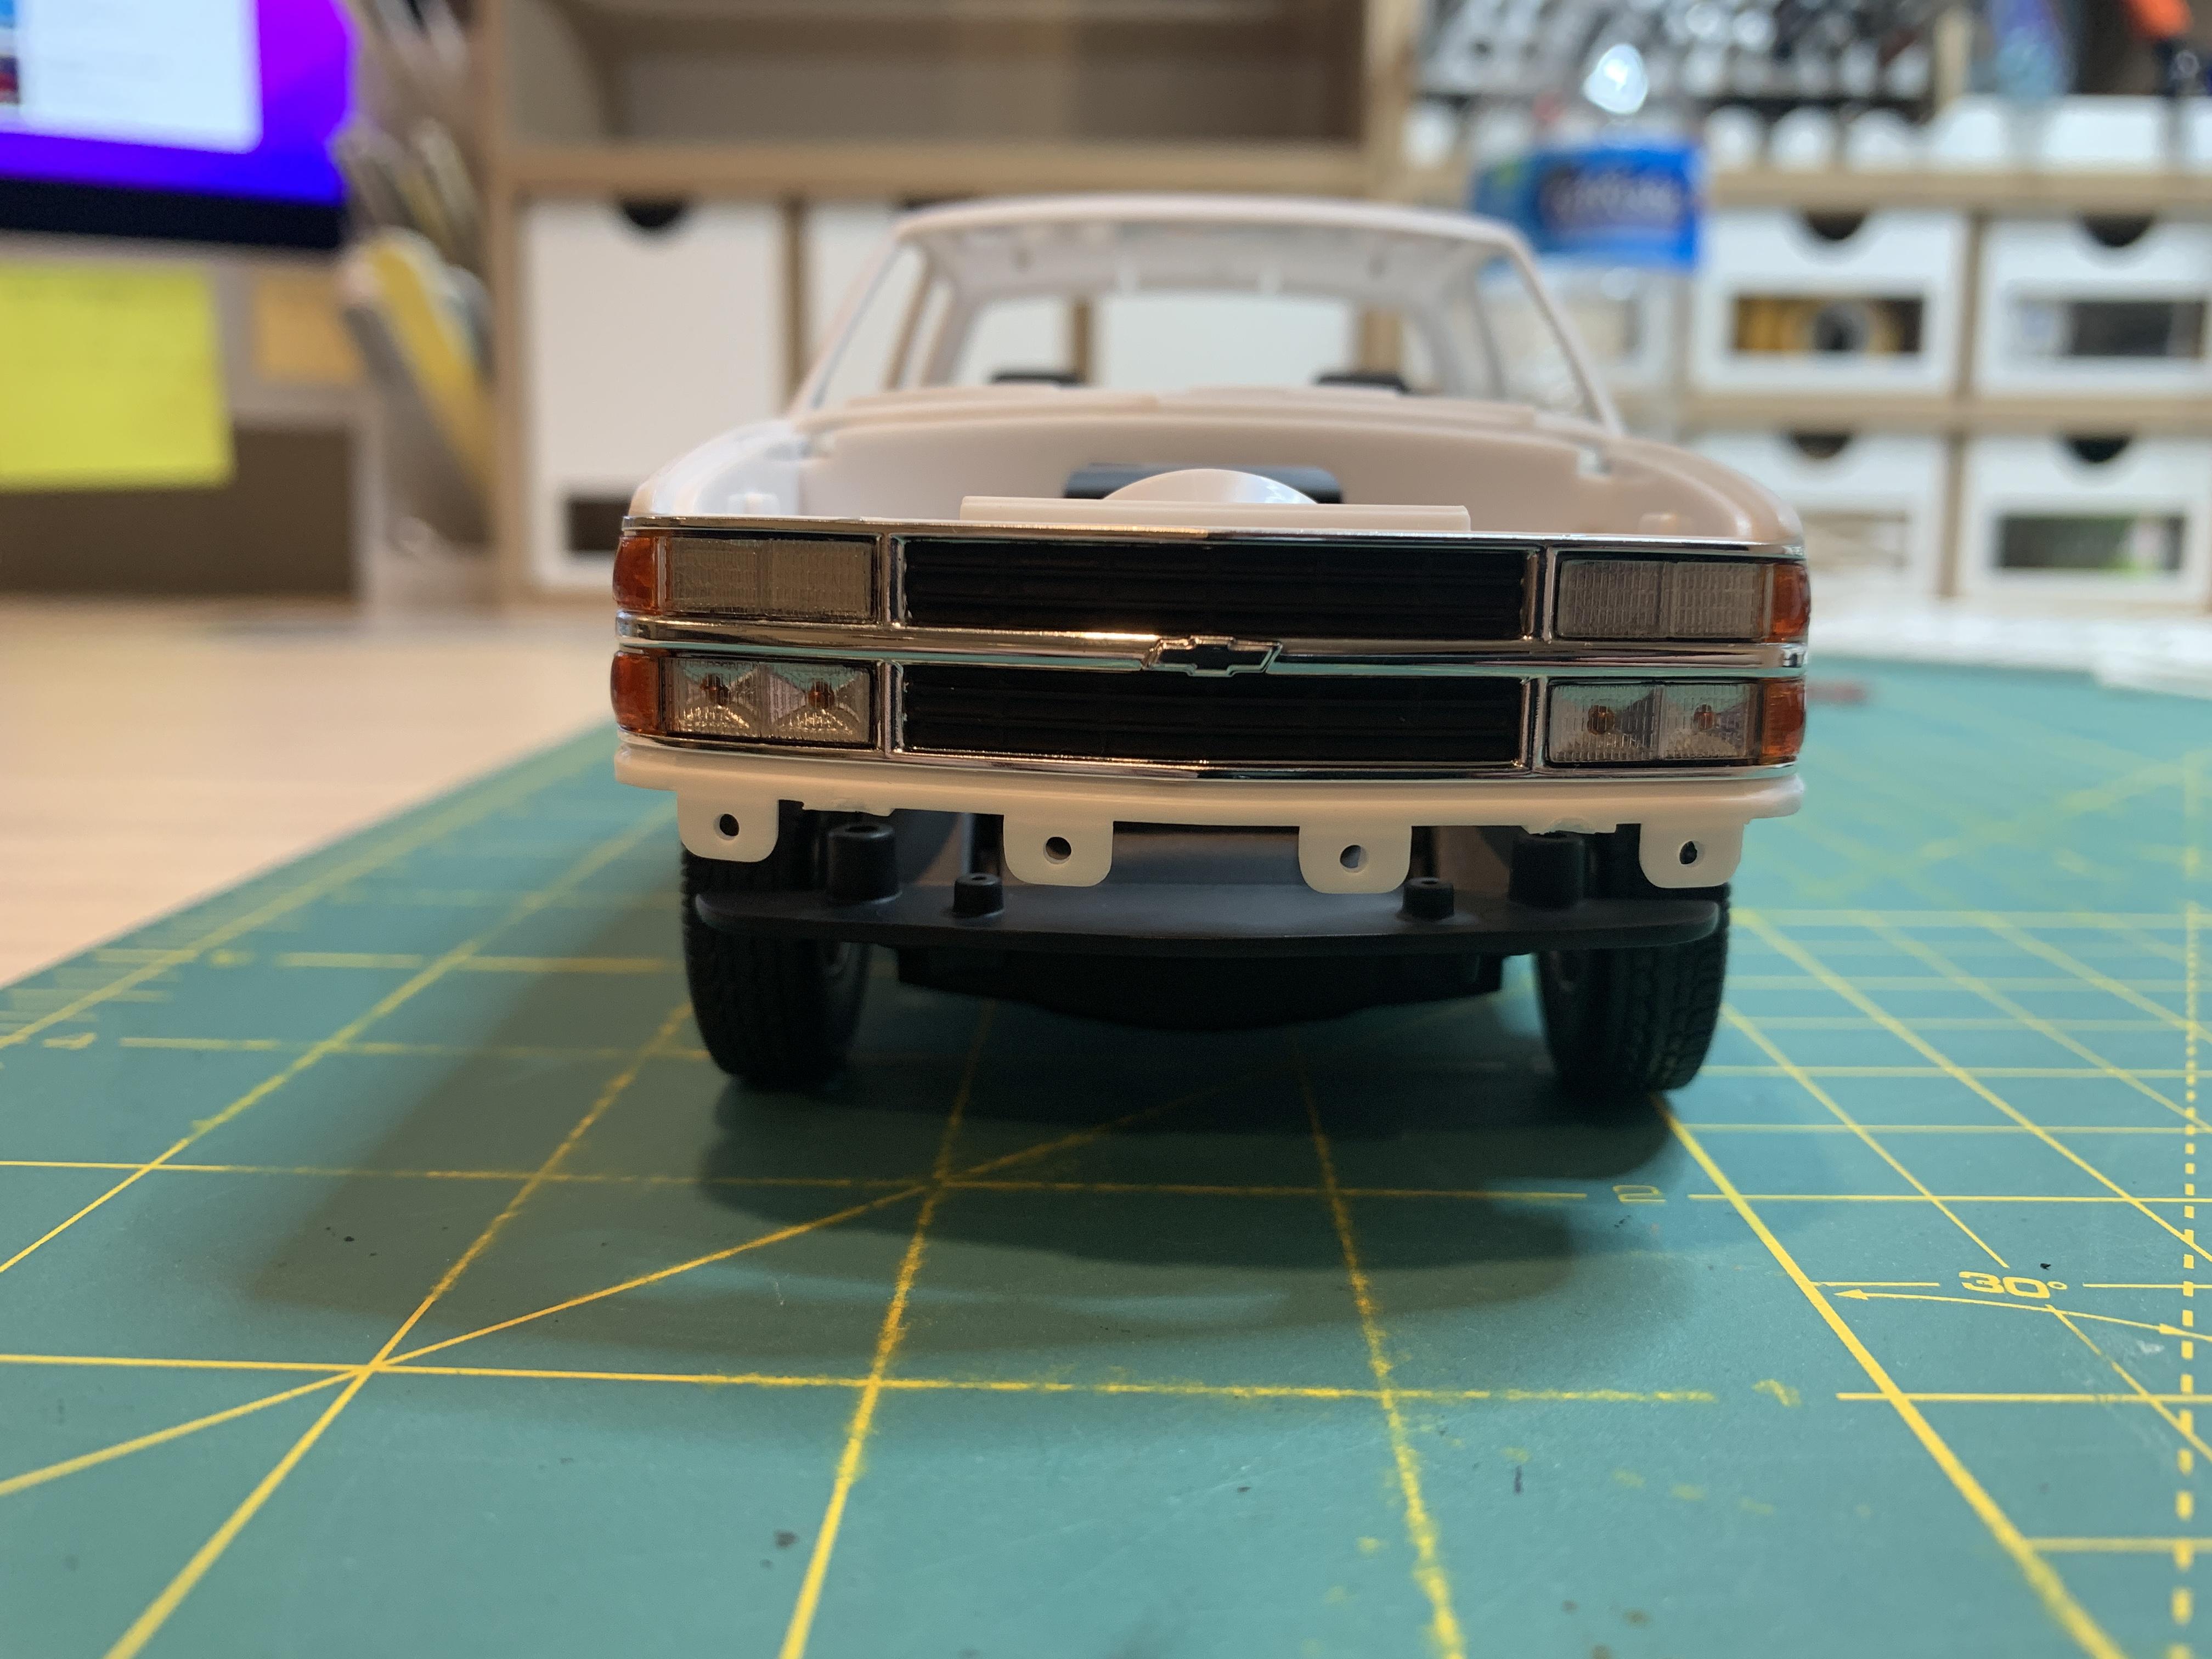
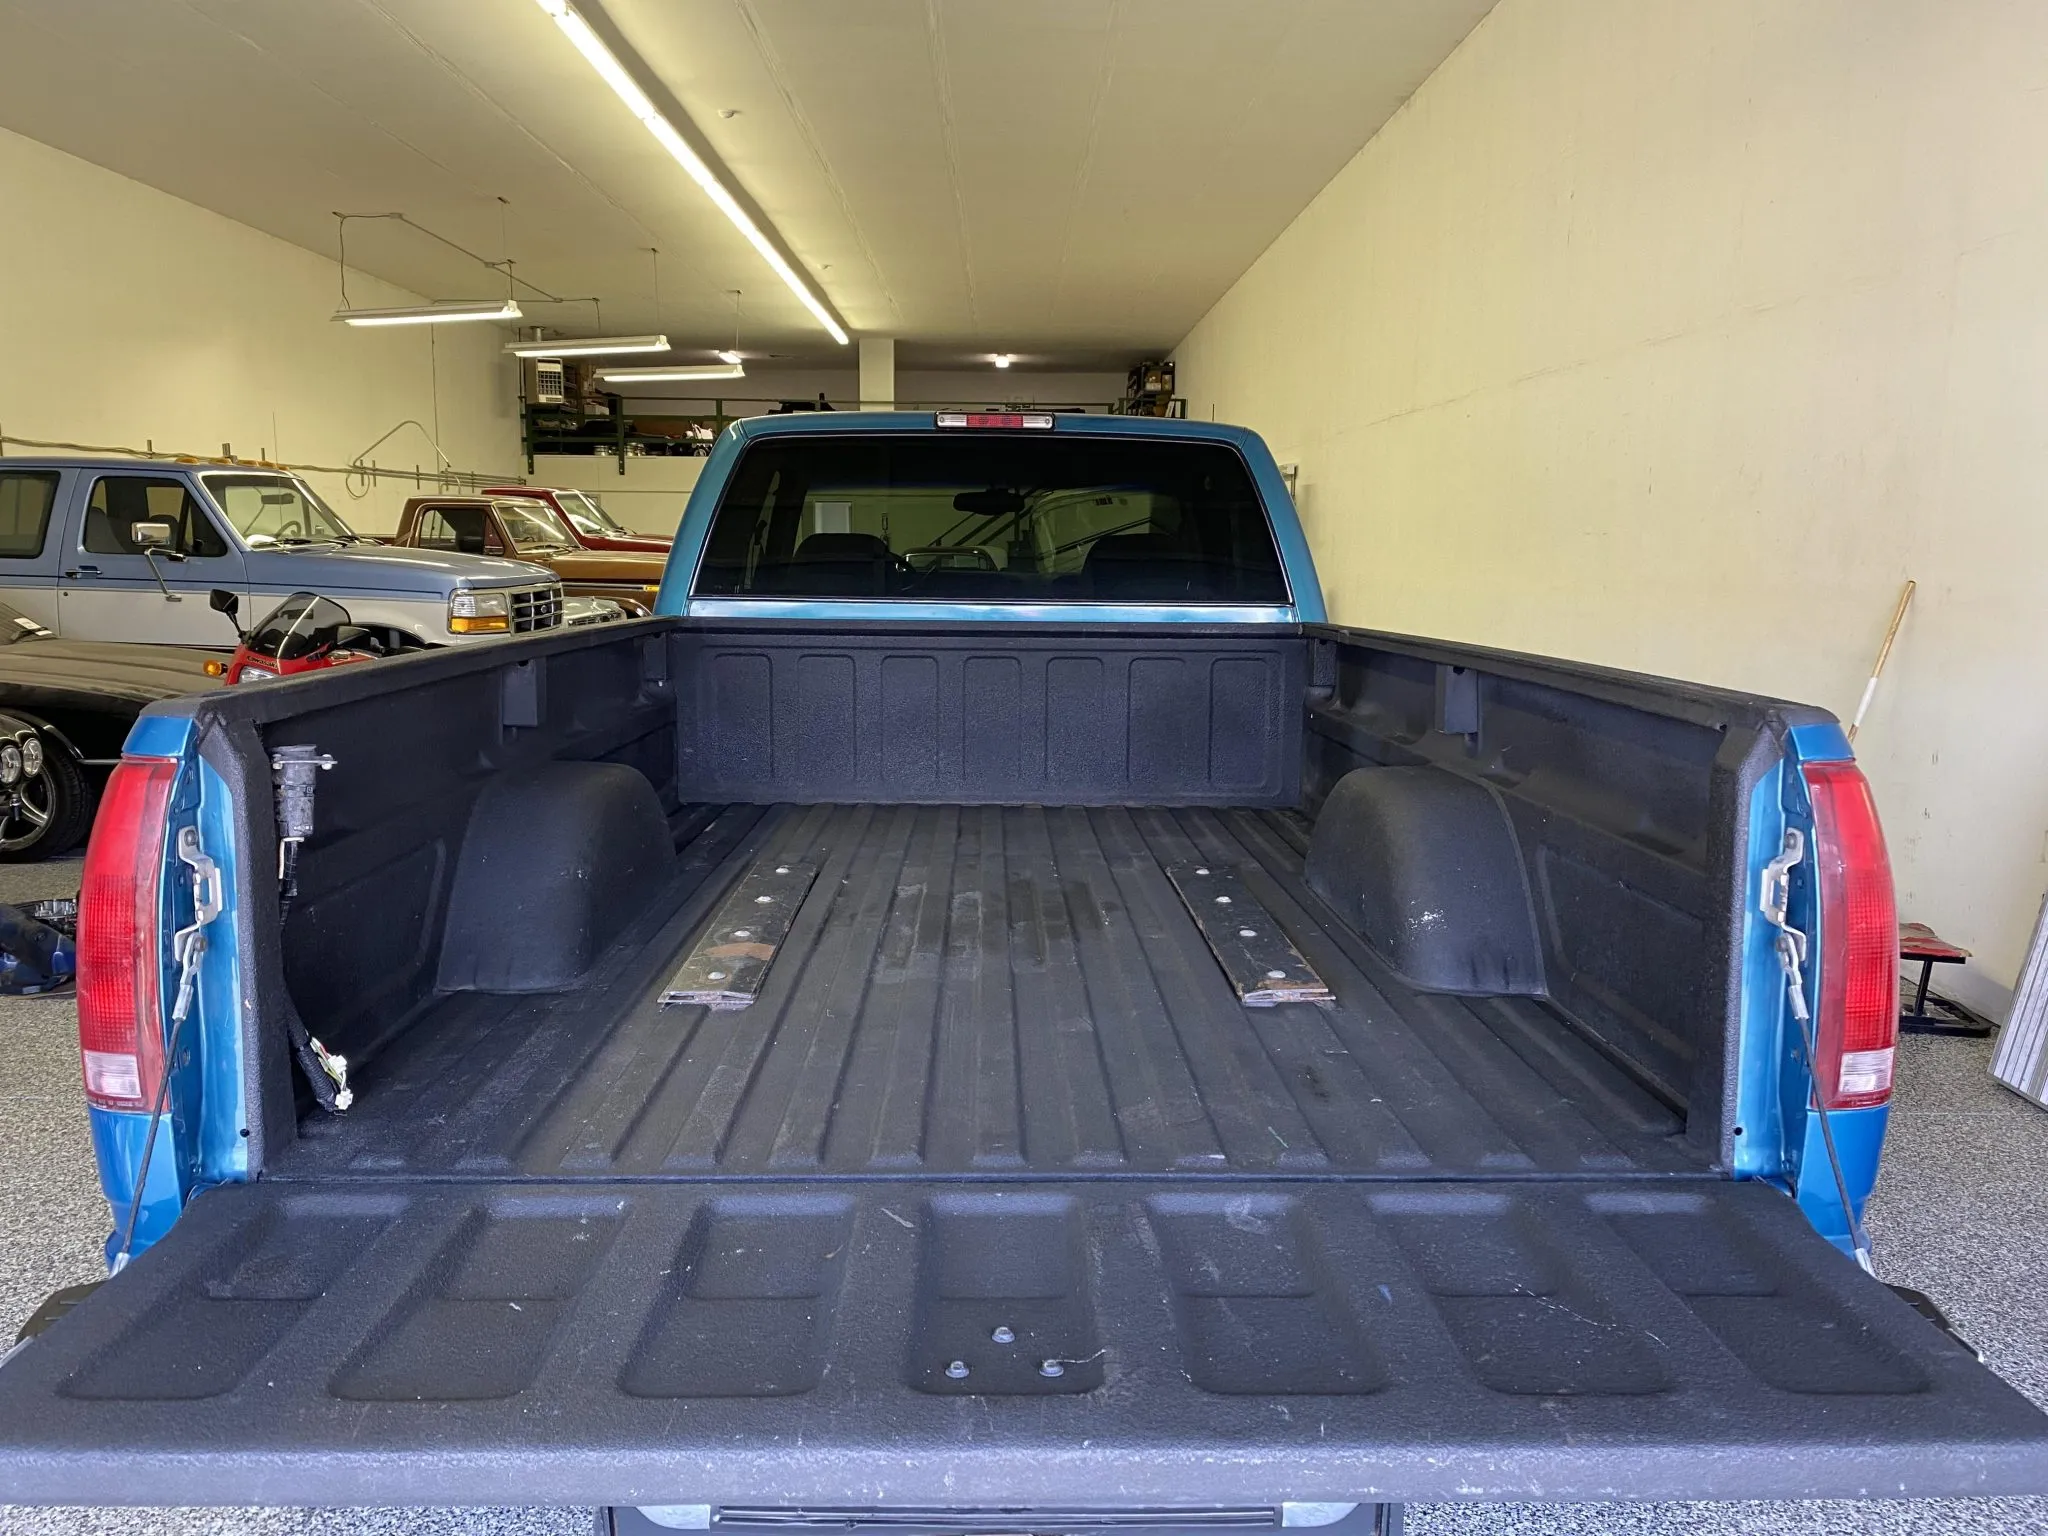
Thank you, Alan. I still can't believe how off AMT was on that detail given how good the rest of the kit is. Anyhow, I got some more work done today. I started off with the tail lights. The kit's lights come with two mounting tabs smack dab in the middle of the lights. The lights are u-shaped, so that made the removal a bit difficult but not impossible. Once I got the tabs removed, I sanded away with 600 grit until all signs of it were gone and used Novus 2 and a few q-tips to polish the inside. I finished the pieces off by sticking BMF to the inside of the lights to simulate the interior housing. I'm not a great picture taker, but here's the end result: I then worked on the front grill. I painted the grill itself with Vallejo flat black and painted the side marker lights with Tamiya clear orange. I used a black Sharpie around the perimeter of the clear lenses to simulate the black rubber suround. I also placed BMF on the upper headlight pieces. You're probably wondering why I did this since I'm covering up the interior light housing that AMT was so gracious to tool up for this new generation of truck kits. If you look at the real deal, you'll notice that both the upper and lower light housings appear slightly different. The upper headlights have a more "even" appearance, almost appearing as though it is one light housing. But on the bottom portion, it is more evident that there are two separate light housings. I hope this all makes sense; This is why I sought to replicate these slight differences. Since I'm going for the high-end Silverado trim model, I decided to use the chrome wheel option on the kit. My vision is of a brand-new truck that was purchased by a family to tow their fifth wheel, boat, etc. during specific times of the year, but otherwise remain un driven most of the time. I used some Tamiya black panel line on the wheels:
-
Roadworthy Rescue Wrecker
av405 replied to Steamboat's topic in WIP: Model Trucks: Pickups, Vans, SUVs, Light Commercial
Looking good so far. Can't wait to see the finished product. -
1996 Chevrolet C-3500
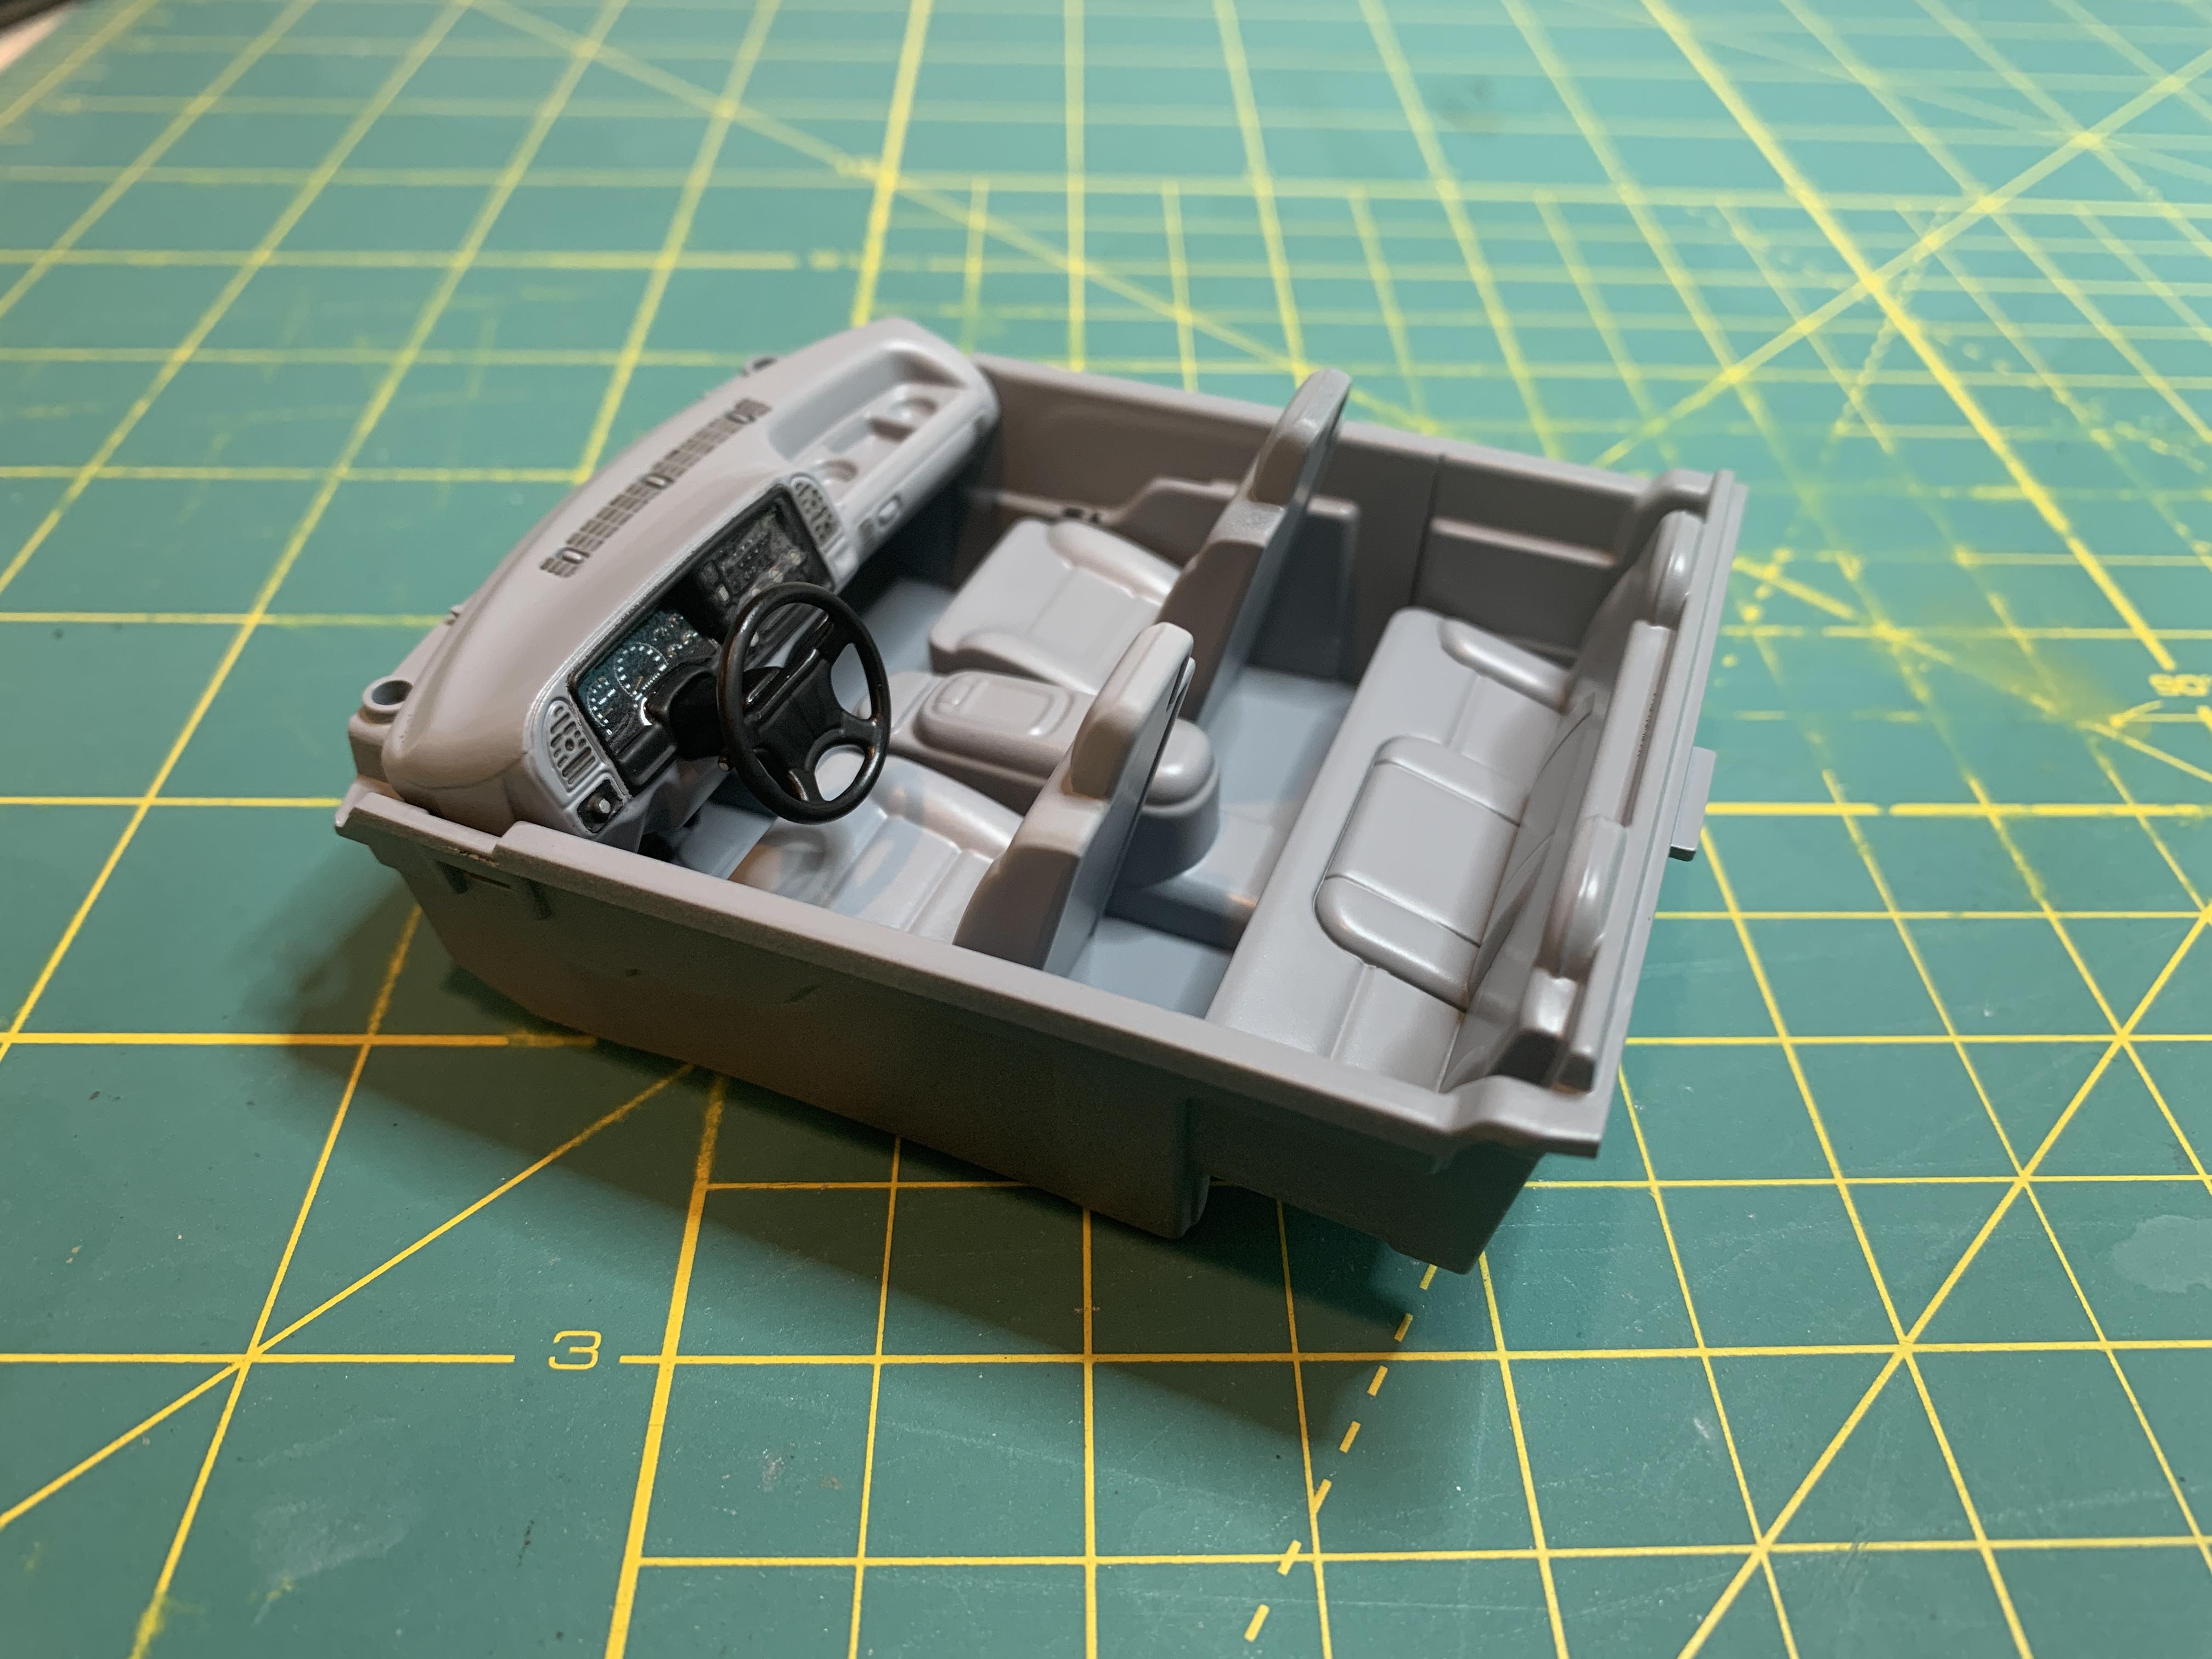
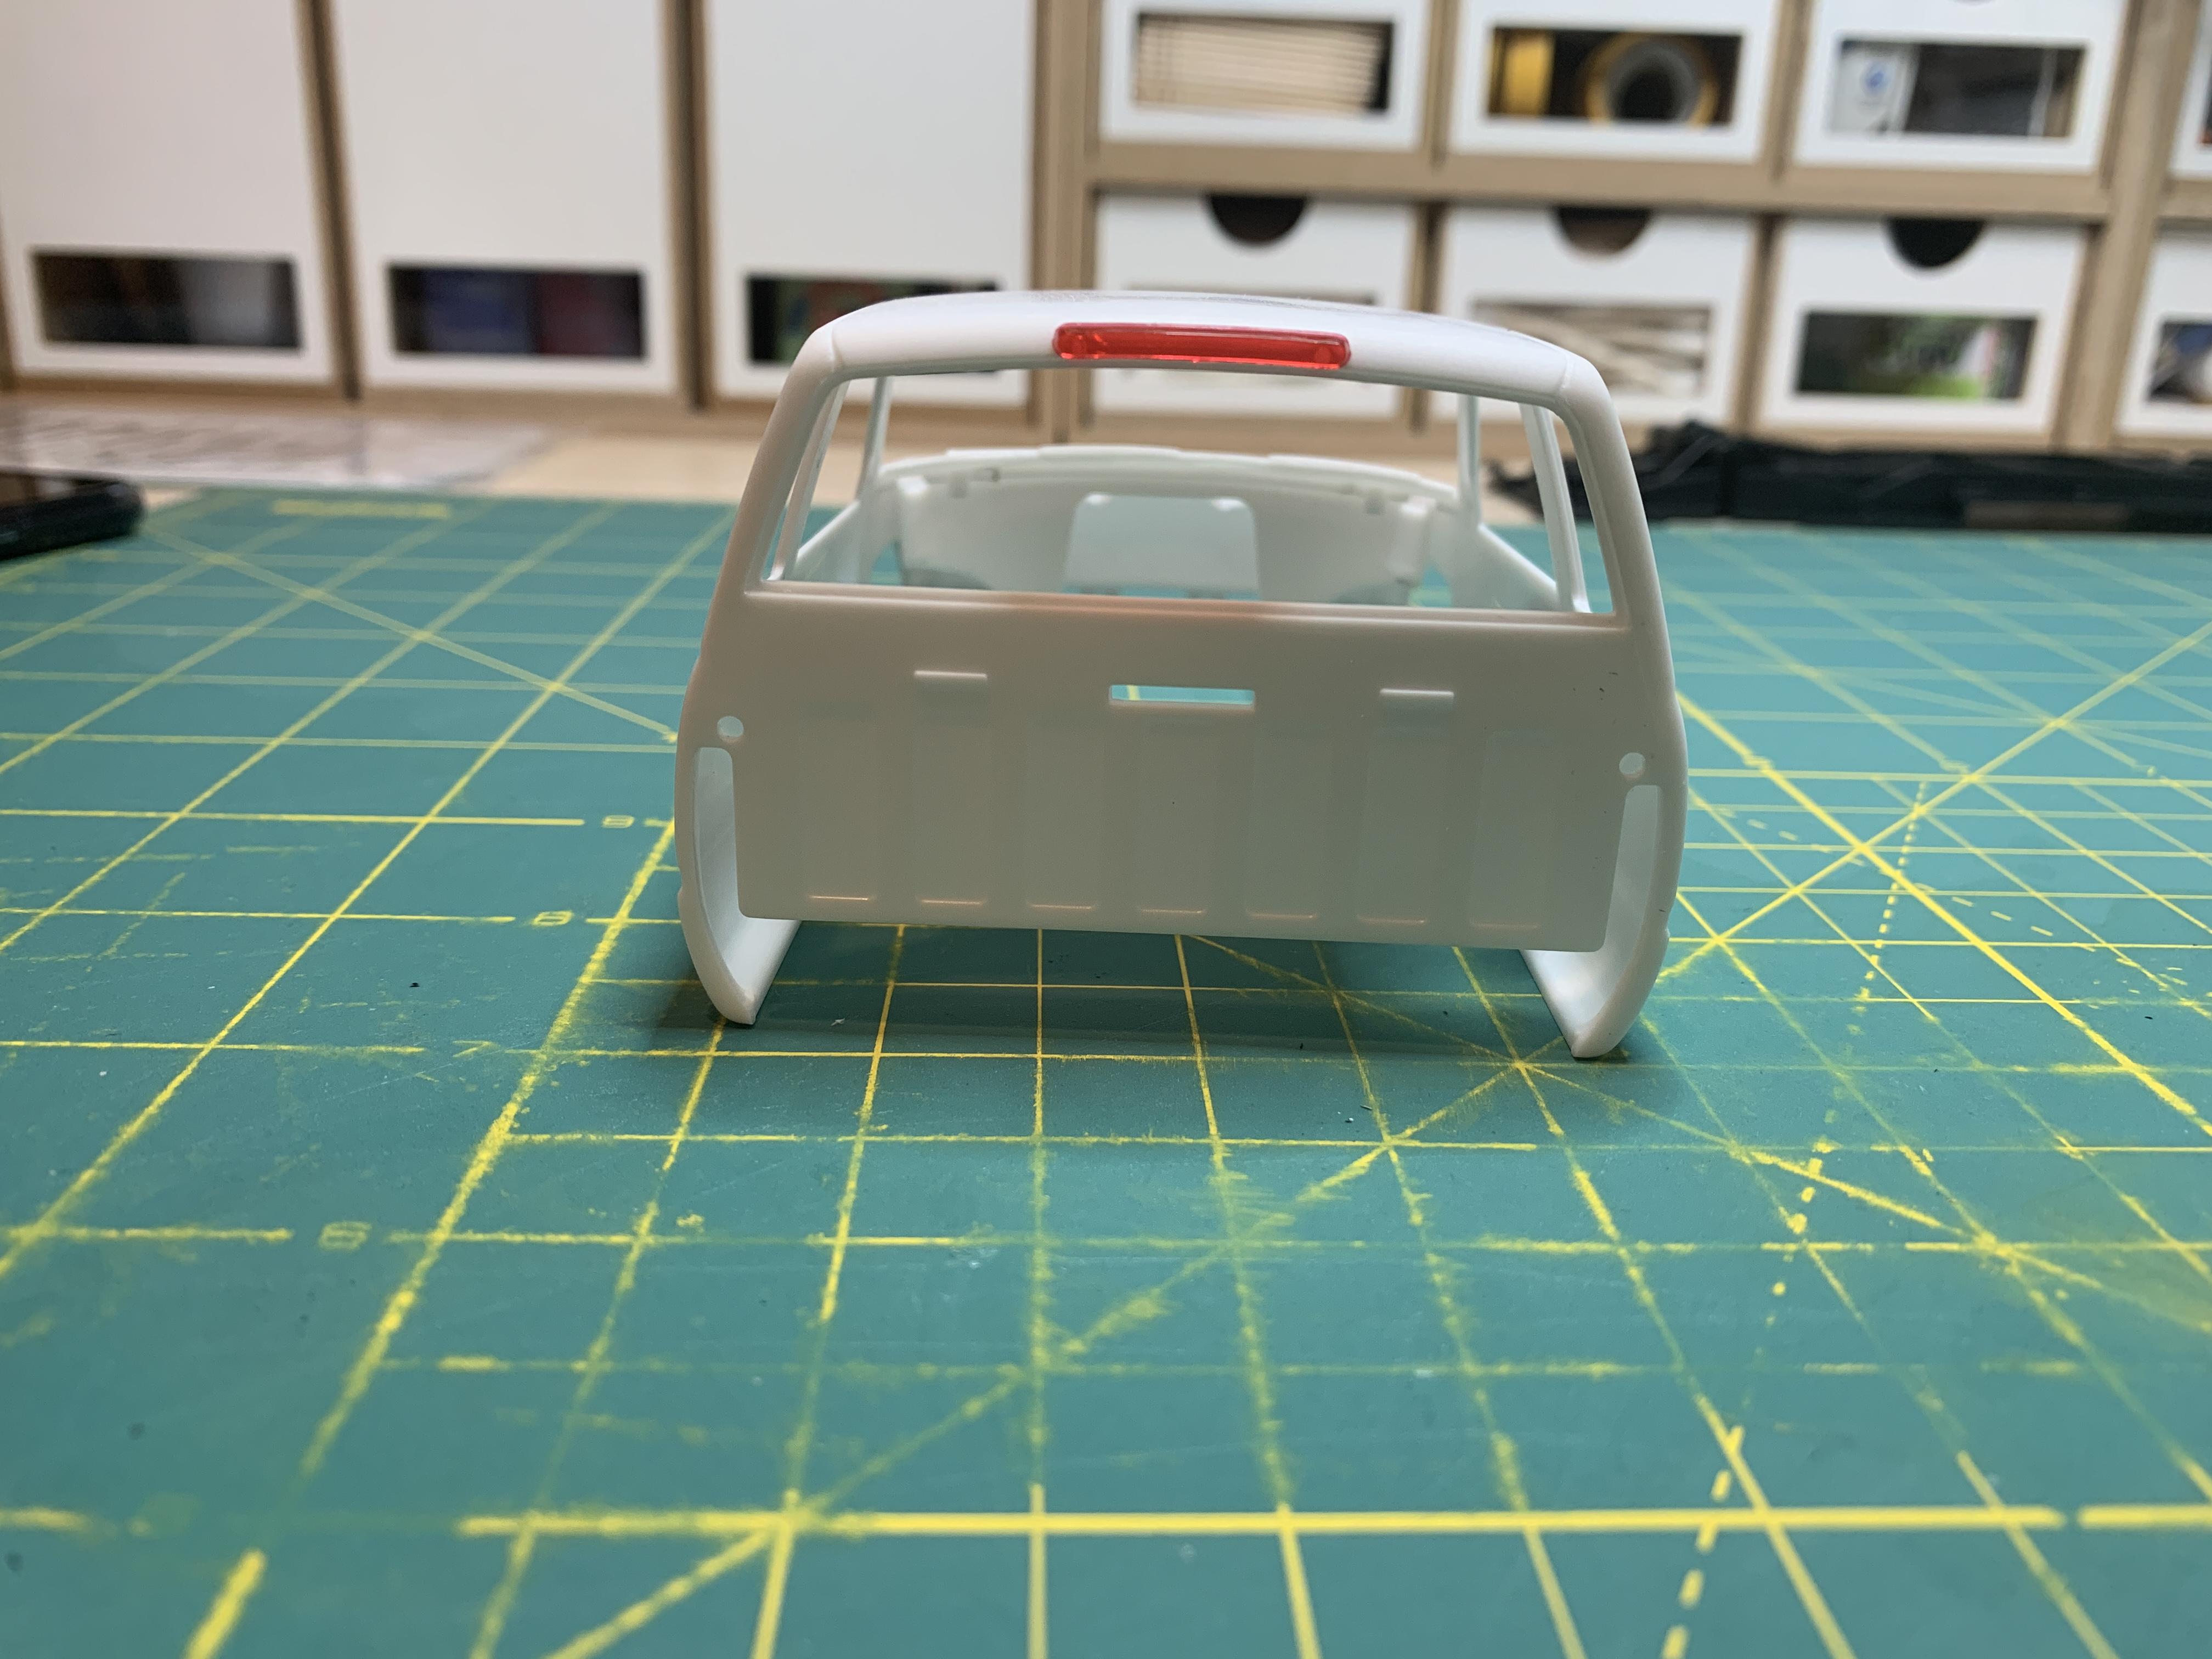
av405 replied to av405's topic in WIP: Model Trucks: Pickups, Vans, SUVs, Light Commercial
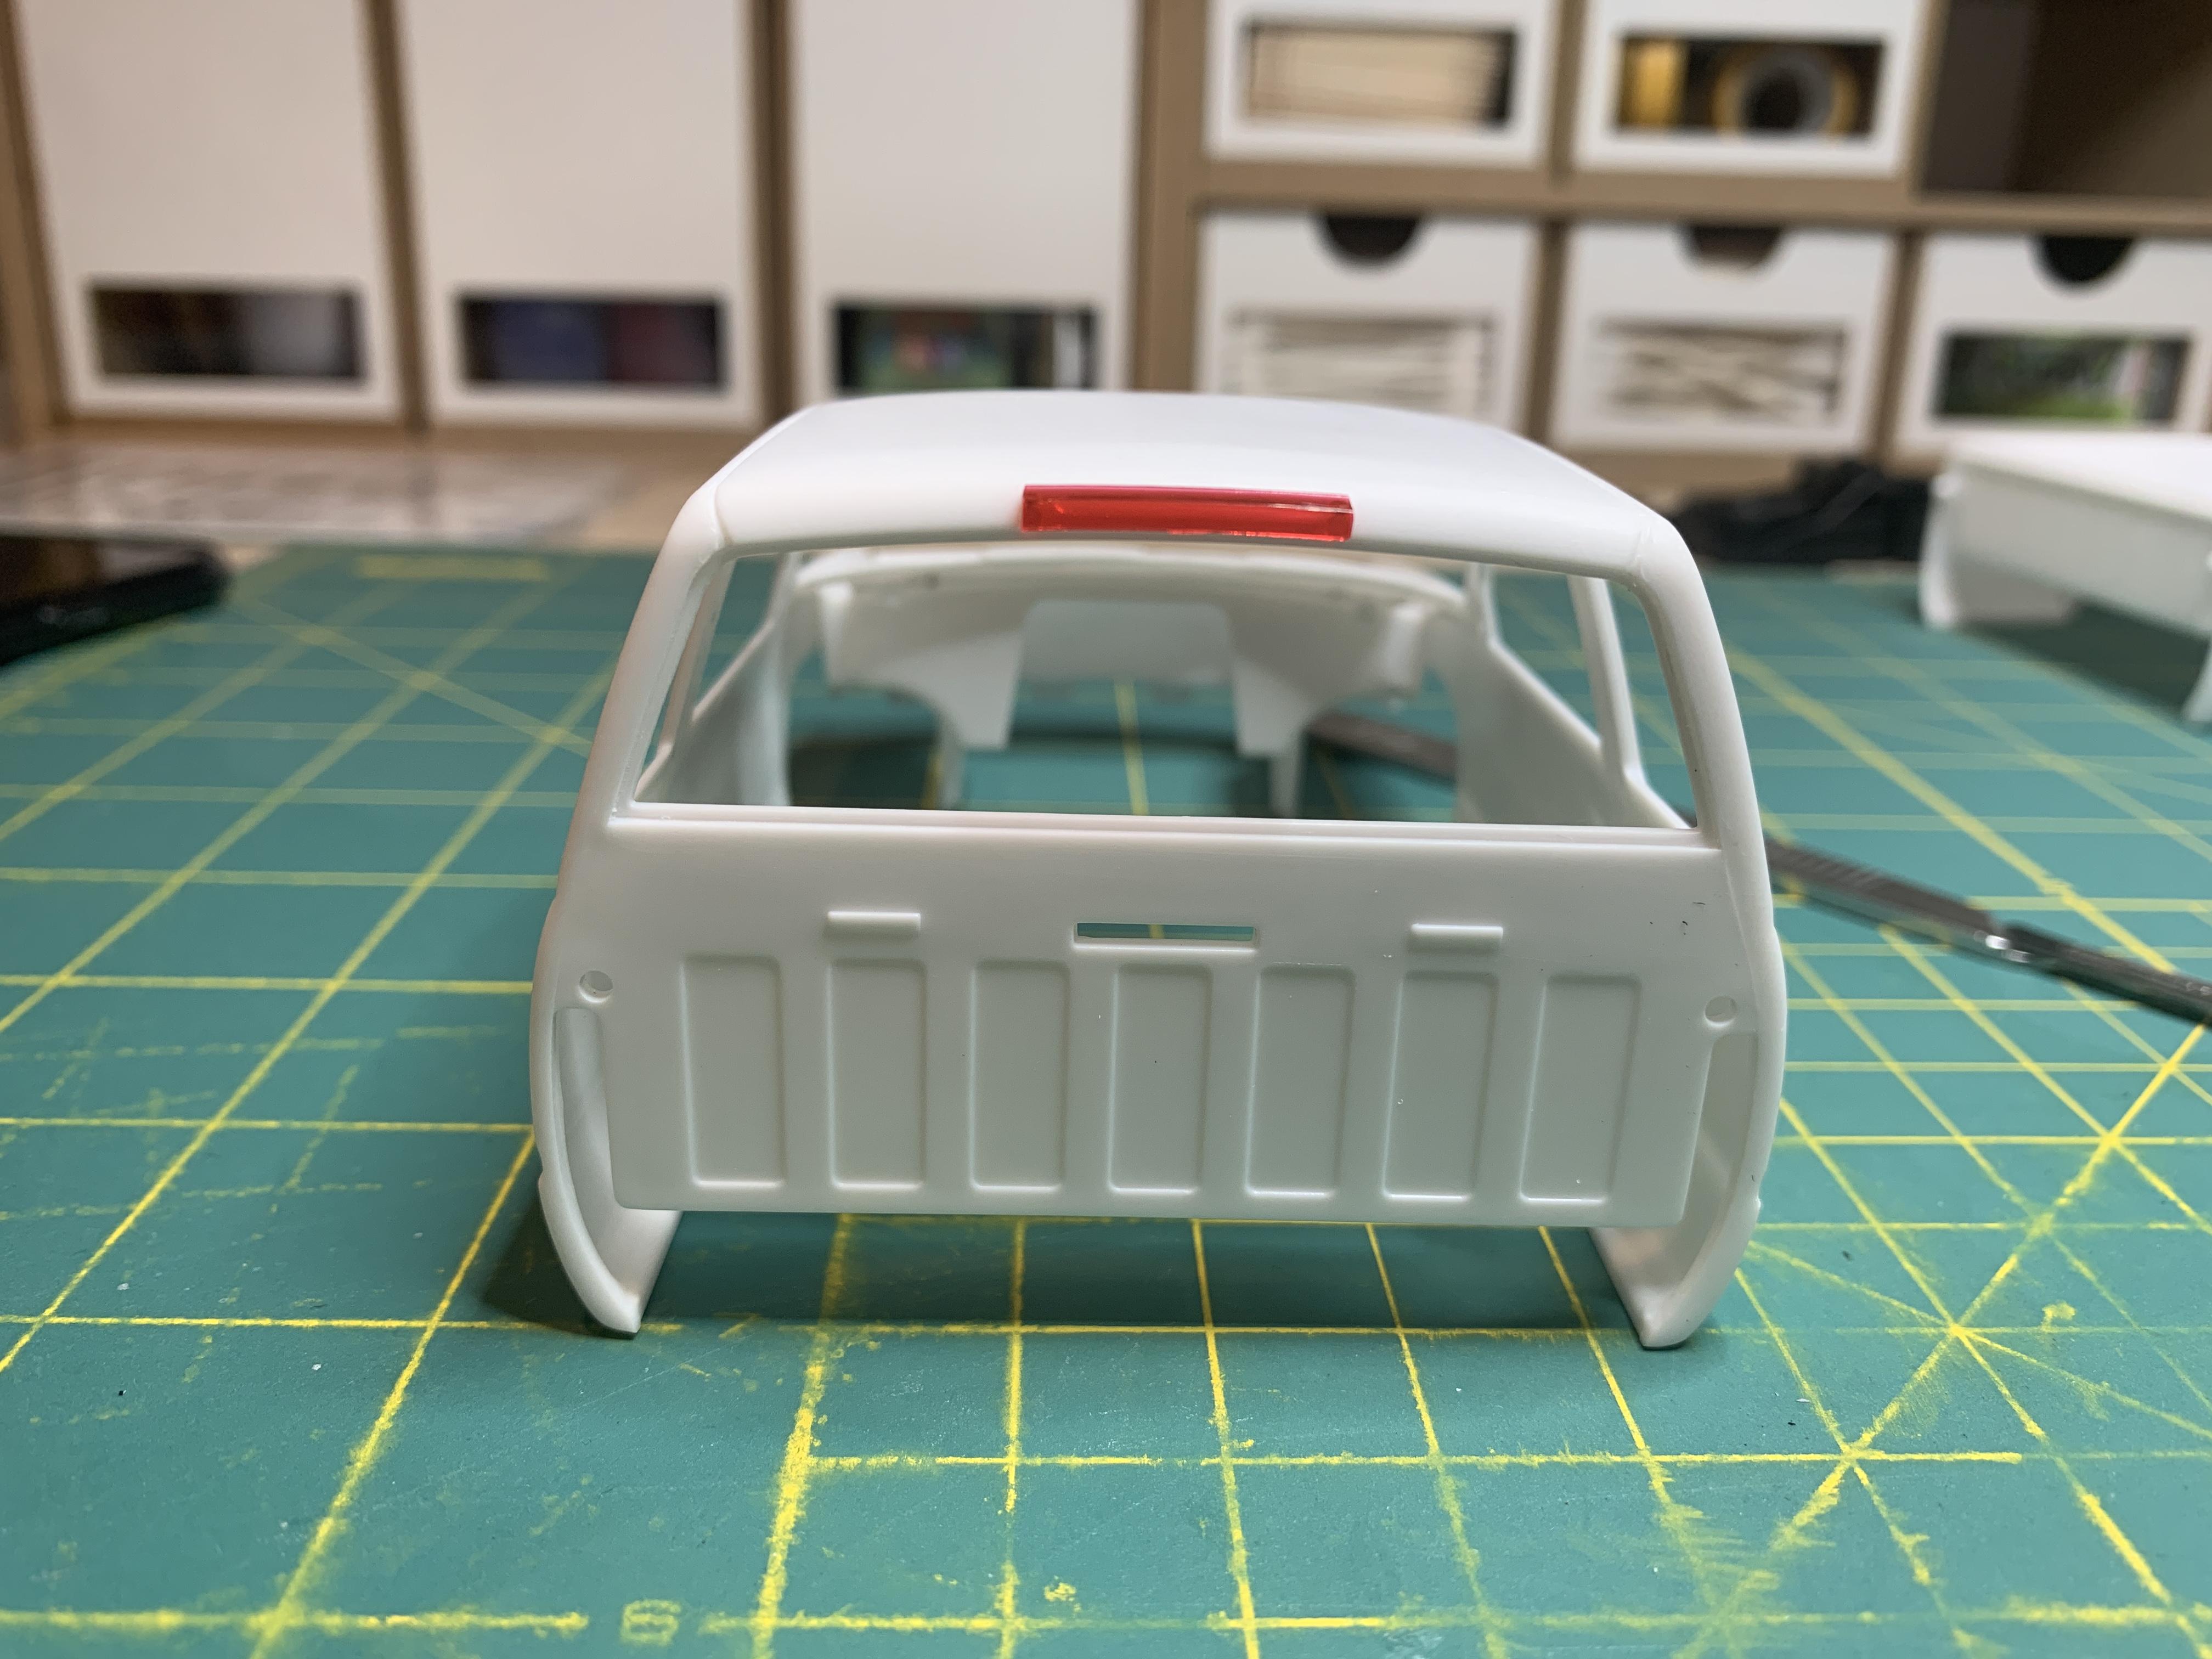
The interior is complete. I liked the speedometer/dash gauge decals, but I wasn't fond of the center dash decal for the radio, AC, etc. The decal is well-detailed and accurate, but too glossy for what the real equivalent looks like. I recommend using a semi-matte or matte clear over it. I moved on to addressing the most aesthetically problematic portion of the kit: the third brake light at the rear of the cab. The kit's light is comically long and has a slight curve to it: Note how much shorter and straighter the real-life equivalent is: I took out one of my trusty saws and shortened the light right up to where the rear mounting tabs are. Here is the final outcome. When I was done, I sanded the edges with 1000 grit sandpaper to get even edges. It is still a bit too long but it looks better than before and with less of a curve: All done after some detailing with black and silver sharpies:
-
Alaska State Troopers Ford Expedition
av405 replied to av405's topic in Model Trucks: Pickups, Vans, SUVs, Light Commercial
Thank you! -
1996 Chevrolet C-3500
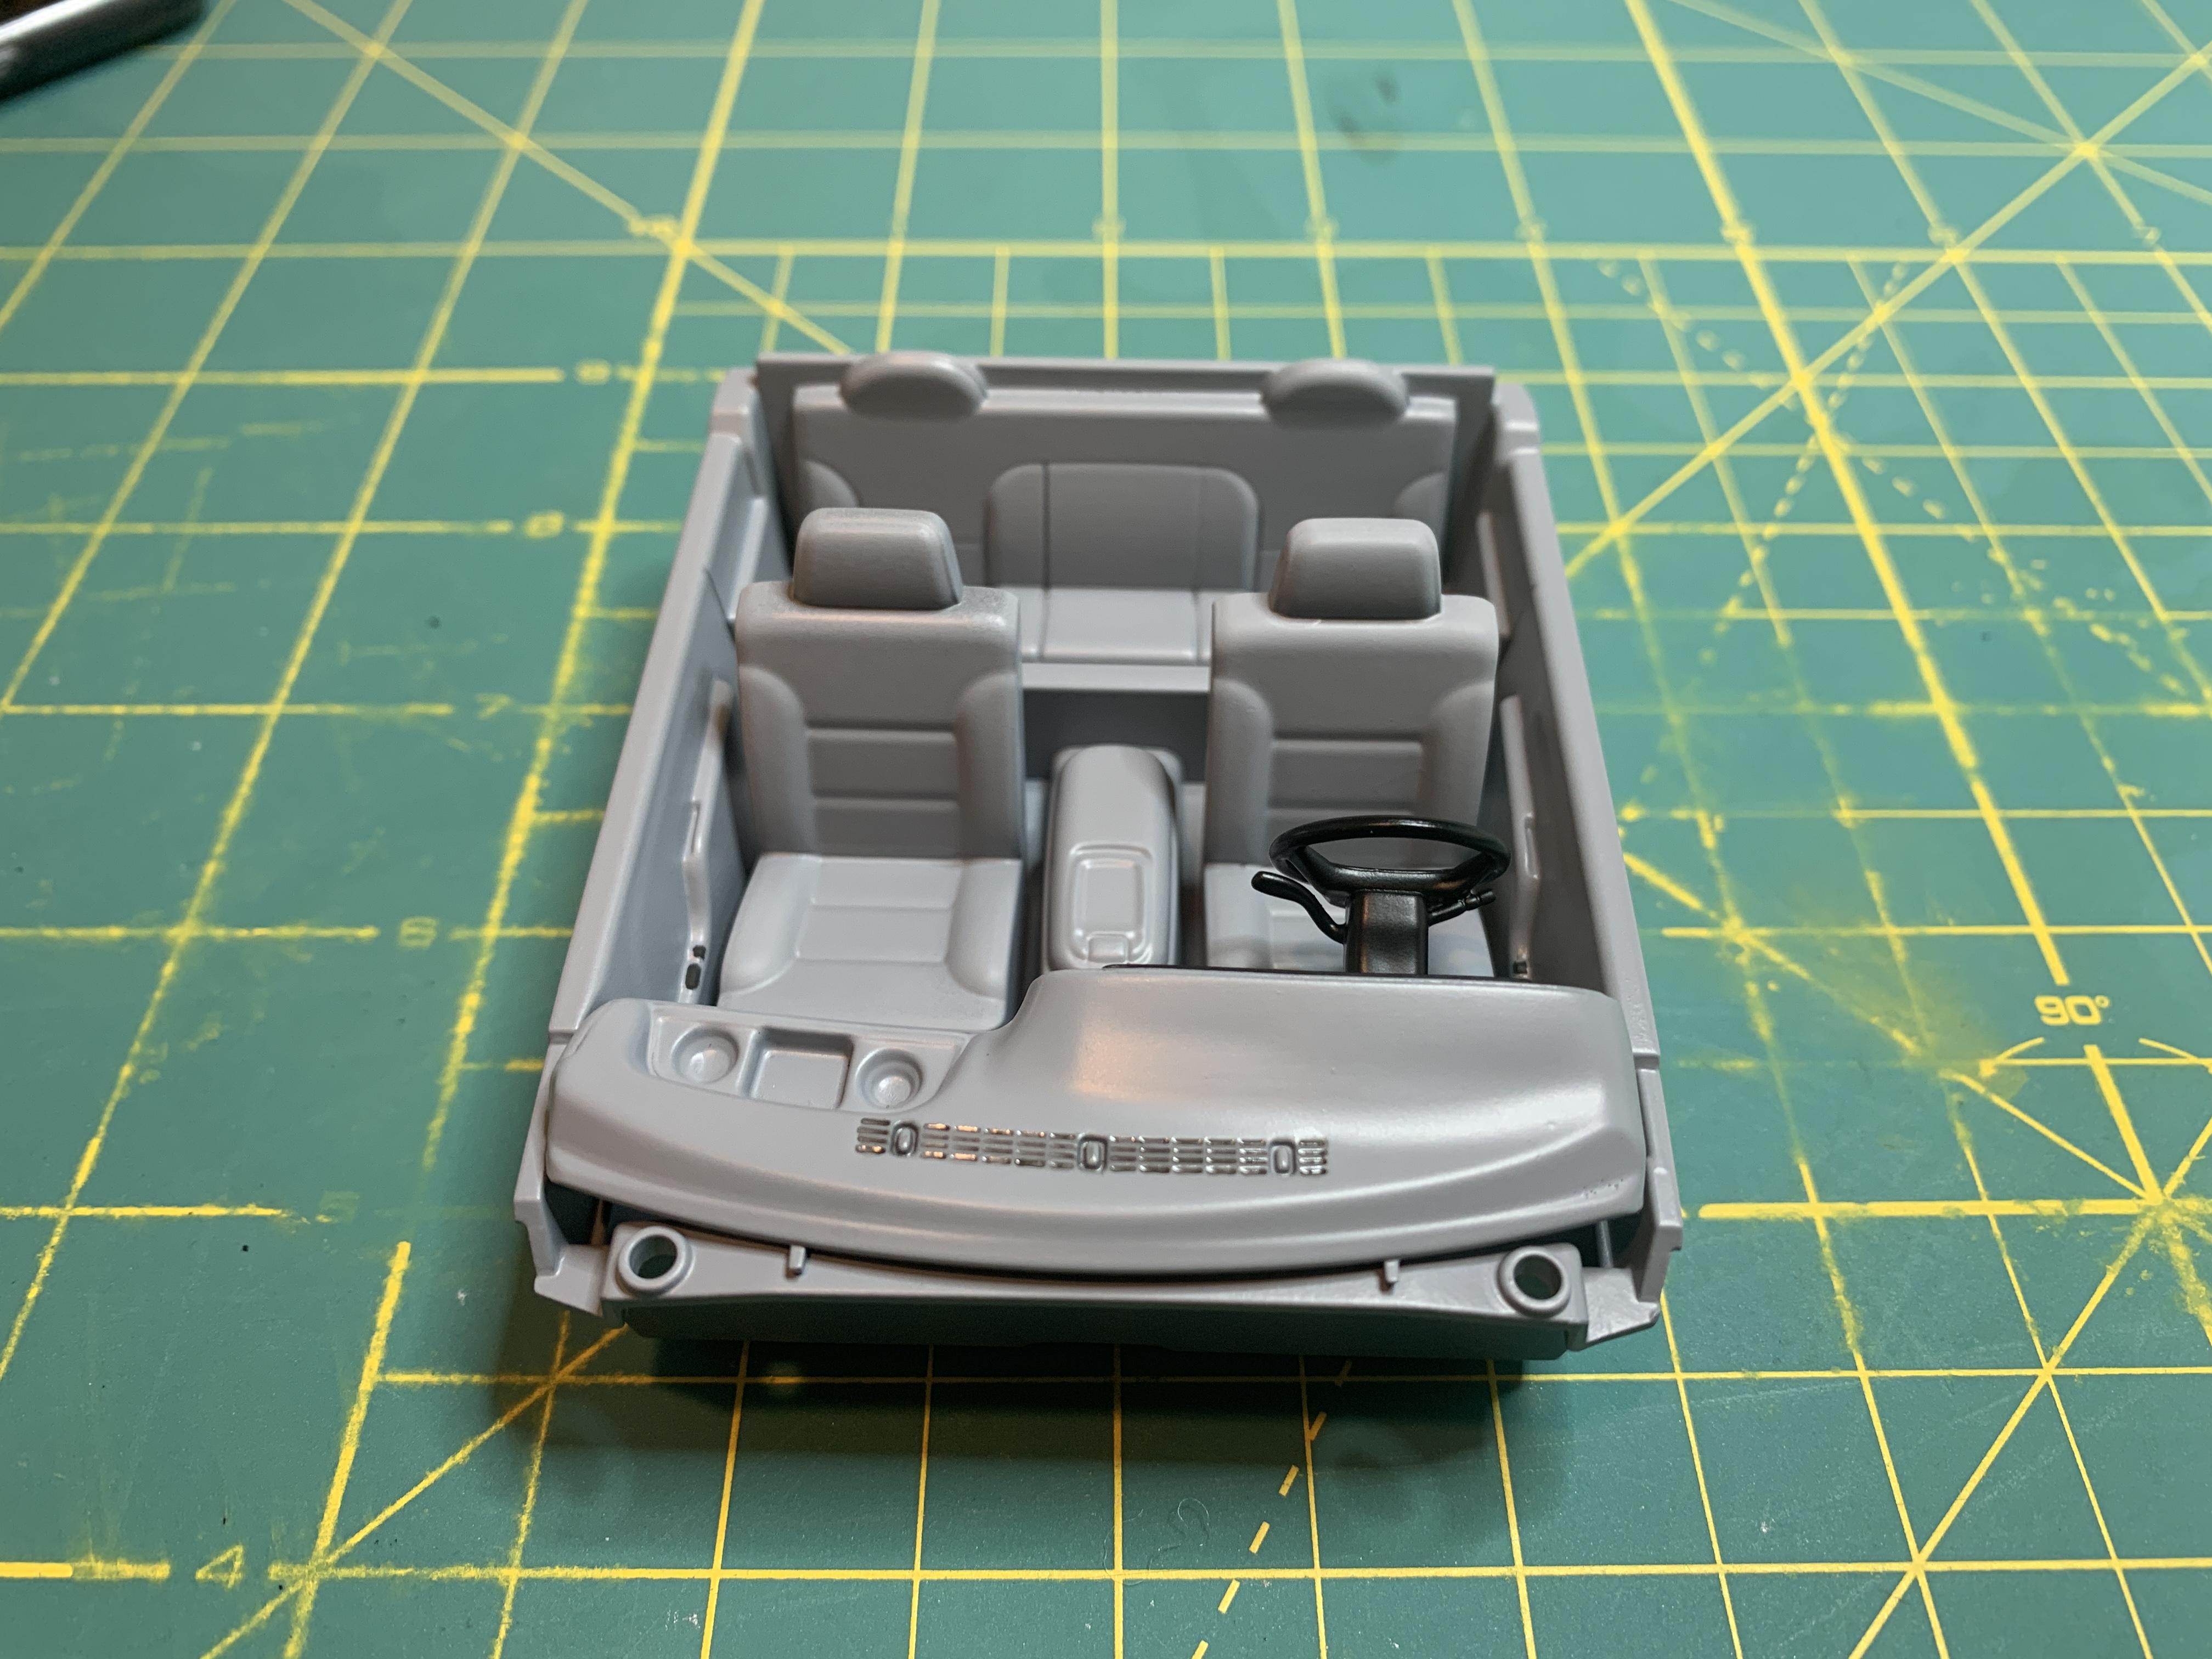
av405 replied to av405's topic in WIP: Model Trucks: Pickups, Vans, SUVs, Light Commercial
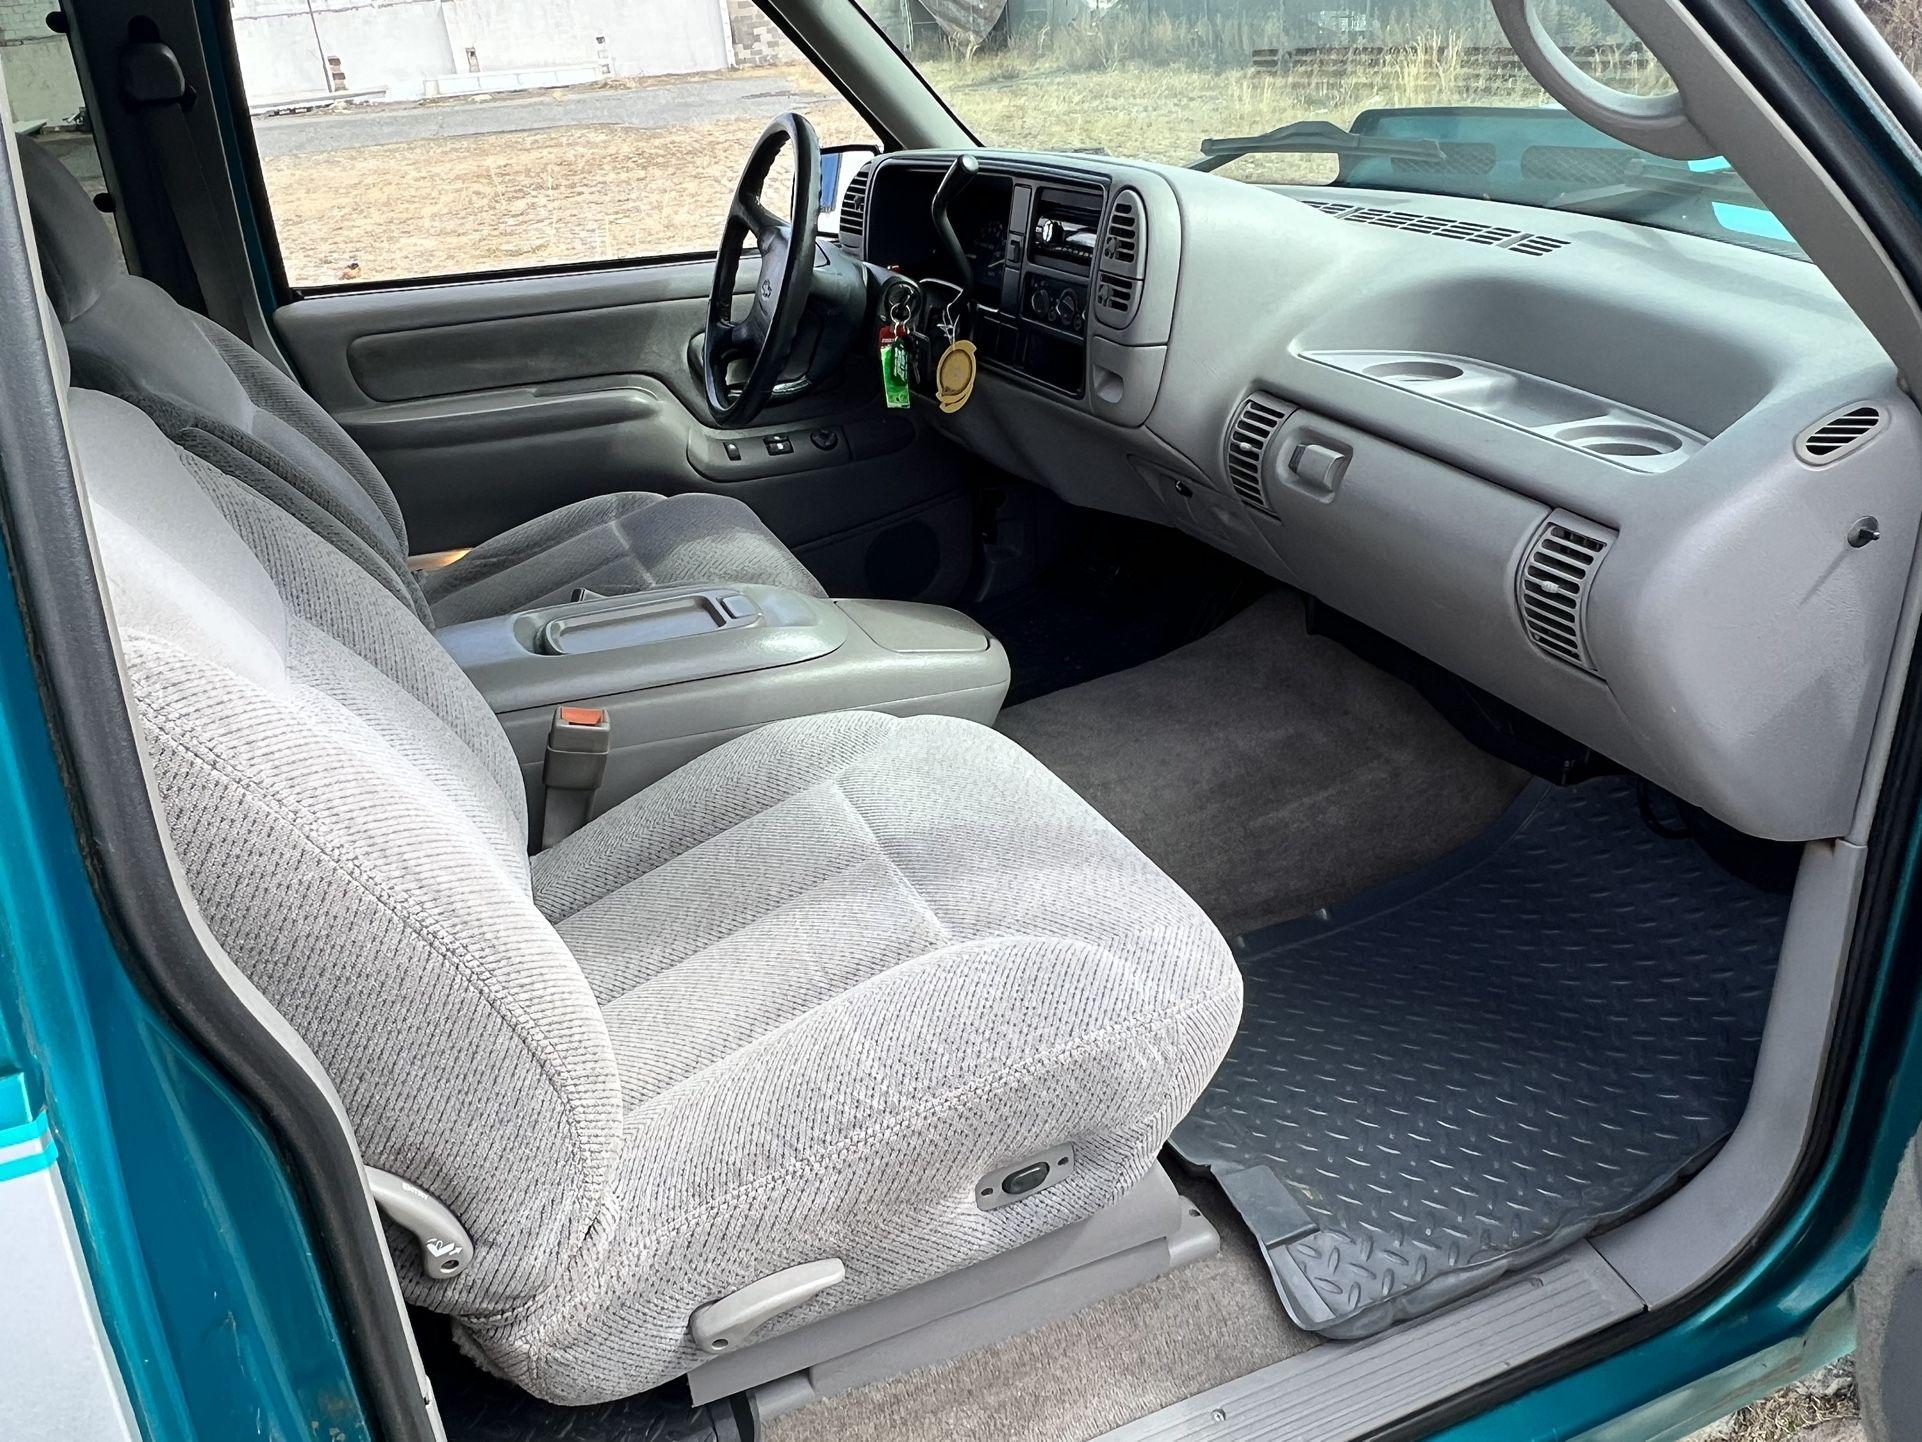
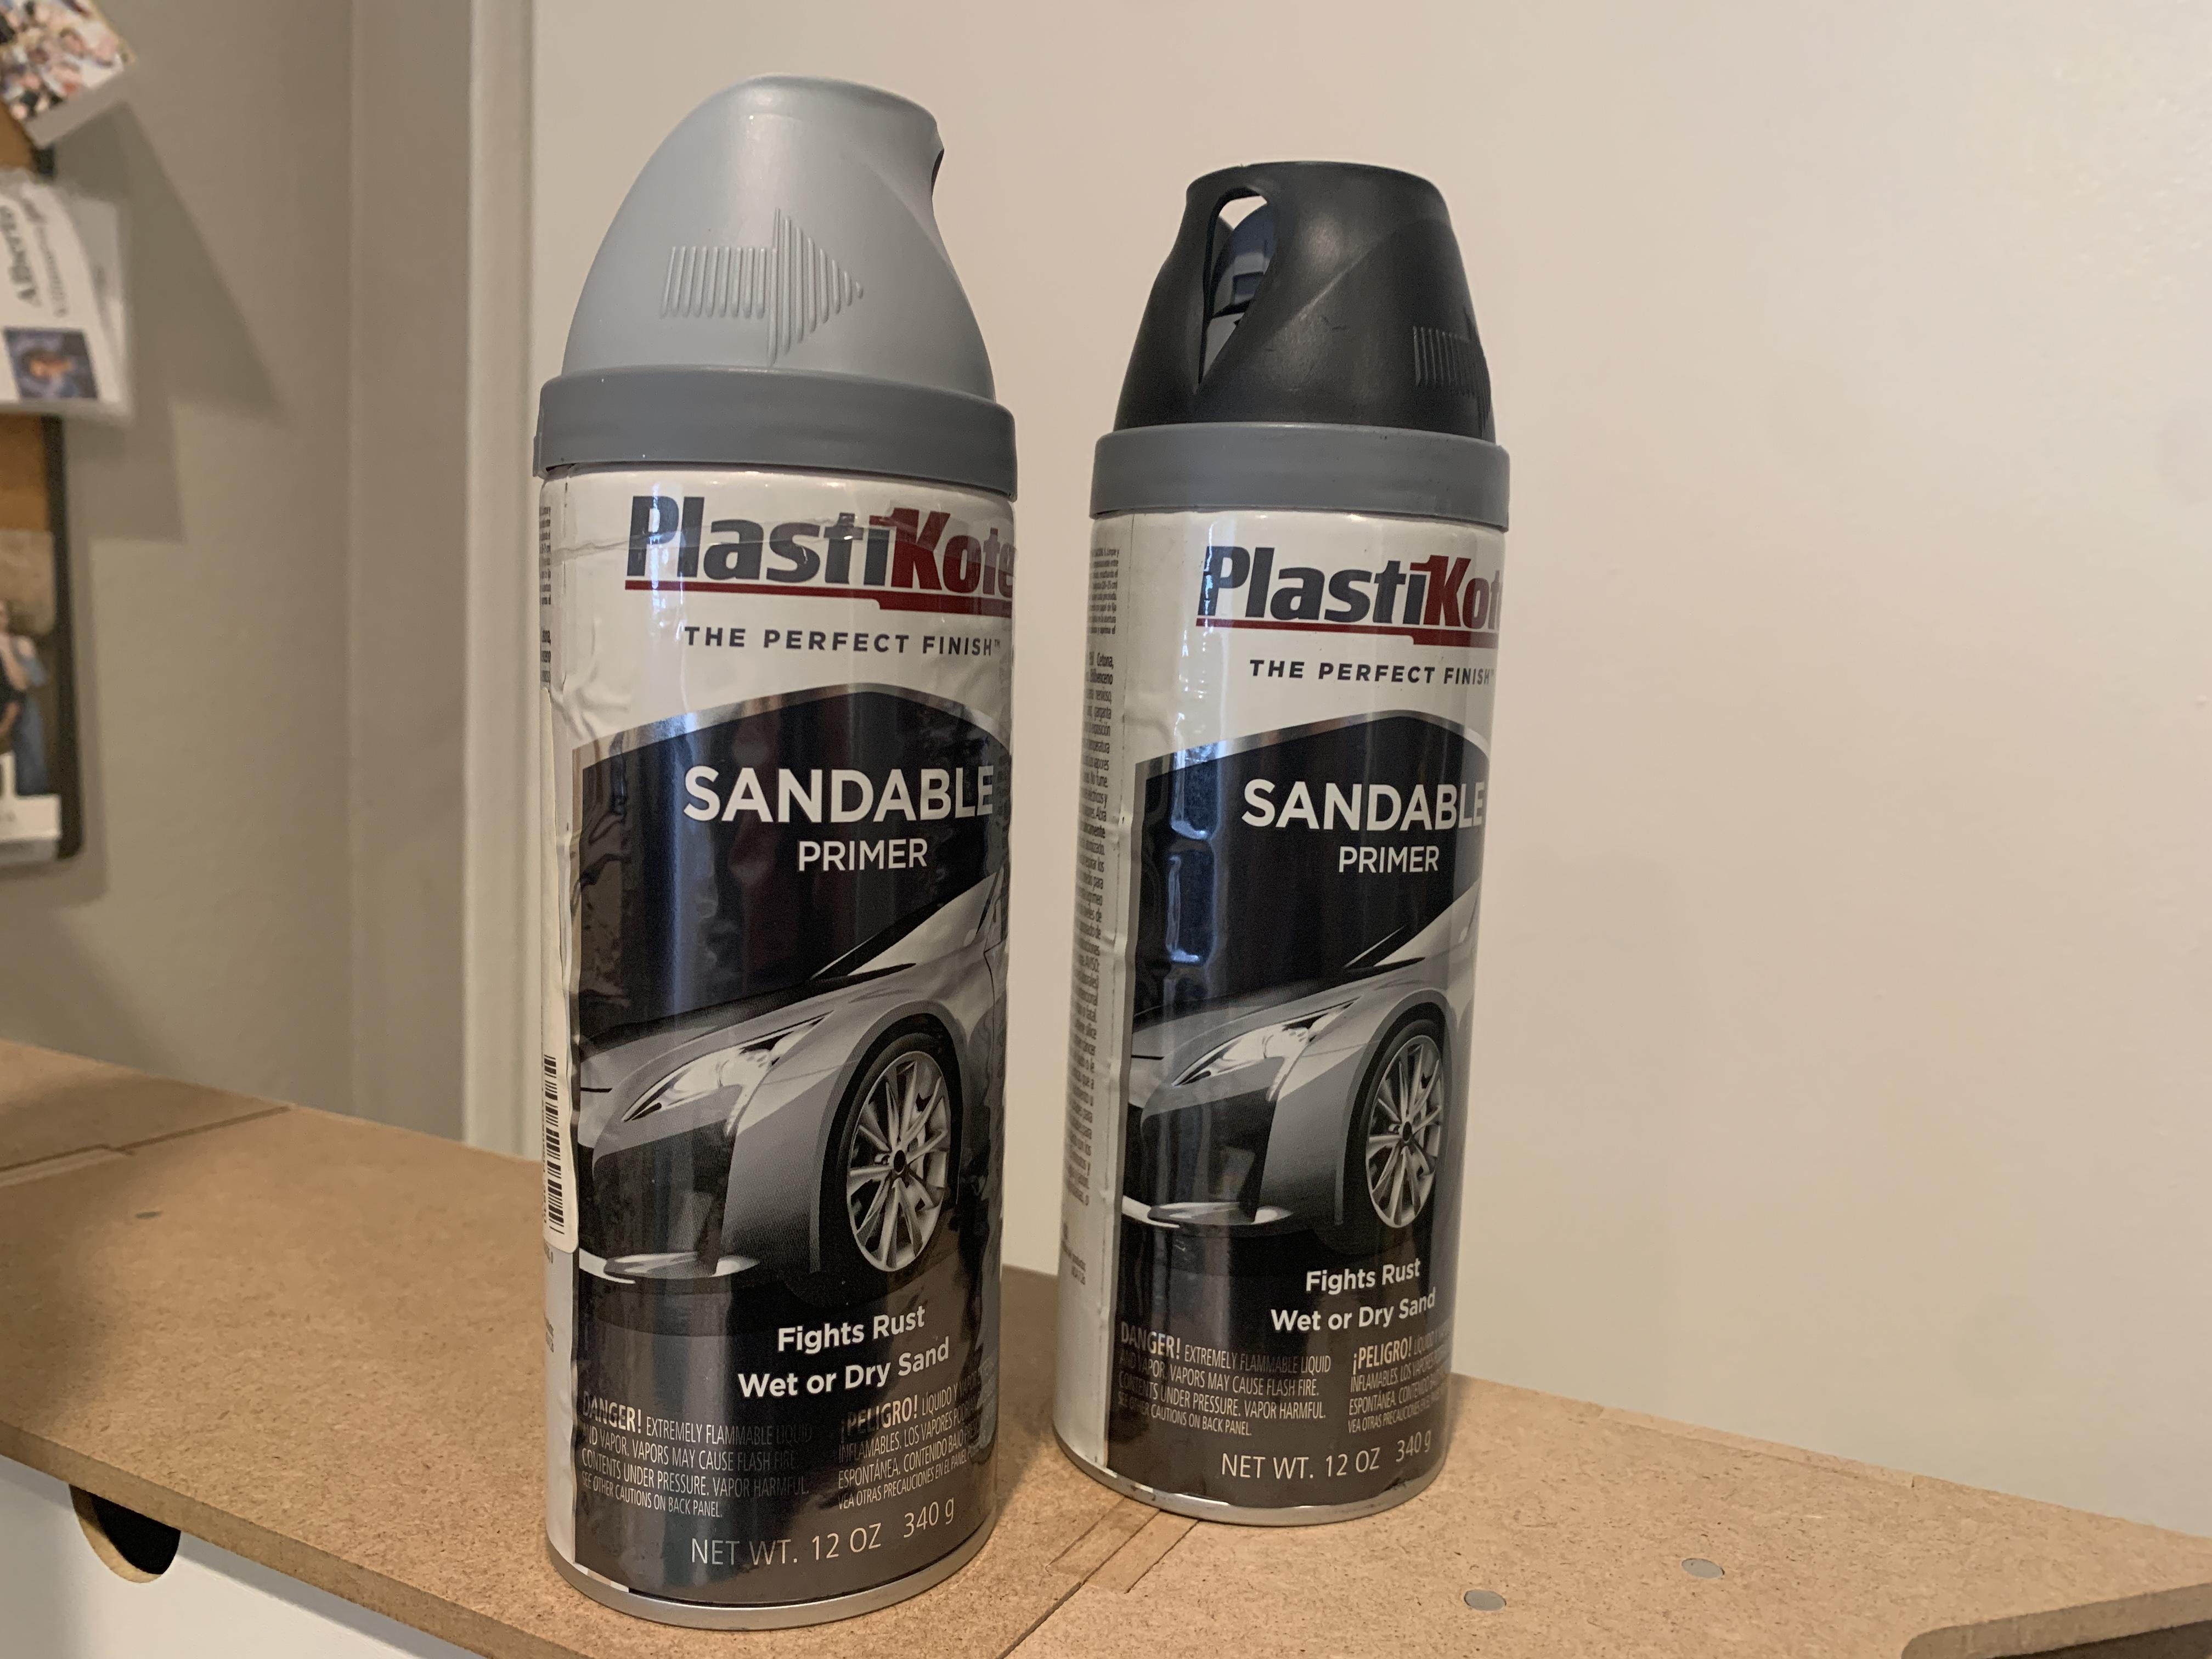
Plastikote was bought out by Valspar a few years ago. That's when the formula changed. The can I have left was purchased in 2016. Speaking of the interior. I initially painted it with Tamiya AS-10 Ocean Grey, but it came out too dark: Note that the grey on the real thing is lighter: Tamiya AS-28 Medium Grey was a much closer match: The black portions were painted with Mr. Surfacer 1500 Black Primer. As much as I like Tamiya's flat black, I somehow prefer using this primer for flat black painting.
-
Alaska State Troopers Ford Expedition
av405 replied to av405's topic in Model Trucks: Pickups, Vans, SUVs, Light Commercial
Thank you, Dom. -
Alaska State Troopers Ford Expedition
av405 replied to av405's topic in Model Trucks: Pickups, Vans, SUVs, Light Commercial
Hey Jeff, thanks for the kind words. Based on what I've seen and heard, black BMF doesn't seem to be a great product and is hard to work with compared to regular BMF. It also looks a bit too shiny for the flat black look I usually need. I sometimes use sharpies for smaller details, but not for bigger areas. Thanks for the tips, though. -
Alaska State Troopers Ford Expedition
av405 replied to av405's topic in Model Trucks: Pickups, Vans, SUVs, Light Commercial
Thank you! Thank you! Thanks! Are you talking about the fog lights on the bumper? If so, they are police spotlights from the Lindberg 1996-1997 Ford Crown Victoria kit that I modified. Thank you! Thank you! Thanks! The Revell Expeditions don't come with door trim. I made the trim out of Evergreen plastic. And I agree with you on the Lindberg kit. I've deleted it on one model so far and I didn't enjoy the process. Thanks! It still bothers me looking at it! Oh well... -
1996 Chevrolet C-3500
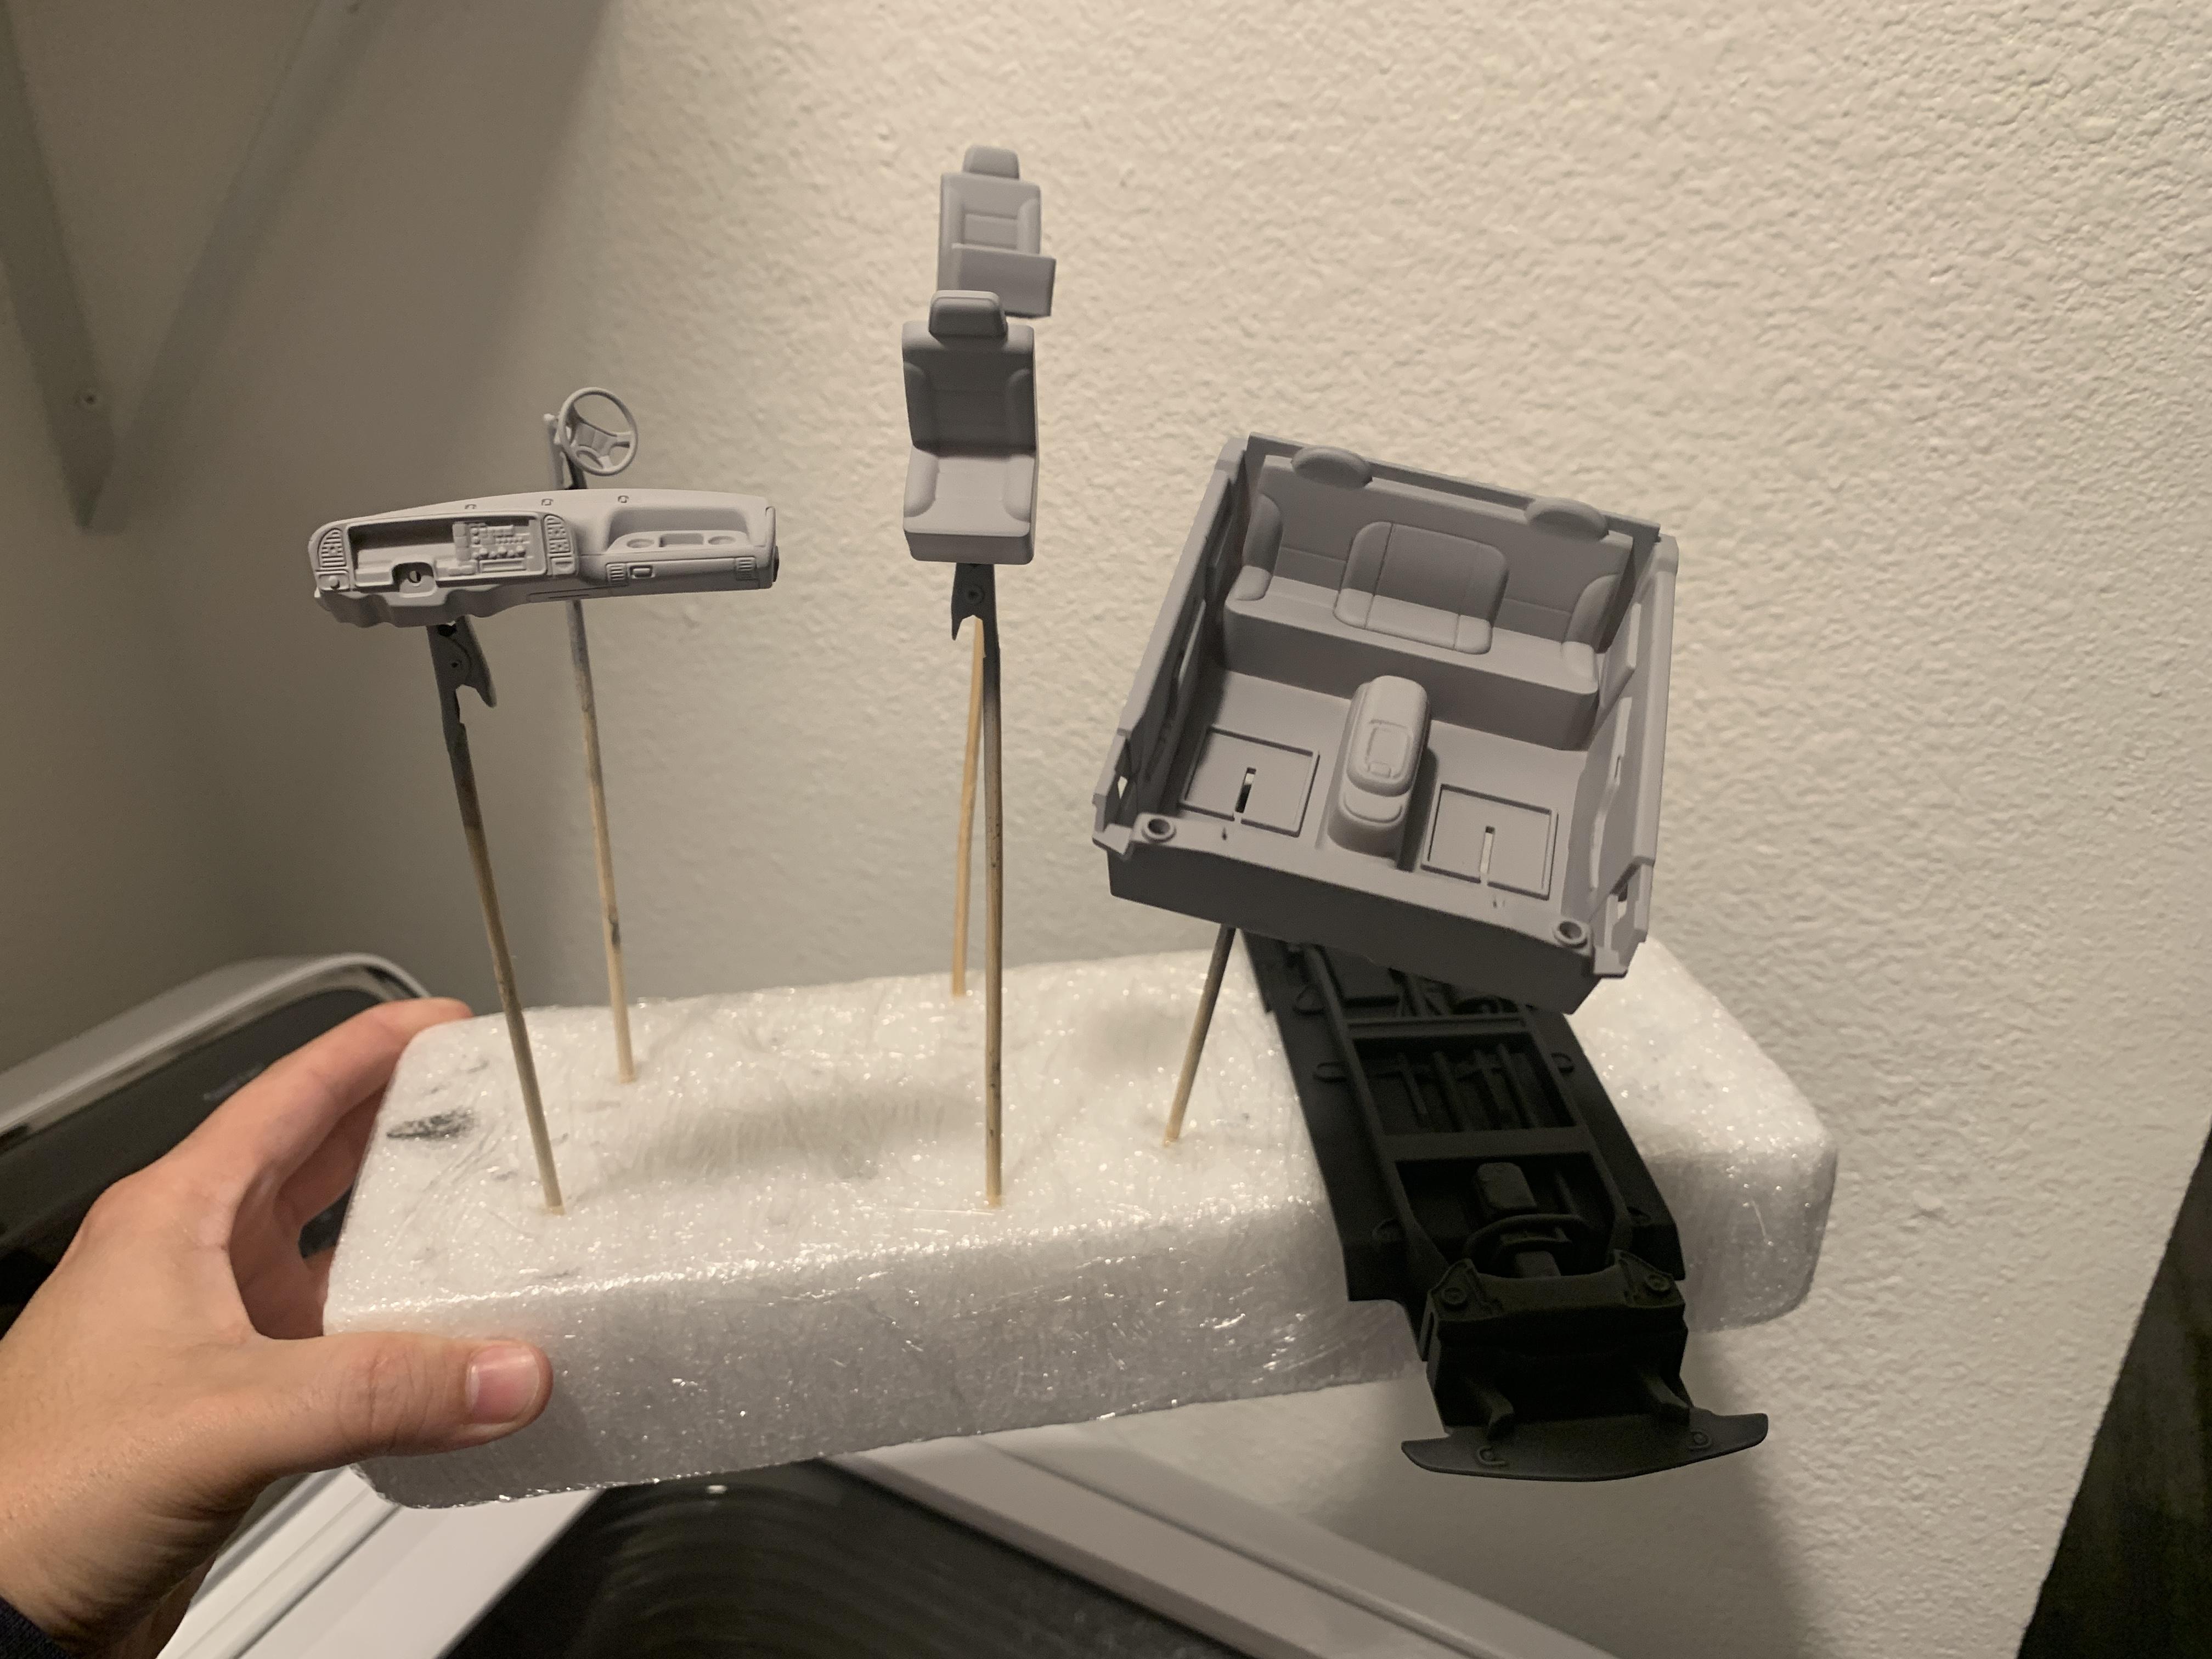
av405 replied to av405's topic in WIP: Model Trucks: Pickups, Vans, SUVs, Light Commercial
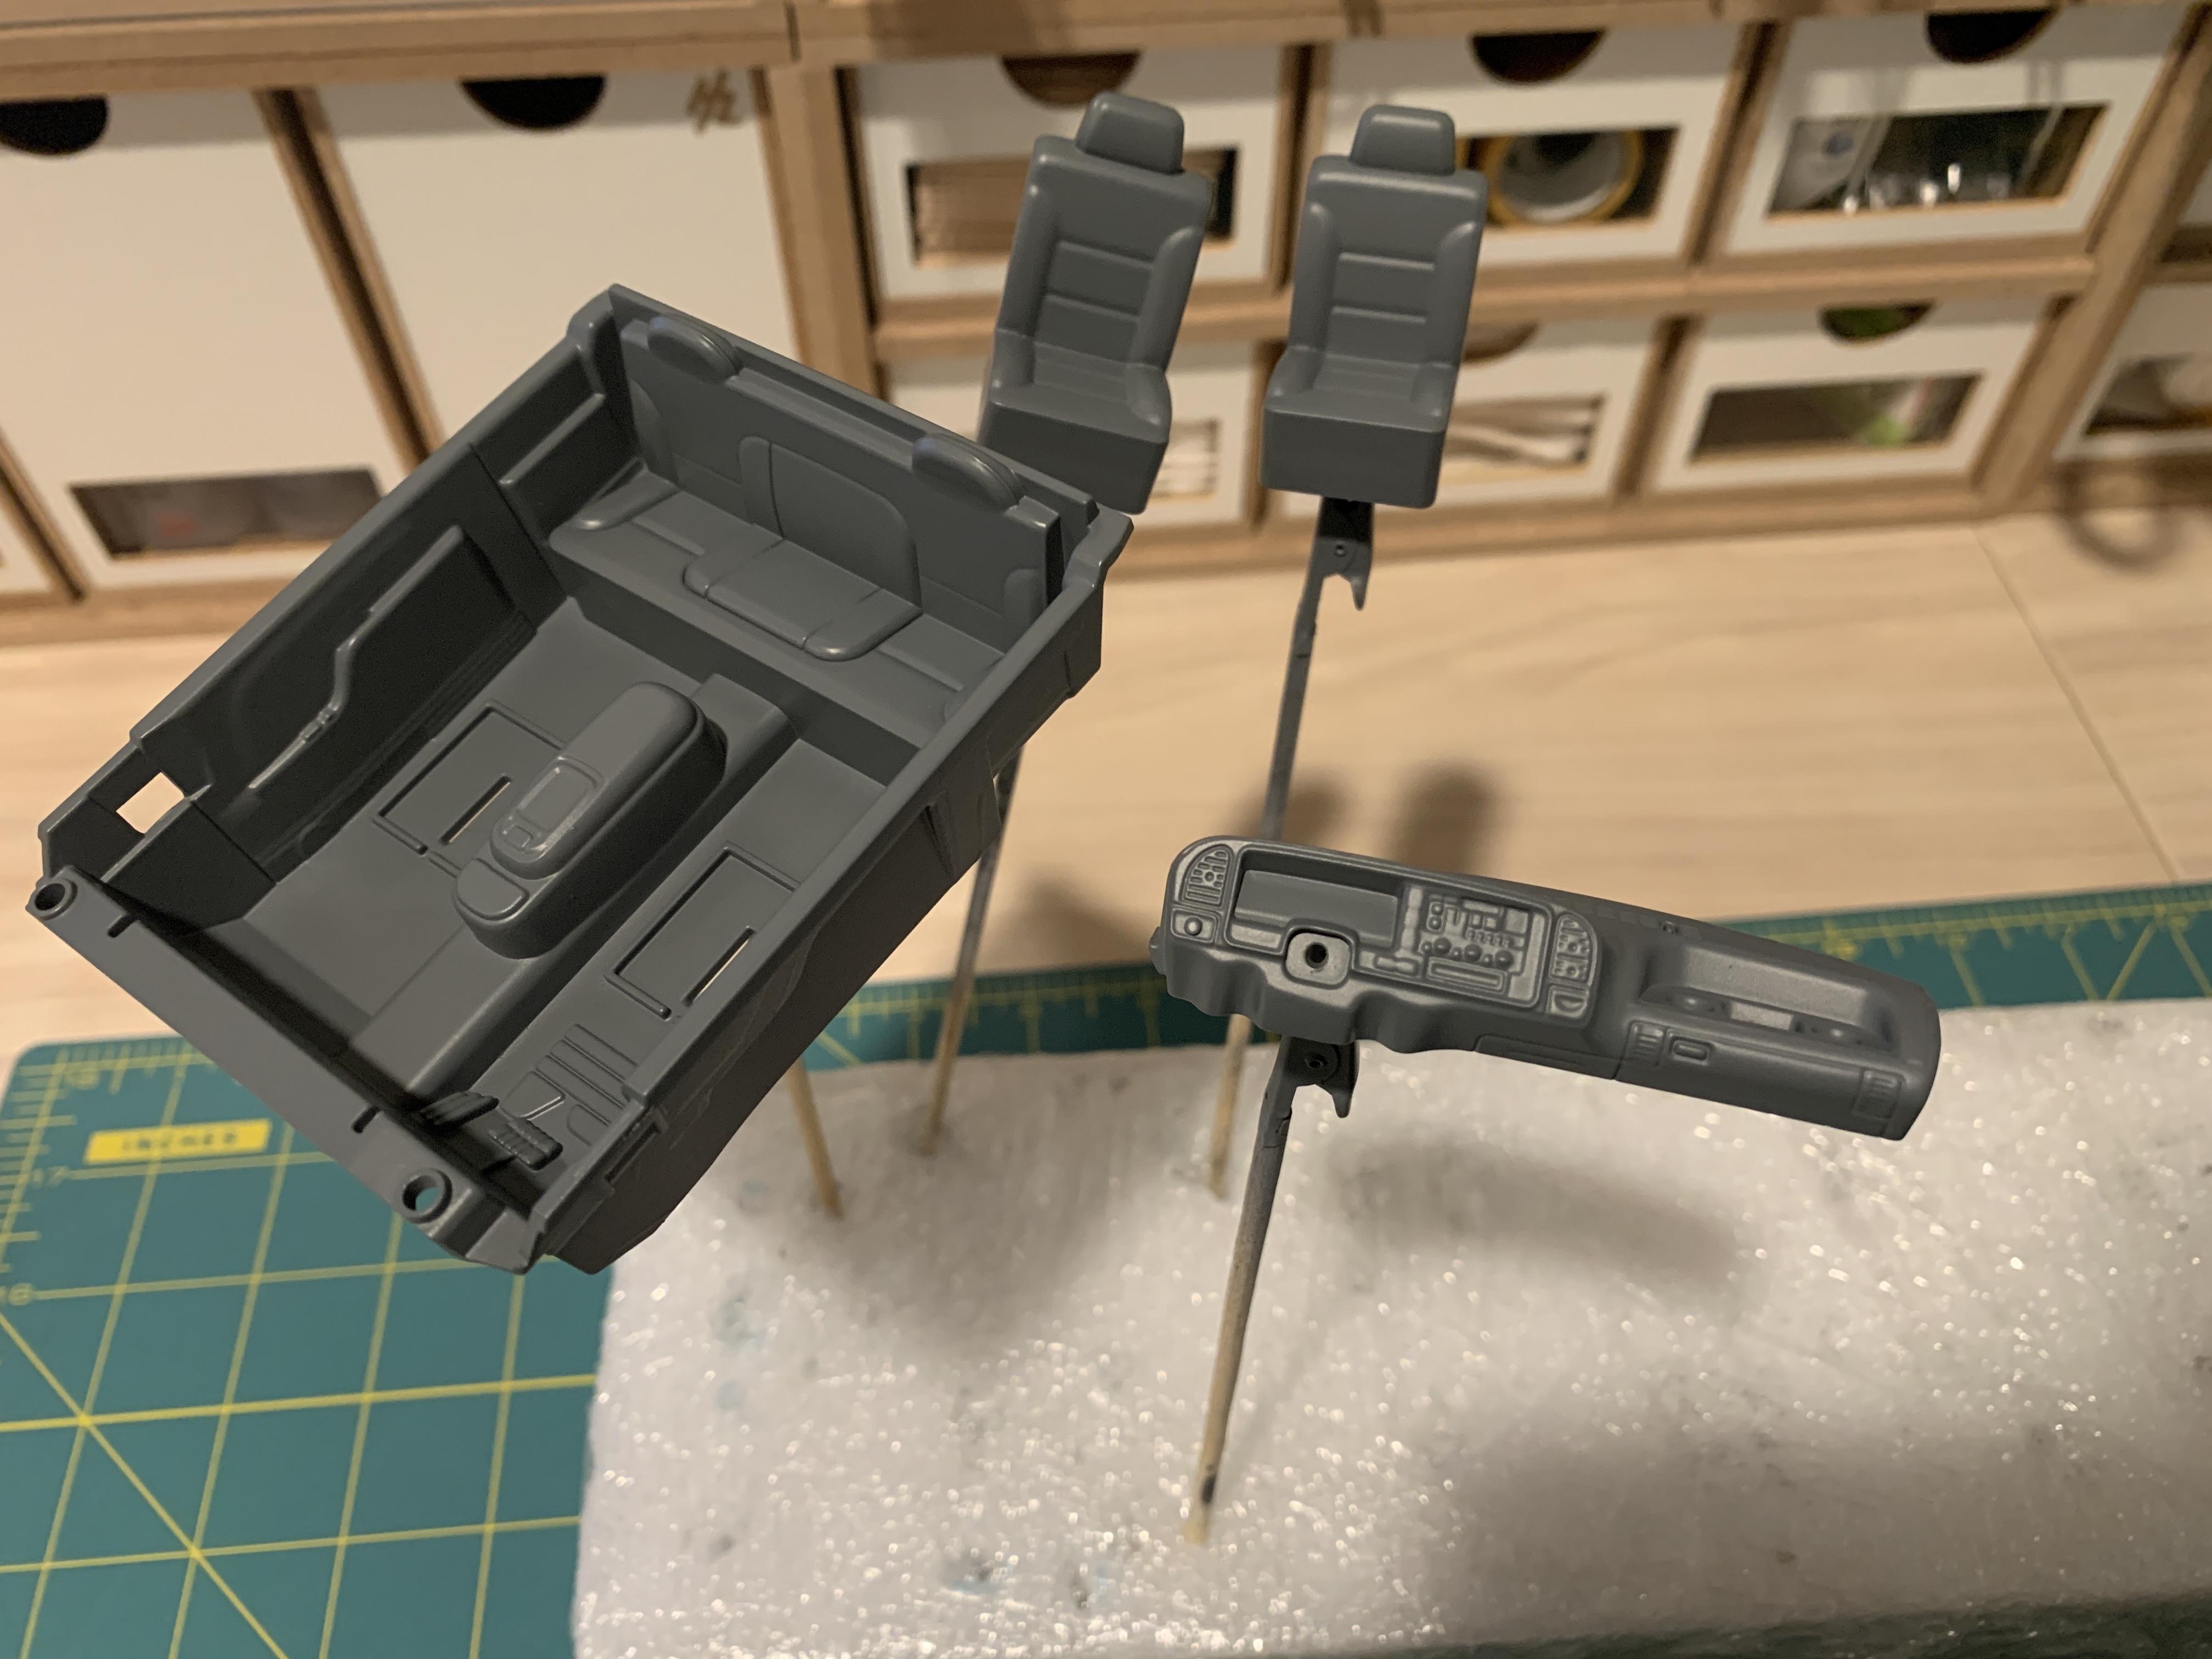
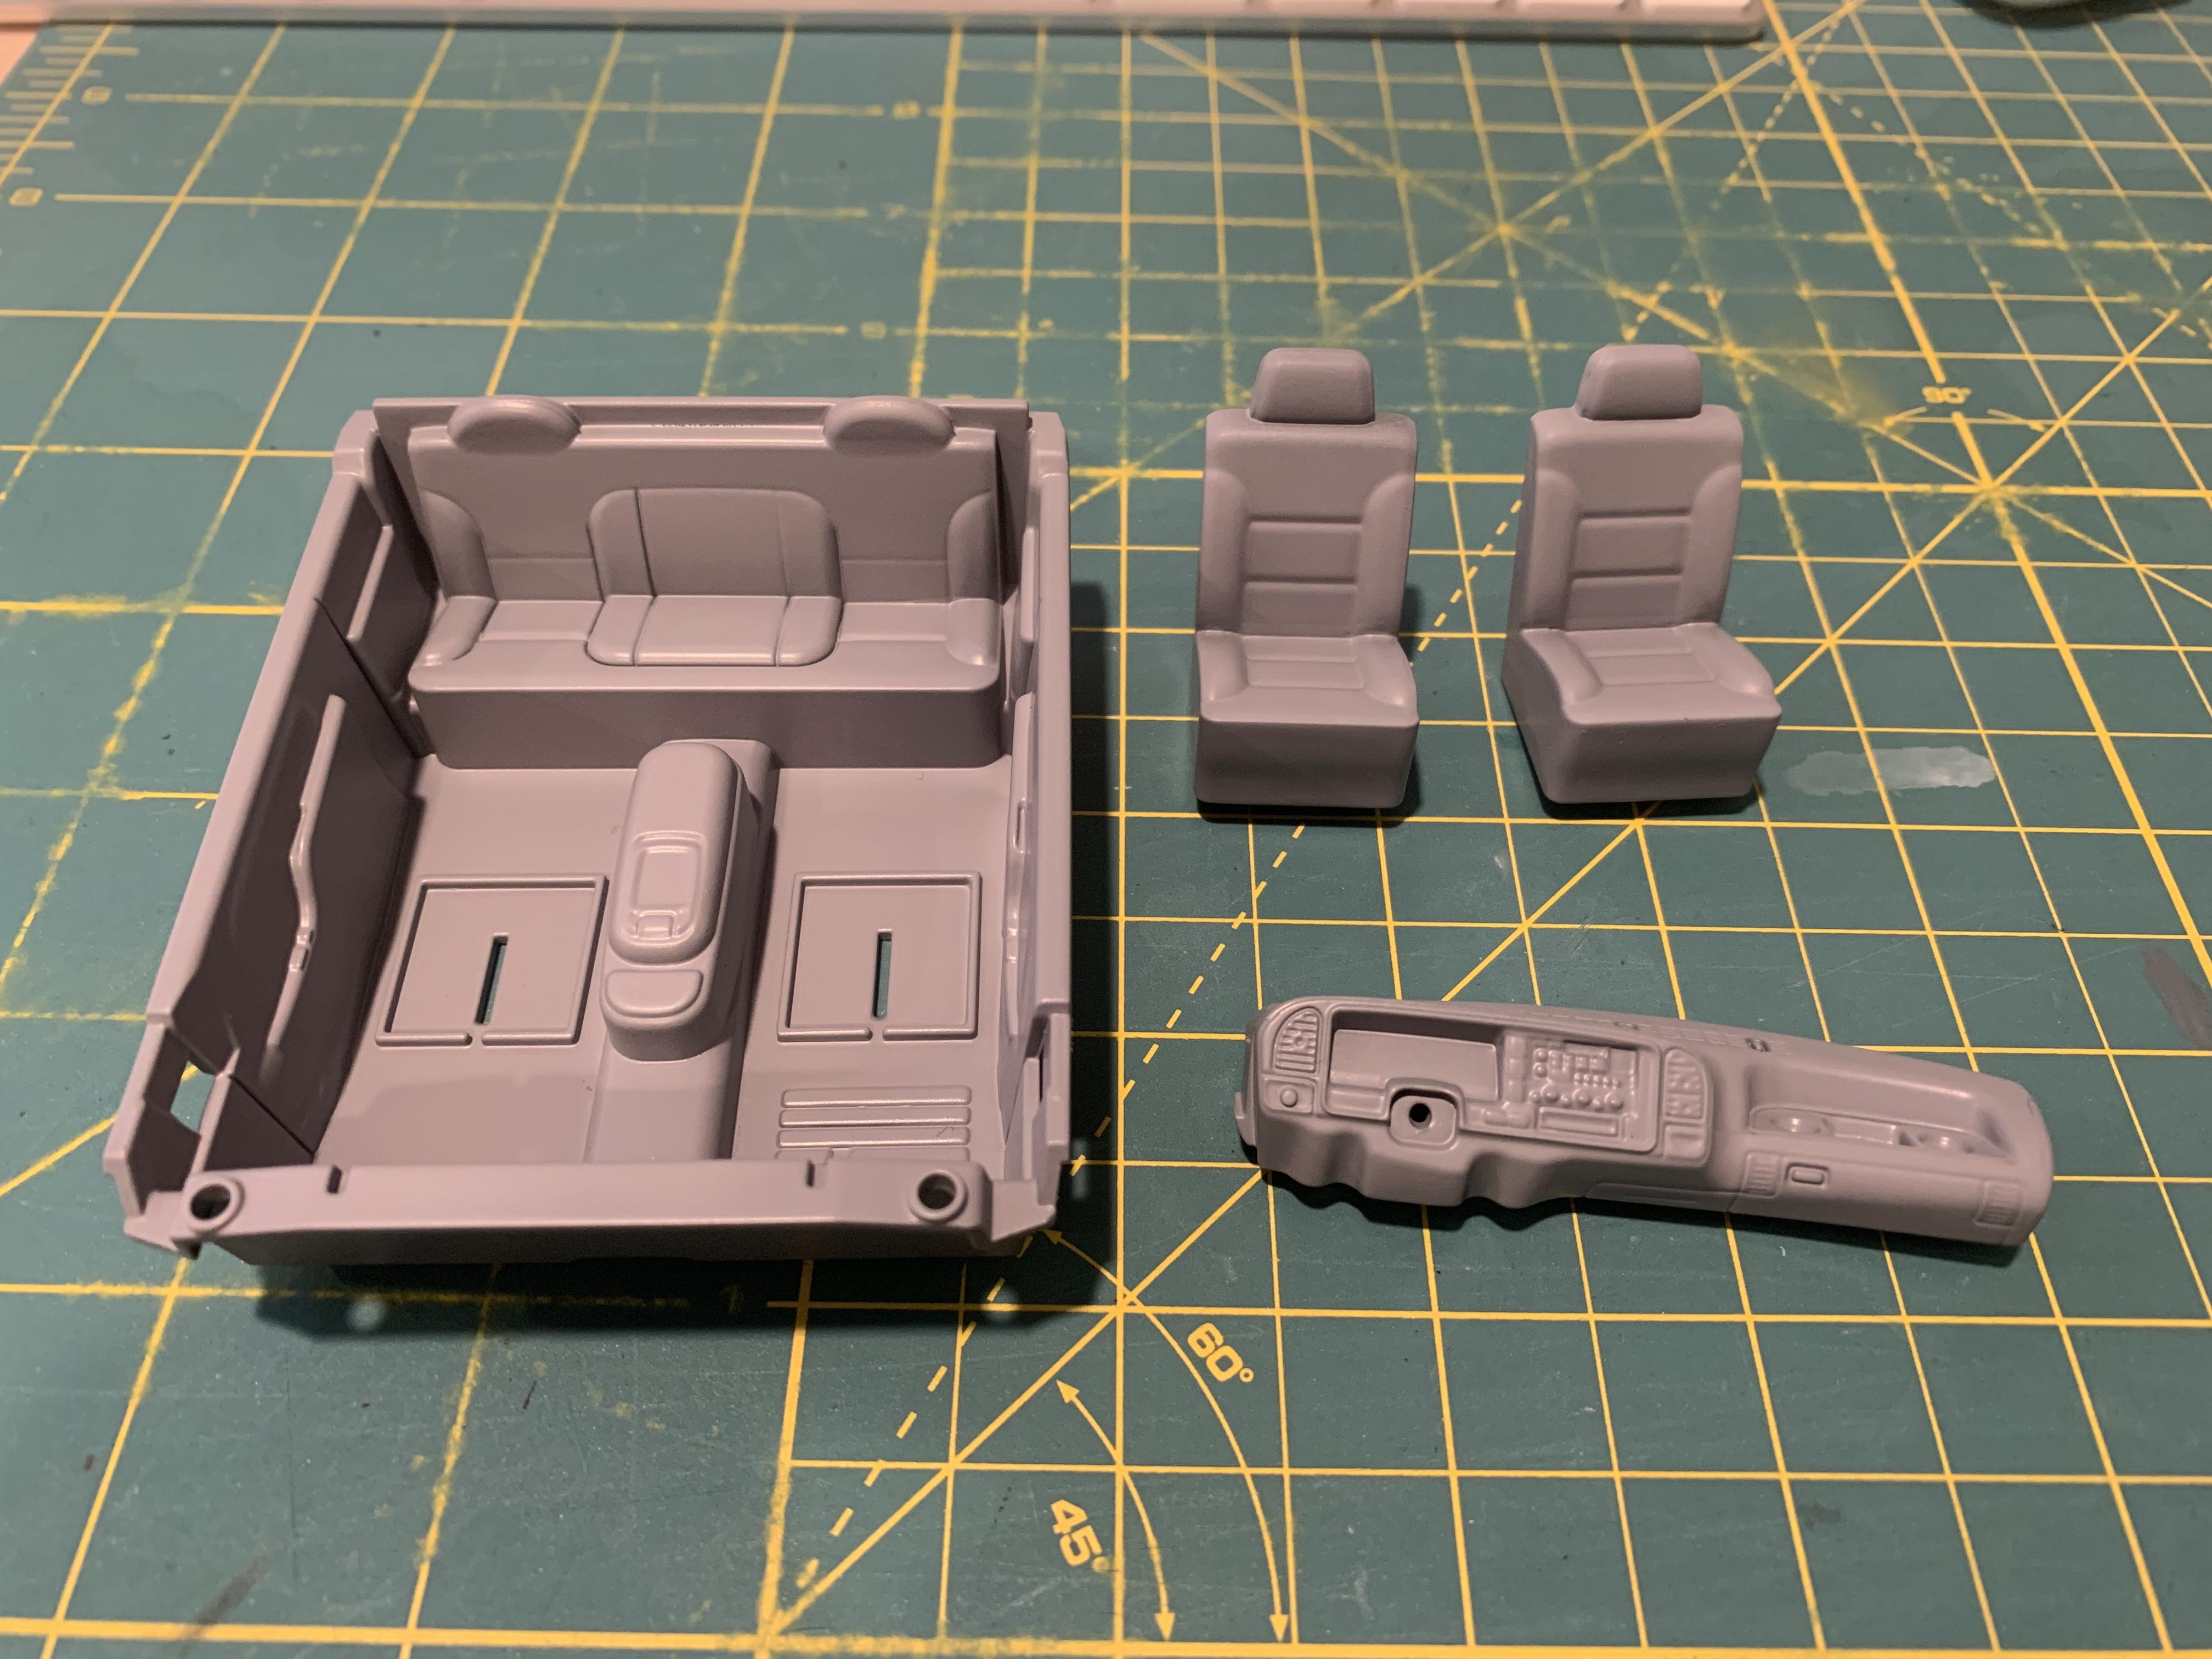
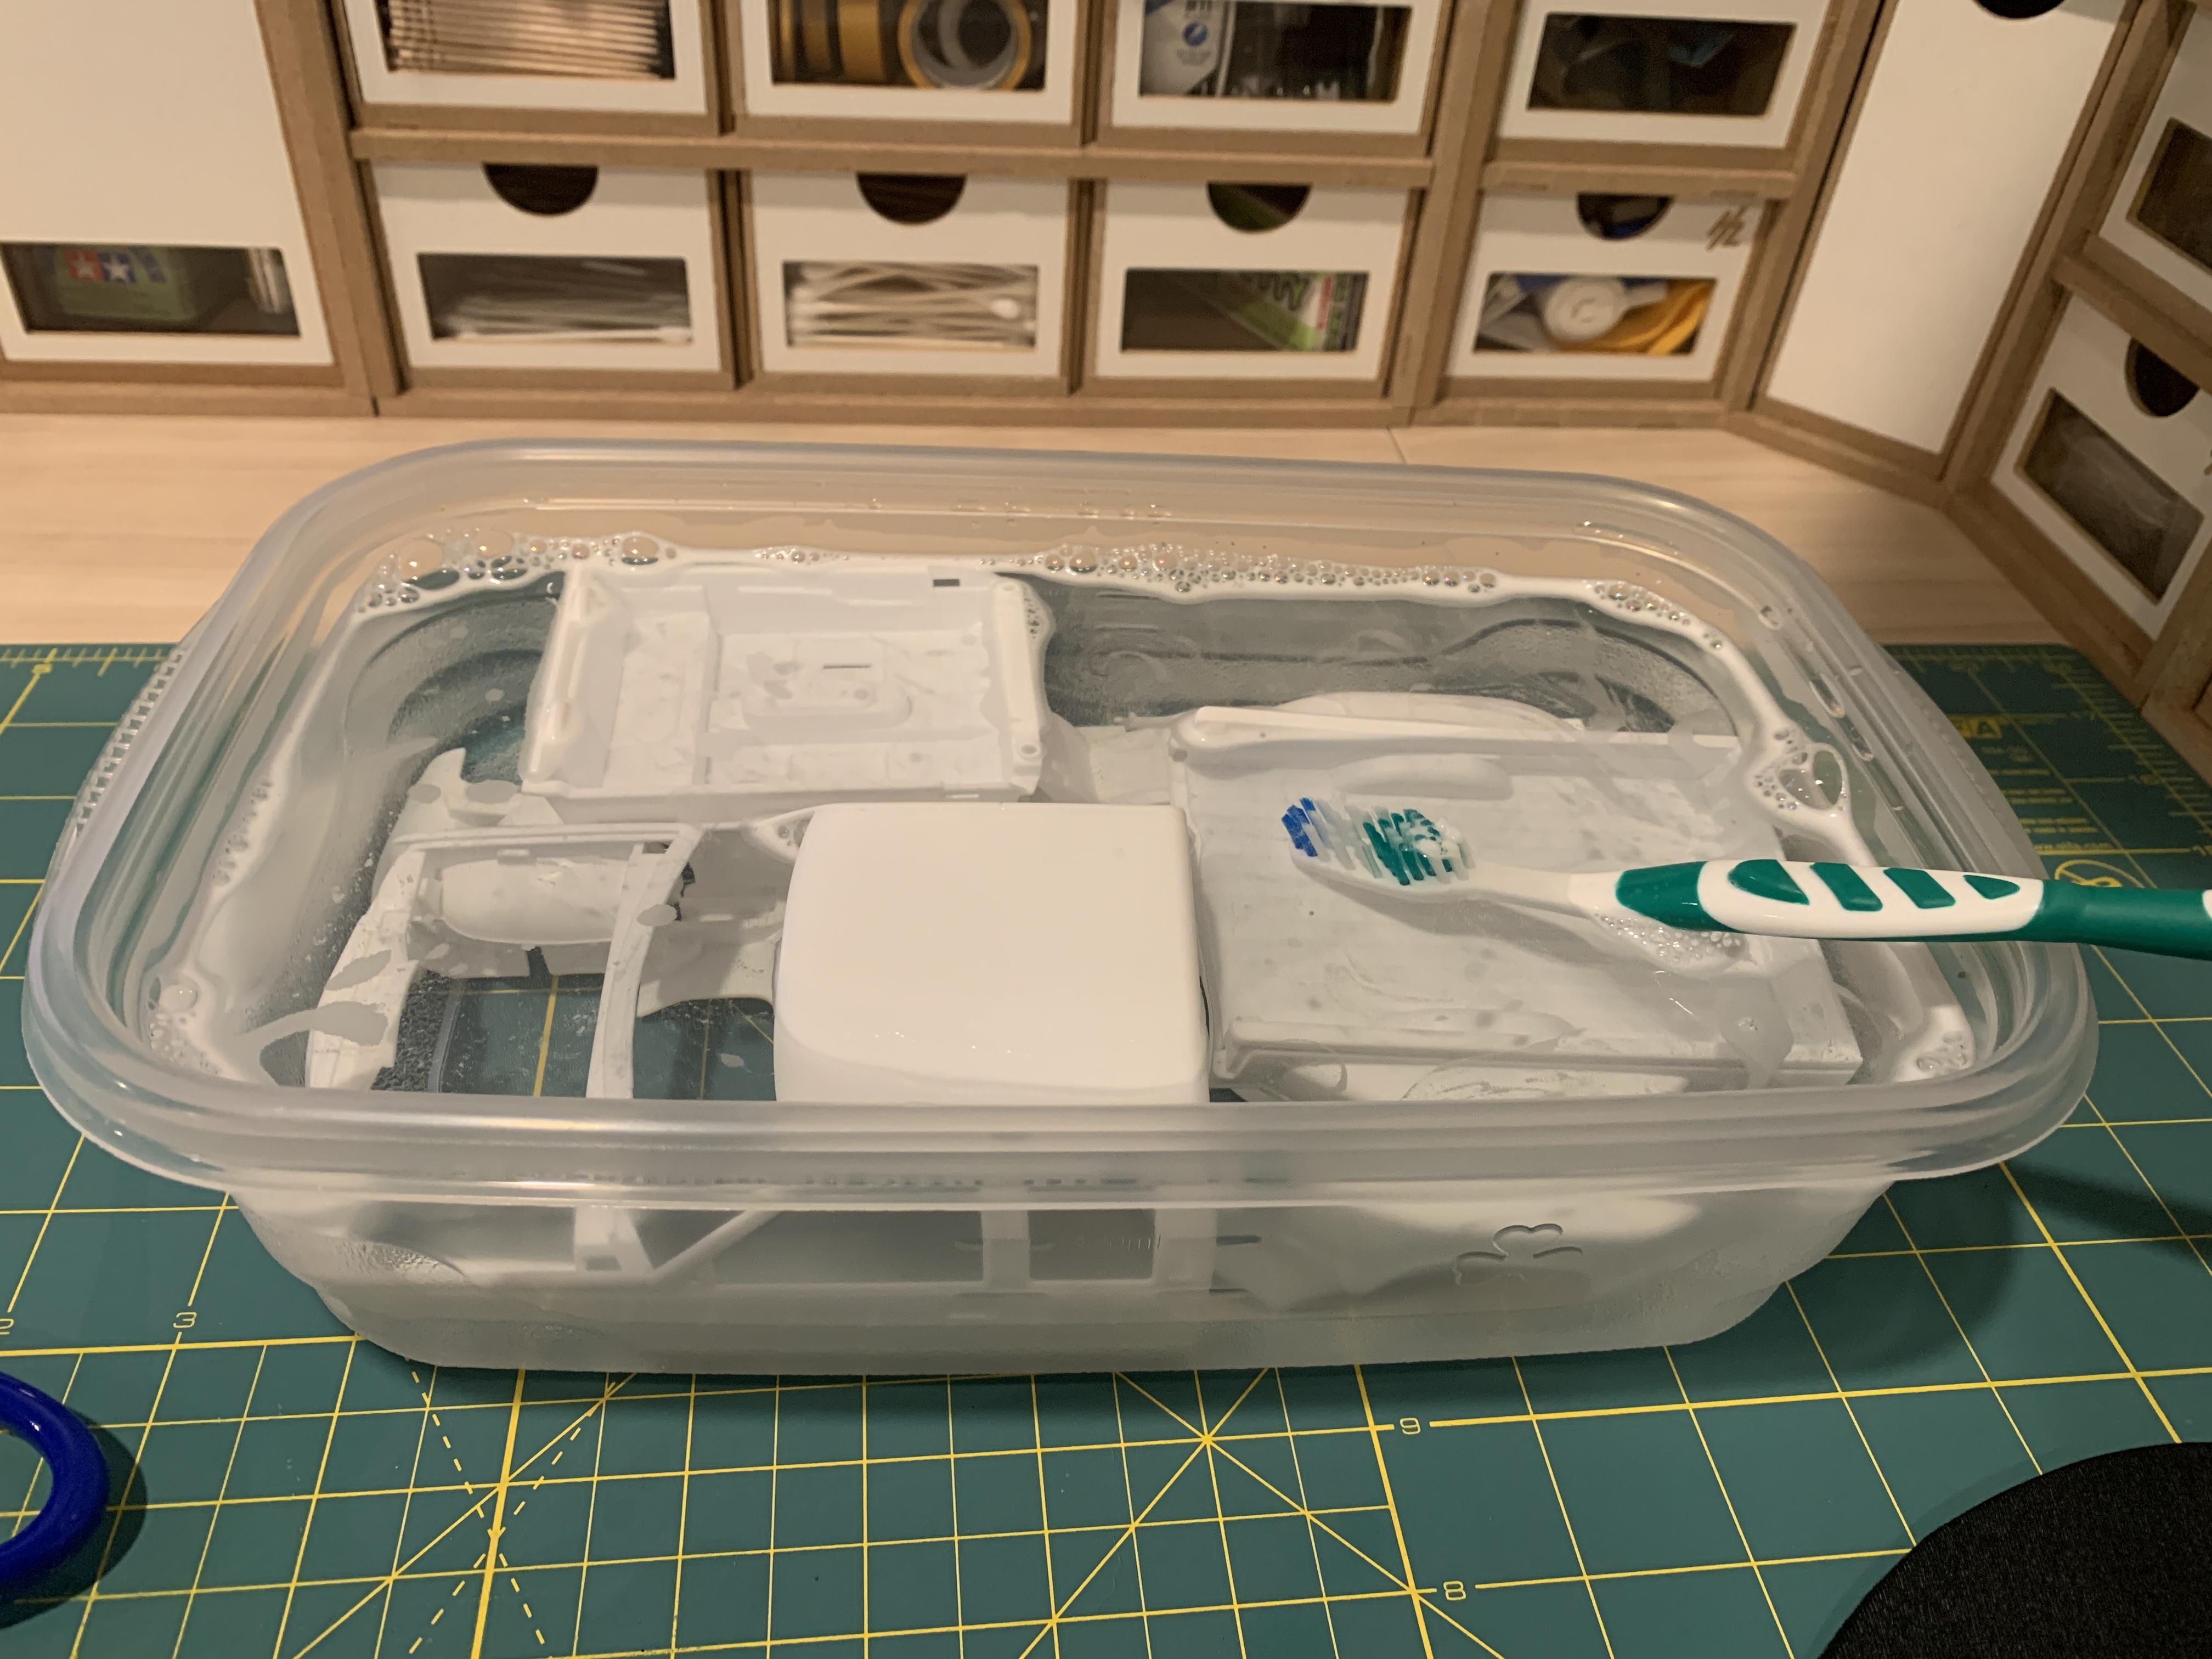
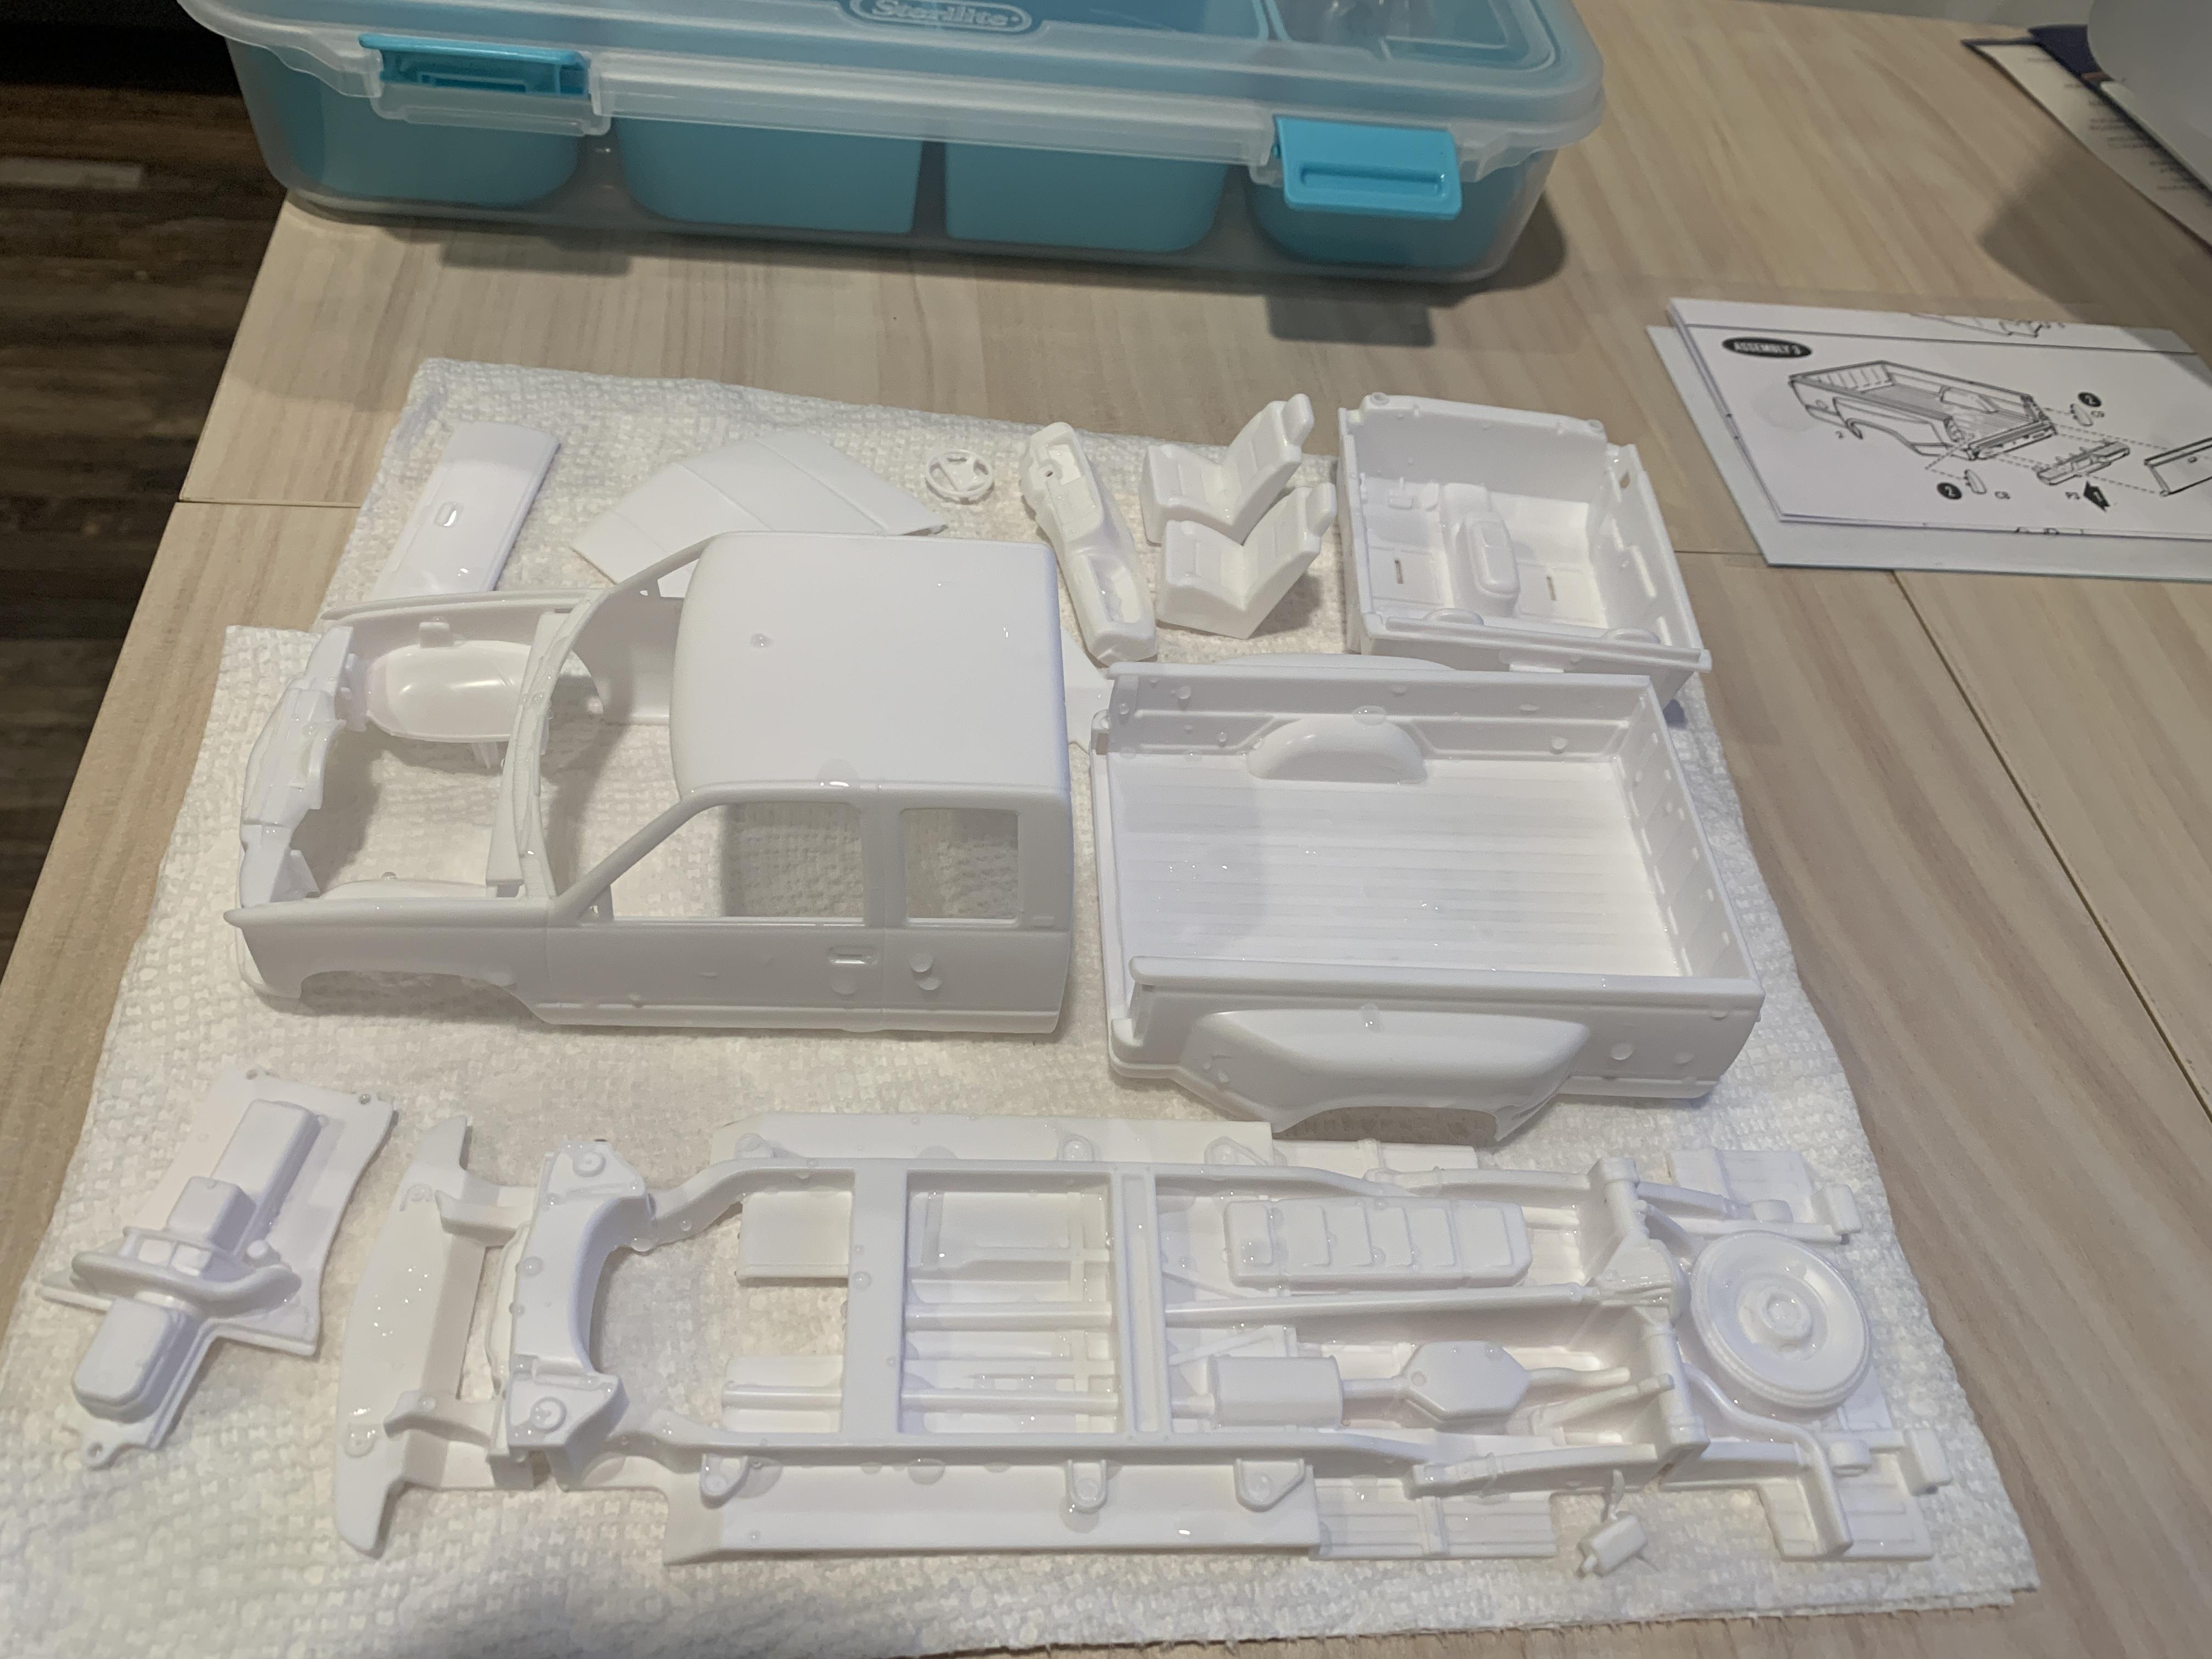
After sanding, I set the white plastic pieces in warm water and Dawn for a spell before scrubbing everything with a toothbrush. I then left the pieces to air dry overnight. When I woke up this morning, I went over everything with a microfiber towel and made sure there wasn't any water left. I then glued some of the components that would be painted together with Tamiya Exta Thin Cement. In this case, it was the seat backs with the seat, the steering wheel and column, and the cap for the chassis to build it curbside, sans engine. With the Tamiya cement, I didn't have to worry about making a mess for such small parts. All very easy stuff. I then moved on to priming the chassis and interior parts. For that, I dug up my old Plastikote primers. This is the good stuff, before the formula was changed. Unfortunately I used the last of the black on the chassis, but at least the grey can is newly opened. I'm going to miss this stuff when I finally run out. It's the best non-hobby primer I've ever used. Another thing I love about this kit is that all of the interior pieces have tabs at the bottom/behind. This makes using alligator clips easy for painting. Here's the interior and chassis primed. I'm going for a grey interior on the truck, so I may just leave everything in primer. I'll have to compare and contrast to the real truck to make sure the color isn't too light.
-
The Future of Revell...for 2024 at least.
av405 replied to niteowl7710's topic in Car Kit News & Reviews
Blazers of different years/grills, Suburbans, pickup trucks; the posibilities are endless if Revell is willing.