Maindrian Pace
-
Posts
2,367 -
Joined
-
Last visited
Content Type
Profiles
Forums
Events
Gallery
Everything posted by Maindrian Pace
-
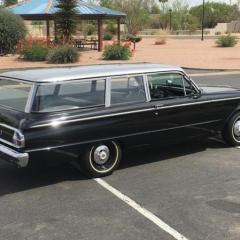
Love the Edsel 2 door wagons, saw one in real life at a car show in the '90s, it was swamped by admirers. Your build looks minty.
-
Tough looking car, David. The Cammer was never a factory option in a production car, and it didn't physically fit between the spring towers of the Mustang chassis. The only chassis that the engine fit with no modifications was the full size Galaxie, but it's an impressive looking engine in any car.
-
Fantastic! I love these muscle car-turned-mainstream builds, so unique and relatable.
-
1964 Ford Mustang - 2JZ swapped madness
Maindrian Pace replied to RickRollerLT1's topic in Model Cars
Nice job, clean and an interesting build to say the least. I drove a turbo Supra once, and these engines are stout. That car would haul. -
1967 Oldsmobile Toronado Californian Custom
Maindrian Pace replied to RickRollerLT1's topic in Model Cars
Very imaginative, great construction, and a serious improvement over the Barris-on-a-bender styling. -
Beautiful job, perfect paint work on a very menacing looking street machine. And the bodywork on the 1/4s and trunk lid are top notch too.
-
Beautiful car, beautiful color combo. Super detailing a super simple kit is truly rewarding.
-
That series of Revell kits from the mid '50s were somewhat primitive; well engineered for the day especially in the all-new medium of styrene plastic, but they were not known for fitting together very well or being particularly easy to build. Given that, this car looks great and presents very well in the factory three tone paint scheme. Nice job on a challenging kit.
-
It even looks good in its bad luck form, no real damage. Very nice looking car.
-
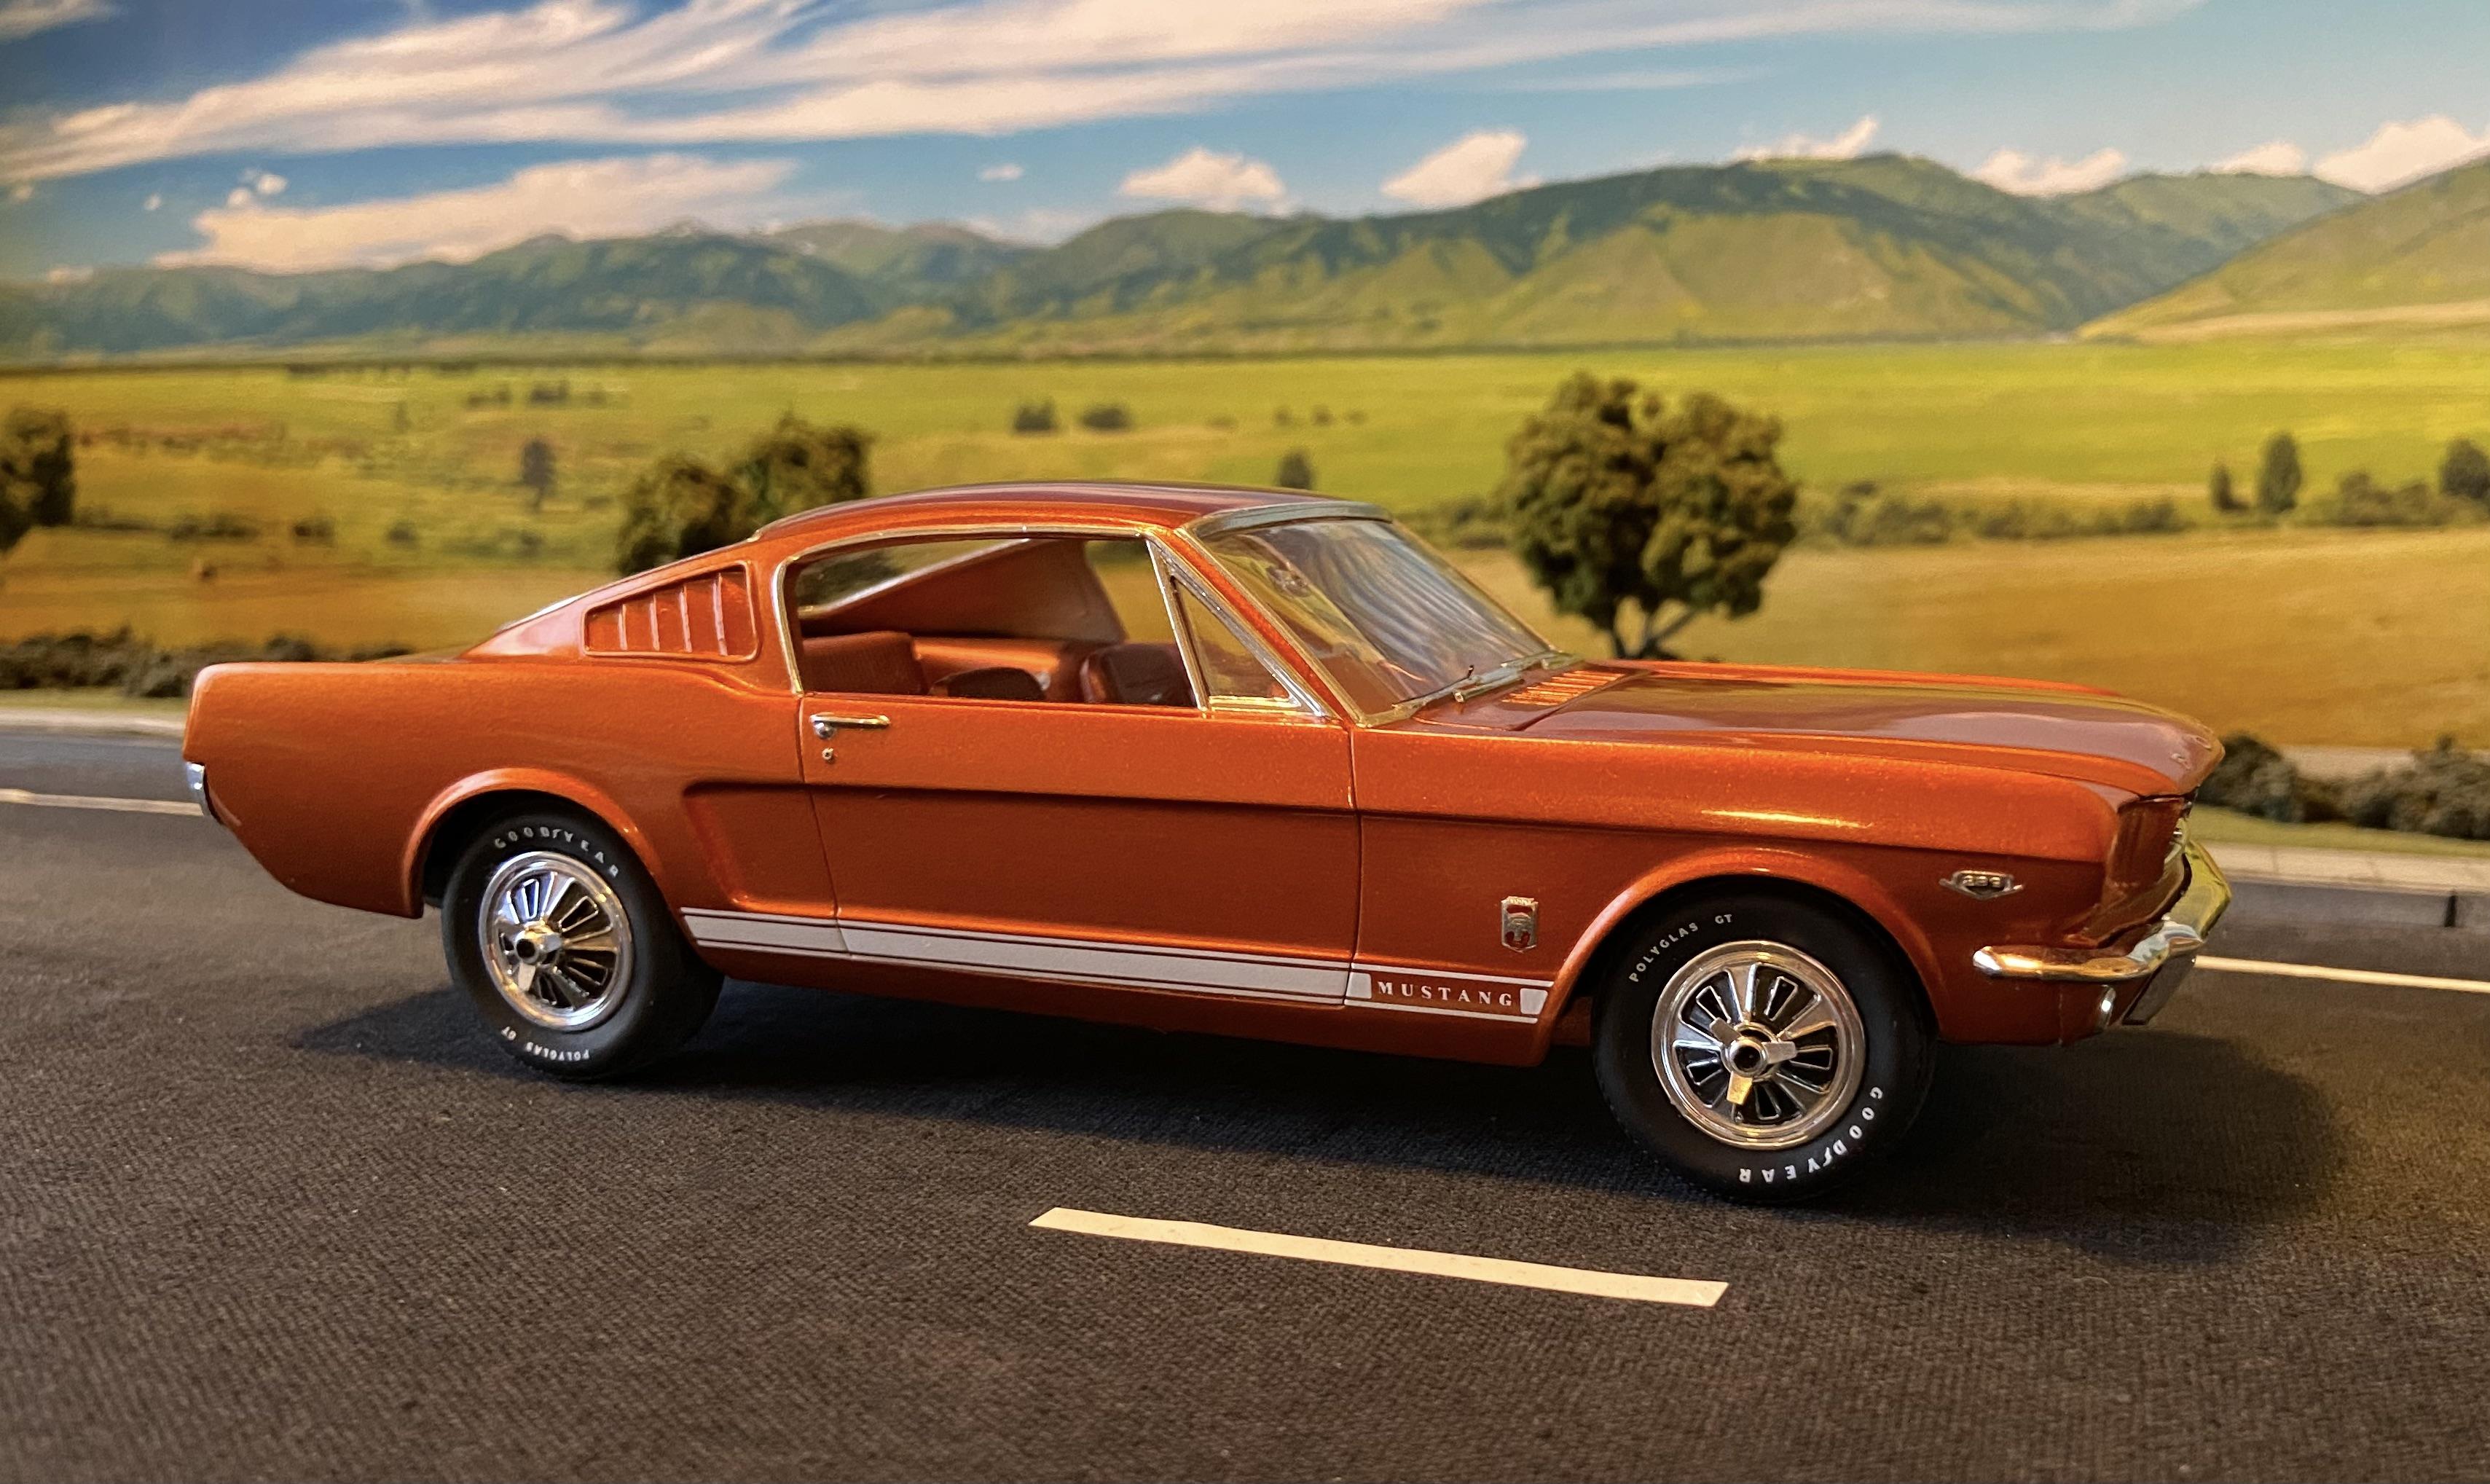
That must have been a lot of fun. I had a Hipo 289 in a '63 Falcon once, and it was a handful with the 4 speed and 3.89 gears. Surprised a lot of new muscle cars back in the '80s. Thanks Bob, it always seems to be the fun projects that get done quickly and never fight you. It's like they want to become something, so they cooperate. Thanks Roger. Not very often that I do a mainstreamer like a Mustang, but the lines on the early fastbacks are just so nice... High praise indeed, Steve. I too prefer the colors less traveled, and with your builds, you always deliver in that area. And pretty much every other area too. Thanks again everyone, two more build threads are on the way. Summertime is model season here in the desert.
-
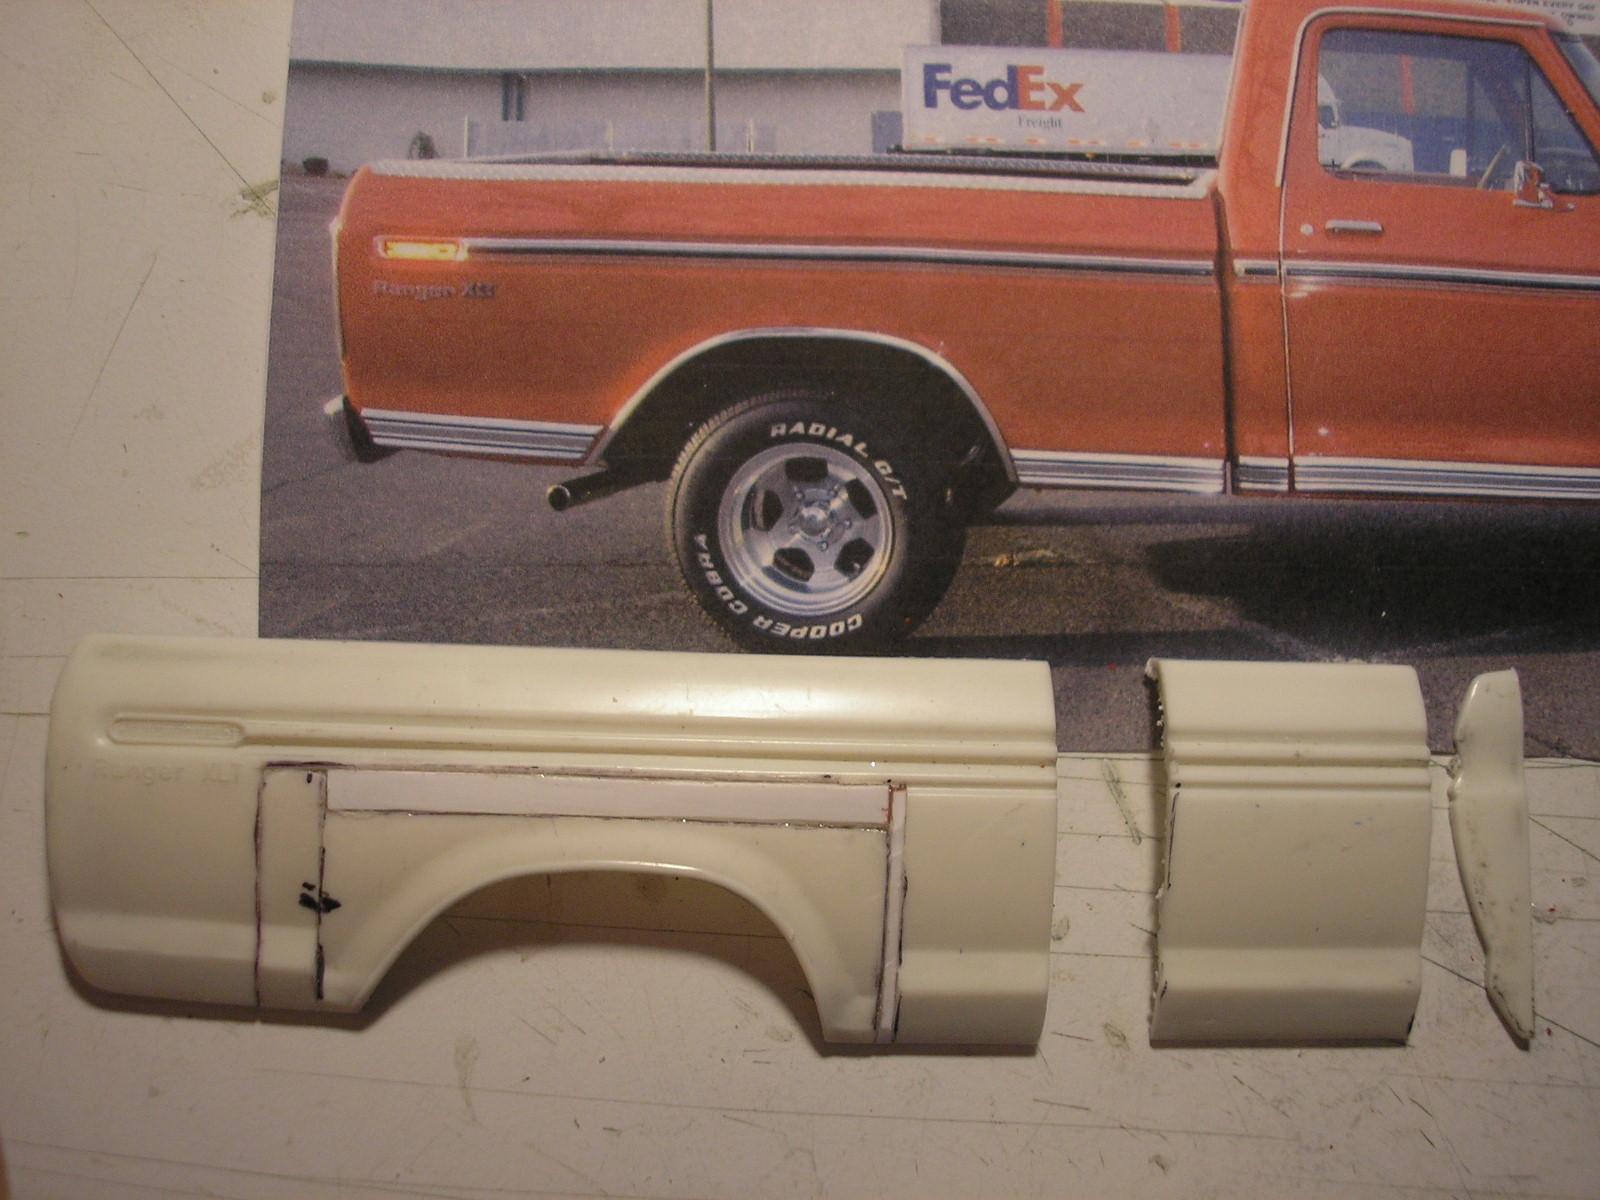
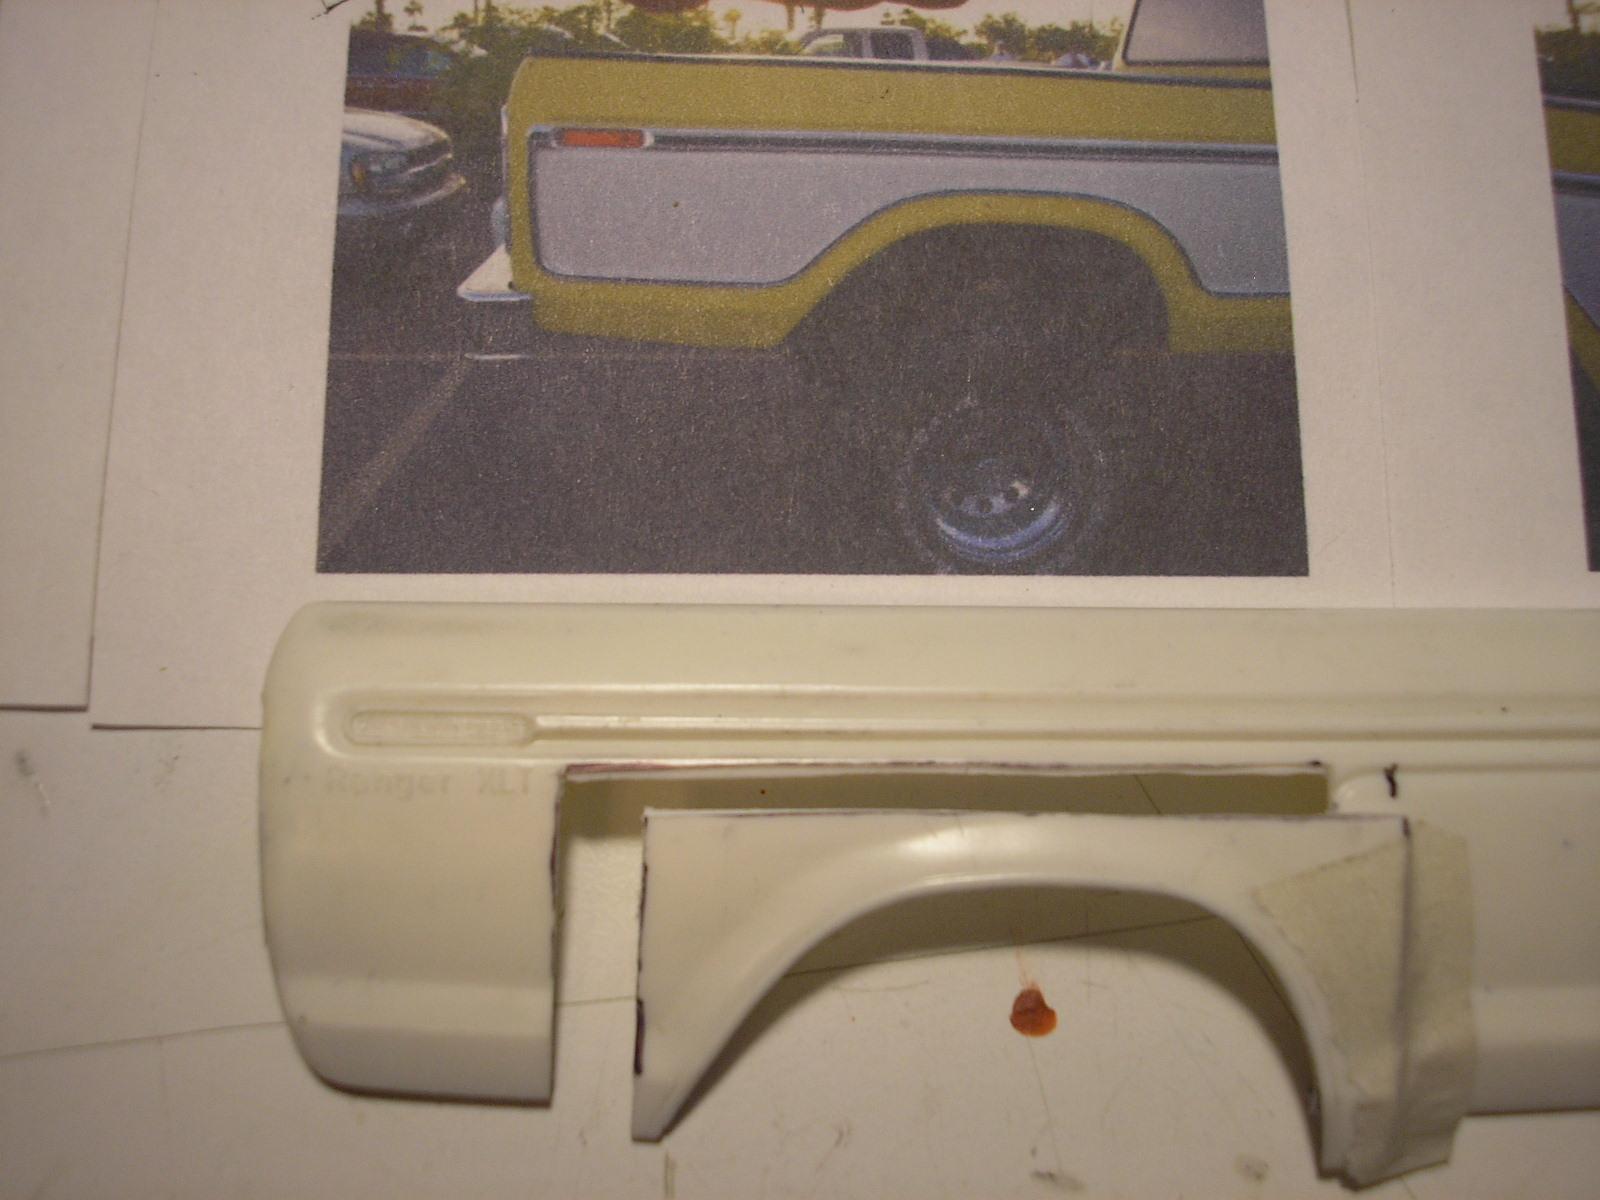
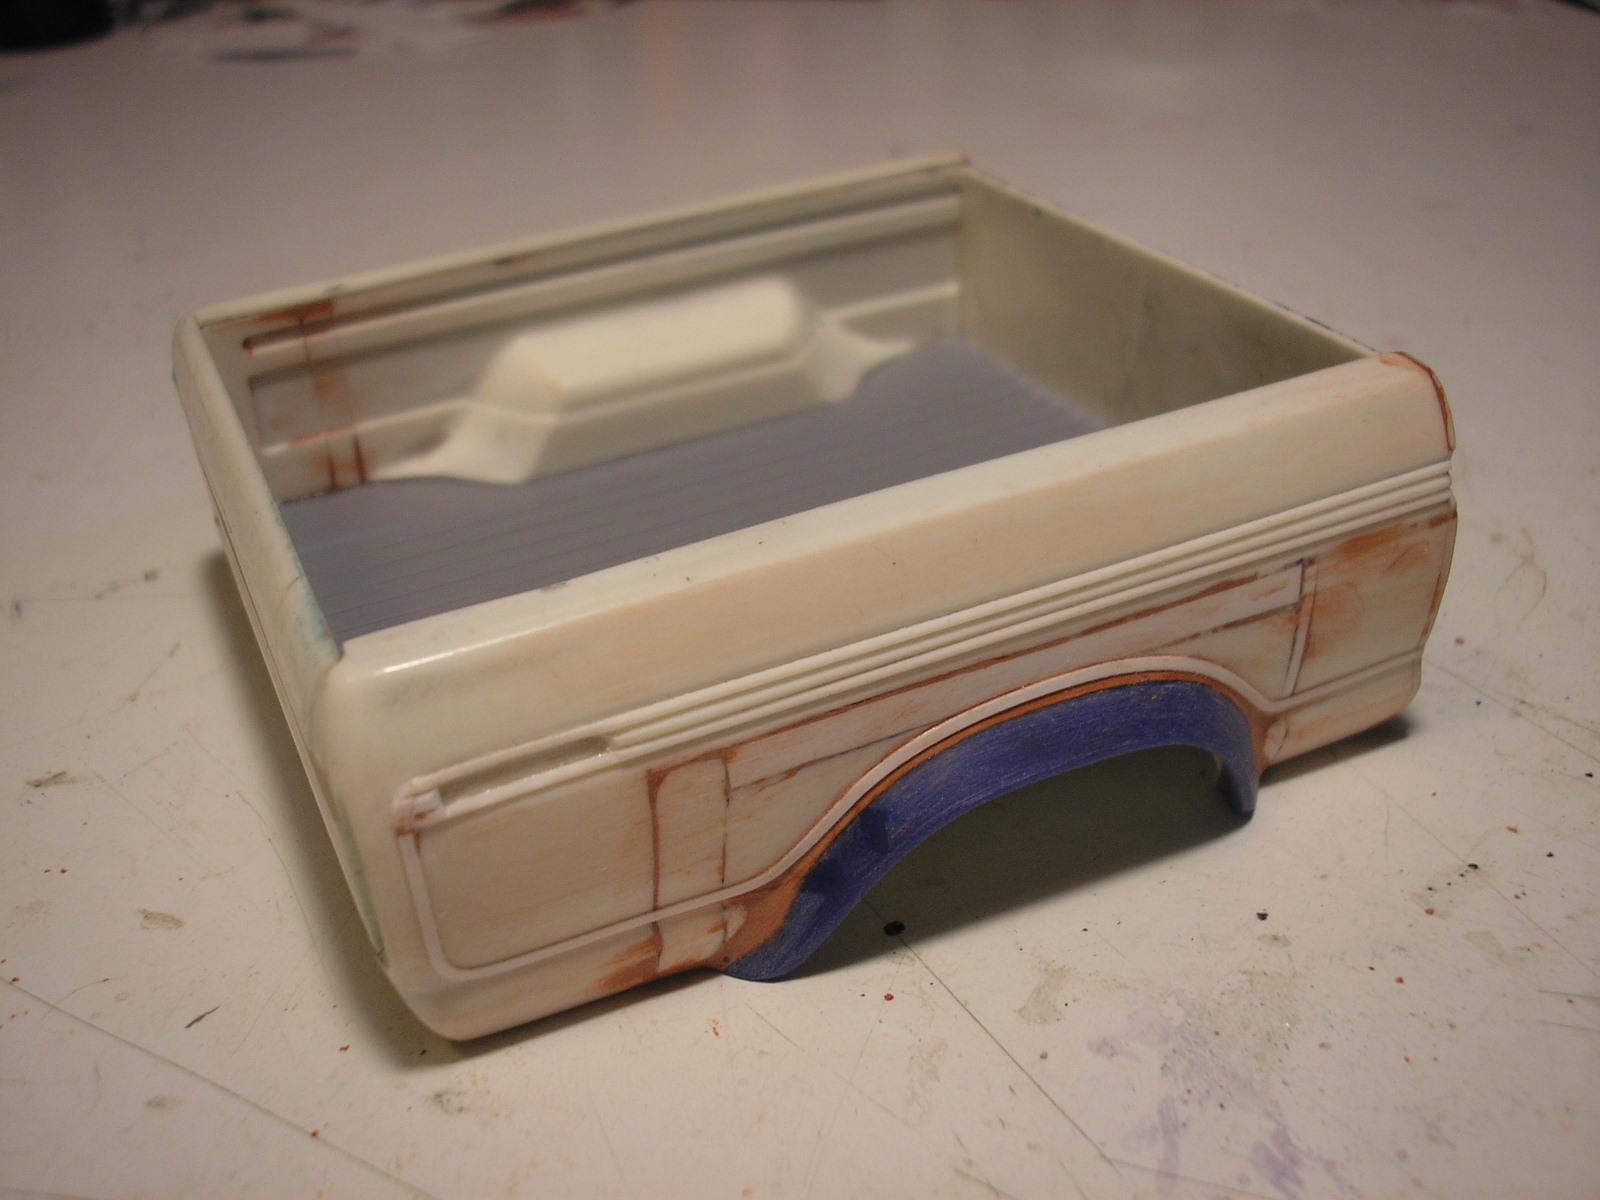
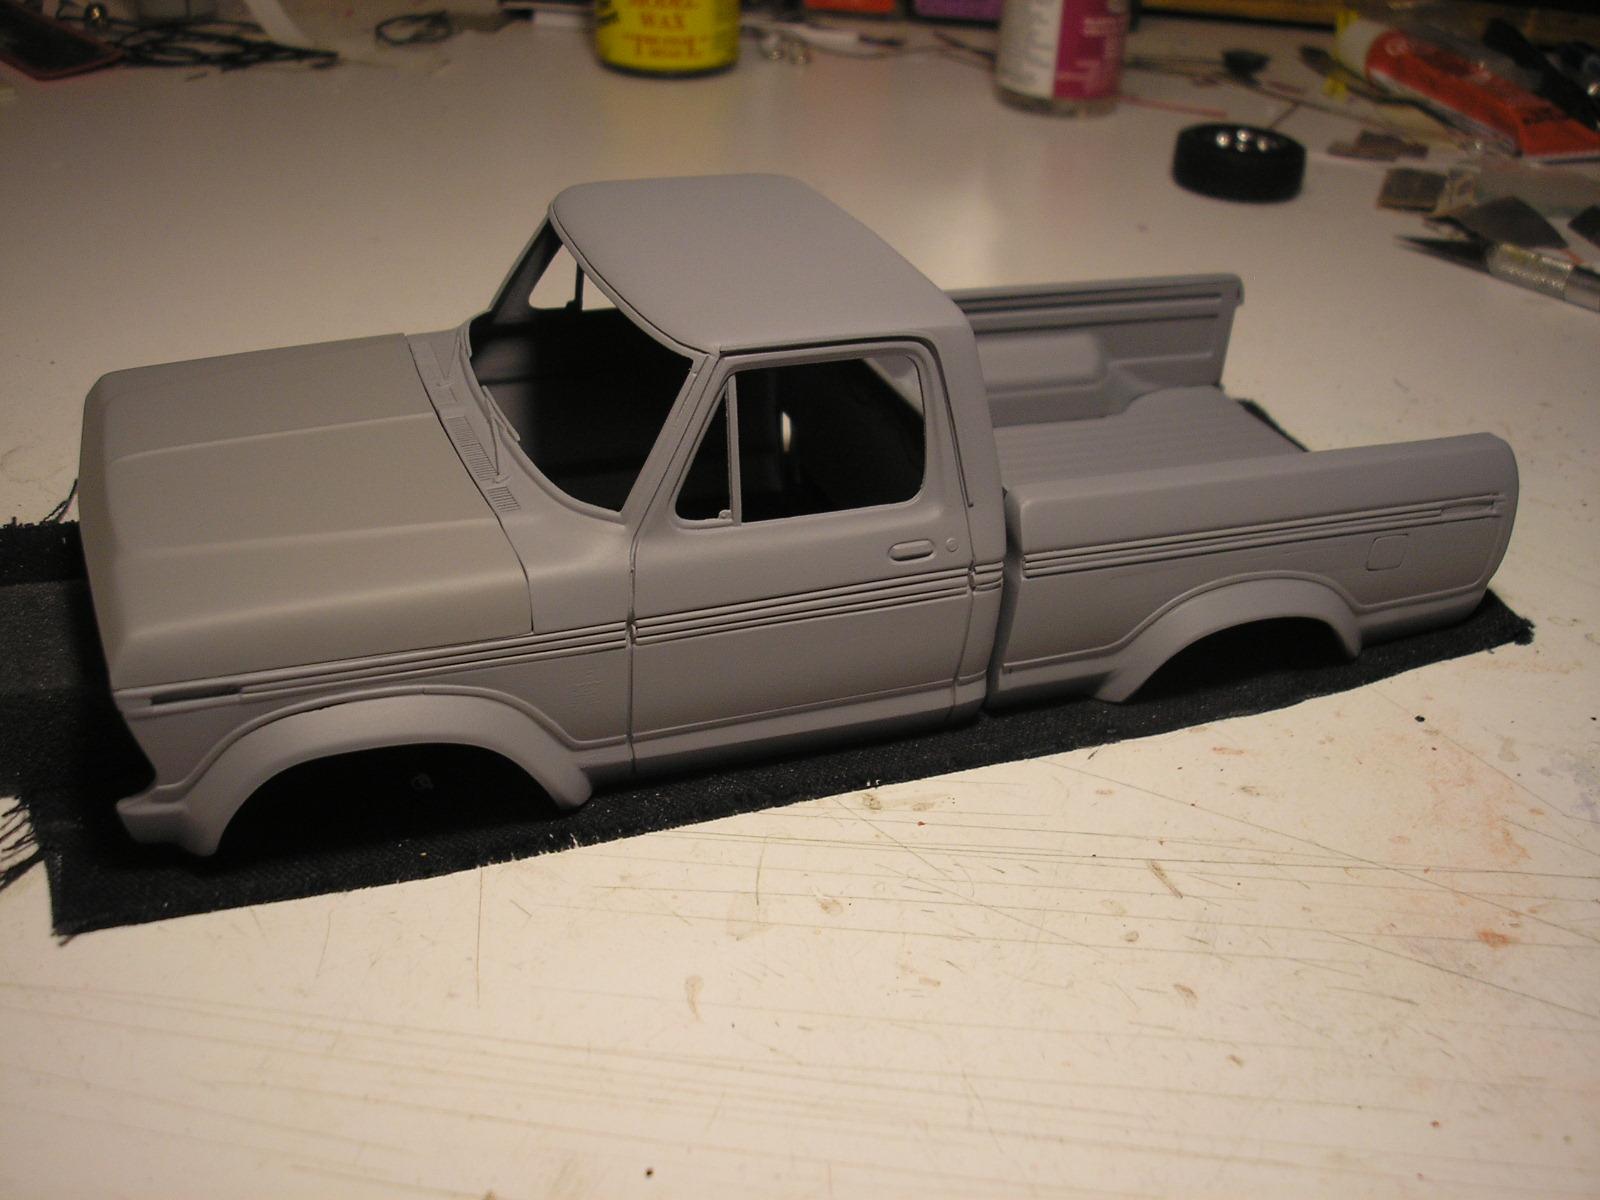
The short bed conversion gets a little involved.

-
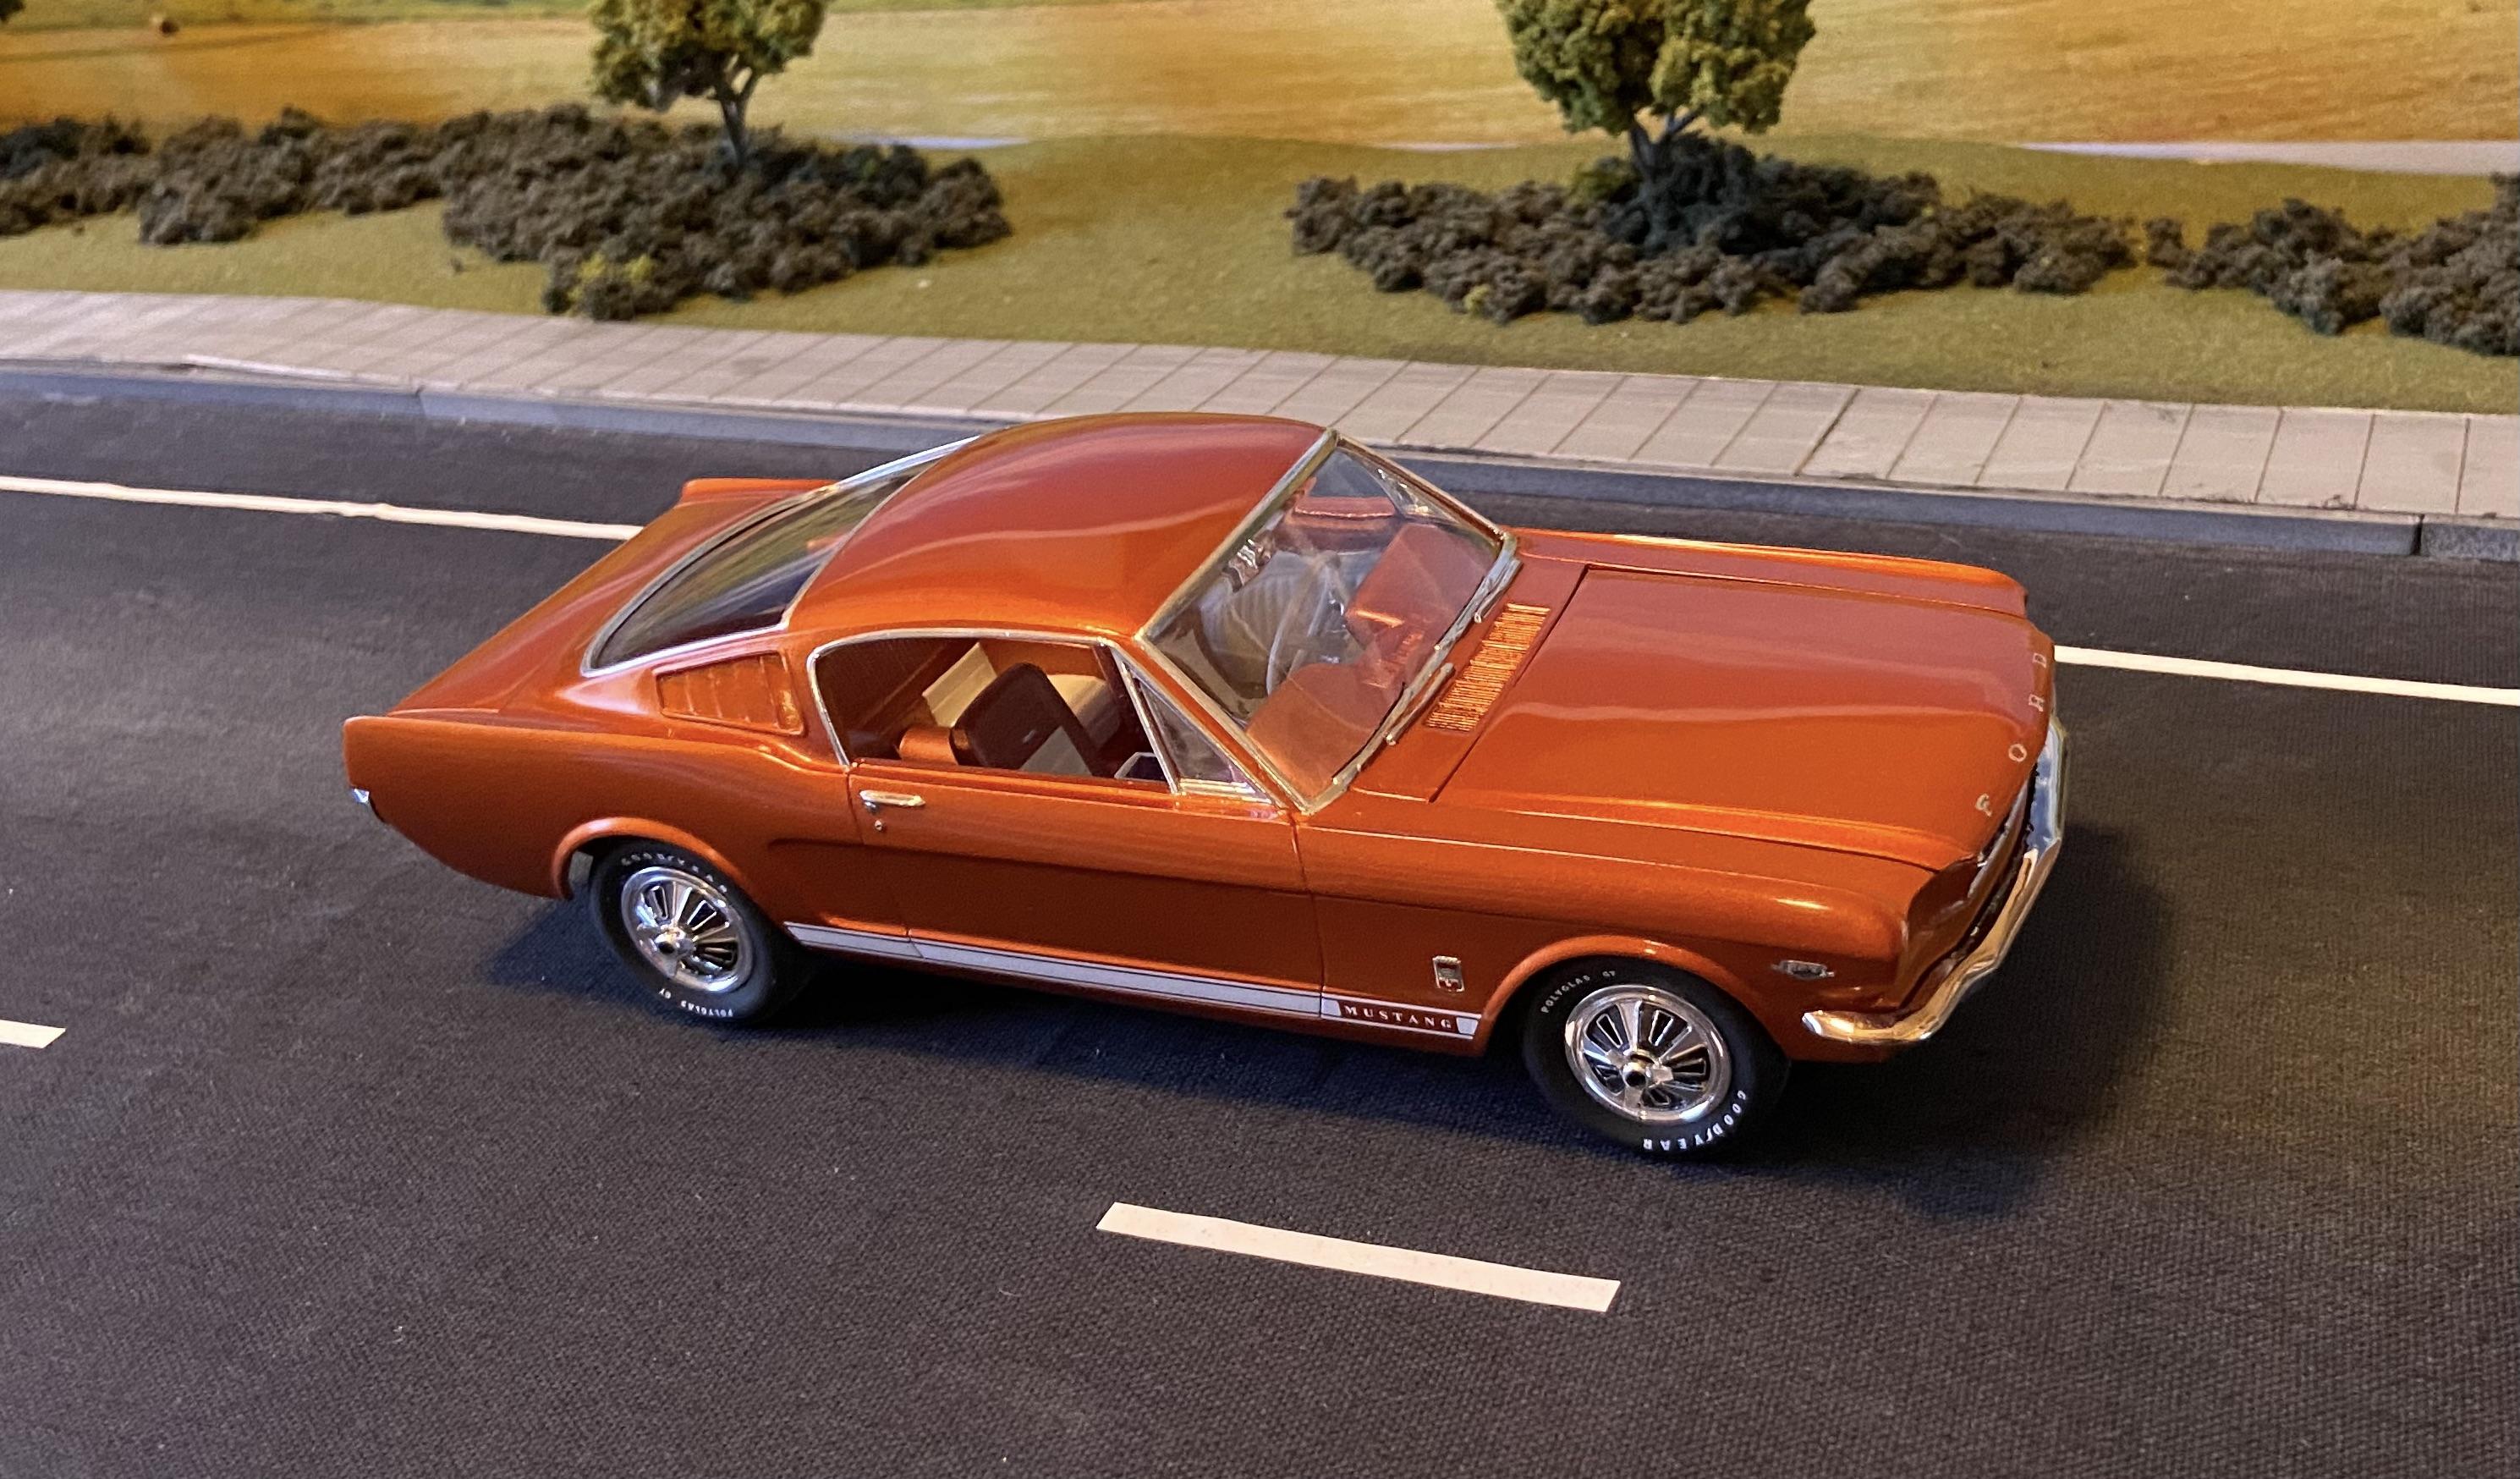
Thanks Rich. One thing I noticed about this color, the camera loves it - I can't seem to take a bad picture. I'm no photographer, and the iPhone isn't the best either; but with other color cars , especially darker colors, it can be a struggle to come up with something clear. Thanks Rex. yours turned out really nicely, and your color choice just may have had an influence on mine. Thanks again Gentlemen.
-
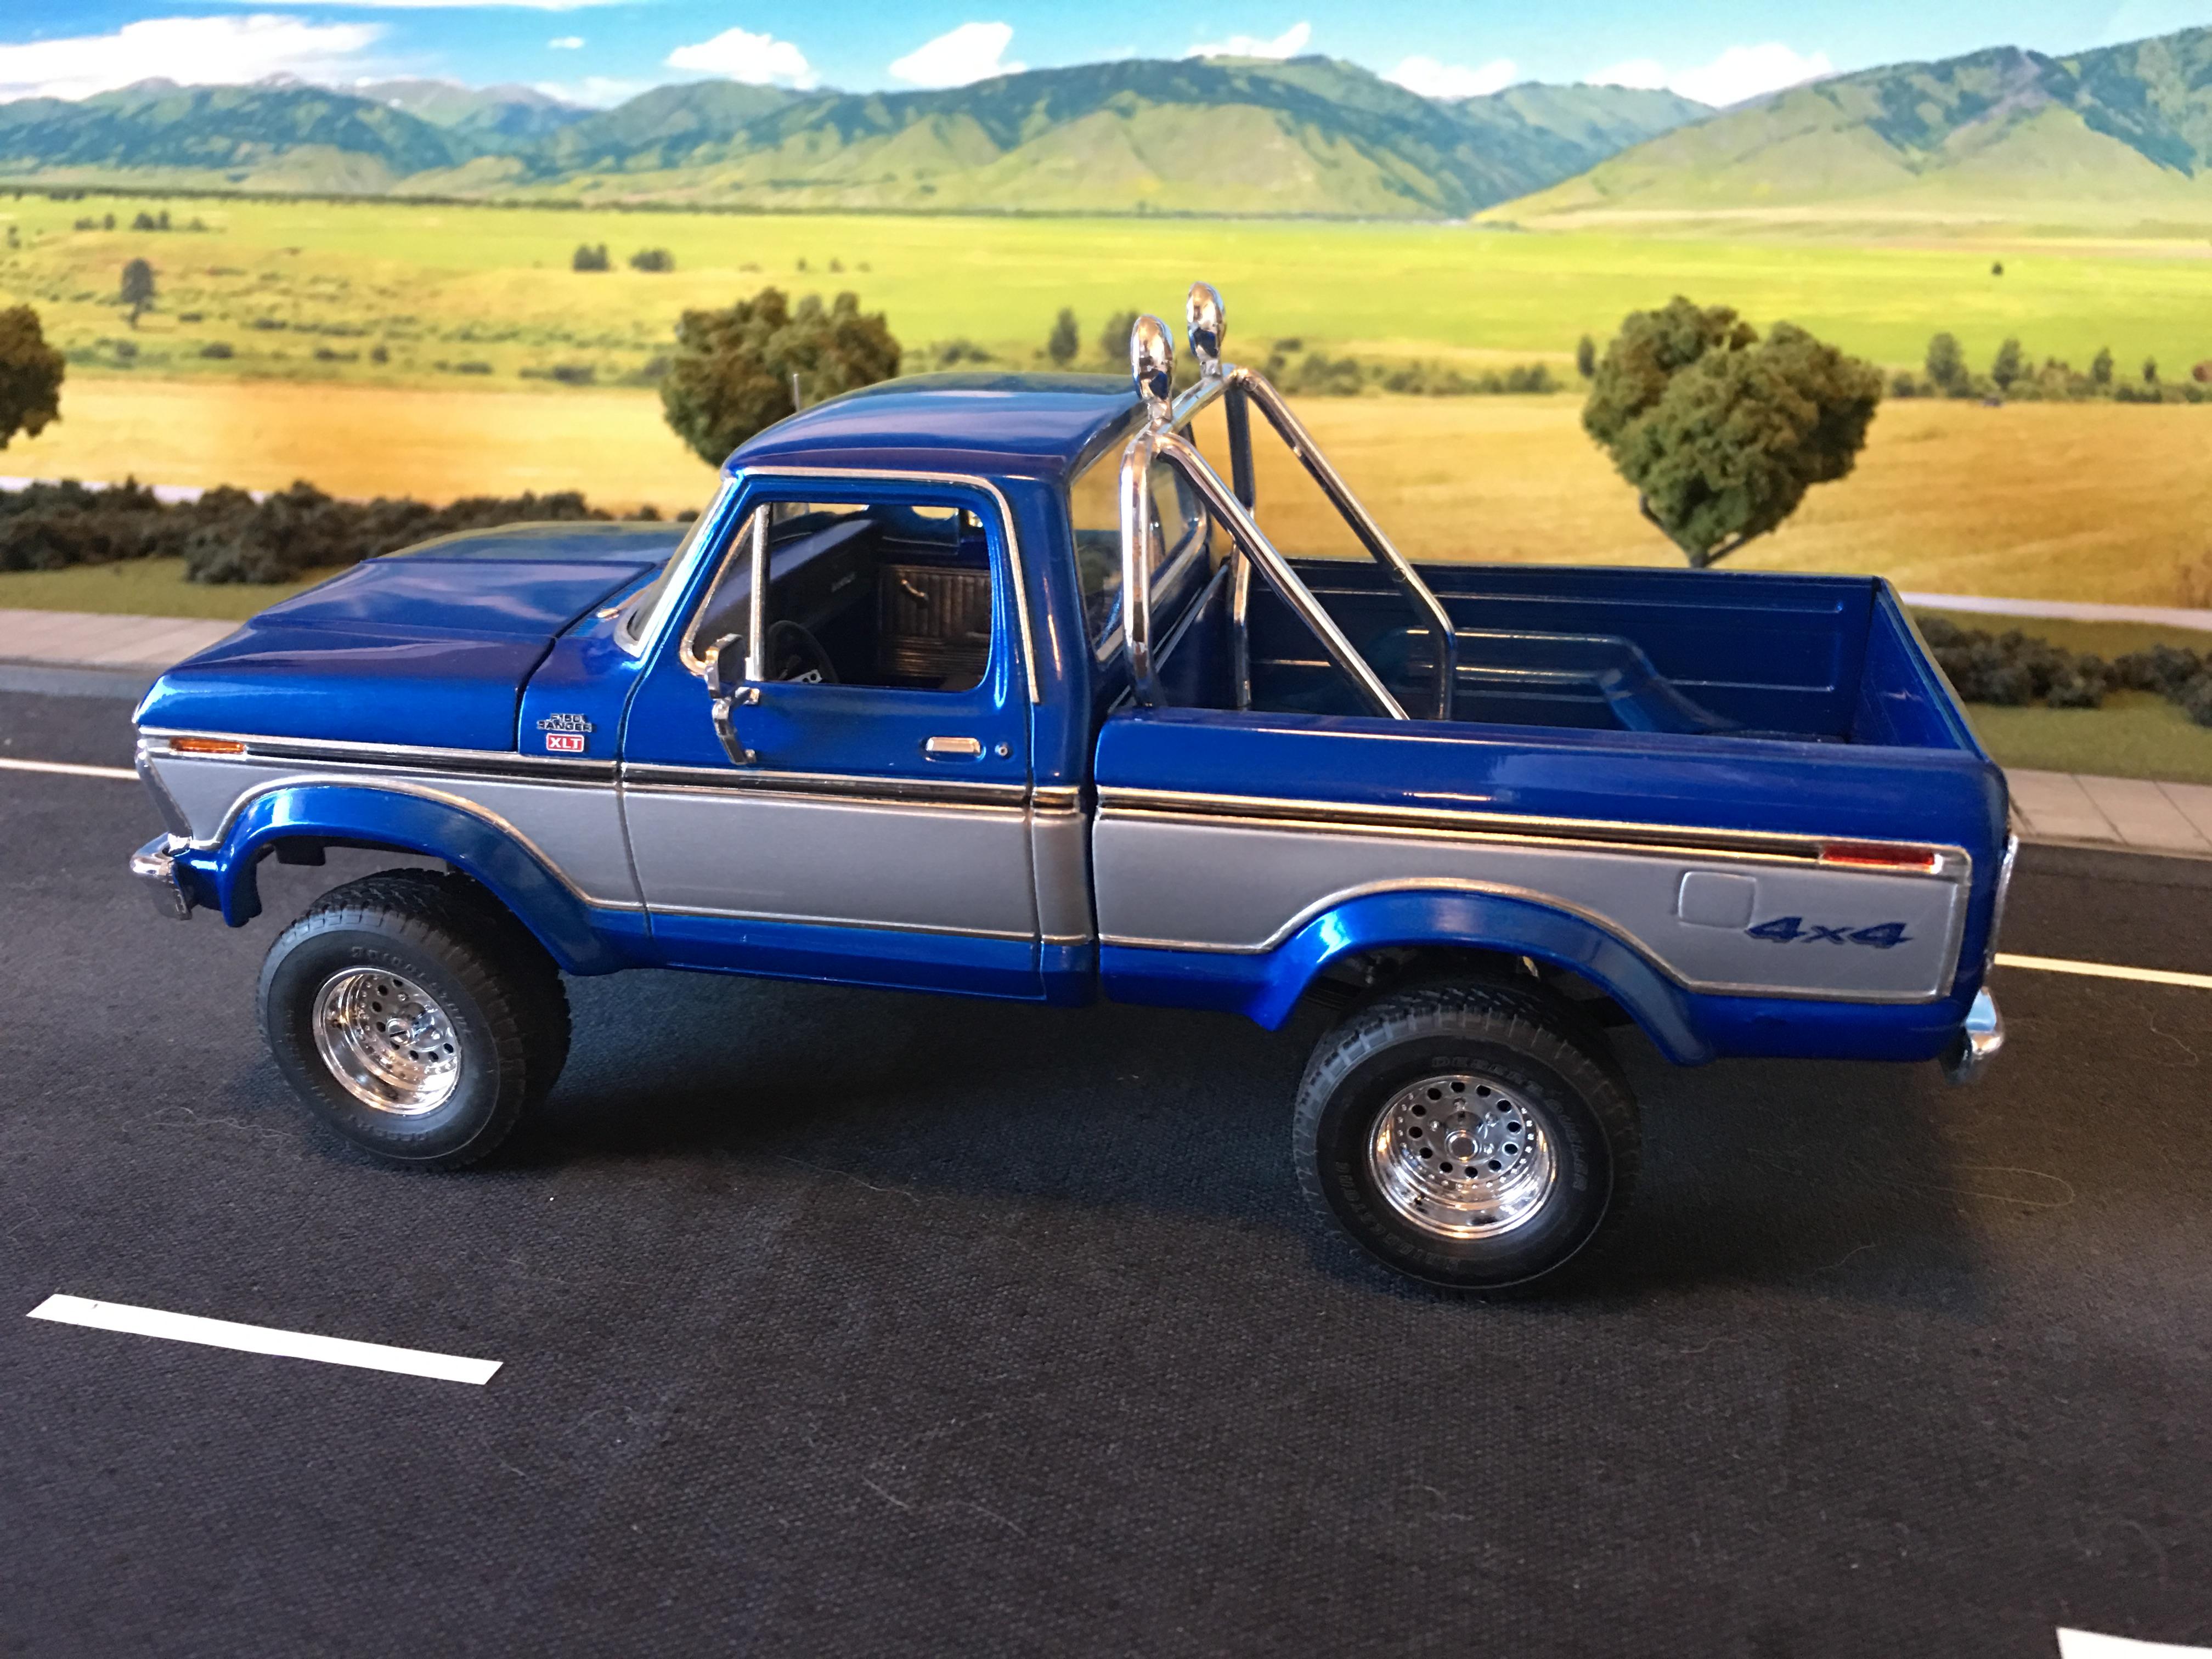
1/25 AMT 1978 Ford Bronco "Wild Hoss"
Maindrian Pace replied to Casey's topic in Truck Kit News & Reviews
Just got one in. Slightly warped body (I can fix that with the hot water/cold water treatment) circular mark on one of the green decals (don't care) one of the unchromed wheels has a melted looking center cap (bummer) Overall not bad but it could have been better. Still, I'm happy to have one. -
Revell 1962 Imperial Crown 4 door --restoration
Maindrian Pace replied to rsmodels's topic in Model Cars
Rich, you're not too happy with that build? I can't see why, it looks fantastic to the detail, and the kit captures well the eccentric Exner-era styling of the Imperial; right down to the sparrow strainer taillights. A+. -
Beautiful, the stance is unimprovable.
-
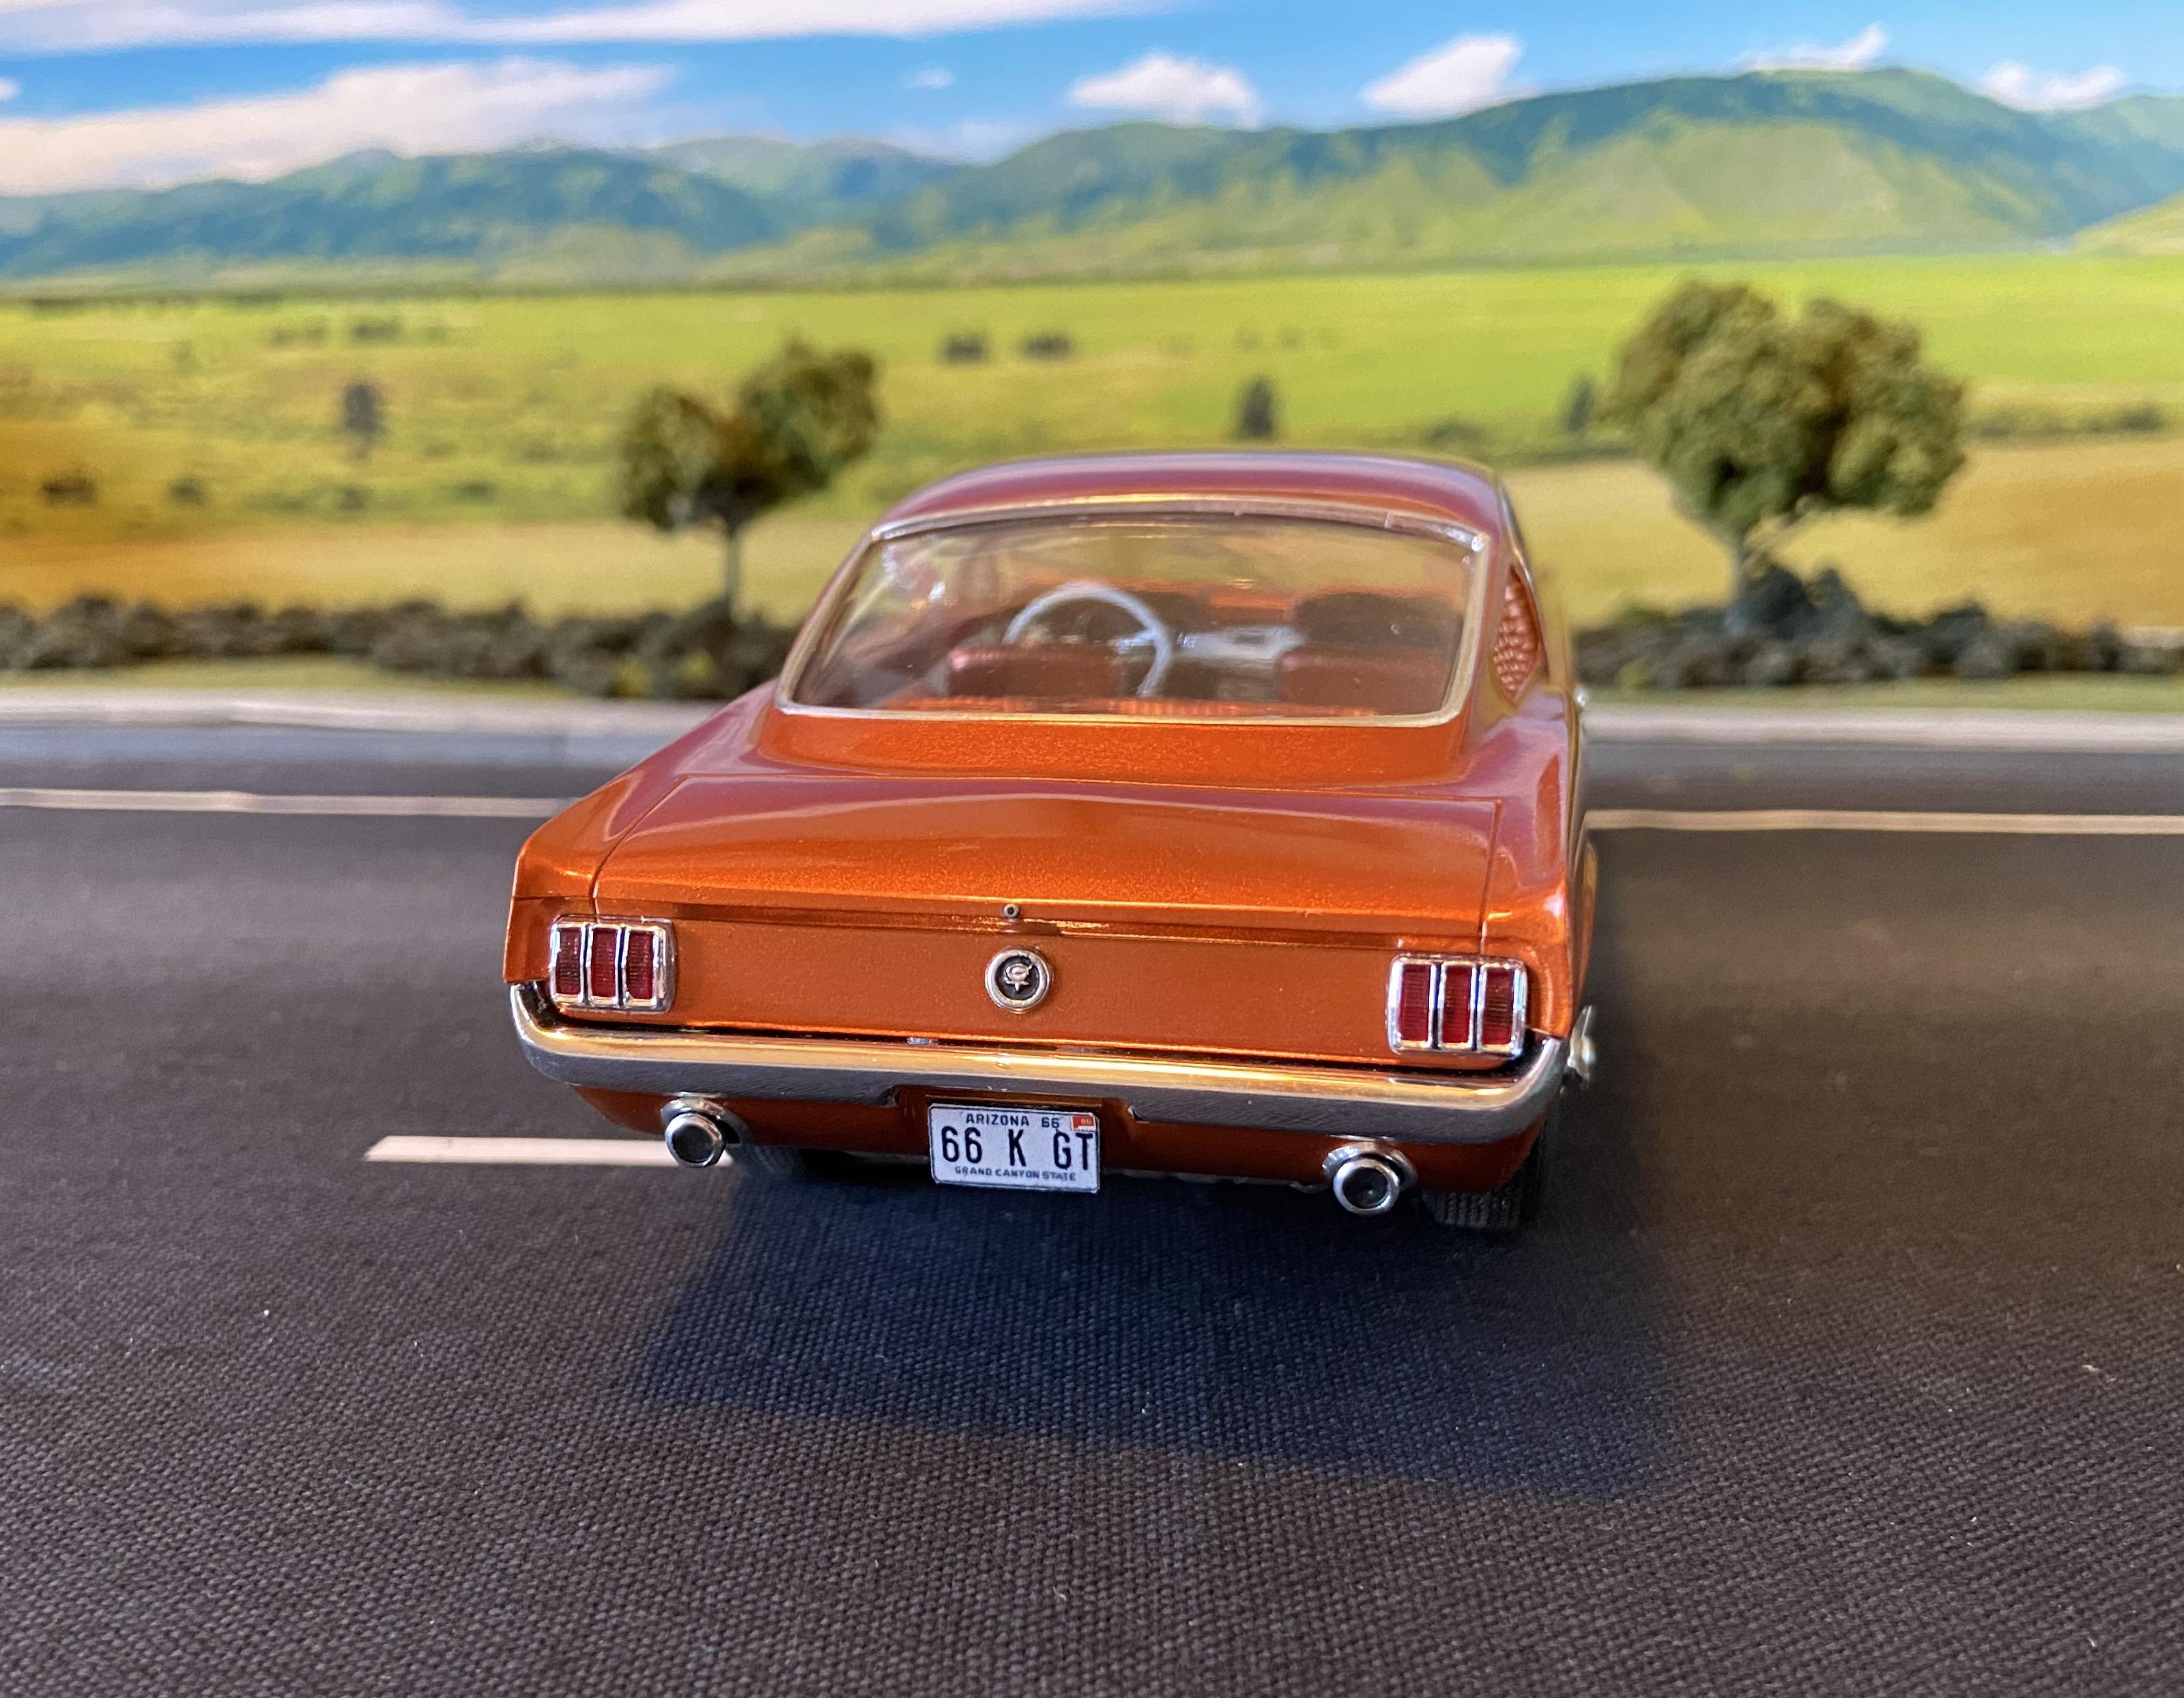
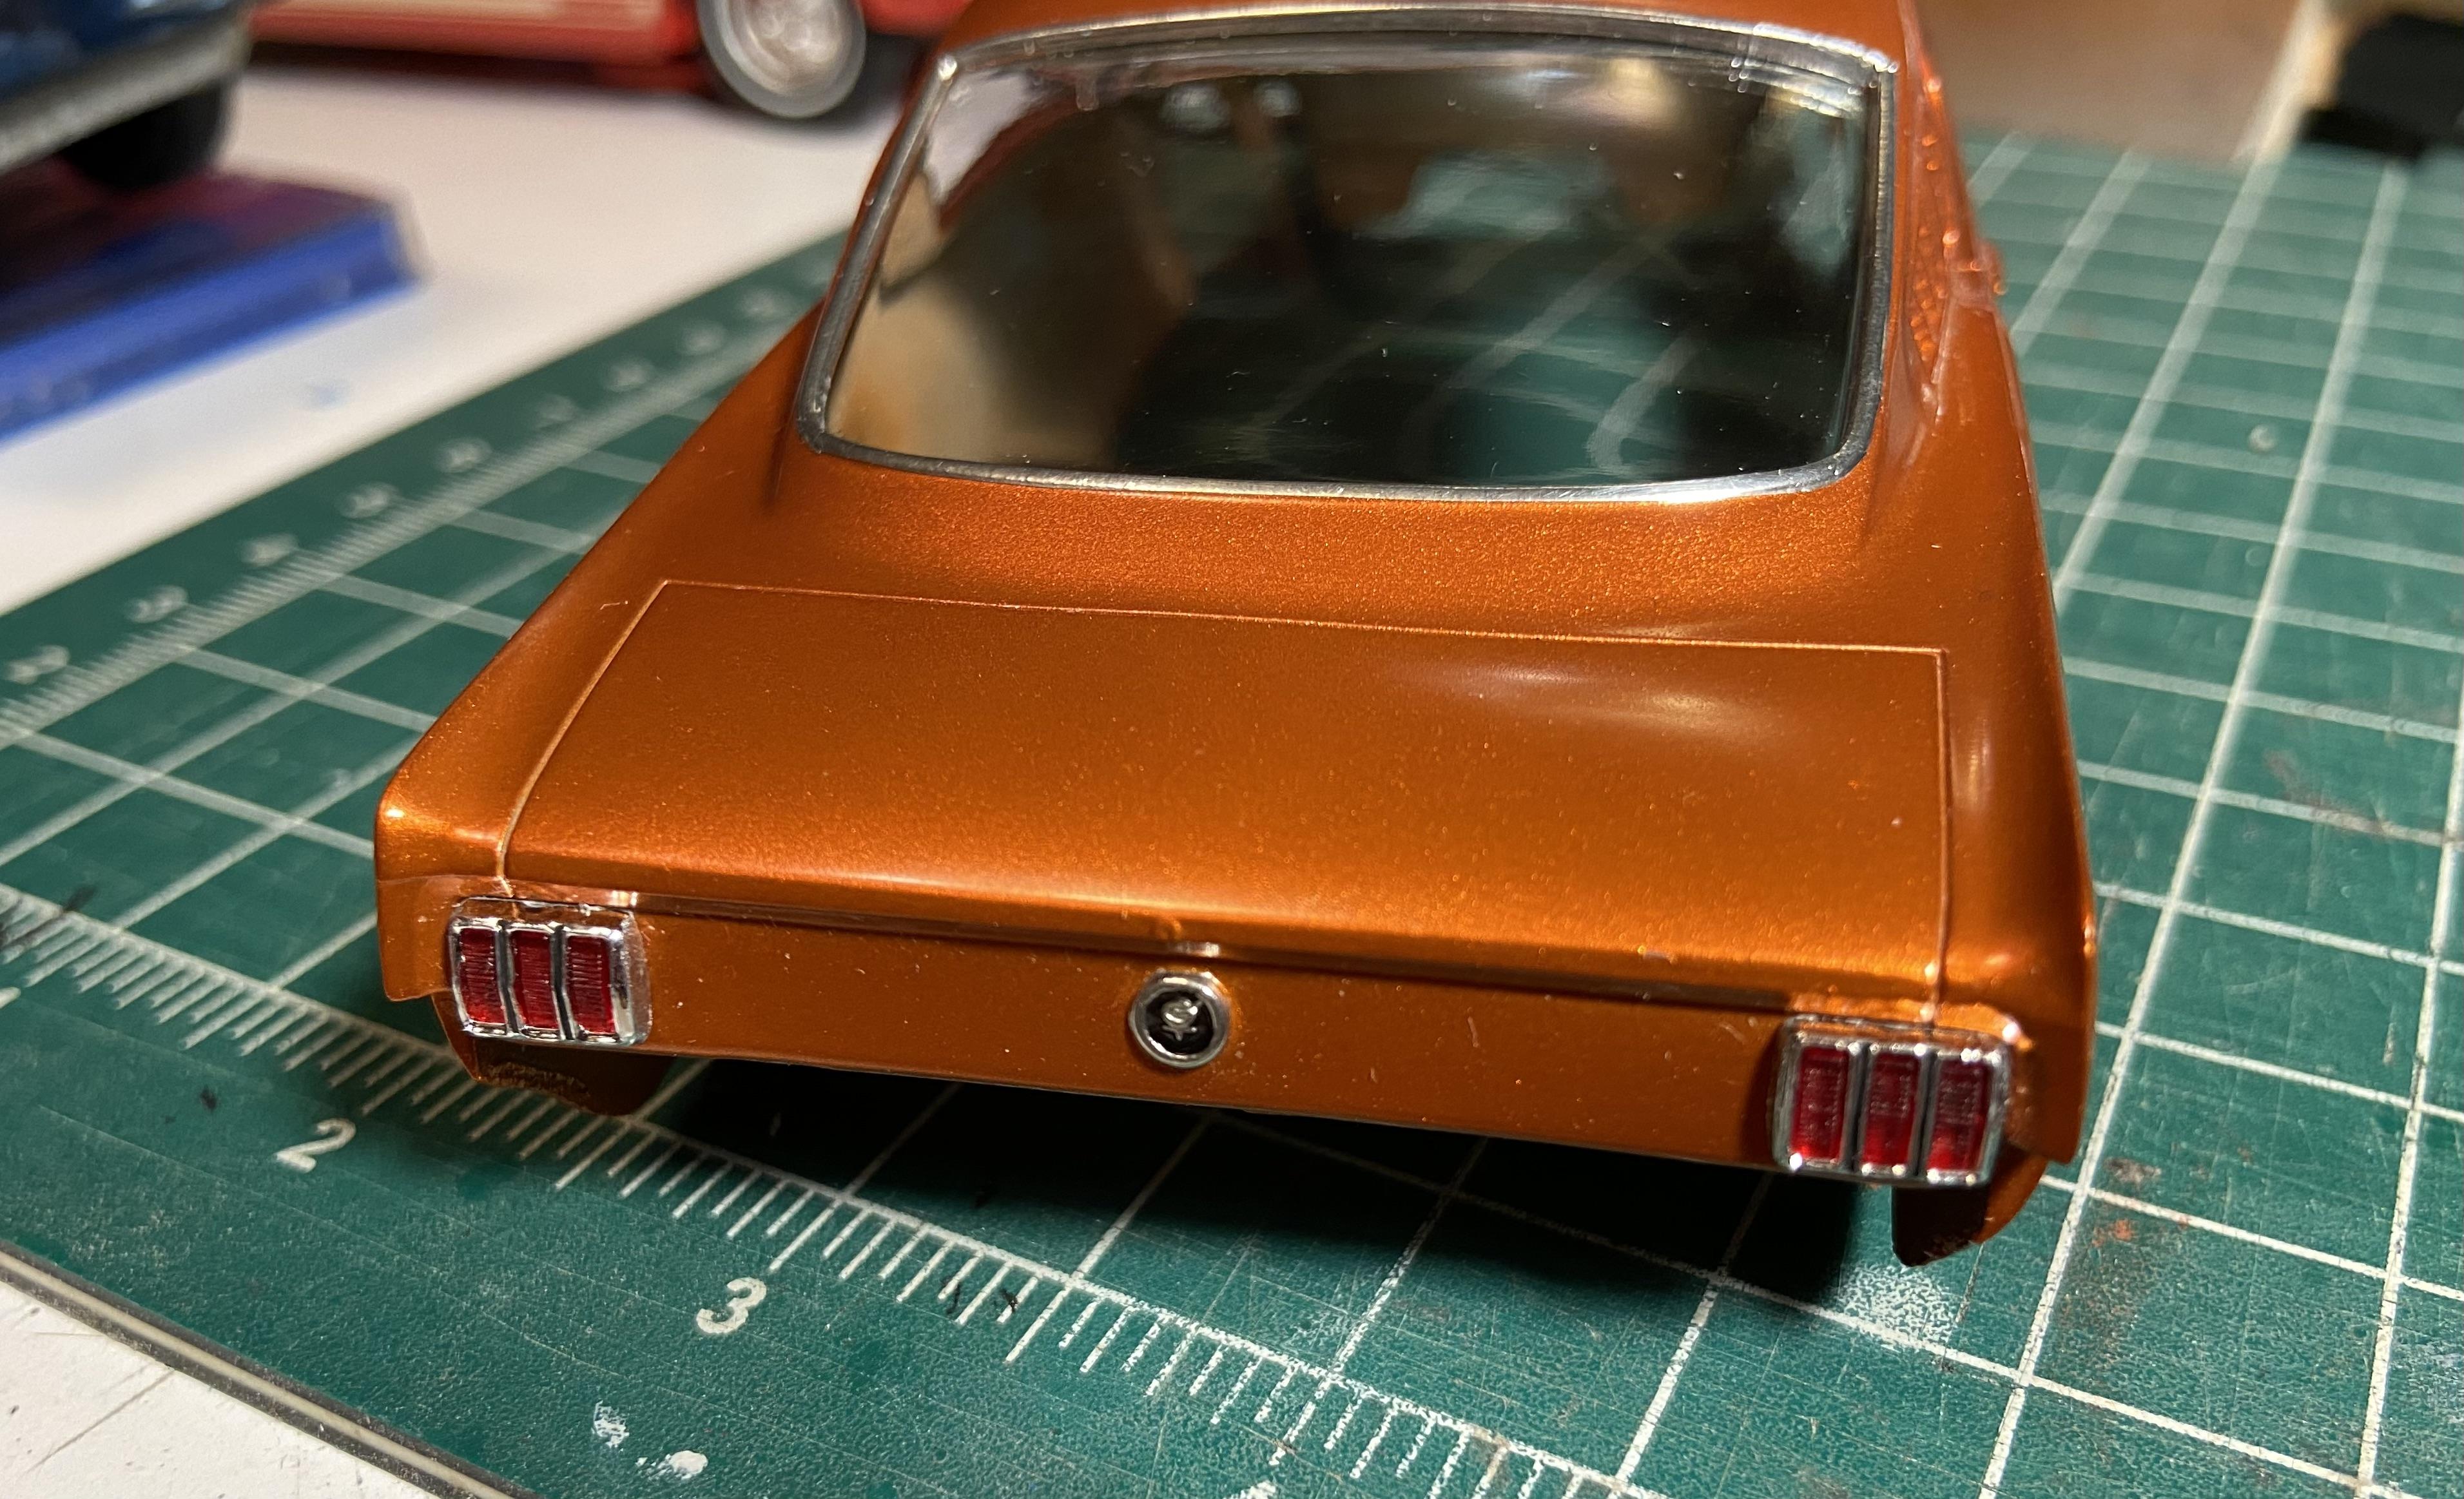
John, they were optional on '65 and very early '66 Mustangs, I believe up to Sept. '65 production. Then the feds made backup lights a requirement for all 1966 cars across the board. AMT probably got the '66 blueprints before the mandate, so no backups in this kit. The new kit looks like it's going to have a new valance that includes the backup lights.
-
Thanks very much Gentlemen.
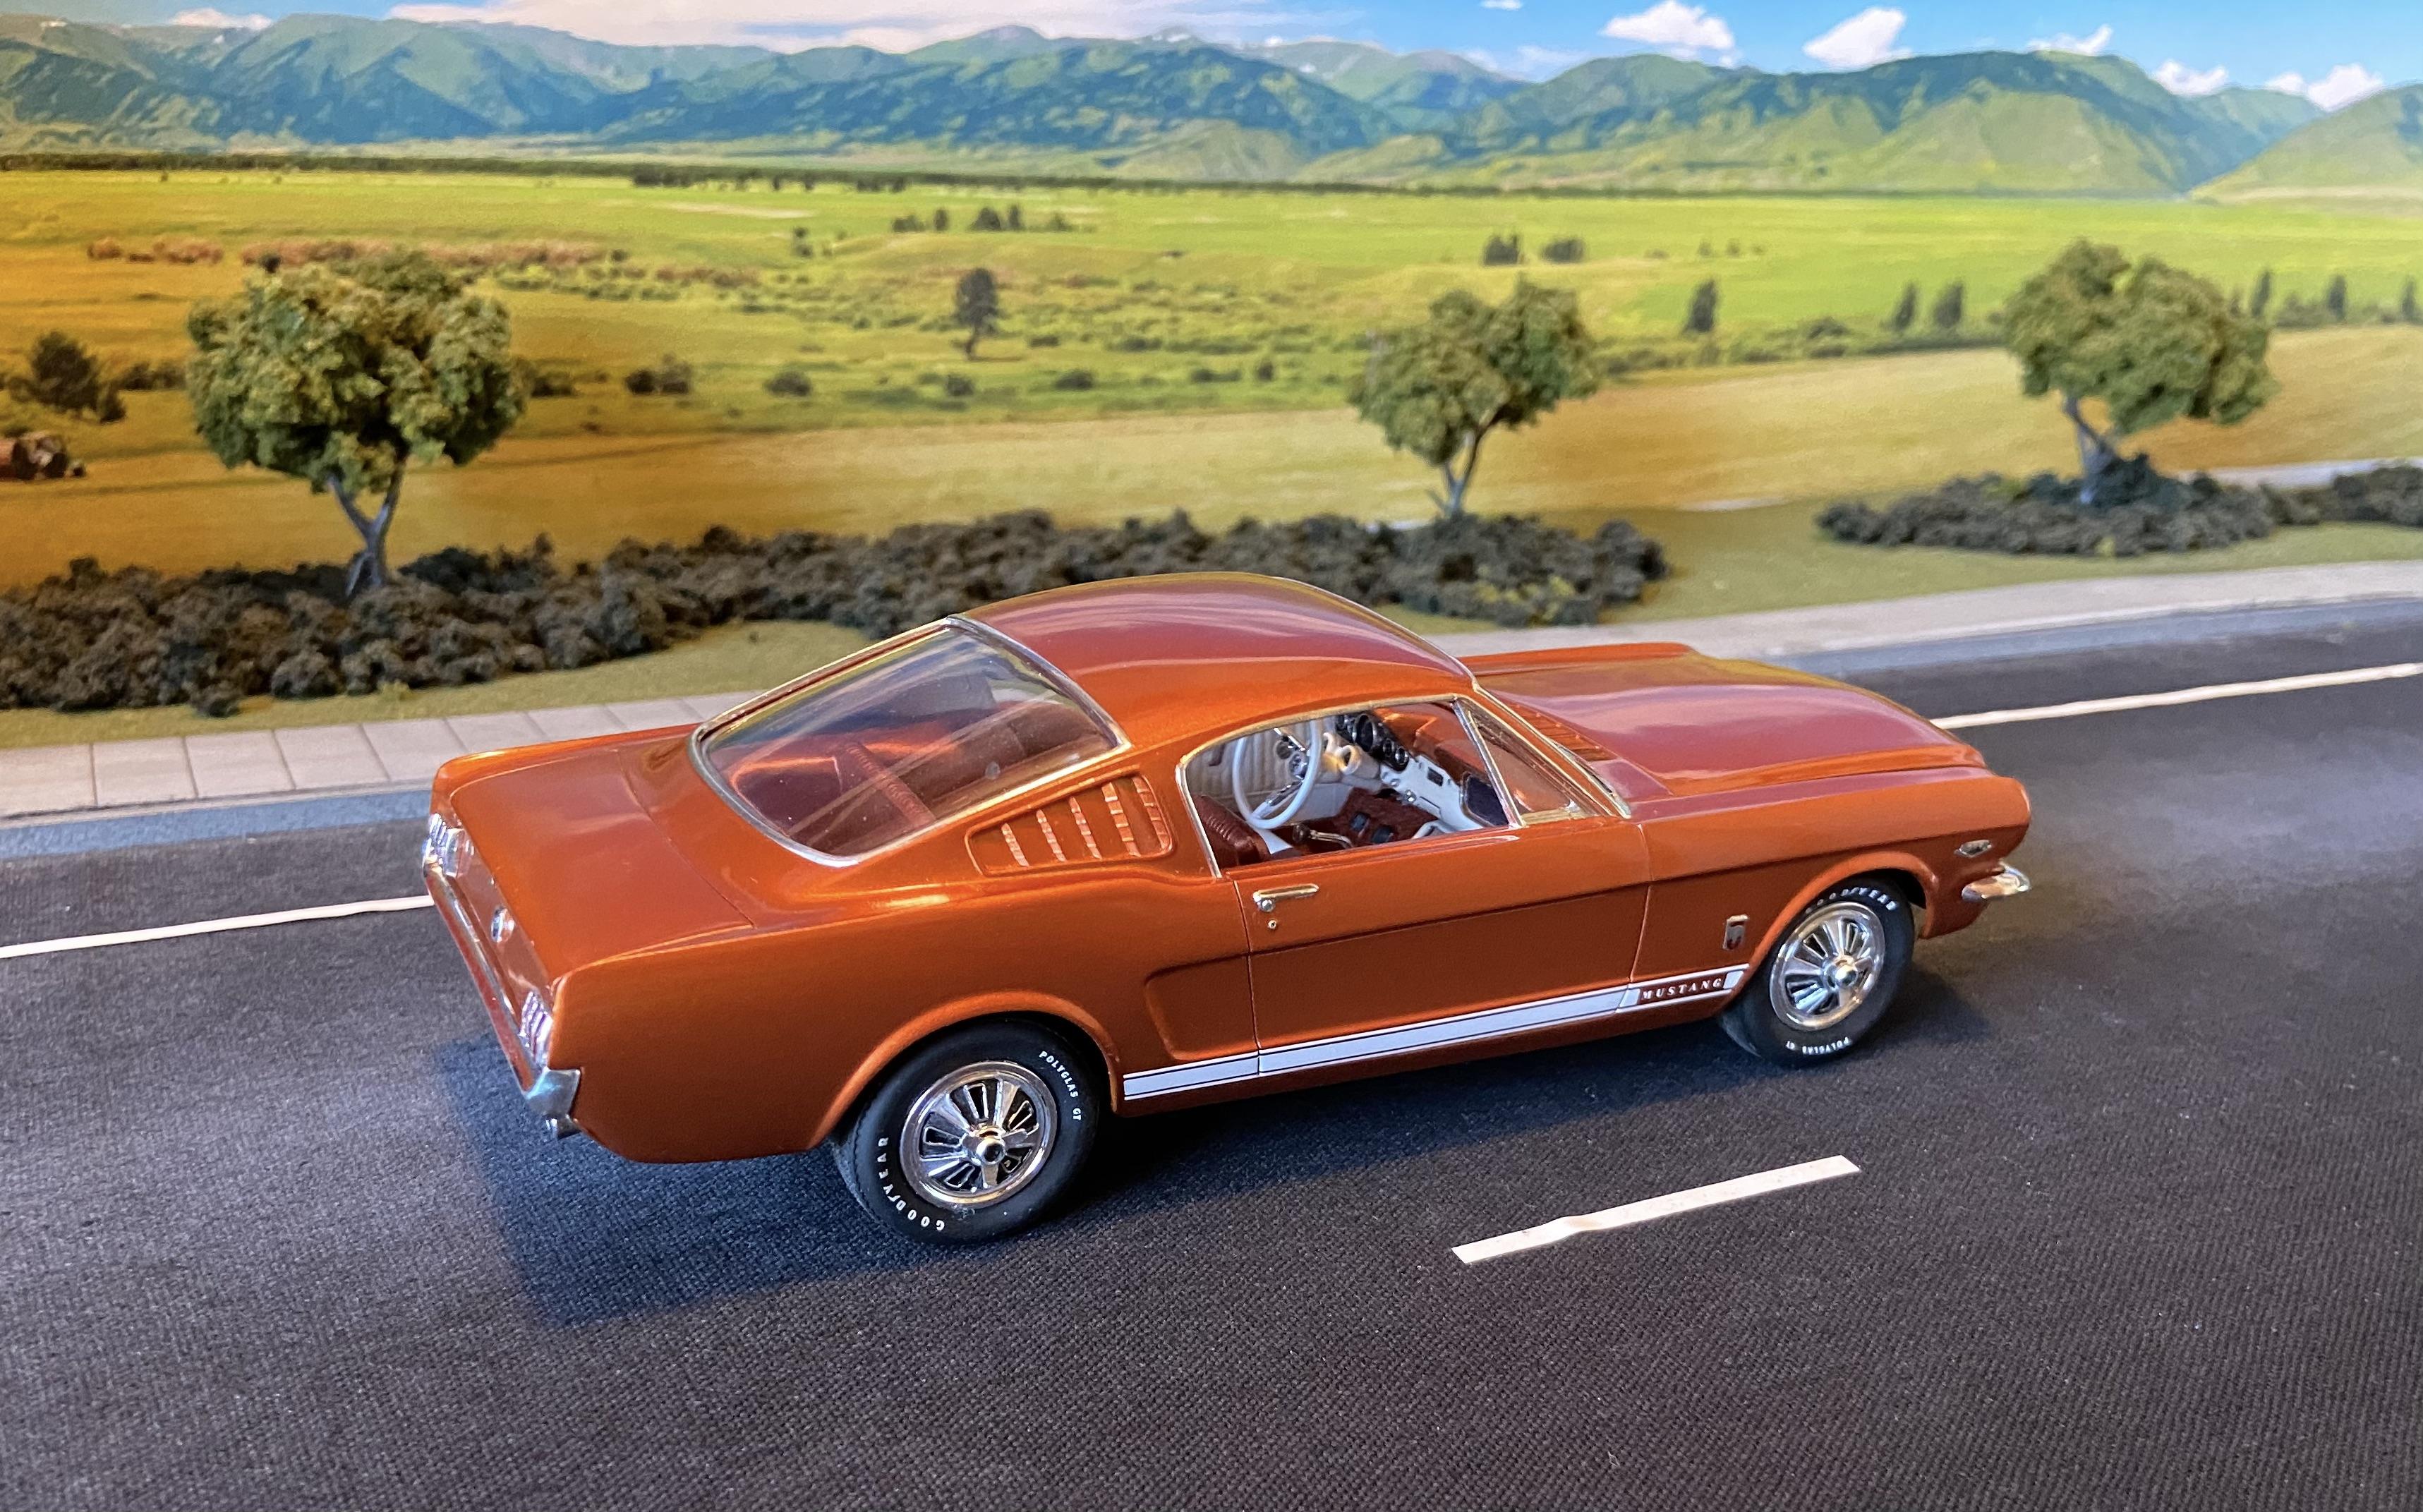
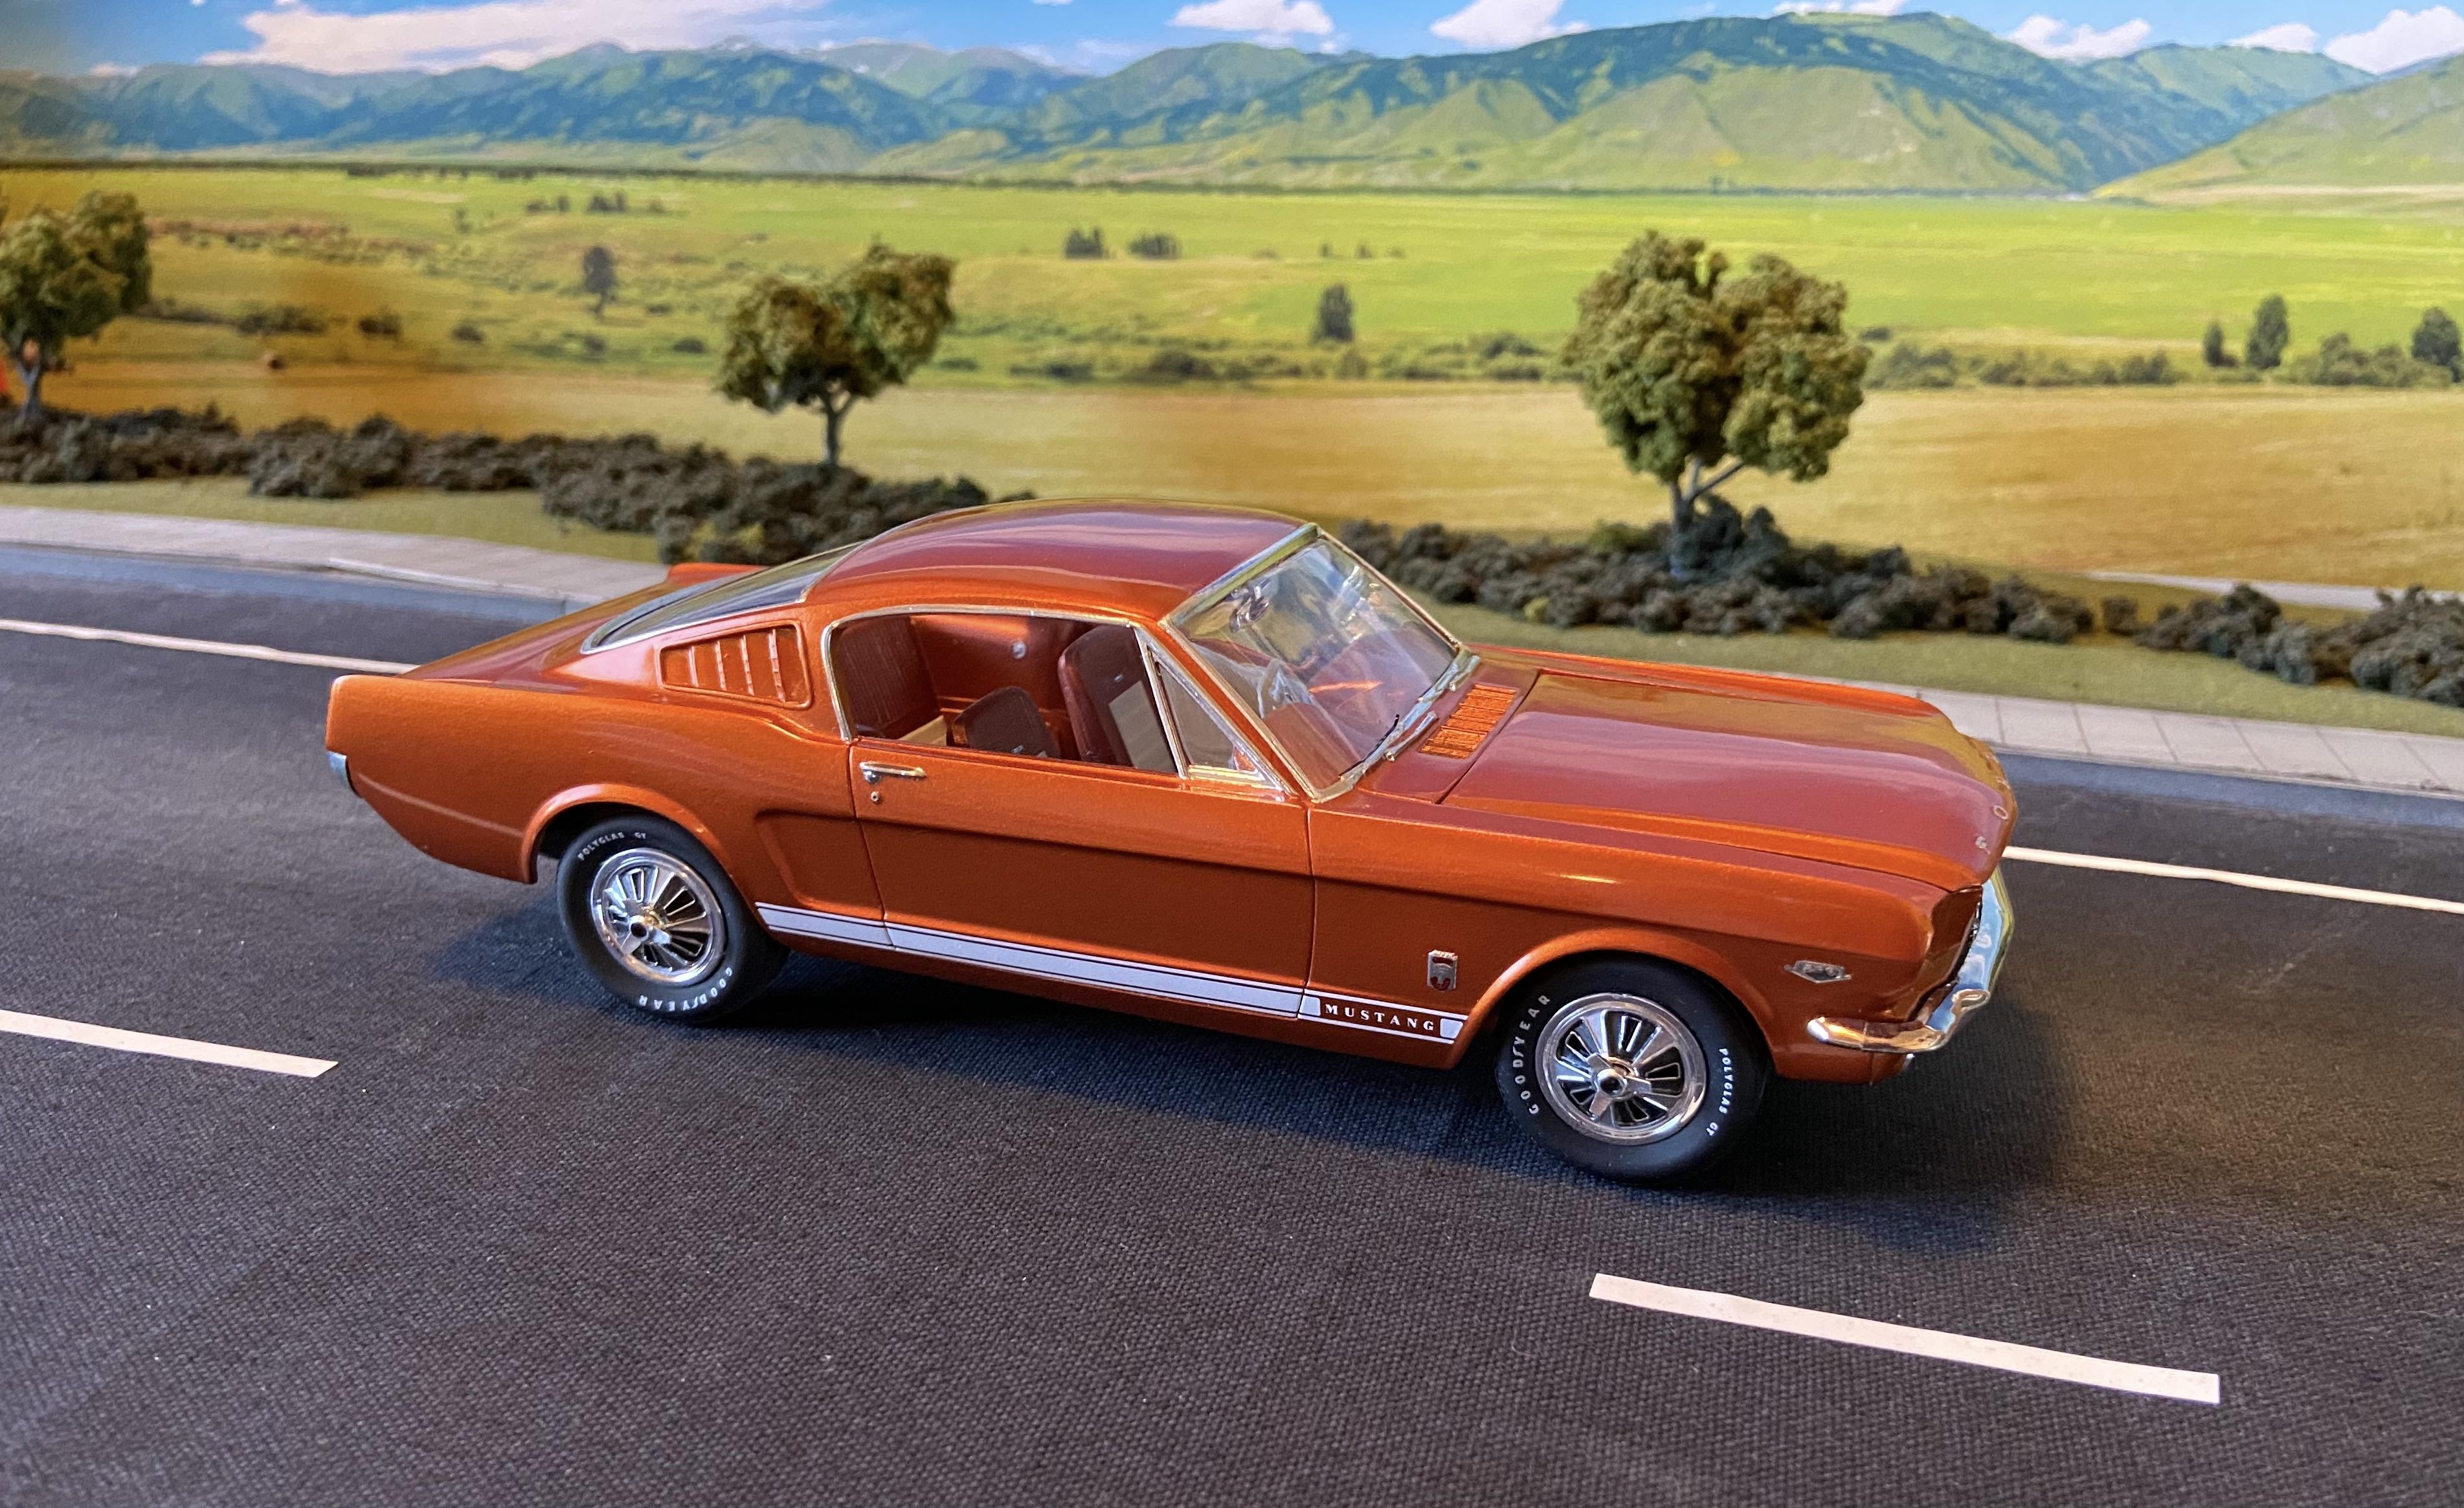
-
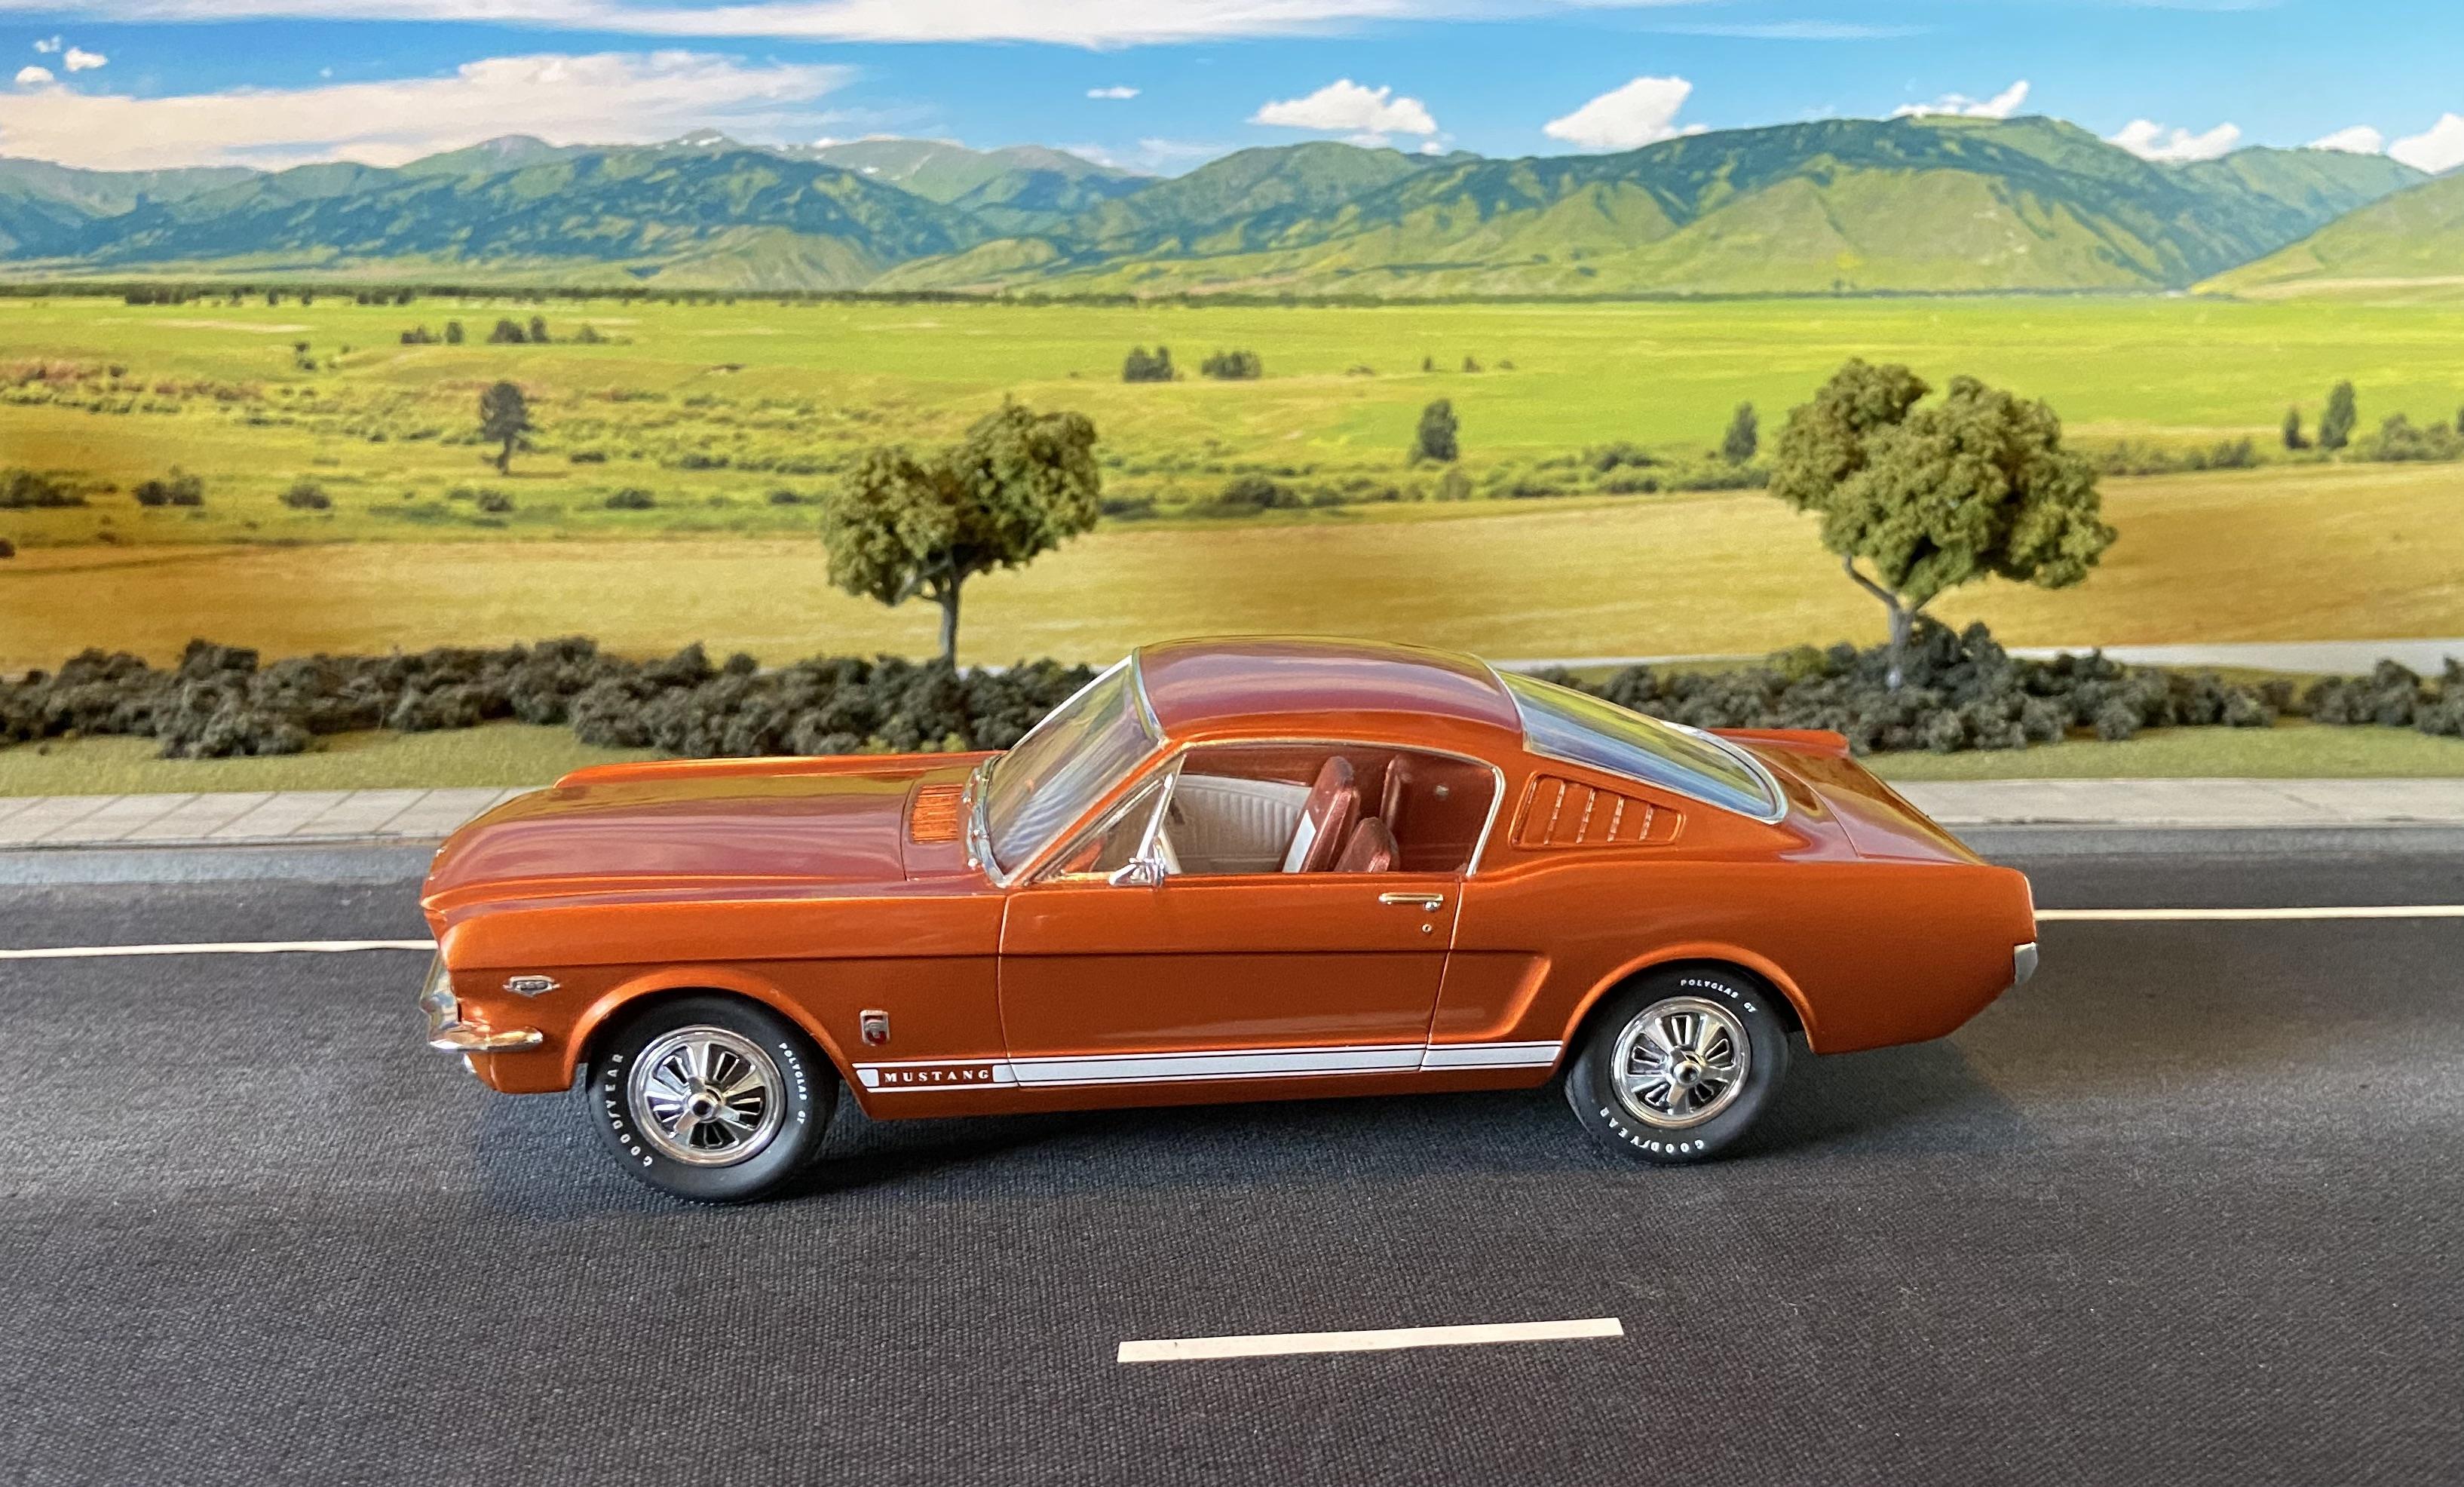
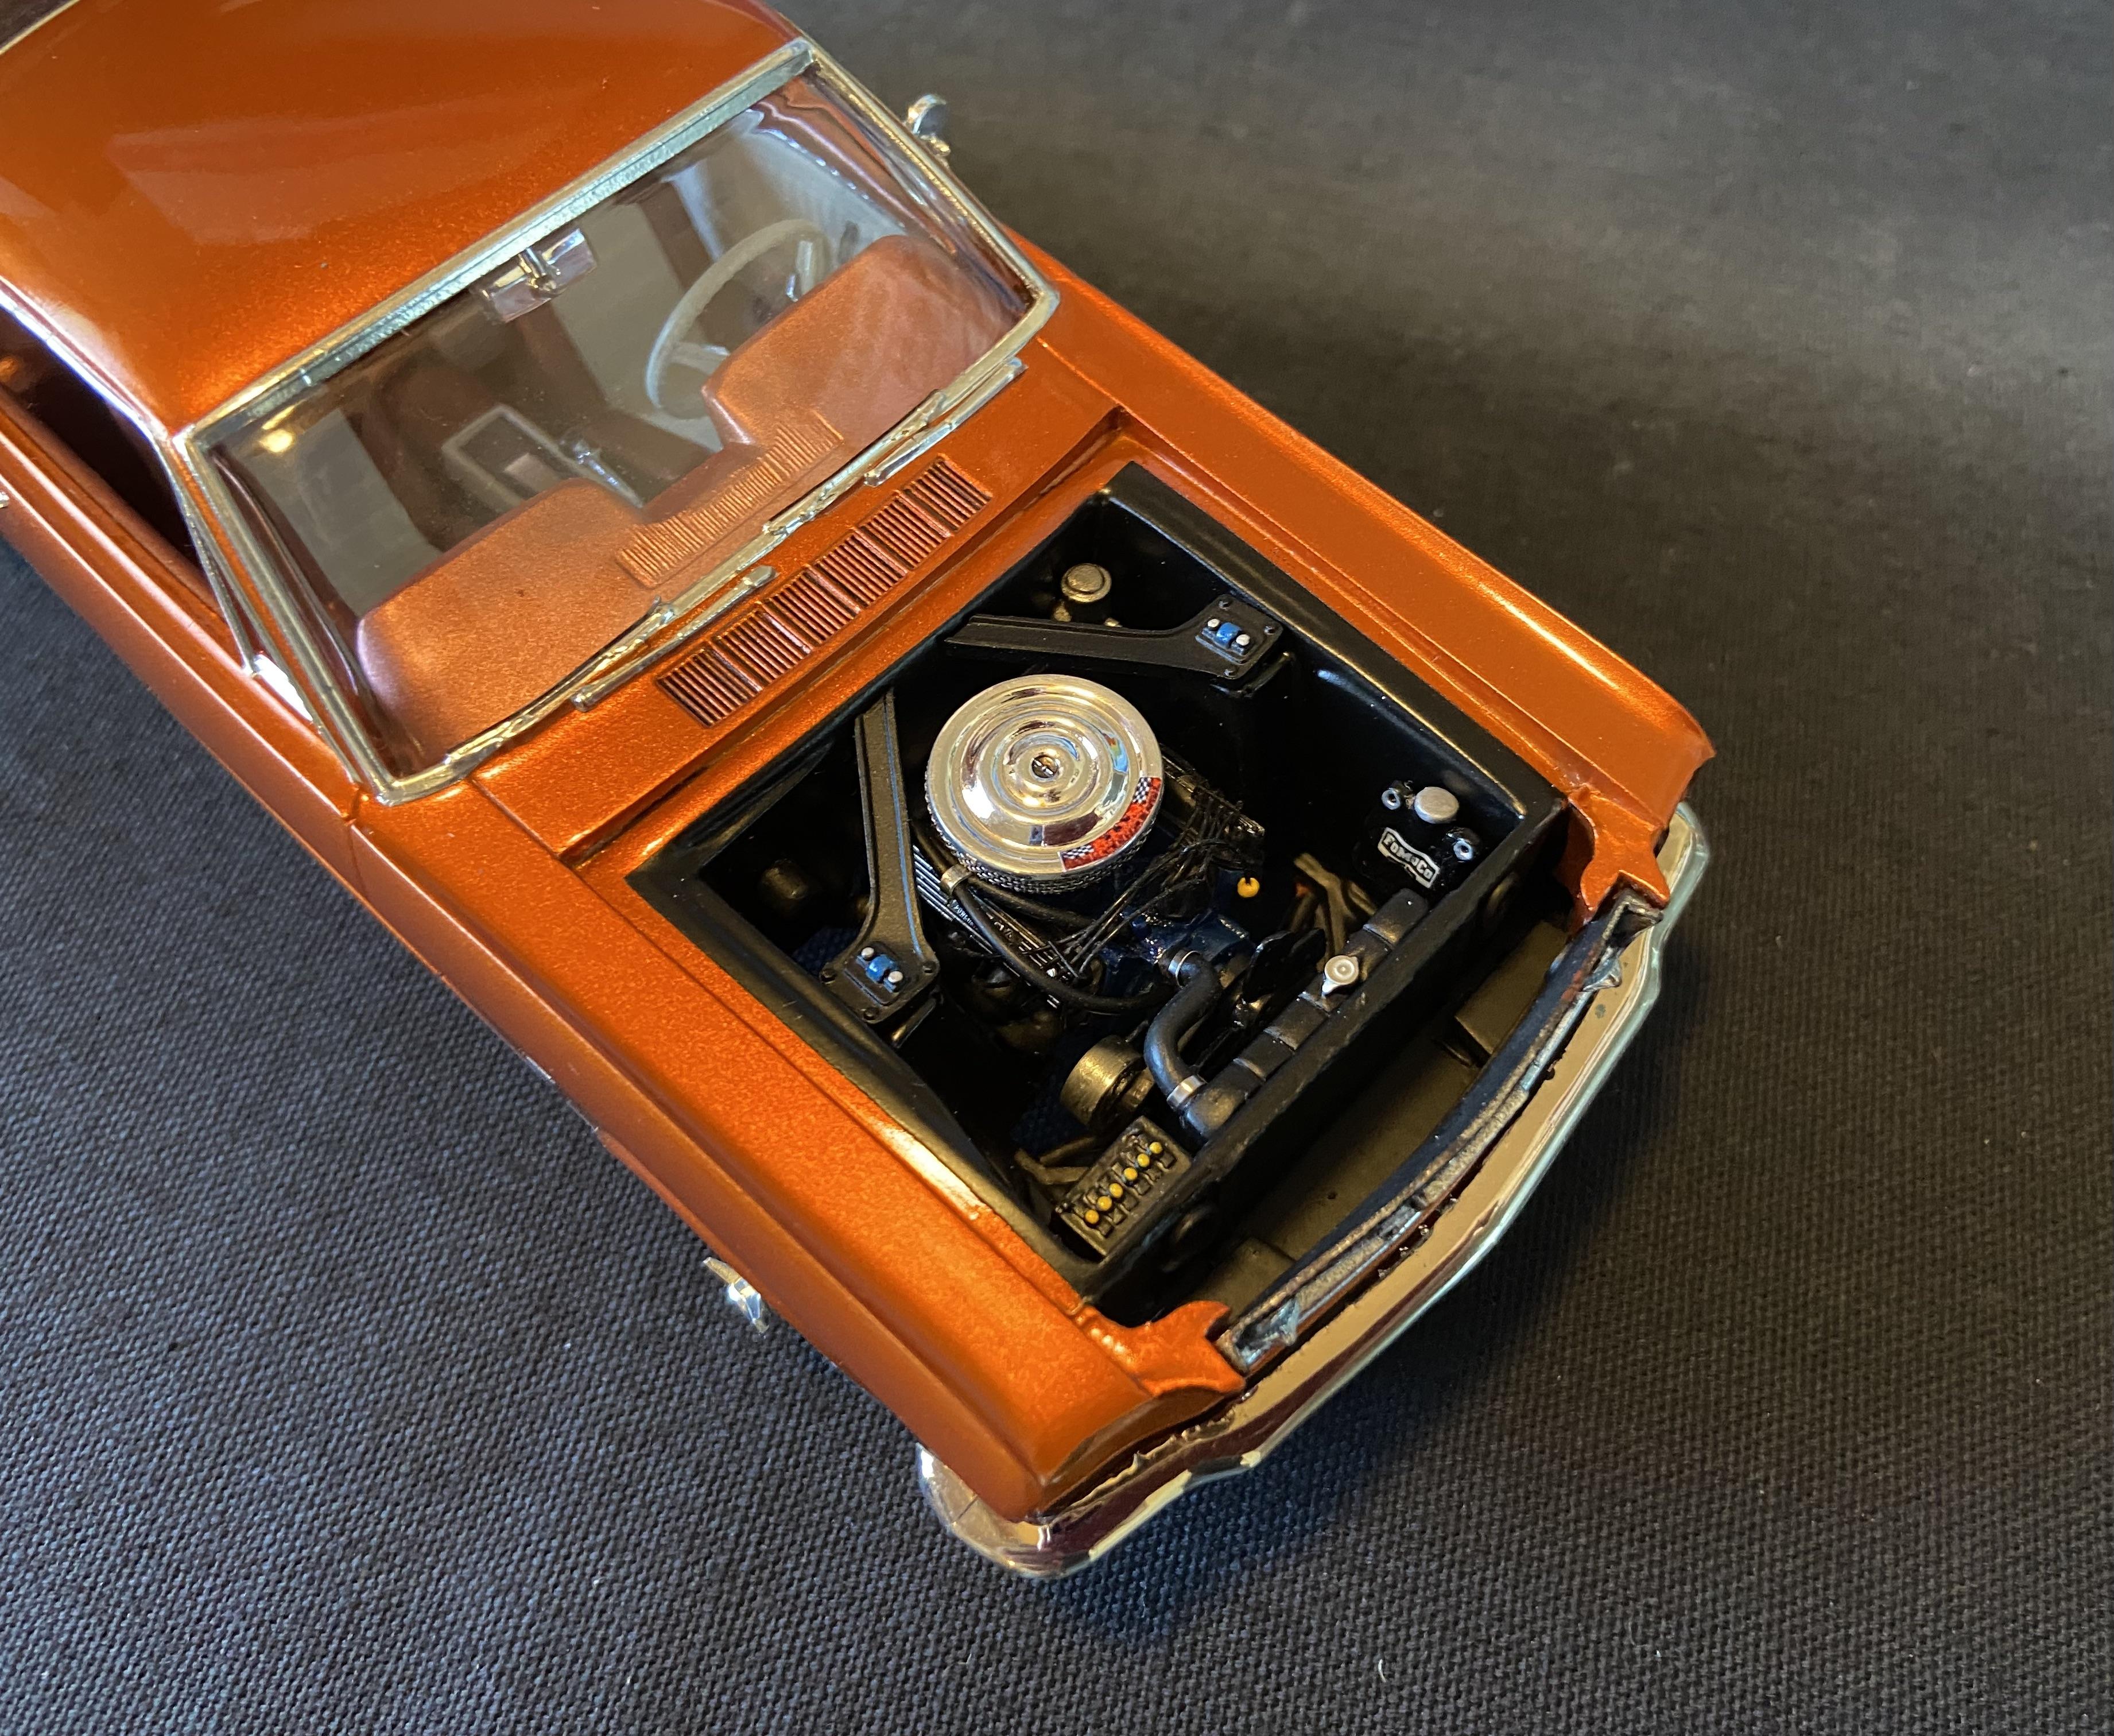
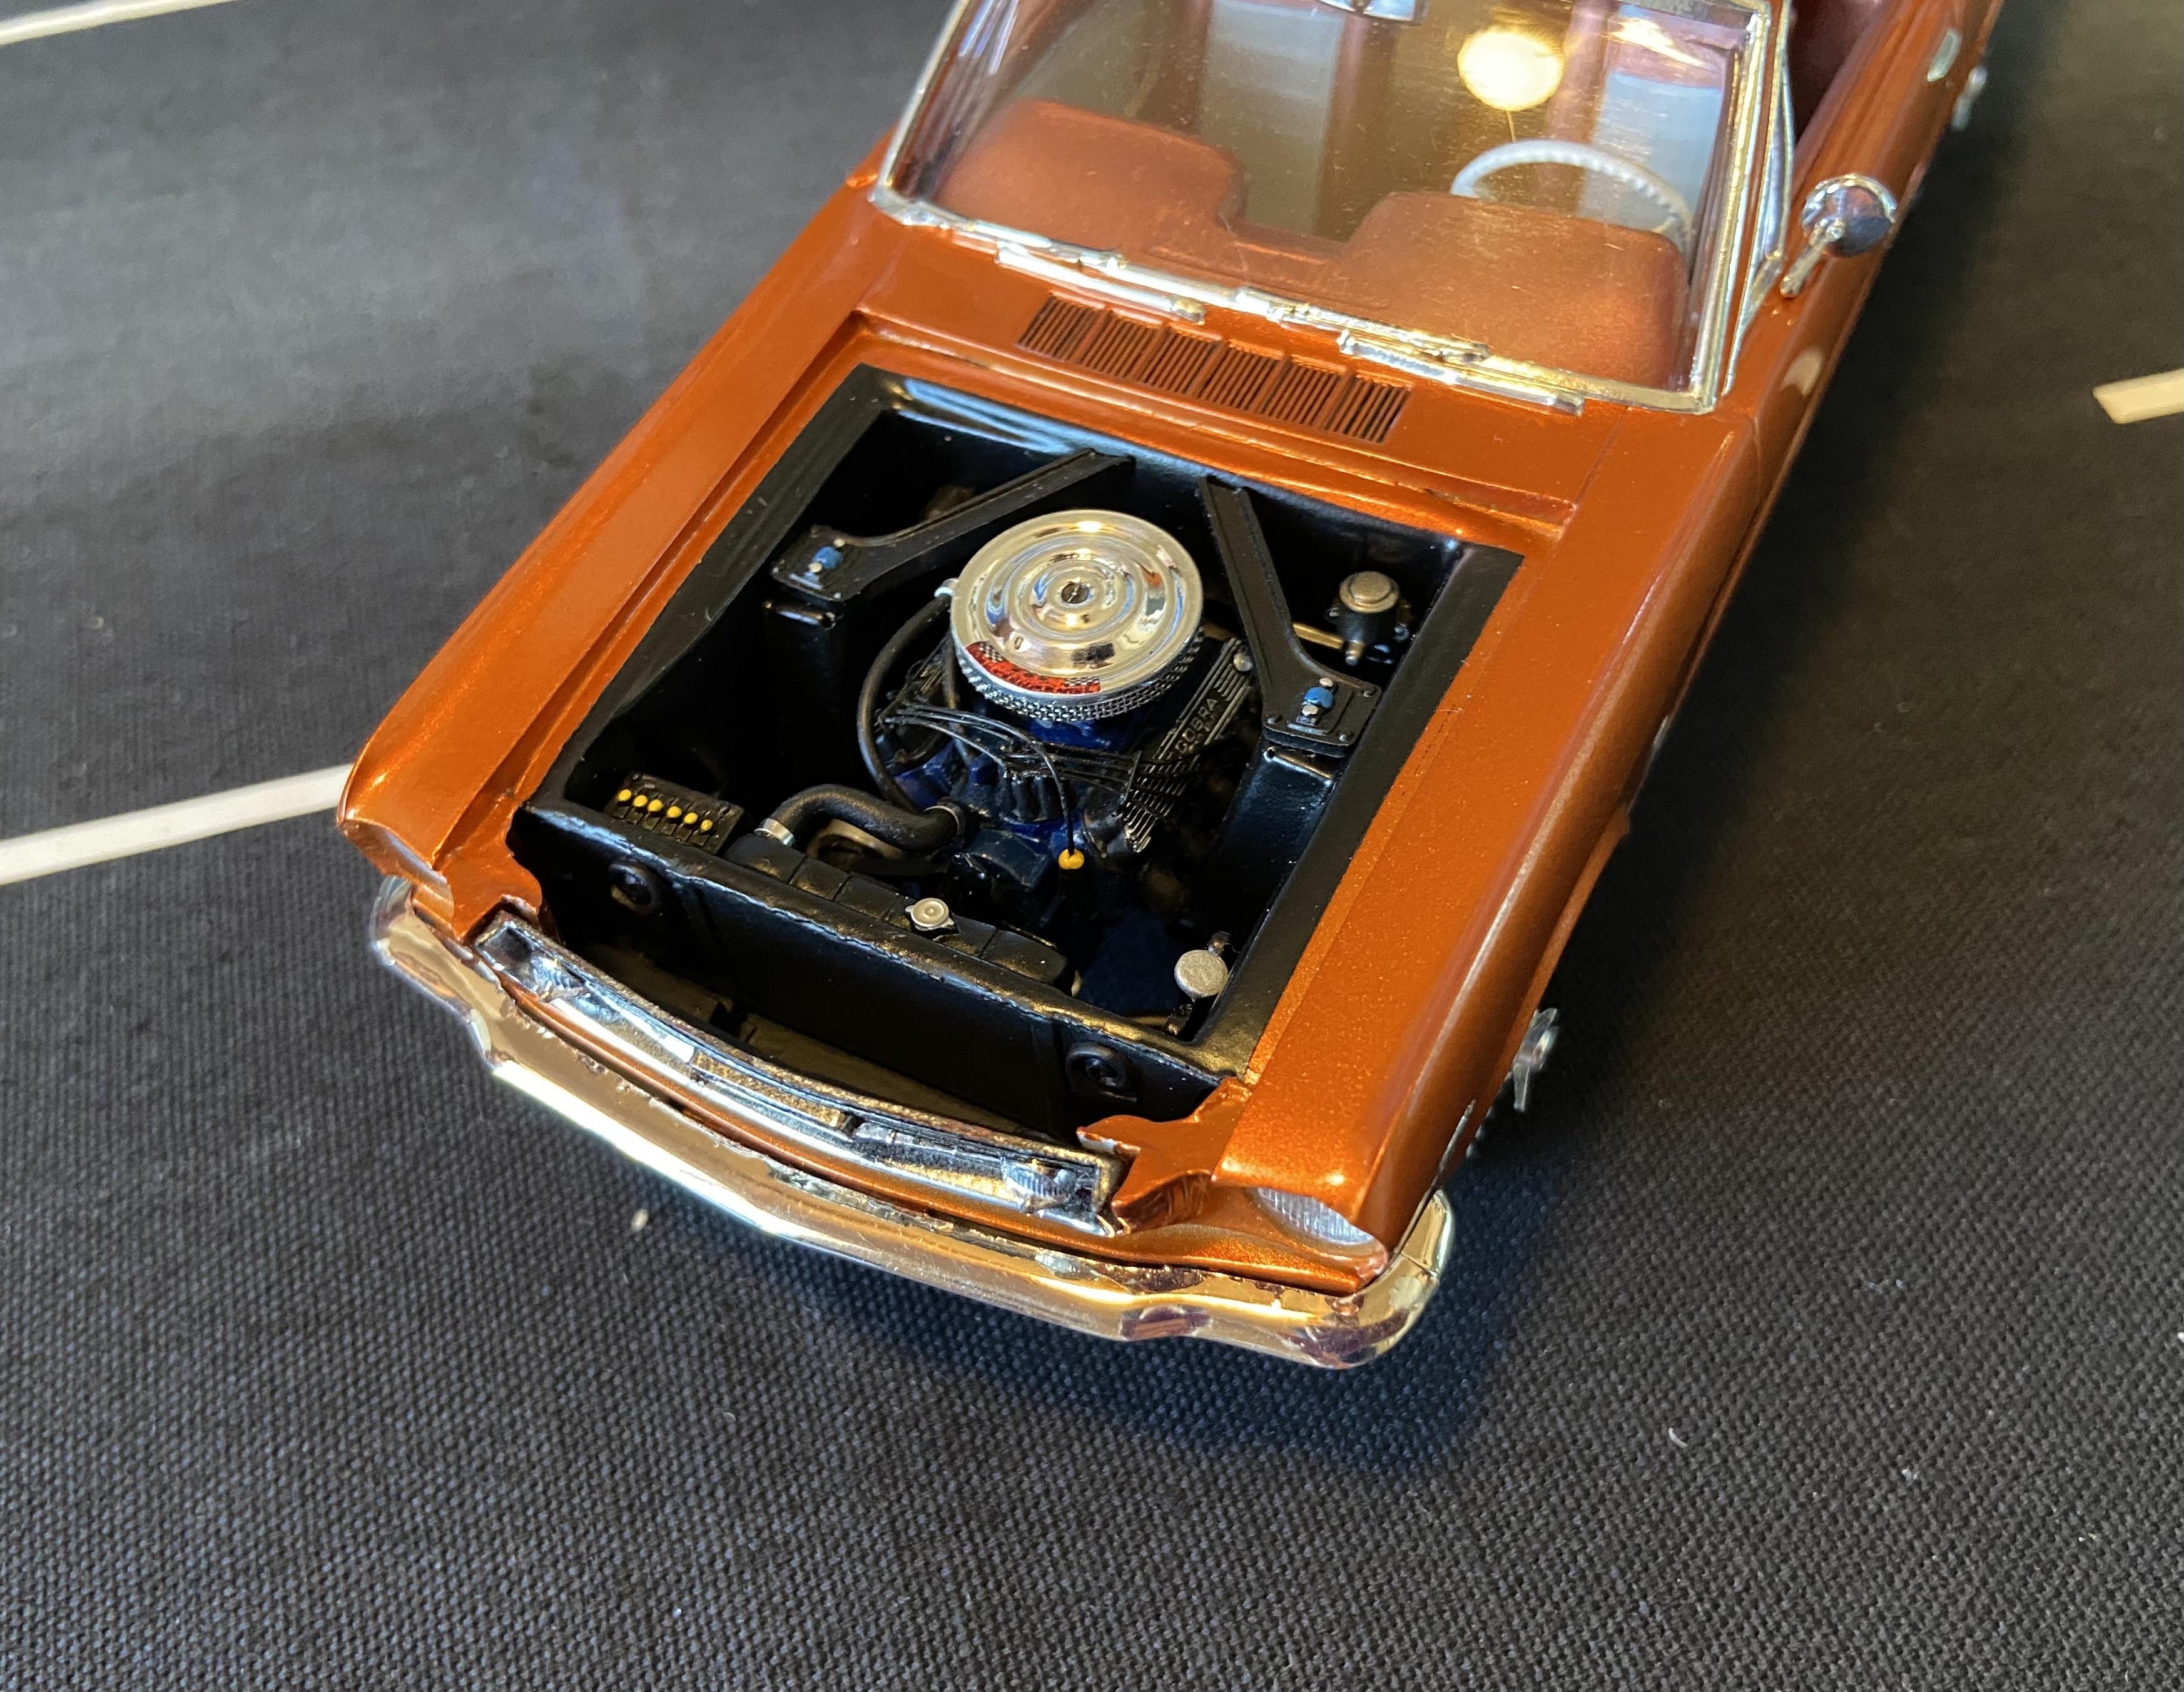
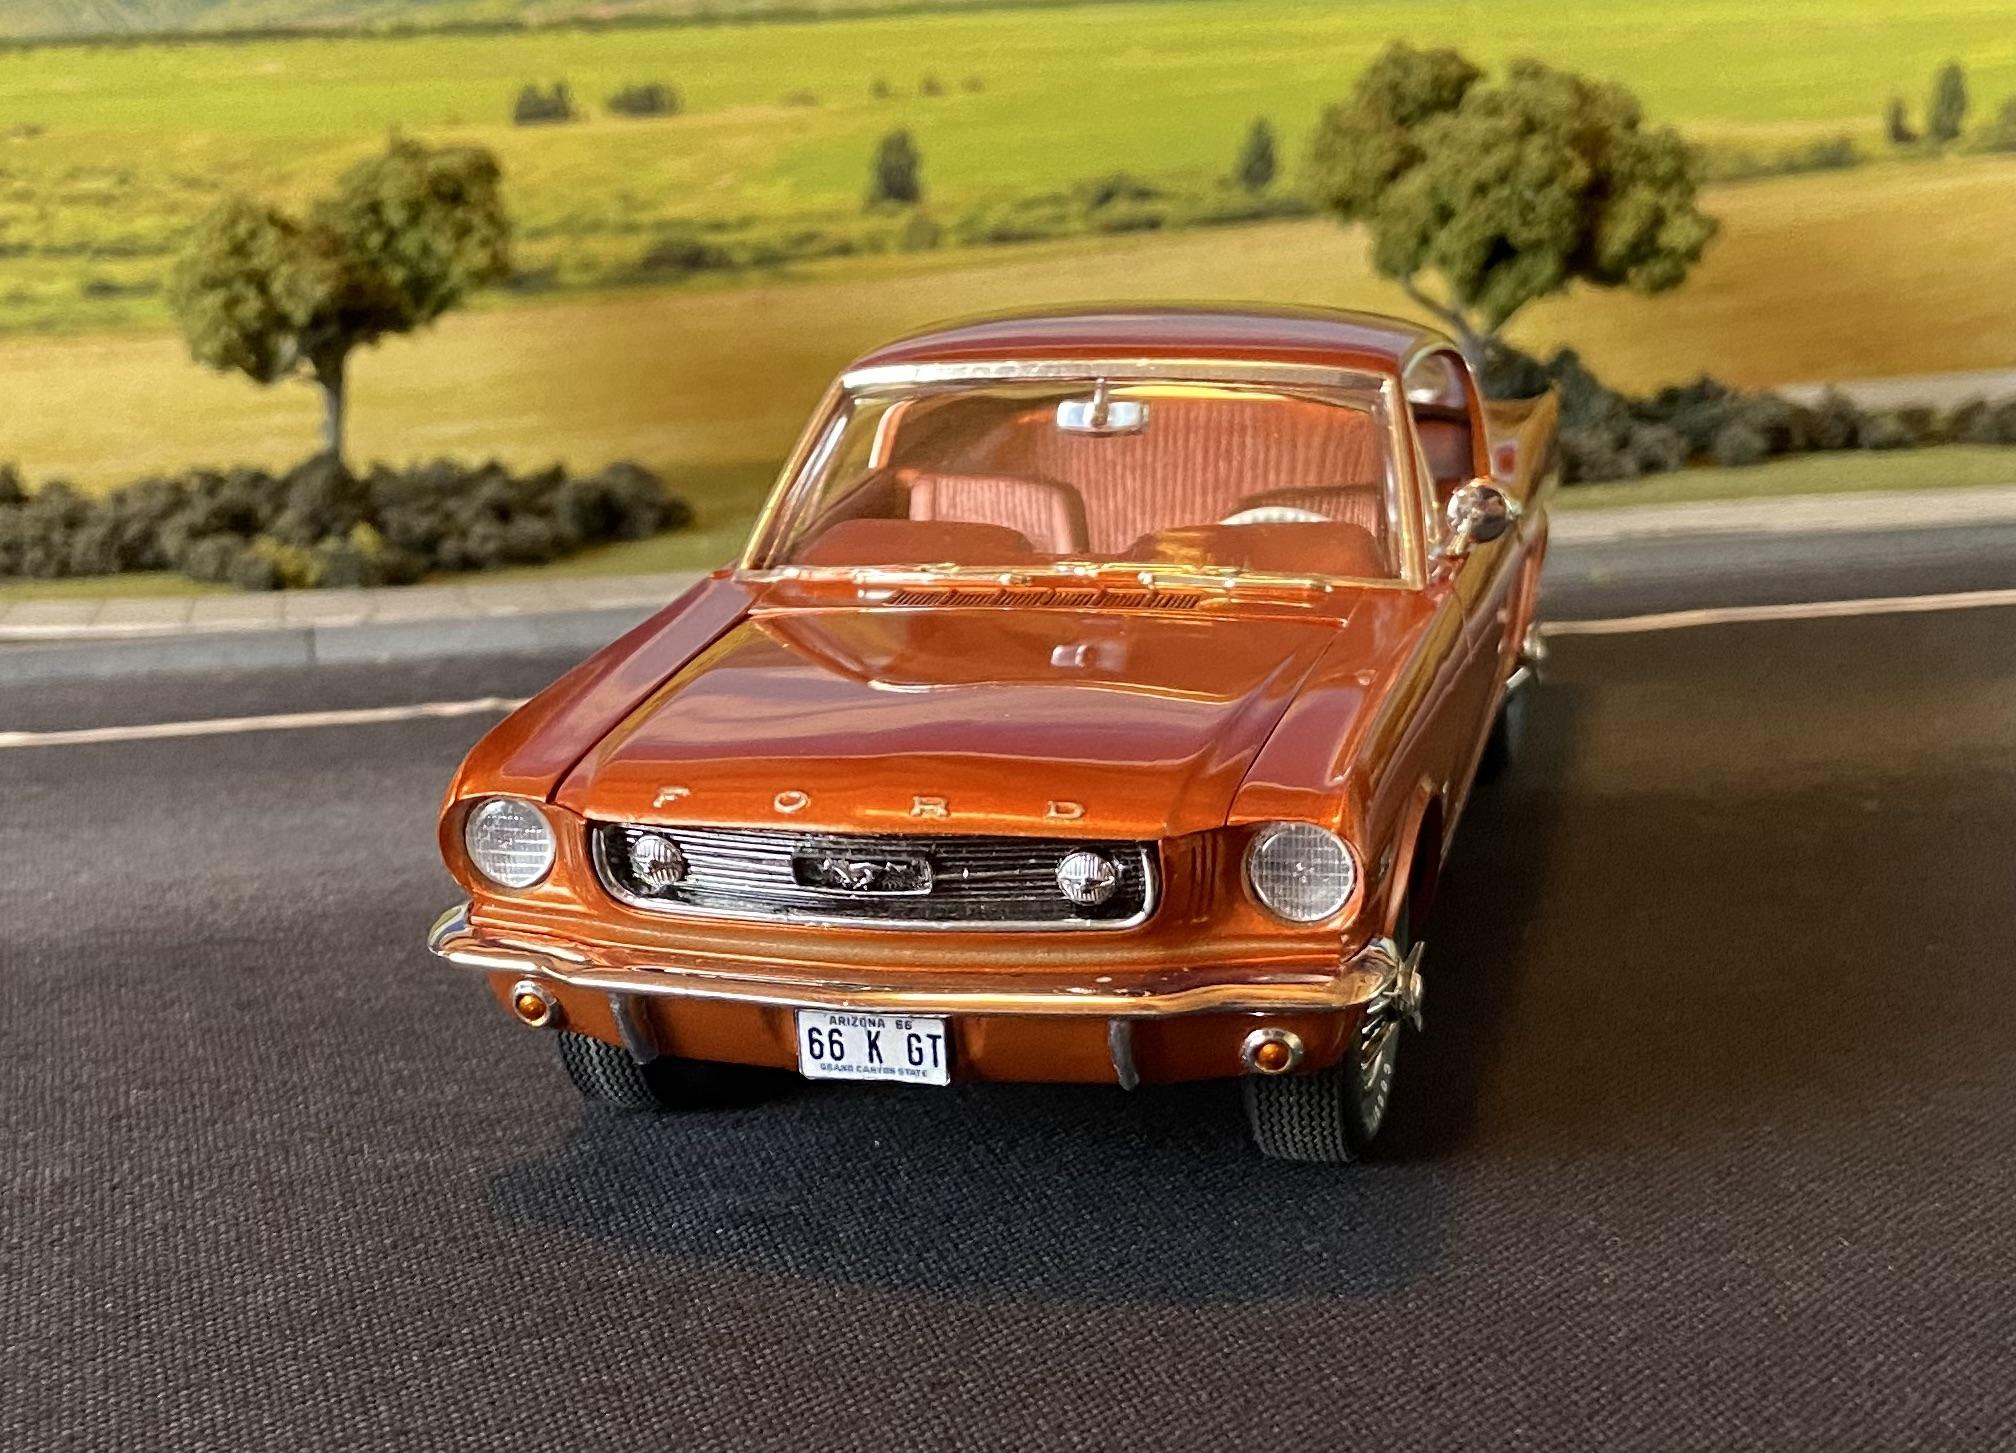
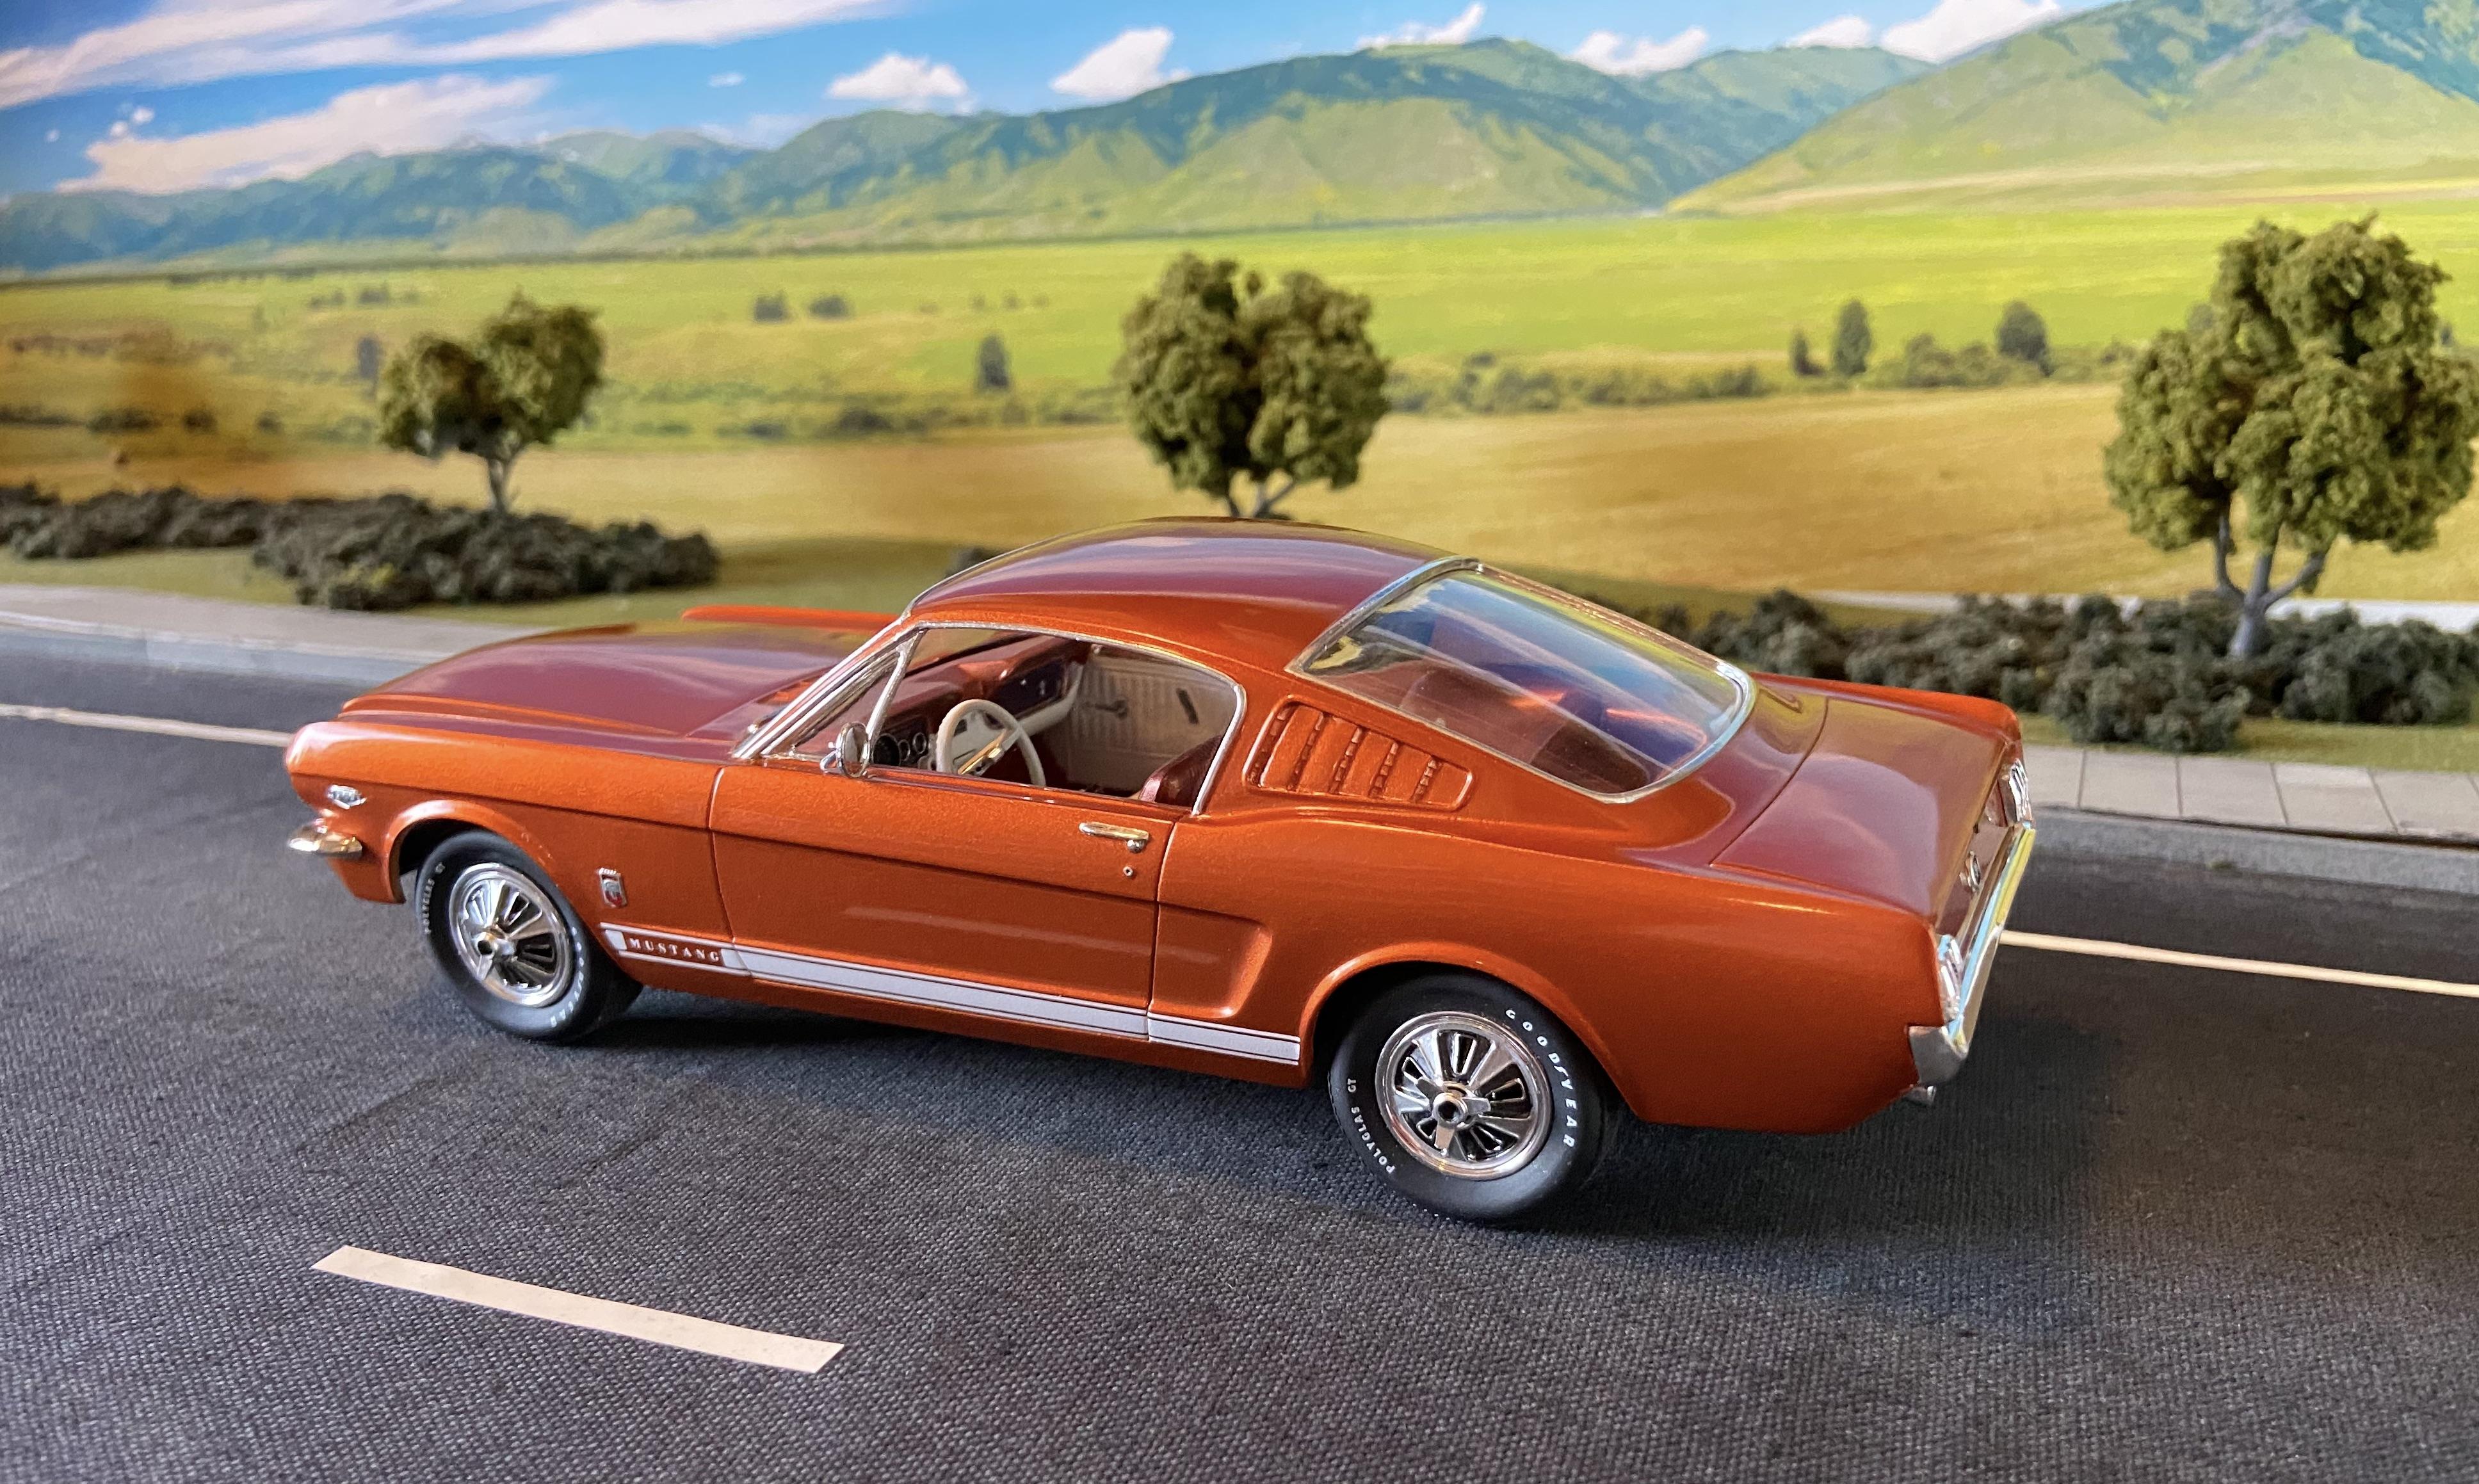
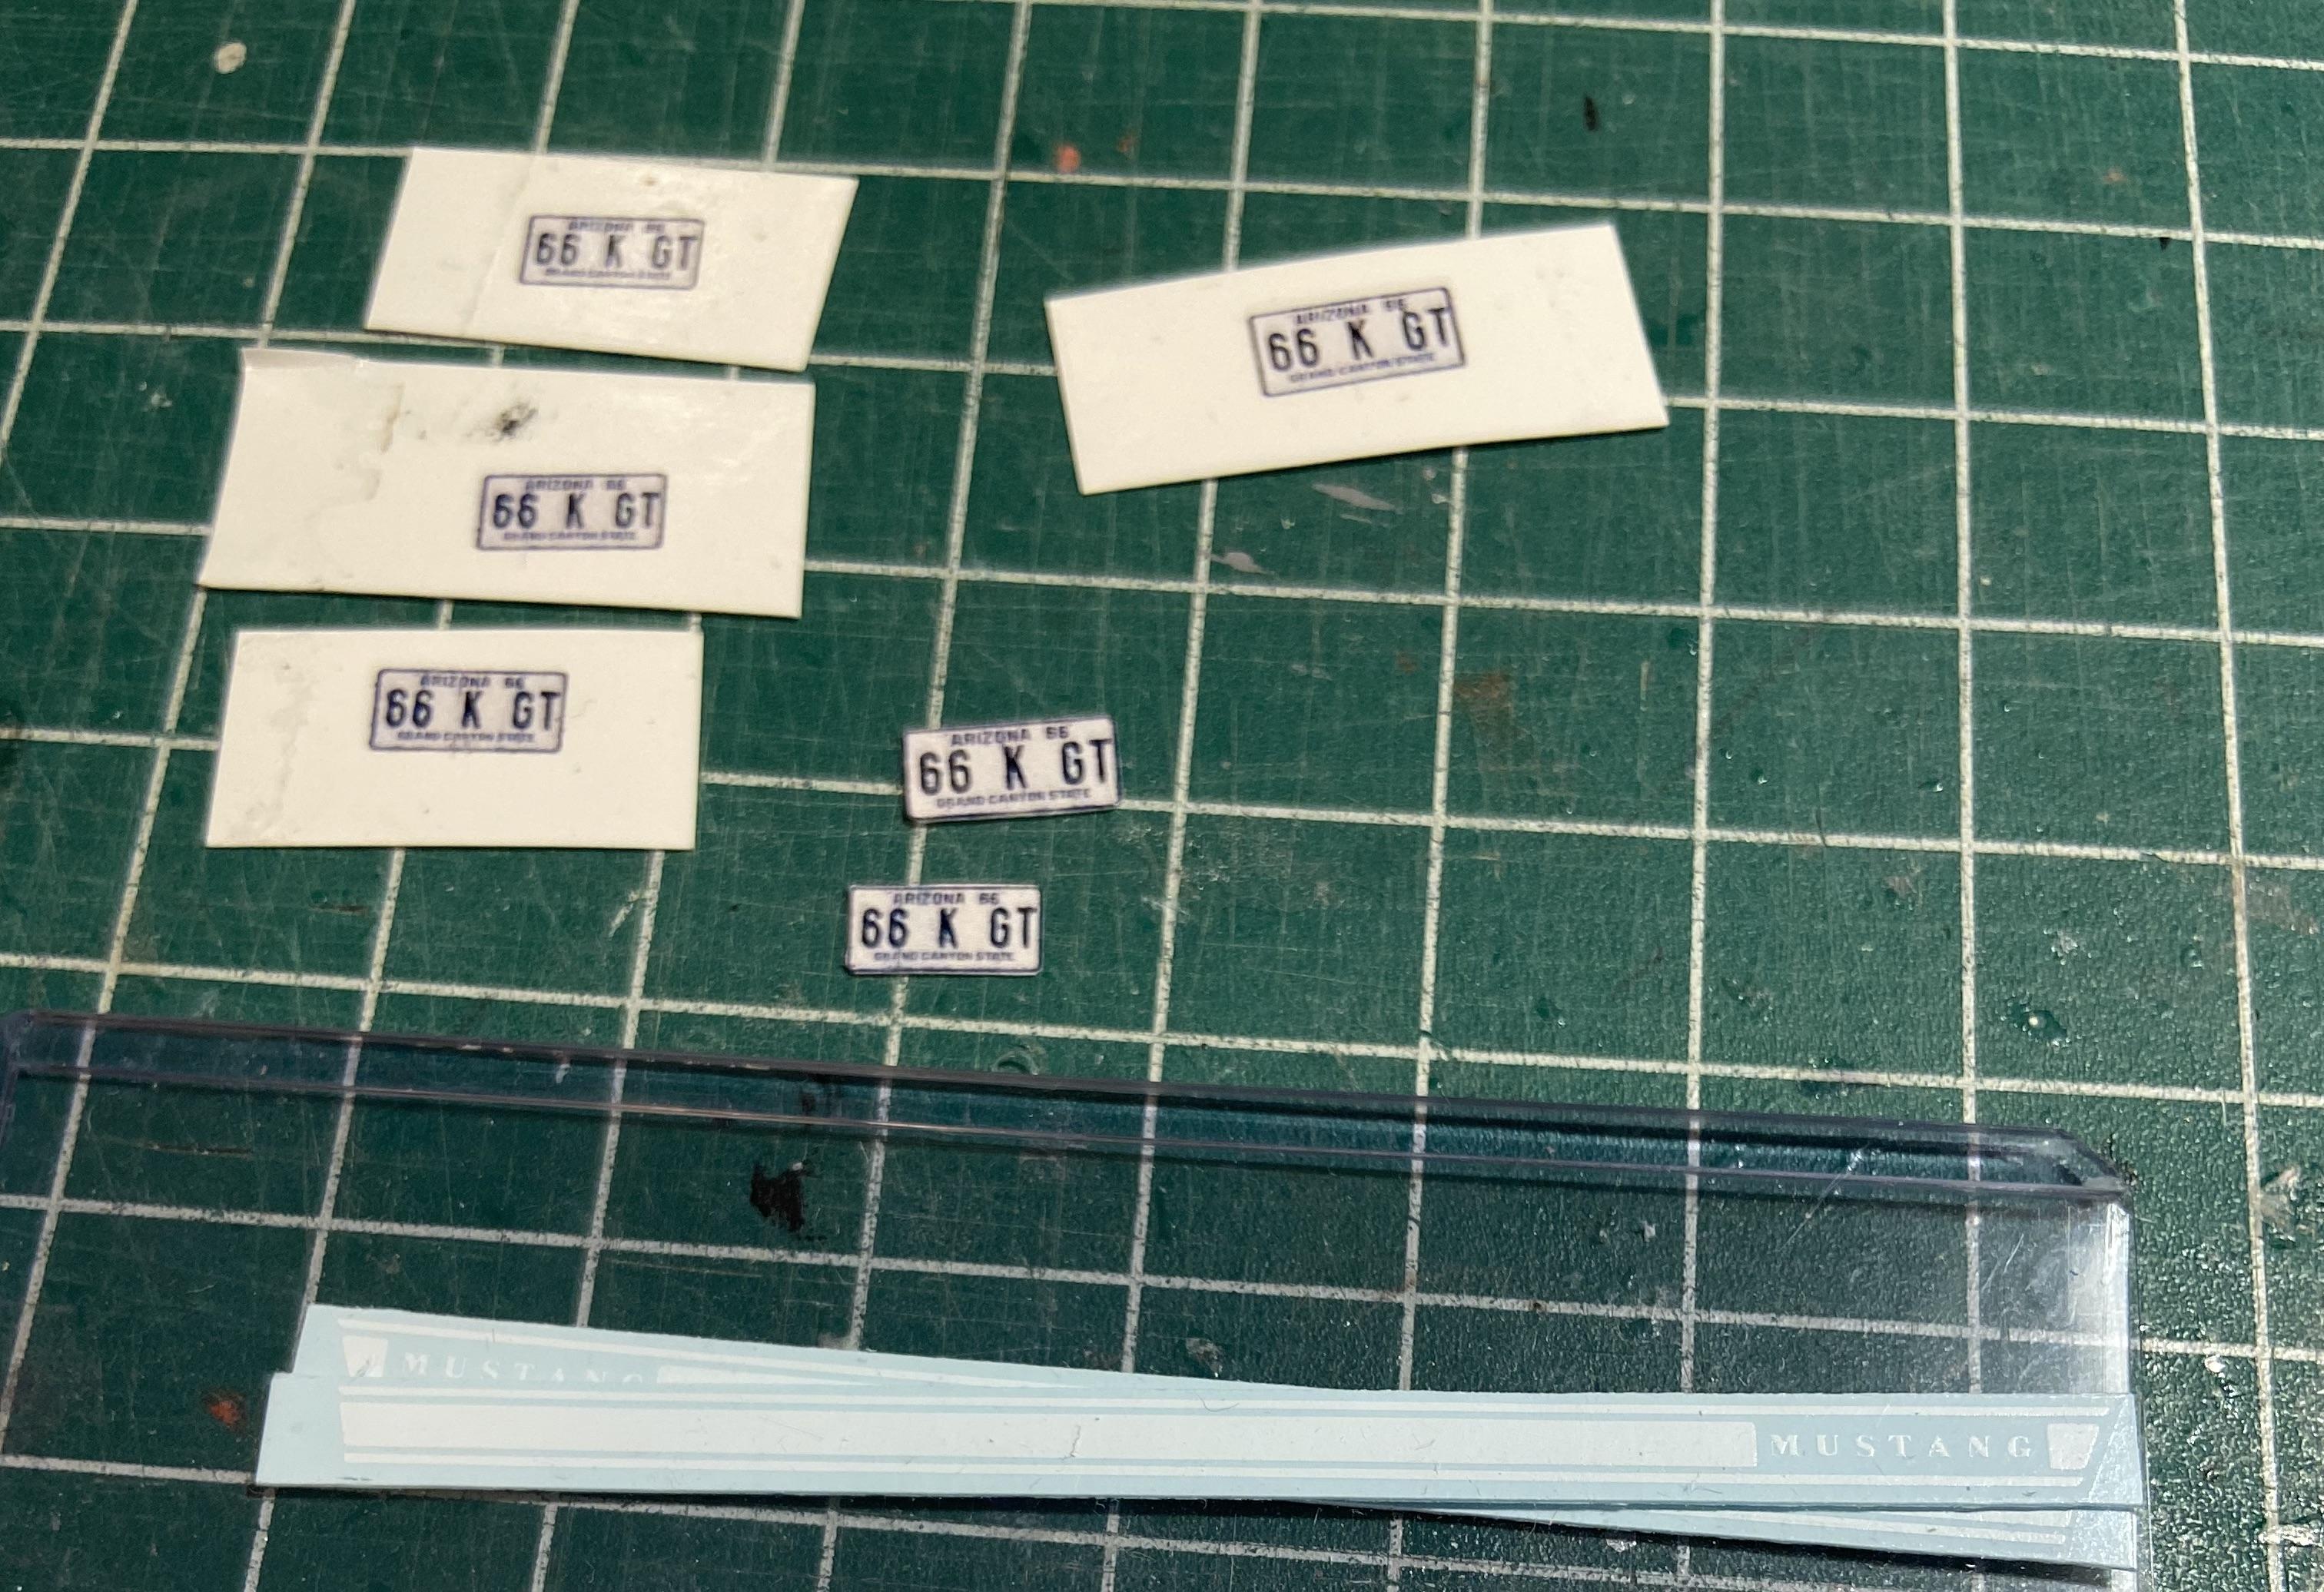
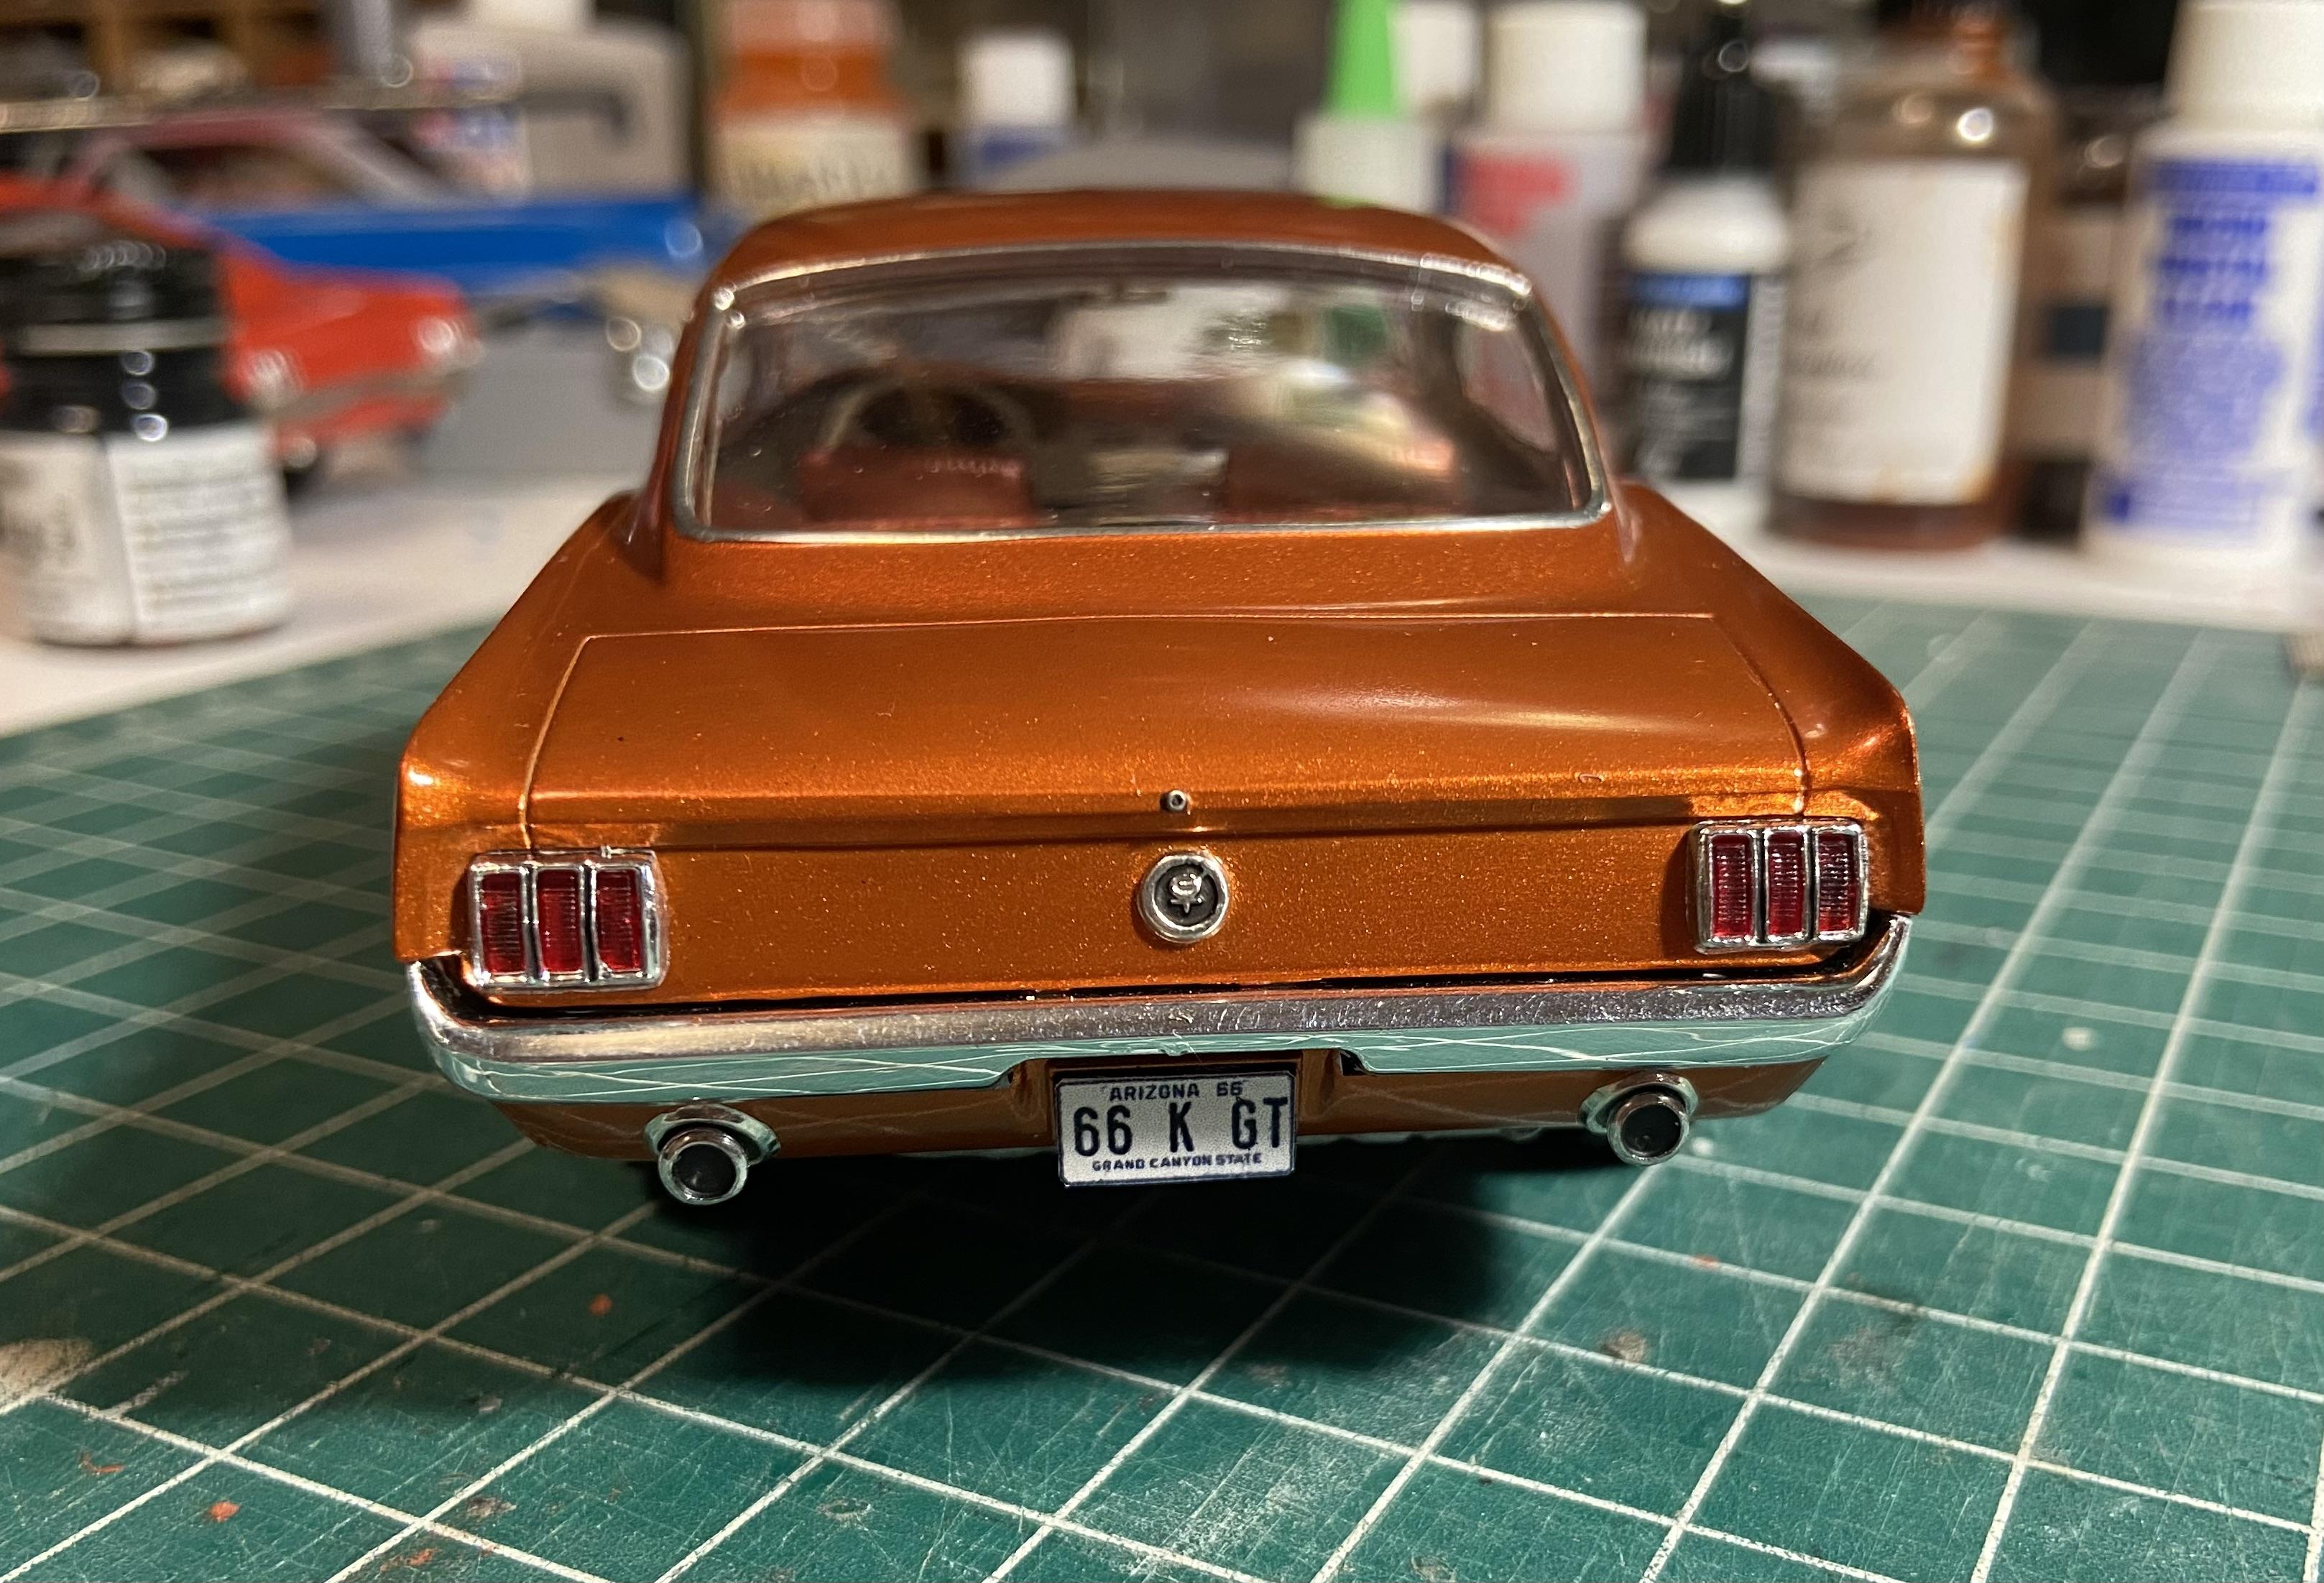
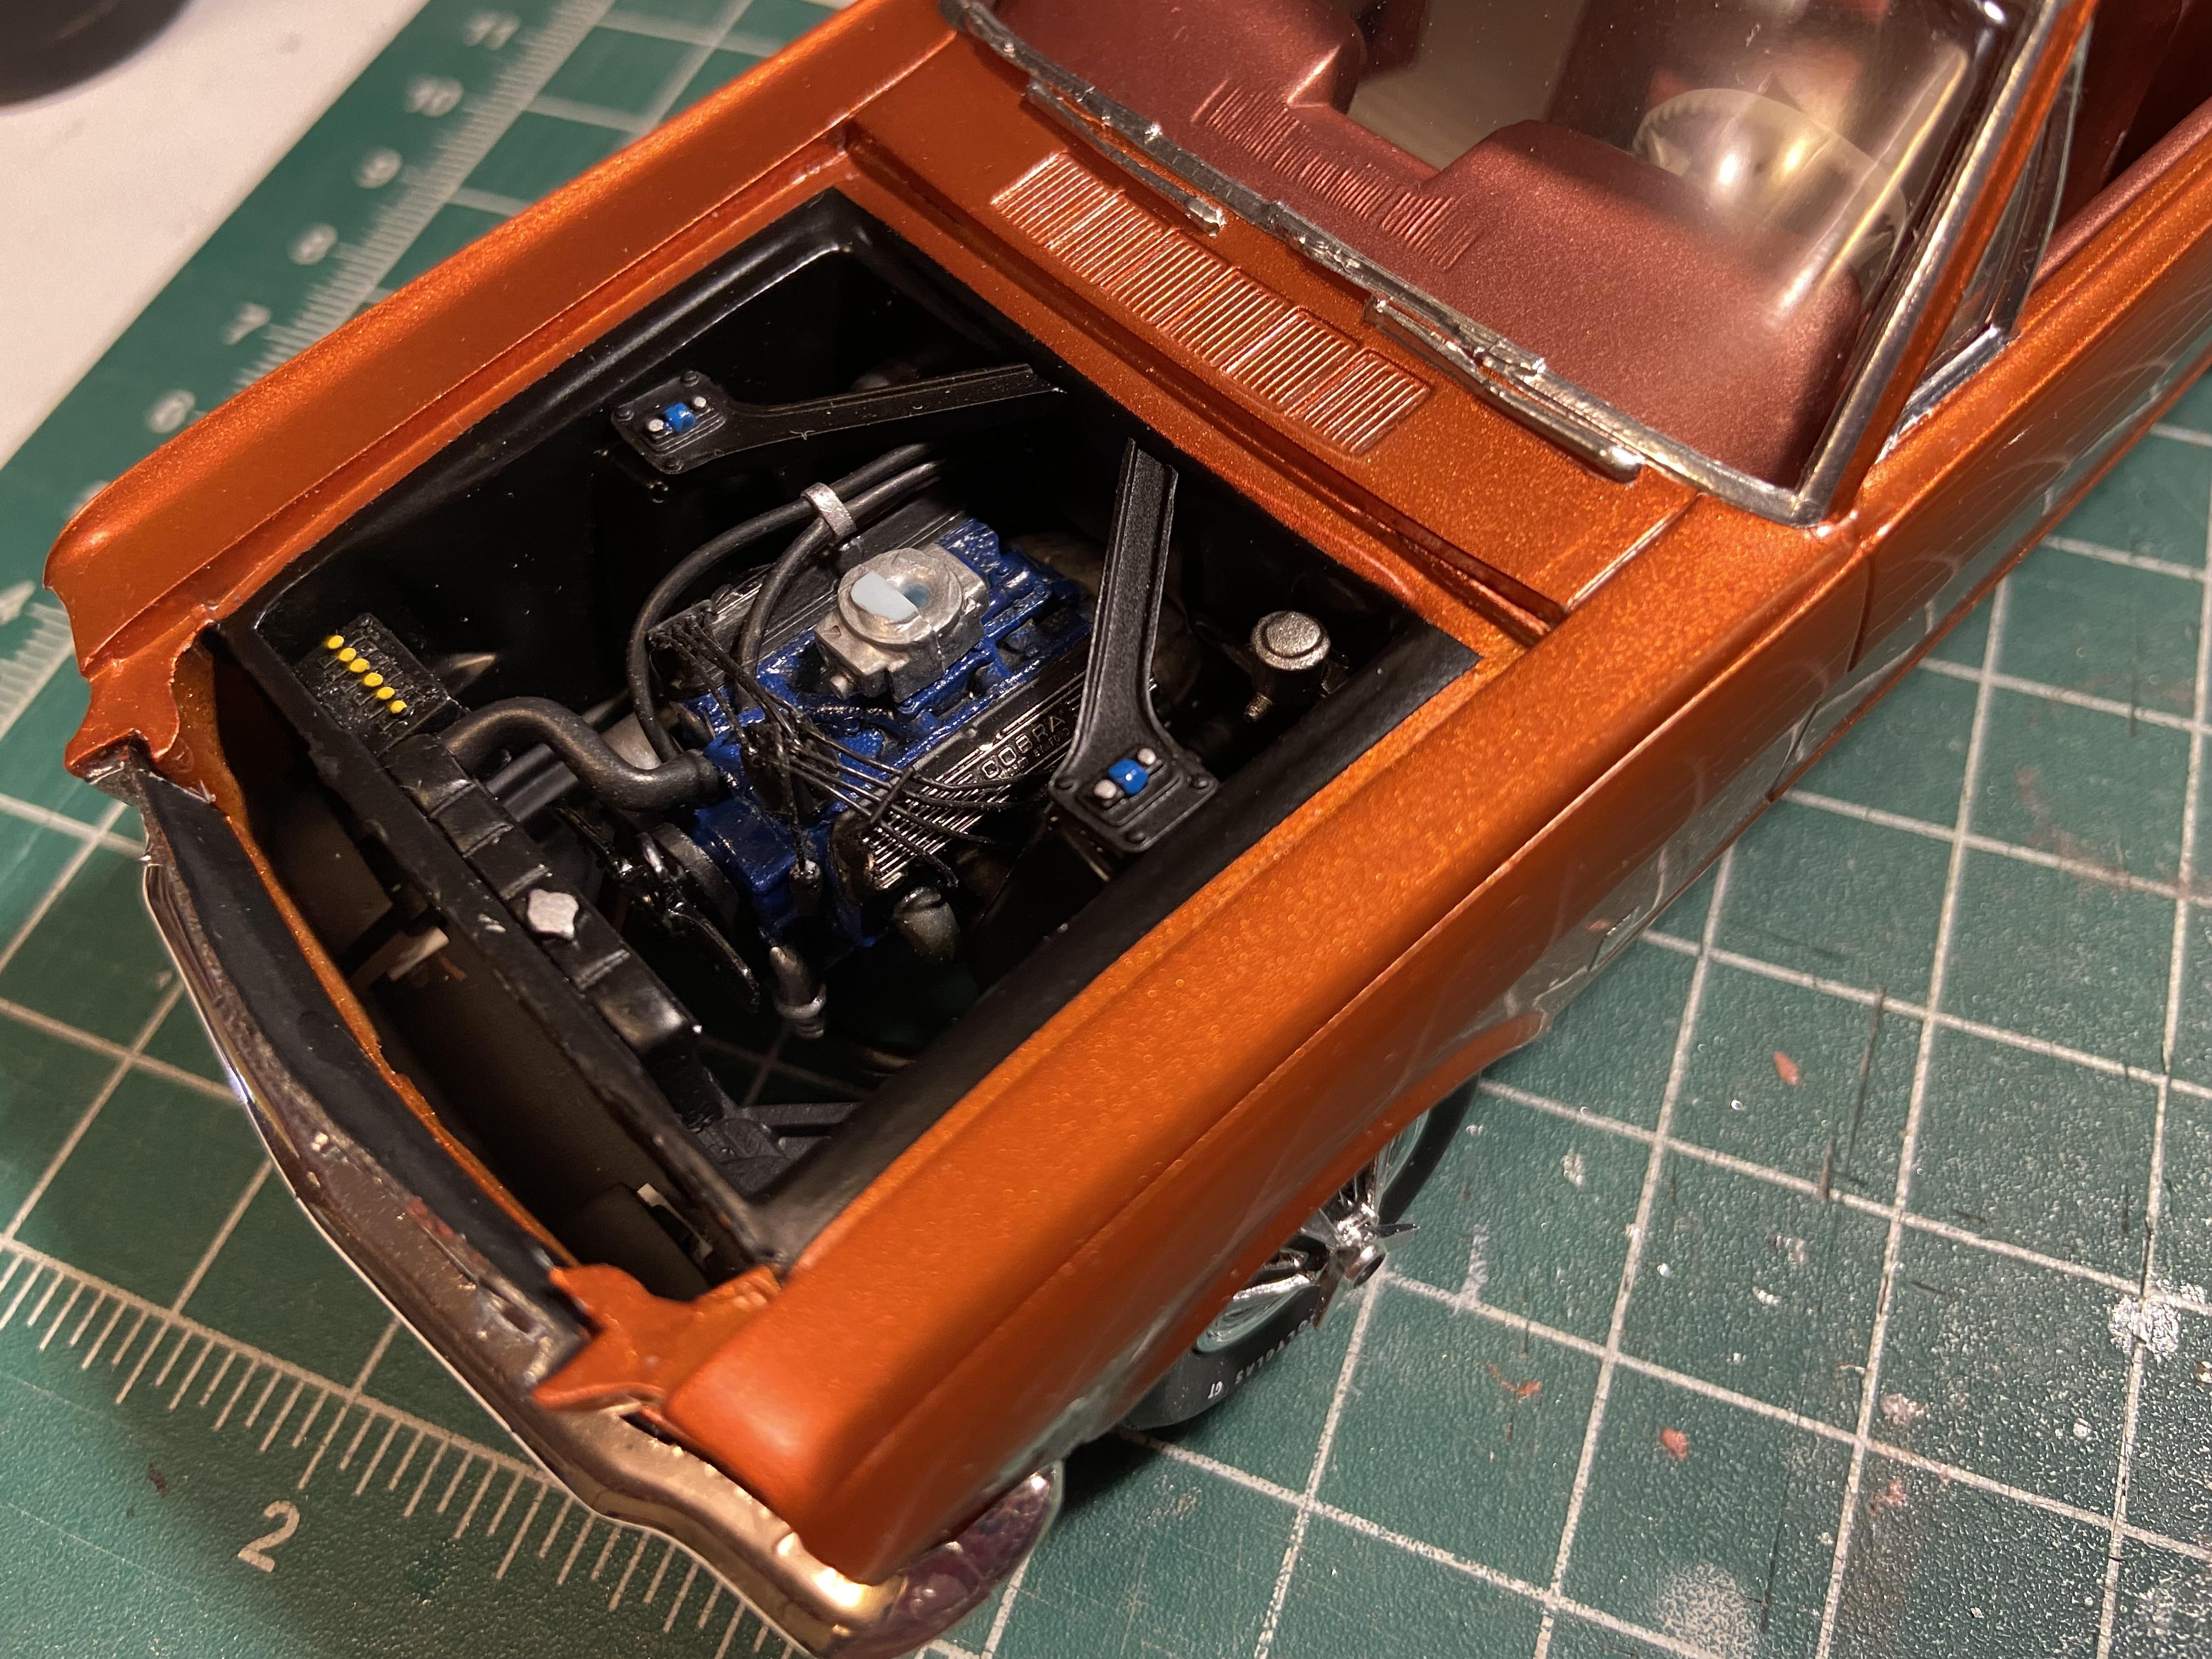
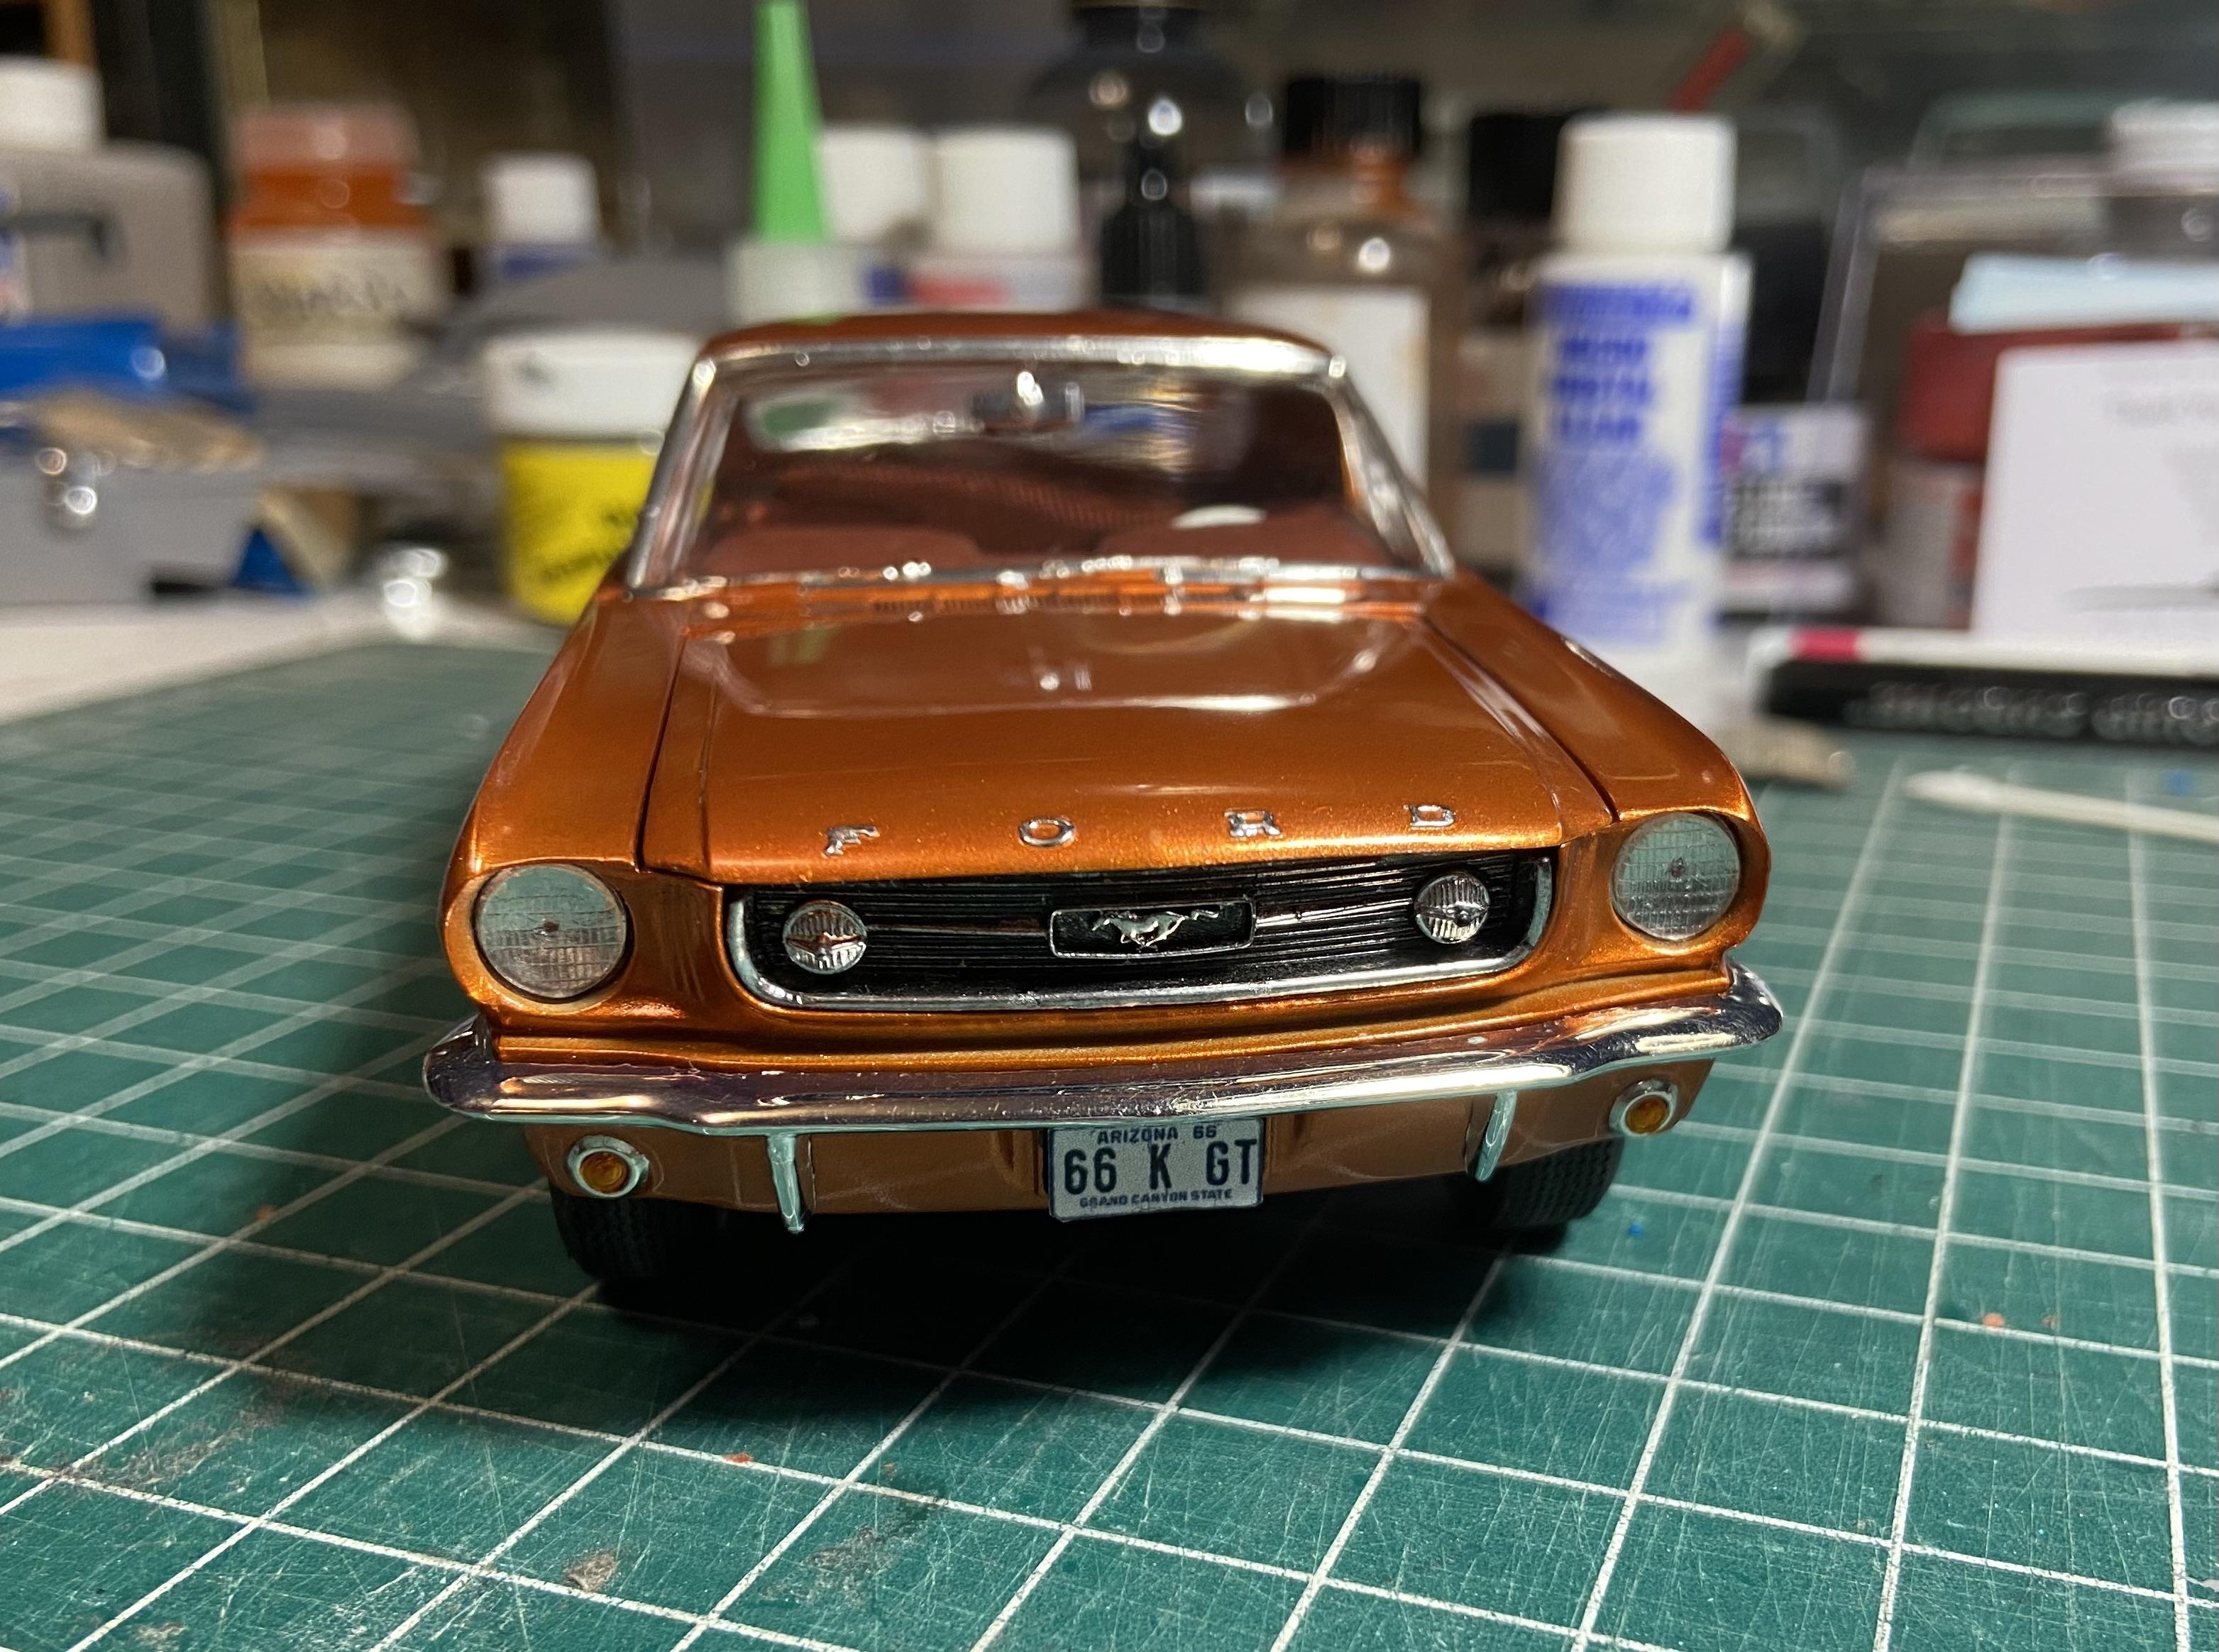
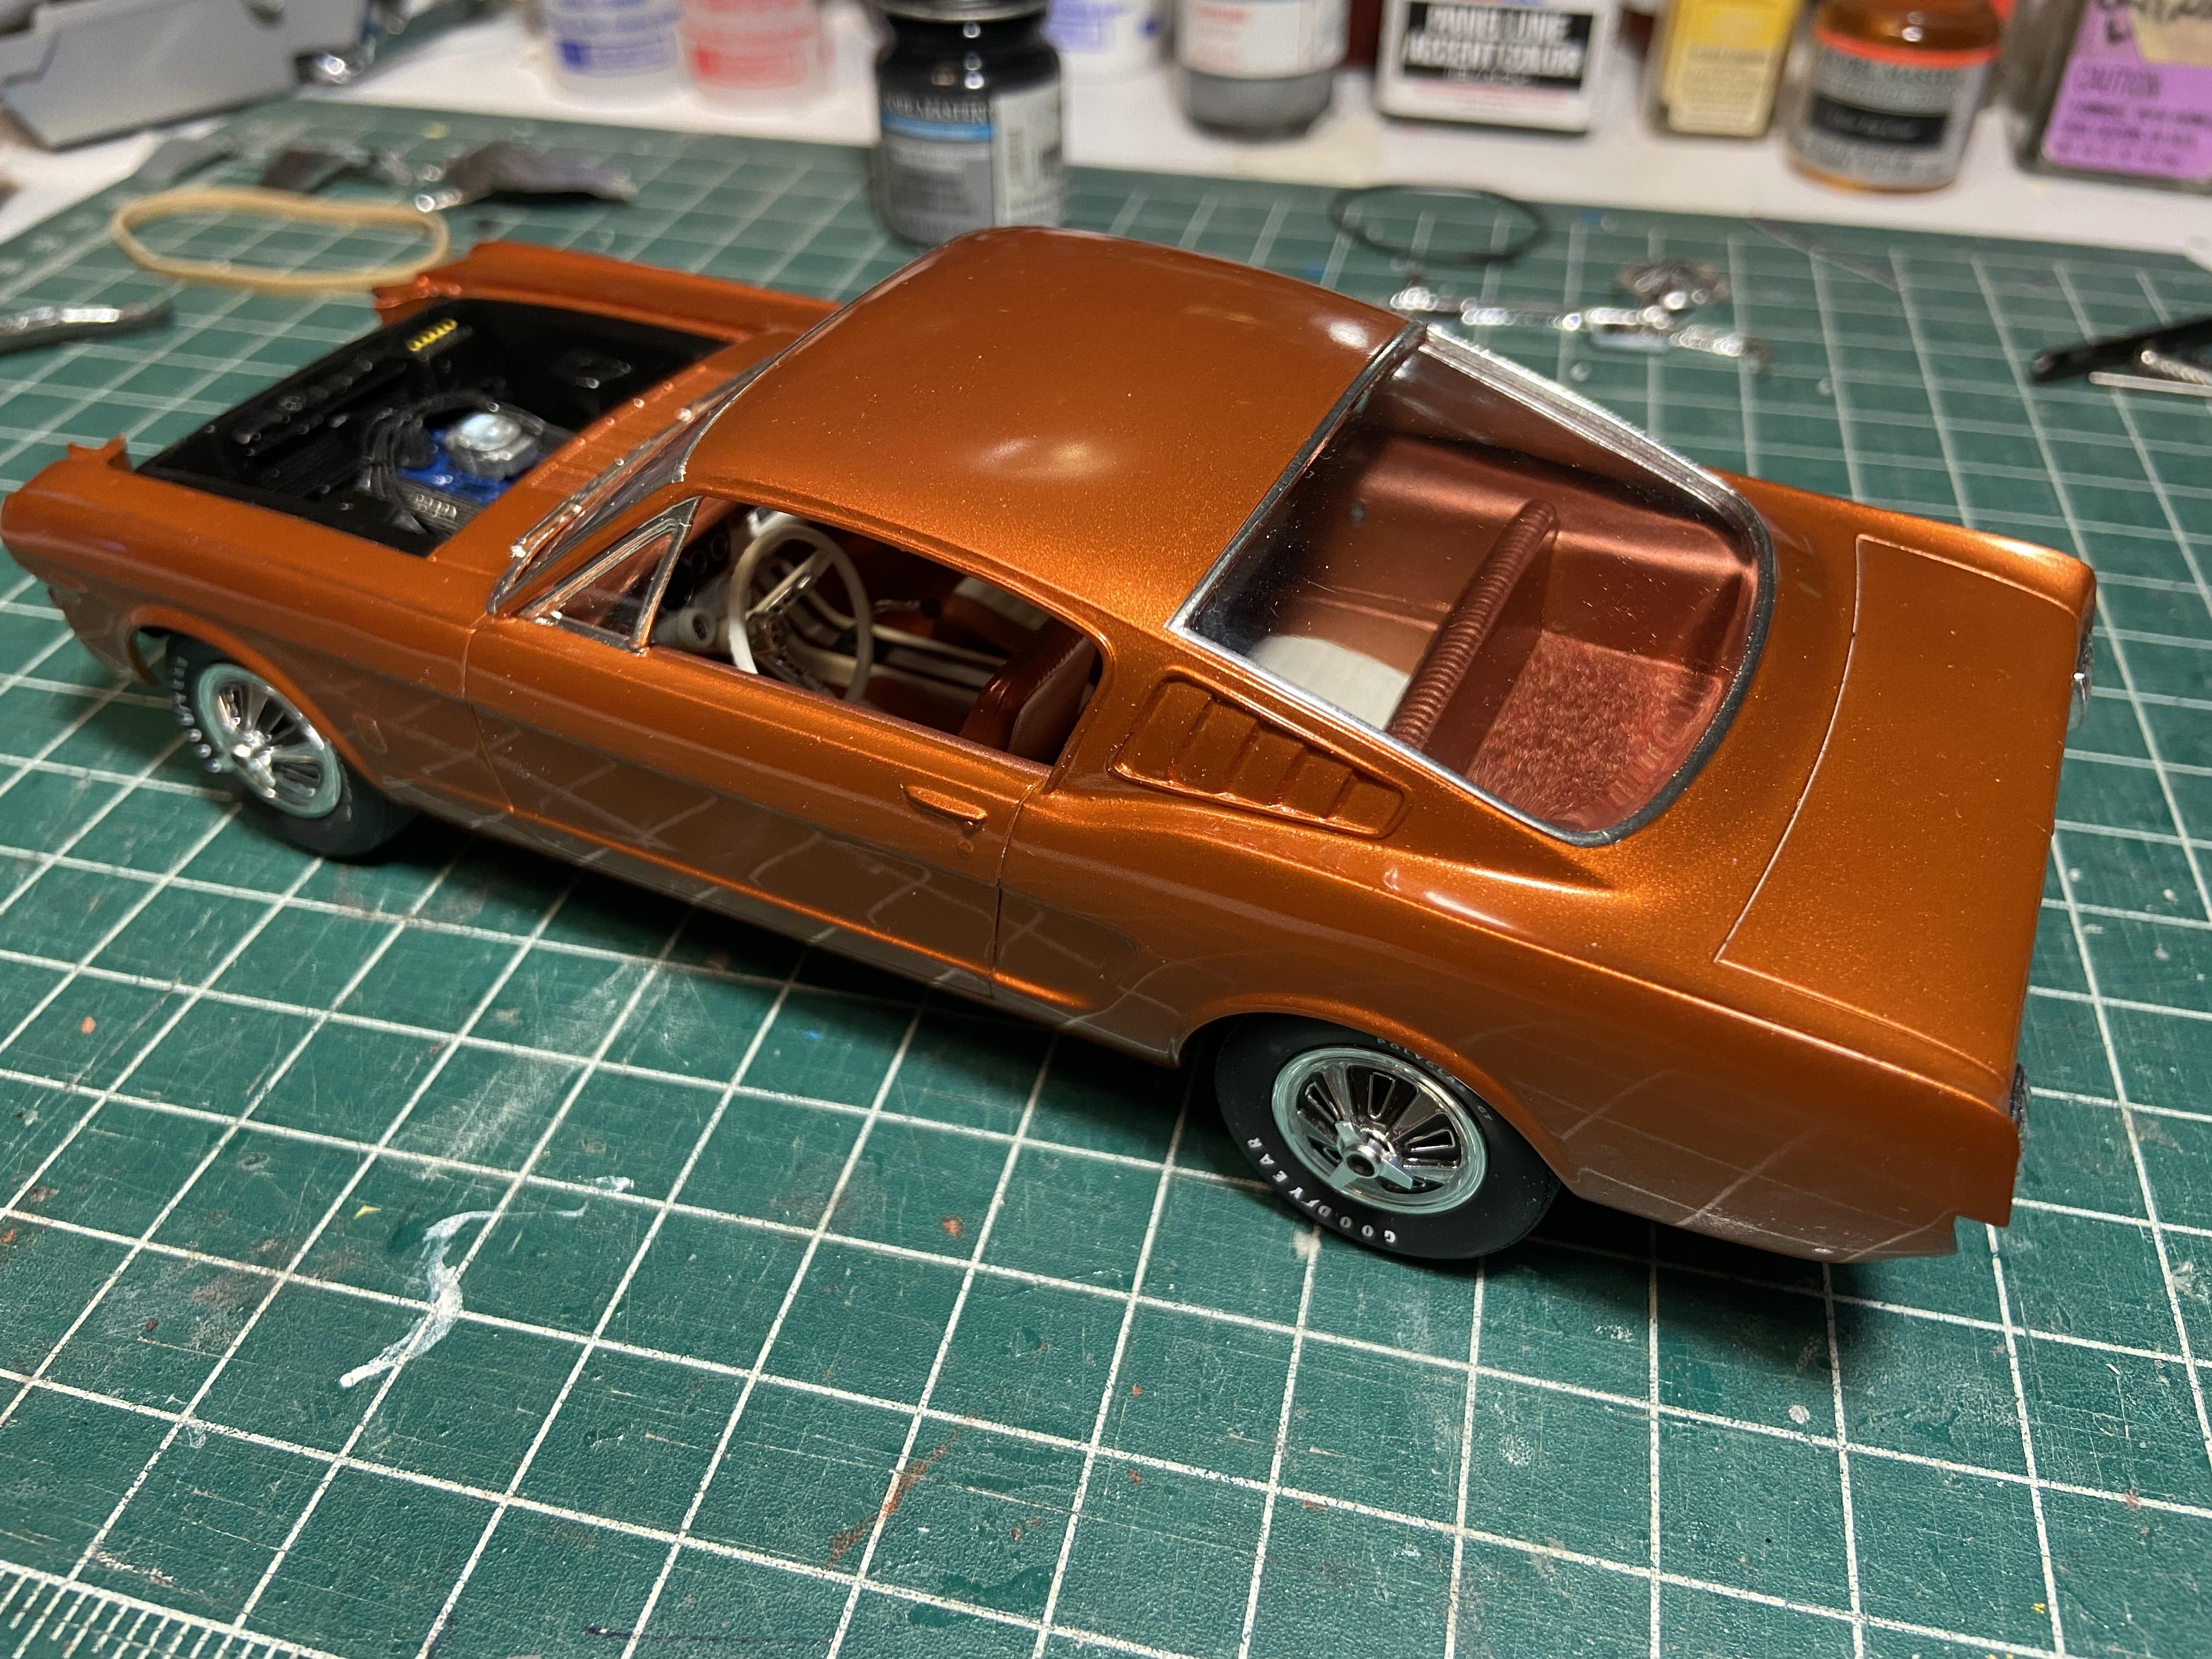
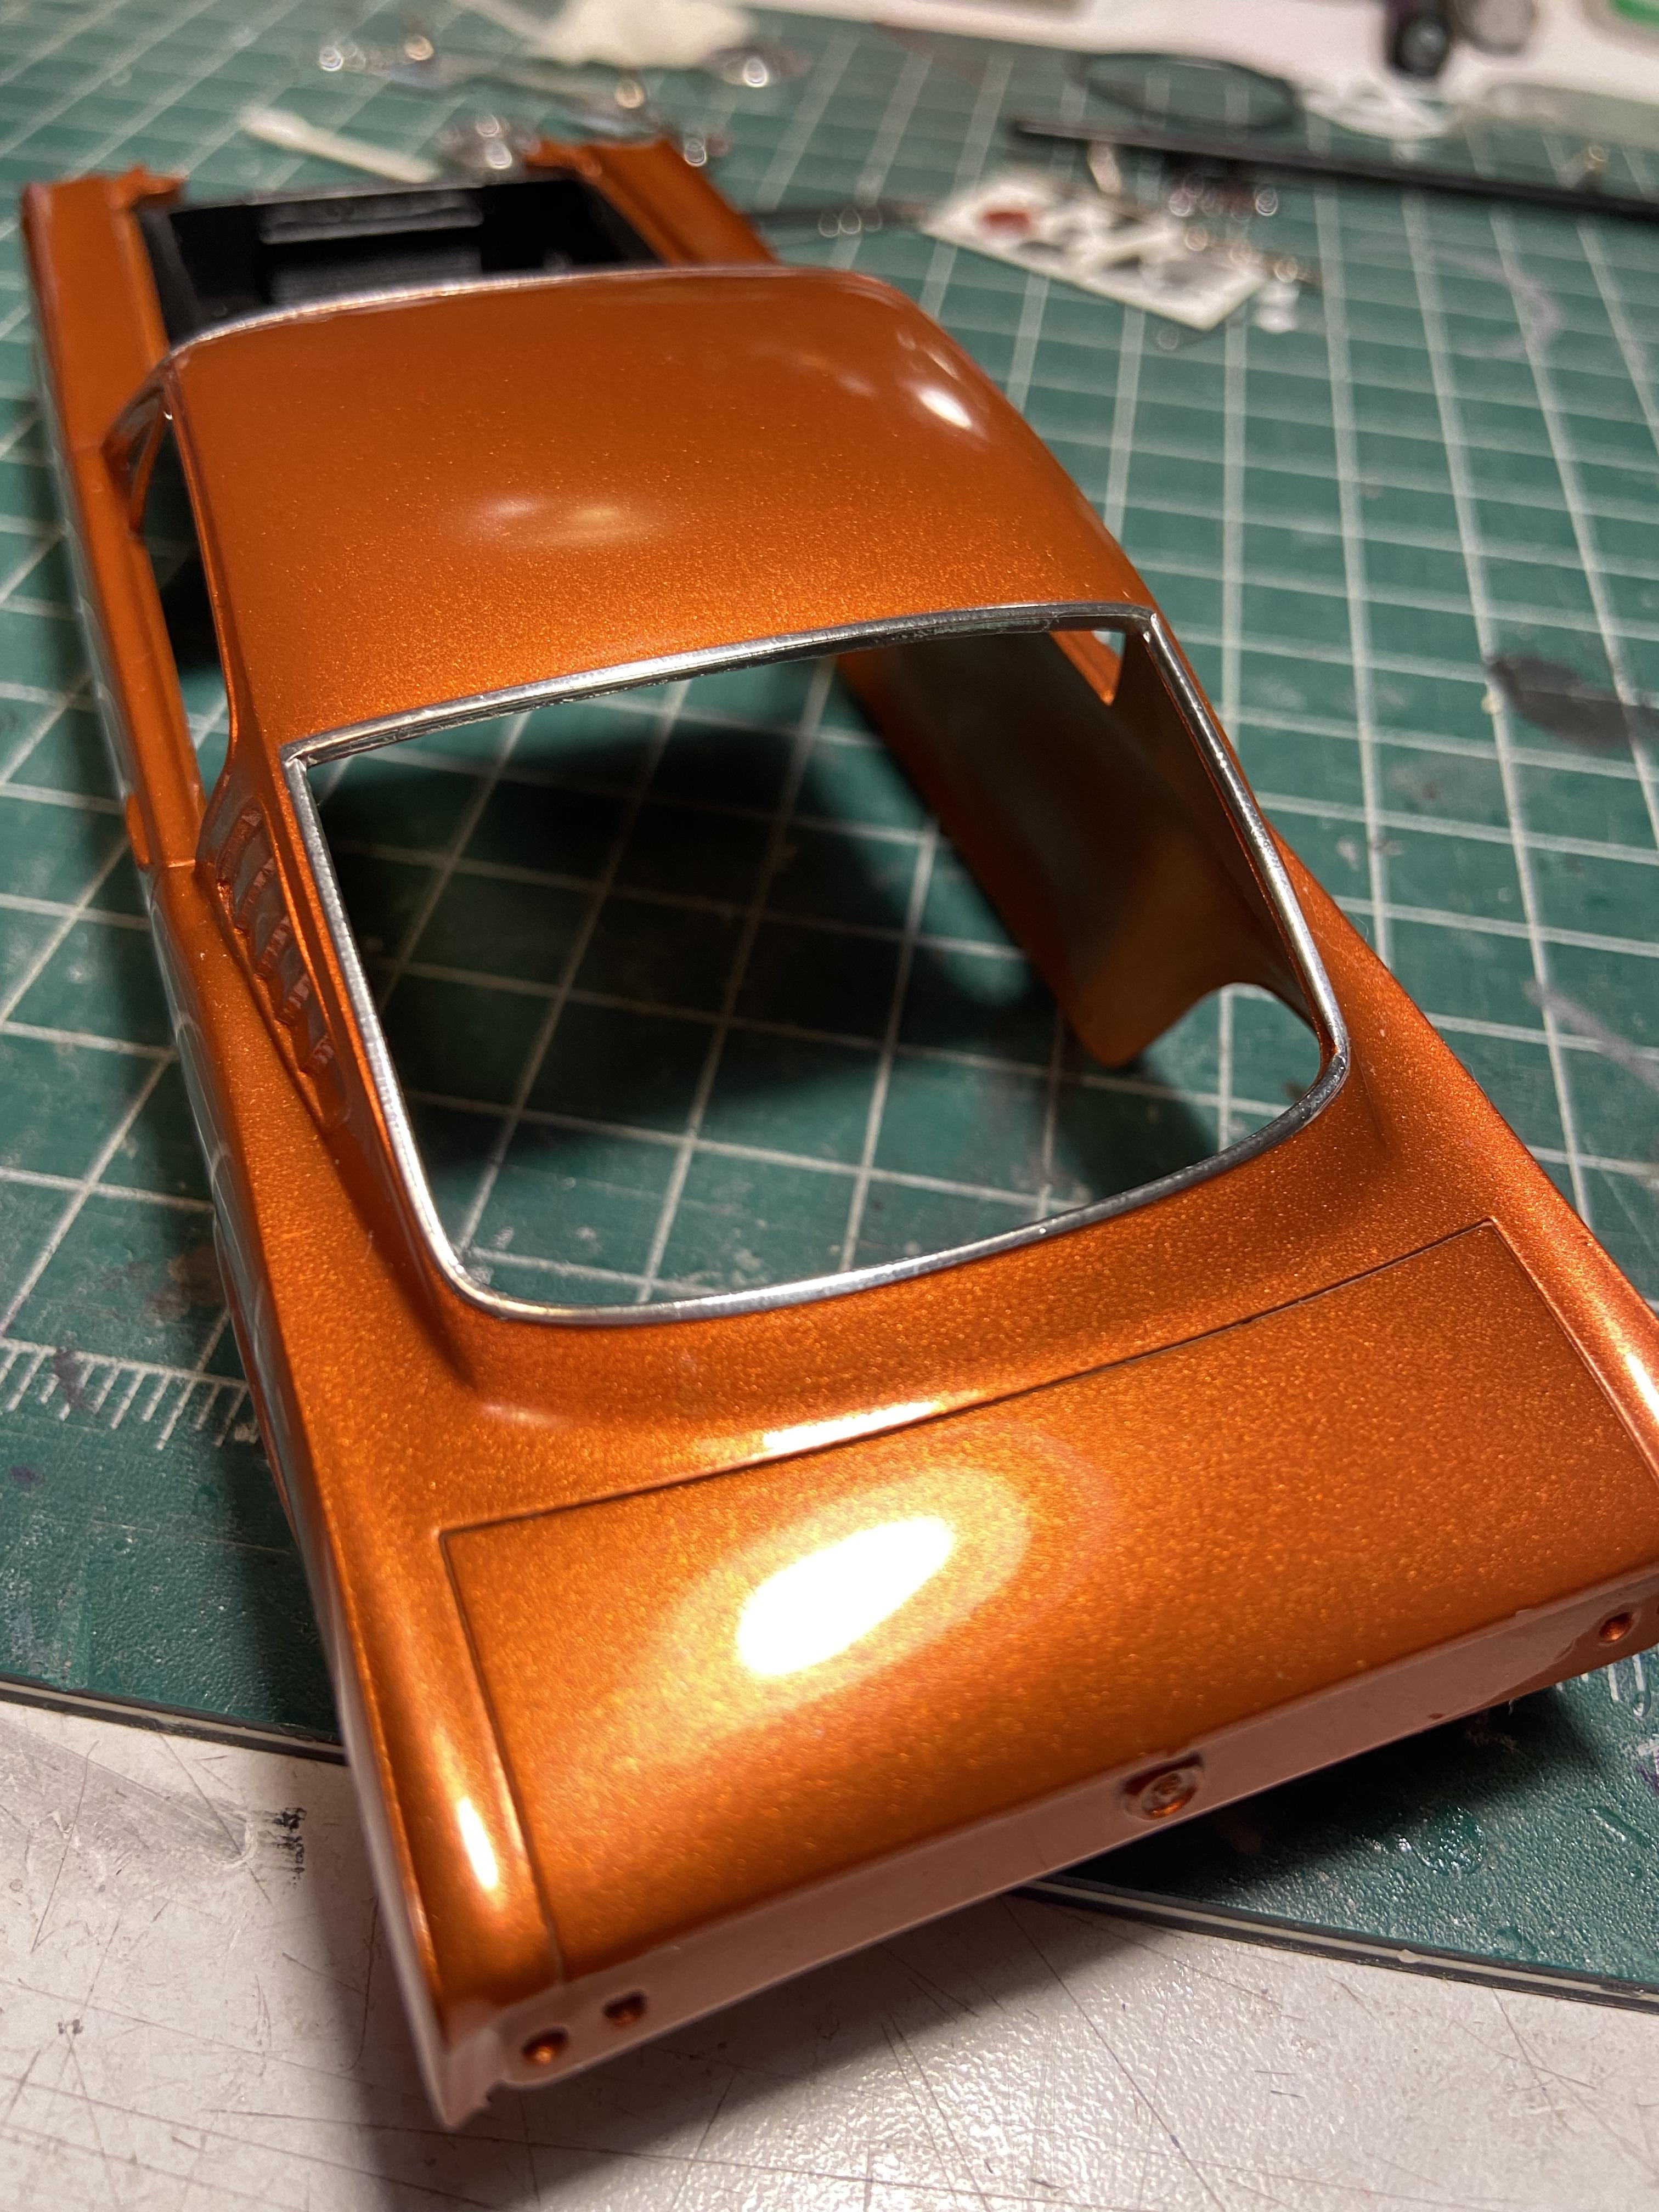
The story of this car is in the build thread, basically a restored glue bomb that I bought a year ago and started working on after the new issue was announced by Round 2. It's basically a stock rebuild with a few exceptions, like the resin engine bay insert and a few other kitbashed details. It's meant to represent a 3 year old car that was looked after pretty well, the owner deciding to spruce it up with Cobra valve covers from the Ford dealer and a set of all-new 60 series Polyglas tires, because those were all the rage back in '69. These are from an AMT parts pack, the smaller of the two sizes. Paint is Scalefinishes Emberglo base/clear, with a matching interior. Side stripes are reproduction decals sold on ebay by Mustang 2+2 Toy Supply. He makes these primarily for the promos and the Philco radios, but they are the same as what was included in the original kits. I printed the license plates and the Hipo 289 air cleaner decal. The expiration sticker on the rear plate was cut from another decal plate. All trim and emblems are Bare Metal foil, windshield wiper blades are slivers of automotive pinstripe tape. Under the hood, the final details were photo etched radiator hose clamps and the center of the radiator cap, and the washer bag from a Monogram '65 kit. I added the two horns on each side of the radiator from the Monogram kit, cut from the core support. They were a little too large, so I filed them down to exactly approximately more or less roughly in the neighborhood of 1/25 scale. It will be interesting to see how the new Fastback kit compares to the original, and what new parts are in the box.
- 50 replies
-
- 14
-

-
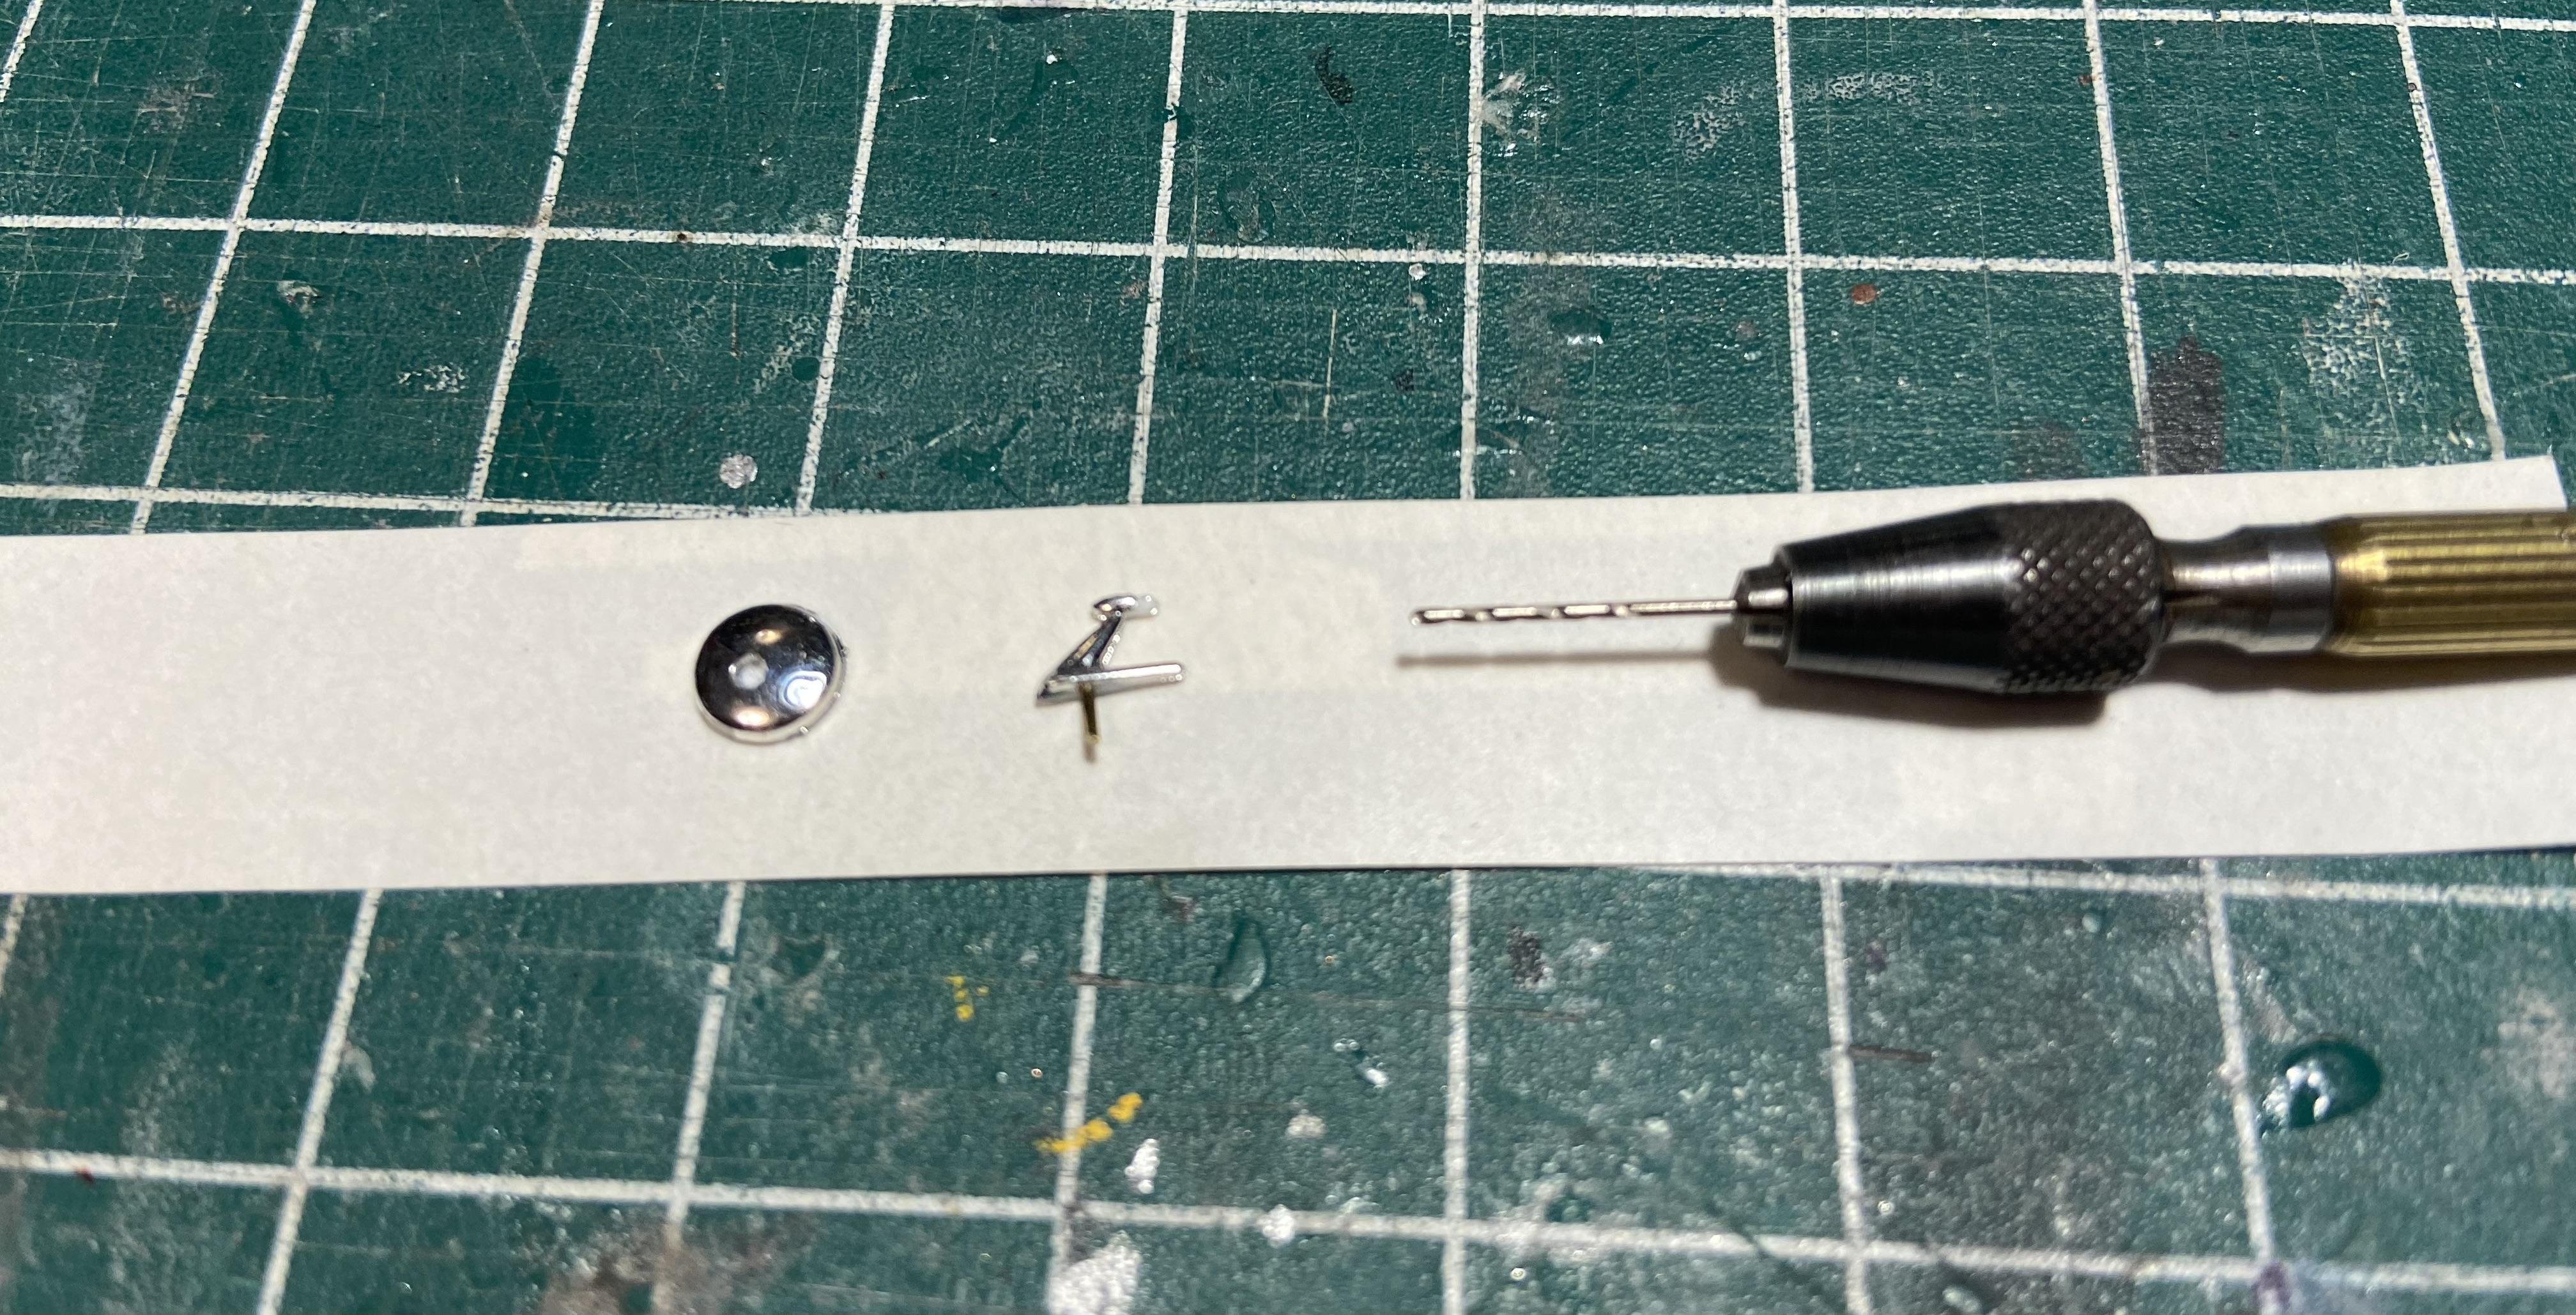
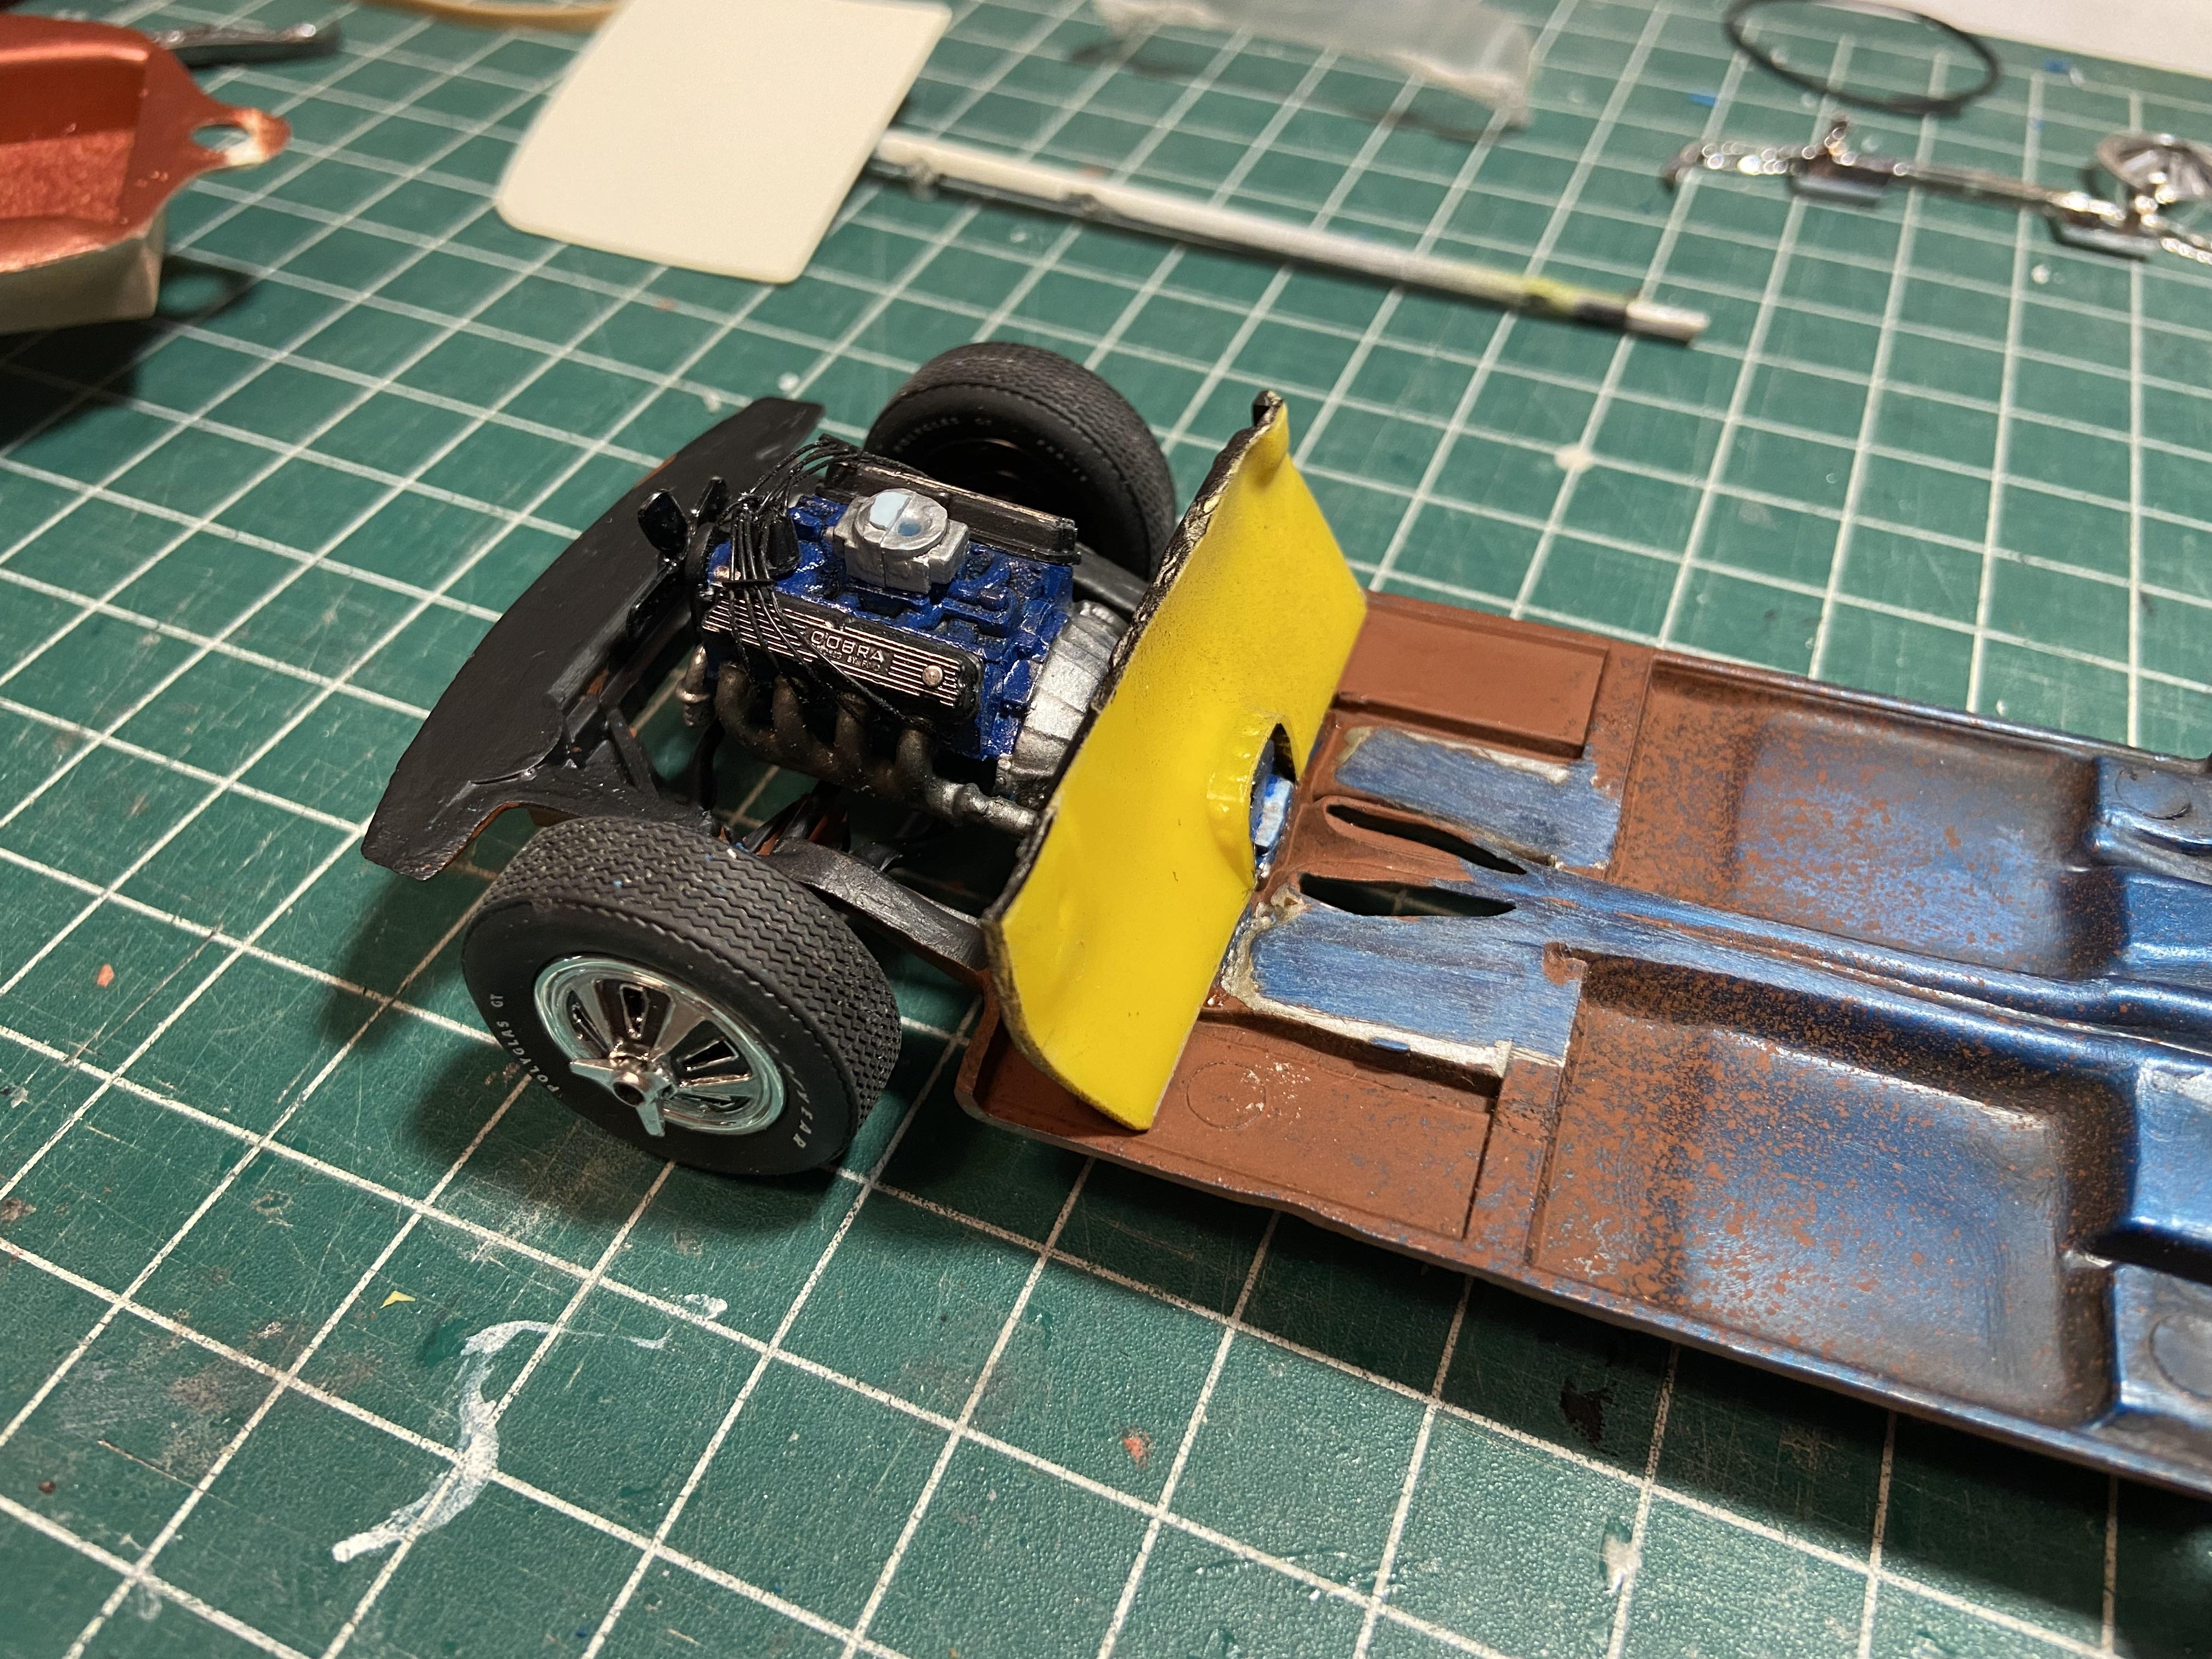
Major parts married, engine bay mostly detailed. I gave it a level 2 - ignition wires and heater hoses. Shock tower braces from the AMT '67 Mustang, master cylinder from the Monogram '65-'66 kits, made a heater blower motor from Evergreen tube, battery and radiator original AMT '66 kit. After a few false starts with the radiator hose, I made one from 10 AWG wire. I removed the copper strands and replaced them with K&S brass rod. This allows you to bend the hose in any direction and have it stay that way. Still have a few engine bay details left. Printed a few 1966 AZ vanity plates. It's not clear if AZ had personalized plates in 1966, but many states did starting in '65. Also seen are the reproduction original side stripes. Front and back nearly finished. Headlights are the Monogram '65 reflectors with parts box lenses. I made license plate brackets to mount the plates at the proper angle. I wanted fresh chrome bumpers, so the '66 coupe bumpers were used. Minor trimming to the backs of the front bumper guards (fangs) to clear the original valance. The rear bumper from the coupe also had the fangs, but the GTs don't have them because they don't fit with the exhaust tips. I tried trimming the fangs off and touching up the chrome with Molotow, but wasn't happy with the result. The solution was in the same box - the "custom" rear bumper with the coupe kits. It's fang-free, but it doesn't have the mounting tabs like the stock bumper because it is intended to be used with the custom rear valance. So I cut the tabs from the stock bumper and glued them to the custom bumper at the proper angle, and that did the job. Exhaust tips are painted with Alclad chrome. Side view mirror is from the Monogram '65 convertible kit, I always drill and pin these so they don't get easily knocked off somewhere where there is no glue available and you forgot to bring your old man glasses so you can't see what you're doing anyway. Not that that's ever happened... This car is finished, I will post pictured in the Under Glass section tomorrow.
-
Fabulous pair of Fords, the 4 door sedan conversion on the Galaxie is spot-on, very clean work there.
-
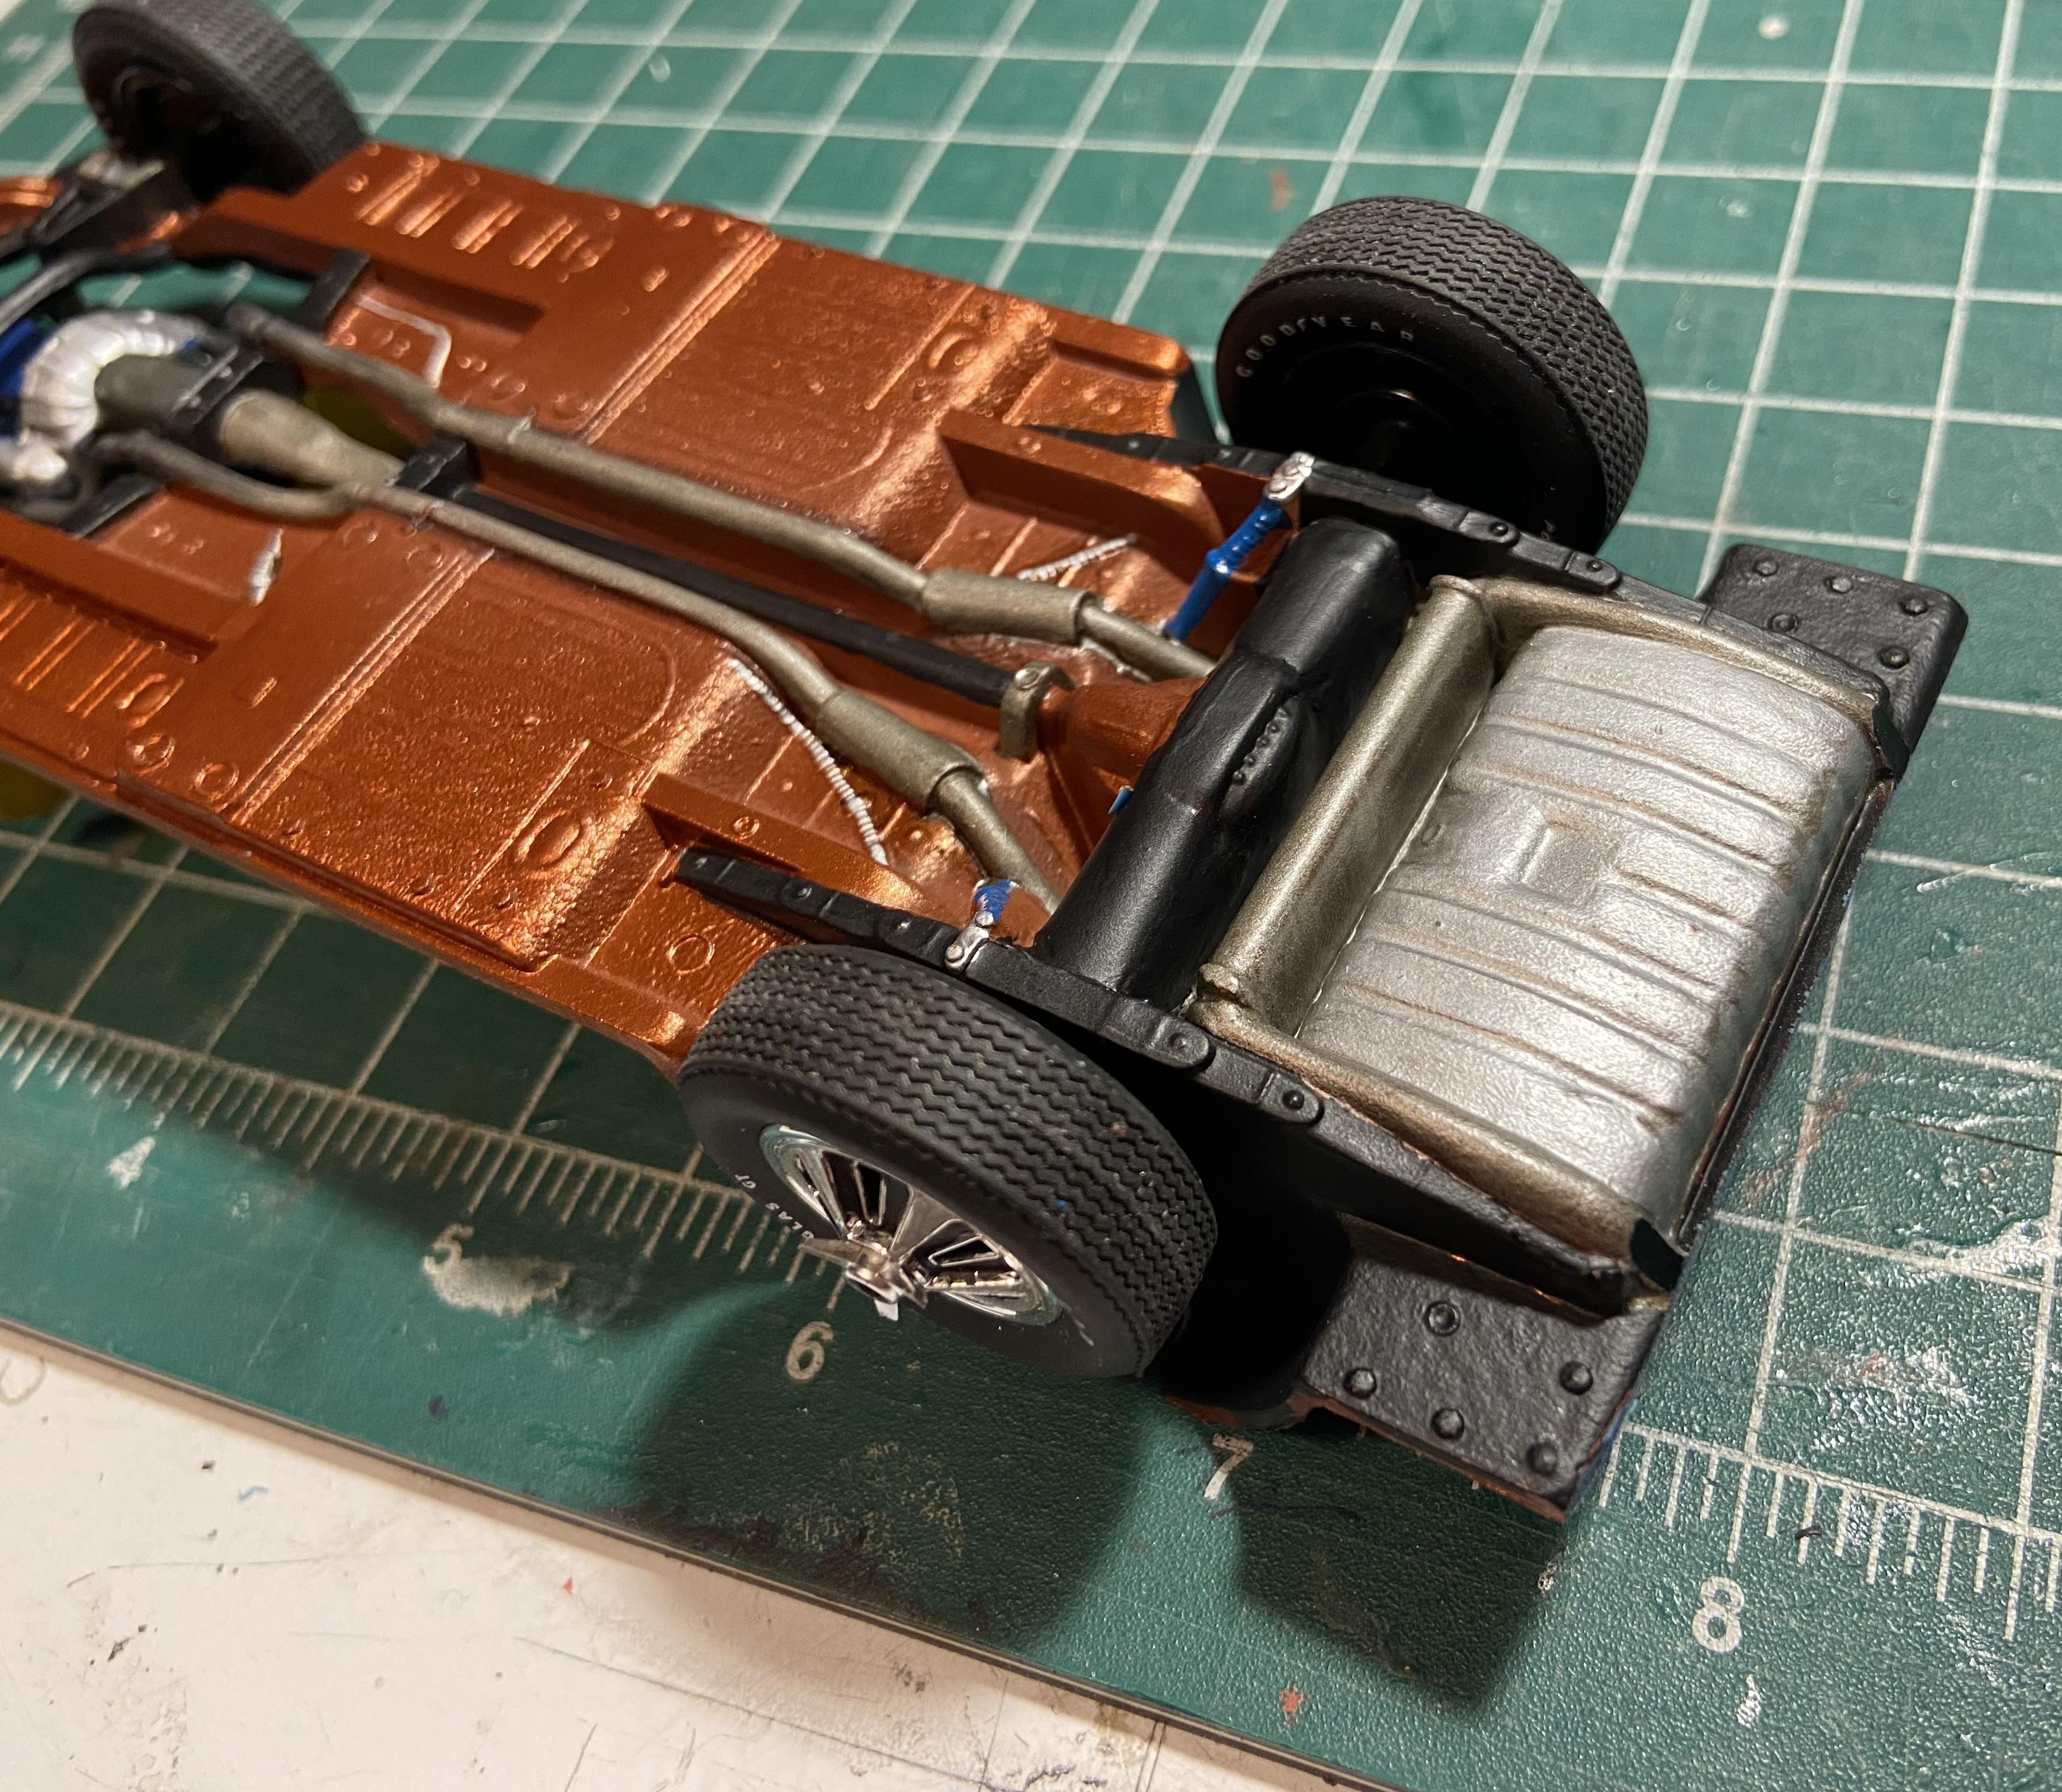
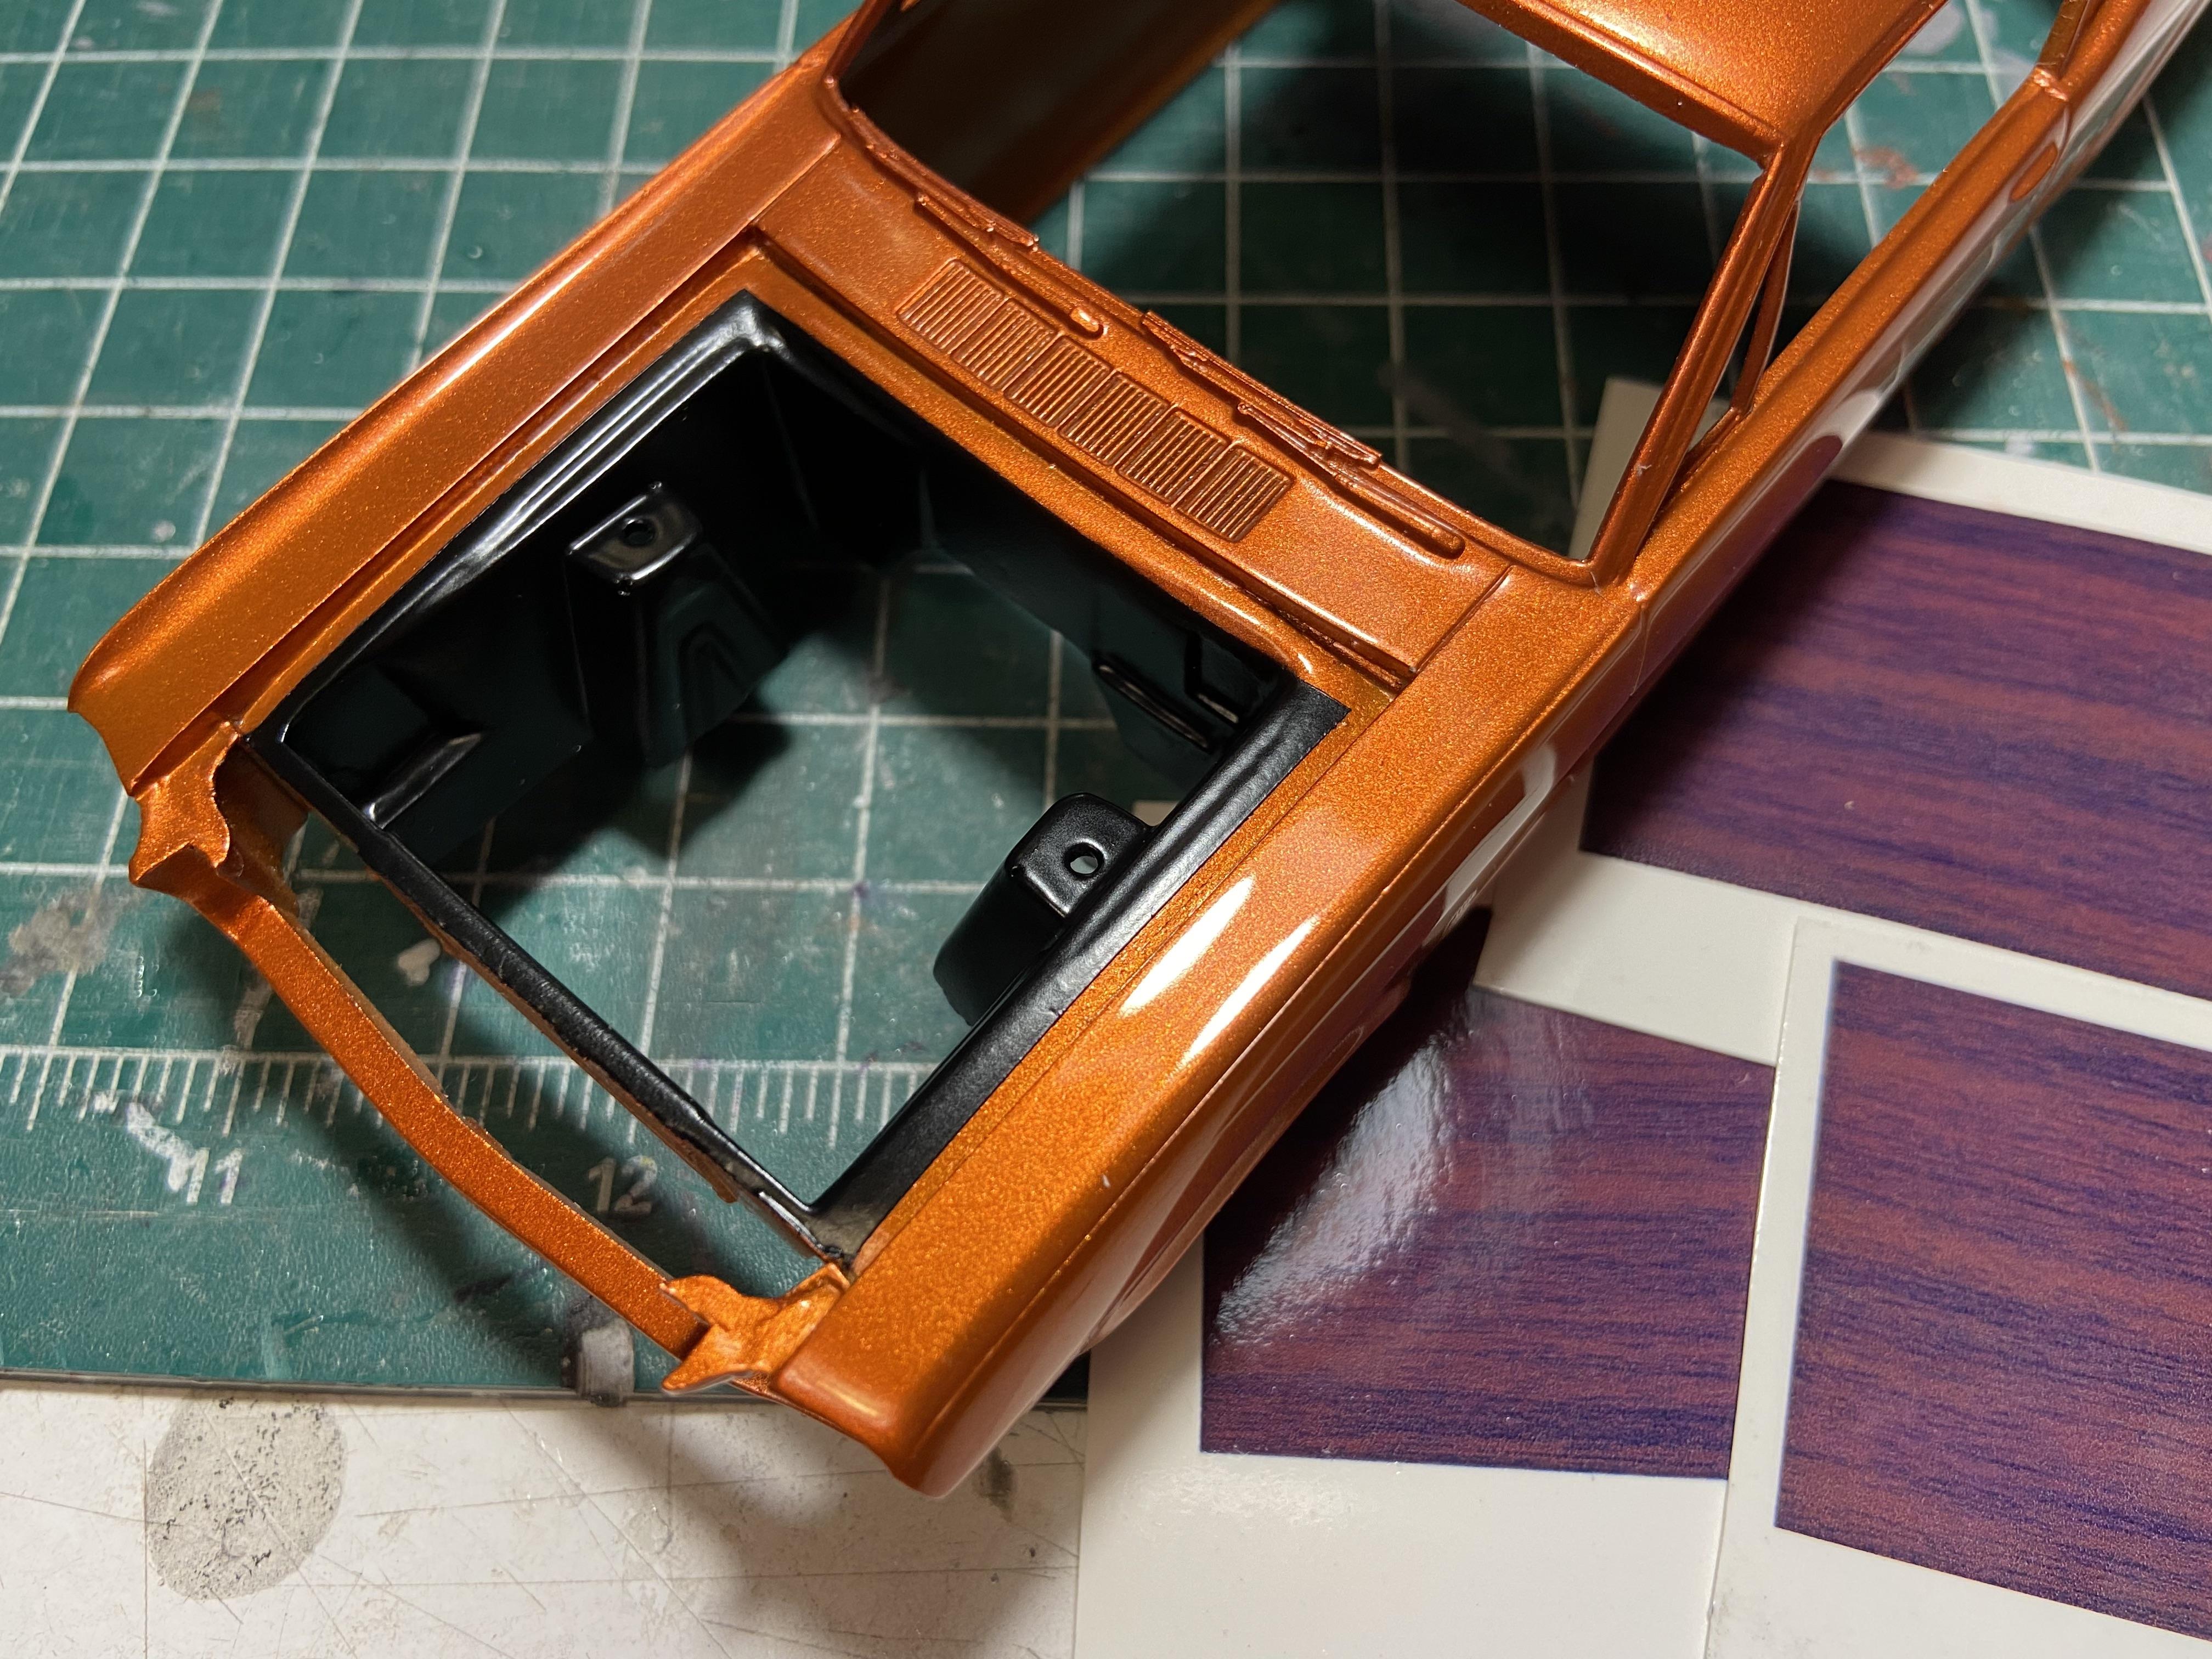
First mock-up. Have to address some clearance issues between the interior tub and the chassis, but it's close. Had to trim the back of the chassis flush to the tank to clear the rear valance. Looking at the bottom of the car all together, there was a large void in the chassis above the bell housing that went up to the inside of the cowl, so I trimmed a parts box firewall and glued it in place; this fits behind the new resin firewall and fills the hole. Problem solved. Installed the taillights with clear enamel paint for glue. My favorite stuff for lenses, photo etched parts, and other small bits that show and can't leave a trace of glue.
-
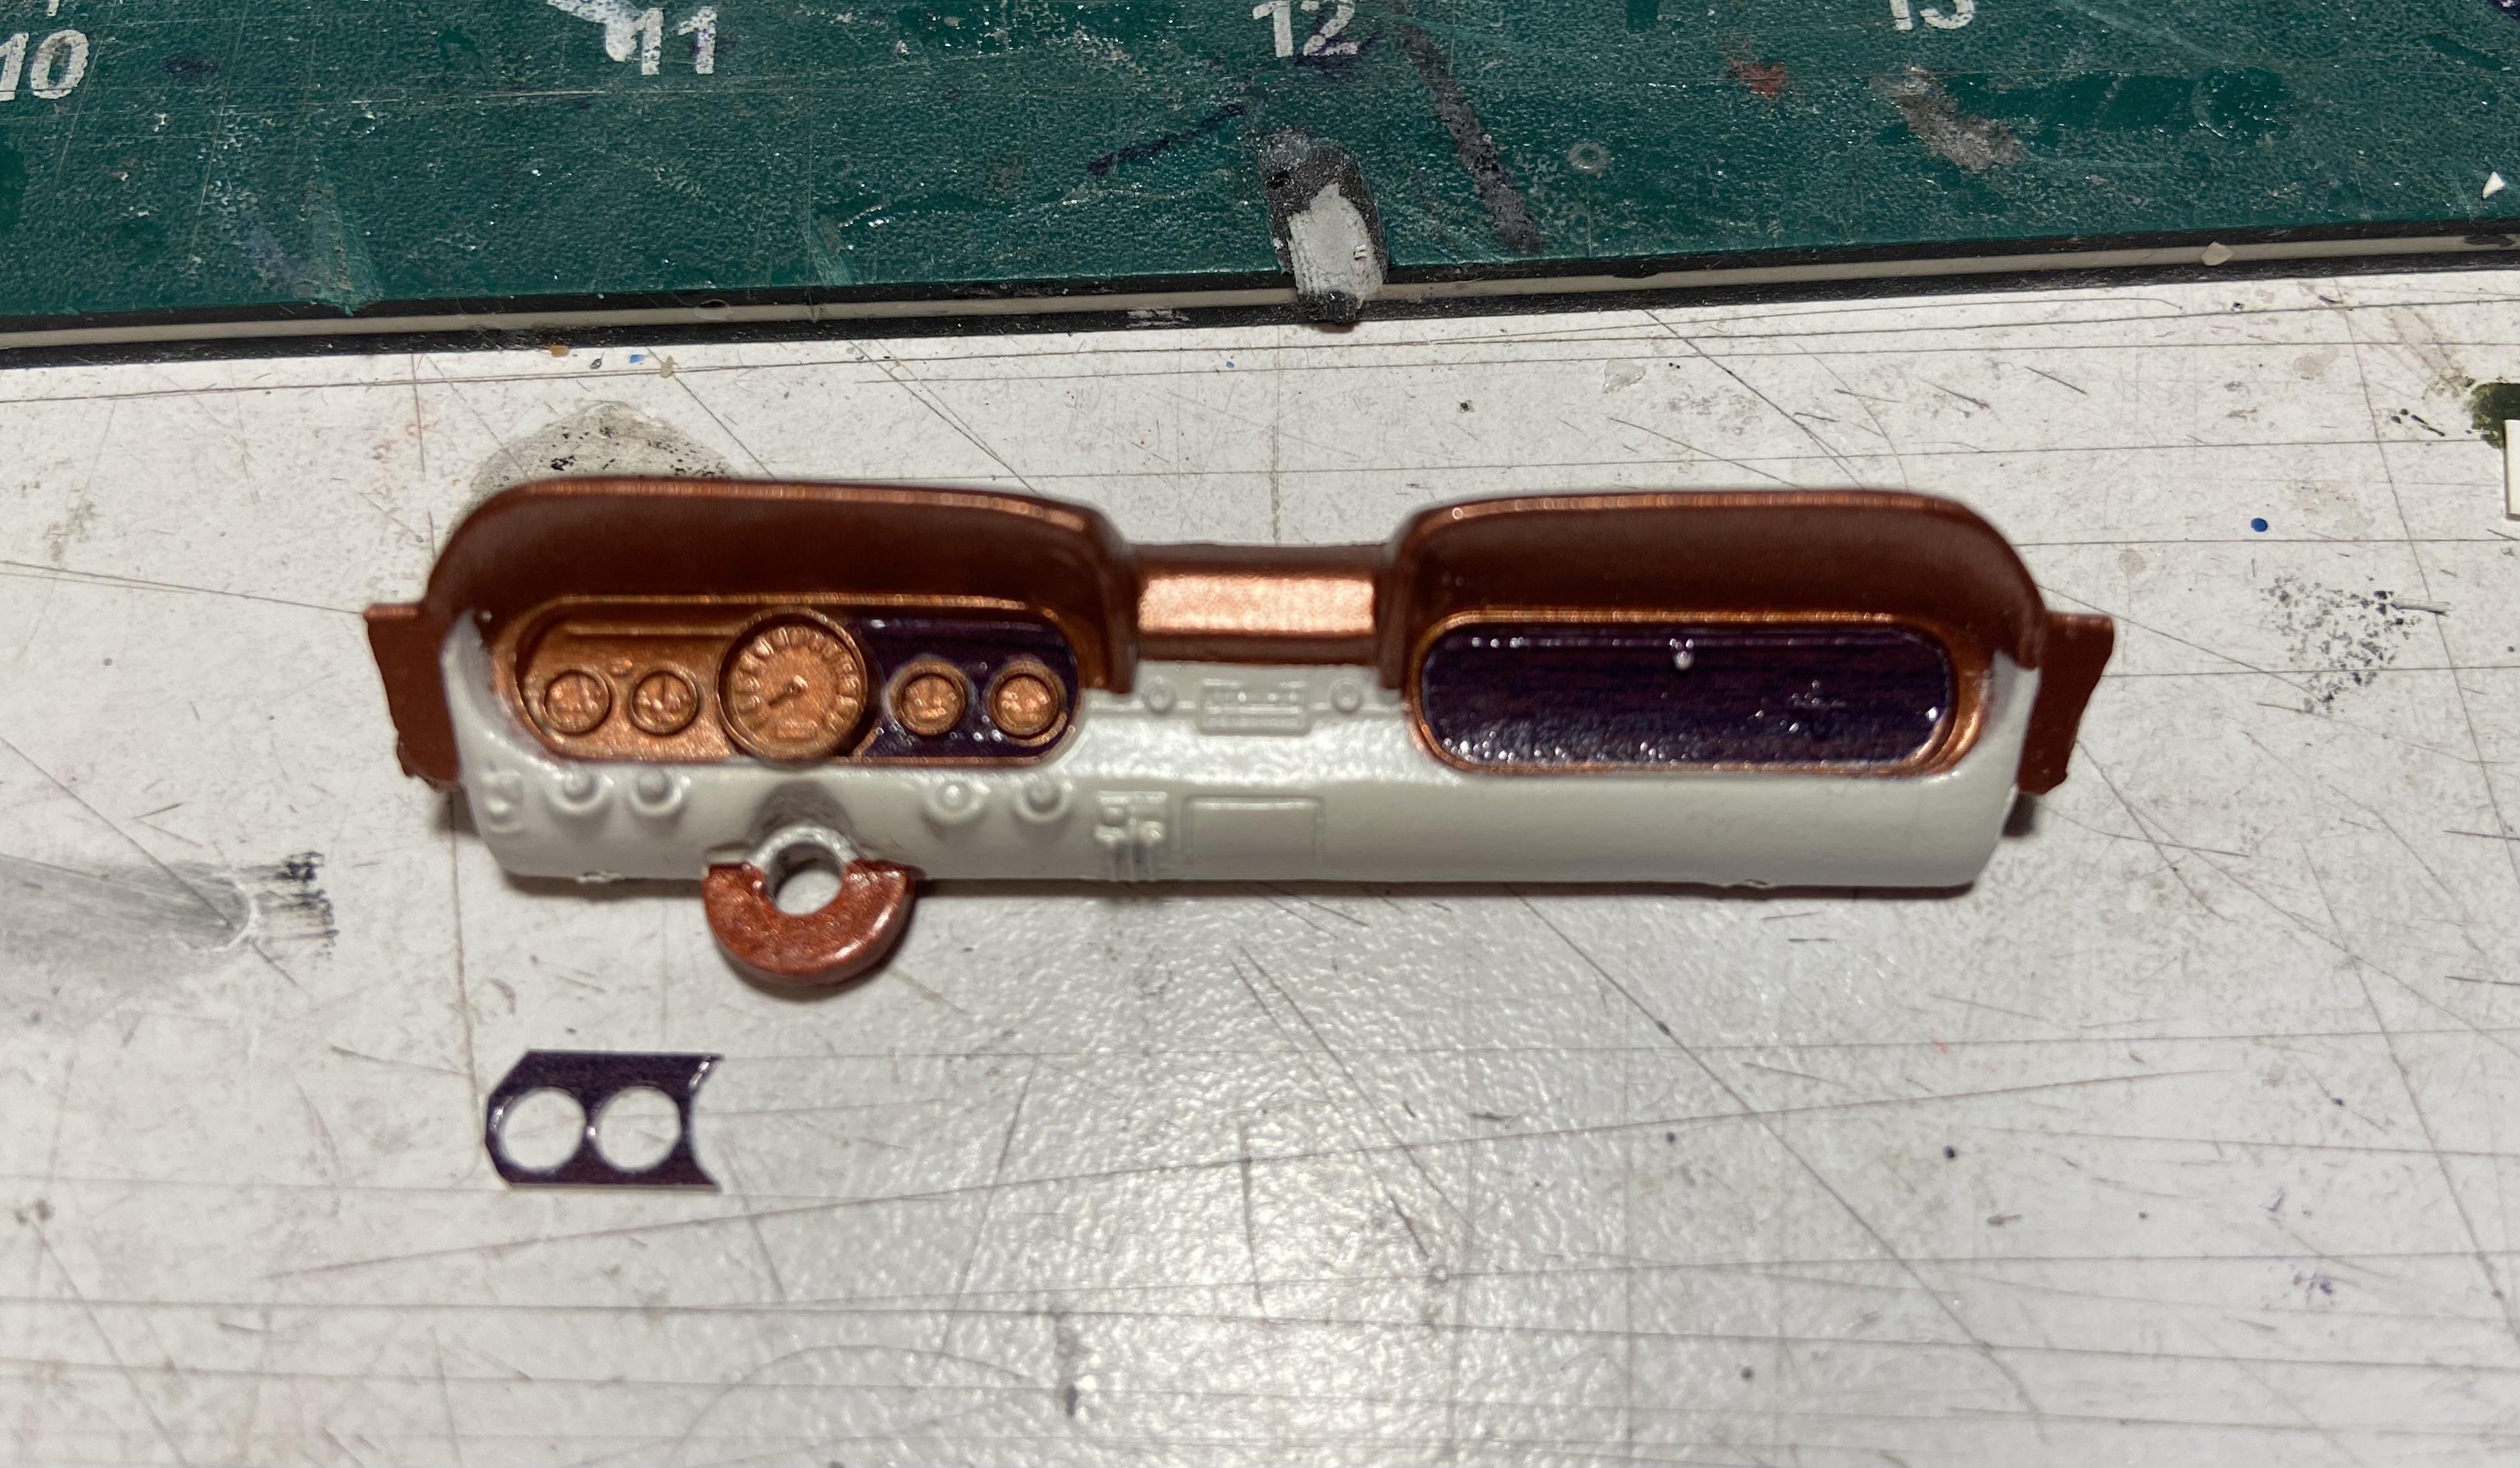
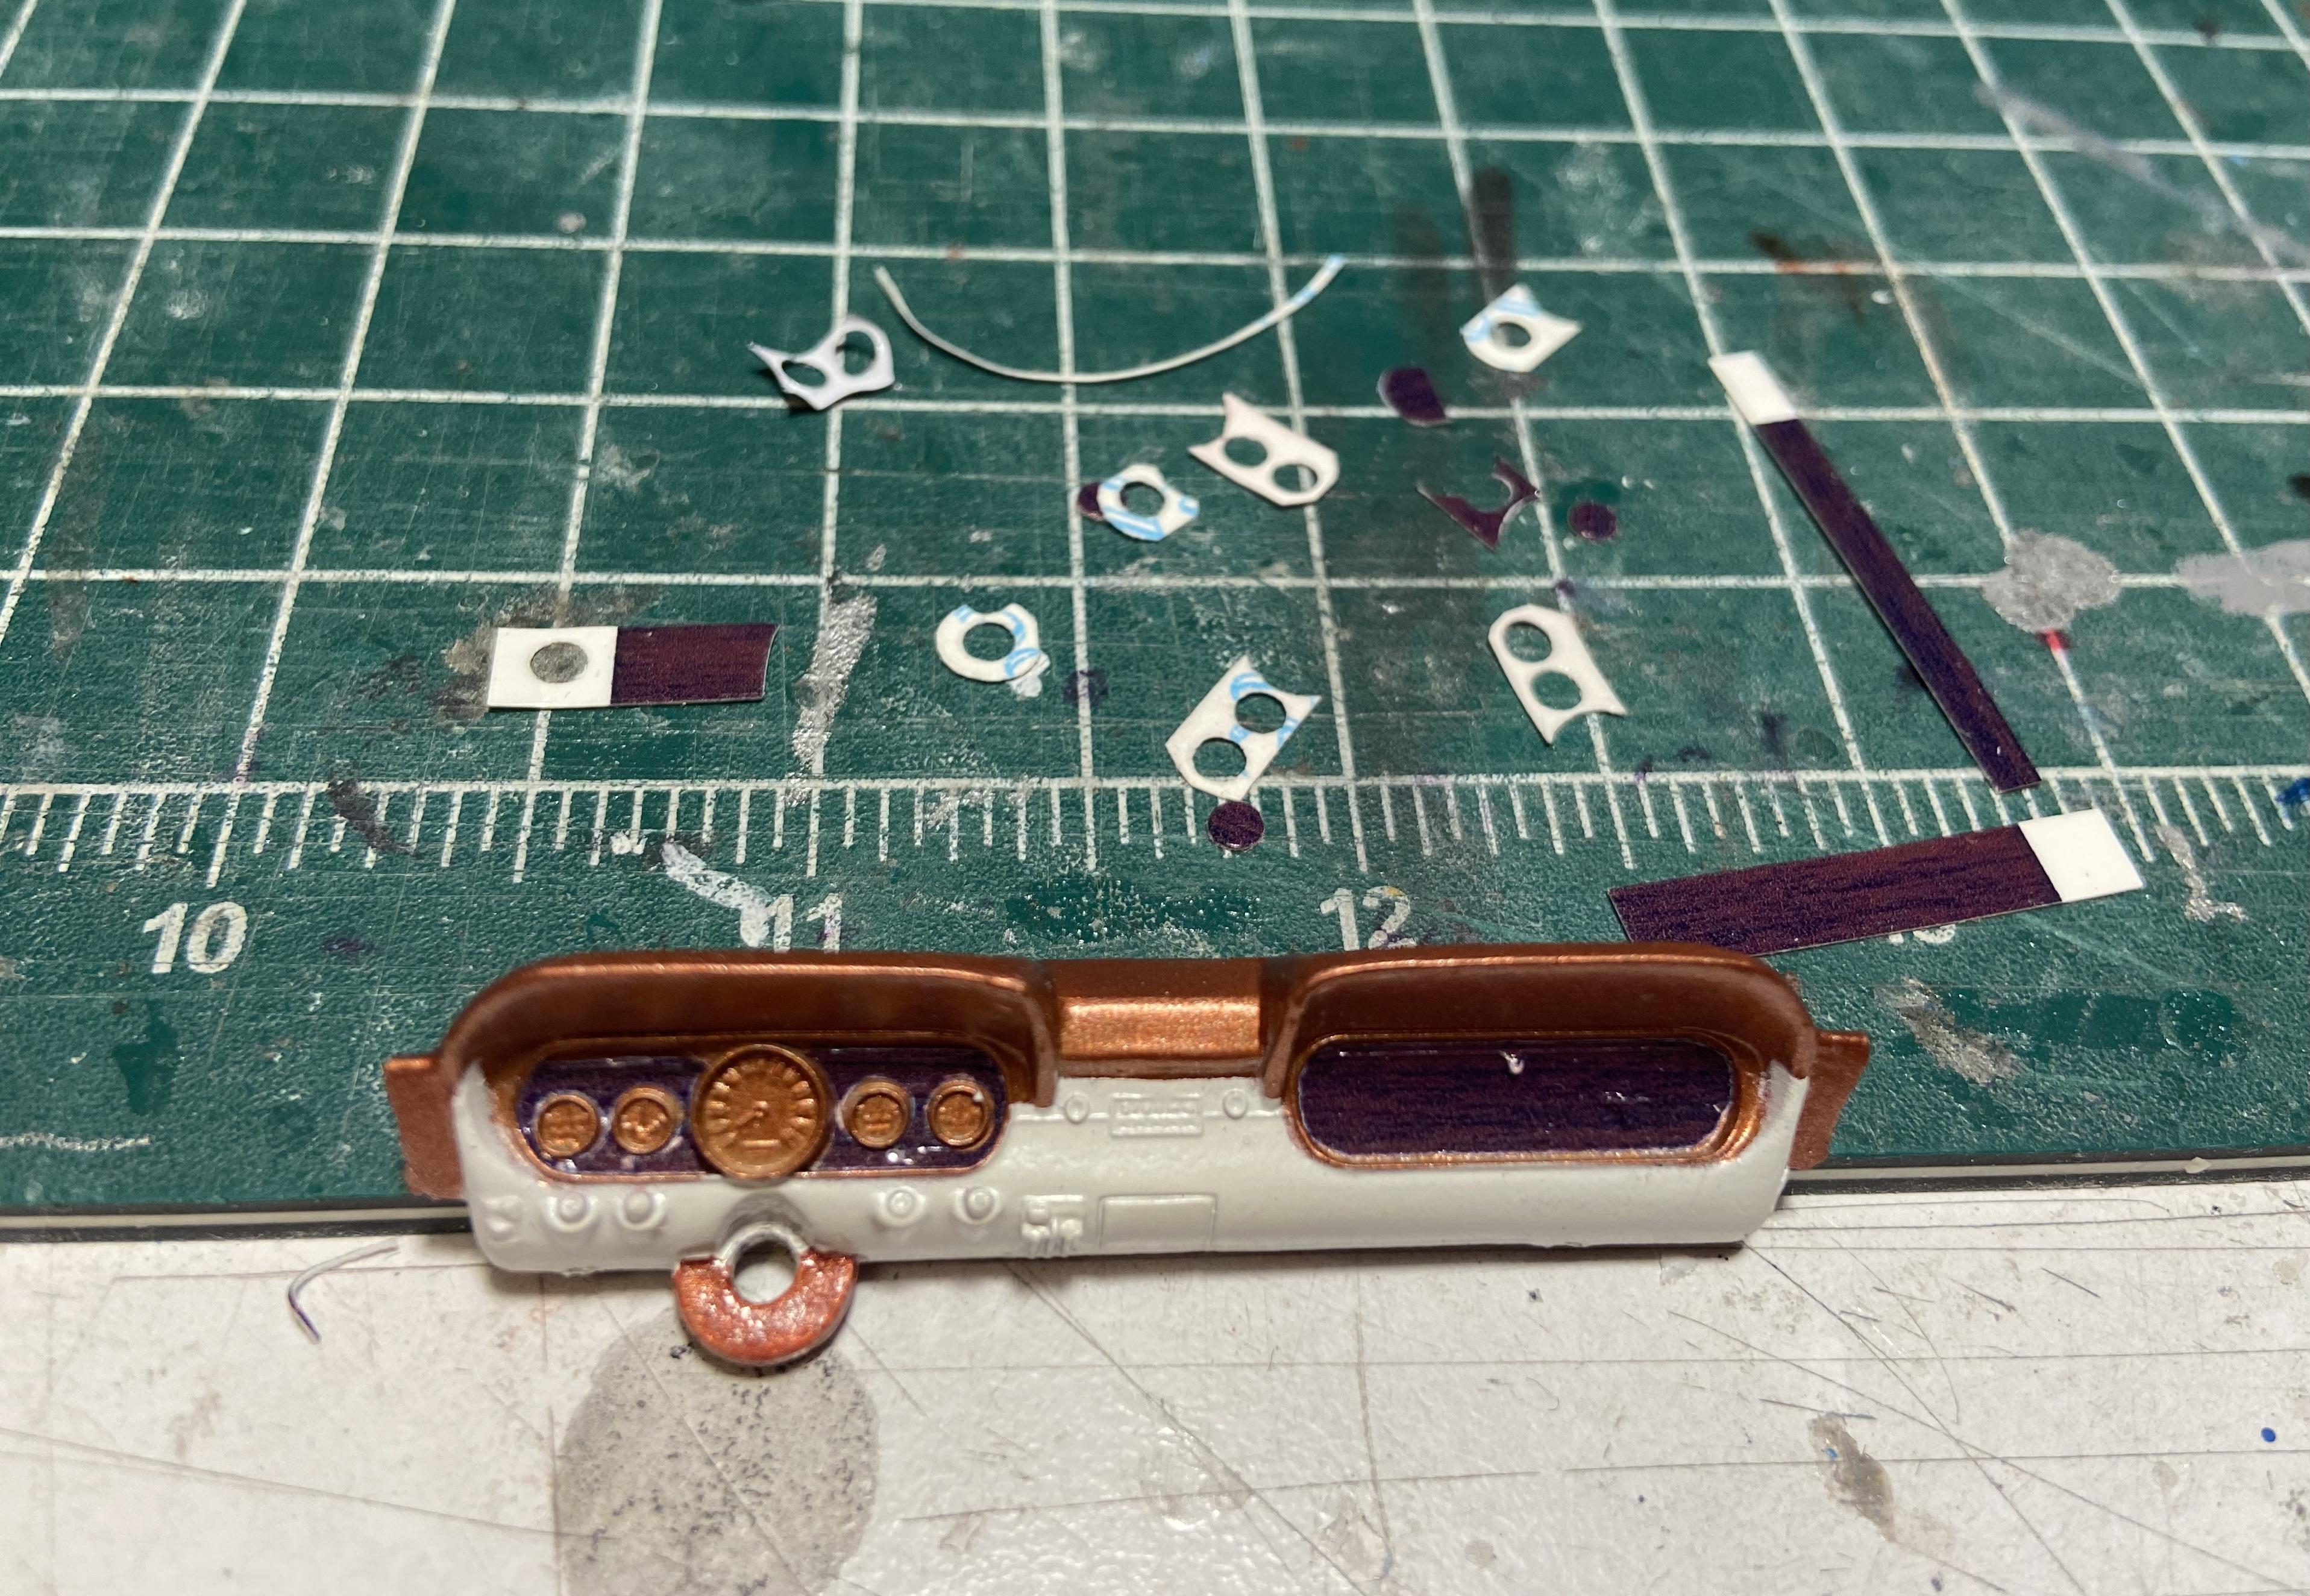
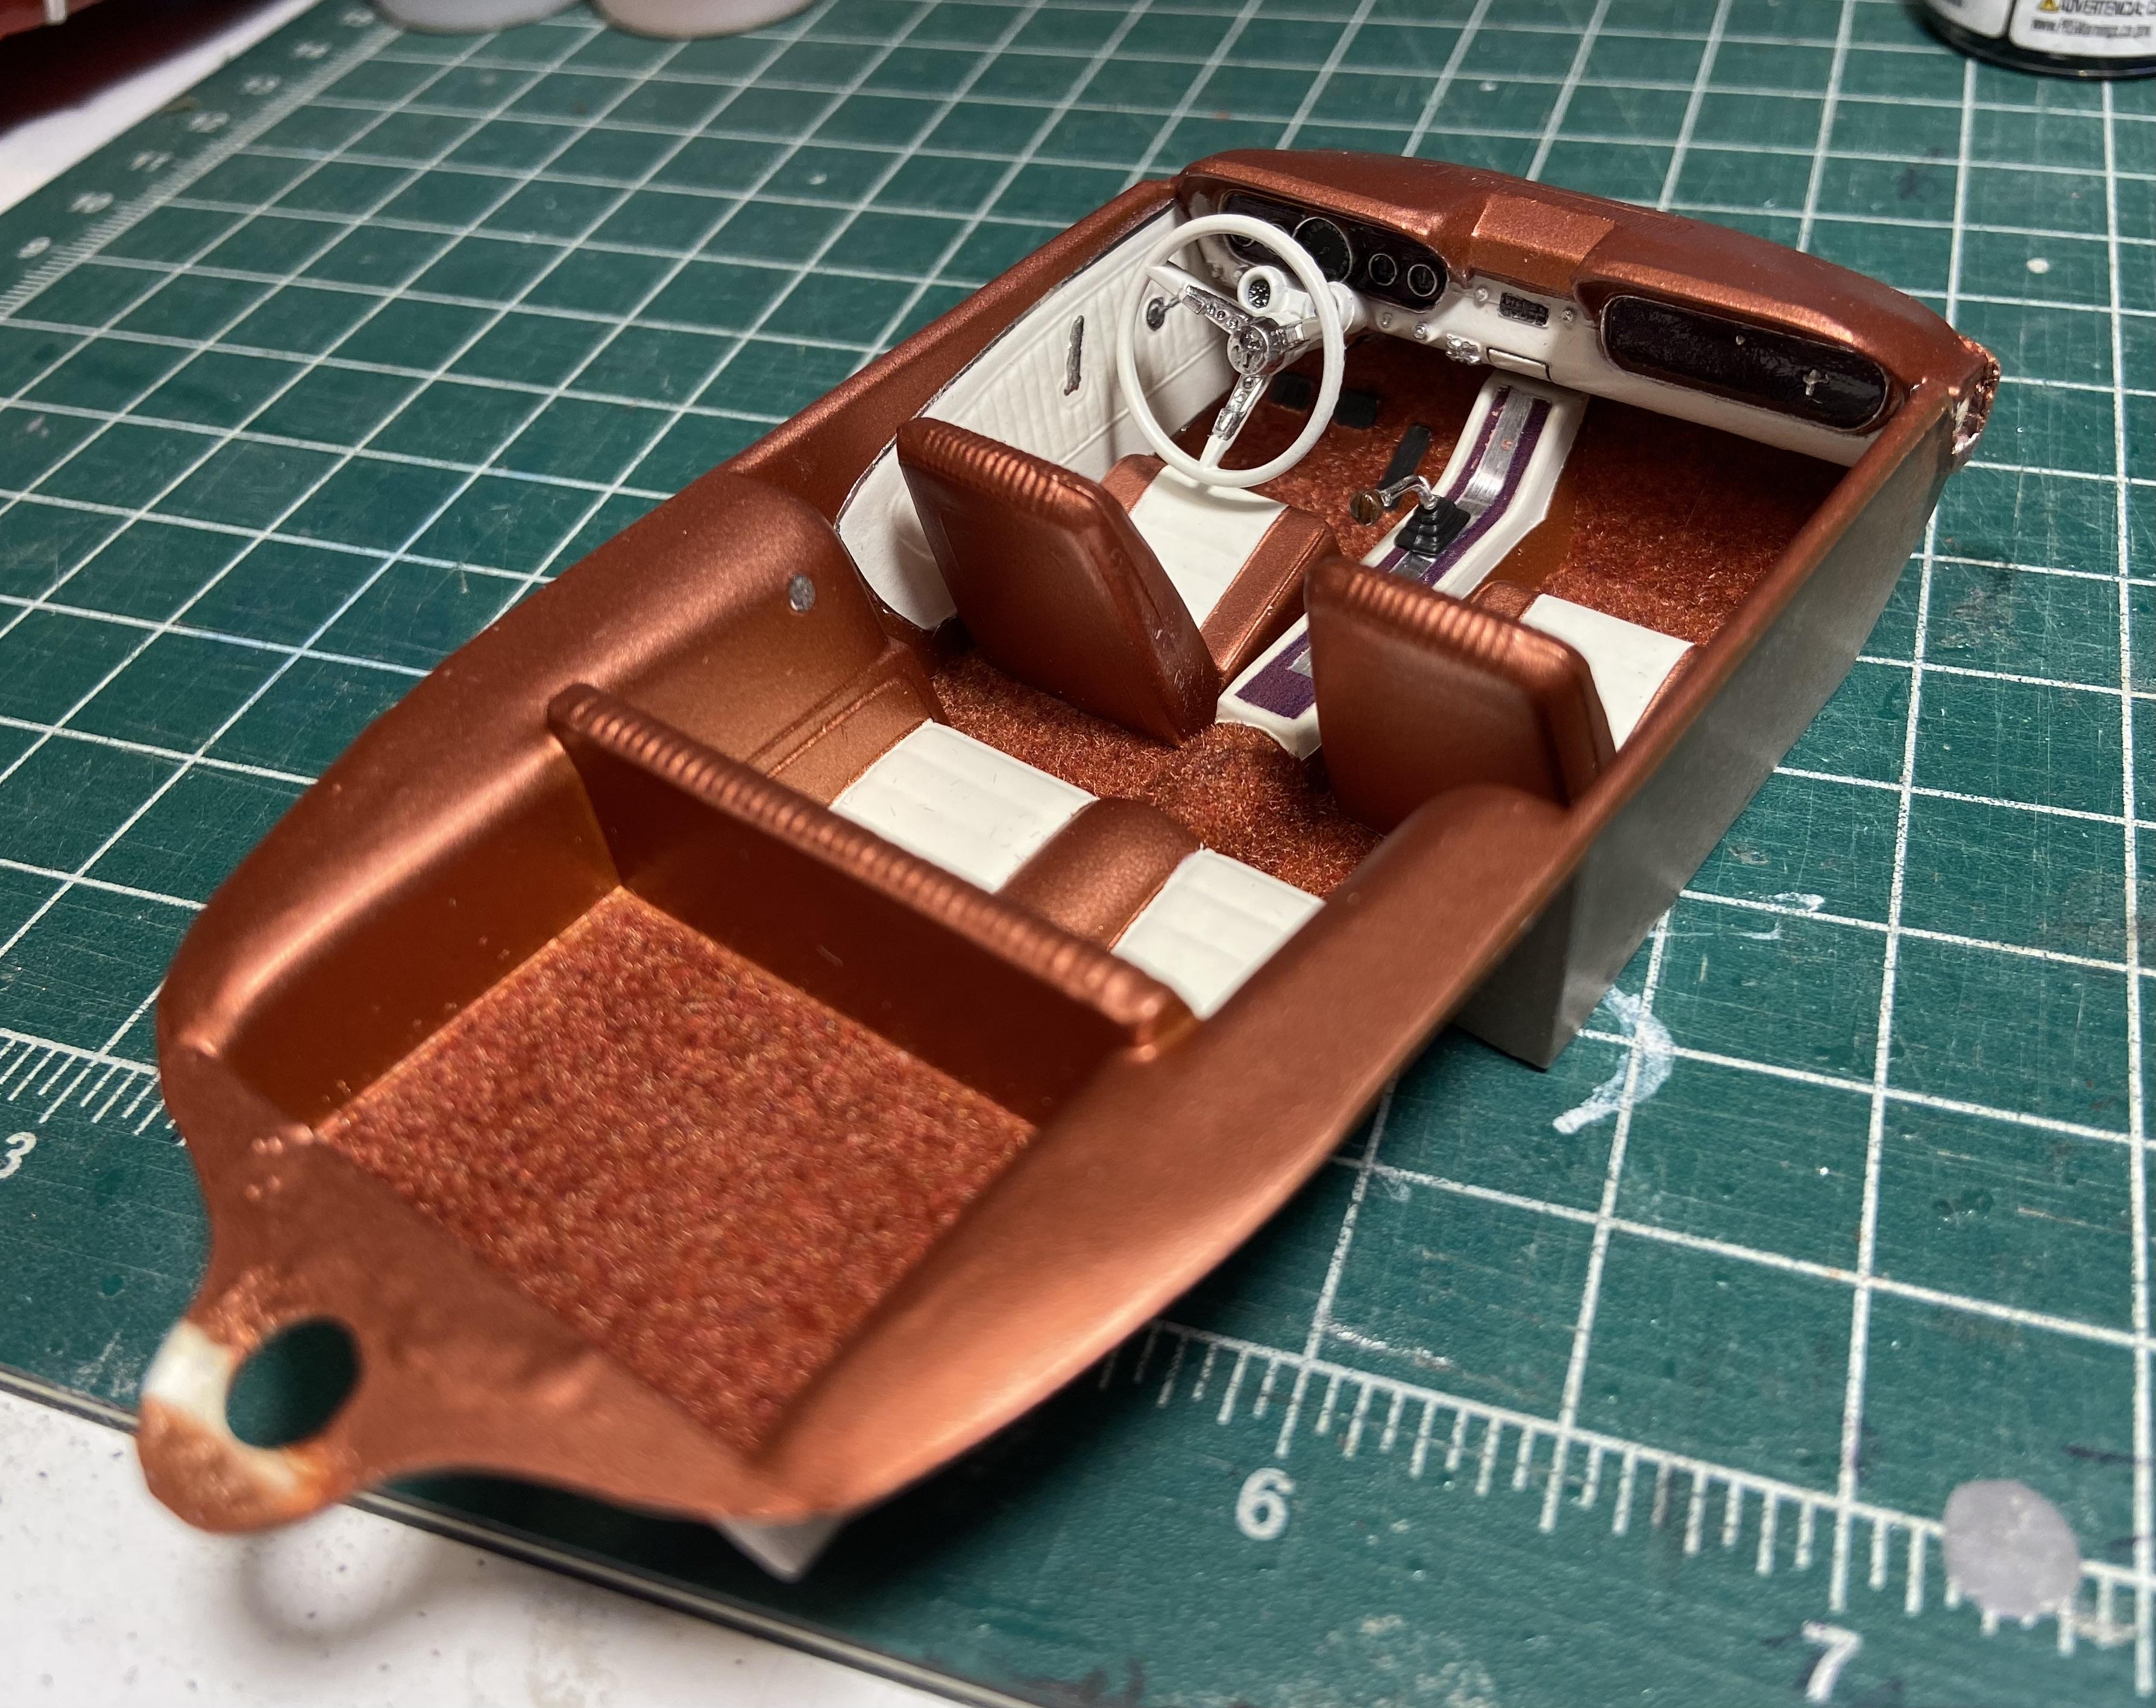
Dave, thanks for letting me know where those headers on the green Mustang came from. I have another gasser planned, and now I have two more sets that I didn't know I had. The walnut decals for the dash went a bit easier than I thought they might, I used a leather hole punch set to cut the circles and semi-circle shapes out. But this did require several attempts. After some detailing with various paints and Molotow ink: And now we have our first complete sub-assembly. I put a strip of BMF on the door panels between the two colors (big pain, had to walk away a few times) cut the decal for the console, and used the shifter from the AMT '67 Mustang and the Rally Pack from an MPC '66 Mustang GT. I used a silver pencil to detail the gauges in the dash, decal faces for the Rally Pack gauges. This interior represents the optional Interior Decor Group, more commonly known as the Pony interior, and those came with the Deluxe Wood grain wheel; but AMT supplied the Falcon Sprint-derived standard wheel. Since this was a part of the original kit, I used it because I want to retain (most of) the character of the original. But if you want to use a wood grain wheel, a decent one comes in the Monogram '65 Pace Car convertible kit. I didn't want to get too carried away with details here, but I'm pleased with how it came out.
-
This is turning out very nicely. Is there anyone who doesn't like a Starliner? They are just so cool.
-
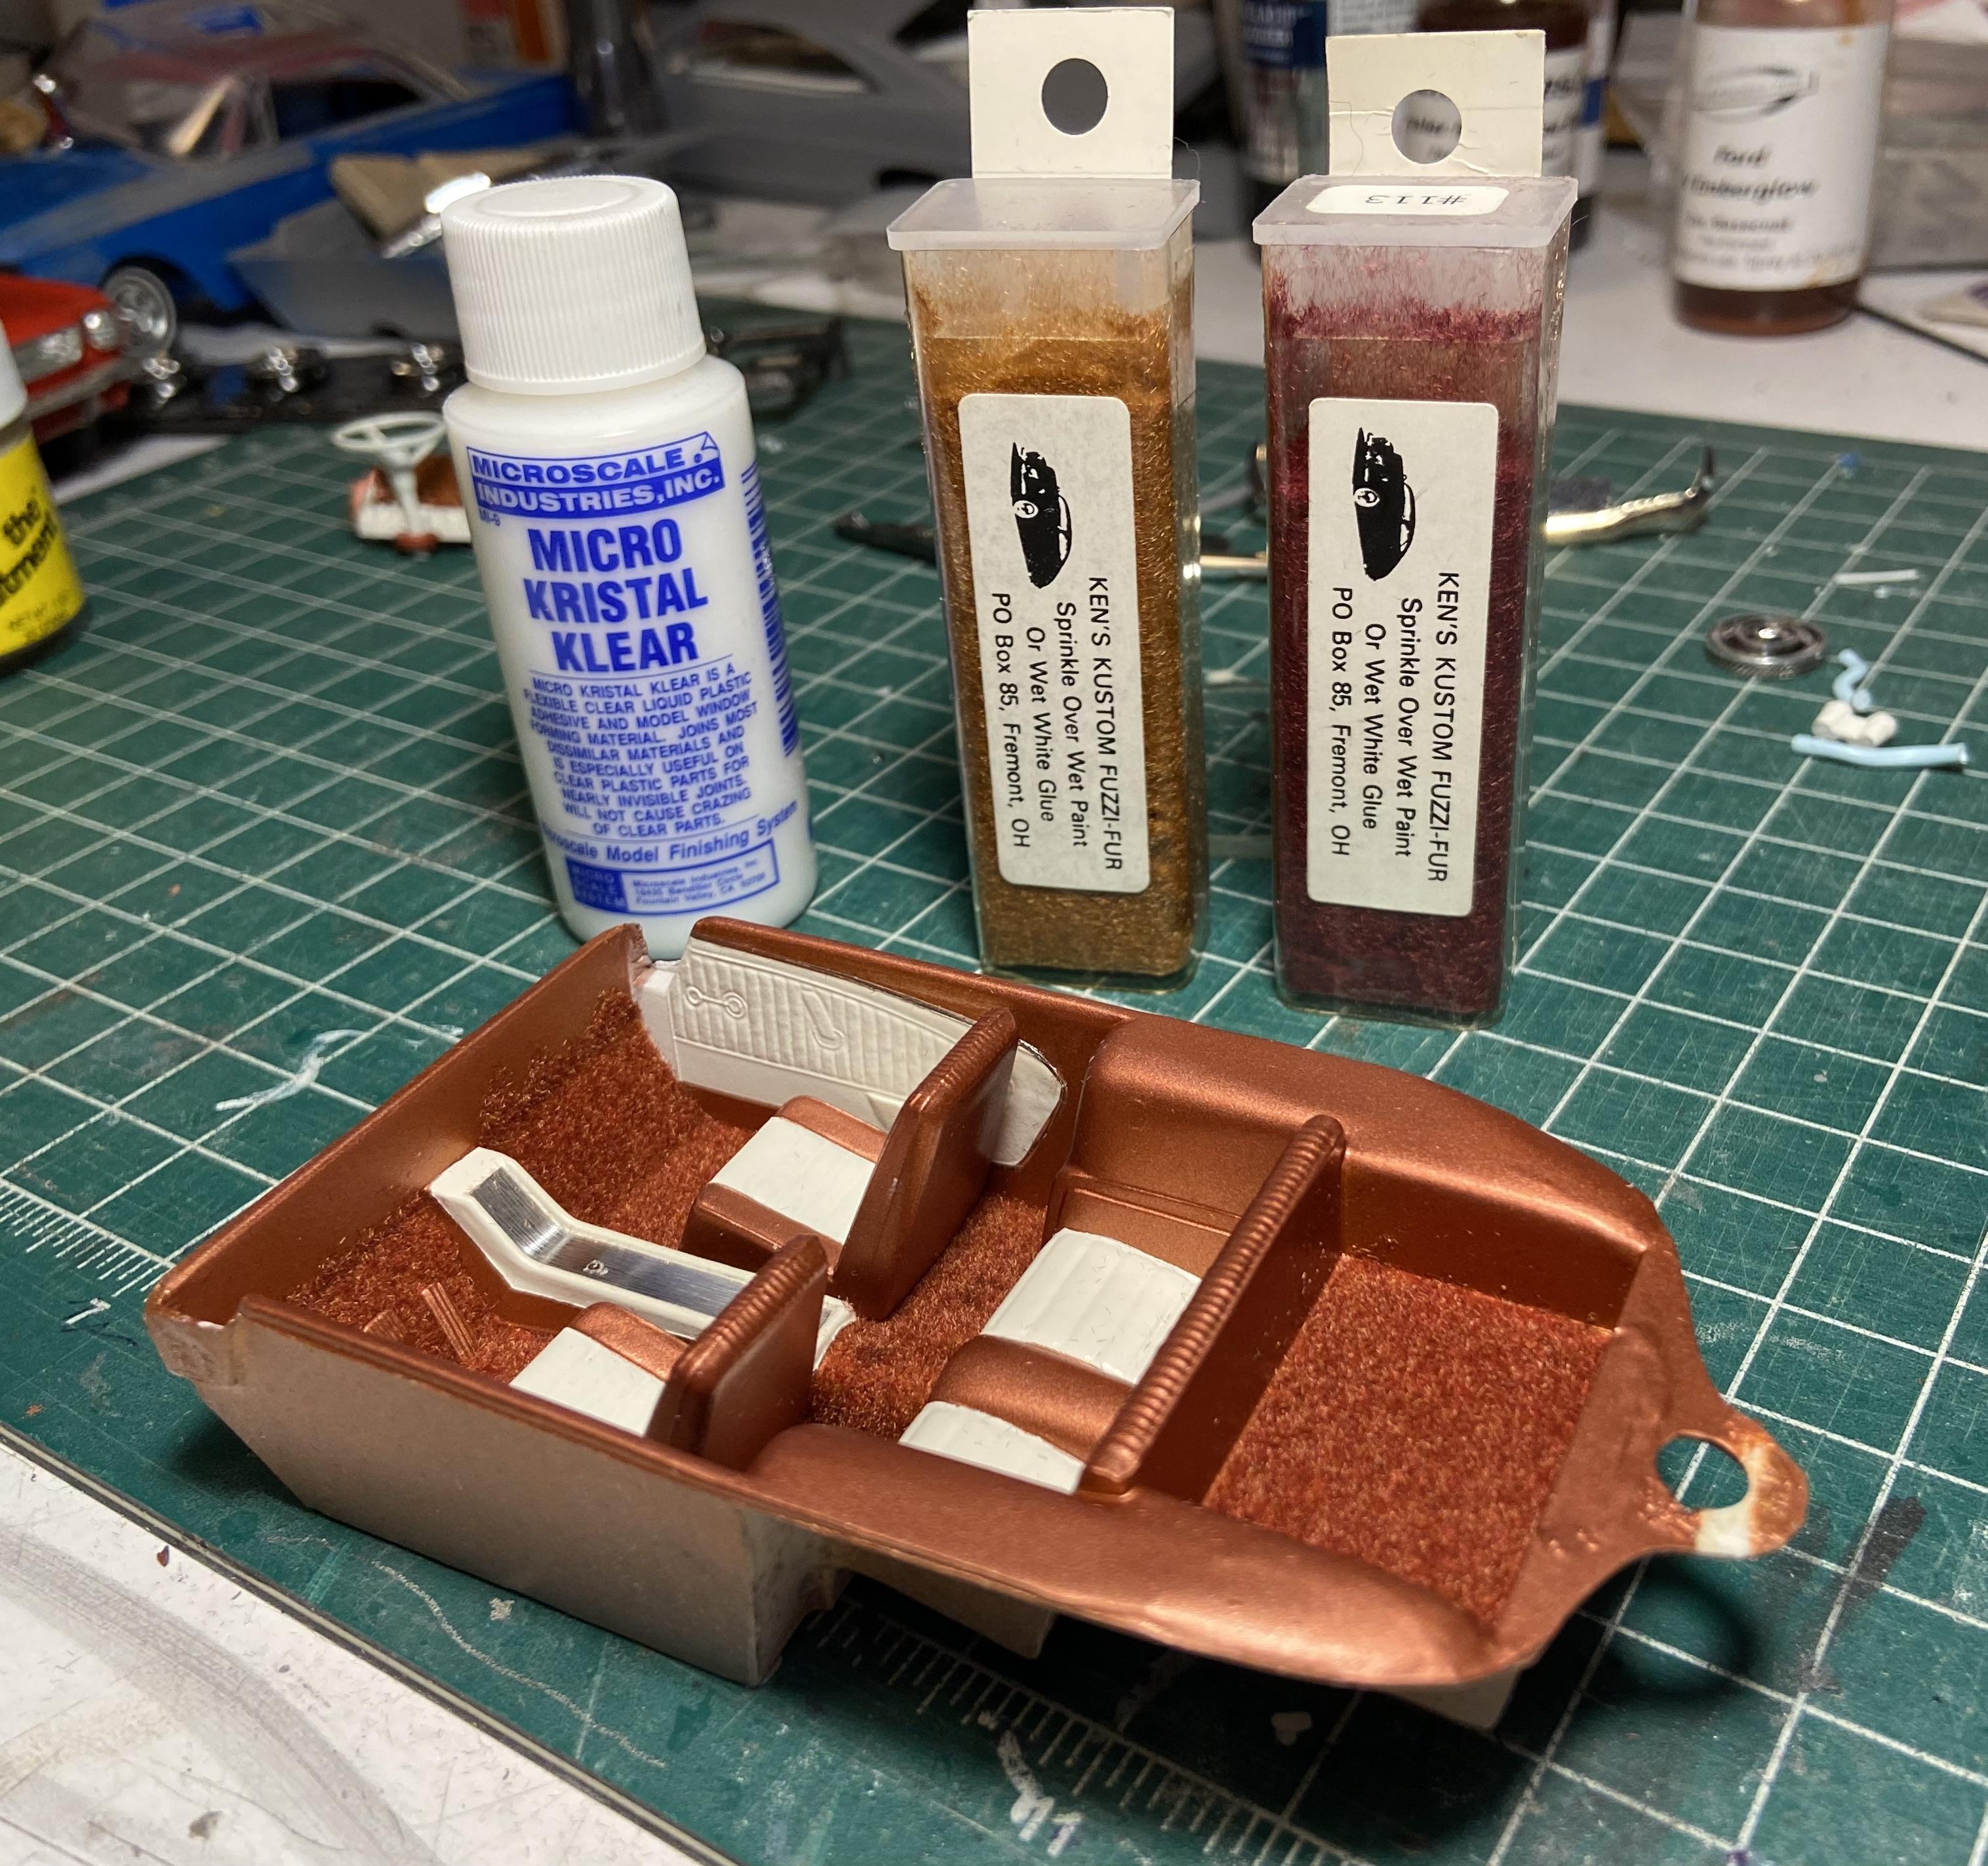
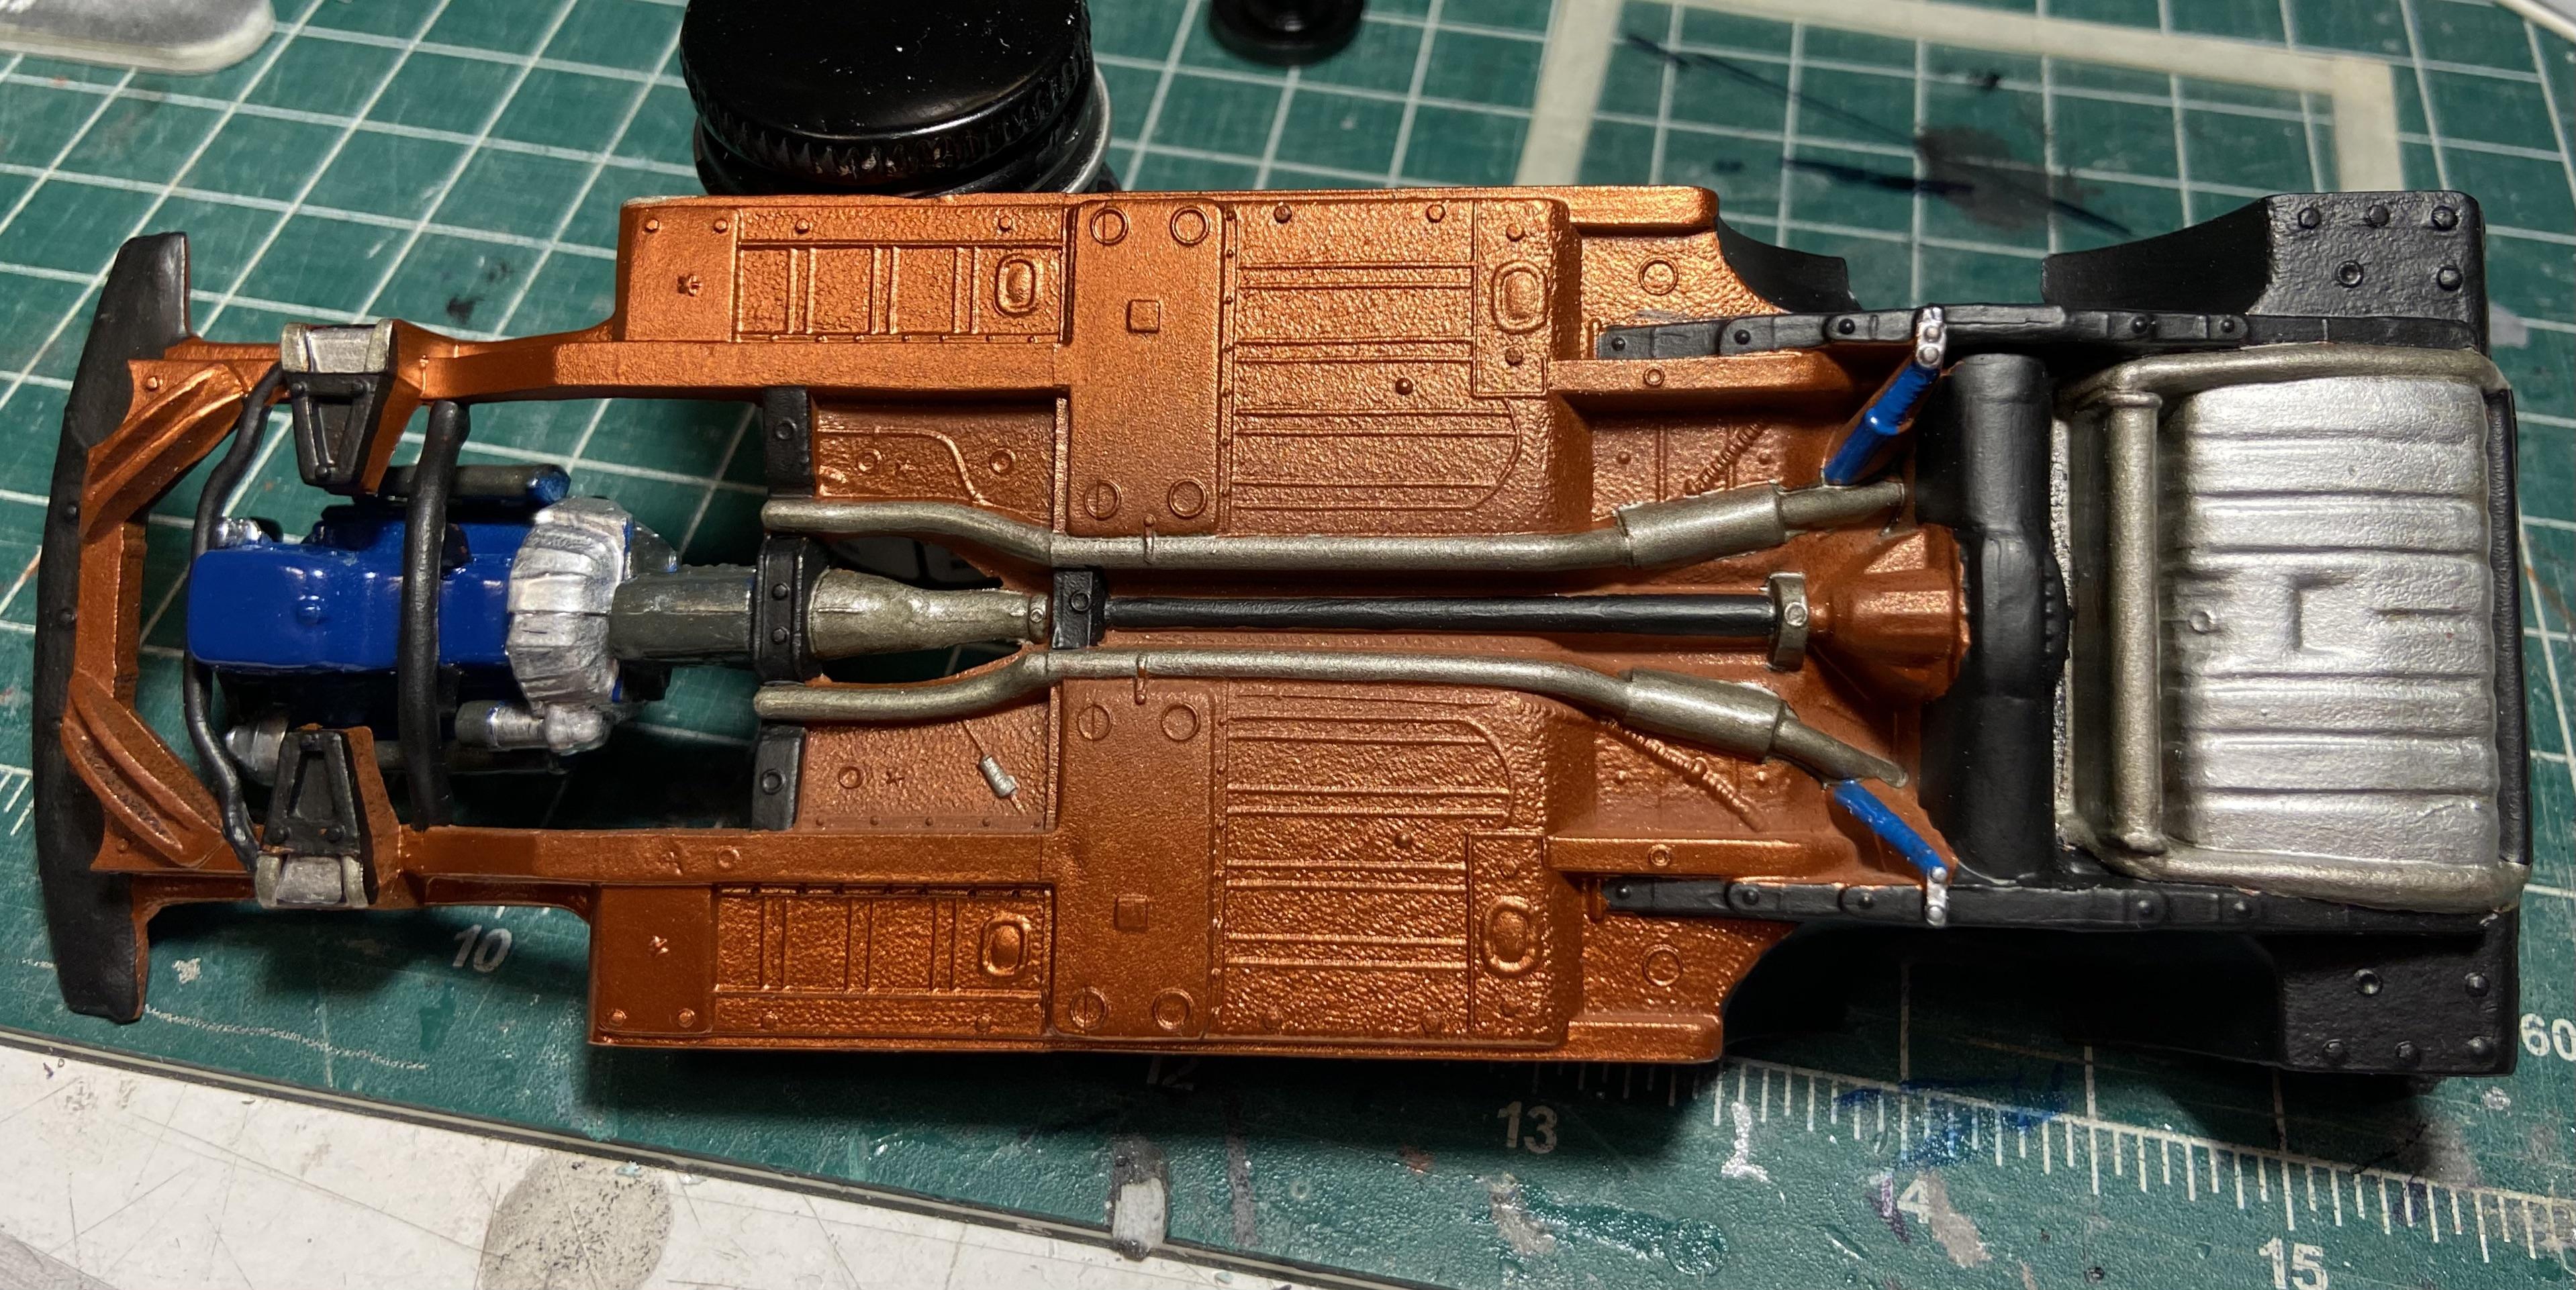
Did some paint detailing on the chassis. You can mix flocking just like paint. These two colors combine to make a convincing Emberglo carpet, installed as much for realism as to conceal the glue burns courtesy the previous builder. Brushed Mylar sticker was used for the console insert. Shot the engine bay in Tamiya semi gloss black, and printed some walnut wood decals for the console and dash inserts. I figured this might be easier than painting them, we'll see. And started on the Bare Metal Foil. Happily, this car doesn't have very much trim.