Maindrian Pace
-
Posts
2,370 -
Joined
-
Last visited
Content Type
Profiles
Forums
Events
Gallery
Everything posted by Maindrian Pace
-
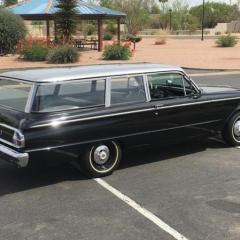
1957 Ford Del Rio "Shooting Brake" Ranch Wagon
Maindrian Pace replied to LennyB's topic in WIP: Model Cars
Pure Vision used '57 Thunderbird fin tips and door handles. I like this car too, and have thought about building one. I love their idea of lengthening the doors to allow for a natural slant to the B pillar, which is the one thing on this car that has always stood out as just not being quite right. -
Super clean build, the dash and interior are especially nice.
-
This thing is rad! And so is that '63 Coyote sedan. Nice to see early Falcons getting such nice modern style builds.
-
Nice project. The '65 chassis has the same problem under the '64 body that it does under the '65, the axles are too far rearward. The front axle/suspension needs to come forward about 3mm, the rear 1-2mm. Aside from that, it's a great swap.
-
Super clean build, excellent decaling work too.
-
Wow, that's quite a first post.
-
Mystery roll pan
Maindrian Pace replied to Maindrian Pace's topic in Model Building Questions and Answers
Thanks Don! They were in an Uncertain-T box. -
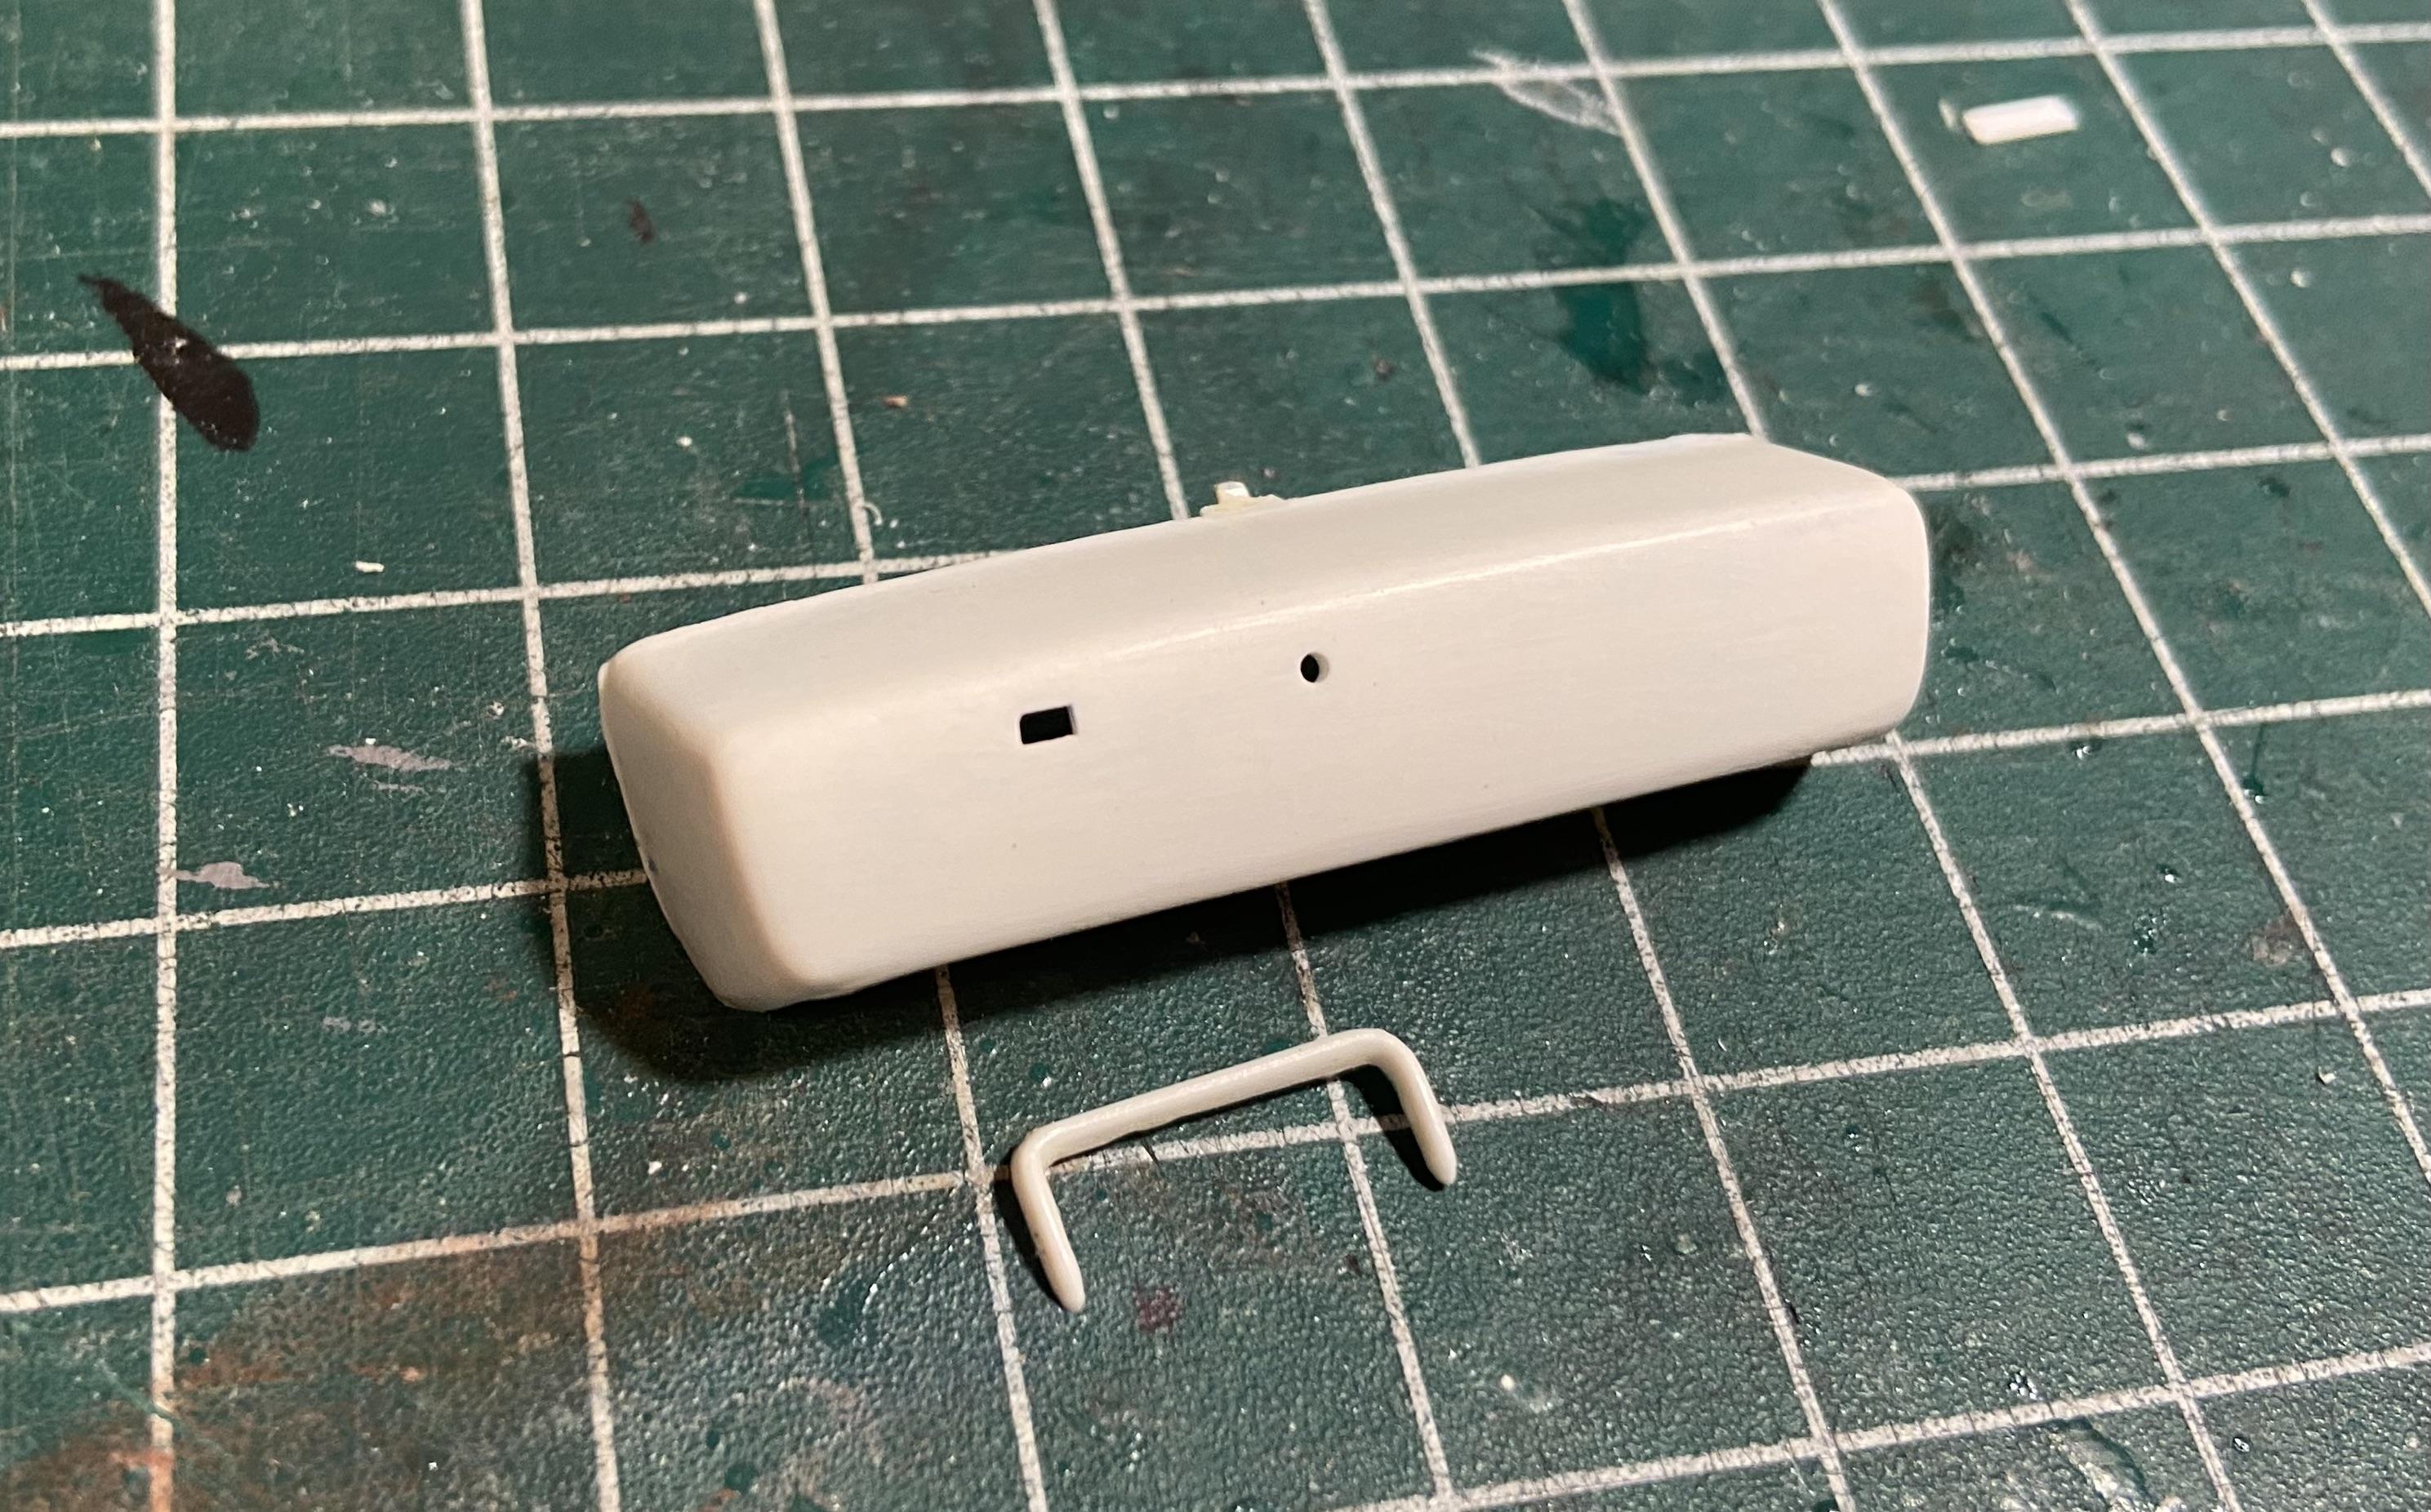
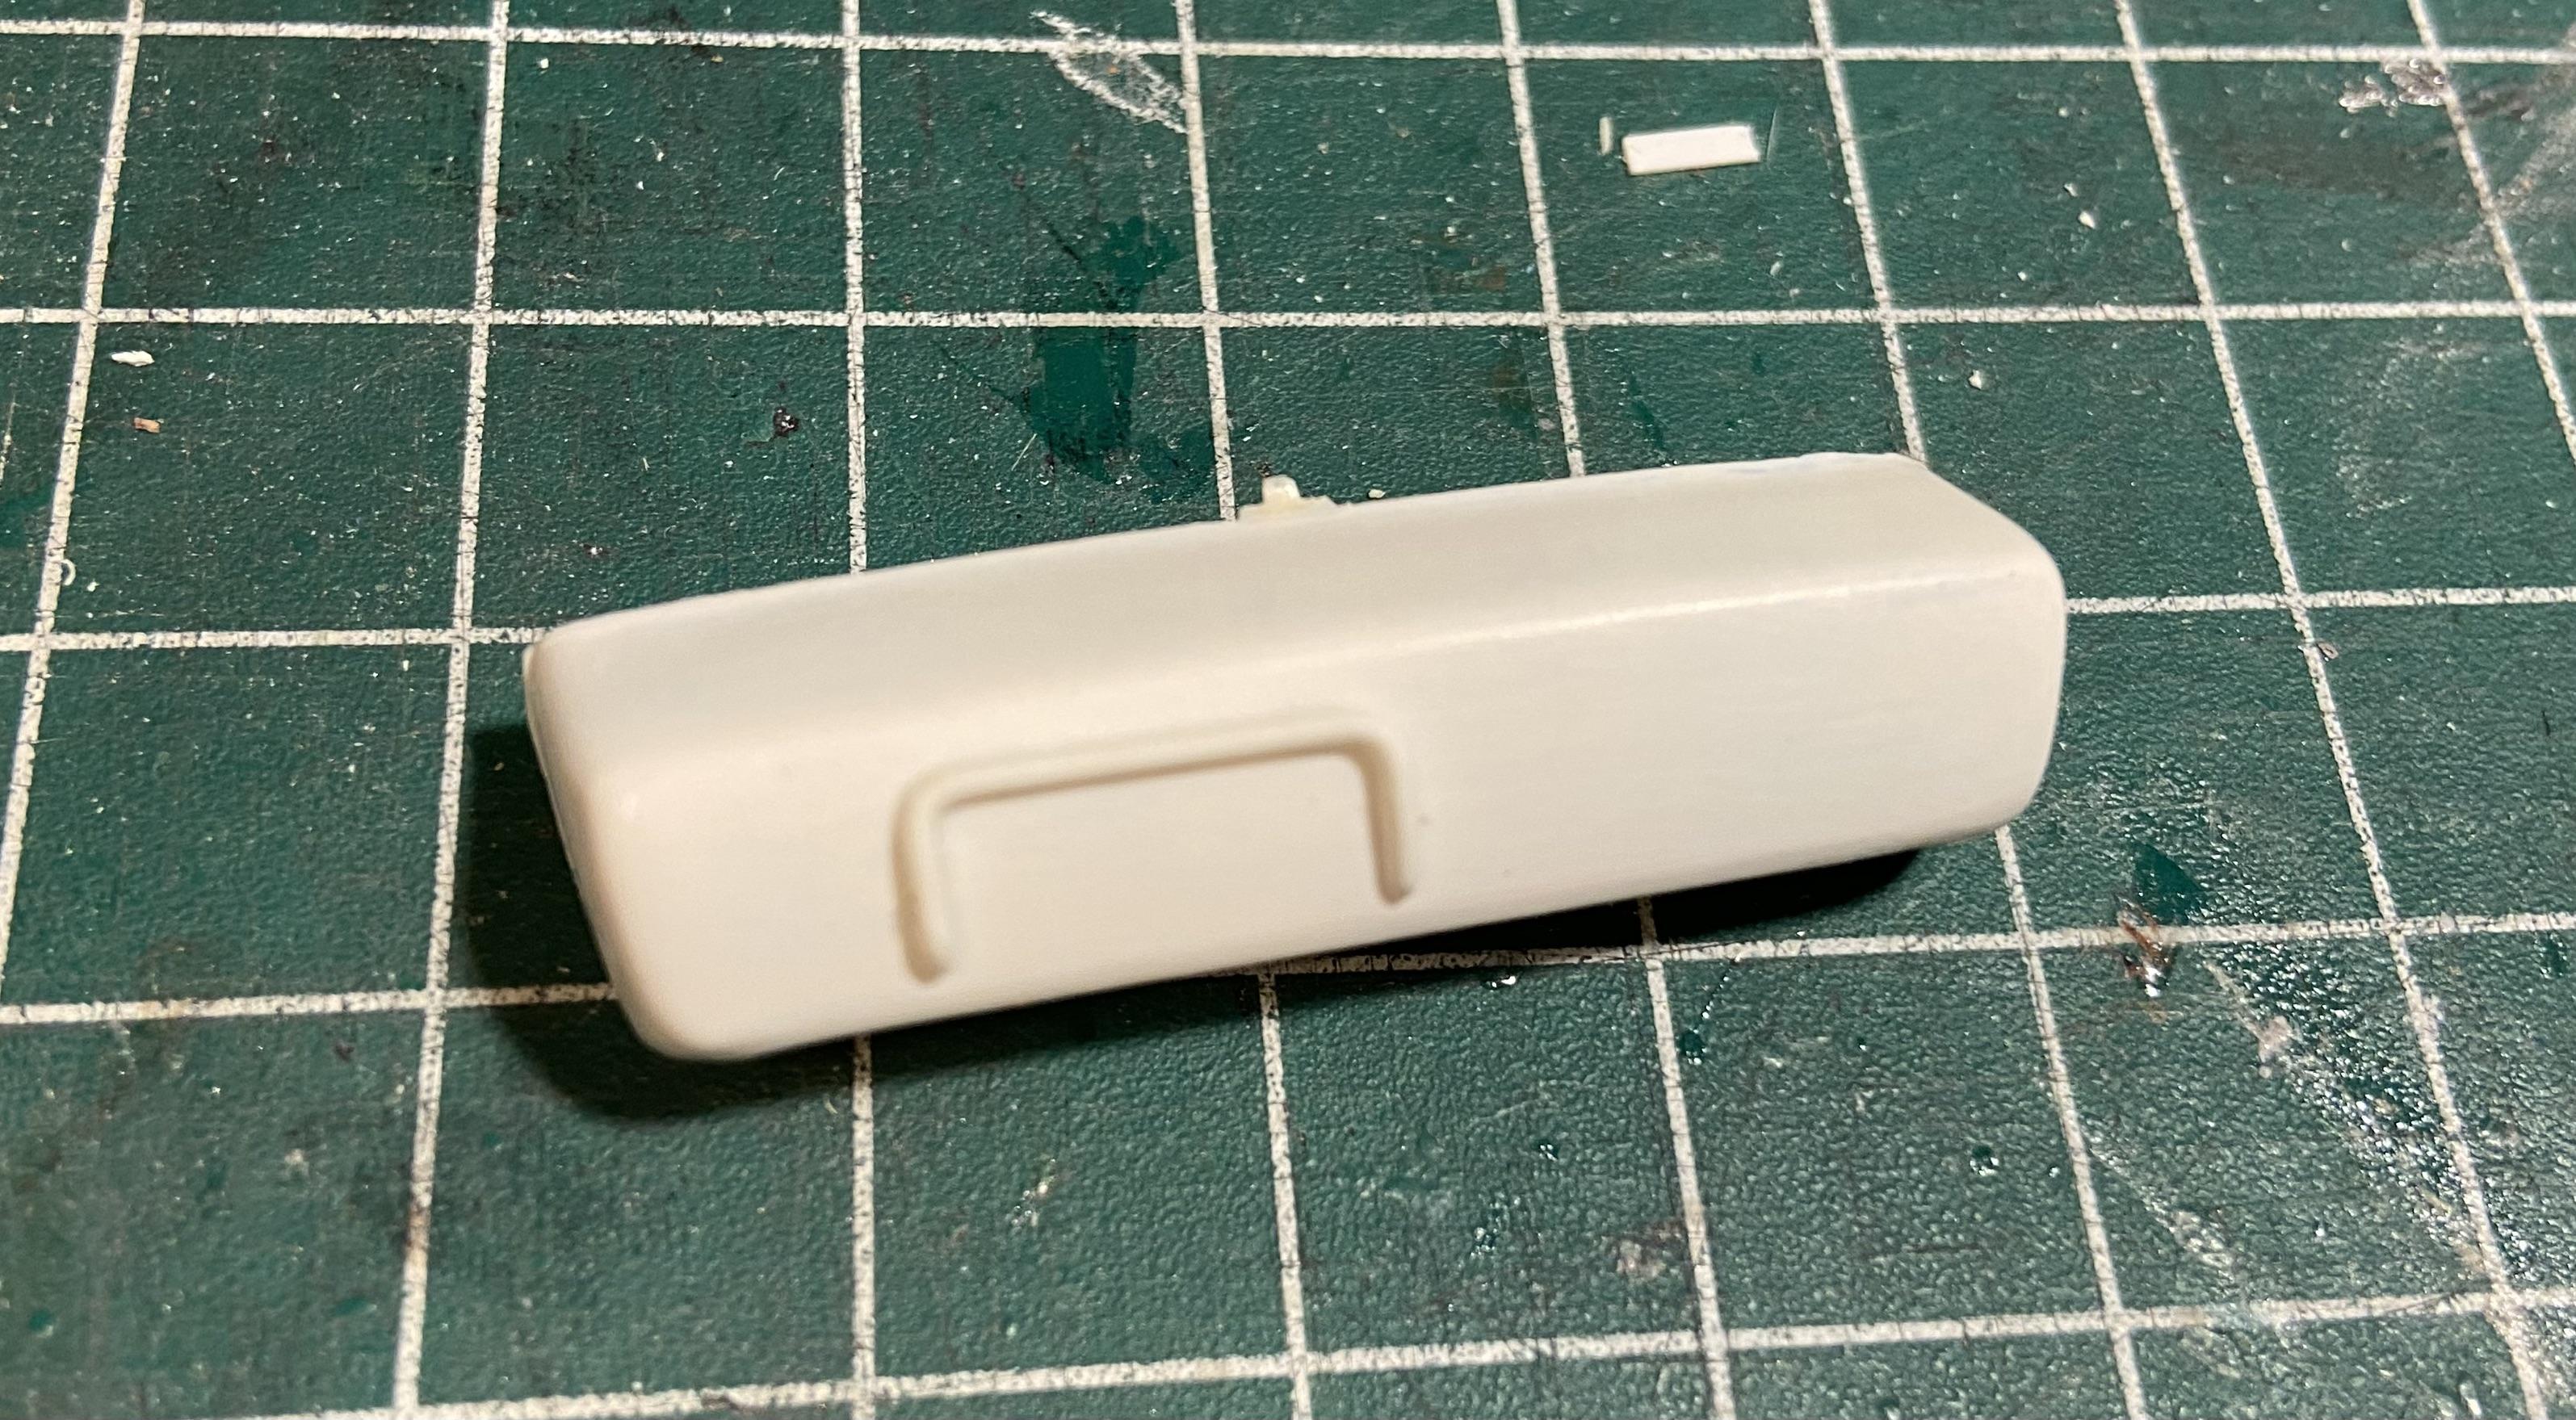
This part came in a box from another kit, it looks like a roadster width pan with separate license plate surround. It's not from the XR6, but looks similar. Does anyone recognize it?

-
Great body work, and that Bel Air (or is it the Moebius Ventura) roof is an absolute natural on the Cadillac body.
-
One fine kitty, that engine bay is a stunner. The added bail wire on the master cylinder is a nice, almost always overlooked touch.
-
Yes, the tool is used to make the trim concave to match the shape of the original moldings. I ground the blade to a curved shape to fit in the recessed area, then scraped light layers away until the desired depth was reached. You can make trim look stepped or cut a recess in the middle of the trim, like in the side trim on '70s GM and Ford pickups, which have a painted recess. Any shape can be made by grinding the blade to whatever shape you need.
-
That actually works! Never in a million years would I have come up with such a combination, but it's cool that someone did.
-
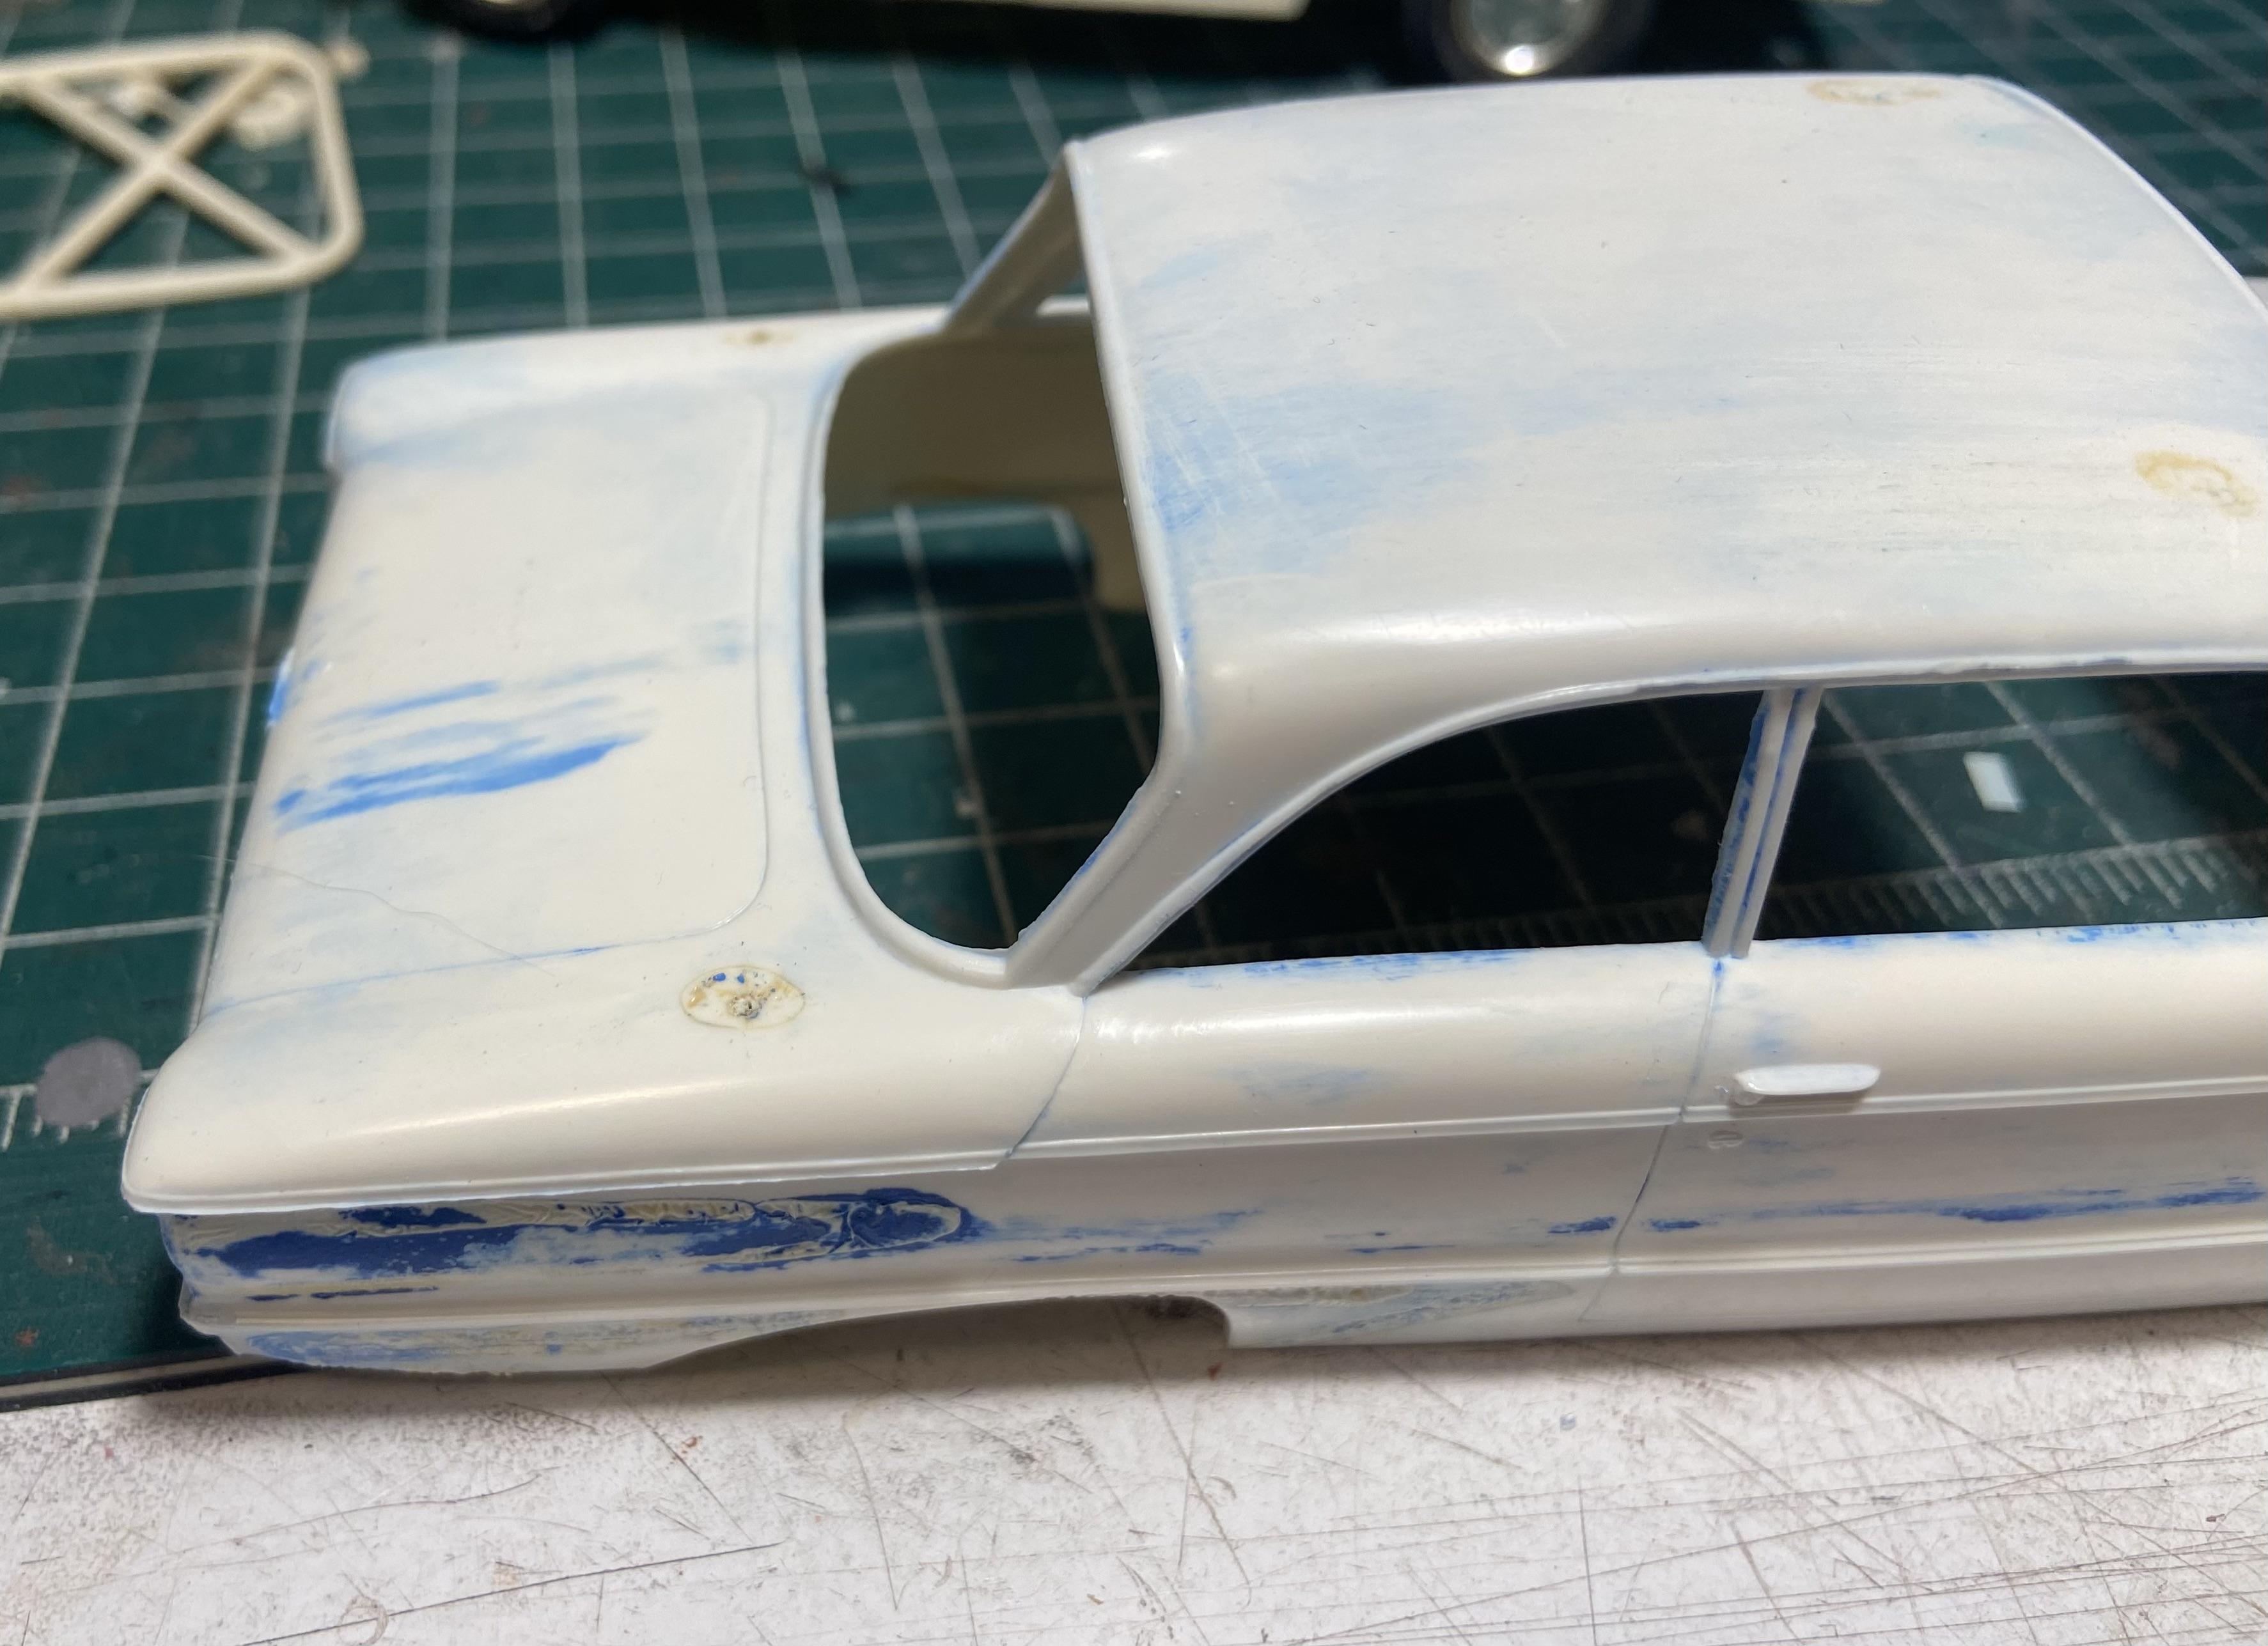
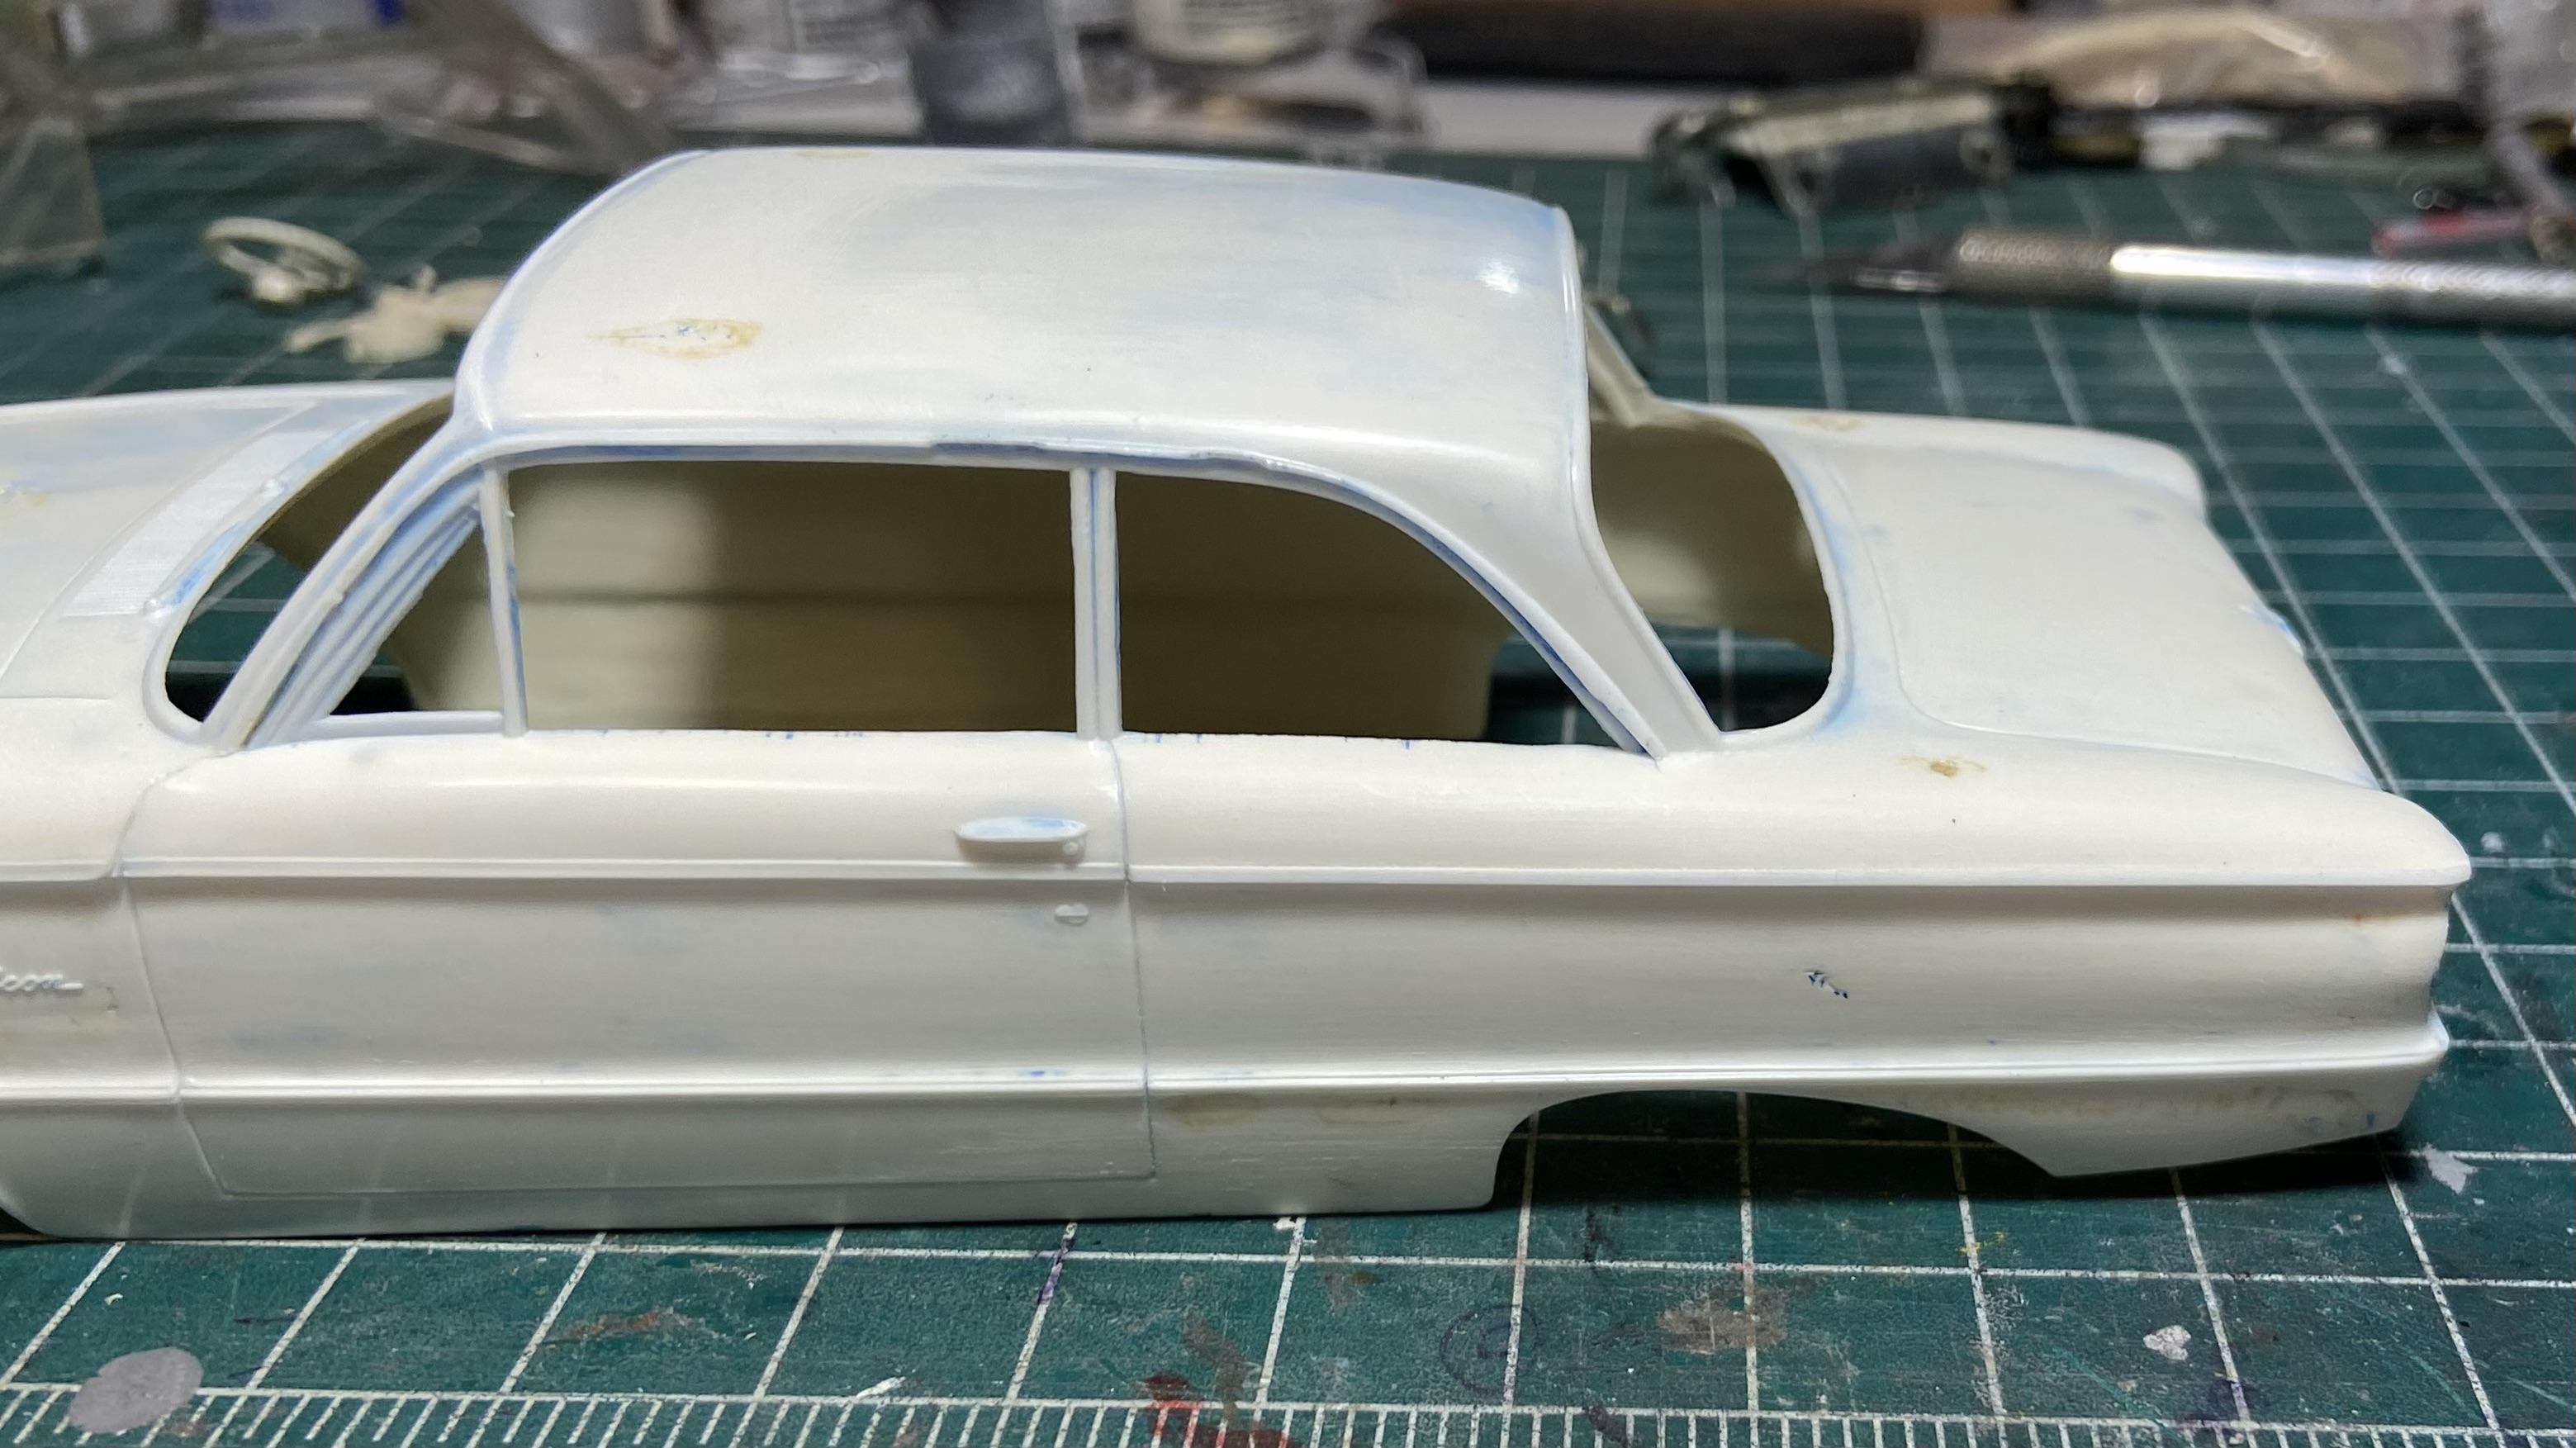
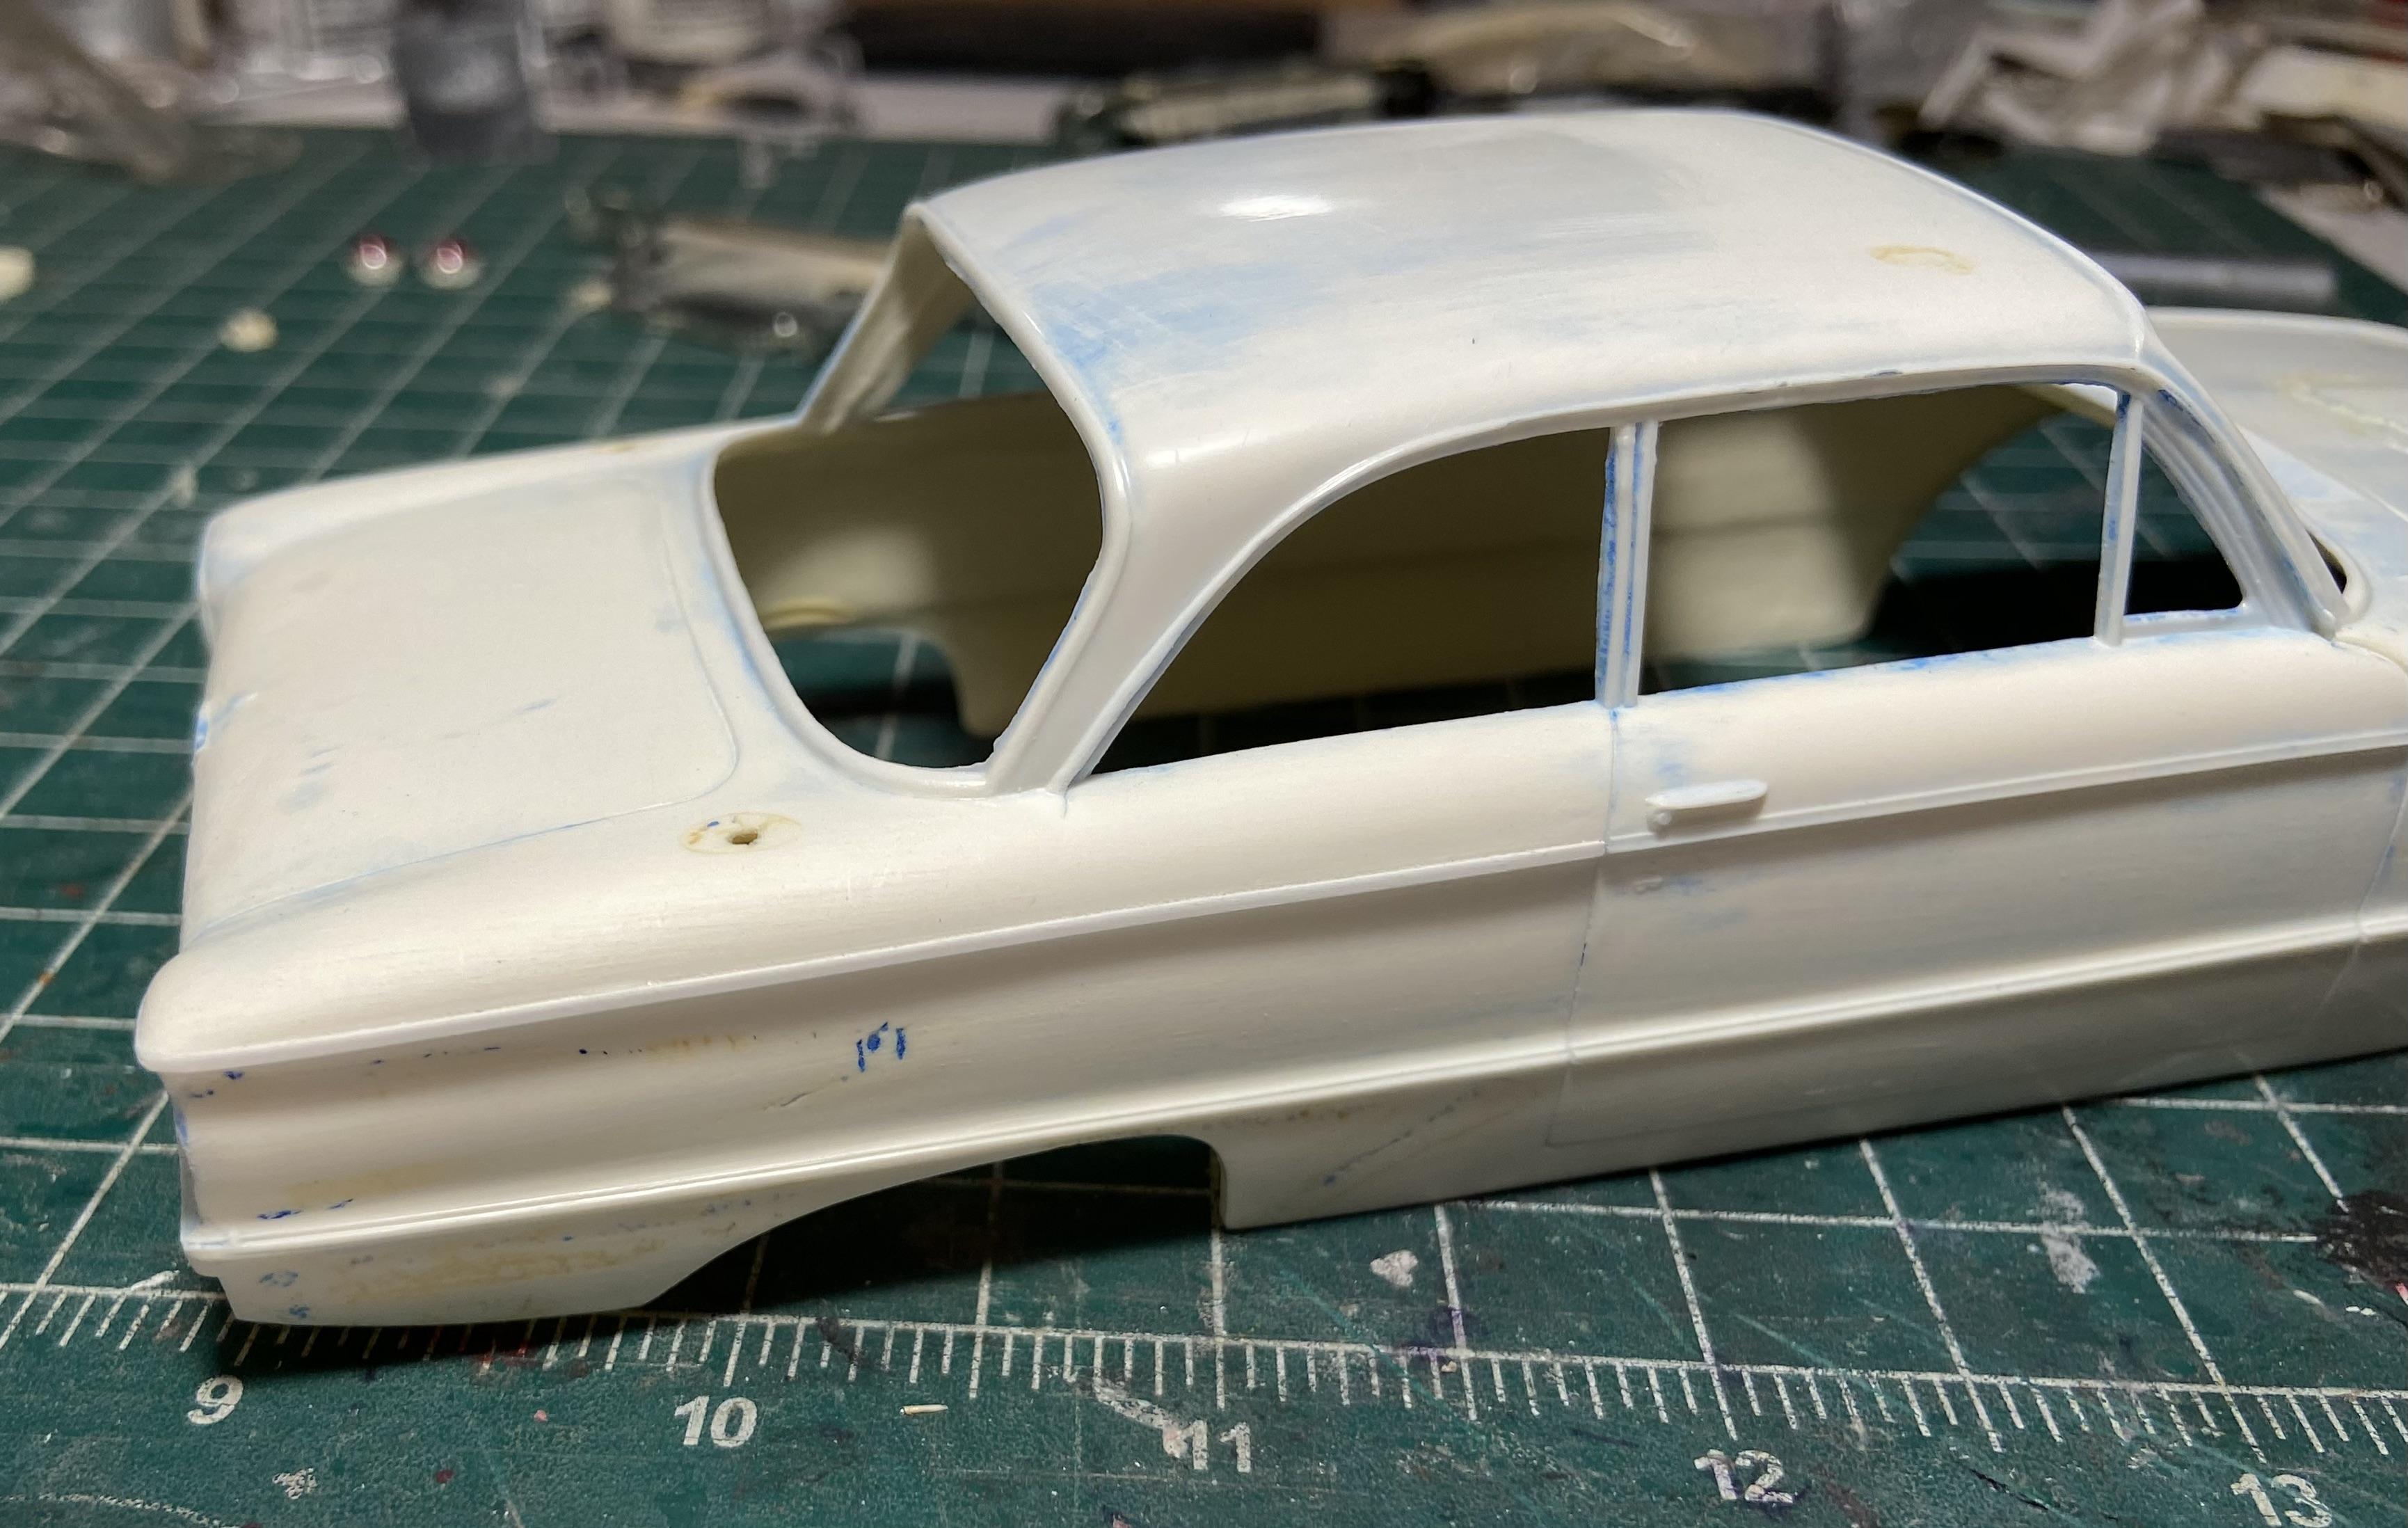
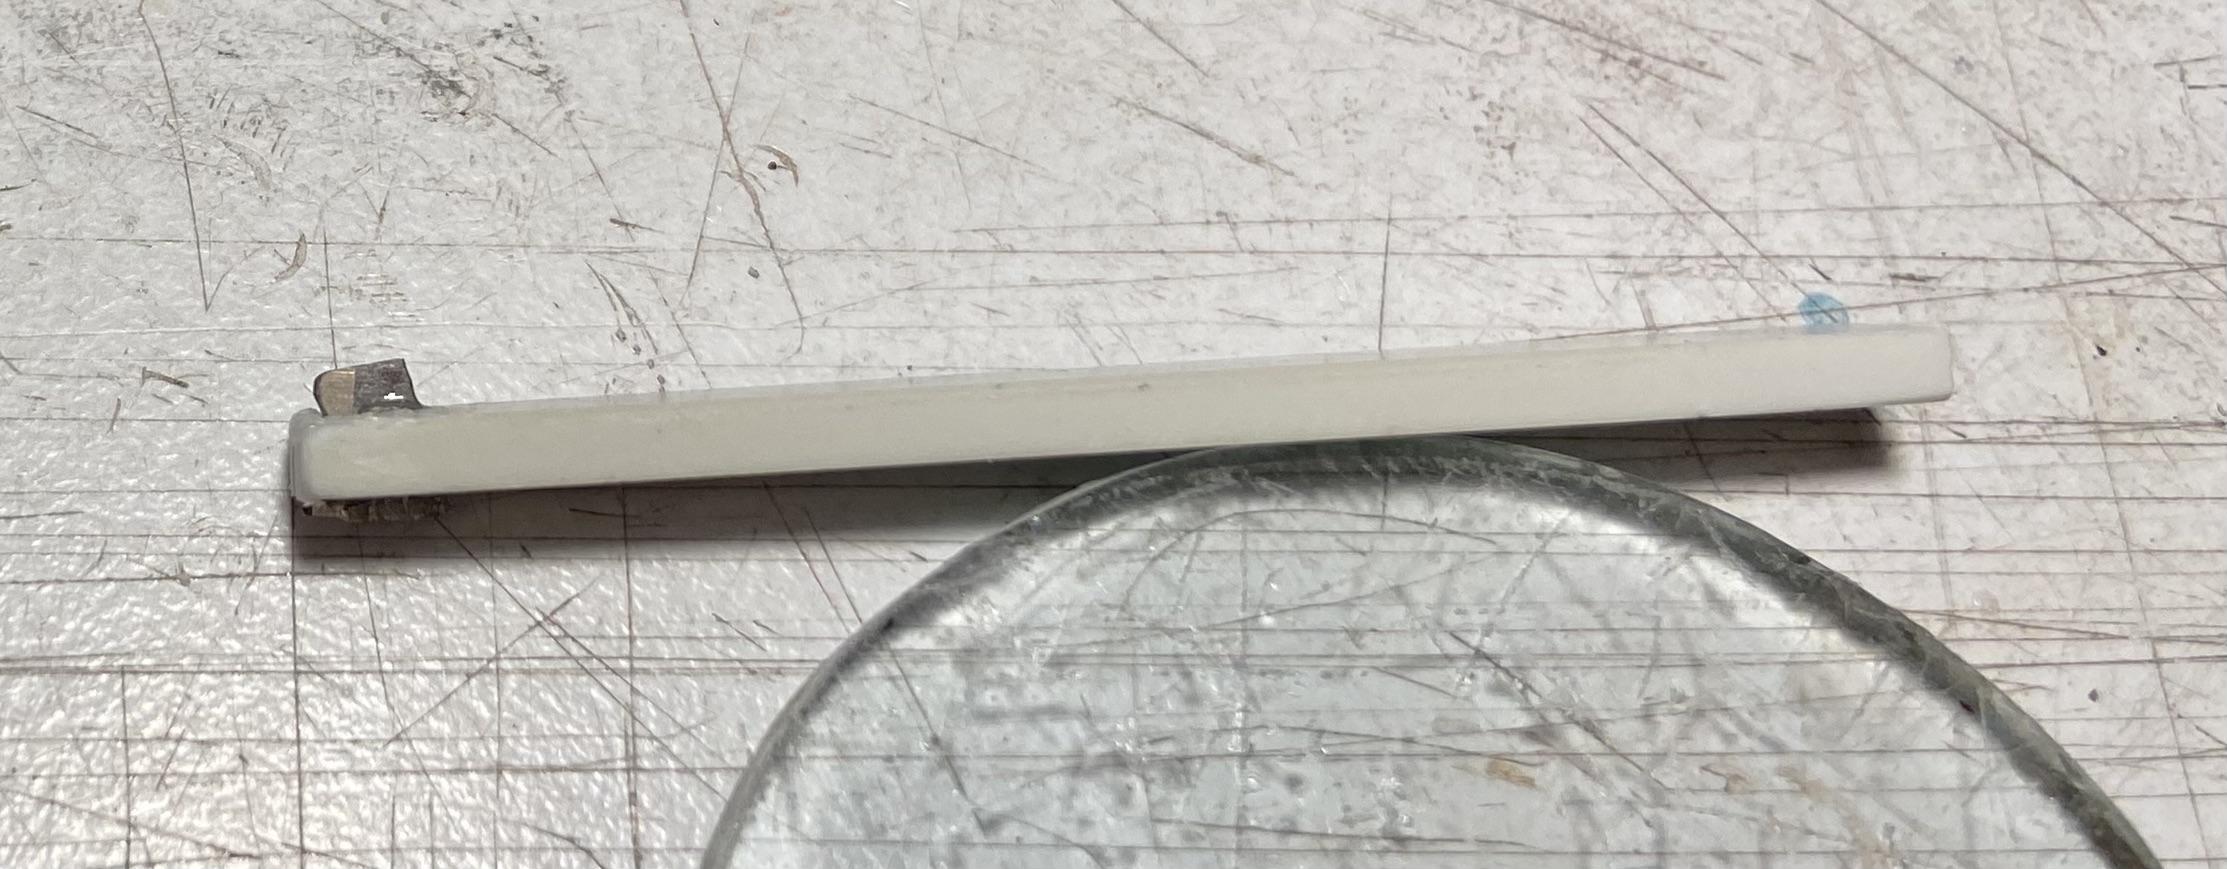
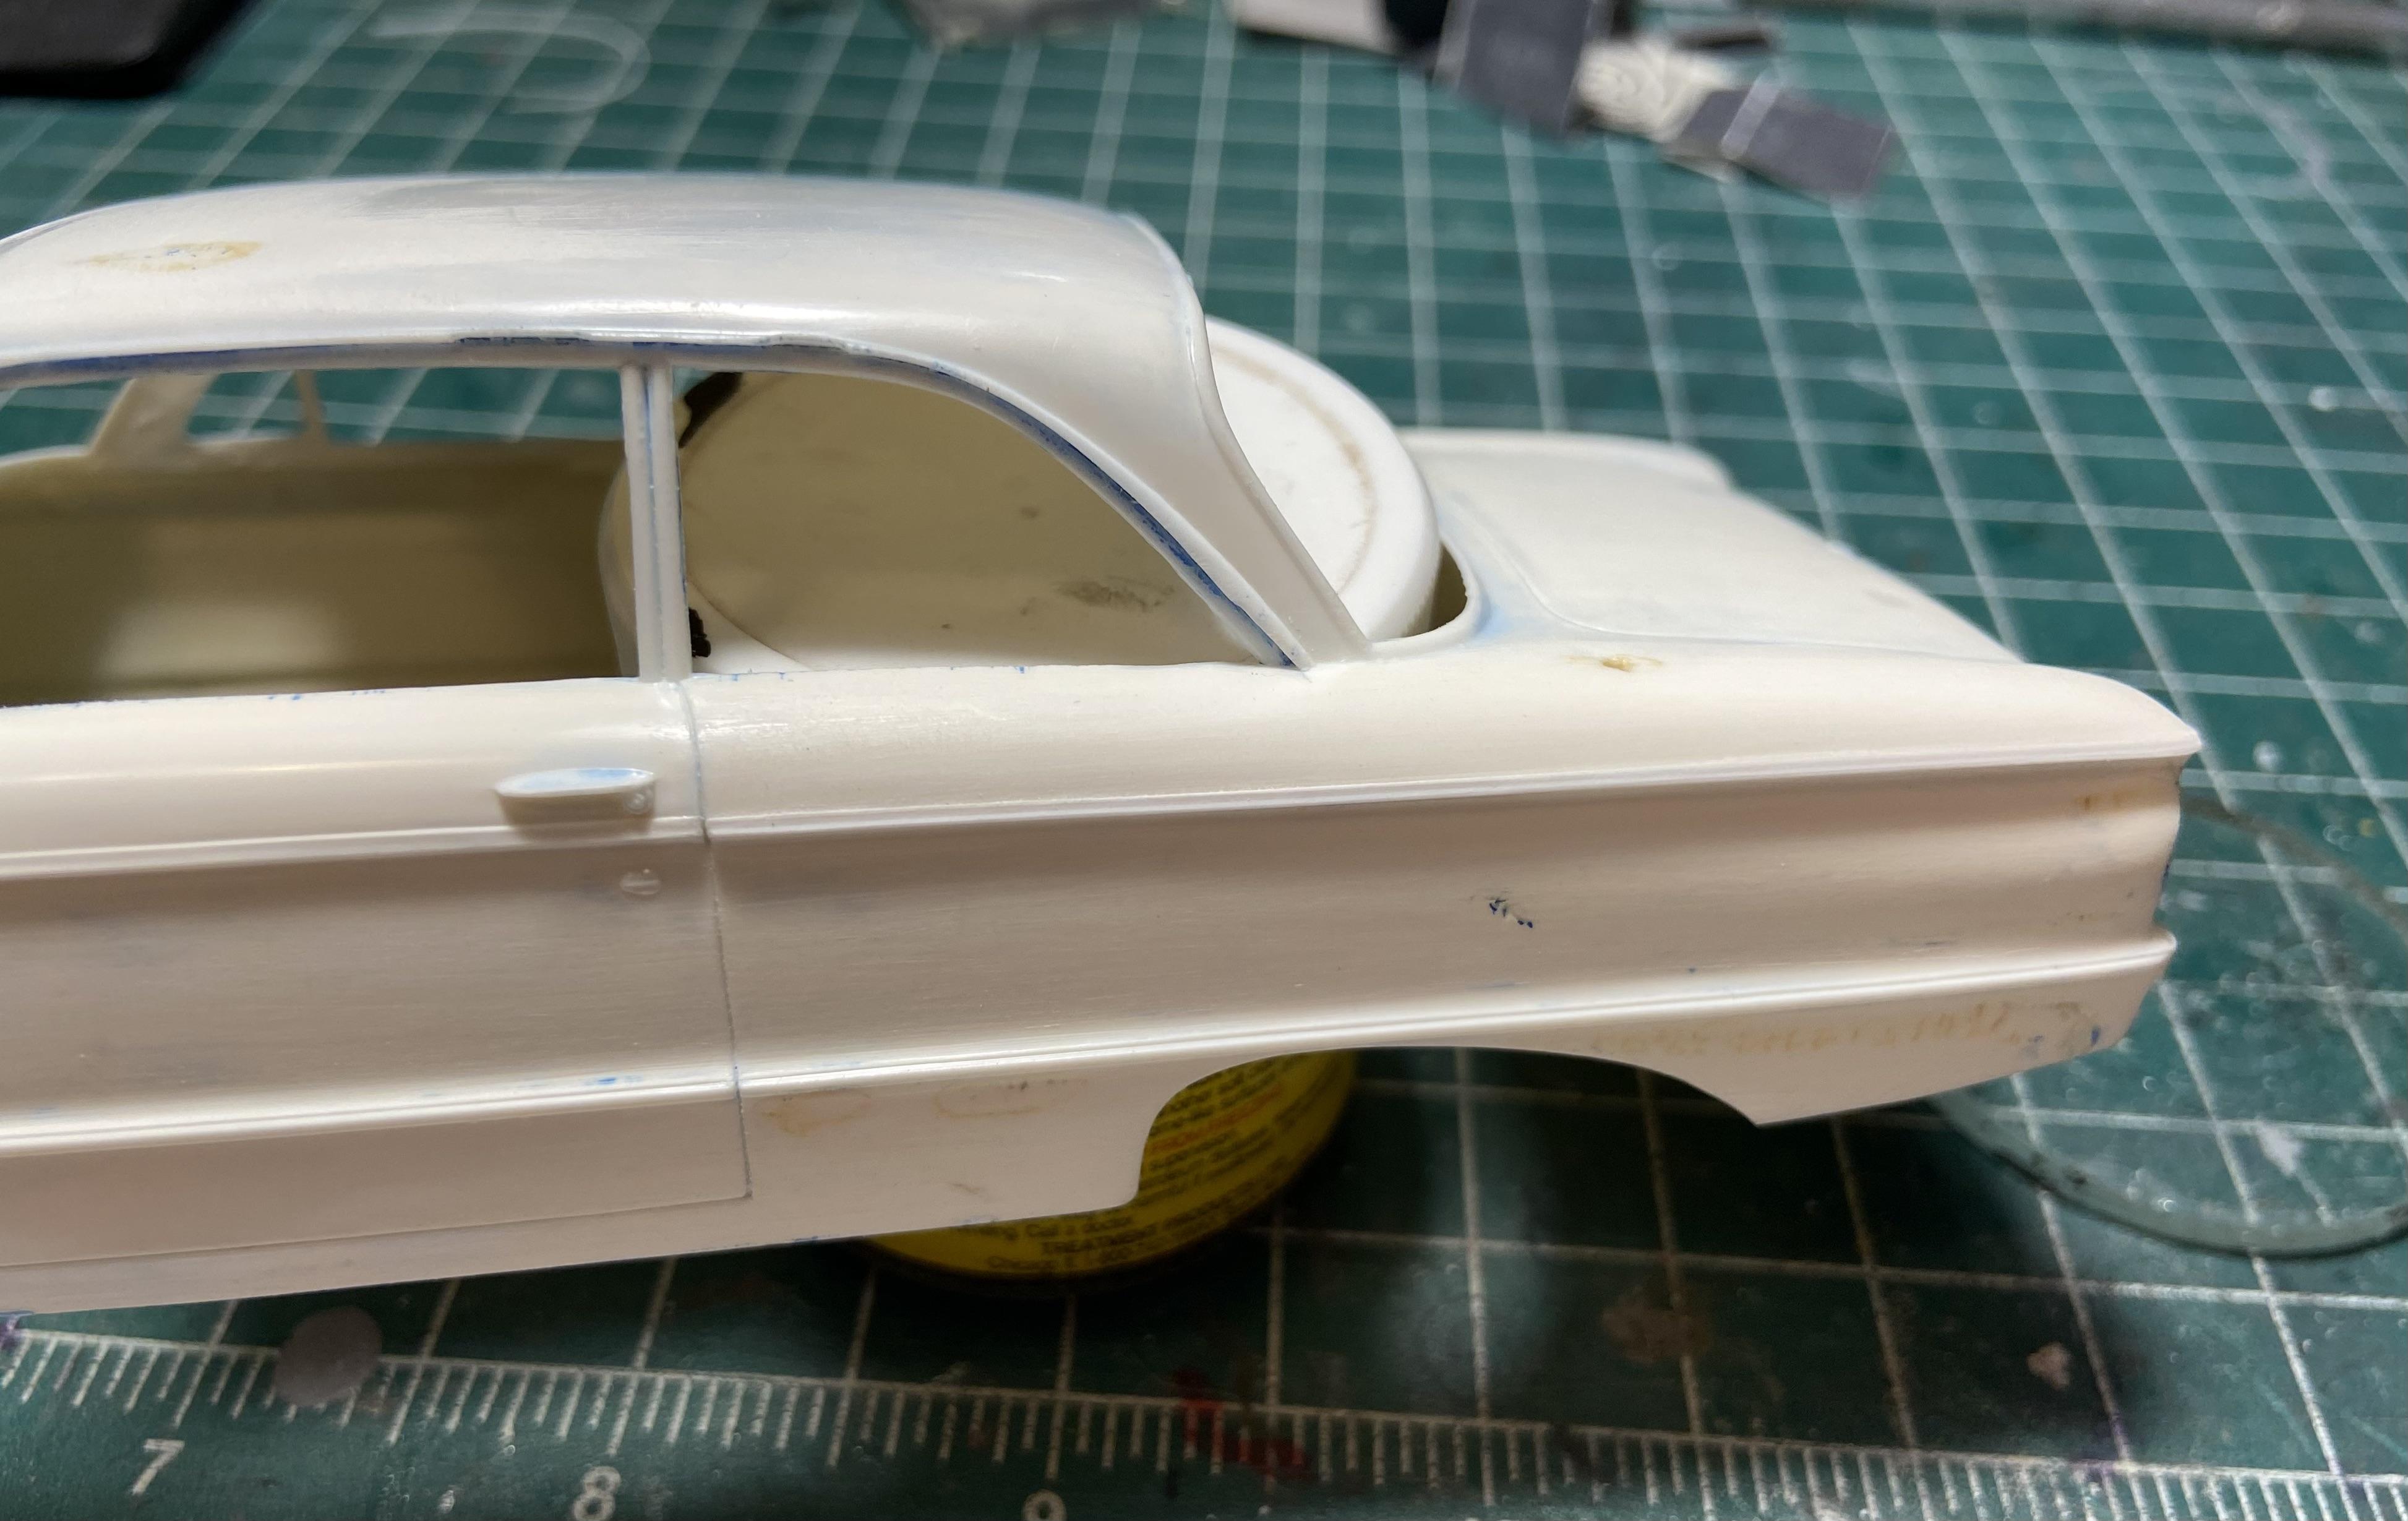
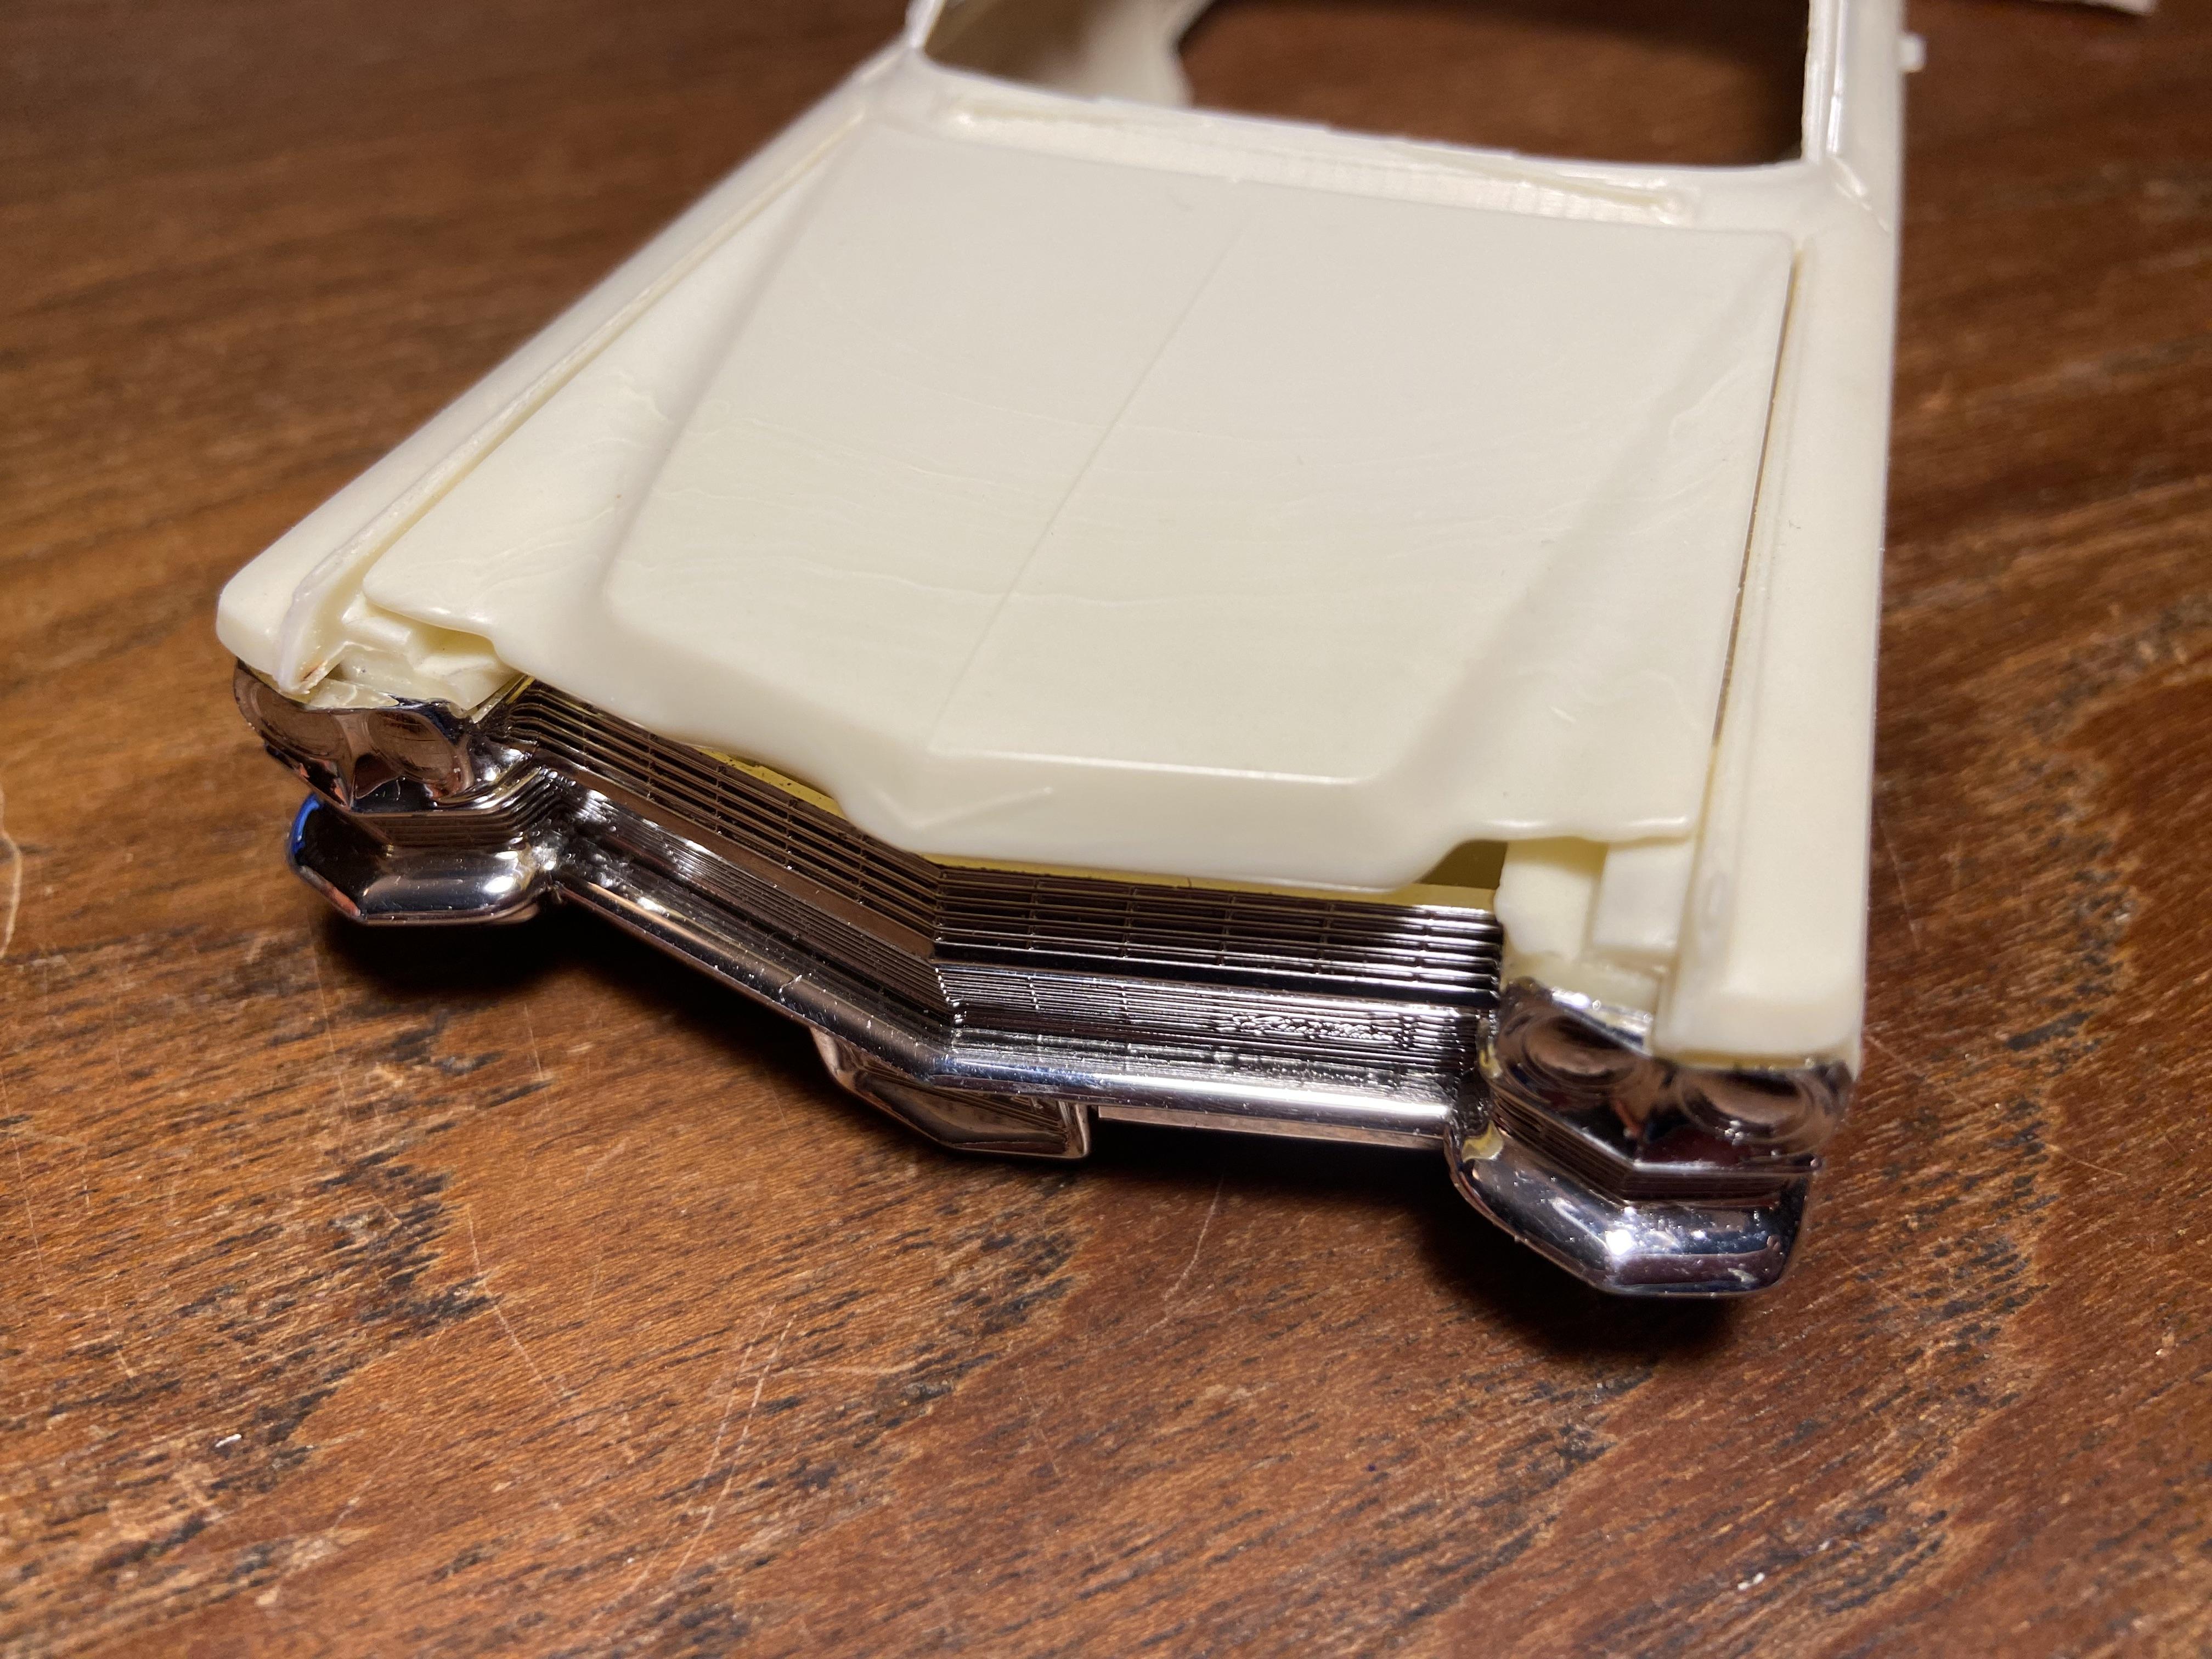
I can't count the number of times that people have asked me how I profile (add shape to) side trim. Actually no one has ever asked me that, but here's how to do it. Restoring a glue bomb '61 Falcon and the rear 1/4 panel trim on both sides, as well as the 1/4s themselves, have an obvious problem: AMT didn't do such a good job aligning the sliding die components, so there is a misalignment of the trim that can't be repaired because it is at two different levels. The first step is to remove the trim and sand the 1/4 panel smooth, being careful not to nick the door trim. Replace the trim with Evergreen strip of the appropriate width, the thickness doesn't matter as much. Run an Exacto blade over the whole trim at a right angle to scrape it down to the correct height. This trim is wider at the bottom and narrower at the top, so the blade was held at an angle to rough it in. Note that the trim looks pretty close, and wouldn't be that noticeable when foiled, but we can do better. Make a custom profiling tool out of a piece of Exacto blade glued into a piece of Evergreen rectangle stock. The end of the rectangle will act as the guide that you will run under the trim to scrape it evenly. The blade has to be trimmed and rounded to match the contour of the trim. I do that with a sharpening stone, holding the little piece with pliers. Some experimentation told me to add a little CA glue to the plastic guide to center the curve of the blade in the trim. Hold the tool and scrape the length of the trim thusly: Play with the angle that you hold the tool to get the cutting edge right where you want it. The angle shown above worked the best here. Take many light cuts rather than digging in hard to work it to shape. Finished, with a comparison to a second body.
- 13 replies
-
- 12
-

-
Not at all what I was picturing, very nicely done and what a cool concept.
-
What did you see on the road today?
Maindrian Pace replied to Harry P.'s topic in General Automotive Talk (Trucks and Cars)
Actually, that's the way it arrived off the roll back. Those wheels are just rollers. -
1992 Ford F-150 XL Work Truck
Maindrian Pace replied to av405's topic in Model Trucks: Pickups, Vans, SUVs, Light Commercial
Nailed it! -
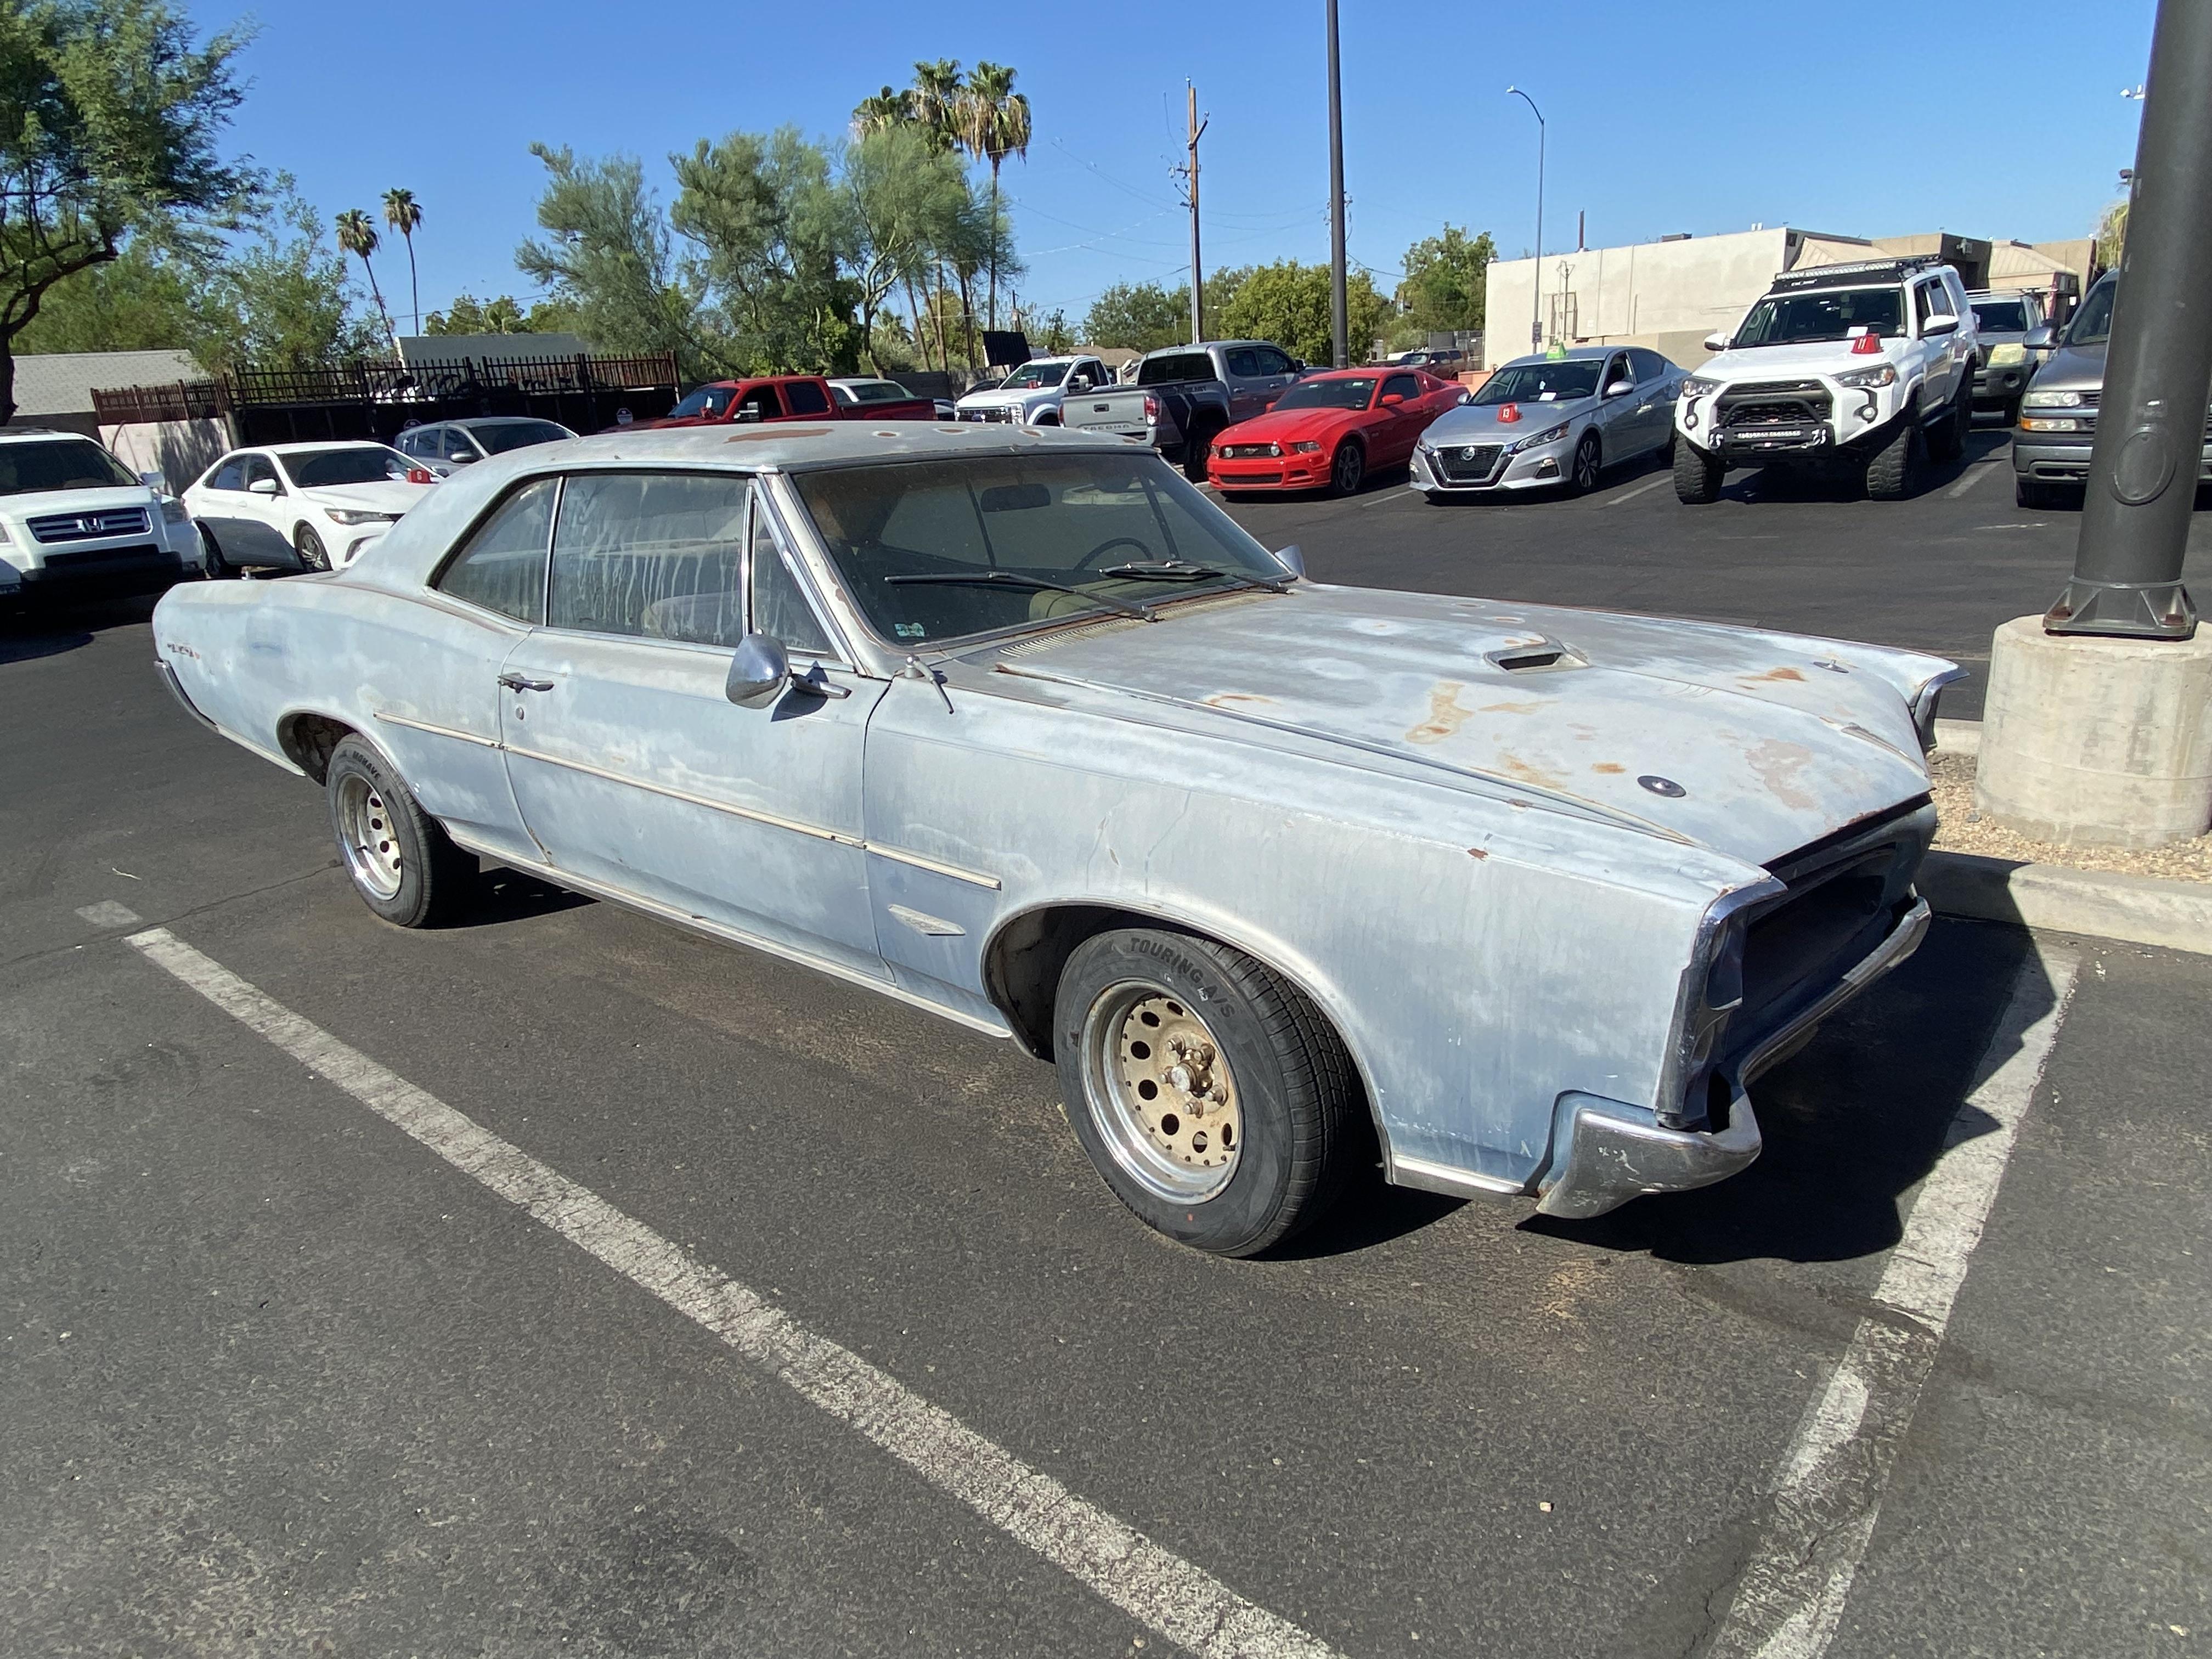
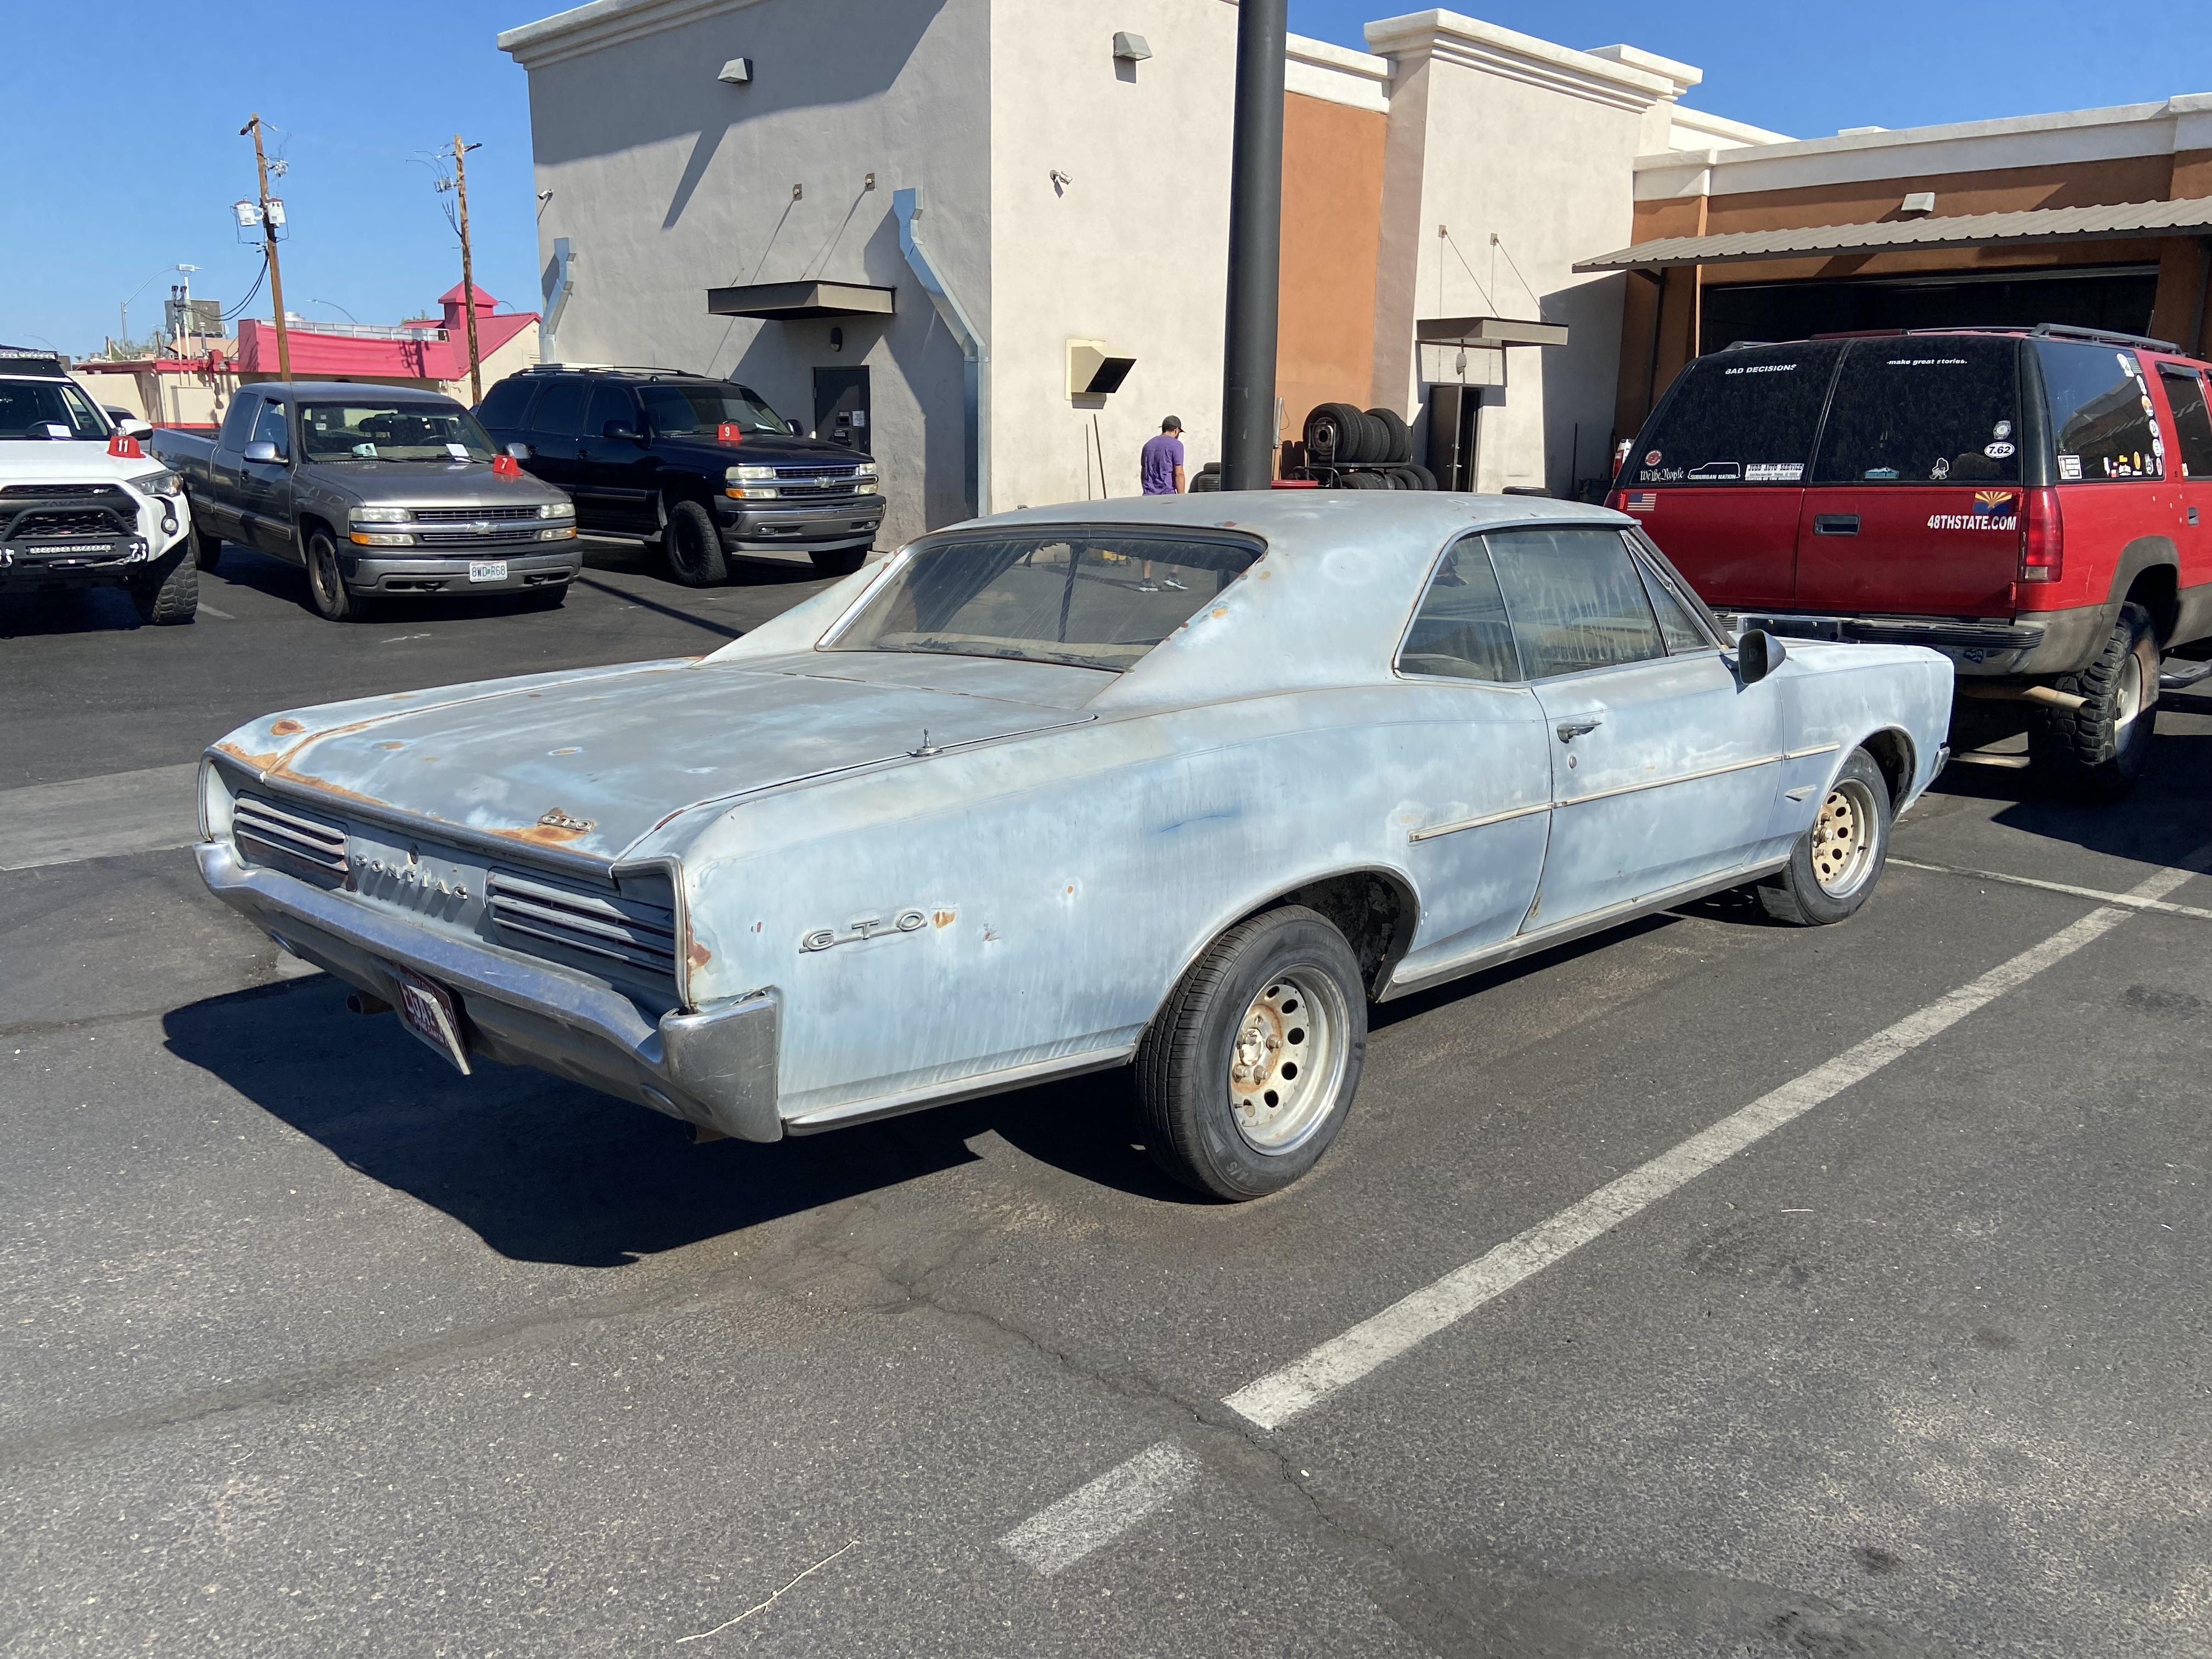
What did you see on the road today?
Maindrian Pace replied to Harry P.'s topic in General Automotive Talk (Trucks and Cars)
Yesterday morning at my local tire/repair shop.
-
Very nice, really clean and correct job on the conversion.
-
Long shot.... Need Johan 64 Cadillac bumpers and hood
Maindrian Pace replied to NitroMarty's topic in Wanted!
I've got a short shot if you feel like a little body work.
-
Might want to joint the FB group Deal or No Deal parts. A built no paint rebuilder just sold there for $75. Rare, but they come up periodically.
-
Recreation of 1964 Model Car Science ad for AMT Trophy series
Maindrian Pace replied to Alan Barton's topic in Model Cars
Amazing! The display really captures the feeling of the original ad, great job to both of you for such an impressive display. -
Sharp! Great body work.
-
The "waste-not-want-not" Starliner project
Maindrian Pace replied to customline's topic in WIP: Model Cars
I love it, as I too am a thick-headed cheapskate! And to more or less the same extreme. Combining spare parts into something presentable is a favorite thing for me, and when this is done, it will present as nicely as it would with the original full-boogie chassis - if not better. -
Thanks for the nice words, everyone.
-
The bed and rear section are spot-on, it's coming out very well indeed. One suggestion if I may: you might want to smooth over the XLT front wheel opening moldings, just like you did the rear, before painting the cab. Great job overall.