Deathgoblin
-
Posts
2,464 -
Joined
-
Last visited
Content Type
Profiles
Forums
Events
Gallery
Everything posted by Deathgoblin
-
 I've got a full detail Jo-Han 1963 Chrysler Turbine, unbuilt. I'm gonna dig that kit out next. Have a partially built Airfix 007 Aston Martin DB5. Got Dr. Krook's Medicine Show. The kit was partially built and mostly complete, but I had to make a few parts like the rear panel. Also have Der Guber Wagen, but it's really incomplete/damaged. I'll have to make a lot of parts and pull from other kits to complete her.
 -
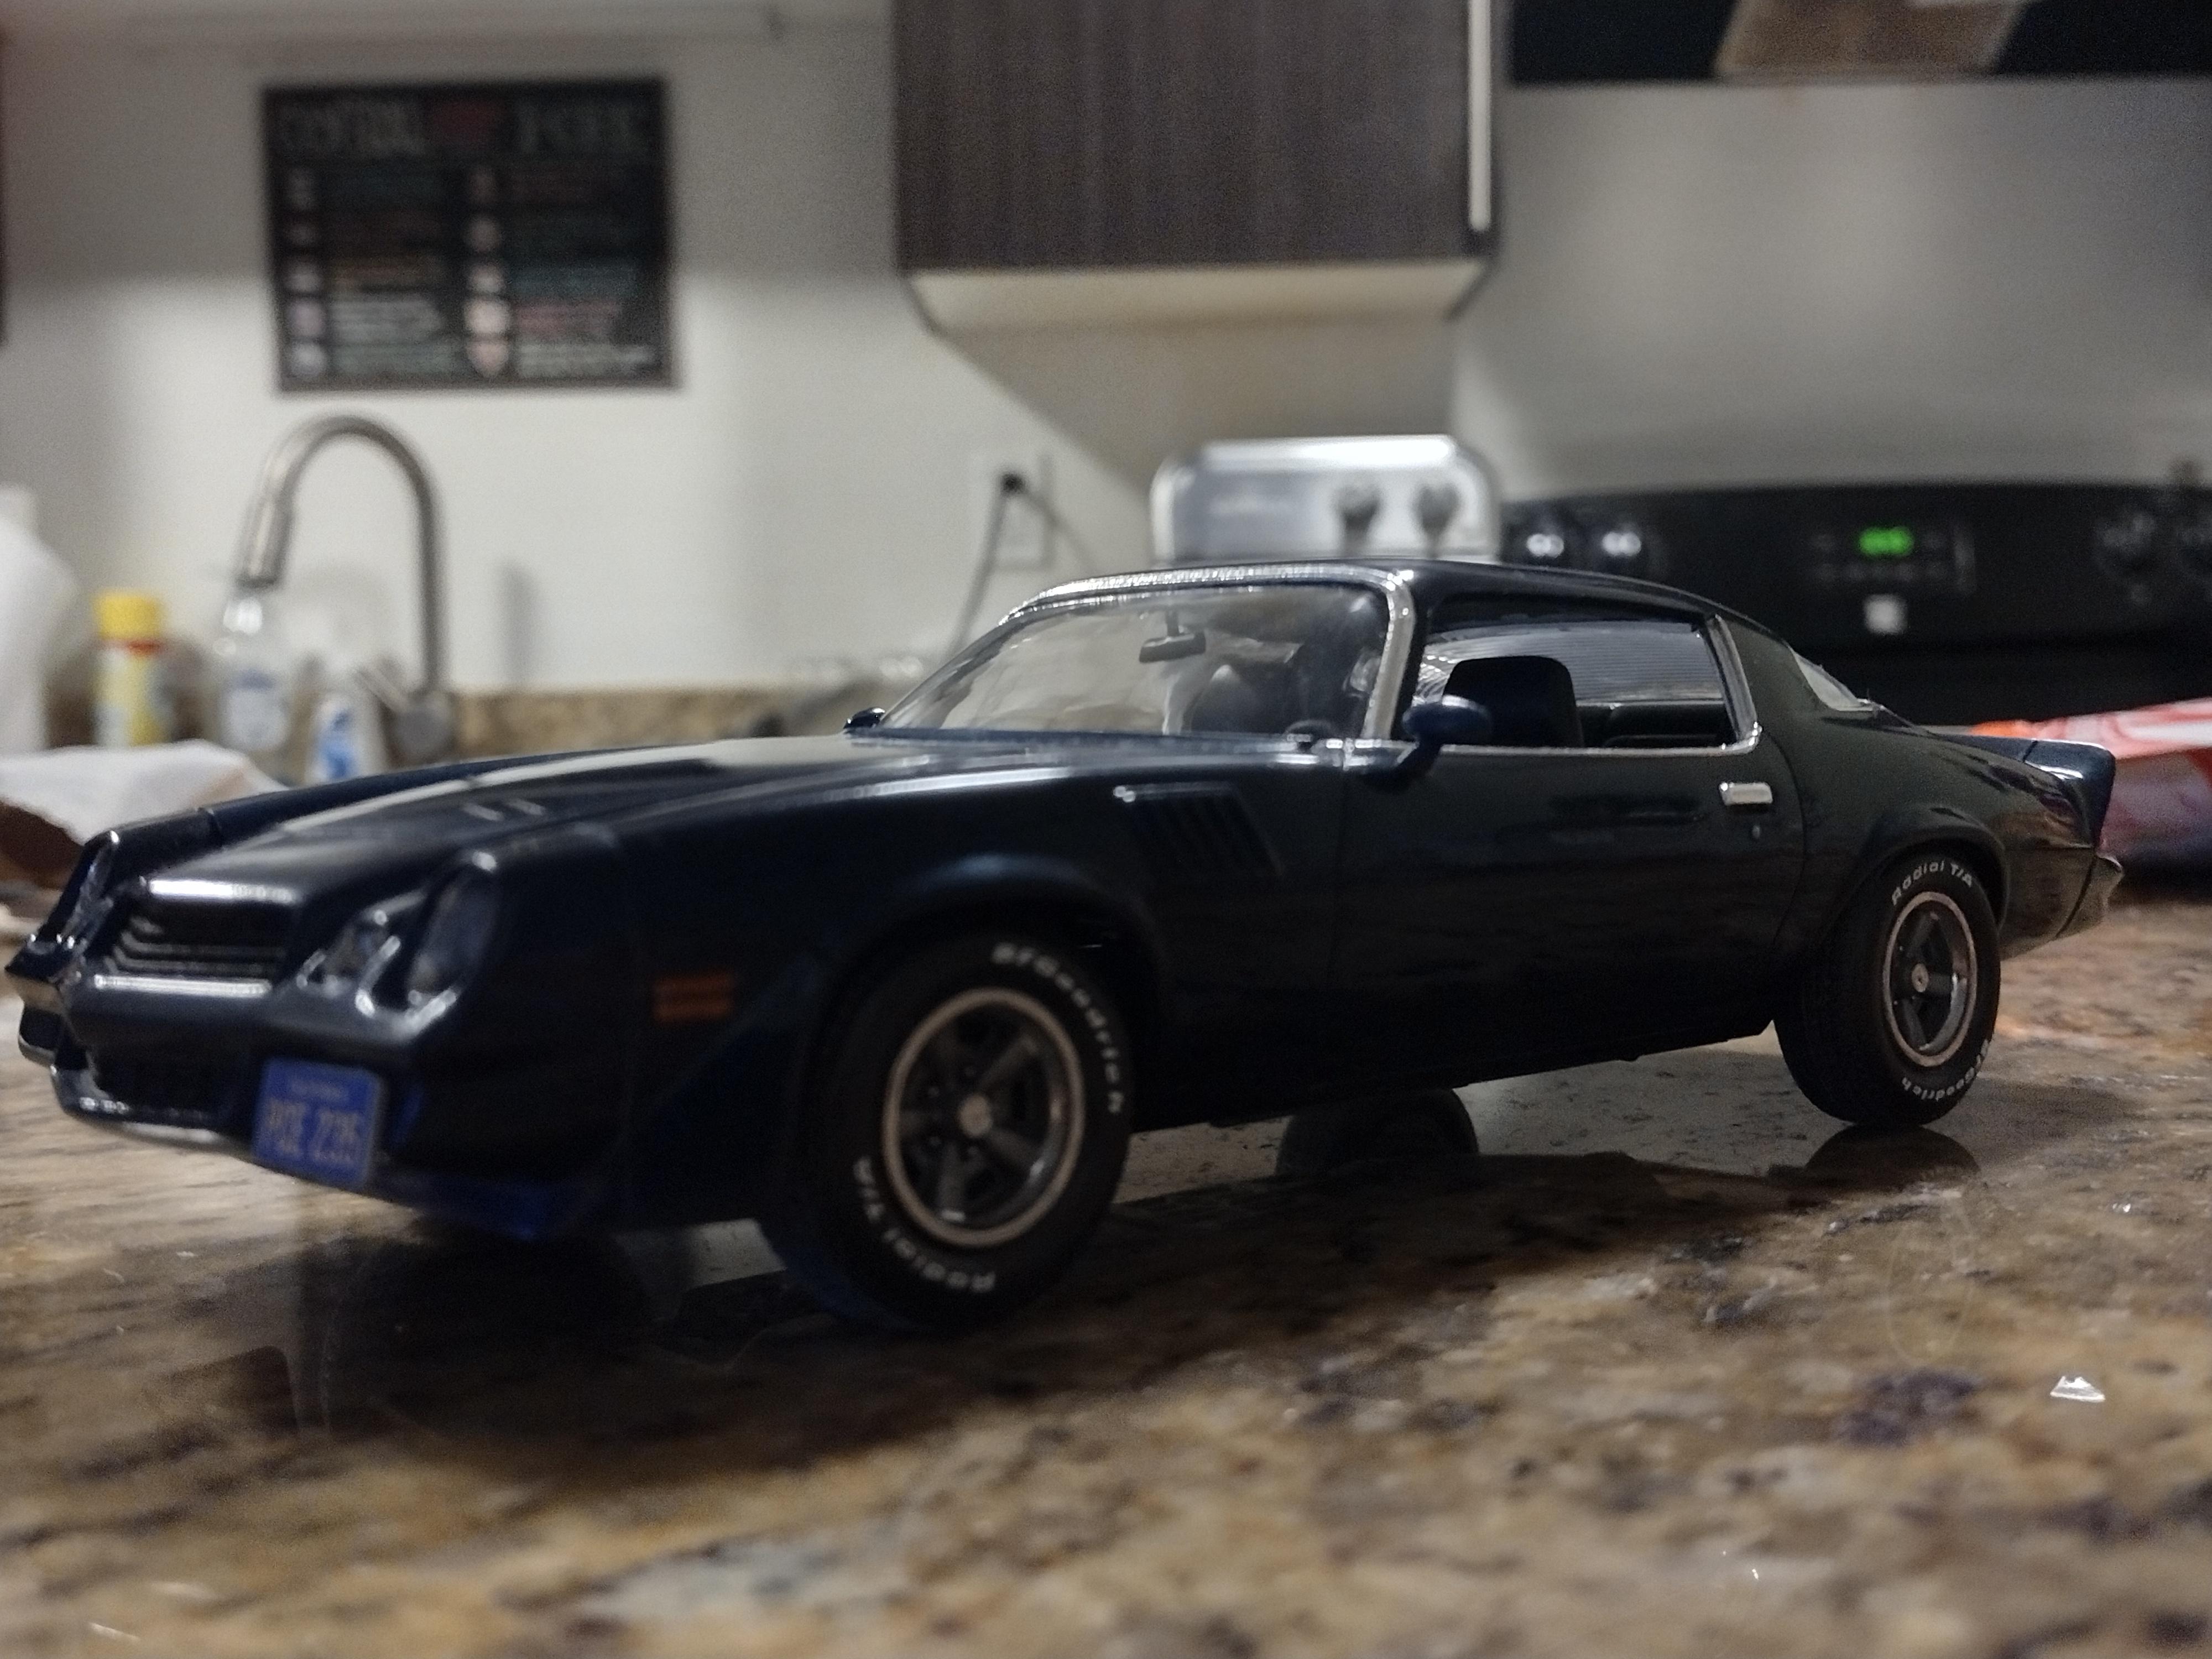
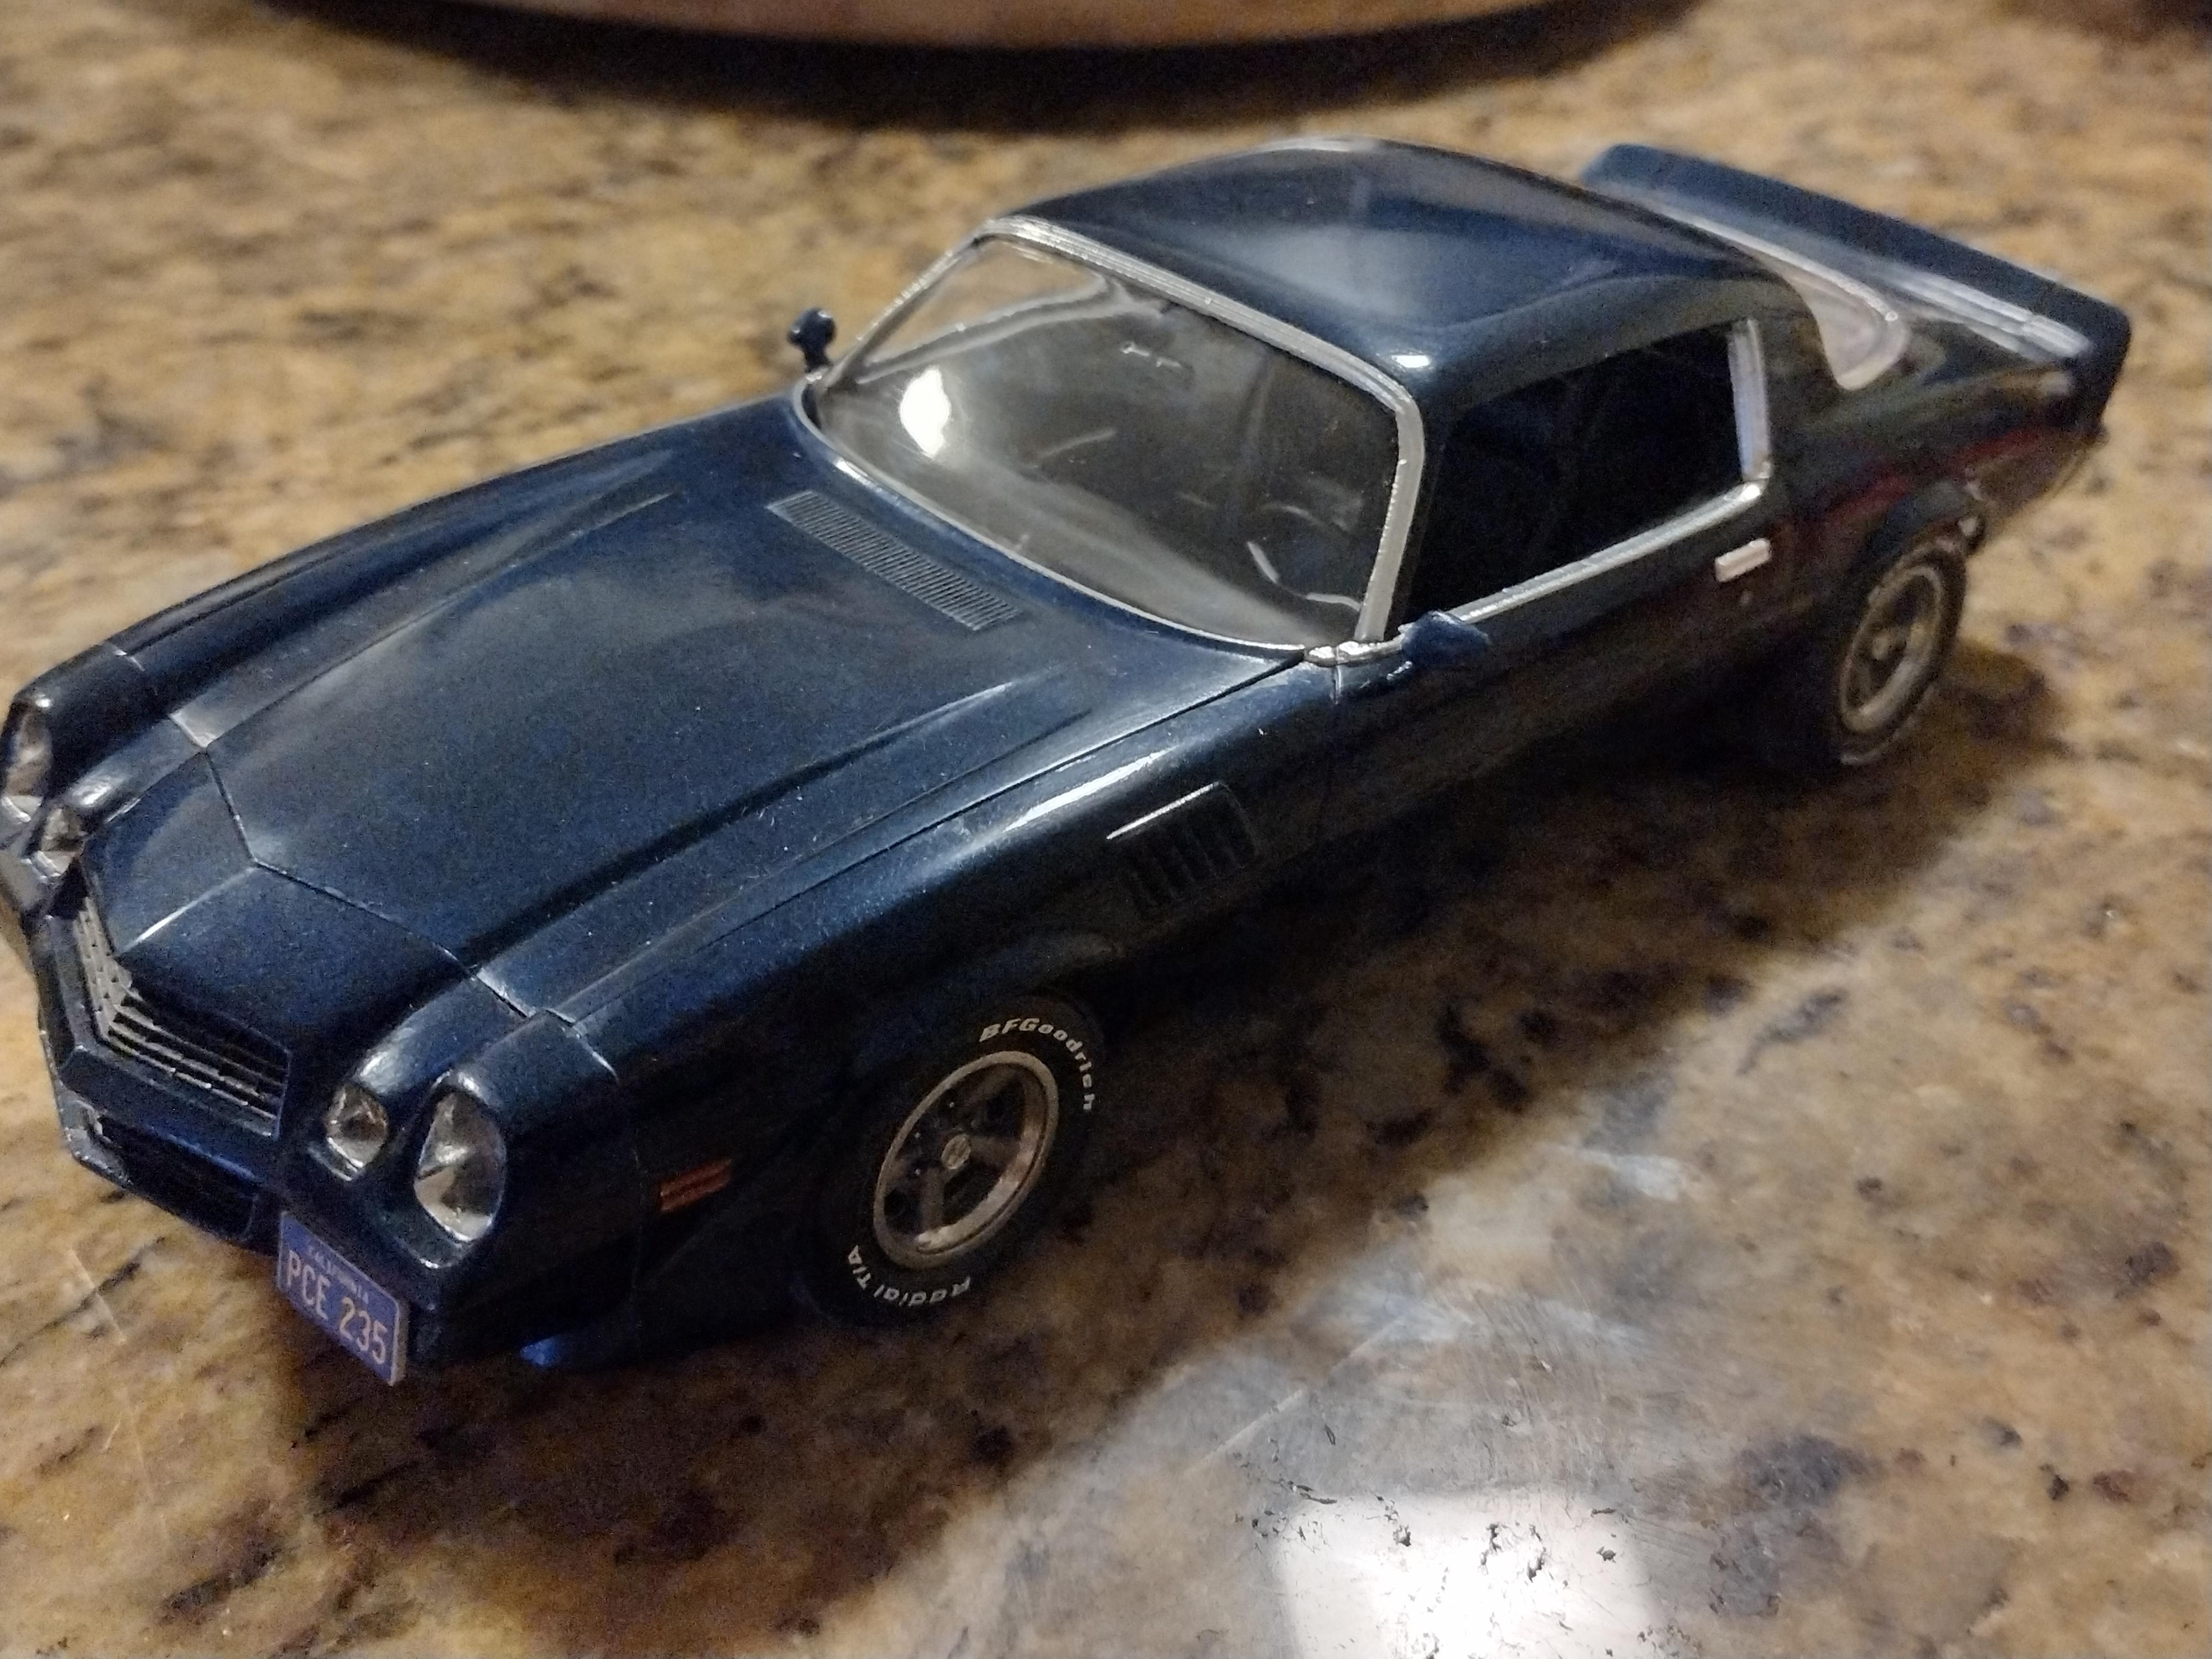
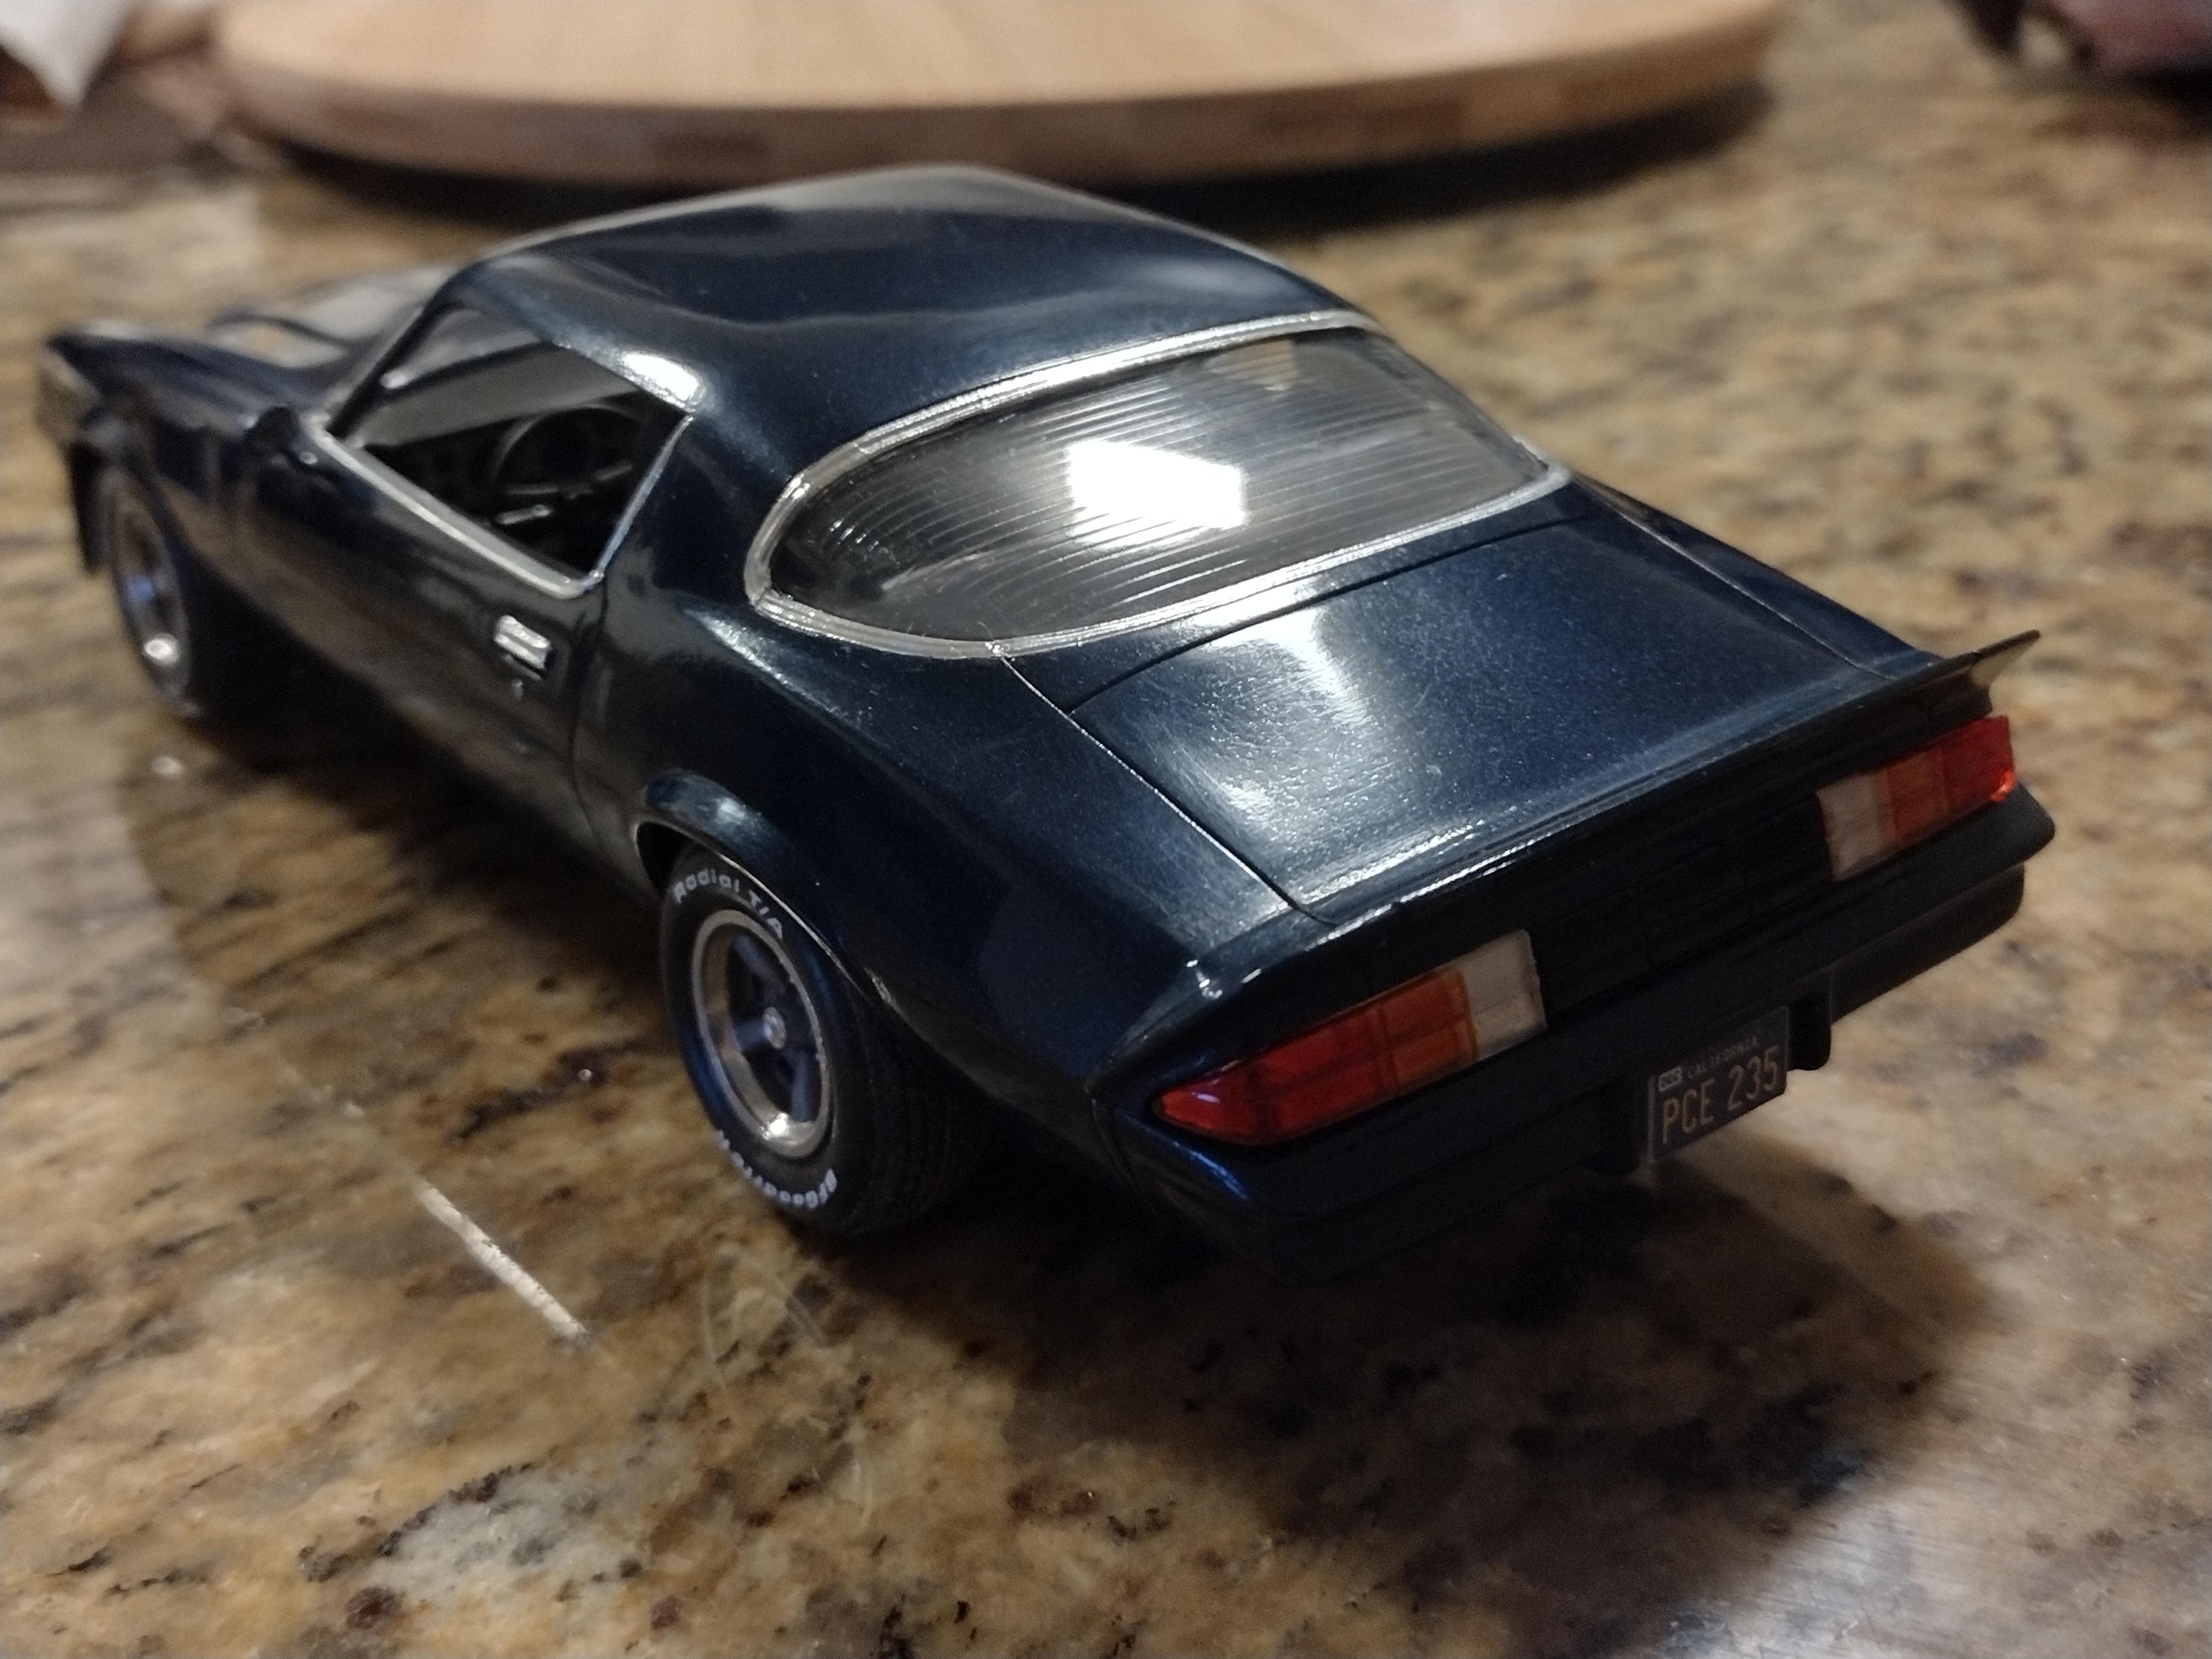
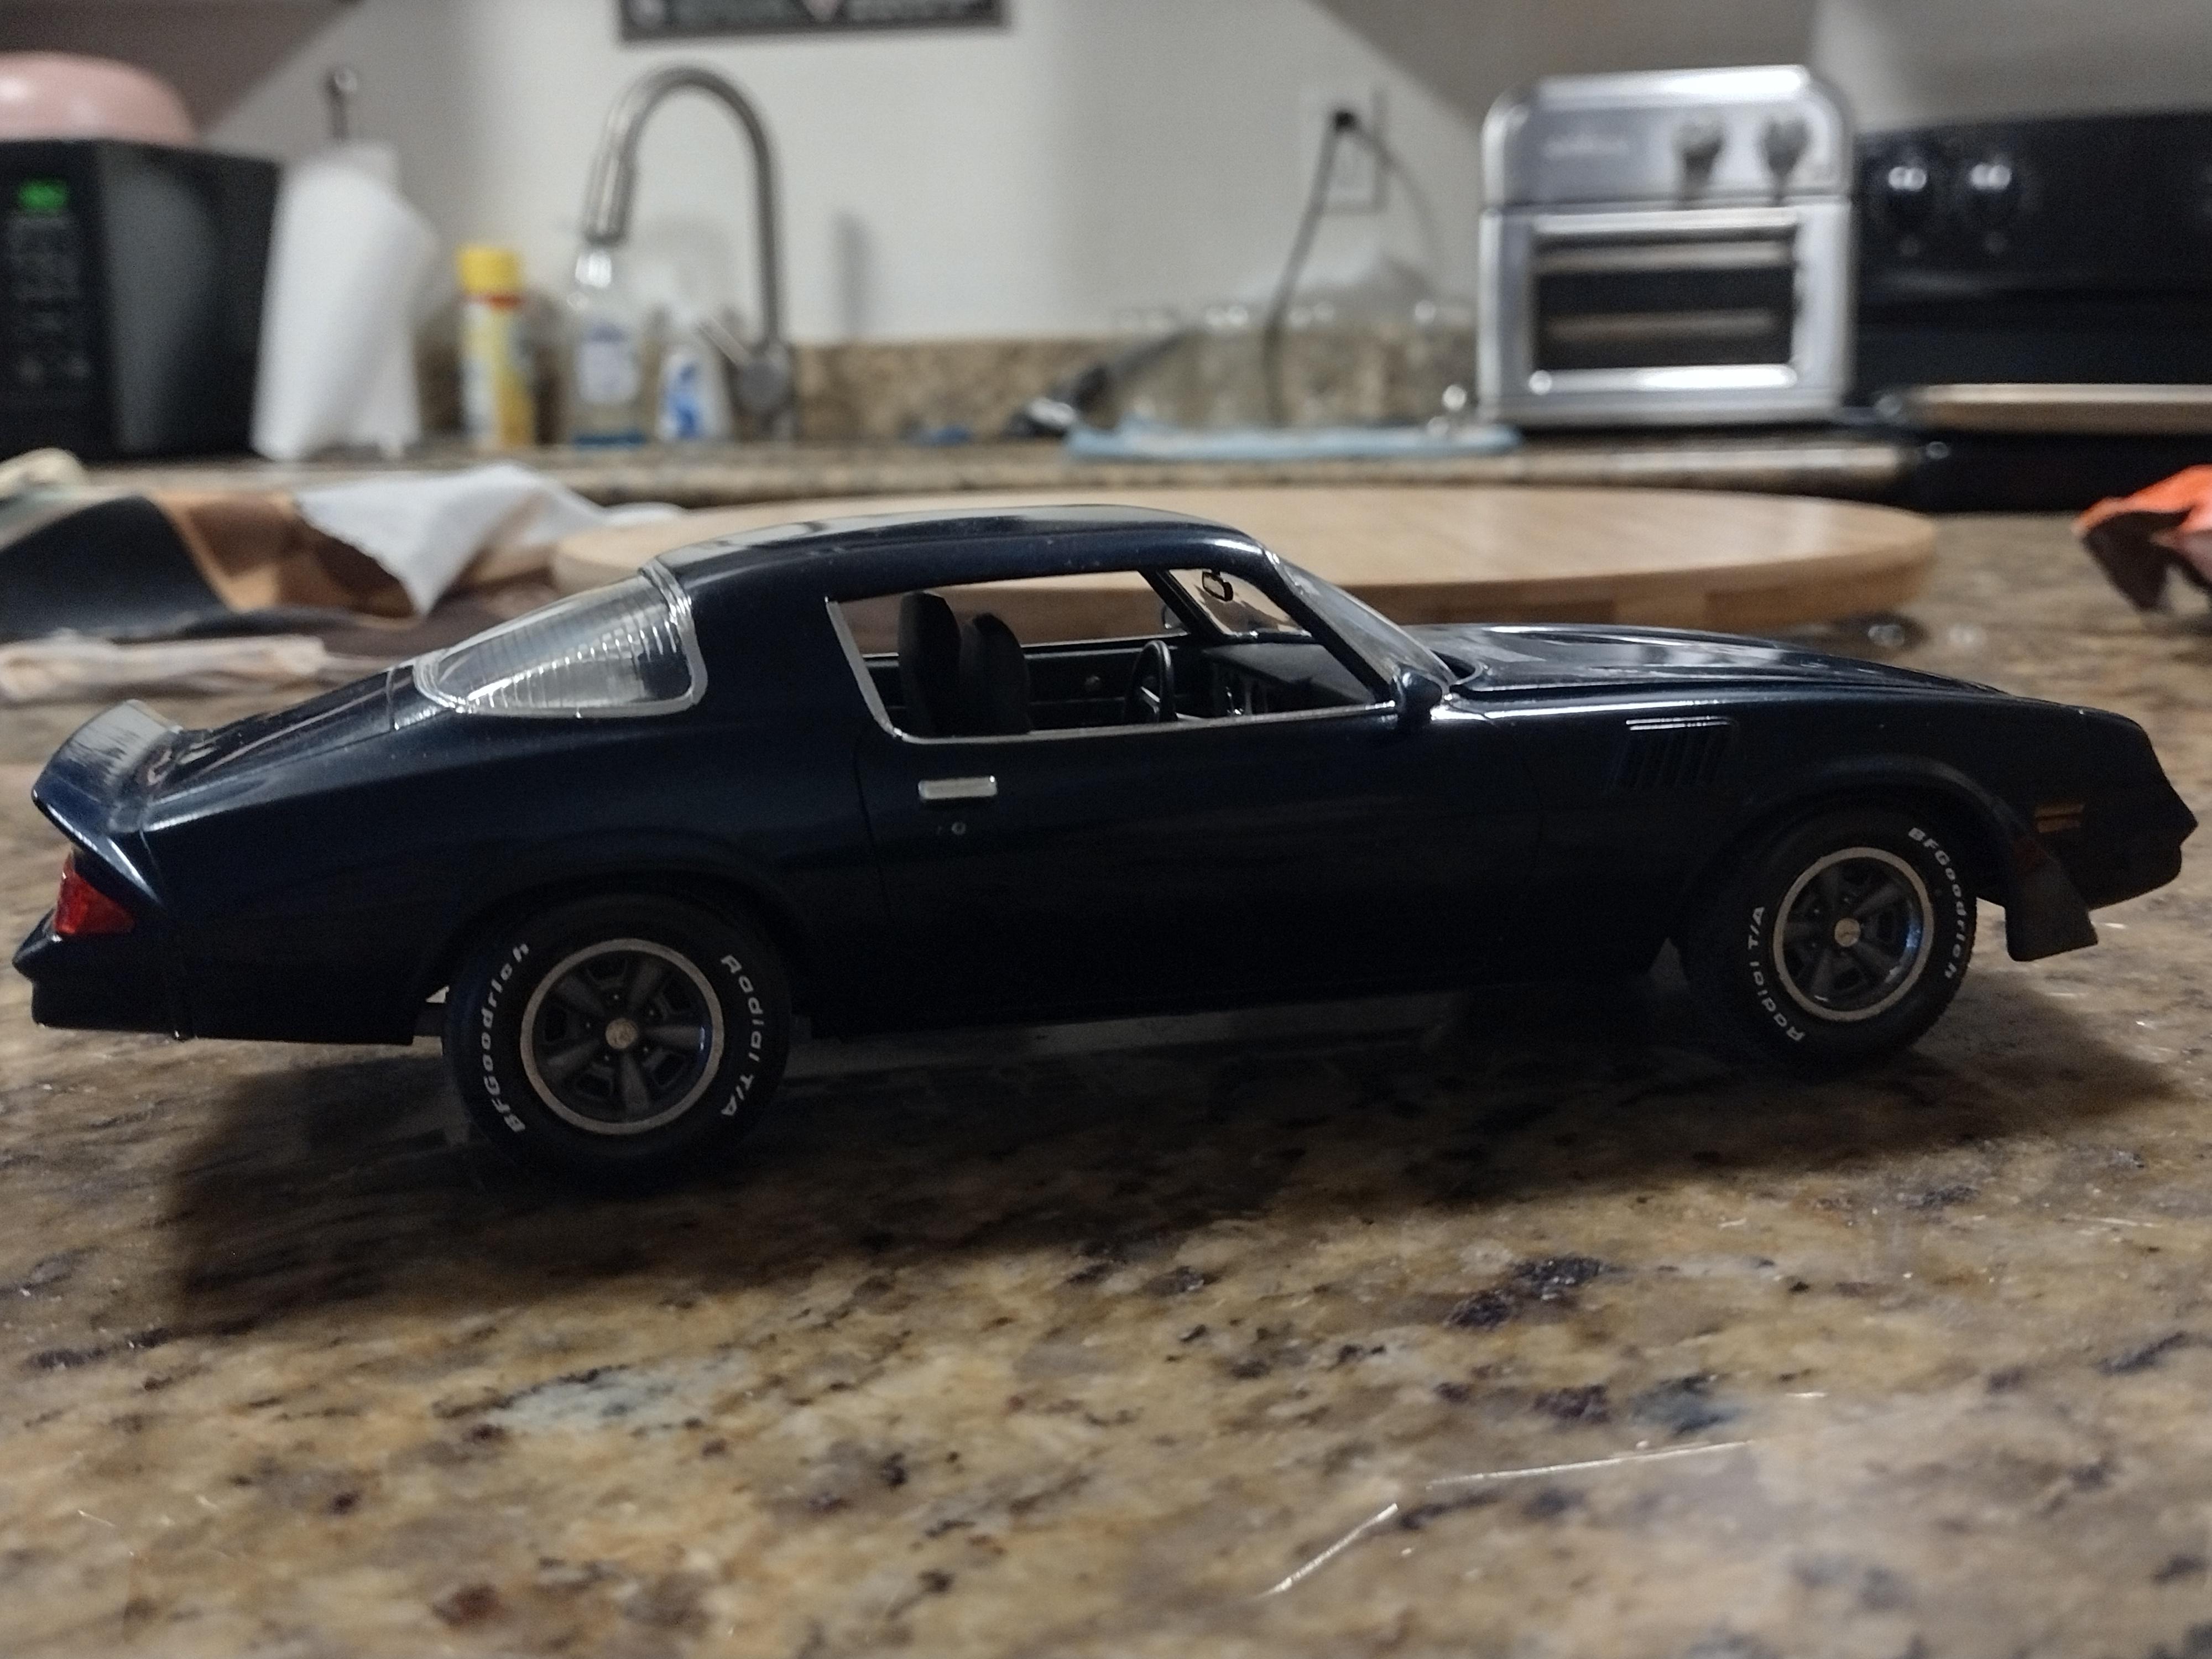
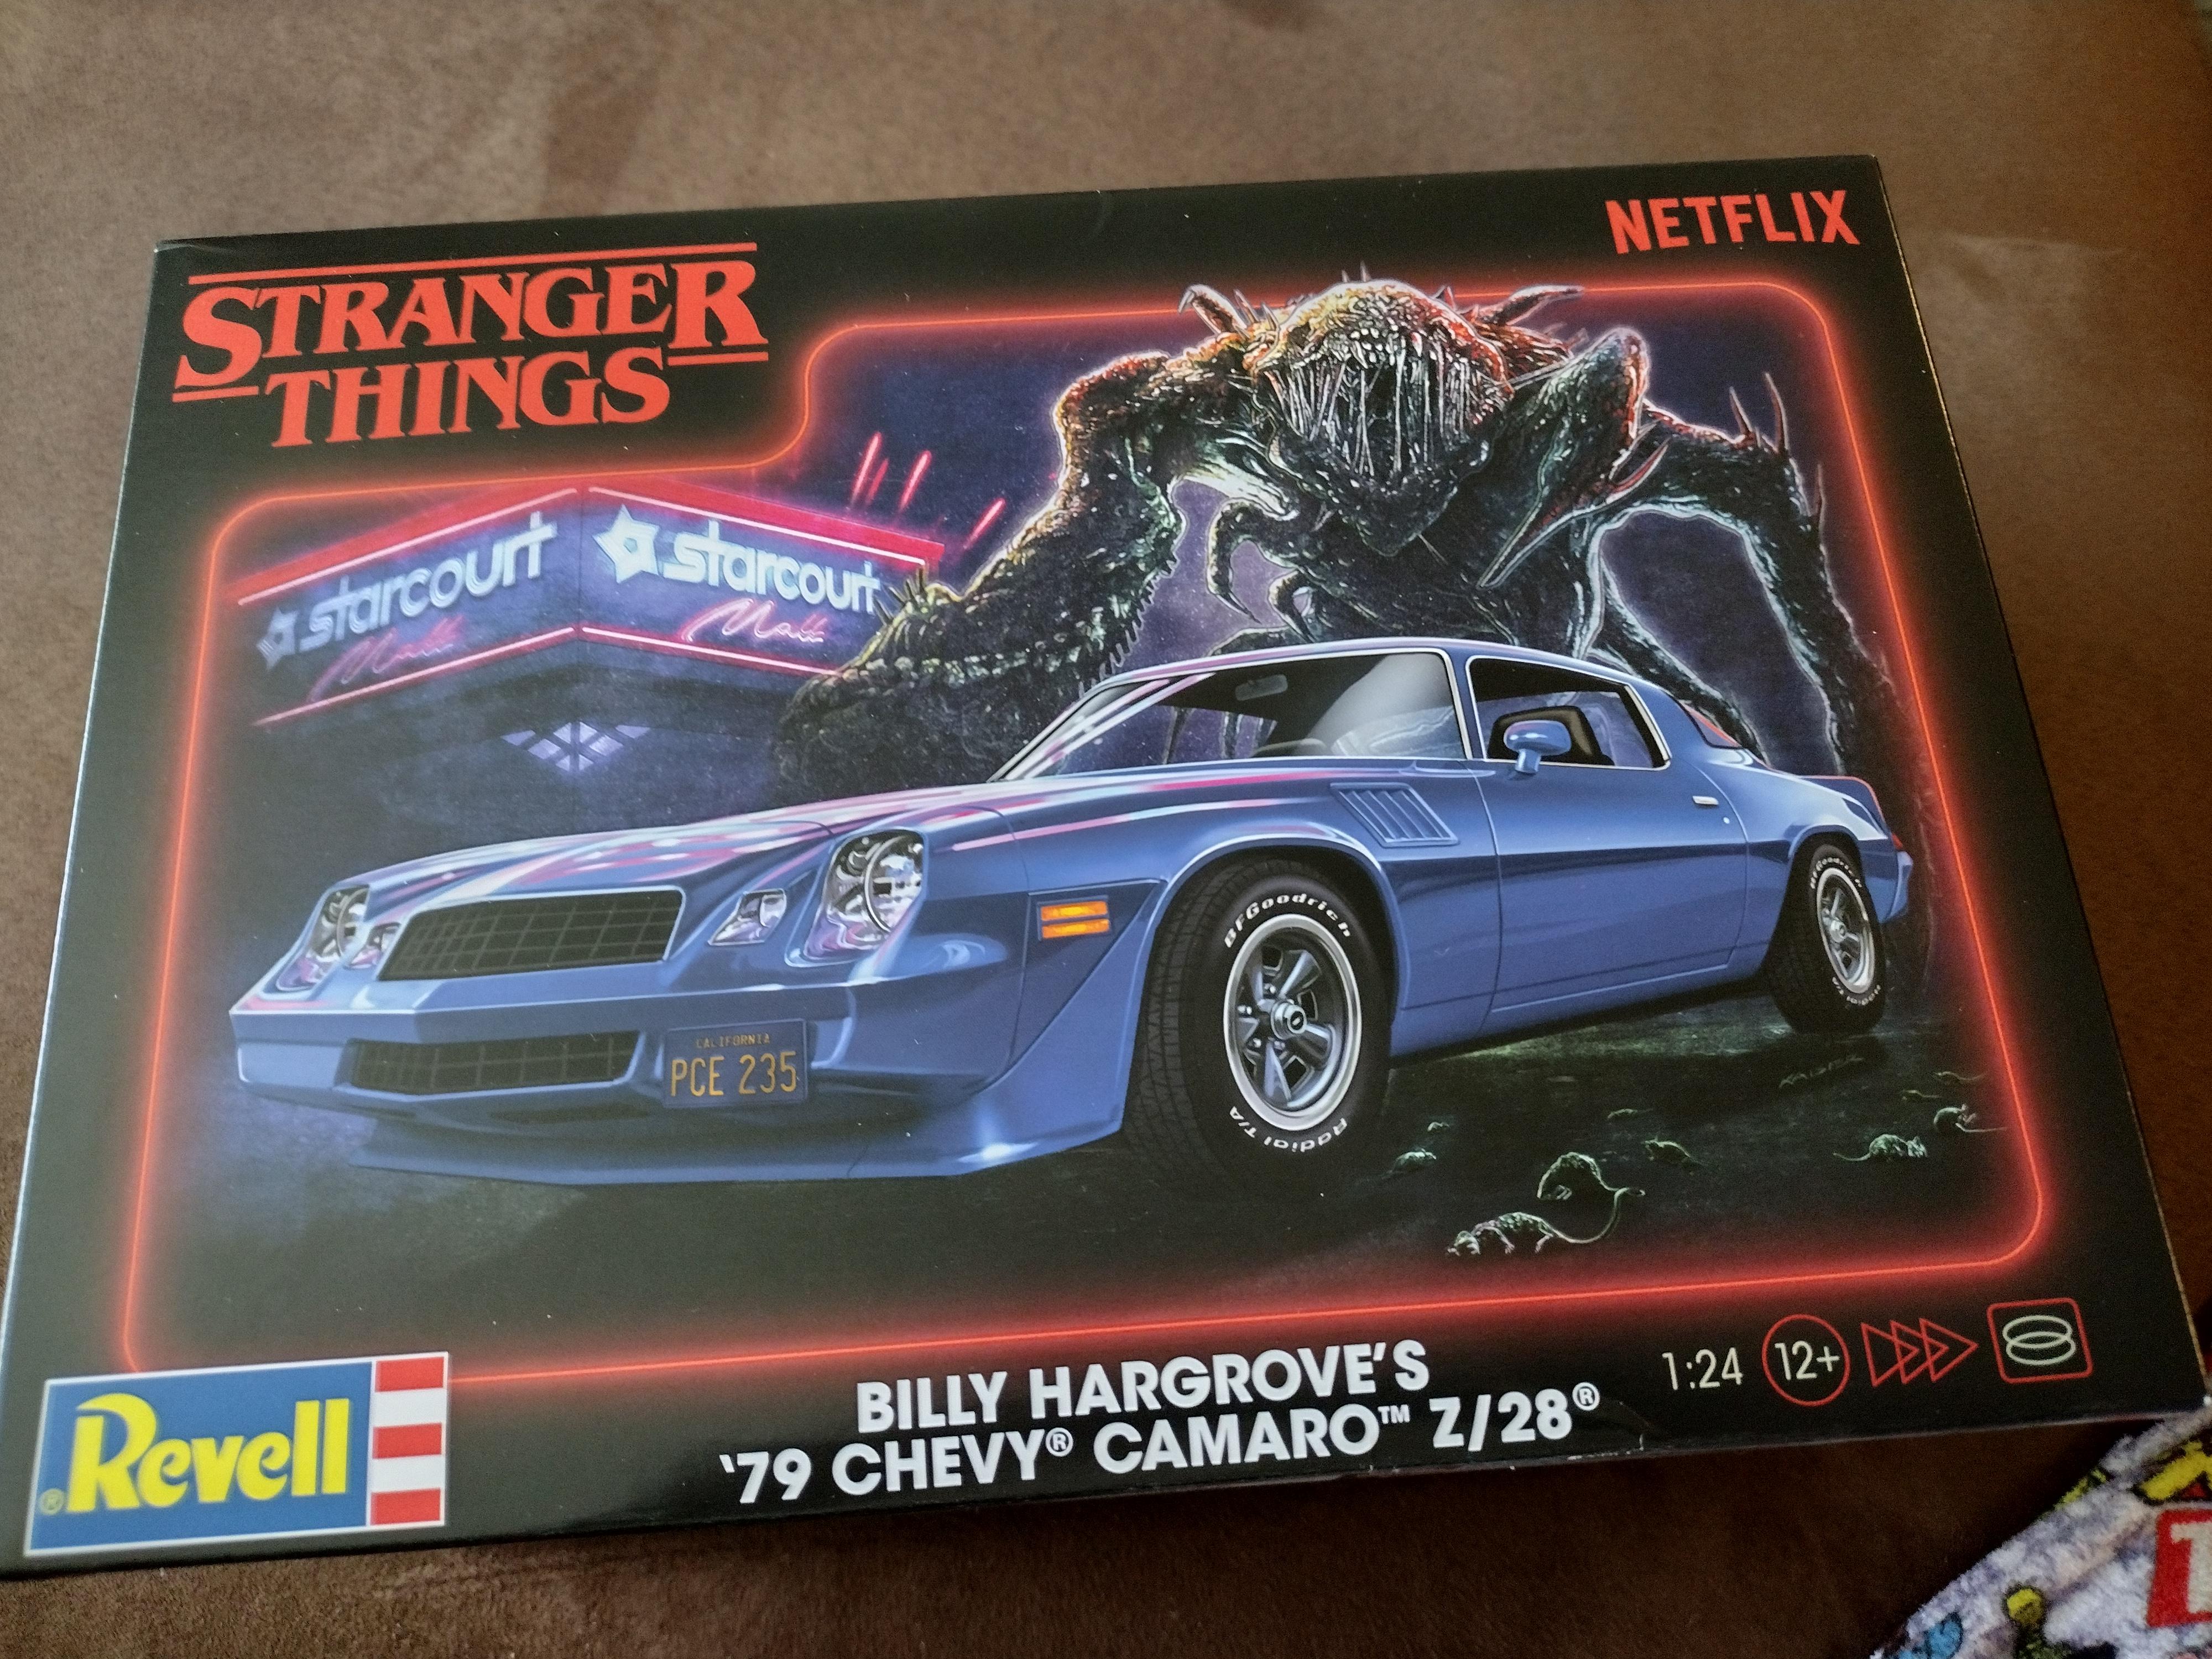
Billy Hargrave's 1979 Camaro-Stranger Things
Deathgoblin replied to Deathgoblin's topic in Model Cars
I use a primer by a company called "Now", it's their universal primer (their white paint is good too). I've never had an issue with it being too hot for the plastic and lacquers work great over it. Other up side is it's about $5-7 a can at the auto parts store. I almost never use clear coat. It's another layer that I'll probably screw up. So the paint is just polished out color coat. -
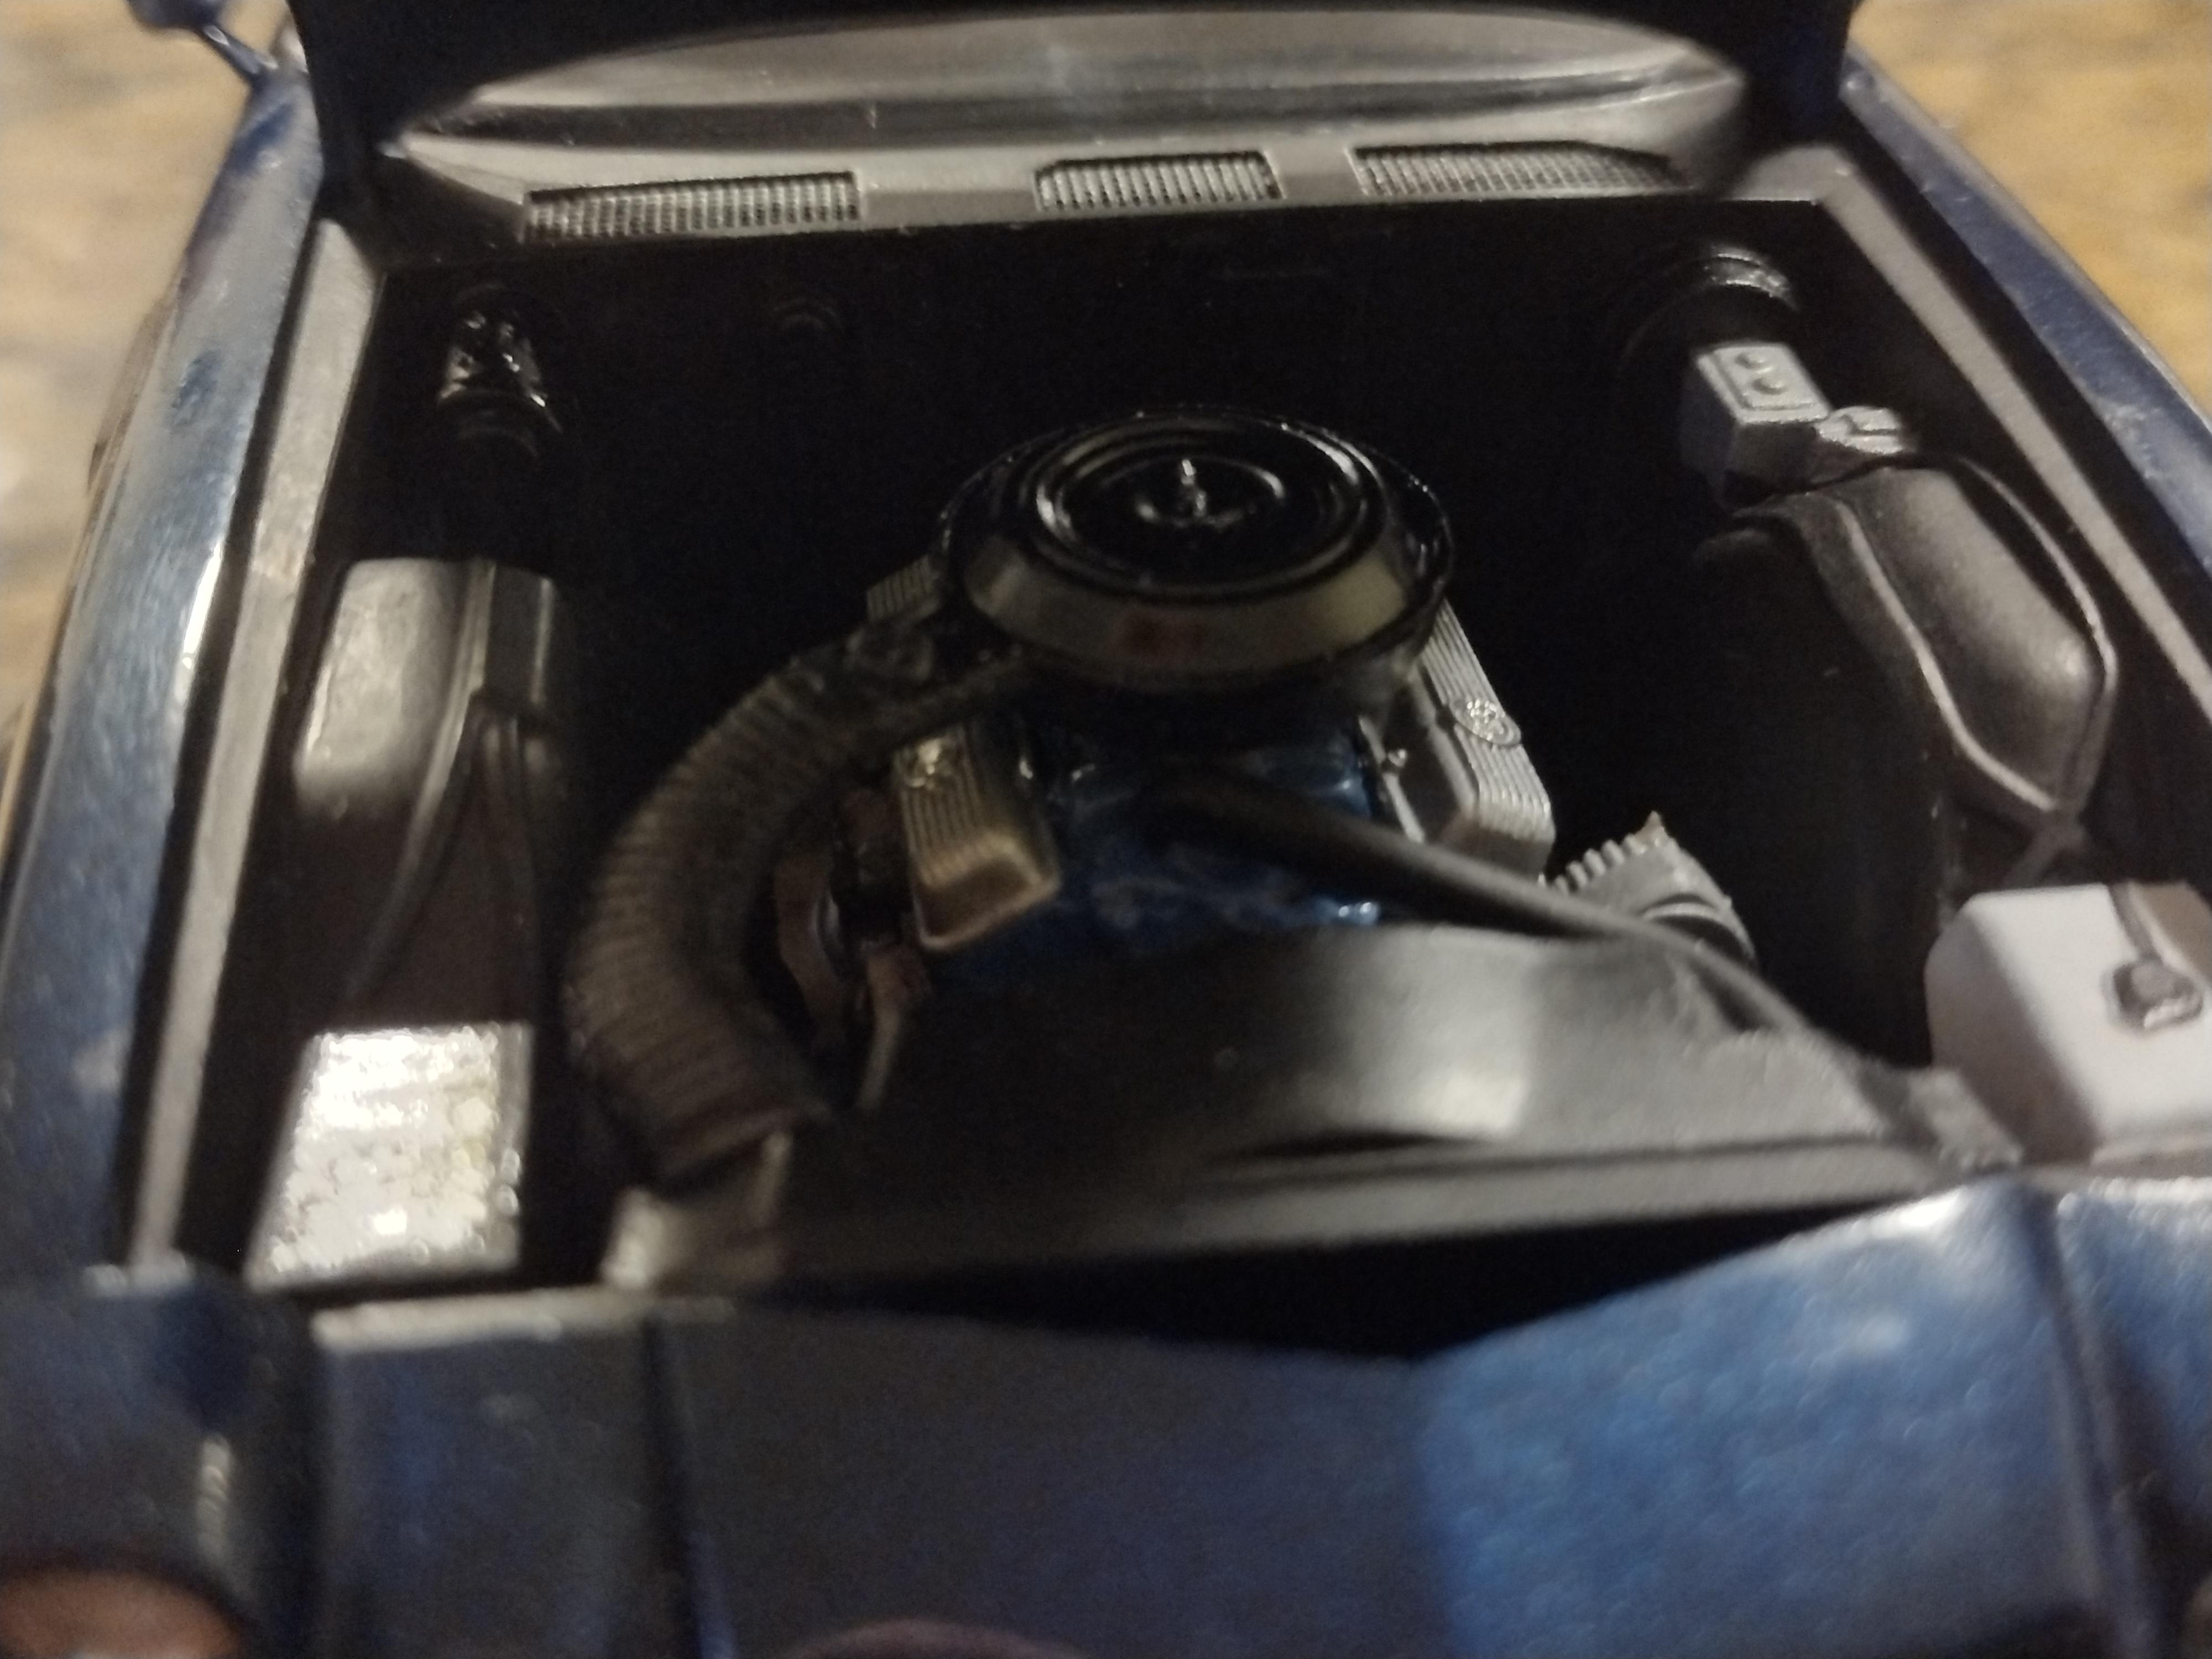
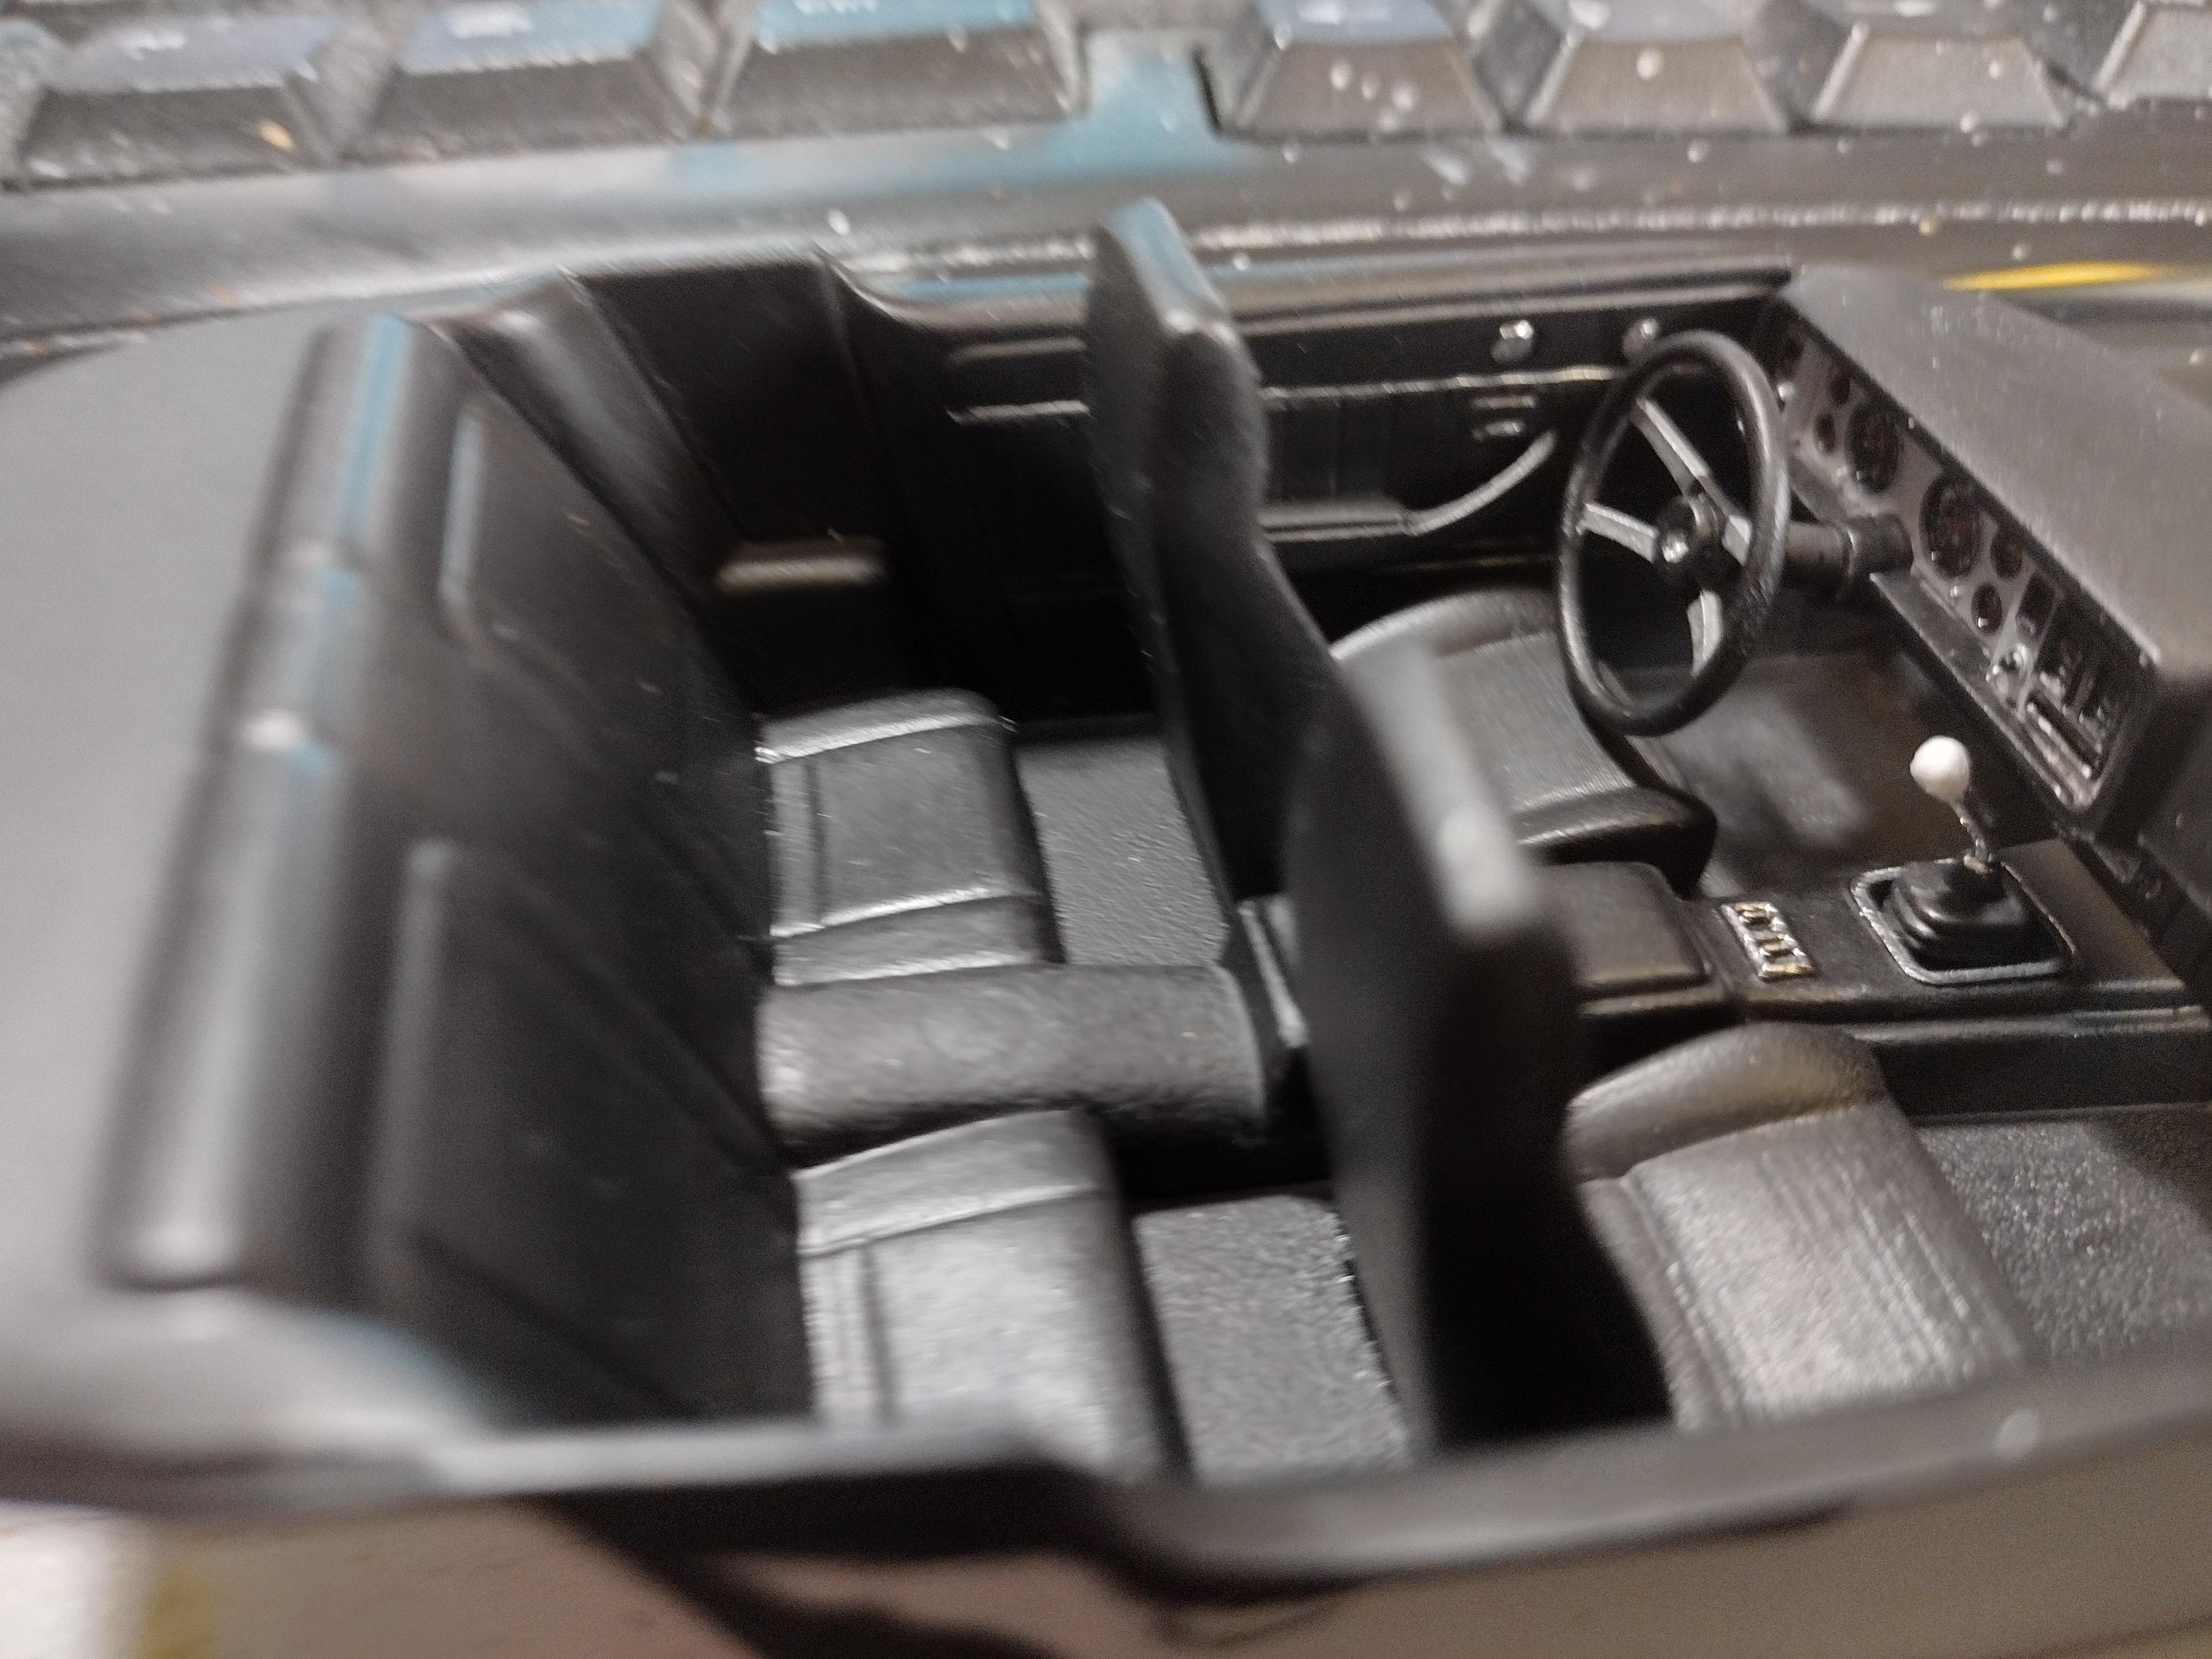
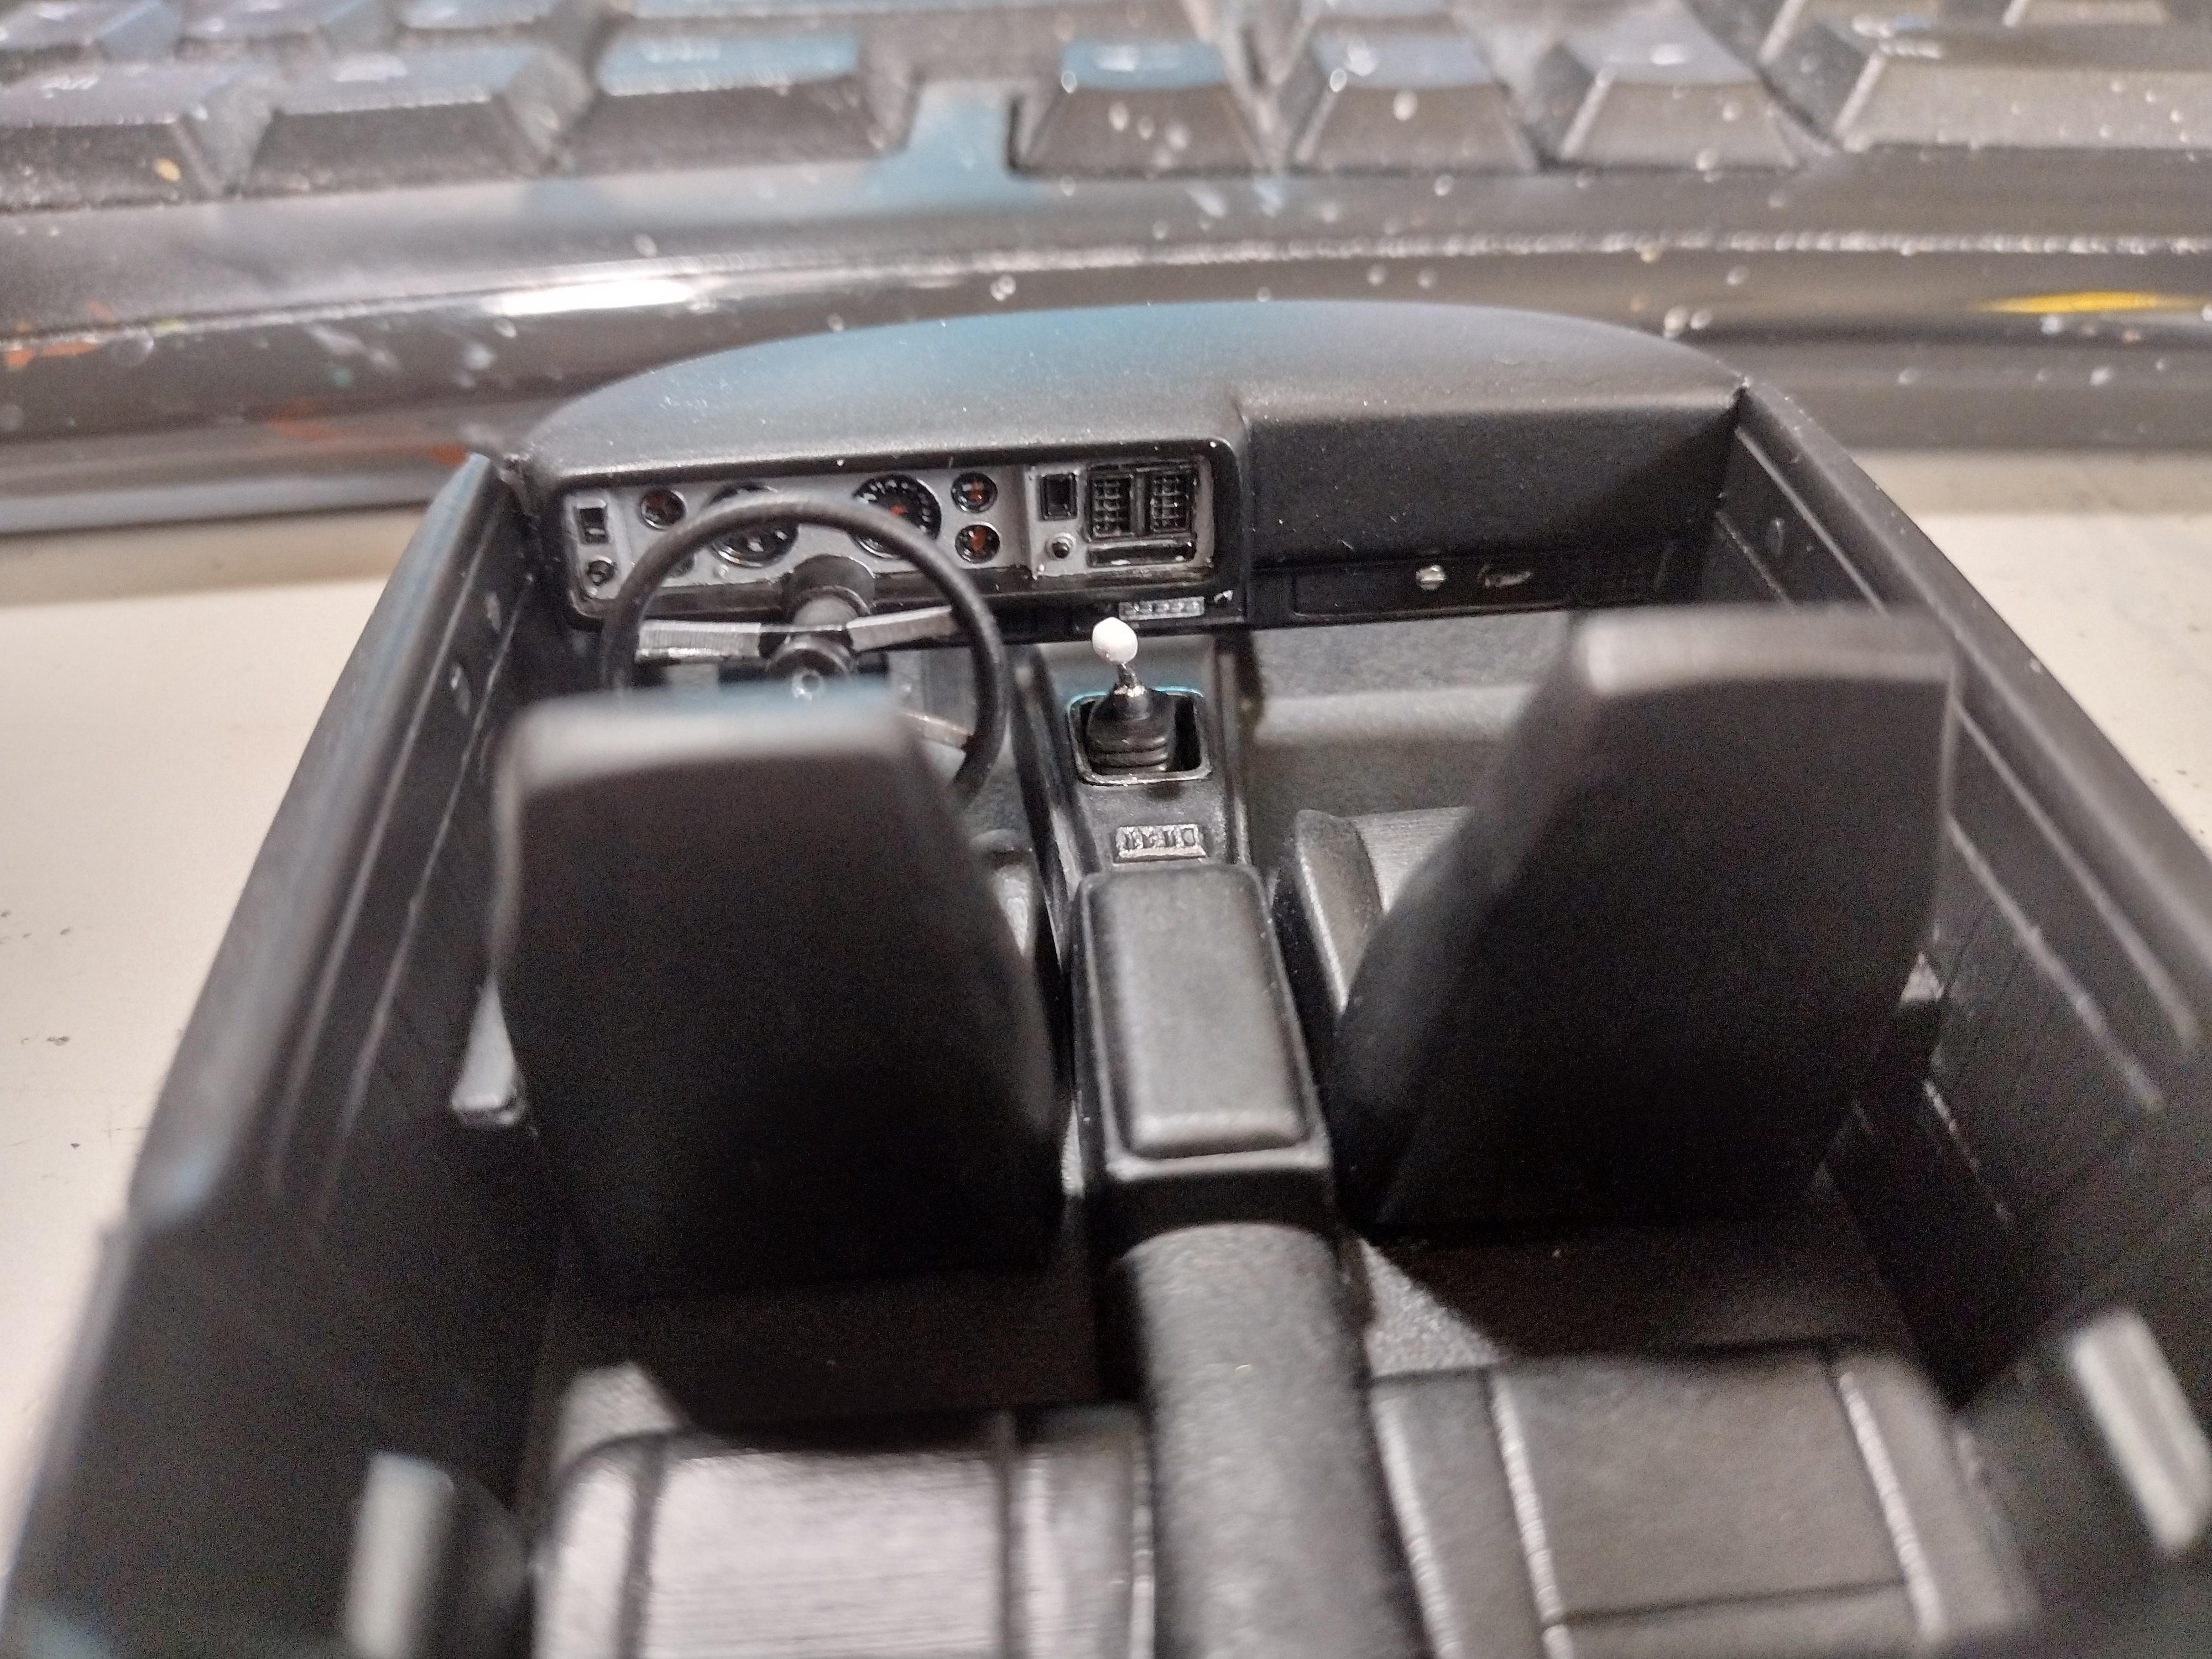
This is a reissue of the Monogram 3-in-1 Camaro kit with some changes. T-tops are filled in, and a flat hood. The kit goes together really well. The paint color is Duplicolor GM Indigo metallic. Love that it comes with decals for the tires. The wheels are painted with flat steel and washed with black, then picked out the details with a chrome pen.

-
Polycarbonate paint question
Deathgoblin replied to customline's topic in Model Building Questions and Answers
I've used it a few times on models. It does spray flat but will polish out. I haven't had any problems with it being too hot or causing problems with plastic, just use a good primer. My Prowler and Tweedy Pie are both painted with with PS-18. -
1931 Cadillac V16 Convertible Coupe, Jo-Han, 1/25
Deathgoblin replied to Matt Bacon's topic in Model Cars
Gorgeous car! -
AMT Cheverolet Bel Air ´55 Regal turquoise / India Ivory
Deathgoblin replied to Greasefinger's topic in Model Cars
Very nice job on the '55! These are fun kits. -
Tamiya or Duplicolor lacquers for car finishes and I'm rarely disappointed. Been using a "universal primer" by a company called Now for a year or so, works as well as any other, but it's only about $5-$7 a can. Big disappointments with Testors Extreme lacquer last couple of times I've tried to use it. Wish they'd bring back the other lacquers they had. As far as interiors go, mostly Model Color or Citadel (Warhammer) paints. Helps that I built an Aeldari (Eldar) Swordwind army, so I'm already familiar with their paints. I also use craft paints like Apple Barrel, Delta Ceramcote and others. Whatever works.
-
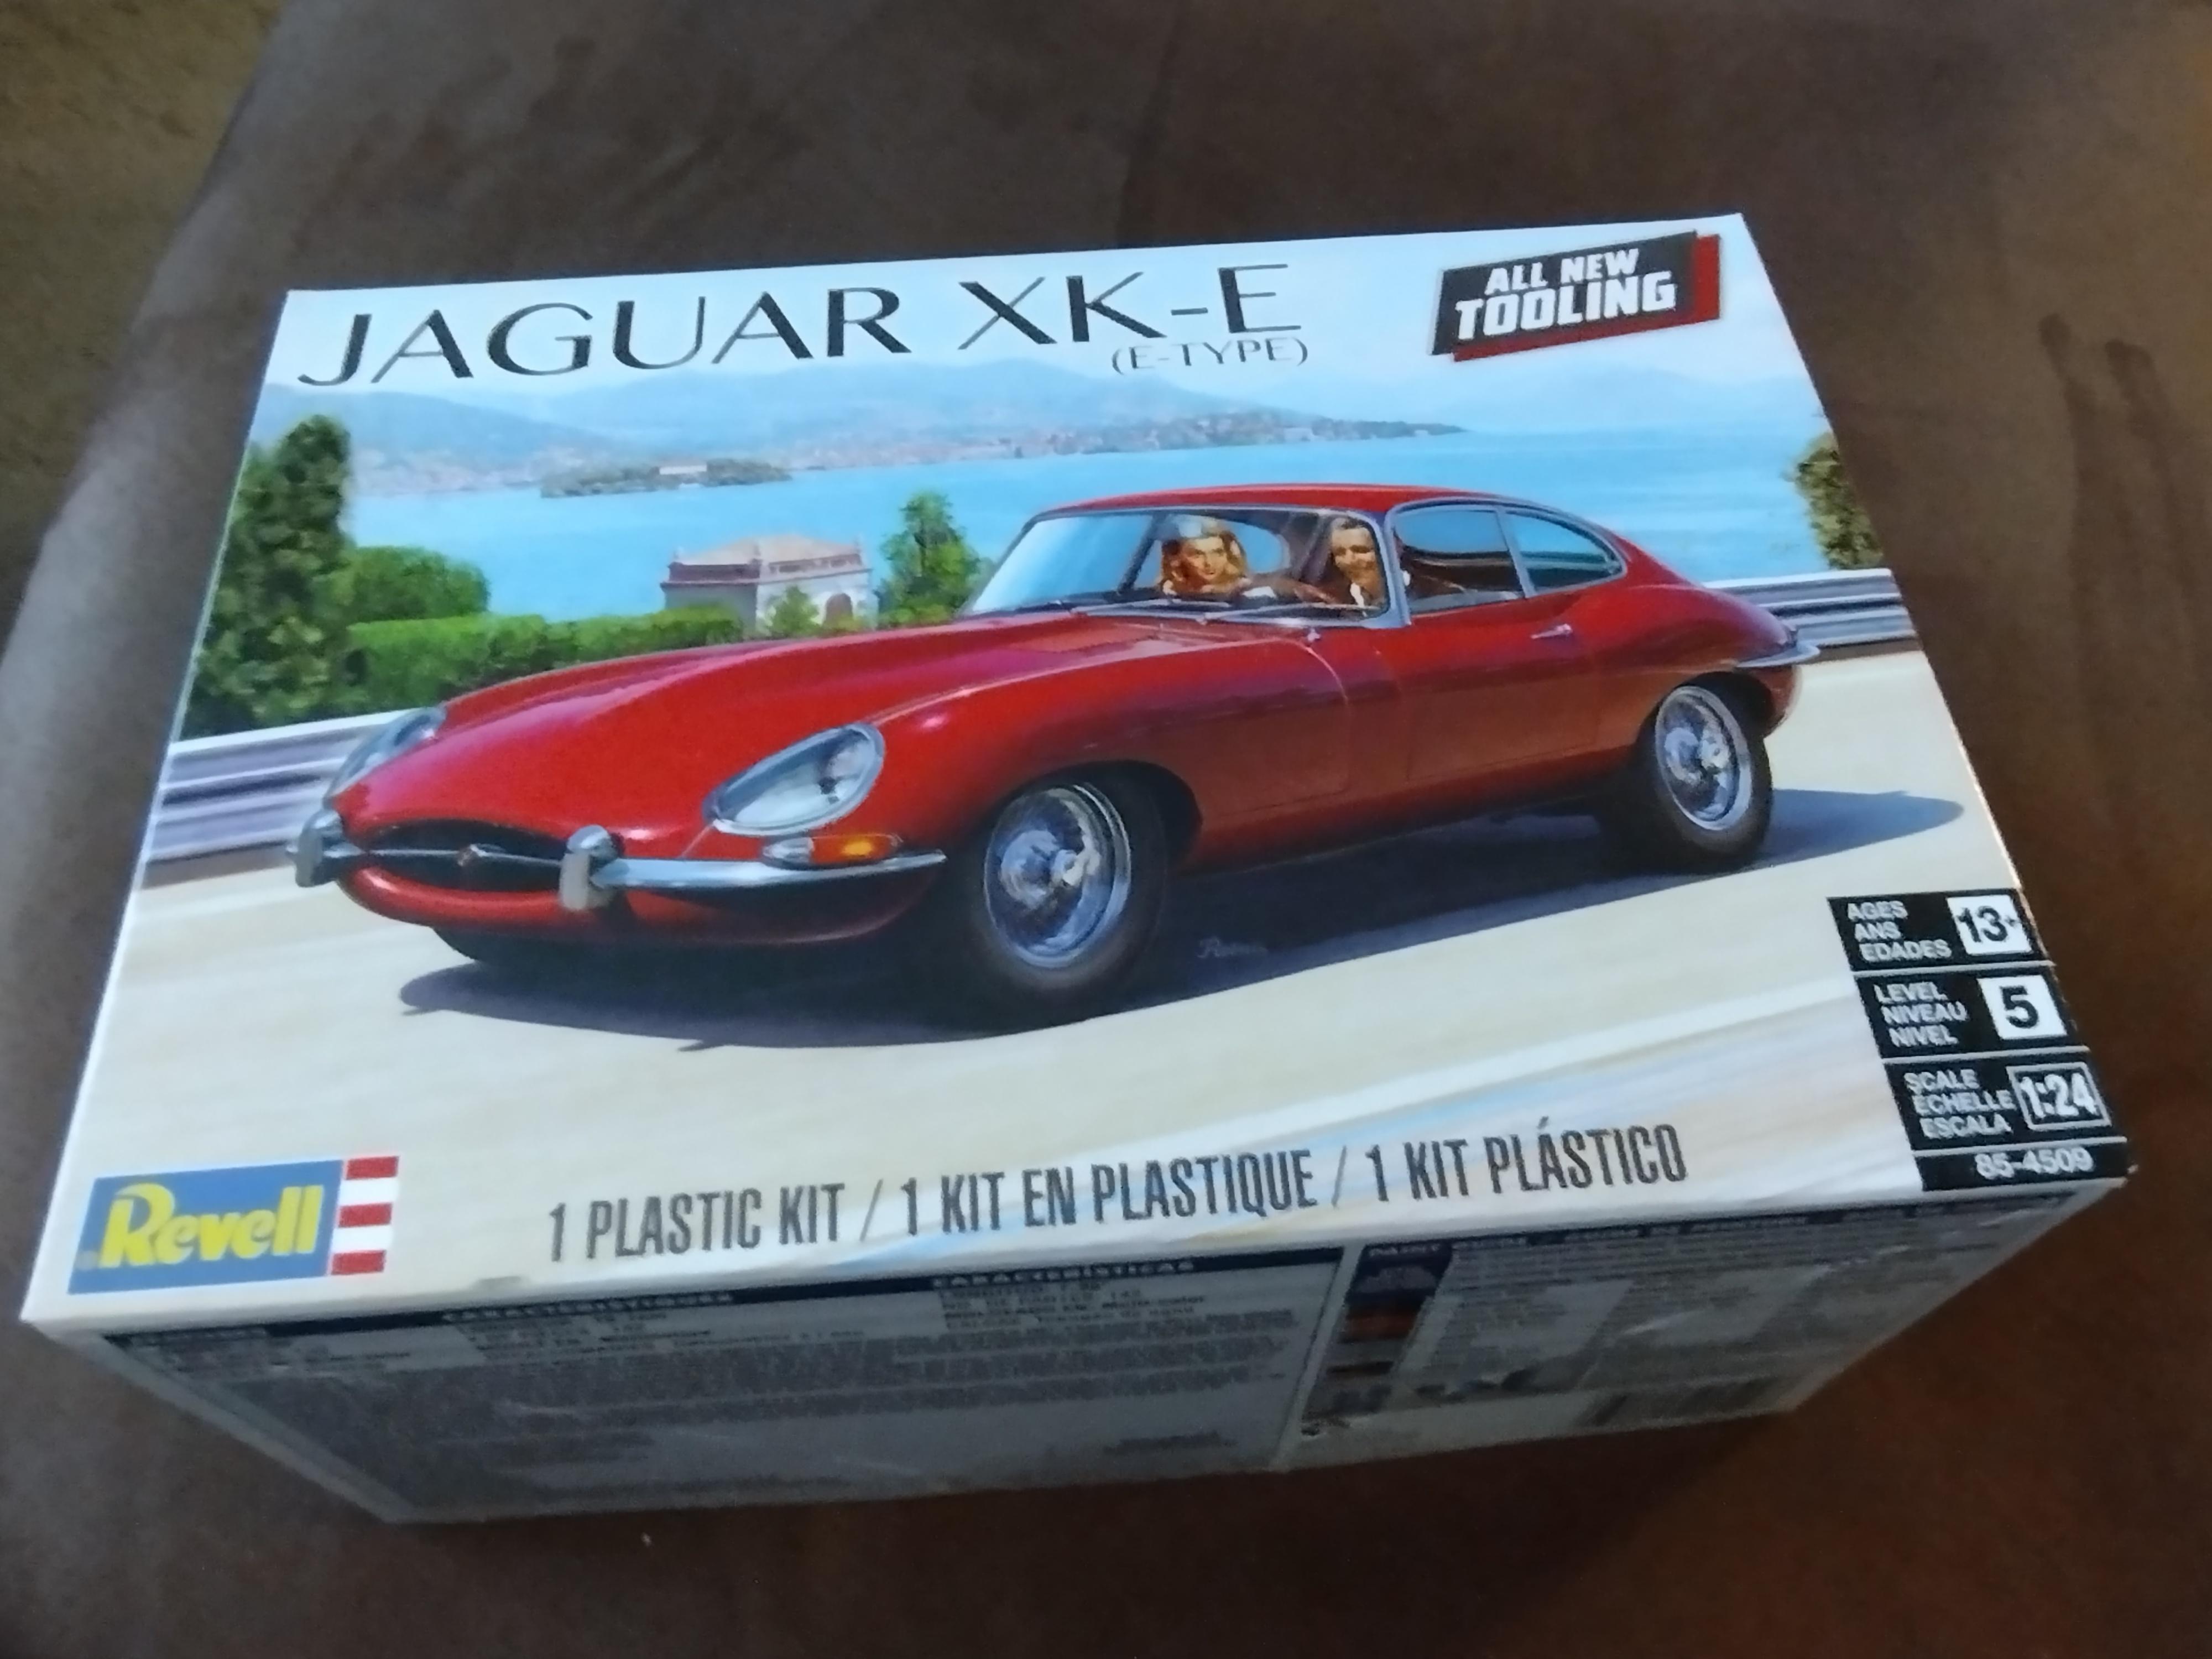
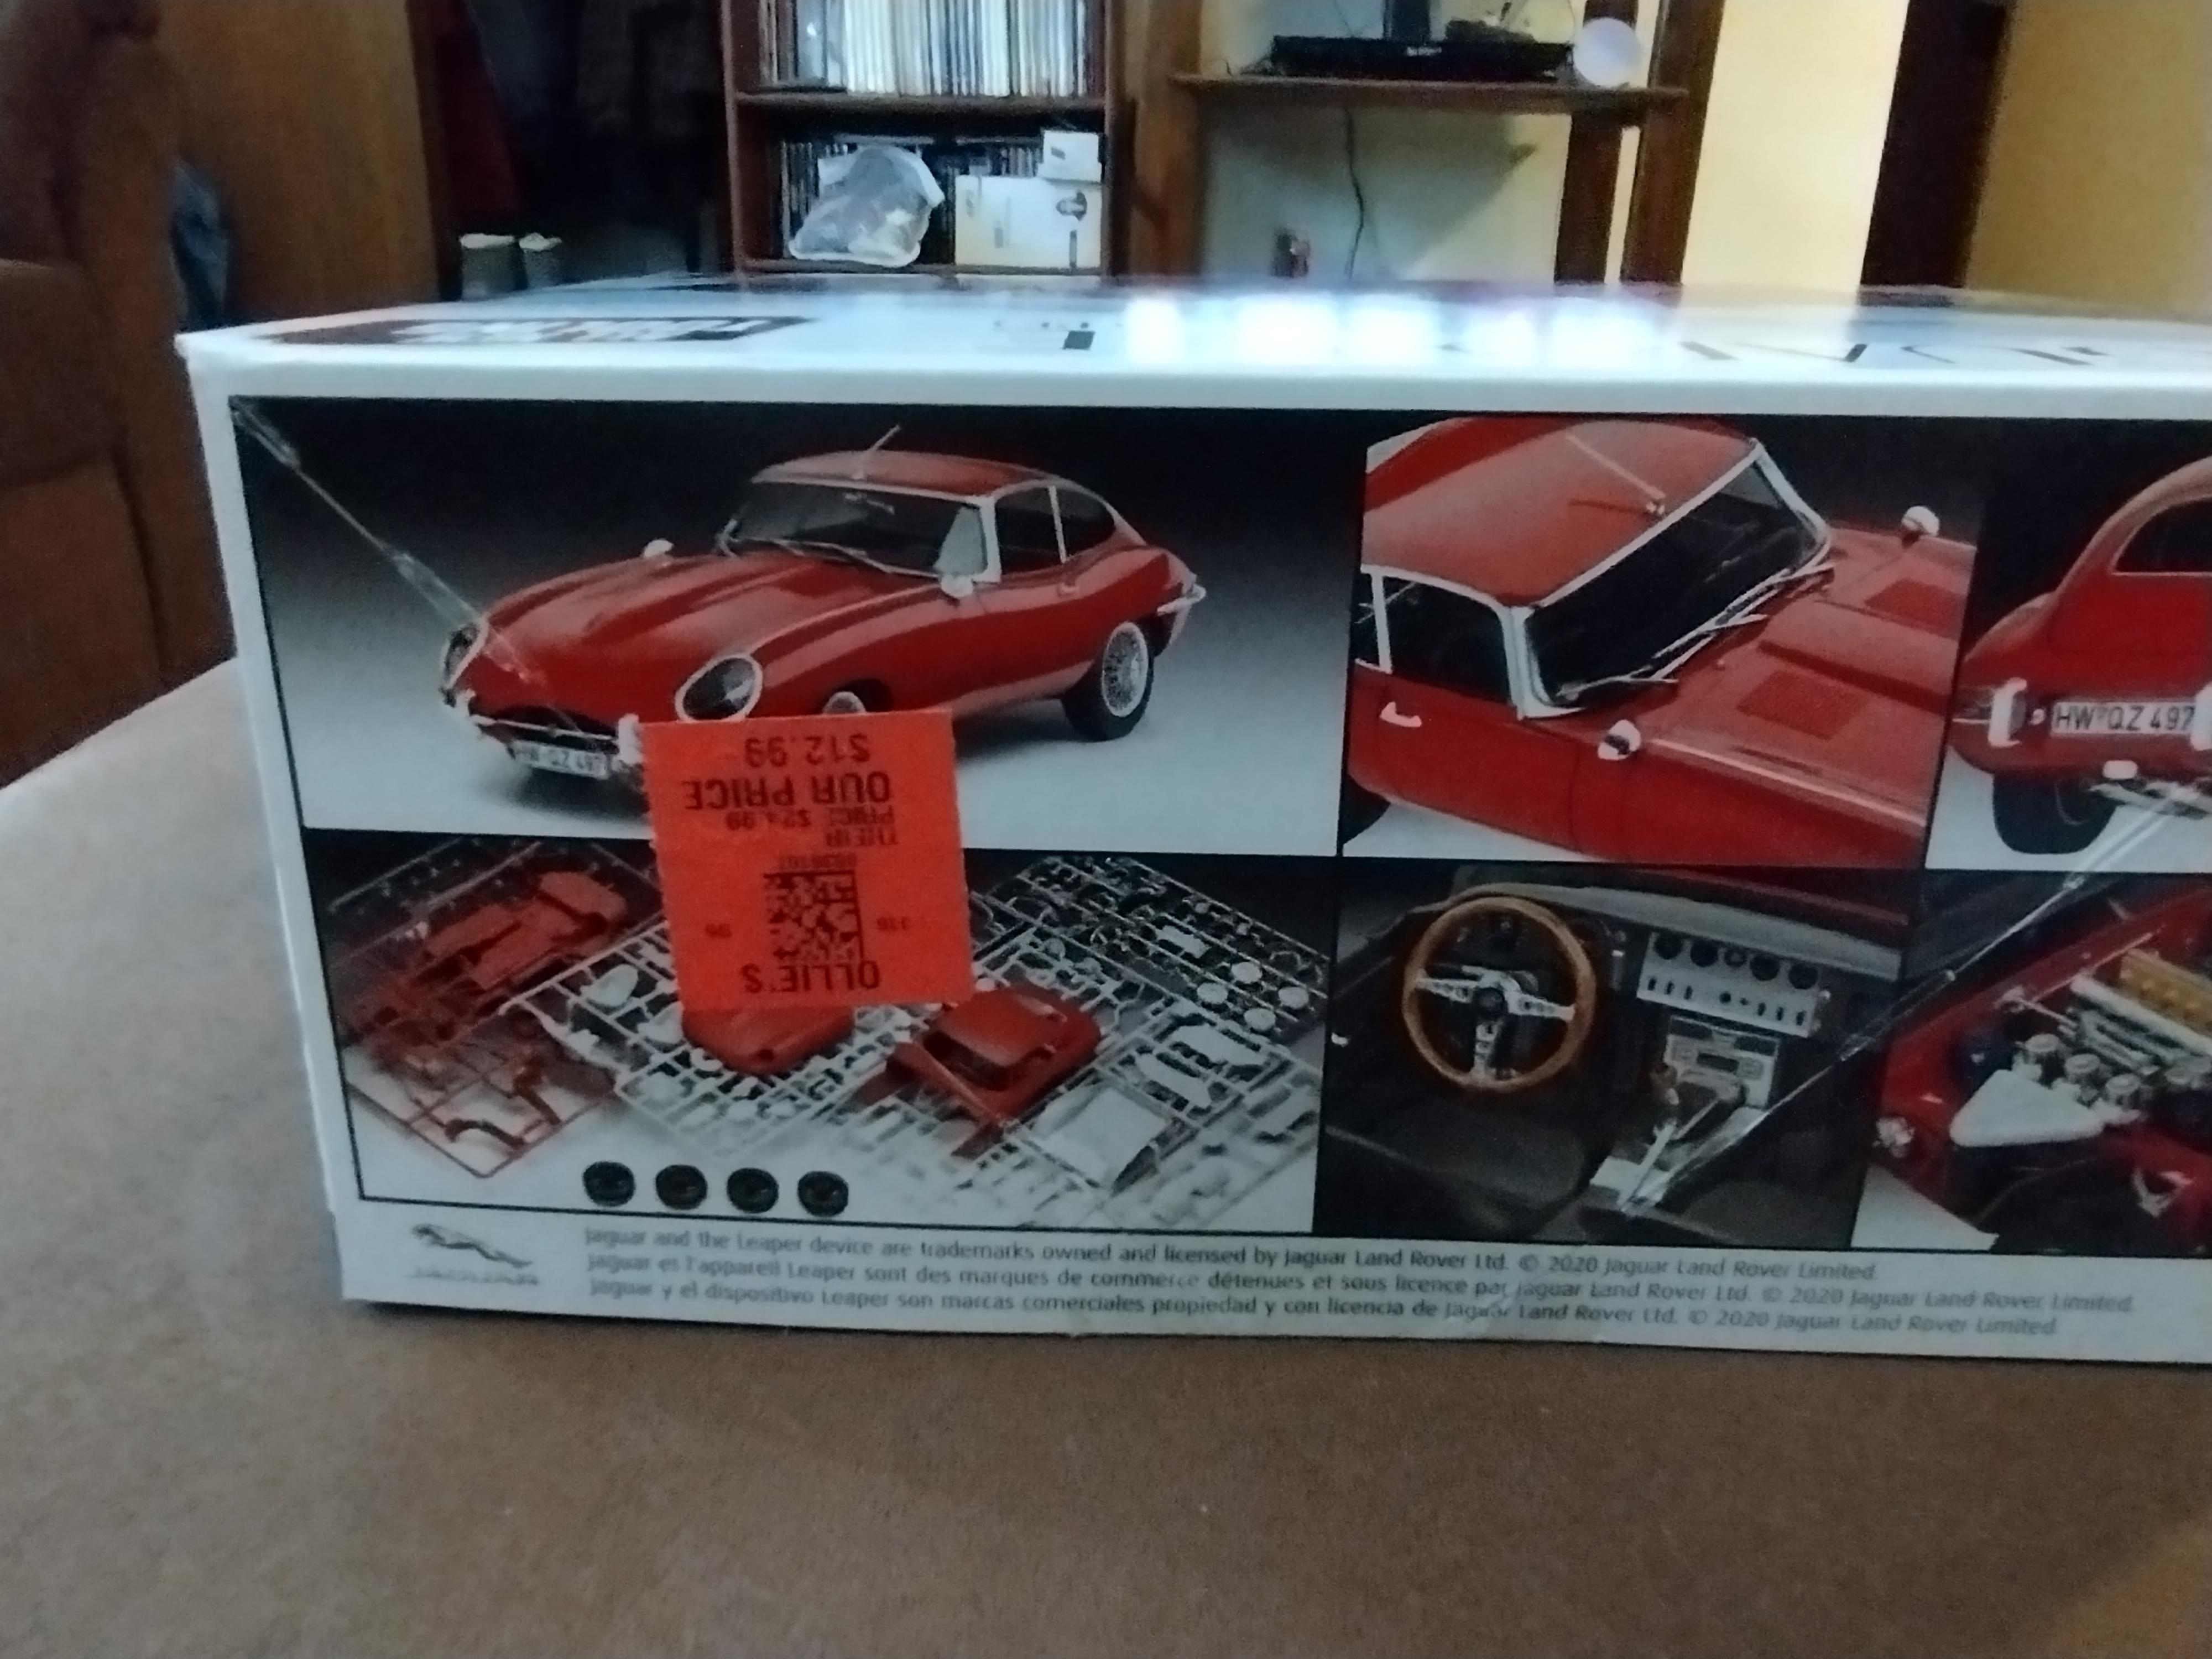
New tool Revell Jaguar E-Type from Ollie's. I love Ollie's.
- 39,134 replies
-
- 6
-

-
- johan
- glue bombs
- (and 1 more)
-
When All Else Fails....?
Deathgoblin replied to gcthree's topic in Model Building Questions and Answers
When I'm applying decals, I use decal set and white glue. I dip the brush in decal set first, then in white glue and brush it on then apply the decal over it. Once it's down, I use a Q-Tip to gently remove the excess. Occasionally there's a little residue on the paint/decal and I use a little Novus 1 to remove. Used it to apply decals on everything from my Richard Petty Grand Prix to the USS Enterprise, and even ones with homemade decals like the Porsche 917. -
Would love to get one of these kits. Great job! I've got a picture of her above the desk in my model room. It's an original studio promotional still/lobby card from "Don't Bother To Knock" 1952. She's on one side and Jim Bakkus is on the other. The picture came from the estate of Freida Hull, one of the "Monroe Six"; a group of teenagers that would hang out at her events to get autographs and photos. She eventually became close friends with the group and would invite them to her apartment while living in NY. I built a few models of some of her cars. Did her '56 T-Bird, the '62 Chrysler 300 she was driving shortly before she died, and I made an attempt at "Cynthia" from her Royal Triton commercial.
-
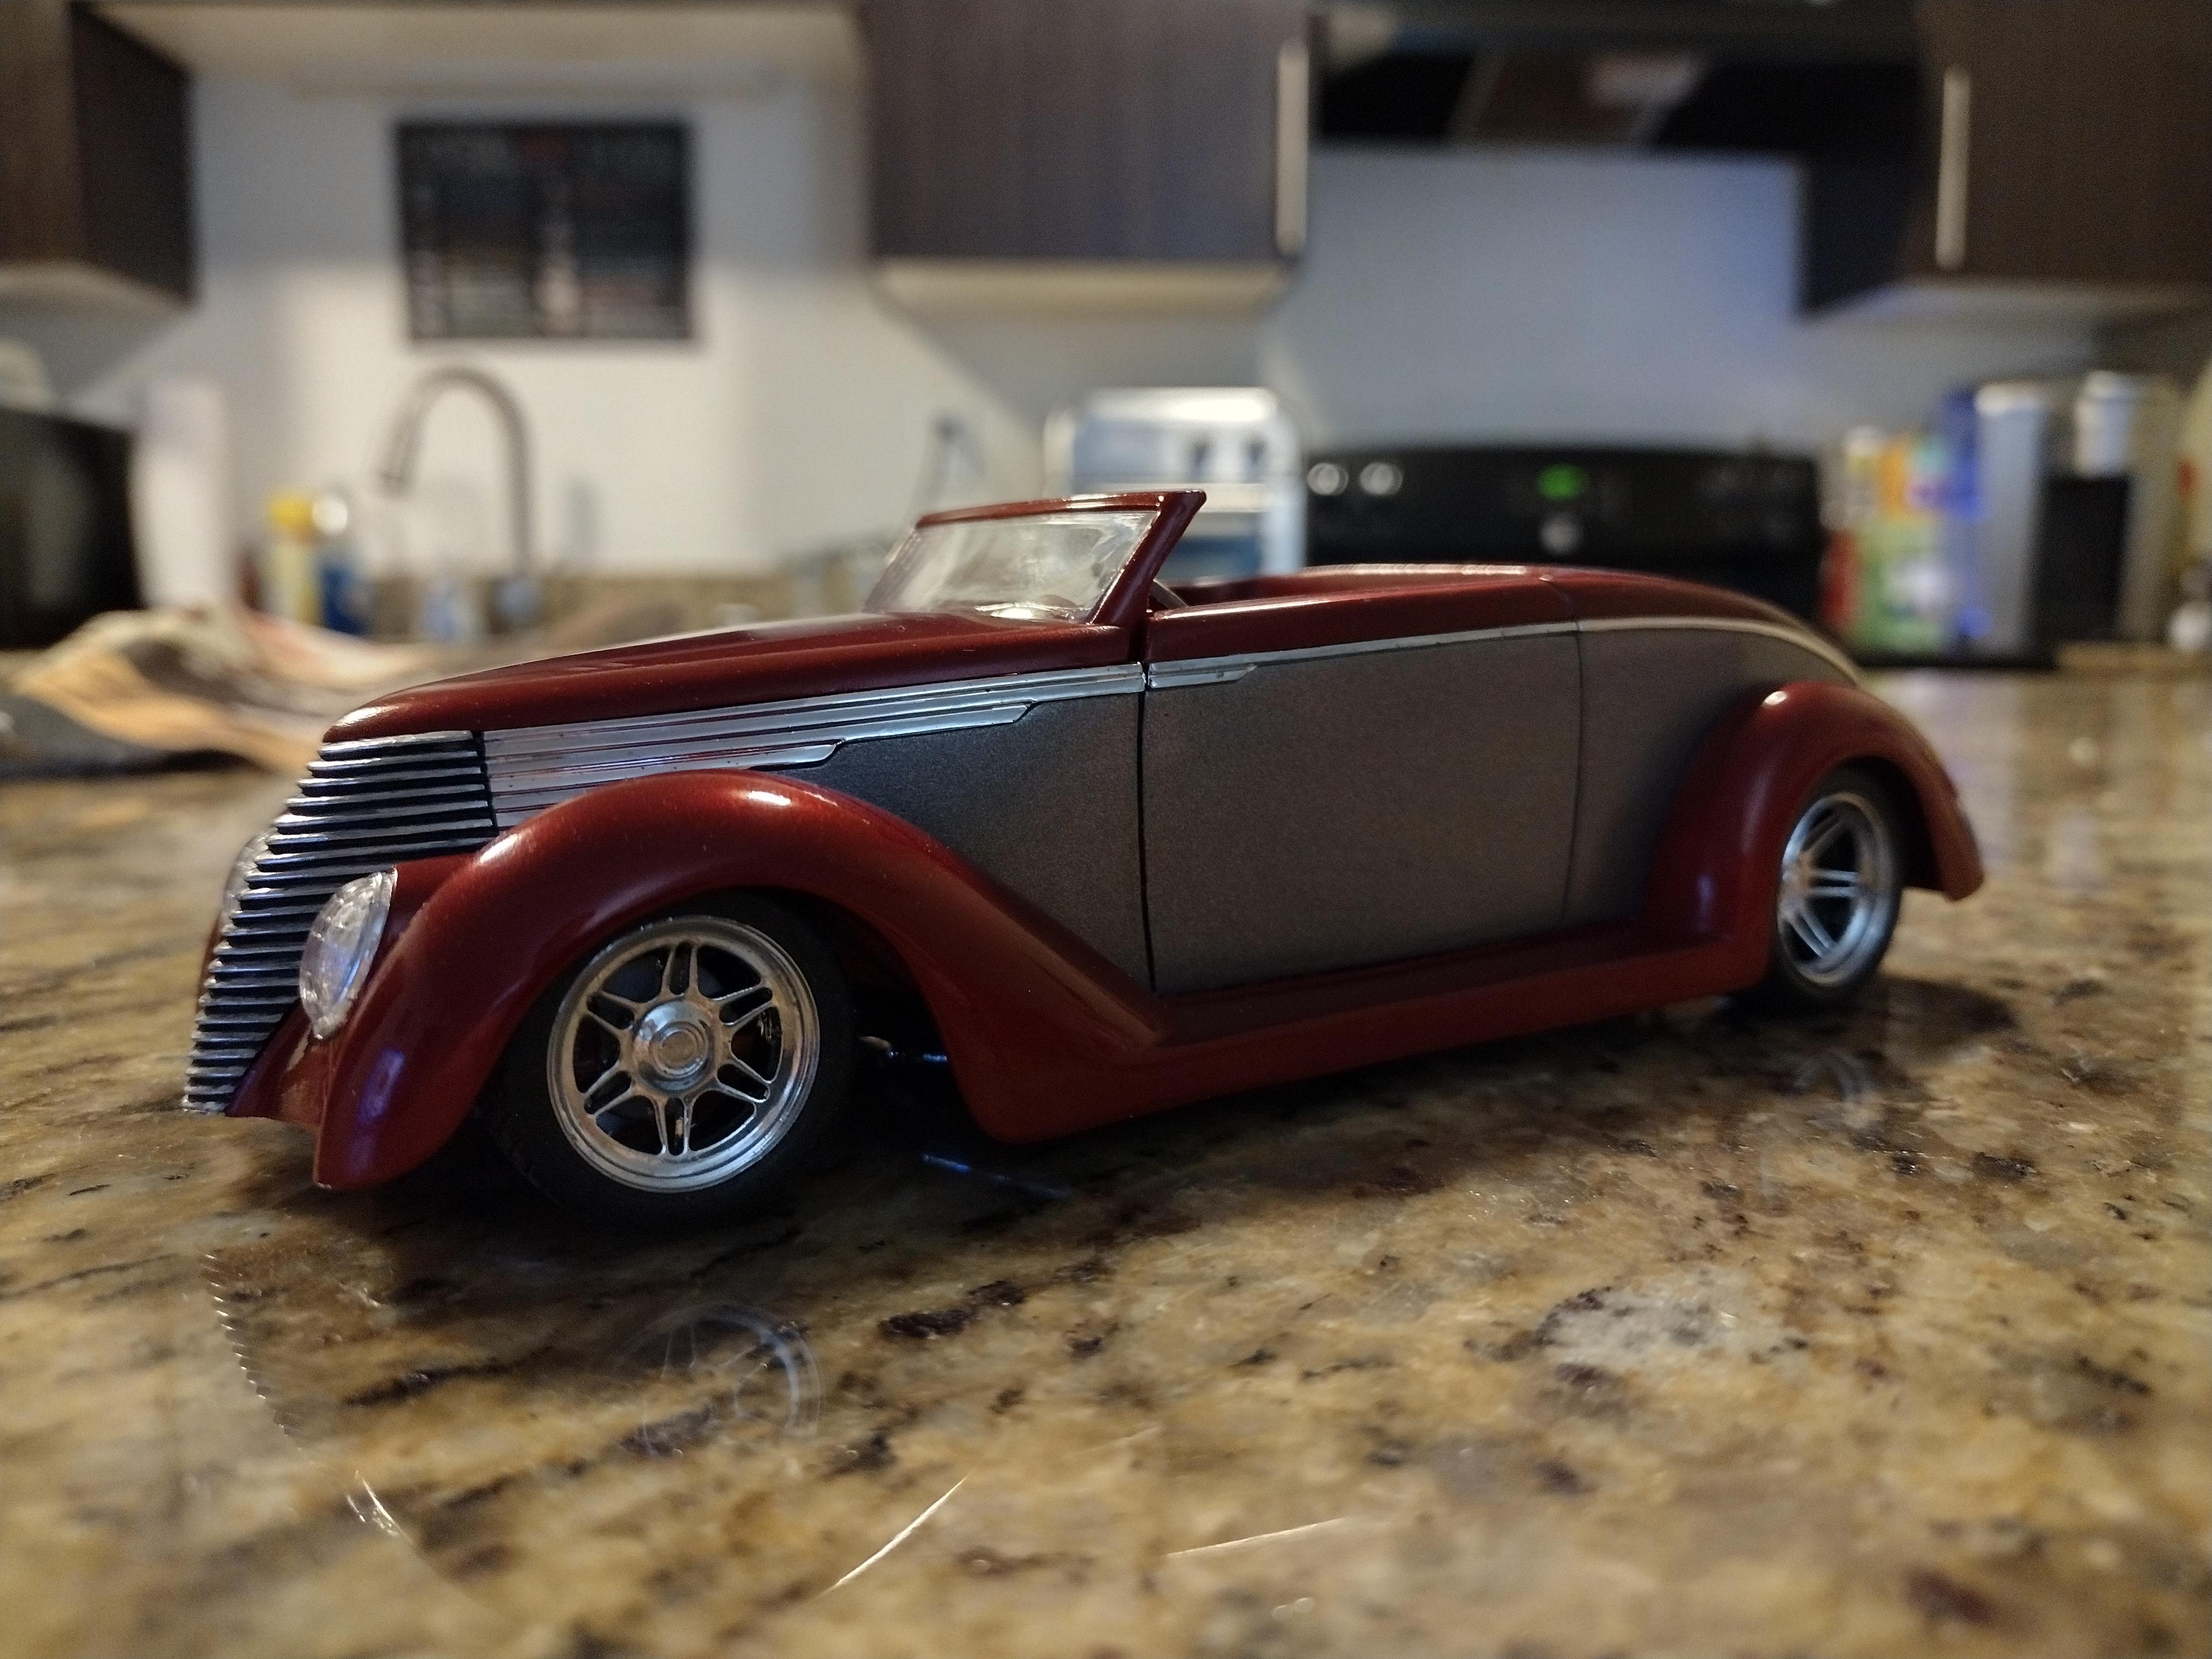
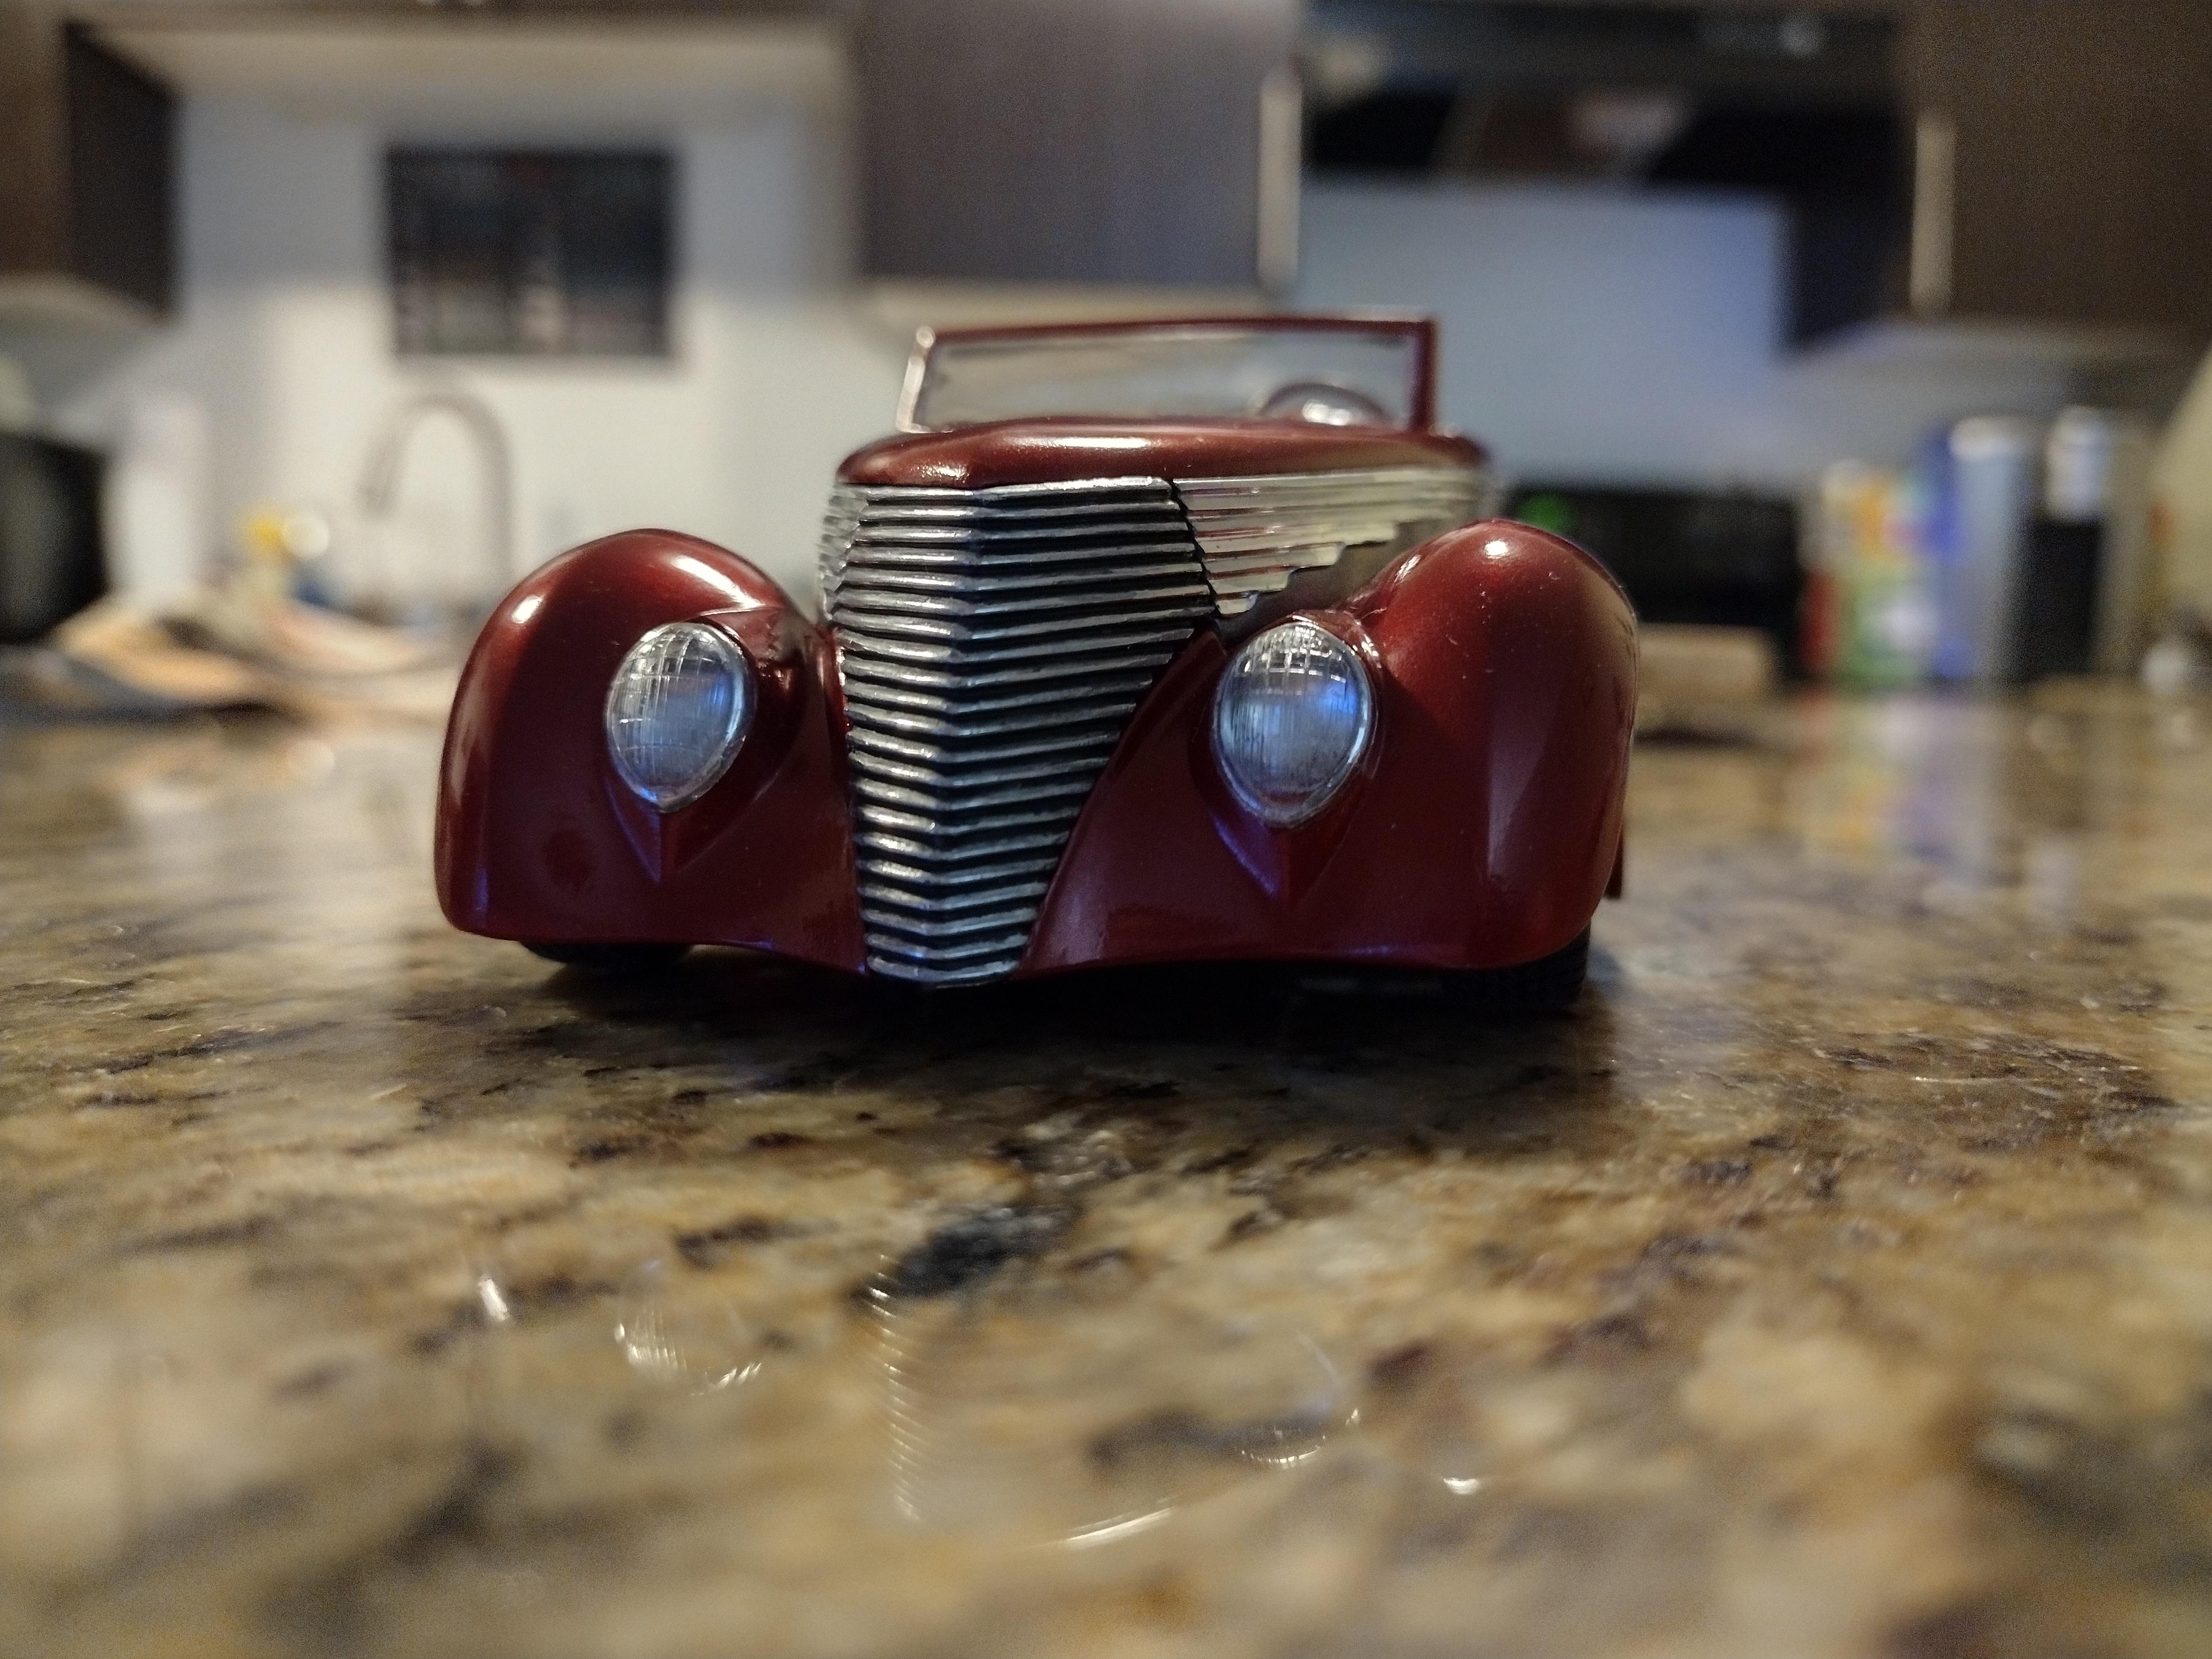
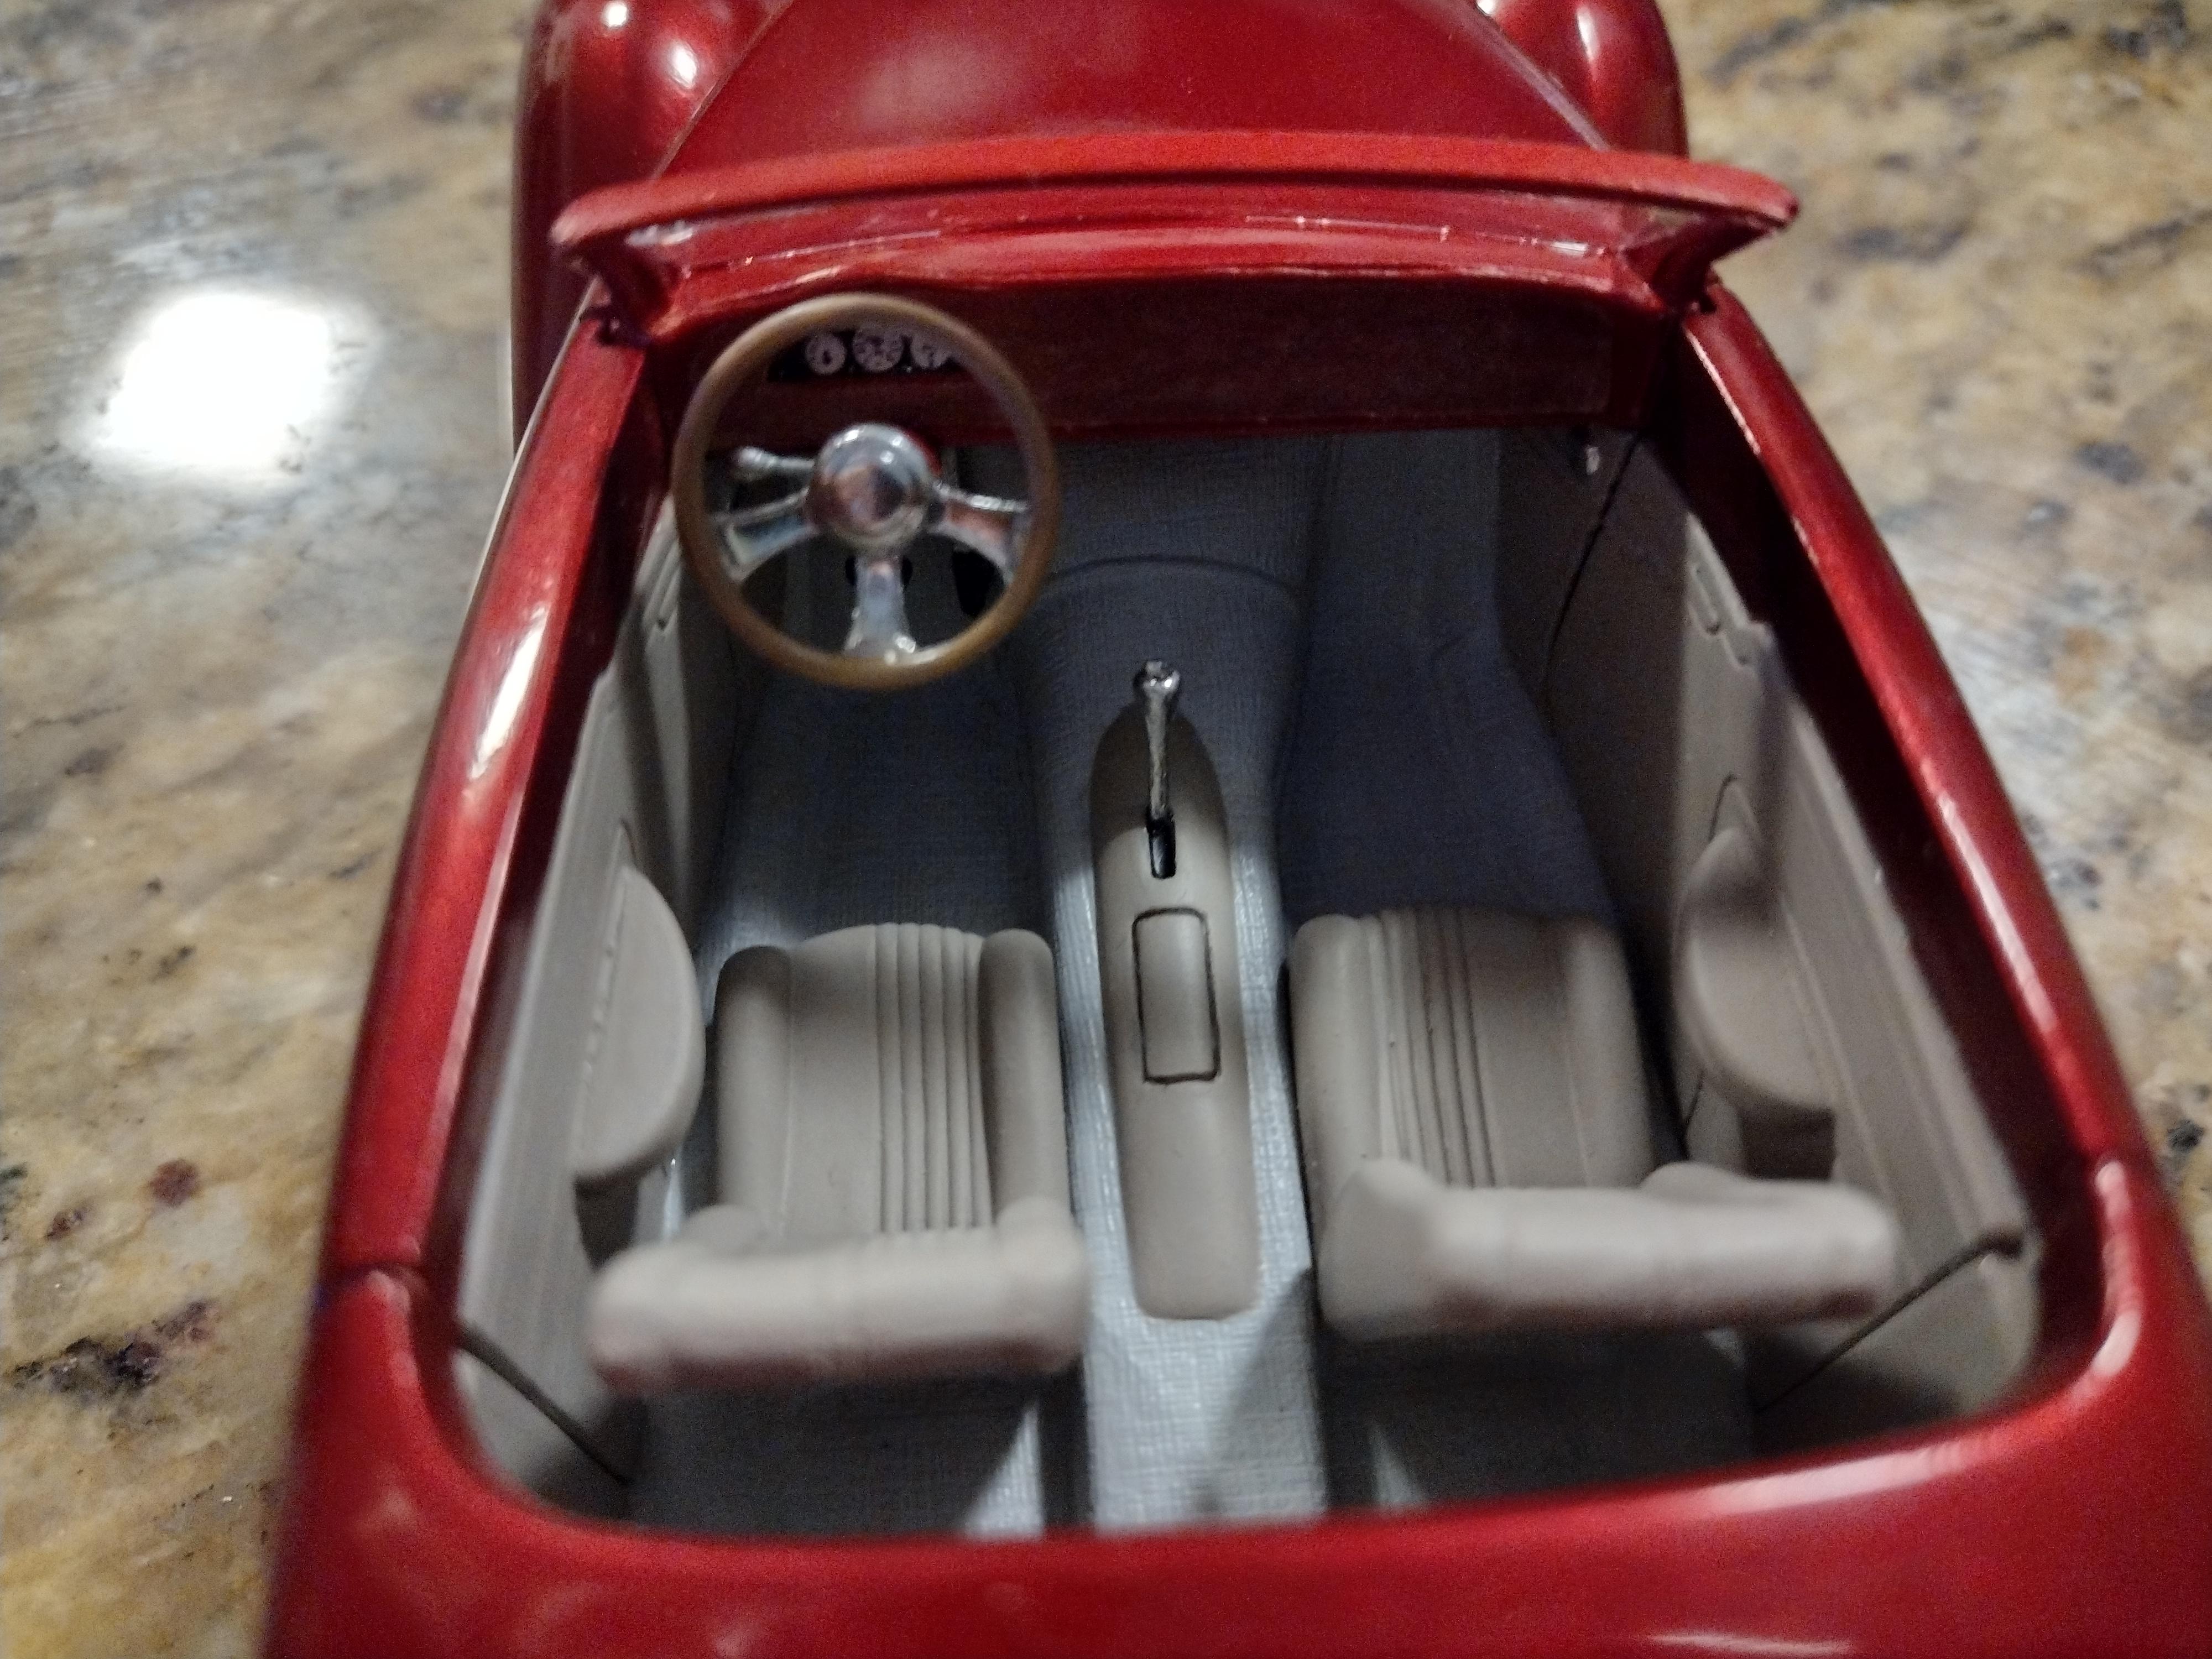
Just finished this one today. The colors are Duplicolor Inferno Red and Medium Charcoal. The only thing not box stock is the steering wheel. The original one flinged off into the never just after I finished painting it. Fun kit overall, it goes together well even if some things are a little vague.
- 10 replies
-
- 15
-
-
WARNING! Not all 1/25 scale is equal.
Deathgoblin replied to WillyBilly's topic in Tips, Tricks, and Tutorials
It looks like it needs bigger wheels and would make a neat CARtoons kinda car. -
1931 Cadillac V16 Convertible Coupe, Jo-Han, 1/25
Deathgoblin replied to Matt Bacon's topic in WIP: Model Cars
Looks fantastic! -
My First Car
Deathgoblin replied to Wickersham Humble's topic in General Automotive Talk (Trucks and Cars)
My first car was a 1972 Buck Skylark Custom hardtop. Flame Orange with a white vinyl top and seats. It originally had hubcaps, but I upgraded it to the chrome wheels with black insets (forget the name) and even ordered a set of center caps from the dealer. Here's what she looked like.:
-
That's a good way to start a modeler "rumble". Just kidding. They all have their ups and downs. I'm not knocking on any of them, though. Jo-Han had absolutely fantastic proportioned and detailed bodies and made cars no one else did, but a few of their kits were lacking on chassis/suspension detail and could be a little simple. Tamiya kits typically almost fall together and have very positive parts location (this part goes HERE), but they can be a little fiddly sometimes and can have very high parts count.... etc. All of them can turn out excellent stuff.
-
I try to only do one at a time due to space constraints (I've also got my work computer on the same desk). Currently I'm working on two. Coming to a close on the Boyd Coddington "Smoothster" 1937 Ford. Also still working on a 1/1400 scale USS Titan from Star Trek Picard. She's a long-term project. A really rough 3D print that takes a LOT of sanding, and I've had to carve off a lot of the surface detail and remake it.
-
There were some fit issues on this one too. I had to pull the body back off at one point for two issues: You have to make sure that the radiator is tilted slightly towards the rear or the body wont go on forward enough to install the front suspension. Also the rear of the frame just in front of the rear wheels needs to be trimmed off. It has a solid vertical panel which is not only inaccurate, but interferes with installing the rear wheels.
-
Just finished this one today. I had it mostly done, but the can of Prowler purple I had went bad. Used Tamiya metallic purple (PS-18) instead. I'm really happy with this one.
- 13 replies
-
- 10
-
-
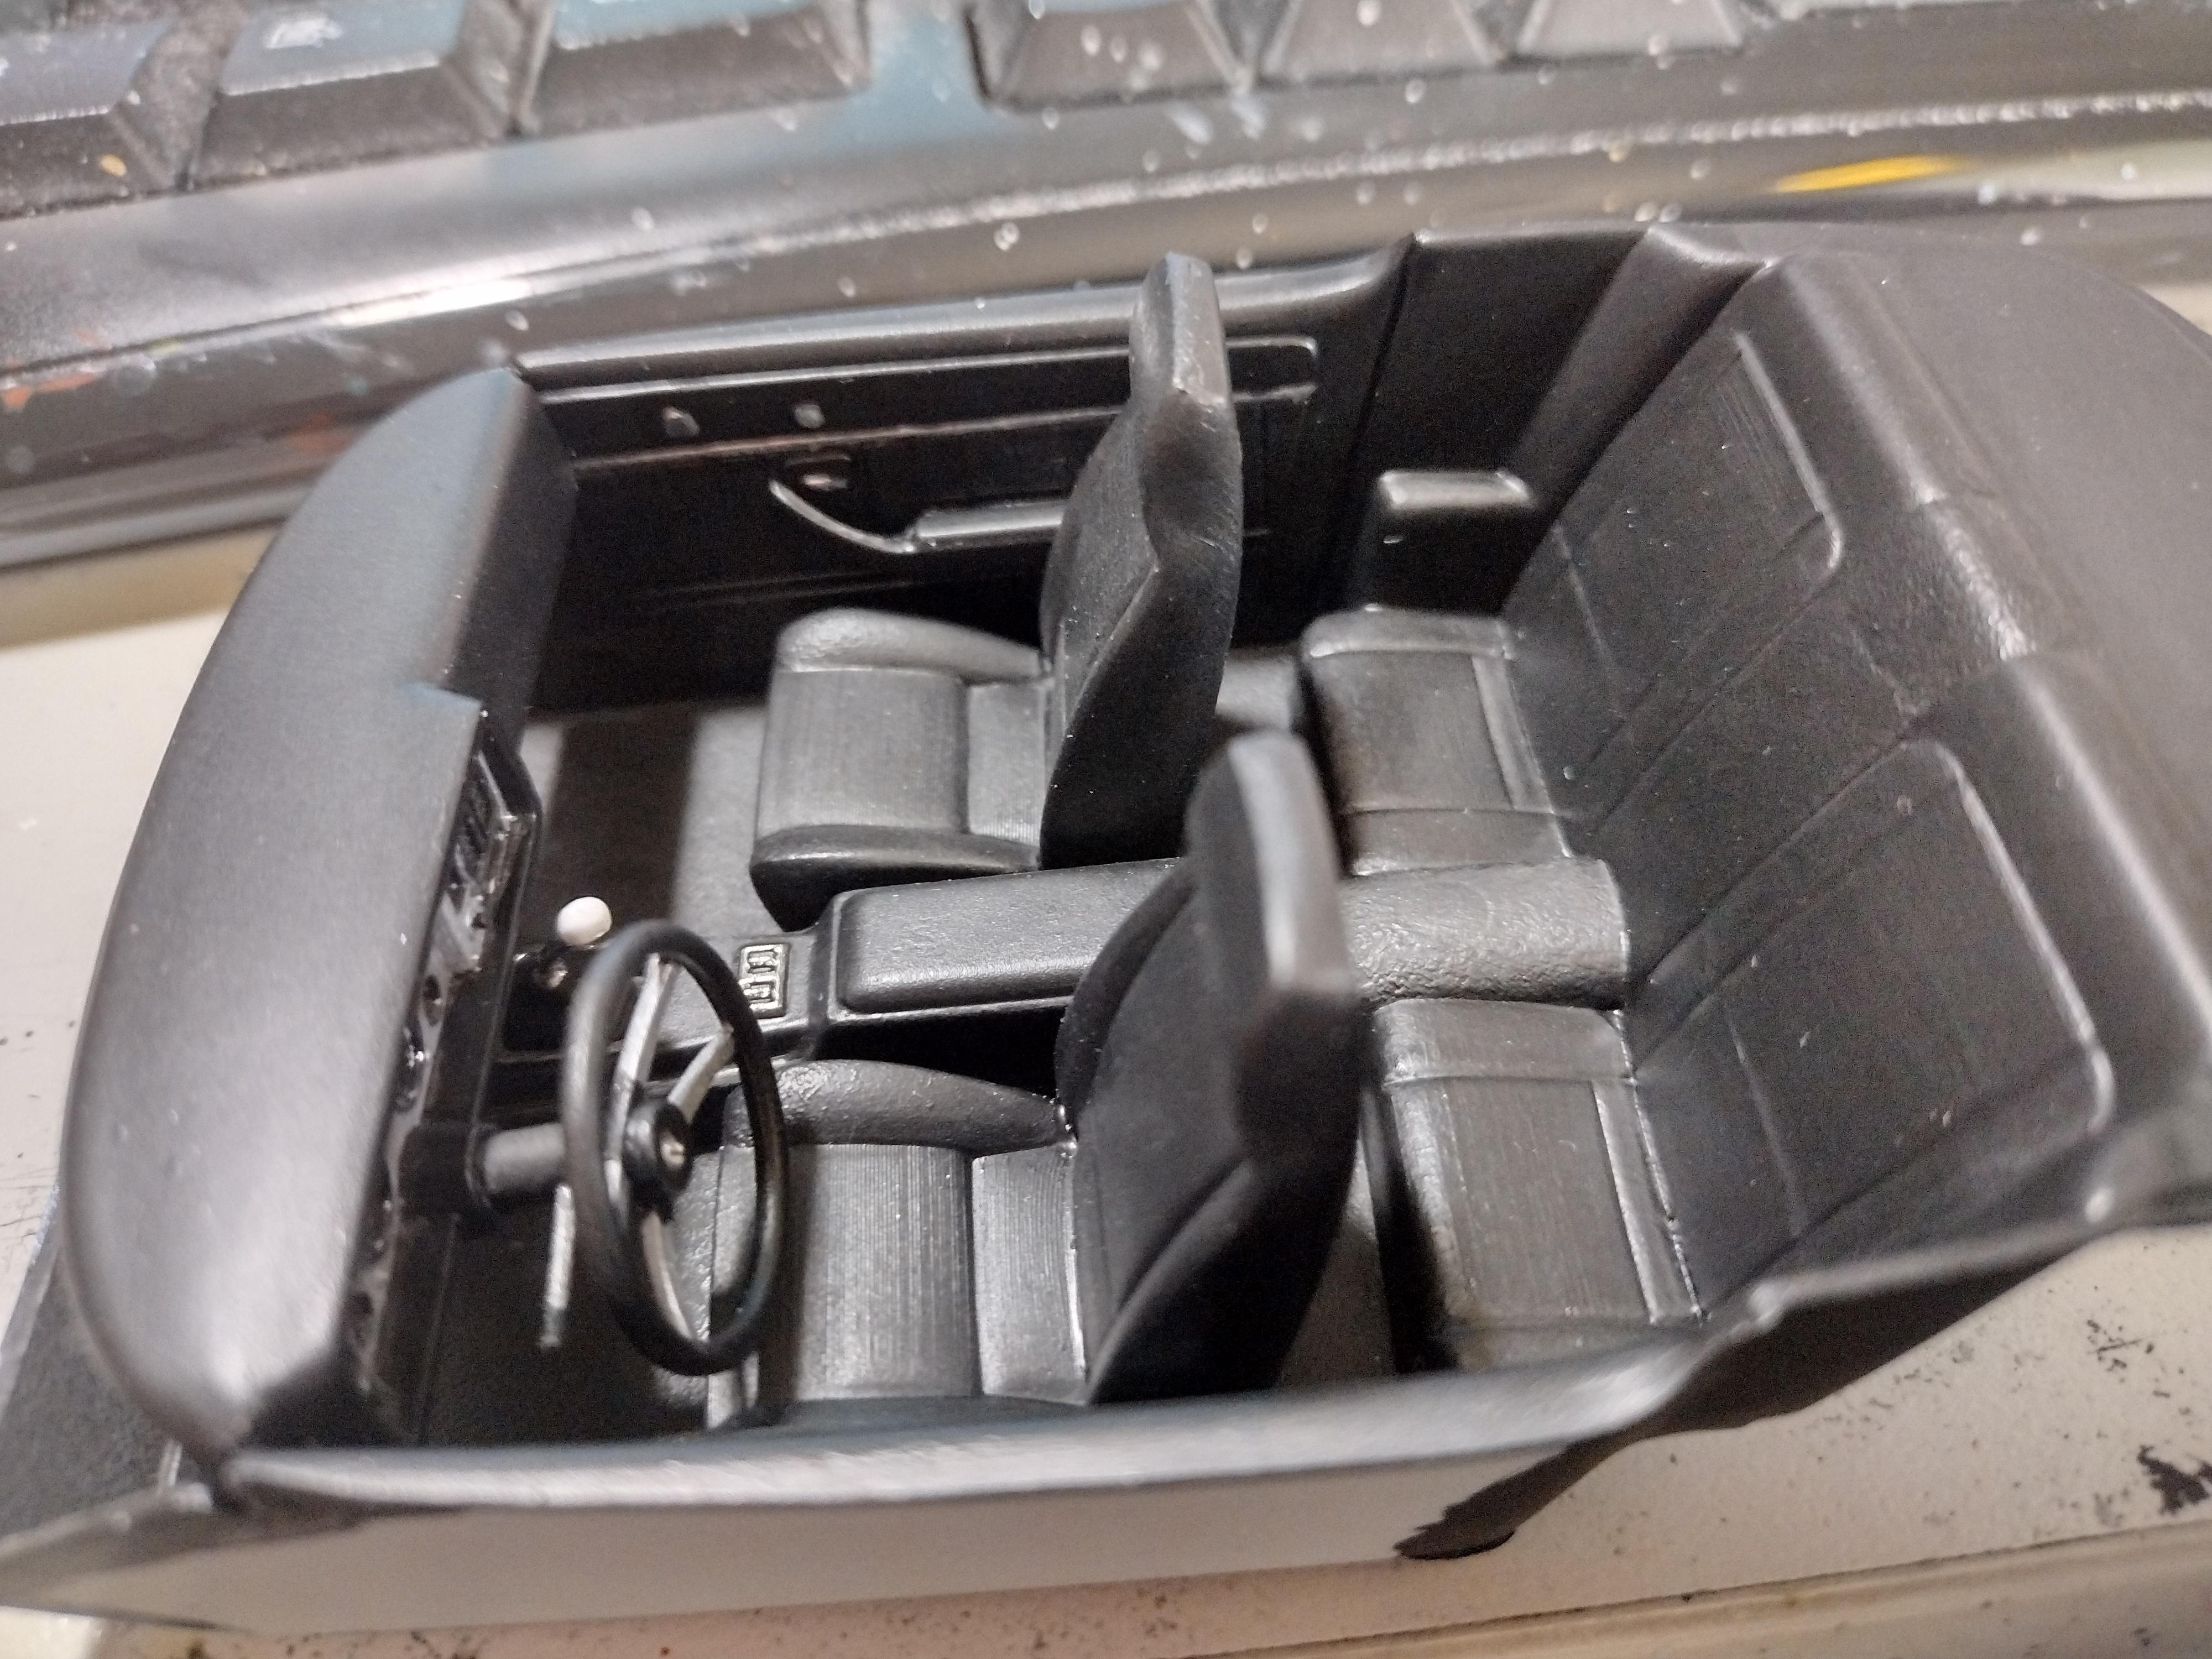
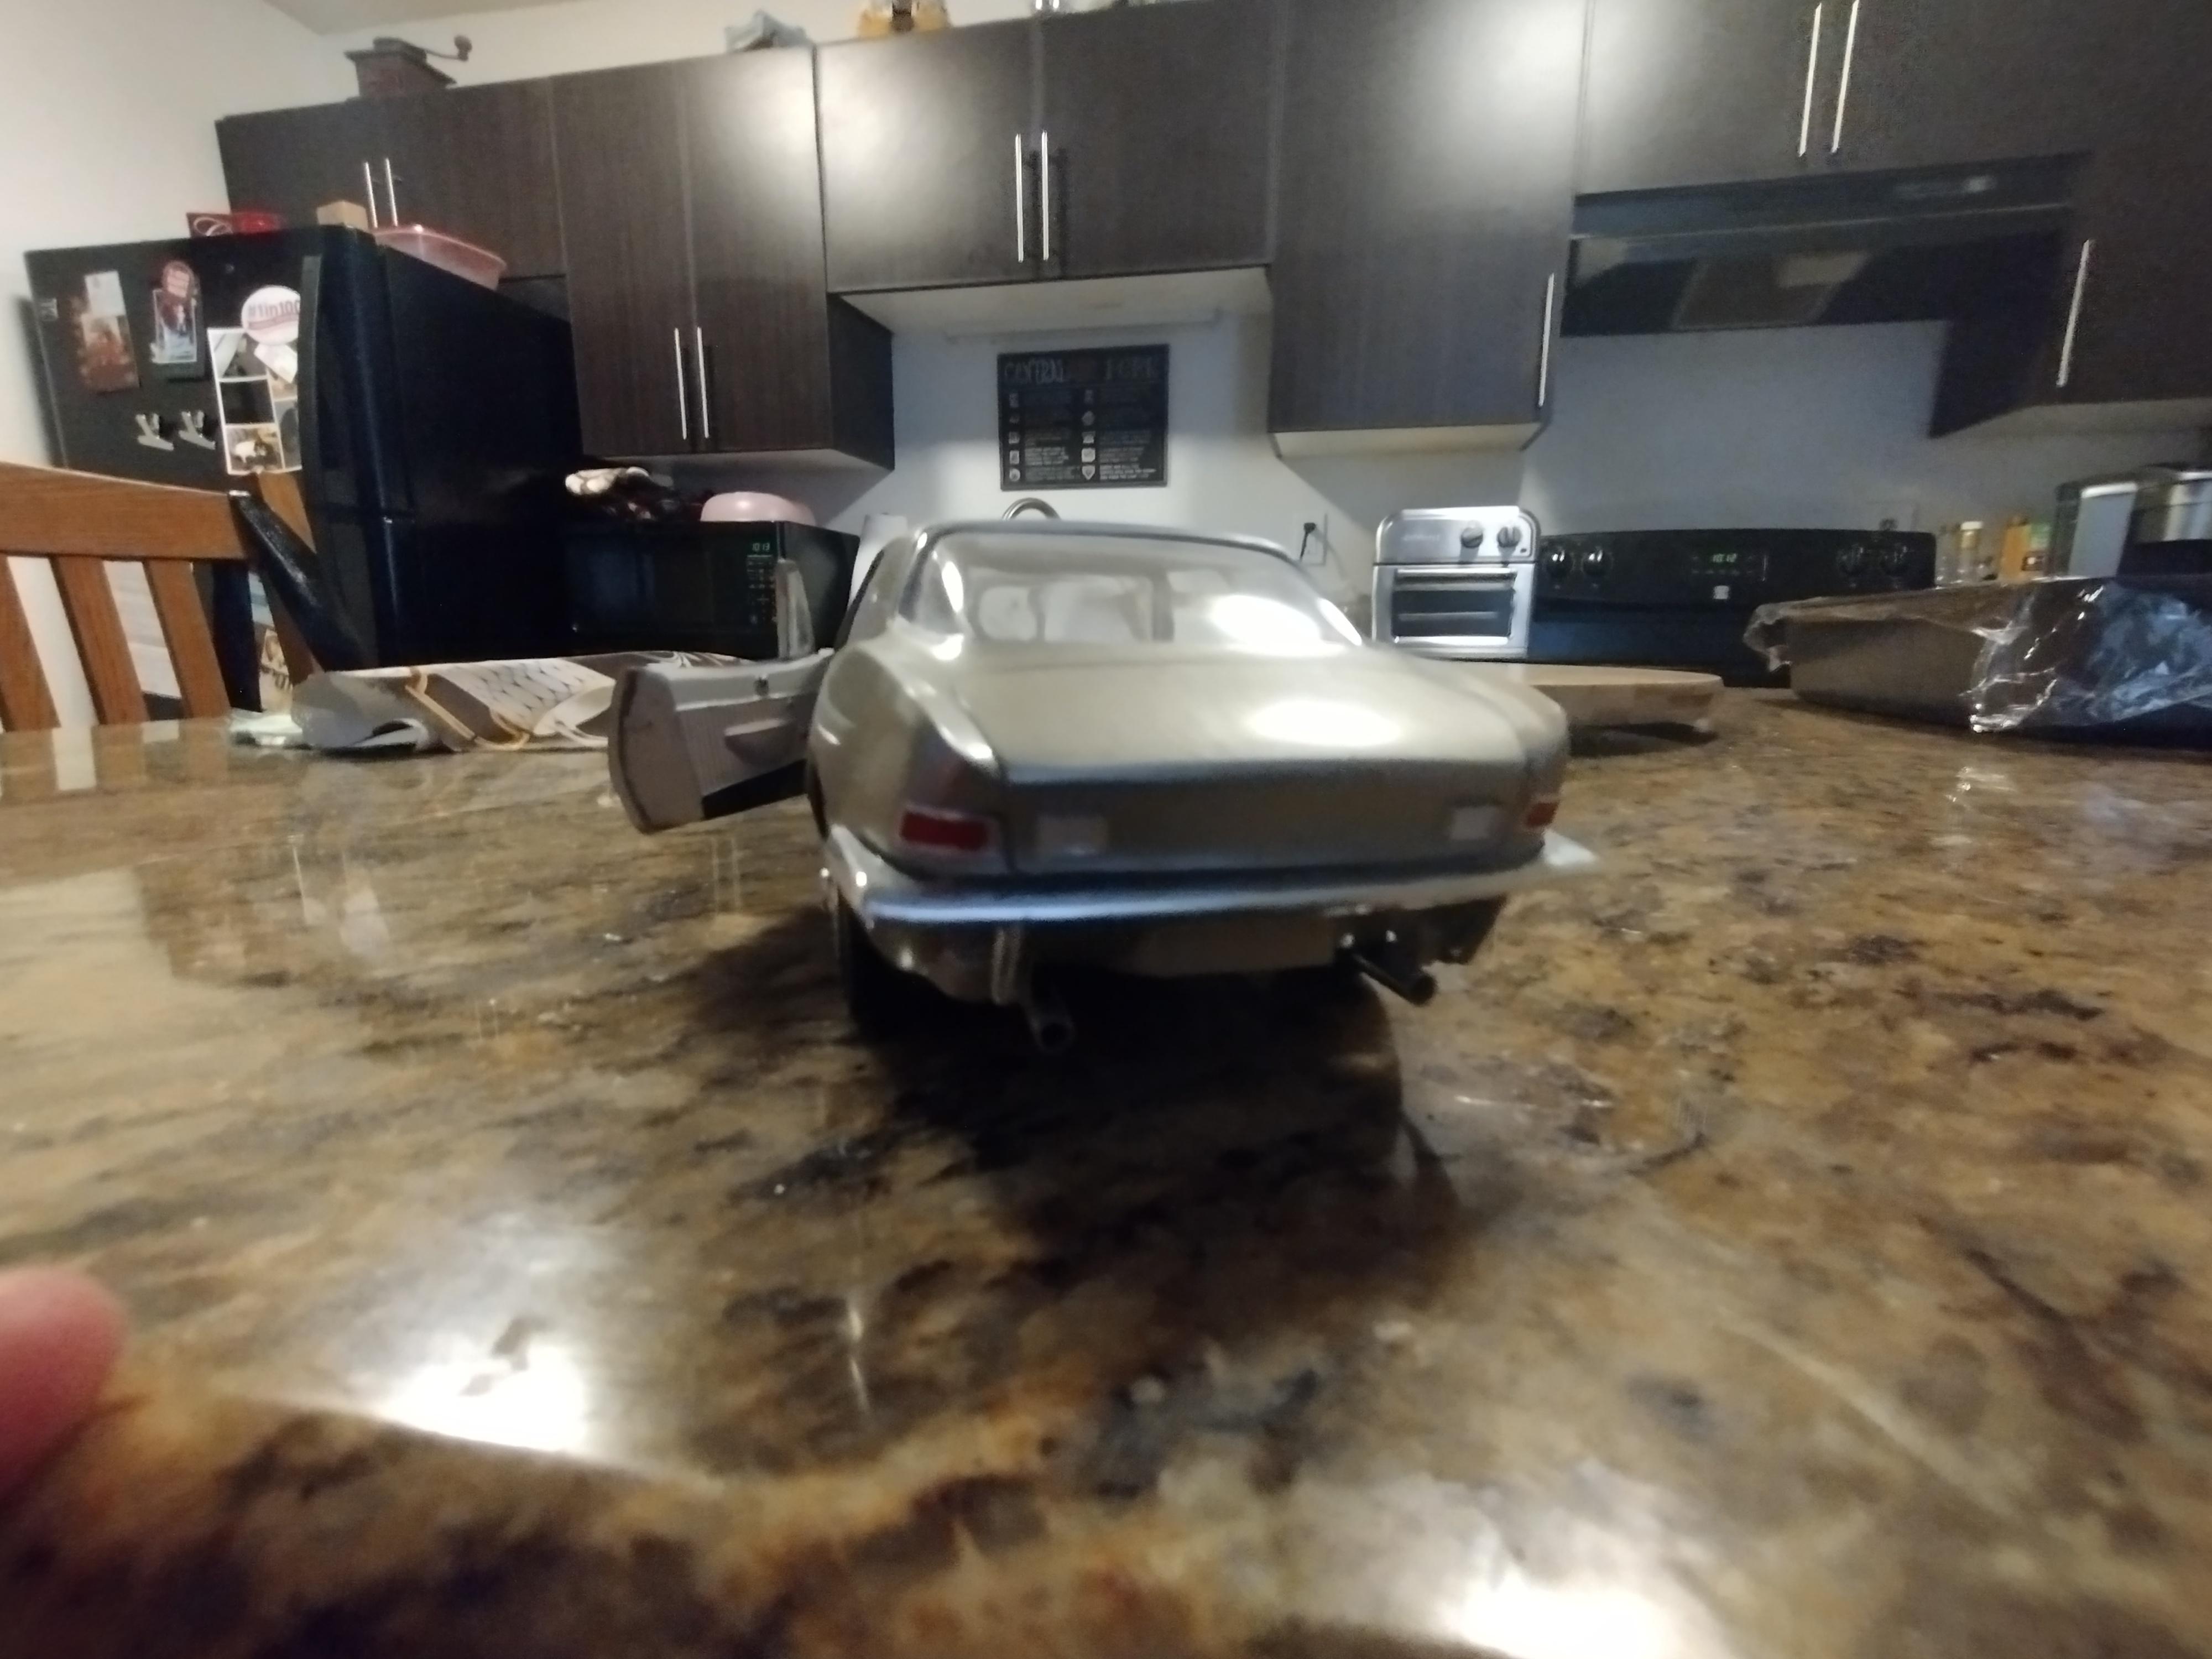
Could've sworn I posted this one. Color is Duplicolor Champagne gold, interior is Citadel paint, I think it's called Wraithbone. Steering works a little, doors both open, held closed by magnets.
- 12 replies
-
- 10
-
-
AMT Studebaker Avanti 3-1
Deathgoblin replied to PatW's topic in General Automotive Talk (Trucks and Cars)
Built one, but never posted pictures. Both doors work and held closed with magnets. I'll post it soon. Pretty good kit overall. Thought I posted this... I'll put it in under glass.
-
Anyone use this product?
Deathgoblin replied to gbtr6's topic in General Automotive Talk (Trucks and Cars)
I've been using a similar "off brand" by a company called Flysea. I find them superior to the Molotow ones. They seem to dry better, so they're a little more touch resistant. I still tend to retouch or paint chrome pieces first and let them sit until towards the end. -
I've got the Smoothster in my stash. I'm gonna dig it out soon and check it after seeing this.
-
I love it! It's adorable.
-
Gorgeous paint and chrome! Excellent job!