Mike999
-
Posts
3,007 -
Joined
-
Last visited
Content Type
Profiles
Forums
Events
Gallery
Everything posted by Mike999
-
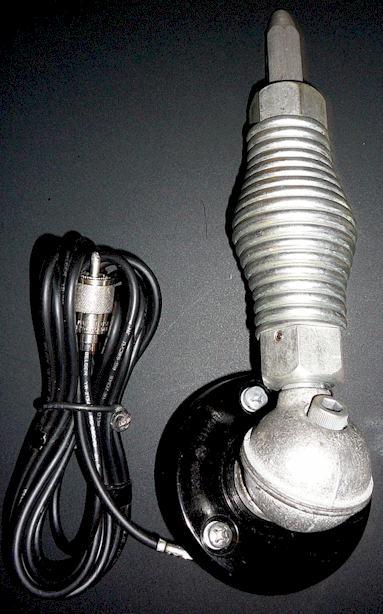
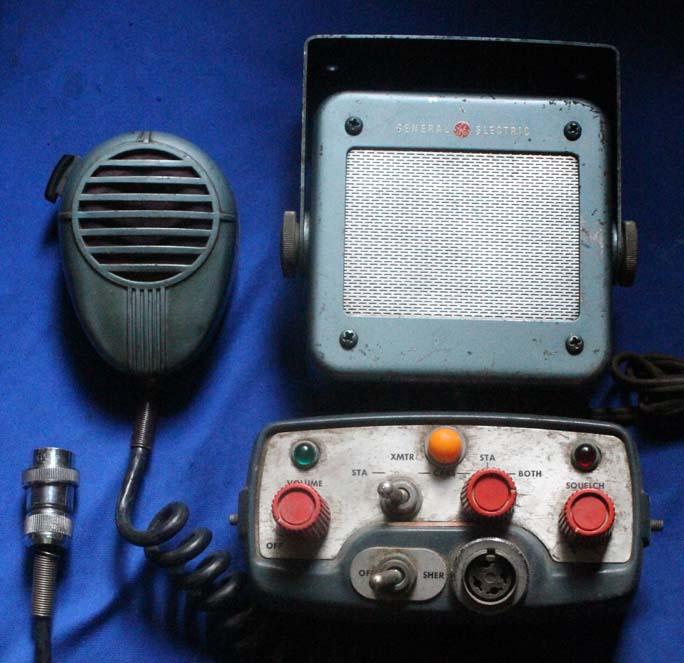
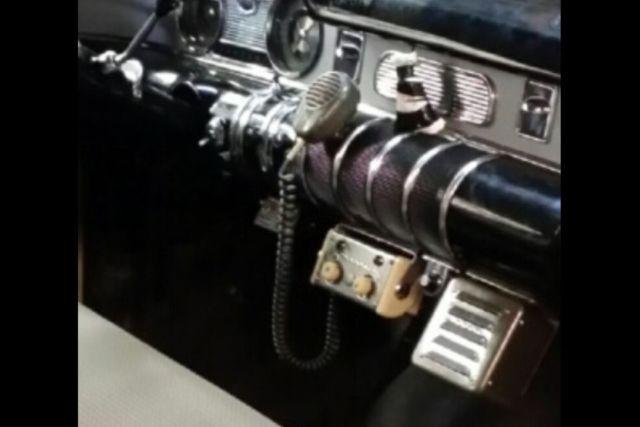
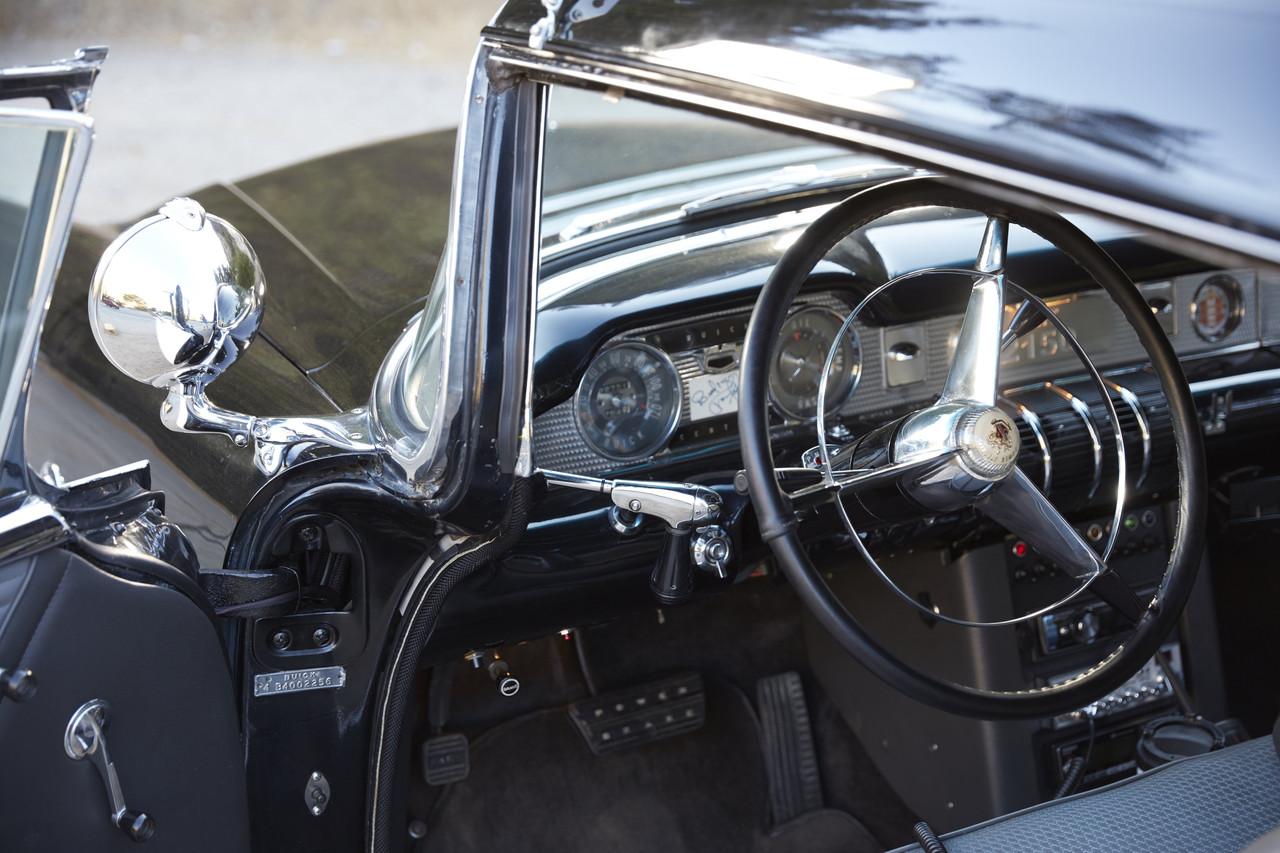
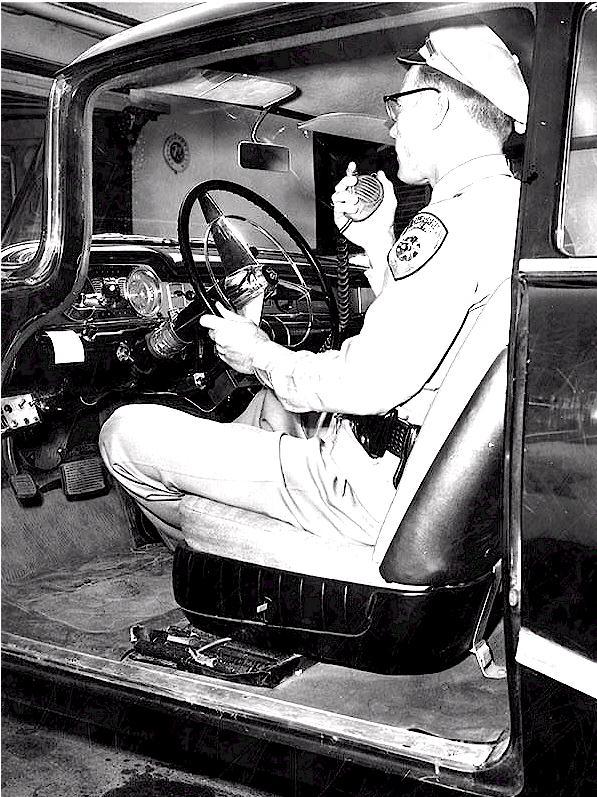
Nice clean build! Looks awesome. Here are a few pix that may help you, or anybody doing an early CHP car. I found these when building the Maisto '55 Buick CHP car. (It's over in the Diecast section.) The second pic is an early General Electric police radio used by the CHP. The third pic shows the radio installation in a CHP '55 Buick. The fourth pic is a "tribute" '55 Buick, not an original, but it shows the typical spotlight mounting in CHP cars. Look closely and you can see Broderick Crawford's autograph between the gauges! The last pic with the cop in the car is also a '55 Buick. The switchbox under the dashboard at the far left controls the lights and siren.

-
revell 55-57 chevy info needed
Mike999 replied to jeffdeoranut's topic in Model Building Questions and Answers
You made me go check the "Skip's" kit I found a few months ago, at a flea market. It was open and is OK. But that box is really packed full. And the body rides on top of all the other parts, in a perfect position to be crushed by the box top when it's closed. Like the Skip's '55 kit, the Nomad is molded in black. At least this one is. So it's buildable...as soon as I get over that kit's reputation as a build that can take years and cost thousands of lives. -
eBay: contest for record highest asking price
Mike999 replied to 89AKurt's topic in General Automotive Talk (Trucks and Cars)
My writing is illegible. I use Avery printable labels from Staples or Office Depot. The Avery 8163 is a good size. The Avery website has templates for MS Word and other programs that automatically format the labels for printing. You're right, I avoid printing...or doing anything else...thru eBay's proprietary apps. The eBay automatic Shipping Calculator is notoriously flaky and I don't trust it. When sending invoices to buyers, I check the shipping price carefully. If anything looks weird or too expensive, I run the Calculator myself, manually entering the size/weight. It's amazing how many times the shipping comes back at a lower price. And the bane of every seller's existence are the bucketheads who don't read the listings, win multiple items, and pay shipping on every one. Then they send irate messages, cyber-screaming that I ripped them off on the shipping. Even though every one of my listings has this in it: "IMPORTANT! If you win multiple items, DO NOT pay instantly. Wait for my invoice after the auction, or request a total. If you pay instantly for multiple items, you WILL be charged shipping on each item. If that happens I will refund your excess shipping thru PayPal." -
Harley-Davidson Classic
Mike999 replied to James2's topic in All The Rest: Motorcycles, Aviation, Military, Sci-Fi, Figures
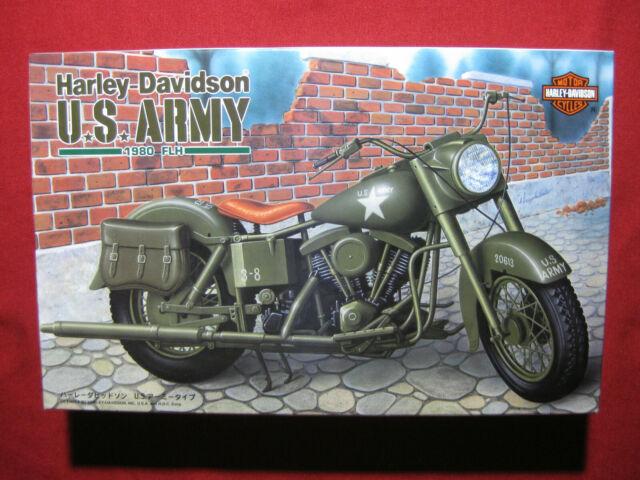
In the photos, I couldn't tell if I was looking at the model or the real bike. Great work! For a 1/12 Harley that doesn't need de-chroming, look for the kit below: the IMAI 1980 "US Army" FLH. It does not have any chrome parts. It's molded in Olive Drab plastic with white resin saddlebags. The military "bicycle seat" is plastic but the kit still has the regular two-person seat. And lots of other unused, non-Army parts, for those of us who like to mix things up. Or for something really weird: IMAI kit #530466 is the US Army version with GOLD-plated parts instead of chrome. It's a class act in Ugly. I wonder where these 1/12 Harley molds are nowadays. The kits have been released over the years by Aoshima, IMAI, IMEX and Revell, in many different versions. IMAI did a couple of "Special Edition" Harleys with white-metal parts, the 1936 EL and the 1960 FLH Duo-Glide. The last re-issue for many of these kits seemed to be the mid-1990s. After that, I suspect Harley licensing became more expensive and/or hard to get. eBay always has plenty, with prices ranging from reasonable all the way up to You-Gotta-Be-Kidding. (US $200-$300)
-
Hobby Lobby re-opening
Mike999 replied to Mike999's topic in General Automotive Talk (Trucks and Cars)
Hit the closest HL today. Still no new kits. I'm thinking of getting a couple of old Aurora 1/72 scale helicopter kits Atlantis just re-issued: the HH-3 "Jolly Green Giant" and the AH-56 Cheyenne. Both very hard to find for decades, especially the AH-56. I've read that Atlantis has a special distribution deal with Hobby Lobby, so I thought their kits might be available pretty quickly. Guess not, though. -
I just checked my original Monogram '40 Ford pickup, copyright date 1964 on the box. It's molded in the turquoise plastic. Contrary to what I've read on the internet over the years, this kit never had a stock interior. Only the diamond-pleated seat and door panels shown on the box art of the original. Monogram sort of admitted that by not advertising a stock version on the box, just a "semi-custom model." A couple of resin vendors have made stock interior parts for the kit, but it wouldn't be that hard to do it ourselves. Those interiors were very plain.
-
Testor's tube glue works by actually melting the plastic parts together. Unlike super-glue (CA glue), there is no magic Debonder that will "melt" it or otherwise get it loose, as far as I know. Some people have suggested putting the model into your freezer overnight, and the low temp might make the glue bond easier to break, just by pulling on it. I've never had much luck with that myself but it might work. The most likely solution: carefully cut off the wheels with a razor saw. Drill holes into the axle stubs and put pins into the holes, to mount your new wheels.
-
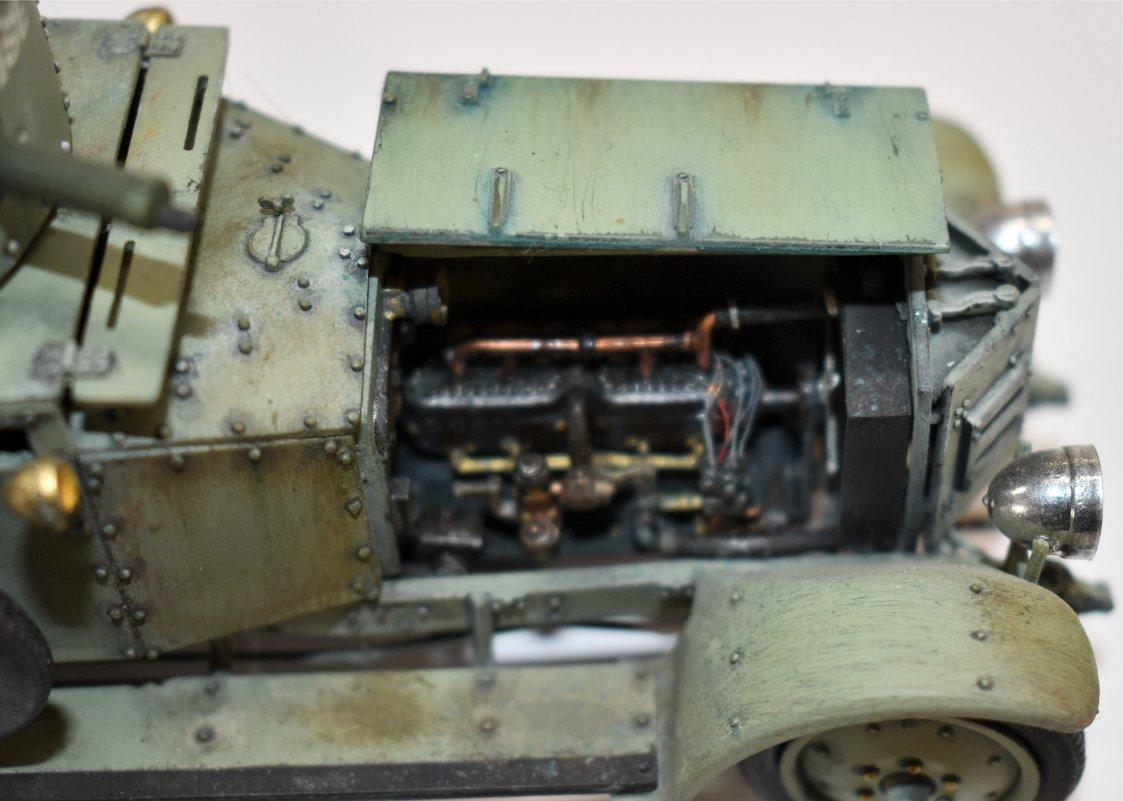
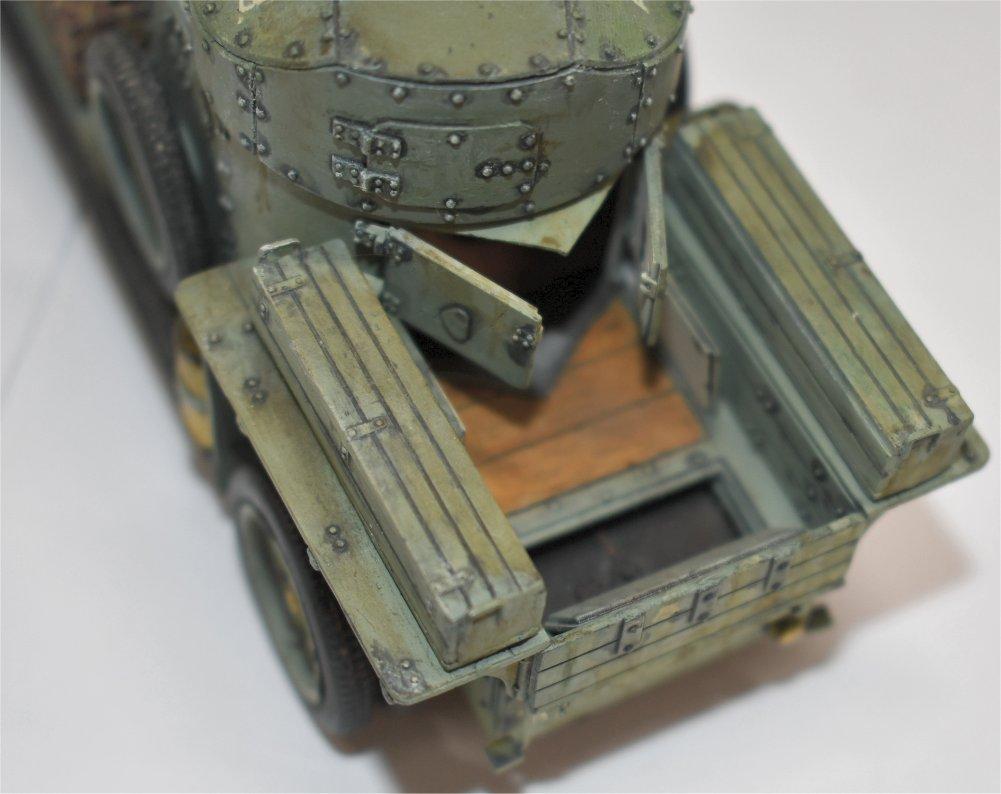
Here are a few pics of my Roden Pattern 1920 Rolls armored car. I built it back in 2009, when these kits were first released. I had always wanted a kit of this vehicle. In 2019, the always prolific MENG company released its own version of the RR armored car. I think it has parts to build all 3 versions in the box: Pattern 1914 with photo-etched wire wheels; Pattern 1920 with disc wheels; and Modified Pattern 1920 with wide wheels, sand tires and a Boys anti-tank gun in the turret. In 1920 the British Army sent 13 of these vehicles to fight in the Irish War of Independence. They were numbered 1 thru 14, apparently because somebody was superstitious and wanted to avoid the number "13." Each armored car carried the designation "A.R.R.-XX" on its turret. Today nobody seems to know what "A.R.R." meant, but "Armored Rolls Royce" seems like a pretty good guess. The crews also painted a nickname on each car, often in the Gaelic language. I'm not superstitious and thought the missing "A.R.R.-13." deserved a build. I gave it the nickname "Taibhse," Gaelic for "ghost." That fit nicely, since these armored cars were built on the Silver Ghost chassis. For a 1/35 scale kit that only measures 6 inches long assembled, the Roden kit is insanely detailed in the chassis and engine. After I got it together...naturally...I learned that the octagonal coaming around the top turret hatch should not be there. A fun conversion: there are photos of T.E. Lawrence in a "roadster/sports car" version of the Rolls armored car. The turret and upper armor plating were removed, leaving it looking something like a prehistoric hot rod. Photos are a bit wonky, I'm still experimenting with a new camera.
-
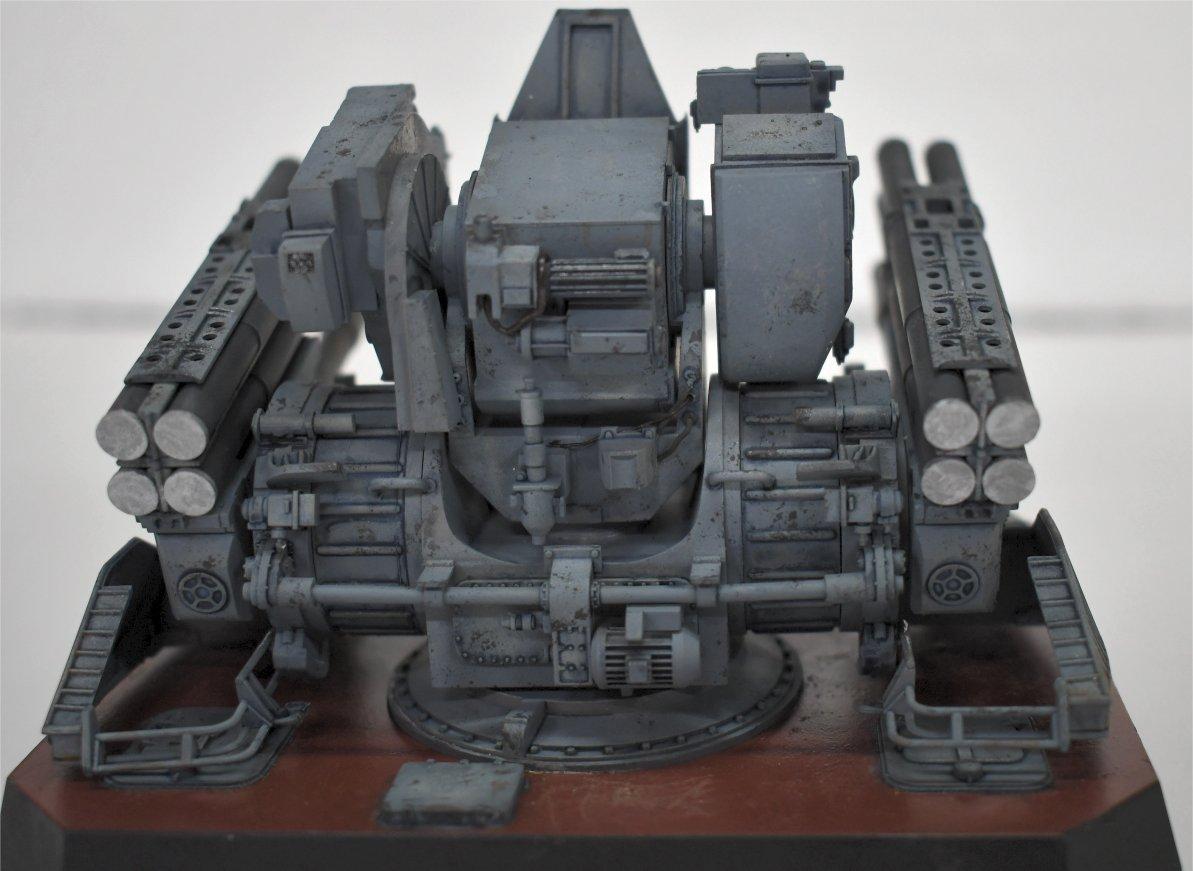
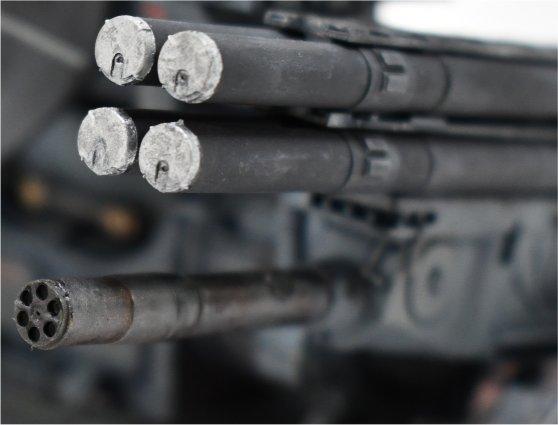
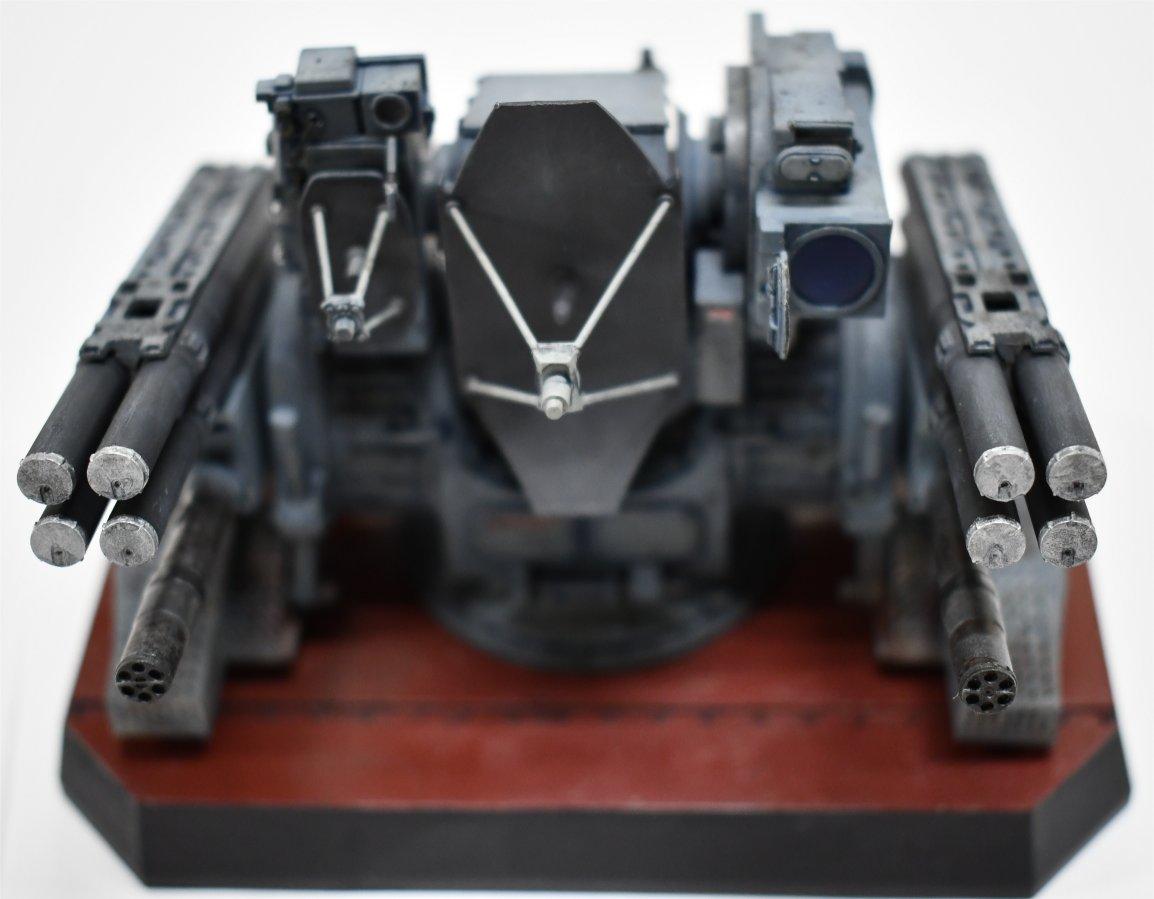
Takom Kit #2128: CADS-N-1 "Kashtan" Close In Weapons System 1/35 scale For modern warships, the last line of defense is the Close In Weapons System (CIWS). The CIWS only has one job: throw a wall of flaming metal at any incoming threat. Most people have seen the MK-15 Phalanx CIWS installed on American ships, with its M61 Vulcan 6-barreled 20-mm gun. The Russian version of the Phalanx - on steroids - is the Kortik CIWS, NATO designation CADS-N-1 "Kashtan" (Chestnut). It was designed to take out any possible threat short of an alien spaceship, from aircraft to anti-ship missiles to Fast Patrol Boats. For airborne targets, the Kashtan carries eight 9M311-1 surface-to-air missiles, with 32 more missiles available for automatic reload. If a target survives the missiles, it still has to face a pair of AO-18K six-barreled 30-mm rotary cannons. Those two weapon systems may sound familiar to armor fans. They are the same missiles and guns used on the Russian "Tunguska" tracked anti-aircraft vehicle. Multiple targets can be tracked and engaged simultaneously through the Kashtan's electronics, which include dual radars and electro-optronic controls. Eight Kashtan systems are currently installed on Russia's only aircraft carrier, the Admiral Kuznetsov. Others have been installed on two Sovremennyy-class destroyers in the Chinese Navy. THE KIT Takom has a habit of making oddball 1/35 scale kits, but even so this was a surprise. The Kashtan is molded in 123 light gray plastic parts, with one clear part for the optic sensor. The only decals are 2 tiny red stars for the gun caps, which I didn't use. The base representing a ship's deck is well done, with 3 hatches and a seam detailed with nuts and bolts. The kit goes together quickly and easily, with a good instruction booklet. Don't sand off those seams on the big round ammo drums. Those are weld marks and should be there. Don't ask how I know this. Those capped guns bugged me and I wanted them uncapped. So off to the parts boxes, where I quickly found a fix: the backs of the rocket launchers from an old Monogram 1/48 scale helicopter gunship. I added a couple of details seen in photos of the guns, with small wires and photo-etched bolts. Voila, they dropped right into place and fit perfectly! Photos show the Kashtan has electrical cables and conduit running all over the place. I swear, no 2 pictures of this thing showed the cables in the same place. I didn't want to go overboard (PUN INTENDED!). But I did add a few of the more visible cables, using thin solder. The same confusion applies to painting. Some photos show Kashtans painted all gray. Others show the missile canisters in black, with bare-metal ends. If you want to paint the racks and missiles different colors, ignore the instructions for assembling the missile racks. The instructions have the missiles and racks glued together early in assembly. I painted the missiles and racks separately, and glued them together near the end of the whole assembly process. No problem, as long as you keep the canisters oriented correctly with the racks. PAINT & WEATHERING The paint was airbrushed Tamiya acrylic Neutral Gray undercoating with Light Royal Gray overspray, for variation. The optical sensor was painted Tamiya Clear Blue. The missile canisters were painted and shaded with various shades of black, like Dirty Black and Tire Black, with Tamiya Flat Aluminum end caps. To indicate that missiles had been fired from the launchers, I used Testors Metalizer Exhaust on the ends of the launcher racks, applied with a small piece of sponge. Those mean-looking guns were painted using various shades of Testors Metalizer, like Burnt Metal and Gunmetal. These were also applied with the sponge trick. The weathering is mostly old-school washing and dry-brushing with dark and light oil paints. Other small details were picked out by studying photos, like the brass-colored universal joints under the main radar. These systems are mounted on deck and constantly beaten up by salt water spray and rough weather. So I added chipping with Tamiya Dark Iron acrylic paint on pieces of sponge. No Chief Petty Officer in any navy would tolerate rust on the system itself, but photos showed that the two thin metal "catwalks" on the sides were often rusted. So I did put a little rust there. Just to break up all that gray, I added the modern Russian flag and double-headed eagle, from an armor decal sheet. I also added a couple of Russian data plates and stencils from aircraft decals. The decks of Russian ships are covered with red anti-corrosion paint, but hatches etc. are left gray, so that's how I painted the base. I roughed up the base to give it an anti-slip surface. To sum up, I wanted a quick, fun and weird build. This kit "ticked all the boxes," as our British cousins like to say. But I keep wondering how this thing would look mounted on the back of a big truck, Mad Max style. Hmmm... Takom makes another Russian shipboard weapon that is tempting me: Kit #2129, the 130mm dual Automatic Naval Gun Turret AK-130. I don't think it will fit on a truck. Excuse the photos, I'm still learning my way around a new camera...
-
Wired and plumbed a grungy engine, to go in a grungy dirt track racer.
-
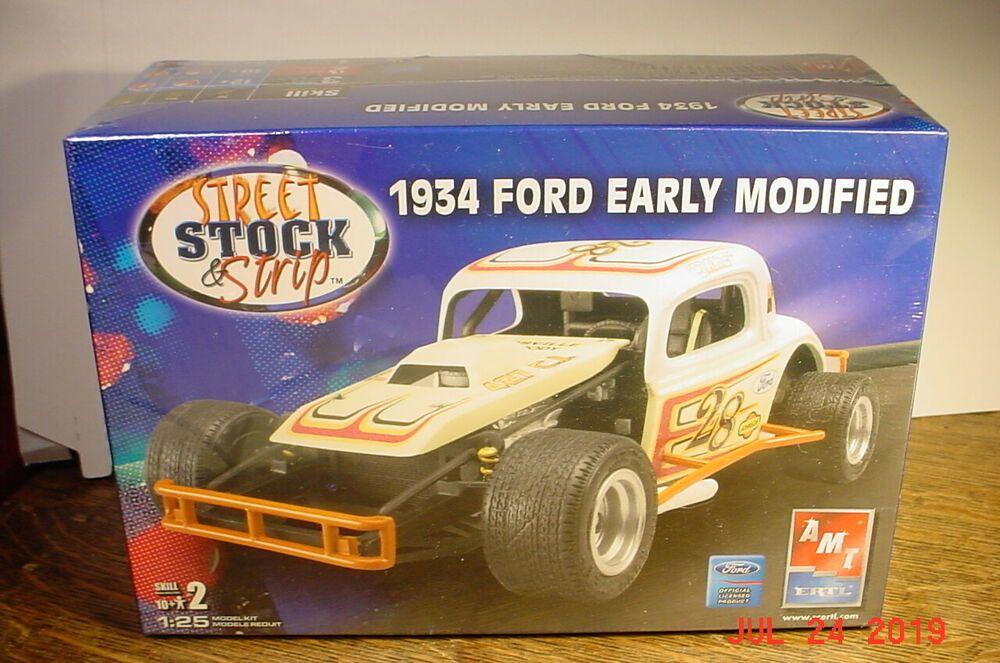
You may find some extra parts in that '34 Ford Slammer kit. A bunch of 'em! I bought my kit open, at a flea market for $5. But all the inner parts bags were still sealed, so none of this extra stuff was added by the previous owner, as far as I could tell. The photo below shows all the unused parts that were in the box: 3 hoods (one not in the photo); 3 firewalls; 3 engine front covers (one not in the photo); a couple of nice air cleaners; 3 rear interior bulkheads; and a bunch of crash bars for the front, rear and sides. Before I glued anything on this kit, I went thru the instruction sheet and pulled out the parts for the '34 Ford. I put all those unused parts in a ZipLoc bag and set them aside. Otherwise it would have got real confusing in a hurry.
-
MENG 1/24 SCALE FORD PICK UP
Mike999 replied to ROY FERGUSON's topic in Model Building Questions and Answers
They sold for about $50 to $65 when new. That was pricey, but it was the first new pickup kit in ages, fully detailed with a modern Diesel engine. Also it was the big honking heavy-duty F-350. A quick eBay check shows them currently selling for over $100, whether in an auction or Buy It Now. The number that sold for $100+ on Buy It Now deals indicates a lot of people still want one. I have no idea why they disappeared so quickly. We modelers expected MENG to do other versions, like a Dually. I guess it just didn't sell as well as MENG expected. MENG does many 1/35 scale military kits and figures, so it made sense that they also released it in that scale. And those F-350's were used in Afghanistan and Iraq, by our military and various insurgents. There are pix of them with Russian anti-aircraft guns and other weapons mounted in the bed. But the 1/35 scale kit is a straight copy of the 1/24 kit, with no chrome parts. No figures or military accessories or parts. Here's a review of it from this site, when the kit was first released. https://www.modelcarsmag.com/meng-ford-f350-super-duty-crew-cab/ -
Thanks for the info. The British also used another quality car, the Lanchester, as the basis for an armored car. It was FINALLY kitted not long ago by Copper State Models. Roden has done 3 versions of the Rolls-Royce armored car in 1/35 scale: 1914 Pattern with wire wheels; 1920 Pattern like your photo with disc wheels; and the WWII version with big fat sand tires. I built the 1920 Pattern as a vehicle used in the Irish Civil War. One of those was captured by the rebels, then re-captured by the British Army. IIRC, after getting it back they painted a new nickname on it: "Turncoat."
-
Life-Like did the Hispano in 1/32 scale. Years ago in the old "Military Modeler" magazine, somebody converted that kit into a World War I scout car. The builder mounted a machine gun on the passenger side, filled up the "trunk" with tools/cargo and weathered it heavily. It looked great. The Alfonso would be an expensive car to take into a war zone. But in WWI, rich officers sometimes did take their personal cars to war with them. So it makes a neat "What If?" build. These kits have engines, so the hood or its side panels could be left off to show even more detail. I've had 2 of those Life-Like kits for years, intending to do a military vehicle. Maybe even using the second kit to make it a four-seat staff car, like this 1913 Alfonso.
-
TV "Star"cars that never were kited
Mike999 replied to ranma's topic in General Automotive Talk (Trucks and Cars)
Squadron's Encore Models did your Goose, if you don't mind 1/48 scale. This is the old Czech Model kit, which was already pretty nice, upgraded with new resin parts, decals etc. Both versions are out of production right now and pretty spendy on eBay, around $100. It originally sold for about half that. But you might get lucky. https://www.squadron.com/Encore-Models-1-48-Grumman-JRF-Goose-EC48005-p/ec48005.htm -
Great job! Especially pulling together the different "stuff." And the diorama really reflects the times we live in right now. If you want to do something even weirder (and who doesn't?)...Sprue Brothers is having a 25% off sale THIS WEEKEND ONLY, for all Legend and Live Resin items. Live Resin does several different 1/35 scale heads wearing U.S. and Russian gas masks. Including this neat Zombie/Damaged version.
-
Just for fun, here's a '65 Fairlane 4-door "Modified Stocker" I snapped in Egypt. It was filling up at the gas station where we stopped almost every morning. Two-tone paint and an...interesting custom grille. But it seems to have its stock hubcaps and they're in good shape, which is pretty amazing. Accessory figures included Dad driving, Mom and 3 kids.
-
Wow, thanks for all the useful information in that post. Kept it for reference!
-
I think that white box was the original MPC box art and AMT carried it over. AMT-ERTL used this box art for the 2006 re-issue. It's even worse.
-
Thanks! I'll bet you're right and the fuel pump was probably electric, mounted at the tank. OK, maybe I'll just remove the fuel pump and make that fuel line a little longer...
-
Here's some inspiration. A build from Phil Dauphinee where he decapitated that 3-window roof and put it on an AMT '34 5-window body.
-
Thanks. I'm trying to rescue one of those from the Shelf Of Doom right now. If I can finish wiring the engine and nail it together, it should be done. On that hood, I wanted to confuse everybody by using "Ford" (for the body) and "Chevrolet" (for the engine) decals together. The engine in these kits is a pretty nice 383 Stroker Chevy small-block with Weiand valve covers. It's missing a fuel pump, easily stolen from elsewhere.
-
Bare metal foil small writing
Mike999 replied to Ctmodeler's topic in Model Building Questions and Answers
Now this is timely! I have a '60 Falcon resin body driving me crazy. The problem is the letters F-O-R-D on the hood and F-A-L-C-O-N on the back. First I tried using a single piece of BMF to cover the letters, on the bare resin. I thought the combo of primer and paint might cover the edges. Nope, they stood out like a sore thumb. Stripped the body and started over. Next I tried tiny individual pieces of BMF. They just don't have a big enough adhesive surface, even when I applied a dot of white glue and burnished the letter down hard. I'm about to give up, paint the thing and use Molotow on the chrome. Or does somebody have a BMF solution? -
Fantastic work! That rigging in 1/700 would have me gluing my fingers together repeatedly. I know nothing about French battleships either, other than their names in WWII history books. So this was something different and interesting to see. The U.S. Naval Institute Press publishes lots of obscure books on naval history and engineering. Some are fascinating, especially the technology race leading up to the all-big-gun Dreadnought battleships.
-
A Brass Era car that literally changed the world in 1914. The Graf & Stift touring car in which Archduke Franz Ferdinand and his wife were riding when they were shot in Sarajevo, kicking off the First World War. It's in the Vienna Military Museum, along with Franz Ferdinand's bloody uniform and the pistol that killed him. That Museum is definitely worth a visit if you ever get a chance. The basement is full of giant Krupp artillery pieces and the museum has a big collection of scale model vehicles, from trams to cars to a giant model of a WWI Austrian submarine. A model kit of the Graf & Stift is probably...unlikely.