David G. Posted October 17, 2021 Share Posted October 17, 2021 Excellent progress on this one. Nice, subtle two-tone paint job. David G. Quote Link to comment Share on other sites More sharing options...
Maindrian Pace Posted October 17, 2021 Share Posted October 17, 2021 If your skills were overwhelmed ten years ago, they certainly aren't now. Fantastic build. Quote Link to comment Share on other sites More sharing options...
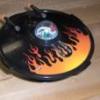
mr moto Posted November 4, 2021 Author Share Posted November 4, 2021 Progress has been kinda slow. Haven't been spending too much time at the bench lately. Gave the hood one more test fit before giving it the final touches and found that it warped a little after painting. I've had this problem with relatively thin resin parts before. In fact, that's why I made this hood with a molded in sound deadening pad - because a previous one had warped and maybe the extra thickness would prevent that. So I decided to bend it a bit using hot water. This is my sophisticated hi-tech heating rig: To save time the water was heated almost to a boil on the stove and then I used the cup warmer to keep it hot while I worked. The end result was much better but I'm not totally satisfied and might try doing it again. Have to weigh the risk against the reward and decide. Putting the correct curve into a complex curved part like that is not as easy as it looks. The sound pad was painted with Duplicolor trunk paint which has some texture and a a sort of slightly speckled appearance. It gives a pretty realistic look. I made a grill insert out of some Model Car Garage photo etch mesh, added an emblem that was foil cast using the one on the rear deck panel as the original, Alcladded the whole works, and then put another Studebaker crest decal on it. BTW, when you're painting photo etch or really any metal parts it's best to start with Duplicolor self etching primer. It really increases the adhesion and durability. Here's the hood after that plus a foil trim added. Yay!! Finally another finished part. Part of the reason for slow progress lately is that I'm waiting for some new foil to come in. The foil I have on hand is causing some issues so I ordered some new direct from BMF. Here's the "glamor shot" so I can admire my work for a few minutes. It's getting there! Here are the exhaust tips I'll be using. They're reshaped from the ones that come in the Round2 '59 Imperial kit. They're not actually correct for a 56J but are similar to the ones that Studebaker offered in 1957. I like these better and they were easier to make and the Authenticity Guide says that dealers installed a lot of these on '56 cars. Anyway, it was time to gather up all the "small" parts, which are really almost everything remaining, for a painting session. Most of them got an Alclad treatment. A few were painted flat or semi-gloss black. My favorite semi-gloss is Duplicolor flat black primer followed by Tamiya semi-gloss clear - all rattle cans. I'll stop here but I hope to be back soon with it almost finished - maybe all the way? See you soon! Quote Link to comment Share on other sites More sharing options...
NOBLNG Posted November 4, 2021 Share Posted November 4, 2021 Excellent job on that grill! This is going to be a real looker!👍 Quote Link to comment Share on other sites More sharing options...
doorsovdoon Posted November 20, 2021 Share Posted November 20, 2021 Beautiful detailed grille. Nice work. Quote Link to comment Share on other sites More sharing options...
slusher Posted November 20, 2021 Share Posted November 20, 2021 Really fantastic work! You grill looks great….. Quote Link to comment Share on other sites More sharing options...
David G. Posted November 29, 2021 Share Posted November 29, 2021 Beautiful work on the grille and hood! David G. Quote Link to comment Share on other sites More sharing options...
mr moto Posted December 6, 2021 Author Share Posted December 6, 2021 Today's Adventure: Final Assembly or "Don't Worry, It'll Buff Right Out!" As usual for me, final assembly became an adventure in damage control. I really need to figure out damage prevention! But in the end, things have turned out pretty well. Progress has been slow with not a lot of time at the bench and I haven't really been pausing to take pictures very much while working but here are a few "highlights". I added a very minor detail but one that I thought was necessary - windshield washer nozzles. Since I went through the trouble of adding the reservoir (just a bag in those days) for the optional washer I had better include the nozzles! These are just some very small styrene rod inserted from below into pre-drilled holes. Push them up to the right height, glue and trim from below. Here's another one that I liked doing. The hood support rod can be raised and lowered like the real thing and even has a little bracket to rest in when it's down. I tinted the windows with a mix of decanted Testors transparent blue and green. The recipe is 4 parts green, 1 part blue and 5 parts thinner. Since I was using decanted paint, it was already thin spray without that extra thinner but it helps with preventing too dark a tint. I always mask off the outside of the "glass" a light colored tape so I can tell how dark the tint has gotten - don't use the blue tape or you can't tell. The lower one in the picture is before tint and the upper one is after. Foiling was complicated by the current unavailability of good bare metal foil. I have some new foil ordered but there's no telling when they'll be shipping again or how the foil will be. I ended up piecing the job together from the remnants of old sheets. It worked but not the finest job ever. I never have been able to get a good foil job on the narrow pieces at the back of the vents so I just brush paint them with a little Molotov. Now it was time to attach the hood but not before I managed to do this. I pieced it back together with a reinforcement and then attached it to the body by installing some tiny pins (Hobby Lobby sewing dept.) as retainers. You can see in this photo just how rough a resin body I started out with. In hindsight, I should have gotten the inside just as smooth as the outside at the beginning of things. Here's a couple of pictures of assembly and finishing bloopers. These don't even show half of the story but it'd hard to stop and shoot photos in the middle of stressful damage discoveries. The Molotov smears on the paint did buff out just fine.! The rear view mirror needed a very fine wire pin installed to hold it together but so far, so good. Like I said these are just a few among many but things have worked out a pretty good conclusion. I'll be posting in Under Glass later when I get a little more time. Thanks for looking and even more thanks for all the appreciation!! Quote Link to comment Share on other sites More sharing options...
afx Posted December 7, 2021 Share Posted December 7, 2021 Impressive work. Quote Link to comment Share on other sites More sharing options...
drodg Posted December 7, 2021 Share Posted December 7, 2021 Wow. Unbelievable Quote Link to comment Share on other sites More sharing options...
Smitty Posted December 7, 2021 Share Posted December 7, 2021 Beautiful work Manuel! I really admire your attention to detail and your dedication to getting it ‘Right’. Quote Link to comment Share on other sites More sharing options...
NOBLNG Posted December 7, 2021 Share Posted December 7, 2021 Fantastic job Manuel ! Your attention to detail is impressive. 👍 Quote Link to comment Share on other sites More sharing options...
Recommended Posts
Join the conversation
You can post now and register later. If you have an account, sign in now to post with your account.
Note: Your post will require moderator approval before it will be visible.