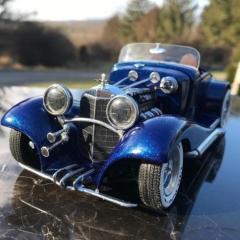
Nosferatu Posted September 25, 2023 Posted September 25, 2023 (edited) This is what happens when you leave an old truck out in the Arizona desert for a couple decades. It was pulled out of the desert and with a new battery, oil, wires and other bodily fluids she’s back up and running. I had an old glue bomb I bought at NNL East when I lived in New Jersey. I wanted to try my hand at rusting again so I studied rust patterns and came up with this. The color is as close as I could get to the original color. The engine shows oil on the valve cover from sloppily adding oil and the seat has rips and tears. Thanks for looking and I hope you like it. Dave Edited September 25, 2023 by Nosferatu 10
happy grumpy Posted September 25, 2023 Posted September 25, 2023 Excellent weathering, very realistic details. great job on the engine and interior.
espo Posted September 25, 2023 Posted September 25, 2023 I think you nailed the look. Sun baked all summer and left out in the one or two winter rain storms. Left to sit out for a few years and this is what you get. Like the way you did the seats and the rubber floor mat.
Nosferatu Posted September 25, 2023 Author Posted September 25, 2023 5 hours ago, happy grumpy said: Excellent weathering, very realistic details. great job on the engine and interior. Thank you for the kind comment! Dave
Nosferatu Posted September 25, 2023 Author Posted September 25, 2023 1 hour ago, espo said: I think you nailed the look. Sun baked all summer and left out in the one or two winter rain storms. Left to sit out for a few years and this is what you get. Like the way you did the seats and the rubber floor mat. Thanks! It was a fun build. Dave
Zippi Posted September 26, 2023 Posted September 26, 2023 Good looking beater. Still a good ole work horse. Nicely done.
Nosferatu Posted September 26, 2023 Author Posted September 26, 2023 Thanks for your kind comments. Dave
BuilderX Posted September 27, 2023 Posted September 27, 2023 this don't look like a out west truck . this looks like a NY or New Jersey or even a PA truck. Great Job! 1
ncbuckeye67 Posted September 27, 2023 Posted September 27, 2023 (edited) 9 hours ago, BuilderX said: this don't look like a out west truck . this looks like a NY or New Jersey or even a PA truck. Great Job! Same for northern Ohio Lol, but there are no holes Edited September 27, 2023 by ncbuckeye67
ncbuckeye67 Posted September 27, 2023 Posted September 27, 2023 Wow, I feel like I need a tetanus shot just for looking at it! This can't be your 1st attempt at a patina build, too much incredible detail!
Horrorshow Posted September 27, 2023 Posted September 27, 2023 I believe that’s the best weathering I have ever seen. Would really like for you to give a short lesson on your technique and paint choices.
NOBLNG Posted September 28, 2023 Posted September 28, 2023 Excellent job on the rust David. It looks so real you’d swear it was steel.??
Bugatti Fan Posted September 28, 2023 Posted September 28, 2023 Very effective weathering done on this model. Any chance of describing the techniques used?
Jim B Posted September 28, 2023 Posted September 28, 2023 Fantastic build. The weathering looks great.
Nosferatu Posted September 28, 2023 Author Posted September 28, 2023 Thanks for all you kind comments. Dave
Nosferatu Posted September 28, 2023 Author Posted September 28, 2023 On 9/27/2023 at 4:25 AM, Horrorshow said: I believe that’s the best weathering I have ever seen. Would really like for you to give a short lesson on your technique and paint choices. 7 hours ago, Bugatti Fan said: Very effective weathering done on this model. Any chance of describing the techniques used? Thanks! I'll try to explain it. I have done rusting a few times and I still have lots of improvements to learn. There are many Youtube videos on rusting. I studied the videos that only used paint, not the salt method. The other area I studied were pictures of desert rusted vehicles in order to understand where the rust forms. In the west the rust forms on the tops and in the east the rust forms on the bottoms and usually eats away the body and door bottoms. First I painted the truck the stock color. I then started with the darker color first. Black, then the oxides, browns. I also mixed some of the colors together. You need to get a few colors that look like different shades of rust and layer it on (its all about layering colors). I applied the colors with a damp sponge and the dry brush method. To dull the factory color paint I used a very thin black wash. For the final rust I used Sophisticated Finishes - Iron Metallic Surfacer and the Rust Antiquing Solution. This iron metallic surfacer uses fine metallic particles and the antiquing solution oxidized the iron particles and is actually rust. I applied this several times is the areas I wanted thicker rust showing. Colors - Black, white, burnt umber, nutmeg, honey brown, red oxide. For the seat I dremeled away the drivers side seat base where your butt would be to look worn and a bit flattened, I also did it to the back of the seat where your back would be. I did the same to the passengers seat but not to the same extreme. Then I covered the seat with blue painters tape. I like that tape because it has texture. Then I slit the tape after it was applied to the seat and picked it open as if to expose the stuffing. I painted some honey brown between the slits to show that the stuffing was a different color. For the seat corner I opened the tape as if the corner was worn and damaged. I used the same method for the floor mats except I didn’t paint the inside of the slits. Then I used a thicker wash and applied it to the seat with a damp sponge to make it look old and dirty. The nice thing about this is that if you mess up its just water based paint so it is easy to restart if it doesn’t wash off. Here are the paints I used. I hope this helps. These videos may help: https://www.youtube.com/watch?v=DUd_vC-7XEA https://www.youtube.com/watch?v=6PVes5Eiz44 Here is another seat I made for a different build. Here is the link to the model: I used this aluminum wire for the springs and used the rust solutions for the rust.
Bugatti Fan Posted September 28, 2023 Posted September 28, 2023 Thanks for coming back with the techniques explanation David. Made a really interesting read.
Chuck Most Posted November 11, 2023 Posted November 11, 2023 Love the whole thing, but the work you did on the seat in particular deserves it's own commendation. Can't tell you how many old farm trucks I've seen with seat coverings that look exactly like what you created there. Just awesome.
Recommended Posts
Create an account or sign in to comment
You need to be a member in order to leave a comment
Create an account
Sign up for a new account in our community. It's easy!
Register a new accountSign in
Already have an account? Sign in here.
Sign In Now