Janne Herajärvi Posted July 9, 2011 Author Posted July 9, 2011 David welcome, sounds interesting. Terry dont worry about hijacking, this is open topic for all builders who want share their work with Police, Fire, Rescue builds. U know there is always good chance for inspiration from seeing others work I havent done nothing now for my Police car builds since ive been busy with couple other projects, but Impala is so close to get finished so i may get back on it later. "Barricade" needs still tons of body work but ill be back on it too. soon
David G. Posted July 10, 2011 Posted July 10, 2011 As promised, here art the pics of what I've been able to so far. and... More updates soon (hopefully) Thanks for looking. David G.
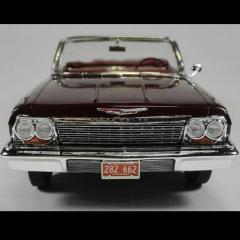
Janne Herajärvi Posted July 12, 2011 Author Posted July 12, 2011 Nice looking chassis David. Is this AMT Taurus or what?
David G. Posted July 12, 2011 Posted July 12, 2011 Janne, Thanks for your comment. Yes, it is the AMT Taurus police car molded in black styrene and repackaged as the official Robocop 2 movie police car. There are a few differences between the kit and the car used in the movie, so it won't be a replica, more of a representation. And it's not a highly detailed kit, though it sounds as if you may be familiar with it. I'm wet-sanding the body now and deciding on how best to work with the flat black paint and decals; the two don't work well together. I think I'll paint it with semi-gloss black, apply and fix the decals, then hit it with dull coat. I'll get some more pics posted as soon as I have something worth looking at. Thanks again for your comments and thanks for coming up with the CBP, without it, I may never have built this kit. Regards, David G.
David G. Posted July 31, 2011 Posted July 31, 2011 It's time for a minor update on my RoboCop Police car. I finally got the interior done. I made a third brakelight from an old taillight lens with a bit of foil glued to the back. I replaced the security cage window with a wire mesh more like the one in the movie car. I also fashoned a mic from a bit of styrene, added a cord and attached them to the dash. I know it's not much, but I hope you enjoy it. Thanks for taking the time to look. David G.
Danno Posted July 31, 2011 Posted July 31, 2011 Looking good, David. 'Approving' smiley would go here.
Agent G Posted August 1, 2011 Posted August 1, 2011 Winking, nodding, and approving smiley! I really got to finish that Impala...............frown smiley here. G
David G. Posted August 1, 2011 Posted August 1, 2011 Thanks G and Danno. Maybe I'll get this one done. If I do, it'll be the first for 2011! David G.
Janne Herajärvi Posted August 3, 2011 Author Posted August 3, 2011 Looking good guys. This time i have something to show too. Barricade is movin slowly forward. I havent find correct looking wheels but ones i have has atleast 7 spokes like original barricade has. Started some chassis work and also painted first part for engine No, you are not going to see engine on original colors, i`ll mix and match colors to my taste how it could look
cargostar Posted August 3, 2011 Posted August 3, 2011 After finally getting some motivation, here are a couple of my builds I would like to try and finish...... Ford C-Cab Hy-Ranger Platform, Mack/Superior 100' mid-mount aerial, 84 Chevy 1 ton mini-pumper, Mack/Anderson Bronto Platform, Ford C-cab Rescue.
Chuck Most Posted August 4, 2011 Posted August 4, 2011 No timeline just join in and use your time what you need. Your model can be "what if" Police car or Fire truck, why not rat rod ambulance...its your choice... Have fun. No timeline? Yeah, I think I can jump in with a rat rod ambulance! Or maybe a rat rod brush truck. Either way, I'm in!
Janne Herajärvi Posted August 4, 2011 Author Posted August 4, 2011 Great, welcome Chuck. Good lookin fire truck projects Dave
Chuck Most Posted August 5, 2011 Posted August 5, 2011 Really liking what I see here- just hope my project doesn't train wreck it!
Chuck Most Posted August 5, 2011 Posted August 5, 2011 Started on the Ambulance. It is a Beverly Hillbillies Olds truck kit, with the suspensions from a Revell '41 Willys SWC/Mazmanian kit. The engine is a booooring Chevy small block, but I jazzed it up with a Potvin blower and some wild headers. I also mocked up a cowl from a junk '32 Chrysler body, just to see how it would look. The body will probably end up being all or mostly scratchbuilt.
diymirage Posted August 5, 2011 Posted August 5, 2011 i really oughta post some pis of my entry, i finished it a few weeks ago but havent had a chance to take pics at all
Airfilter Posted August 6, 2011 Posted August 6, 2011 Dave, great projects. Chevy mini pumper, Ford C cab Rescue, these are my favorites. Chuck, alias Mr. Rat Rod, or Peggy looking good so far.
SteveG Posted August 6, 2011 Posted August 6, 2011 Here's some photos of my Michigan State Patrol Dodge Charger build up already in progess ........ I have the 5.7 litre engine ready to install ...... and in the chassis ready for the cooling parts and underhood components .... ..... the finished engine bay. I added a photo etched coolant cap, washer bottle decal, and a piece of fine line aluminium stripe tape for a air duct clamp. The rest is straight out of the box. Almost ready for the body, just a few more interior details first. I've got this moving along pretty quickly now, I'll add more photos soon ..... -Steve
David G. Posted August 7, 2011 Posted August 7, 2011 There's some good stuff going on here, I like the idea of the Rat Rod Ambo and the Dodge is coming along nicely. David G.
Chuck Most Posted August 7, 2011 Posted August 7, 2011 I'm already forming a bond with the Michigan State Trooper Charger- VERY familiar with those.
Chuck Most Posted August 8, 2011 Posted August 8, 2011 Did some of the body on the ambulance- will need a roof, and a few other doodads, but here's today's progress-
Aaronw Posted August 11, 2011 Posted August 11, 2011 I'm finally starting to make some progress. The 1950 USFS fire engine has the cab started and as a bonus I've started work on a Hummer fire engine using the Revell snap kit
SteveG Posted August 15, 2011 Posted August 15, 2011 I've got the interior almost finished, I modified the laptop to look more like what's in my MSP reference photos and I revised the mounting bracket to bring it closer to the center console. The stock parts are on the left. Before the interior can be installed I have to mount up some rear deck LED's. The kit ones look correct but I need to change there position slightly. I also have to install the headliner & upper interior trim. I should be getting pretty close to the final assembly soon. -Steve
Recommended Posts
Create an account or sign in to comment
You need to be a member in order to leave a comment
Create an account
Sign up for a new account in our community. It's easy!
Register a new accountSign in
Already have an account? Sign in here.
Sign In Now