All Activity
- Past hour
-
I’d rebuild them and I remember seeing old cool cars in junkyards around here many years ago.
-

'32 Ford Roadster.......there can never be too many, right?
Phildaupho replied to Andrew McD's topic in Model Cars
Good looking Deuce. Great colour choice. Totally agree - there can never be too many -

Do you also have 1:1 project cars?
redscampi replied to ctruss53's topic in General Automotive Talk (Trucks and Cars)
Transformation has begun!
-
Here it is with my Scale-Master decals applied.
-
Do you also have 1:1 project cars?
redscampi replied to ctruss53's topic in General Automotive Talk (Trucks and Cars)
Like this? :)
-

Lindberg's '53 Ford - following the instructions
customline replied to customline's topic in WIP: Model Cars
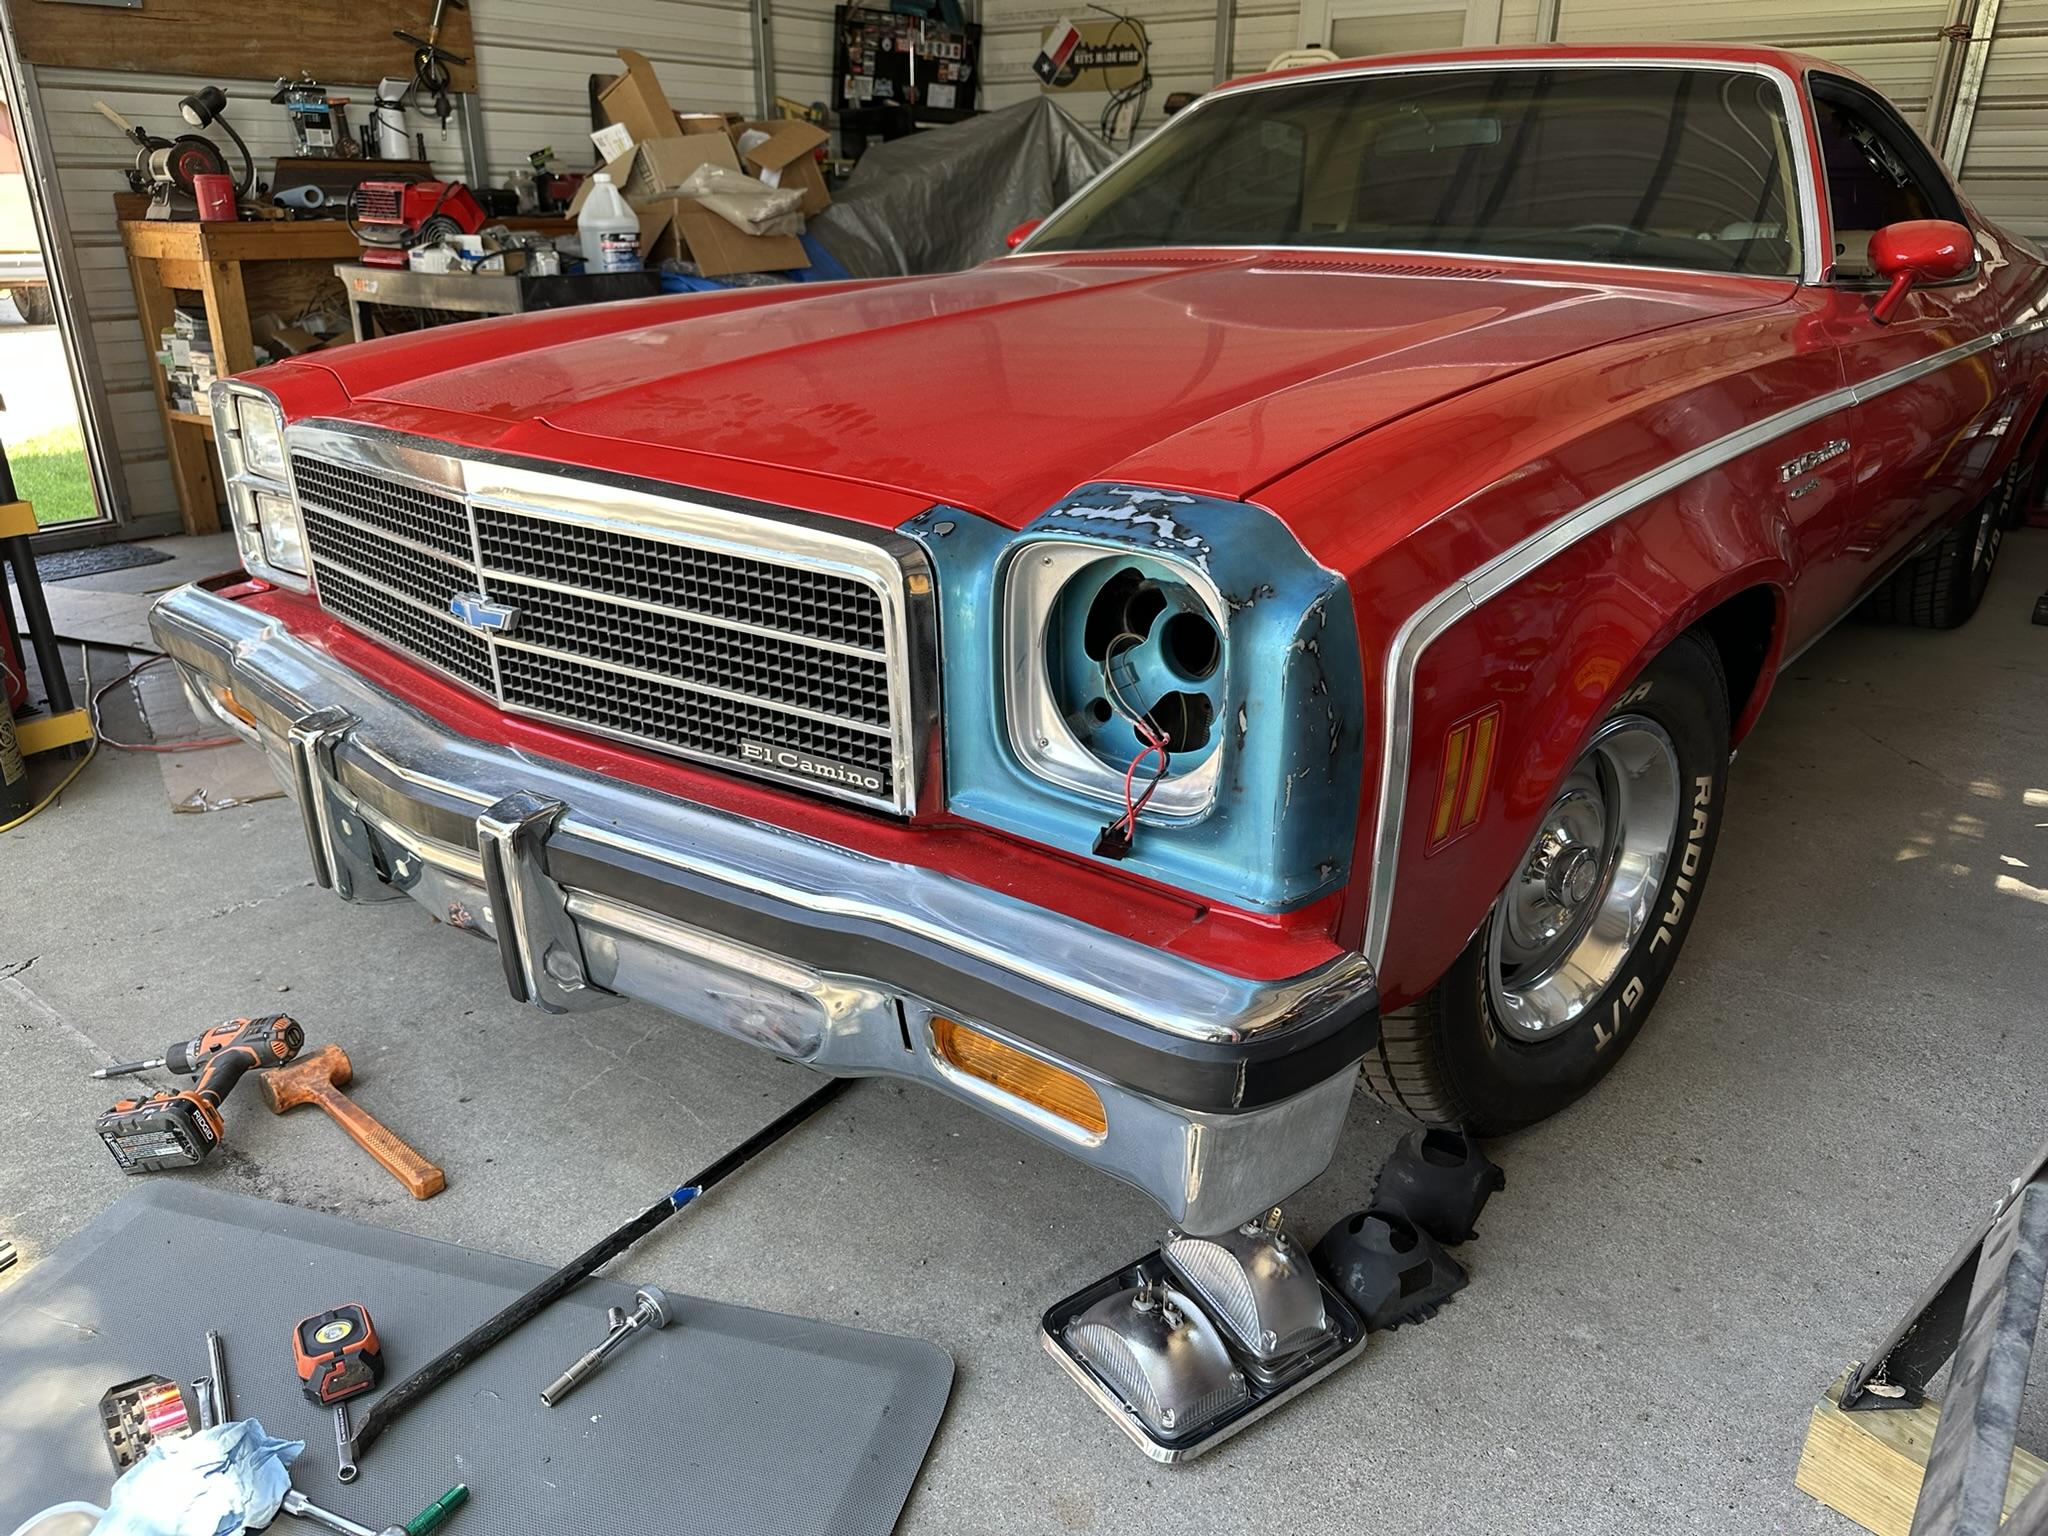
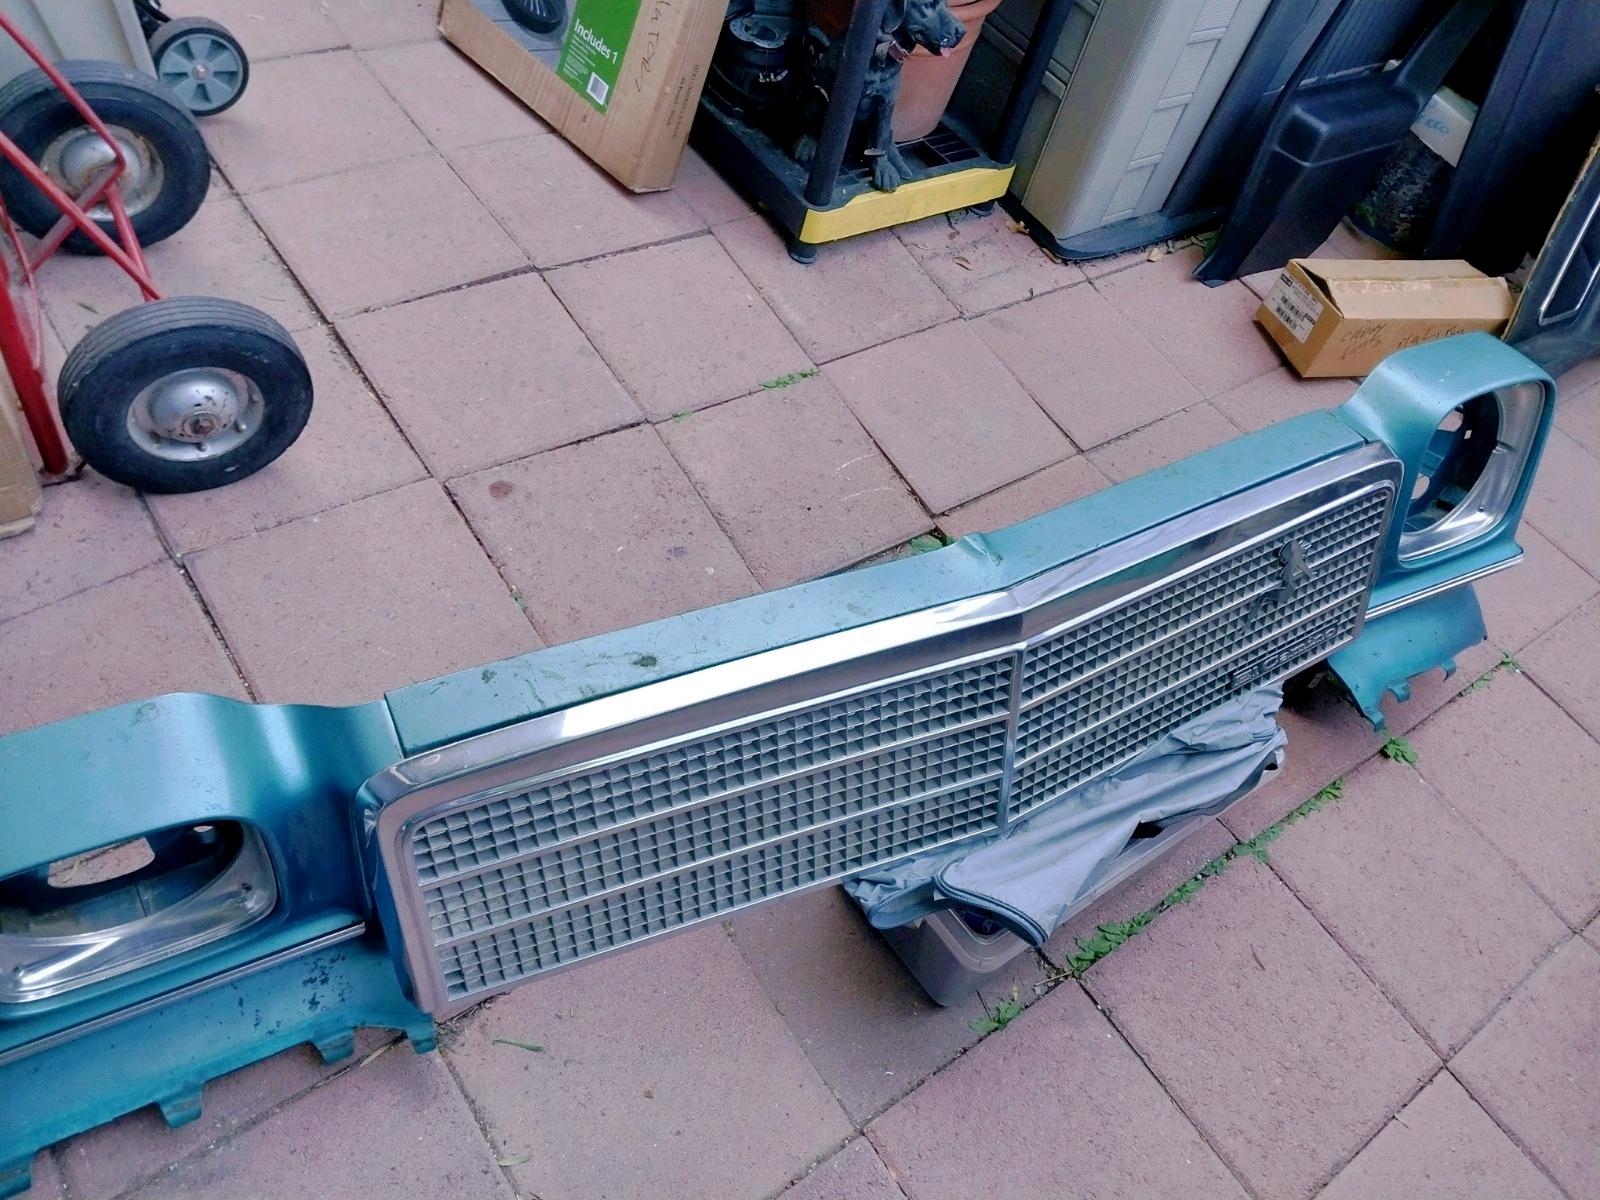
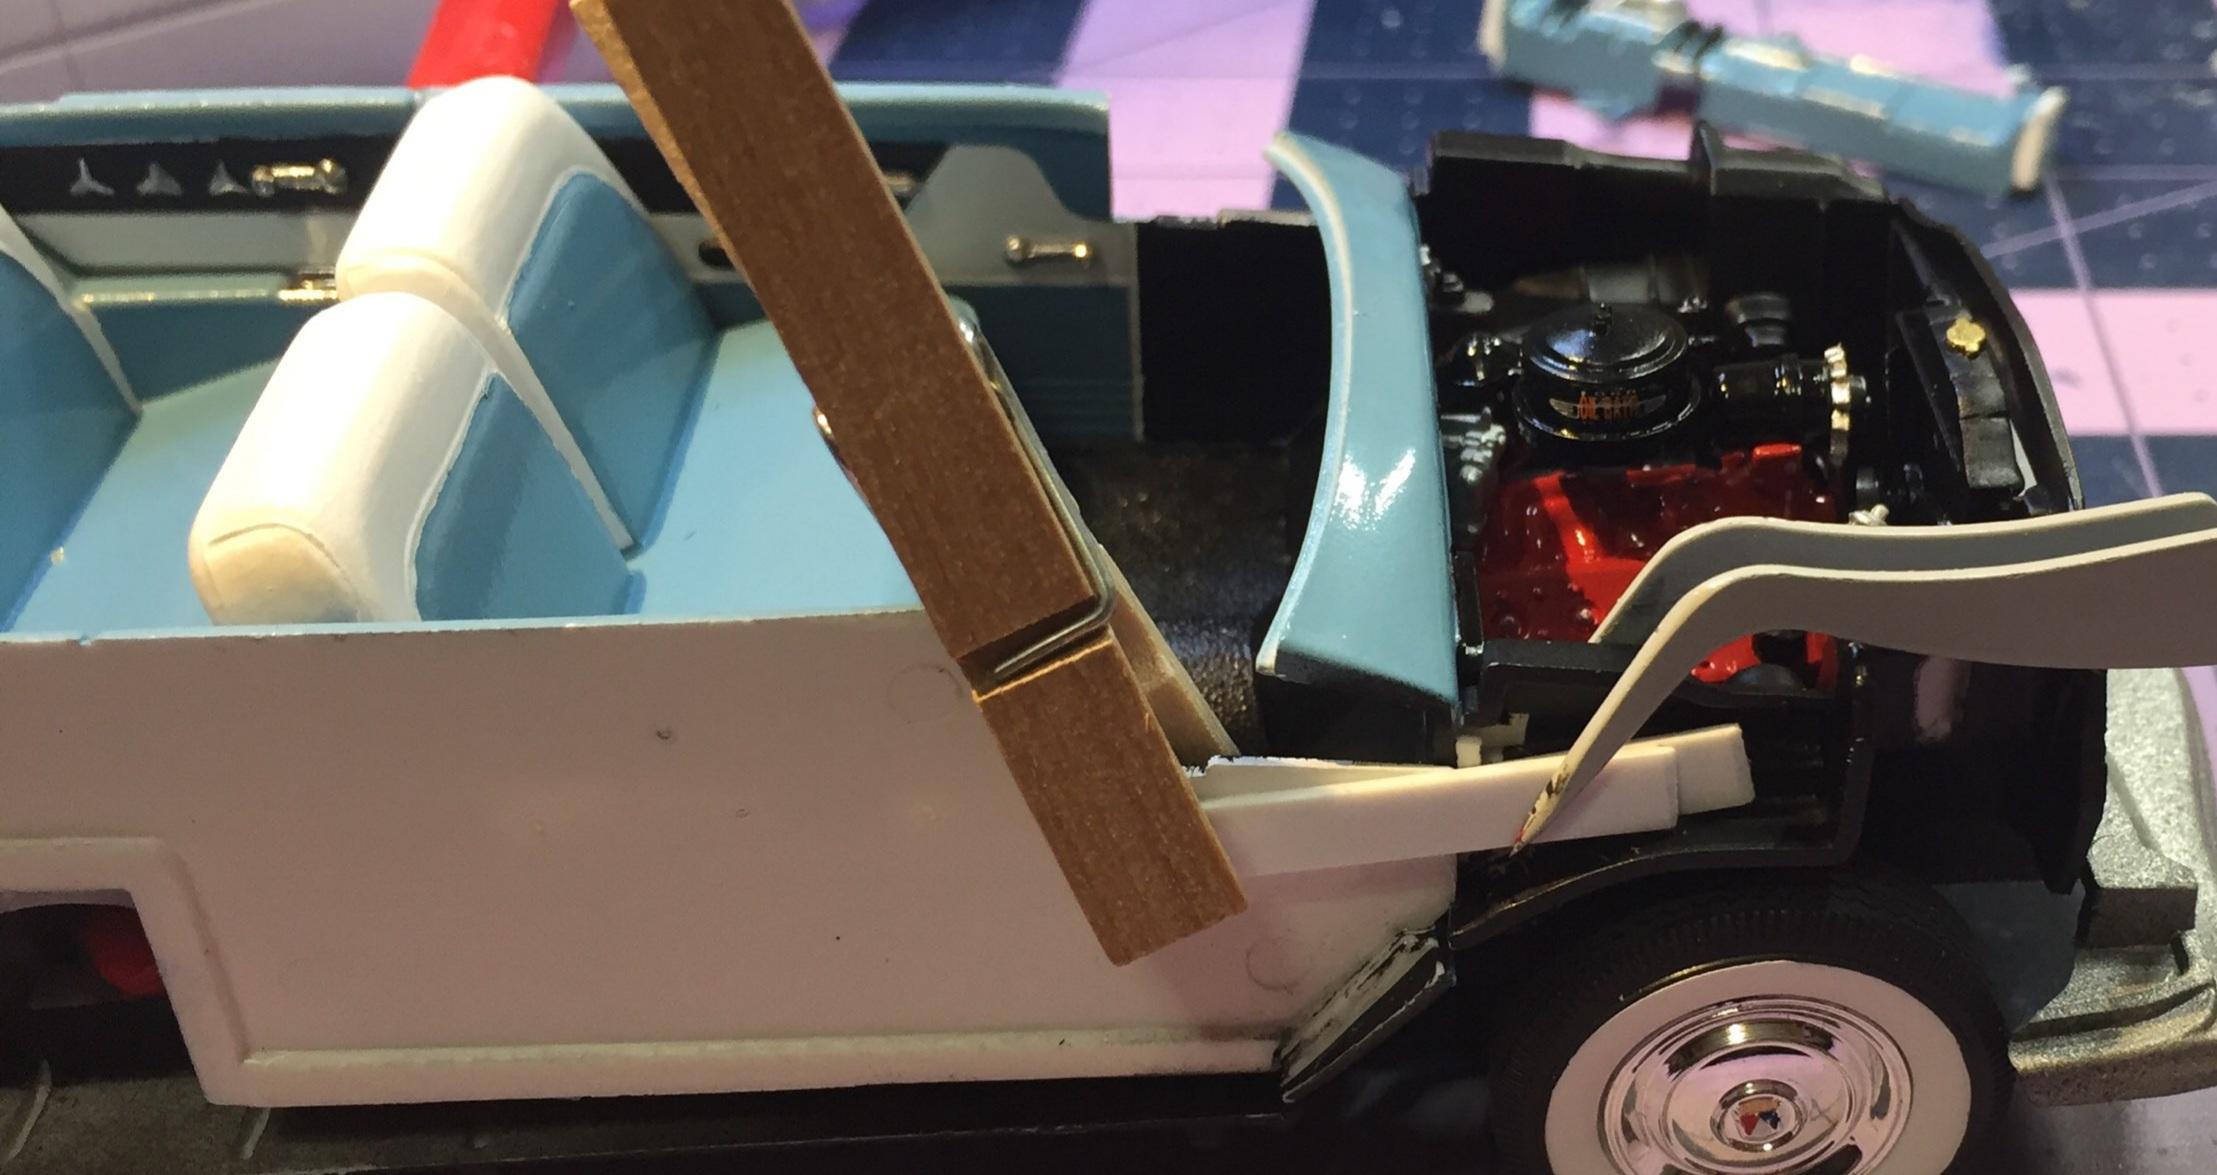
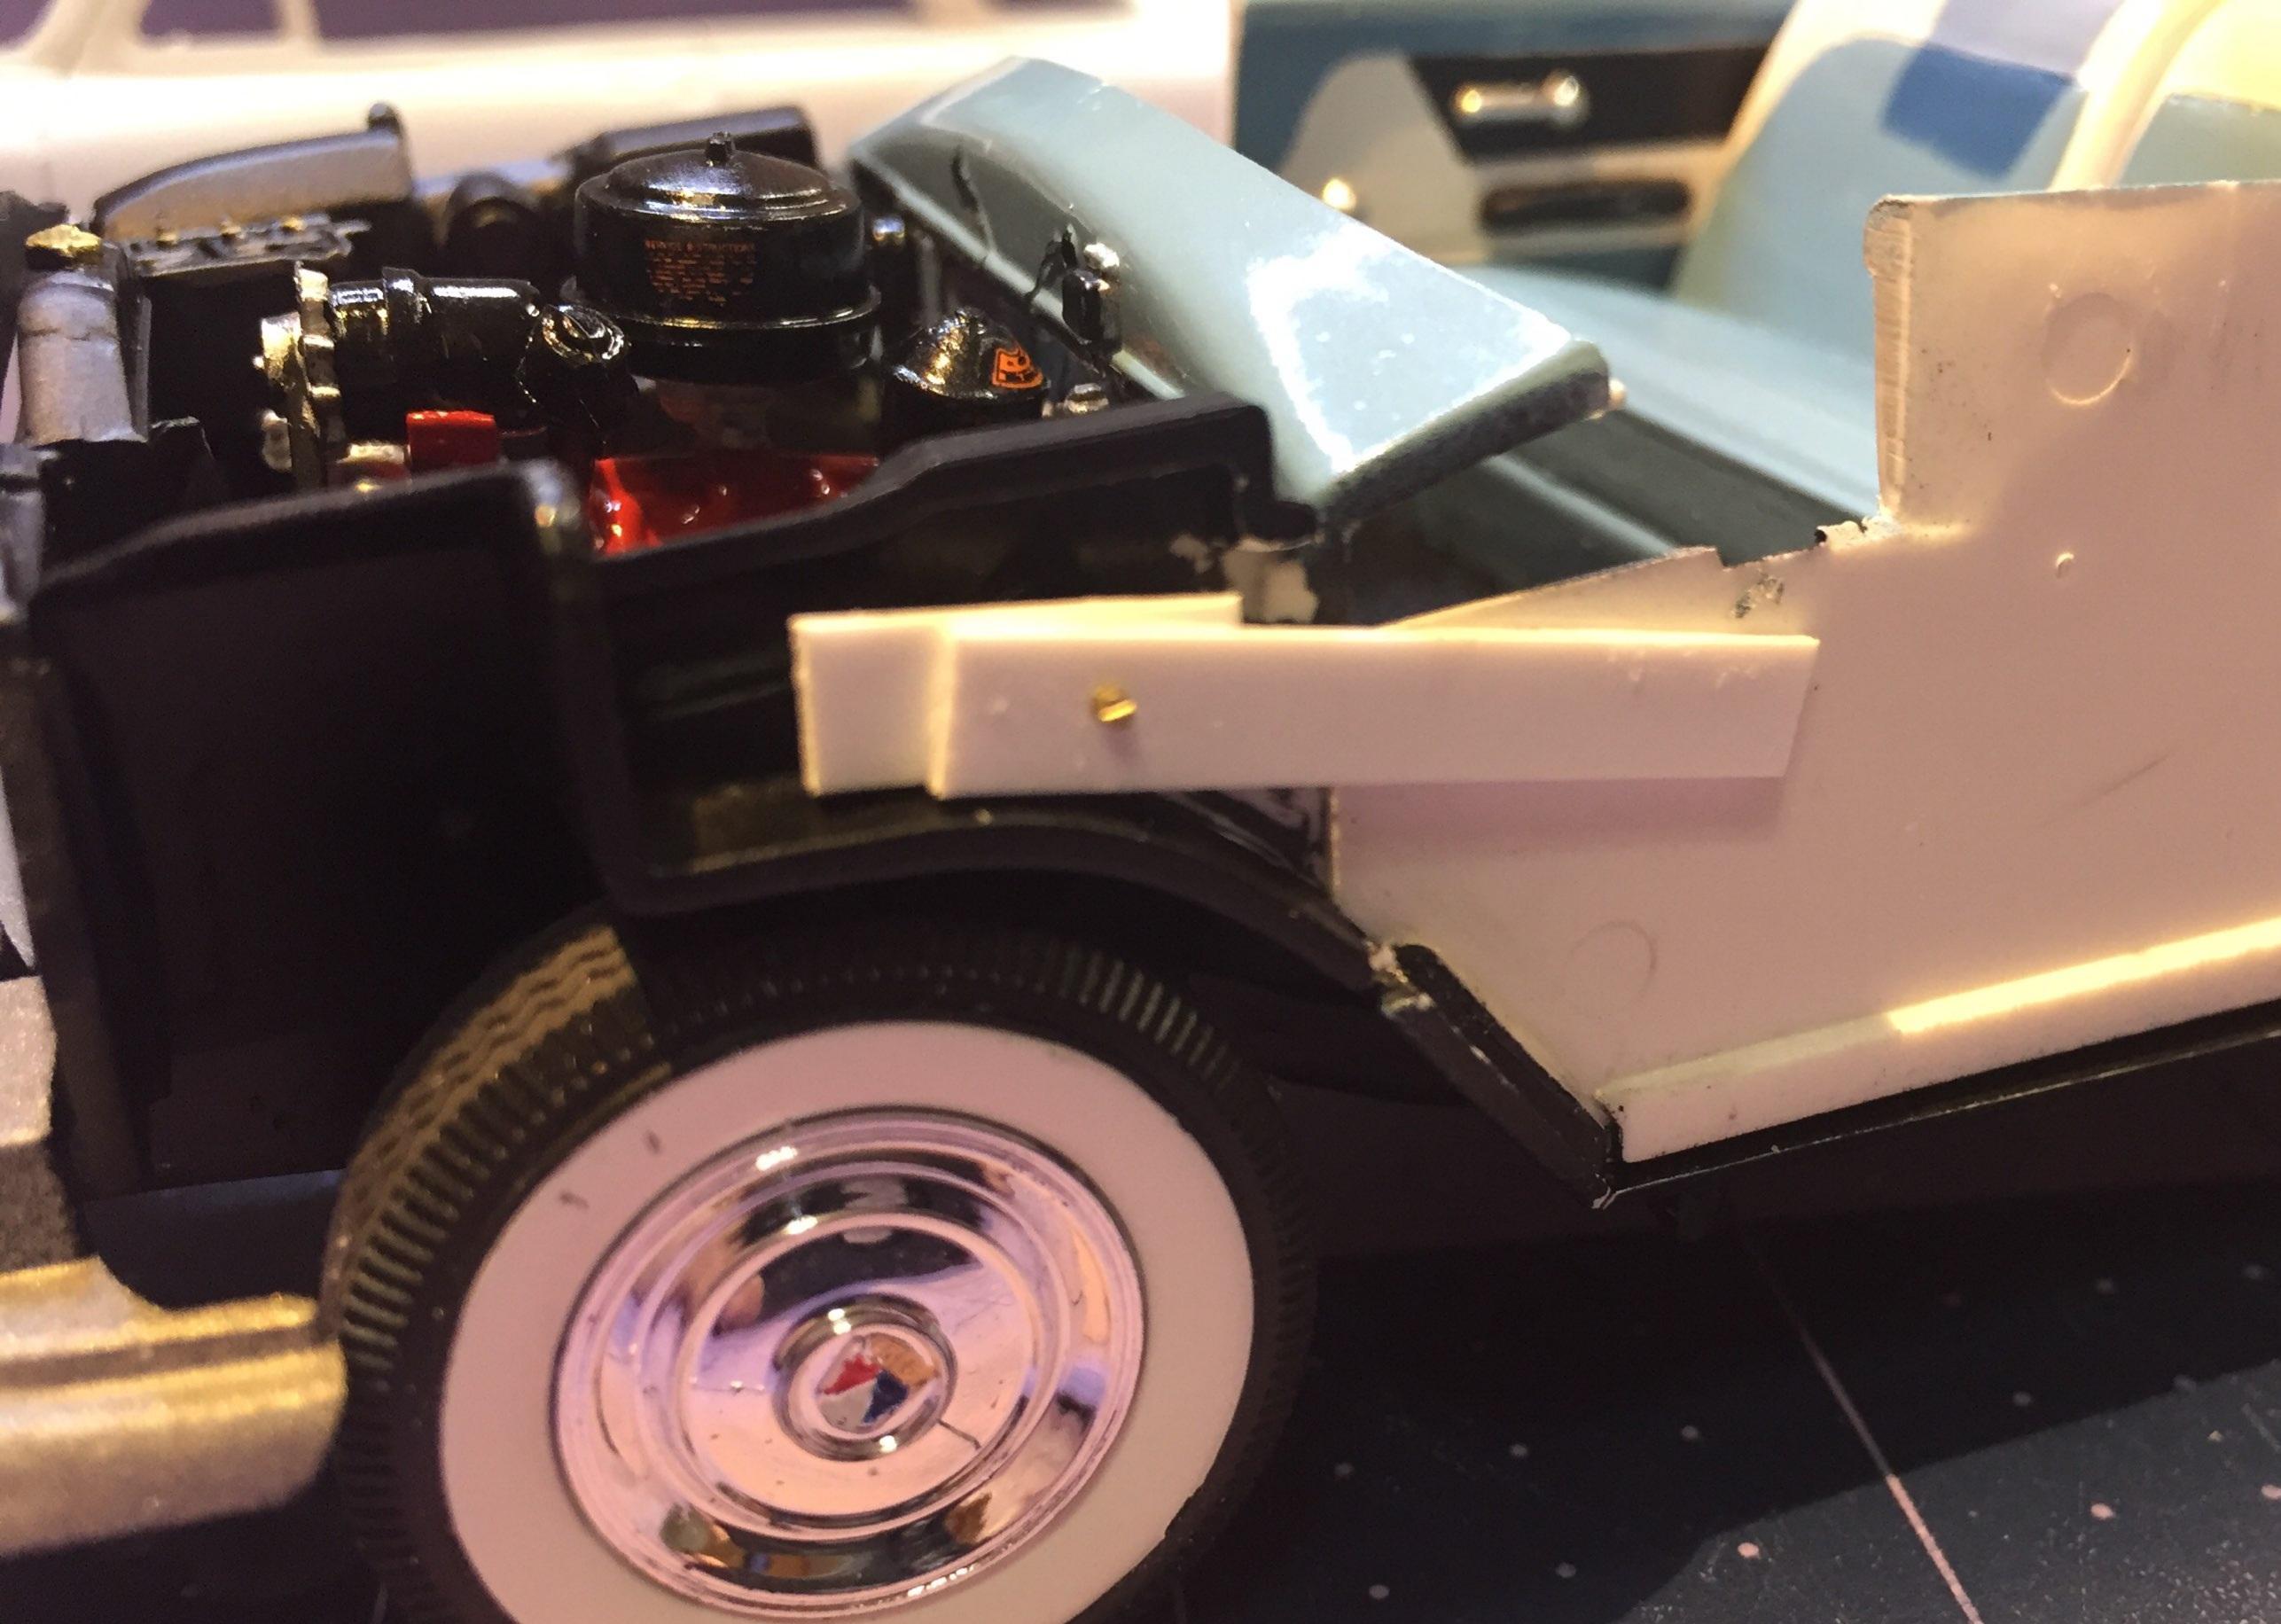
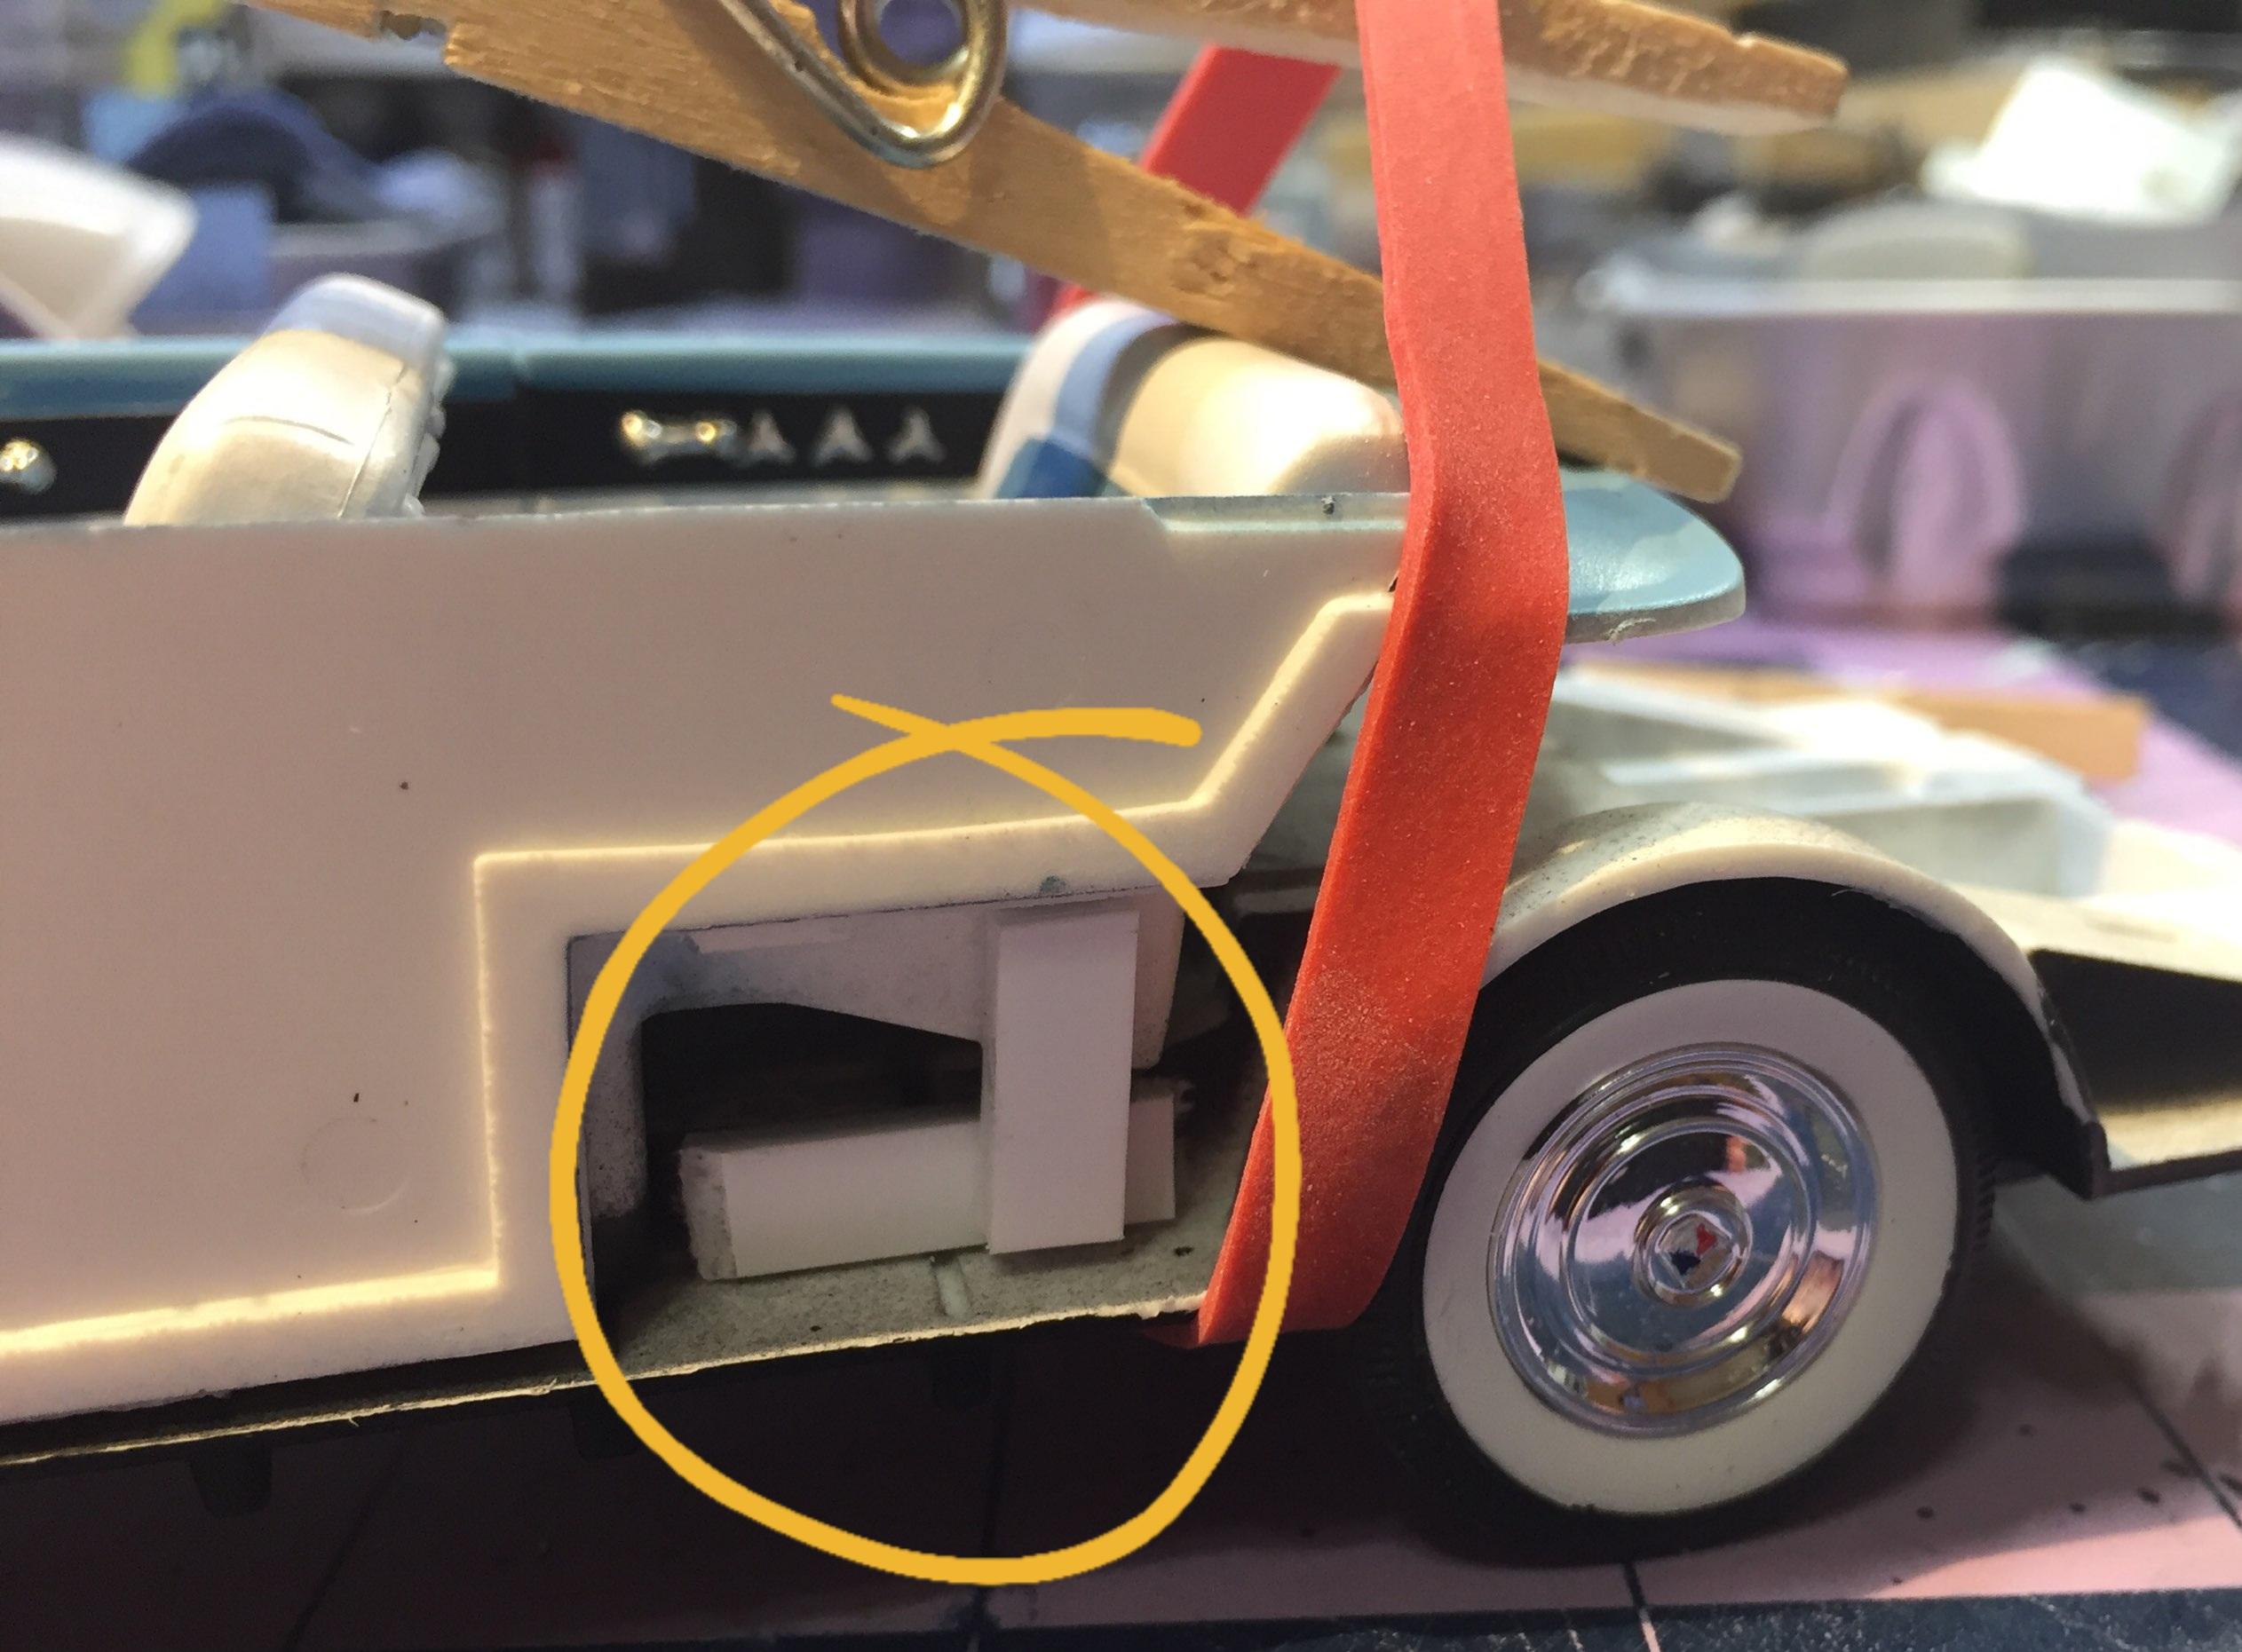
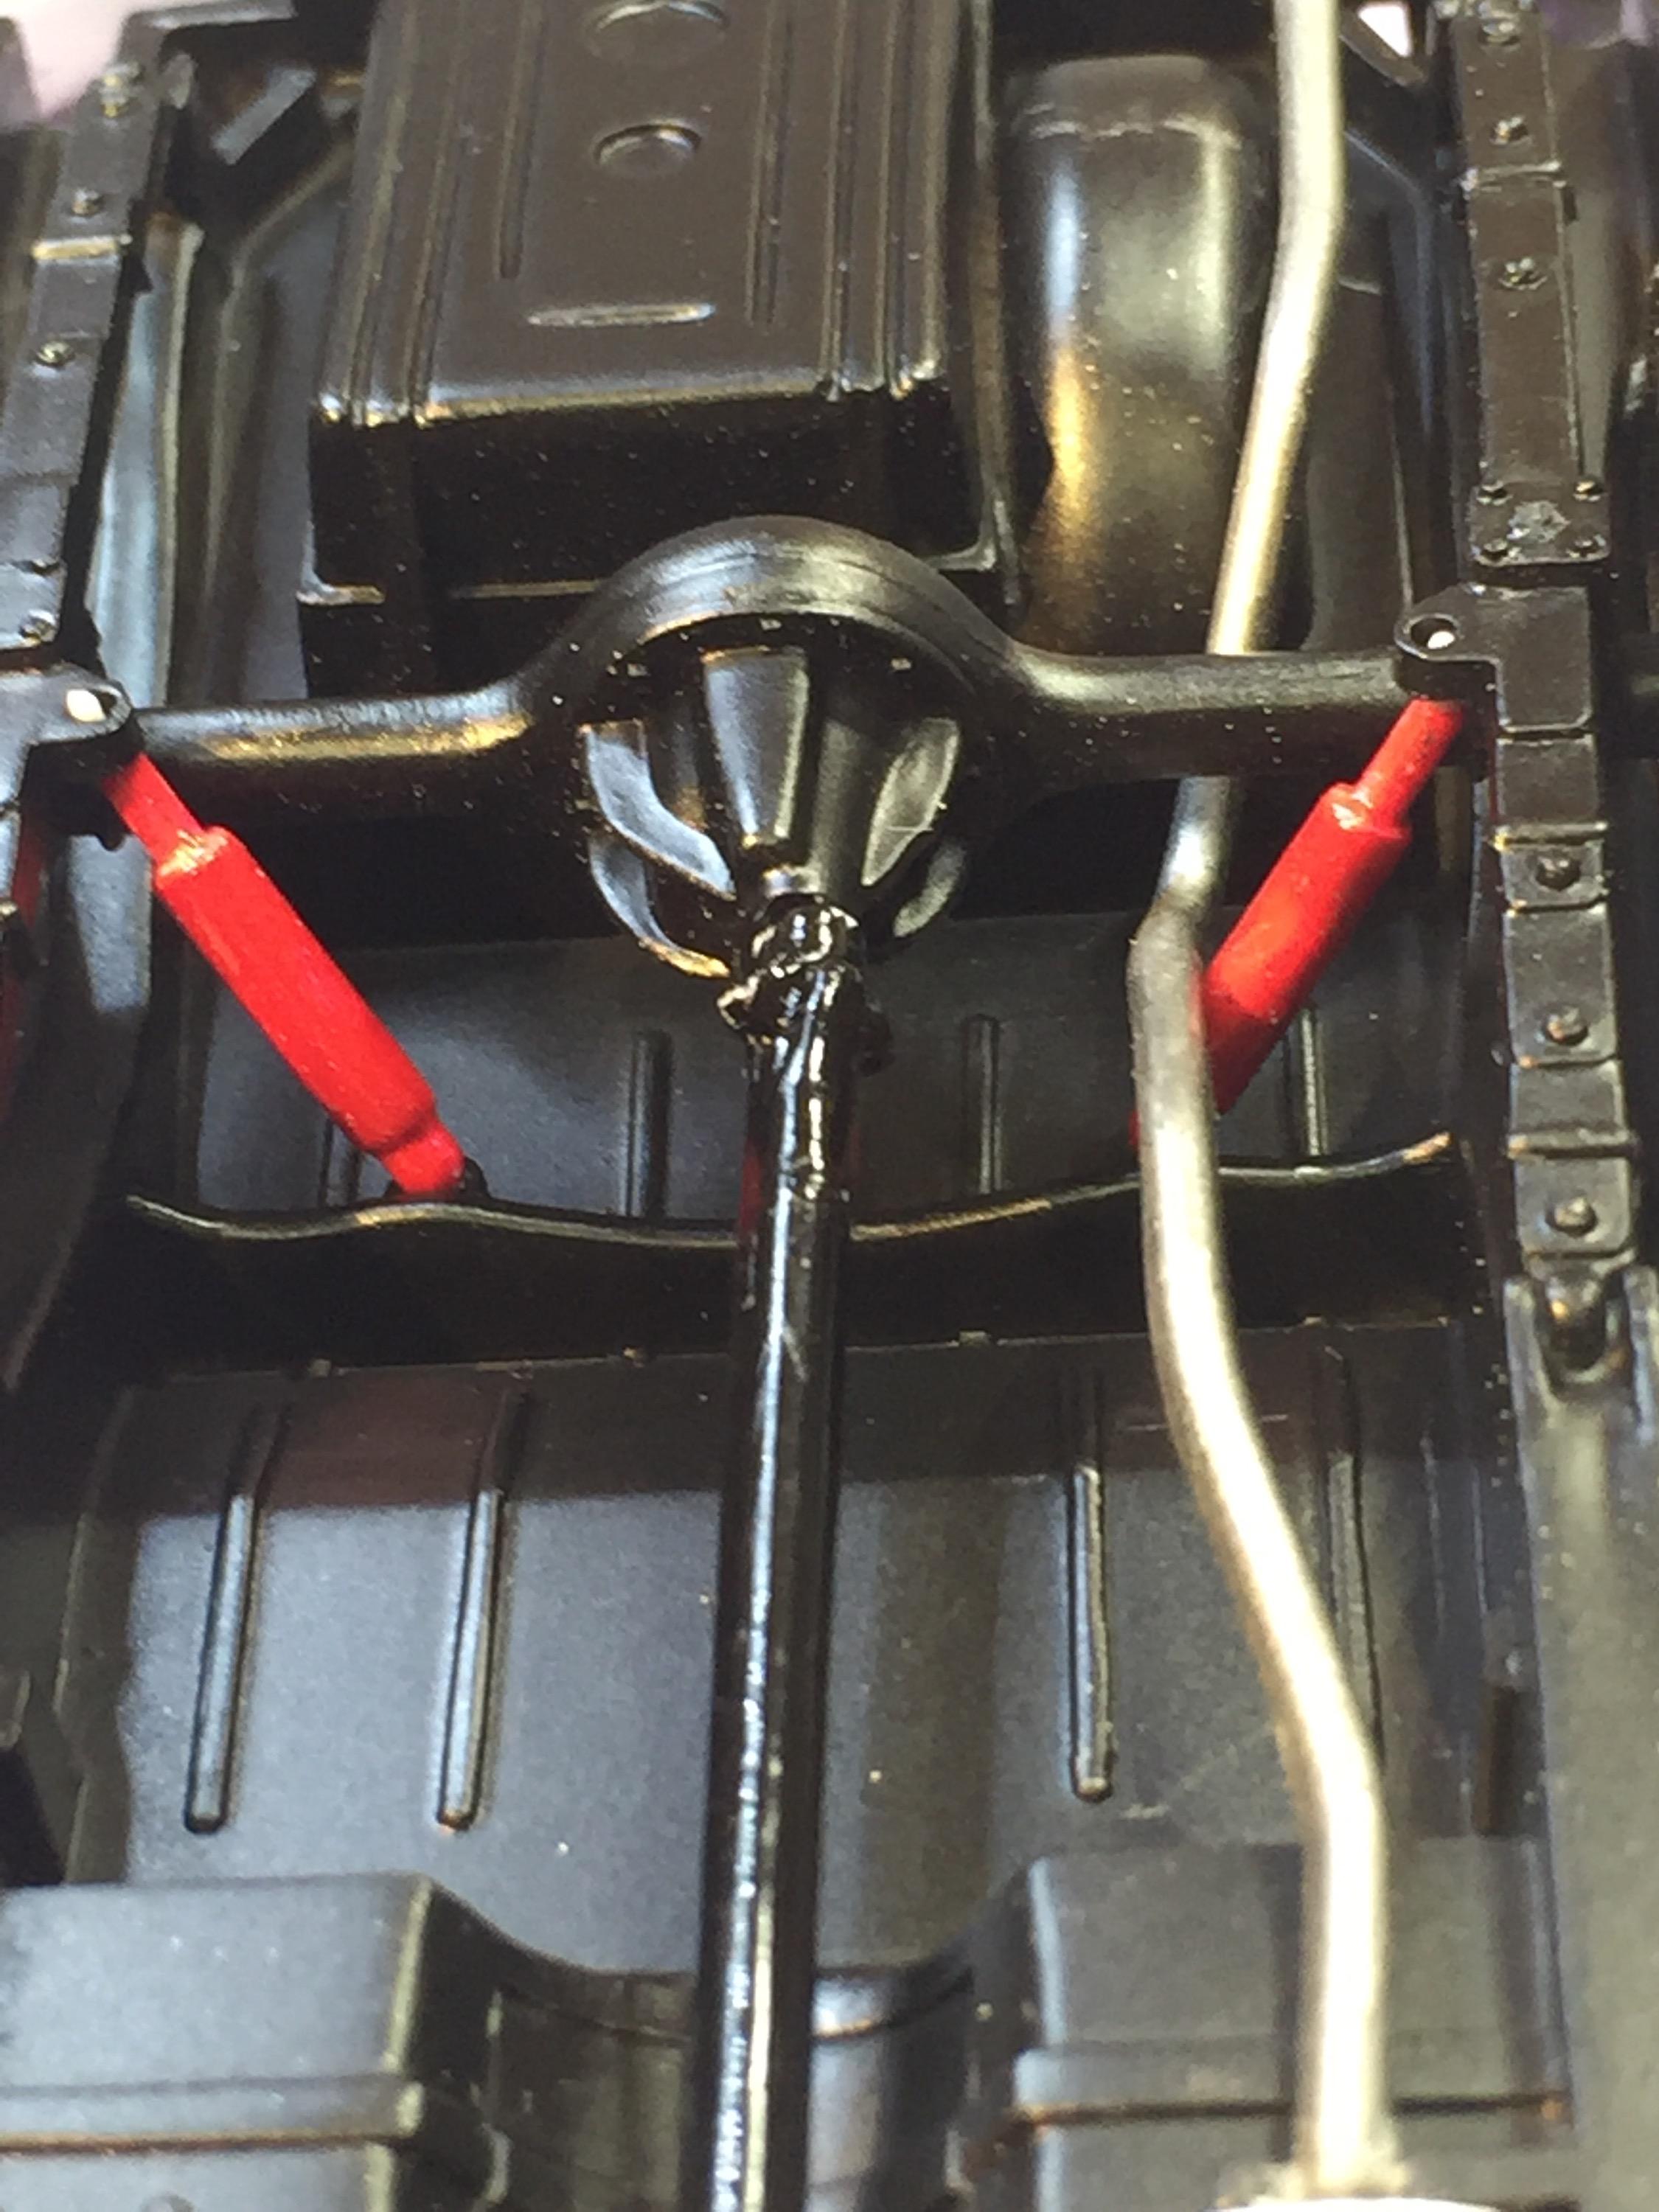
In my previous post I mentioned the warped chassis issue. I decided to tackle that today. It was way too late in the game to heat it and bend it so what I did was secure the front of the interior (the firewall) to the inner fender/radiator support assembly which has been glued to the frame previously. I added some heavy members for reinforcement and inserted brass pins for extra security. The first pic shows the firewall bonded to the inner fenders with some Evergreen added. Notice the angle of the interior tub to the chassis. Here it is with pin in place. The pins go through the inner fender panels and a bit of s g black hides it. Evergreen was welded to the chassis in the rear to get a good base for a strong attachment. Using the leverage of the tub at the rear to bring the assemblies together, and then, under tension of the rubber band I then bonded the styrene strips It worked but not 100%. The left side came together and there is a smaller gap on the right but it needs a pretty good squeeze to get contact. If I was doing a "beater" I'd just leave it hang. Oh...and..... There now. Both upside-down. 😂 During the work, the steering box mysteriously became detached (sure, now it falls out.) I had a dandy time with that. It made the right front Firestone breaking off pretty tame in comparison. A good time was had by all.
-
is this the original issue of this kit ? No bar codes of any kind. Metal axles etc
-
I originally built it on the fly so I never measured it. However, I just checked and it's about 20 inches long x 12 1/2 high x 13 deep. I was aiming for something small enough for a desktop sized that would still allow for any sized model.
-

What Did You Have for Dinner?
JollySipper replied to StevenGuthmiller's topic in The Off-Topic Lounge
Steve man, you should open a restaurant, or at least write a cookbook! All your food pics make me hungry................ -
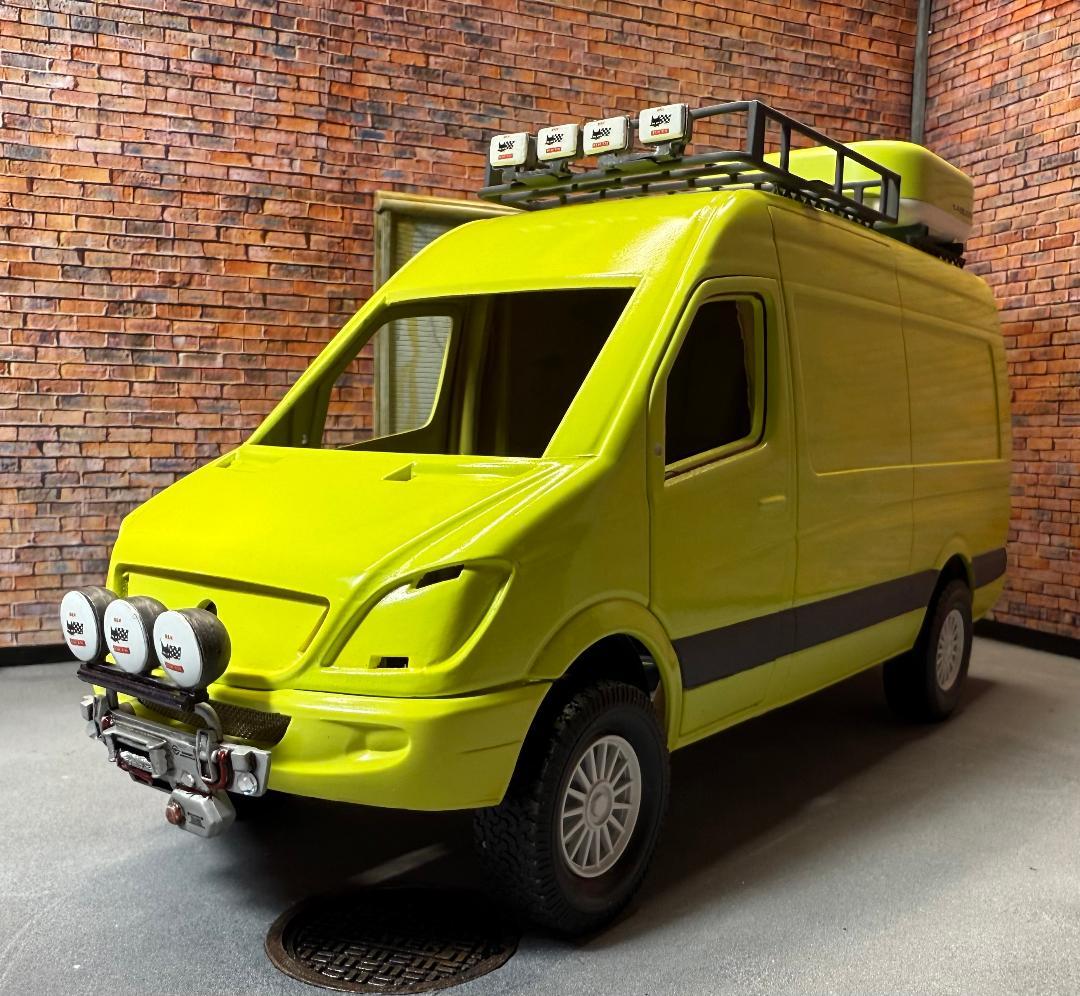
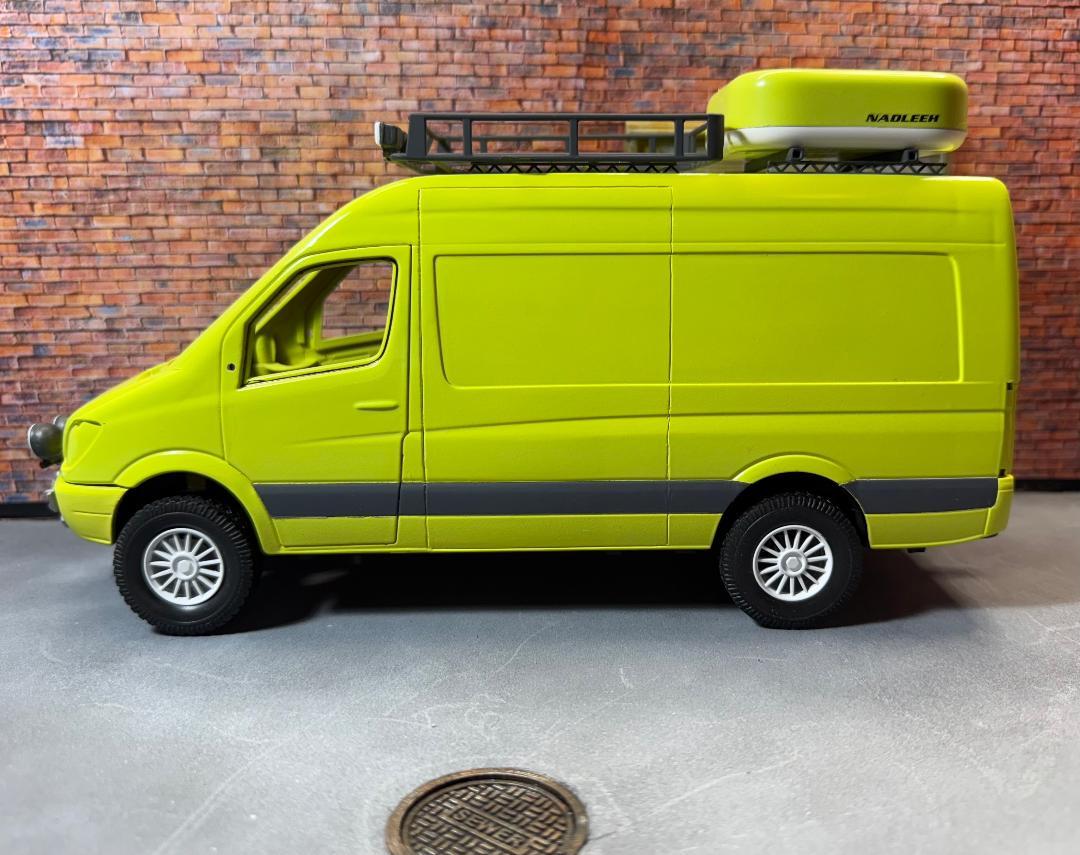
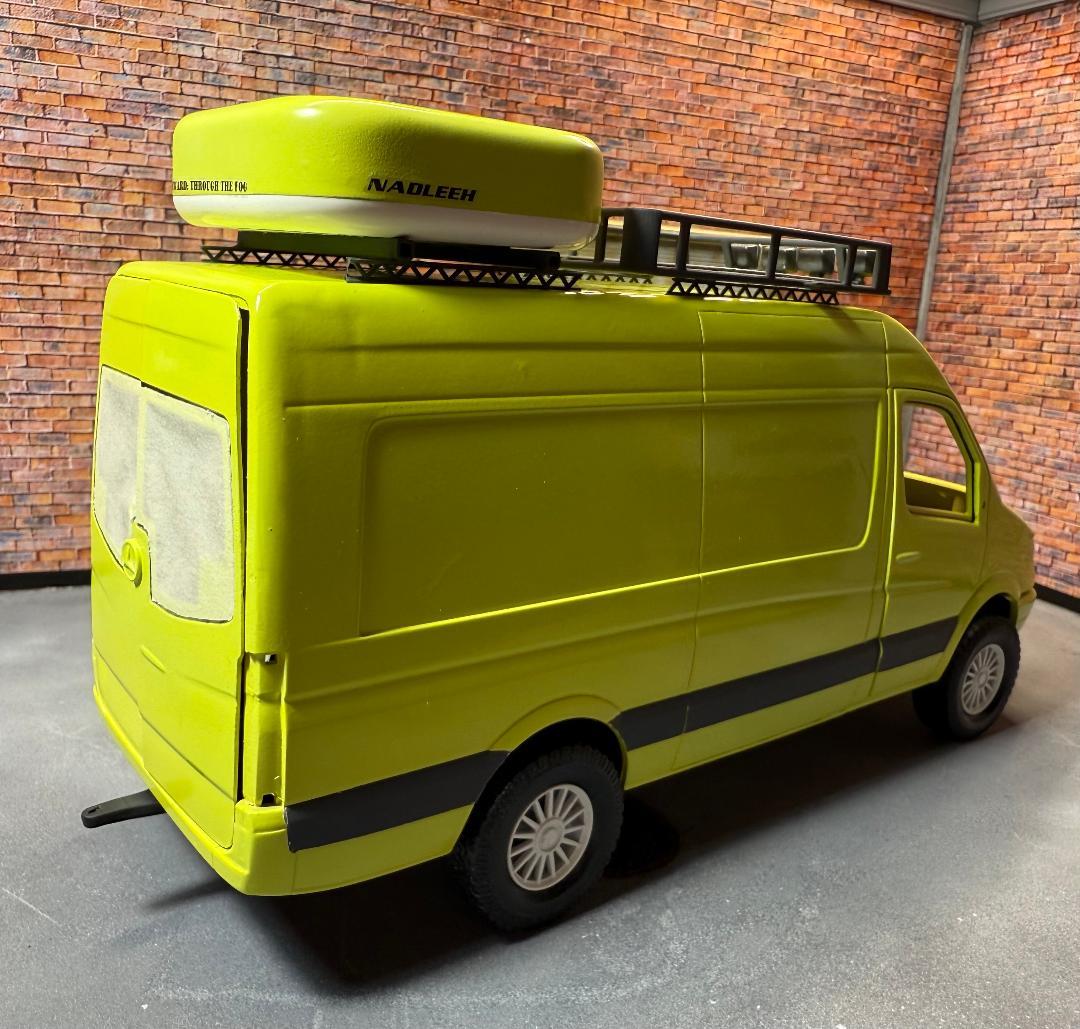
 Well, first of all, a weather report. we had clear skies today and the ground is practically steaming in the sun. It seems the rain has finally passed our area. It was hot and humid, but that's better than what we had the last few days. I did have a leak somewhere in the shop yesterday. I was working and looked down to find a stream of water at my feet. I think it probably built up outside and found an entry point. No damage really done except for a box of old magazines. With the A/C running full blast today, the shop was comfortable so I got a few hours work done on the van. Being the impatient sort, I had to do a test fit to see how things looked and am pretty well satisfied. The chassis is a simple flat casting with rudimentary drivetrain details cast in so it'll stay a curbside. I did raise the ride height to sit more like a 4x4 Sprinter. No big deal, just lowered the axles in the chassis. The wheels are a set of Pegasus Spiders found in a box and stripped of their chrome. They were painted white to look like something you might see on a rally car. The label says they are 22 inch and they fit perfectly on a set of off road tires from a totaled Maisto 4x4 diecast. The push bar on the front and the roof top cargo are about where I want them. I'll need to scrounge up a ladder somehow. By the way, the roof rack is a 3D print by Hooligan Scale Models from Etsy. They have some good products at a good price. The rear box is an Apple Airpod box repurposed. The auxiliary lights are made from a mold I made. I tried some UV resin and they aren't perfect, but not bad for a first try. Definitely need something stronger to cure it than a small UV flashlight. I hope to have the van finished soon. Still looking for ideas for the headlights, but everything seems to be falling into place.
- Today
-
Very nice looking Ford. Well done.
-

'32 Ford Roadster.......there can never be too many, right?
Jim B replied to Andrew McD's topic in Model Cars
Great looking roadster. Love the color. Well done. -

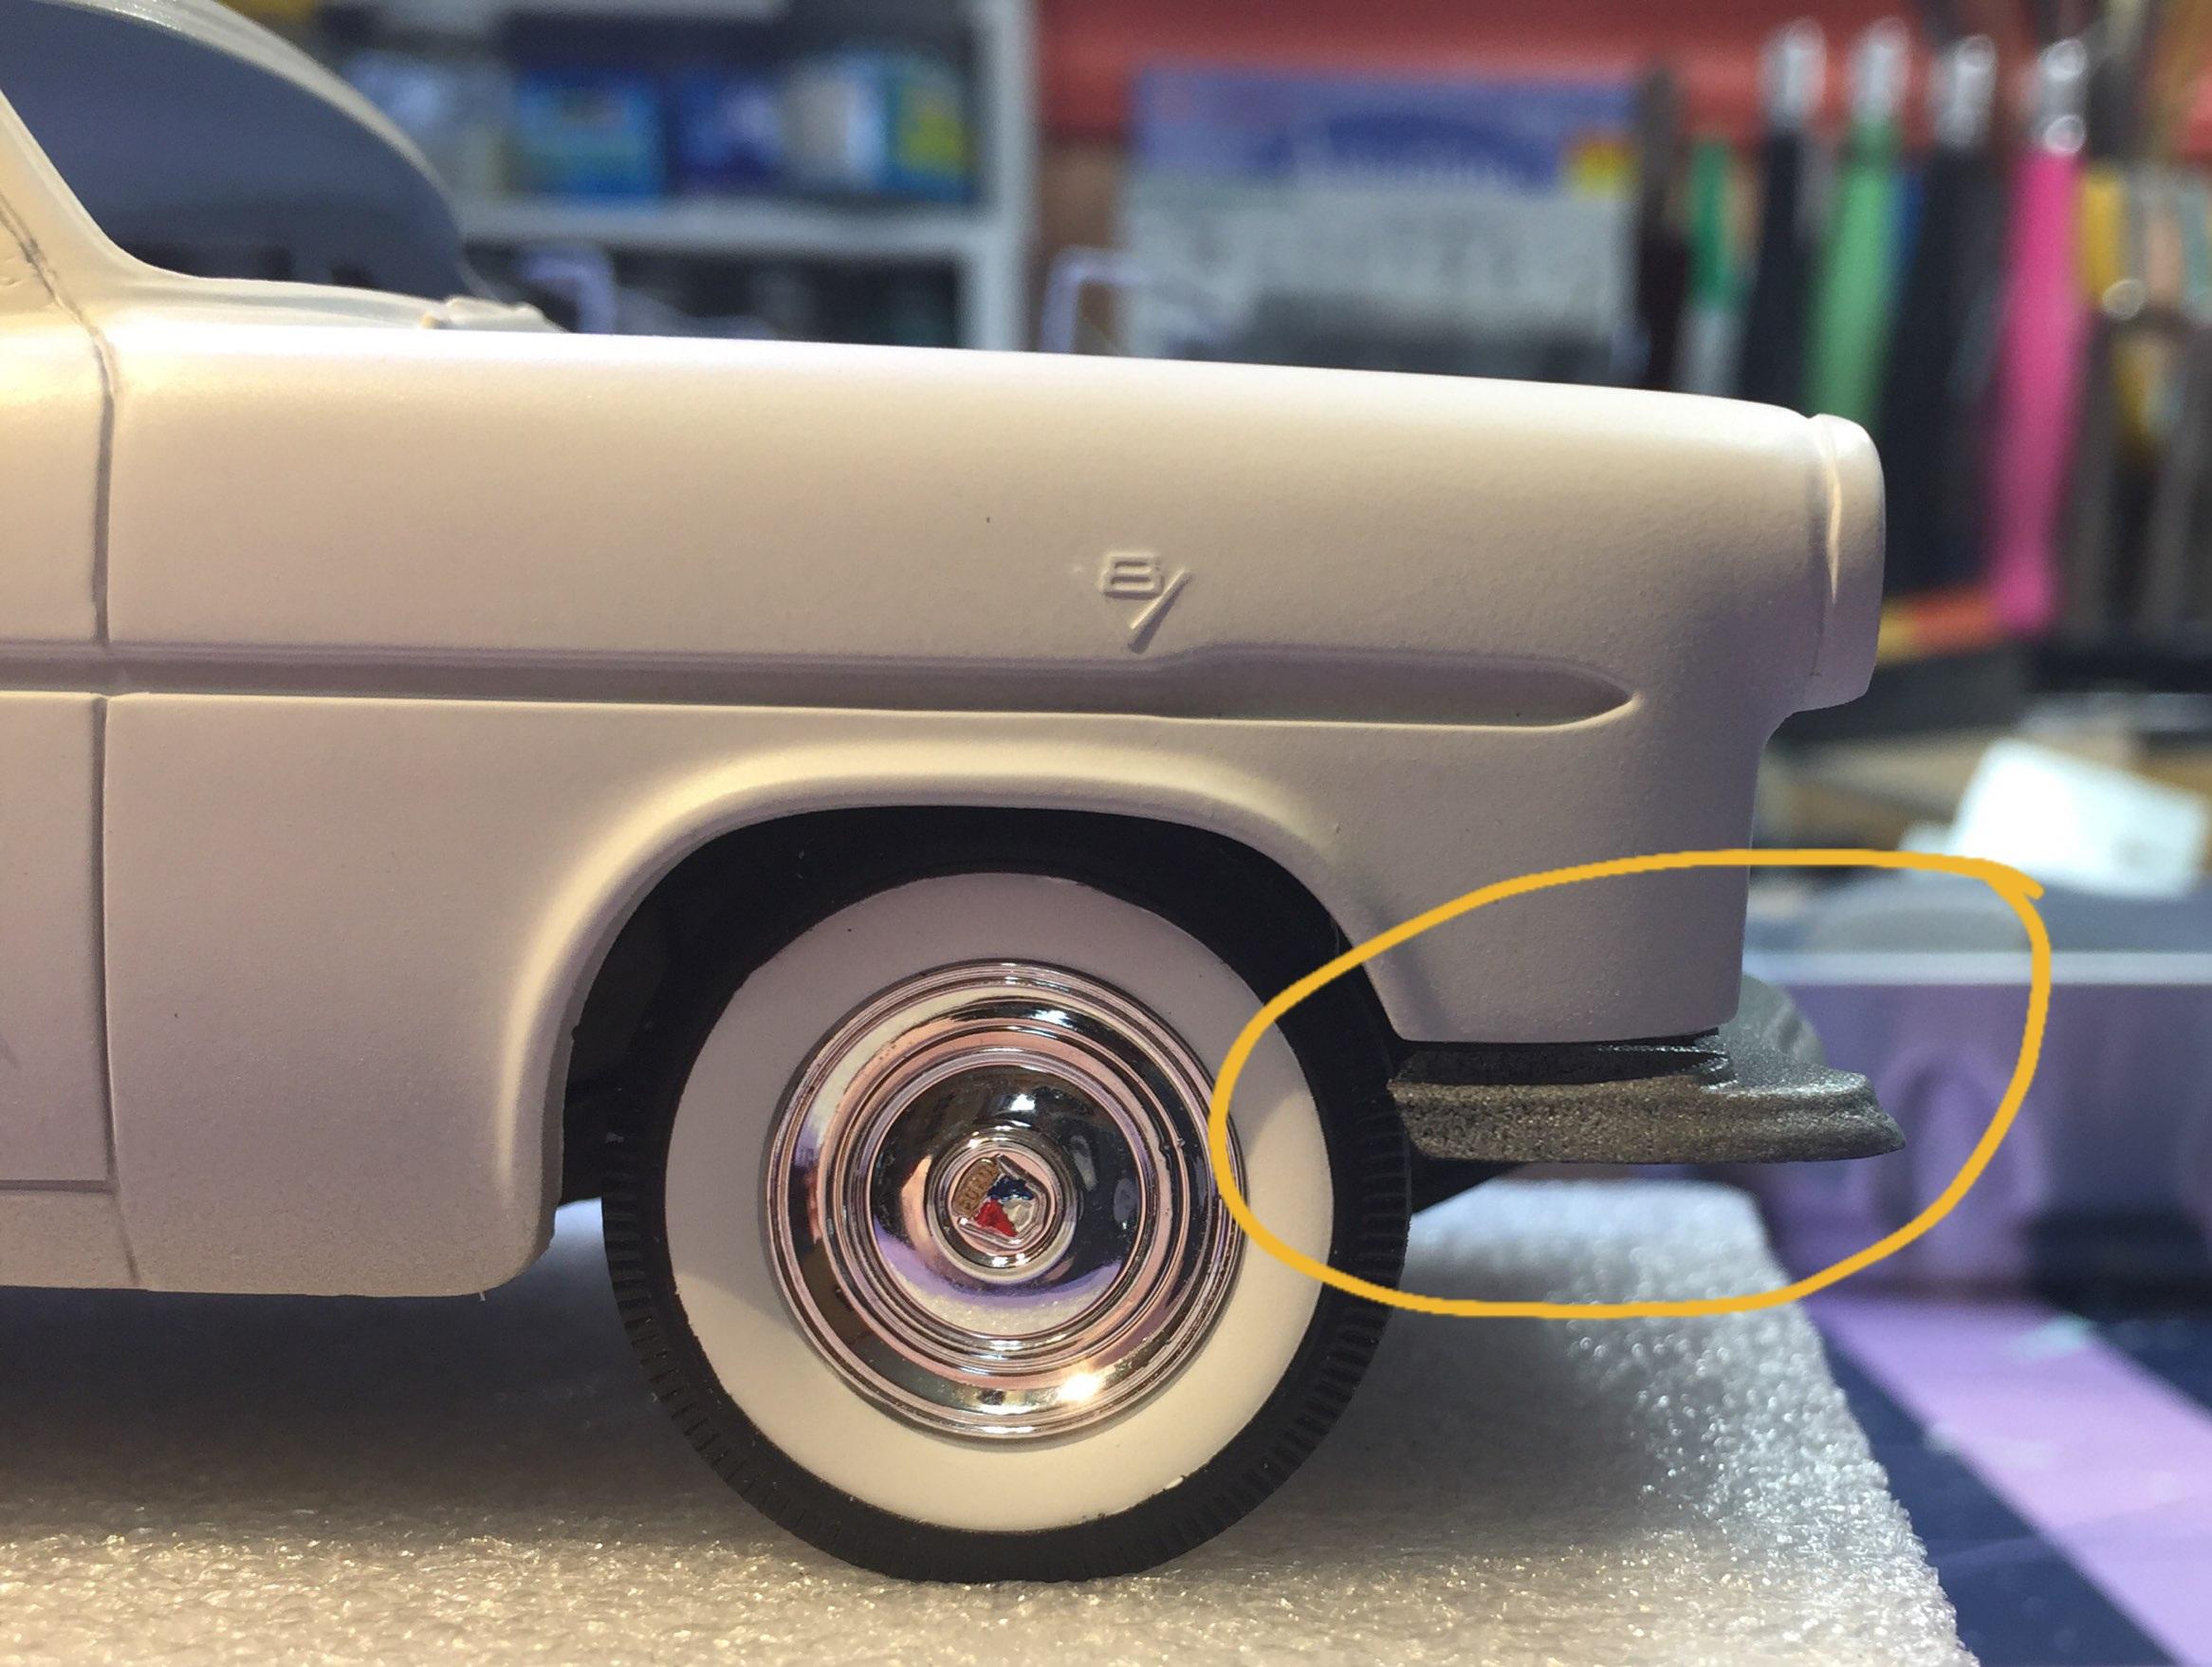
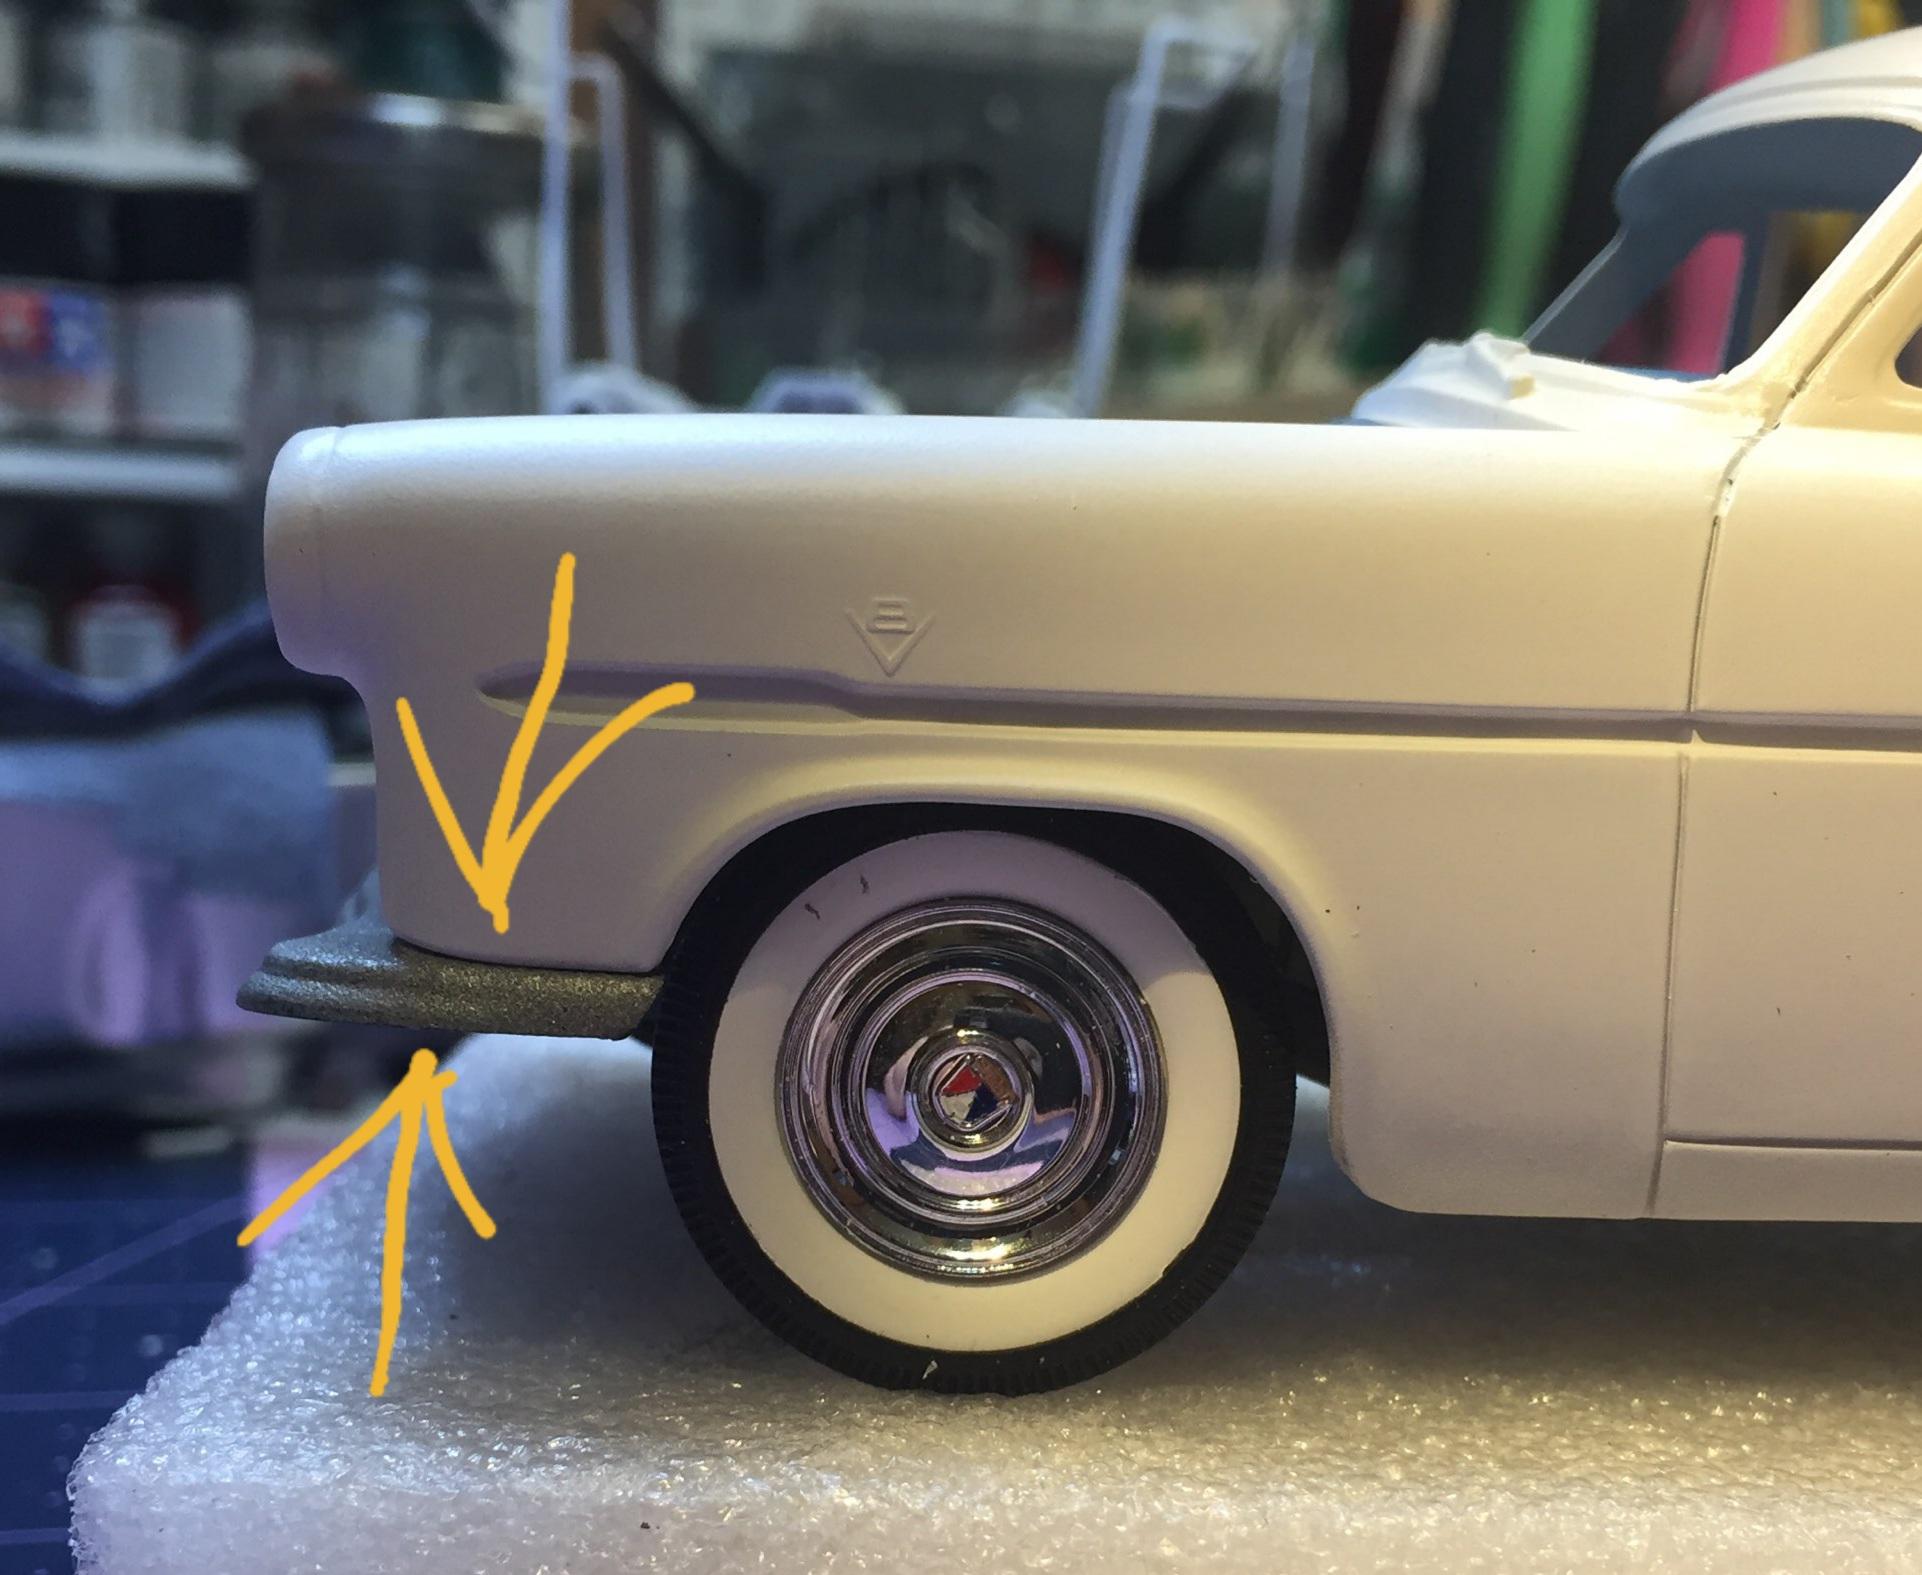
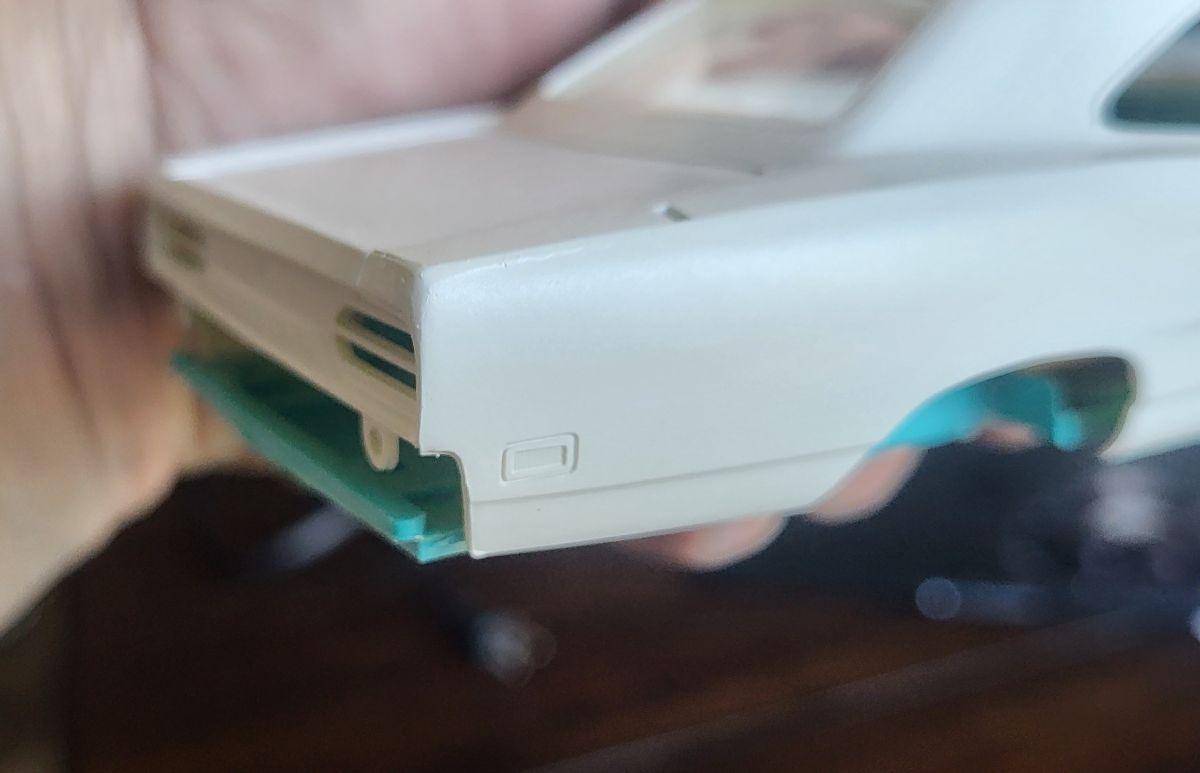
Filling molded in sidemarkers
gtx6970 replied to gtx6970's topic in Model Building Questions and Answers
Rectangular But not very deep by any means
-

What Did You Have for Dinner?
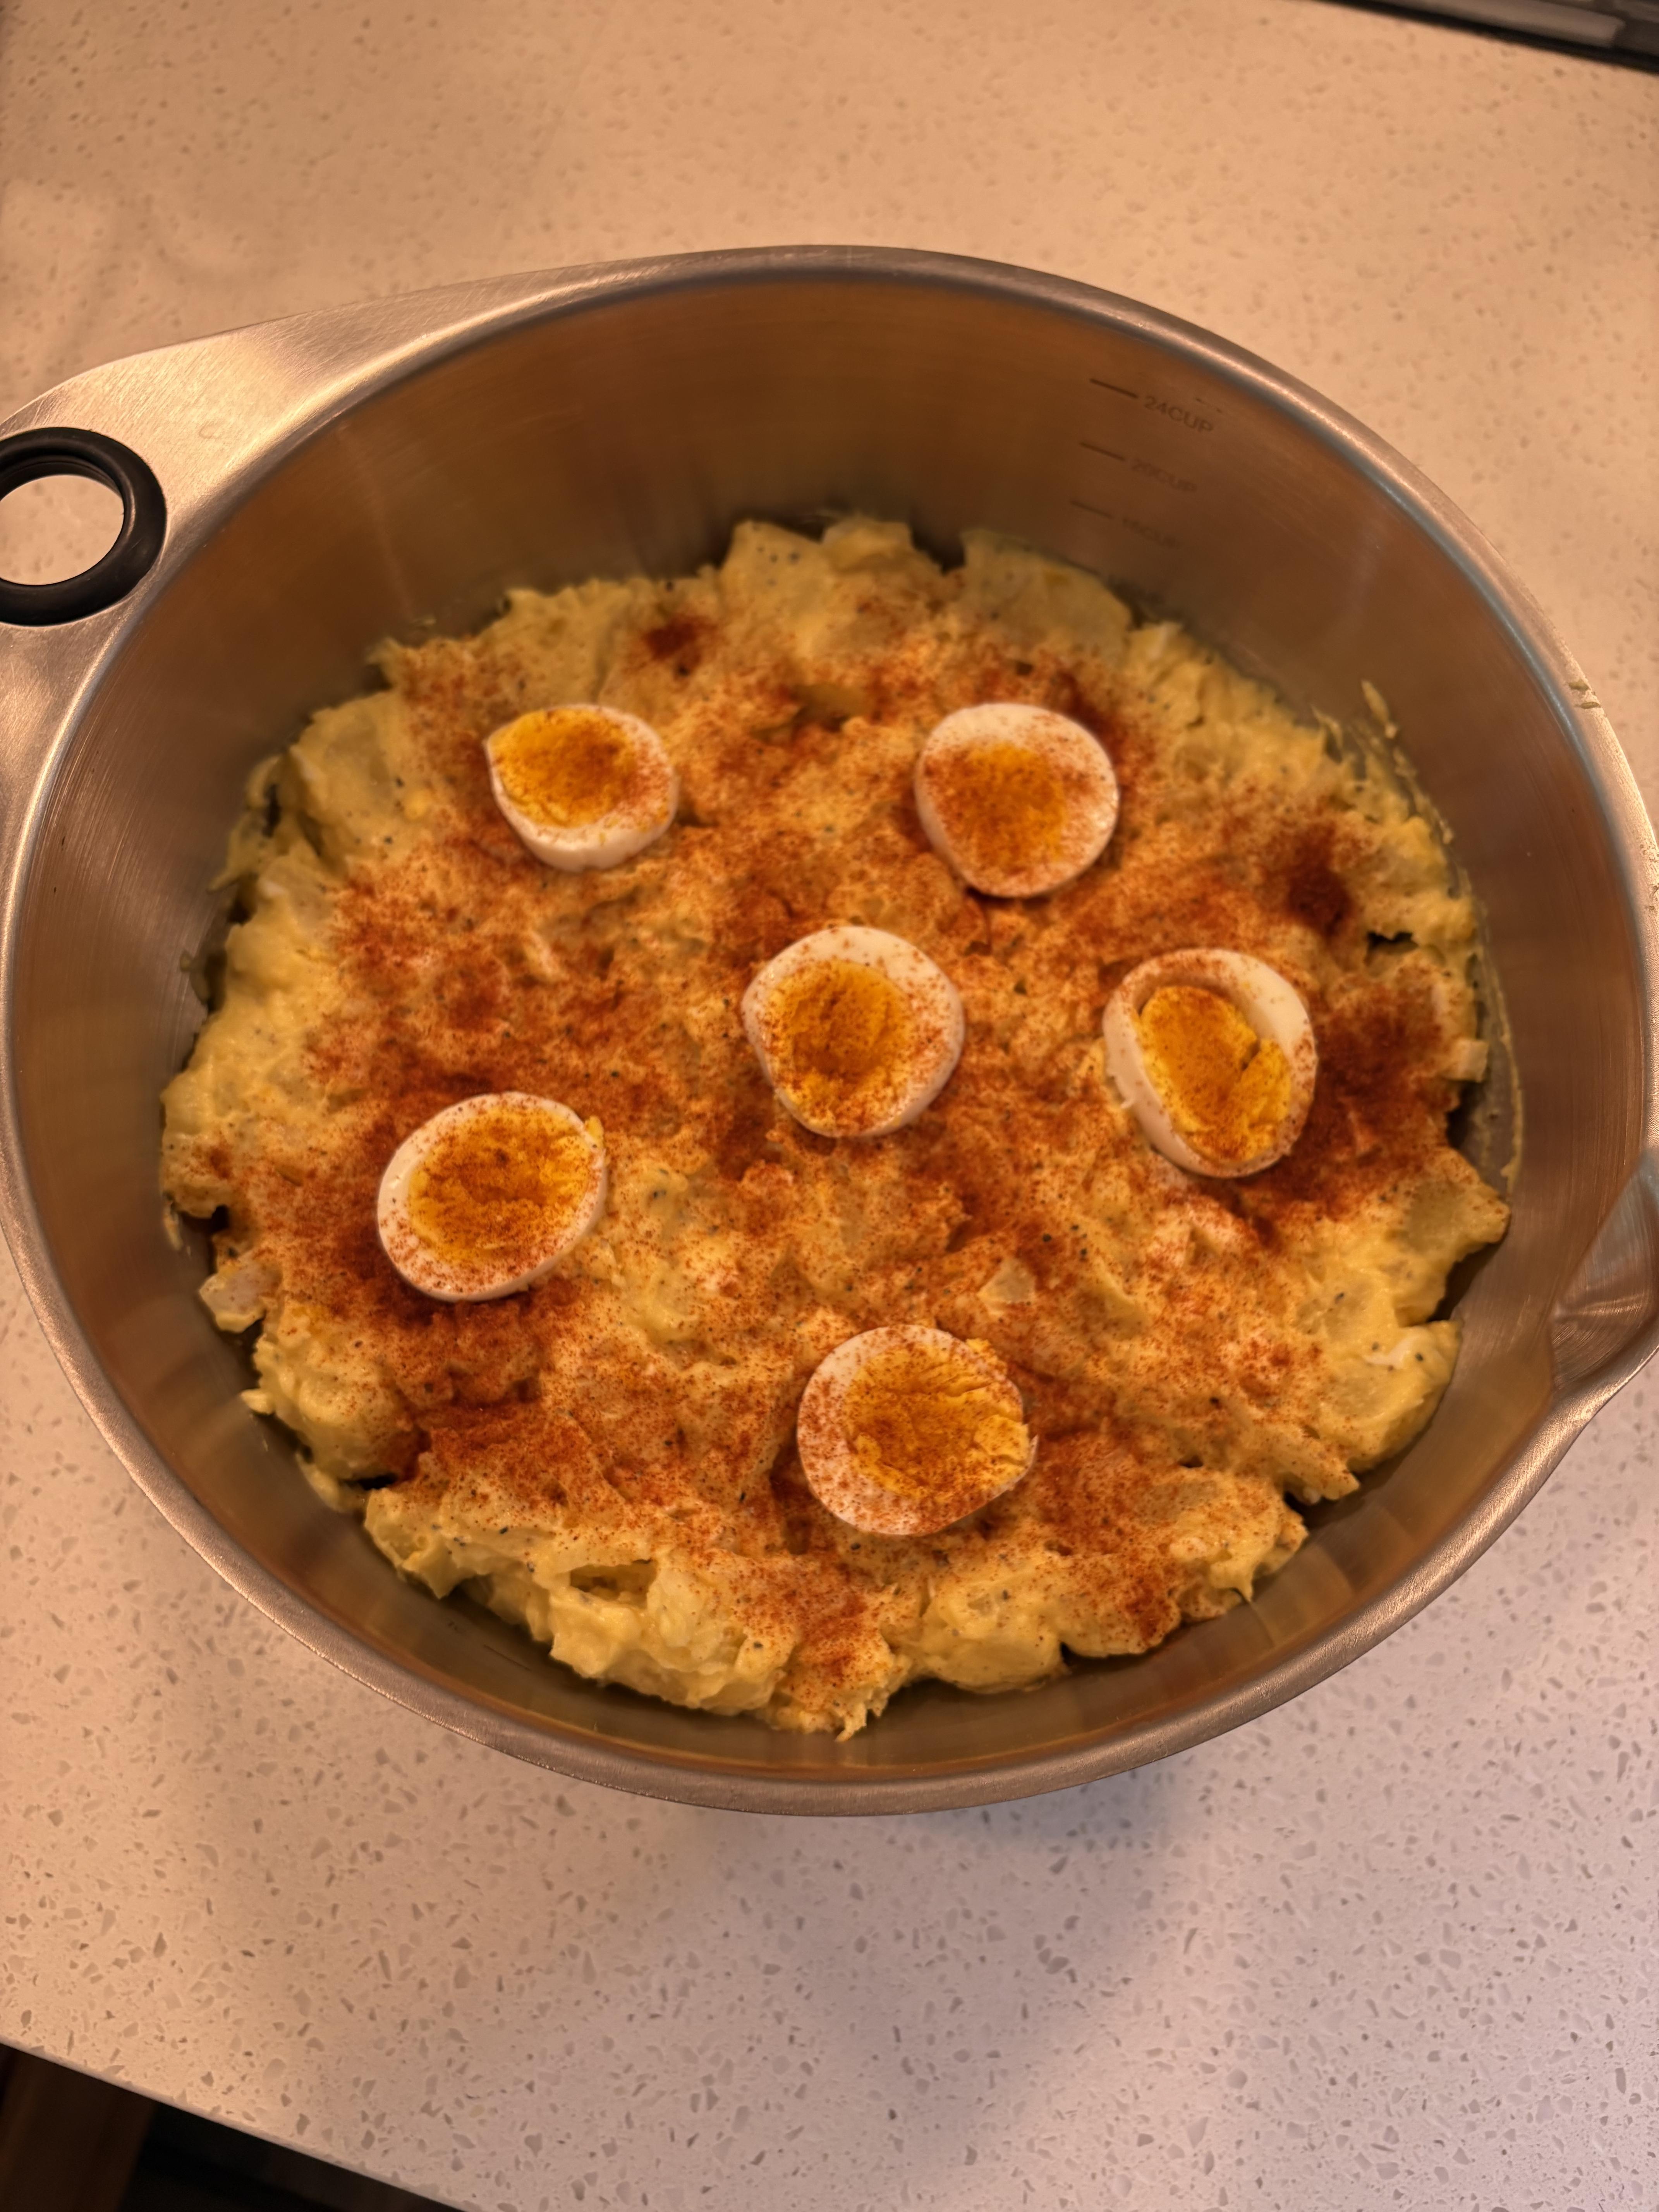
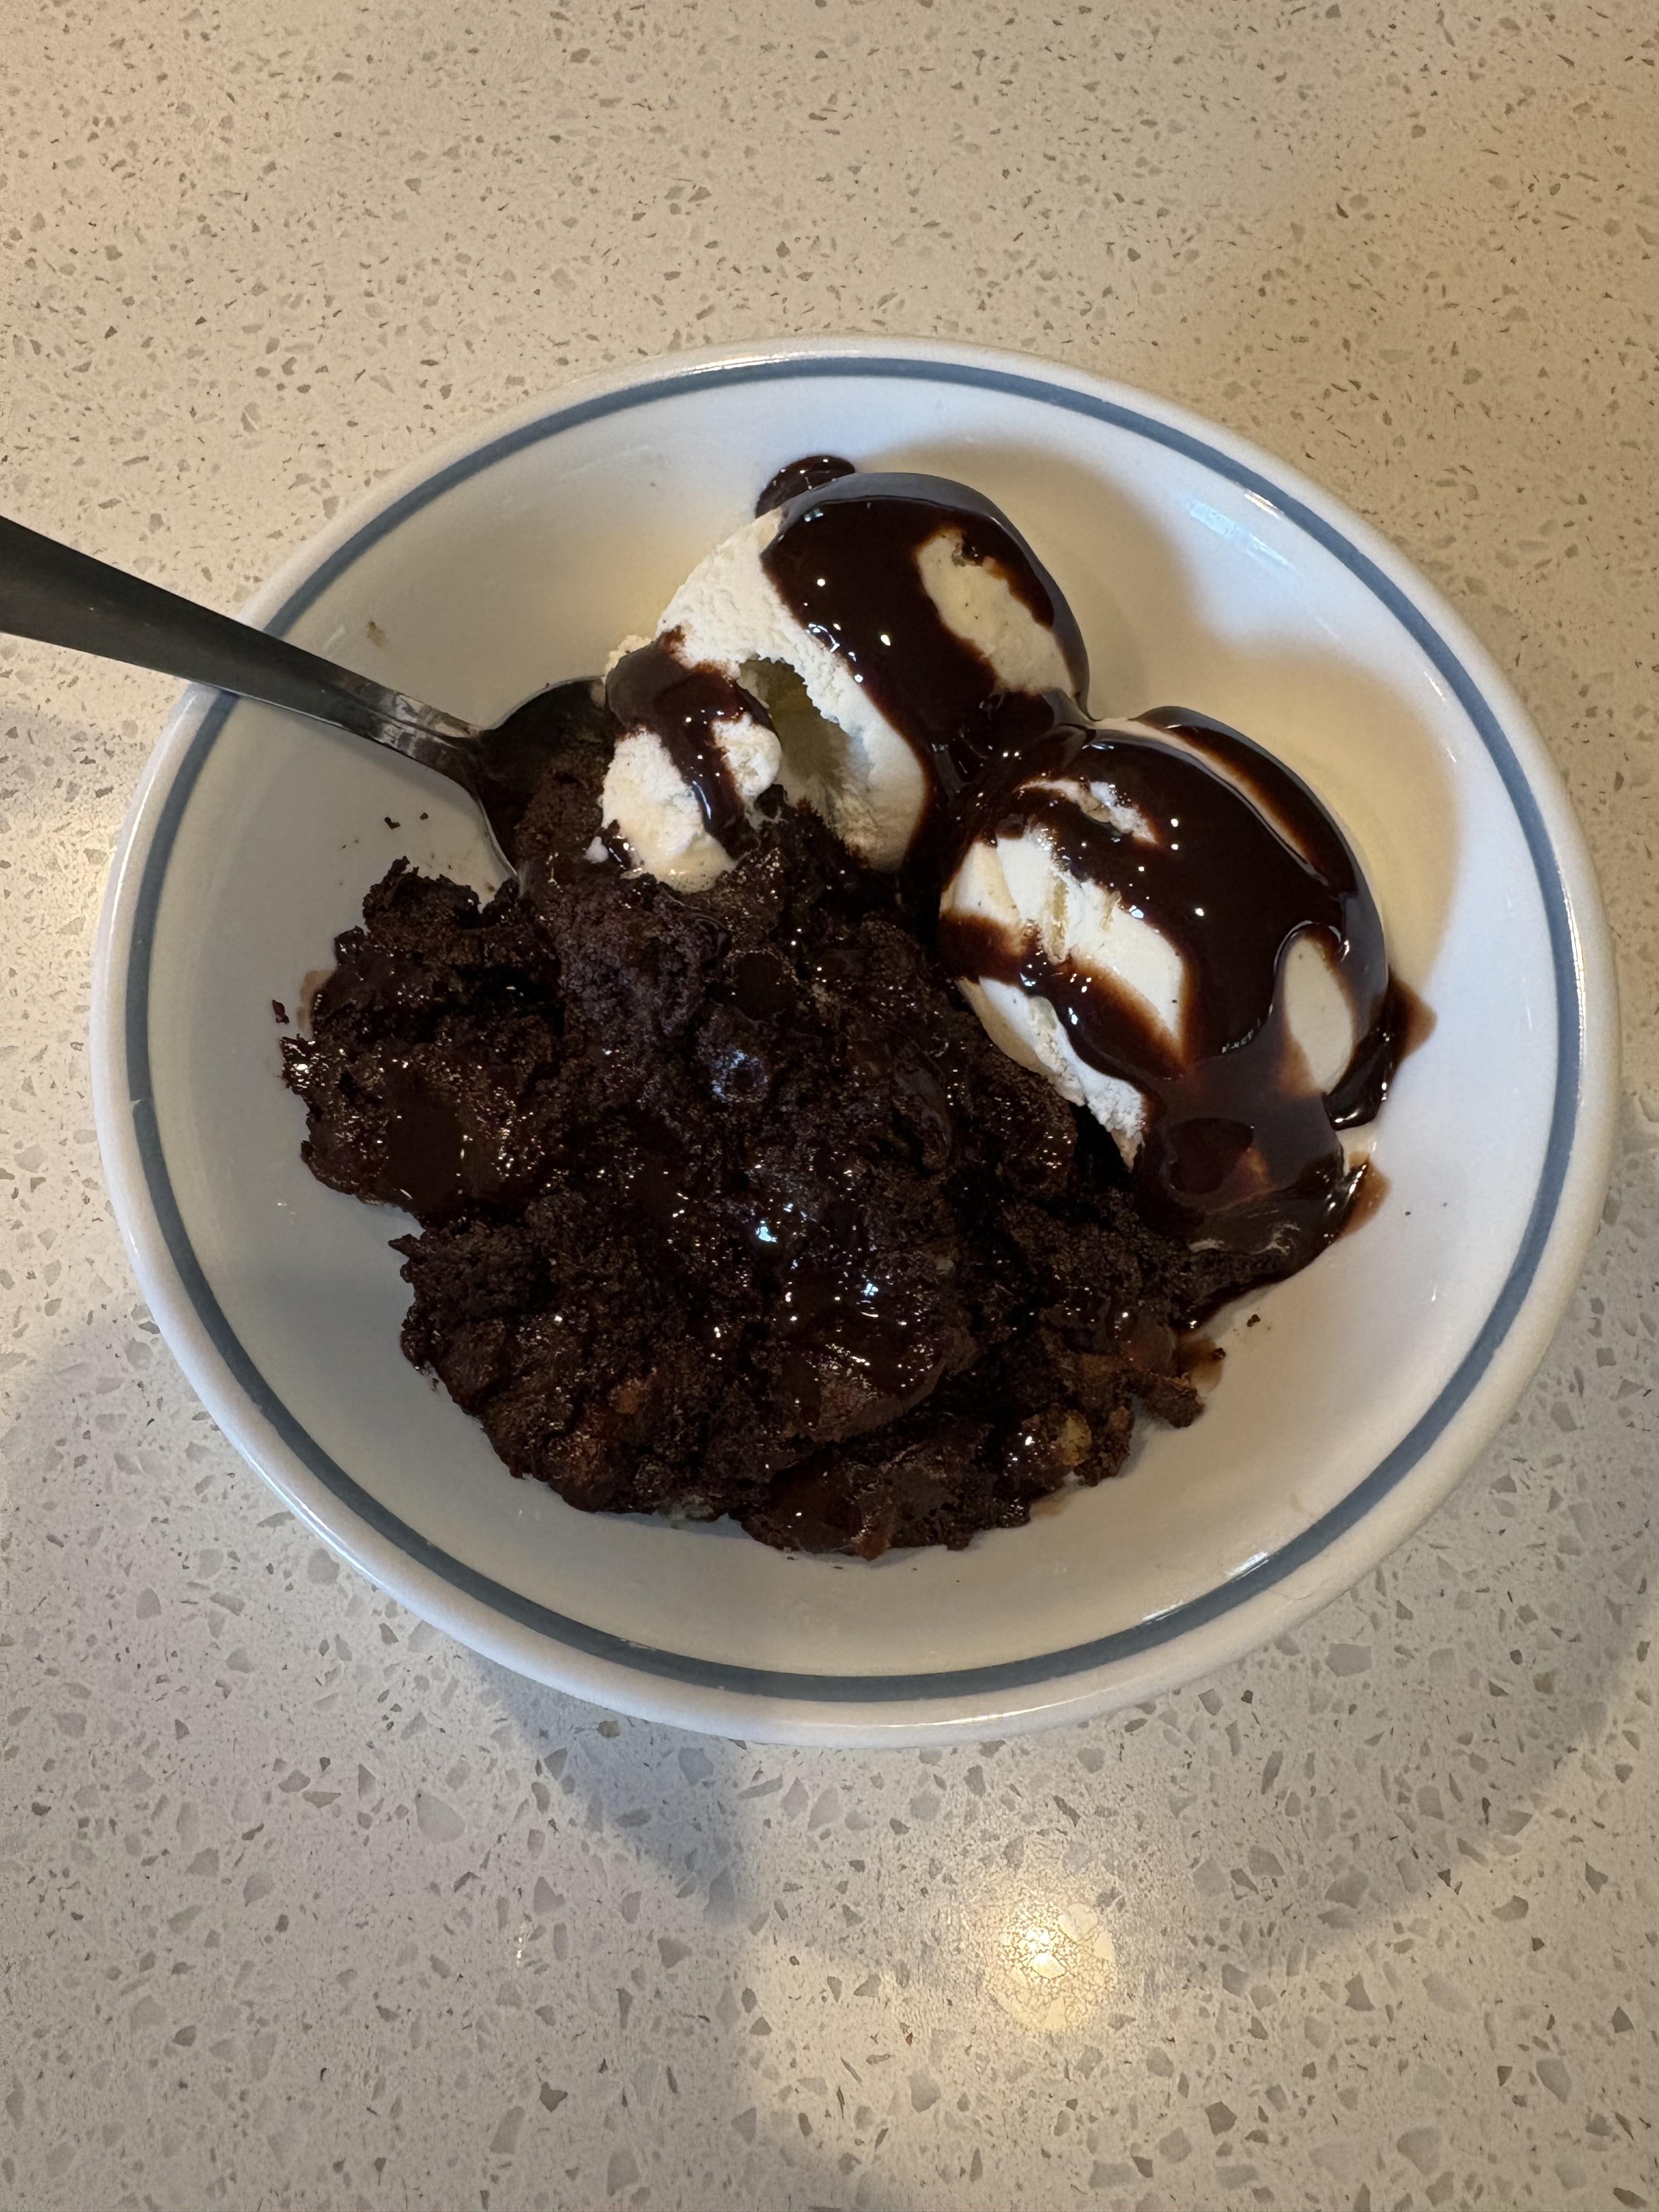
StevenGuthmiller replied to StevenGuthmiller's topic in The Off-Topic Lounge
For the 4th of July celebrations, a big pot of oven BBQ Beef, Homemade Potato Salad, Watermelon, and Chocolate Bread Pudding with Ice Cream for dessert. Steve
-
Very well done! Revell really needs to re-release this one!
-
What Did You Have for Dinner?
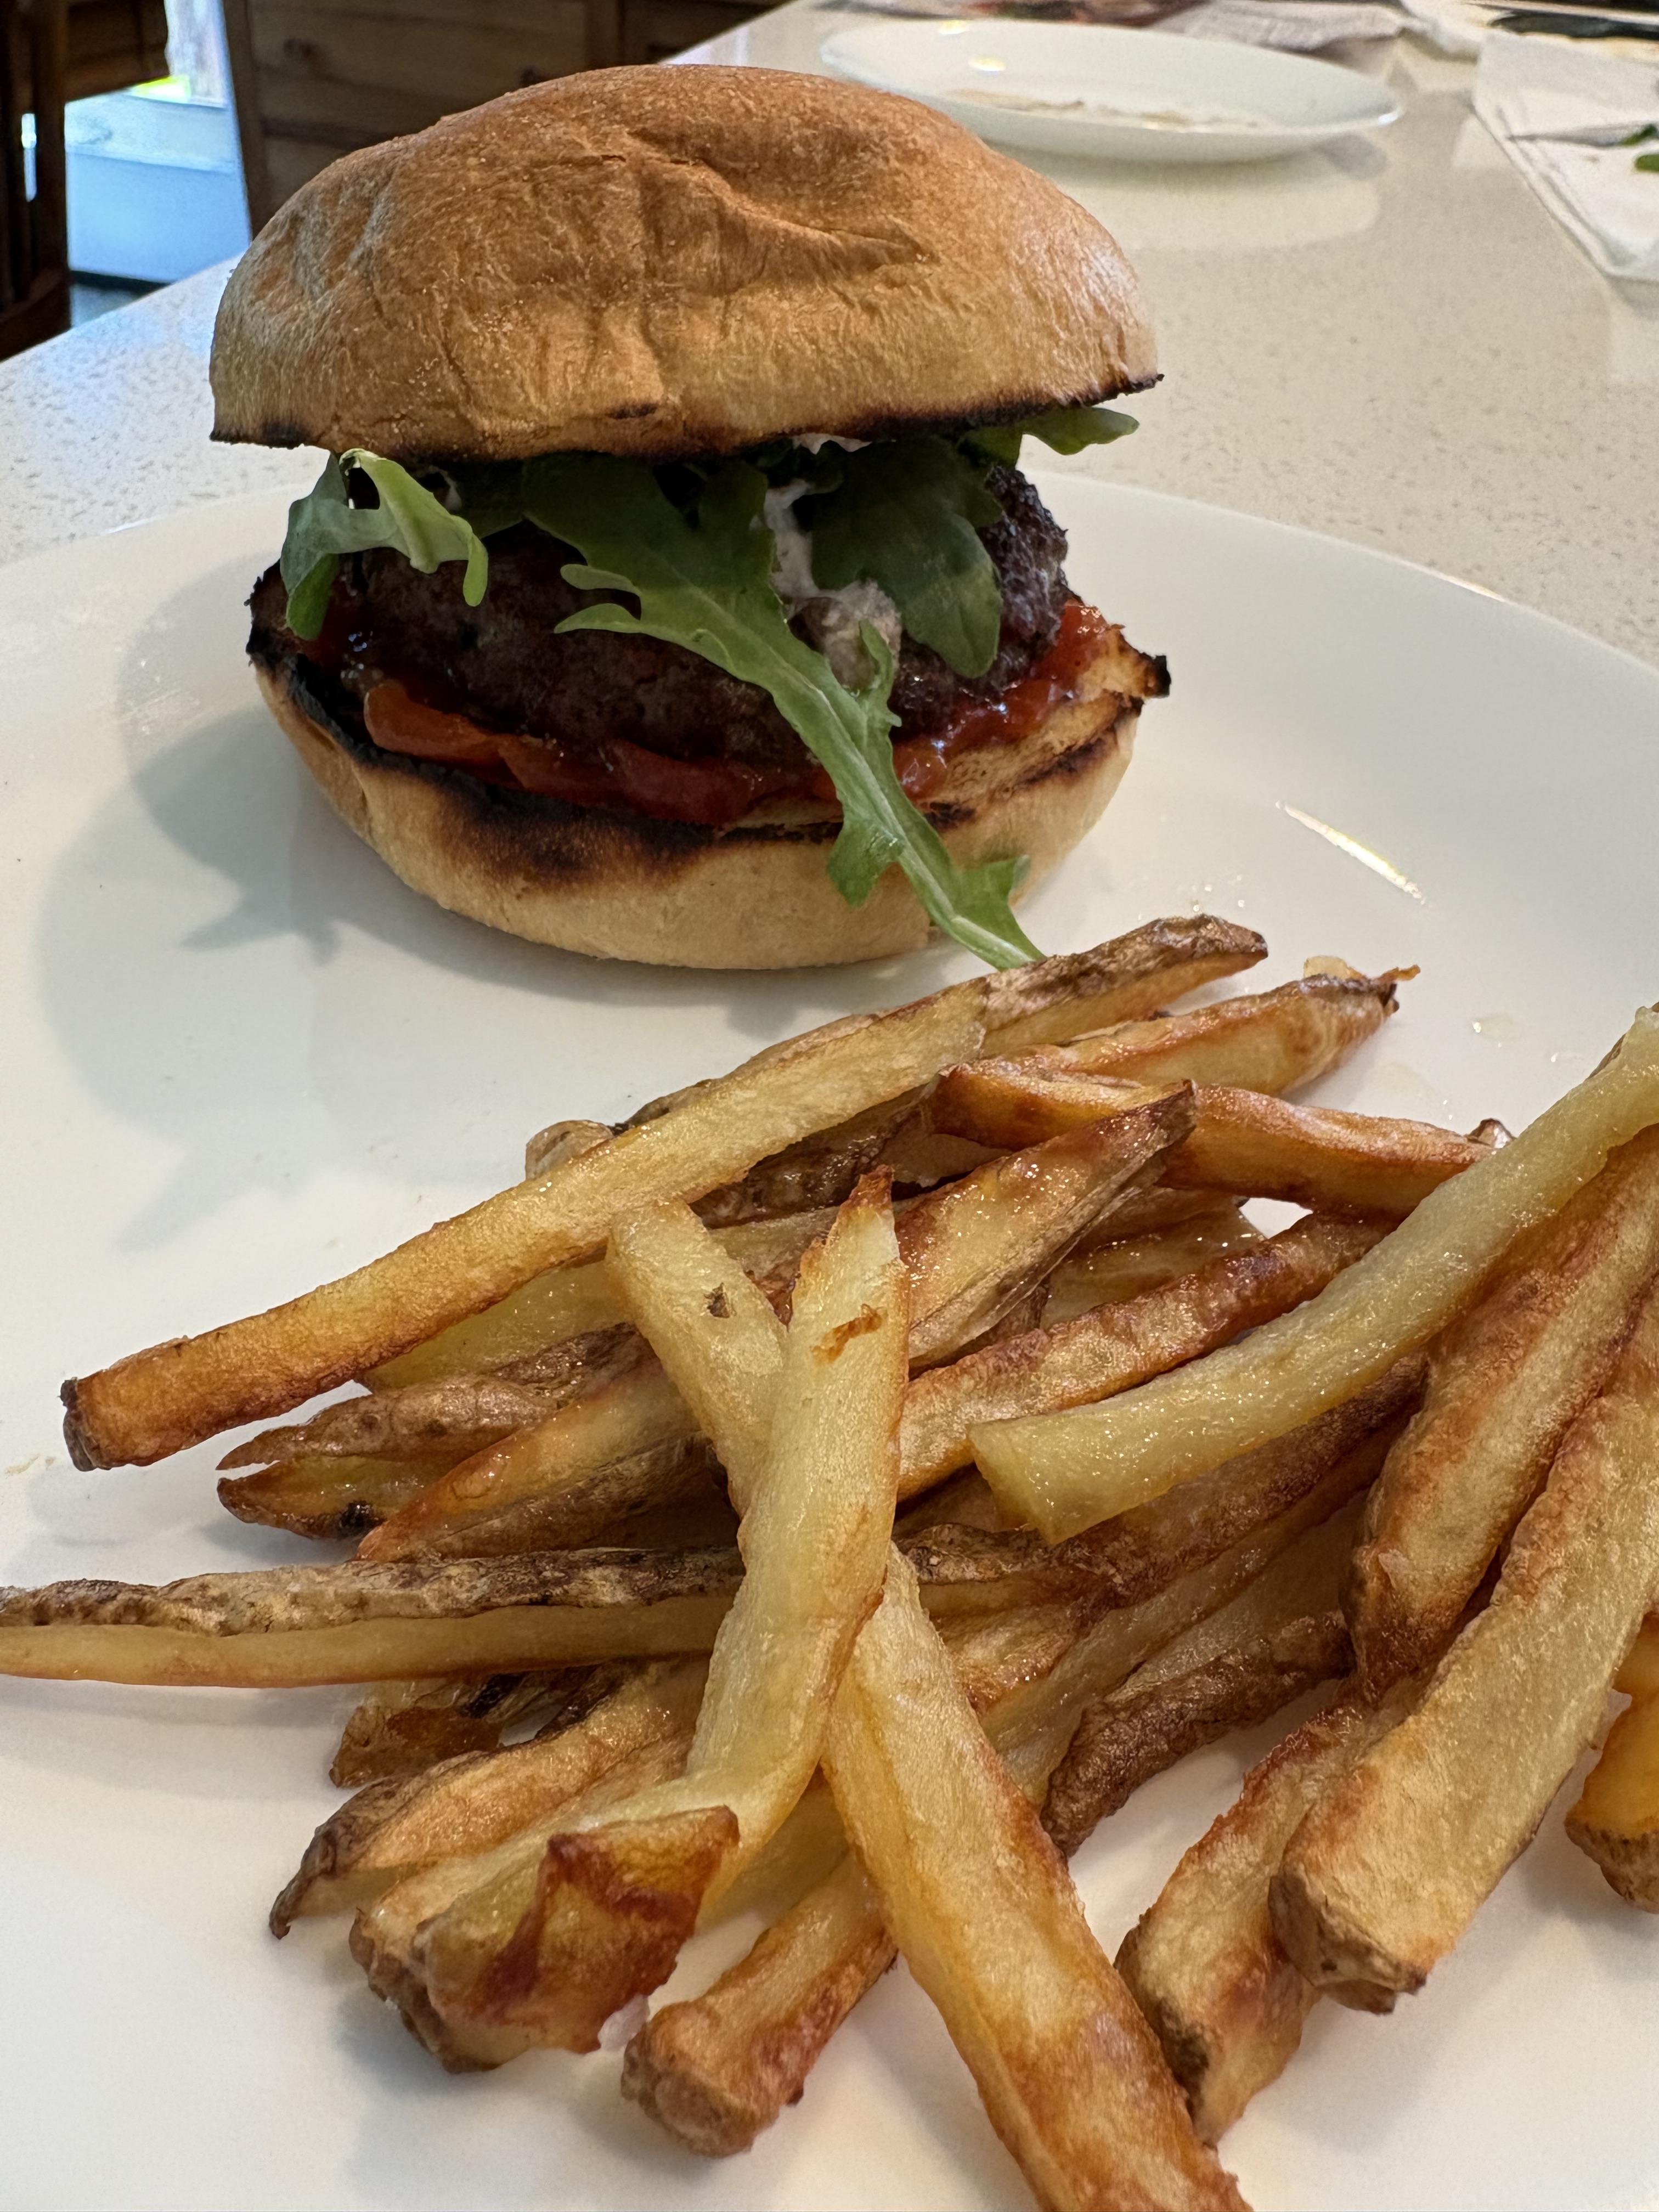
StevenGuthmiller replied to StevenGuthmiller's topic in The Off-Topic Lounge
Goat Cheese “Juicy Lucy” with Tomato Jam and Oven Fries. Steve
-
What Did You Have for Dinner?
StevenGuthmiller replied to StevenGuthmiller's topic in The Off-Topic Lounge
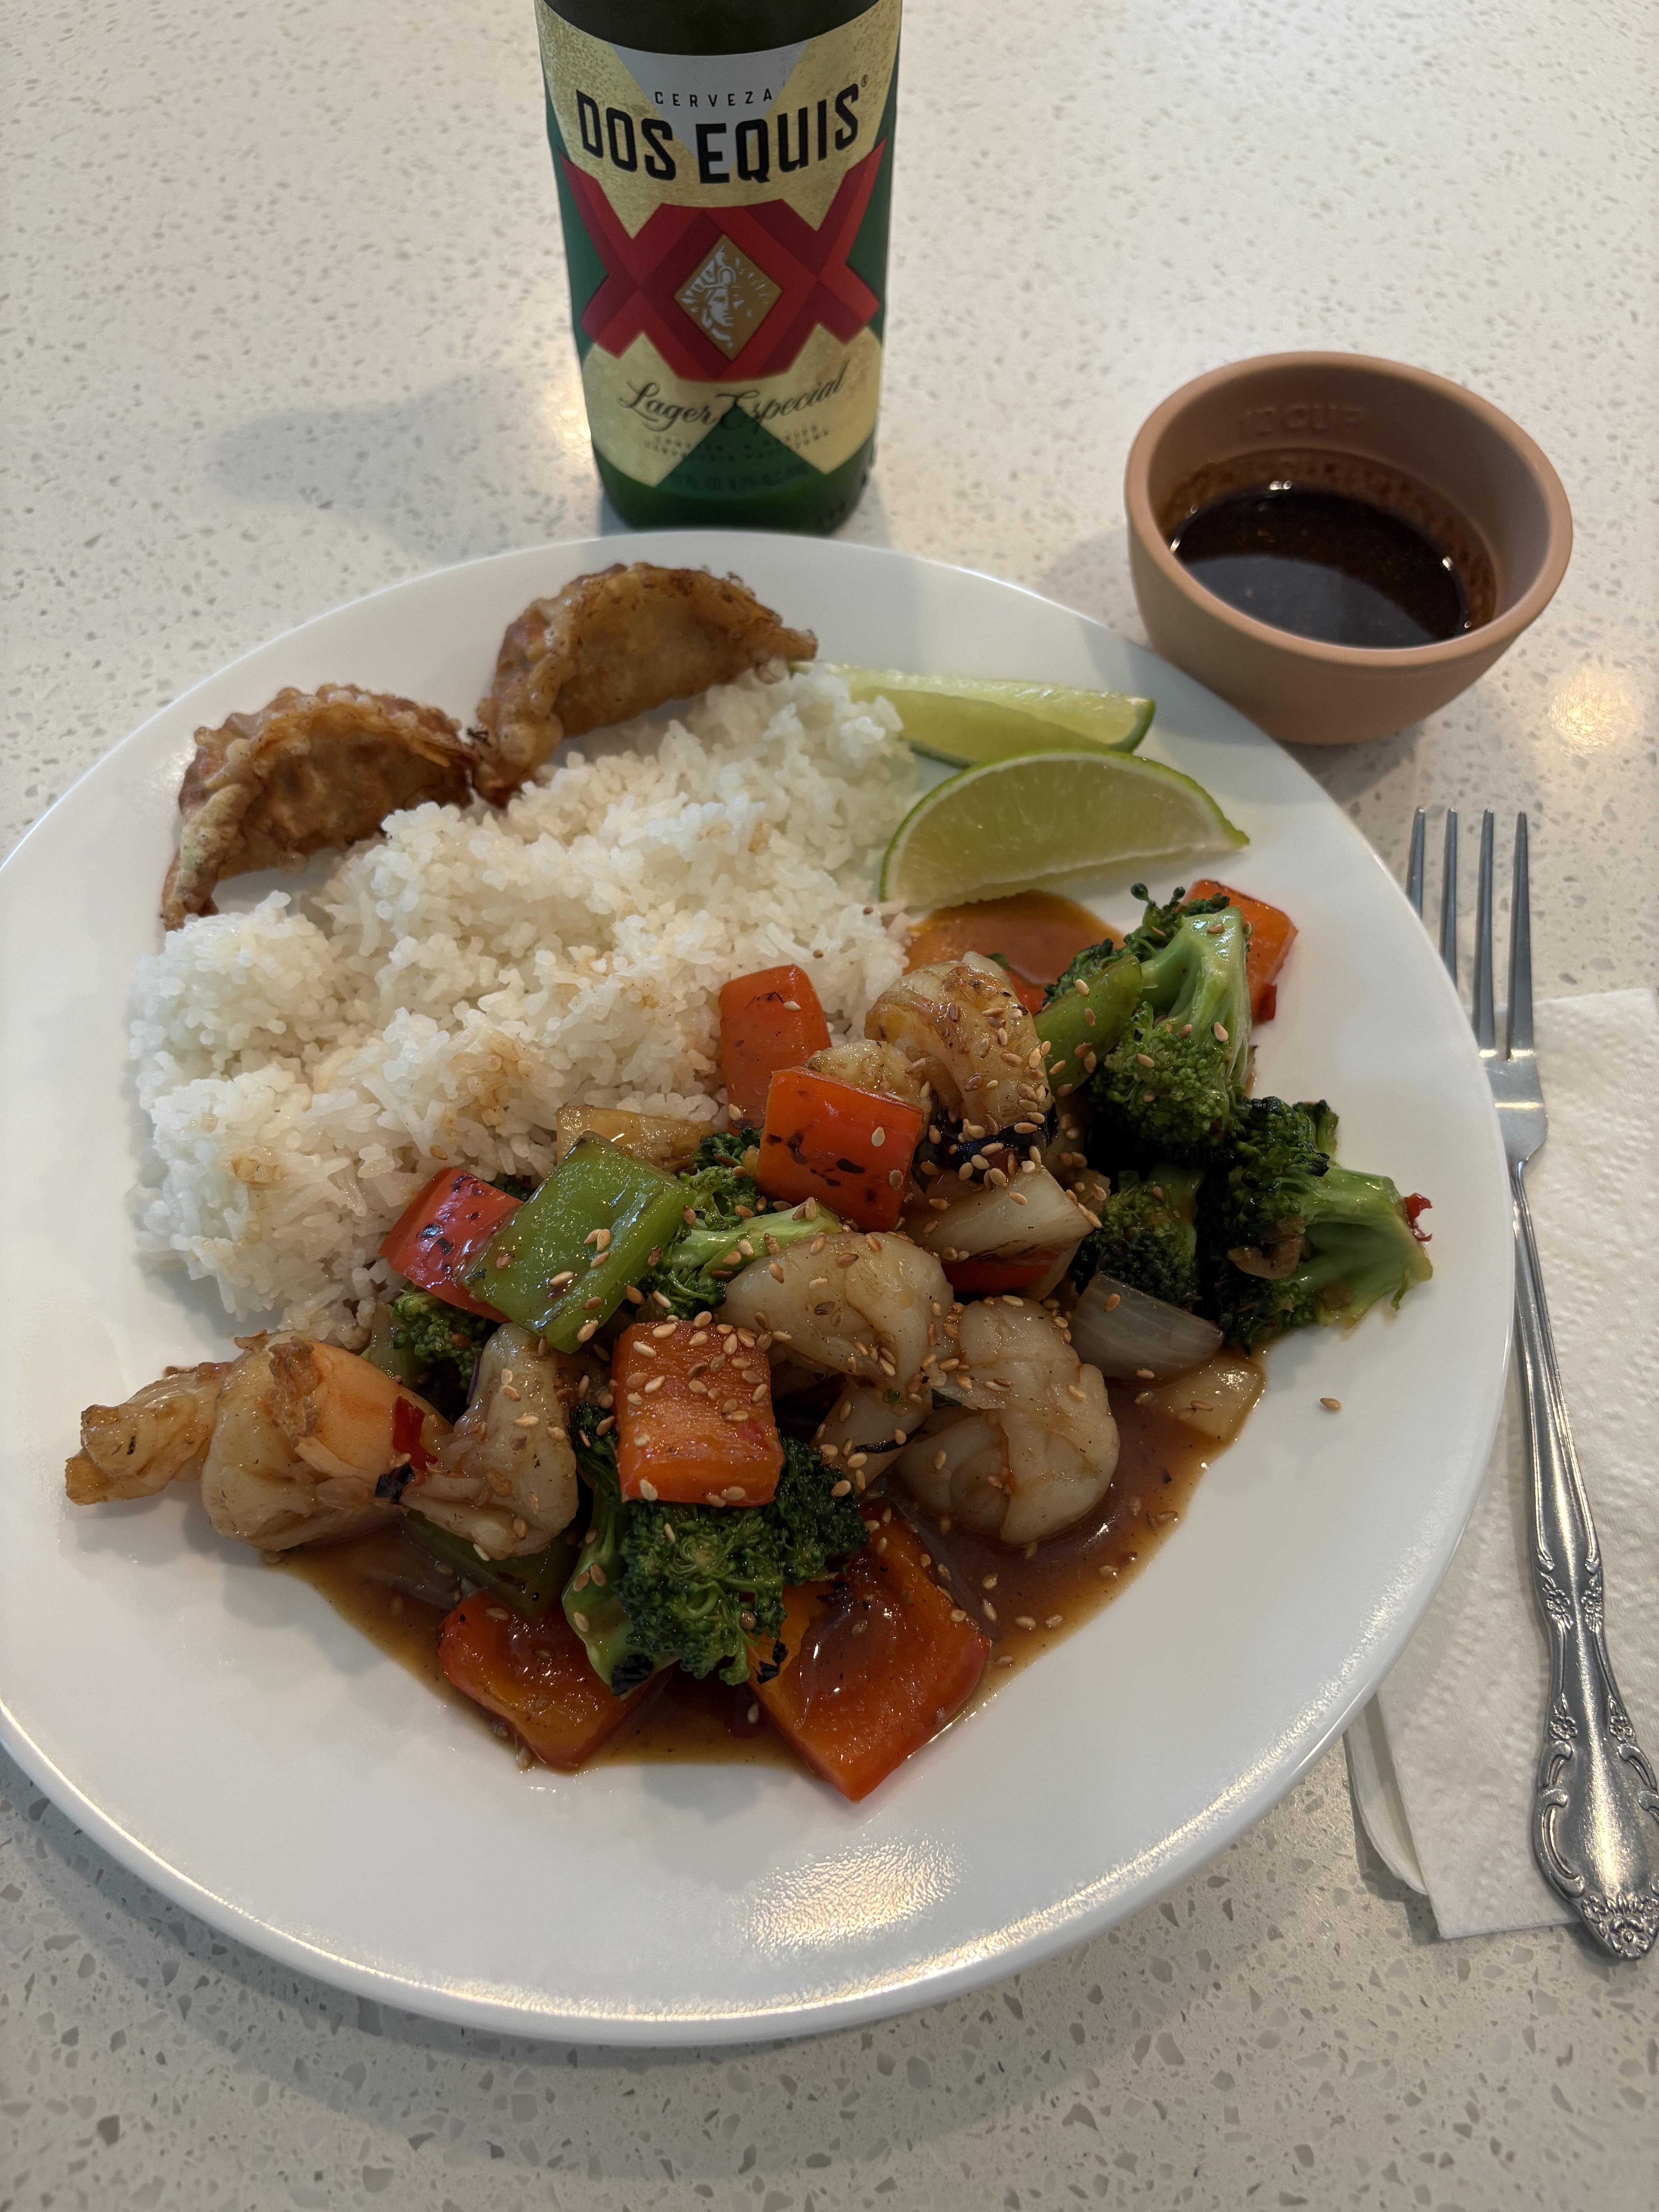
Thai Sweet Chili Shrimp and Vegetables with Jasmine Rice and Fried Dumplings. Steve
-
 So...ummmmm...where are the consumer class-action lawsuits for billions in punitive damages?
 -
Filling molded in sidemarkers
StevenGuthmiller replied to gtx6970's topic in Model Building Questions and Answers
I agree! Fill them with styrene if at all possible! Steve -
Sticker shock has reached epic proportions.
-
Beautiful paint finish and color. Clean looking body trim and like the Monroney Window sticker.
-

'32 Ford Roadster.......there can never be too many, right?
espo replied to Andrew McD's topic in Model Cars
Beautiful looking paint finish and color. Like how detailed the engine. -
Like seeing this great kit done as a stock vehicle like this. Well done OEM style paint treatment and finishes. Well detailed stock engine.
-

Yellow Fever Competition Coupe, Keeler's Kustoms
Brother Harold replied to stavanzer's topic in Car Kit News & Reviews
I think that the AMT Fiat Topolino body will fit the fenders from an AMT '32 Ford. -
 I drive people around me .....crazy