
Russell C
-
Posts
1,672 -
Joined
-
Last visited
Content Type
Profiles
Forums
Events
Gallery
Everything posted by Russell C
-
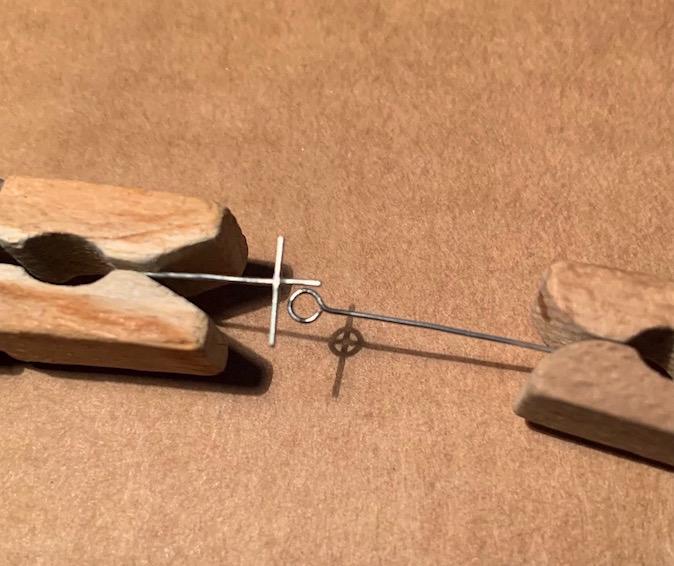
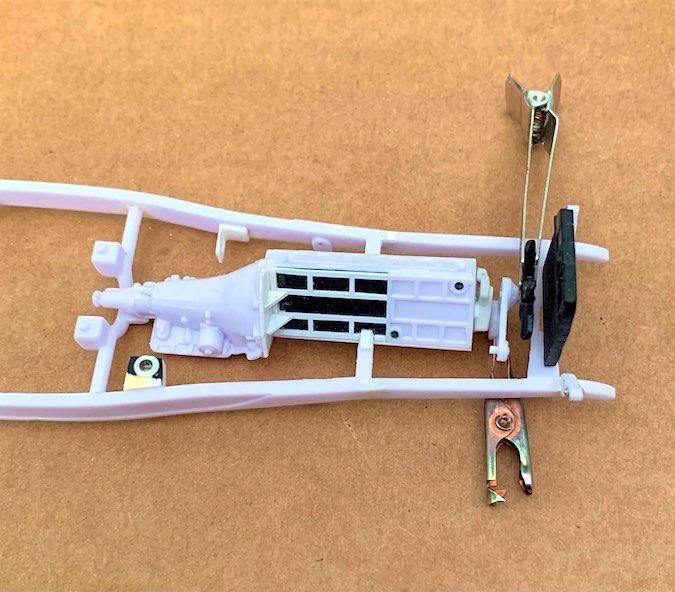
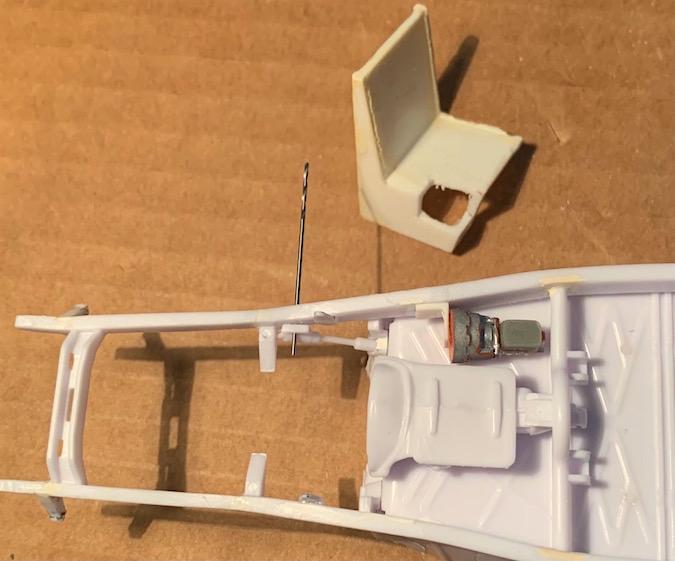
 Evil "89AKurt". Over at his now-turquoise & florescent yellow (I assume) GSL Common Kit '29 roadster build, he mentioned a "puke tube" while doing his radiator work. Never heard that term before, so I tossed it into a search at the Jalopy Jounal 1:1 forum. Of course, a coolant overflow tank! Various types to see there, ranging from whisky bottles to basic vertical tube tanks. Once I see a simple detail like that, it's hard to unseen it. A quick rummage through my metal bits pile turned up an old scrap of aluminum tube with a smaller tapered end that looked sorta like a tall stainless Thermos bottle, so that'll do, with a bit of aluminum rod 'lathe-turned' on my motor tool to be the cap that fills in the tube end. A little bit of wire will be the bracket to hold it to the radiator side, hole drilled in the bottom for the future overflow hose. Glue once, measure twice. Or something. In seeing whether things were lining up in the engine / frame department, I saw that I'd glued on the front cover / one-arm water pump in a non-vertical position - that was brilliant - so I had to pry it off and put it on right. Won't have to carve out a crevasse for valve cover clearance, that's nice to know. Top radiator inlet 'arm' somewhat ironically is sourced from the old blue-molded Revell '31 Ford Sedan Delivery (you should see what I'm doing to that kit's engine). Added a little piece of plastic to the right side of the crossmember, which will be filed flat on top after the glue hardens to serve as the surface the overflow coolant tank sits on. Ignore the black spots on the crossmember, I drilled the holes for the radiator locator pins one increment too far over to the right and filled in the holes with stretched black plastic sprue. May have figured out what to put on as a radiator cap ornament. Inspiration was the Red Baron glue bomb that provided the front part of the now elongated chrome oil pan. Couldn't remember if that pile still had its gunsight radiator ornament or not, but that must have been busted off when I got it. However, since the wire bracket for the overflow tank was such an easy circle/stem to make, I should try it to see if I can make a 3-piece gunsight ornament out of wire. This might work, take two perpendicular wires and mash them together hard with a needle nose pliers and add a tiny drop of superglue to the junction and hope it's strong enough to survive trimming off the excess to fit within the circle. We'll see.
-
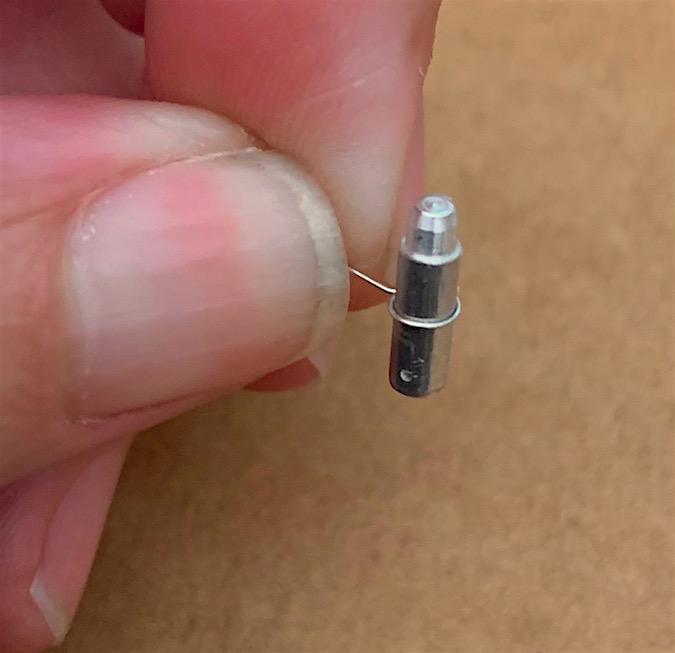
At first, I thought I could flip the Revell roadster kit's chrome plated oil filter upside down, slice it thin at the top, and turn it into a ribbed radiator cap, but it ended up looking just too big in diameter. Plan B was to lightly crimp an aluminum dowel with pliers around the top to create the ribs, and then lathe-turn it into a shiny dome with a smaller diameter boss underneath for mounting on top of a short length of black plastic sprue, which itself goes onto the ex-Franklin Mint '41 Lincoln radiator. Decorative ornament pinned into the cap to be figured out later. Now that the oil filter is reduced to being a chrome cap for some future project, my orange glue bomb Vette scrapyard pile donated one more item to this project, its oil filter, lathe-turned a little smaller in diameter and length. Realistic orange color for Fram filters, will use a fine-tip marker to draw in that name upside down later, too.
-
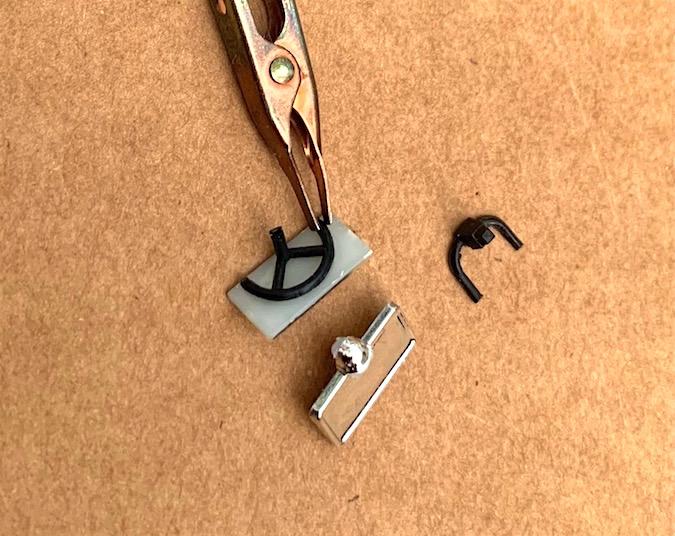
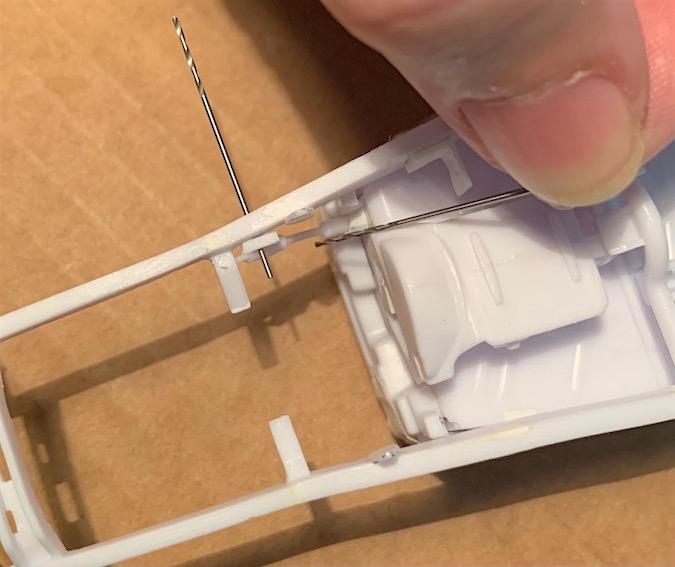
Back last March, I tipped NY state modeler Jim Bongiovanni that Arizona doesn't require front plates like New York does, and as a sort of homage to his Revell '29 roadster buildup, I thought I'd make my build a 2-plate NY state-registered rod. Plus, I've never been to NY state, so here I can dream just a little on how nice it would be to live in the sky above Manhattan and occasionally take the rod for a summer ride out in the country a ways while being as politely street legal as possible. Handy that I had a license plate frame in my parts box the identical size as what's in the '29 Revell kit. The bracket for the front plate is a 32nd scale half steering wheel that's been rattling around in my parts box since forever, don't recollect what the bracket for the back one came out of. Since it might be a little dark under the frame extension out back, I added a little light housing on top of the Revell kit's plate, butted up against a leftover bit of the plastic sprue I left on the plate frame. Might as well not arouse the ire of the local cops for not having a lit plate back there at night. In gathering images to use as a template to draw the NY plates in my old CorelDRAW program, I was wondering why I didn't see yearly / 2-year registration tags on the back plates like we have in AZ. Finally figured out those are put in the left corner of the windshields. Wasn't planning on using the Revell kit windshield frame at all, but now I think I'll install just a short bit of it with a vestige of windshield glass to put those stickers on. Folks will see later why I was skipping the whole windshield entirely. Next, made a much stronger pair of connecting pins for the engine/transmission to that I could finalize the engine mounts, particularly since the passenger side of the V8 is gone. My guesstimate turns out right on the added length to the front of the frame, if not just a tad too much. Might end up with a shroud around the fan … or not. Hacked the radiator itself out of a Franklin Mint '41 Lincoln parts pile, and the fan comes from that pile, too. Call me a traditional mechanical stick in the mud, not a fan of electric fans. Ah. Well, I figured that a cantilevered pedestal in the interior that's fairly heavy couldn't just be bolted to the sheetmetal of the floor, so I put in a large bracket directly underneath that it could bolt down through to. .. ..... Nothing …… !
-
Johan ‘70 Cadillac ElDorado pro touring (low and aggressive)
Russell C replied to Steve H's topic in WIP: Model Cars
Equally divided between the first two wheel choices, not liking the black wagon wheels 3rd option .... -
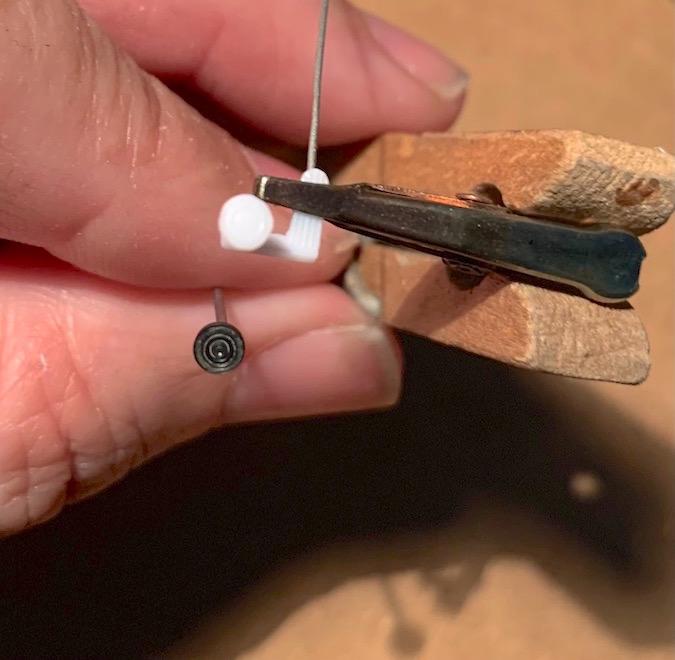
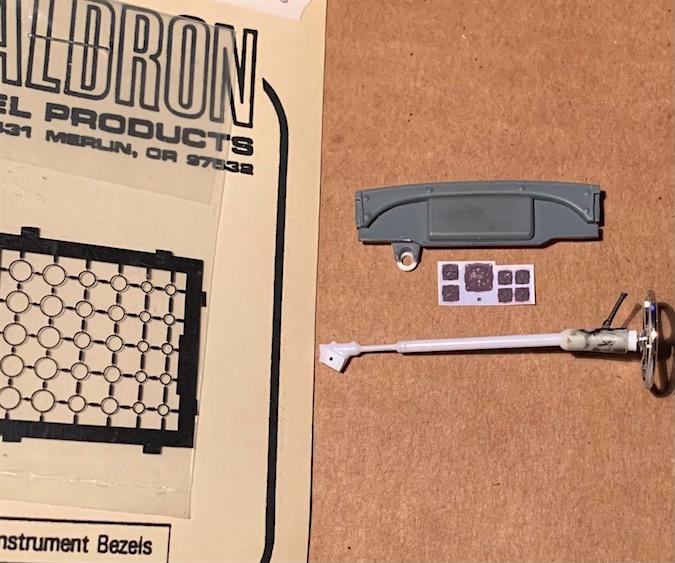
Put a mounting plate on the side of the engine that's missing (where it used to be a V8). Will carve those gussets down a bit smaller after the glue dries. Temporarily clipped to the transmission to be sure it's all proper flat joining surface. 'Lathe-turned' (on my motor tool) a new perfectly round brake pedal out of black plastic sprue (ignore the plastic fuzz in the treads, that will be cleaned out better). Keeping the accelerator pedal, but will sever it from the assembly after the glue dries and have it hanging from a wire arm instead. I drove one car many moons ago with a pedal that hinged at the floor, never liked how that action felt. And finally, partway through adapting a parts box auto shift steering column to the kit column, will add a turn signal lever next along with the gear selection indicator and ignition lock. Not a fan of the lonely-looking stock '29 Ford dash gauges, but I do like the aircraft-style ones in the "Red Skull" car from the "Captain America: First Avenger" movie, so I did a low-res paper printout size check to make sure it fits on the additional plastic I put on the kit dash. When I get the higher-res printout from "89AKurt" (in exchange for doing the graphics of the license plate he's putting on his GSL WIP build), I'll add some black plastic Waldron bezel rings to the gauges to give them more dimension. If it turns out that clear canopy glue doesn't dissolve the printout ink, that might end up looking like convincing gauge "glass."
-
Irks me that it demands "back to historic flow path." Geeze. Define "historic."
-
Irked by my email service provider, over an unresolved issue of why for the 3rd time in a month that my account was locked due to "unusual activity" which they can't specify what that is. Another 2 hours of my life I will never get back .....
-
One of my objectives is to use up every scrap in my parts pile - when they are all gone, then I'm done model building. Here, one of my seats from some 1970s AMT semi-truck contributed a corner to be the underfloor master brake cylinder bracket. The brake unit itself comes from the '69 Vette glue bomb I got off eBay, with an additional plastic scrap to fill in the empty void in the bottom of that unit. Got it figured out that a Lokar-style column shift link will work from the transmission to the steering column where I can scribe in what looks like a movable sleeve and add an arm to that area to connect to the link rod.
-
GSL International Scale Model Championship: THE LAST ONE
Russell C commented on Gregg's event in Model Car Shows/Events
-
This set? https://www.3dscaleparts.com/product-page/1-25-wire-wheel-big-and-little-with-firestone-wide-rear-tires Looks like a good company to bookmark for future reference!
-
Bump for the pipes & decals. Longshot request, but always amazed at what guys save in their stockpiles ...
-
Ford W Series cab 3D printed. Interested?
Russell C replied to Oldmopars's topic in Truck Aftermarket / Resin / 3D Printed
Who is not this guy, right? https://www.ebay.com/itm/354536014005 The proportions of the sleeper in that one appear to be a ways off ... -
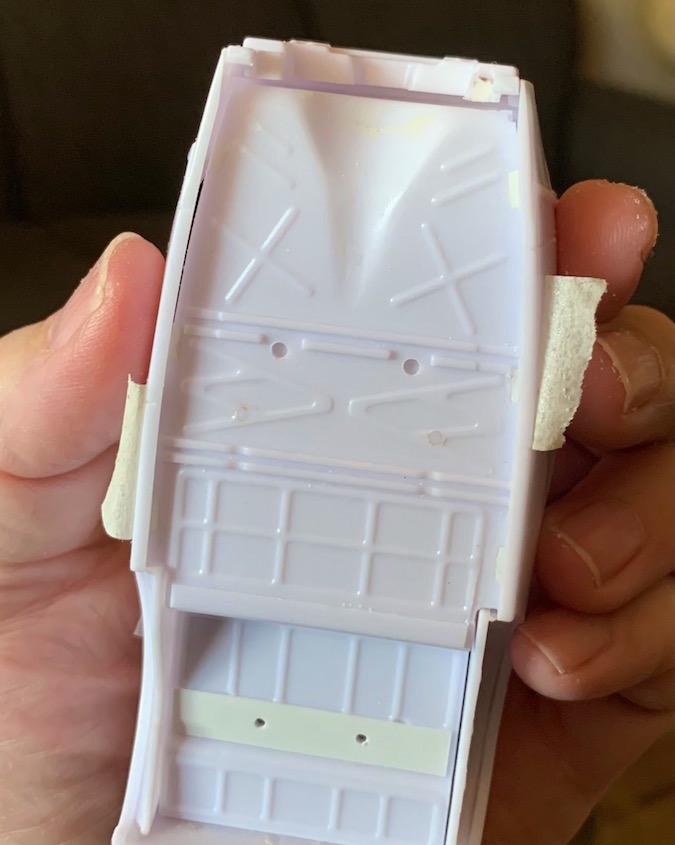
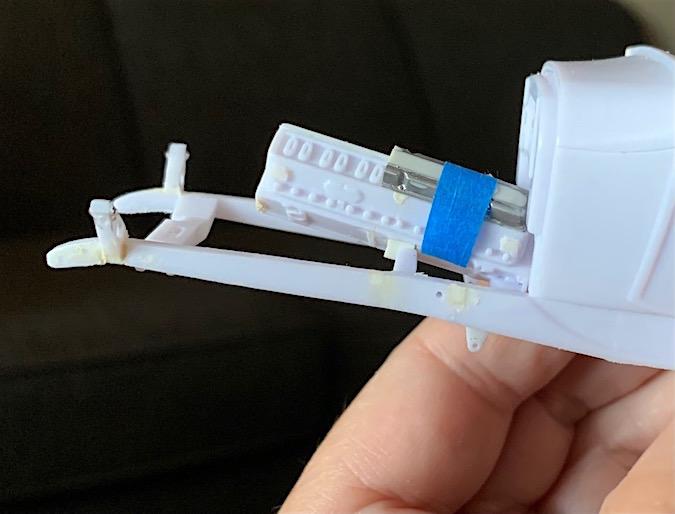
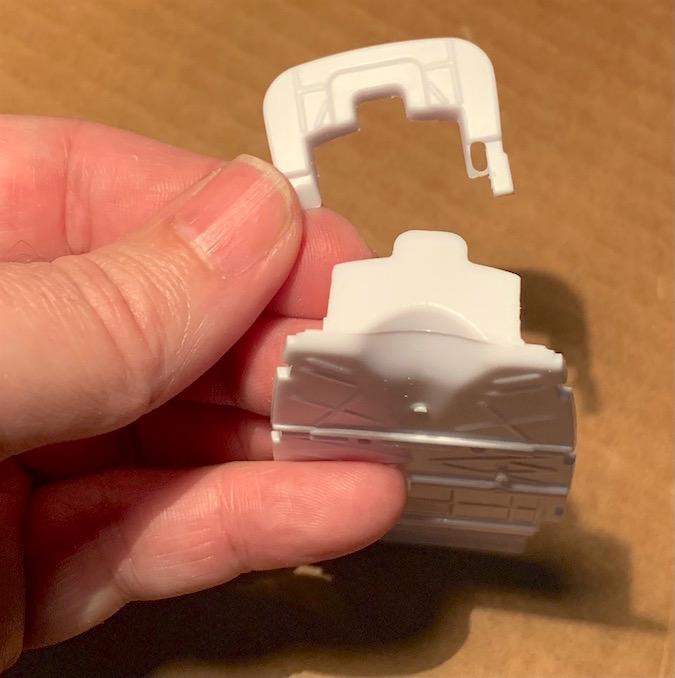
Filled in the 6 tab cutouts at the floor edges, sliced off the corresponding tabs on the interior side panels, filed off the locator circles for where the rear frame crossmember locates to the floor and filled in the dimpled hole locator areas for the exhaust pipes over the rear axle by just putting a big sheet of really thin Plastruc sheet strip over the whole area. Not sure if I am ambitious enough to fill in the exhaust divots in those parallel ribs in the center of the floor, though. The tradeoff in gluing the back vertical lower part of the firewall to the floor to make for a smooth transition in the transmission hump area is now the giant gap where the forward part of the firewall meets that vertical flat area. Will fix that by adding more material to the back of that now-separate front part of the firewall, but after I took this photo I got the firewall to sit maybe another 64th of an inch further back into the body. Well, the slanted over GM engine mostly fits. Will tweak the platform on the engine where it meets the frame mount and engineer one on the other side so that the engine sits lower and more level (my masking tape of the engine to the transmission is really weak here). Might not actually need any sculpting of the firewall for clearance, although the 1/25 scale mechanics that need to work on this car later will probably curse at the builder for making the valve cover too difficult to lift off the engine at the back in such tight quarters …
-
Right at the moment, I believe you have to be on their list to receive an email copy of the registration form when they have it ready to go out: http://www.gslchampionship.org/
-
Naw, in prior efforts it just gave the models more of an incentive to steer right off the shelves ...
-
Untrustworthy that I am, I don't trust that I can avoid having an air gap happening between the firewall and the floor transmission hump area, if I first glue in the floor and then the firewall to the body. So I cut the back-most flat area of the firewall/hump area off and glued that to the floor now, where I can smooth in the area when the glue dries and ensure it is seamless. I can always add in some shim bits to the back of the firewall as I have it now, to make sure it meets up again perfectly with that flat vertical area. I may also have to sculpt it a bit if the slant GM engine has any clearance issues over in the driver's side area. Filled in the hole for the automatic tranny floor shifter since I will have a column shifter. Later, if things work out right, you'll see why I need a smidge more floor space.
-
I NEED A MODEL CAR IDEA
Russell C replied to yo mama's topic in Model Building Questions and Answers
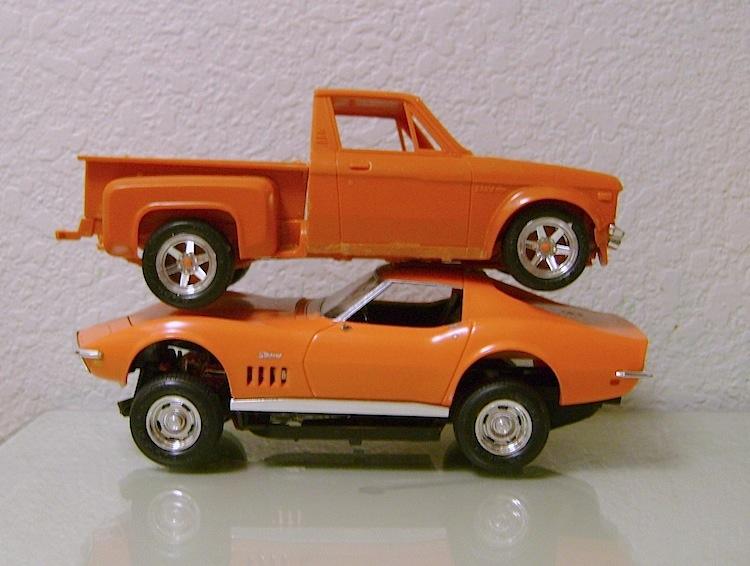
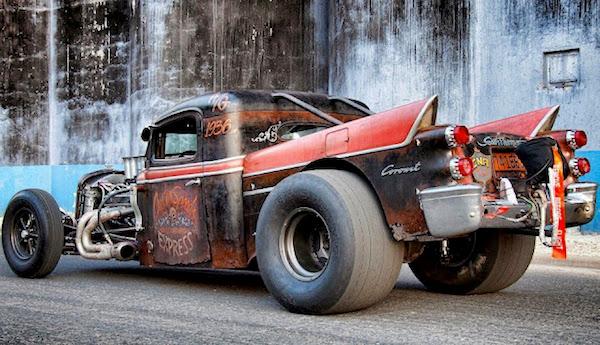
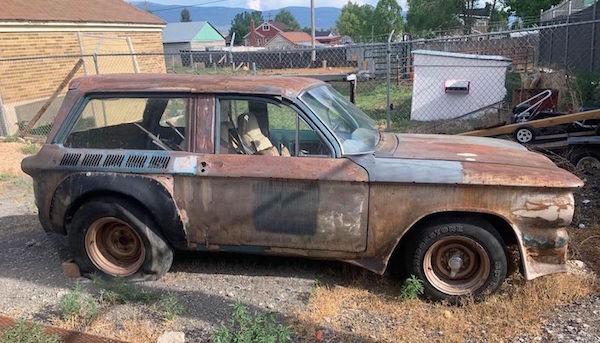
The reality there is that I altered the original photo off Craigslist or some other place, where it was just somebody's stillborn hot rod wagon project. -
I NEED A MODEL CAR IDEA
Russell C replied to yo mama's topic in Model Building Questions and Answers
Corvair hot hatch?
-
Oh, good, I was aiming for something in the range between 5 and 11.
-
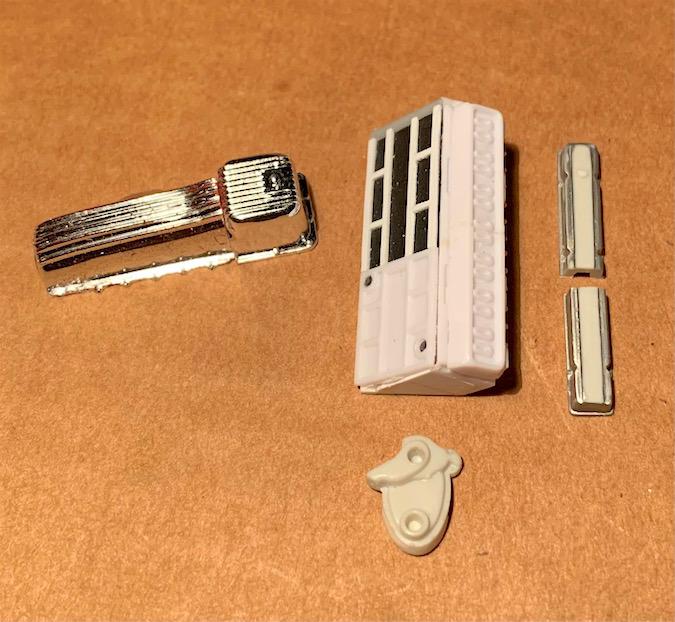
The cobbling-together of the Revell kit's oil pan back area to the glue bomb Red Baron pan I had (the longest ribbed chrome one I had in my parts pile) worked out as well as I guessed. Friction-fit the head and new passenger side wall on the block before final gluing. Change of plans on the Revell valve covers which have slight top arch curves that won't look good when spliced together, so I'll put together the sanded off Edelbrock covers out of the AMT '34 Ford street rod. That center ridge will lend itself better to the long "Chevrolet" letters decal I have. It is really long. I usually run out of fingers counting up that sort of thing. Probably less than 13 from the looks of it so far ….
-
Cabs under construction
Russell C replied to Repstock's topic in WIP: Model Trucks: Big Rigs and Heavy Equipment
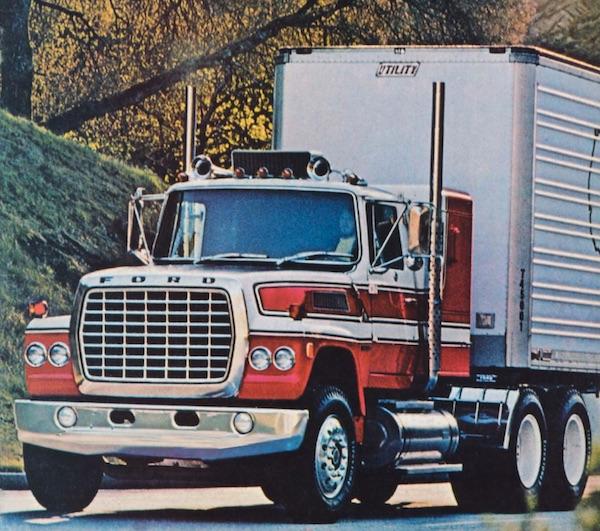
Missed this thread from years back, great starts! I have a weakness for the long hood L Fords, and halfway recently wondered what a phantom late-70s round quadlight version might look like, so I did a quick photo alteration of one of the Ford brochures. Alas, no available time to take on such a model project ...
-
Help me ID this truck, 60’s Ford semi
Russell C replied to Oldmopars's topic in General Automotive Talk (Trucks and Cars)
Wow, I've surfed across his various posts, but missed this one on his assortment of cabs: -
Shout Out to:Bolide Plastic Model Werks!
Russell C replied to stavanzer's topic in Car Aftermarket / Resin / 3D Printed
Have not heard of this company before - one to bookmark! https://www.bolidemodels.com/shop -
Help me ID this truck, 60’s Ford semi
Russell C replied to Oldmopars's topic in General Automotive Talk (Trucks and Cars)
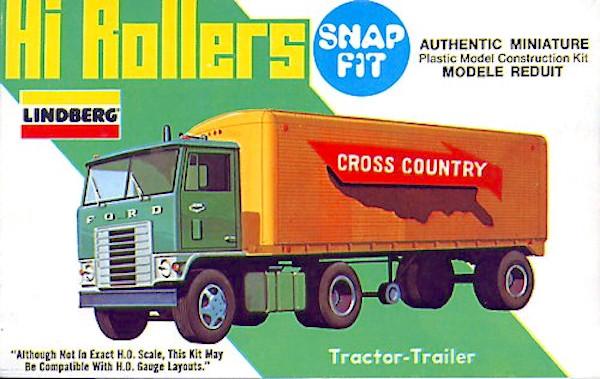
Day cab already available in kit form ....... if ya don't mind that it is 1/87 scale and a bit more primitive that what the box illustration shows. (dump body might also be available in the same scale for model railroad builders)


until