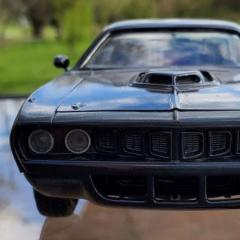
pcm1977 Posted February 19, 2016 Share Posted February 19, 2016 I was doing some cleaning and discovered I had one of these laying around from a model I started a long time ago and ruined the body, but kept the other pieces. This got me to thinking...so i bought one of these from eBay I figure I'll stretch the frame a bit, custom exhaust, and maybe even try to fit the Viper's seats into it. Then I'm going to paint it like this. What do you think? Quote Link to comment Share on other sites More sharing options...
Foxer Posted February 19, 2016 Share Posted February 19, 2016 most excellent! Quote Link to comment Share on other sites More sharing options...
CFMgarage Posted February 19, 2016 Share Posted February 19, 2016 YES! I'd drive that haha Quote Link to comment Share on other sites More sharing options...
GTJUNIOR Posted February 19, 2016 Share Posted February 19, 2016 Awesome idea. Quote Link to comment Share on other sites More sharing options...
cobraman Posted February 19, 2016 Share Posted February 19, 2016 Go for it ! Quote Link to comment Share on other sites More sharing options...
69NovaYenko Posted February 19, 2016 Share Posted February 19, 2016 (edited) Sounds like you got a plan..as Nike shoe says "Just Do It"! :-) I gonna be following this one. Edited February 19, 2016 by 69NovaYenko Quote Link to comment Share on other sites More sharing options...
Roadrunner Posted February 20, 2016 Share Posted February 20, 2016 Sounds crazy enough to be cool. Quote Link to comment Share on other sites More sharing options...
pcm1977 Posted March 9, 2017 Author Share Posted March 9, 2017 So It has been a little over a year since I floated this idea and I am finally getting around to this one. First I have to figure out how much I need to stretch the frame and make modifications to the body if necessary. I decided to build up the engine that comes with the Revell '29 and measure it against the Viper's V10 and increase the size of the frame to make up the difference. Much to my surprise the overall engine and transmission of each engine is relatively the same. and the width is about the same on the bottom side (the part between the frame rails) of the engines. Another pleasant surprise was the exhaust. I took the manifold off the V10 and placed it next to the manifolds of the '29. They matched up with the exception of the lack of a 5th pipe. However as you notice below a properly placed piece of styrene and some scratch building and I have a sweet exhaust for the V10. The bonus is that the way the '29 manifold sits it appears that I do not need to modify the frame width to fit the exhaust inside it. One last thing. I am considering finishing the '29 engine and either using it for another build or a diorama. However I do not know what type of engine it is, so I can make sure I get it done up correctly. Thanks. Quote Link to comment Share on other sites More sharing options...
Jantrix Posted March 9, 2017 Share Posted March 9, 2017 One last thing. I am considering finishing the '29 engine and either using it for another build or a diorama. However I do not know what type of engine it is, so I can make sure I get it done up correctly.Thanks. It's a Buick nailhead. I like your project. Maybe come up with some sort of crazy intake to put like 8 or 10 carbs on it? Quote Link to comment Share on other sites More sharing options...
Modelbuilder Mark Posted March 9, 2017 Share Posted March 9, 2017 Good to see you on this one again. Quote Link to comment Share on other sites More sharing options...
pcm1977 Posted March 10, 2017 Author Share Posted March 10, 2017 Tonight I started the planning phase of what i need to do to fit the V10 into the frame of the '29. I took some general measurements of each engine and compared them to come up with how much I need to adjust the frame. After looking over everything I came to the conclusion that I need to extend the frame about .025 of an inch. I also need to move the engine mounts back about 0.080 of an inch. Those two adjustments and I think the larger V10 will fit in the frame. Quote Link to comment Share on other sites More sharing options...
landman Posted March 10, 2017 Share Posted March 10, 2017 Interesting project. V10s make good swaps. I have two in big Dodge trucks. So why not in a Ford? Quote Link to comment Share on other sites More sharing options...
espo Posted March 10, 2017 Share Posted March 10, 2017 I think this is a great idea. The only fitment problem I see is at the rear of the engine. Not sure how much clearance you have at the firewall, but it looks like the Viper is taller in the firewall area than the Buick. The Viper intake manifold looks like it would stand taller than the Buick distributer would. Quote Link to comment Share on other sites More sharing options...
pcm1977 Posted March 10, 2017 Author Share Posted March 10, 2017 I think this is a great idea. The only fitment problem I see is at the rear of the engine. Not sure how much clearance you have at the firewall, but it looks like the Viper is taller in the firewall area than the Buick. The Viper intake manifold looks like it would stand taller than the Buick distributer would. Thanks espo, I have been worrying so much about getting it in the frame that i totally forgot about body fit. The V10 does sit higher in the frame that the Nailhead and I had not worried too much about that since I had no intentions of putting a hood on it. Quote Link to comment Share on other sites More sharing options...
espo Posted March 10, 2017 Share Posted March 10, 2017 Thanks espo, I have been worrying so much about getting it in the frame that i totally forgot about body fit. The V10 does sit higher in the frame that the Nailhead and I had not worried too much about that since I had no intentions of putting a hood on it.You might see if the firewall can be pushed back inside the cowl or even notch the cowl to clear. I have seen where some builders are even creating a flat firewall in place of the kit's. Quote Link to comment Share on other sites More sharing options...
pcm1977 Posted March 12, 2017 Author Share Posted March 12, 2017 So I worked some more on this one tonight. I took into account the firewall just as espo suggested. The good thing is that the firewall is almost vertical so it did not appear to be an issue. However the transmission hump was. I took some measurements and began to try and figure out how much I would have to cut out of the hump to fit it all in once I extend the frame. I did not want to extend the frame too much and put a large gap between the firewall and the back of the engine and was ready to give up till I decided to work on moving the engine mounts. I realized that the mounts sat on the top side of the frame and angled upward. I was going to cut them off and move them back approximately 0.080". As I looked over them and the angle on the side of the engine block, I realized that if I simple cut them off, moved them back the 0.080" and then flipped them over and placed the lower angle of them up. When I glued them back on I lined them up with the bottom of the frame. This lowered the engine considerable in the frame and will allow the transmission hump to fit over the transmission with not modification once the frame is stretched 0.025" just behind the engine mounts. I mocked up the body and engine along with the low profile tires I plan on using. The new engine mounts from the top. and from the bottom With the tires. Quote Link to comment Share on other sites More sharing options...
crazyrichard Posted March 12, 2017 Share Posted March 12, 2017 cool project ! Quote Link to comment Share on other sites More sharing options...
KWT Posted March 12, 2017 Share Posted March 12, 2017 I definitely like where this is going. I'm going keep an eye on this. Quote Link to comment Share on other sites More sharing options...
Jantrix Posted March 12, 2017 Share Posted March 12, 2017 Interesting project. V10s make good swaps. I have two in big Dodge trucks. So why not in a Ford? Agreed. The way I see it, if they can put a small block Chevy in EVERYTHING, why not a Viper V10? I put one in a Camaro . Nice work on this. Pretty clever use of the Legos. I'll likely shamelessly steal that idea. Quote Link to comment Share on other sites More sharing options...
pcm1977 Posted March 13, 2017 Author Share Posted March 13, 2017 Worked a bit more on the frame this afternoon and this evening. I cut the frame and put a piece of styrene 0.025" long on each side just behind the engine mounts. Since I did not have the right size of rectangular styrene I sandwiched three pieces of flat sheets together. A bit of sanding and some putty and you should not even be able to tell I put them in. I also added the extra pipe to each header this evening. Just waiting for the glue to dry, then I will put the flange on it and a bit of sanding. The next issue I came across this evening was the brace for the back end of the transmission. The original brace that came with the kit holds the end of the larger transmission too high, which interferes with the bottom of the body. While not a big deal I just did not want to make a new one from scratch...o'well. Thanks for looking I also mocked up the engine and body to see how they looked against the stretched frame. Quote Link to comment Share on other sites More sharing options...
pcm1977 Posted March 15, 2017 Author Share Posted March 15, 2017 (edited) Did a bit of work on the frame this evening. I accidentally broke the frame apart on the one side when washing it before painting. I glued it back together last night and added some thin pieces of styrene to the inside of the frame for reinforcement. Tonight I modified the cross brace/transmission support. I simply cut out the middle and added a curved piece of round styrene. Her are some pictures of what it should look like with the engine and the body. Talk about building a car around the engine As I looked over what I had done tonight it came to me. Once I get the axles and wheels I was planning on using on the car the oil pan and transmission bell are too low in the frame and actually looks as if they will keep the wheels off the ground. Initially I think all I have to do is boost the back end of the transmission up and put some blocks on the rear axle to drop it some. I hope this "boost" does not make the car look too tall over all, since my original idea was to keep this as low as possible. Edited March 15, 2017 by pcm1977 Quote Link to comment Share on other sites More sharing options...
alan barton Posted March 15, 2017 Share Posted March 15, 2017 Peter, mate, please don't raise the back of the trans and put blocks on the rear end. Instead, add a few shims on top of your front engine mounts. Your side view looks to me like that would raise the pan enough to keep the car low to the ground. I realise you might have to play with the transmission hump and firewall but it will be worth it. Stance should never be compromised by things like ground clearance! if it doesn't look good, who will want to ride in it?I really like where you are going with this. I've got a spare Viper motor at home - will have to have a look tonight!CheersAlan Quote Link to comment Share on other sites More sharing options...
pcm1977 Posted March 15, 2017 Author Share Posted March 15, 2017 Peter, mate, please don't raise the back of the trans and put blocks on the rear end. Instead, add a few shims on top of your front engine mounts. Your side view looks to me like that would raise the pan enough to keep the car low to the ground. I realise you might have to play with the transmission hump and firewall but it will be worth it. Stance should never be compromised by things like ground clearance! if it doesn't look good, who will want to ride in it?I really like where you are going with this. I've got a spare Viper motor at home - will have to have a look tonight!CheersAlanAlan, Thanks for the advice, but I don't know if raising the engine is an option right now. The overhang on the upper part of the firewall is pretty close right now. I do not want to really add another bit into the frame and push the body back, that was a pain in the A!!. Quote Link to comment Share on other sites More sharing options...
pcm1977 Posted March 22, 2017 Author Share Posted March 22, 2017 So I have made a bit of progress over the past couple of days. I had to reinforce the frame in the cut location some more. I added some very thin pieces of styrene on both sides of the frame and will sand them down to blend them in once the glue dries for a day or two. I also added some styrene to the tops of the engine mounts and raised the transmission mount in a attempt to raise the engine up some more. This however had and adverse effect on the fit with the firewall. After numerous attempts at trying to modify the firewall I finally gave up and cut the body back slightly and added a vertical piece of thick styrene and began to blend it in to the body. Maybe I will put some bare metal foil on the new firewall. New Height I was pleasantly surprised when I gave the seats out of the Viper a try in the body and they fit. I was so excited, because I want to use these so bad. I also mocked up a stick from the junk box and I am liking the look. The other thing I worked on was the paint colors. After some research I discovered that the Iron Man red from the movies is rustoleum colonial red and the gold is a gold metallic I had sitting around. I put a clear coat on the metallic and it dulled it down a bit making it perfect. The rims and some other small pieces will be painted flat steel. Thanks for looking/watching. Quote Link to comment Share on other sites More sharing options...
pcm1977 Posted April 2, 2017 Author Share Posted April 2, 2017 Worked a bit more on this one this evening. I have been fighting a bad cold for a week and my life was either spent at work or on the couch. I finally got the headers done. If you guys remember I took the headers from the '29 and added a piece of styrene to the space in the middle to create another pipe. I think they look pretty good now that I have them painted with a flat steel color. I figure I will paint the rest of the exhaust the same color. I got the tires and wheels with the brakes painted and together. I decided that flat steel was the way to go with these too and put the kits moon caps on them. A couple more pieces painted up. Axles, dashboard and headlights. The headlights are the gold color that I am going to paint the frame and some other small parts. The last thing I got to tonight was one of the rear coil over shocks. Since these are very visible I wanted to add some detail to them, but I was having difficulty painting up the ones that came with the kit to my liking. So I decided to simply make some out of rod styrene and wire. The biggest issue I had was the ends of the shock. I decided since I would not be using the ones that came with the kit, Cutting off the ends and gluing the styrene rods to them to create each side of the shock. Then I simple slipped the coiled wire over the larger side and put a small drip of glue on the end of the wire on each end. After the glue on the wire is dry the shock should have a little bit of adjustment to them so they will fit as good as the originals. Just need to touch up the paint (did not notice till I was posting picture). I have a simple question at this point hoping that someone has an answer for me. Since I cut the body back and I redid the firewall, there does not seem to have a lot of detail on it. I was thinking that maybe I could and a brake booster to the firewall engine side of the firewall to dress up the blank space a bit. I mean if I had one of these engines in a rod like this I would want as much help as possible to come to a stop. I found one in my junk box and started touching the paint on it up. I know that a real rod like this would not have had one, but would it be possible that after the modifications similar to the ones I am doing, something like this might have been added? Thanks Quote Link to comment Share on other sites More sharing options...
Recommended Posts
Join the conversation
You can post now and register later. If you have an account, sign in now to post with your account.
Note: Your post will require moderator approval before it will be visible.