ModelcarJR
-
Posts
1,648 -
Joined
-
Last visited
Content Type
Profiles
Forums
Events
Gallery
Everything posted by ModelcarJR
-
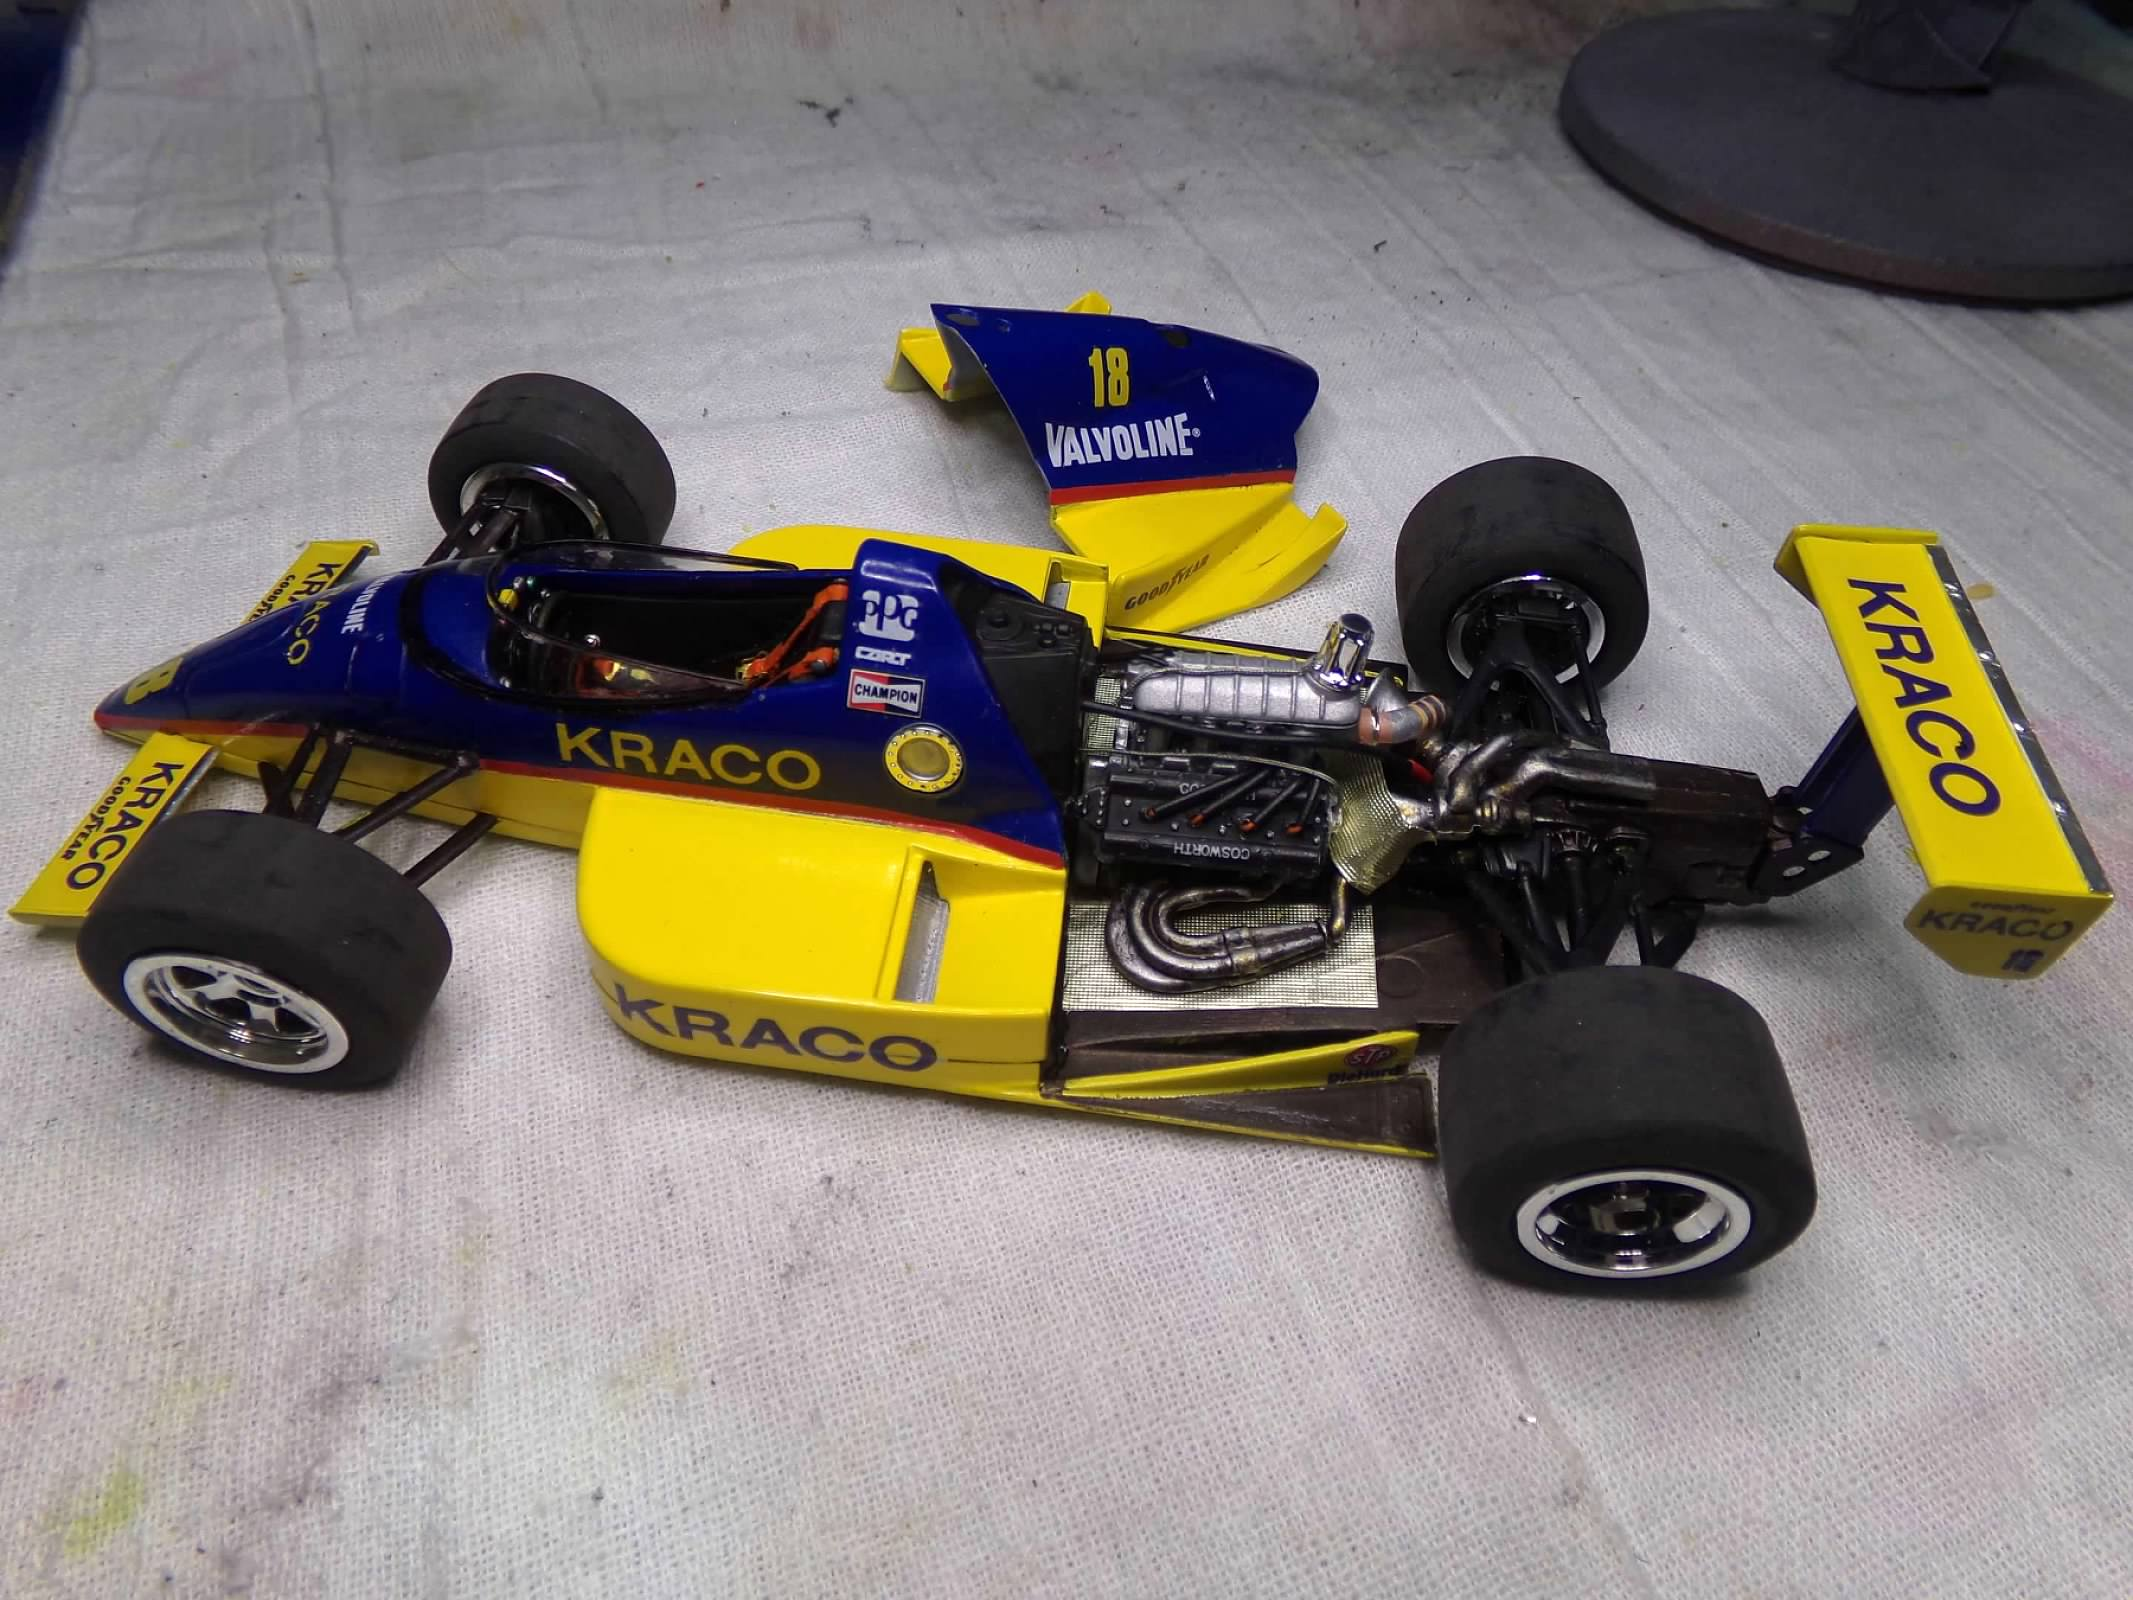
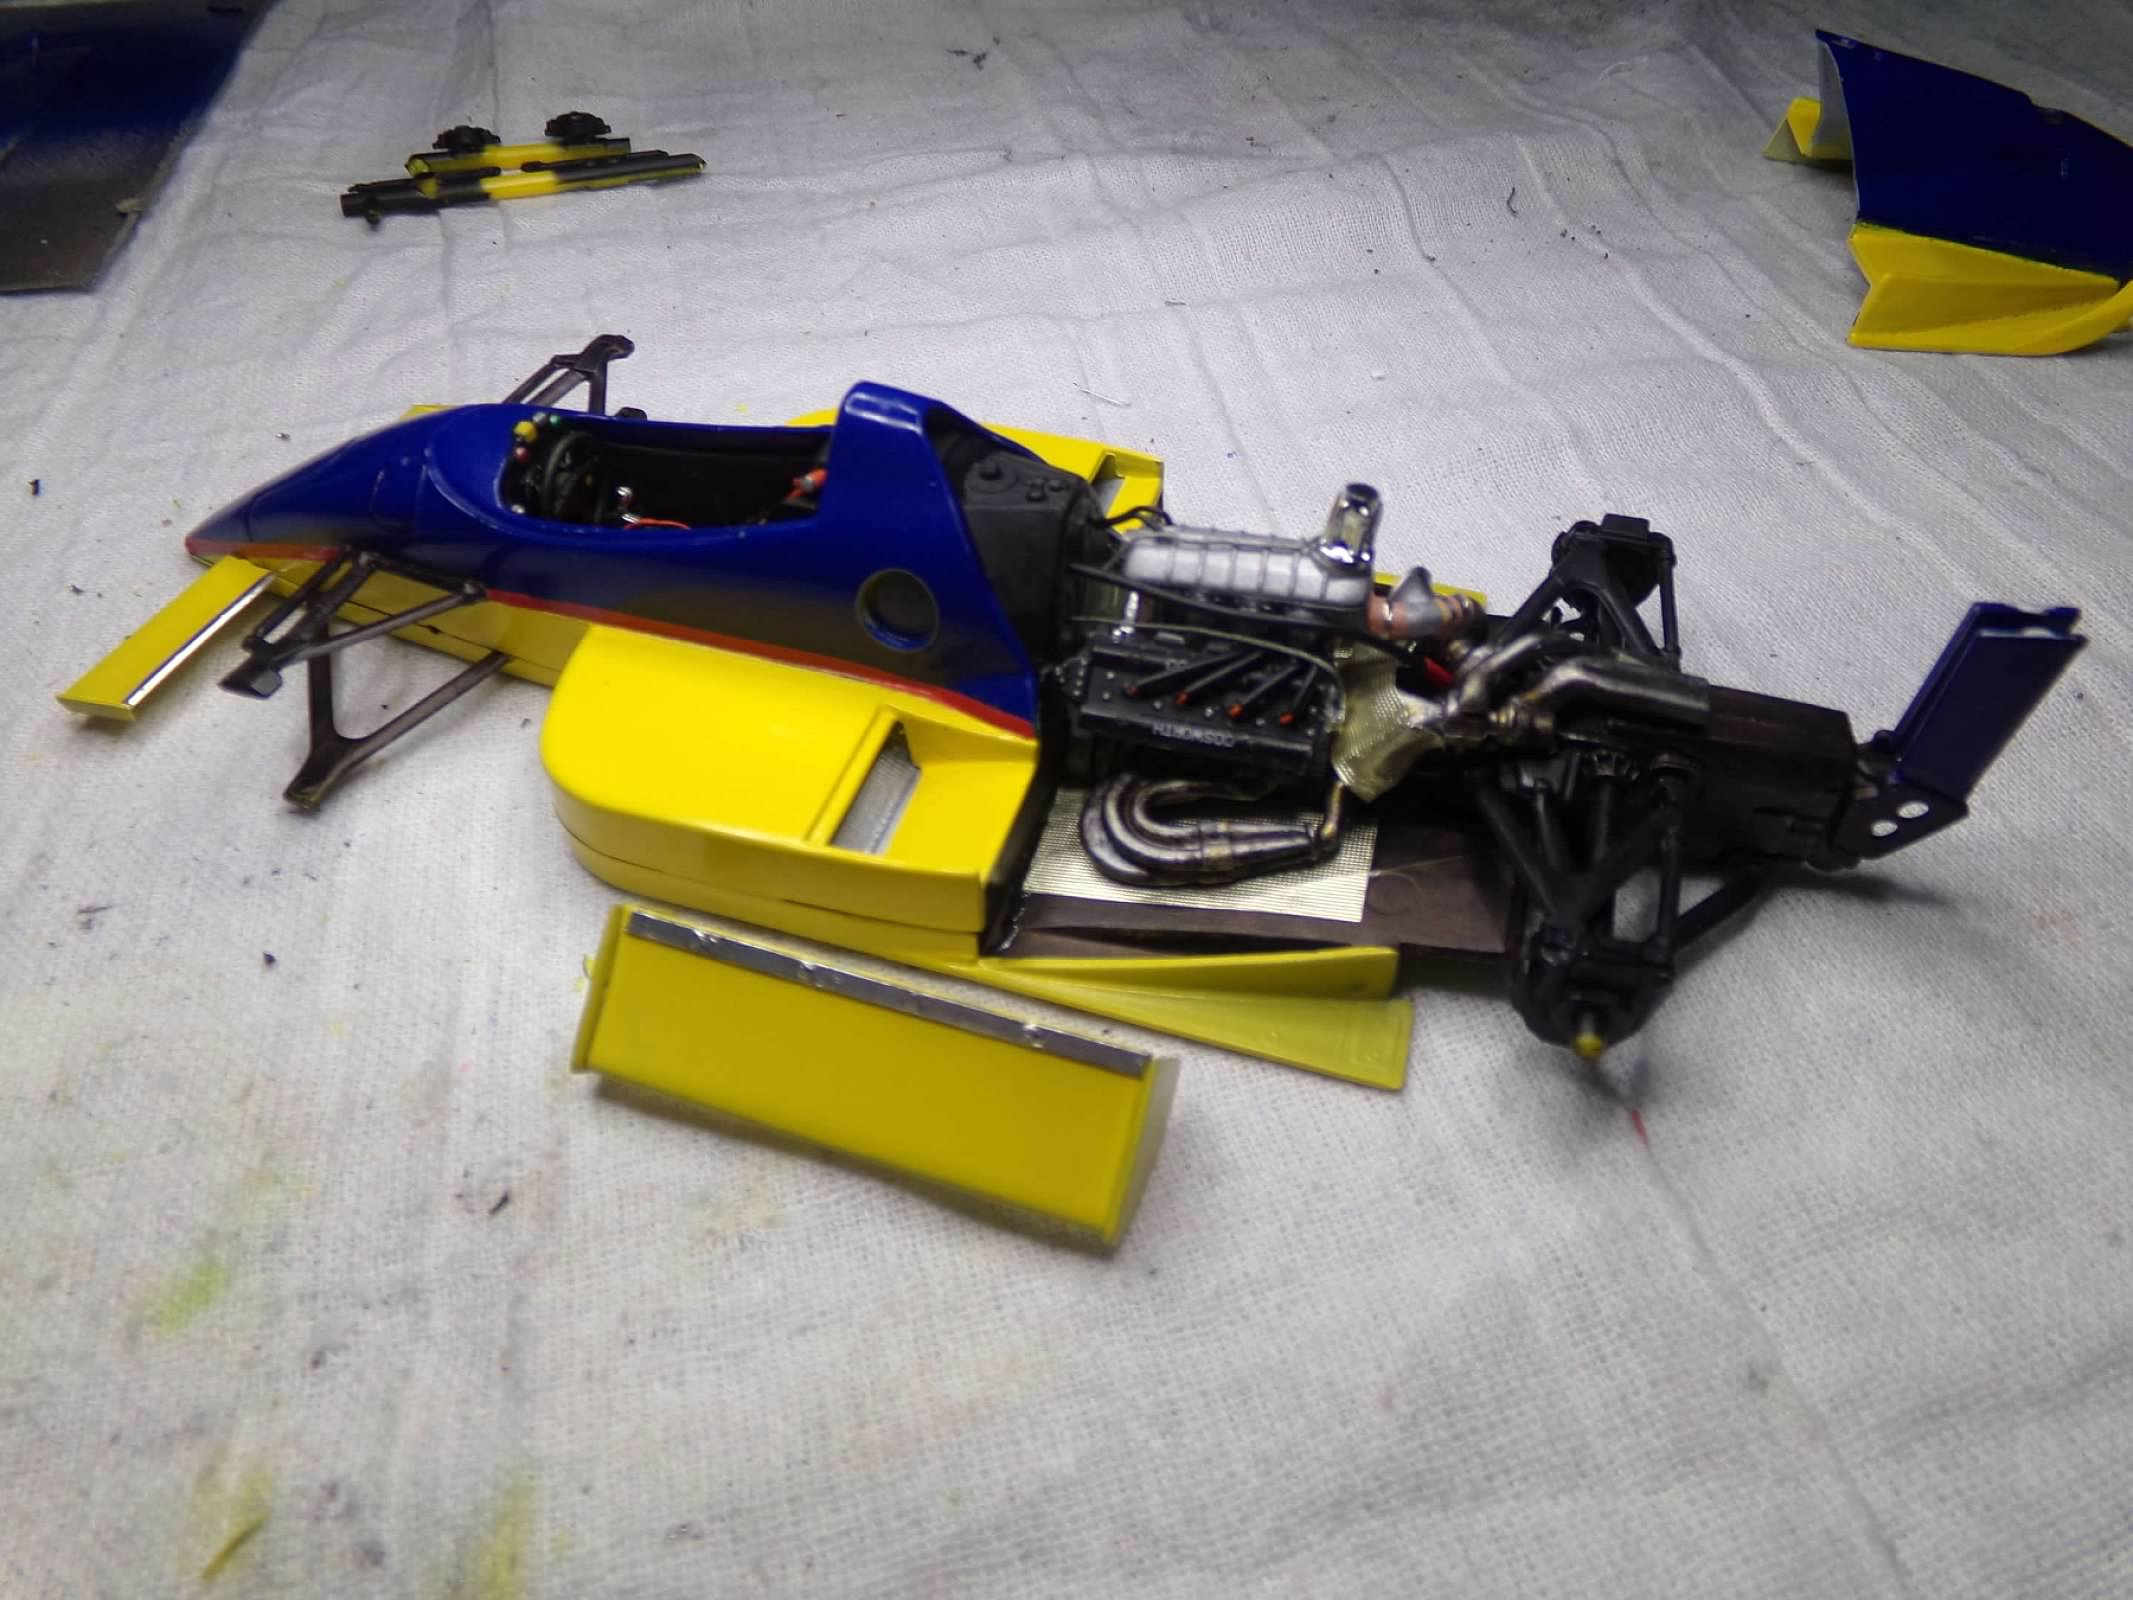
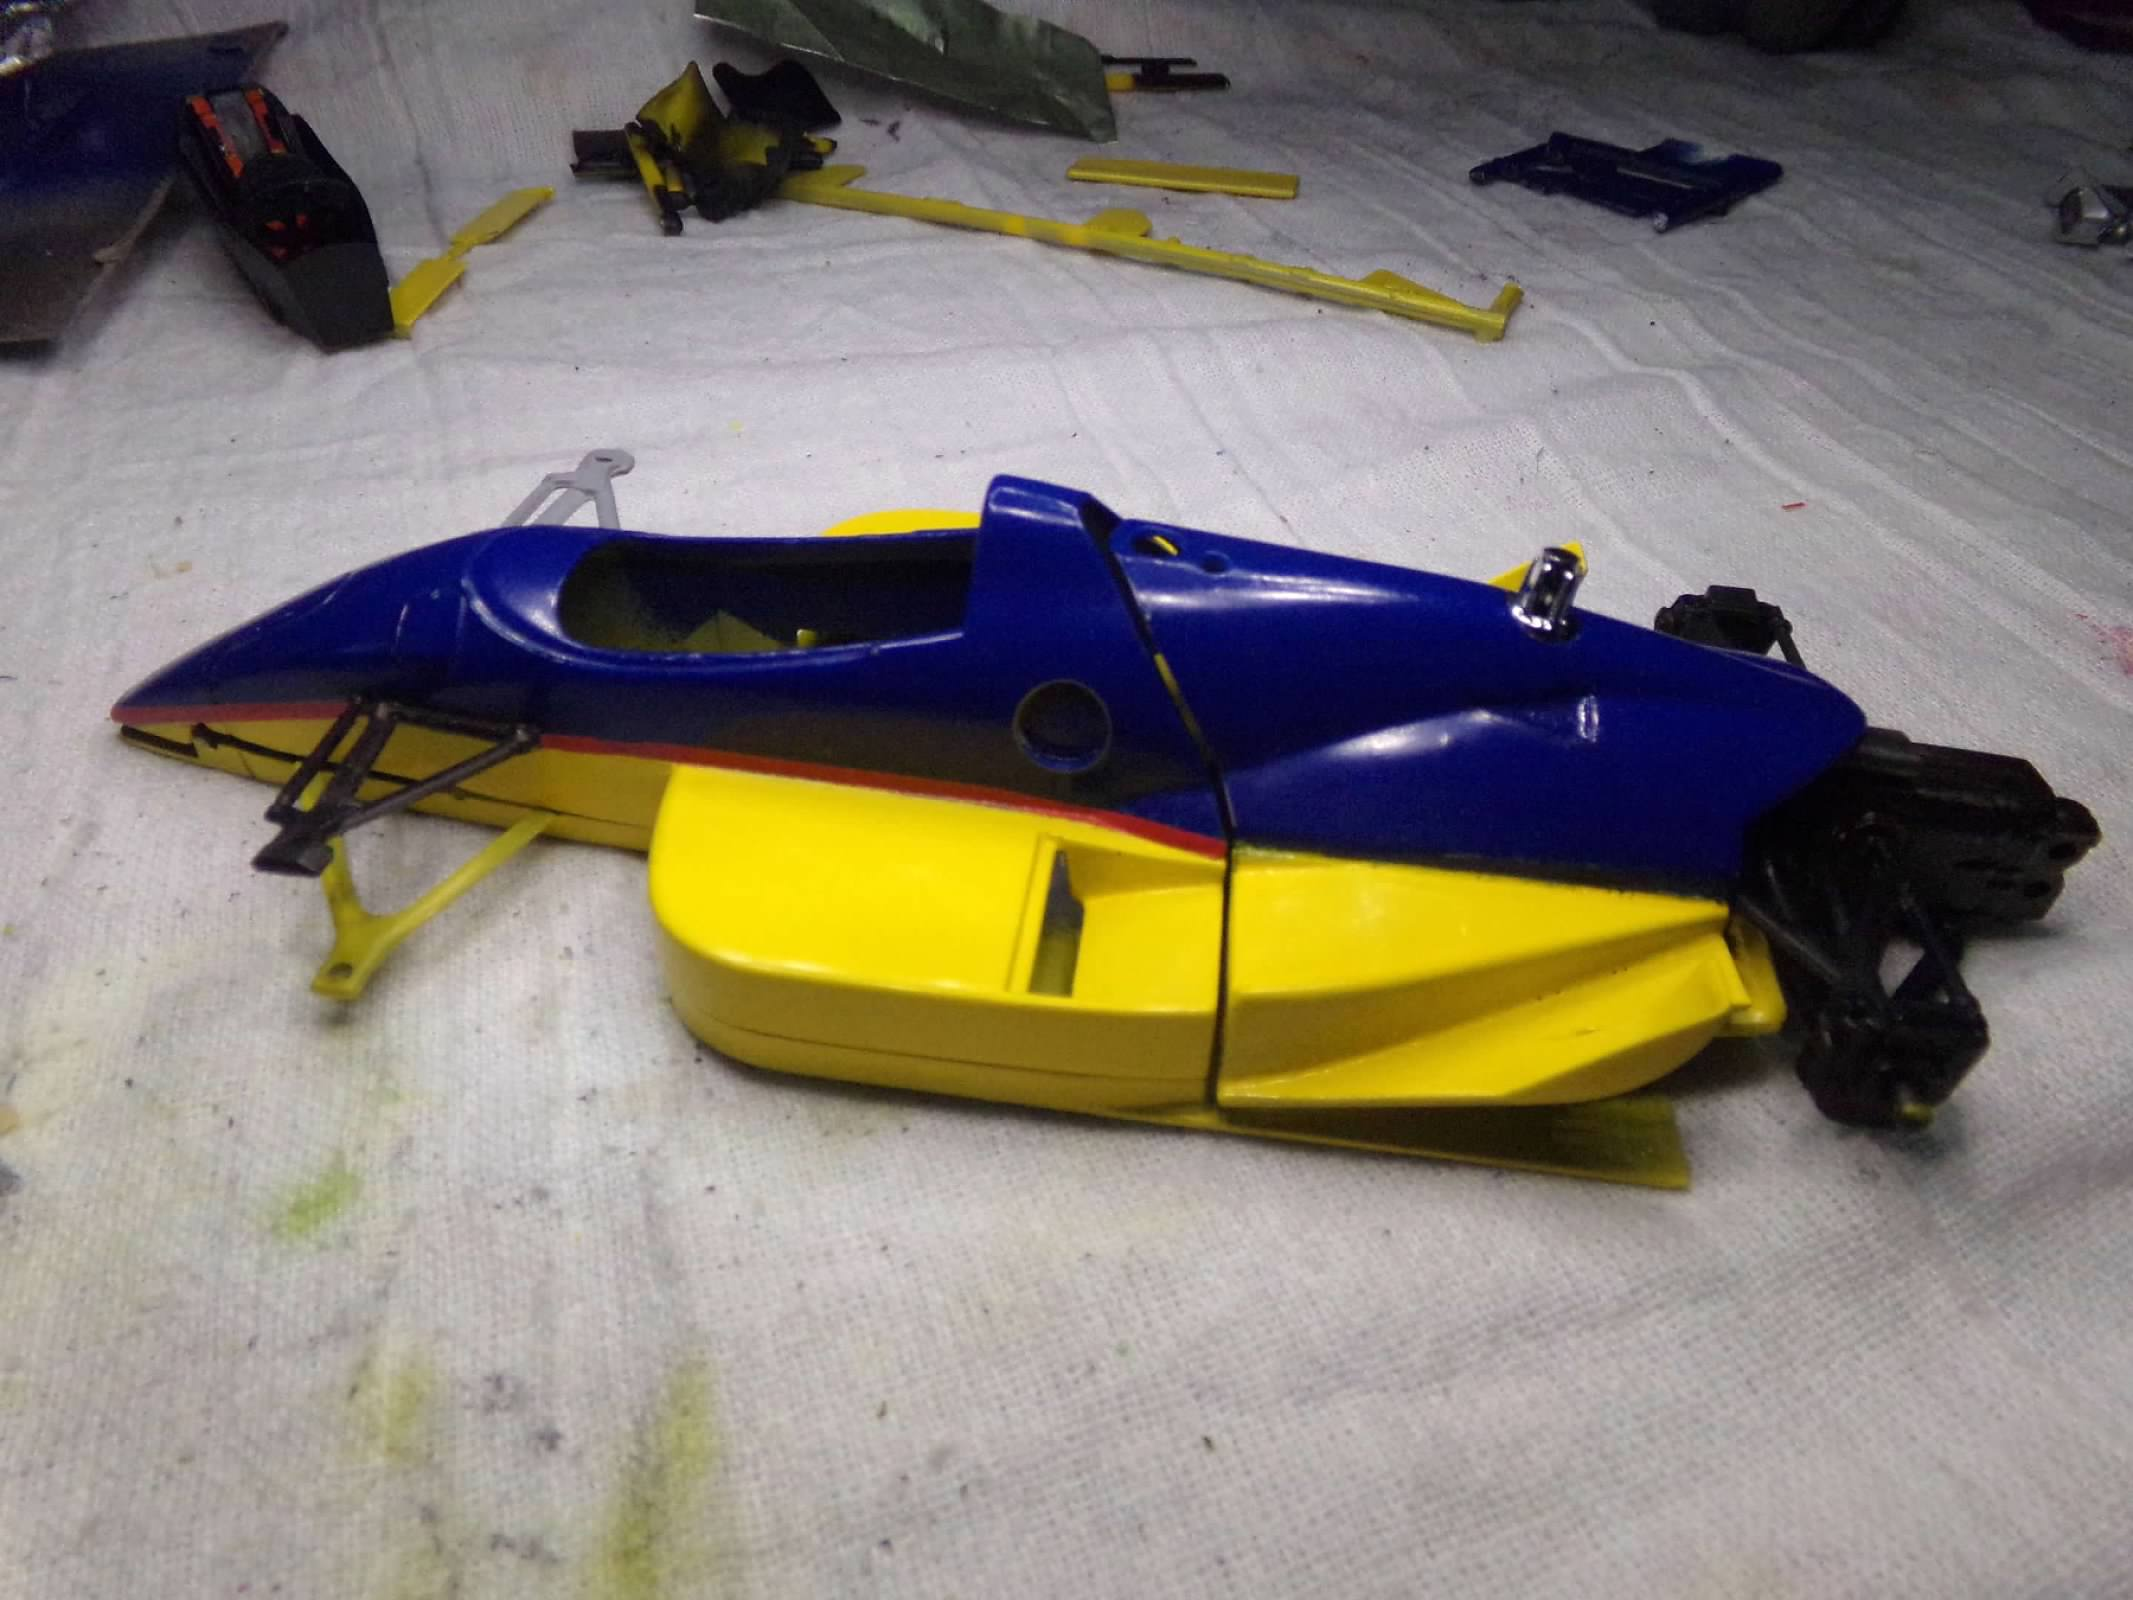
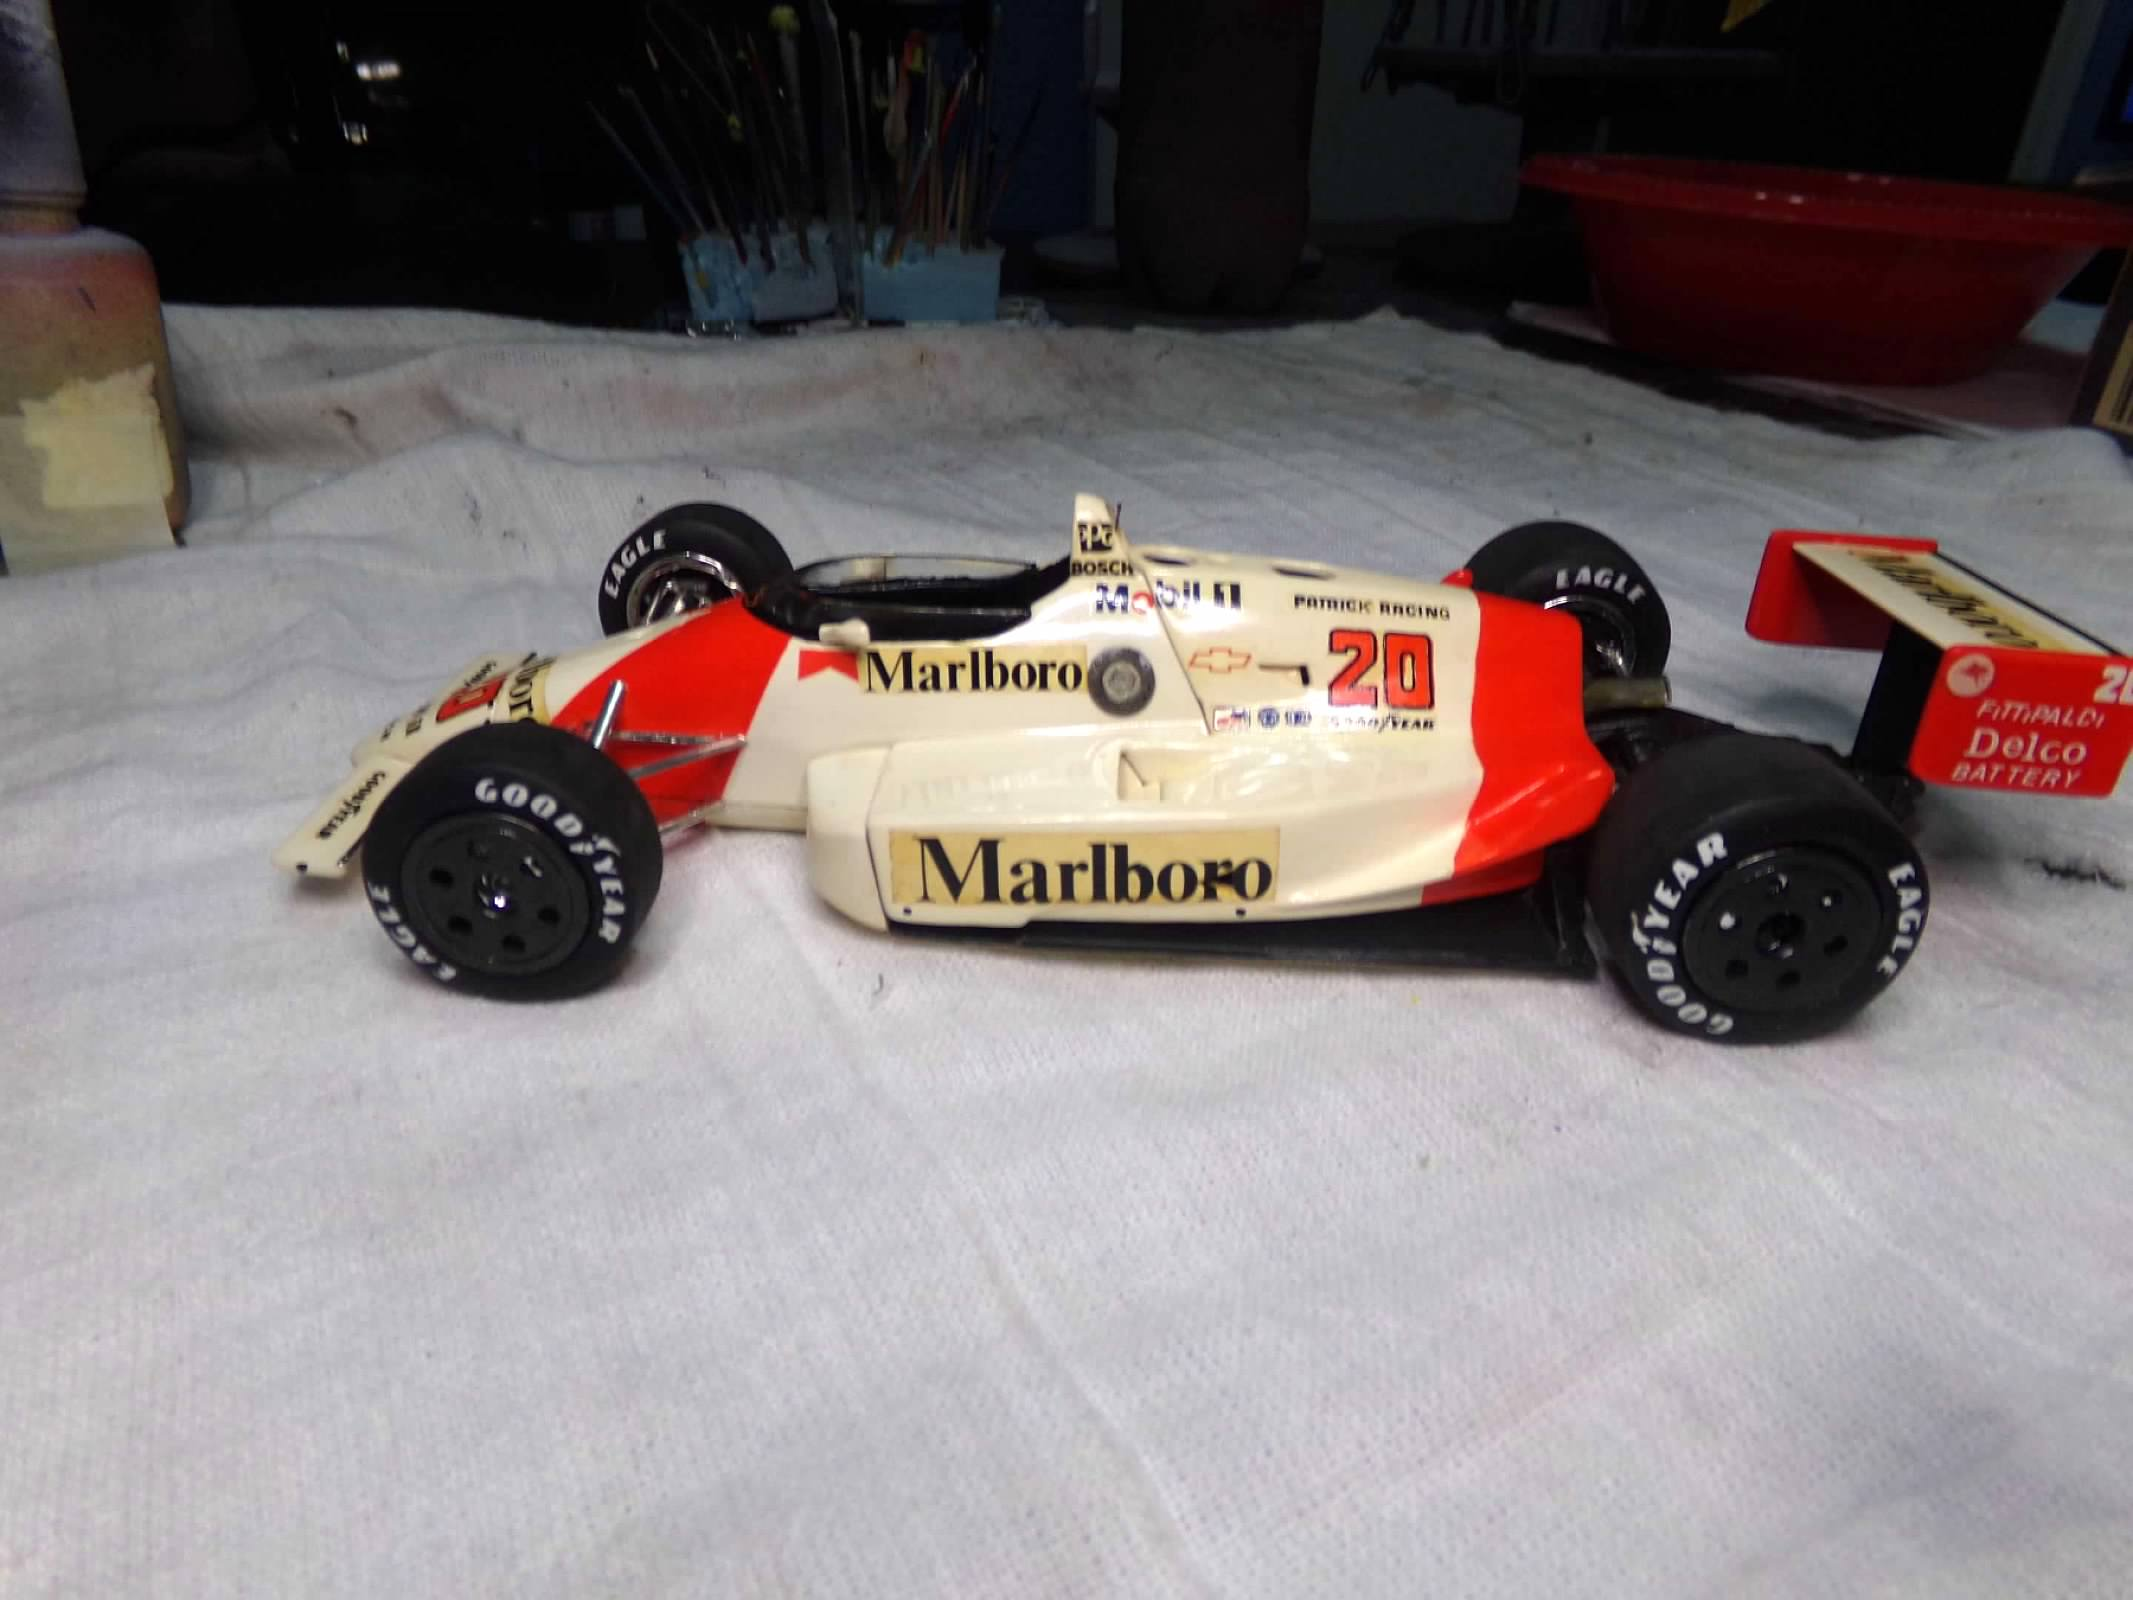
This is a mock-up of the finished race car without the tire decals and the mirrors. The tire decals will be much easier to apply with the tires and wheels off. I'm leaving the mirrors off until the end so I don't inadvertently knock them off while mounting the tires and wheels. Thanks for looking! ?

-
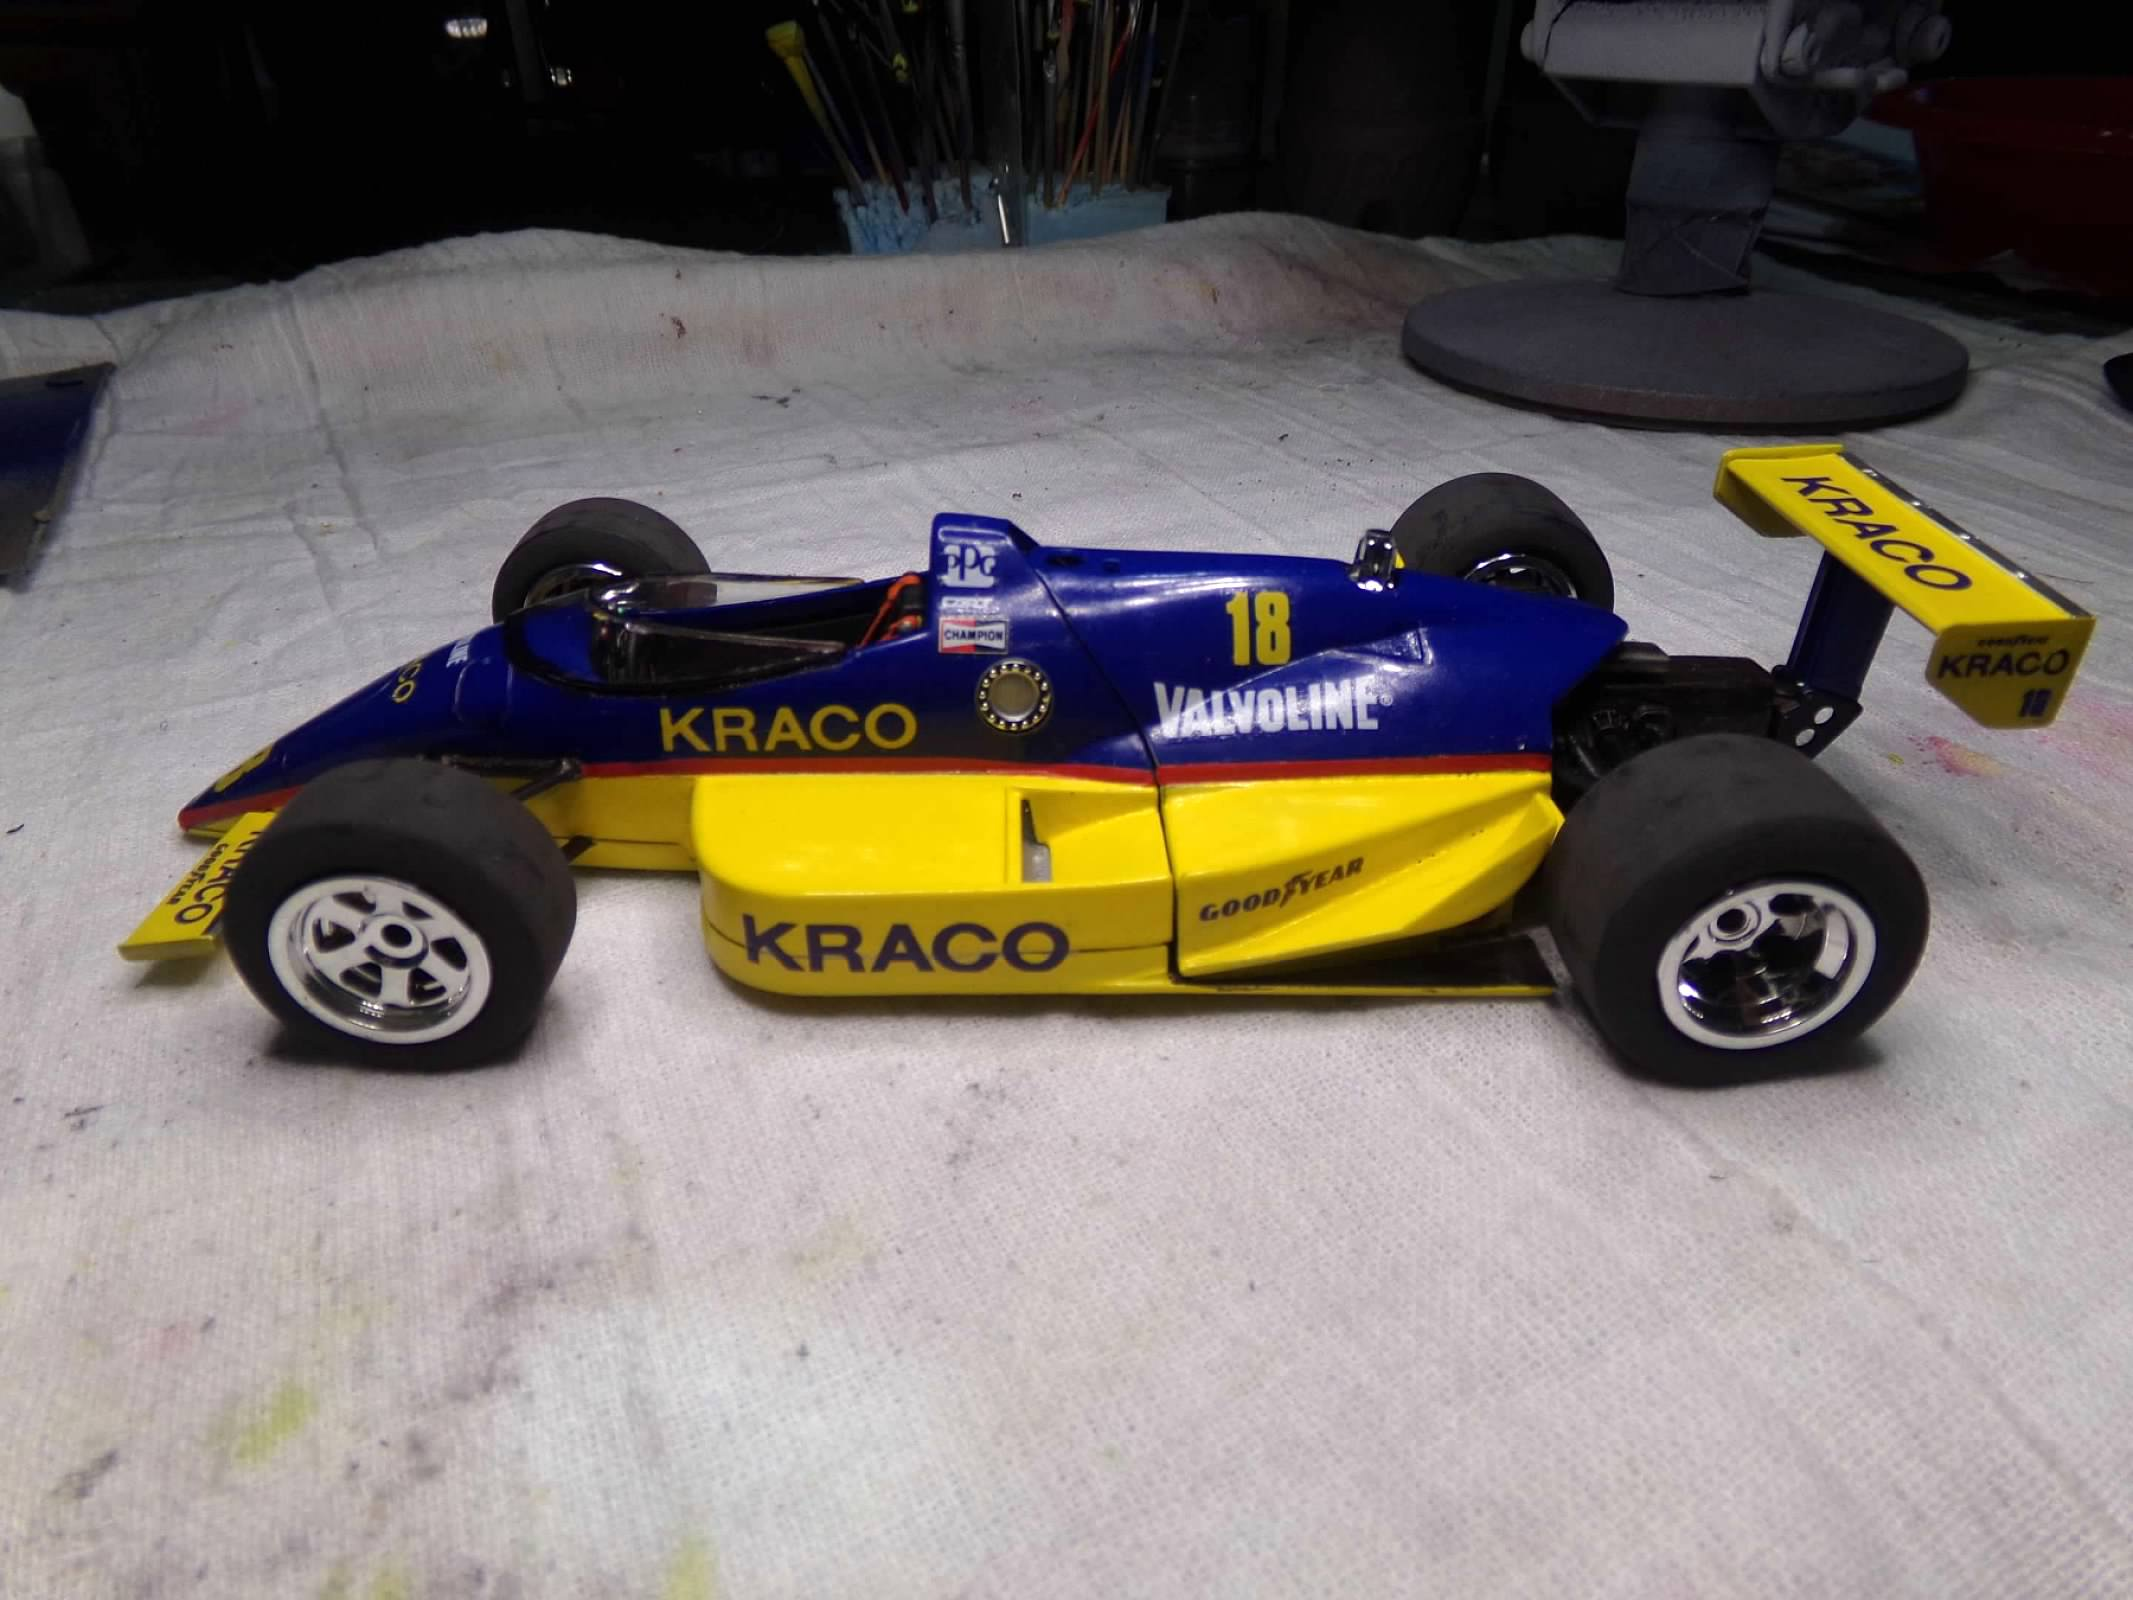
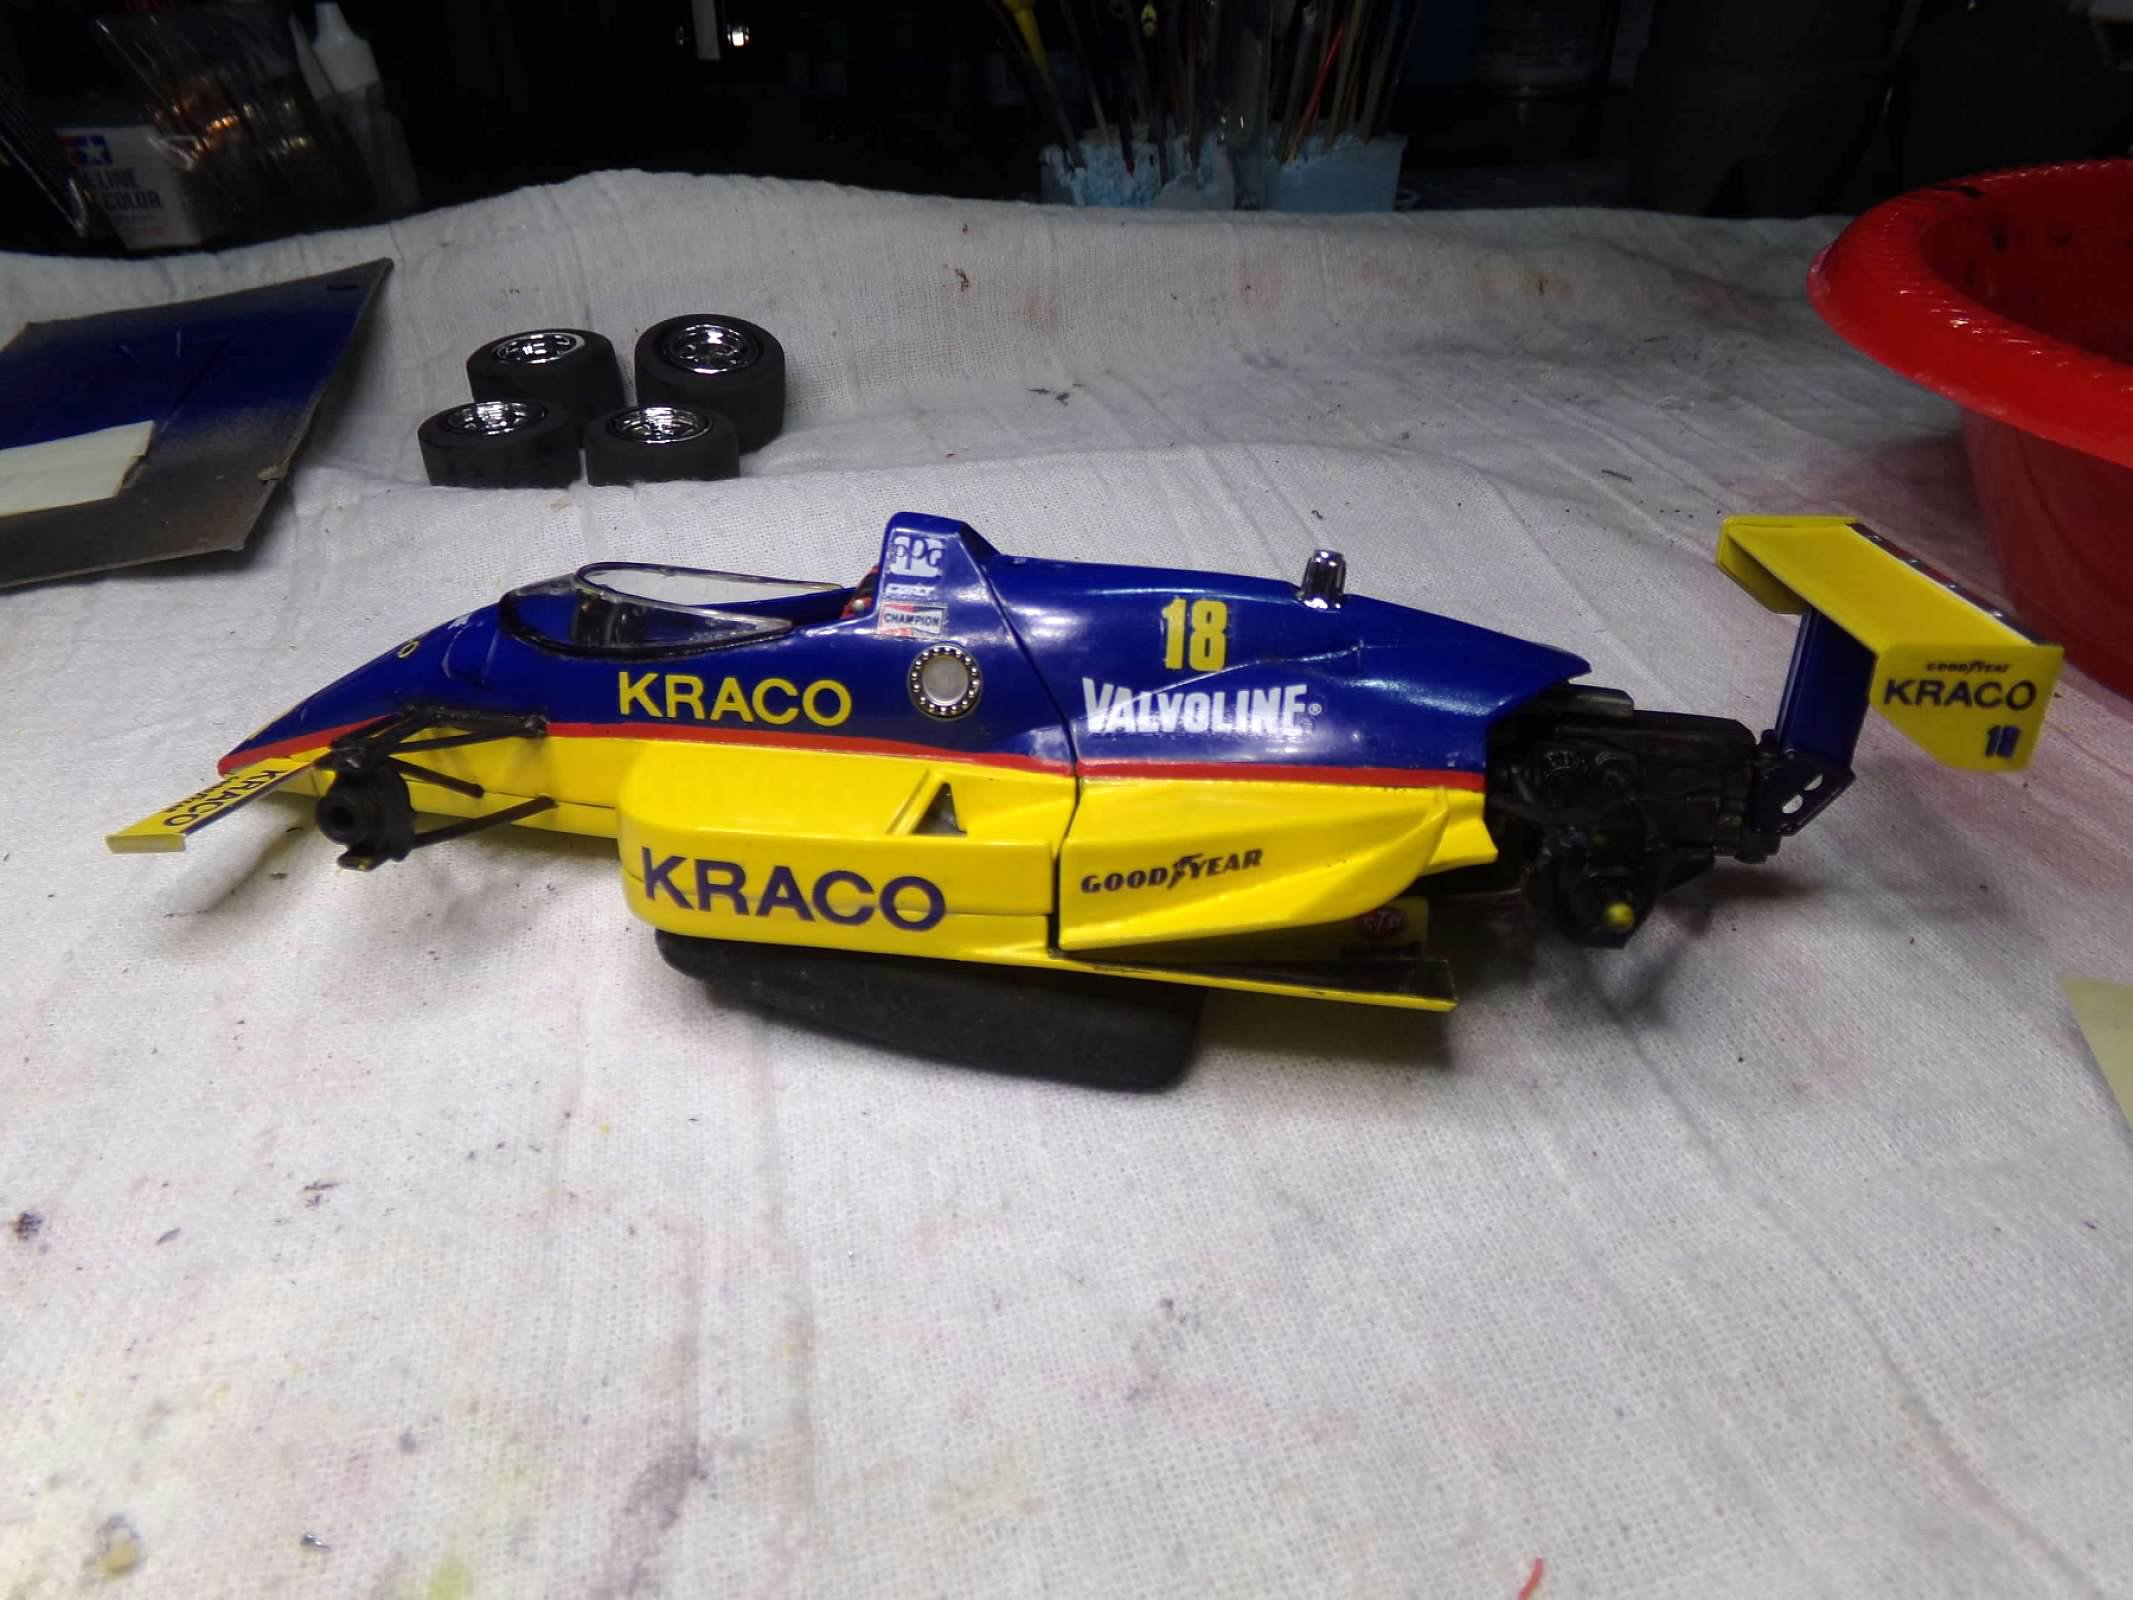
Decals are almost done and the tire decals from IndyCals were mailed today. I have to be careful with these decals as they are very old kit decals and will split very easily. I noticed that there are slim red decals meant for the paint separators but I have already added some that I cut from another decal sheet that are thicker. I'm sure that the thin ones on the sheet would have broken apart. Once I have the tire decals I will apply them and then mount the very tiny mirrors and add some mirror foil before mounting them. I probably can finish this year! Thanks for looking! ?
-
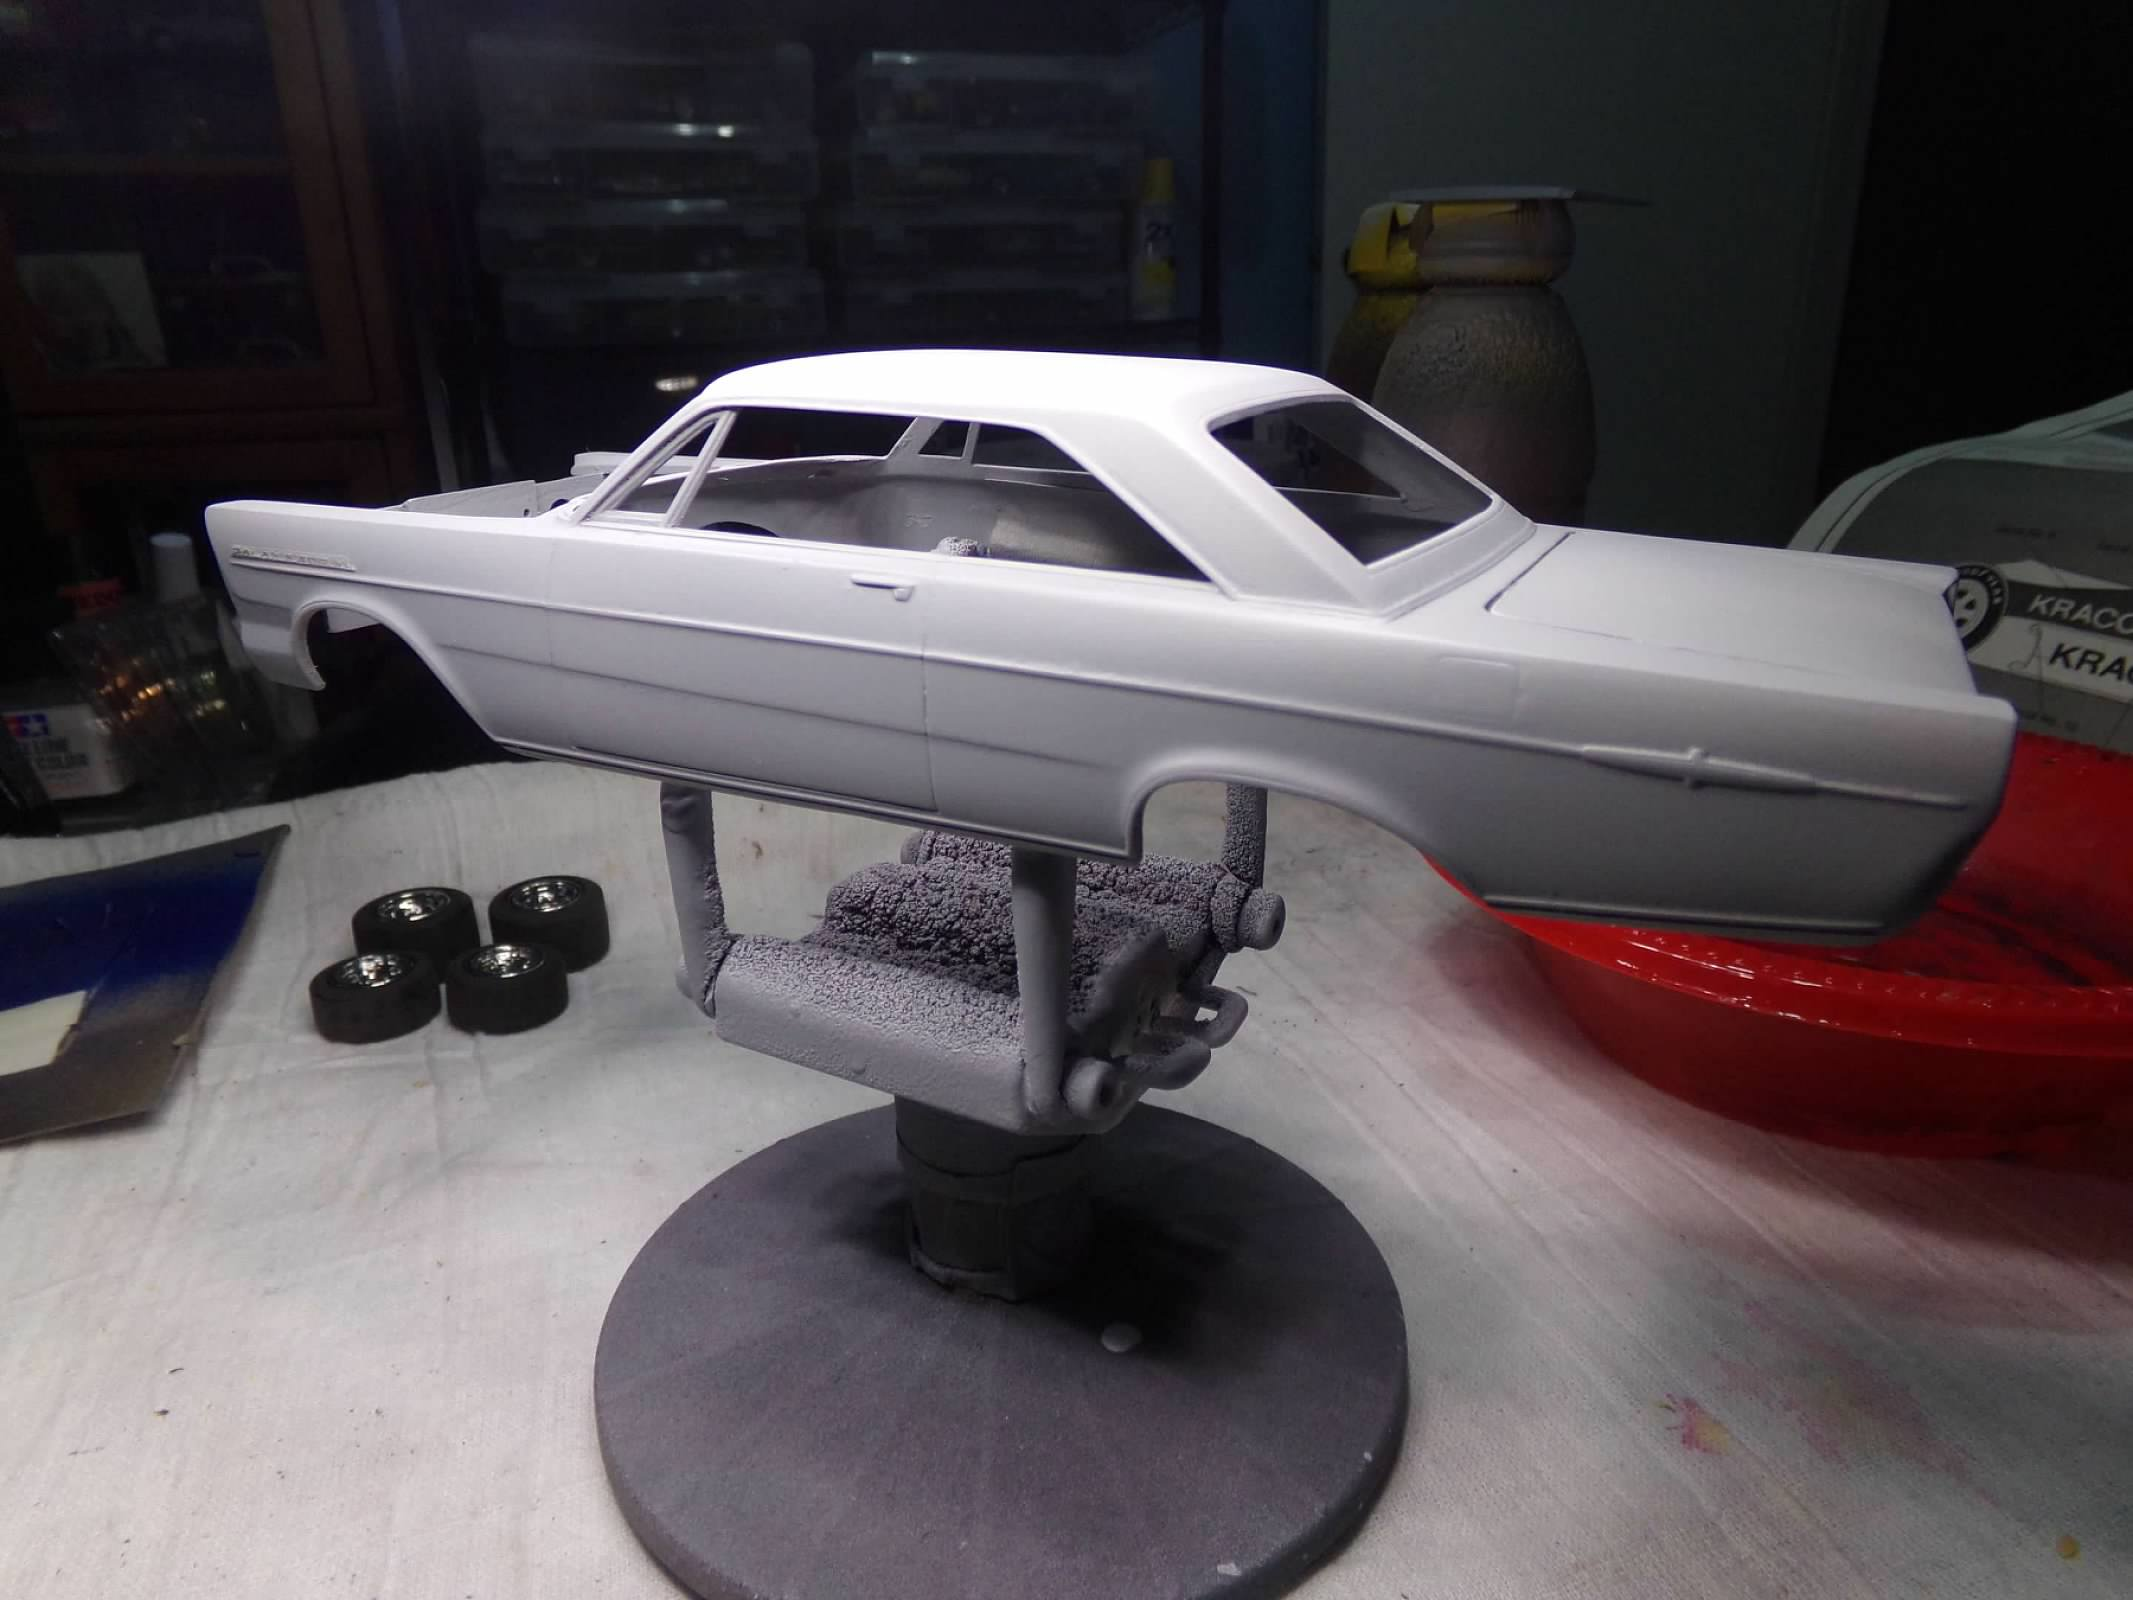
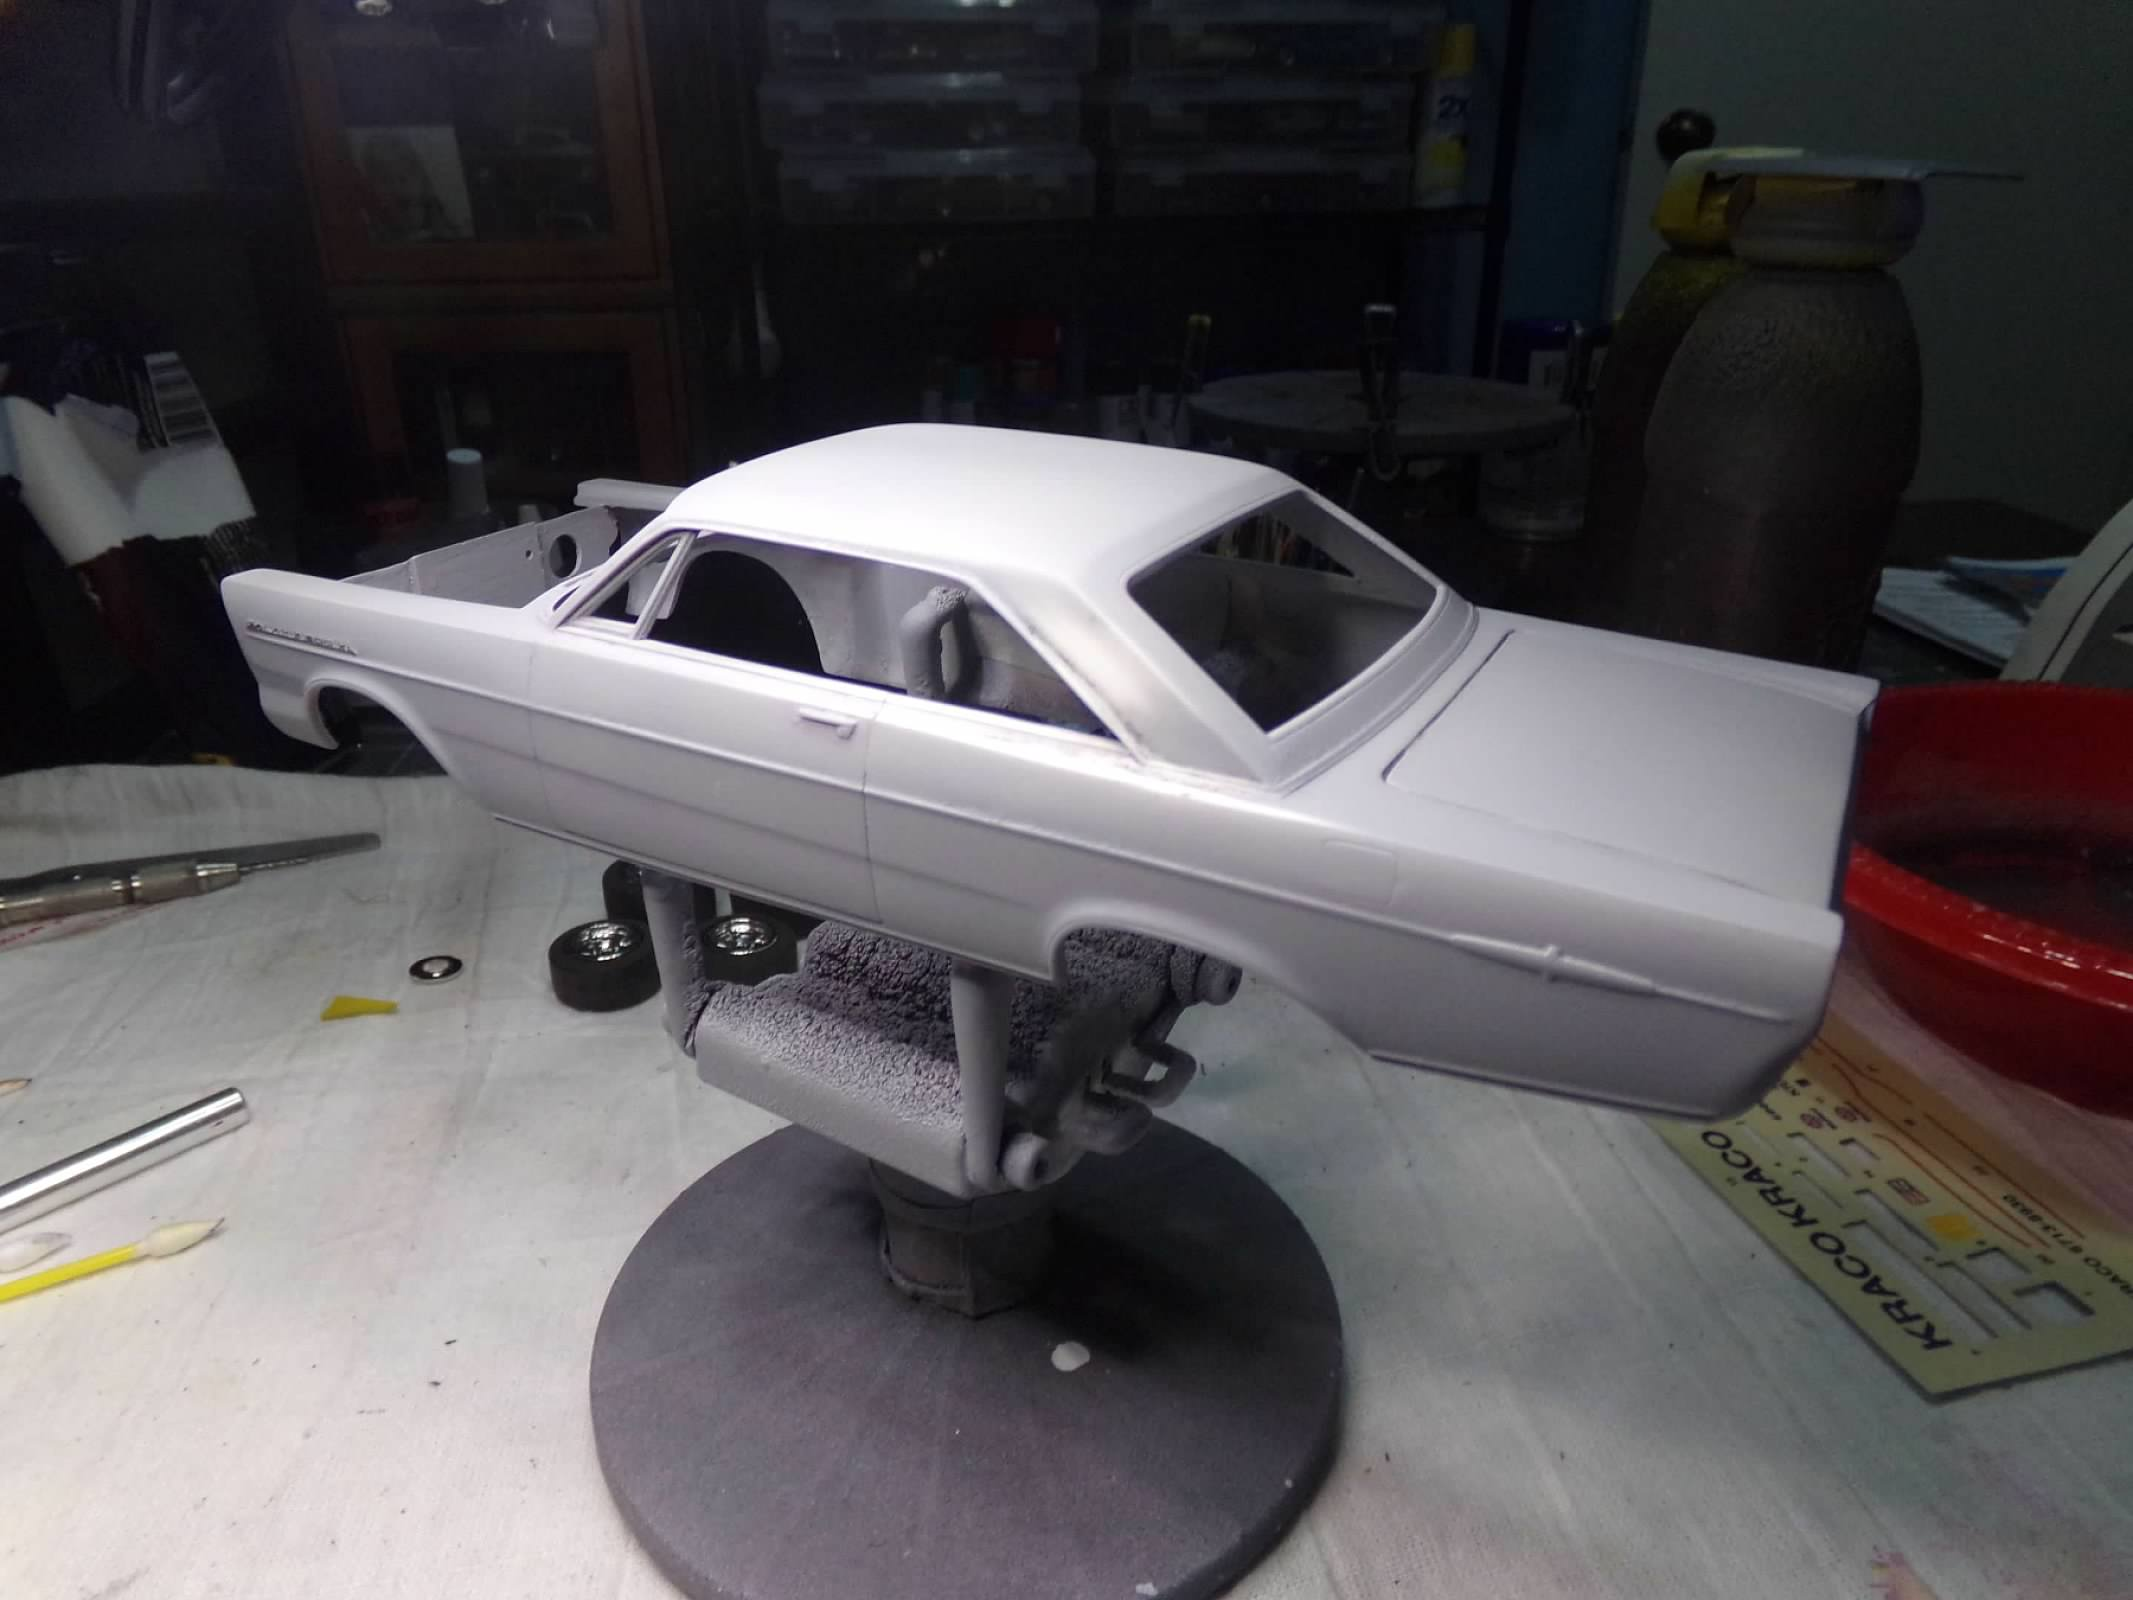
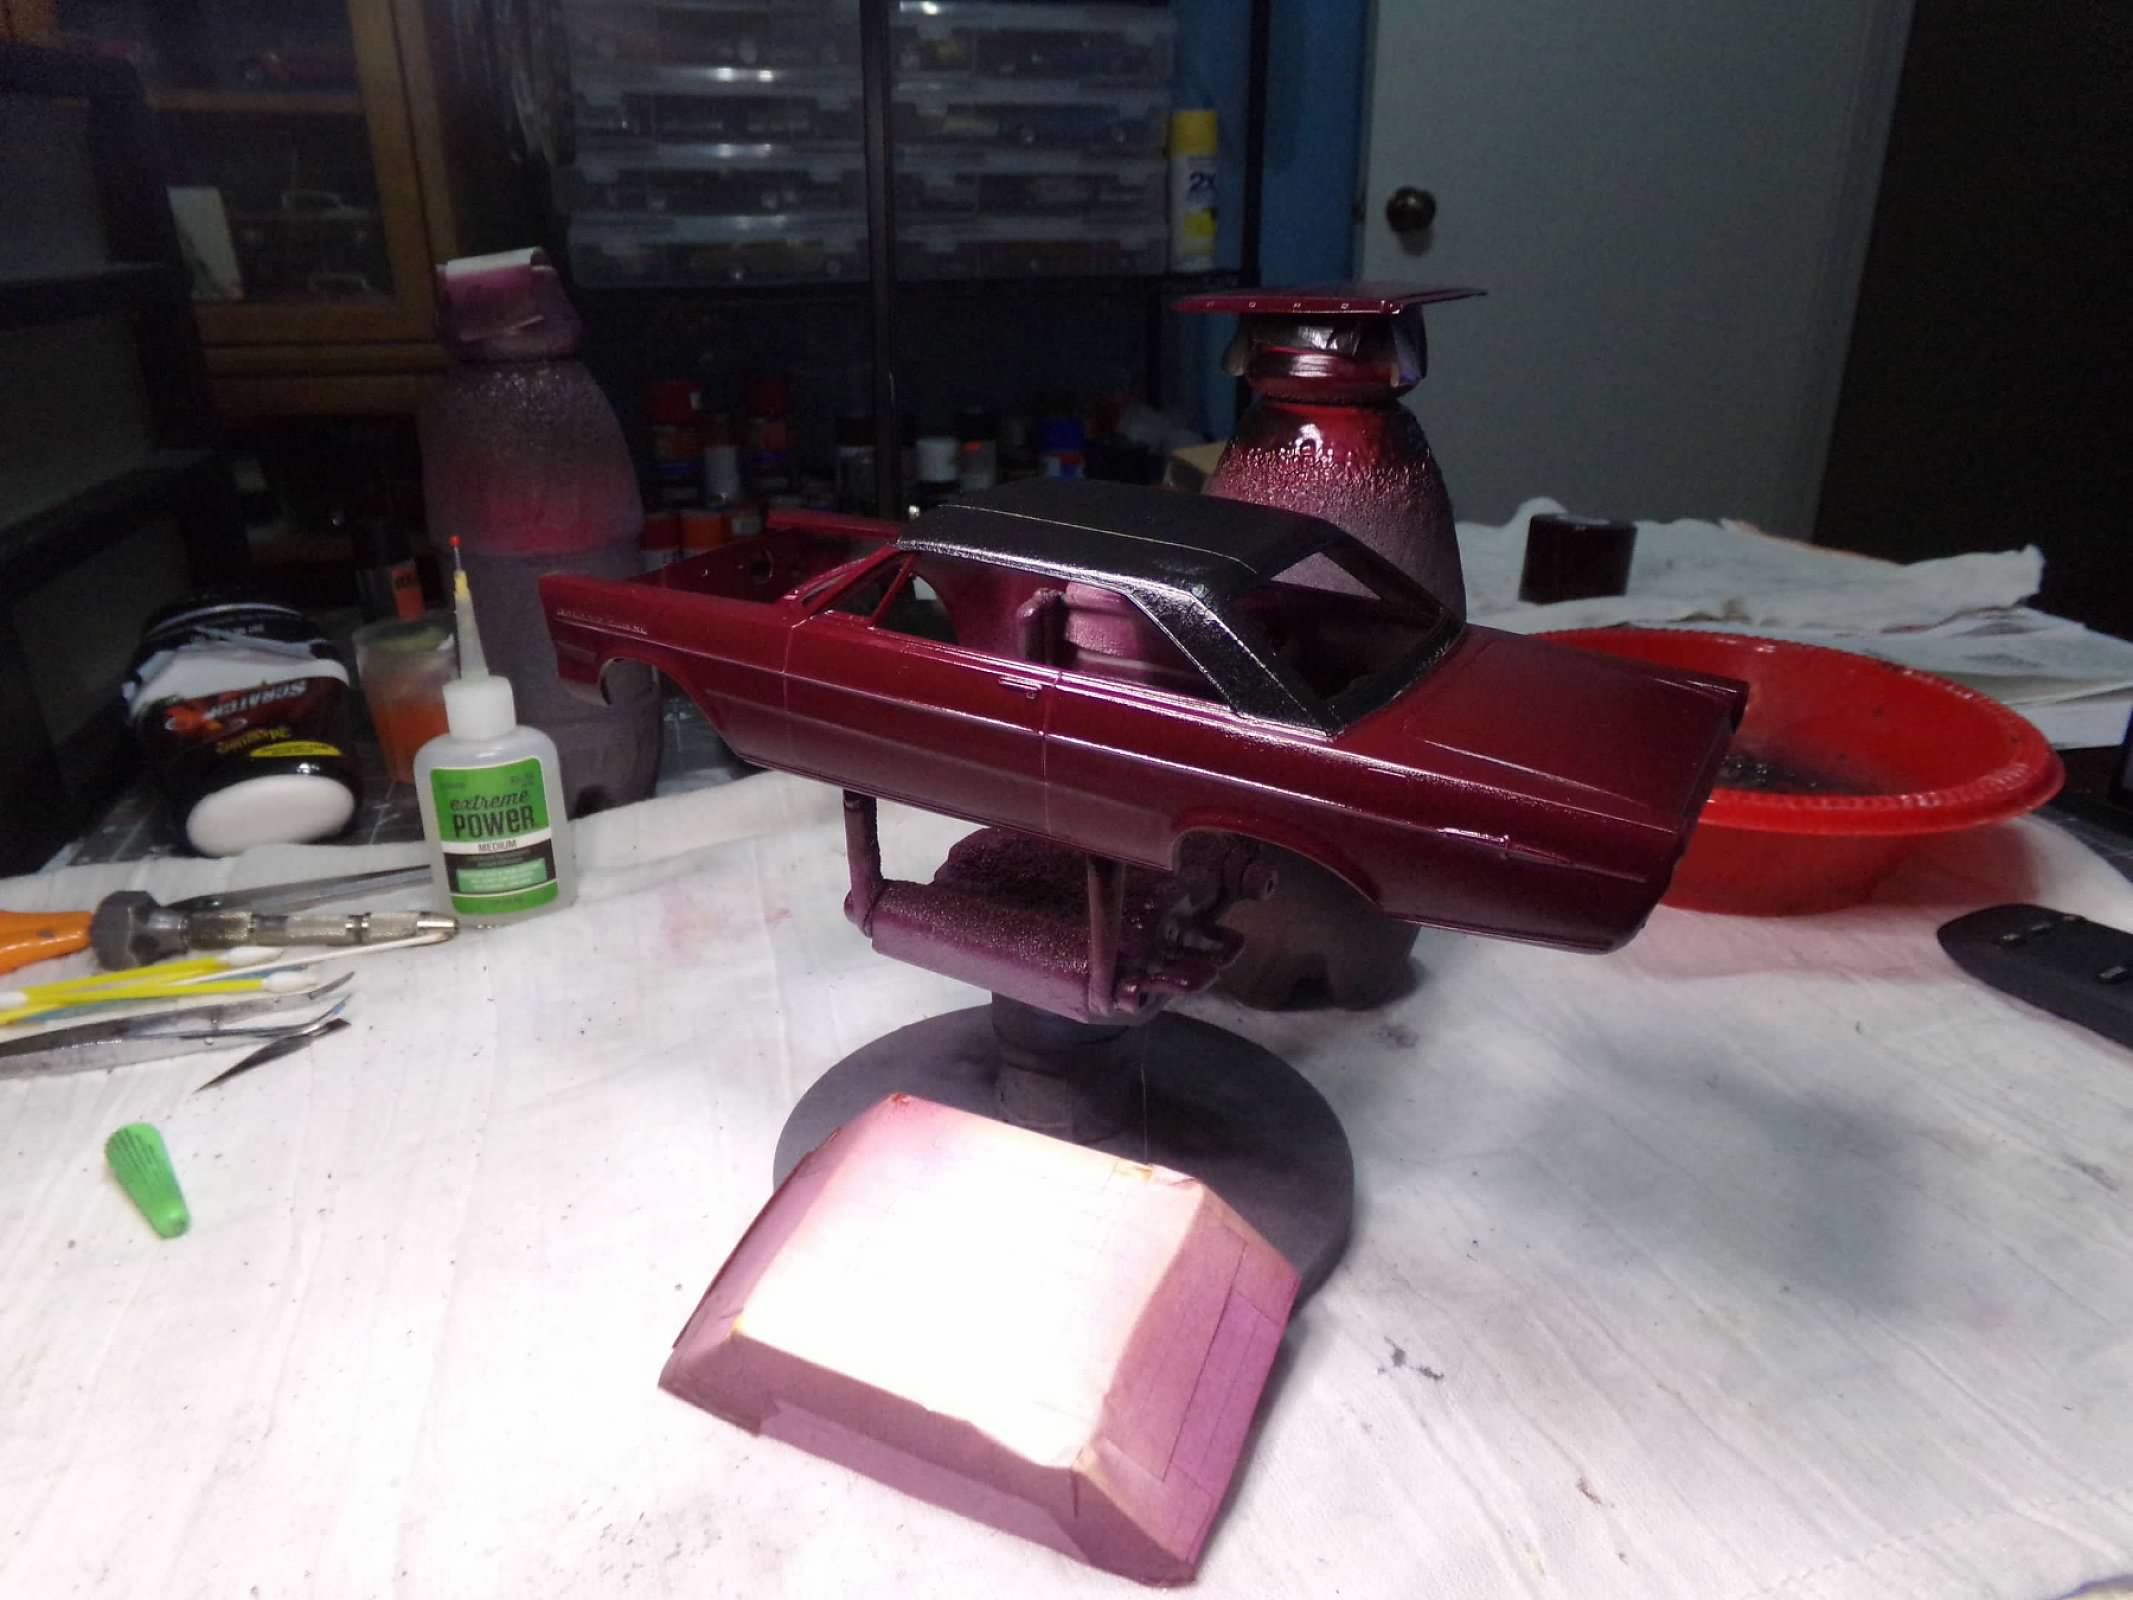
Thanks, MrMike and Carl! I appreciate your comments! Well, Carl, I normally don't have a problem removing paint and repainting but this one is testing me. I don't know what was wrong with that Tamiya Maroon paint (and I never have any luck with Maroon paint) but not only did it not go on well but it has been almost impossible to get off. I think I it in multiple oven cleaner baths for at least 10 days. Finally, I had to pick and sand off some of the paint. But I think I am close now. Its in primer and I have worked through a couple of rough spots. The Galaxie 500 XL scripts, especially on the right side have lost some definition. But I will this one a shot and this time I am going to use the last of a can of Dupli-Color Dark Toreador Metallic. I am also going to skip the vinyl top this time so that I can get this painted tomorrow before it starts raining through Christmas. Thanks for looking! ?
-
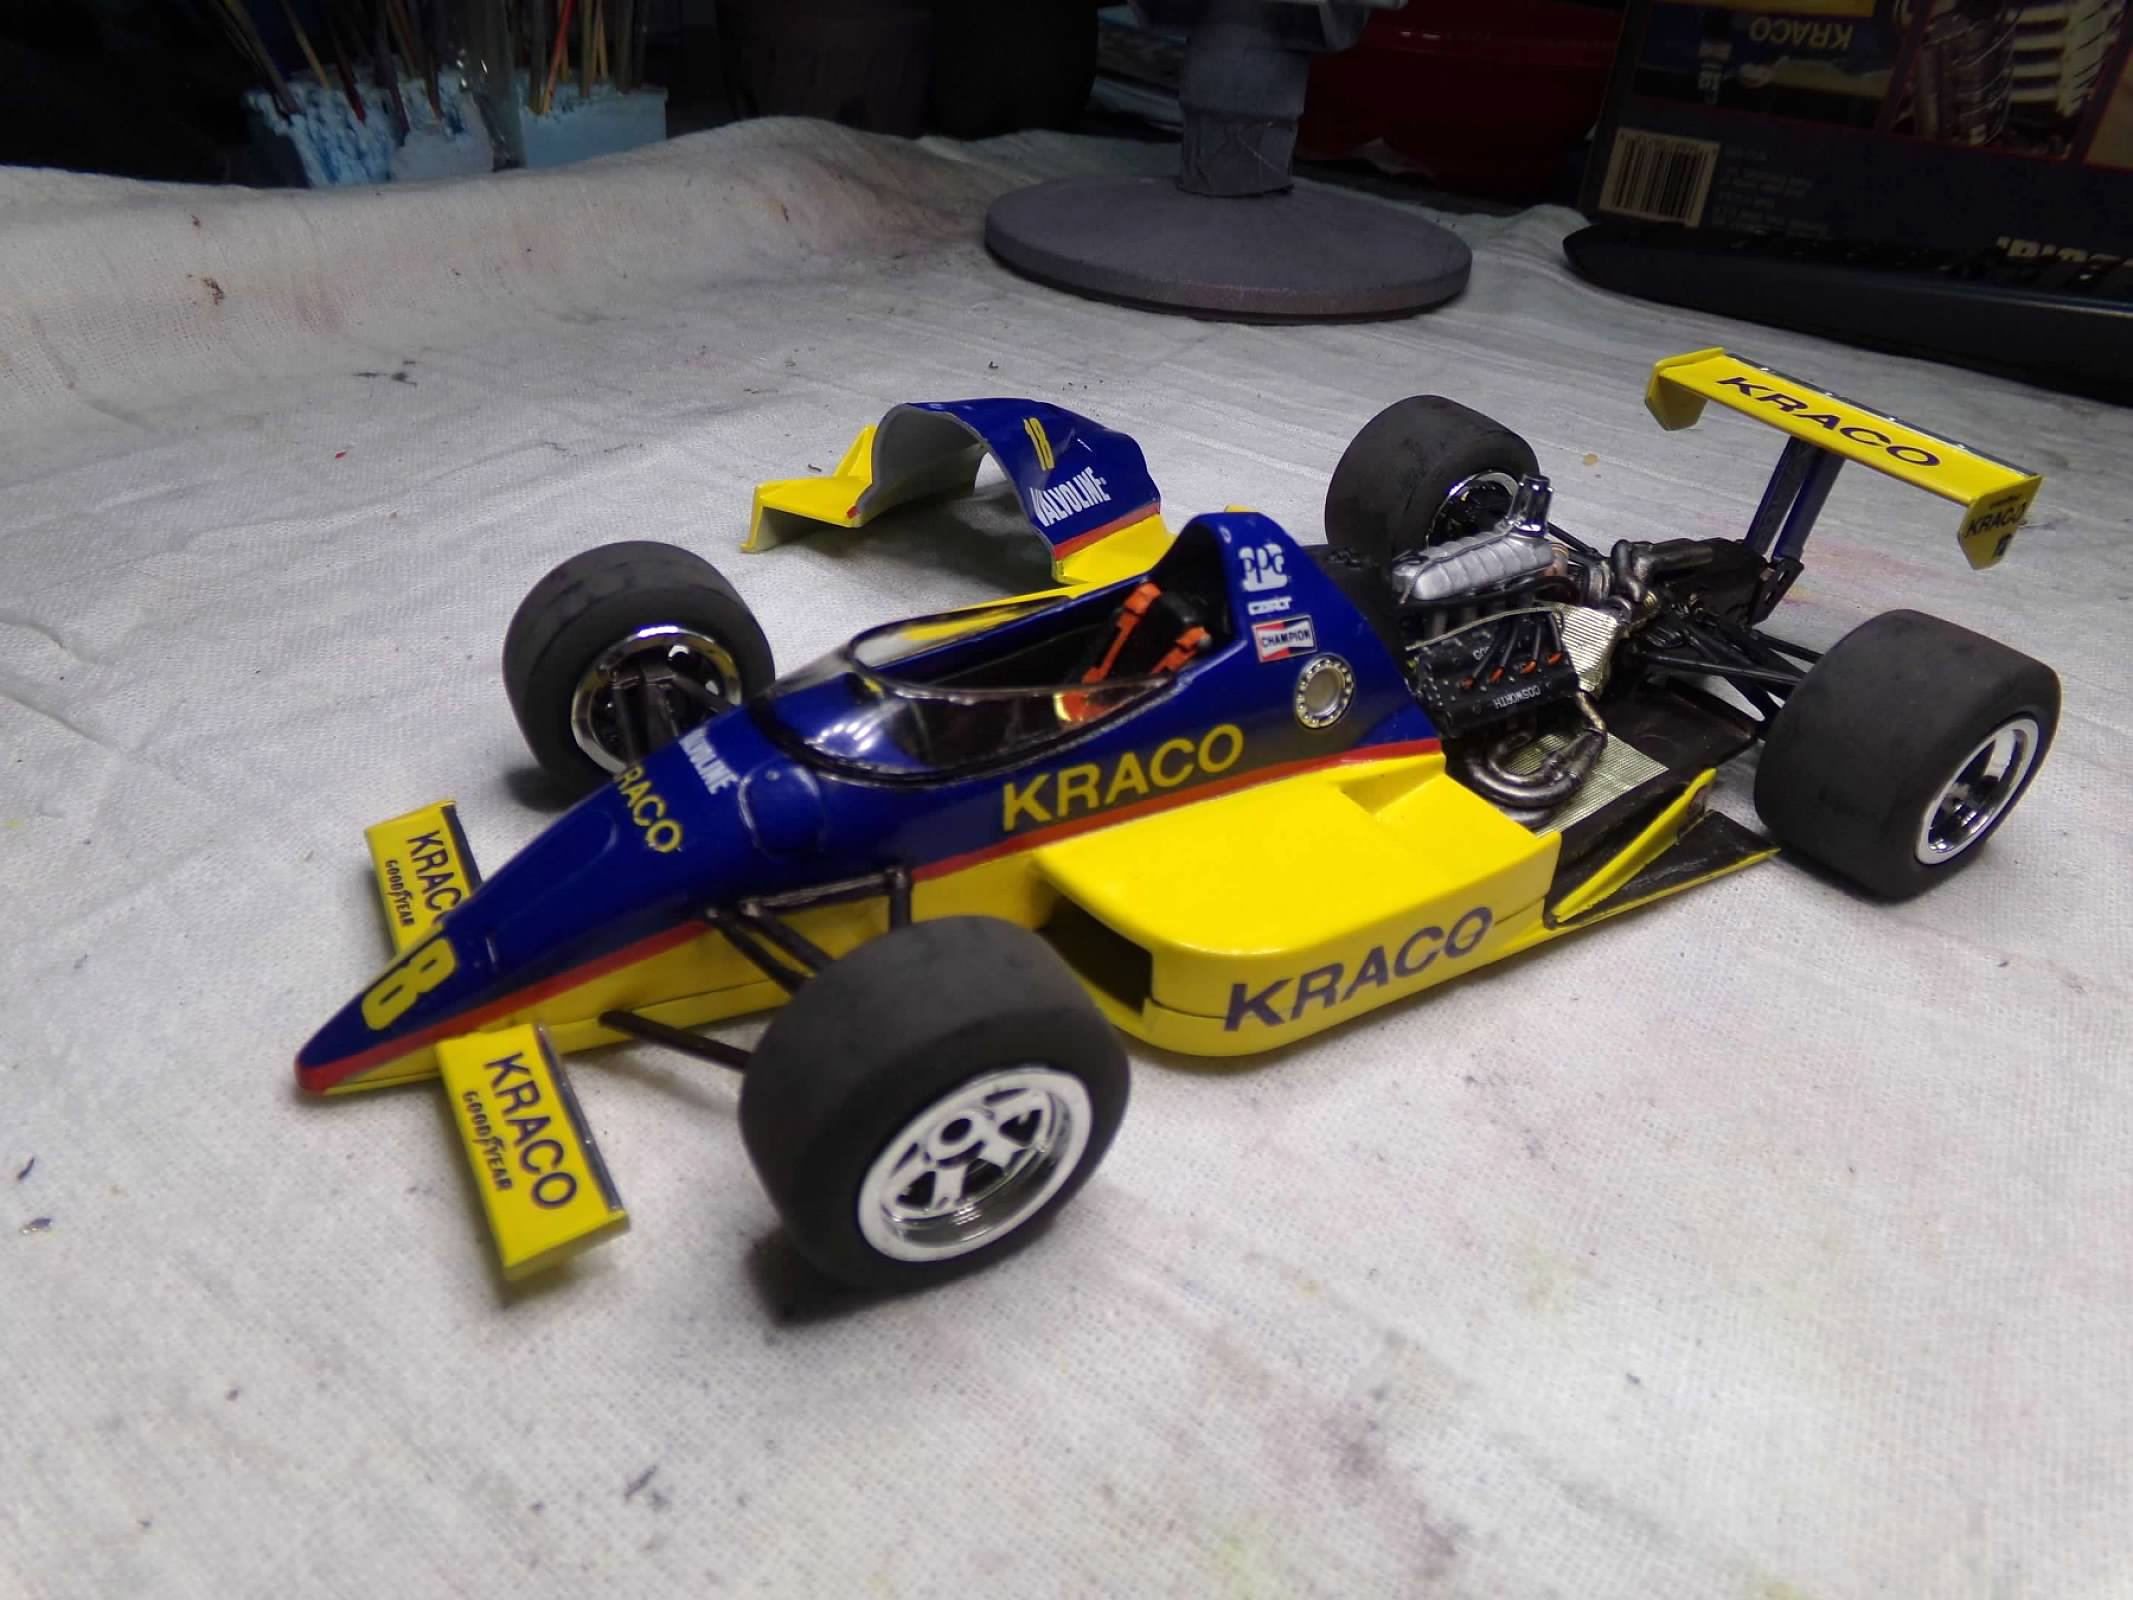
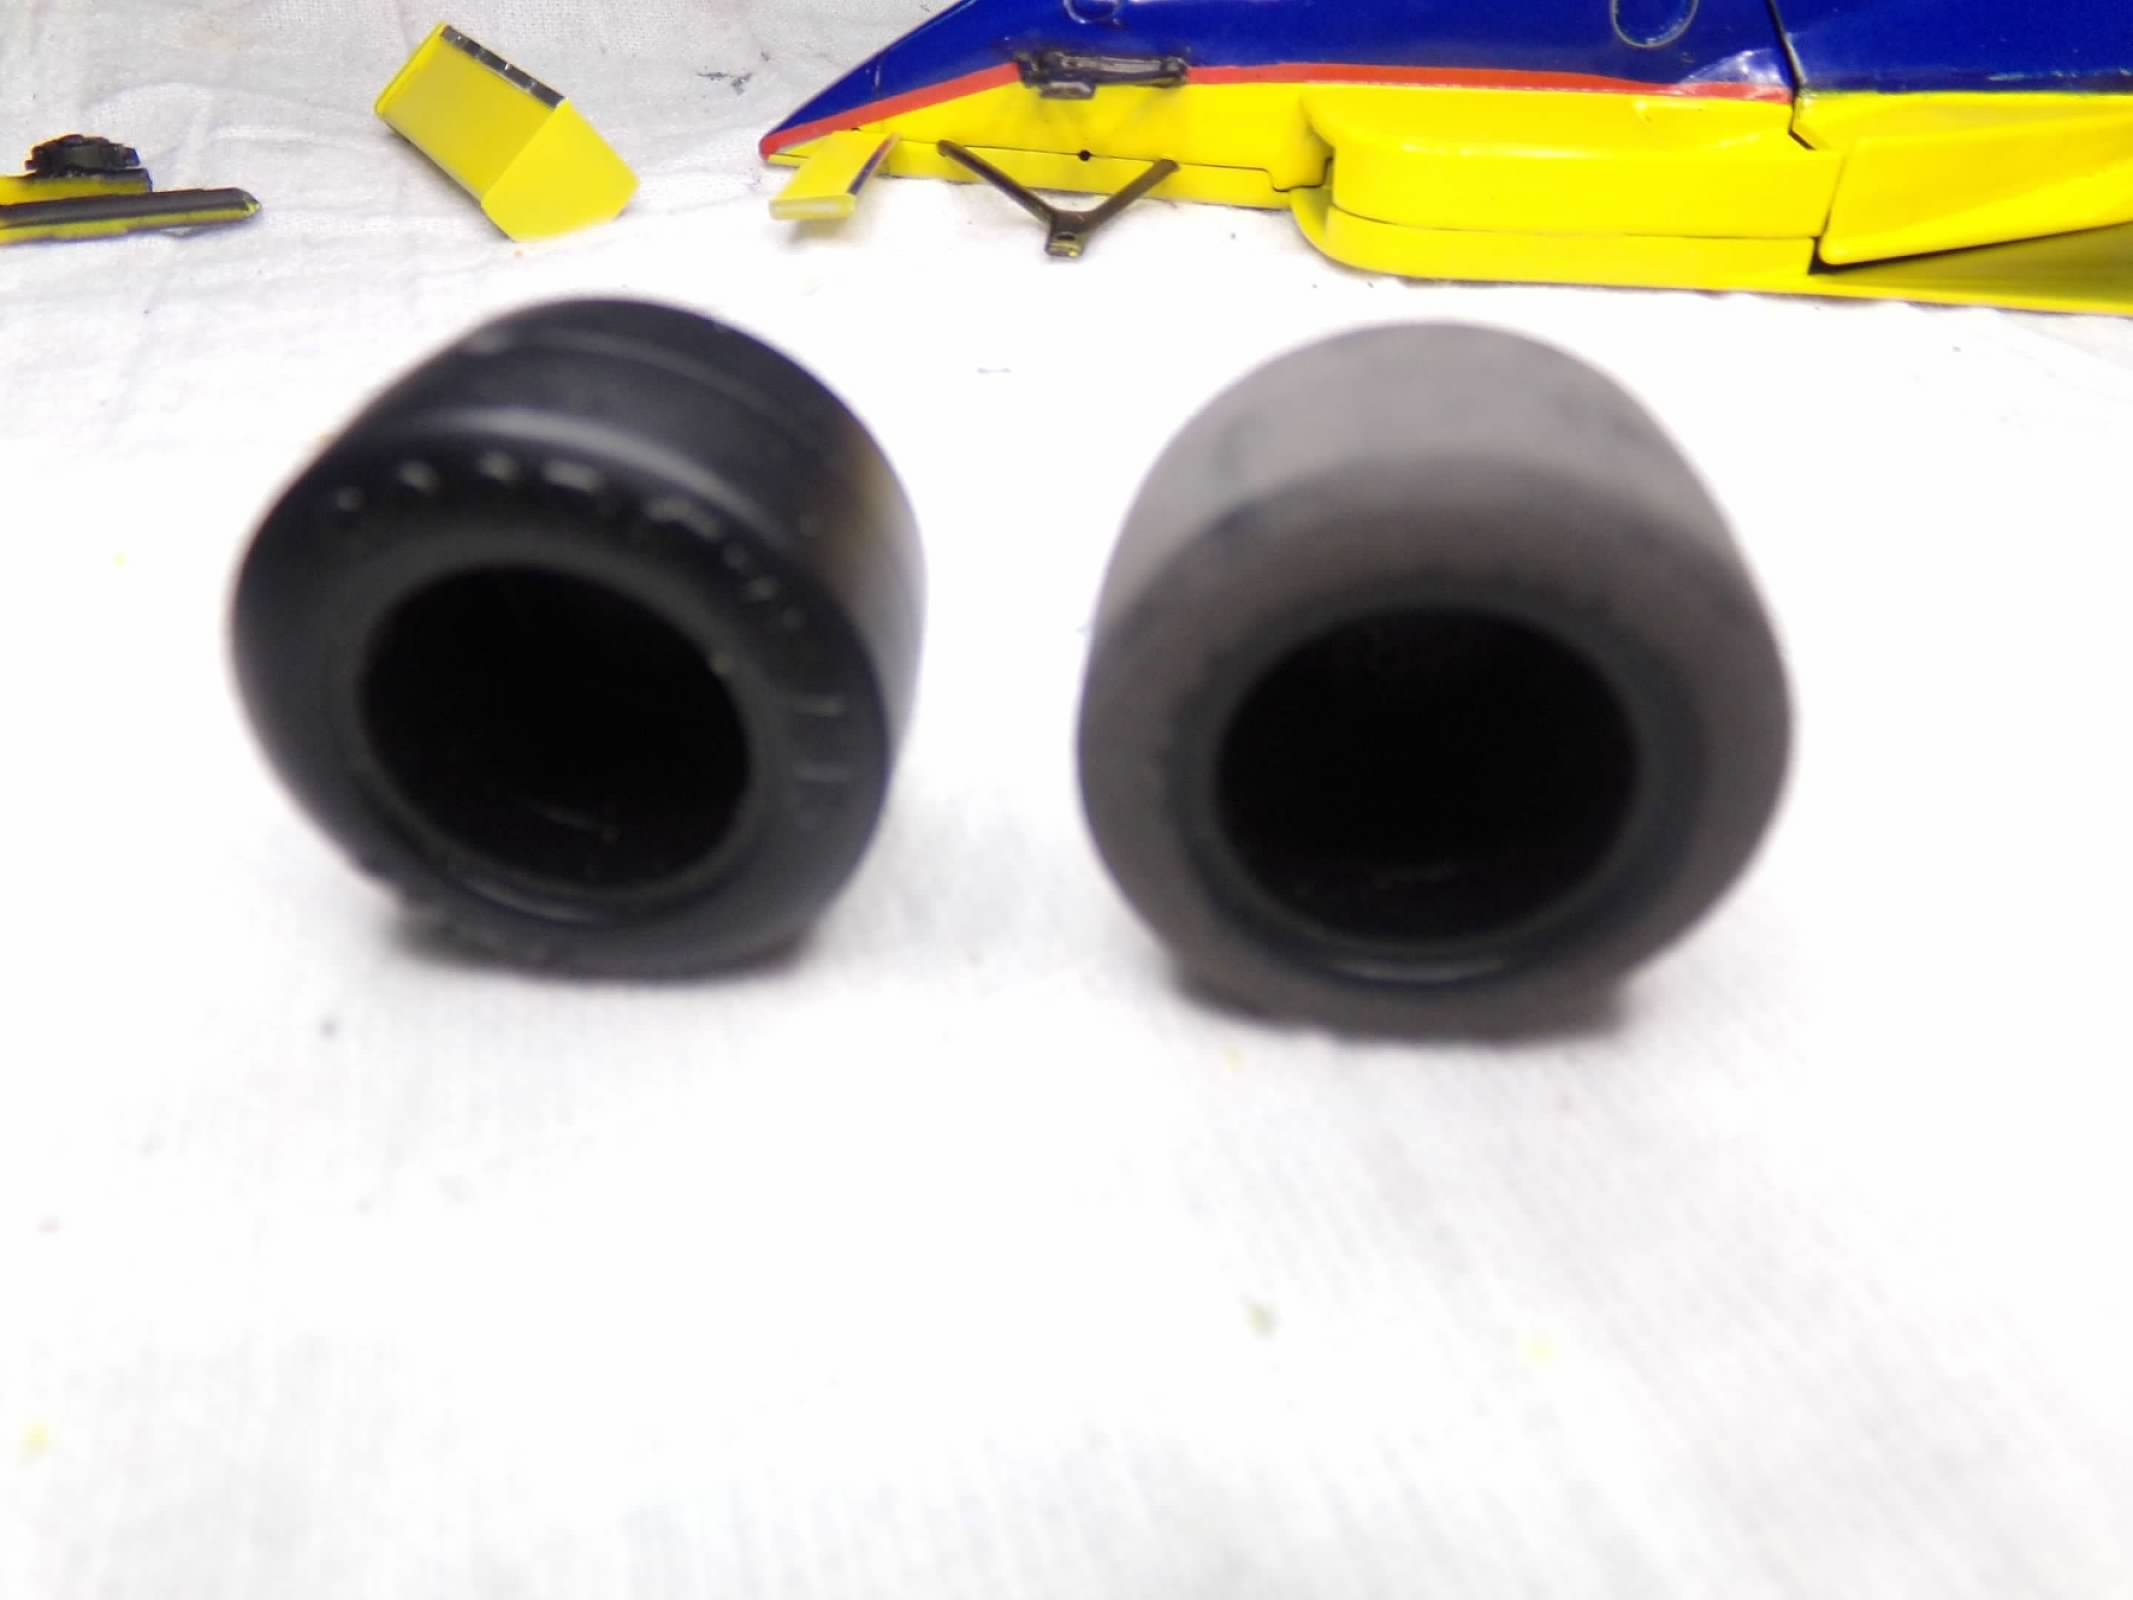
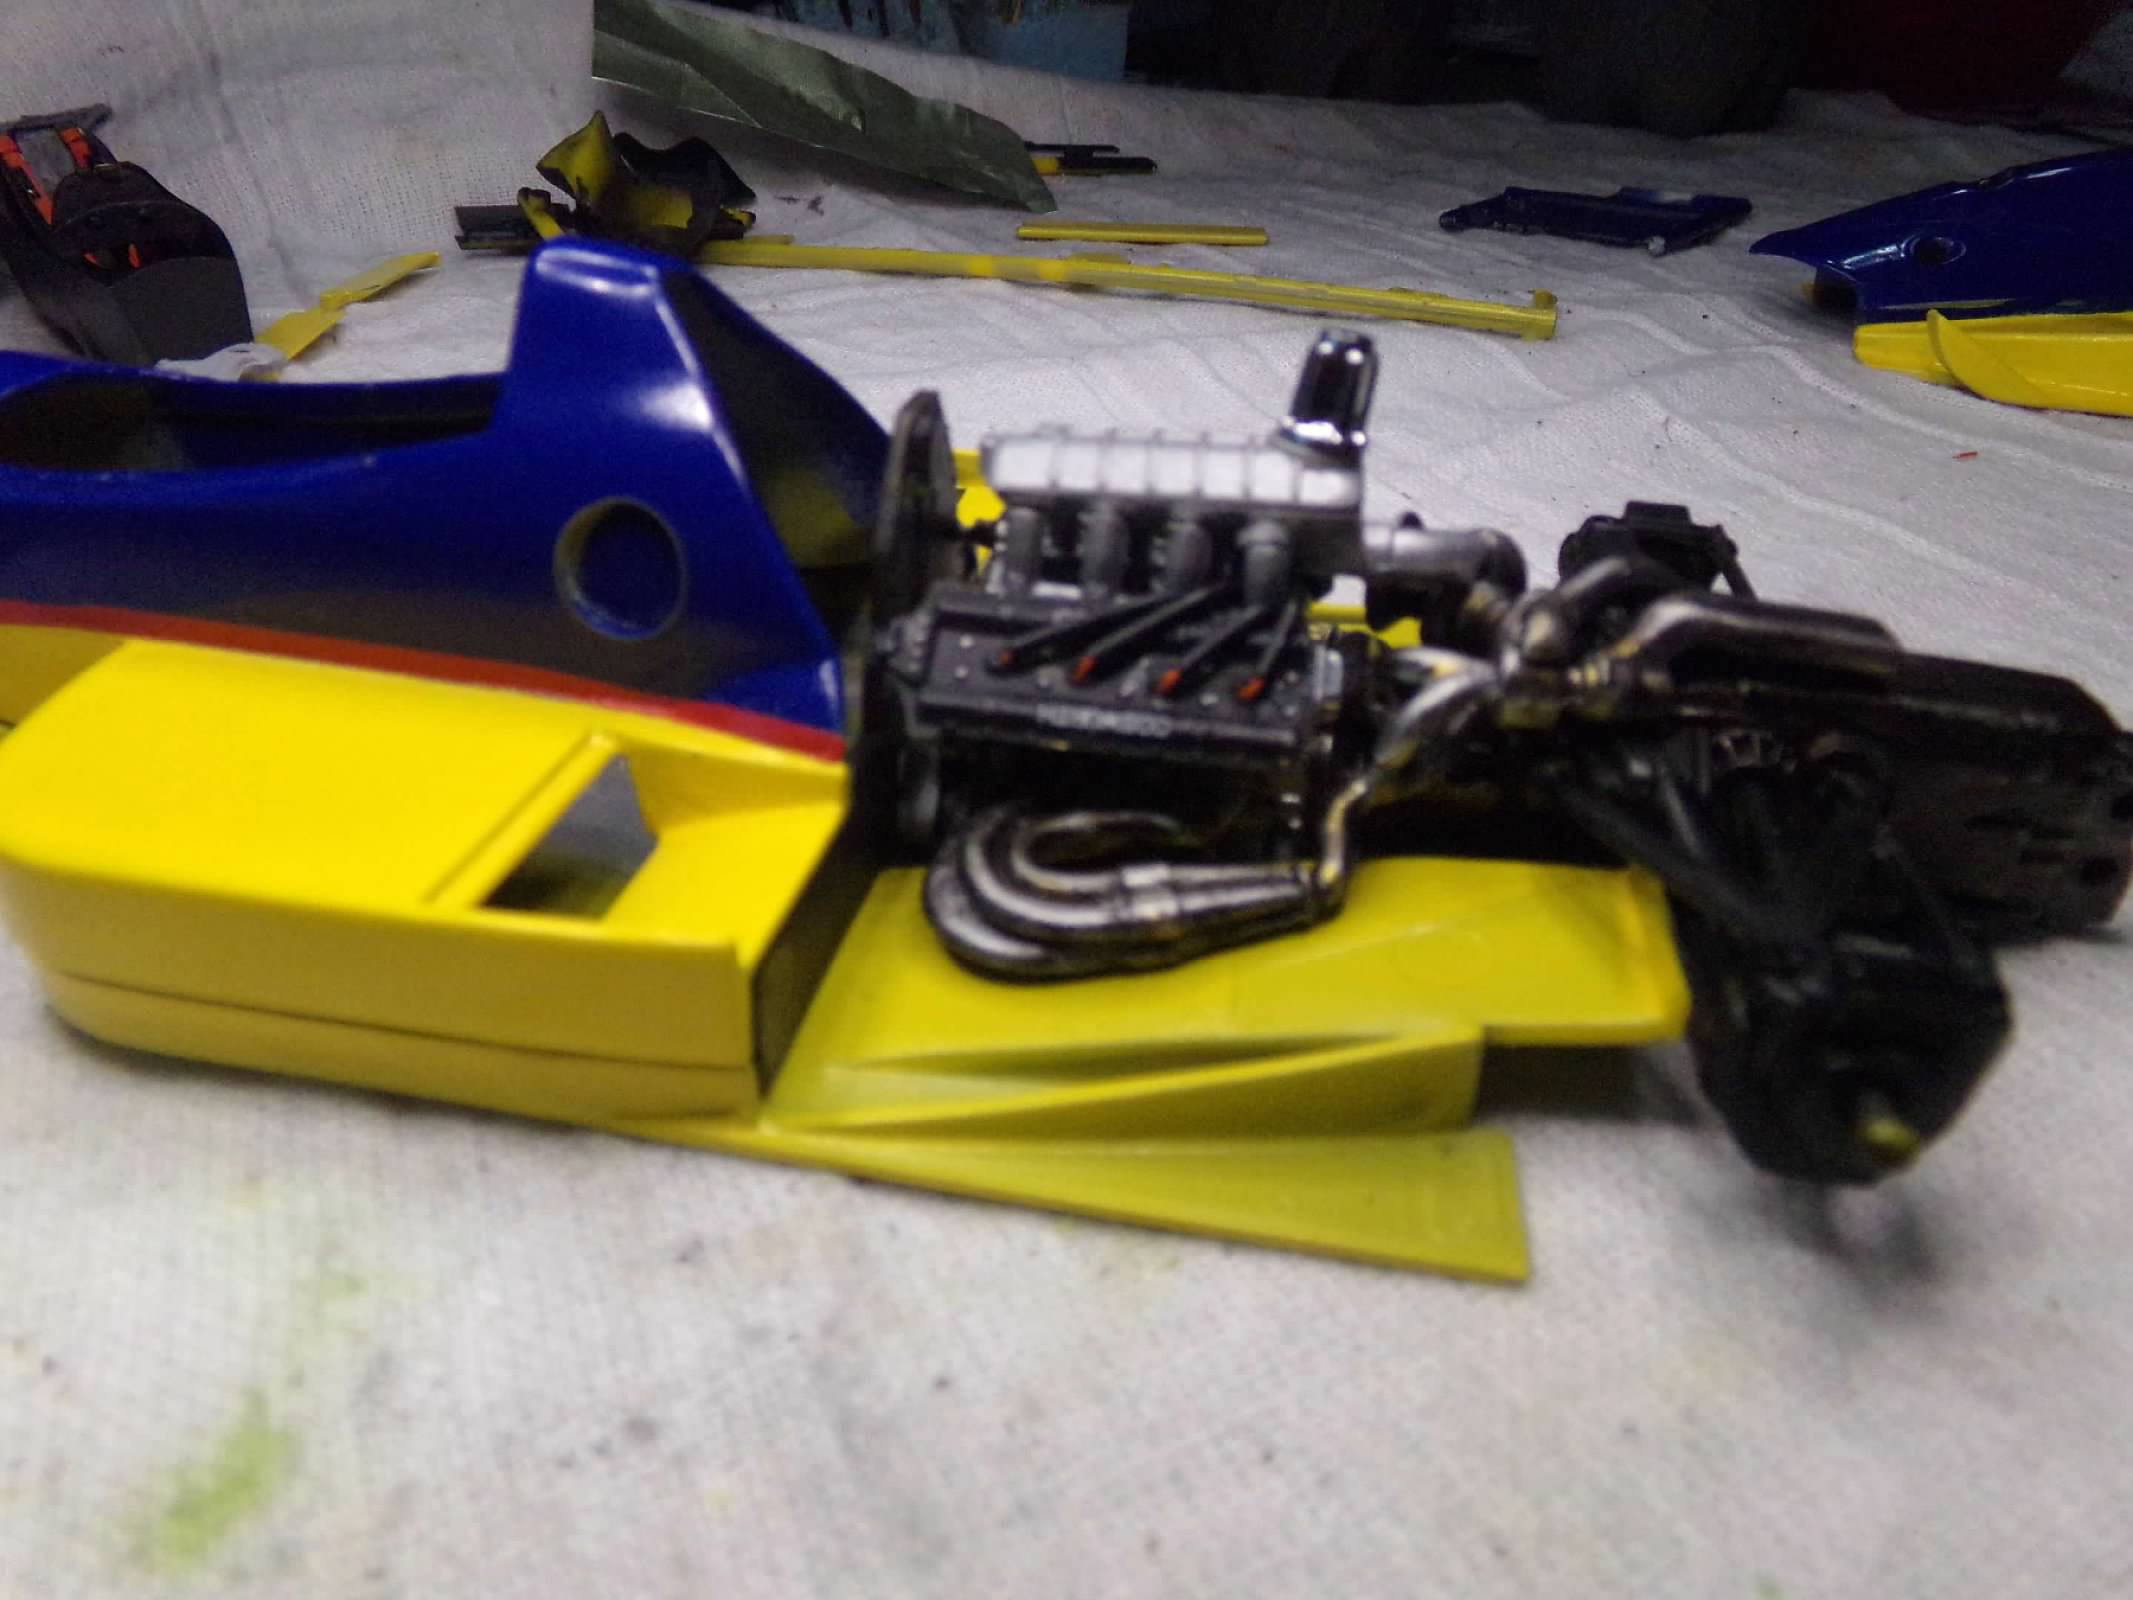
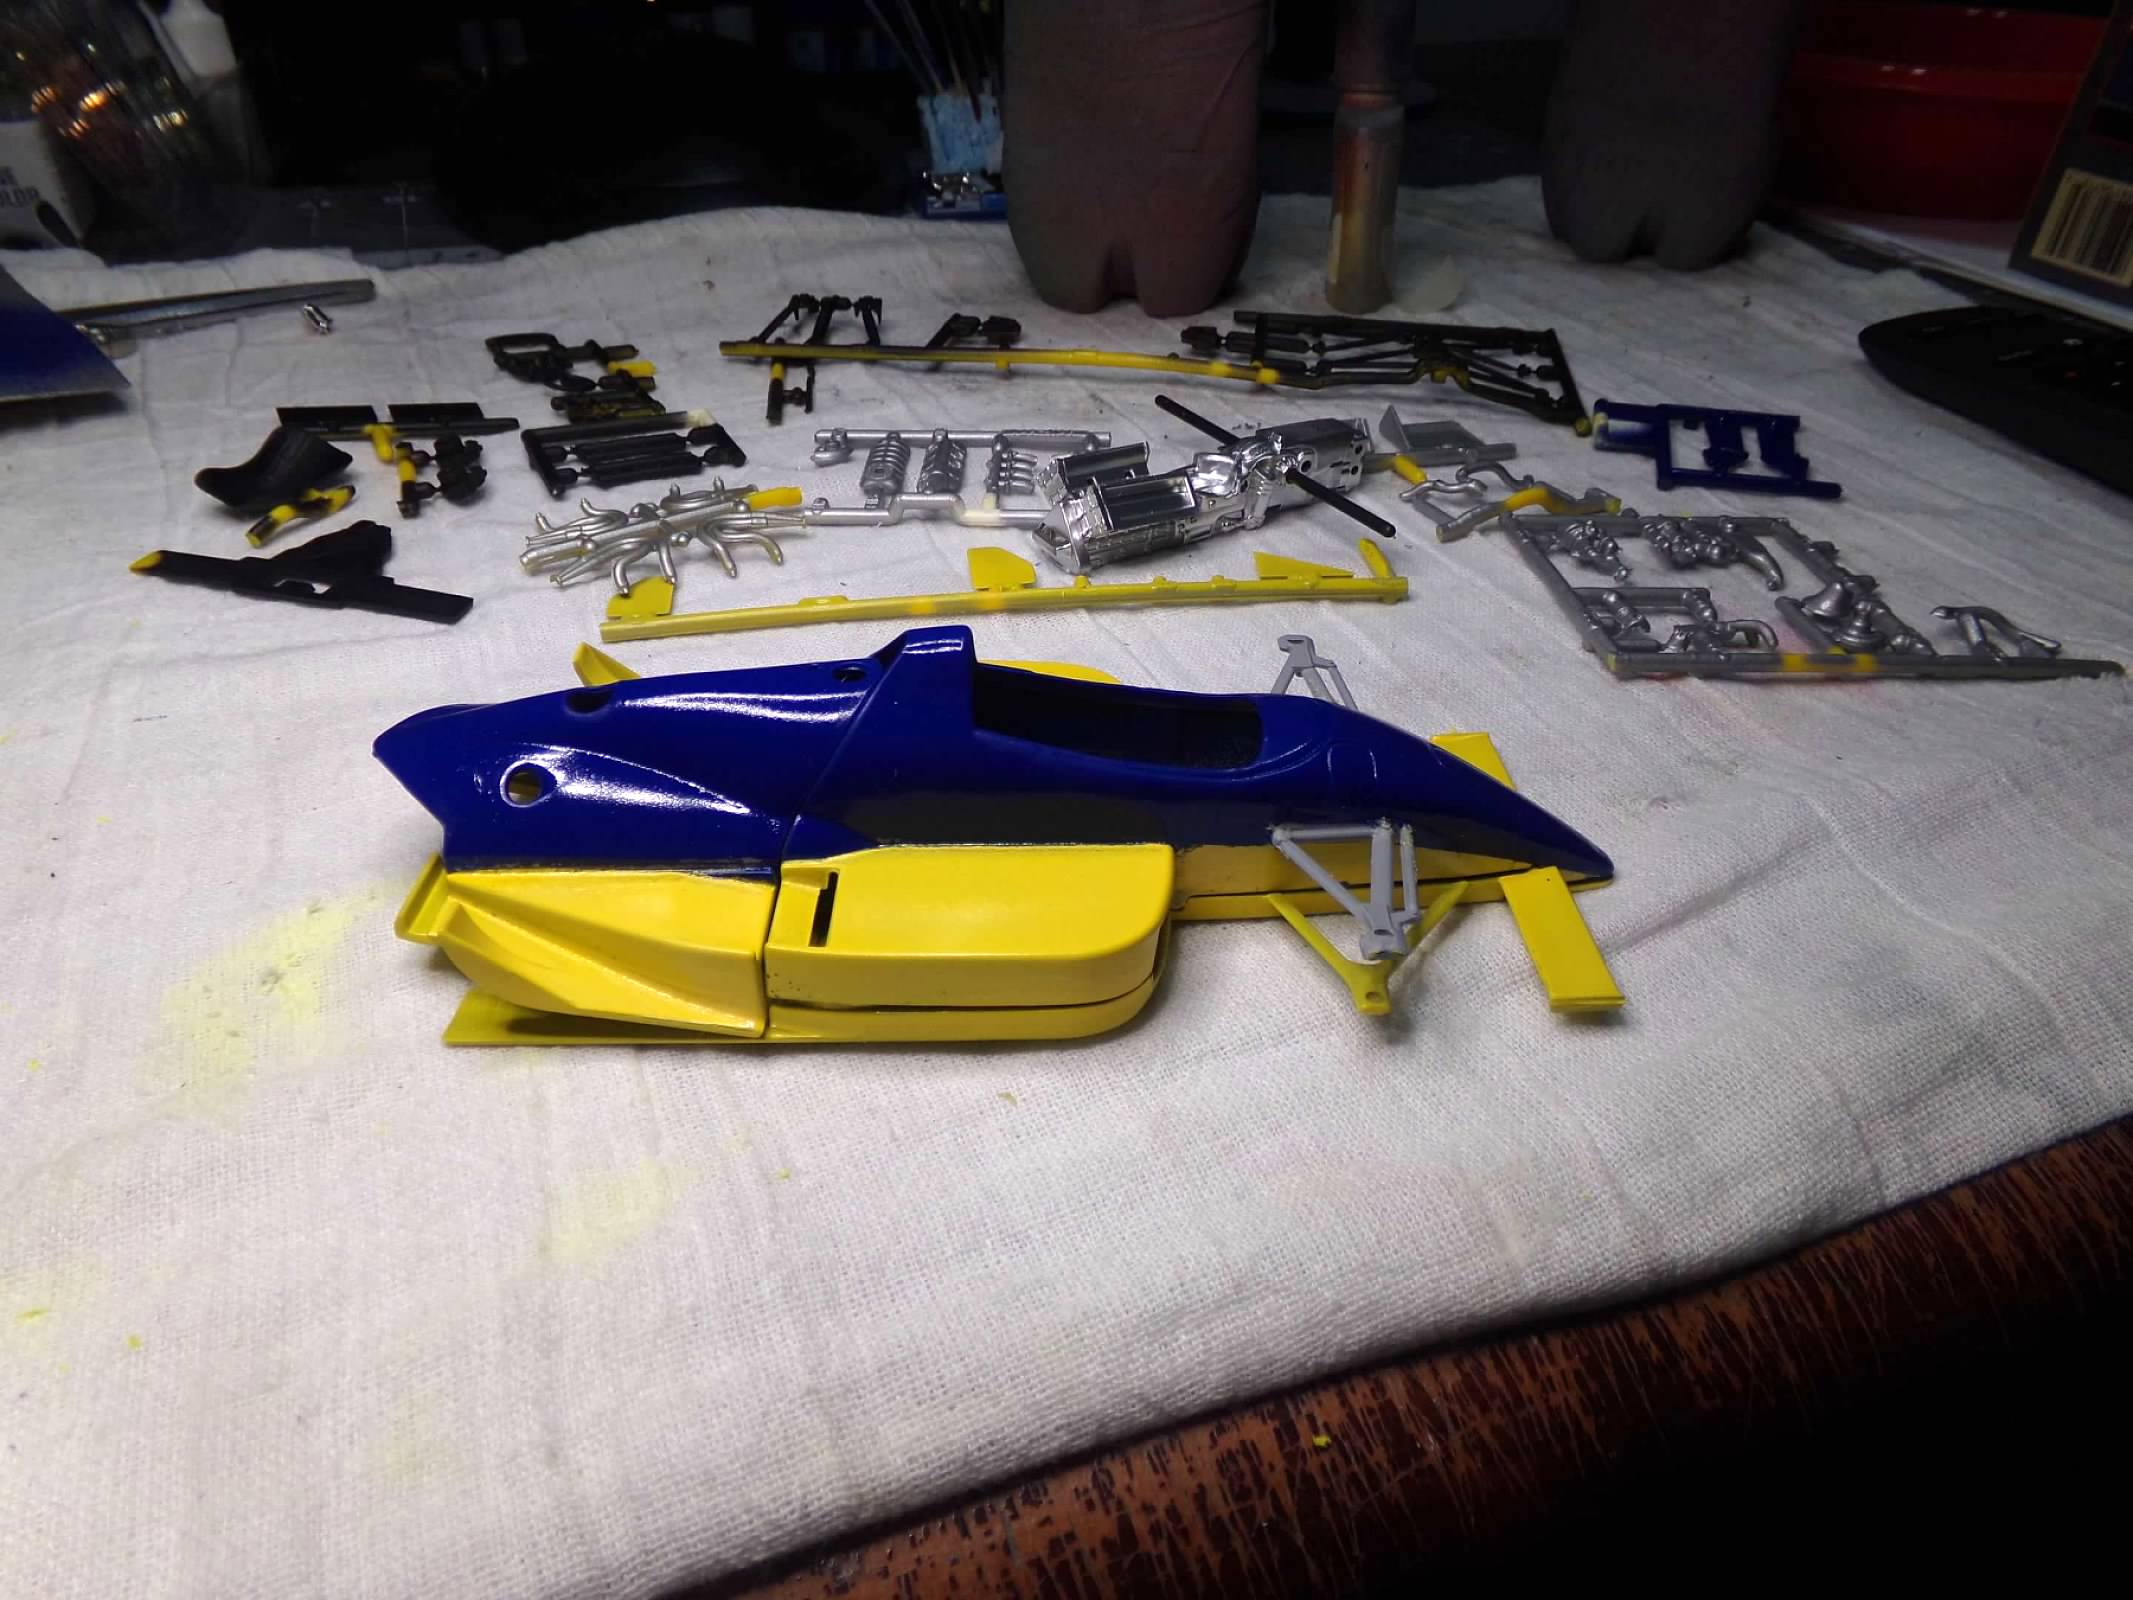
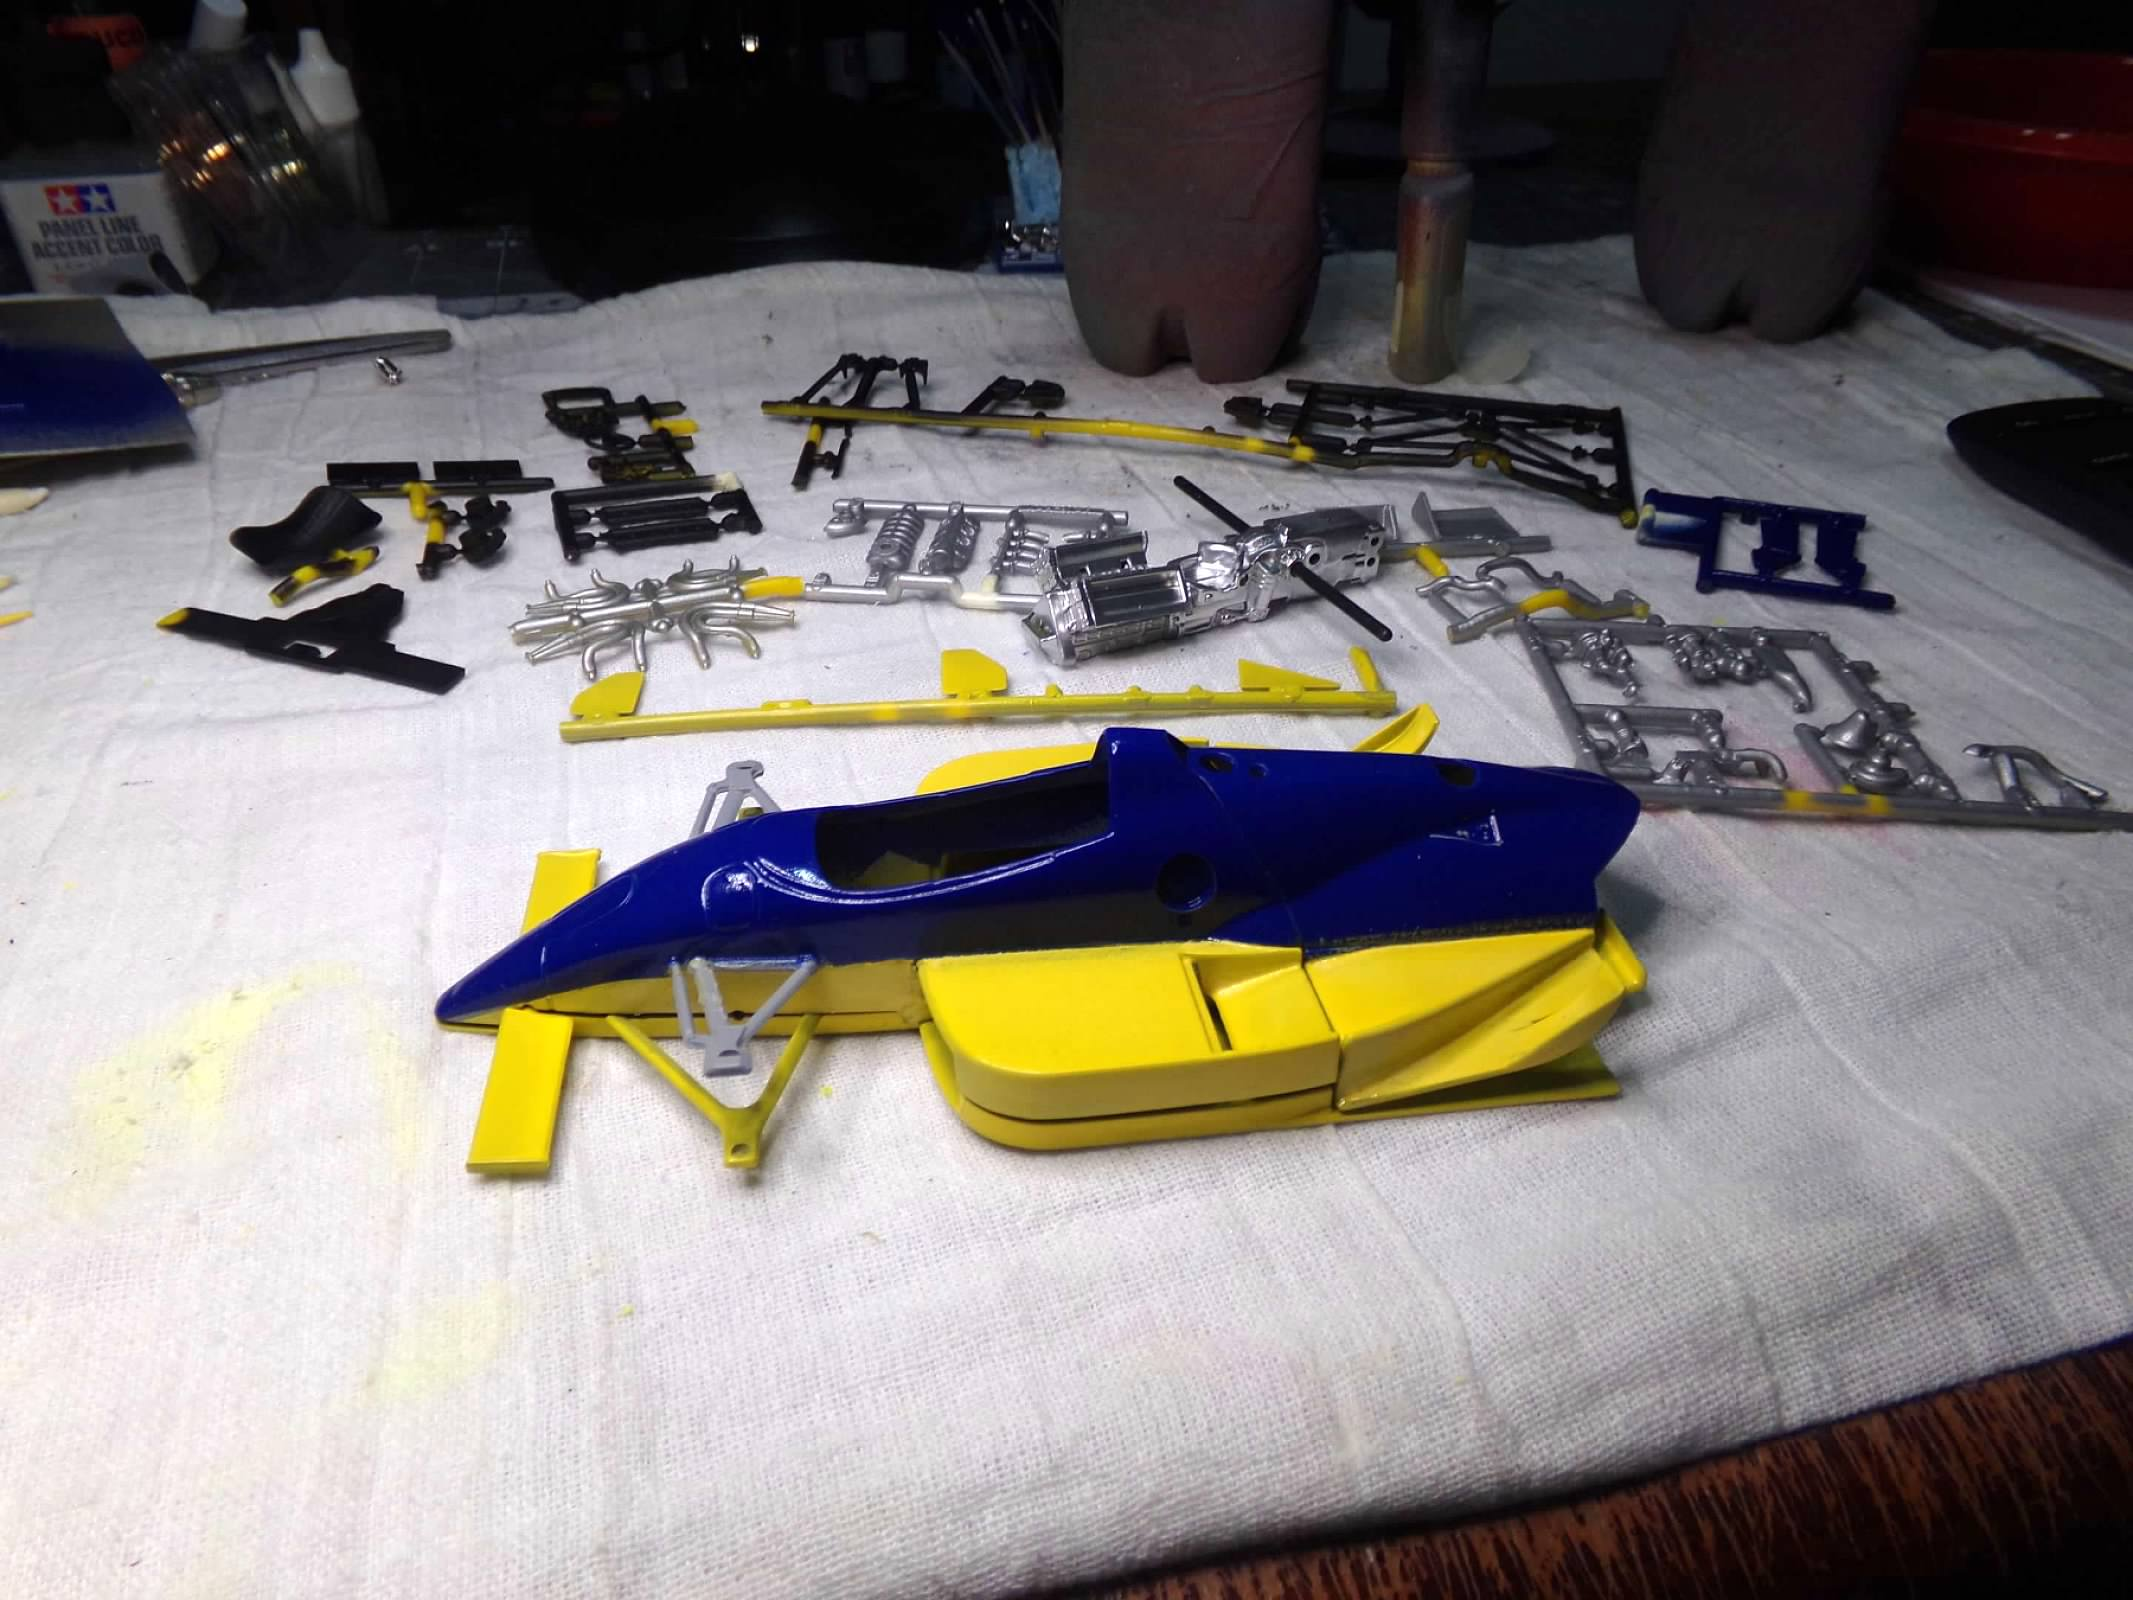
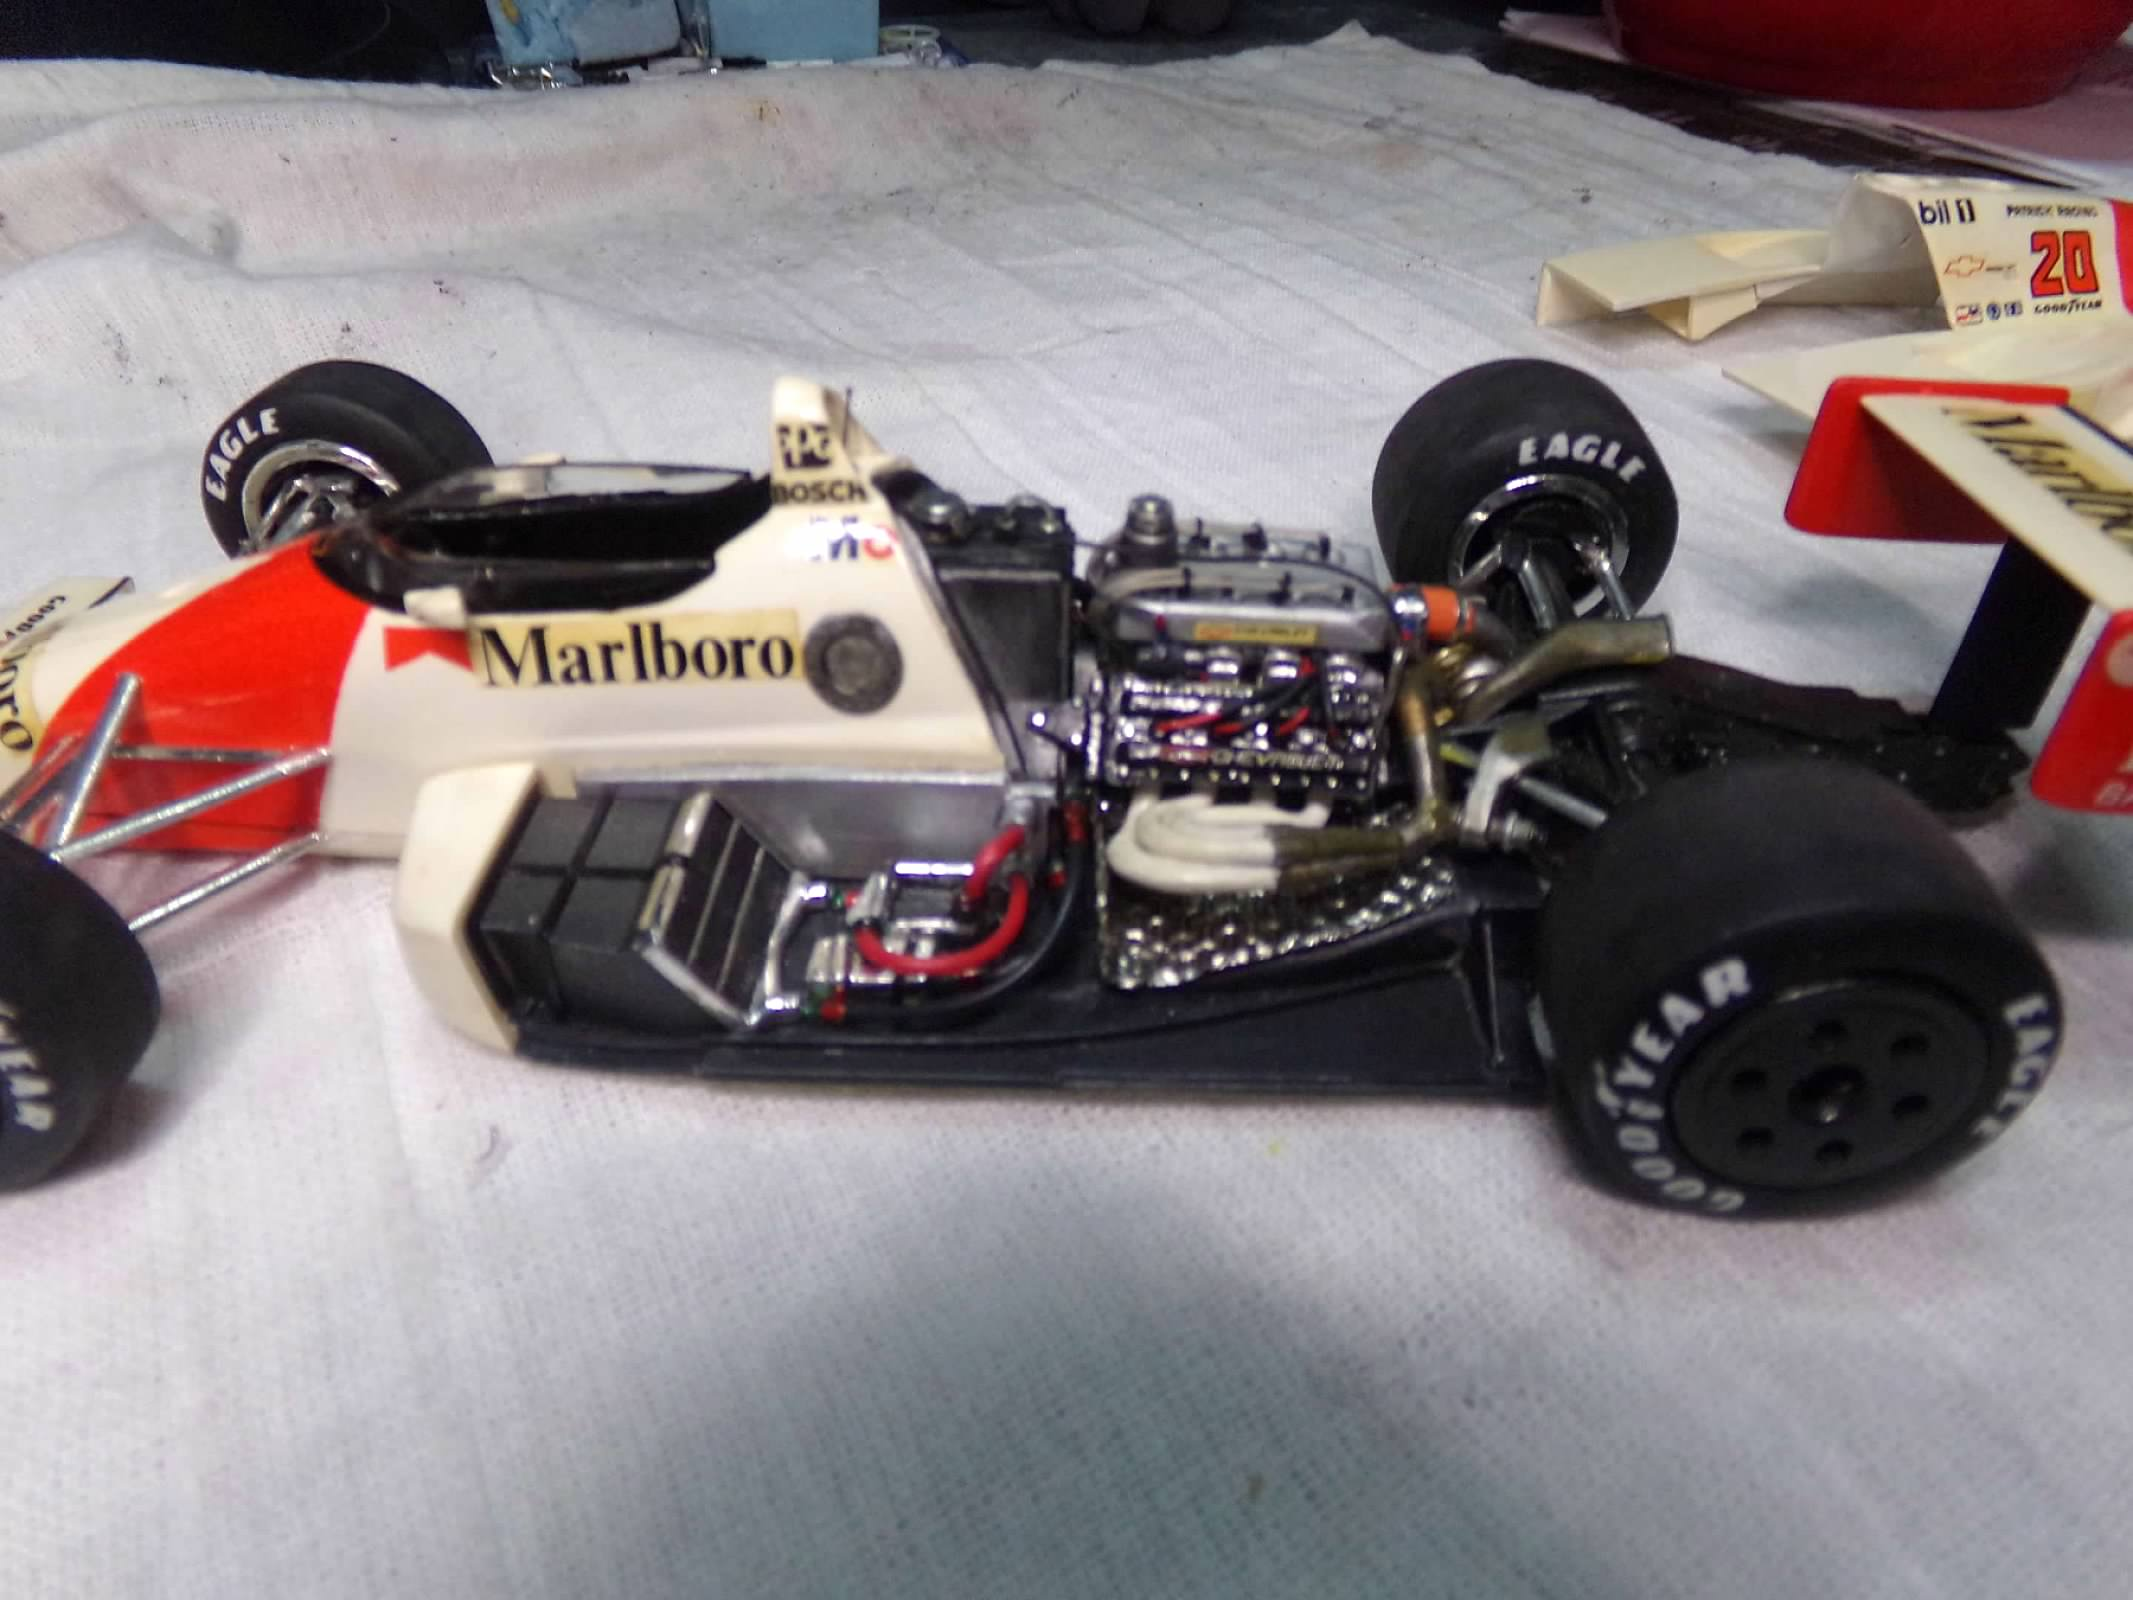
Finished the rest of the engine plumbing that I am going to do although you may not be able to see it due to my poor camera. I also added a wickerbill to the rear wing. I am working on the tires and I thought I had decals for the tires but the one I have are for Slixx decals for Stock Cars. They would probably fit on the rear wheels but would be too big for the front tires. So I have ordered some from IndyCals. The rest of the construction is done except for the windscreen and mirrors that I will do last. I'll finish sanding down the tires to remove the raised lettering and scuff up the surface of the tires and add the decals to the body. After that its just a waiting game for the tire decals. Thanks for looking! ?
-
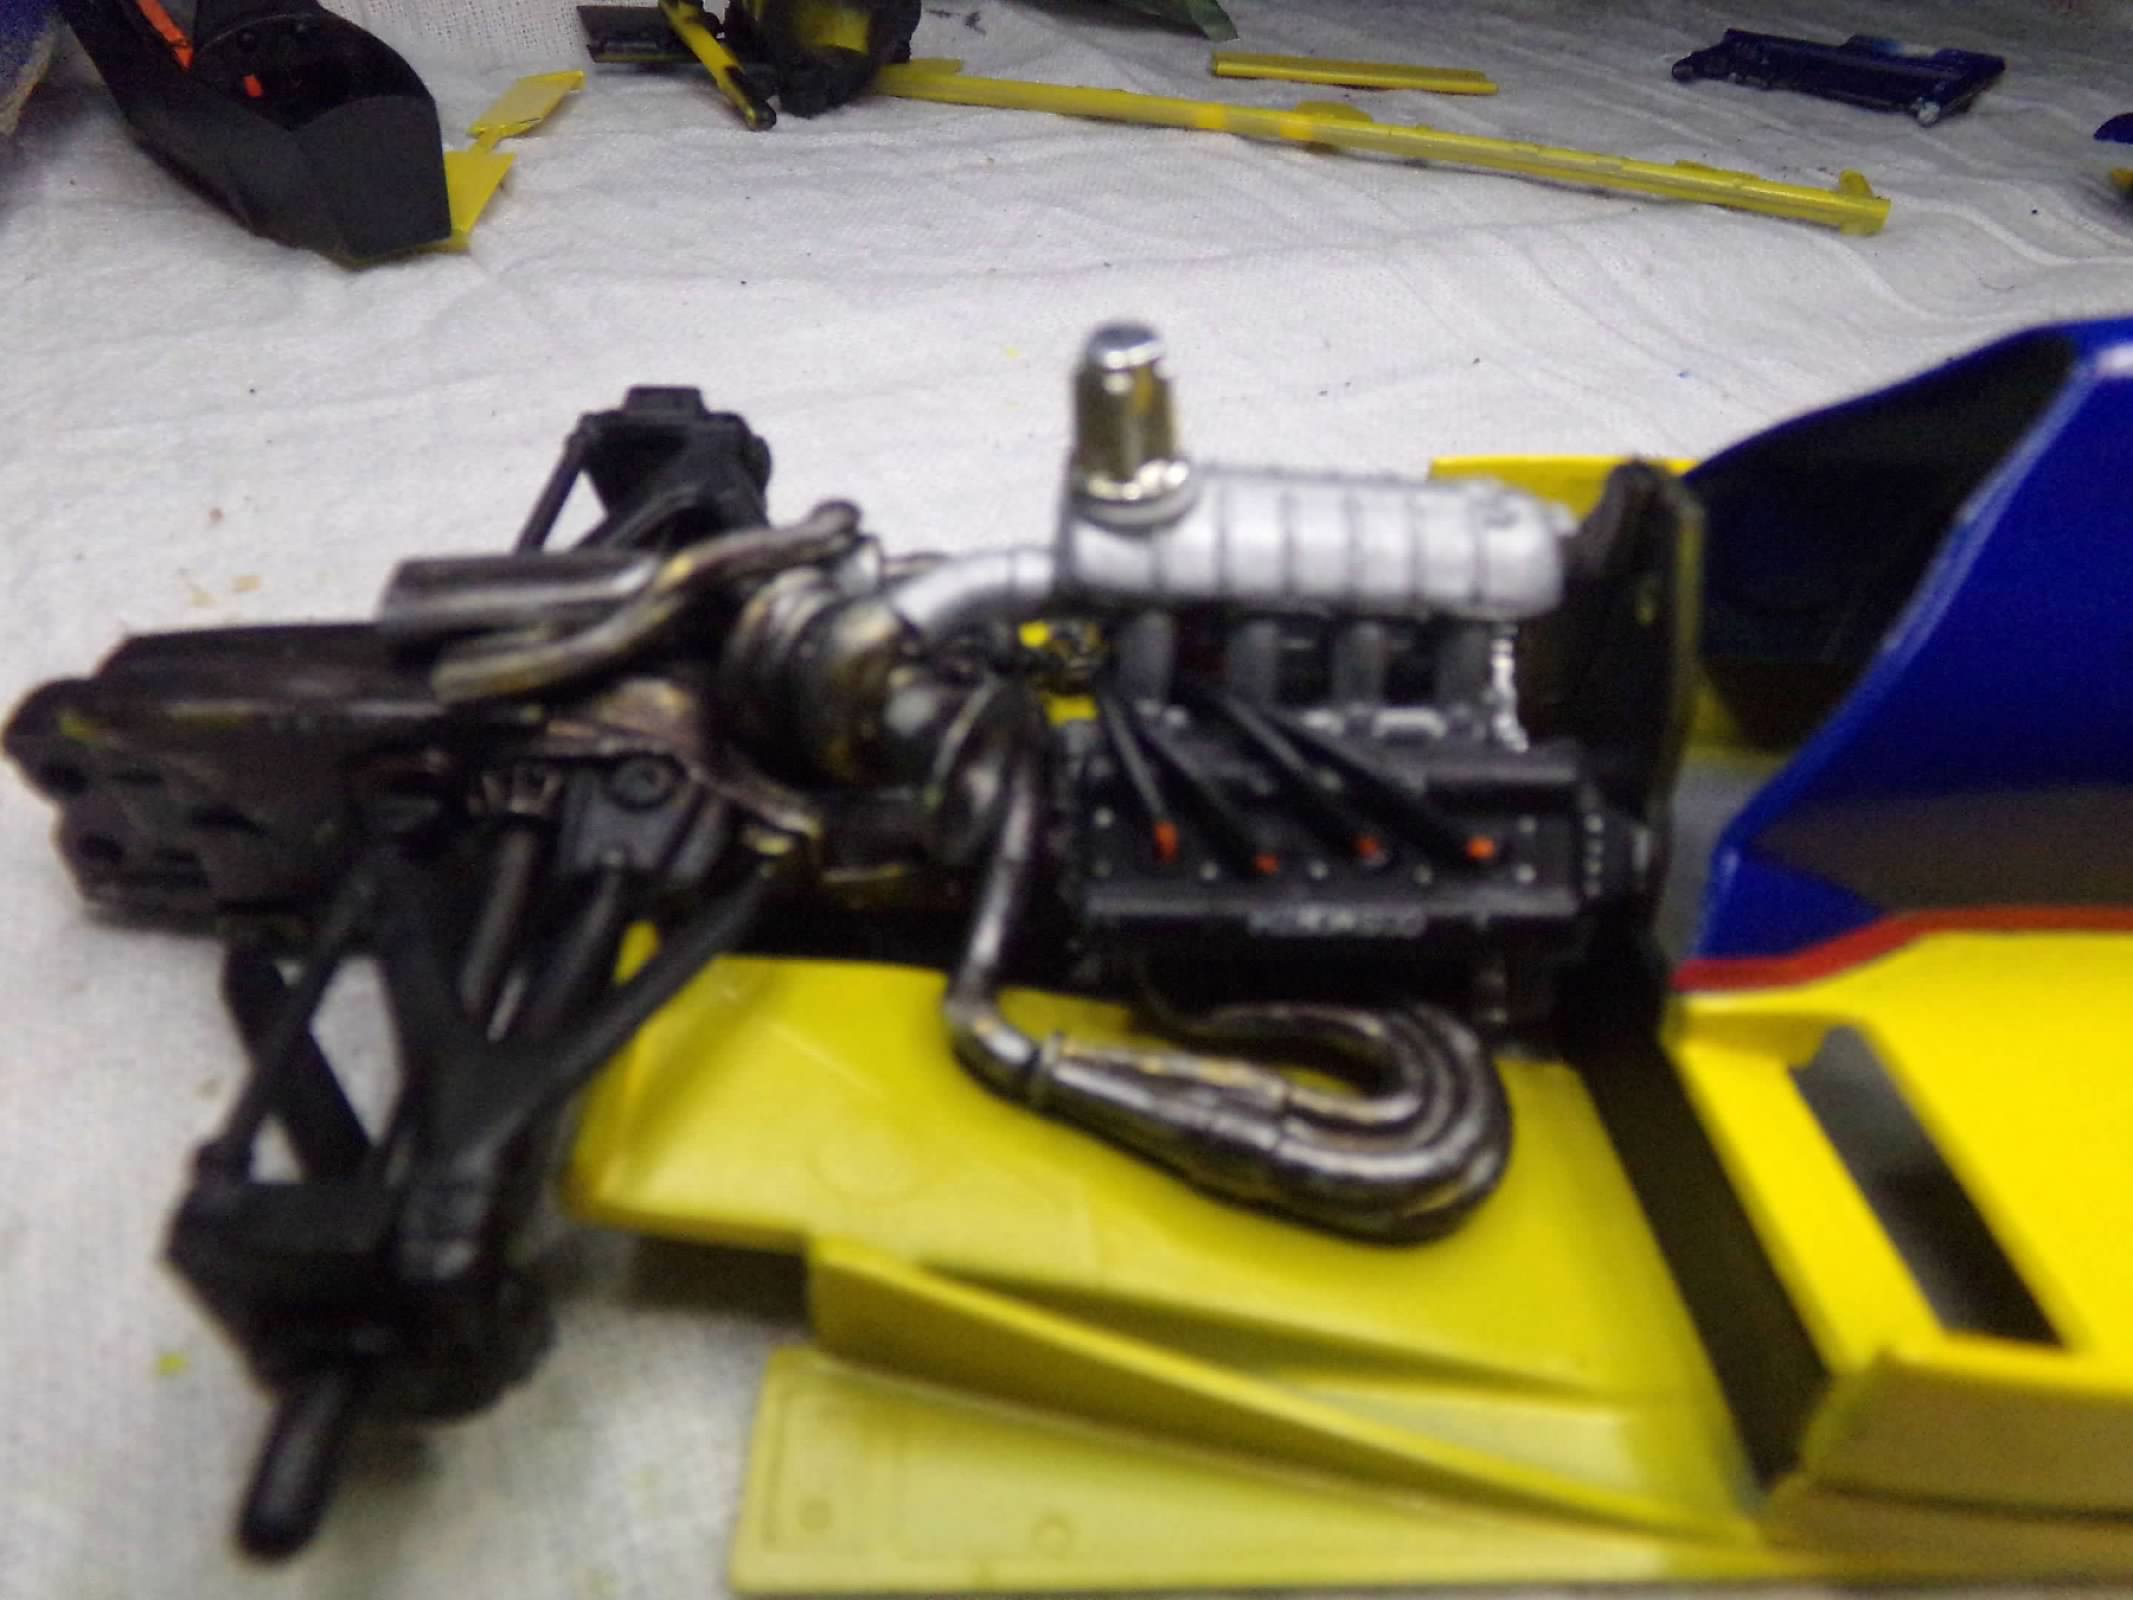
I finished the engine assembly, including plug wires and the rear suspension. I will add some additional plumbing after I mount the engine behind the bulkhead. The nice thing about building these engines is that you can use a brush to swab some additional colors over many of the parts to make it look like a running engine. I used aluminum, Model Master metalizer burnt iron, (I still have some!) and Model Color brass. A few more pieces and this one will be on its way to final assembly. Thanks for looking! ?
-
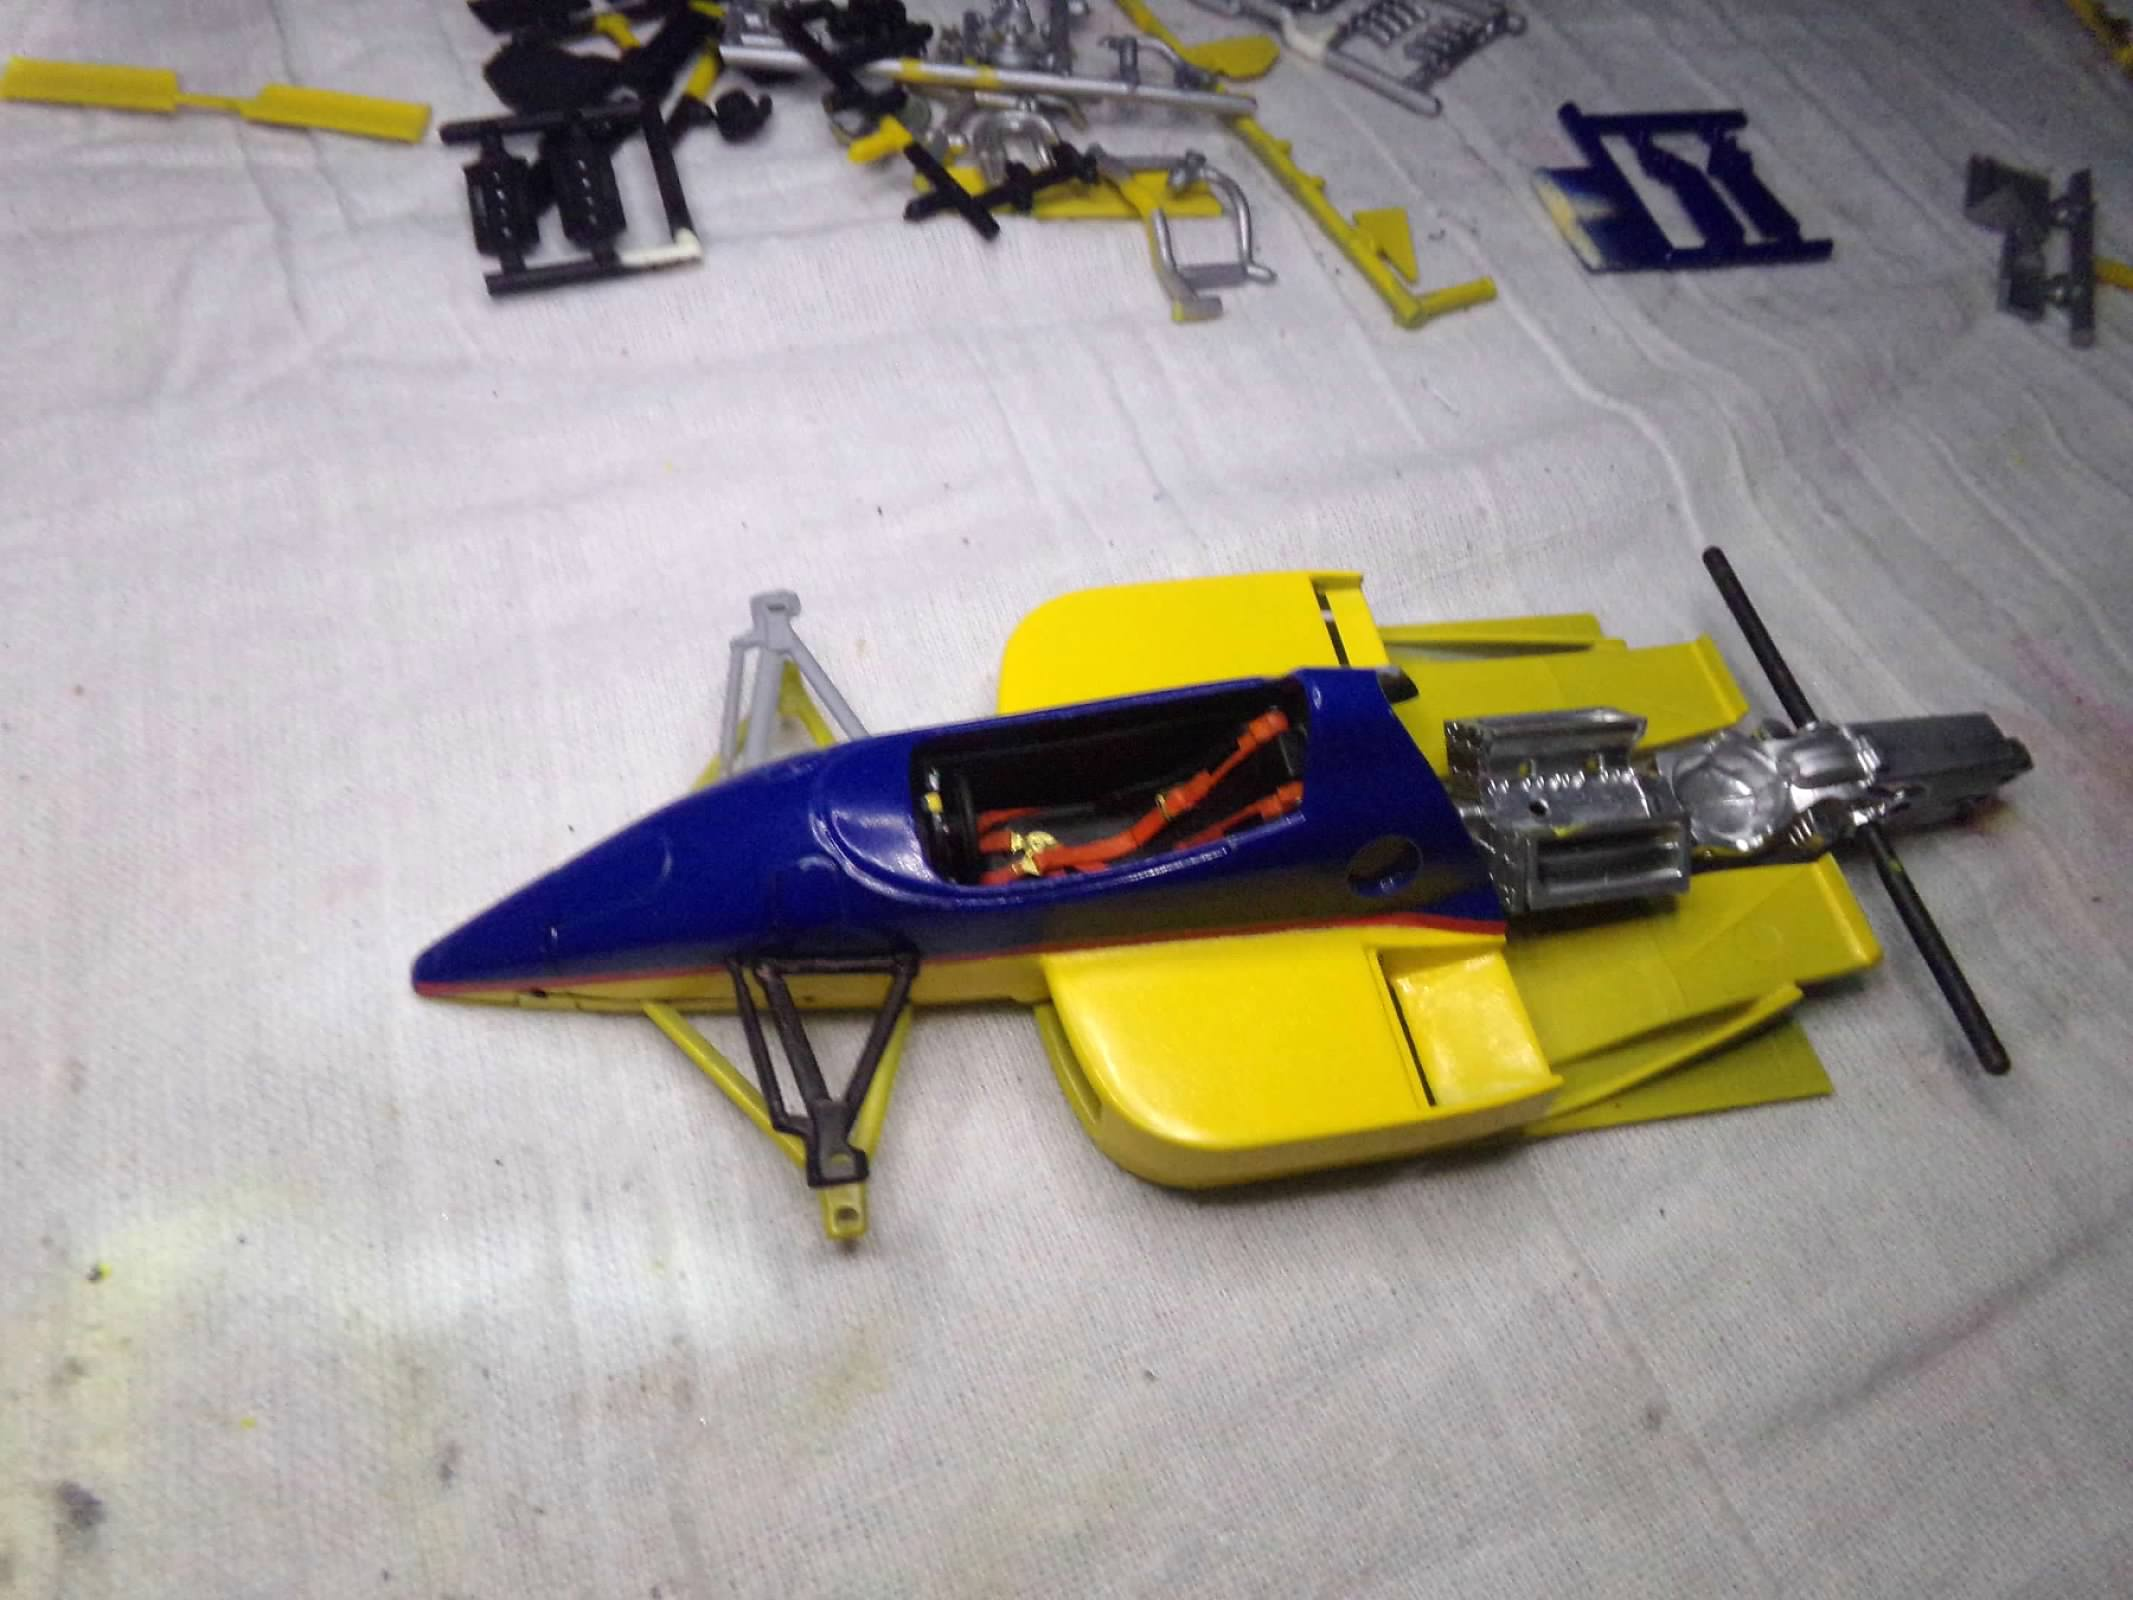
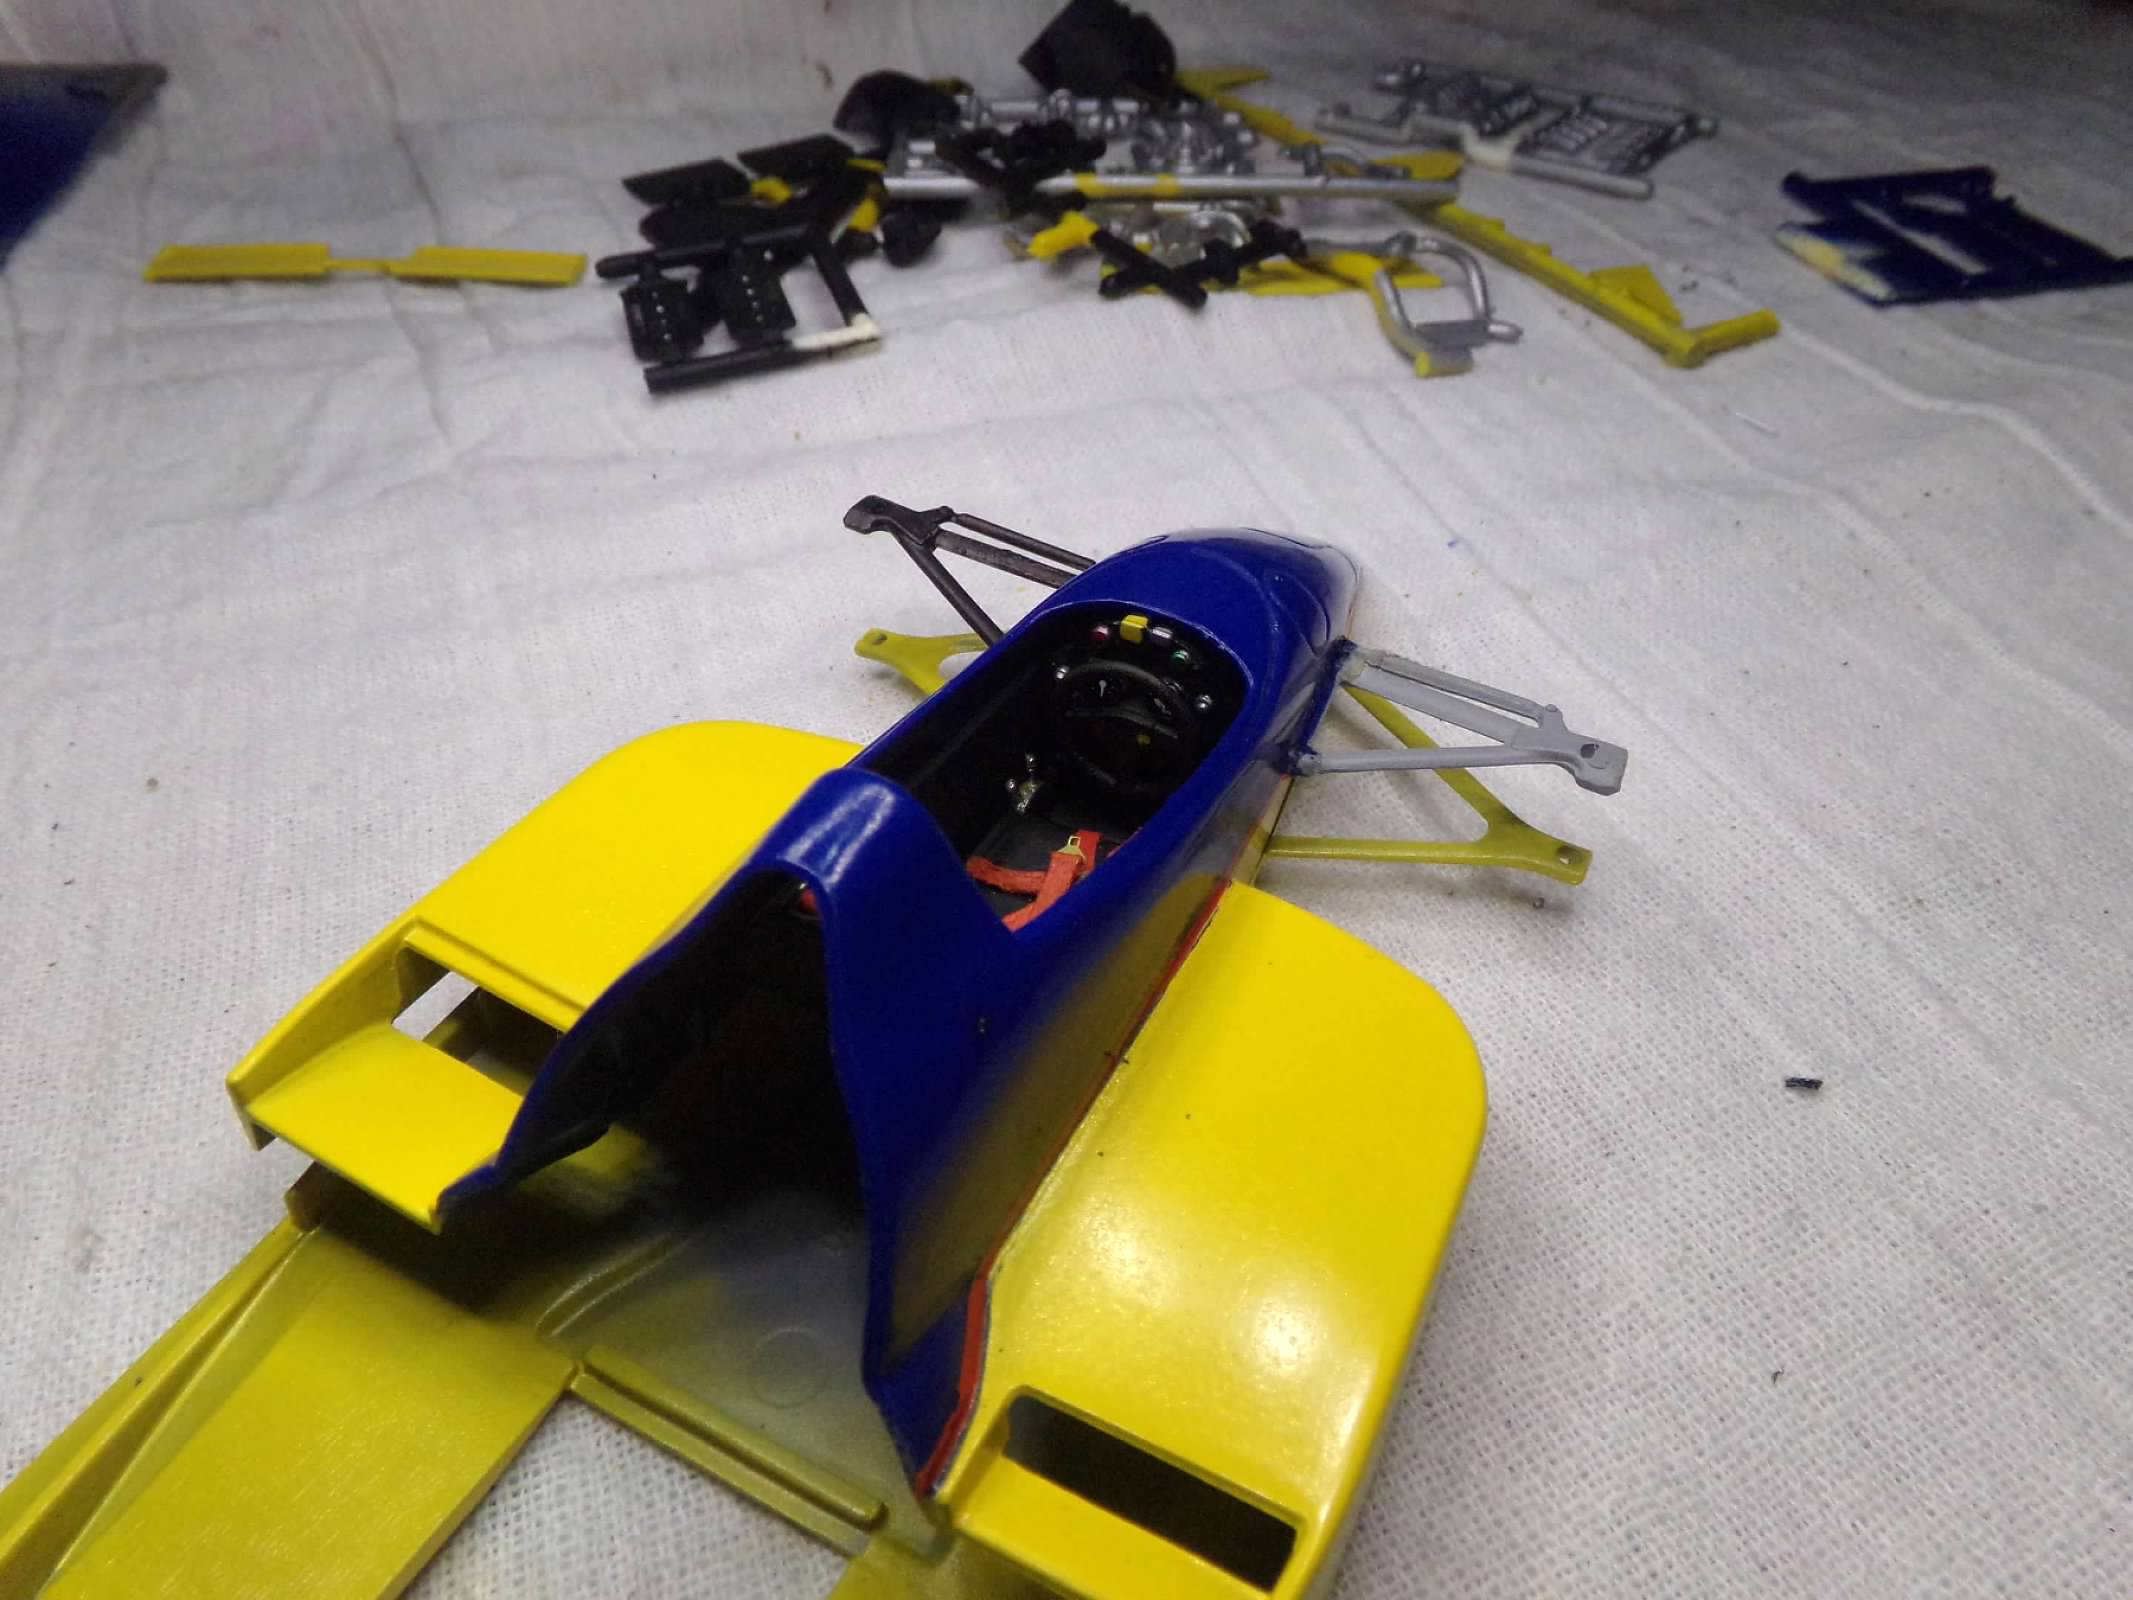
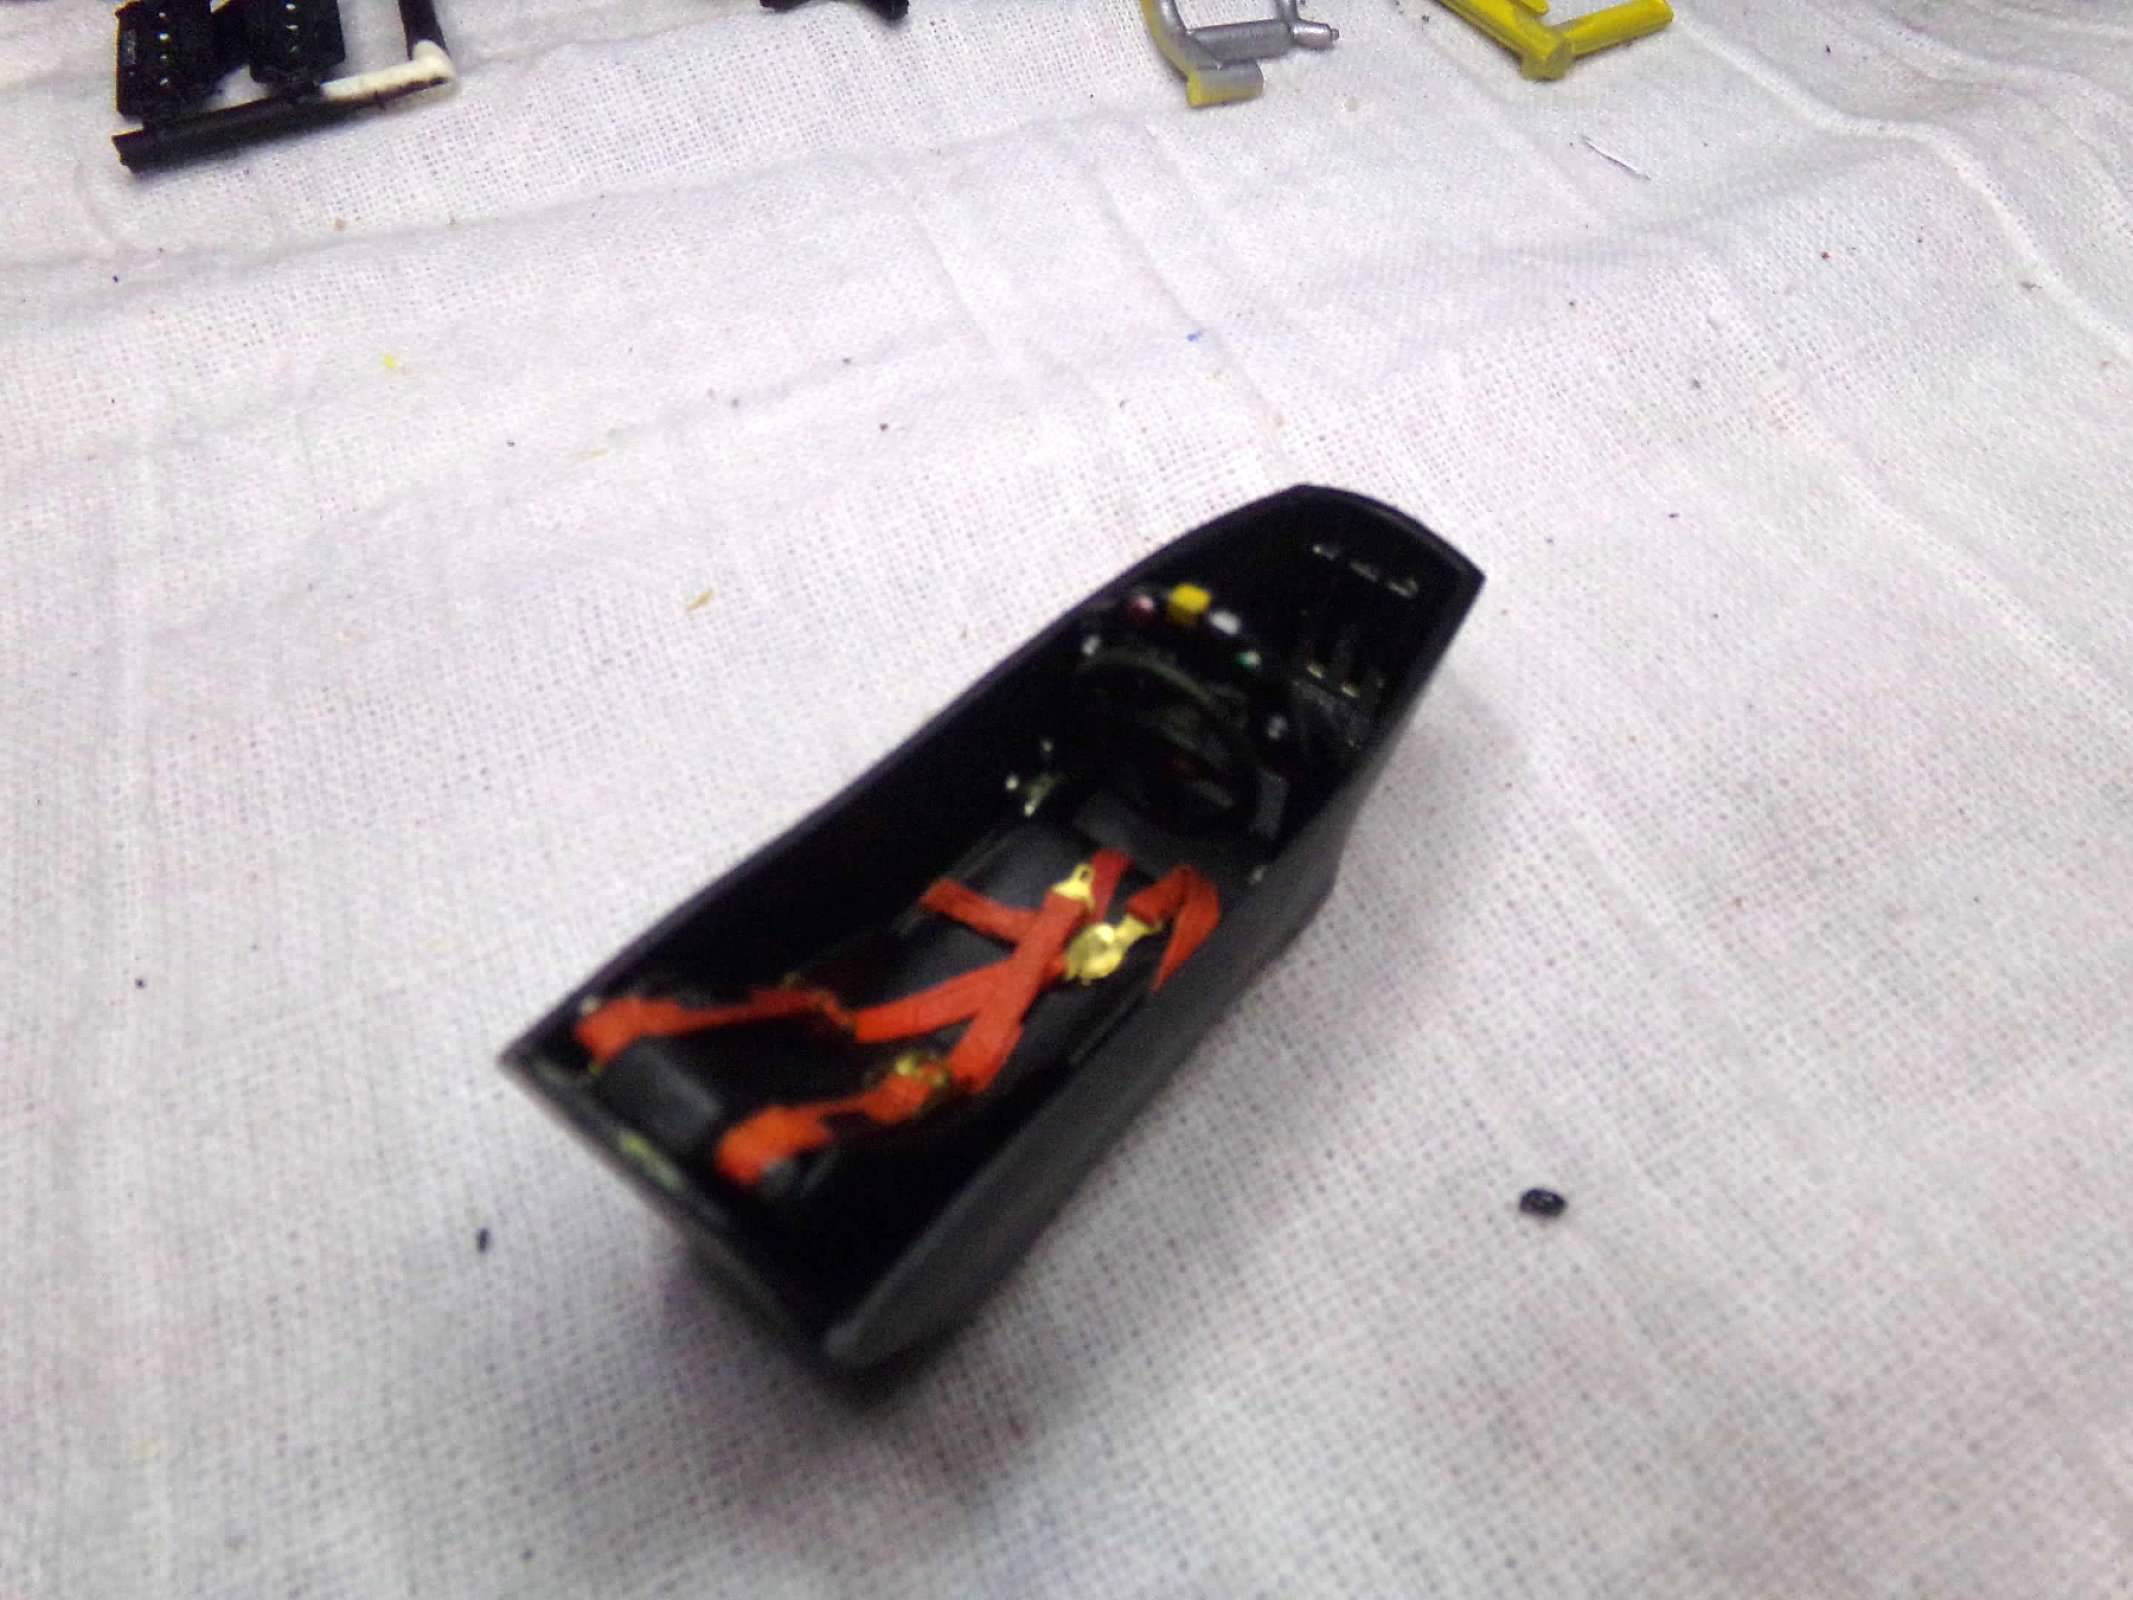
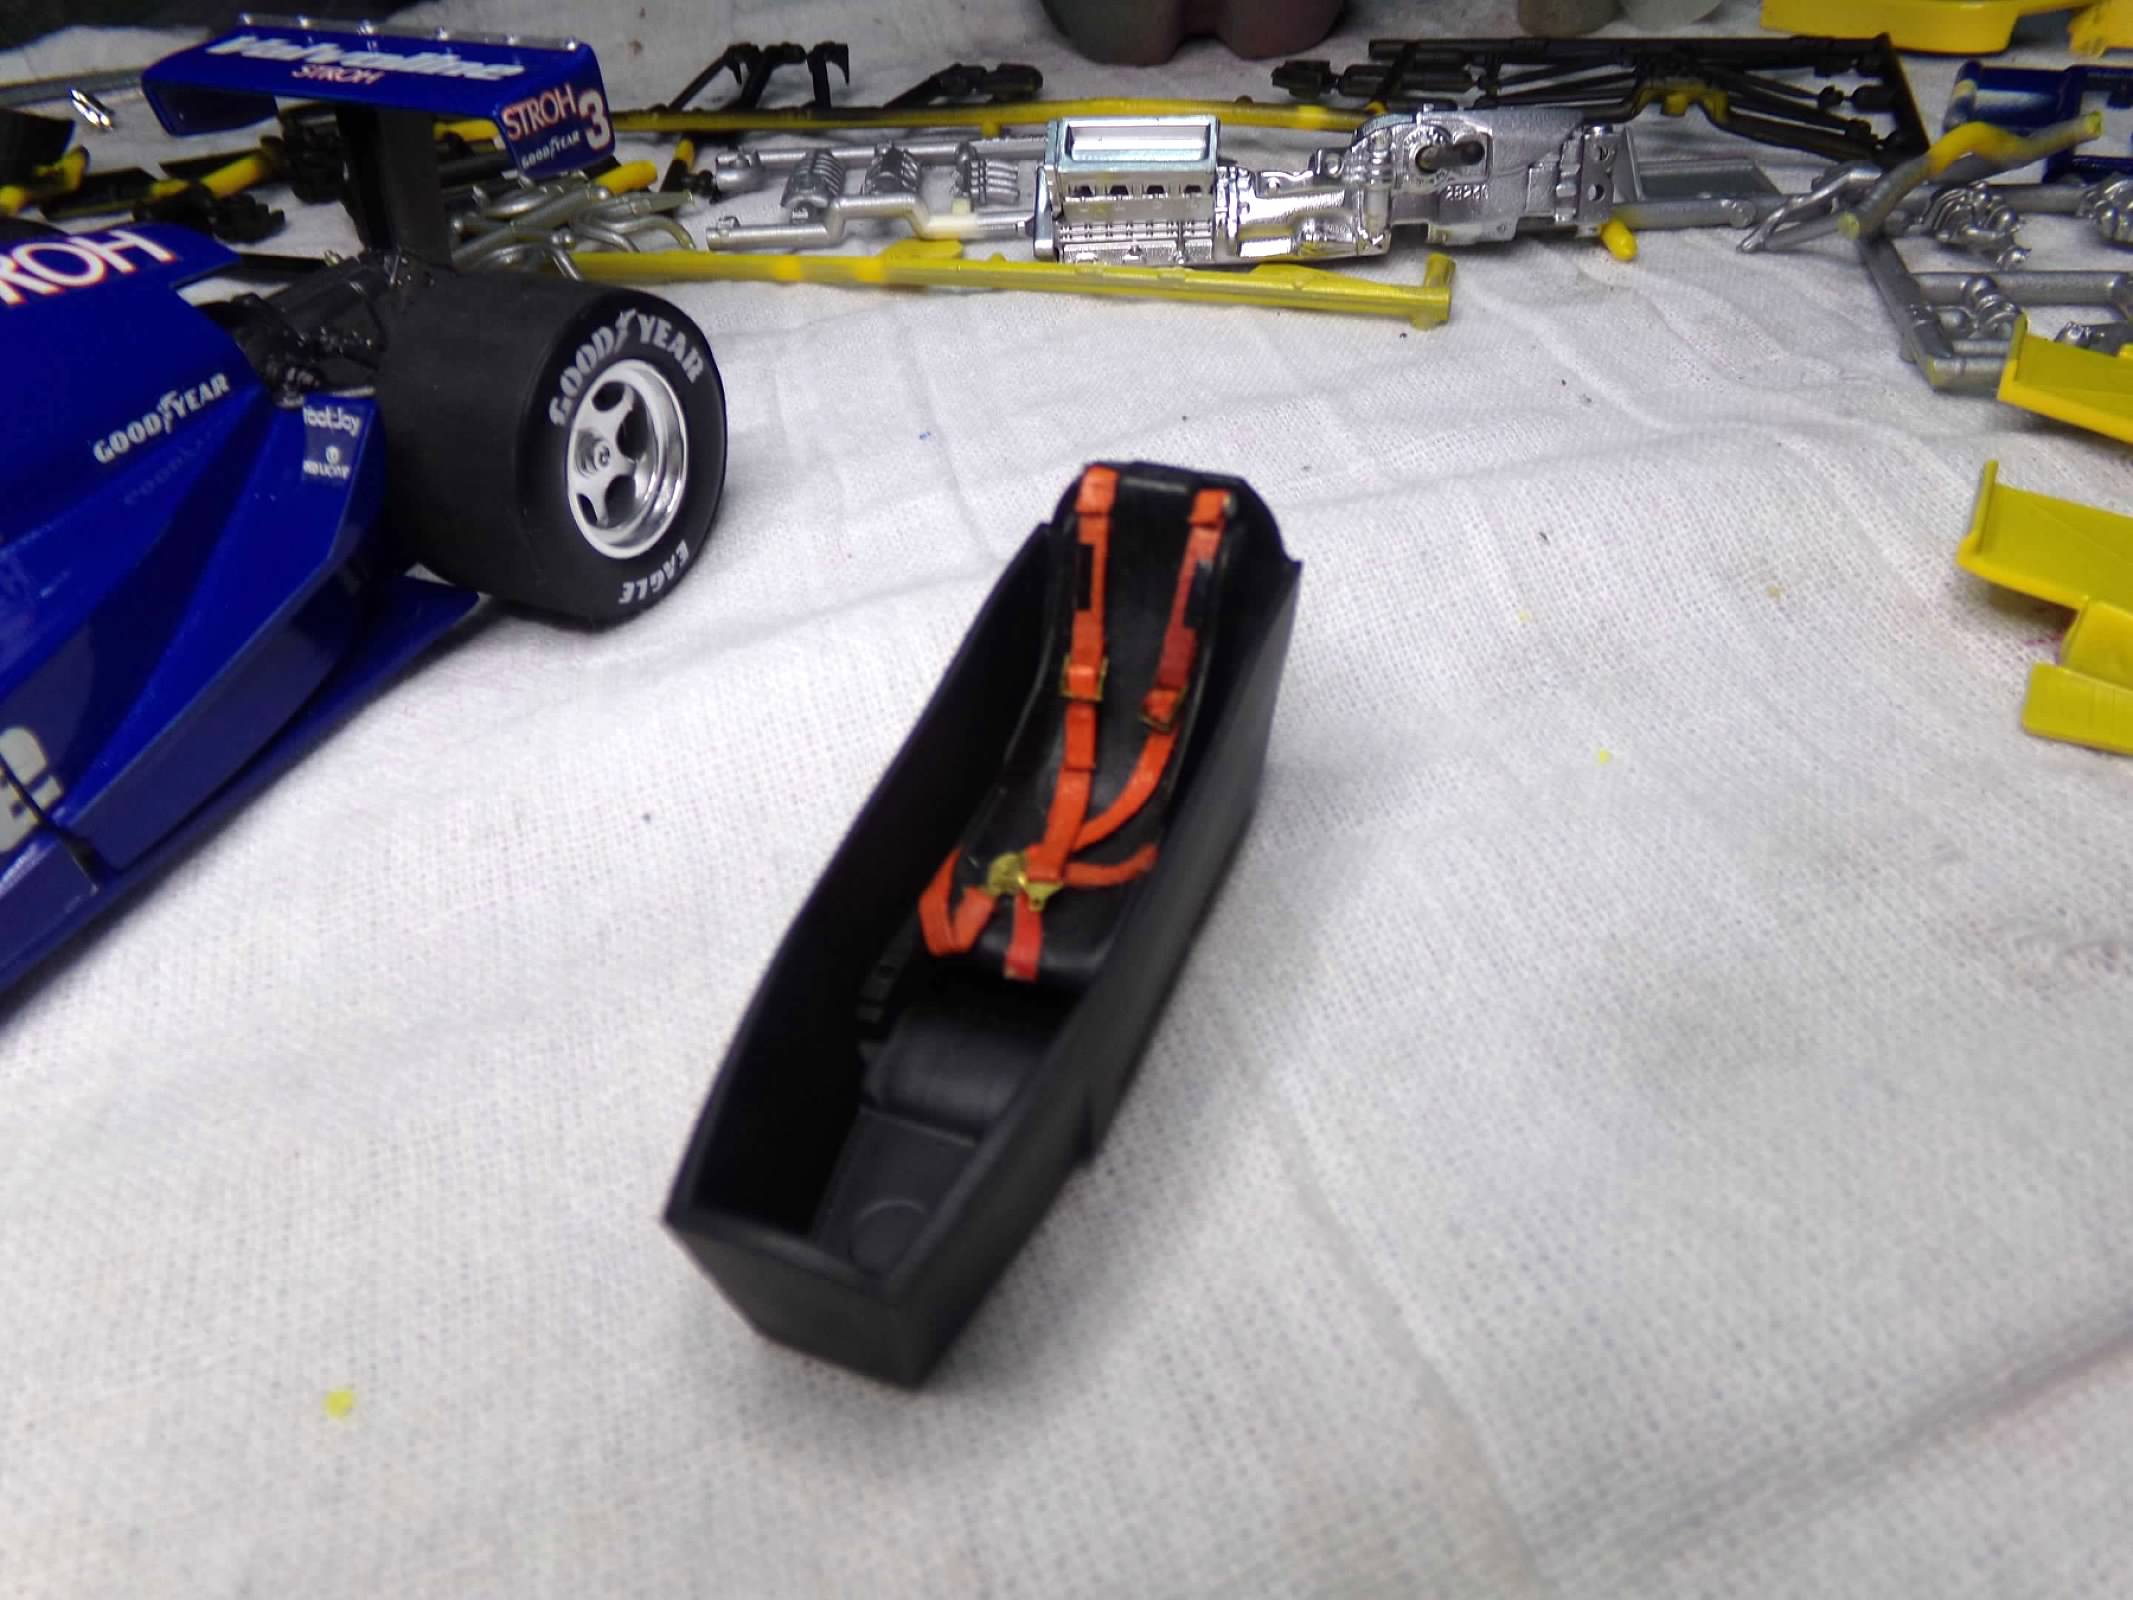
I have the cockpit and although it doesn't look like much detail, I did use a couple of old Fred Cady decals for the gauges and added some paint to the dash and steering wheel. The front part of the body has been rubbed out and I have added a red decal stripe as a paint separator. Next, I'll work on the engine. Not as much detail as above but I add some lug wires and do some paint detailing. Thanks for looking! ?
-
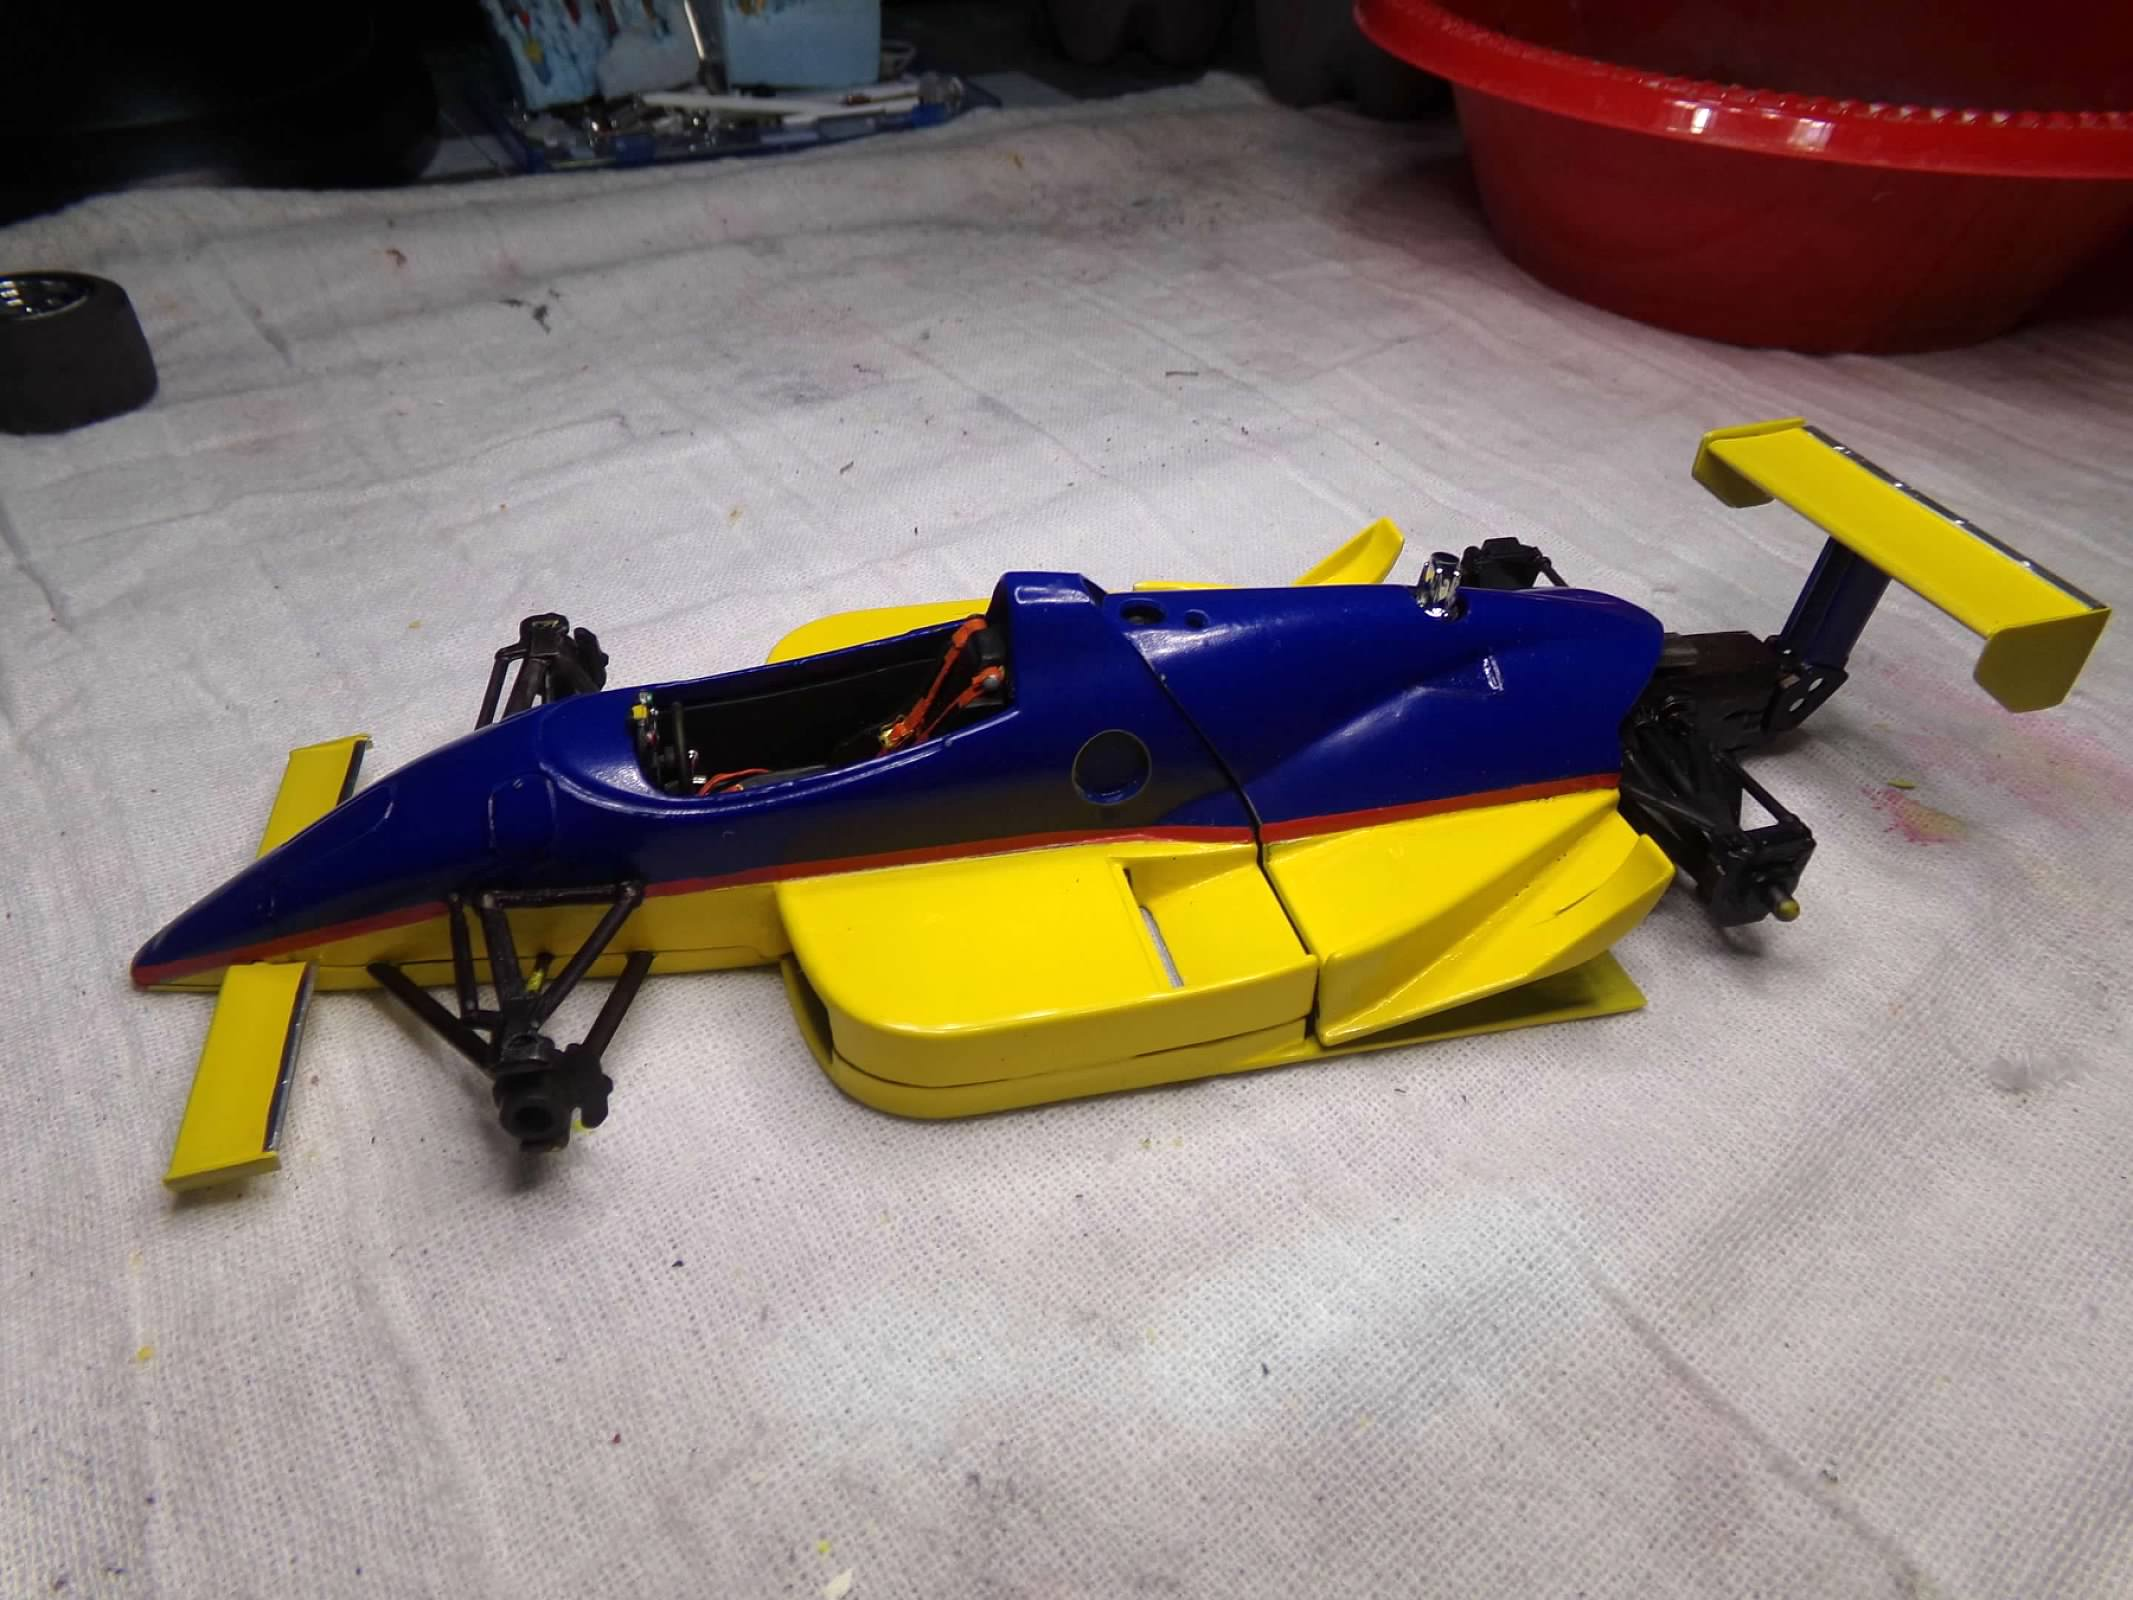
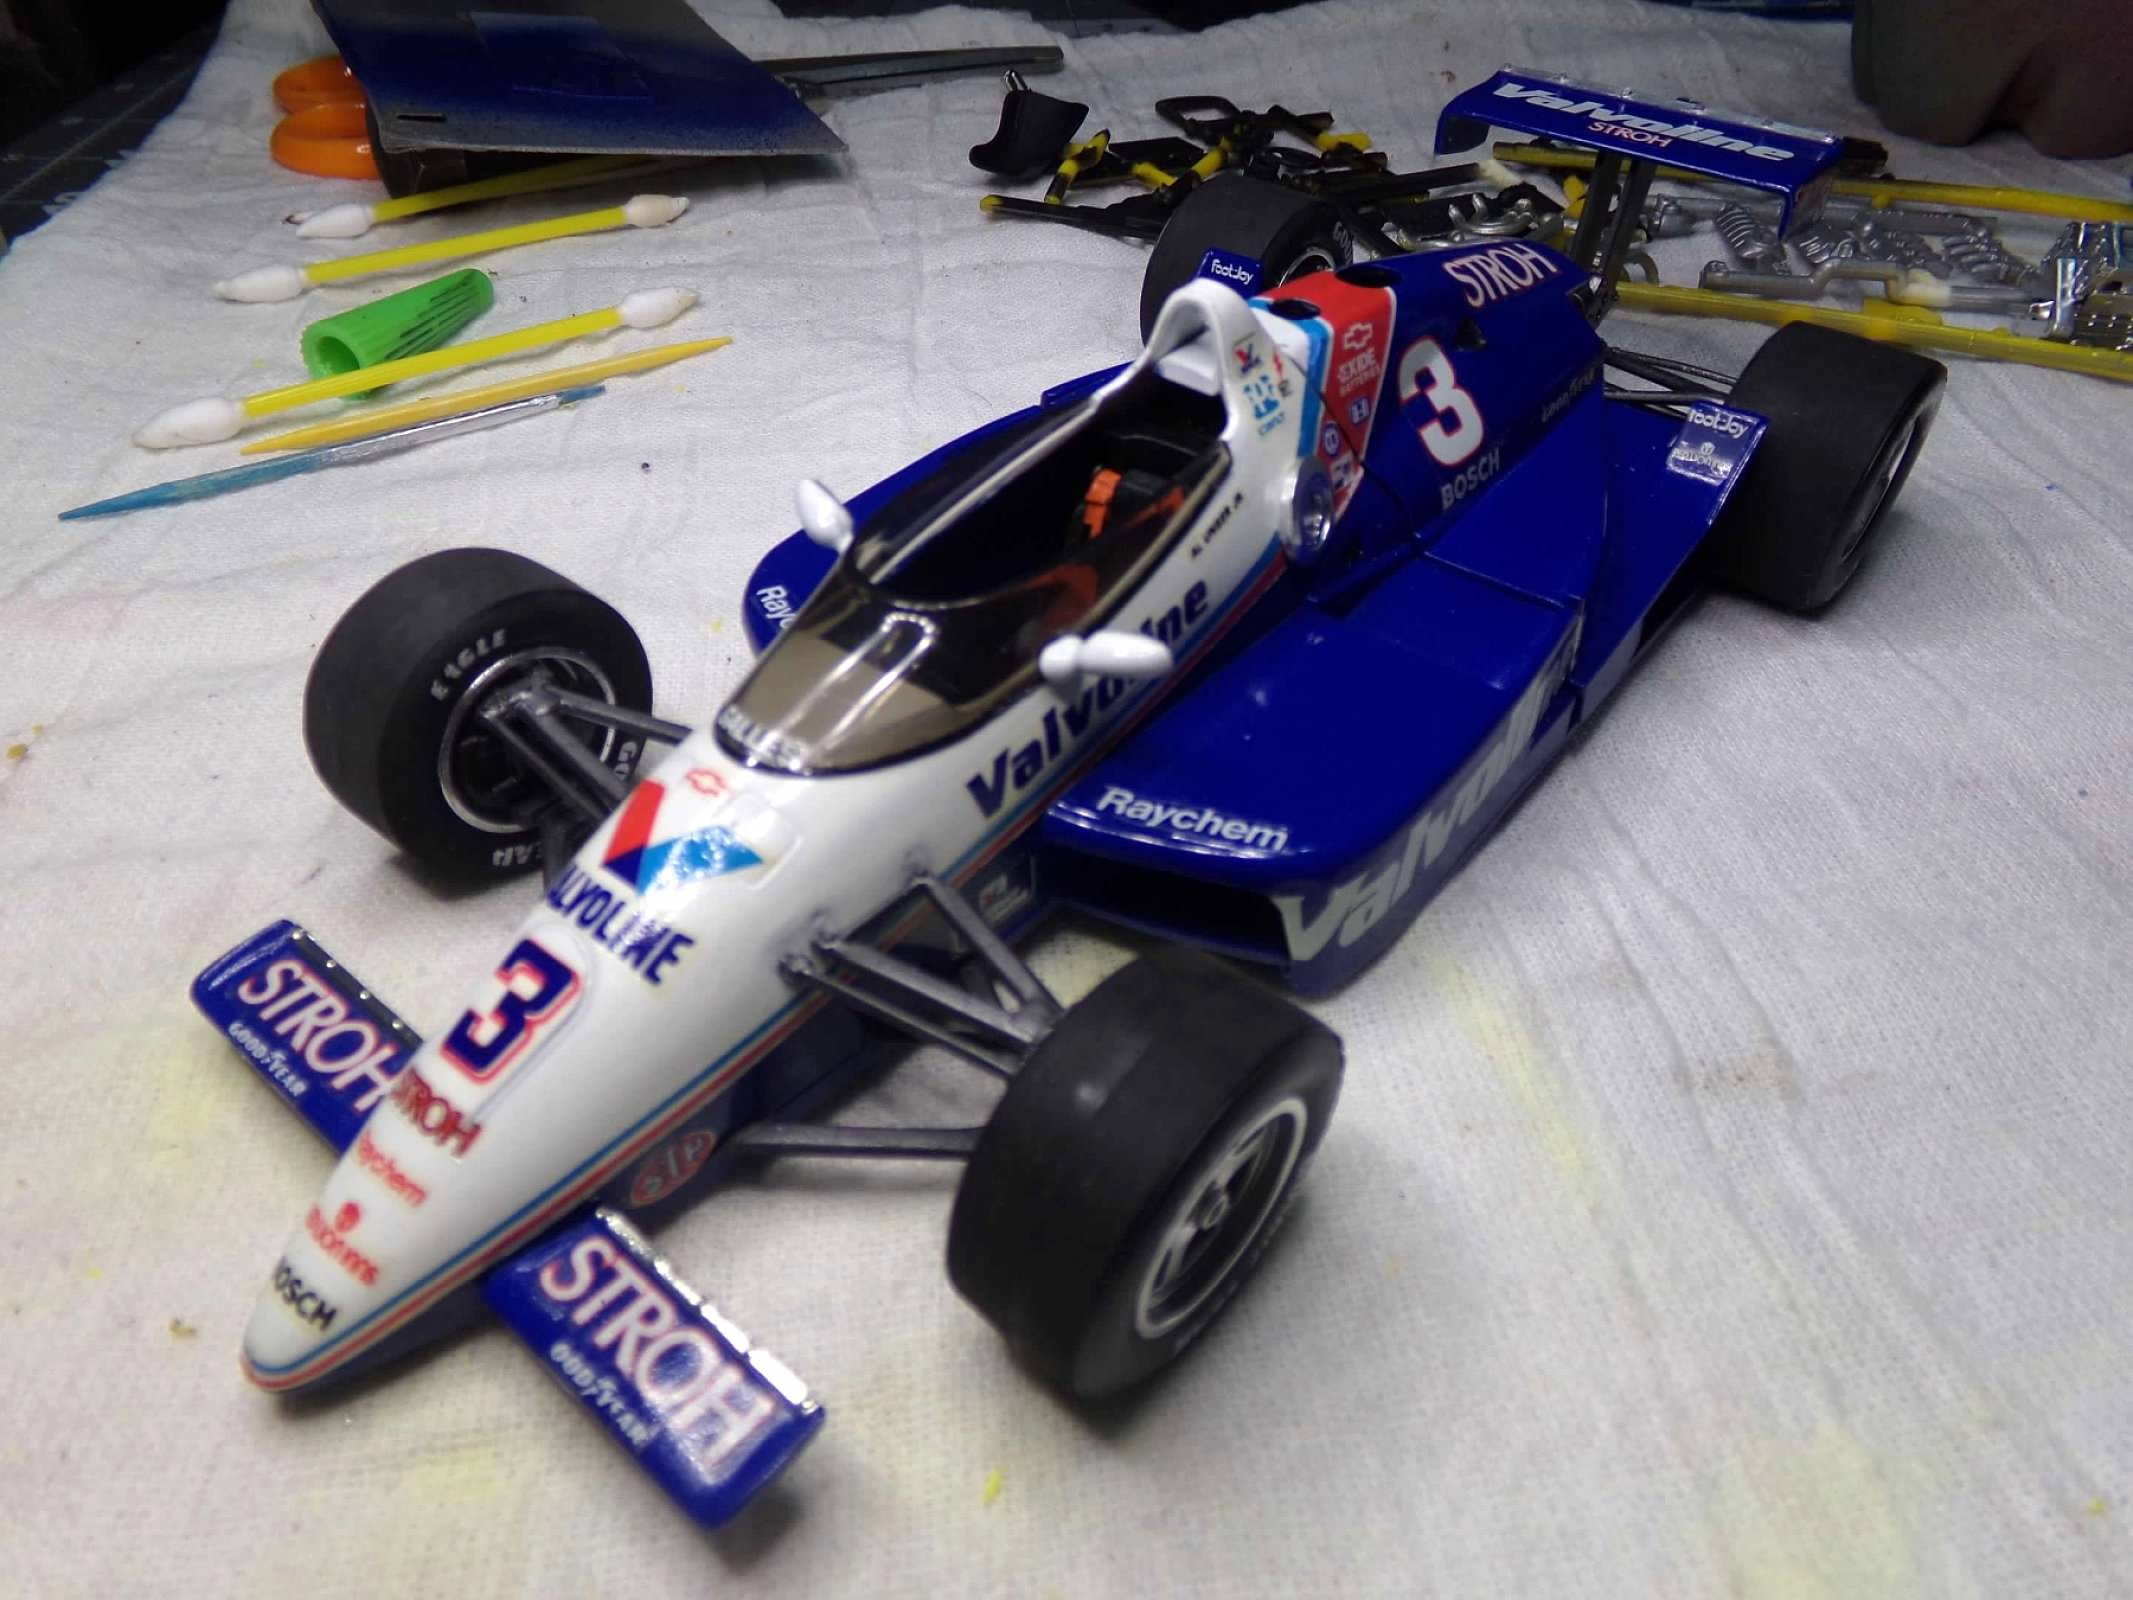
Thanks, Daniel, JC, and David! I appreciate your comments! I finished the painting today, hopefully, since it is going to rain tomorrow and the rest of the weekend. I'll rub it out tomorrow and see where I stand. The paint is Tamiya yellow and Krylon Short Cuts Forever Blue. I also used this Krylon Blue on the last one I built because I can never find a good solid blue in model paint lacquer. The last one I built is the 1988 Al Unser Jr. #3 car below. Al won in 1992 and 1994. And look - there's a seat with a 5 point harness in the Valvoline Special! That will fit perfect in this one! Imagine that! Thanks for looking! ?
-
Thanks, everyone! I appreciate your comments! ?
-
This is any AMT kit that I am going to start next. It is the car that Michael Andretti drove to 4th place in 1988, the year that Rick Meyeaars won his third Indy 500. I grew up in Indianapolis and have been to over 50 Indy 500 races. 1988 was a good year because that was the fourth year that I traveled from Houston to the race and I brought 3 of my friends for their first Indy 500 race. I rented a Cadillac for that weekend and the weather was great so we had a great time. Building Indy 500 race cars has also been a great way for me to get into modeling and also helped me with model contest competition. I was frustrated with going to contests and not placing so this category, competition open wheel was something I knew a little bit about and I had research materials and it was a category that didn't have a lot of entries. So I have added two photos of the 1989 Indy 500 winner that I built many years ago. It took 1st place At the Southwest Challenge in 1990. the lettering for the decals was Letraset letters rubbed onto clear decal film one letter at a time. The red paint is a 50/50 mix of Testors model master red and a dayglo red I found somewhere. the white is Testors white and both color were airbrushed. There's a lot of wiring and plumbing in the engine from studying some photos of engines at the time. So I won't be going to that level of detail on this one but I am going to get started tomorrow! Thanks for looking! ?
-
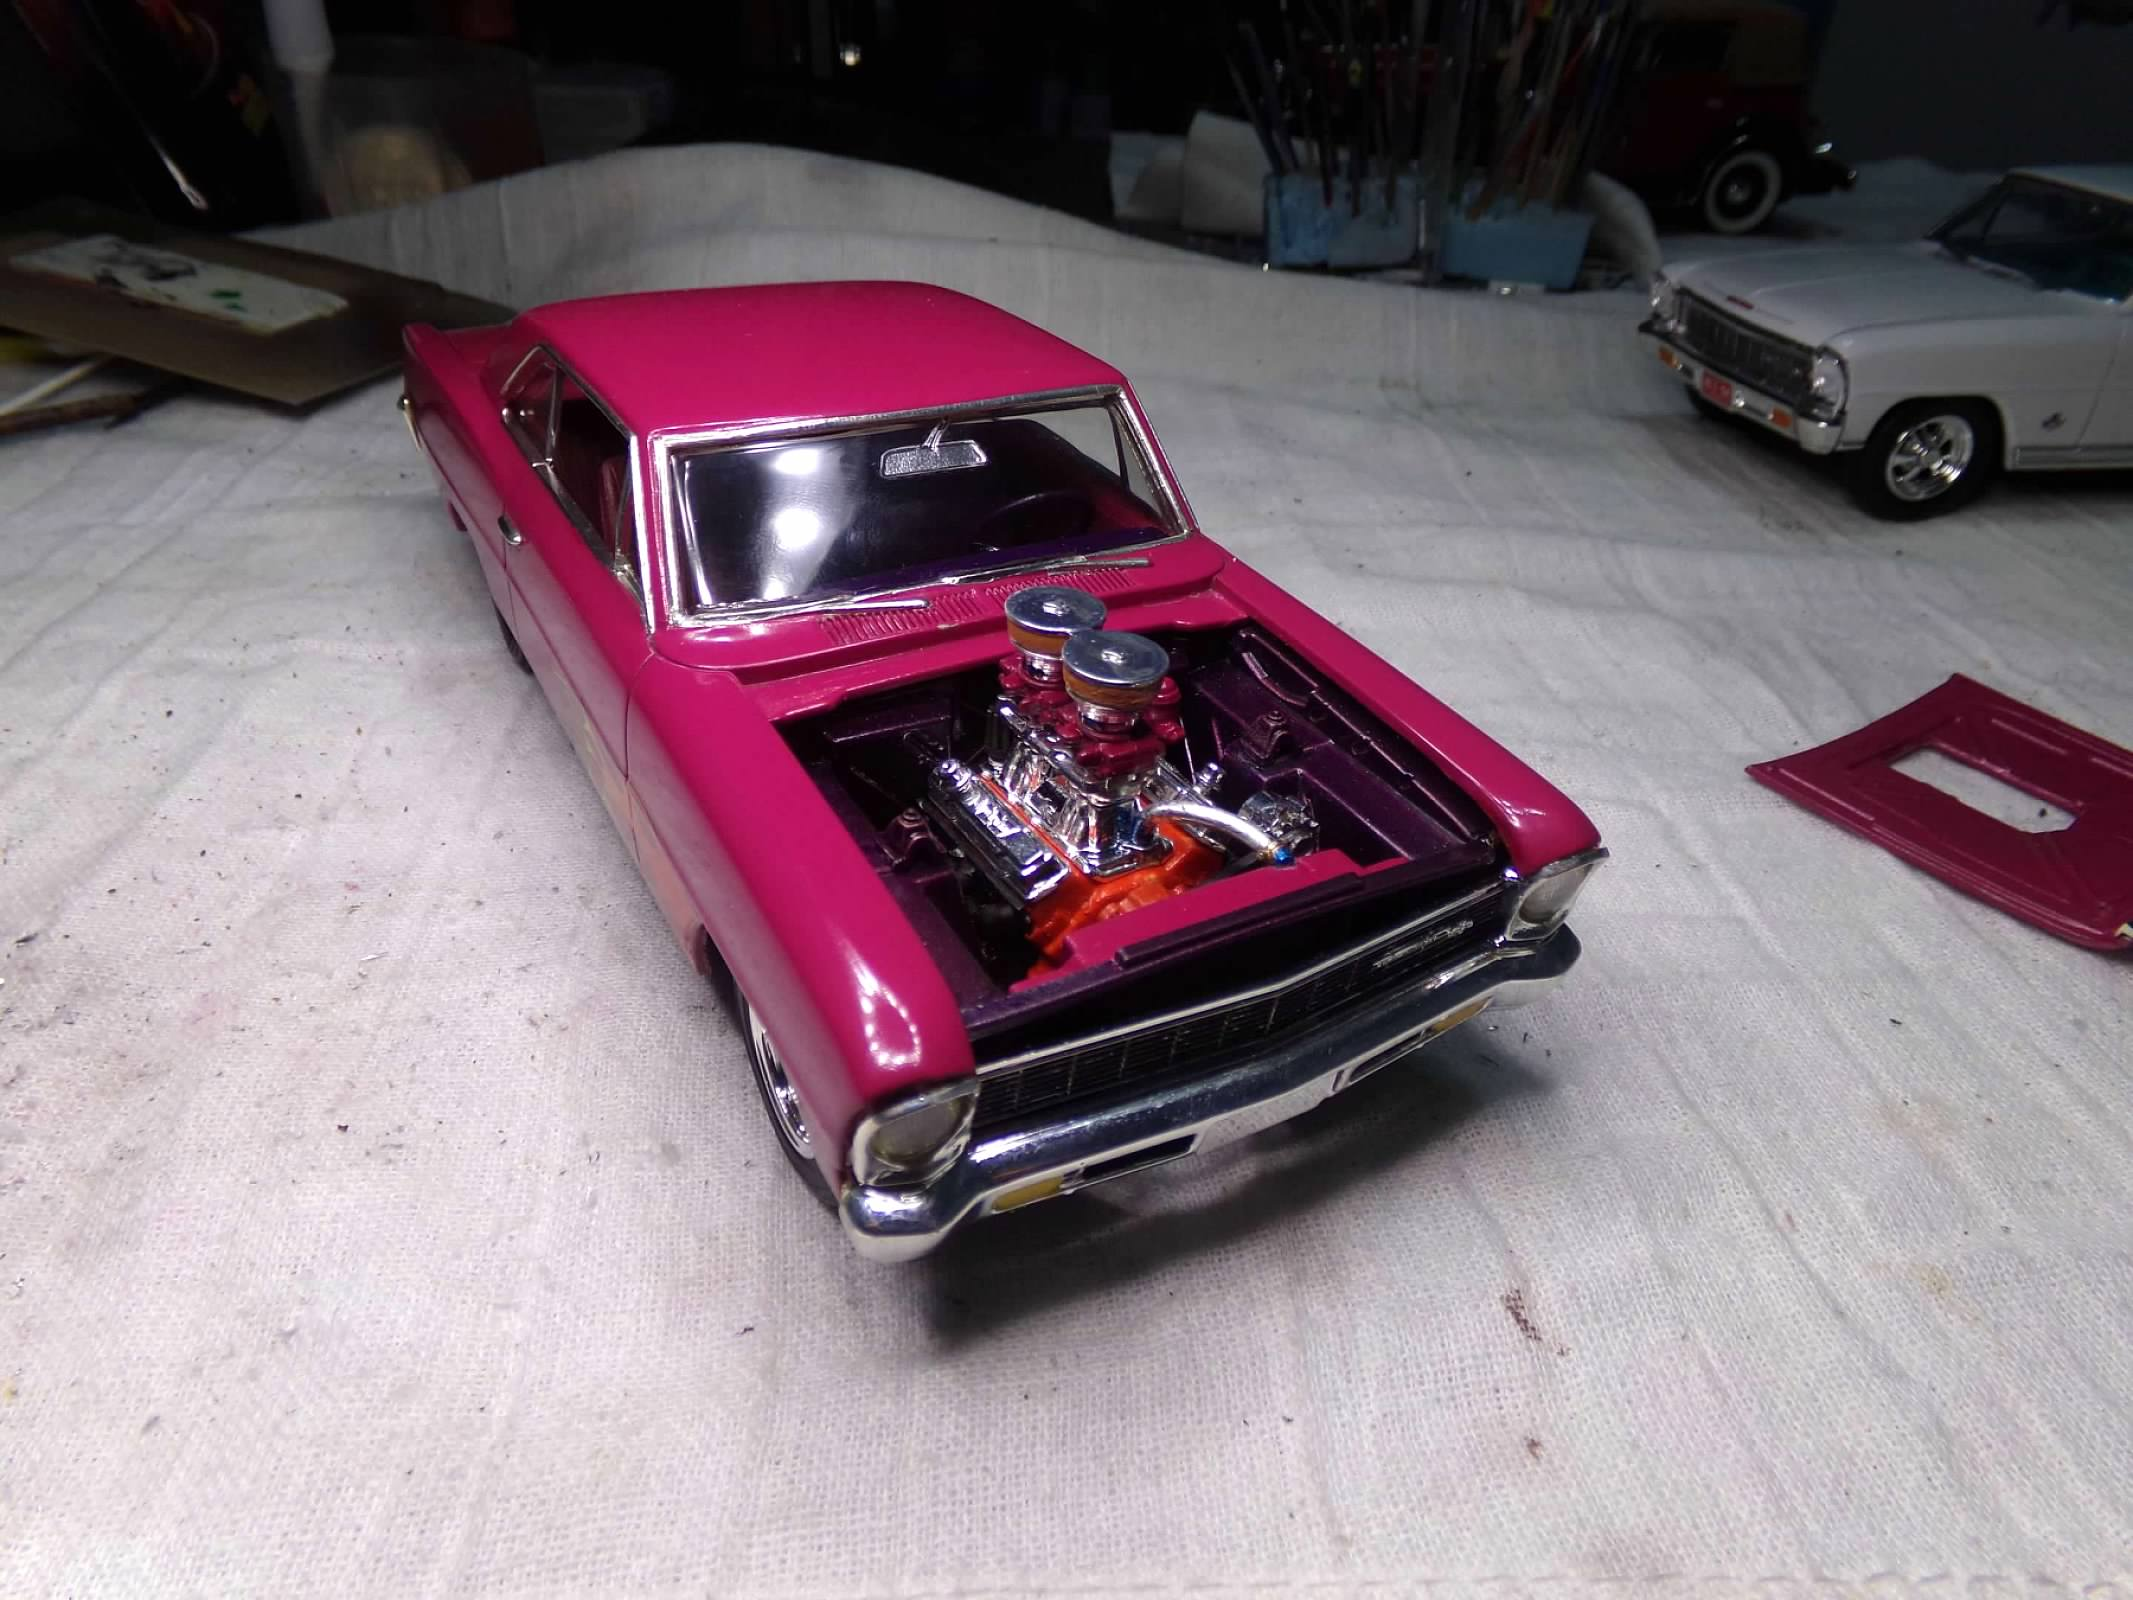
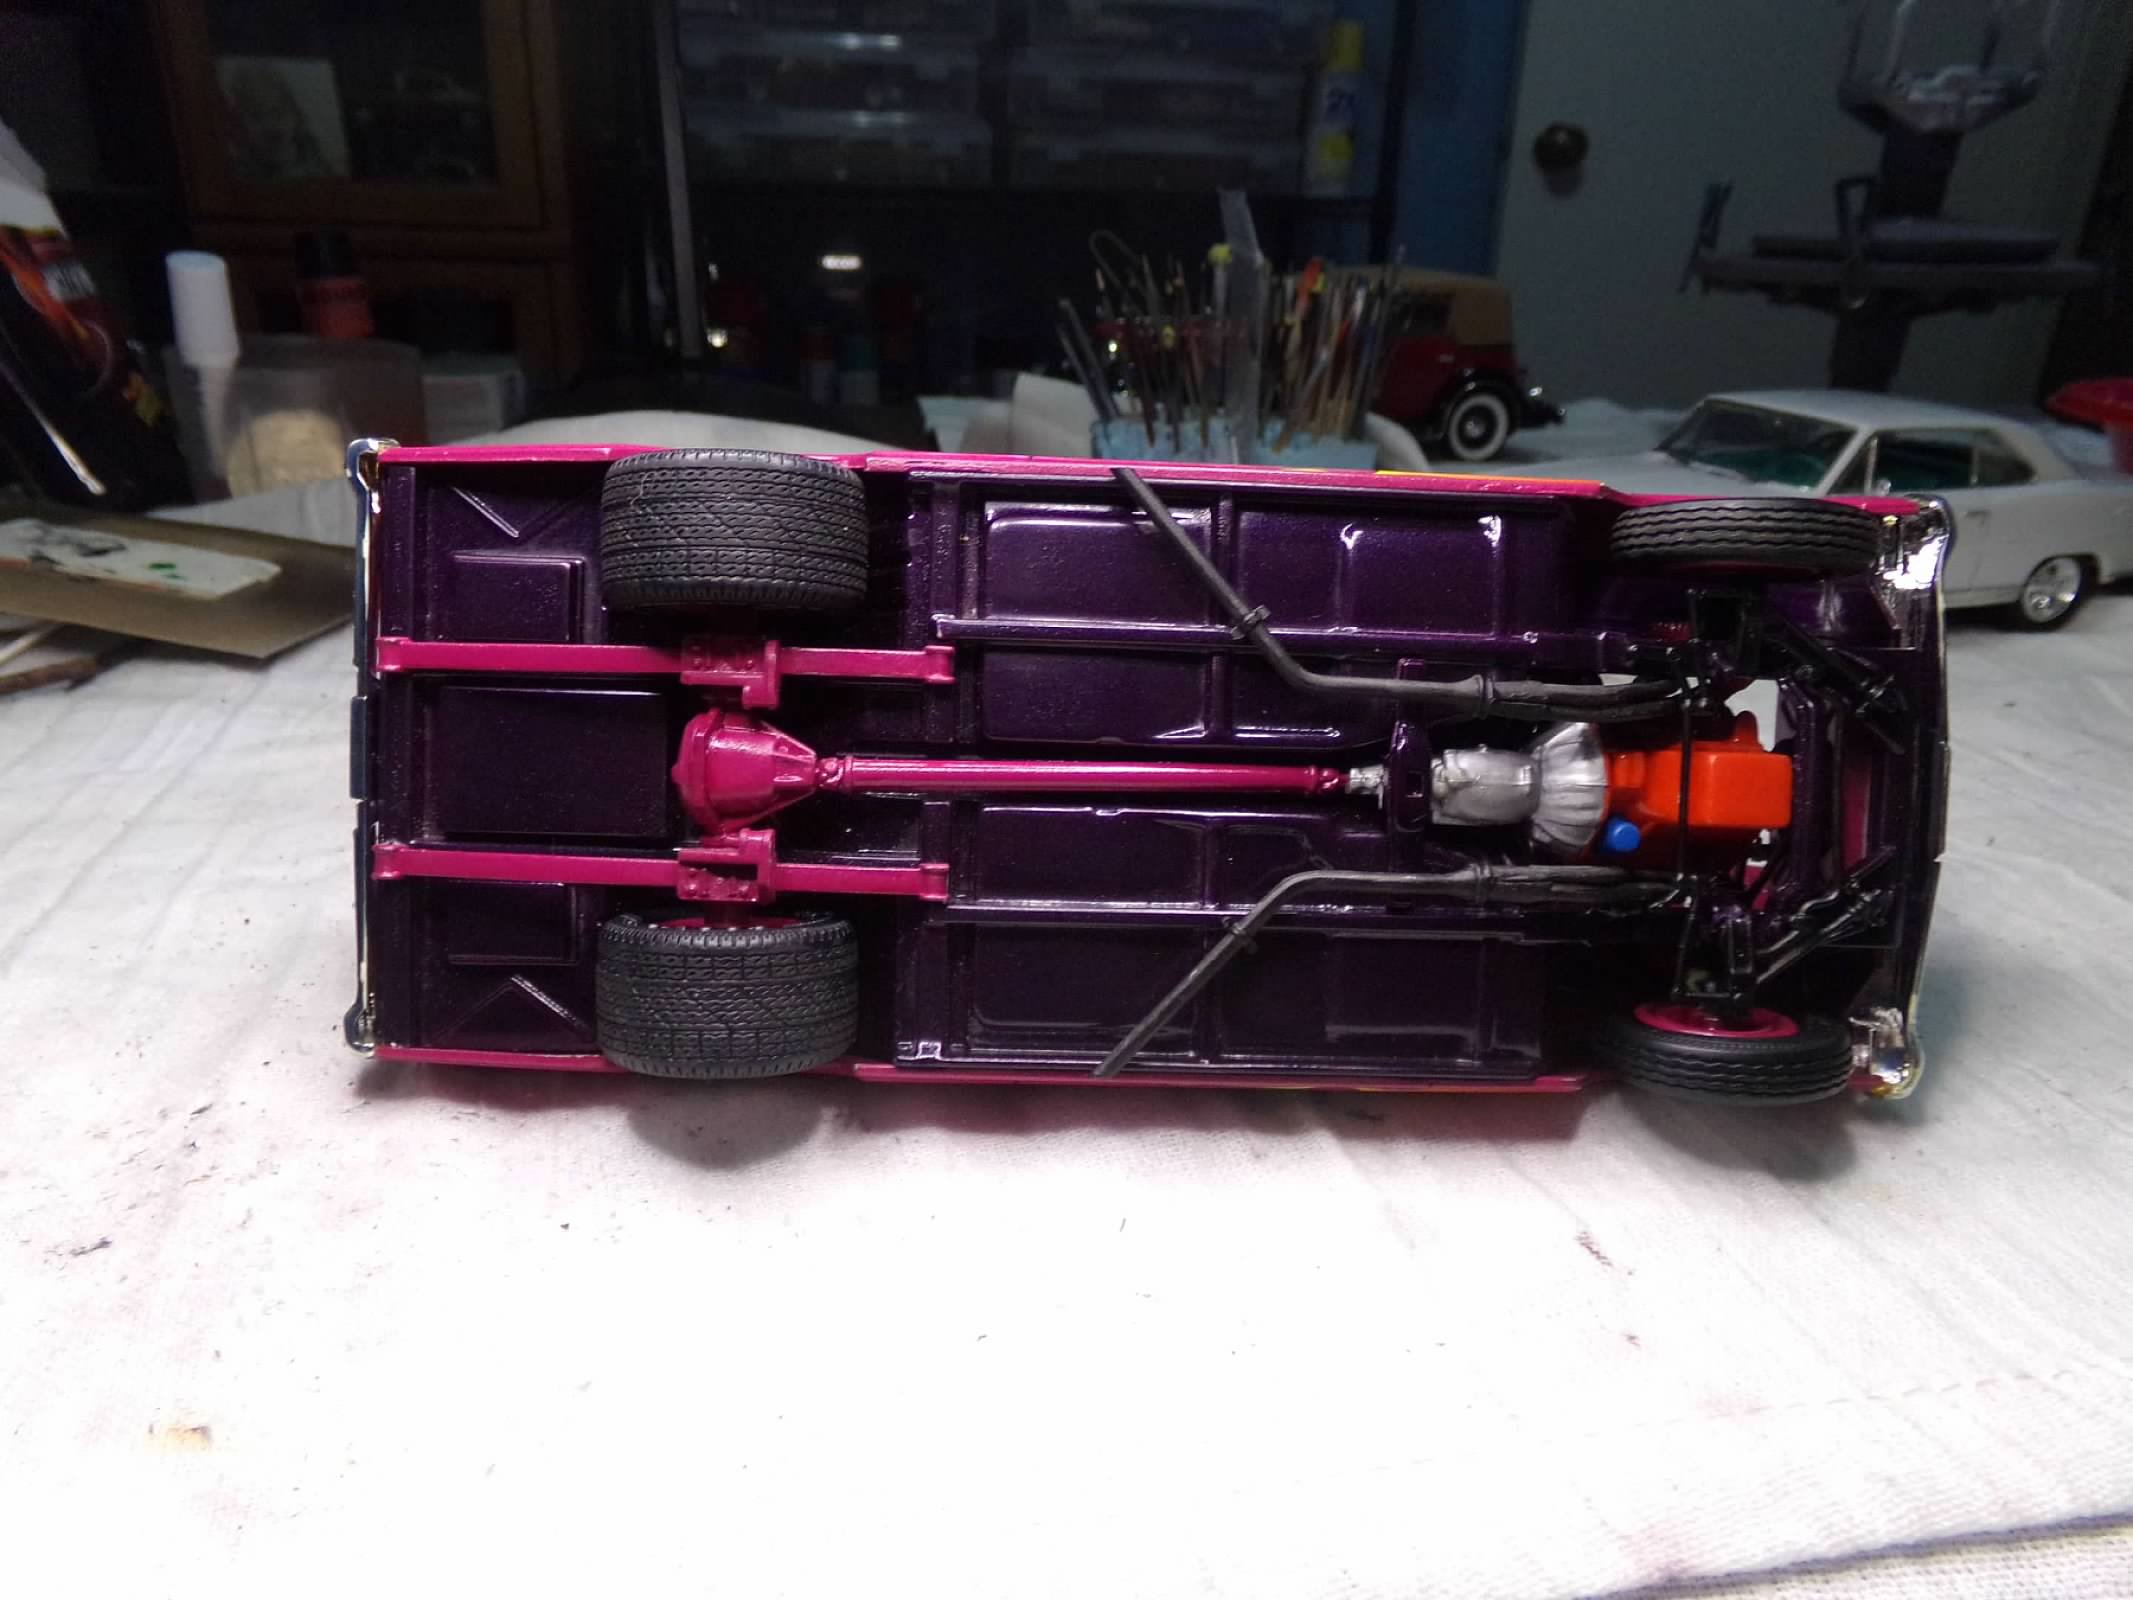
This one is the latest reissue of this kit which is much different from earlier Pro Street versions (see previous build below). The paint is Dupli-Color Pure White on the exterior with Testors Extreme Lacquer Turquoise using Dullcote to eliminate the metallic appearance. Engine is wired, plumbed with a fuel line and heater hoses. A alternator bracket has also been added. The previous version had a tubbed chassis with wide cheaters on the rear. That one is painted with Model Master Panther Pink and Plum Crazy. It is built box stock and is at least 20 years old. Two very different versions of the same kit. Thanks for looking! ?
-
Thanks, everyone! I appreciate your comments! This one is done! I had a few setbacks or I would have been done yesterday. First, I knocked out the rear window while finishing the rear and it was a bear to get back in while the body was on. The clear plastic included in this issue can only be described as "stiff cellophane." I also had to reattach the front fenders and bumper/grill to get the hood to sit right. But its done now, including decals. See final photos along with a Pro Street version from a previous build in the "Under Glass" section. Thanks for looking!
-
Looks good, Jim! I can't wait to see it with paint and foil! ??
-
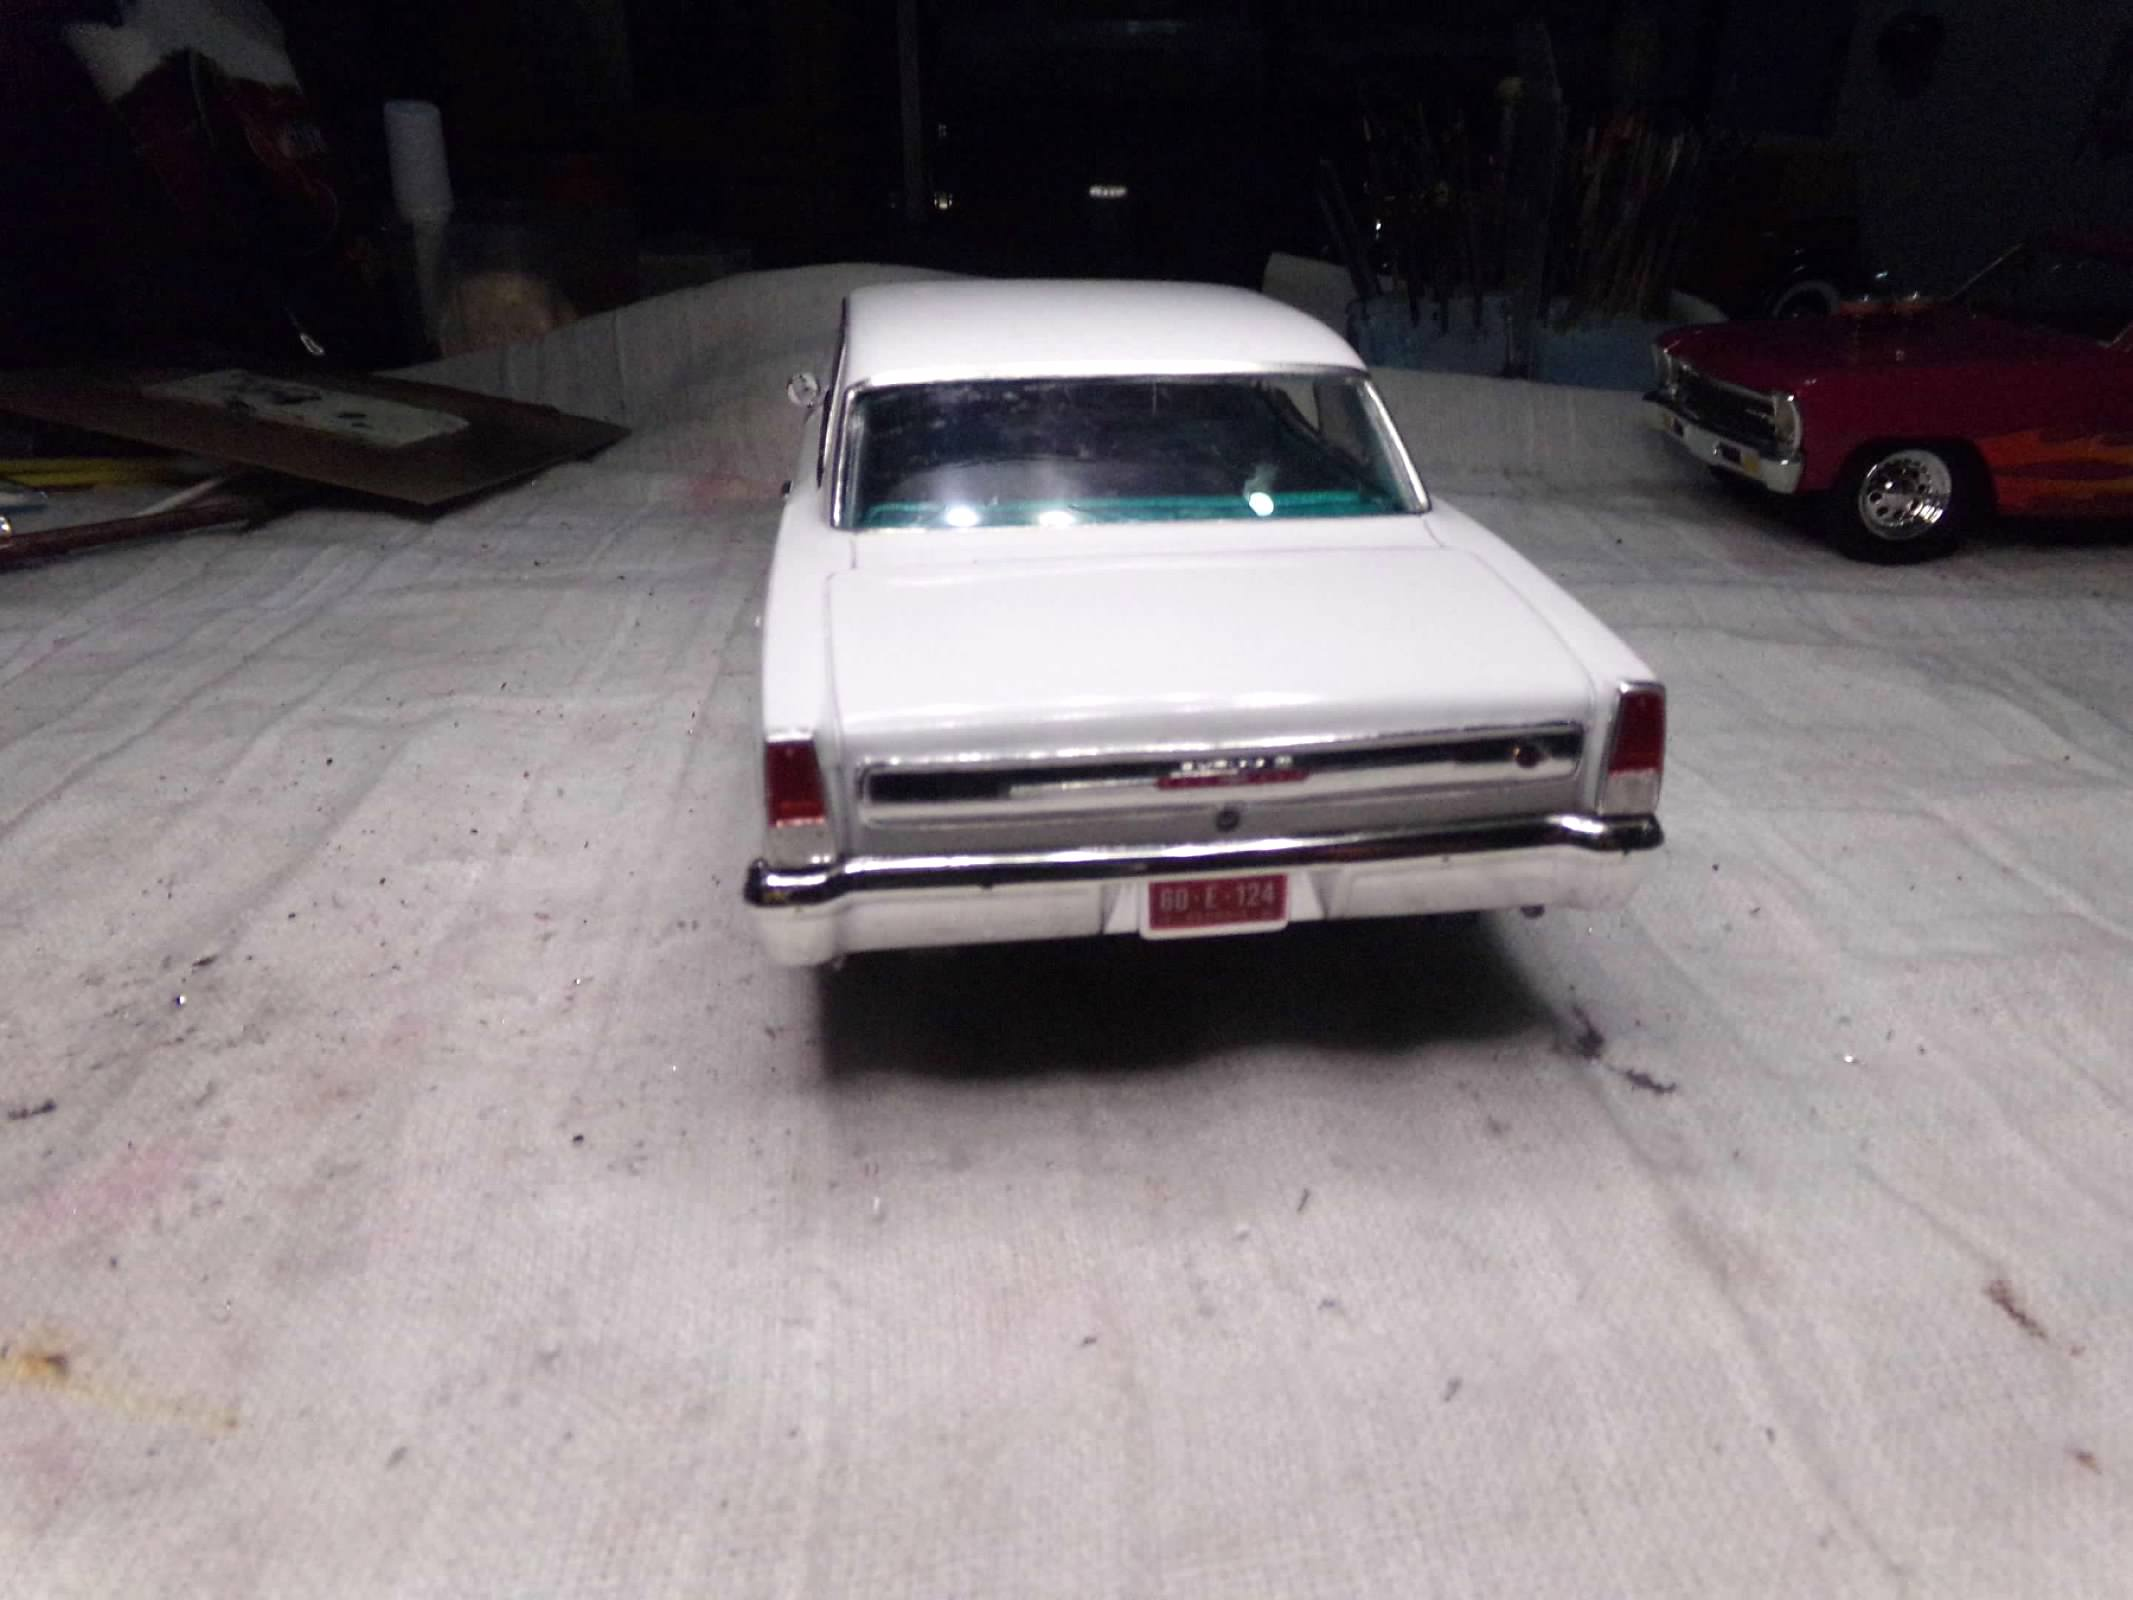
Windows are in, interior is in, and its on wheels! I've finished the rocker trim on one side and the front bumper/grill is done. I'll finish tomorrow, including decals. Thanks for looking! ?
-
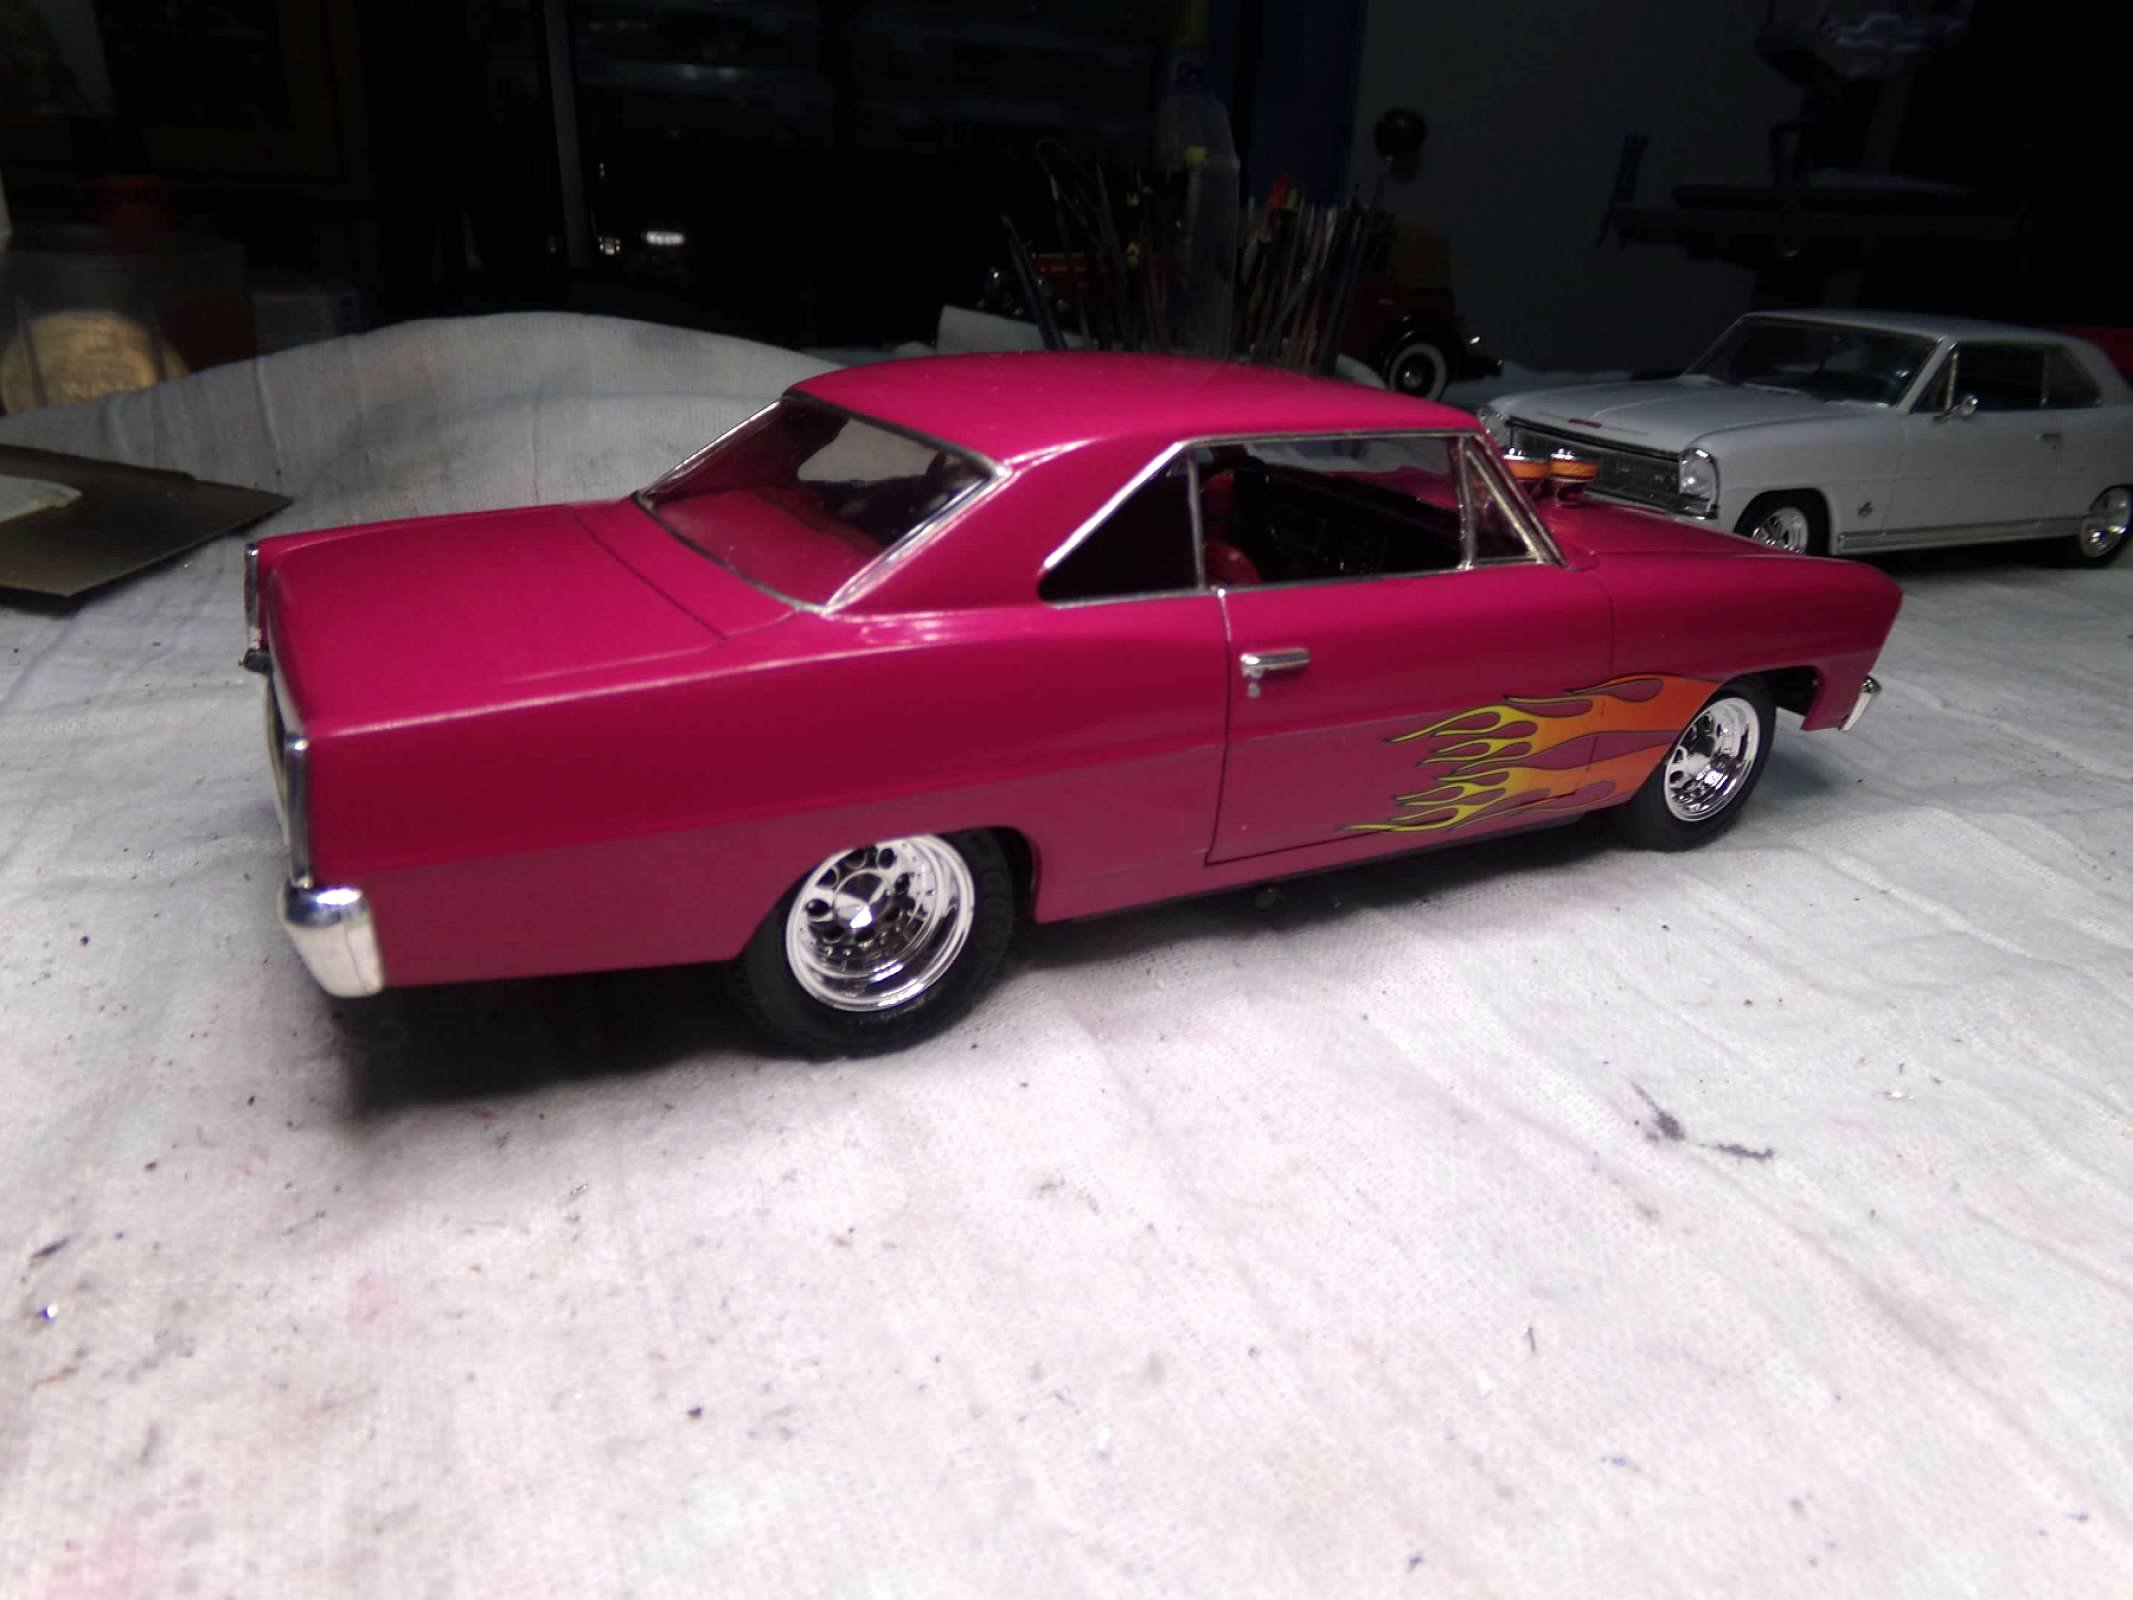
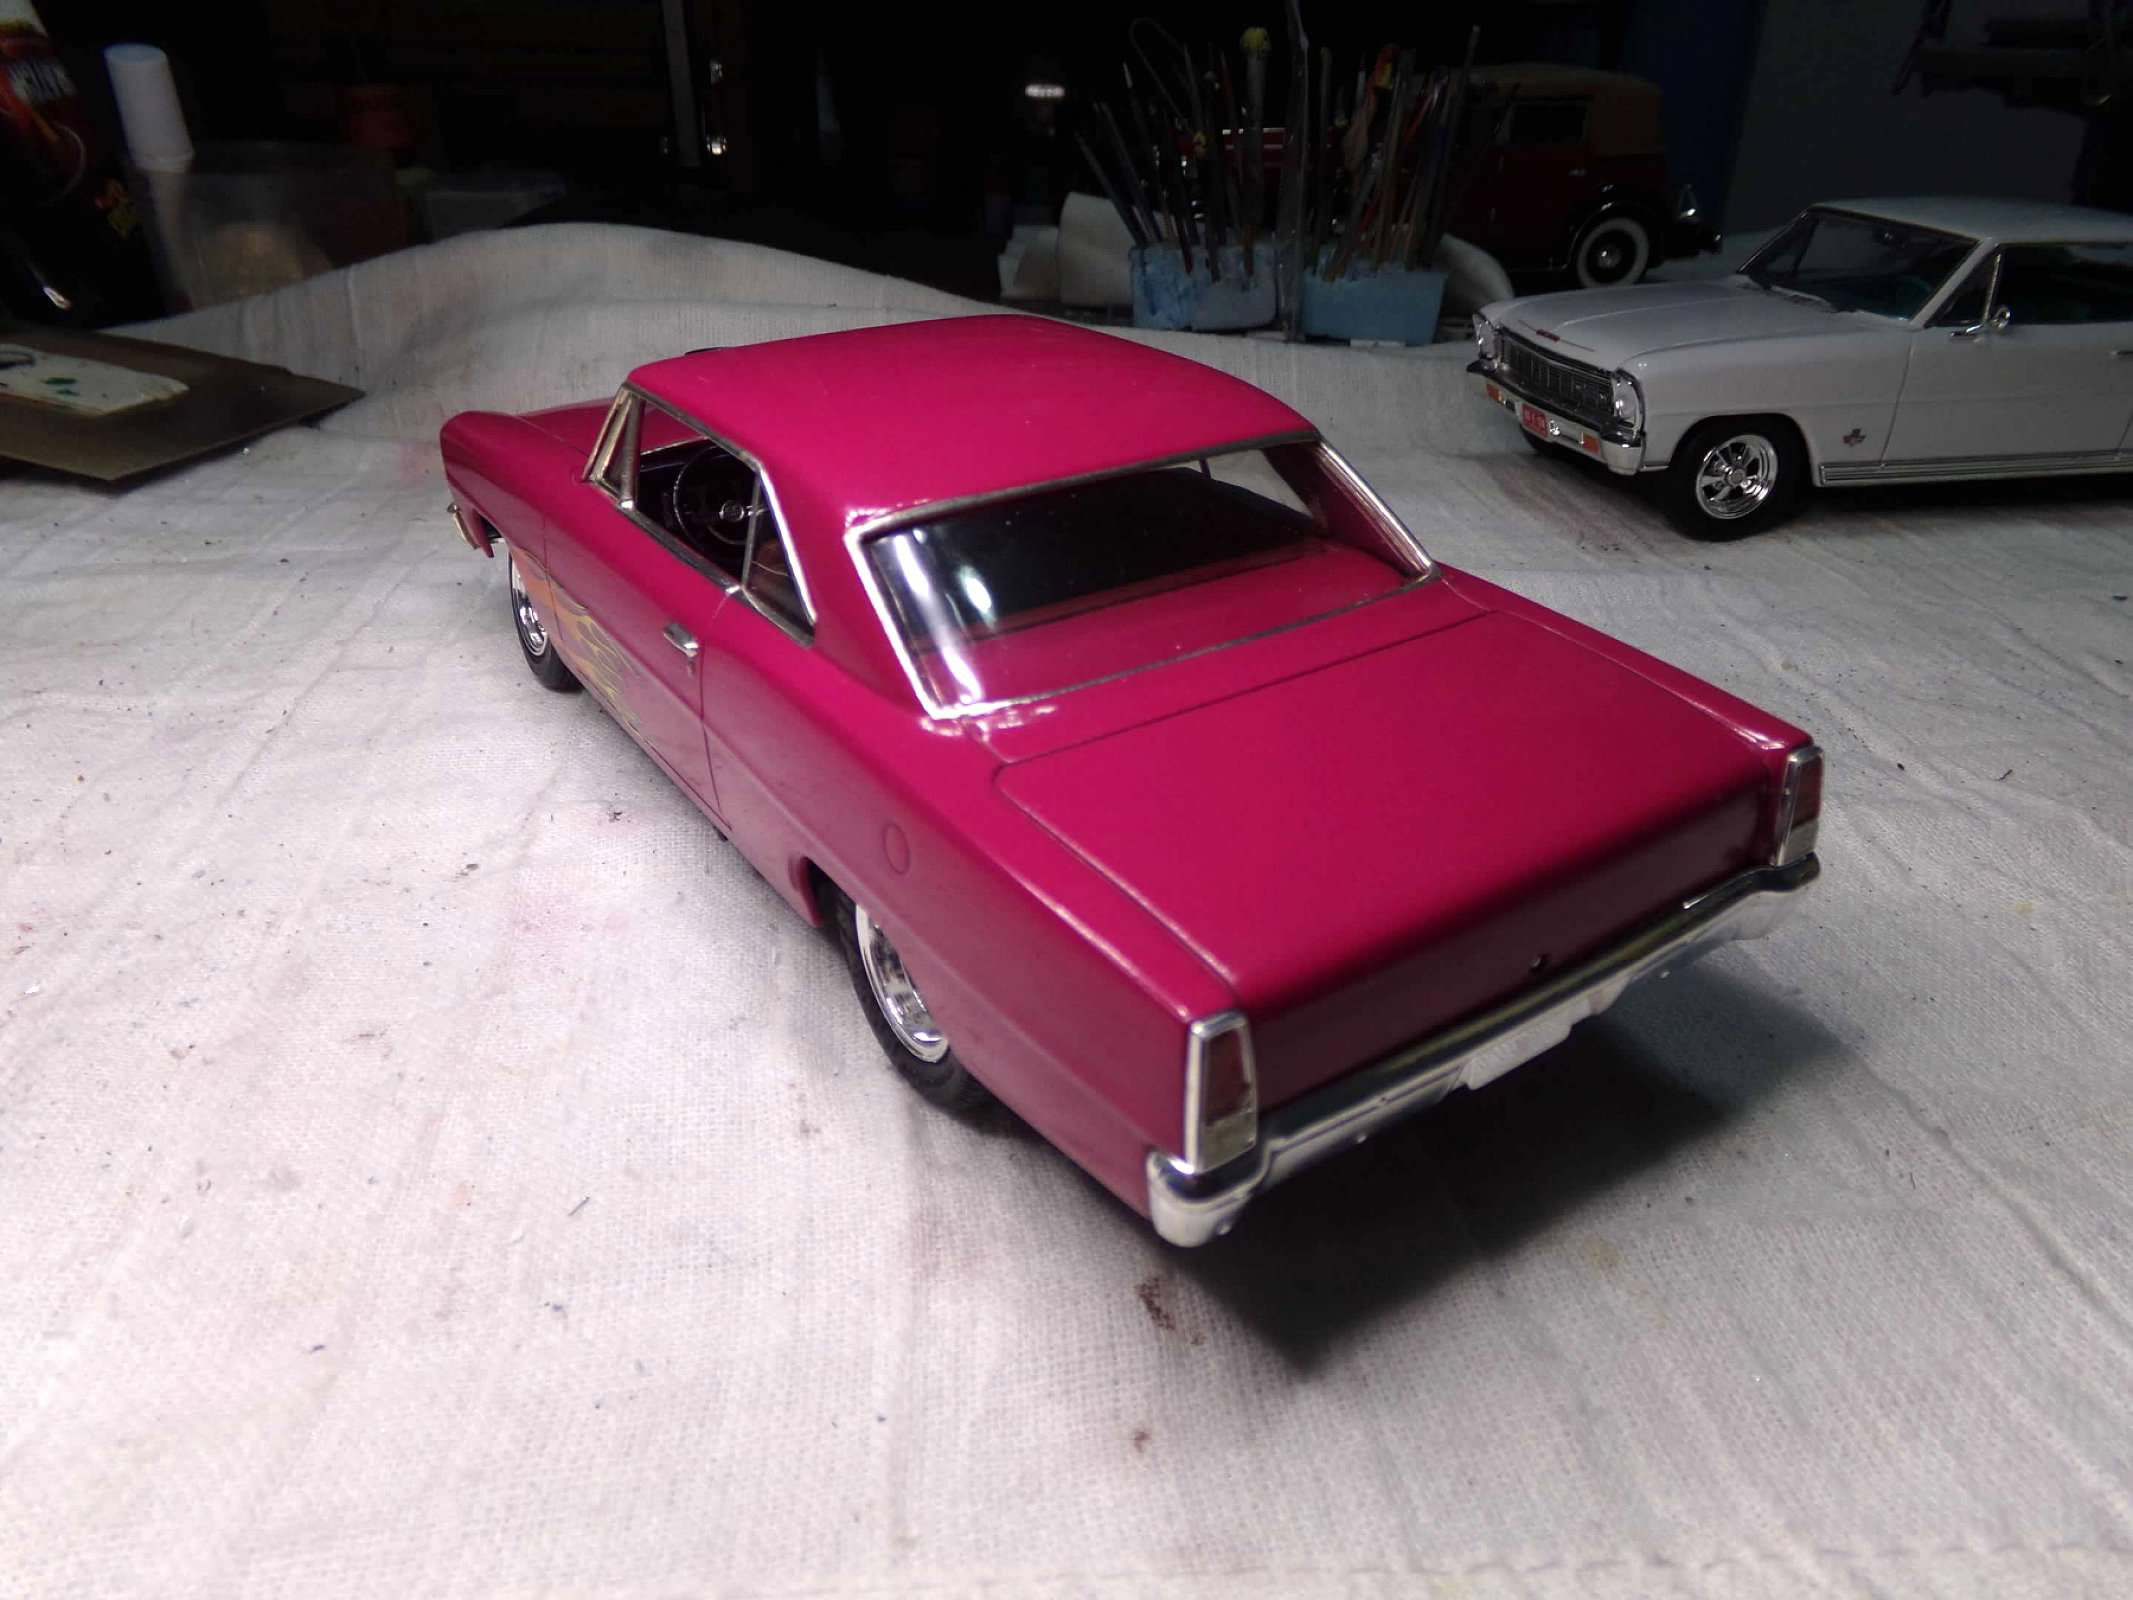
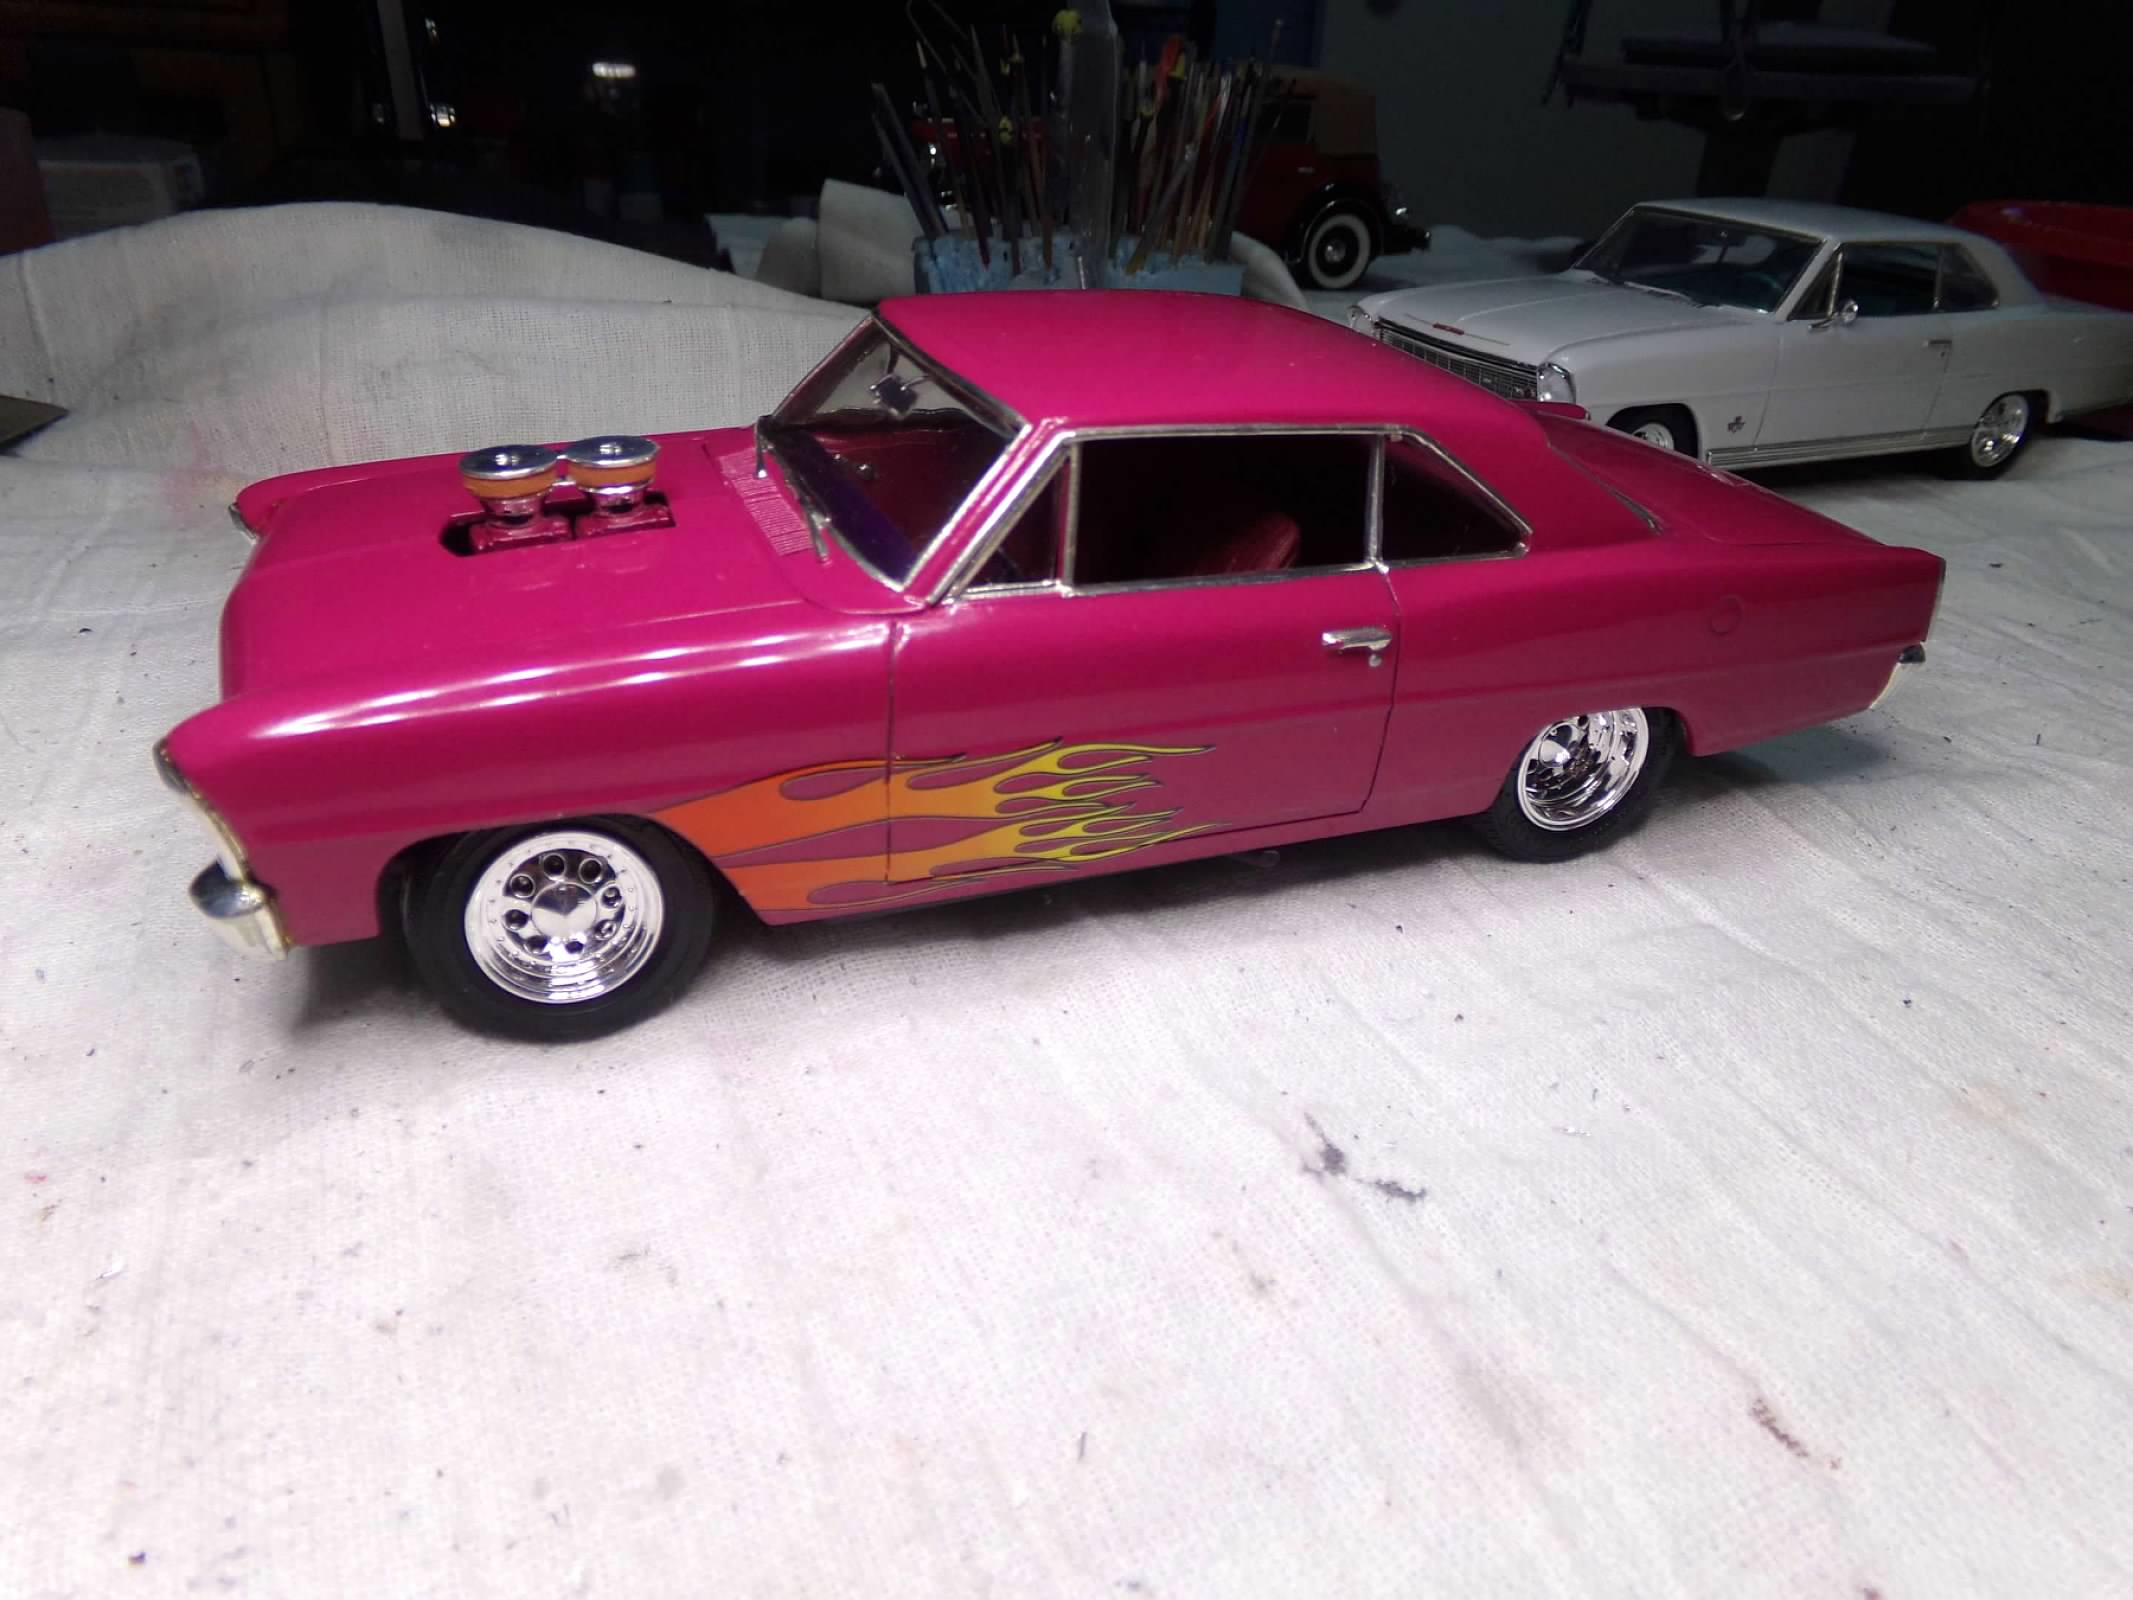
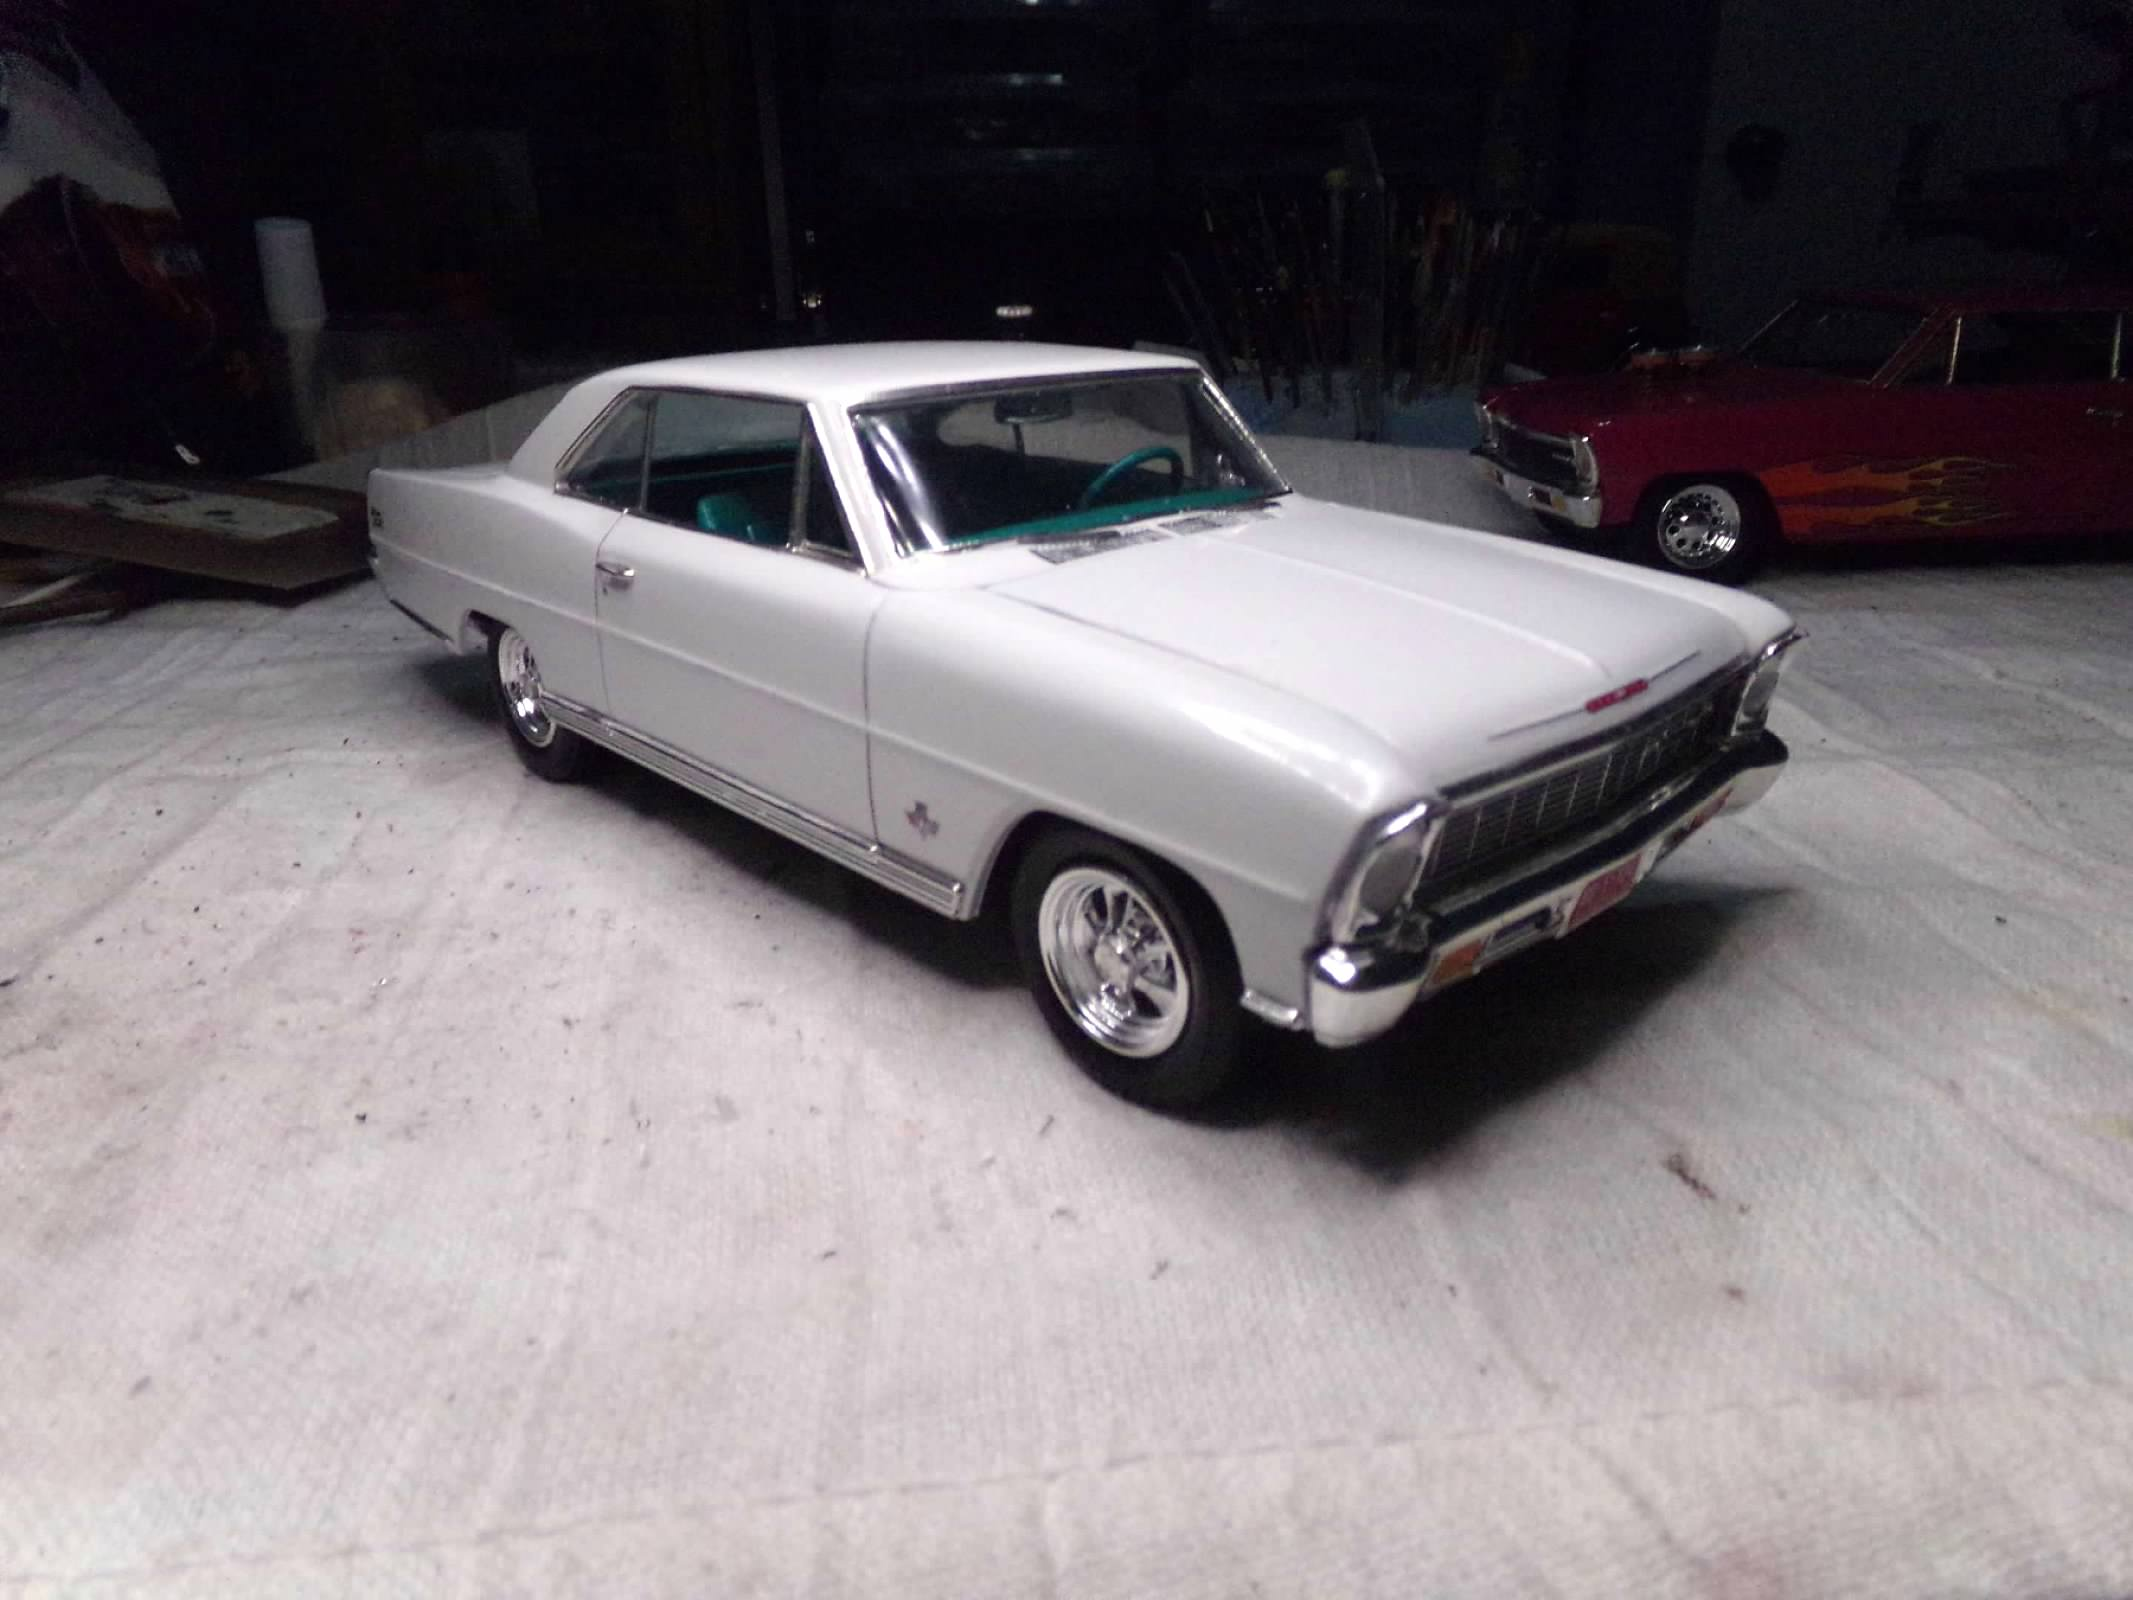
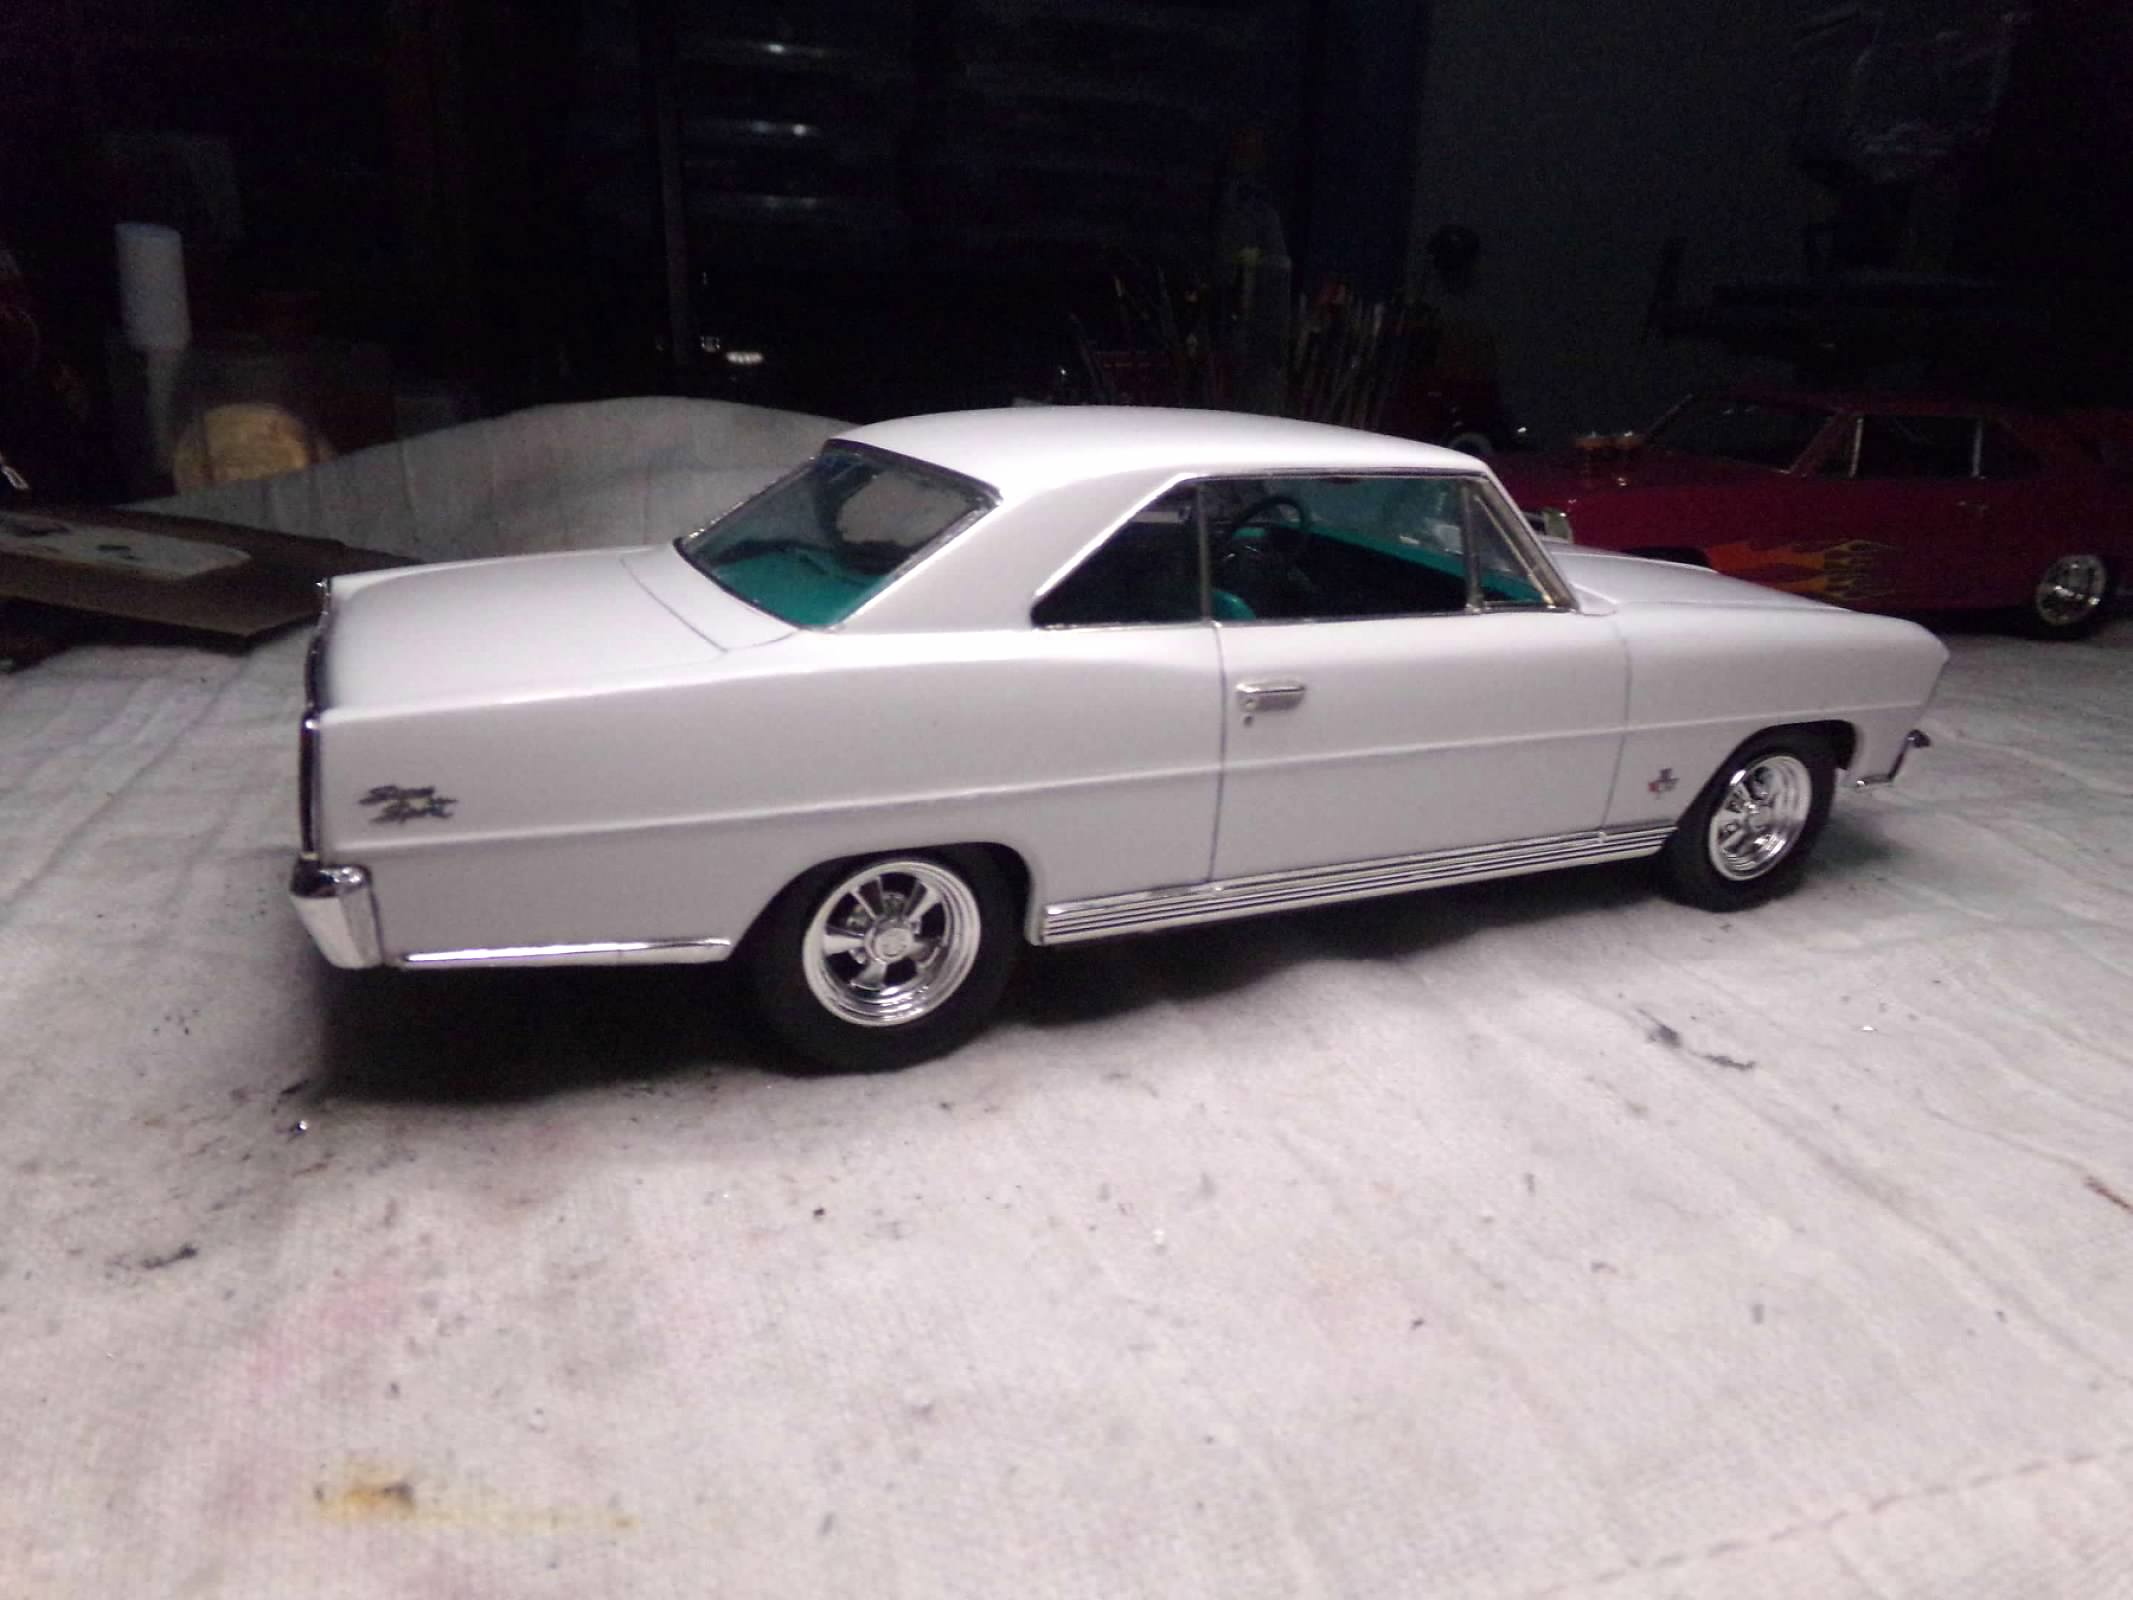
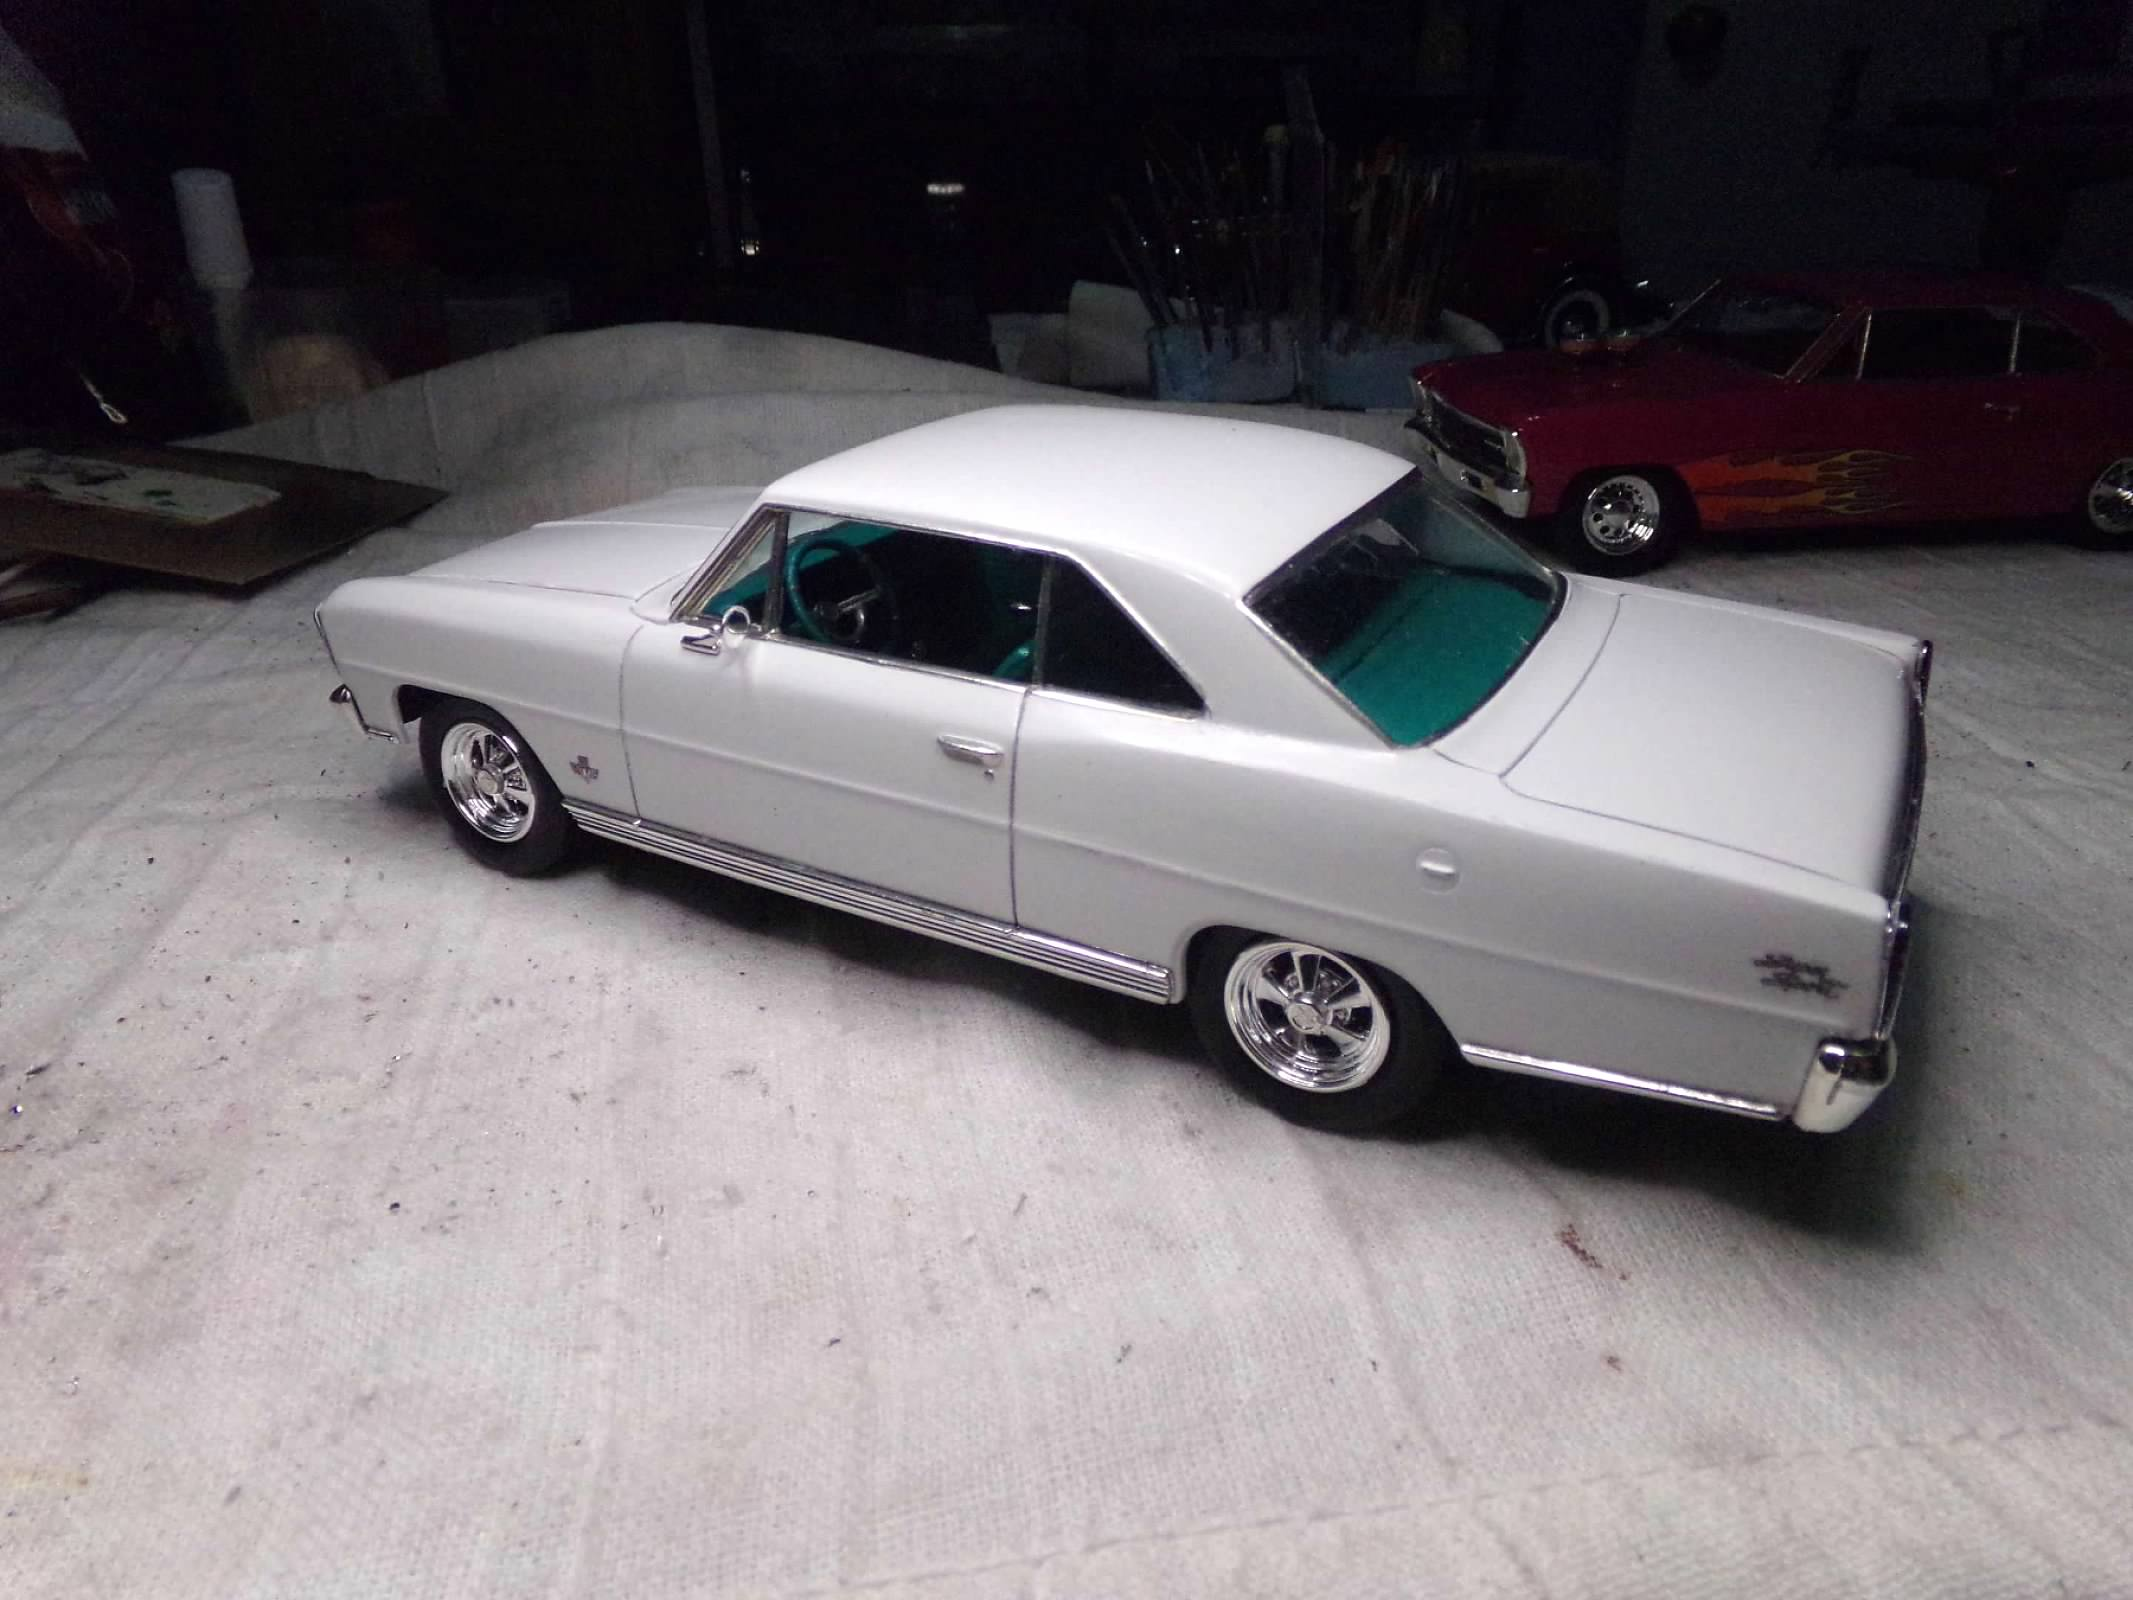
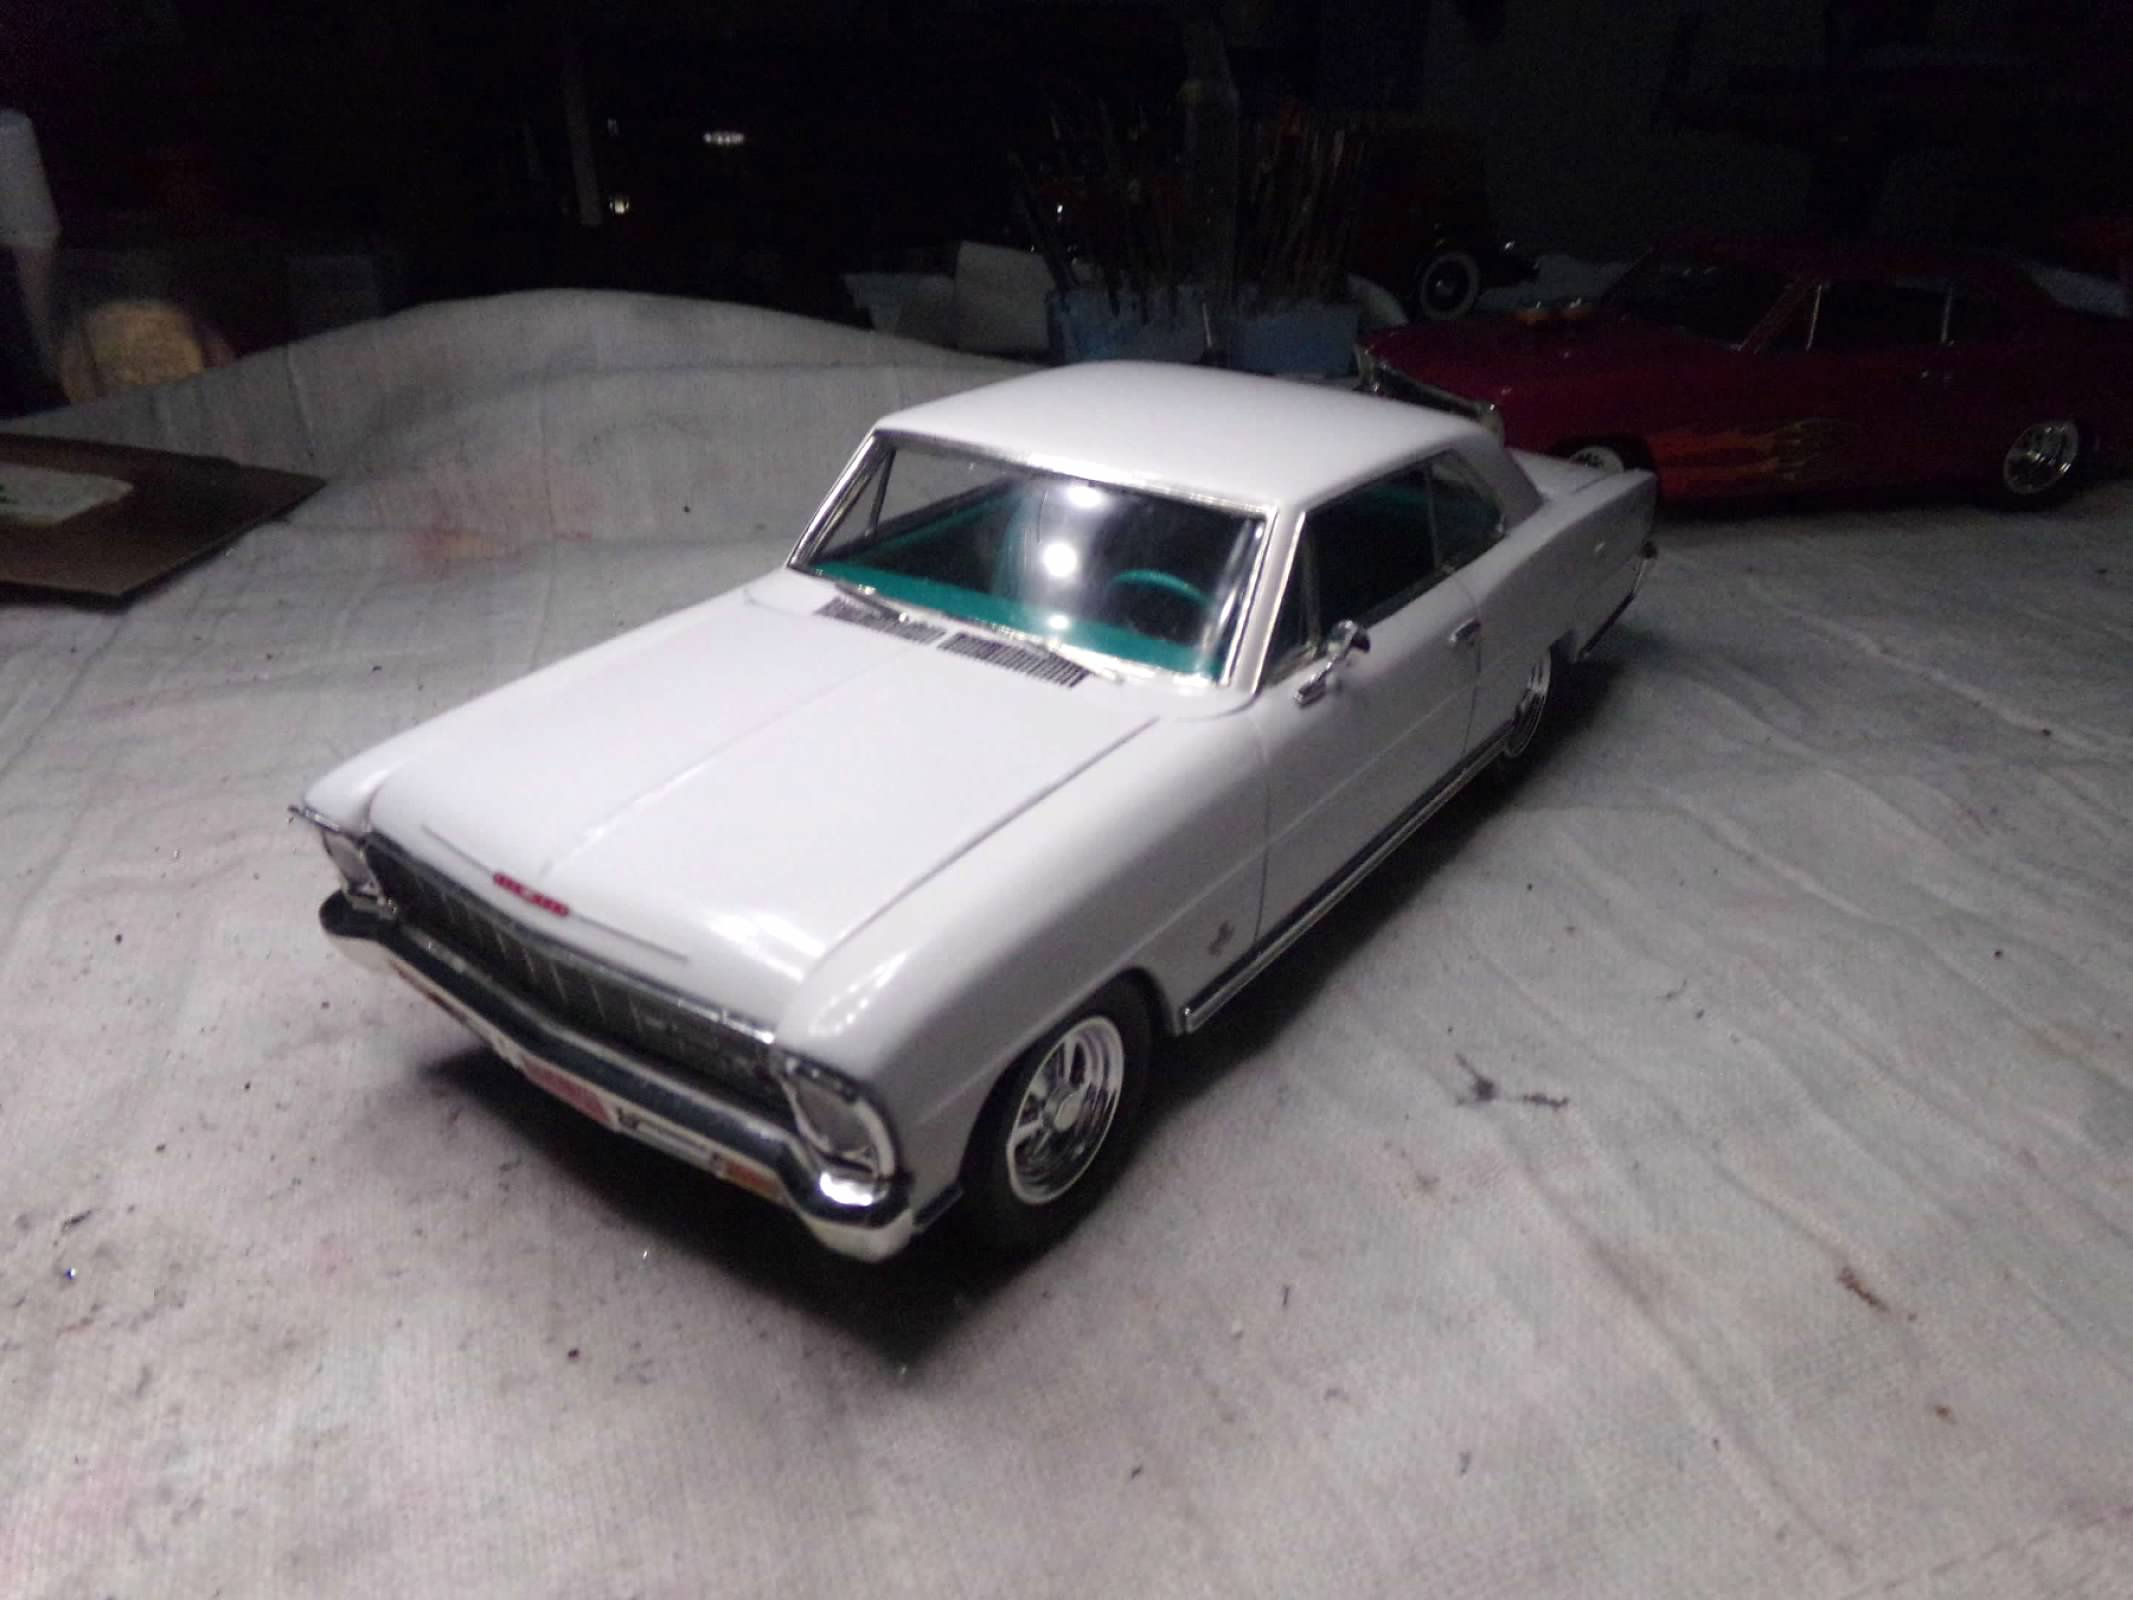
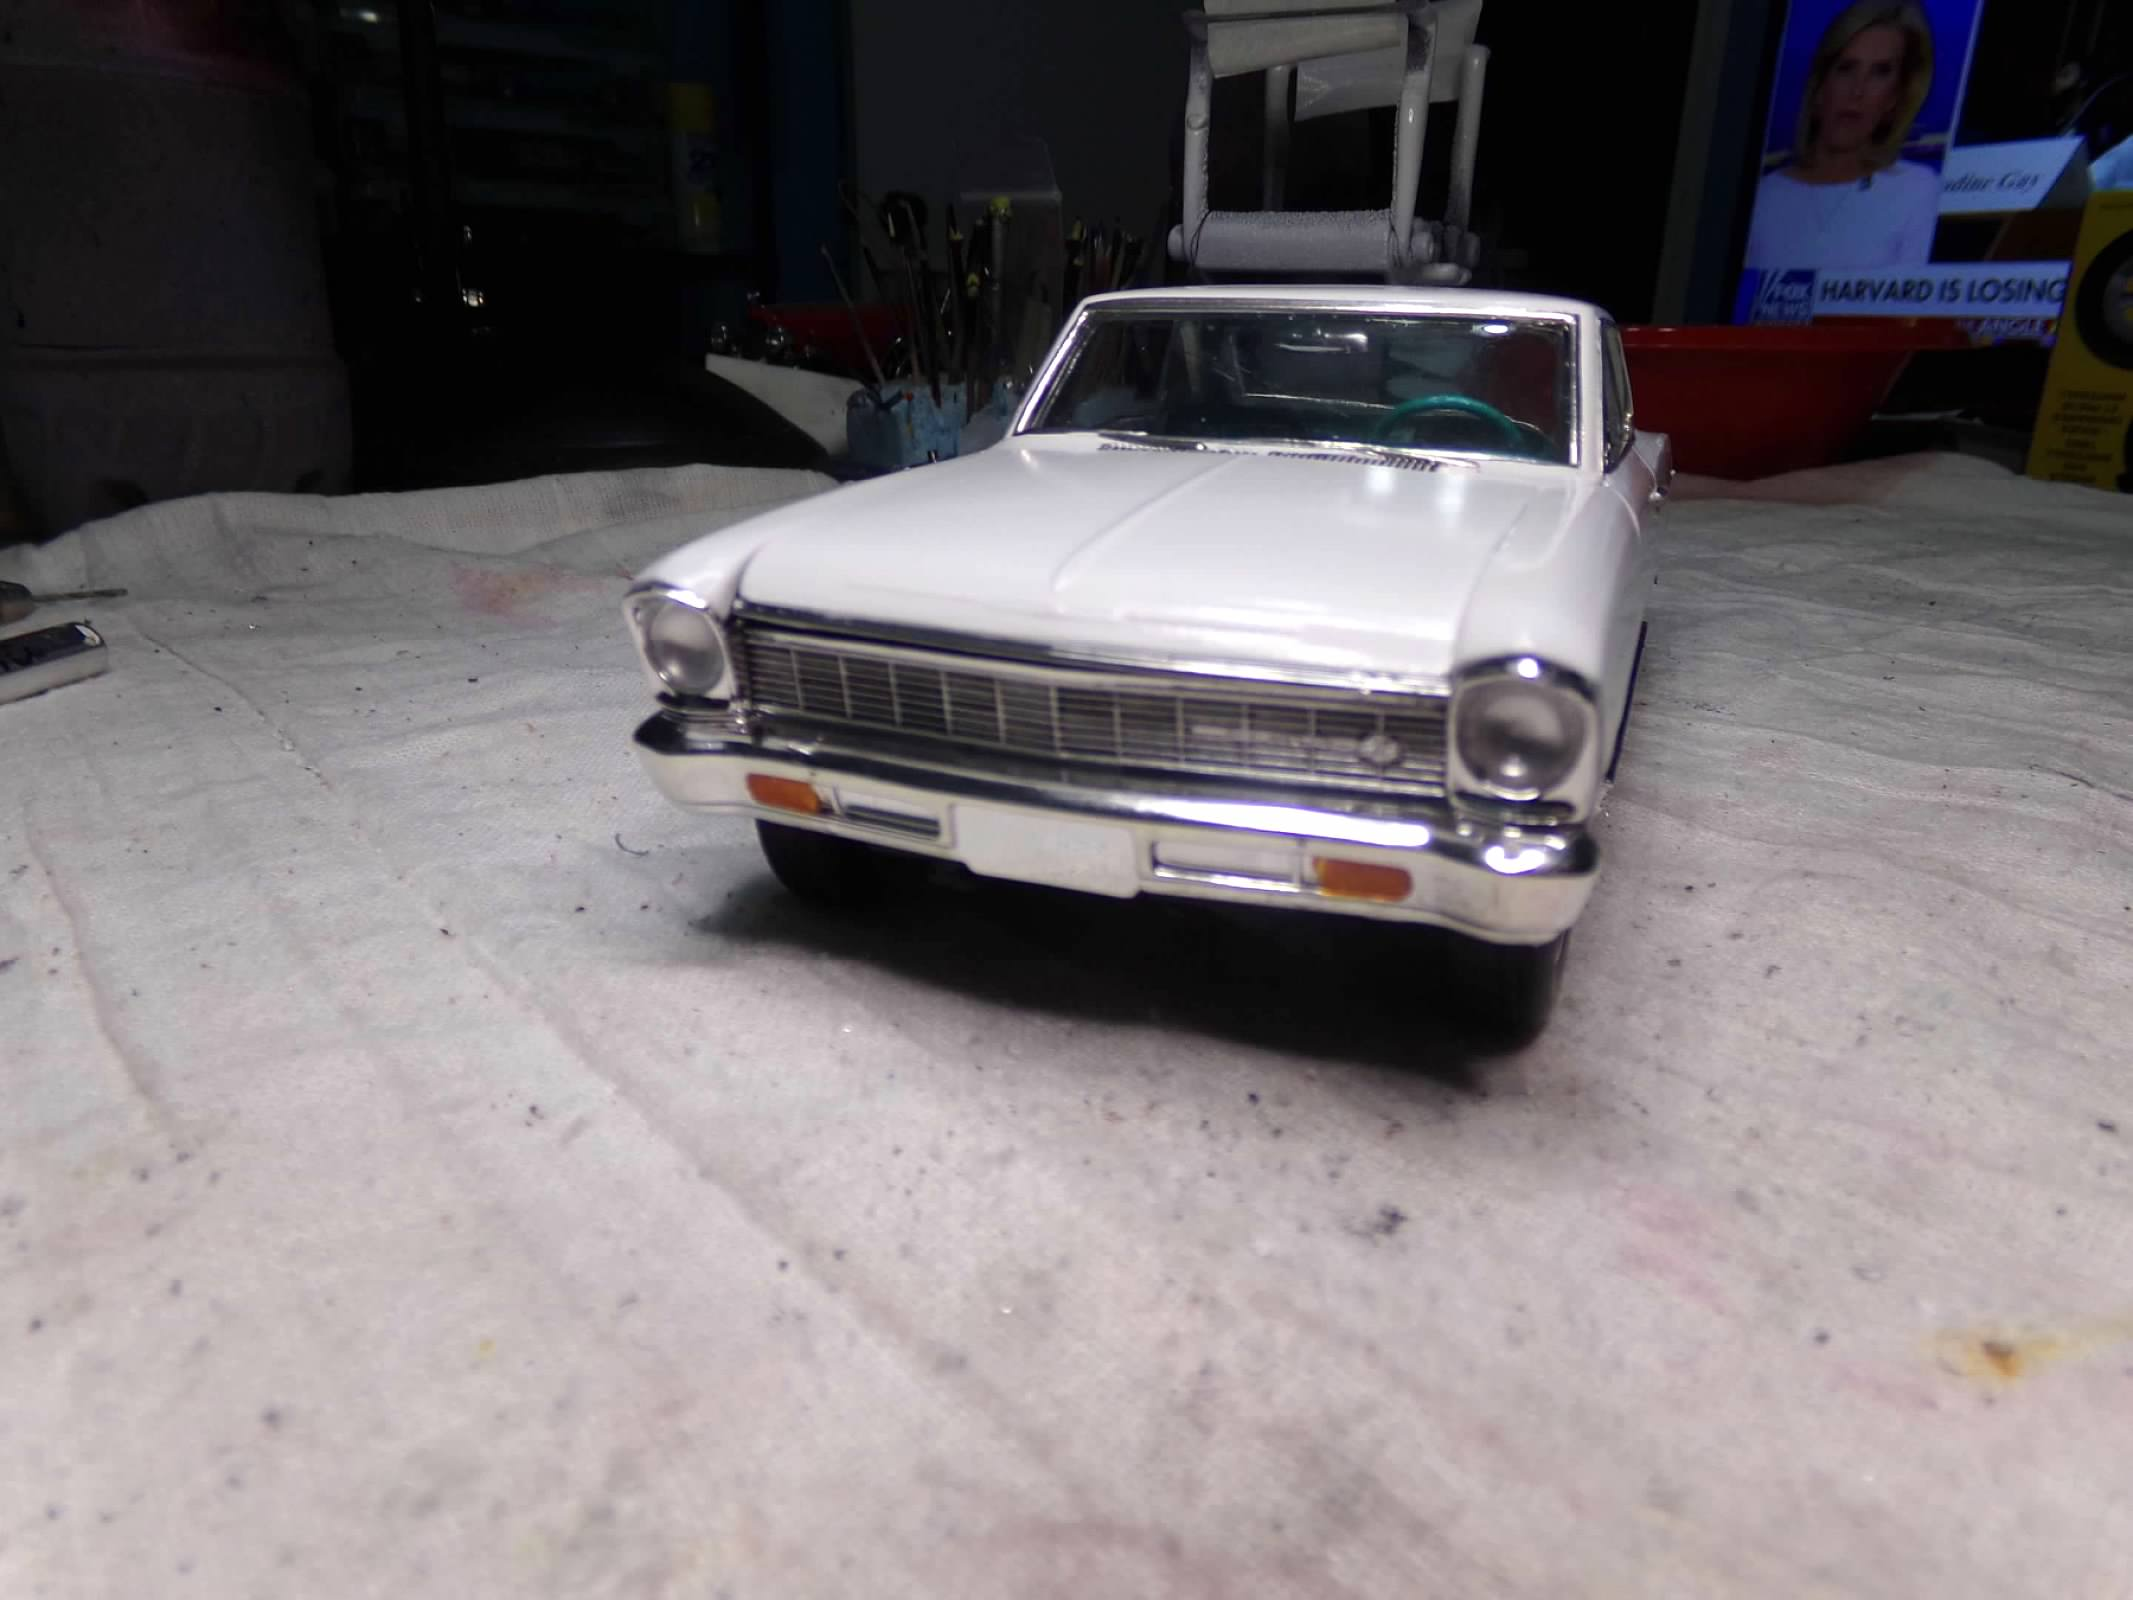
Chassis is done, wheels are on and the interior is complete. I used a set of tires from the parts box that are a little smaller and wider than the skinny whitewalls in the kit. I was going to dd white letter decals but decided there's enough white already so I left them black walls. The front will sit down a little more when its glued down. In the interior, I used the extra decal from the 69 Nova and cut it down for the speedo, gas gauge and other gauge. I added foil, chrome pen and a turn signal indicator lever. Window glass is next and then on to final assembly! Thanks for looking! ?
-
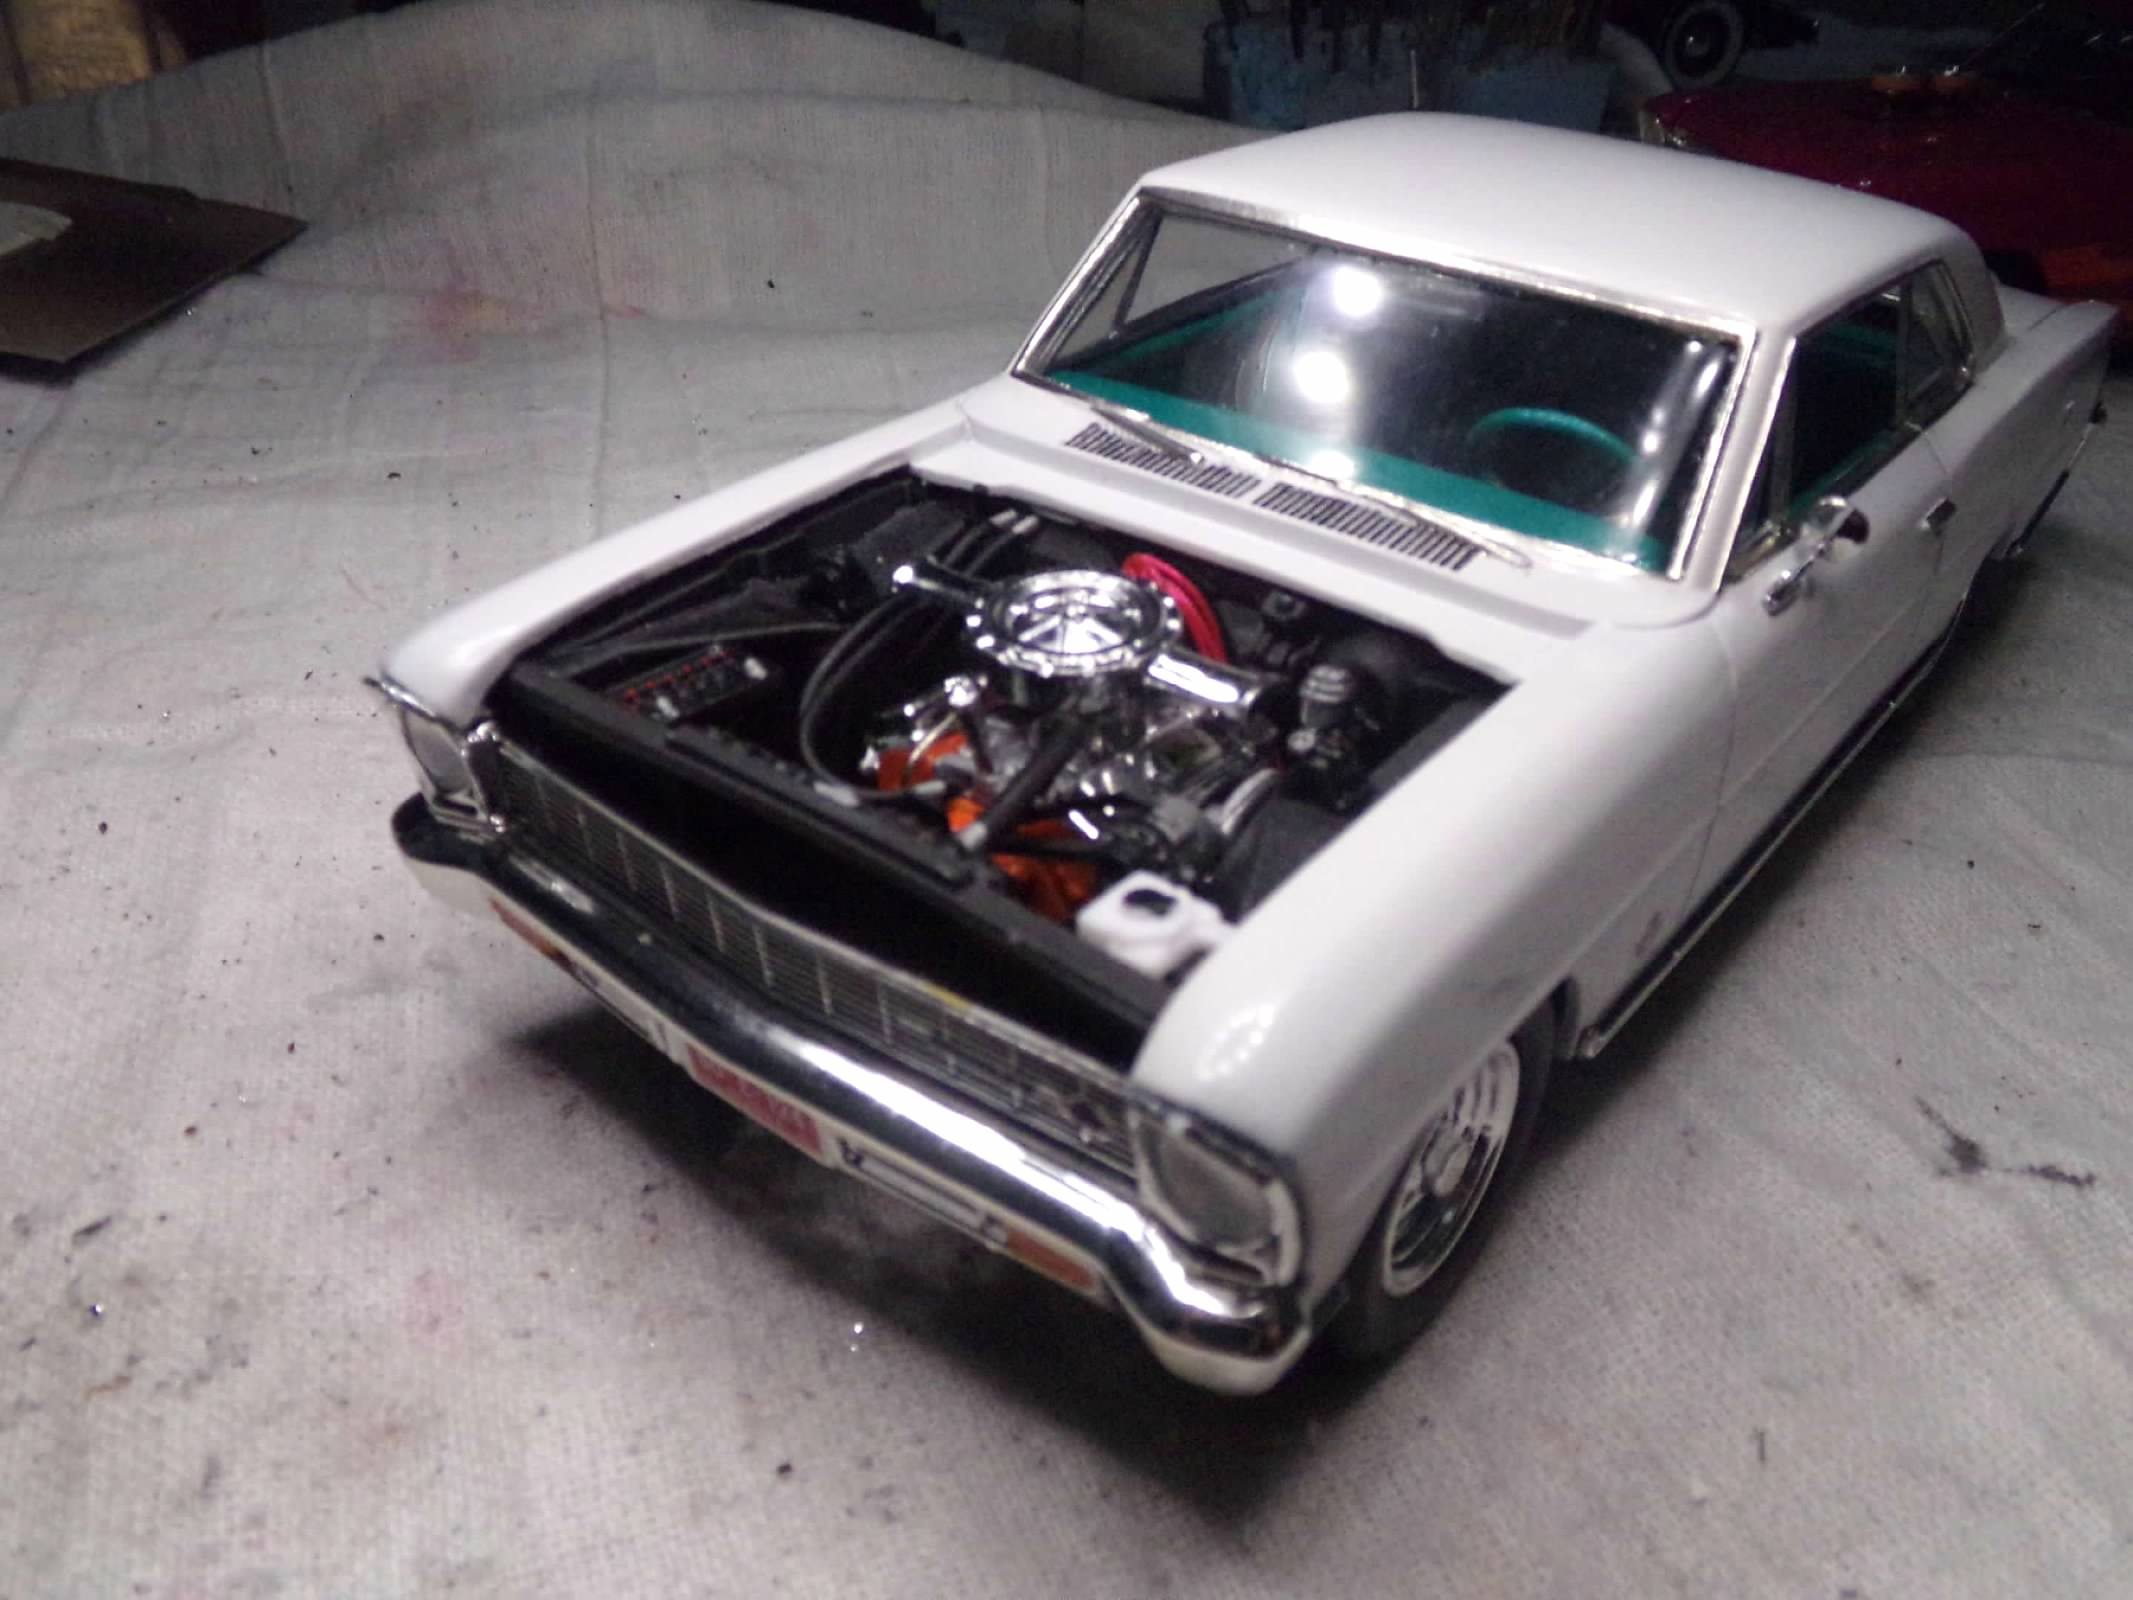
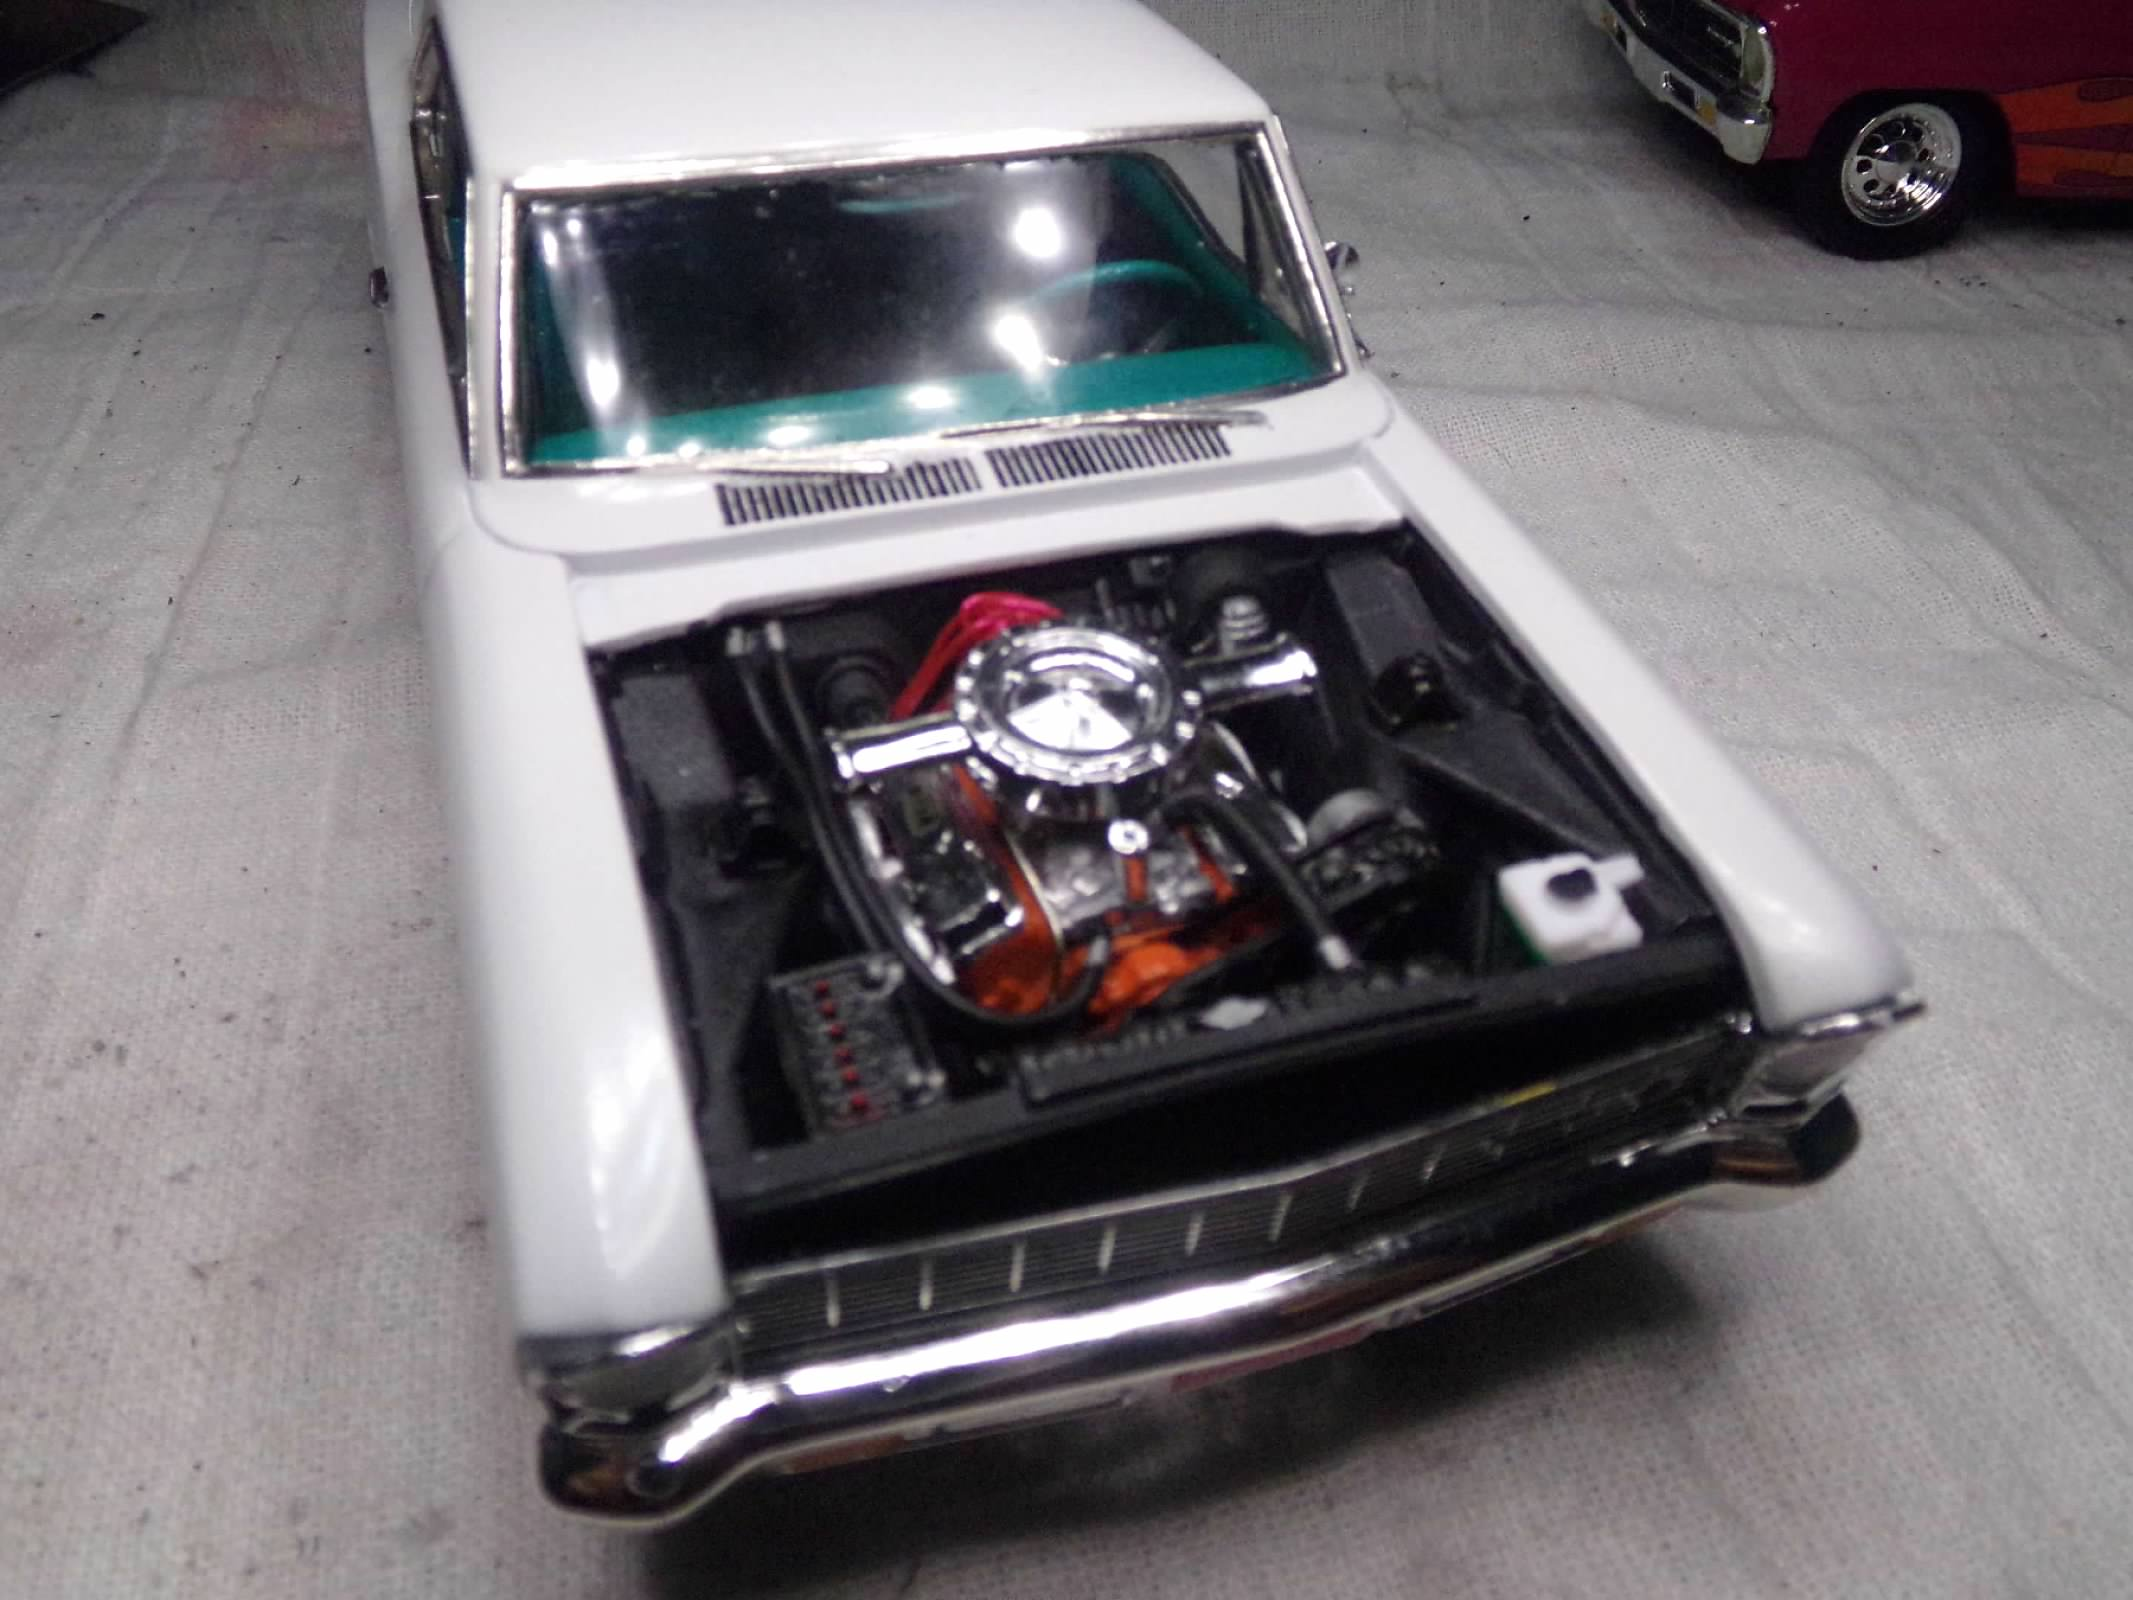
Thanks, Guido, Gregg, David, Carl and Joe! I appreciate your comments! Joe, I am just going Factory Stockish with this one. I will probably use the wheels in the kit instead of hubcaps and try to find some white letter tires for the wheels. I built the last one of these Pro Street and I'll find it around here somewhere before I'm done. Completed engine assembly and added plug wires, fuel line and a alternator bracket so that it wouldn't be flying on its own. I didn't want to use a pre-wired distributor since if it is wired right, the only thing that is visible are the wires coming out of the distributor and going behind the engine. So I drilled out a distributor and stuffed nine pieces of wire in it and then wired it up. The doghouse leaves no room for any error and it is a very tight assembly so it takes a lot of attention to make sure everything is square. Body and hood seem to fit well and everything looks square to me so I guess its done! Next is interior detailing. Oh, I also need to find a couple of 327 badges for the valve covers. Thanks for looking! ?
-
Nice engine work, Joe! It looks almost real! ??
-
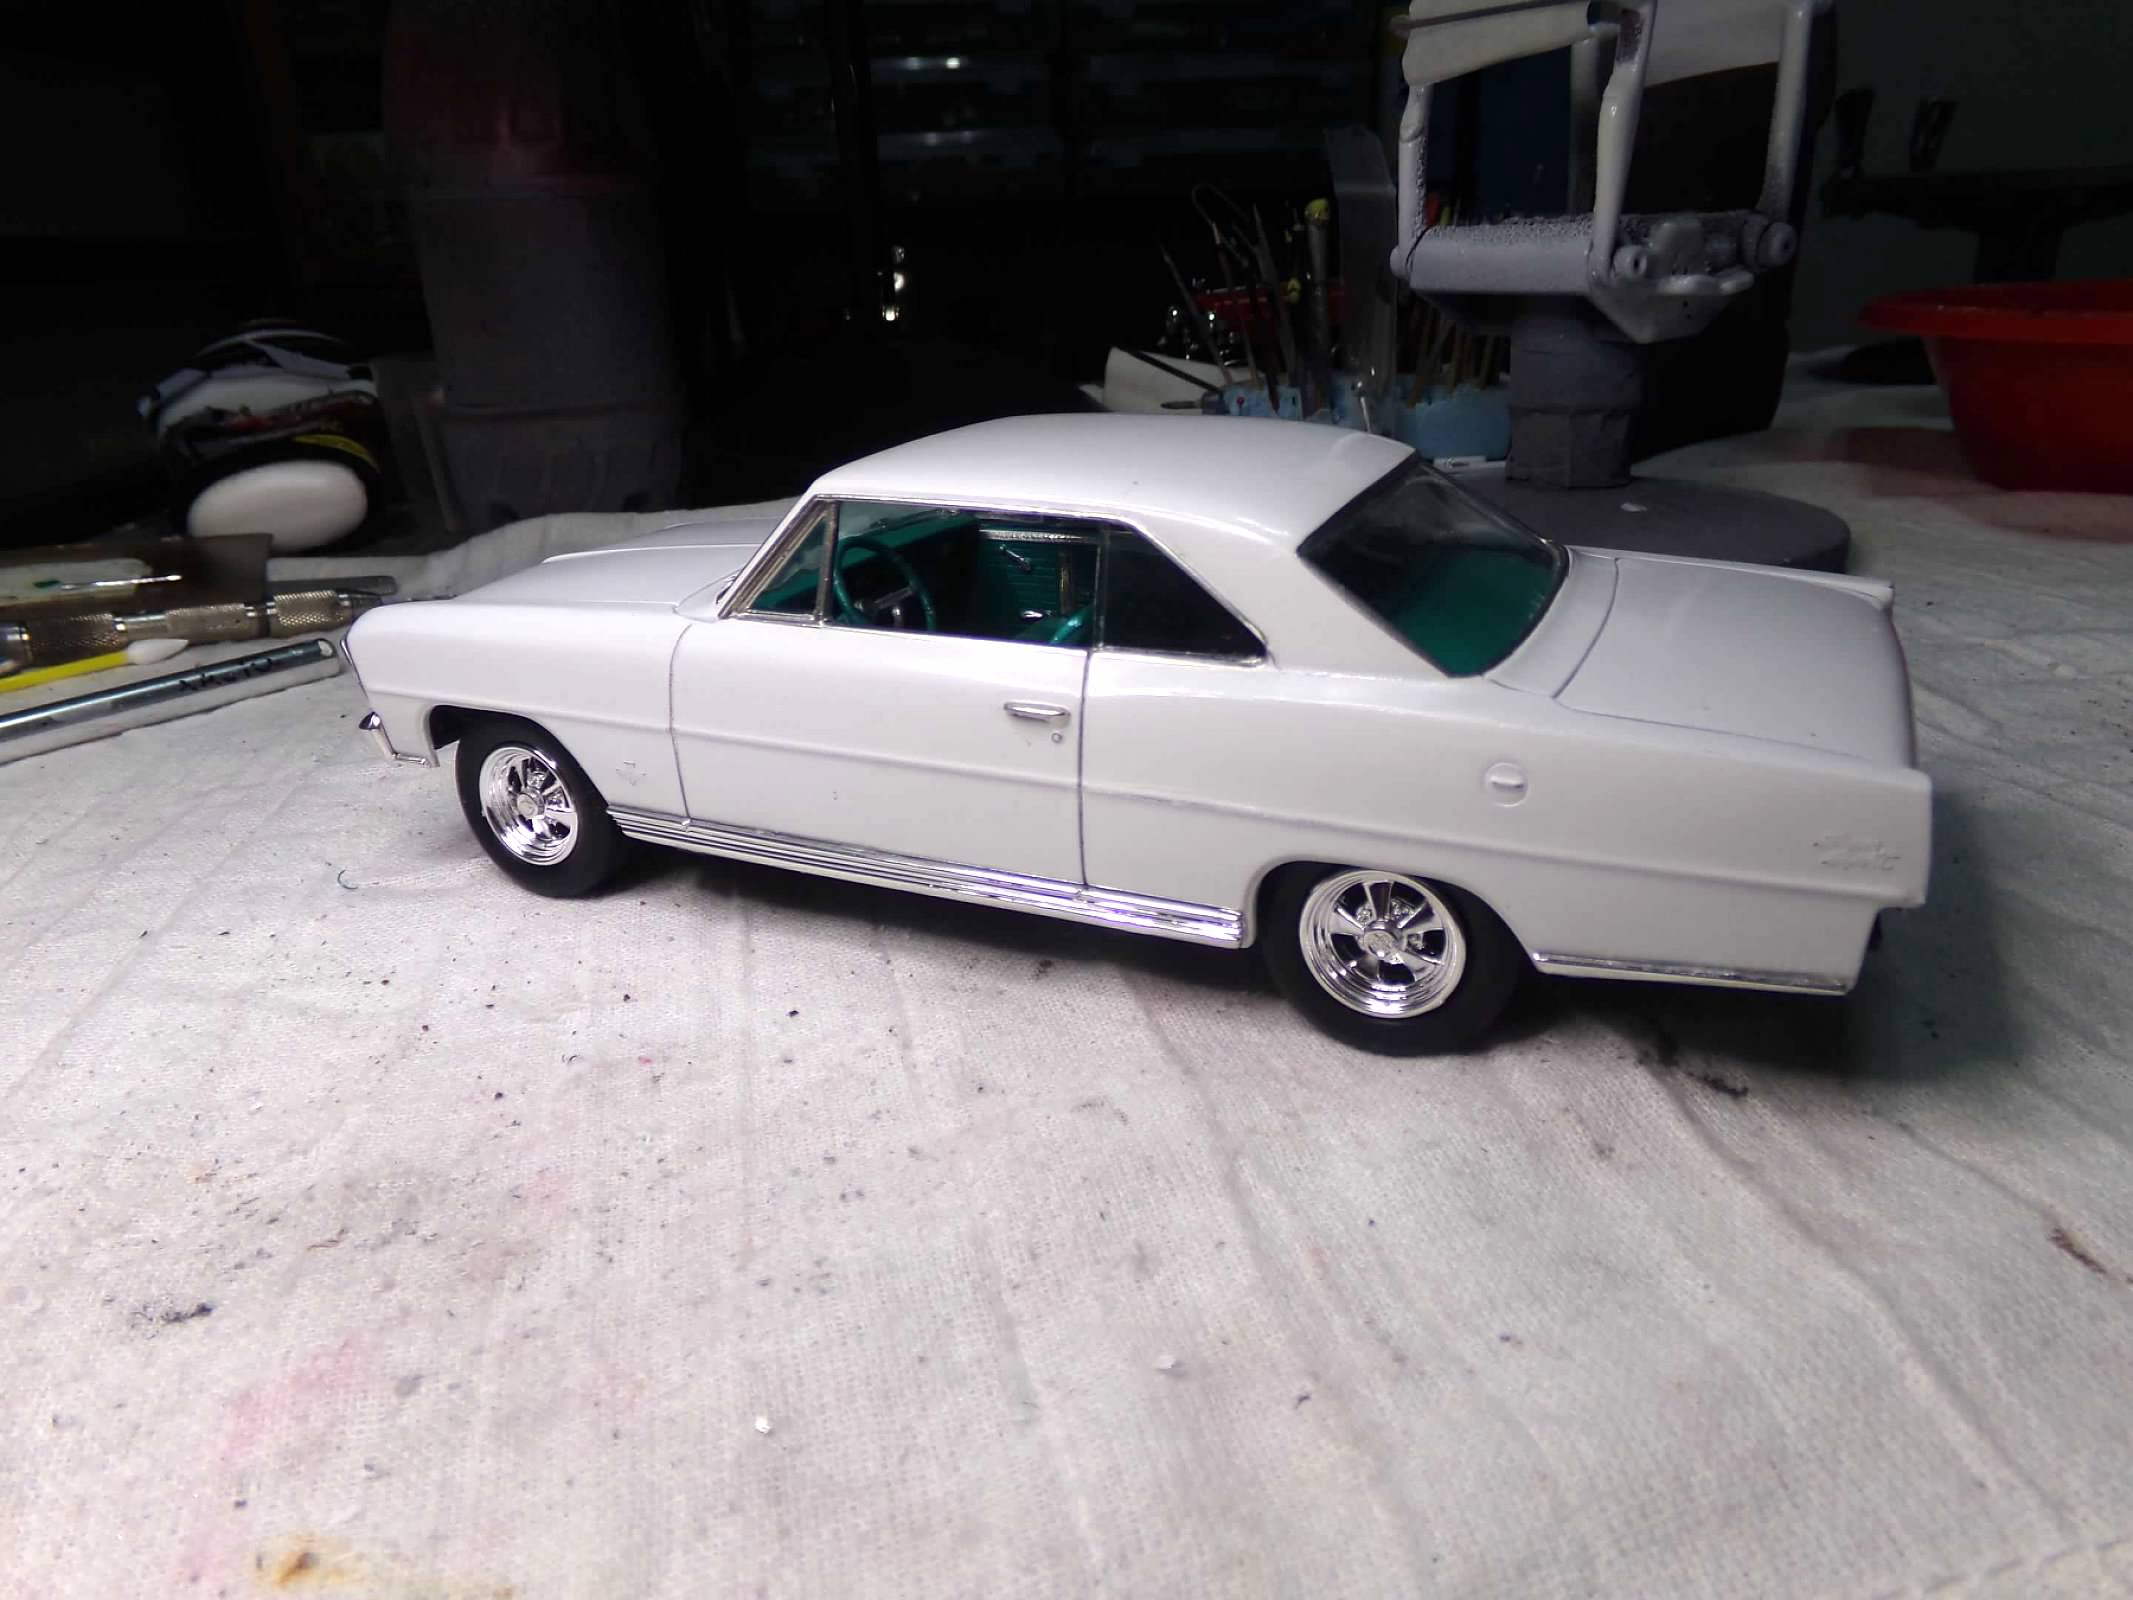
Thanks, Greg, and Bob! I appreciate your comments! Rubbed out the body today without rubbing out any edges and foiled the greenhouse. Foil is hard to see with all the white. Mocked up the basic interior. I'll work on the engine and chassis next. As I remember, the inner fender liners have to be lined up just right to get the body to sit on them right and get the hood lined up straight. Thanks for looking! ?
-
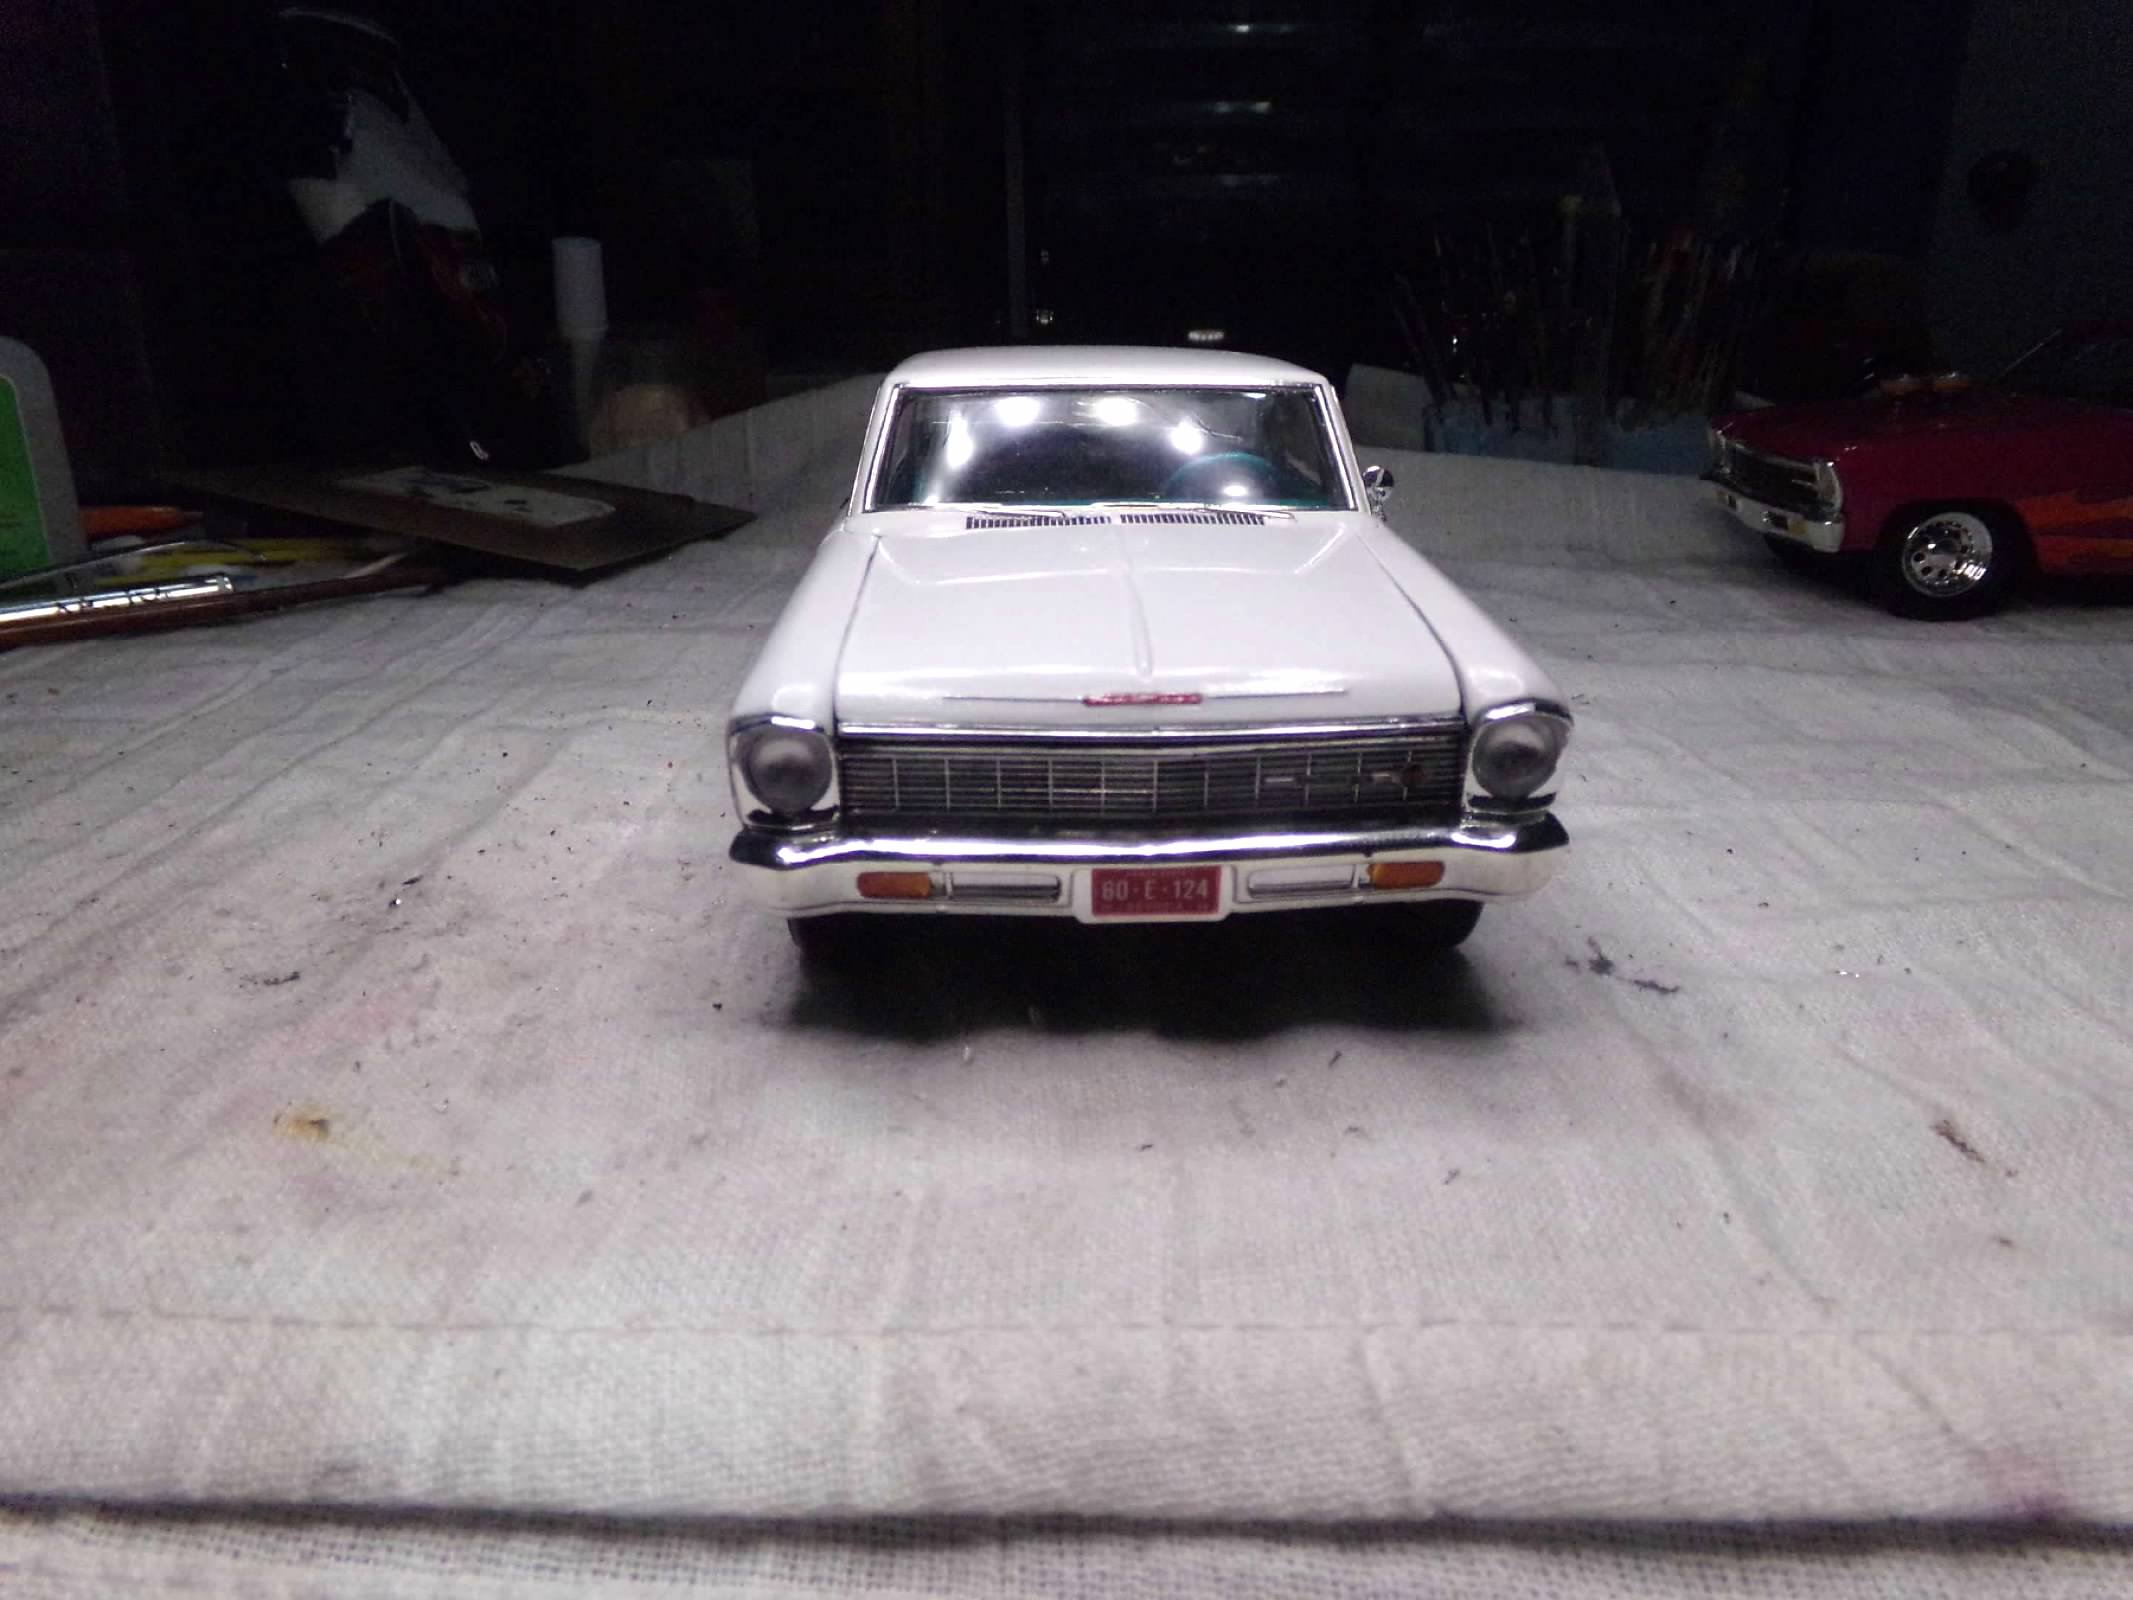
This one hit the shelves again so I bought it since I haven't built one of these in years. Most of them were painted either Regal red, Marina Blue or Black, it seems, from looking at photos online. But I wanted to be a bit different and I haven't painted one this color in quite a while so here it is in Dupli-Color Pure White. I'll rub it out tomorrow. The interior will be Turquoise using Testors Extreme Lacquer to get rid of part of a can. I'll take the sparkle out with some Dullcote. Still waiting for the oven cleaner to do its thing on the 65 Ford Galaxie. Thanks for looking! ?
-
Your bird is looking fabulous already, Greg! The rear bumper, hood hinges, fender flares, engine.... everything looks fantastic! ??
-
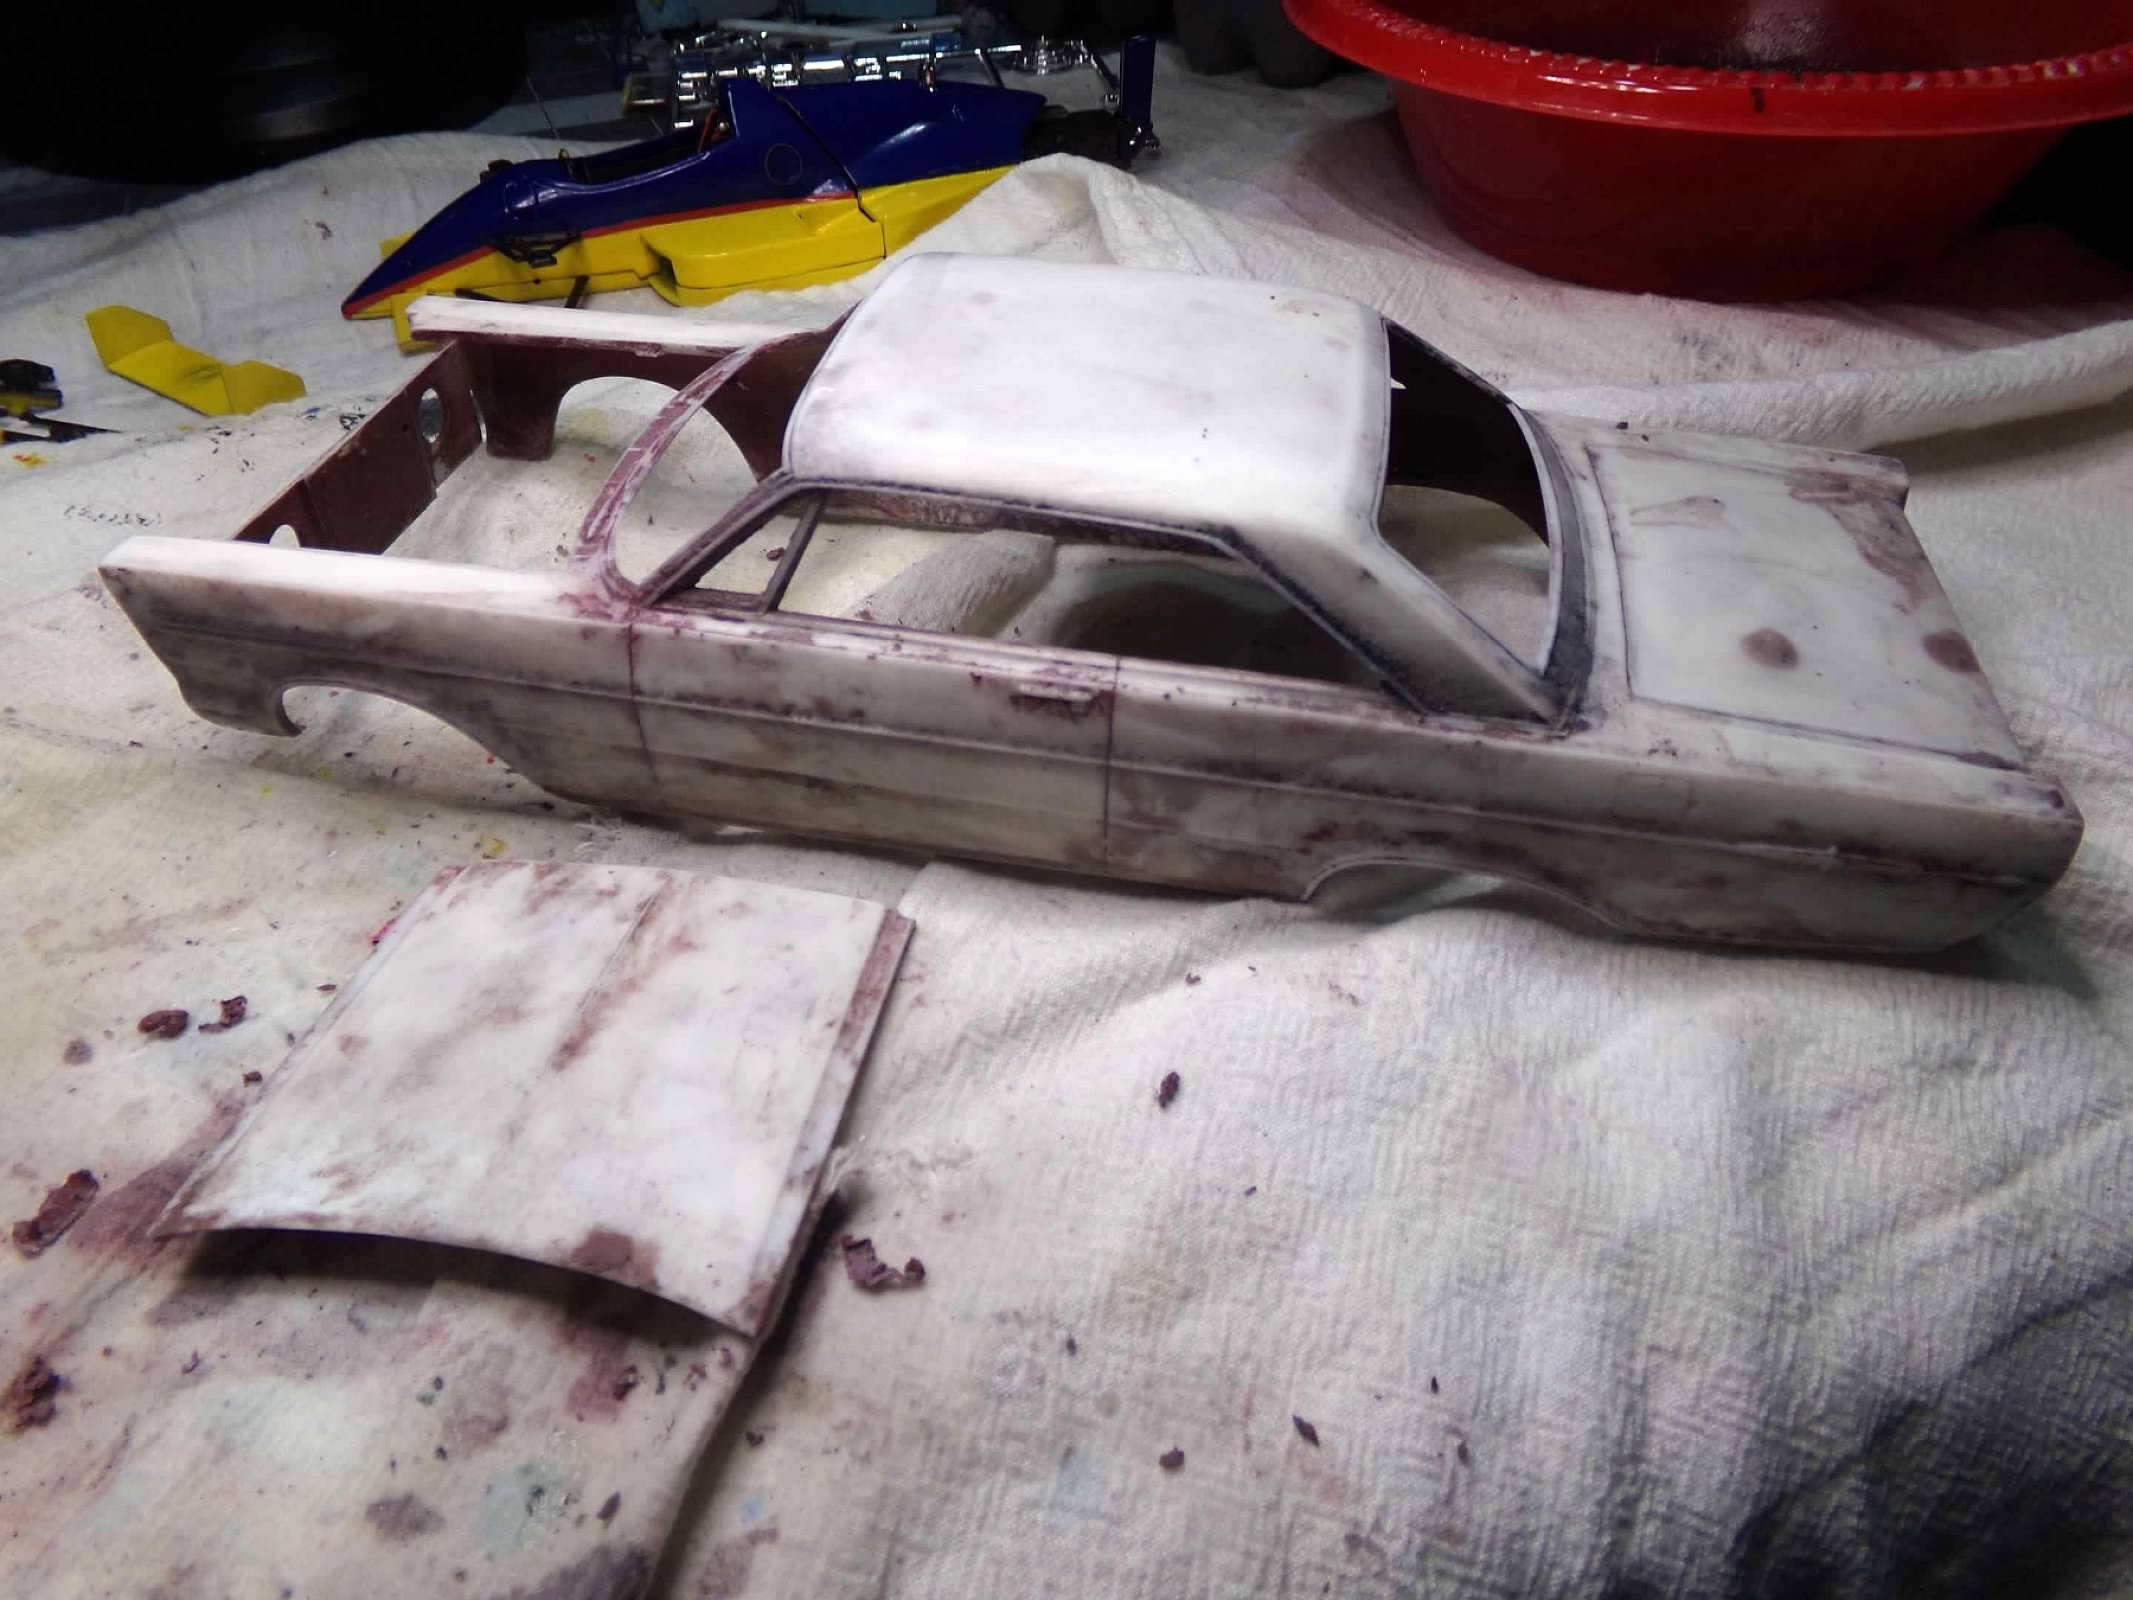
This one is not working out. I have just finished three with on problems and I try to paint the same way every time. But it seems that about 1 in 4 just don't work out. The finish is just lumpy in places and the edges are still being exposed too easily. So this one is in the oven cleaner to be continued later. ?
-
Thanks, All! I appreciate your comments! ?
-
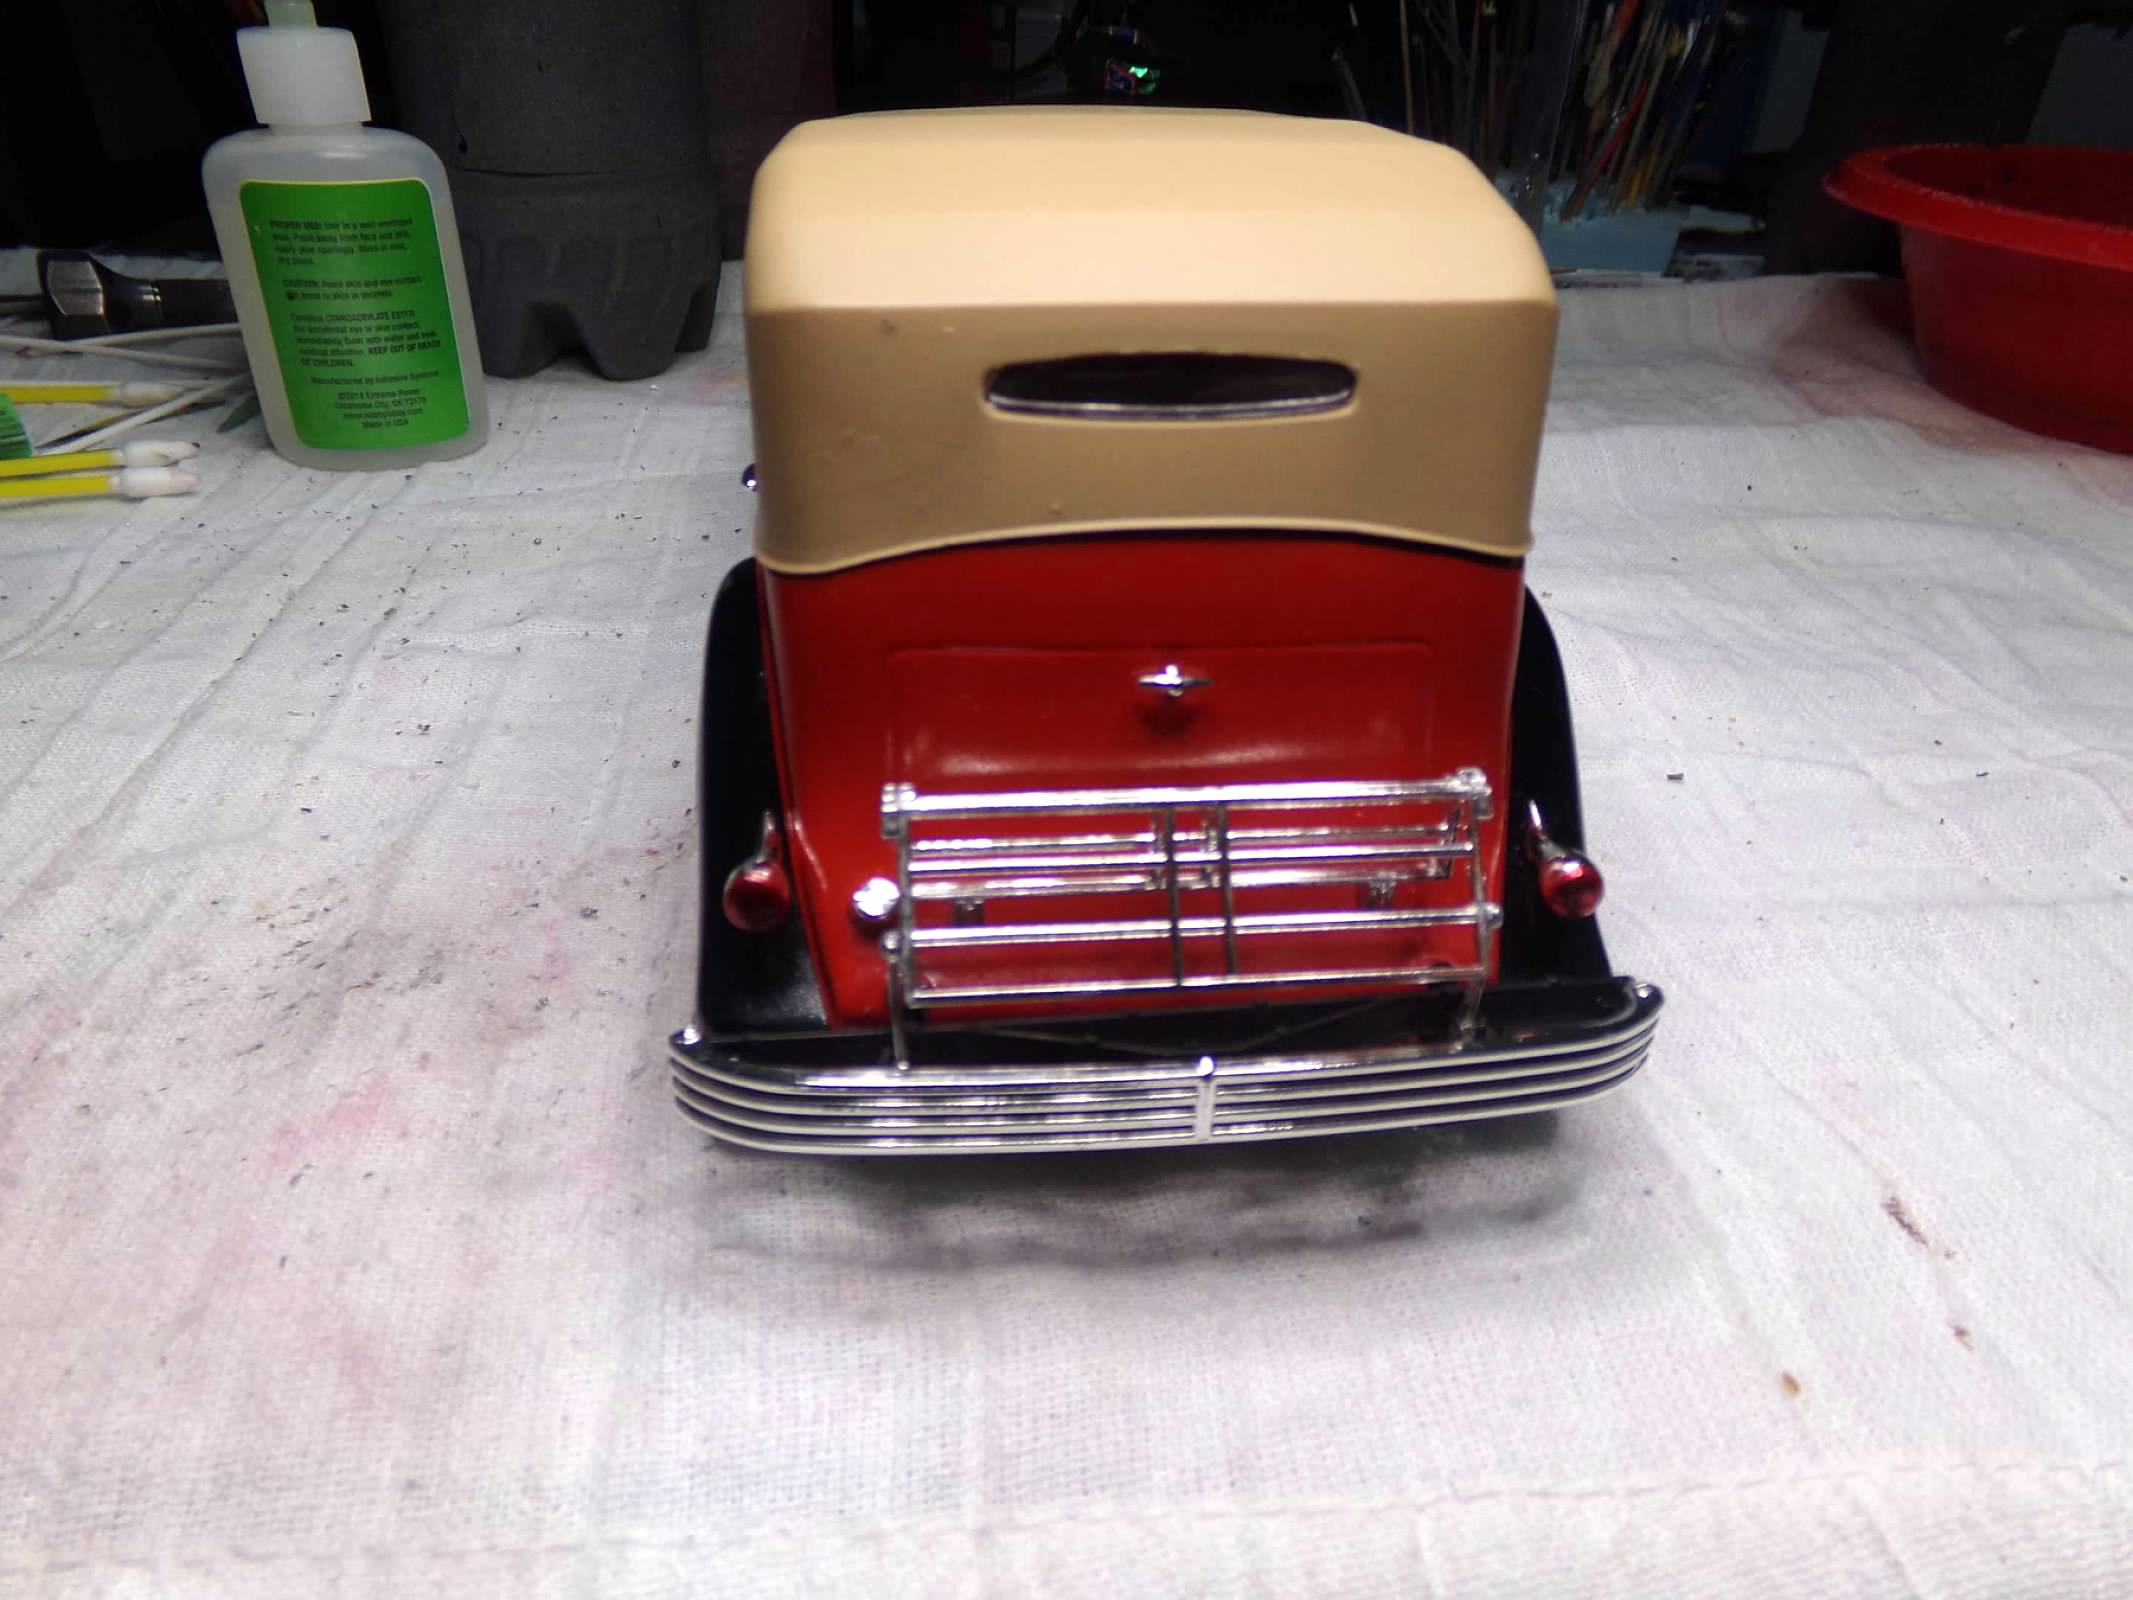
This is a Testors/Italeri offering from way back. I bought it sometime in the 90s on a mark-down at Larry's Hobbies that has been gone now for at least 20 years. The paint is Dupli-Color Universal Black and Flash Red along with Krylon Khaki interior and convertible top. I forgot to take photos of the engine and interior but it is built box stock with the exception of gluing the two hood sides together and eliminating the nasty attachment points on the centerline of the hood and replacing it with a half-round plastic strip. No detailing except for the foil and I see I have a piece to repair. Thanks for looking, ?
-
Thanks, Carl! I appreciate your comments! I started rubbing out the body and noticed that I was exposing too many edges and the overall appearance of the paint was a bit fuzzy or grayish. Maybe it was too humid when I applied the clear and it blushed. Maybe I didn't get enough paint on it either. So I needed to give it another coat of paint and clear. But first, I had to make a french fry tray hat to cover the vinyl top. You remember the french fry trays that they used to use at the A&W Root Beer stands and other car hop drive-ins. You can't find them today and neither the Sonic drive-ins or the Dairy Queens use them today. I built one but it is probably smaller than an actual french fry tray but it will serve the purpose. Today, when the humidity was below 40% ( I haven't seen that in a long time) I gave it another wet coat of paint, removed the paint from the chrome foiled letters, and then gave it two coats of clear. I also added a couple of passes of clear to the top after removing my french fry try hat for the top. Now, I thin I can work with this body to rub it out properly and get some foil on it. And now I have a hat for the next model that has a vinyl top or a different color on the top! Thanks for looking! ?
-
1933 Cadillac Fleetwood All Weather Phaeton
ModelcarJR replied to ModelcarJR's topic in WIP: Model Cars
Thanks, Tom, Dan, Dan, and Carl! I appreciate your comments! Dan, there is no separate trim on this model and I noticed that the 1:1s that I have seen on the internet don't have the same level of trim that the black ones have. I am just adding the trim on the centerline on this one. This one is done! The trim level is what I have seen on all the red ones on the internet so I left the emblets on the front fenders off and only foiled the centerline on the hood. I rubbed out the hood this morning and then added a light coat of paint and clear. I also added another coat of Dullcote to the top and added the door handles and the hood ornament. Thanks for looking! ?
-
1933 Cadillac Fleetwood All Weather Phaeton
ModelcarJR replied to ModelcarJR's topic in WIP: Model Cars
Thanks, All! I appreciate your comments! Weather broke and I got the hood painted and the grill shell touched up. Tomorrow, I'll rub out the hood and add the the foil on the centerline. I managed to get the headlights with horns, turn signals, wipers, front bumper and left side spare tire installed today. Only door handles, hood emblem and emblets on the sides of the fenders left. The headlights were tough and I don't now how I get those added without getting glue all over the fenders. Almost done! Thanks for looking! ?