Brianl
-
Posts
296 -
Joined
-
Last visited
Content Type
Profiles
Forums
Events
Gallery
Everything posted by Brianl
-
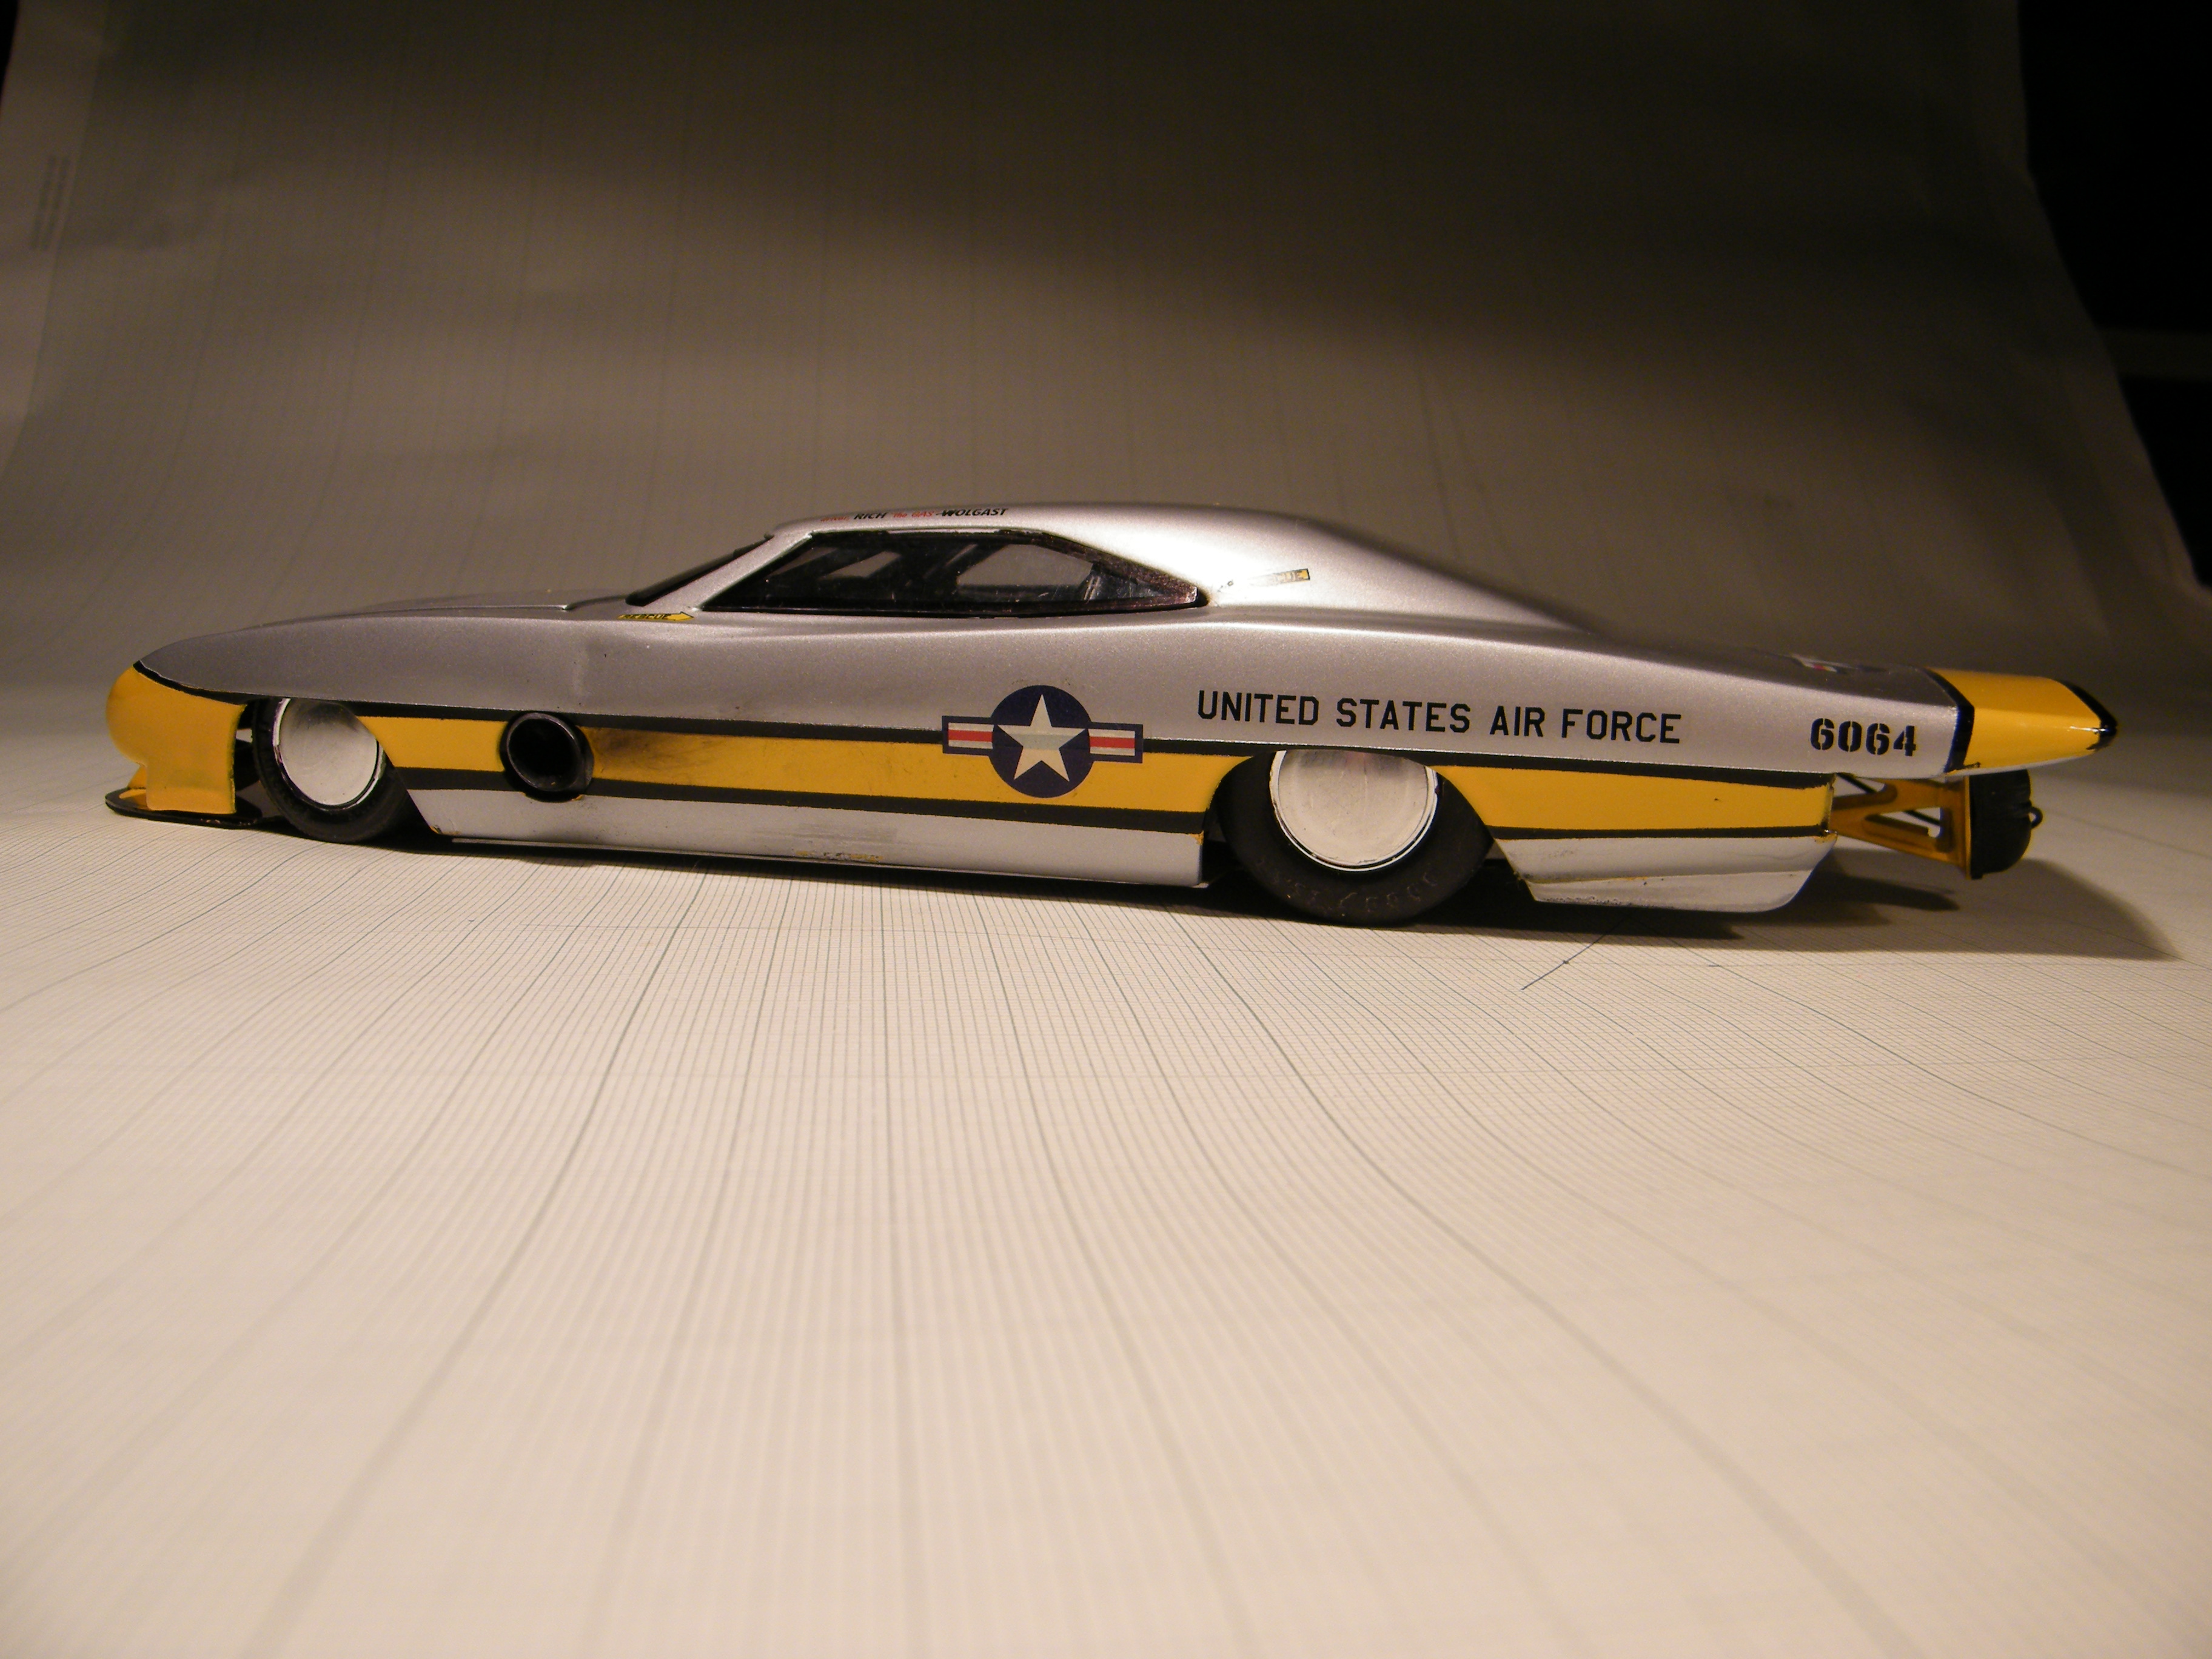
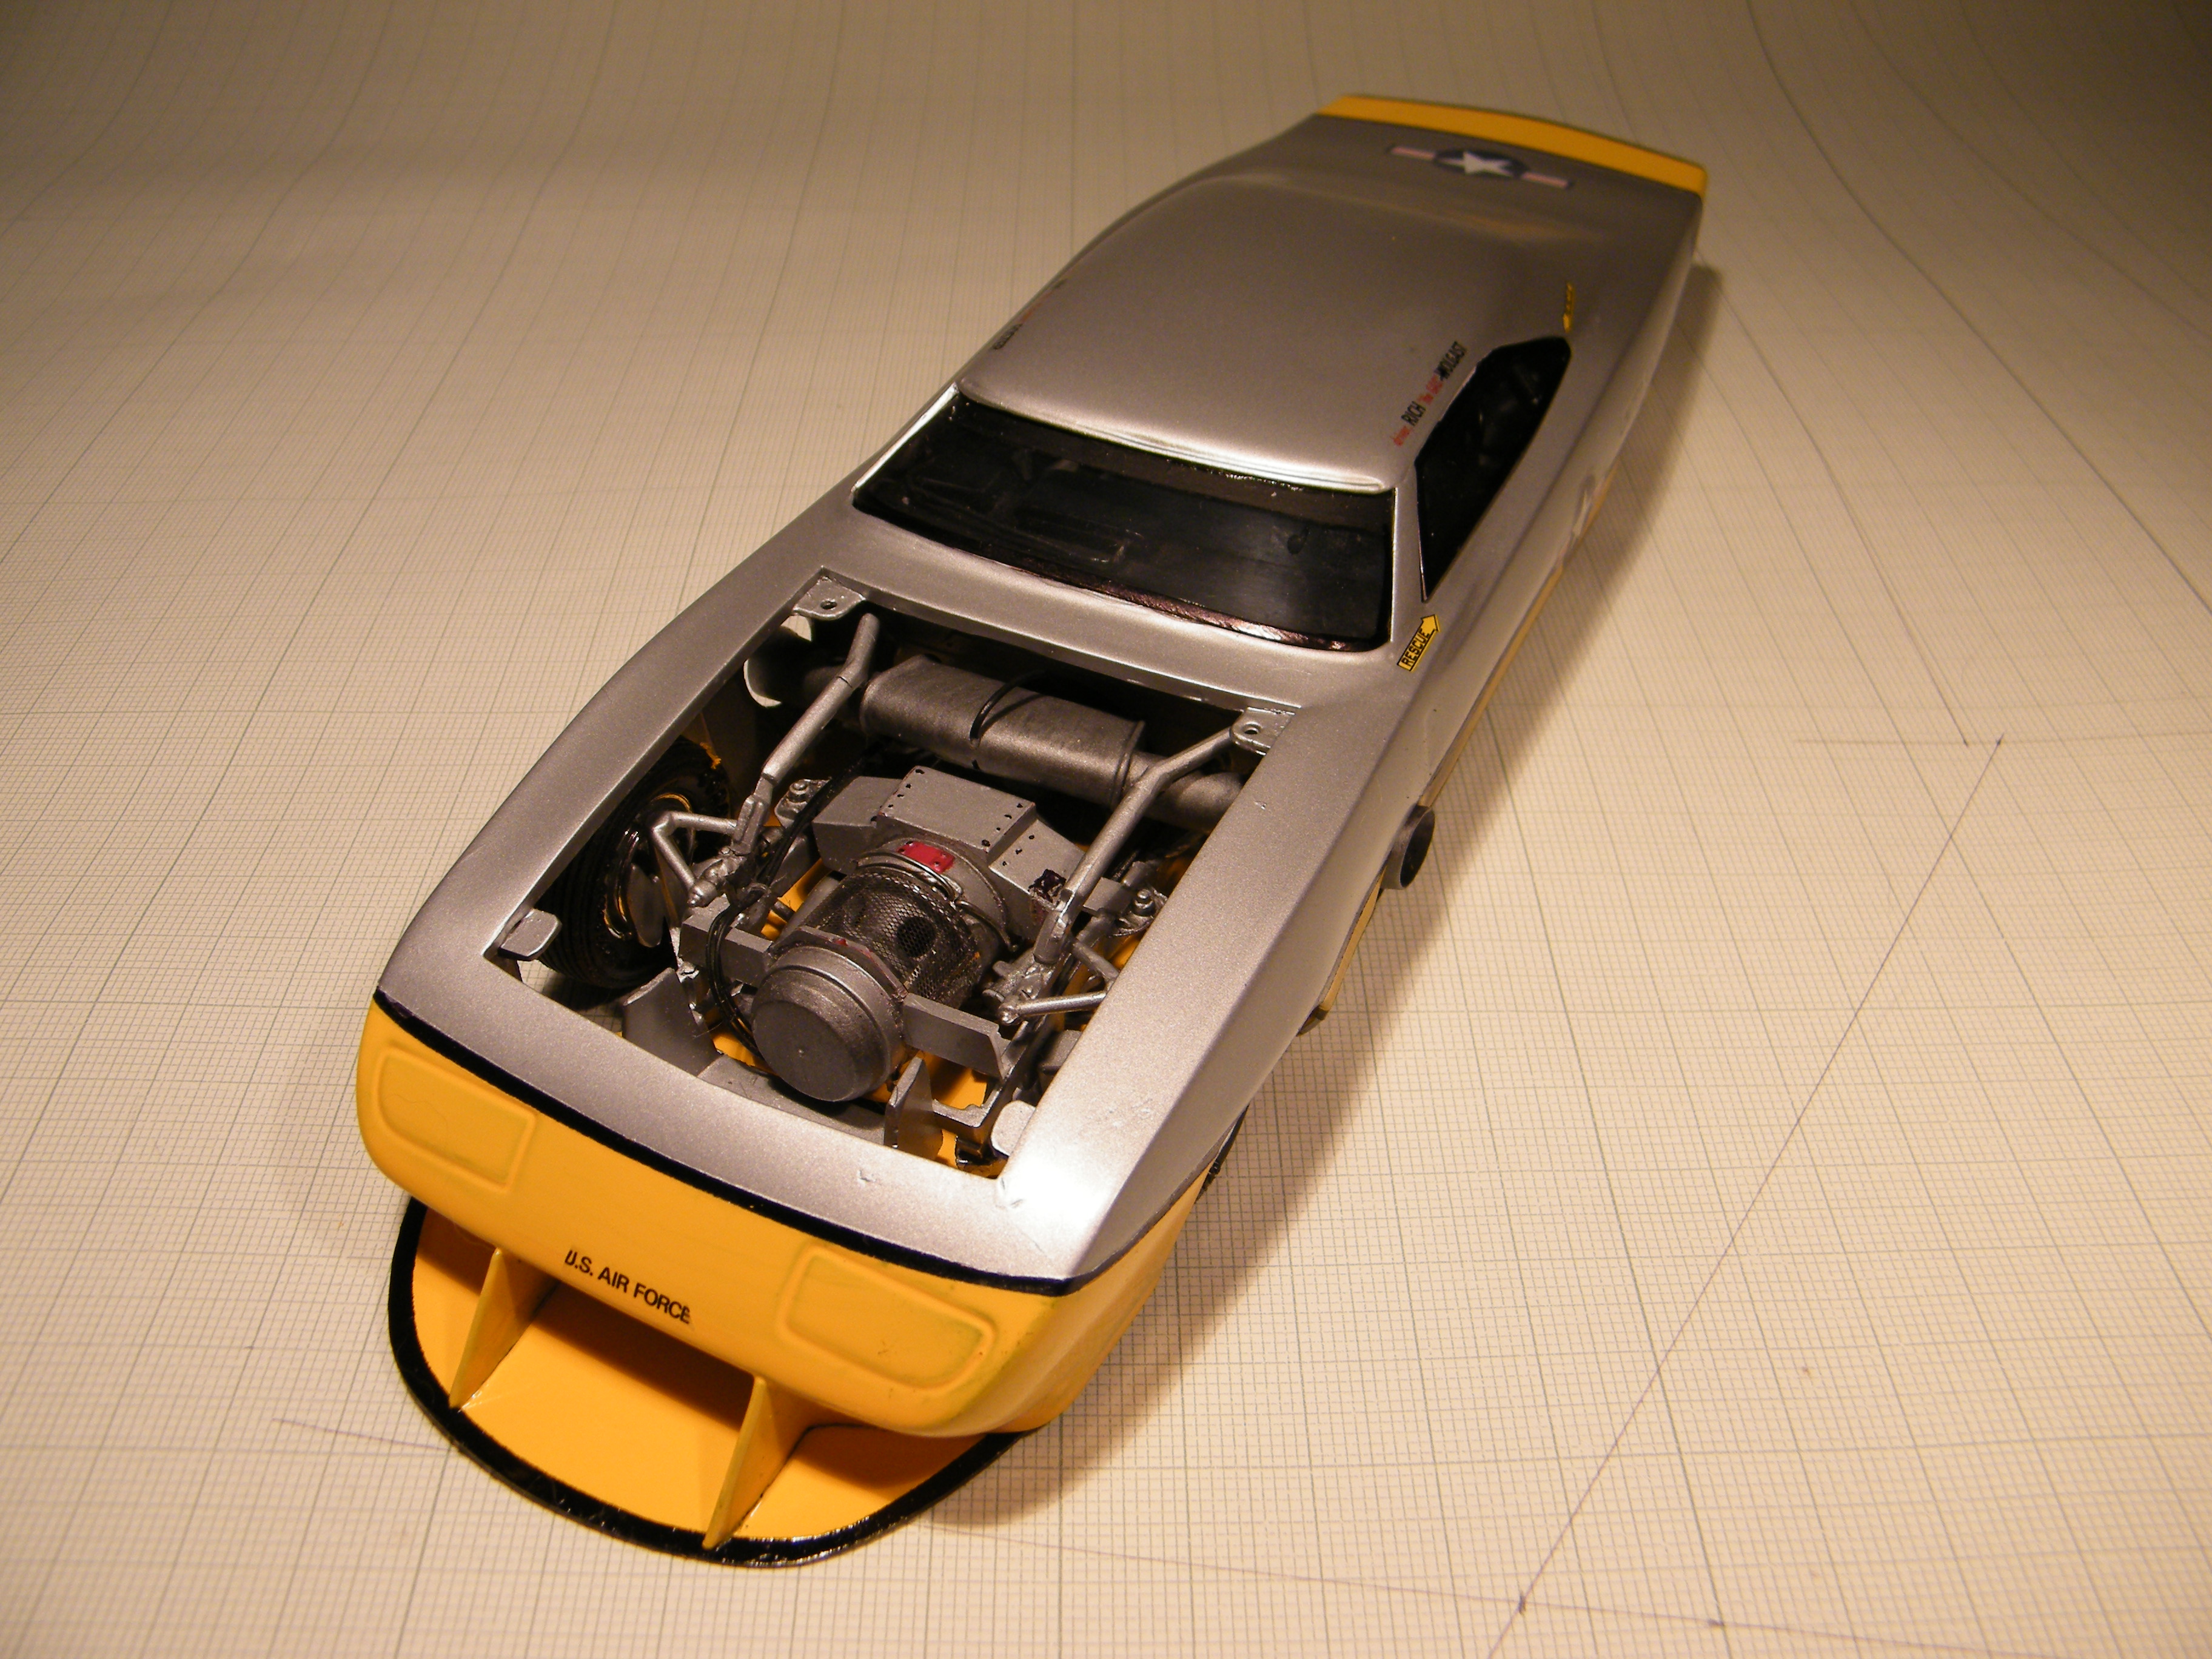
One more for the bucket. I didn't need much of the original kit! Brian

-
This thing is all attitude. Would be awesome to see on the track. Beautiful finish & detail again mate Well done Brian
-
That's the car!!! Awesome isn't it. Didn't want to copy the colour scheme exactly, its more of a tribute thing. I used an old block & added some cam covers, some wiring, a set of down-draft webbers & the home made air cleaners. I originally wanted to put in the trumpets on the webbers but couldn't get the right ones. Thanks for the comments Brian
-
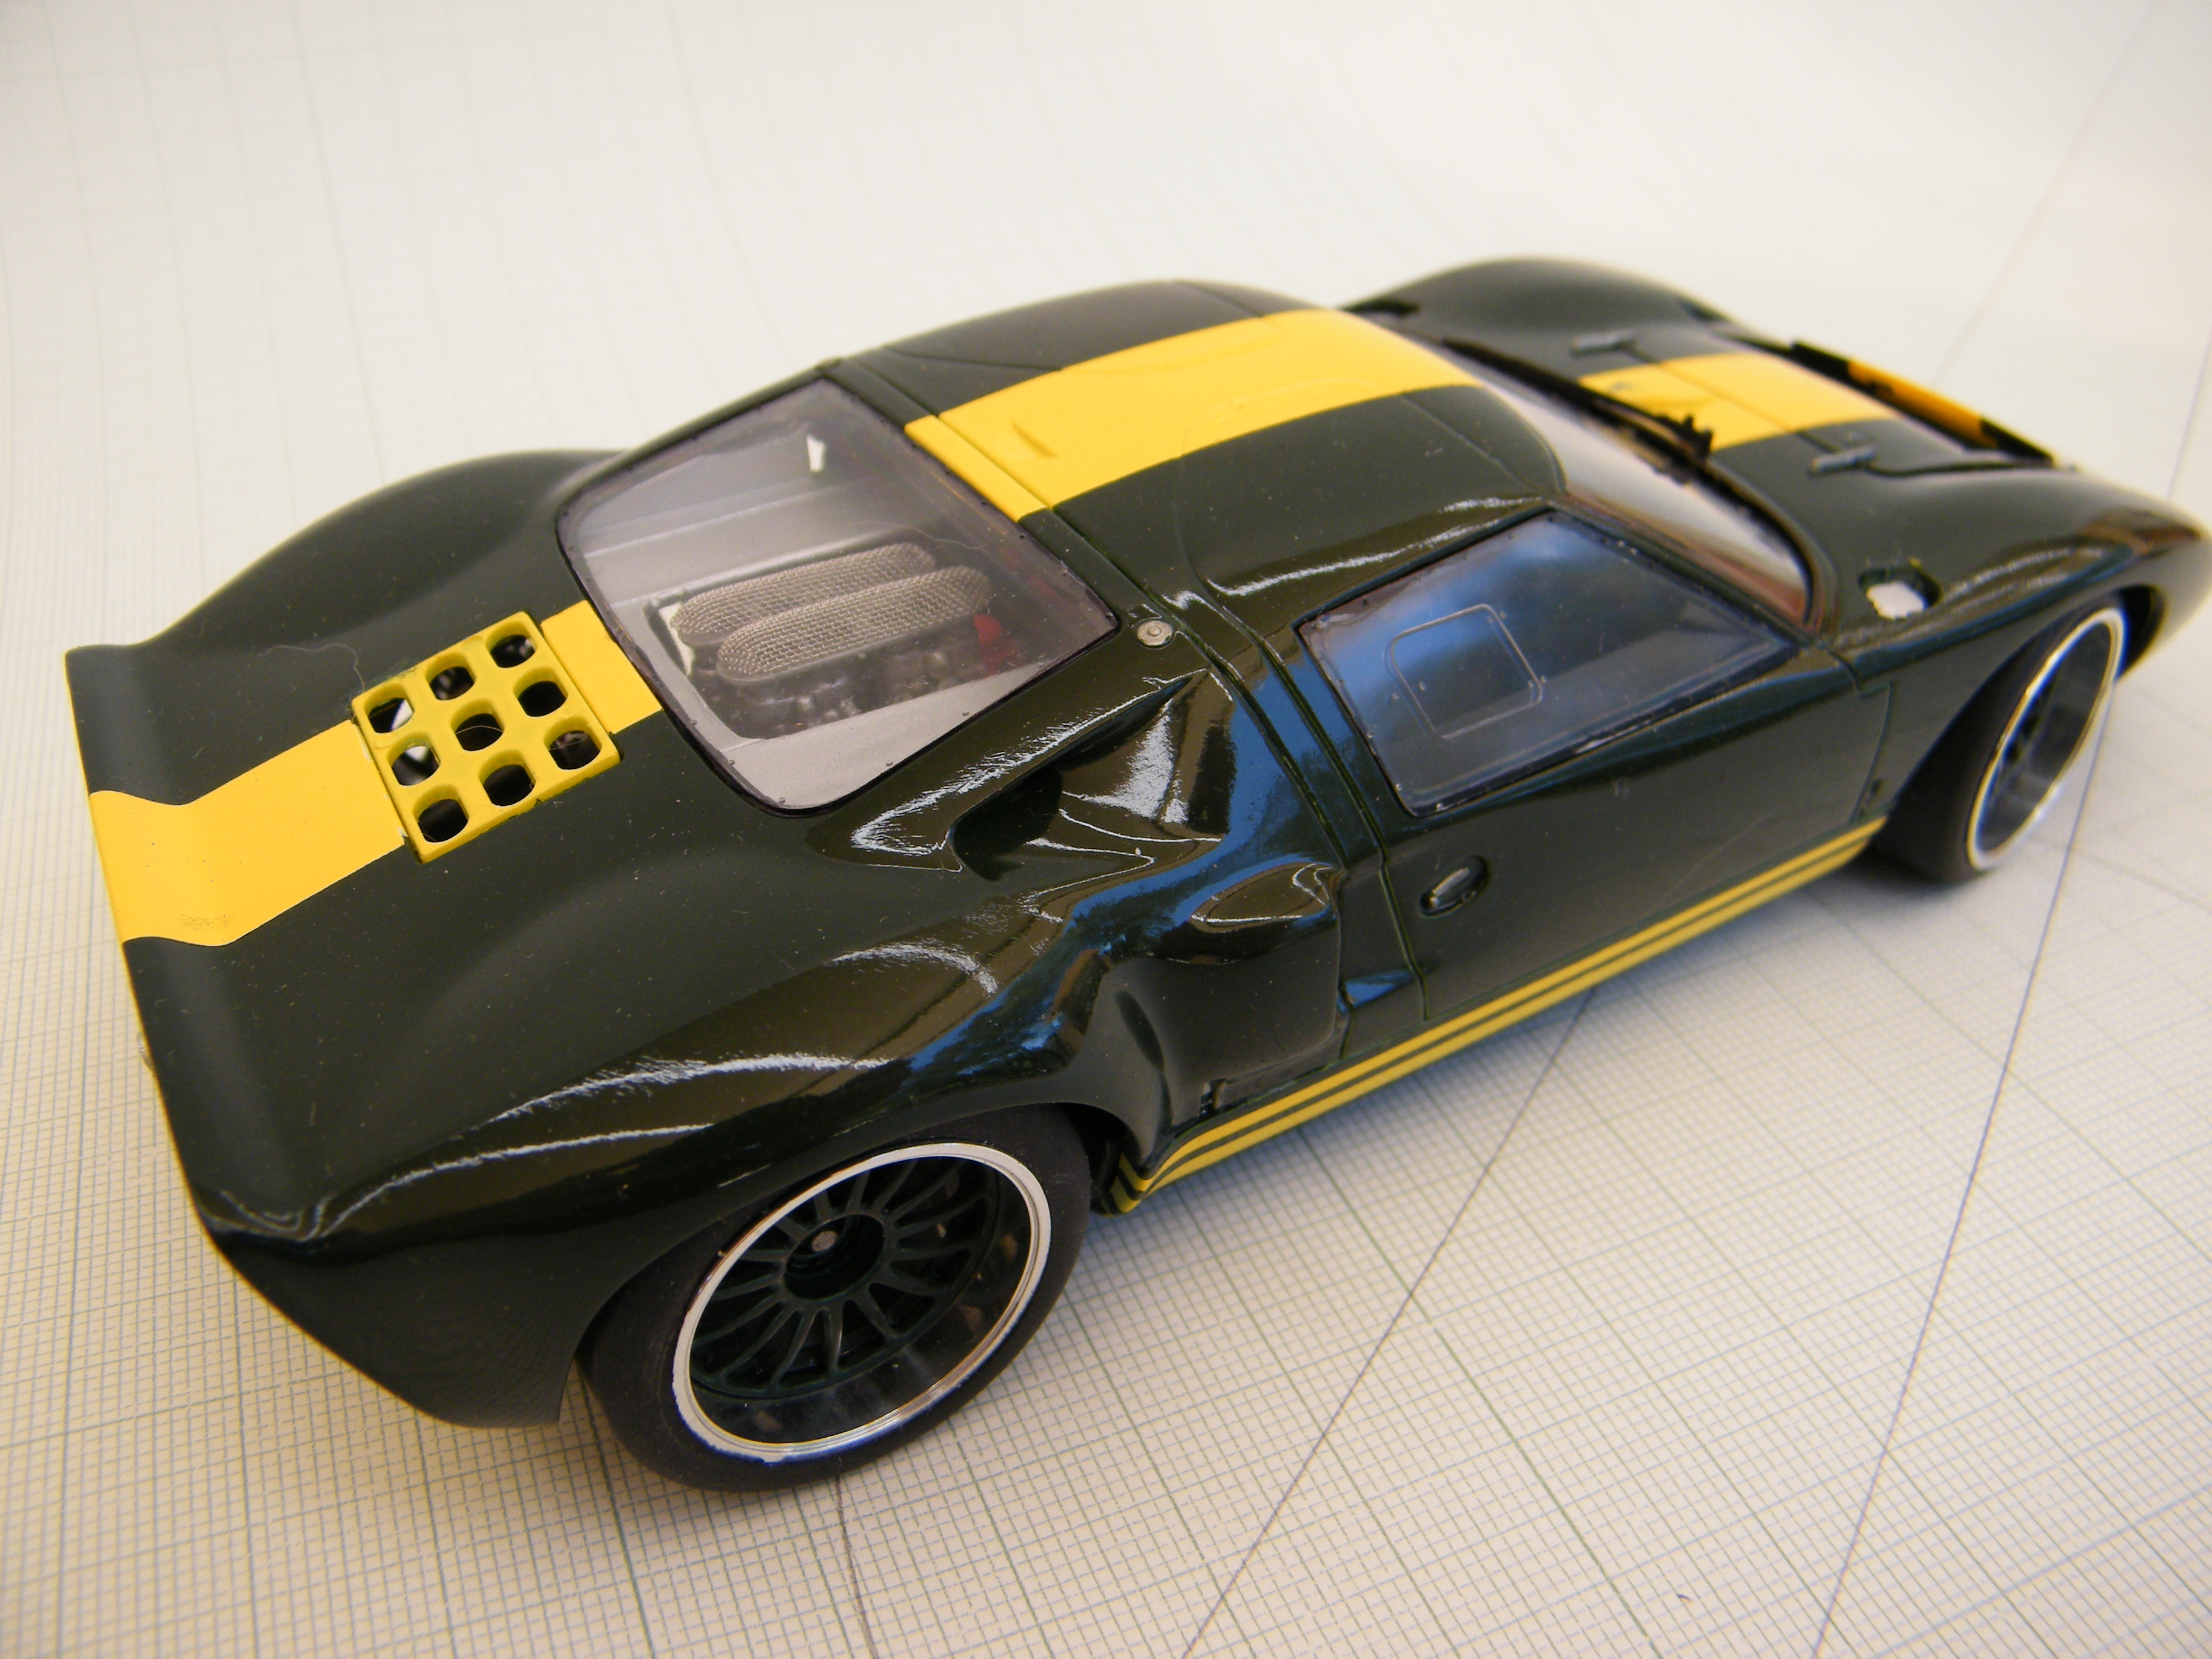
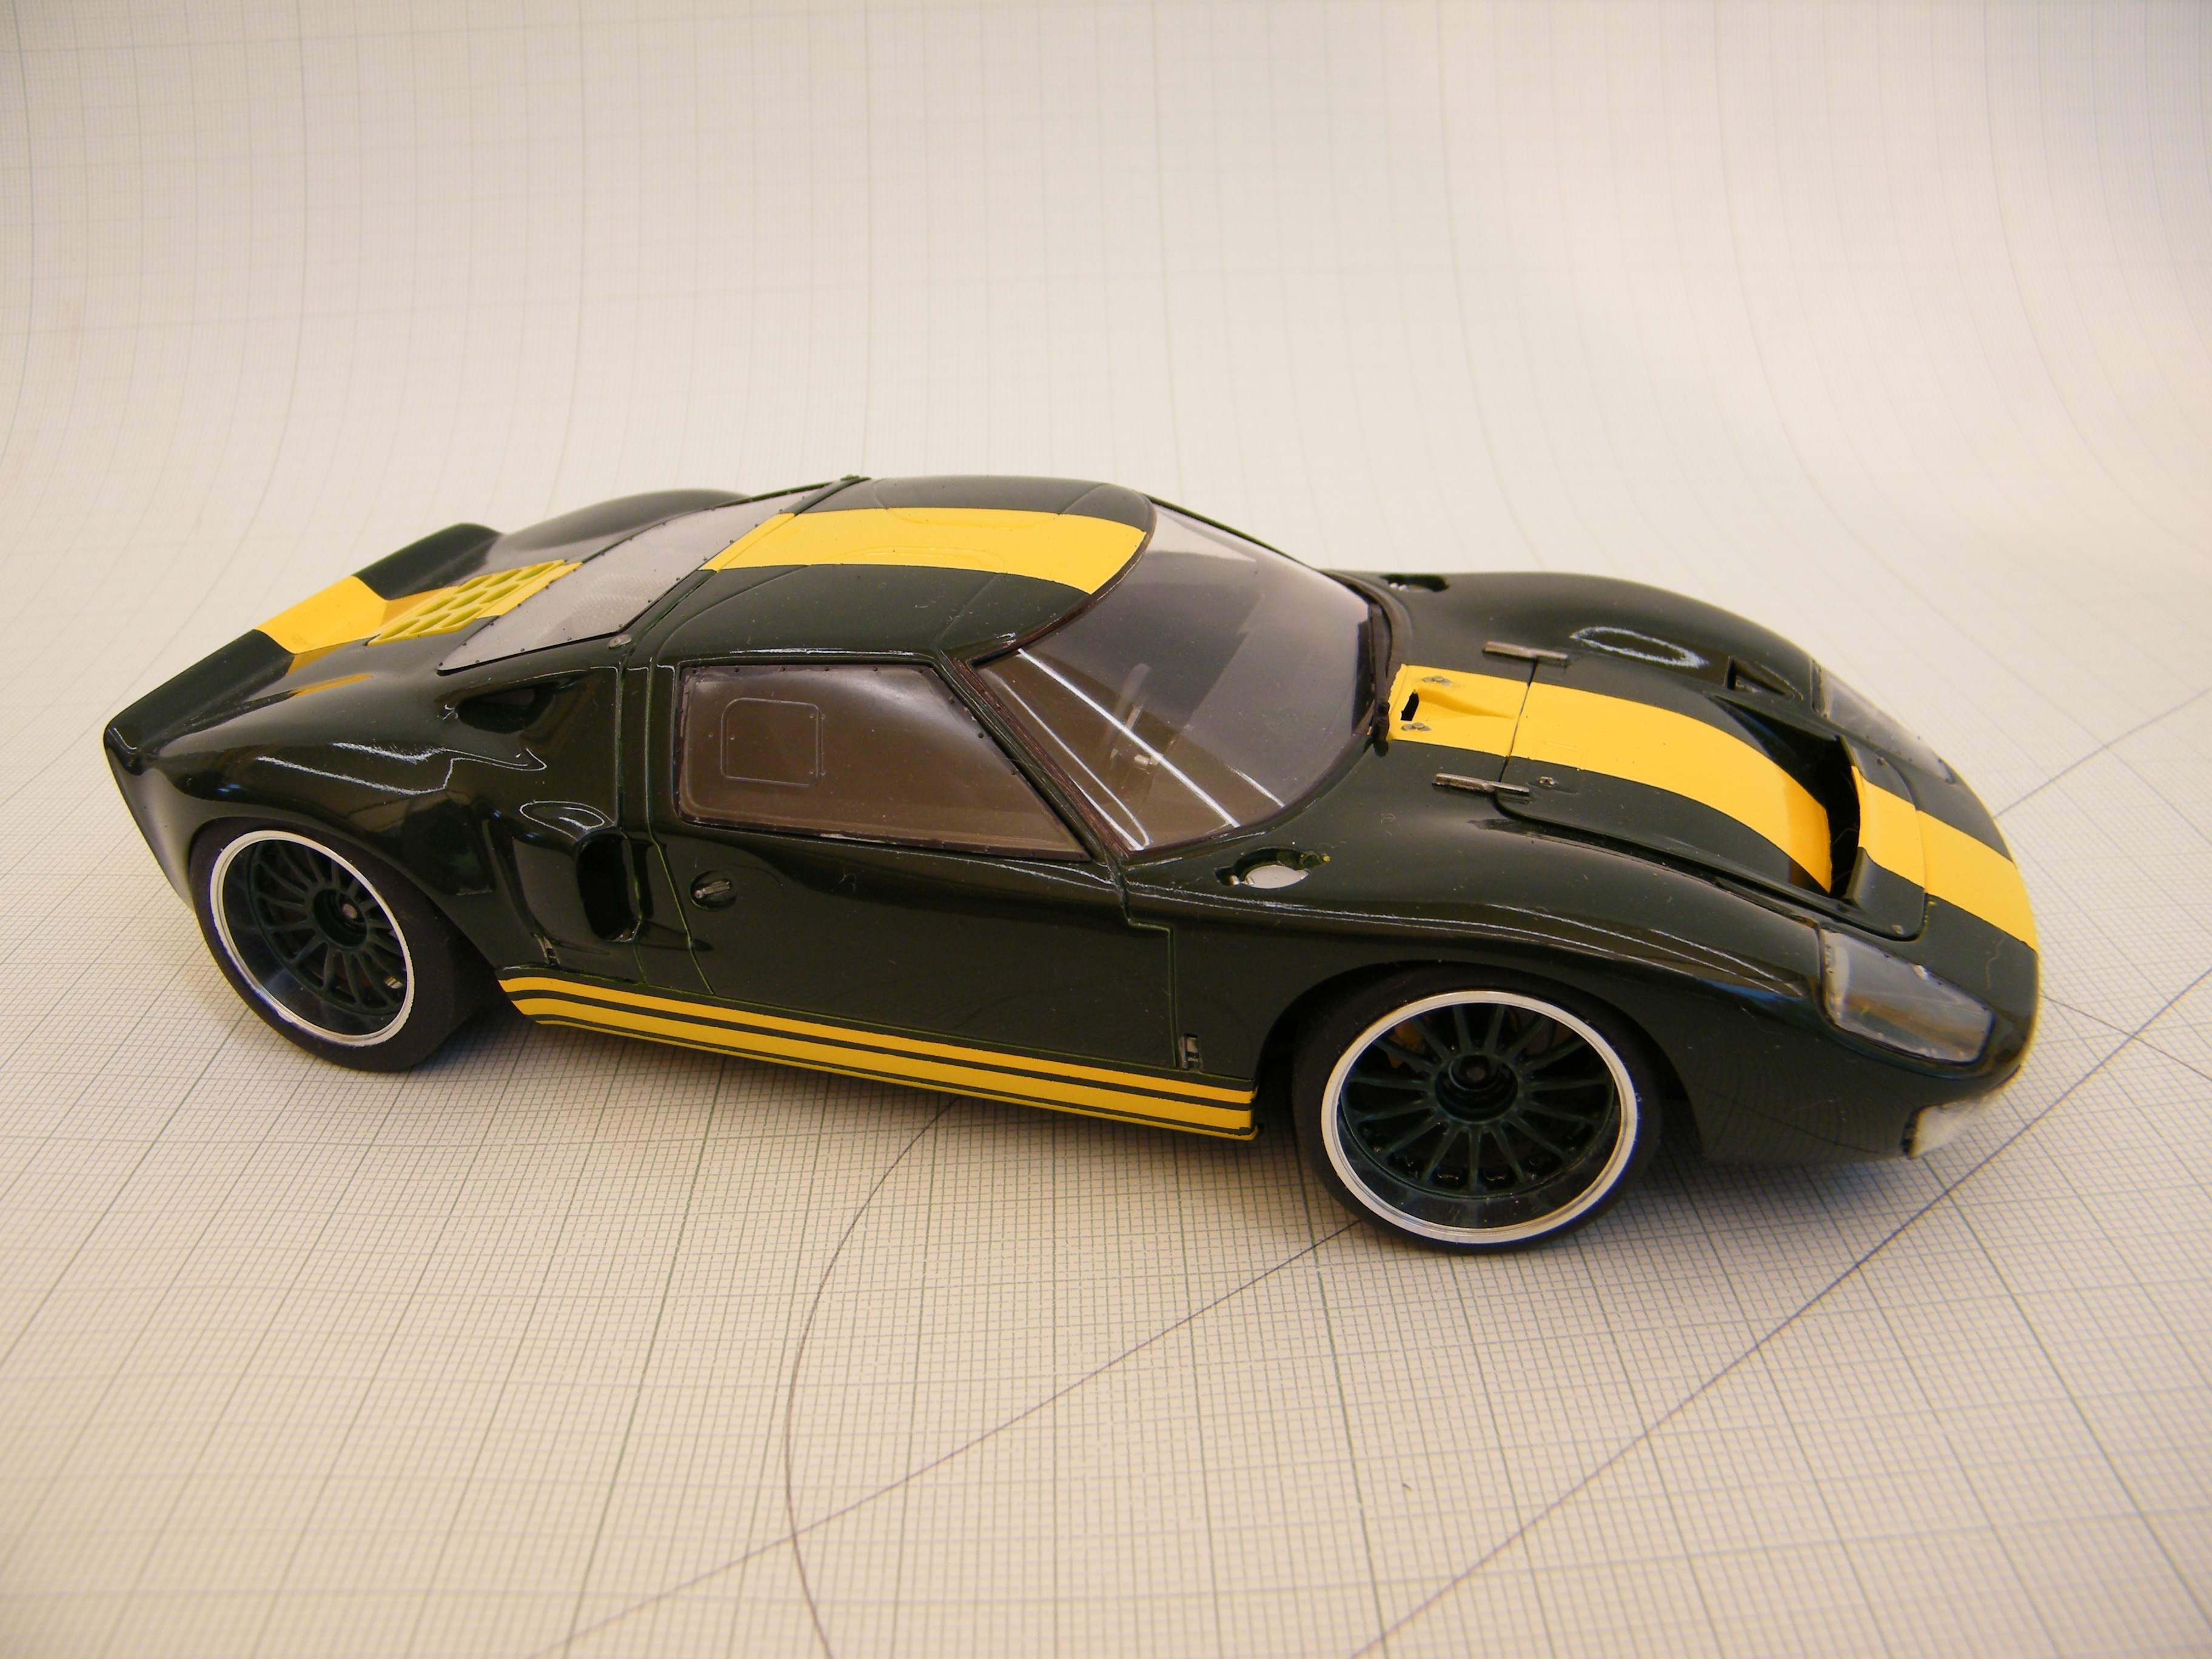
This is the old Fujimi kit. I have added a set of GT3 wheels & detailed a top of the motor to make it a bit more interesting. Colour is based on the Bib Stillwell GT40. Bib was a prominent racer down here who had a very desirable stable of race cars. Brian
-
Well posted my friend. Superb model with those little touches like the stripes under the doors that set it apart. Brian
-
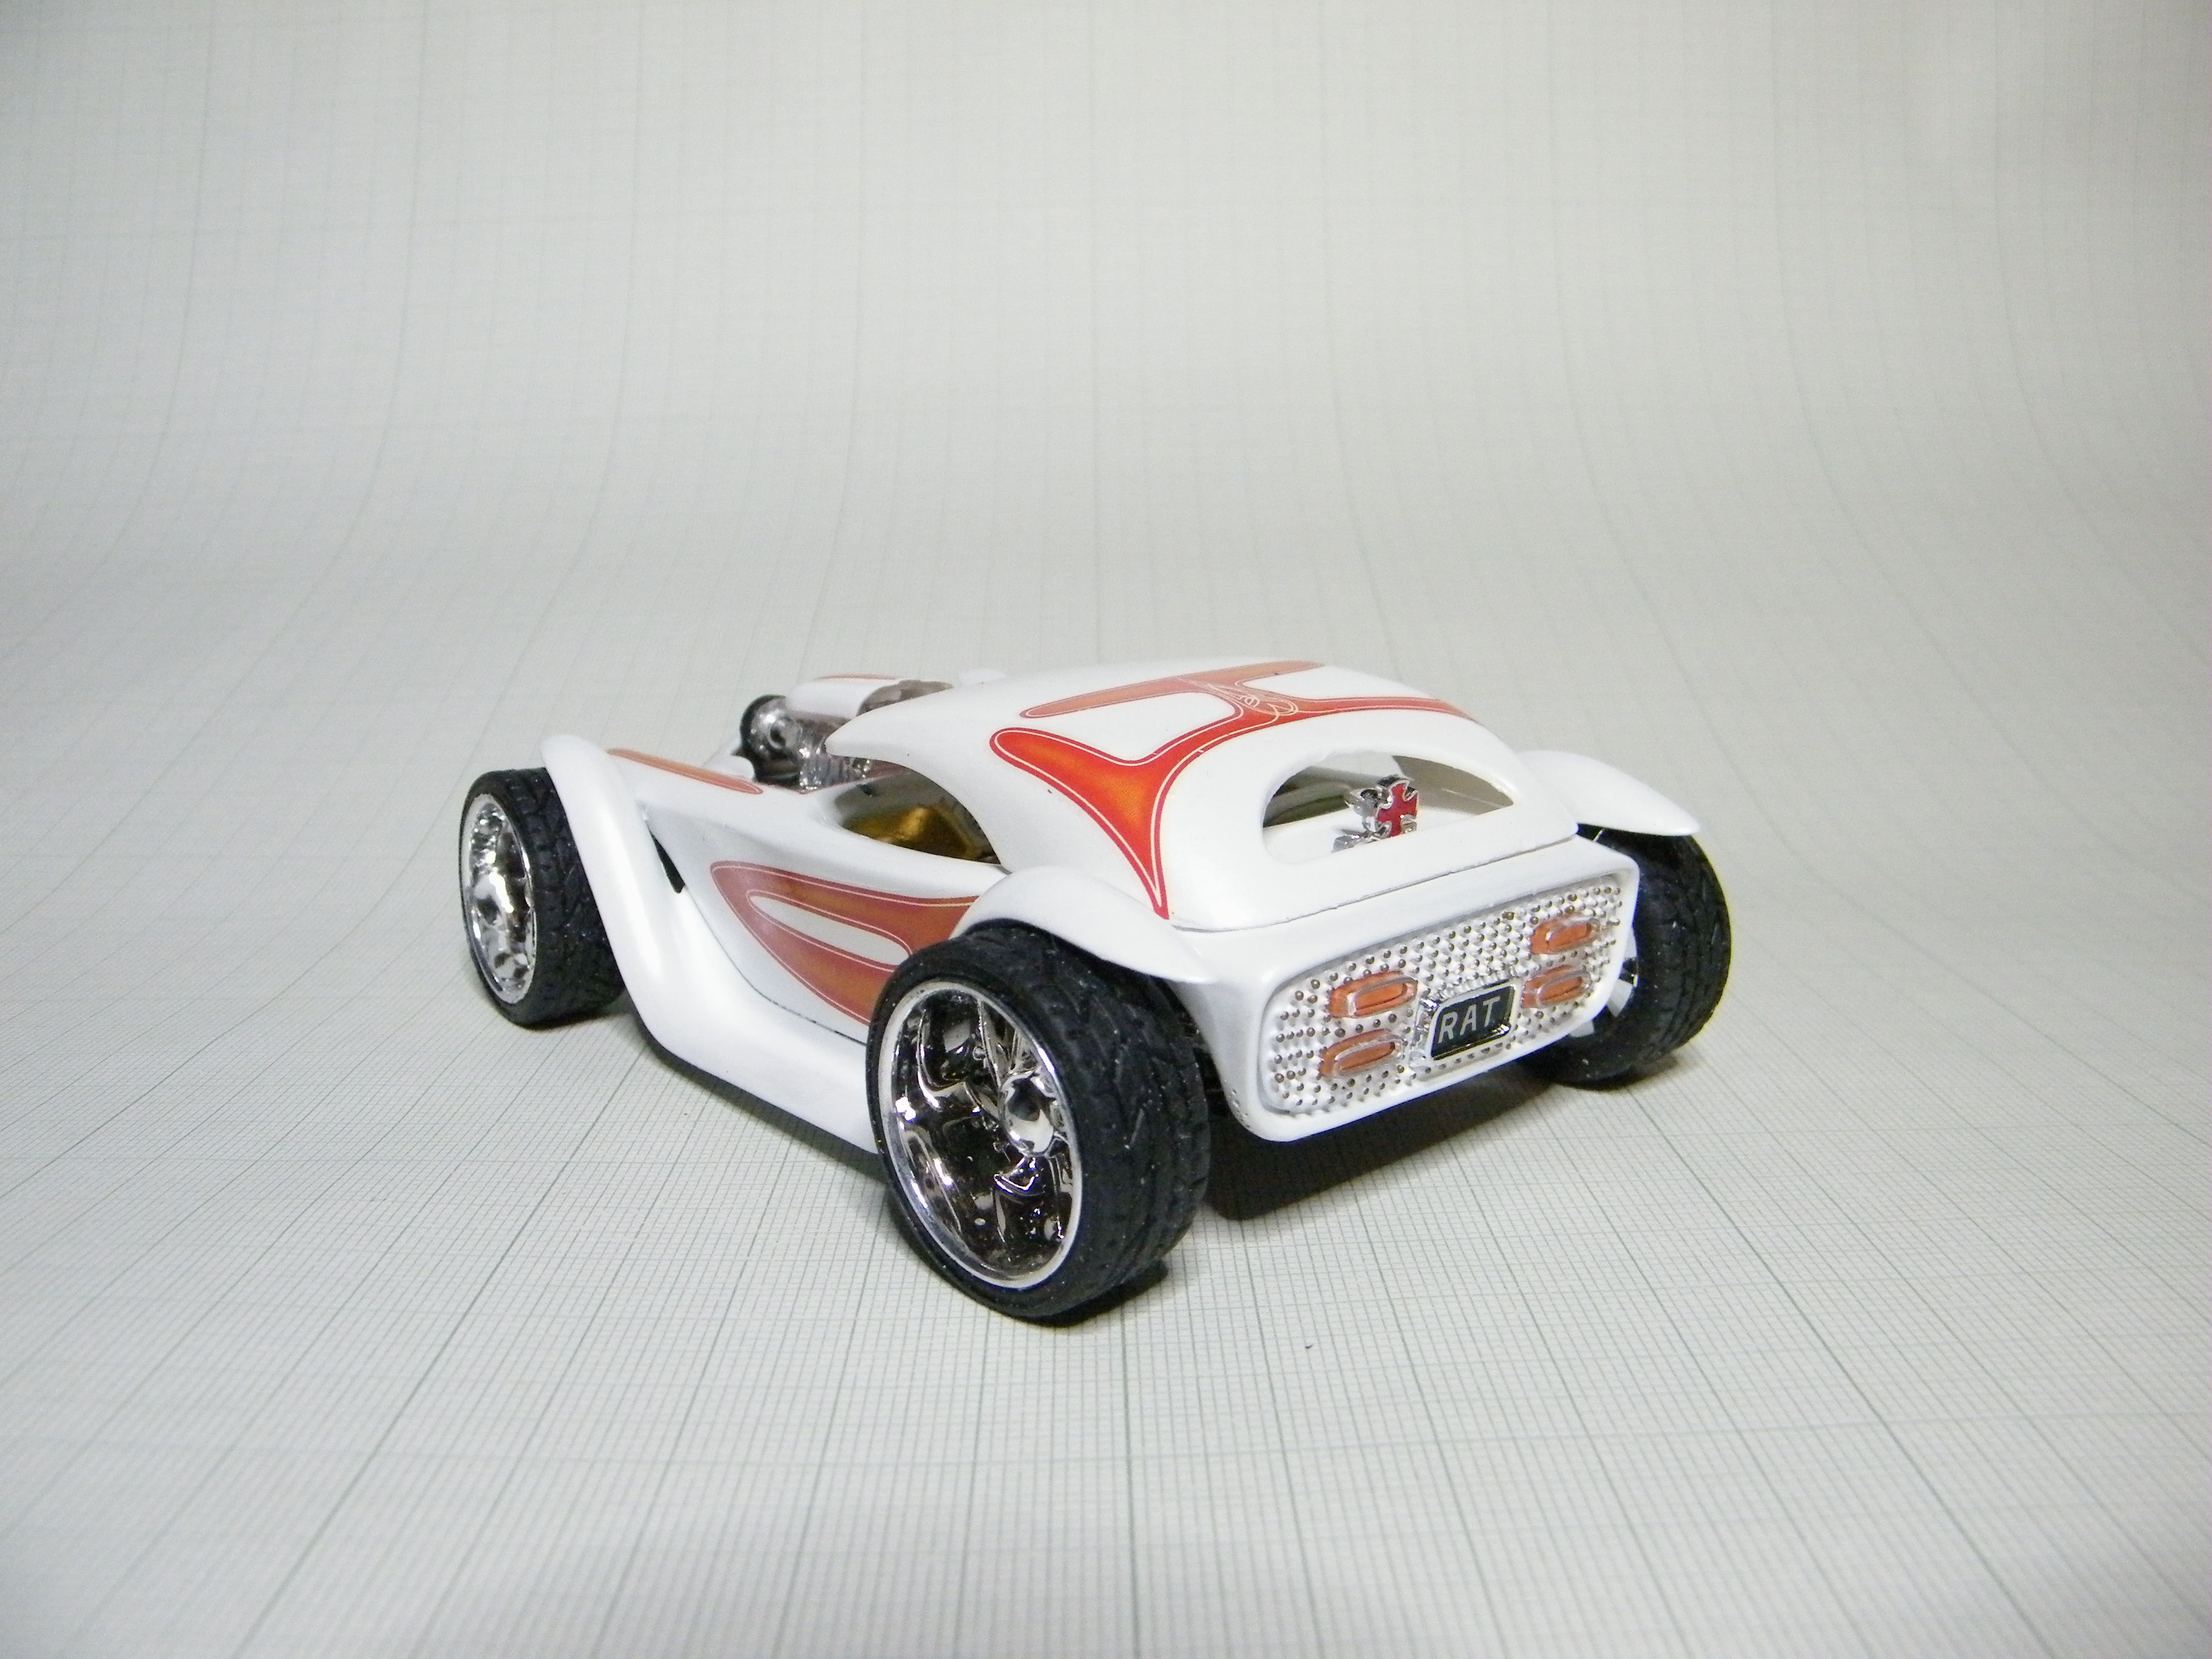
Thanks for the comments gentlemen. David, it was the old Ed Roth Beatnik Bandit but I lost the canopy assembly. He did some very cool things back in the early days of fibre glass. Brian
-
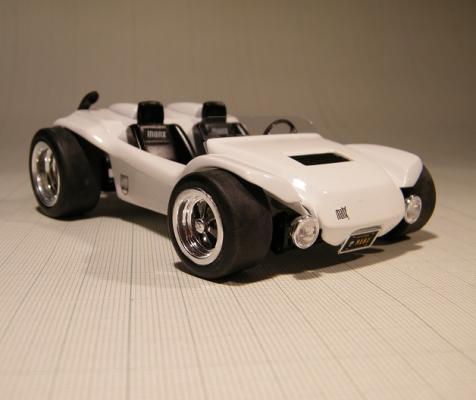
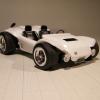
This was one of the first kits I started when I got back into modelling & I stuffed it up. Came across what was left of it a while back & decided it deserved a better fate. Some mild custom work (on a wild custom). Big wheels worked well I thought. Good Christmas to all. Brian
-
Michael Yep, the chassis & some other bits come from that parts pack. The pain with that chassis is the tubular beam front axle so I replaced it with something more appropriate The body is part Model T & part sprint car tank & the rest scratch. Congrats on the Street Fighter paint job. Its a model that needs it to make it. Brian
-
For what they are worth.... I can't seem to leave a kit standard. As someone very wise said on this site "Instructions are only someone else's opinion" Brian
-
Old build but one of my favourites.
-
Stock out of the Revell box... for a change. Built it for the motor. That twin blower setup is way cool !! Brian
-
Sweet build Mate!! Your colour & wheel combinations work again!! Brian
-
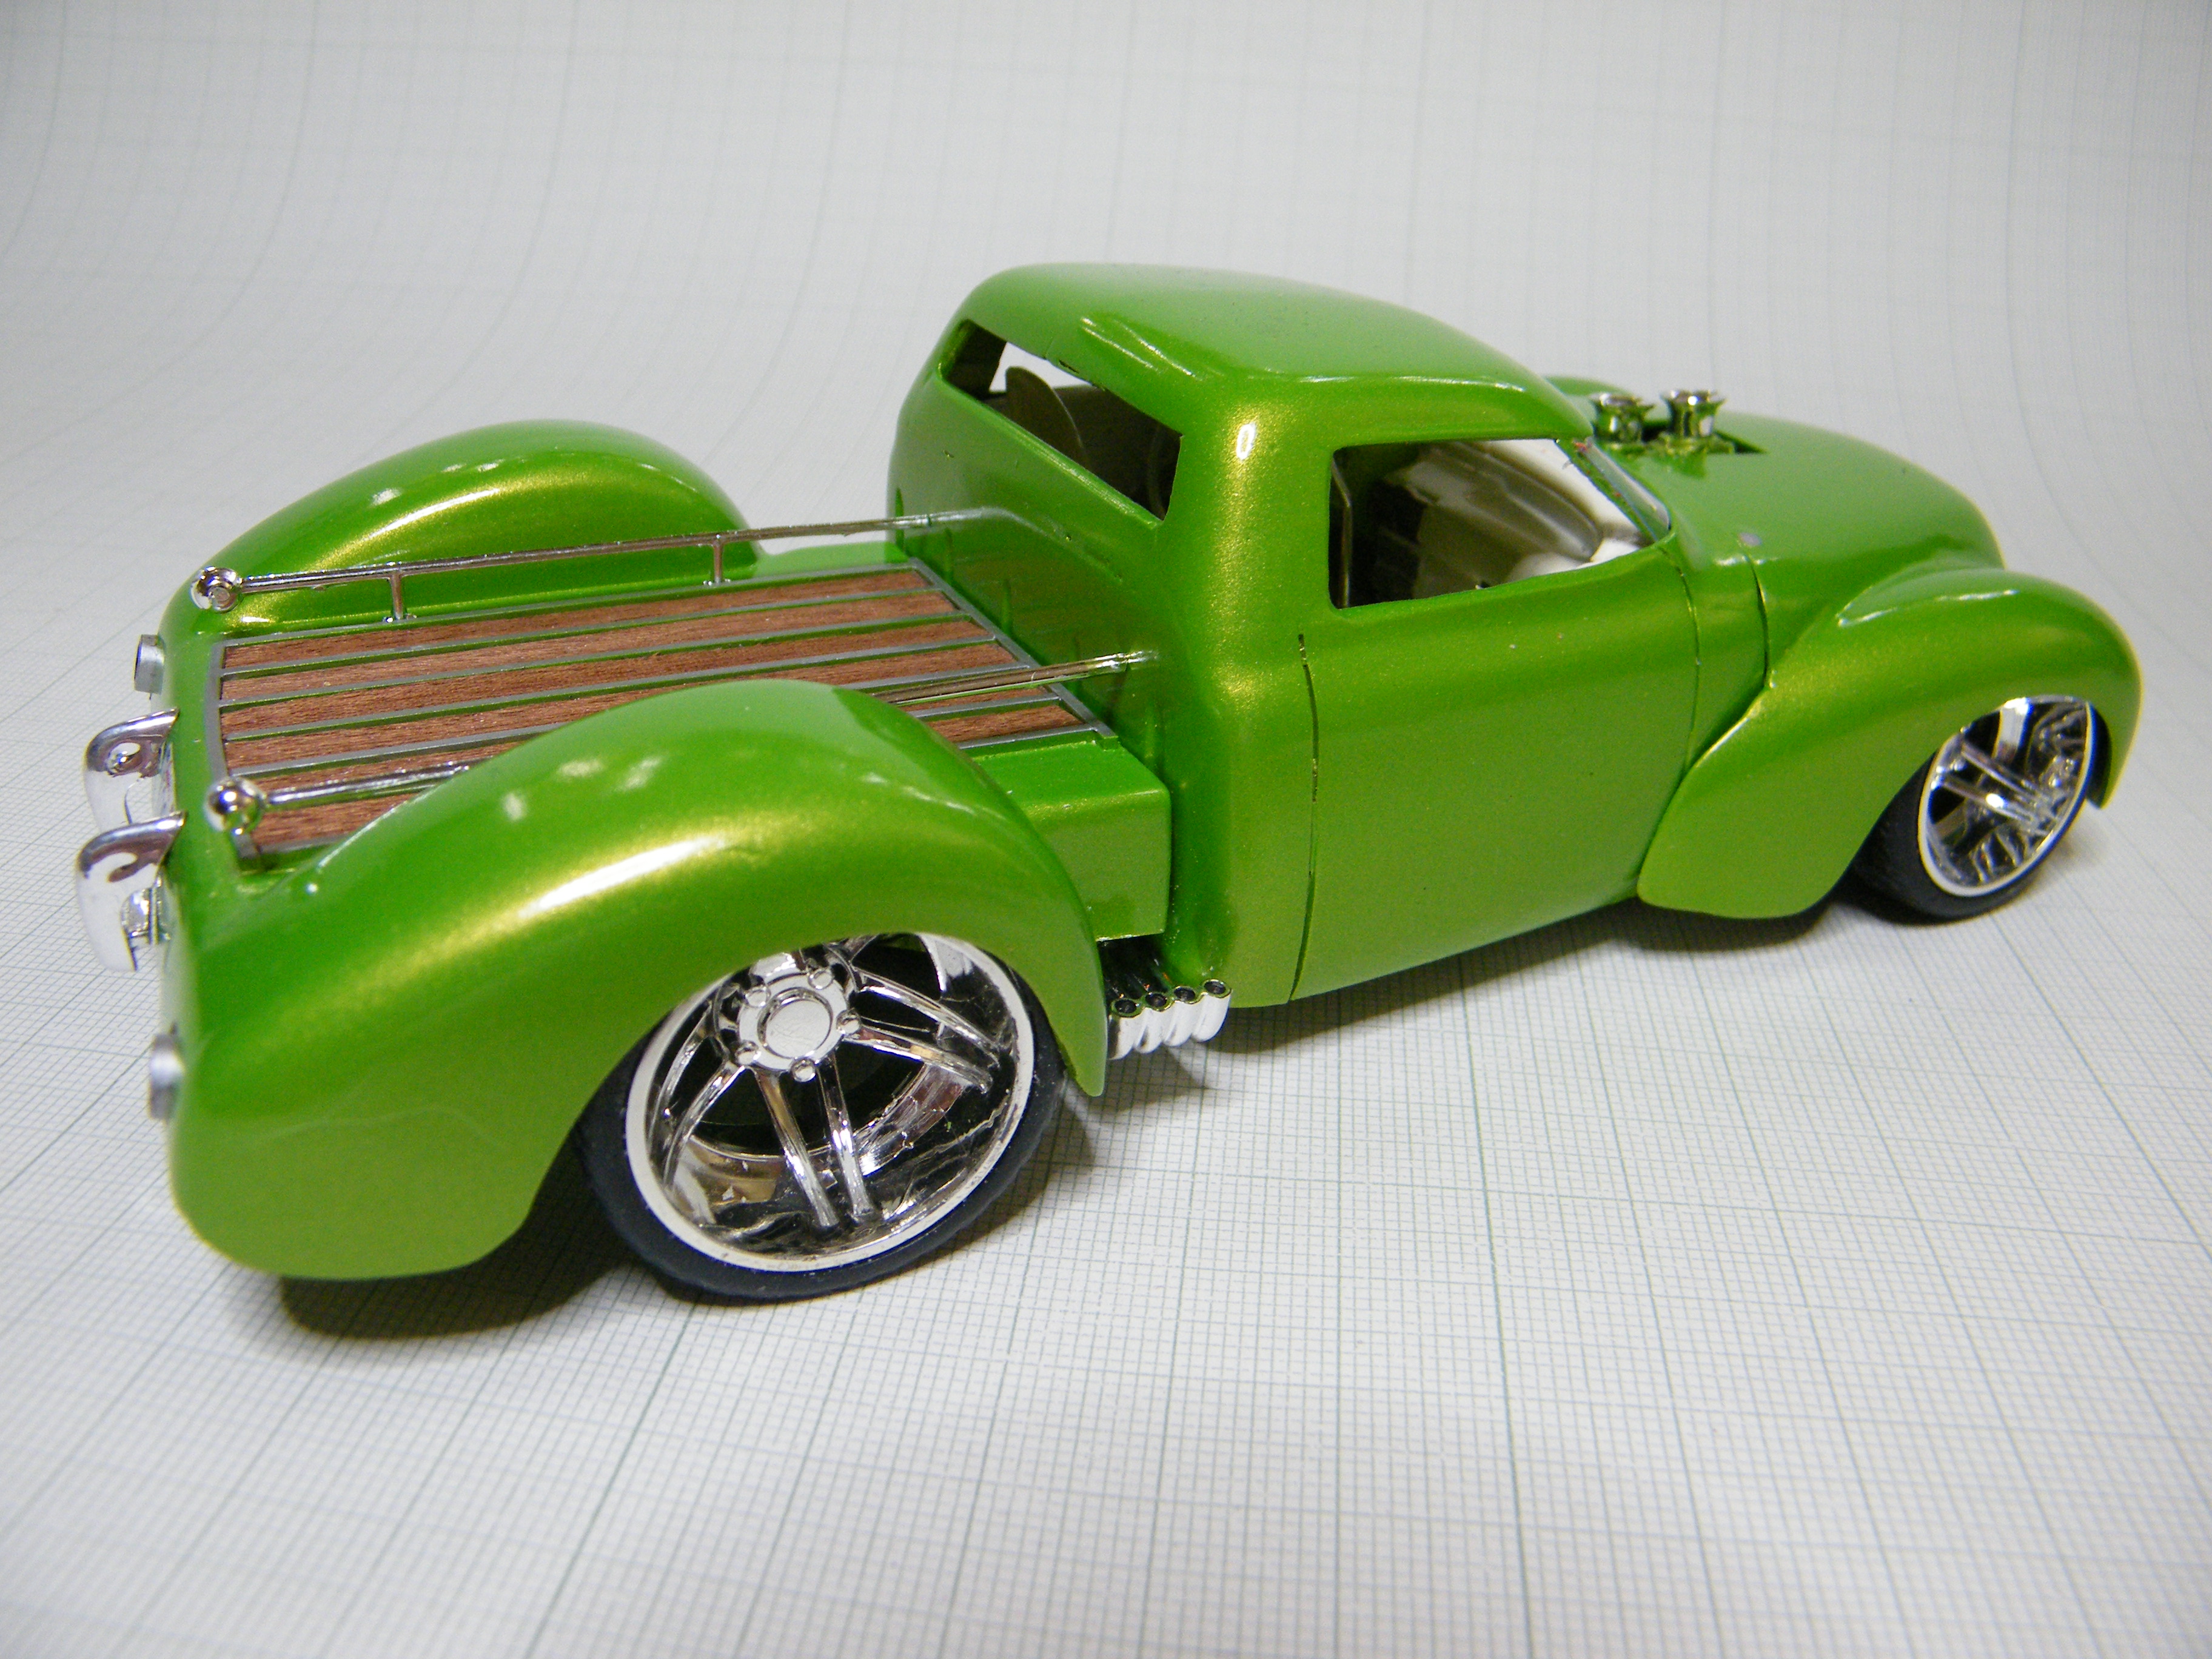
 Finished!! Inspired by old photos of the Oakland Roadster Show. Started with the MPC Double Flip Ford Pickup kit which seemed a sad bit of gear, but supplied a lot of good bits for other models. Cab has been cut every which way including increasing the tumblehome on the roof. I was too enthusiastic with the sectioning & couldn't get the wheels under the standard guards so I grafted in a pair of early Chev fenders. The rear bed & fenders also came from the Chev although they have been widened a little! Wheels are from a $10 toy from the local supermarket. Nose was the suggestion of Gatorincebu thanks. Using this forum is well & truly worth it. Thanks Brian
 -
F100 Custom Stakebed
Brianl replied to Brianl's topic in WIP: Model Trucks: Pickups, Vans, SUVs, Light Commercial
Dave I picked up the rims from a $10 toy at Woolworths! Car was junk but the wheels were good. I often check out the supermarket toy section, mainly for wheels & have found some really good stuff. Recently got a diecast Lambo for $10 with some very accurate wheels, seats & instrument panel. Thanks for the encouraging comments all. Brian -
F100 Custom Stakebed
Brianl replied to Brianl's topic in WIP: Model Trucks: Pickups, Vans, SUVs, Light Commercial
Update time! Body & paint are just about done. I have worked out a template for the screen that will cover the A pillars. There are timber planks to go on the bed & something chrome to stick out of the hood Brian -
Thanks for the encouragement gents Hey Nitro, I had to smile at your comment on replacing the A pillar. I have a thread going in the pickup work bench where I had a couple of recommendations to ditch the A pillar on the F100 I'm building at the moment!. I did try the A pillar but that is where the exhaust stacks will exit & because the roof is lower, smaller & further back it looked a little cluttered. If I do anything it might be to close in all the window openings l!. It will make for a very pure shape. Still thinking about the final outcome. Thanks for the feedback mate. Brian
-
Been playing with this for a while & still can't come up with a better paint scheme so I'll park it & wait for a revelation (maybe). Based on the Revell Mongoose rail with a donated Corvette shell that was damaged. A few things need finishing up but I'll wait for the "revelation" to turn up. Thought it might generate some ideas if I posted it. Body is narrowed & the roof is chopped, narrowed & moved back. It was a fun build. Brian
-
Top marks mate. Wheels & guards are spot on & I'm glad to see you weren't tempted to put 20 degrees of negative camber on them. I love this type of thing. I just got back from the World Time Attack Day in Sydney. They had a stack of Rocket Bunny type stuff at the Show & Shine including a GTR with wheels deep enough to take a bath in. Awesome stuff if you ever get the chance to get there it'll blow you away. Again, great job, any more? Brian
-
Just scored one of these myself but it is missing the wheels & tyres.. so now I know thankyou Paint really suits the style of the car. Nicely done & well worth having on the shelf Brian
-
F100 Custom Stakebed
Brianl replied to Brianl's topic in WIP: Model Trucks: Pickups, Vans, SUVs, Light Commercial
Billy Joe & Jim - I had a similar idea early on but the screen scared me, guess I'll have to give it a go now. Steve, I like my dremel & saw, they sit under my right hand at all times, although I think my clubmates reckon I should wear a butcher's apron Bought a can of candy lime green & will add some white pin striping (for now) Thanks for the feedback, the suggestions have been winners Brian -
F100 Custom Stakebed
Brianl replied to Brianl's topic in WIP: Model Trucks: Pickups, Vans, SUVs, Light Commercial
Started on the backend! Fenders came off the same Chev kit as the front ones, I think (thanks to the Silverfoxx again). Crazy thing was how the whole rear floor of a sedan made an easy tray for a pickup. That back panel has already come off as its too bland & I want to try to roll a timber floor over a the back some how. Thanks for the suggestions on the paint. Green & pearl are the favourites so far but I wont know or sure till I get it finished it in primer Brian -
F100 Custom Stakebed
Brianl replied to Brianl's topic in WIP: Model Trucks: Pickups, Vans, SUVs, Light Commercial
Most of the body work is done, just the A pillars to go. Colour is going to be something from the sixties, probably start with a pearl white plus some flames or panels... still thinking. Any suggestions anyone? (please keep it simple, I am not much of a painter) Brian -
F100 Custom Stakebed
Brianl replied to Brianl's topic in WIP: Model Trucks: Pickups, Vans, SUVs, Light Commercial
Looks like it might work! Had to narrow it a bit to get it looking right. A little bit of filling & filing to do. I'll cut down the chrome bar grill that came with it & use it & I'll put the headlights behind the grill. The photos make the nose look bigger than it is by the way. I was going to do either a gloss black or metallic green. But Gator's reference to the 50's 60's rods is getting me thinking about candy reds & pearls... still thinking! Brian -
F100 Custom Stakebed
Brianl replied to Brianl's topic in WIP: Model Trucks: Pickups, Vans, SUVs, Light Commercial
Thanks for the comments gentlemen Justin, I'm looking at a fairly small square timber flat bed with some timber rails on the side only. I'm trying to get a styling counterpoint to the smooth clean body. Trying to nail down the front end at the moment. I have spent the last coupe of hours going through my stash trying all sorts of fronts but nothing worked. Started writing this reply & reread Gator's suggestion about the '58" Chev nose & I remembered I had one so I dug up the box, found the bit & .... mate you are right. It looks like working very well !!! Thanks. Photos to follow when I mock it up Have a good one Brian -
This started from the MPC Double Flip Pickup which was pretty ugly but had some good bits that were used in other builds, so I had the body left over! Cabin is sectioned & the roof chopped & narrowed to give more tumblehome. Because I was over enthusiastic with the cutting, the front wheels didn't fit under the guards anymore so I grafted some 40's fenders on & with a bit more filling & filing it should look OK. Wheels are from $10 toy from the supermarket. I'll do a stake bed on the back with a big keg! Looking at black or metallic green at the moment. Brian