Jump to content
Model Cars Magazine Forum

Nacho Z

Members
  • Posts

    2,916
  • Joined

  • Last visited

Everything posted by Nacho Z

  1. I don't think I can come with something that hasn't already been said about this. Great job!
  2. Love that paint, Jim. Good looking model!
  3. It looks really good Curt. You do such nice work. Another great looking model from your workbench!
  4. I'll continue on with the drivetrain. A little detail painting to make it look more interesting.
  5. Beautiful!!! Very, very clean. Thanks for sharing it Karsten.
  6. Nice Ferrari, Eric!
  7. I'll continue on with the engine. I was going to use the original clear tubing on the engine but it was so stiff and brittle it just kinked at the slightest bend. That is why I had to go to the aftermarket and by MFH tubing.
  8. Nacho Z

    PT Ute

    I like it Danno! I think it is a cool look. Like Tulio said, I think you improved it .
  9. Thanks Ian! See my post above this one. When I started this kit there was really nothing out there, just some generic pieces. Tamiya re-issued this kit a few years back and then the after-market came up with quite a bit of things. Last I looked, most items are listed as "out of stock".
  10. Thanks Henry! The braided line and A/N fittings are all Detail Master items. They are about the only after market items I used on this model. For this 1:12 scale kit I used #3, #4 and #5 sizes. The clear tubing is a mixture of tubing I got from work and a few sizes I got from Model Factory Hiro. I also made some by stretching the ends of pipettes. I will post pictures of this later. As far as a wiring diagram, I only had pictures from a couple of books. As I understand it, the Ford Cosworth DFV is essentially the same in a number of F1 cars. If you can find any pictures of the DFV from that era, it should be a good baseline to get you started.
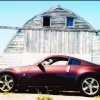
  11. She looks good in black!
  12. The radiators and pipes have been installed. The beginning of the engine. No detail painting has taken place yet. I put a 1:43 F1 car for size comparison. Again, I did not want to go out and buy a lot of after market parts. I cleaned up the kit parts and added some paint.
  13. Niiiiicccceeeee
  14. This is not my genre of autos but I know a great model when I see one. Just had to compliment nice work. She looks great Marty!
  15. Wow Jake! Very, very nice. Great job on the paint and decals.
  16. Jake, I'm a big fan of all race cars and really enjoy seeing them here. F1 cars are not the most popular subject on the board. Nice to see yours. Looks great! Thanks for sharing.
  17. Here are a few photos of the front end of the car. Brake system and fire extinguisher. I also replaced the kit springs with ones I made. I also made new pipes that run from the side radiators. The kit parts had huge "steps" in them were the two mold halves did not line up.
  18. A very nice looking model James. Great work for your first model, (or any model ).
  19. Thank you Thomas! Up next is part of the fuel system. At the time I did this, it was the most detailed work I had ever done. Once again, these are scanned printed pictures. Some may be a little blurry. You may notice that some of the A/N fittings are missing paint. They have all been touched up since the pics were taken.
  20. Oh my . Very nice indeed.
  21. As with other models I have shared here, this one is actually complete. I have only shared it on one other board and recently on FB. I have a few WIP pictures and thought I would share them here. I will spread the pictures out over a few days or weeks. Please feel free to ask any questions about the kit or what work I may have done to it. All painting was done with rattle cans, no airbrushing. A colleague was a huge Mario Andretti fan and bought this kit back when it was issued. He asked me to build it for him. It started out as an out-of-box build but ended up with a little more detail. I did not want to spend tons of money on after market items and at the time this kit was given to me there really was nothing available, just some generic parts. I had this kit for 10 years, building it as I had time. During this time the kit was reissued and a ton of parts became available. I stuck to my guns and did not purchase all of the goodies available. I also had a problem with reference pictures. Again, when I started this kit there was not much out there. I managed to find one good Japanese book with some good pictures but it was all in Japanese which I can't read. Here is the kit box and the sales receipt. I started with the front rotors. No aftermarket pieces, just detail painting. These pictures are scanned from paper pictures, (remember those?) For the battery cable ends I took solder and flattened it in smooth jaw pliers. I sanded it to shape and drilled a hole for the post. I used wire insulation for the crimp piece. The cable ties are thread that I ran through wax to keep the fuzzies down. The hold down straps are Chart-Pak tape cut to size.
  22. So many cool details! One could look at this many times and see something new each time. Very, very, very nice.
  23. WOW!! You're going to have to put a paper towel underneath that thing to catch that wet paint!
  24. Nacho Z

    59 BUICK

    The first two words that came to mind: Sweet and clean. That is one sweet build and it is oh, so clean!
  25. Just to touch on one point having to do with charities. My wife and I agreed that if we ever won a gazillion dollars on the lottery, (which we don't even play), and knowing we could never possibly spend it all, we would never give it to the big name charities but rather we would help out many small, grass roots types of charities. I won't get started on how wasteful some, (maybe not all), of the big name charities are. There would be some sort of vetting process. Even a humble charity can go cockeyed when given a lot of money.
×
×
  • Create New...