gotnitro?
-
Posts
4,498 -
Joined
-
Last visited
Content Type
Profiles
Forums
Events
Gallery
Everything posted by gotnitro?
-
 Good to hear Ben !
 -
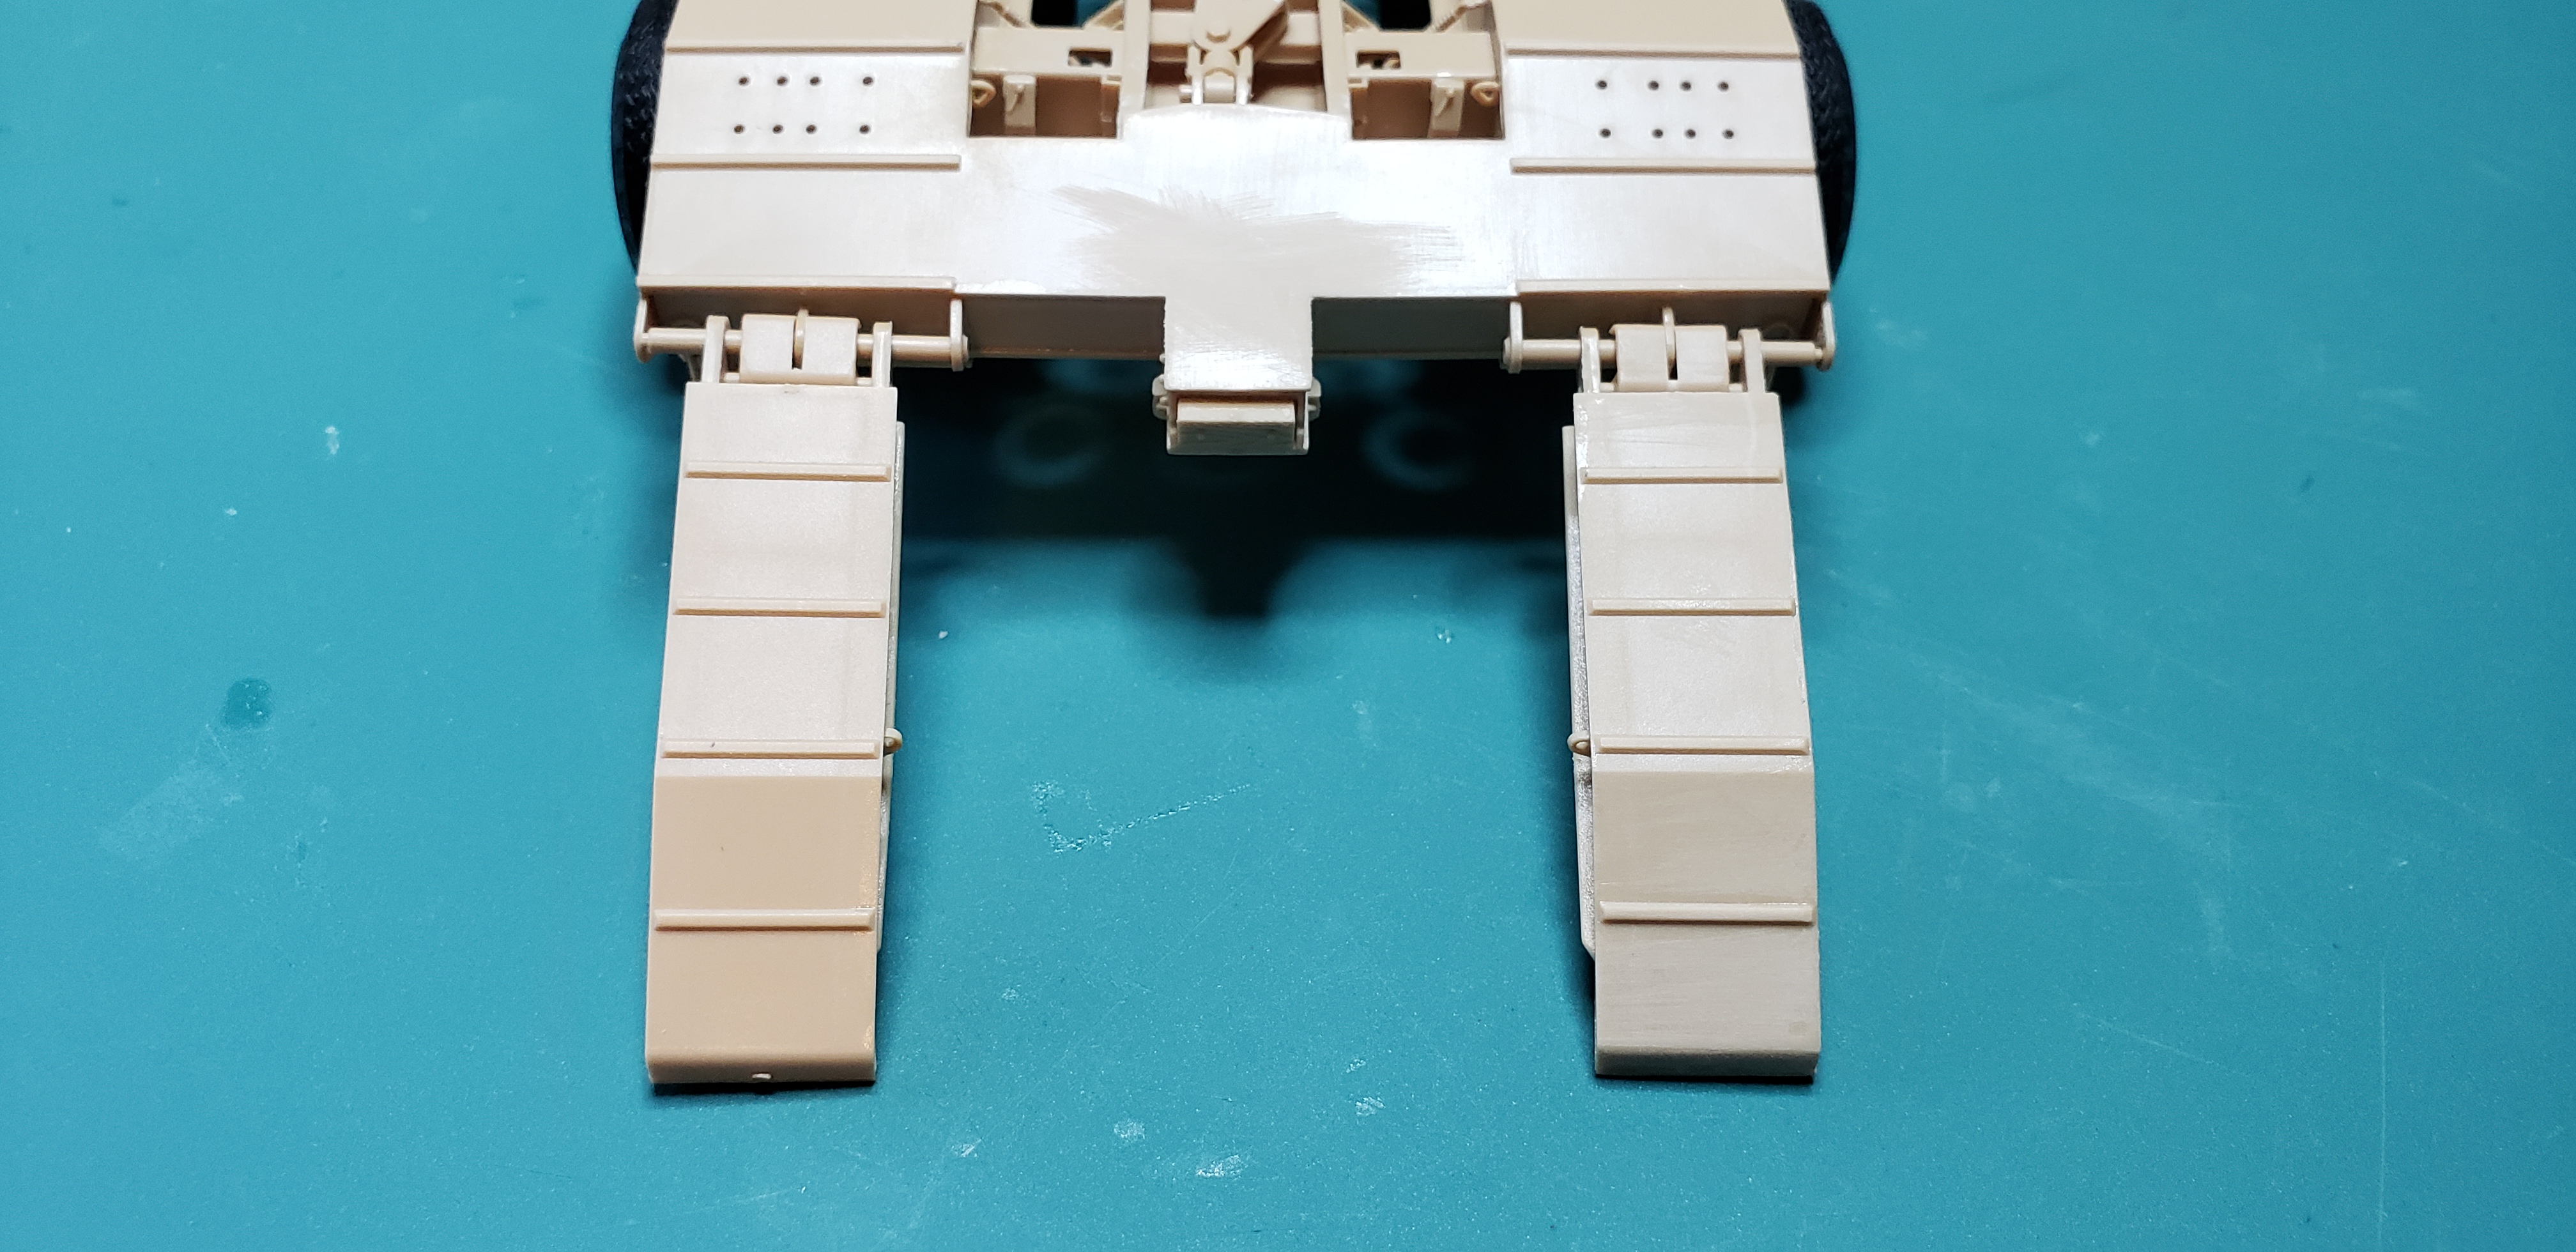
Thanks Joe ! The issue I'm mainly having is the tires actually look over inflated rim doesn't have enough lip to hold them..but I'll try your trick
-
Ignore those last 3 pics...I cant remove them from post dunno why
-
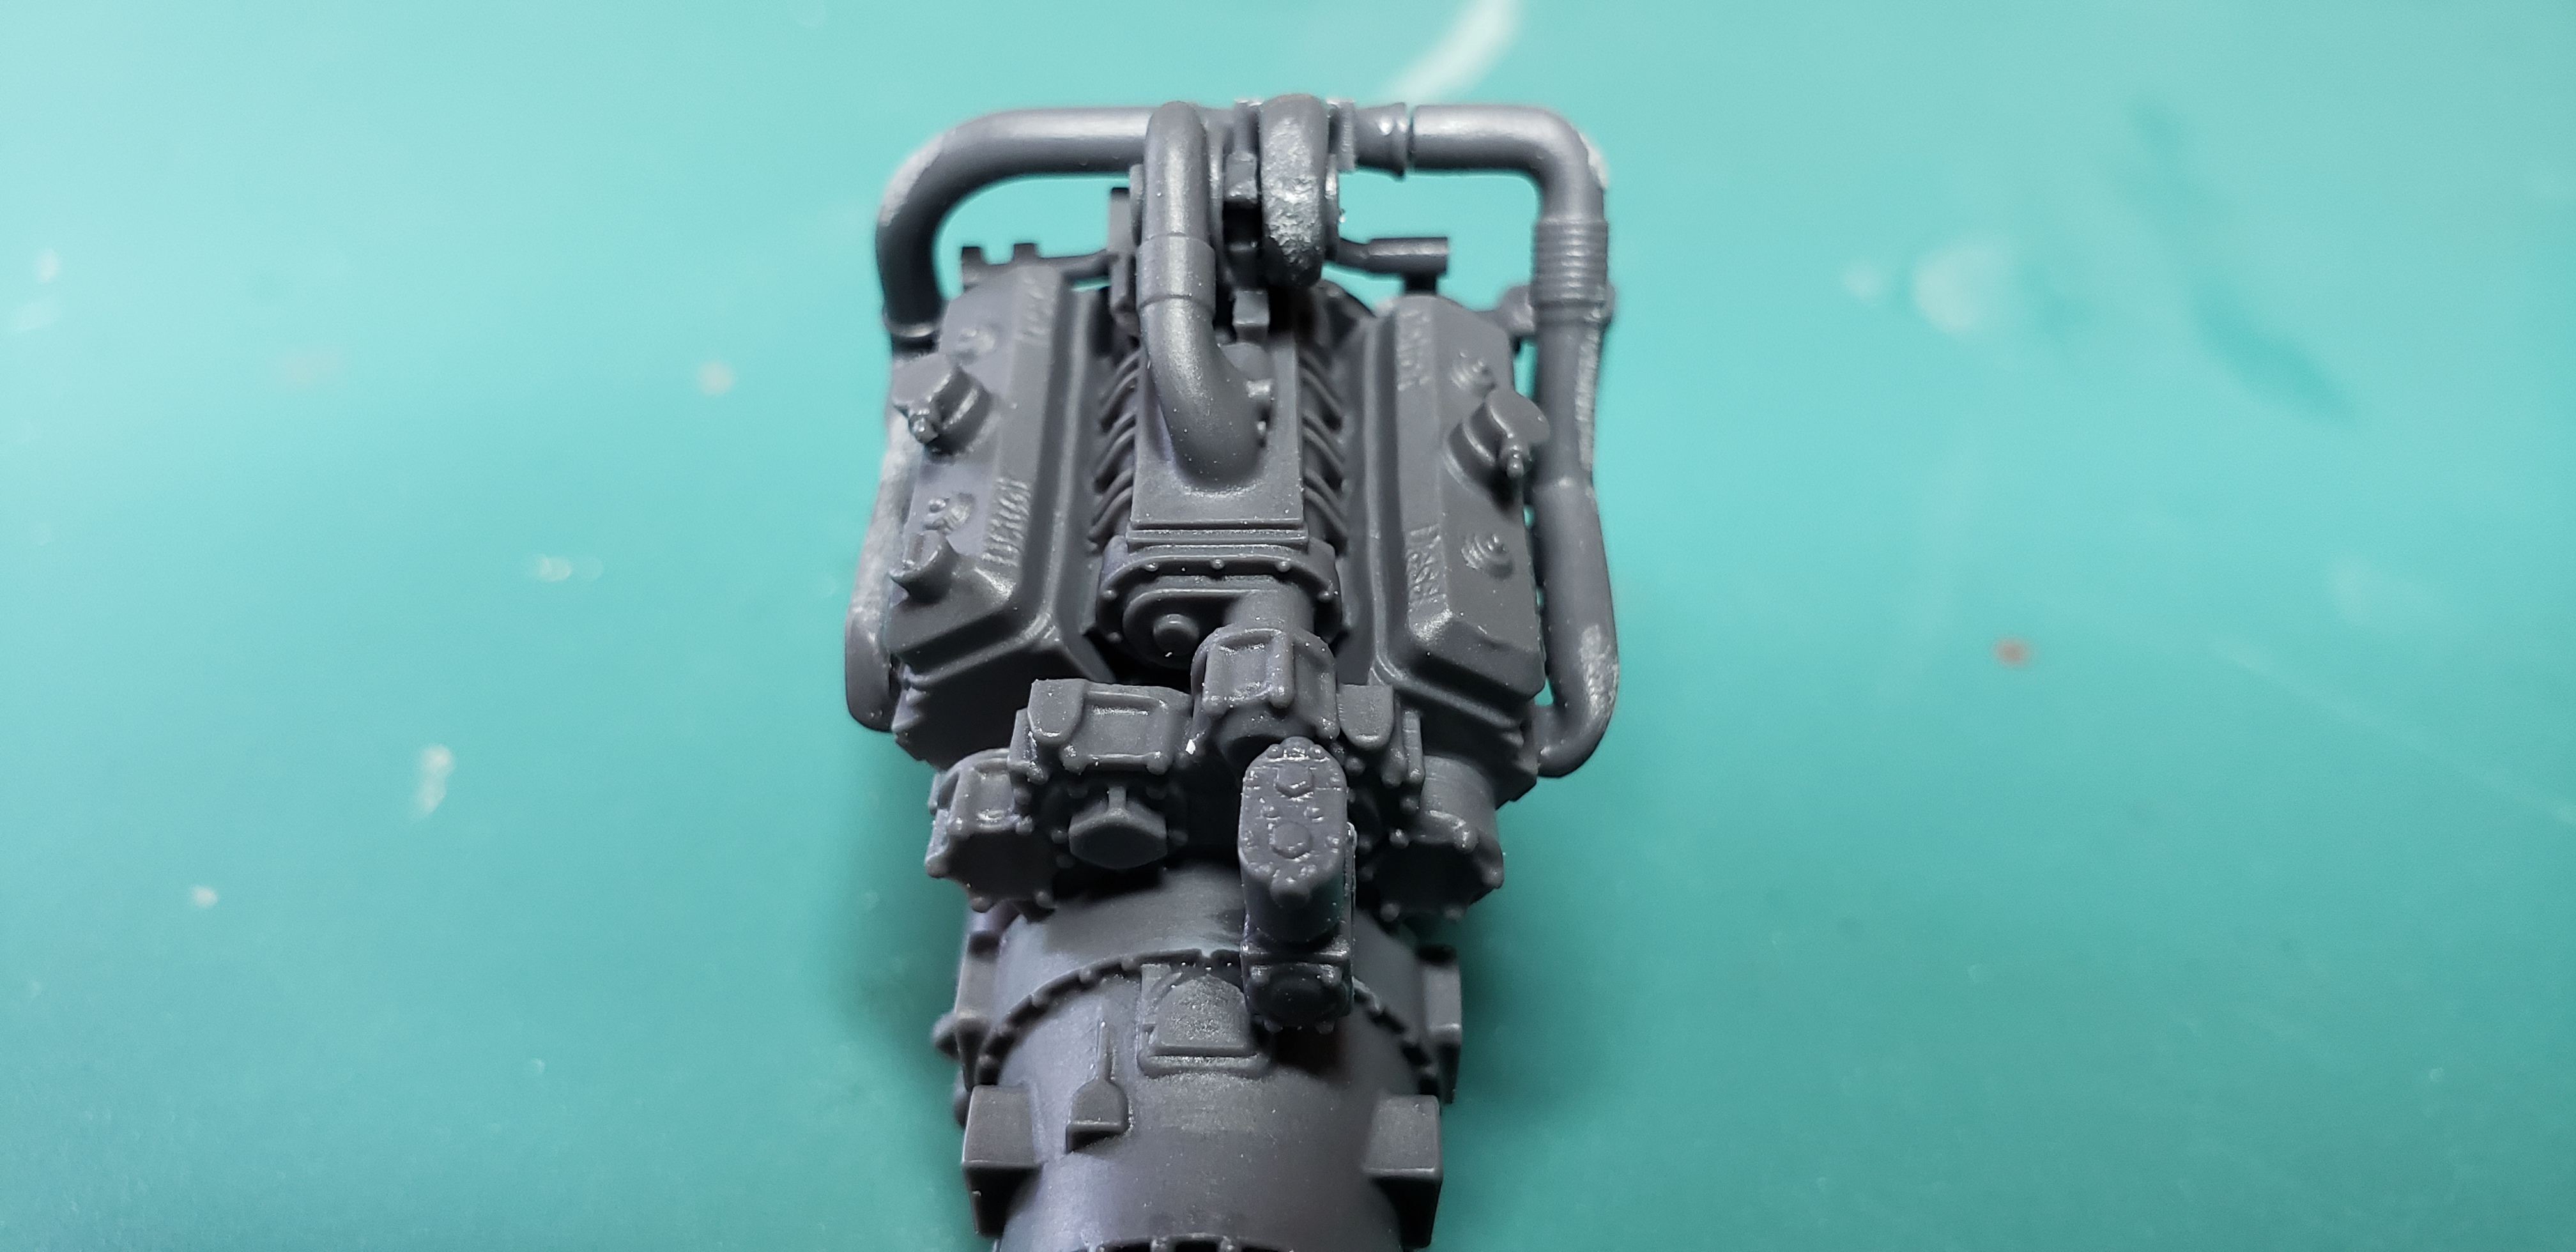
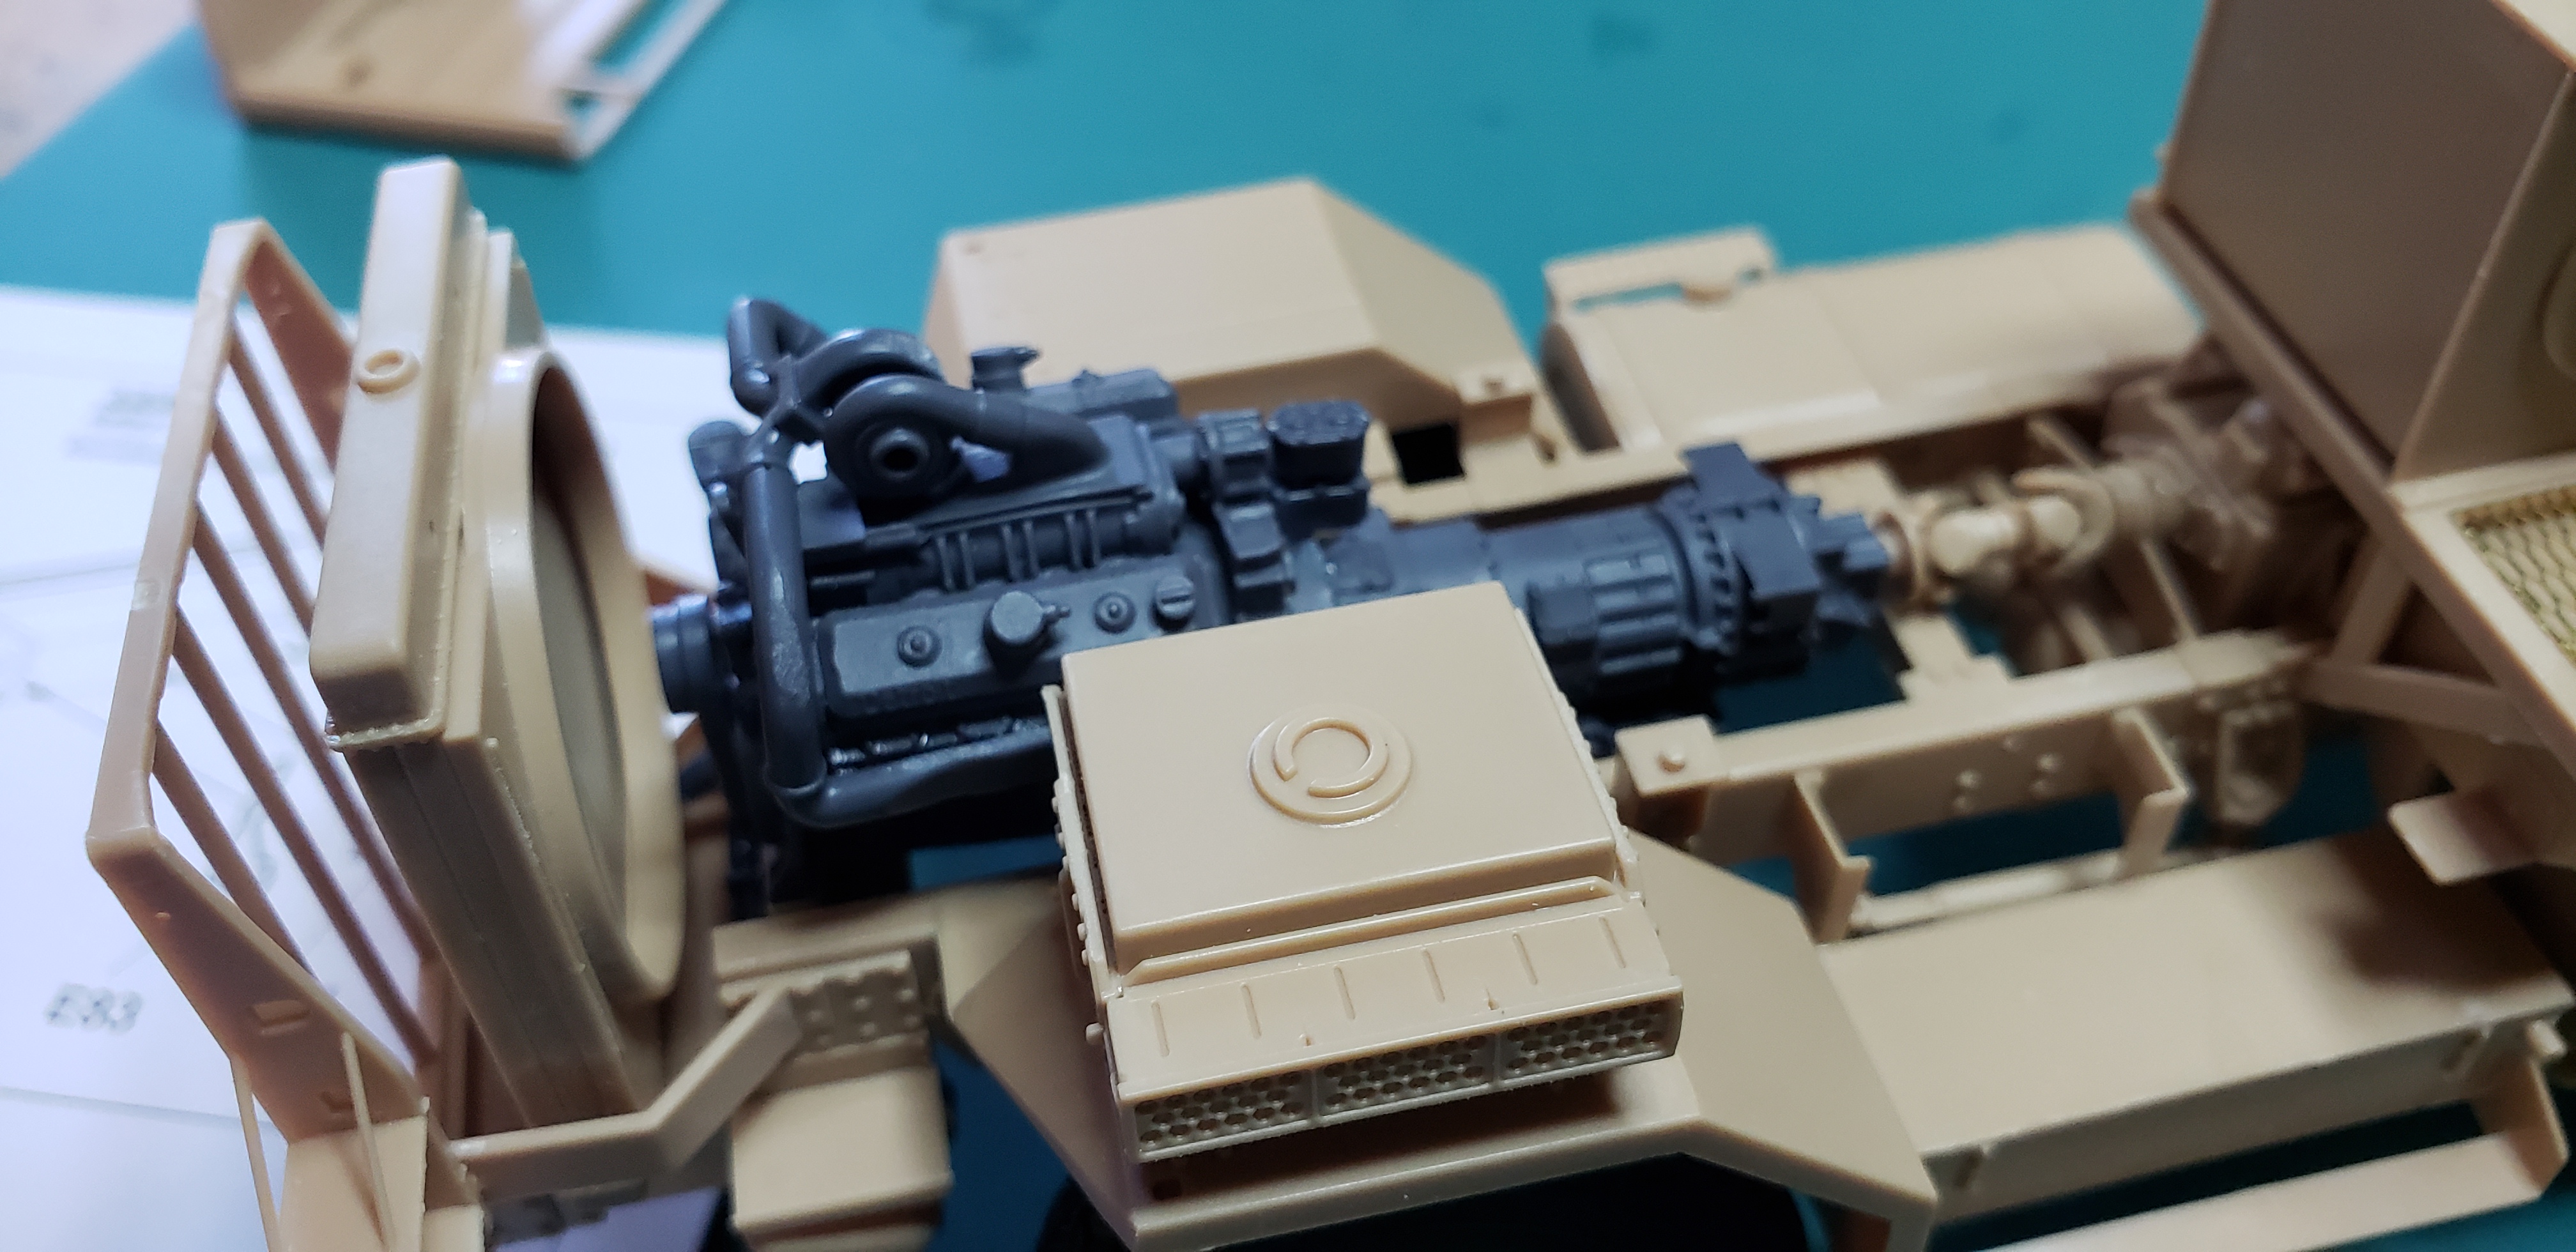
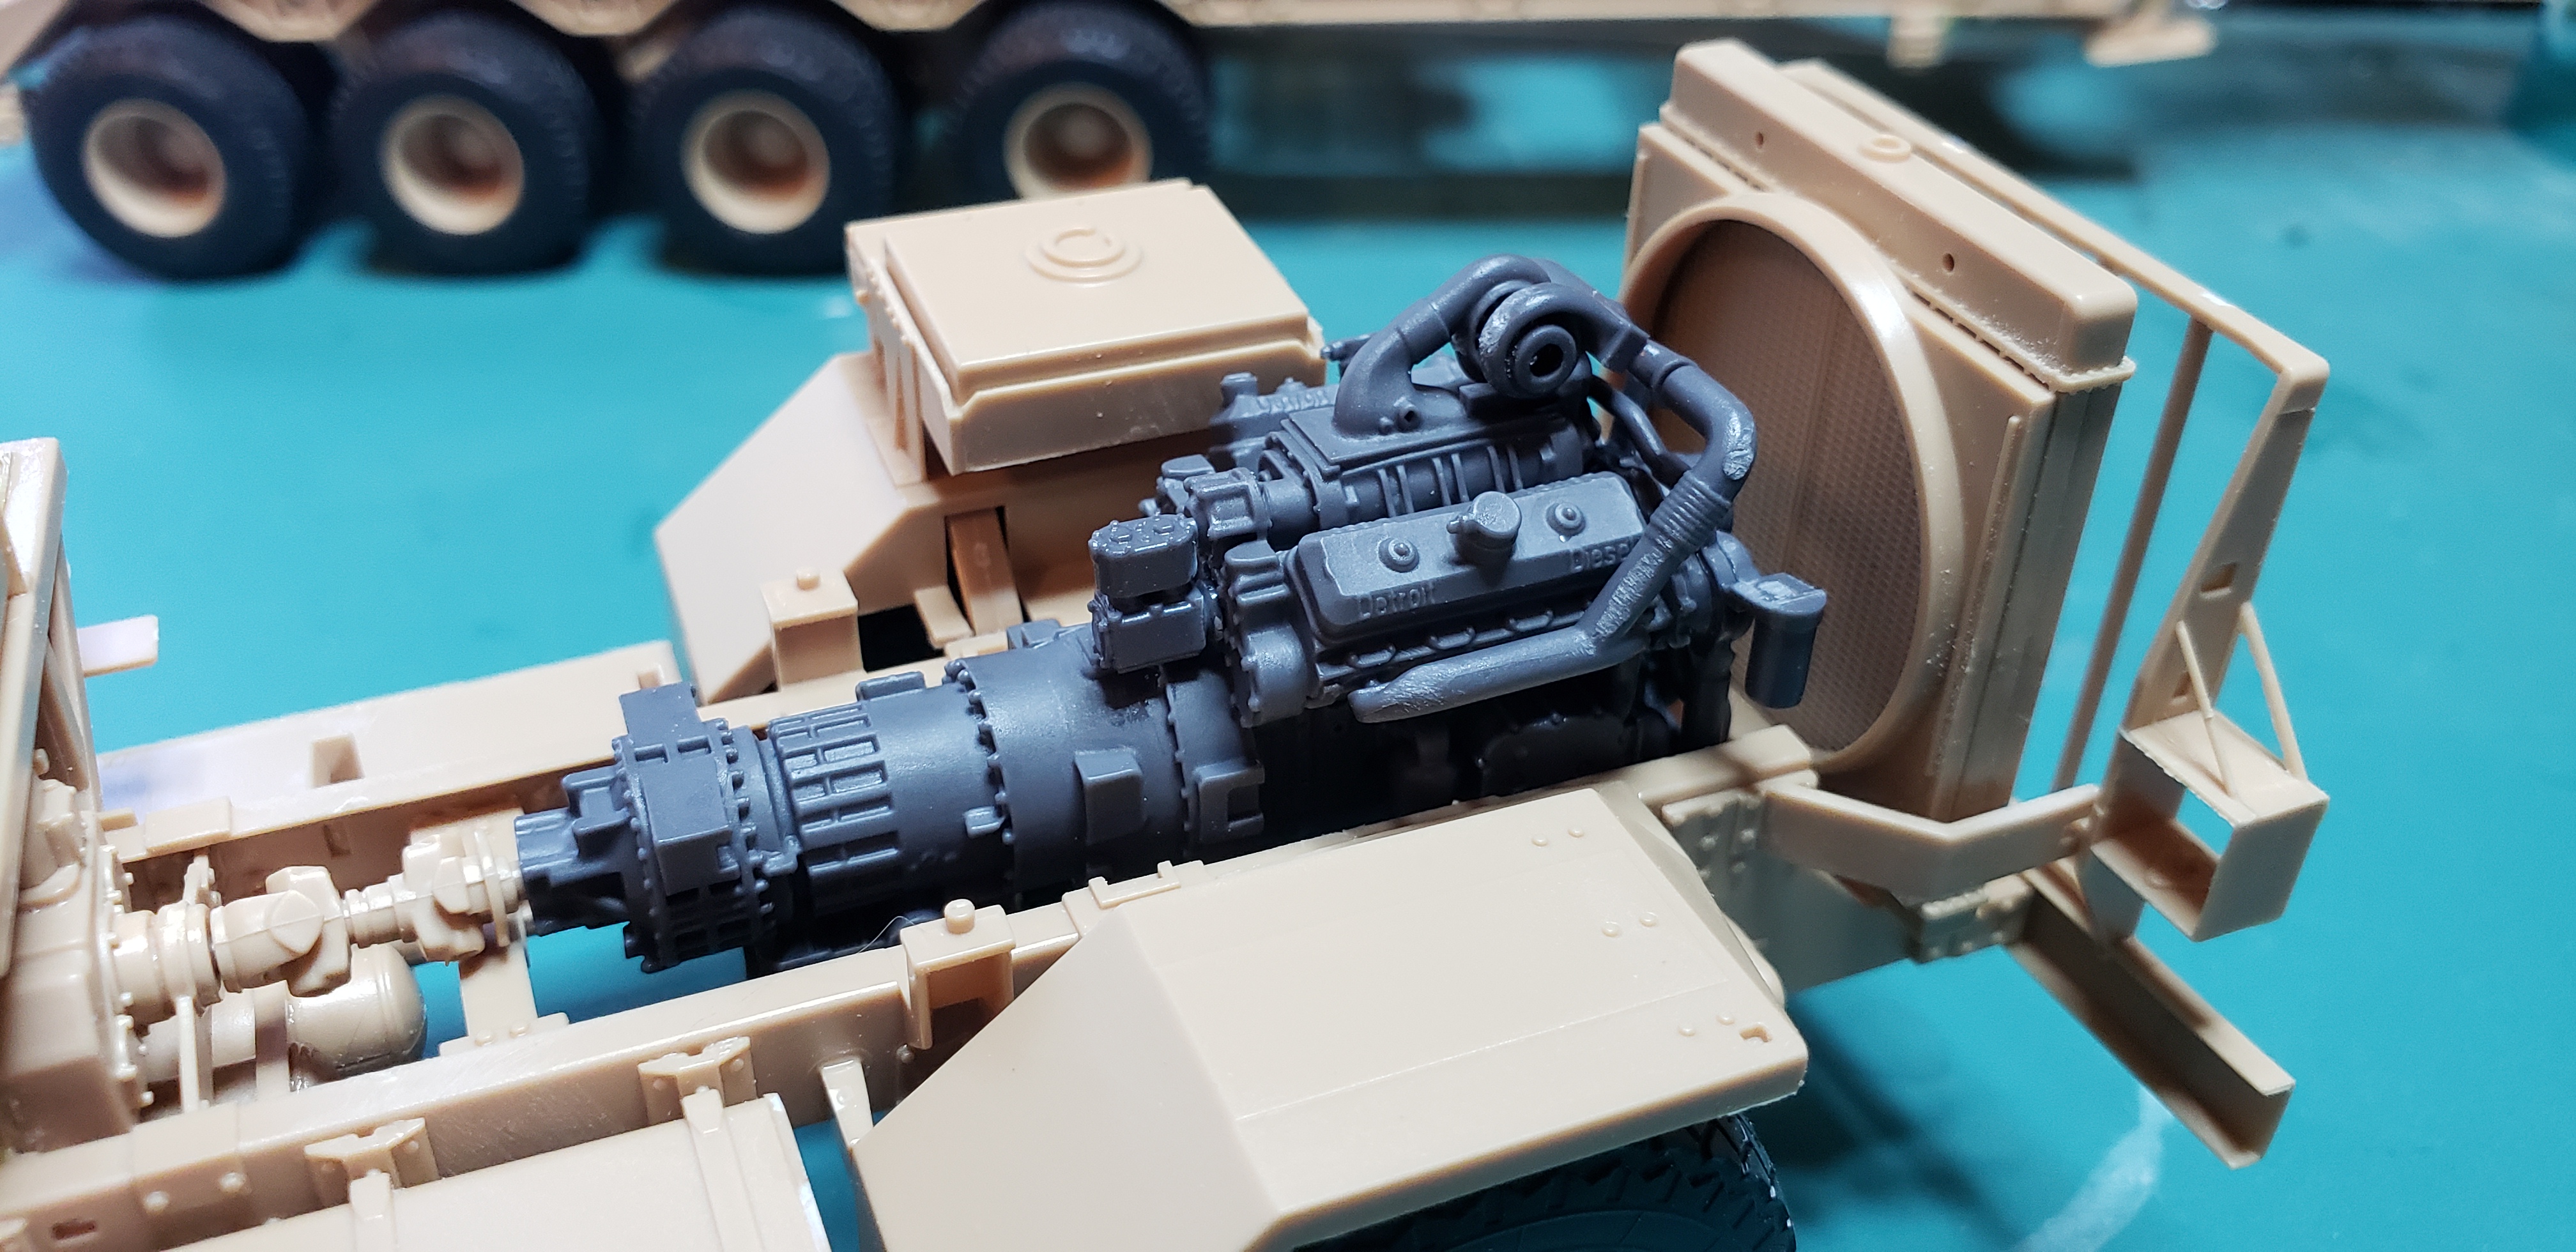
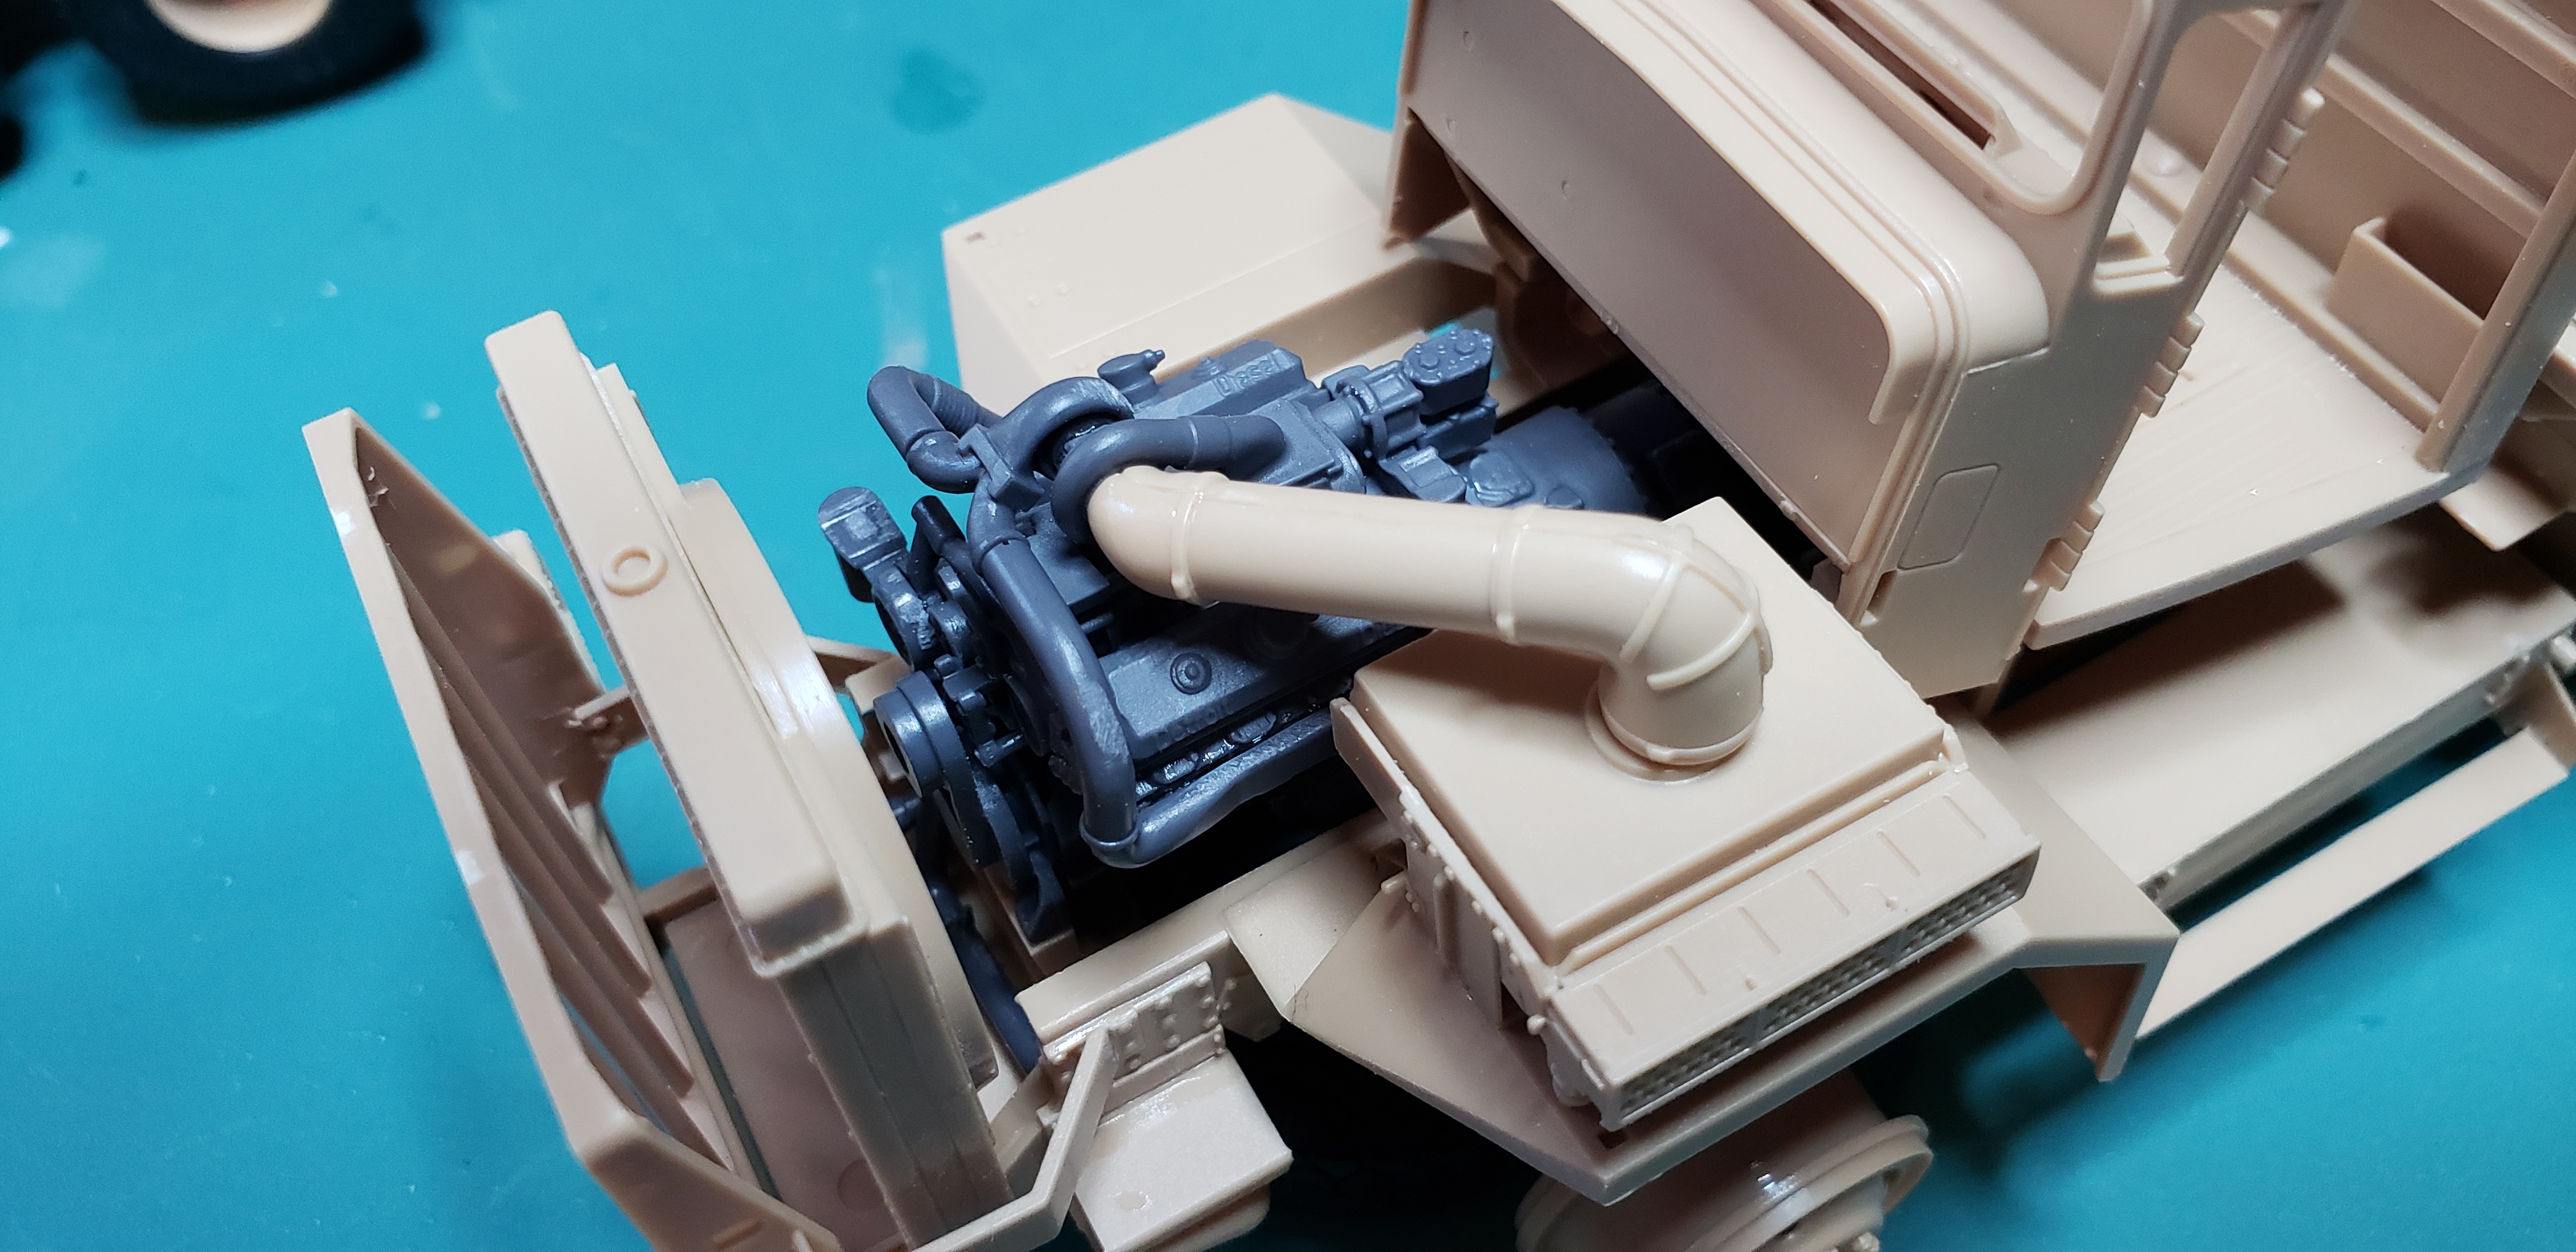
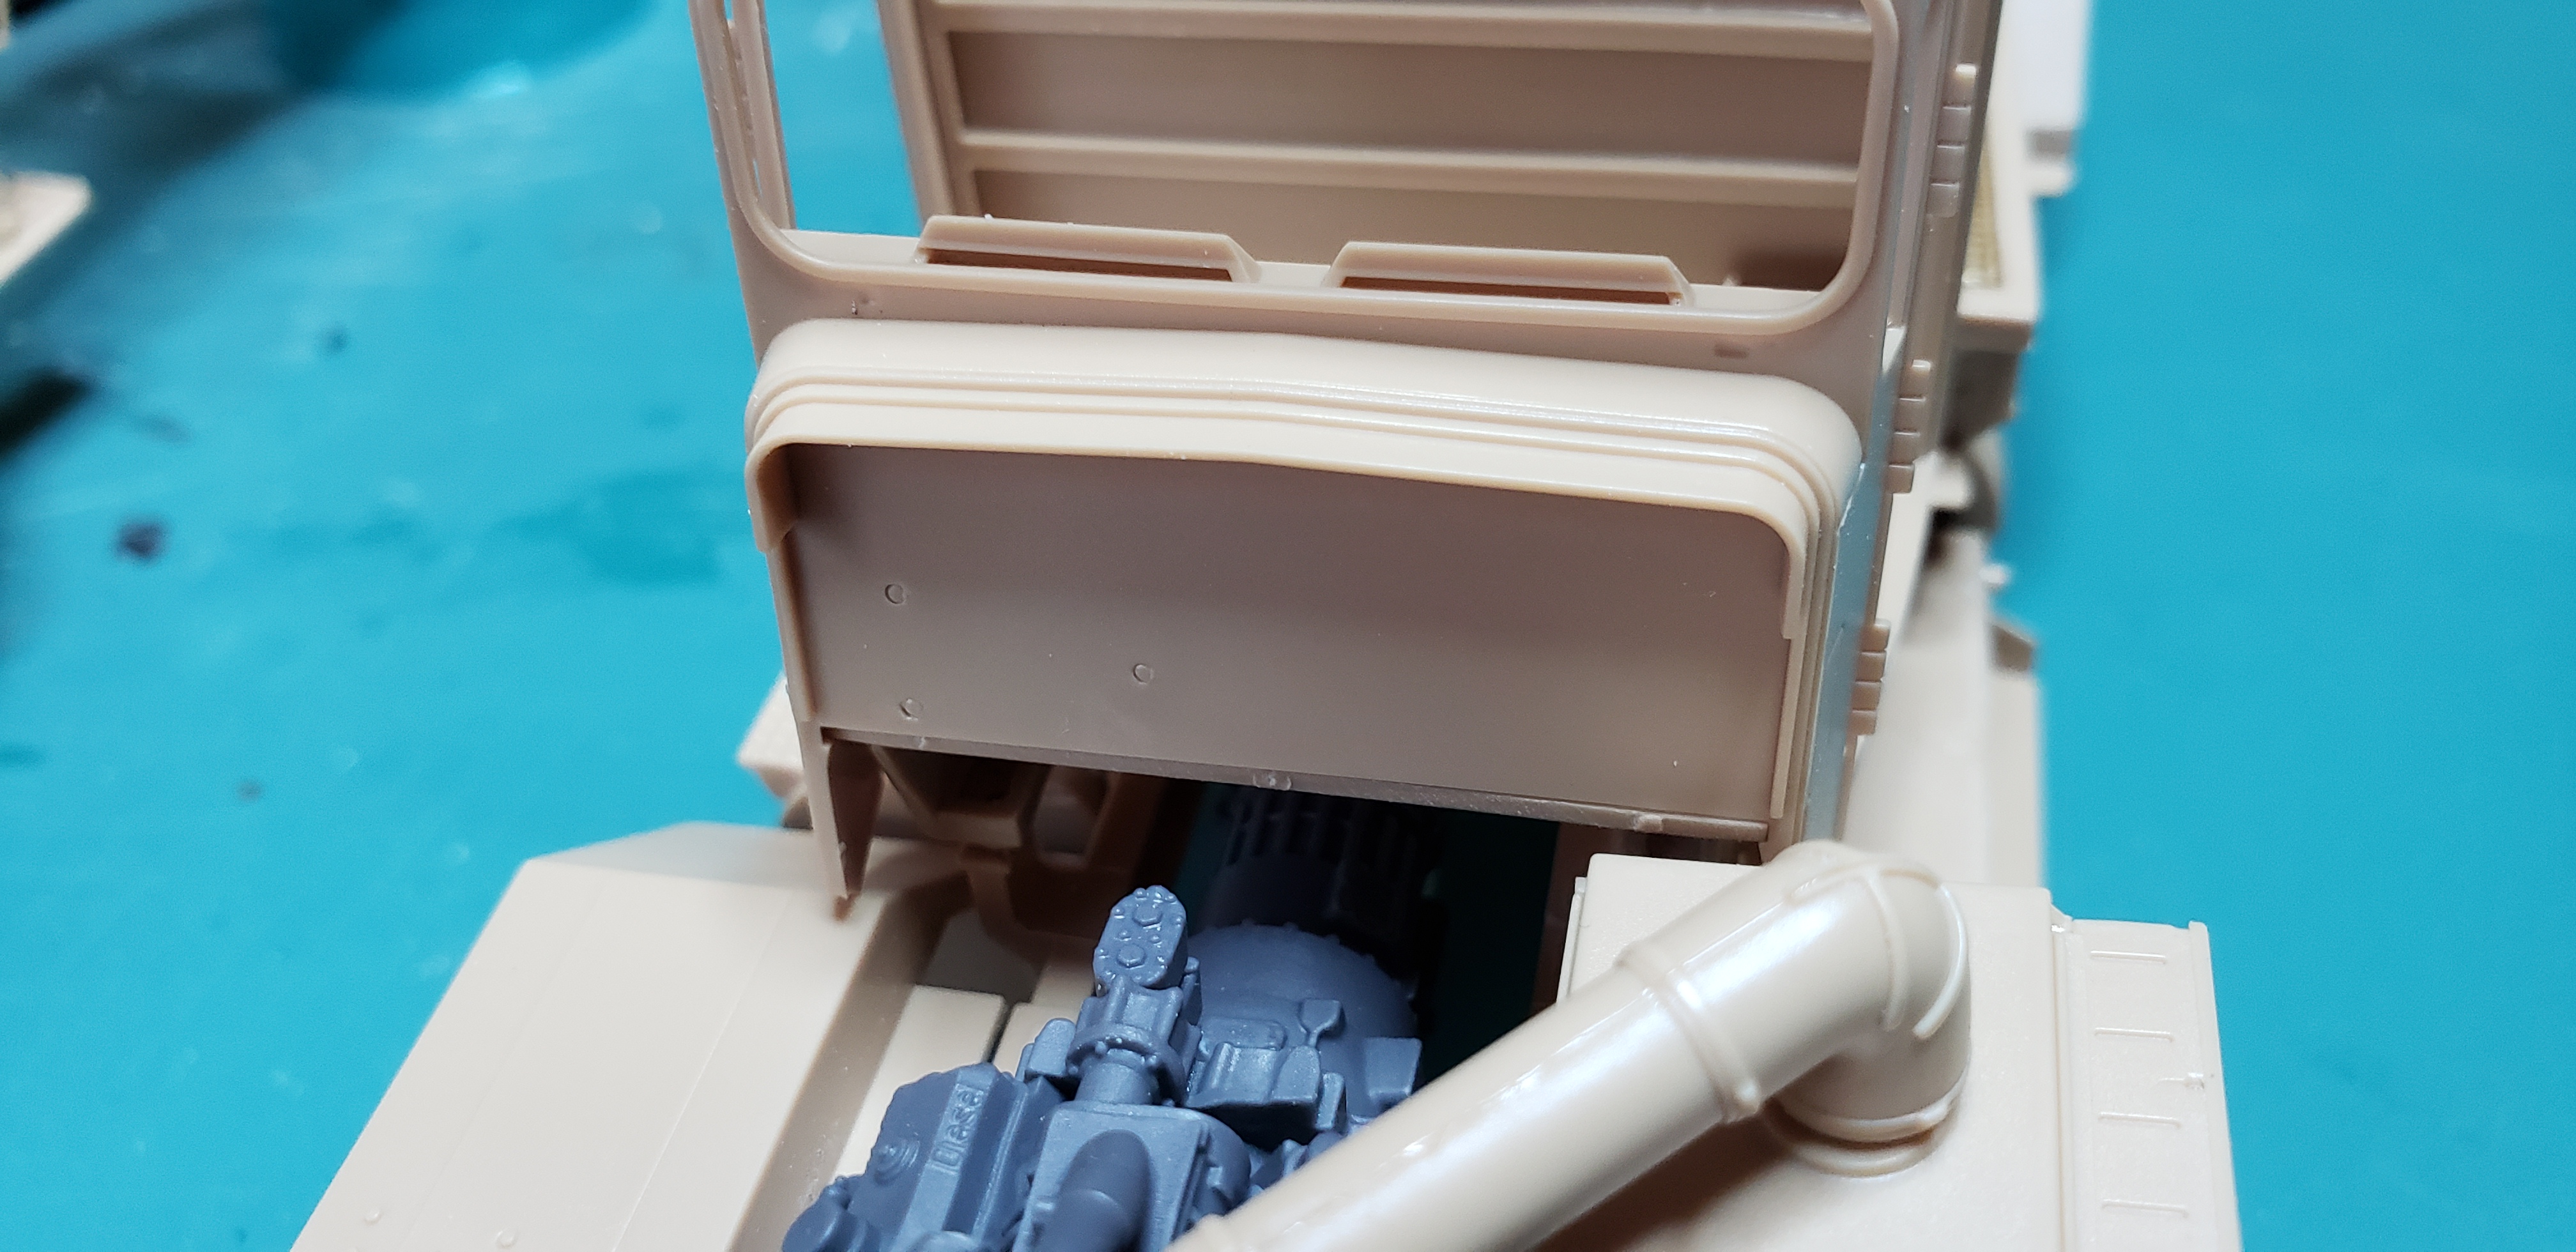
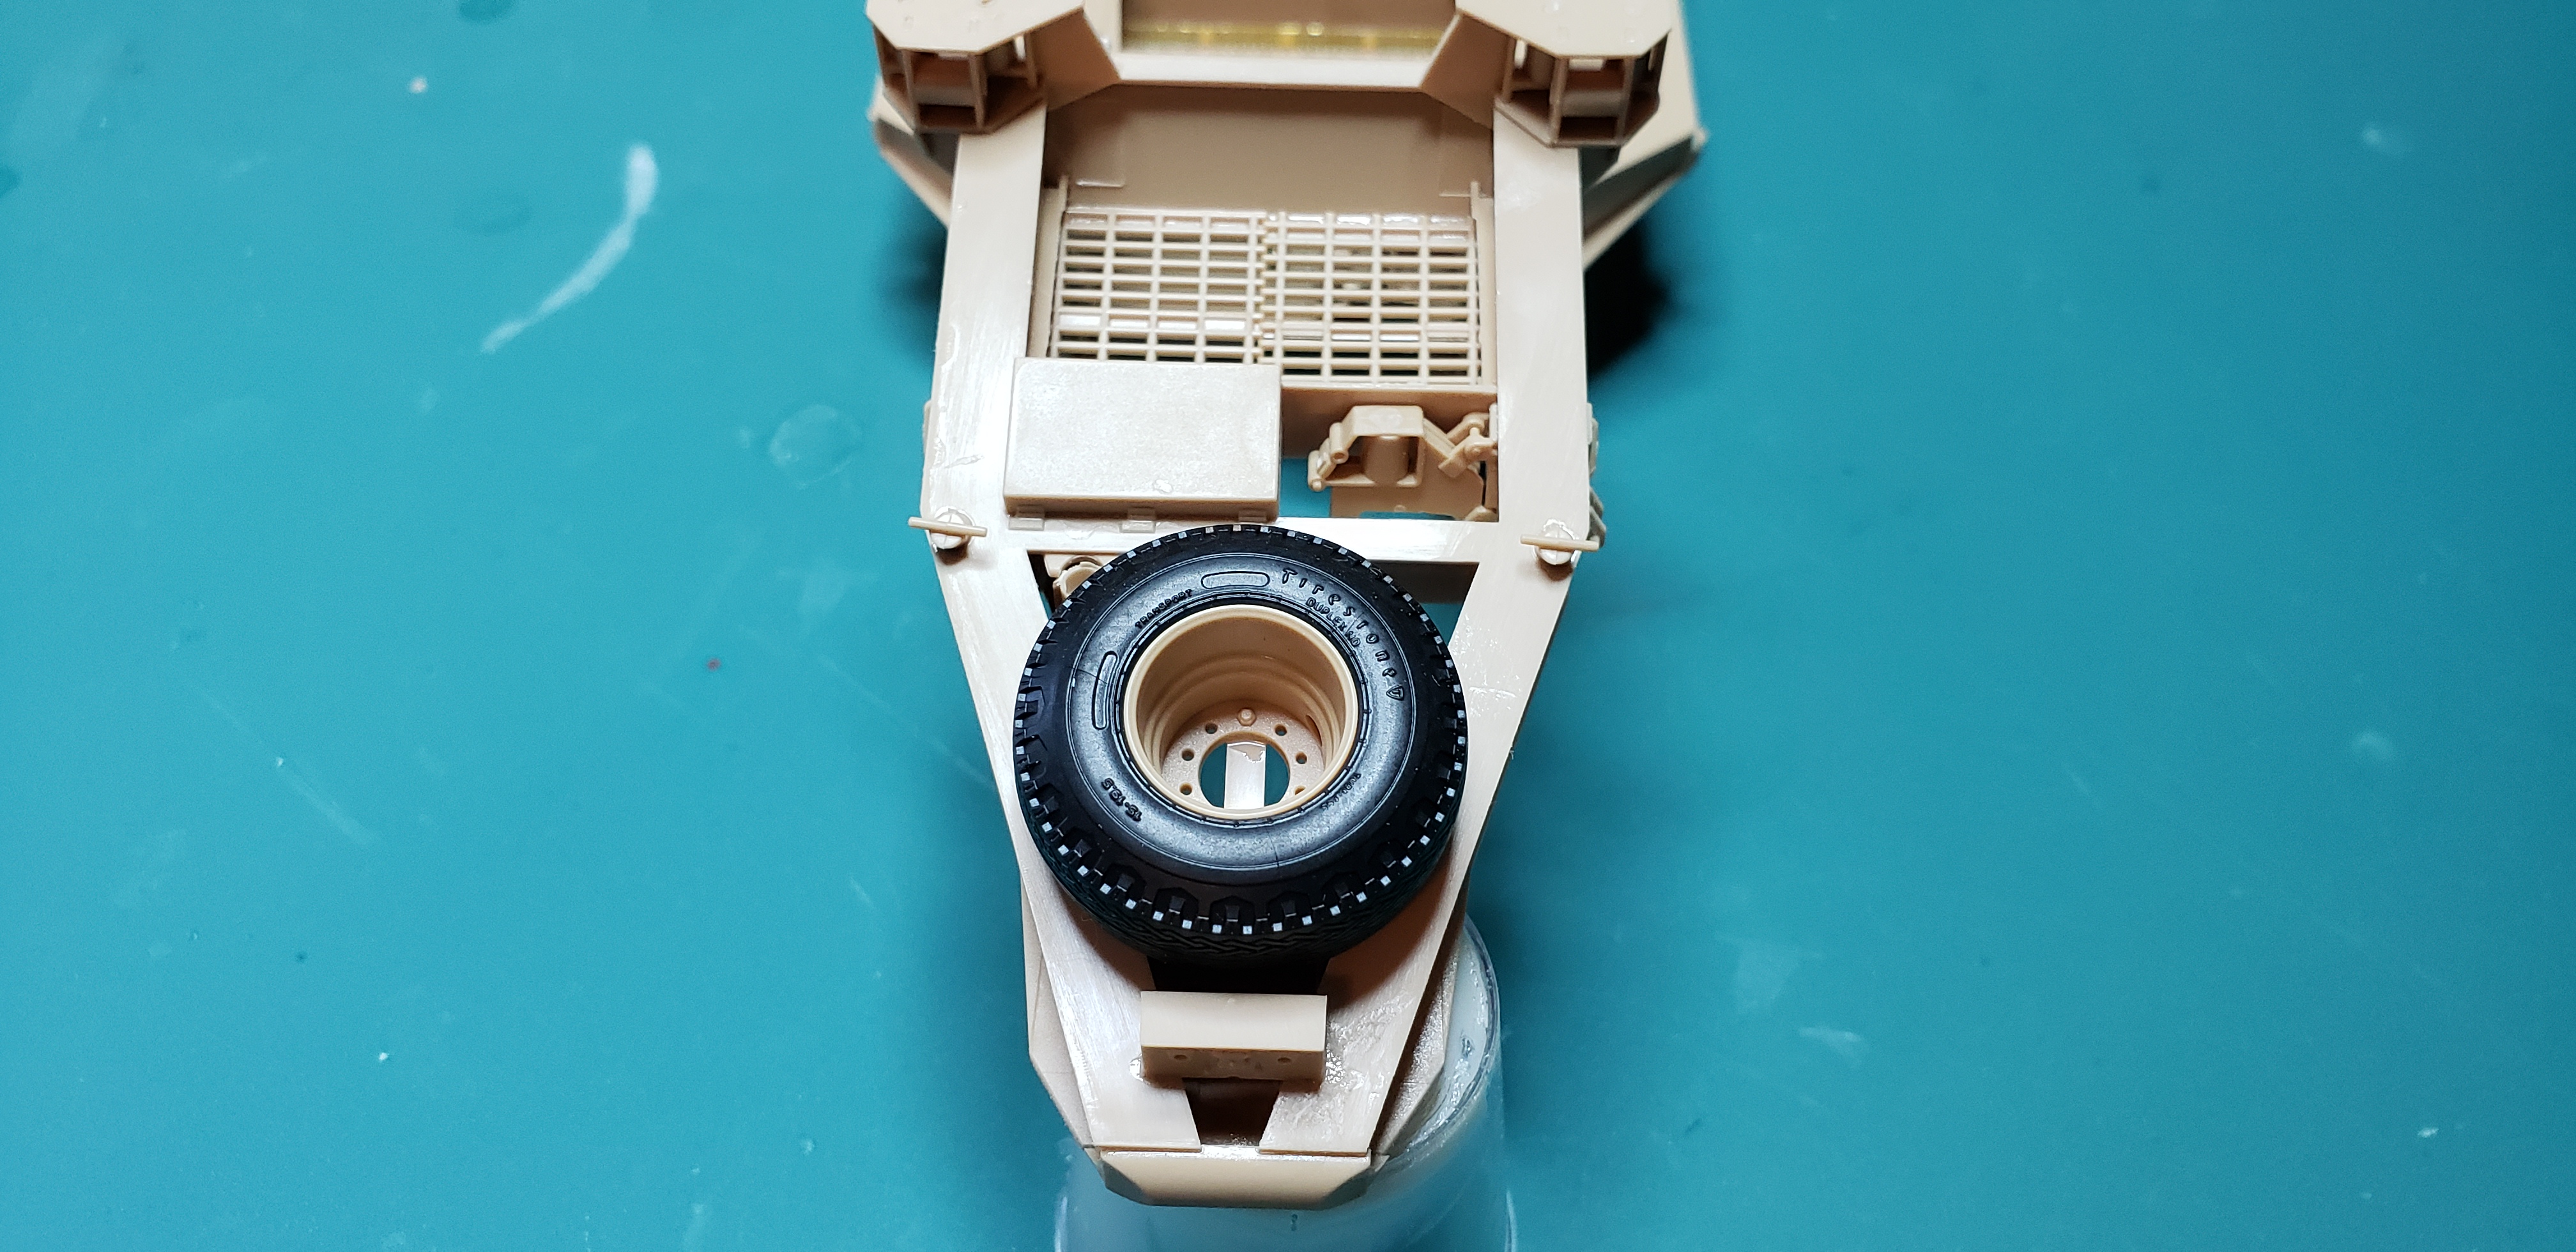
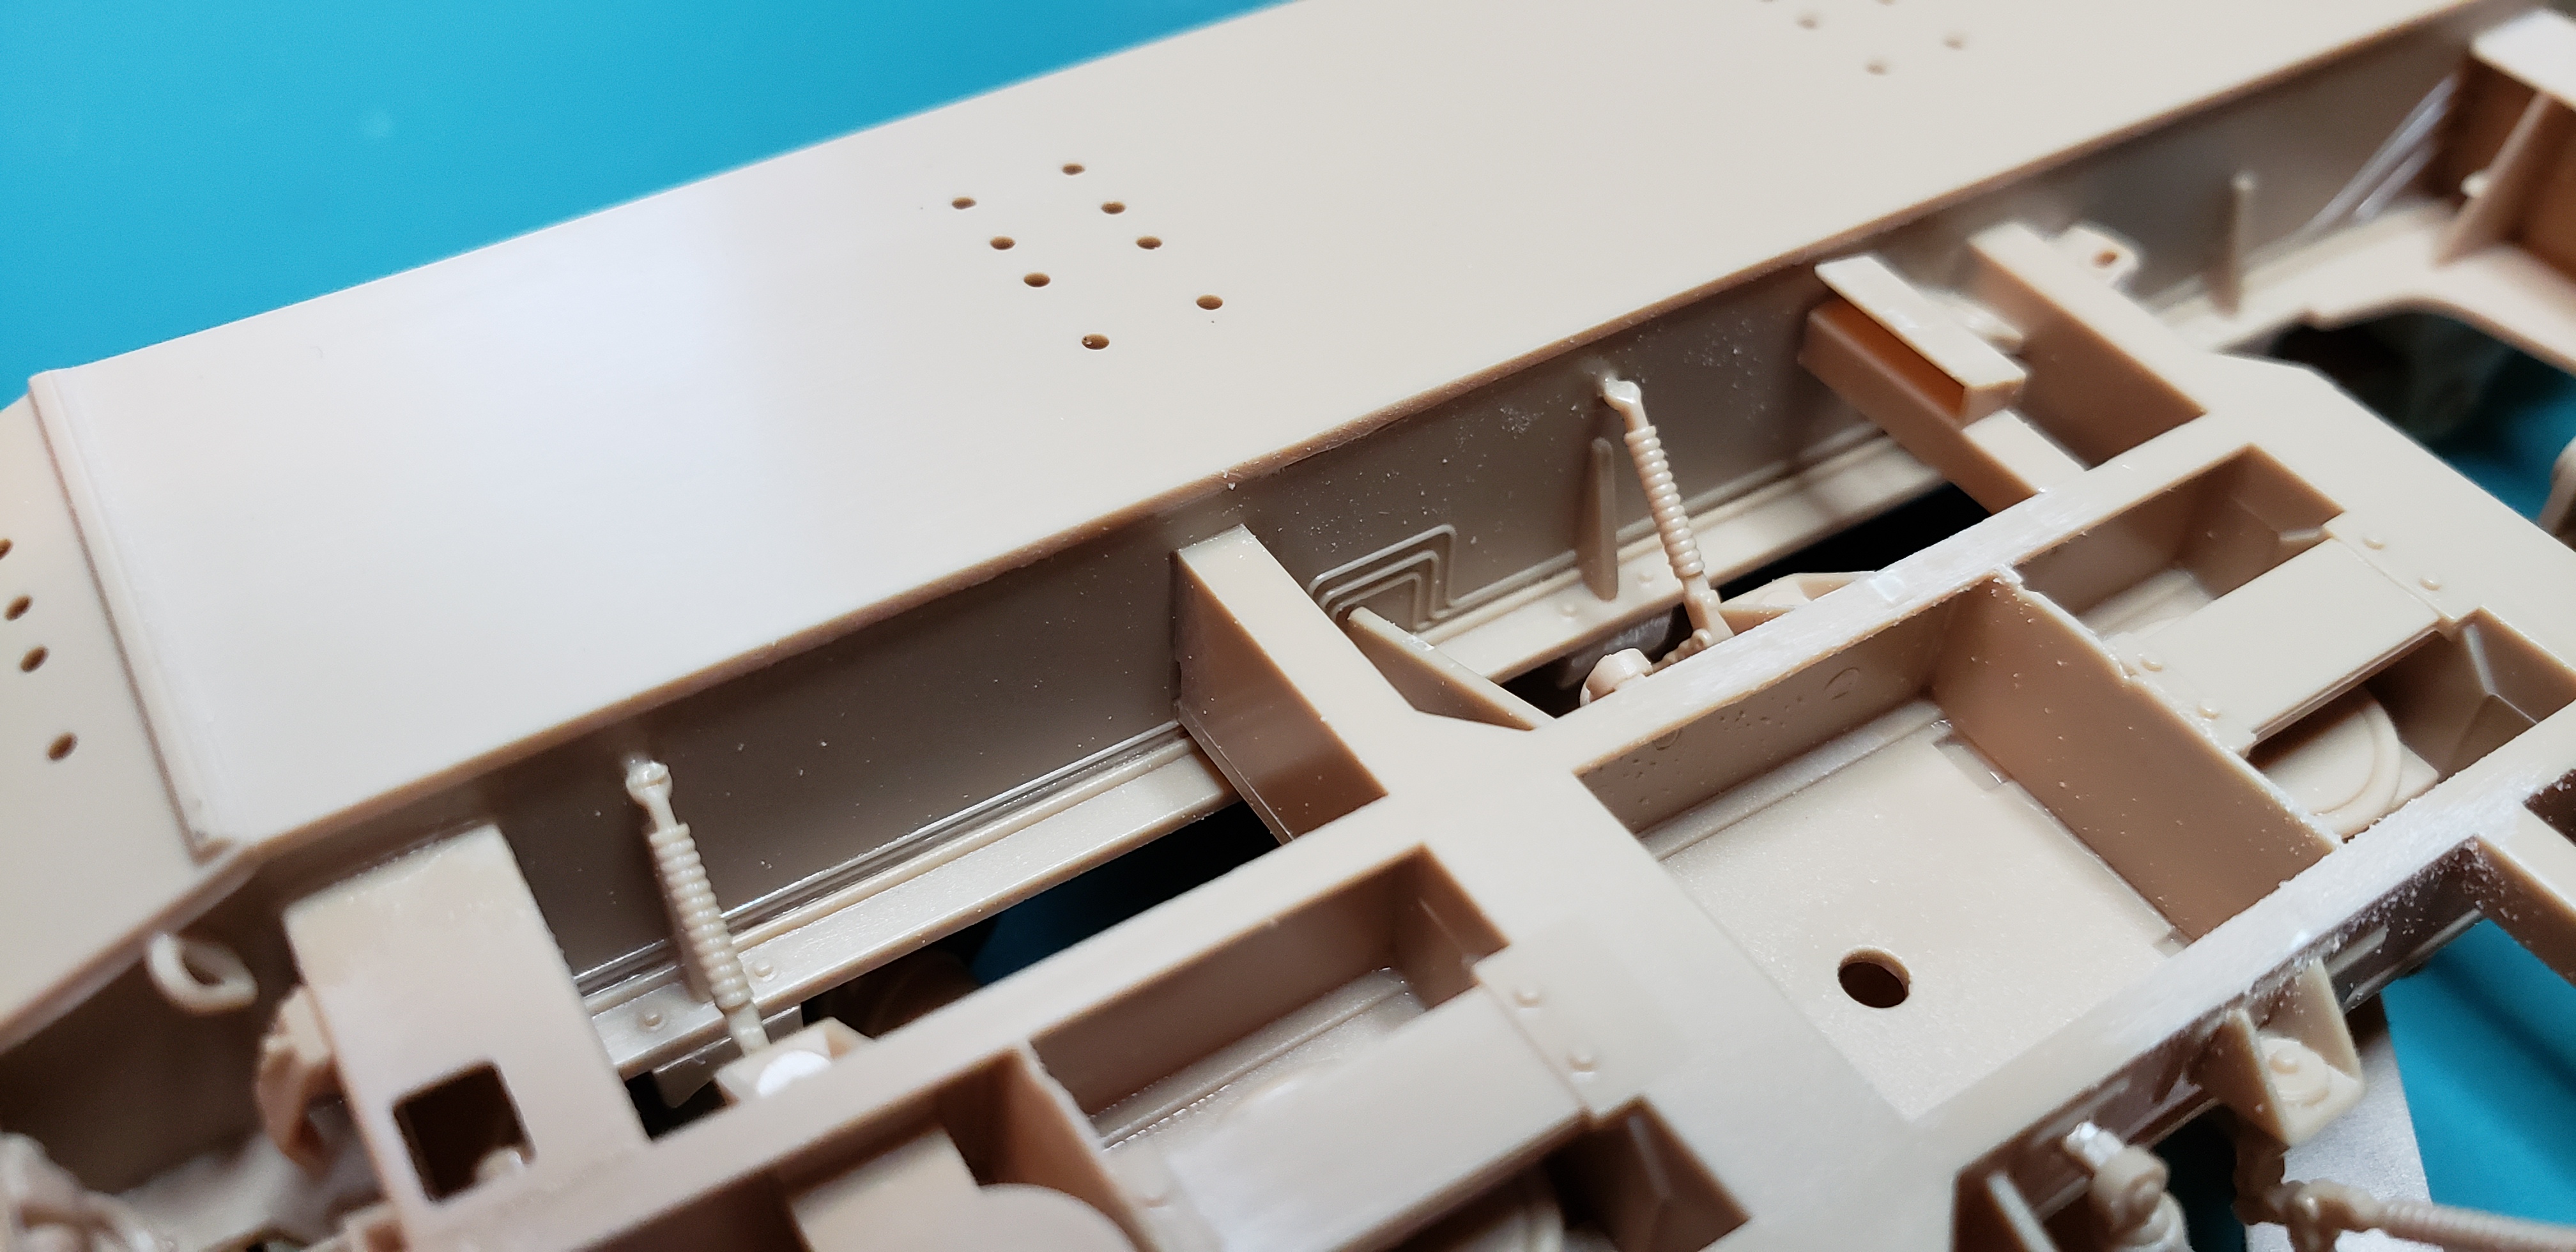
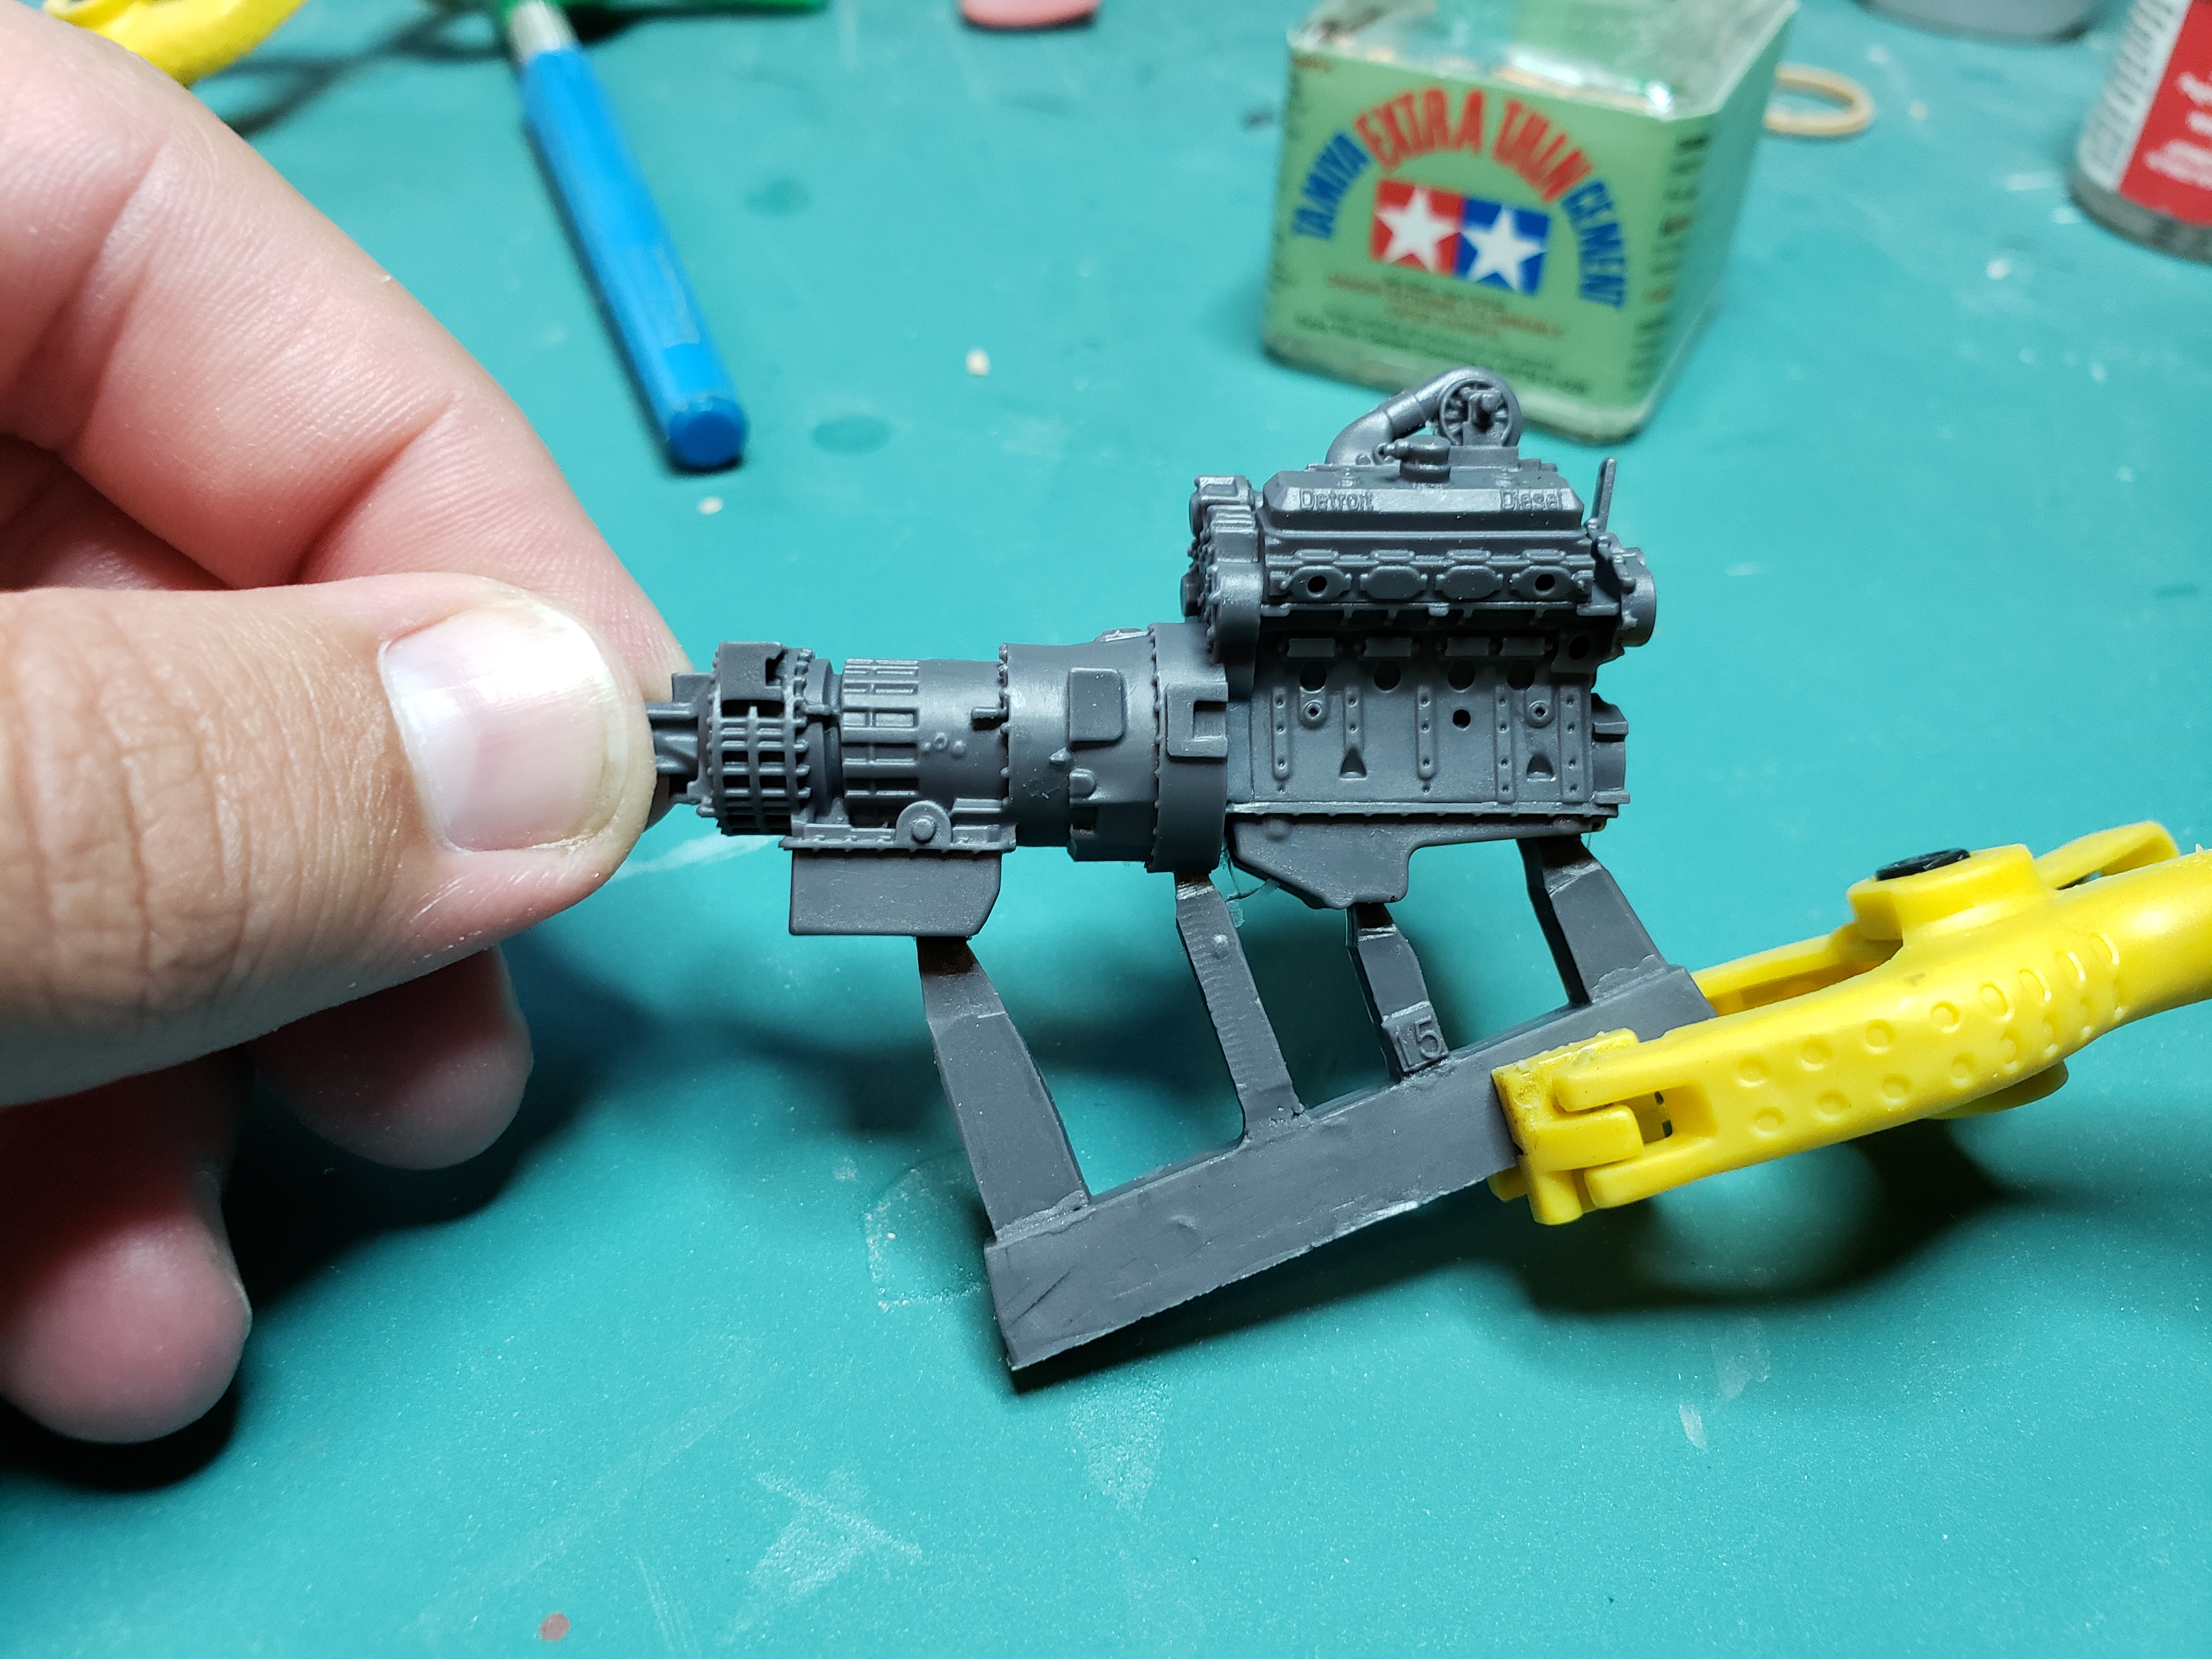
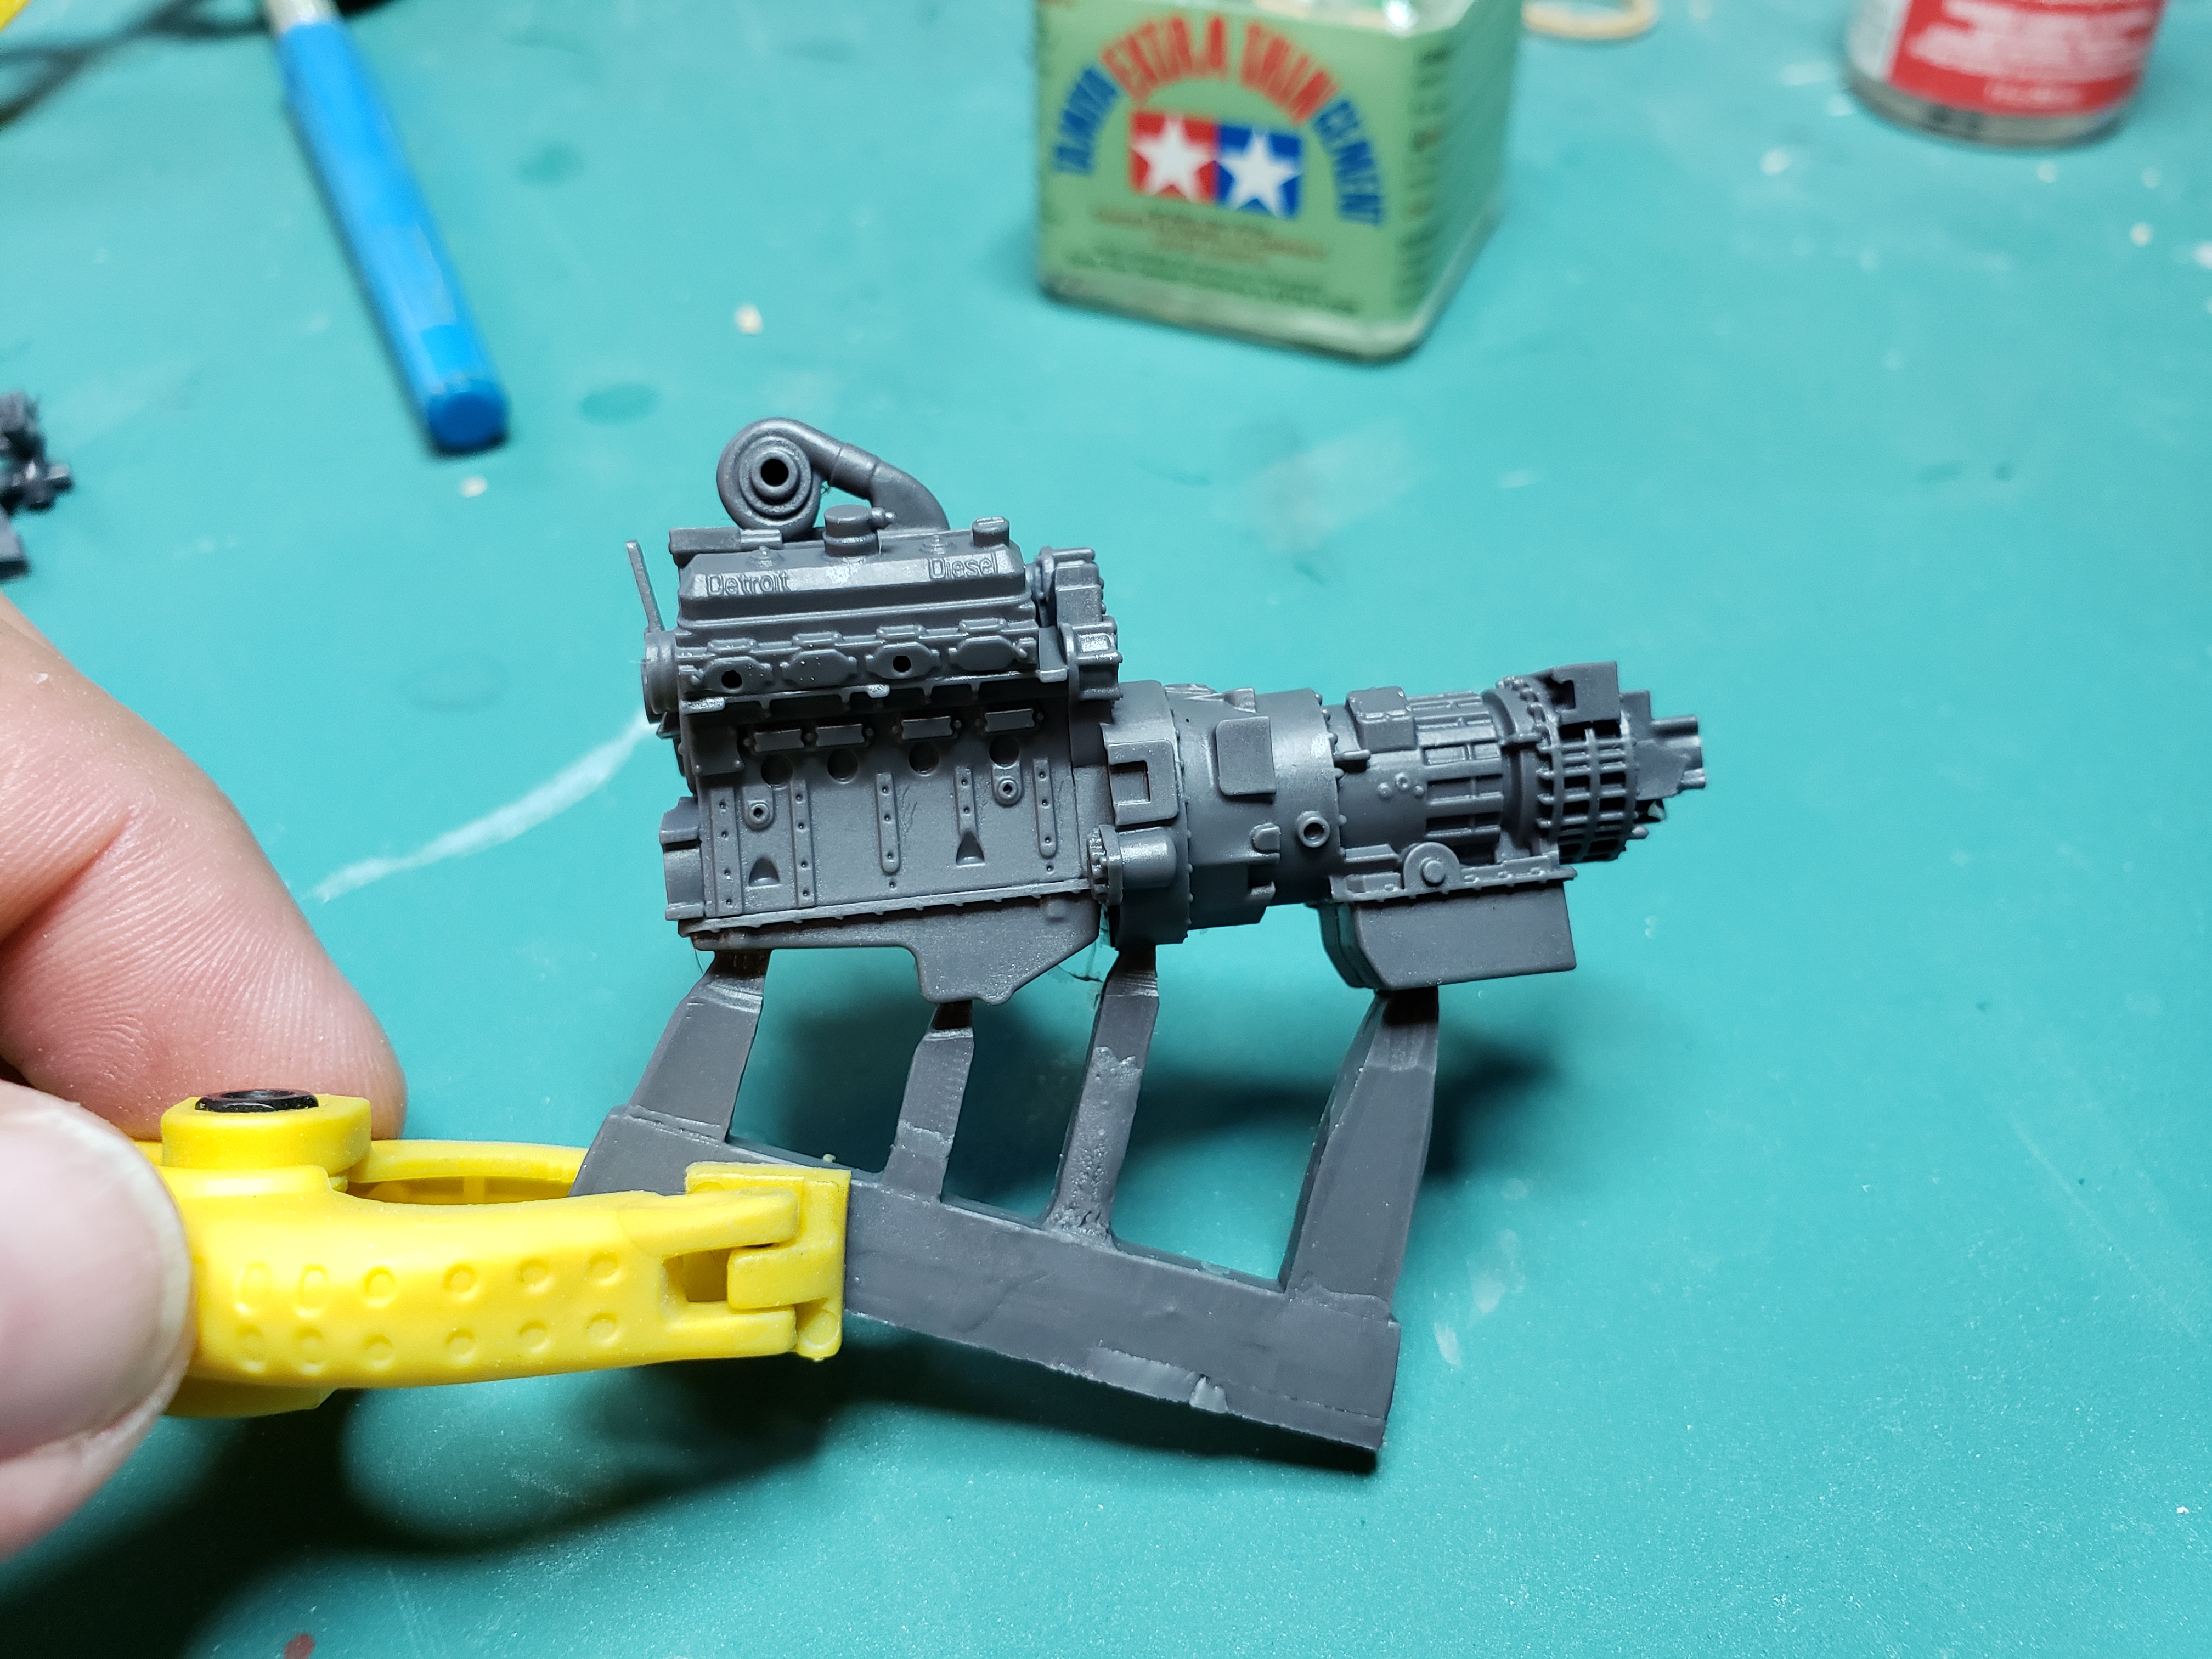
Another view Now it's time for the 8v92 TA build.. I did remove the lower side panels from hood to show this off as you can see they engineered the kit parts to fit directly onto the resin engine. Even the radiator holes line up with the hoses...but...what's up with that bare firewall...I'll deal w that next . Only problem I've dealt with so far is the tires..terrible fit and keep popping off which I'll replace w resin replacements once available. Vinyl is okay for house siding..lol Any questions or feedback welcome!!

-
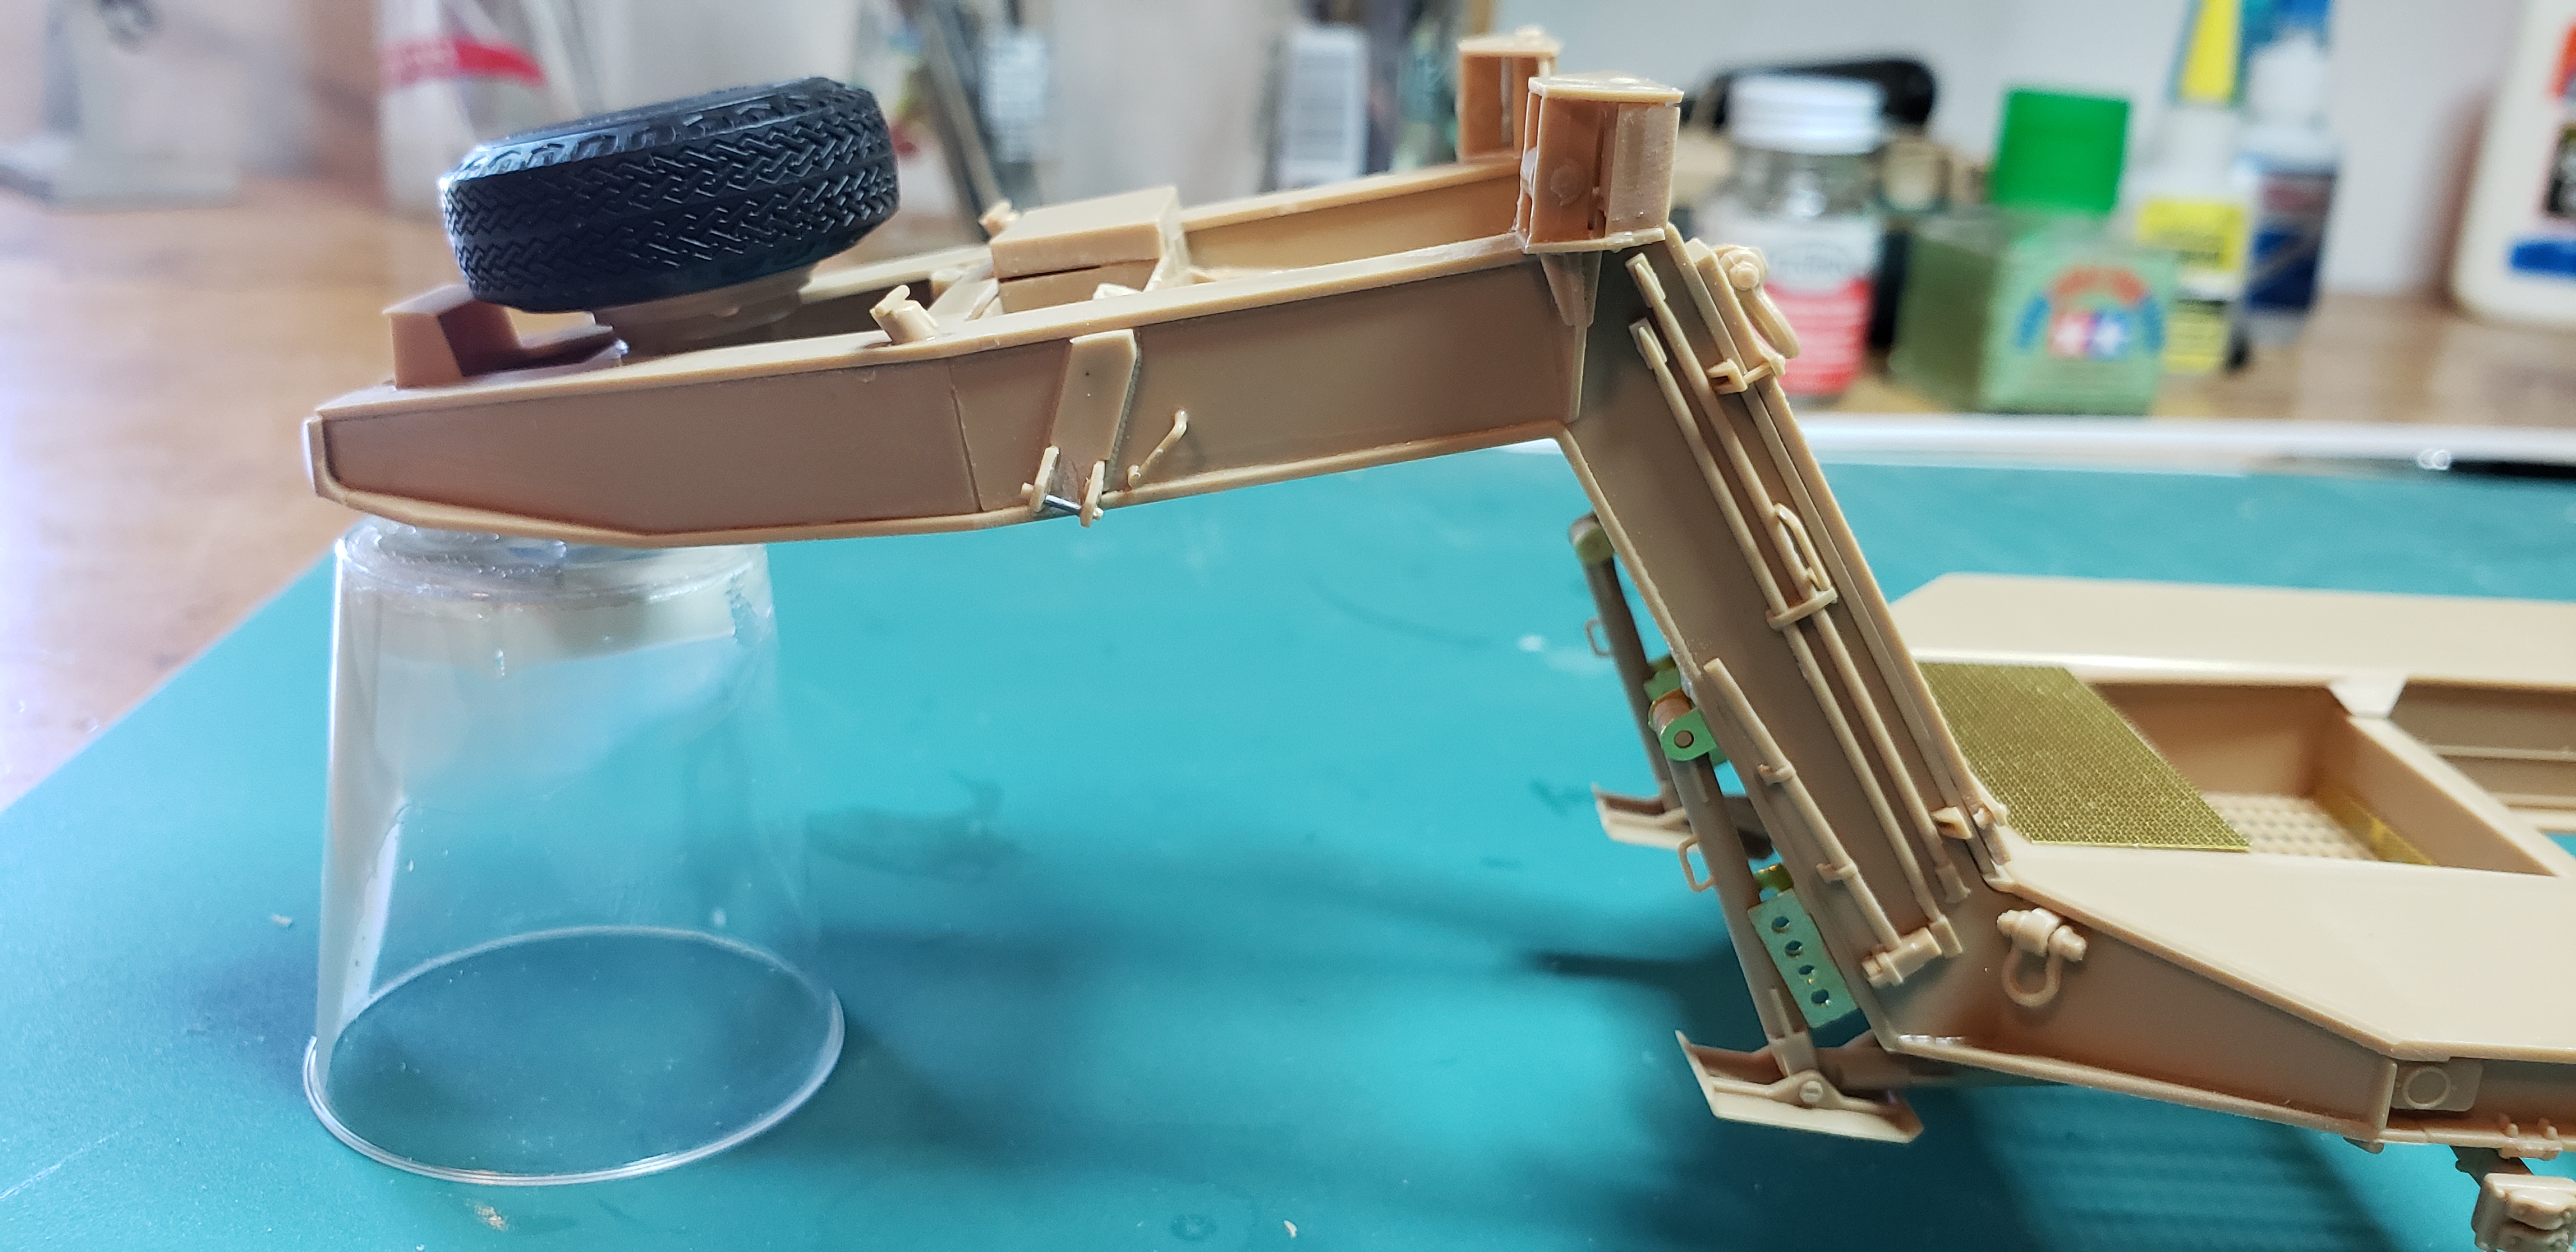
The M747 trailer is ready for primer !! I broke a few small parts trying to remove from sprue..ridiculous attachment points at weak areas...oh well it looks good when assembled. The combo will eventually have a Type 69 II"war trophy " being pulled onto the deck. I like the spinach green /Iraqi sand combo w the US Sand used during the war. Enough gab... The trailer airtanks had individual lines fitting into the trailer frame.. I chose the stowed landing leg option, a few brass brackets secured w Future.. More to come !
-
Wow stunning work and excellent craftsmanship!! Keep up the great work . Love the small details you added makes everything very convincing. I recall stopping by my dads shop after school and always getting a " pop " out of they're machine..exactly like yours
-
Ditto ! The soldering work is awesome to watch
-
Brief outage earlier
gotnitro? replied to bobthehobbyguy's topic in General Automotive Talk (Trucks and Cars)
Thanks Dave -
Lmbo...hope ya caught up on sleep ! Glad to have ya following along
-
Hey no problem Joe ! Its great to have the right info about kits and aftermarket goodies when we're laying down the cash for them . That's a great looking and very detailed engine even if the finish is what it should be. Yeah the transfer case also fit the HEMTT series , recalled the similarity.
-
Please post a build on yours once you purchase it, we would enjoy seeing it . I'd be interested how they compare , HB makes some quality kits
-
I didn't add the engine to my M1070, kept it closed up. The transfer case is different on the M911
-
Very cool Ben !!! Miroslav from Real models makes outstanding products for certain. I used his 5 ton wrecker conversion for a 800 series wrecker I drove on Ft Hood . The details were fantastic.
-
Thanks ! I've used prime portal images for yrs definitely great source . I did forget your link to tms..I'll check it out Thanks again
-
Thanks !! Its certainly an impressive kit..around 800 parts. Course it's a baby compared to the Other Oshkosh tank transport....that's only 1800 parts the immense M1070 HET w M1000 trailer
-
Yeah always wish the detail level was higher on 1/25 kits..cost definitely comes into play. This kit is 149.00 add 30 an engine..then usually resin tires to replace the vinyl balloons....and photo etch for the overly think parts... cha ching lol!
-
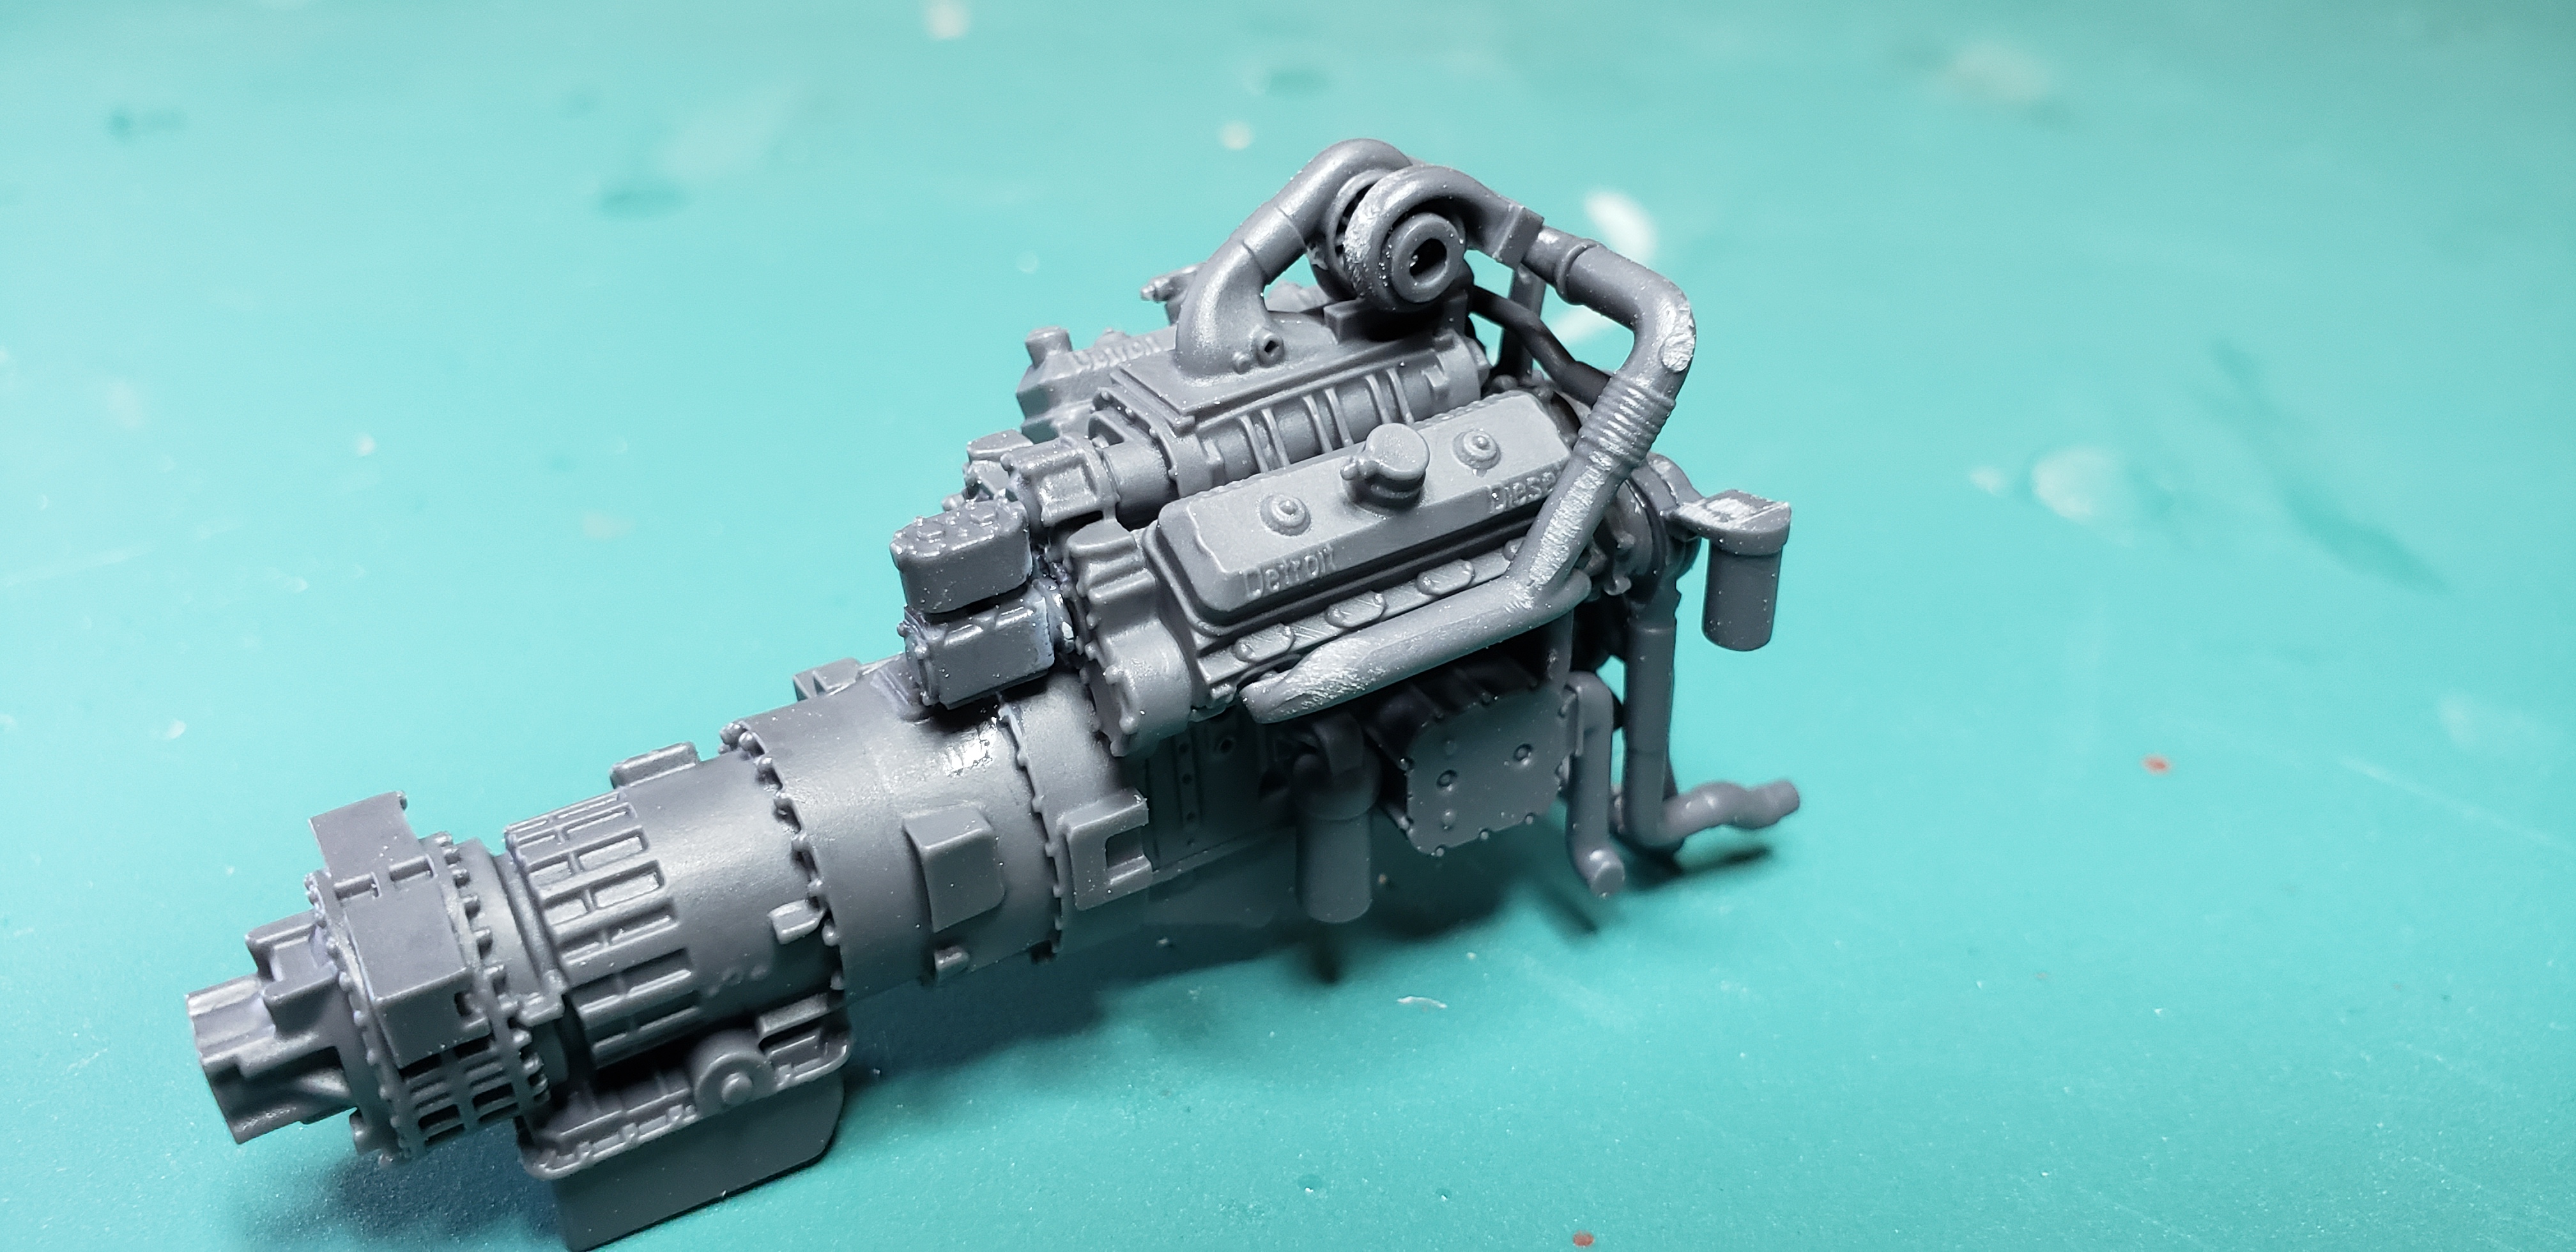
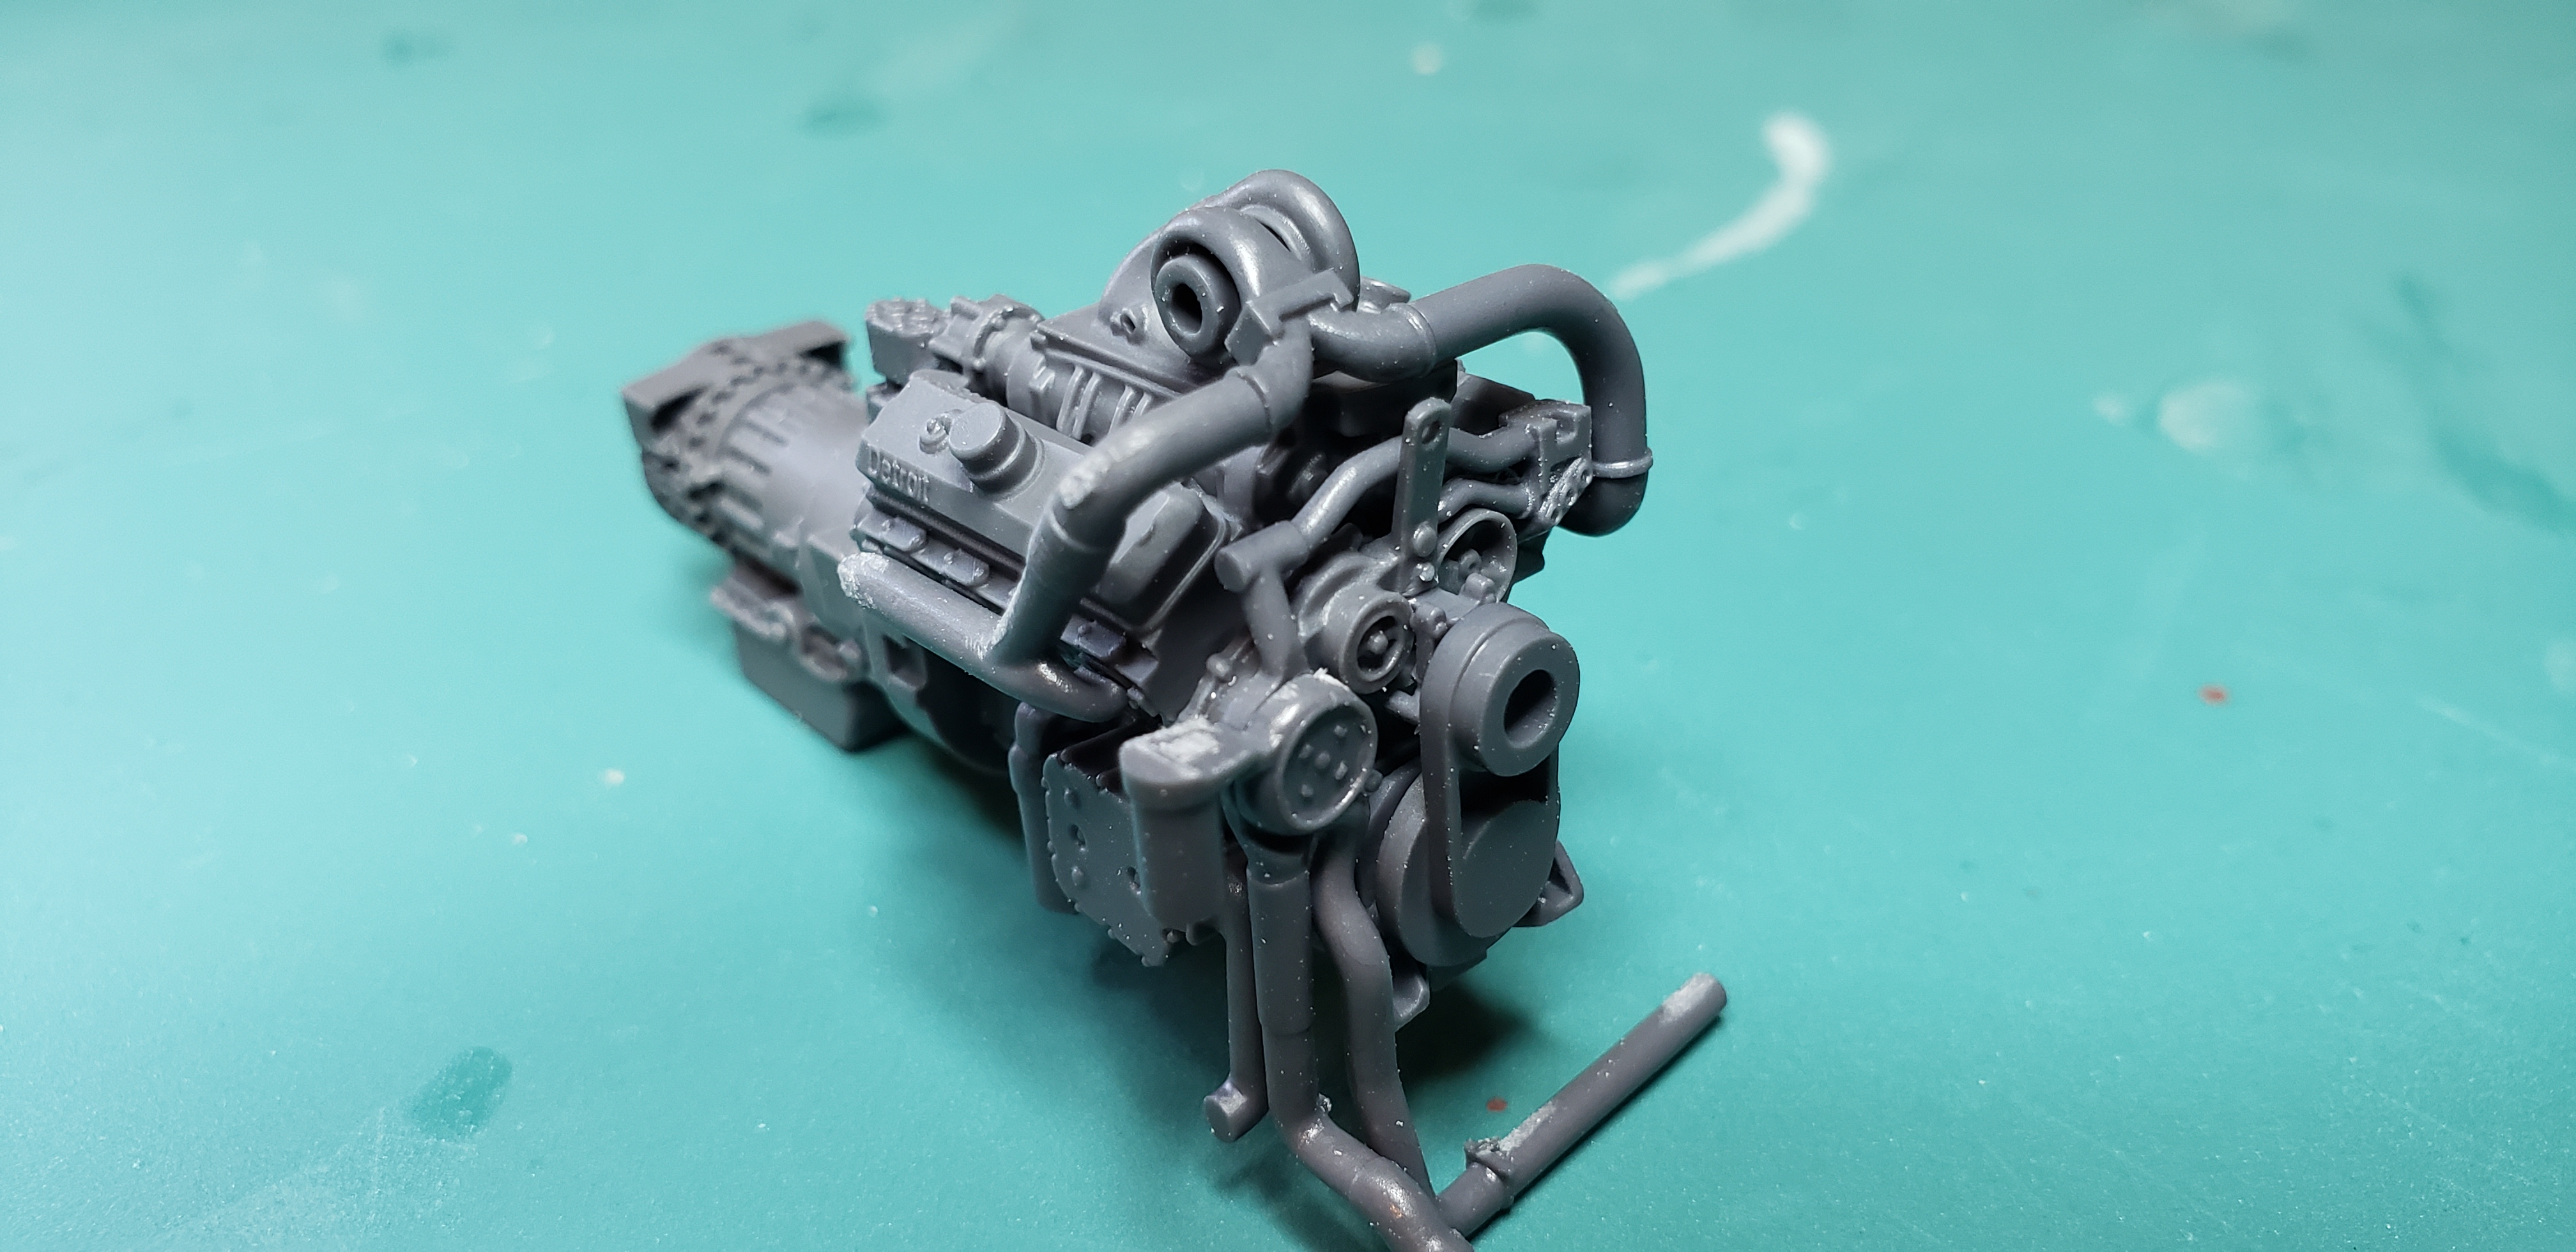
Yeah I looked closer it's one piece. Unless they added the blower and accessories before boxing up...I dont see any signs of it .
-
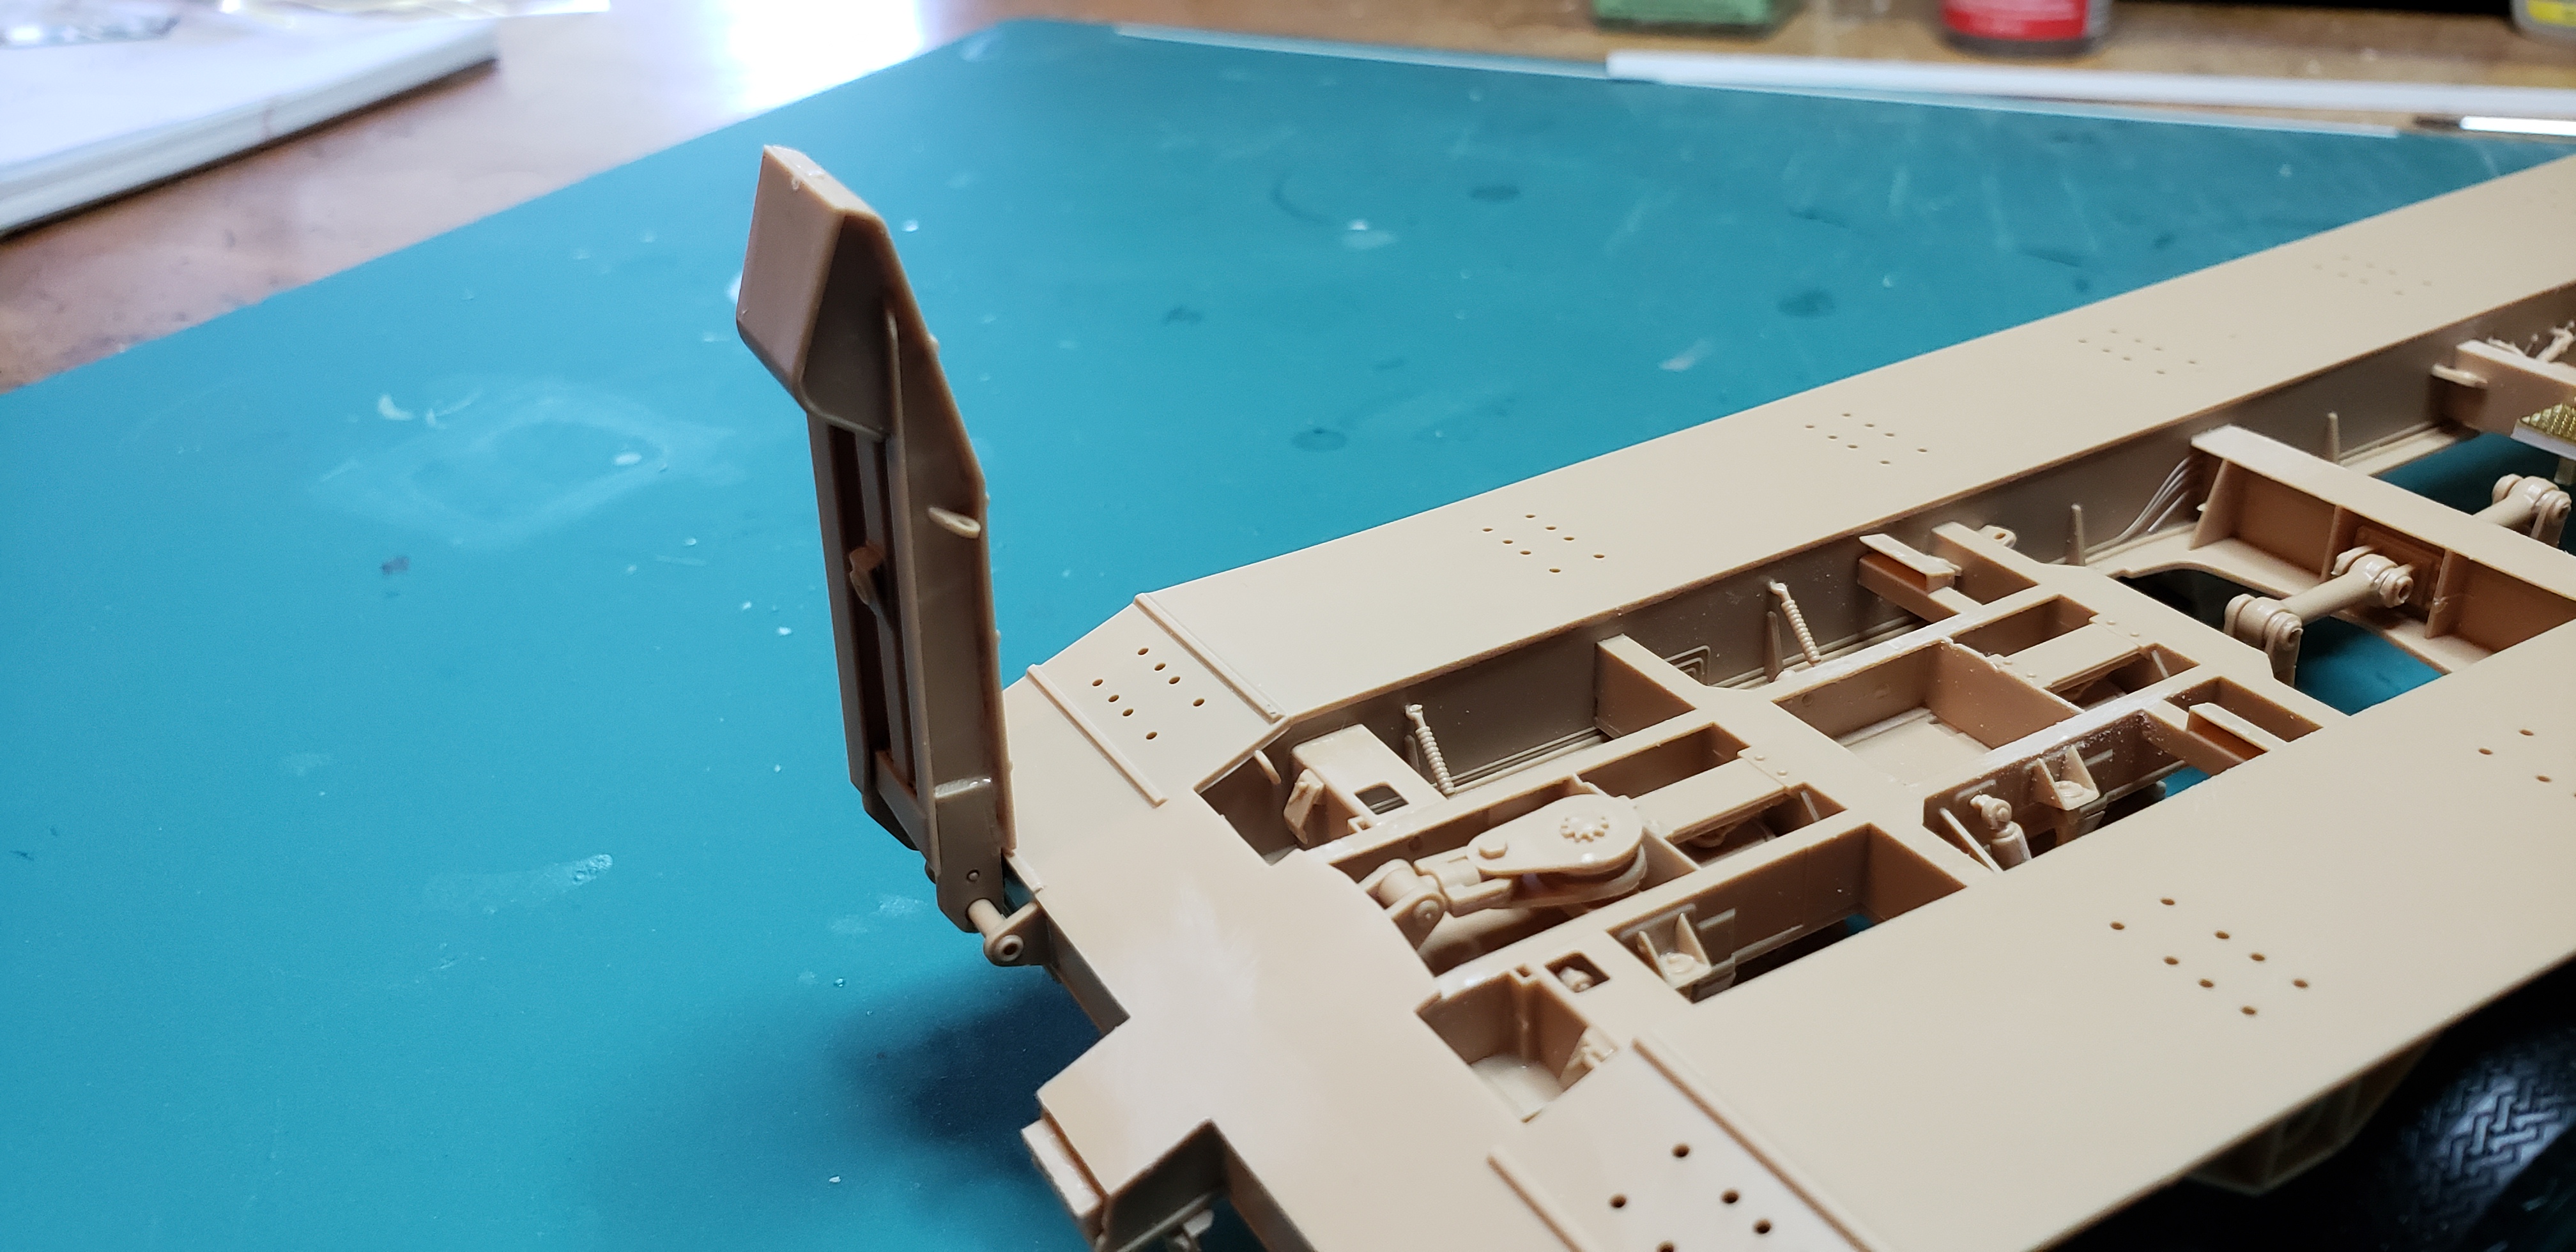
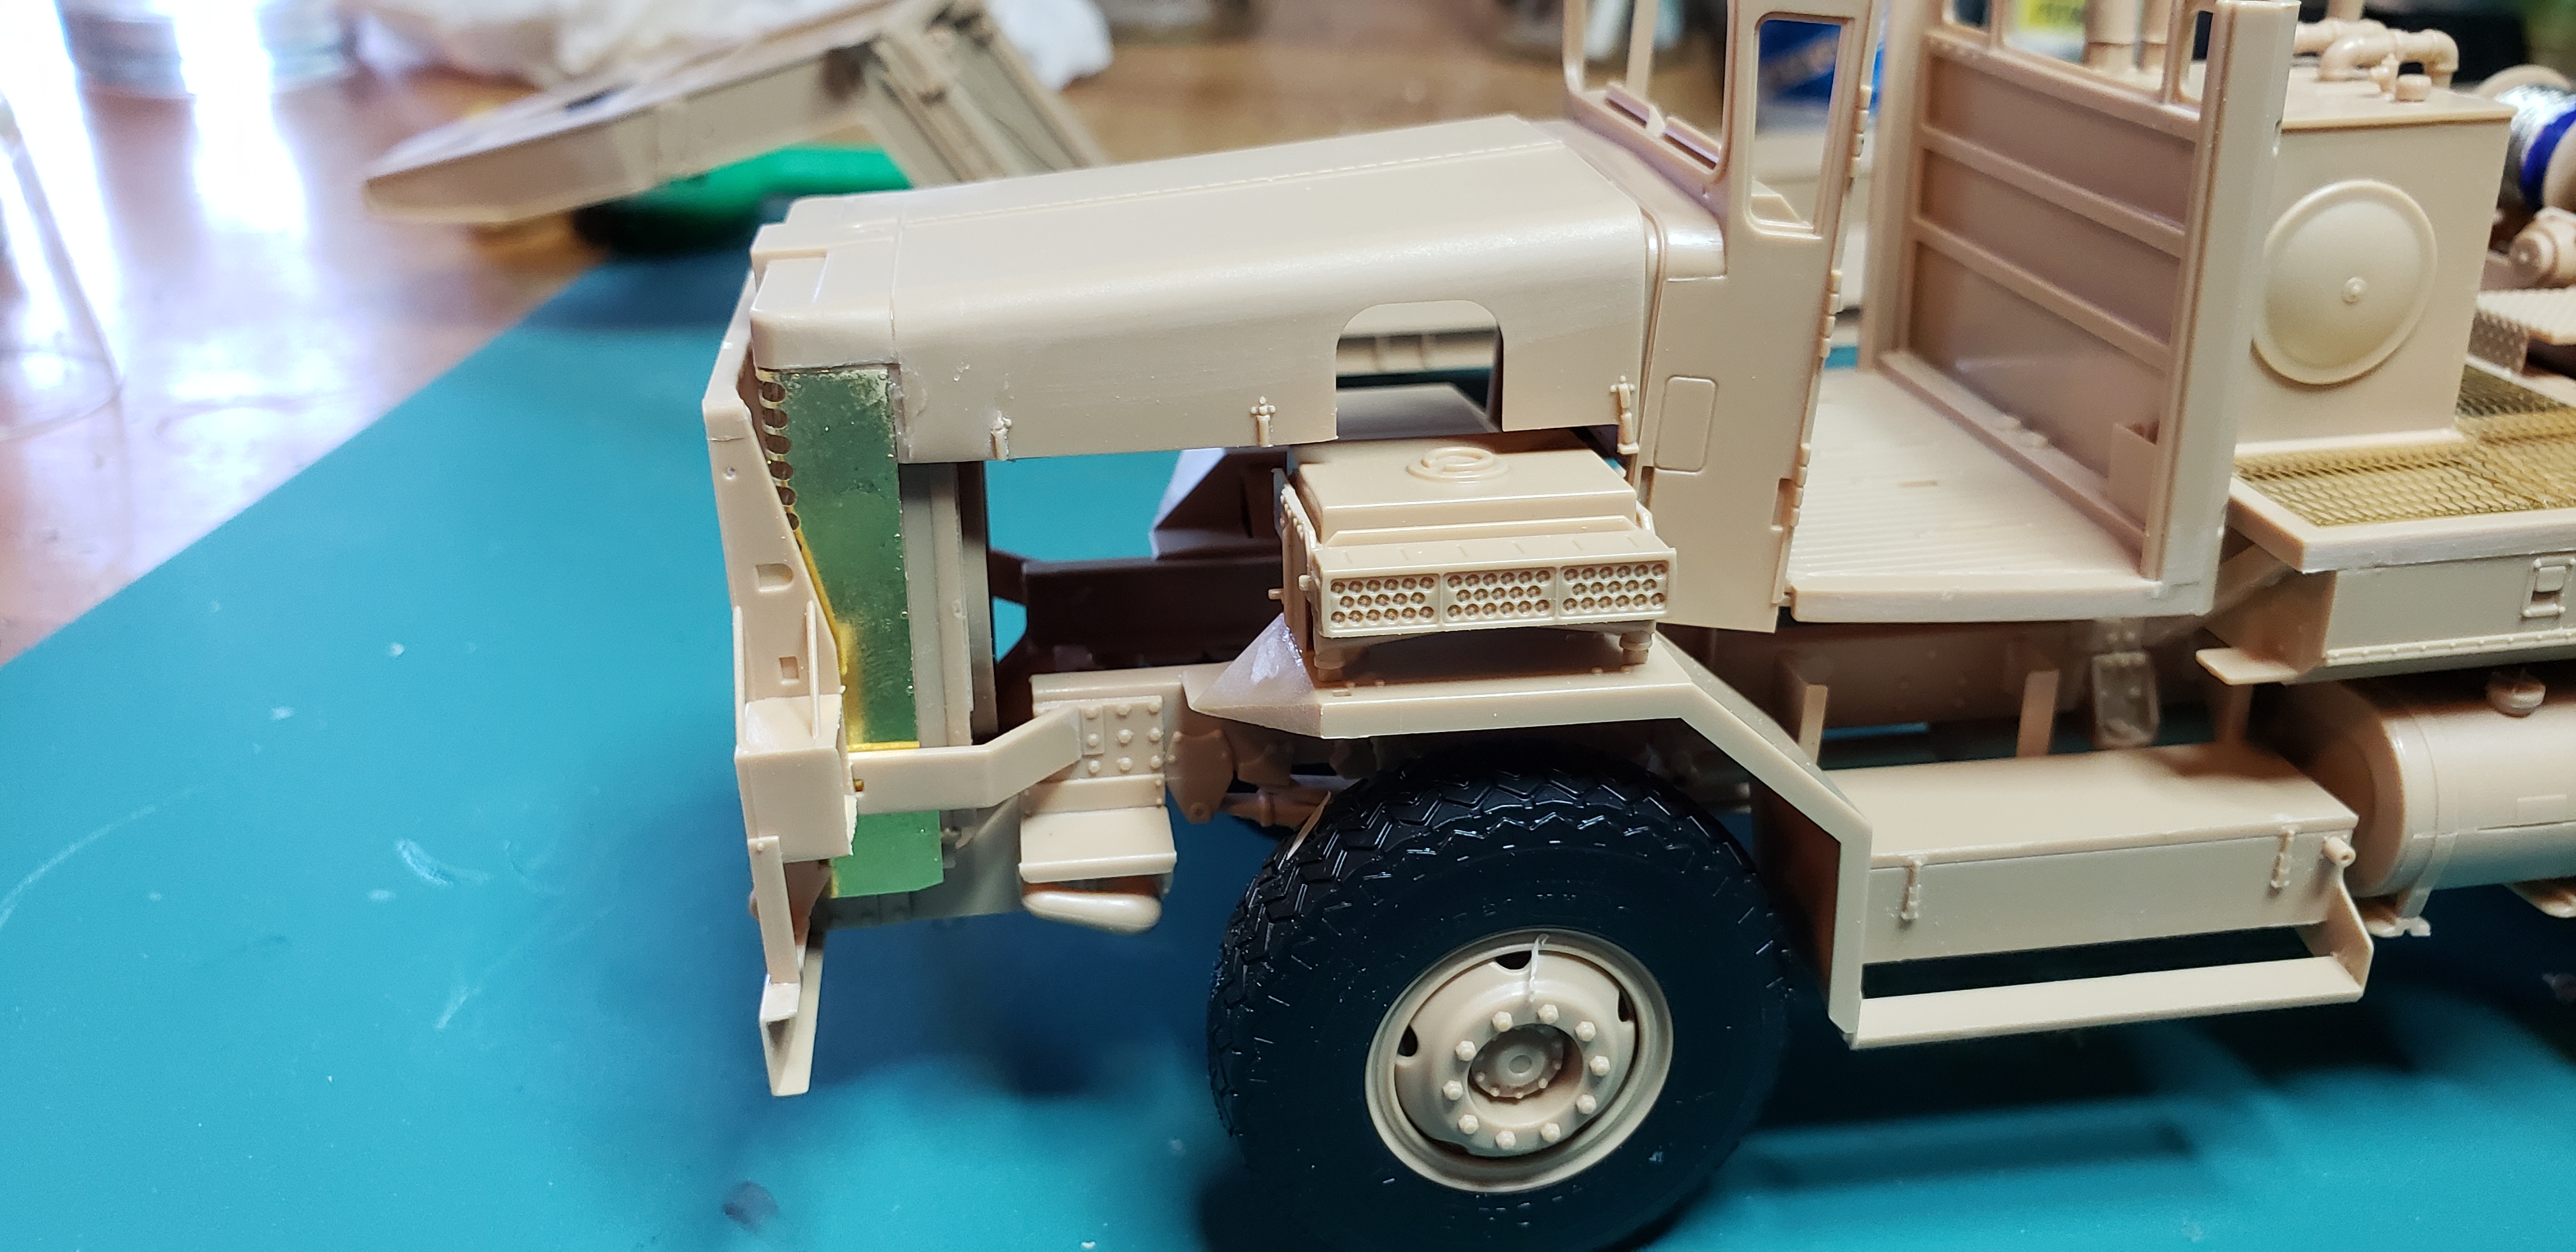
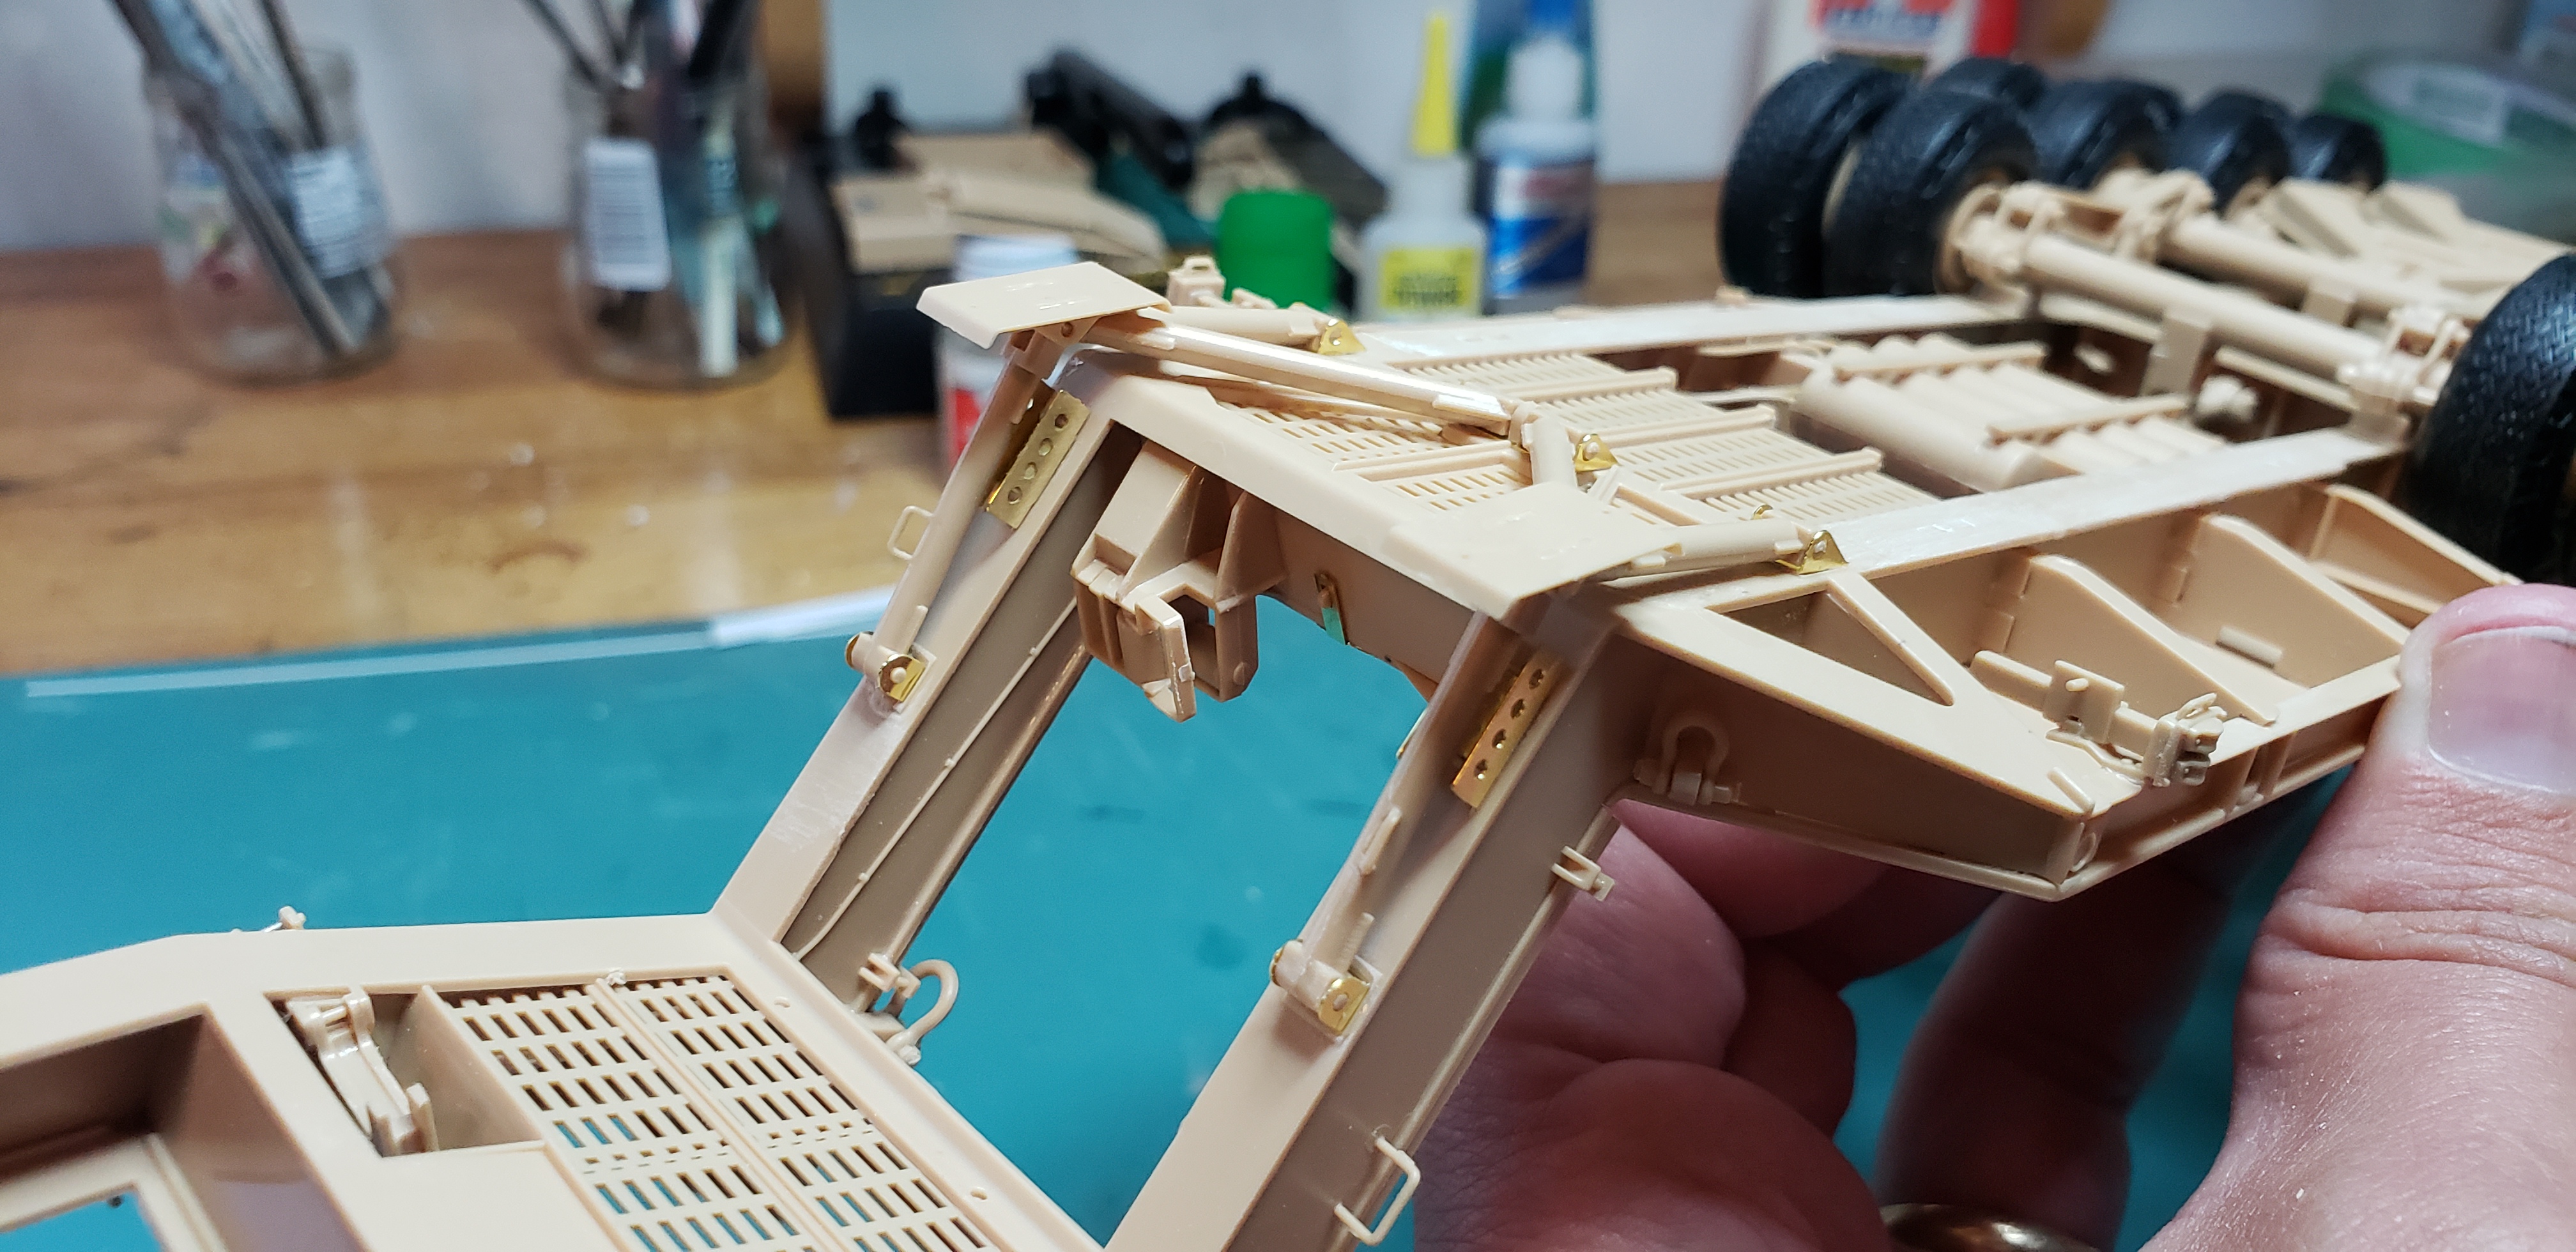
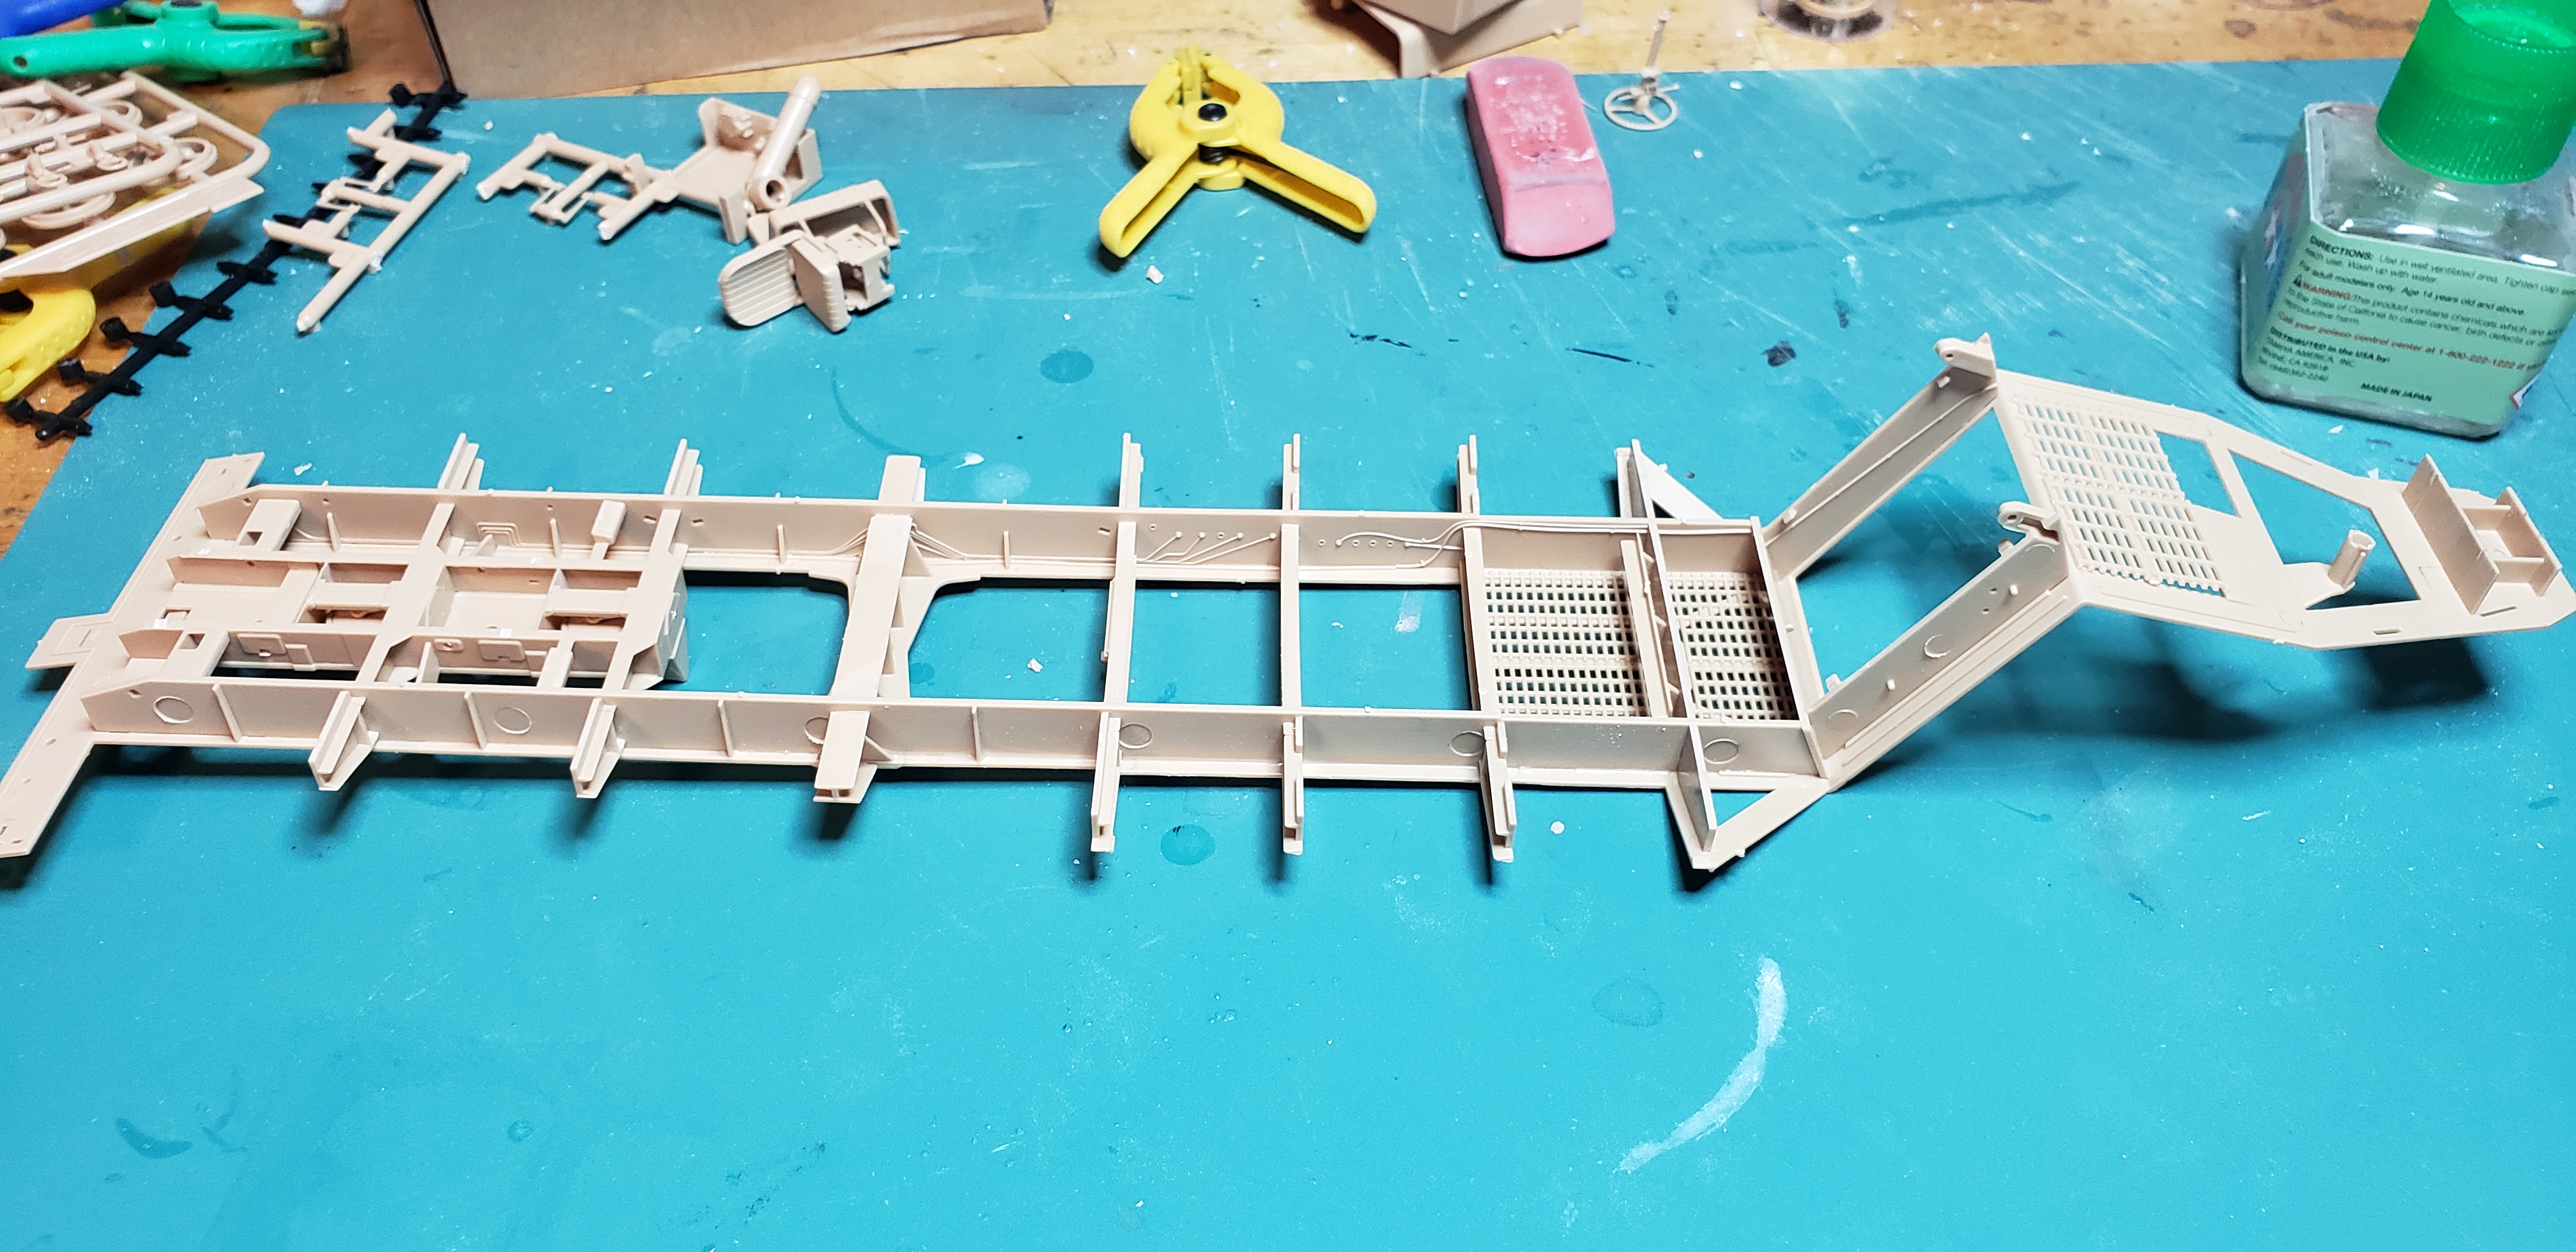
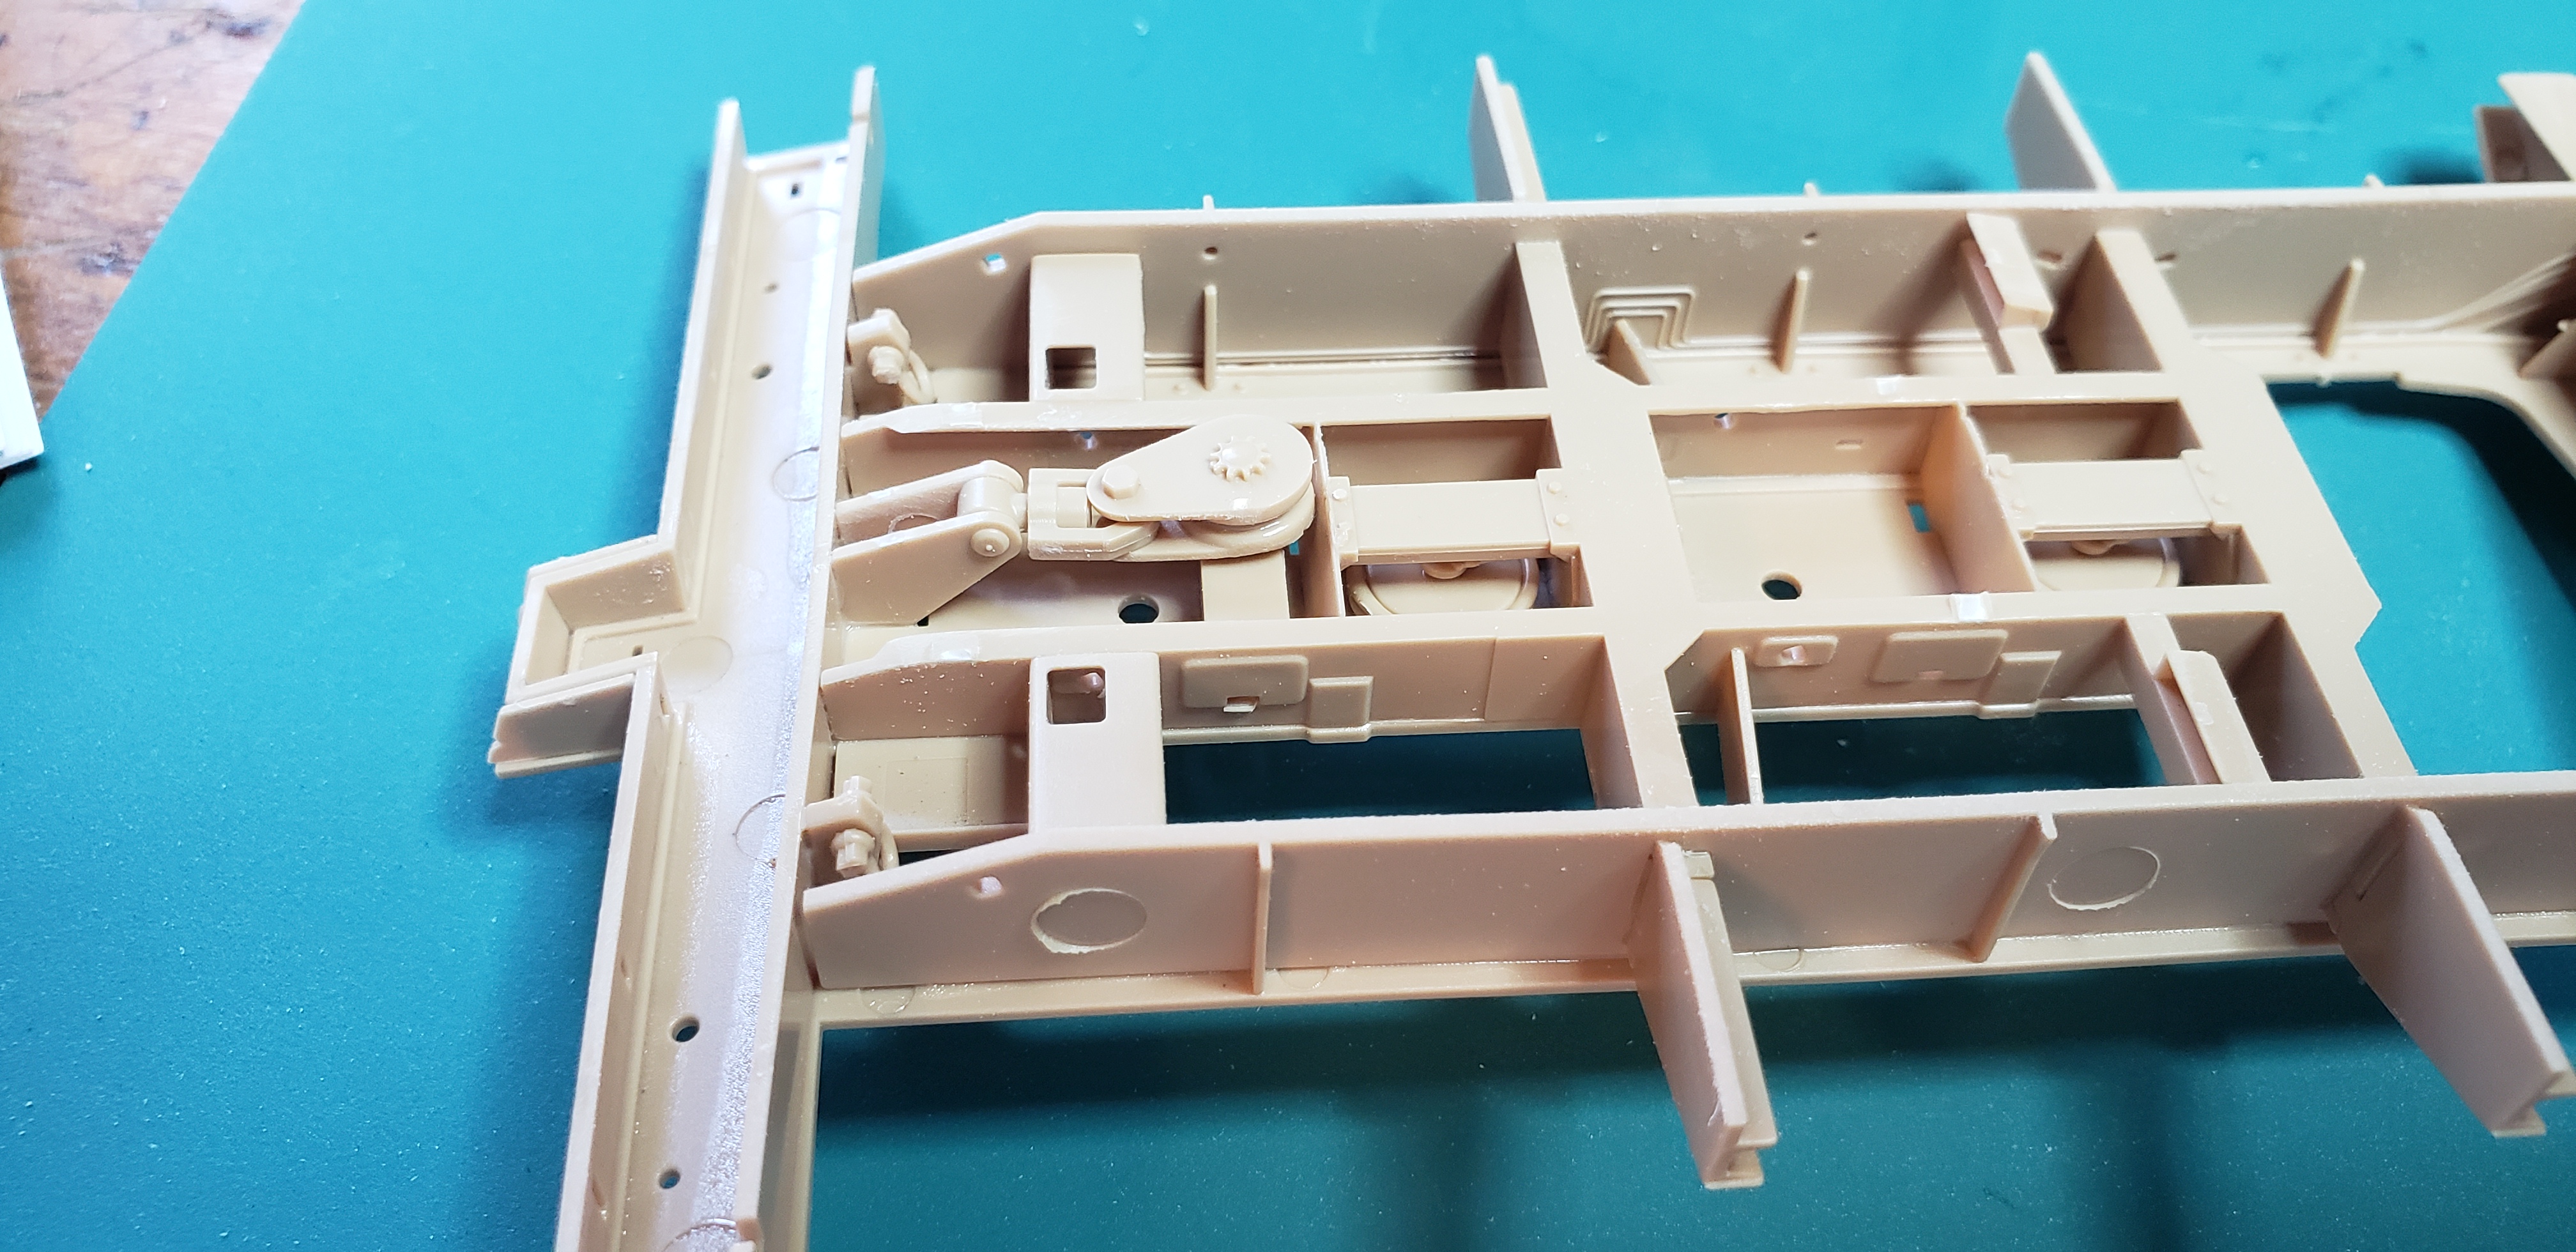
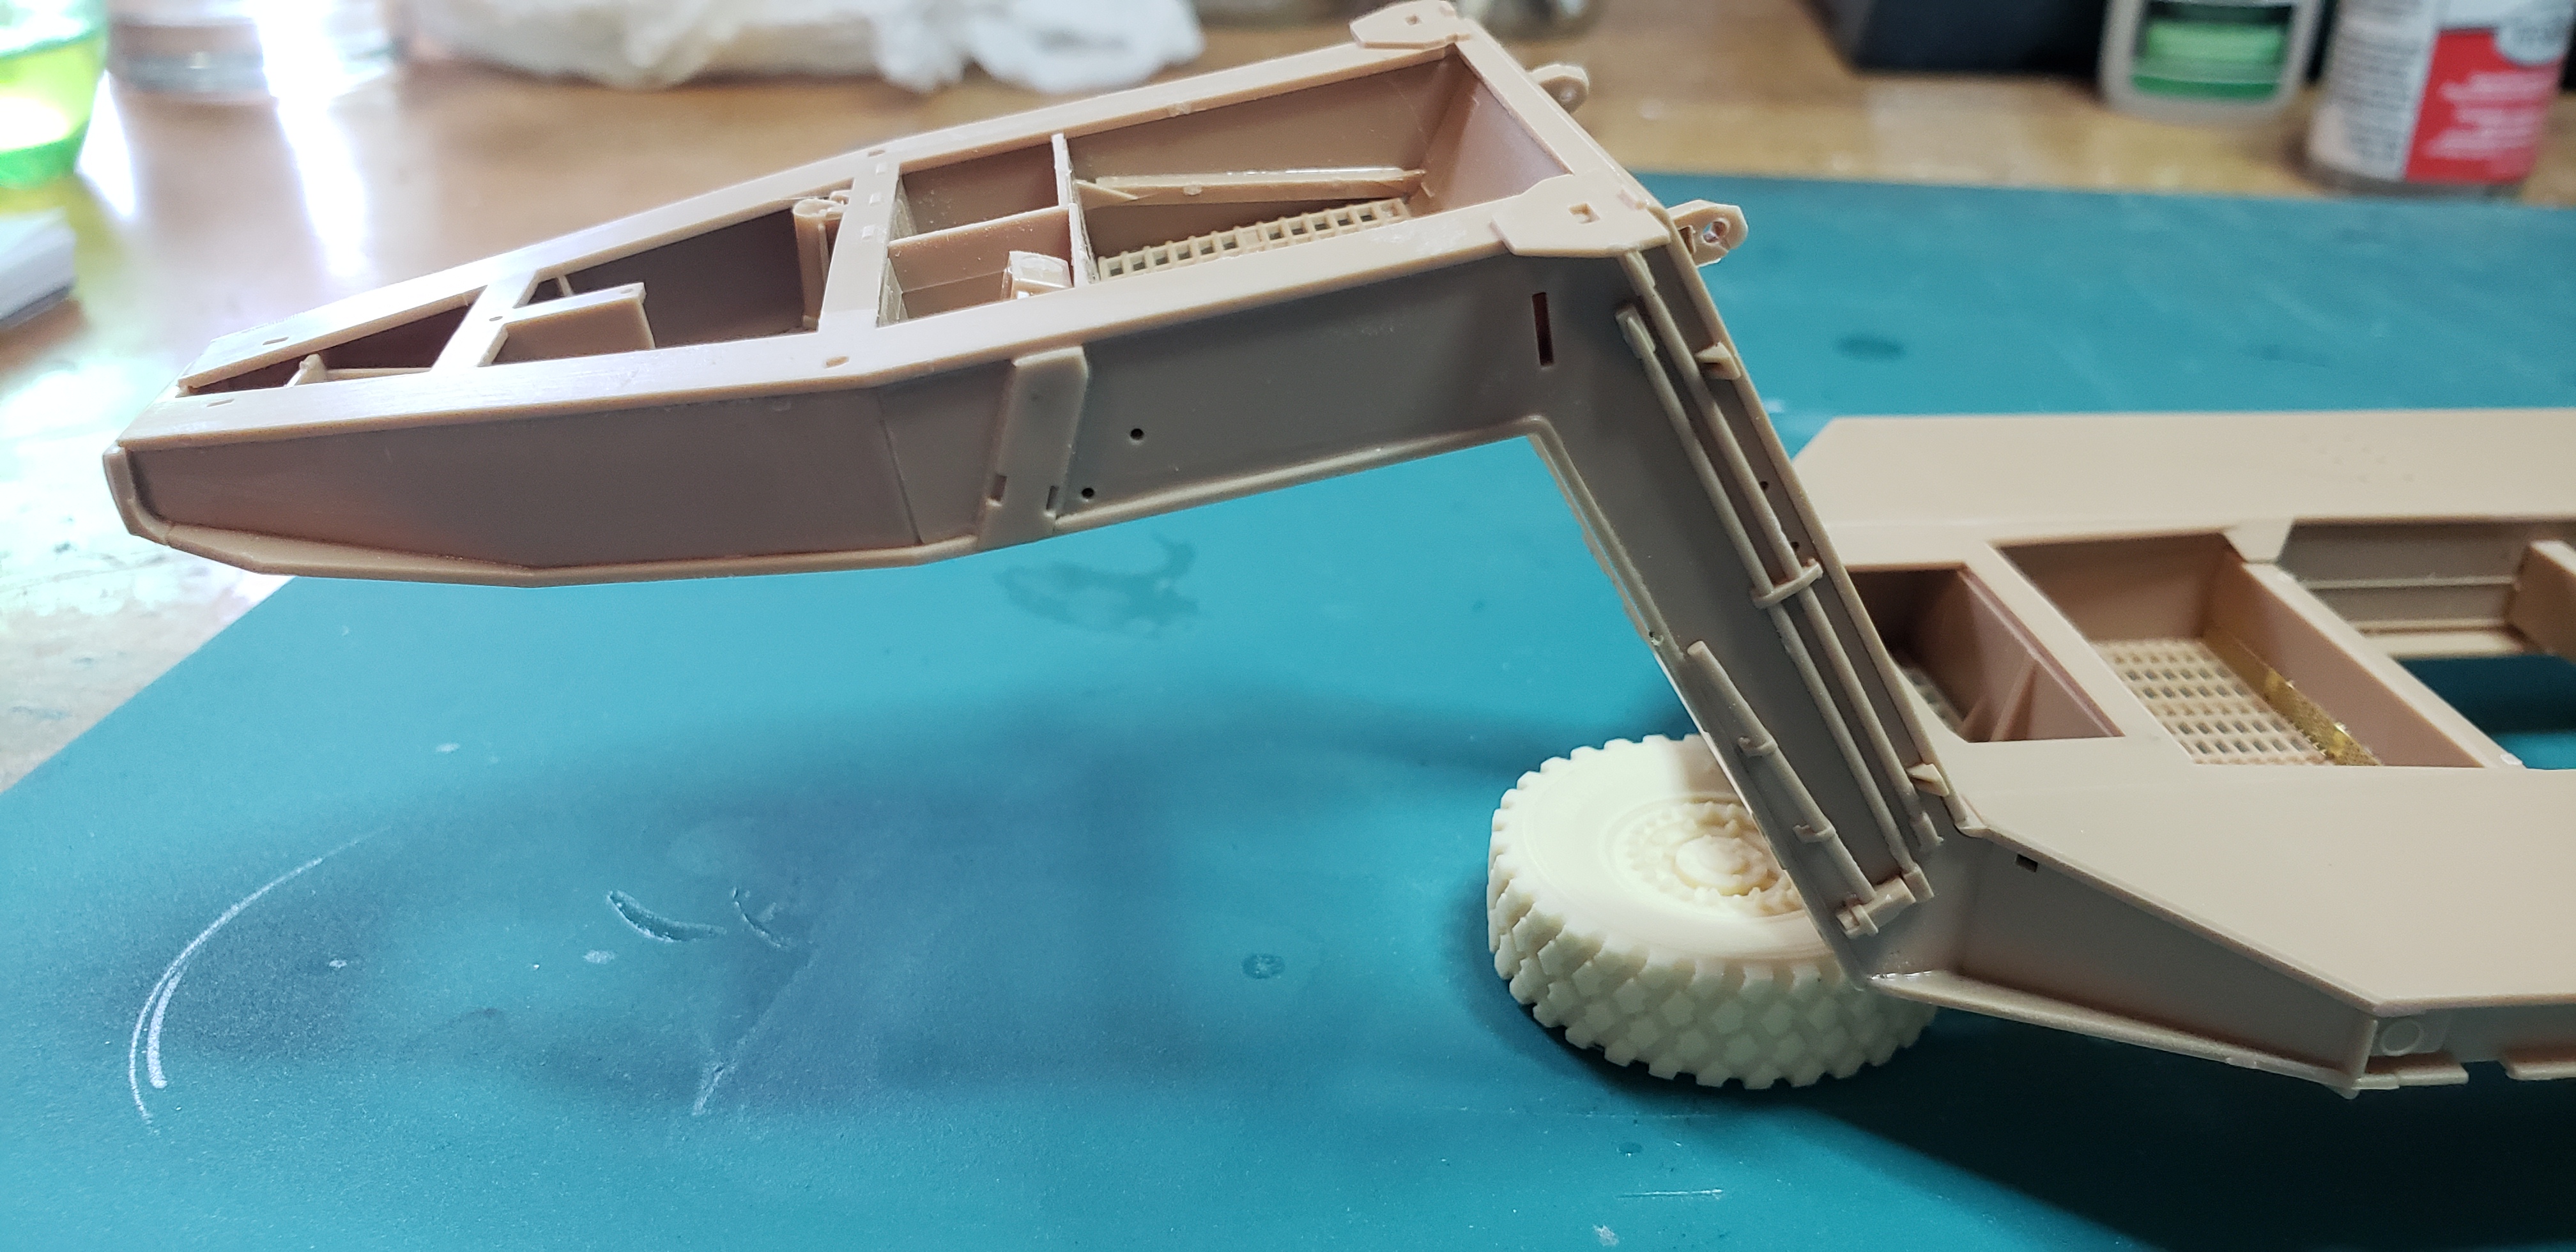
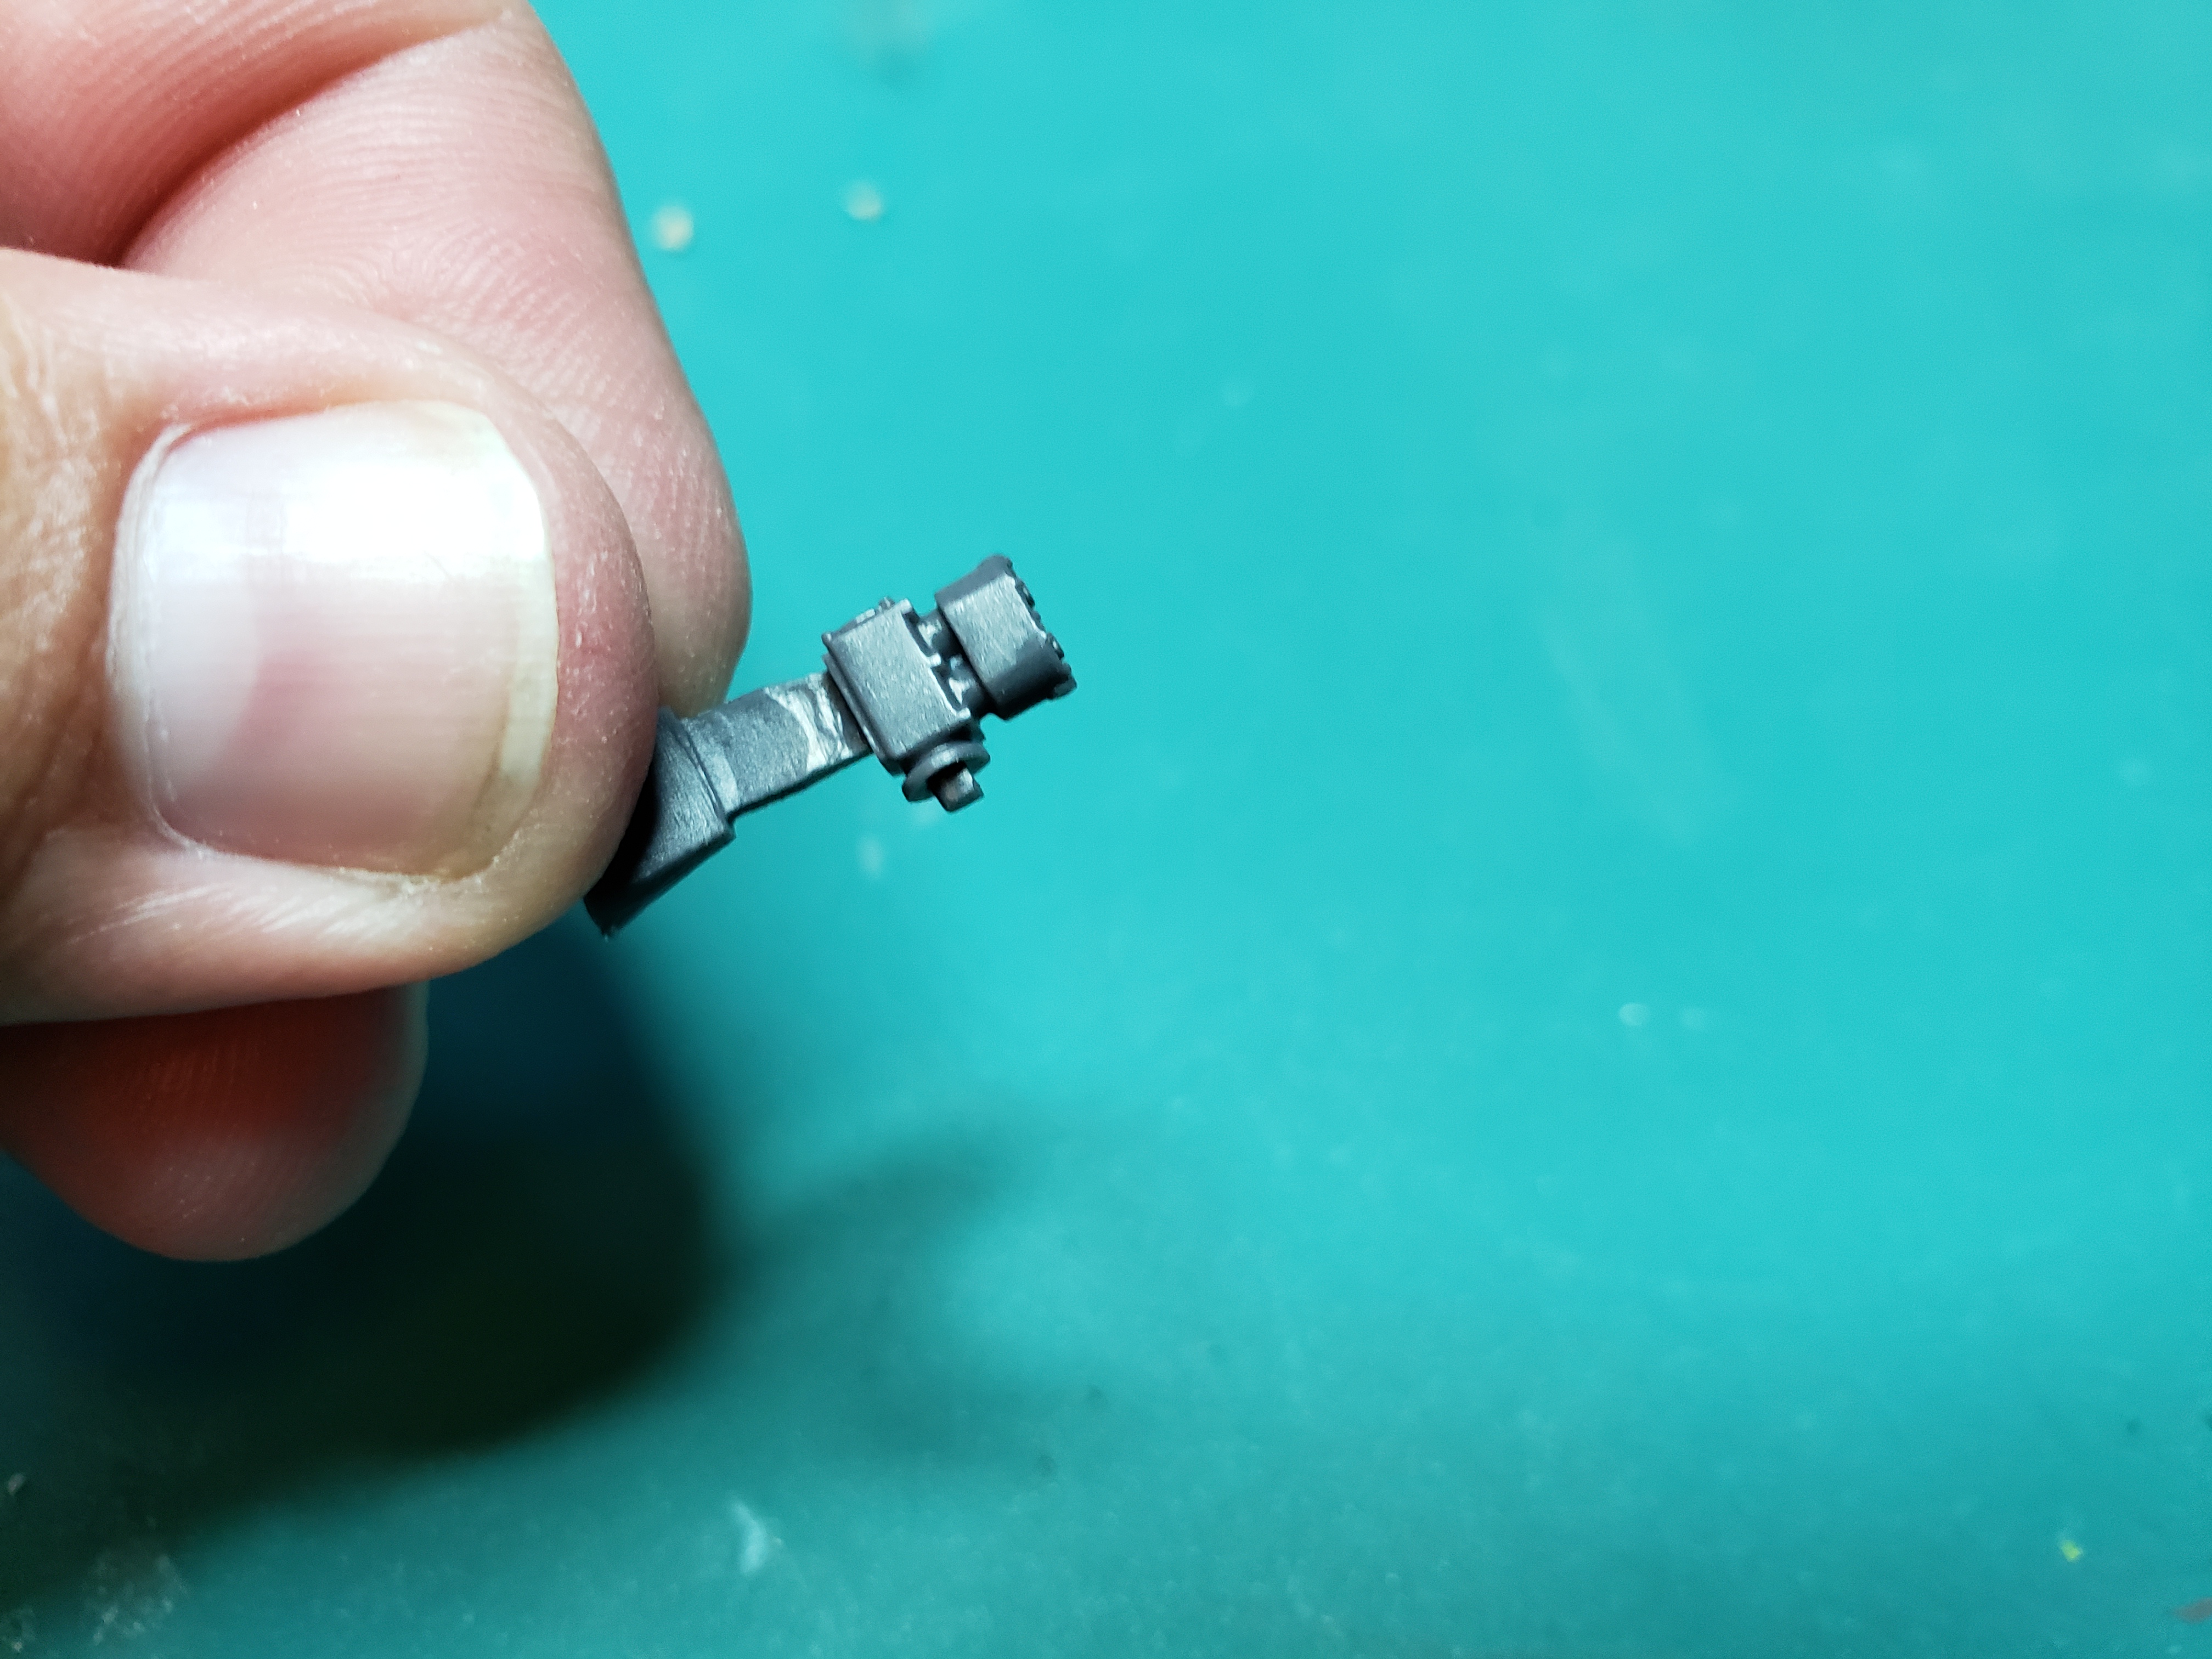
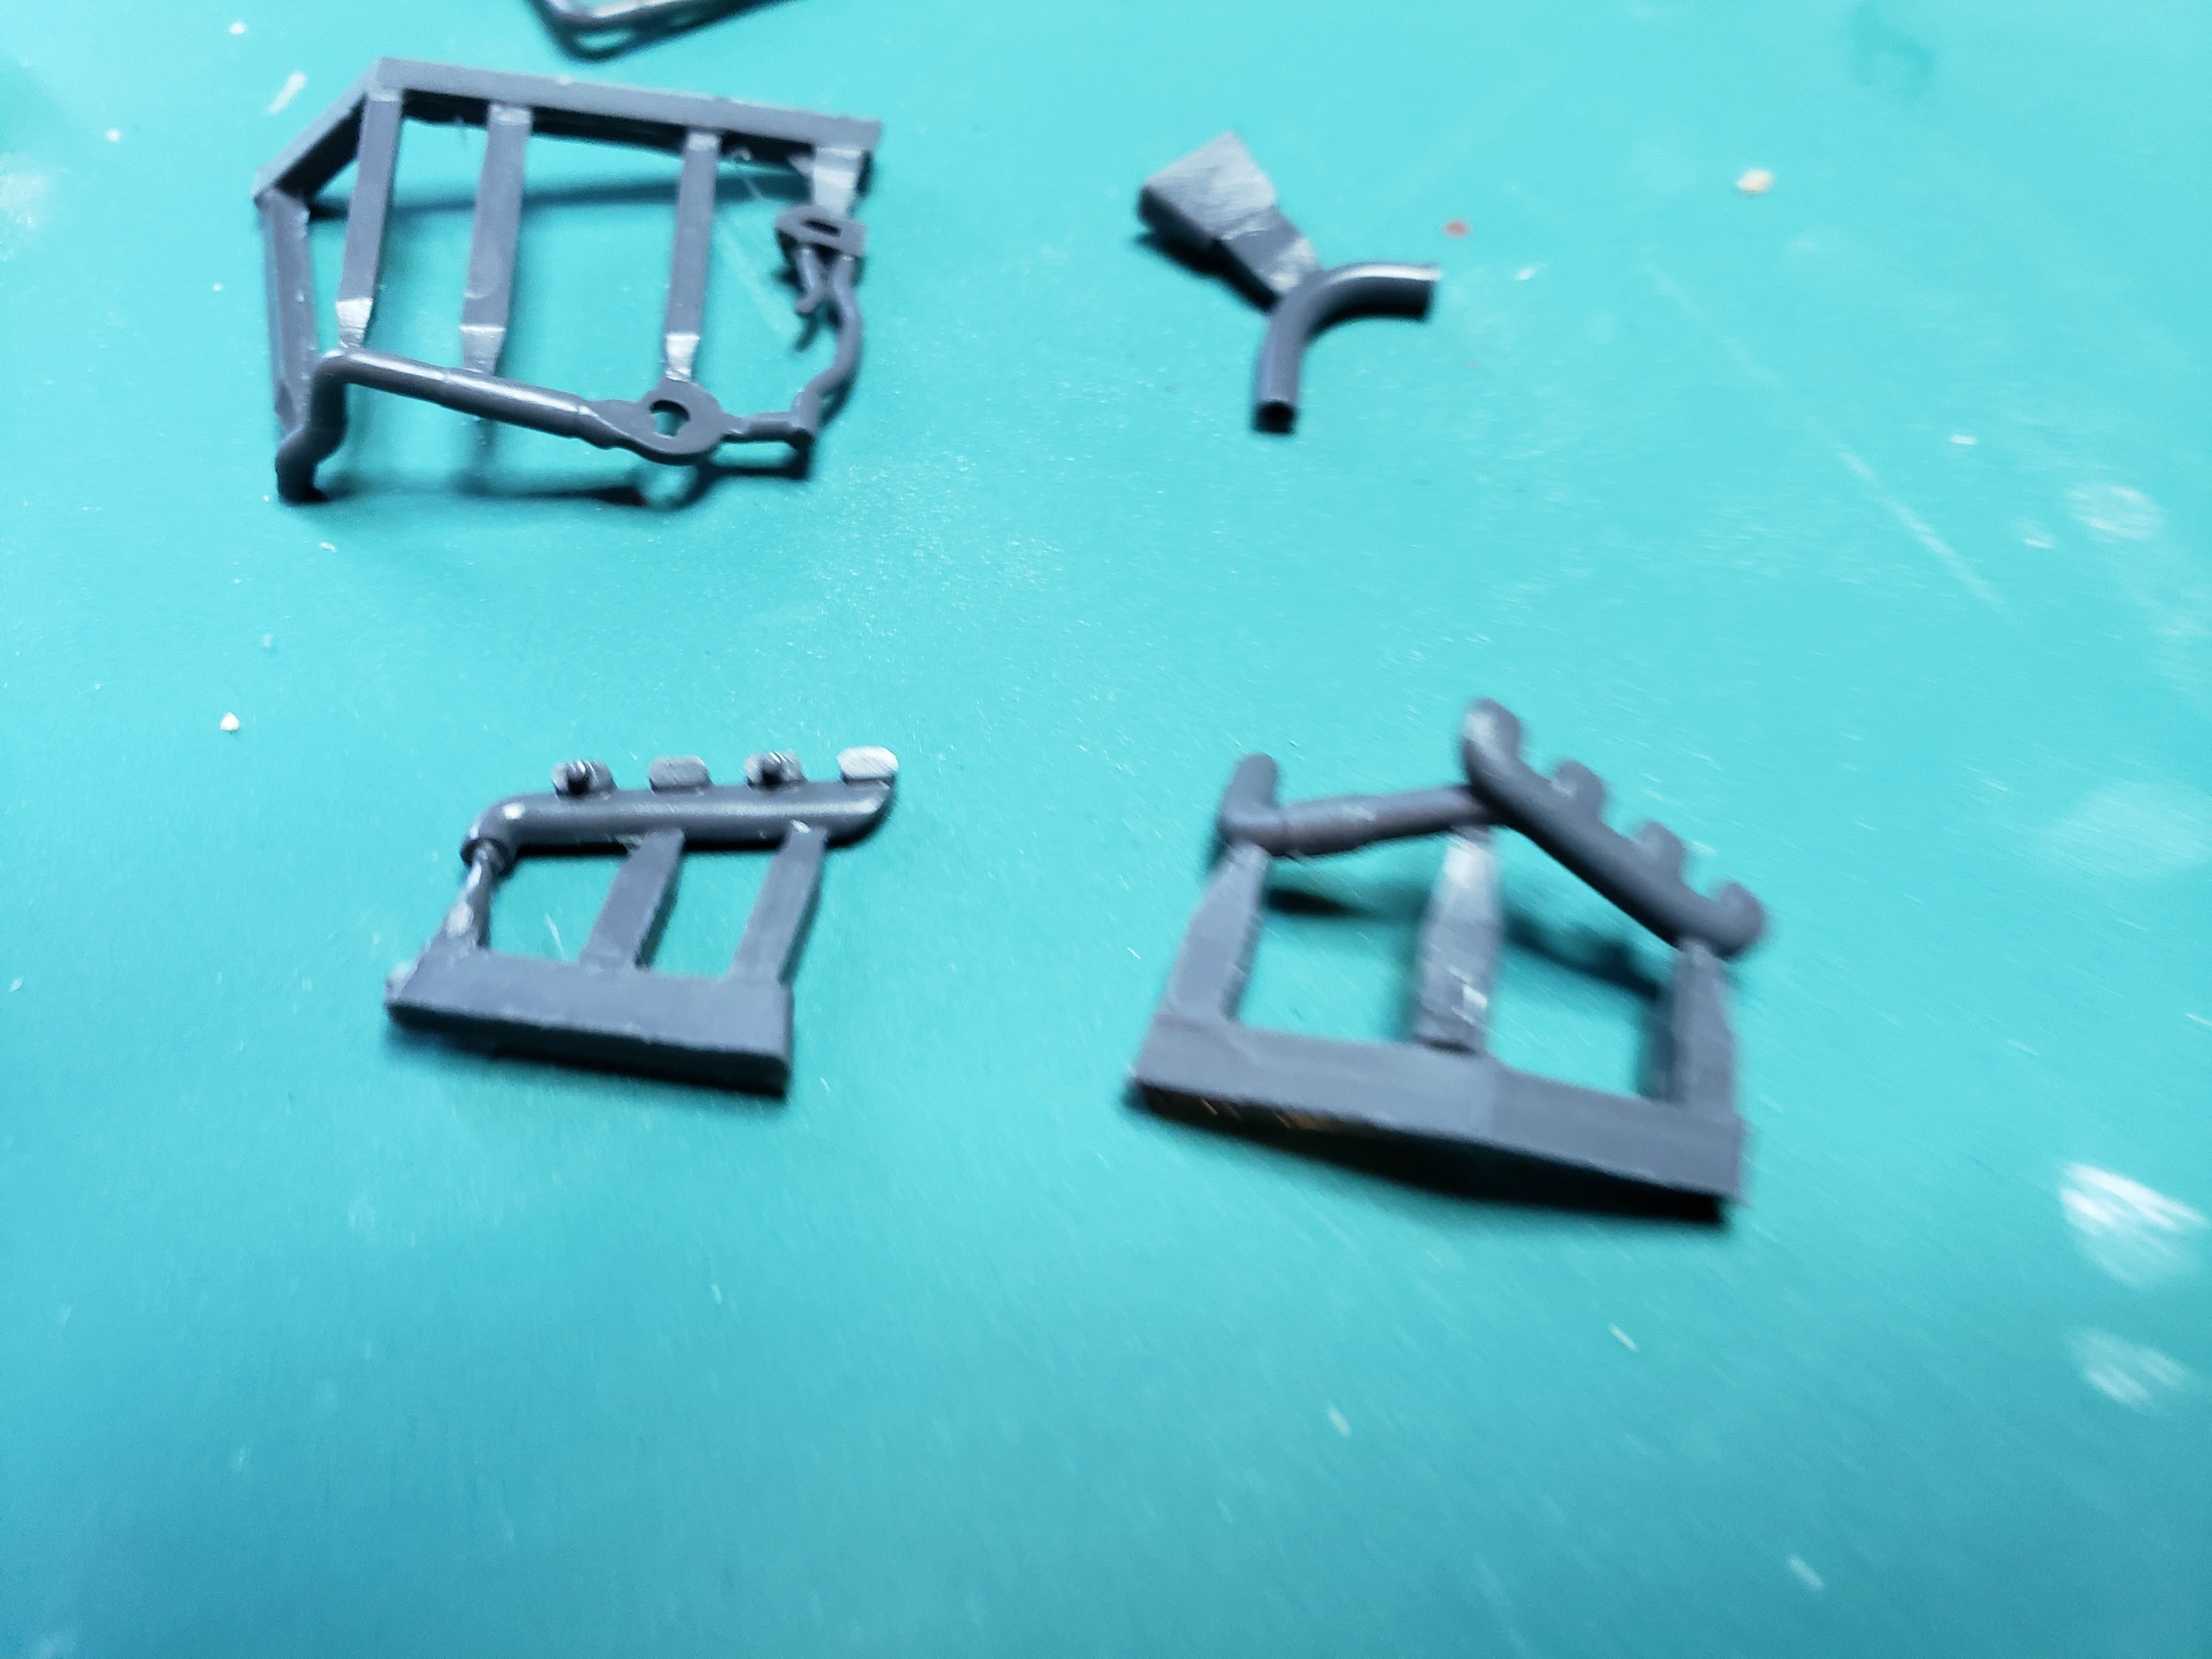
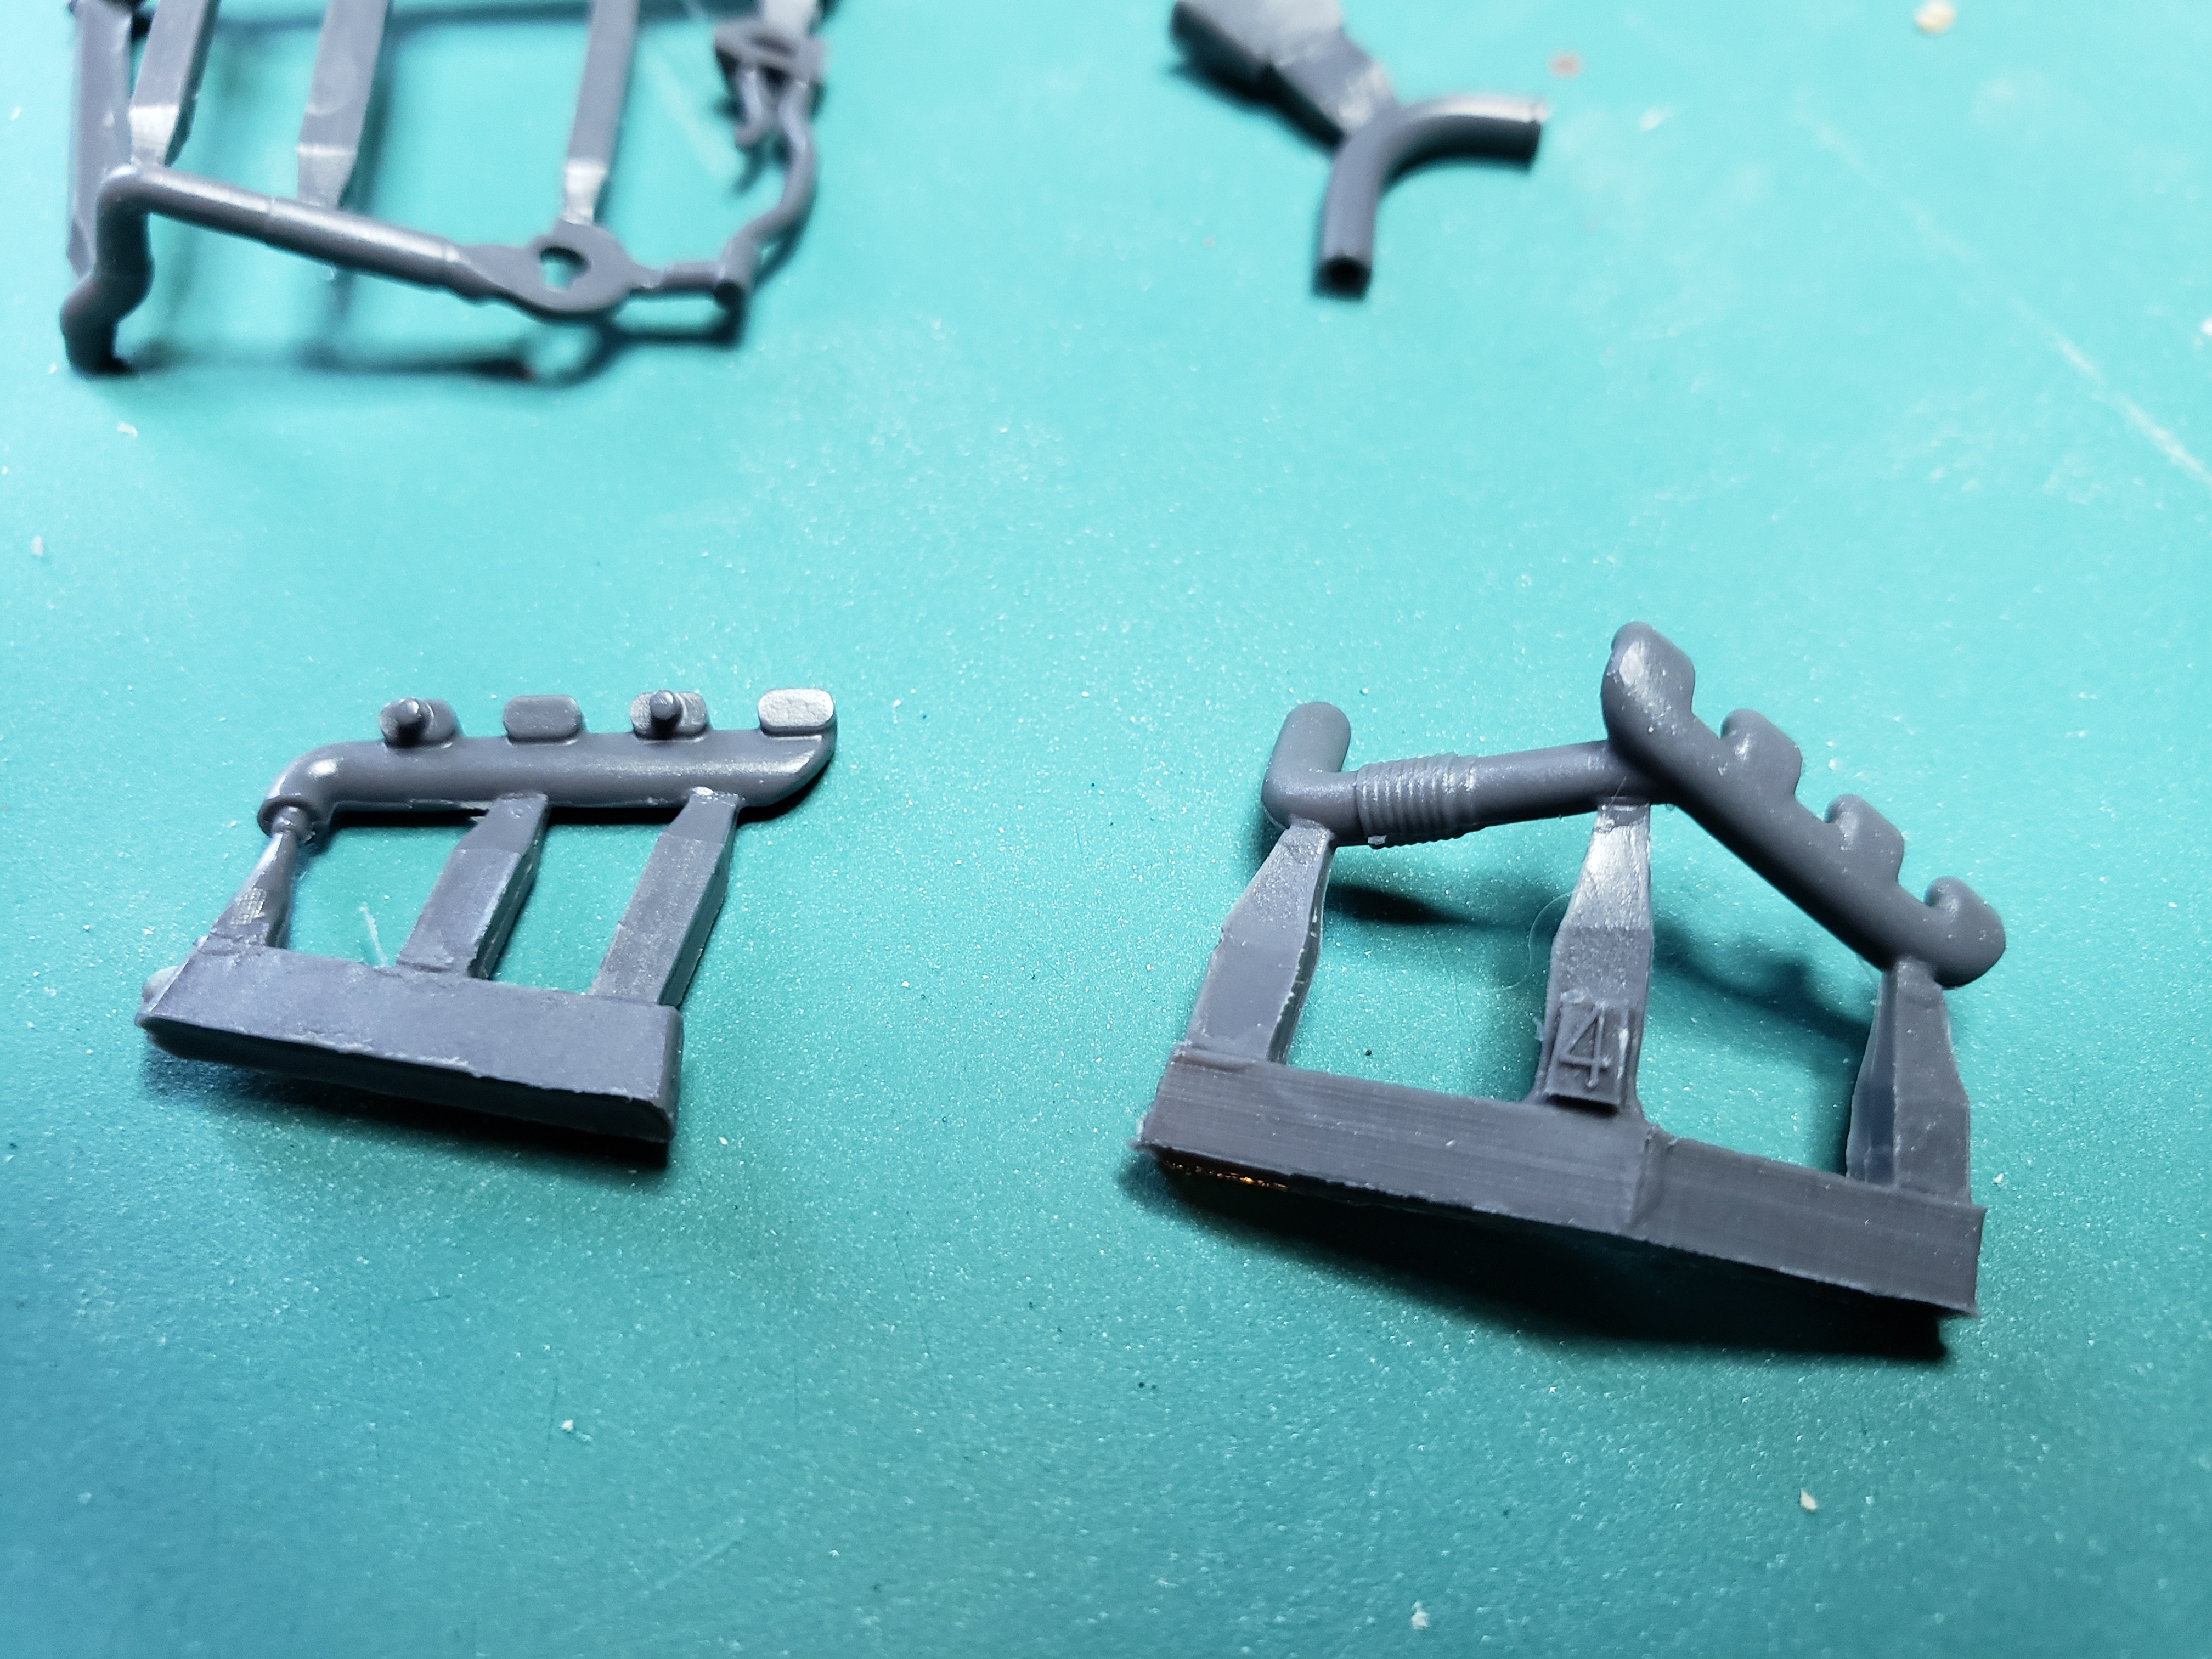
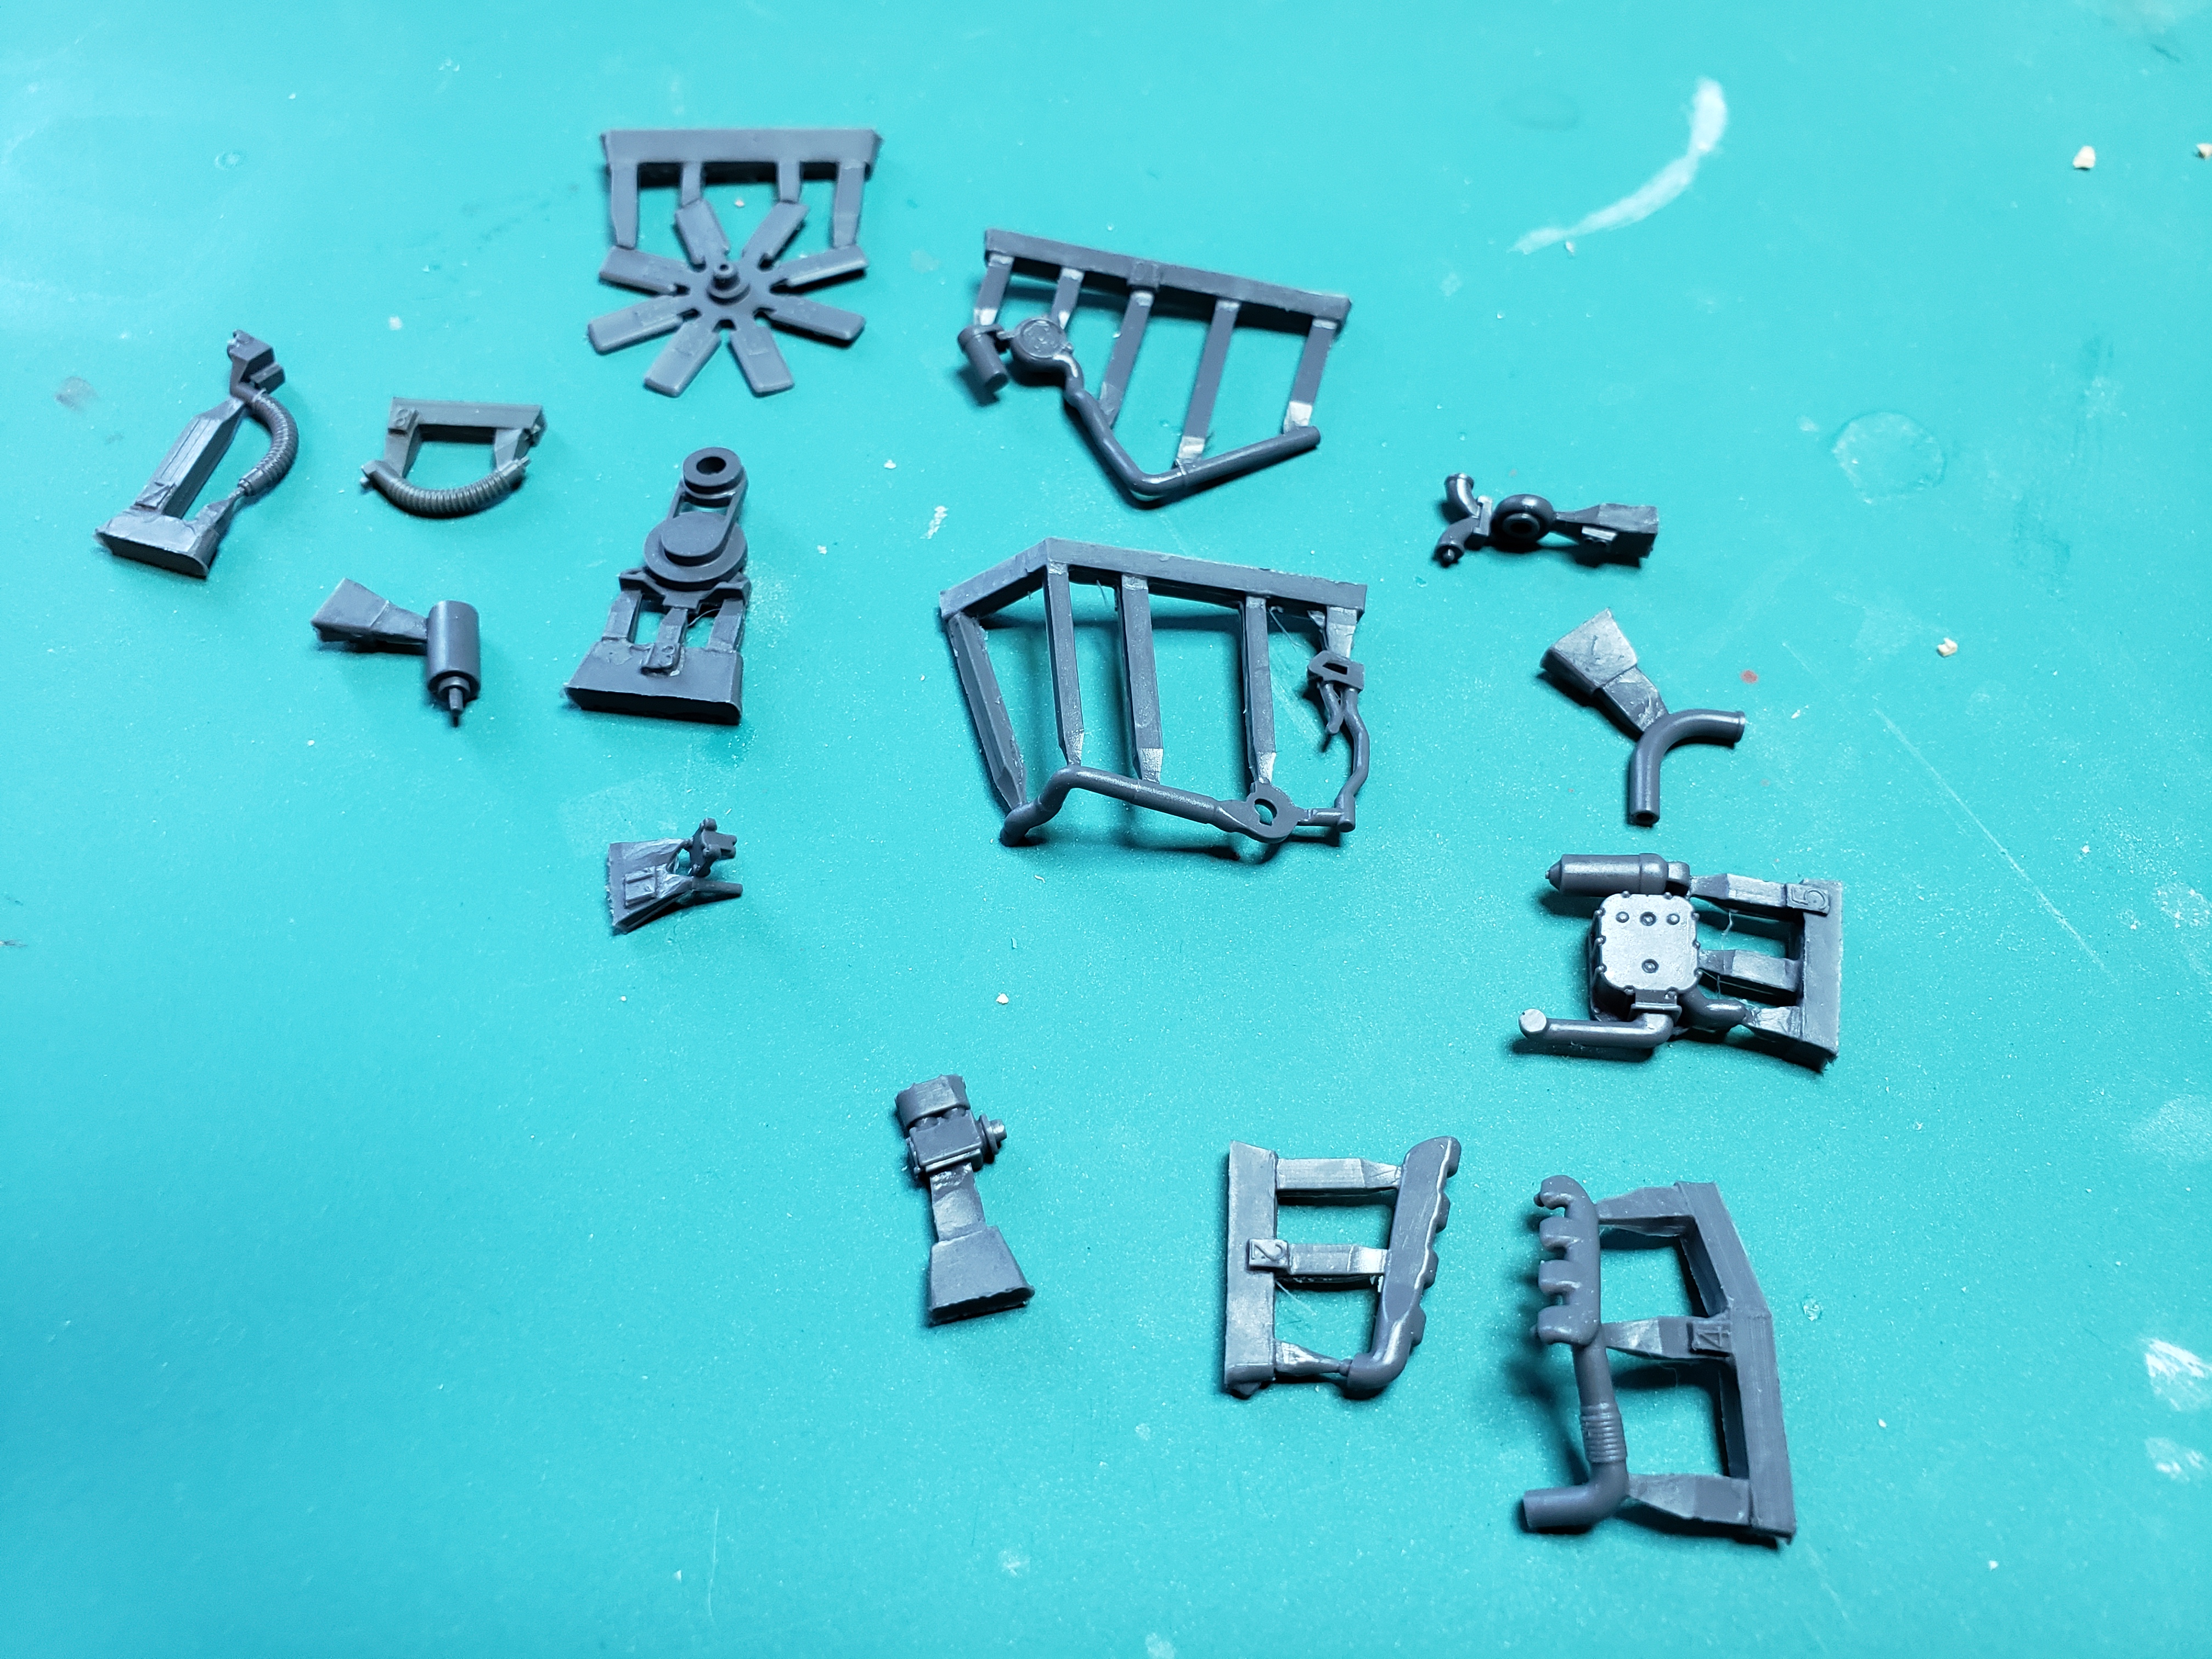
Quick mock up of progress planning to open the bottom side panel showing off the engine, still working out how to support the etch grill after removing the panel.most pics of ODS trucks have these sides removed...whether for cooling or easier access. Jumping ahead...I started the M747 heavy trailer...a few hrs of work and we have this... Cool huh !!!! A few close up shots of the itty bitty details lurking they included the precision hammer on the gooseneck and plumbing lines. I tried to snap a close up of the tie down cleats inside the trailer hopefully they show.i lost a few to carpet monster ...his name is Fred..lucky Meng included spares ...lots of spares lol. I'm really bummed those knock out spots are so visable now... The deck will receive a heavily worn finish using the "hairspray " method leaving a multi layered finish. More to come !!
-
Looking good Kerry have safe trip
-
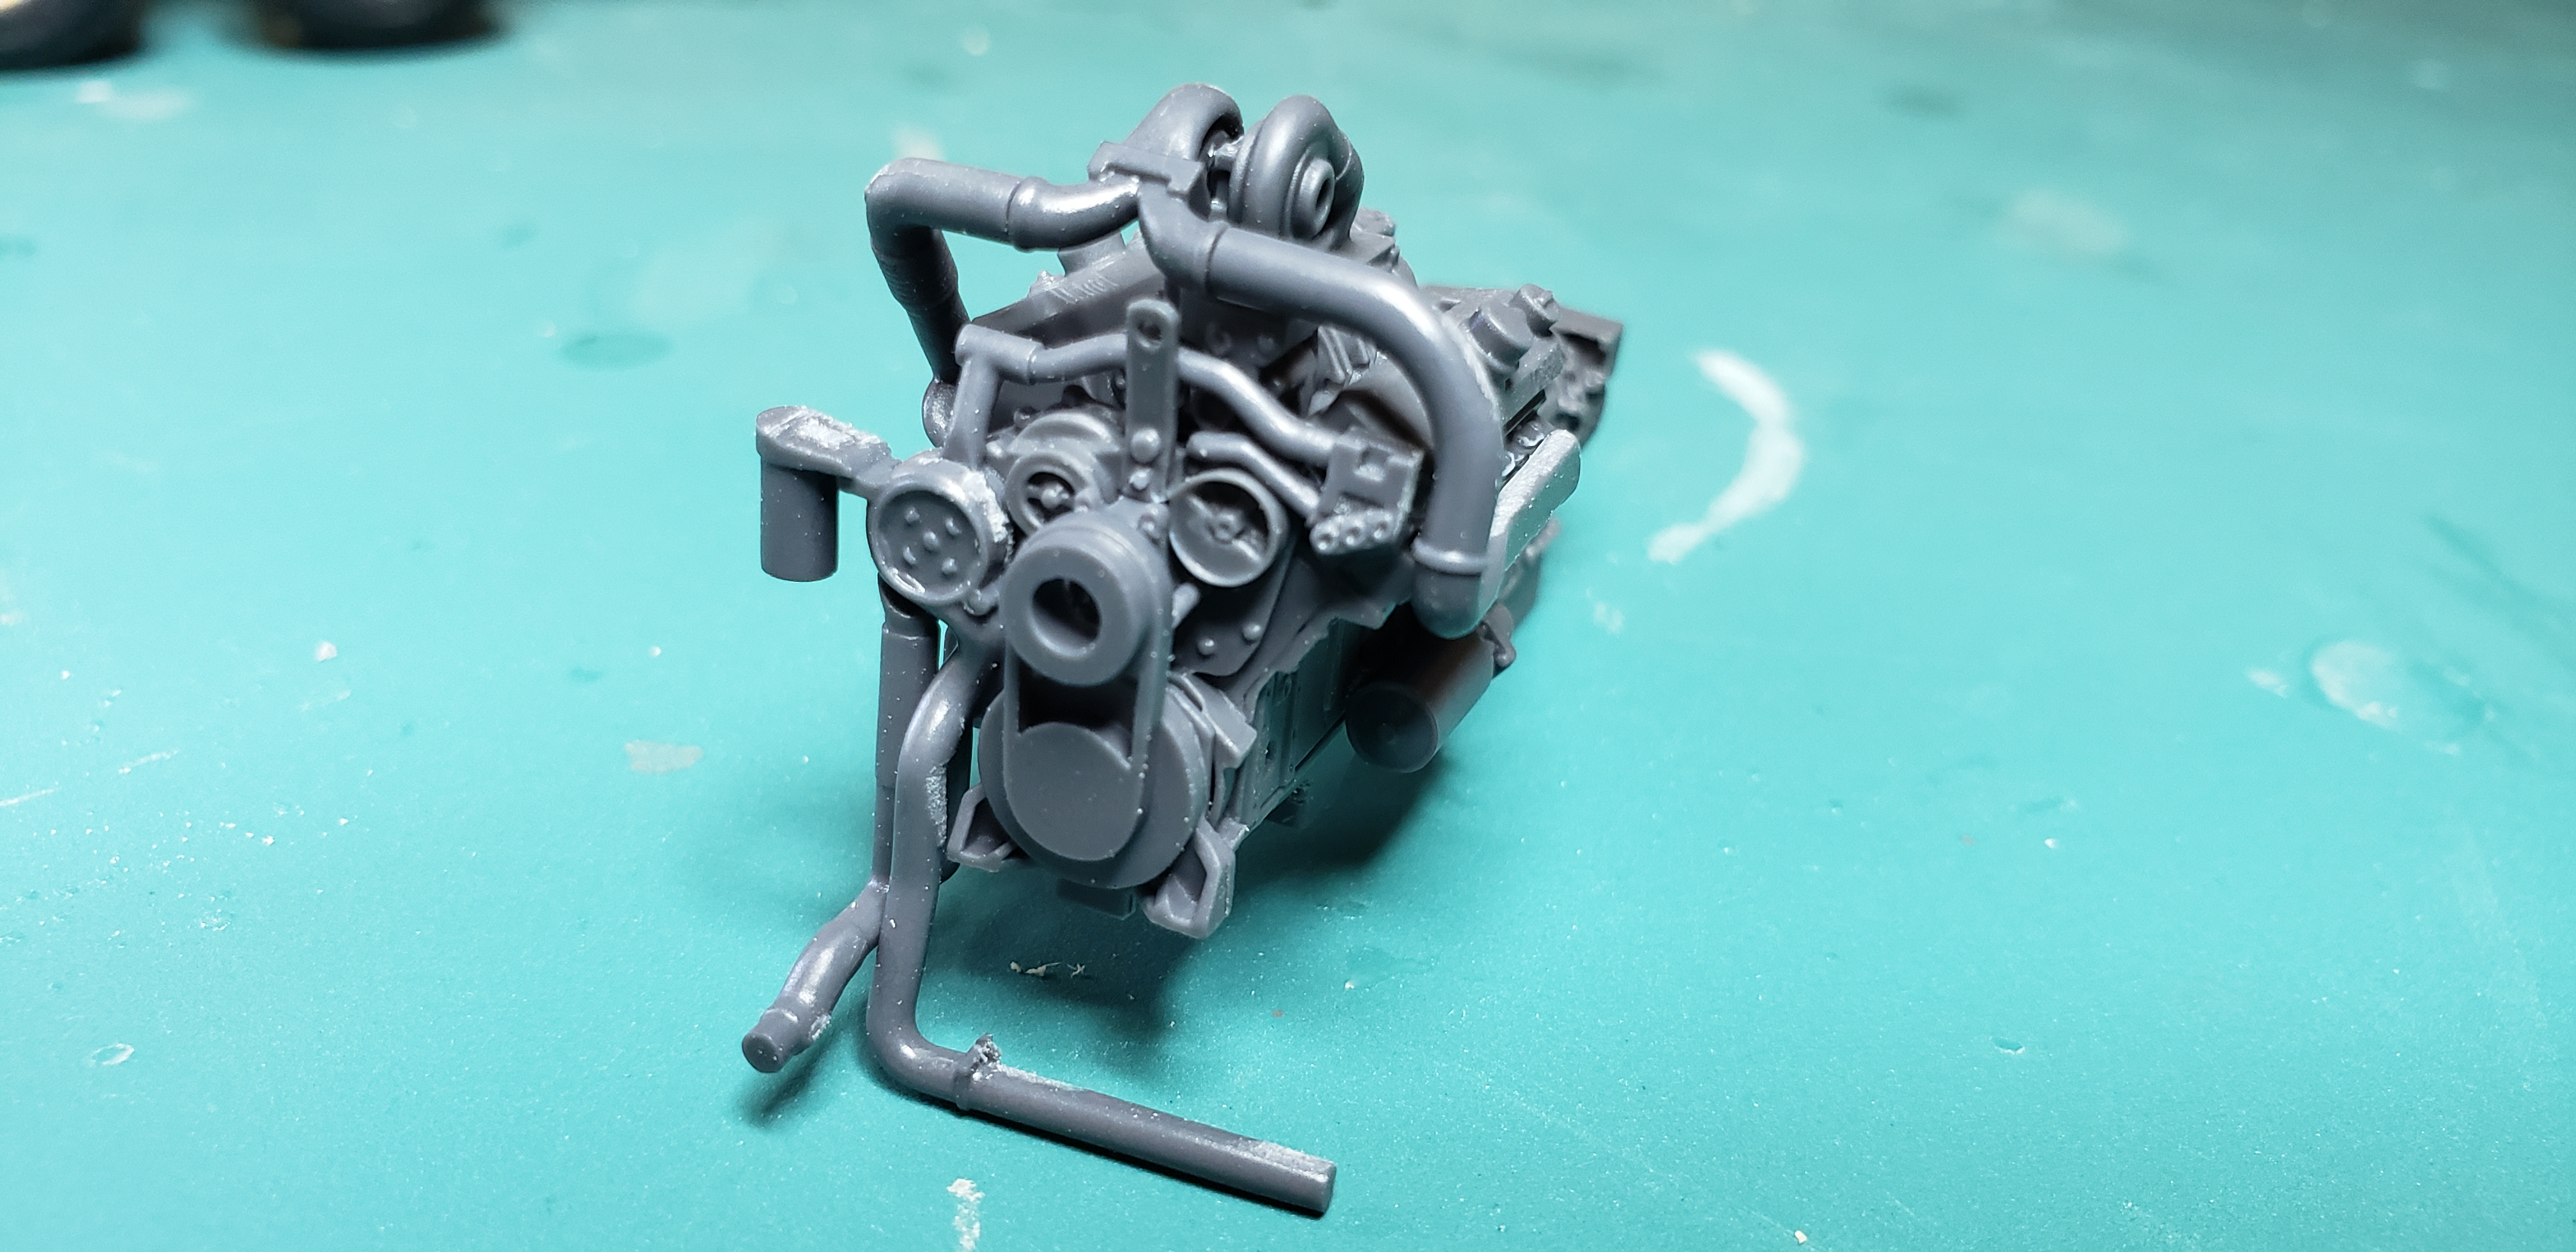
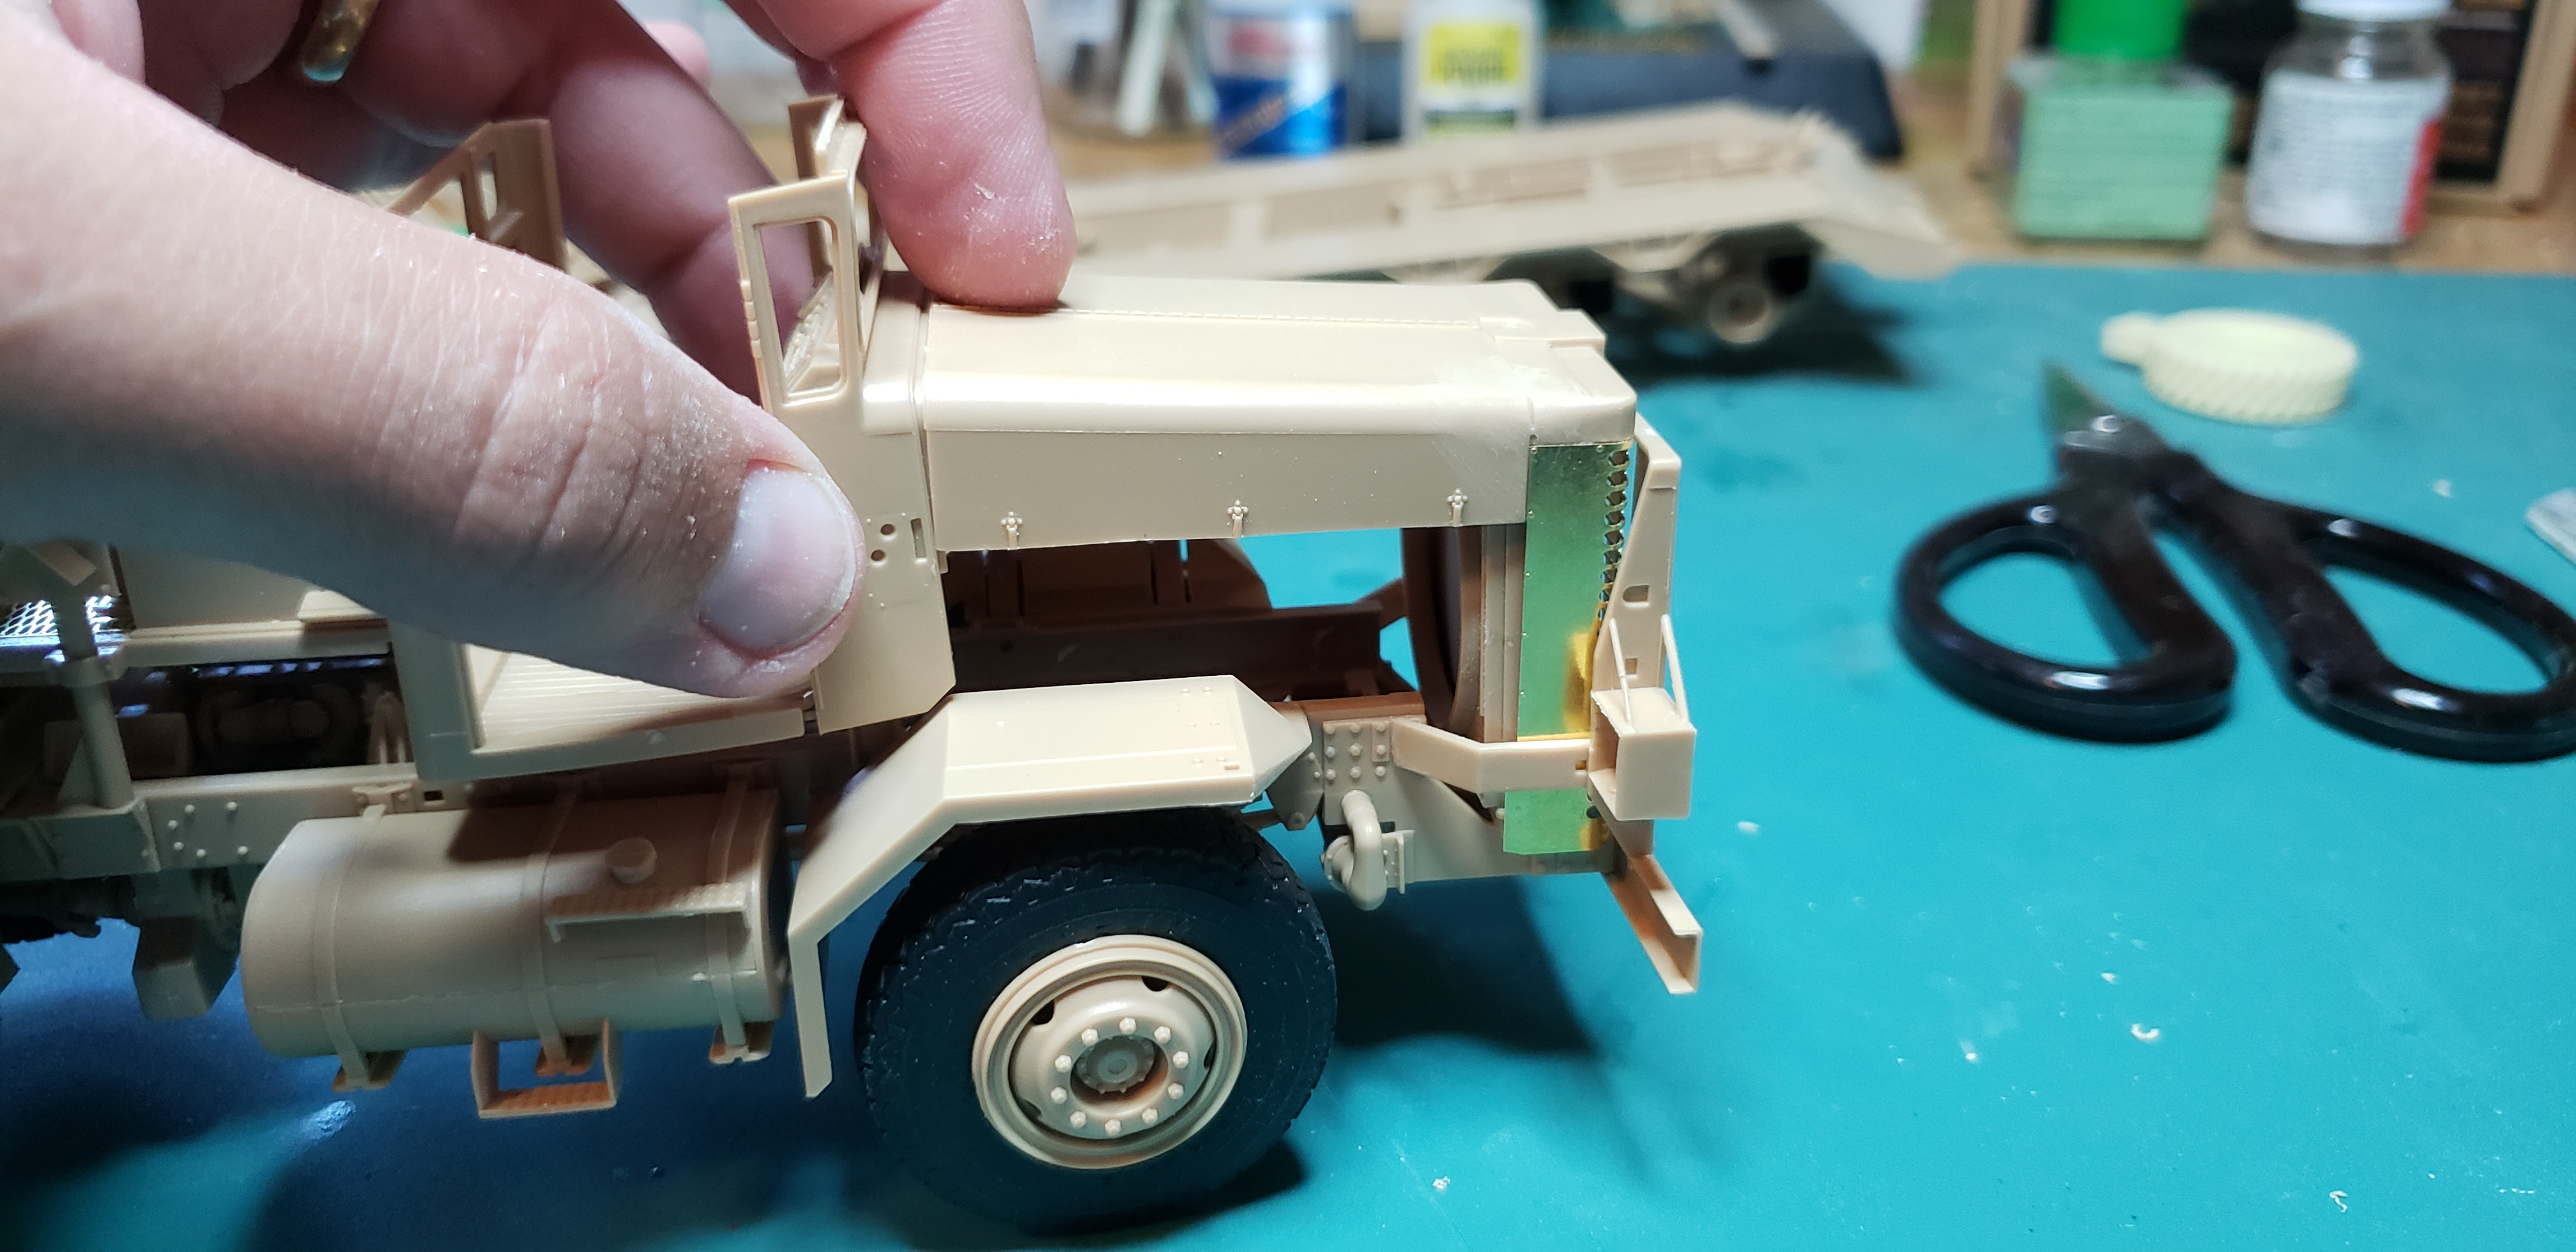
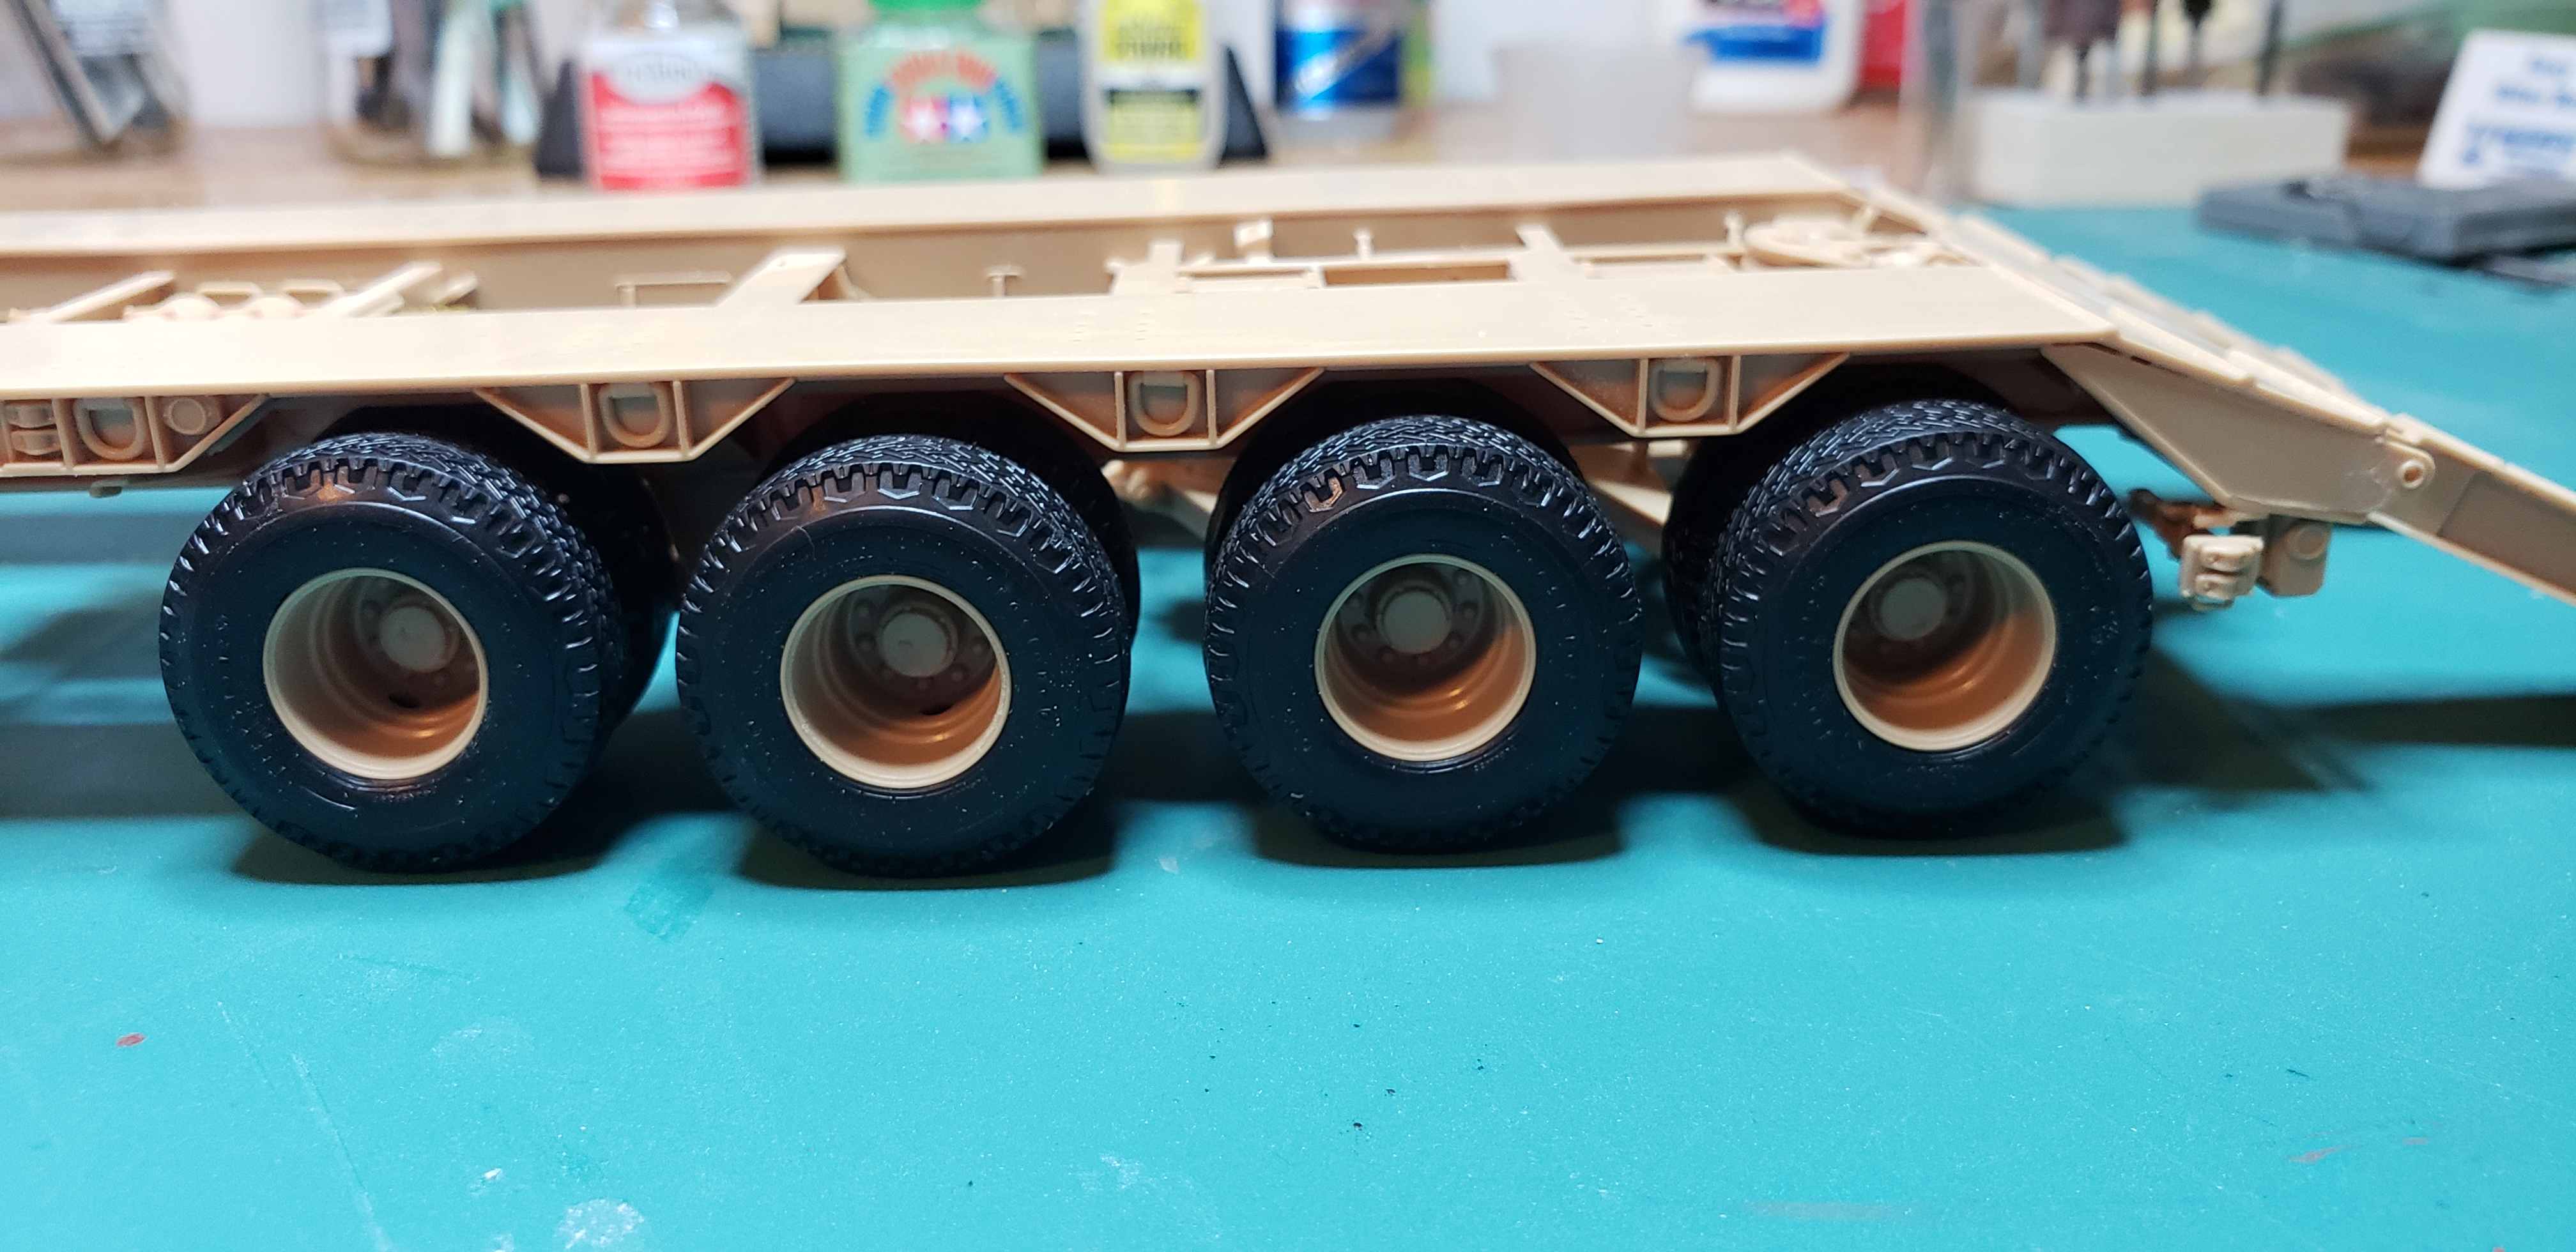
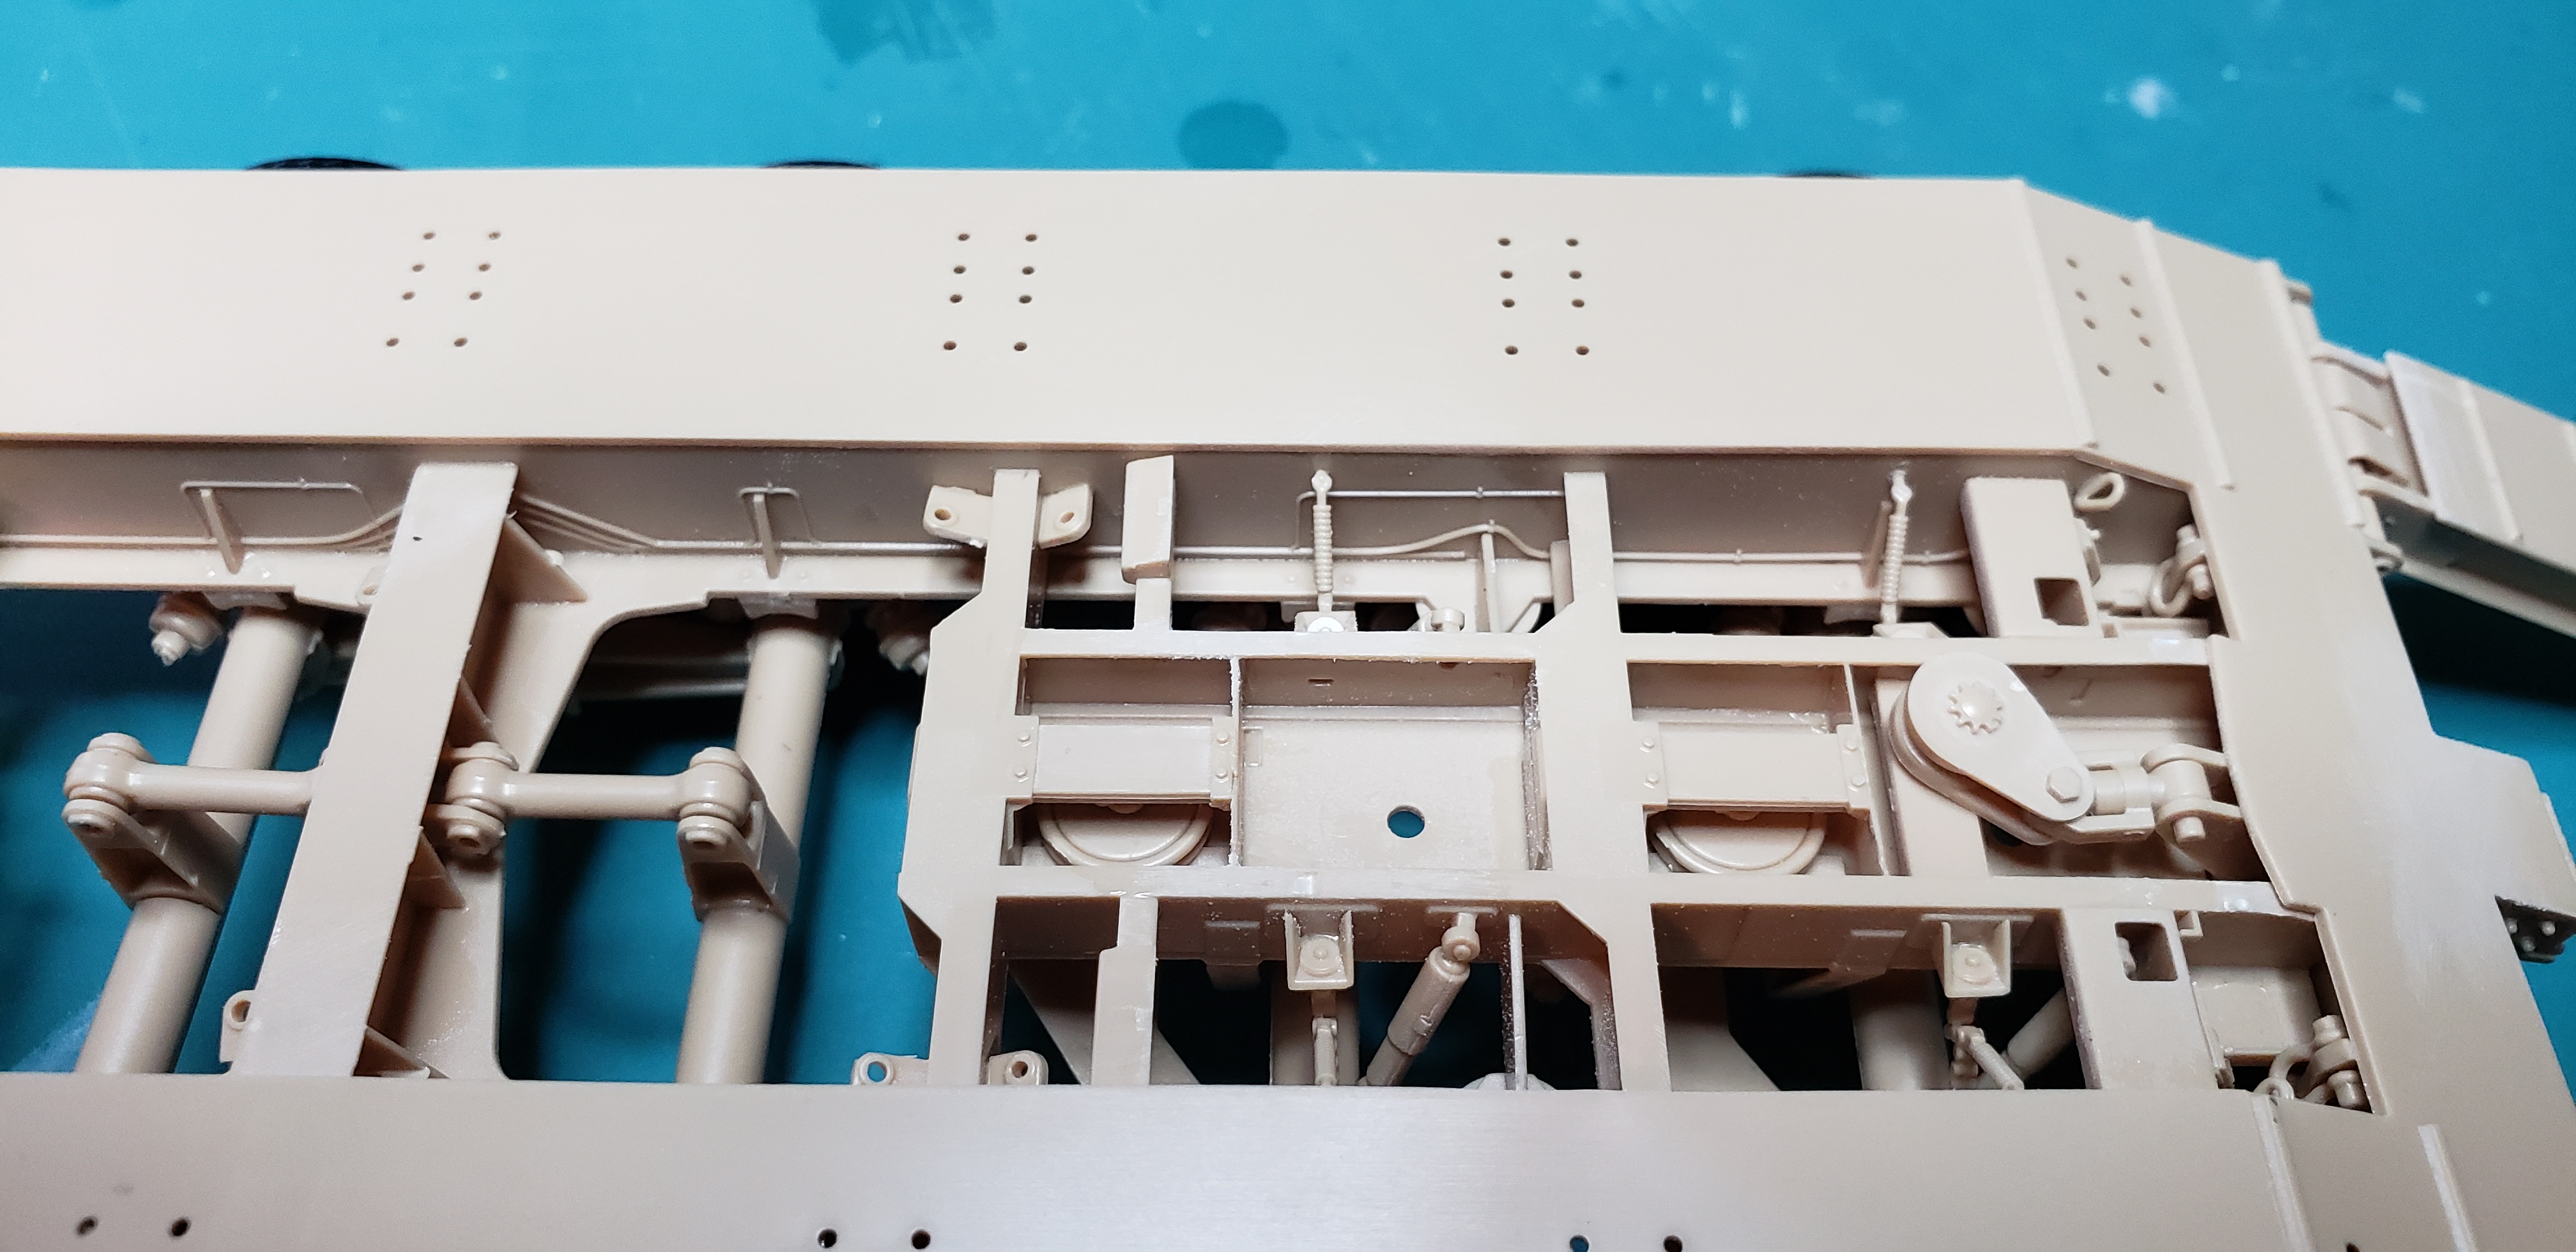
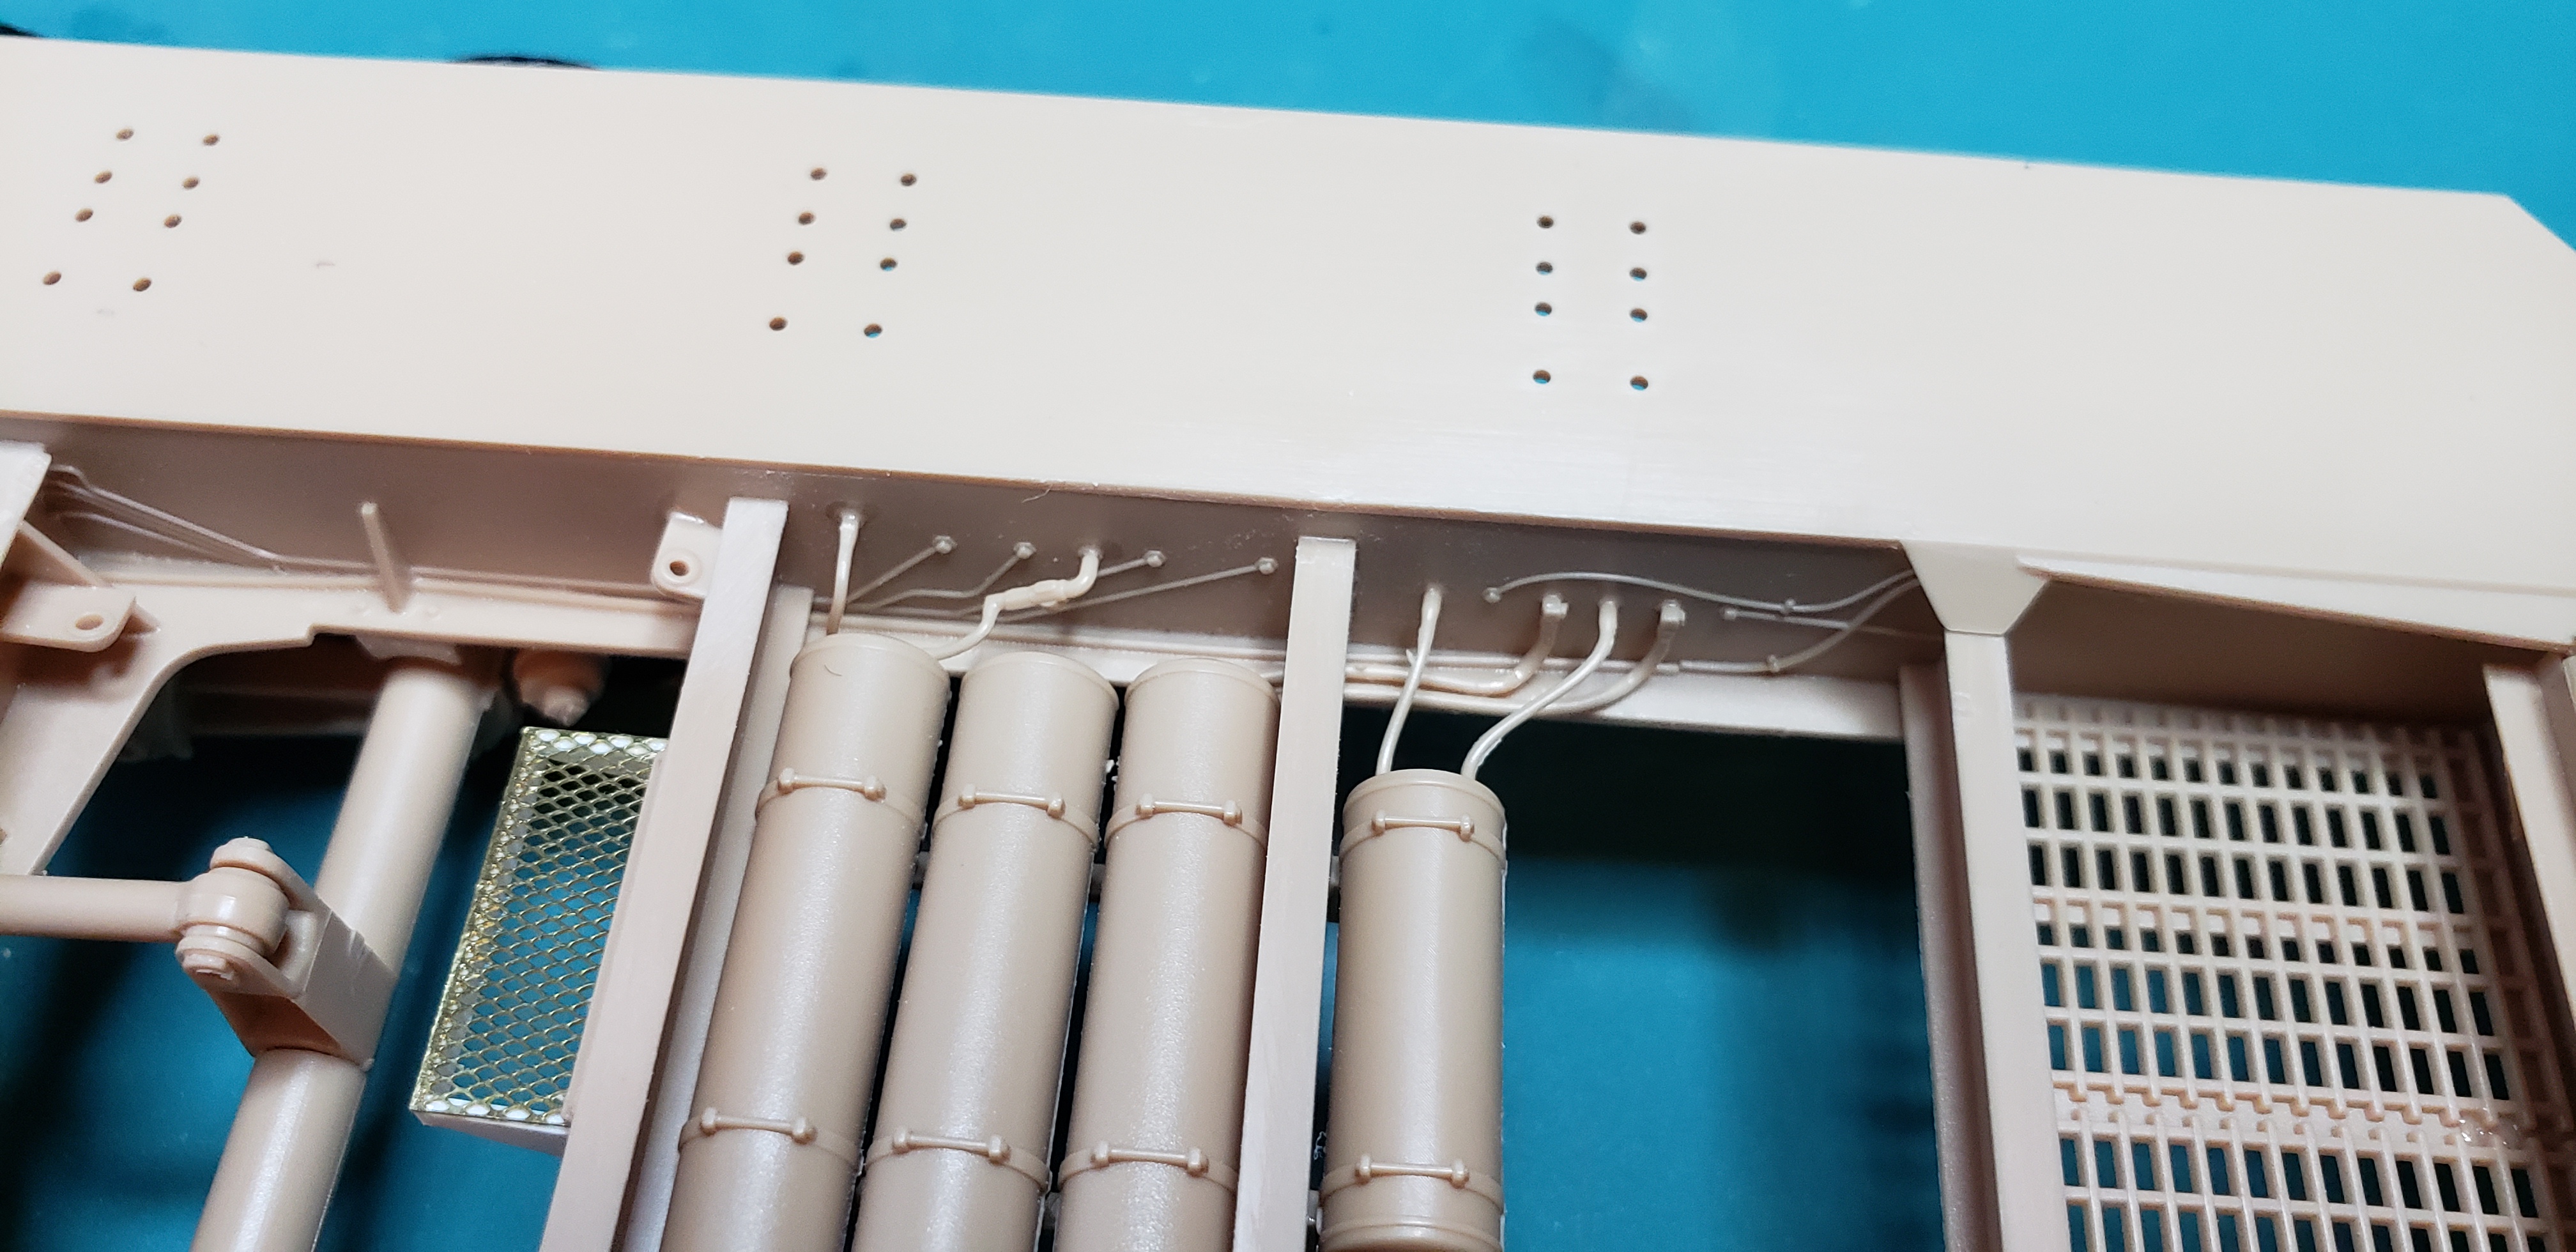
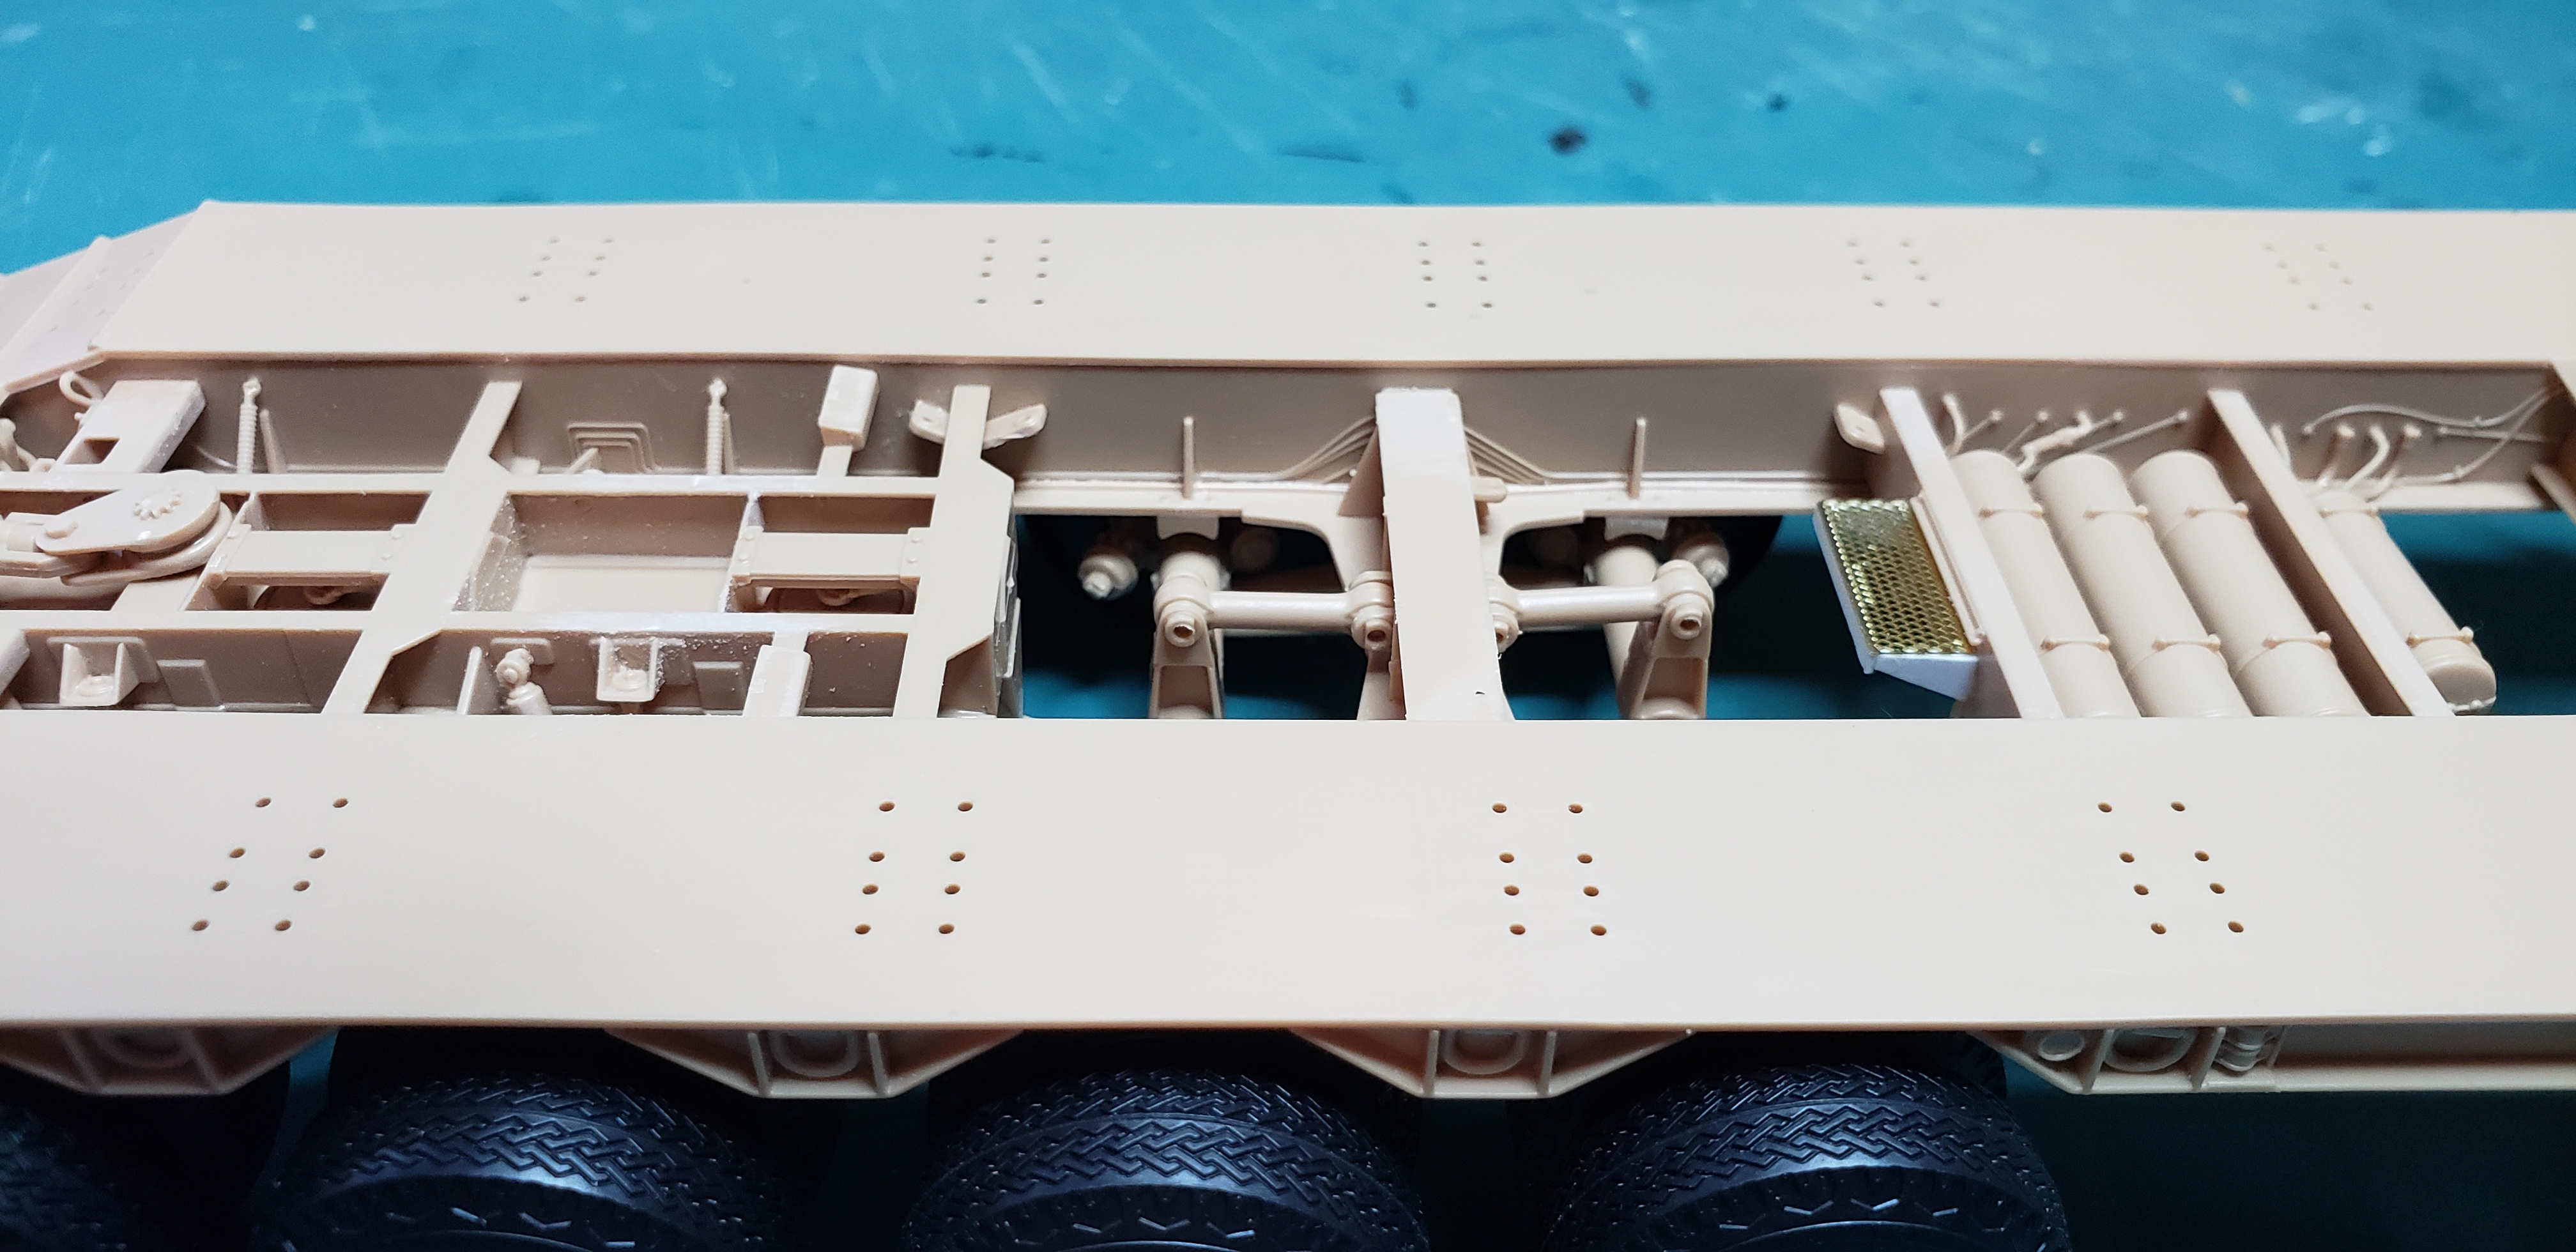
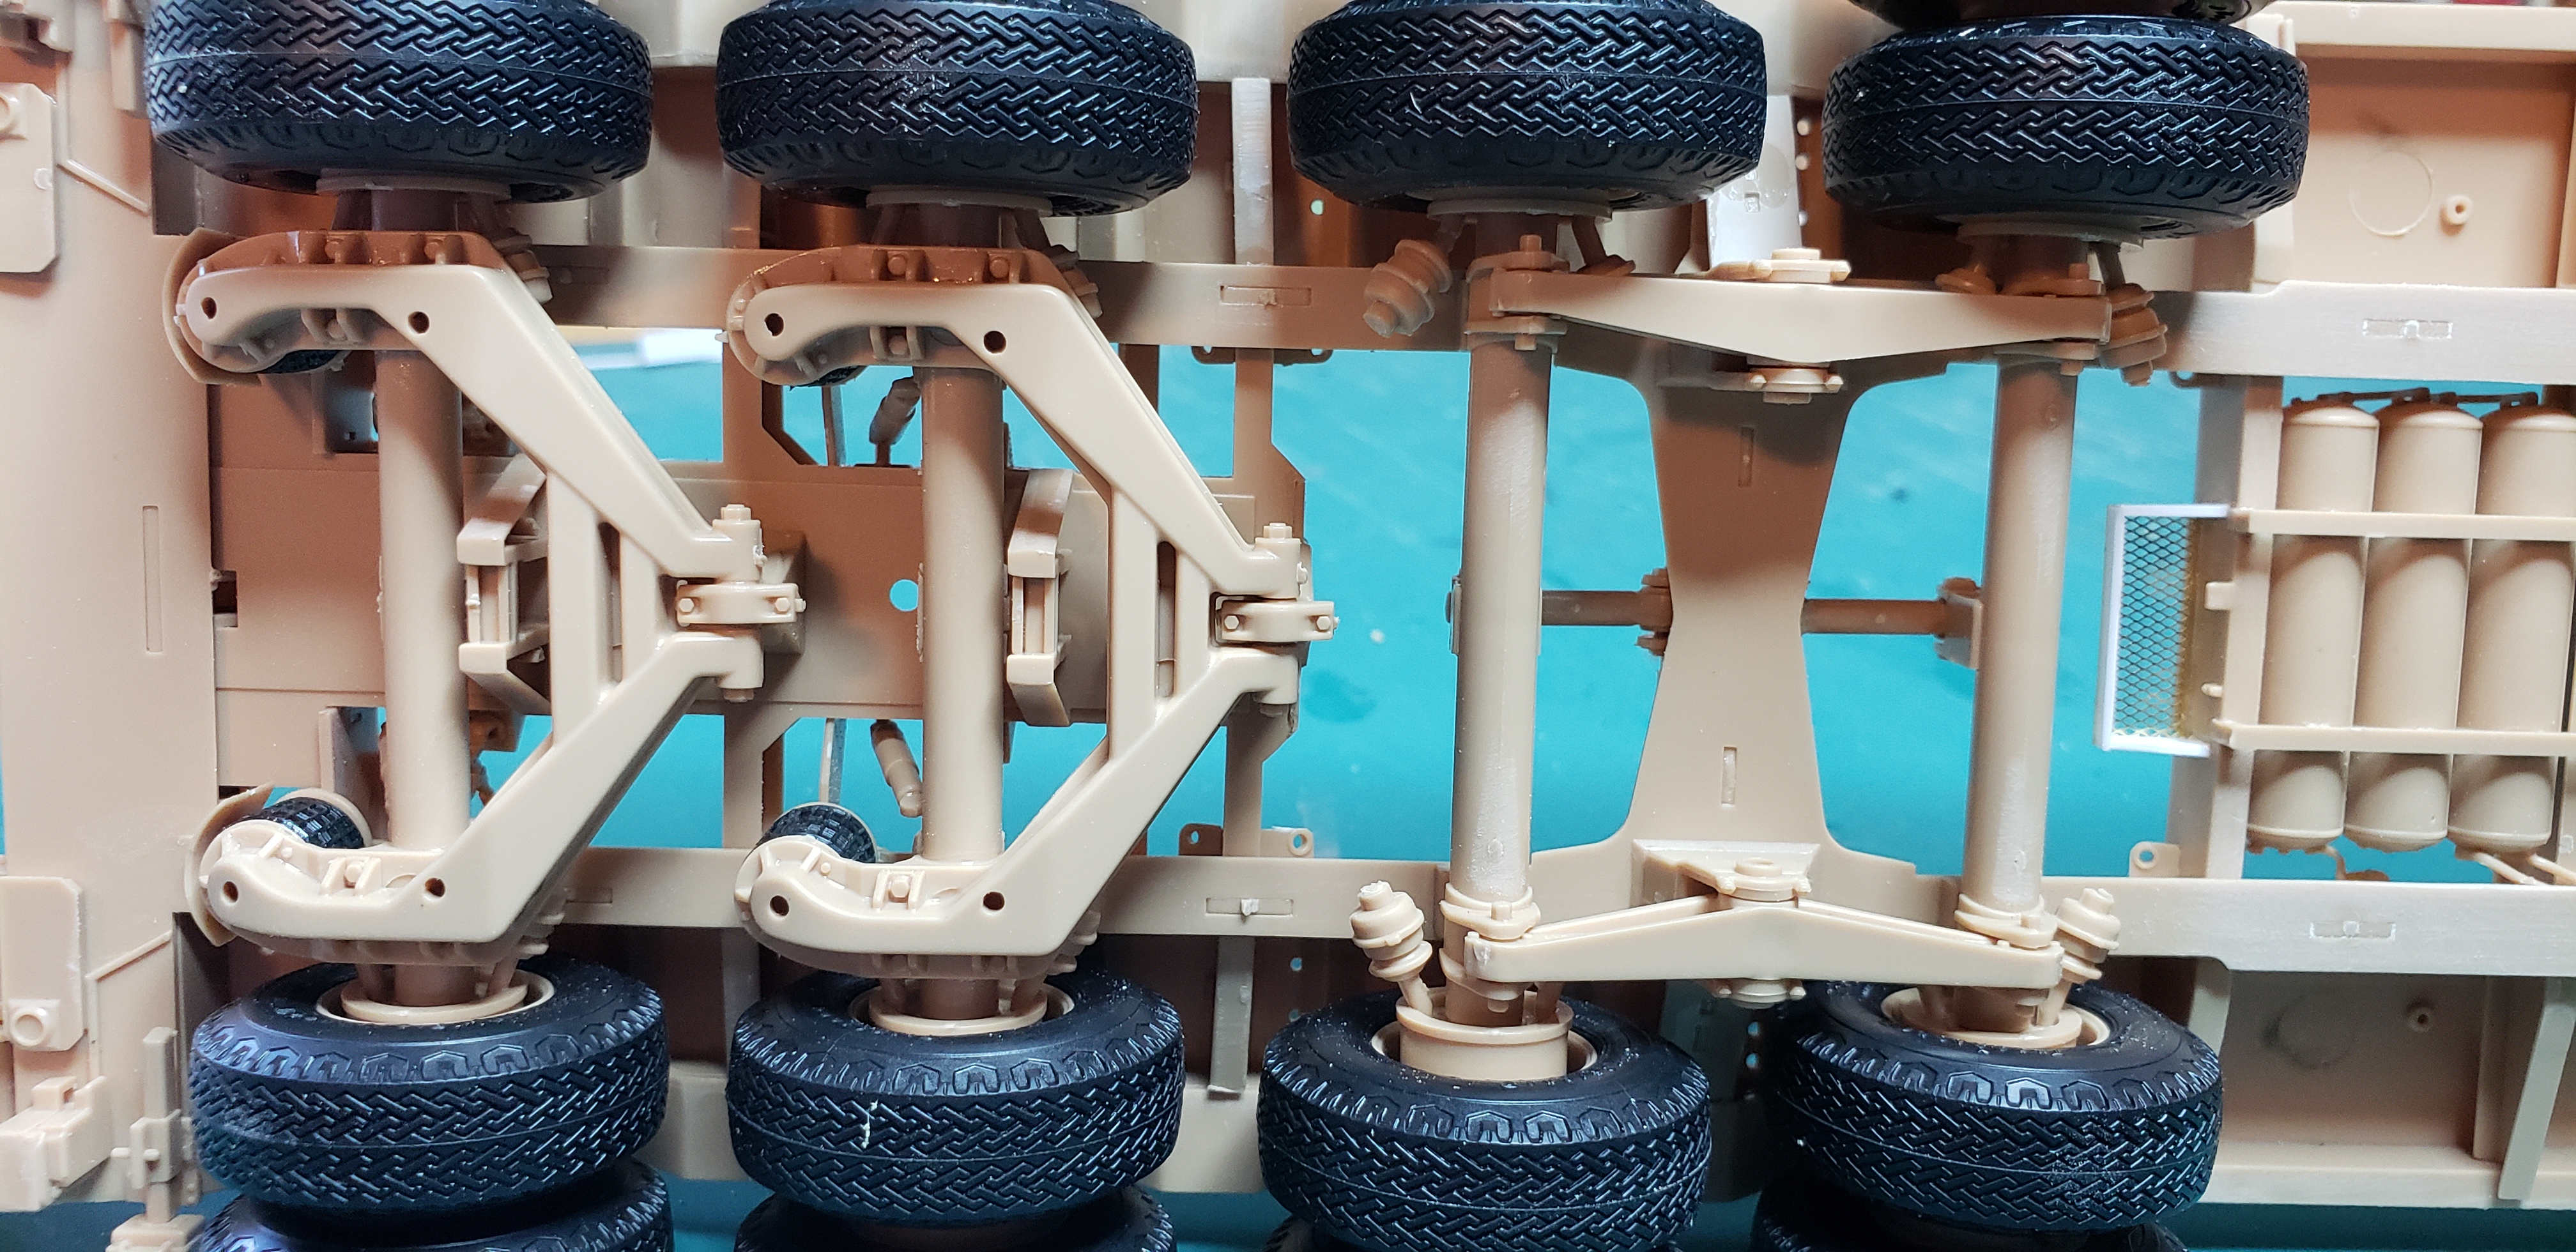
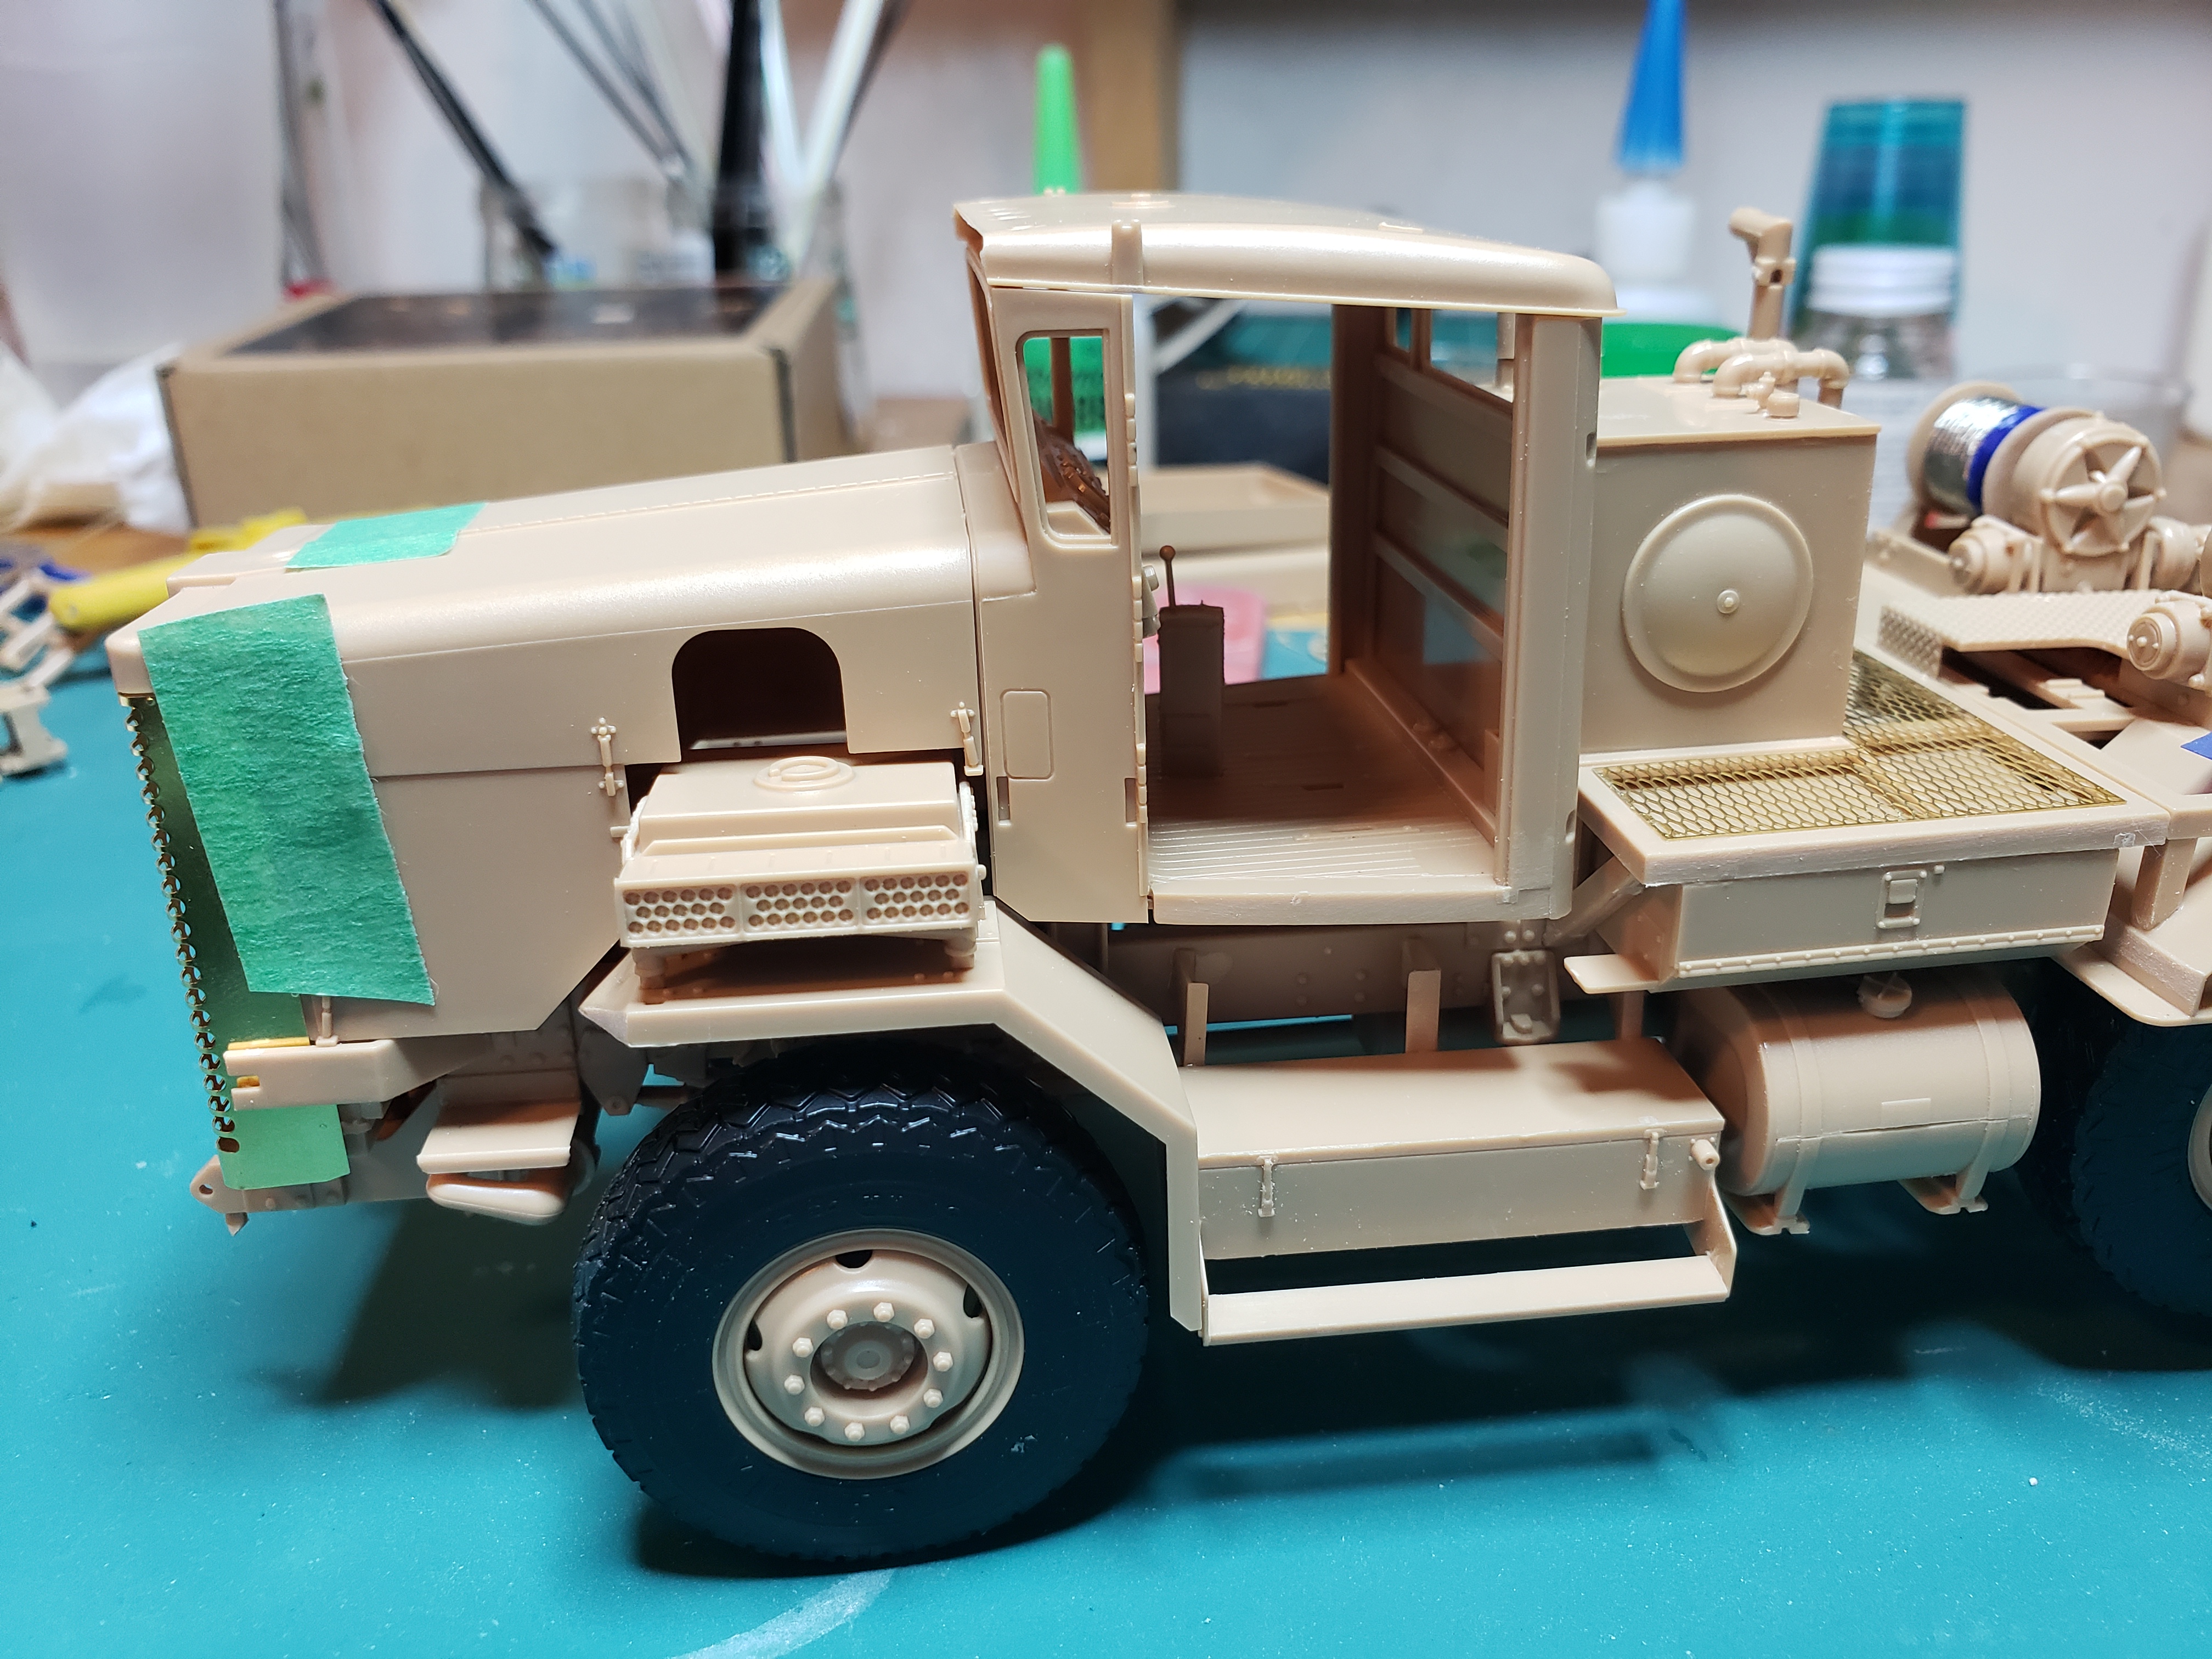
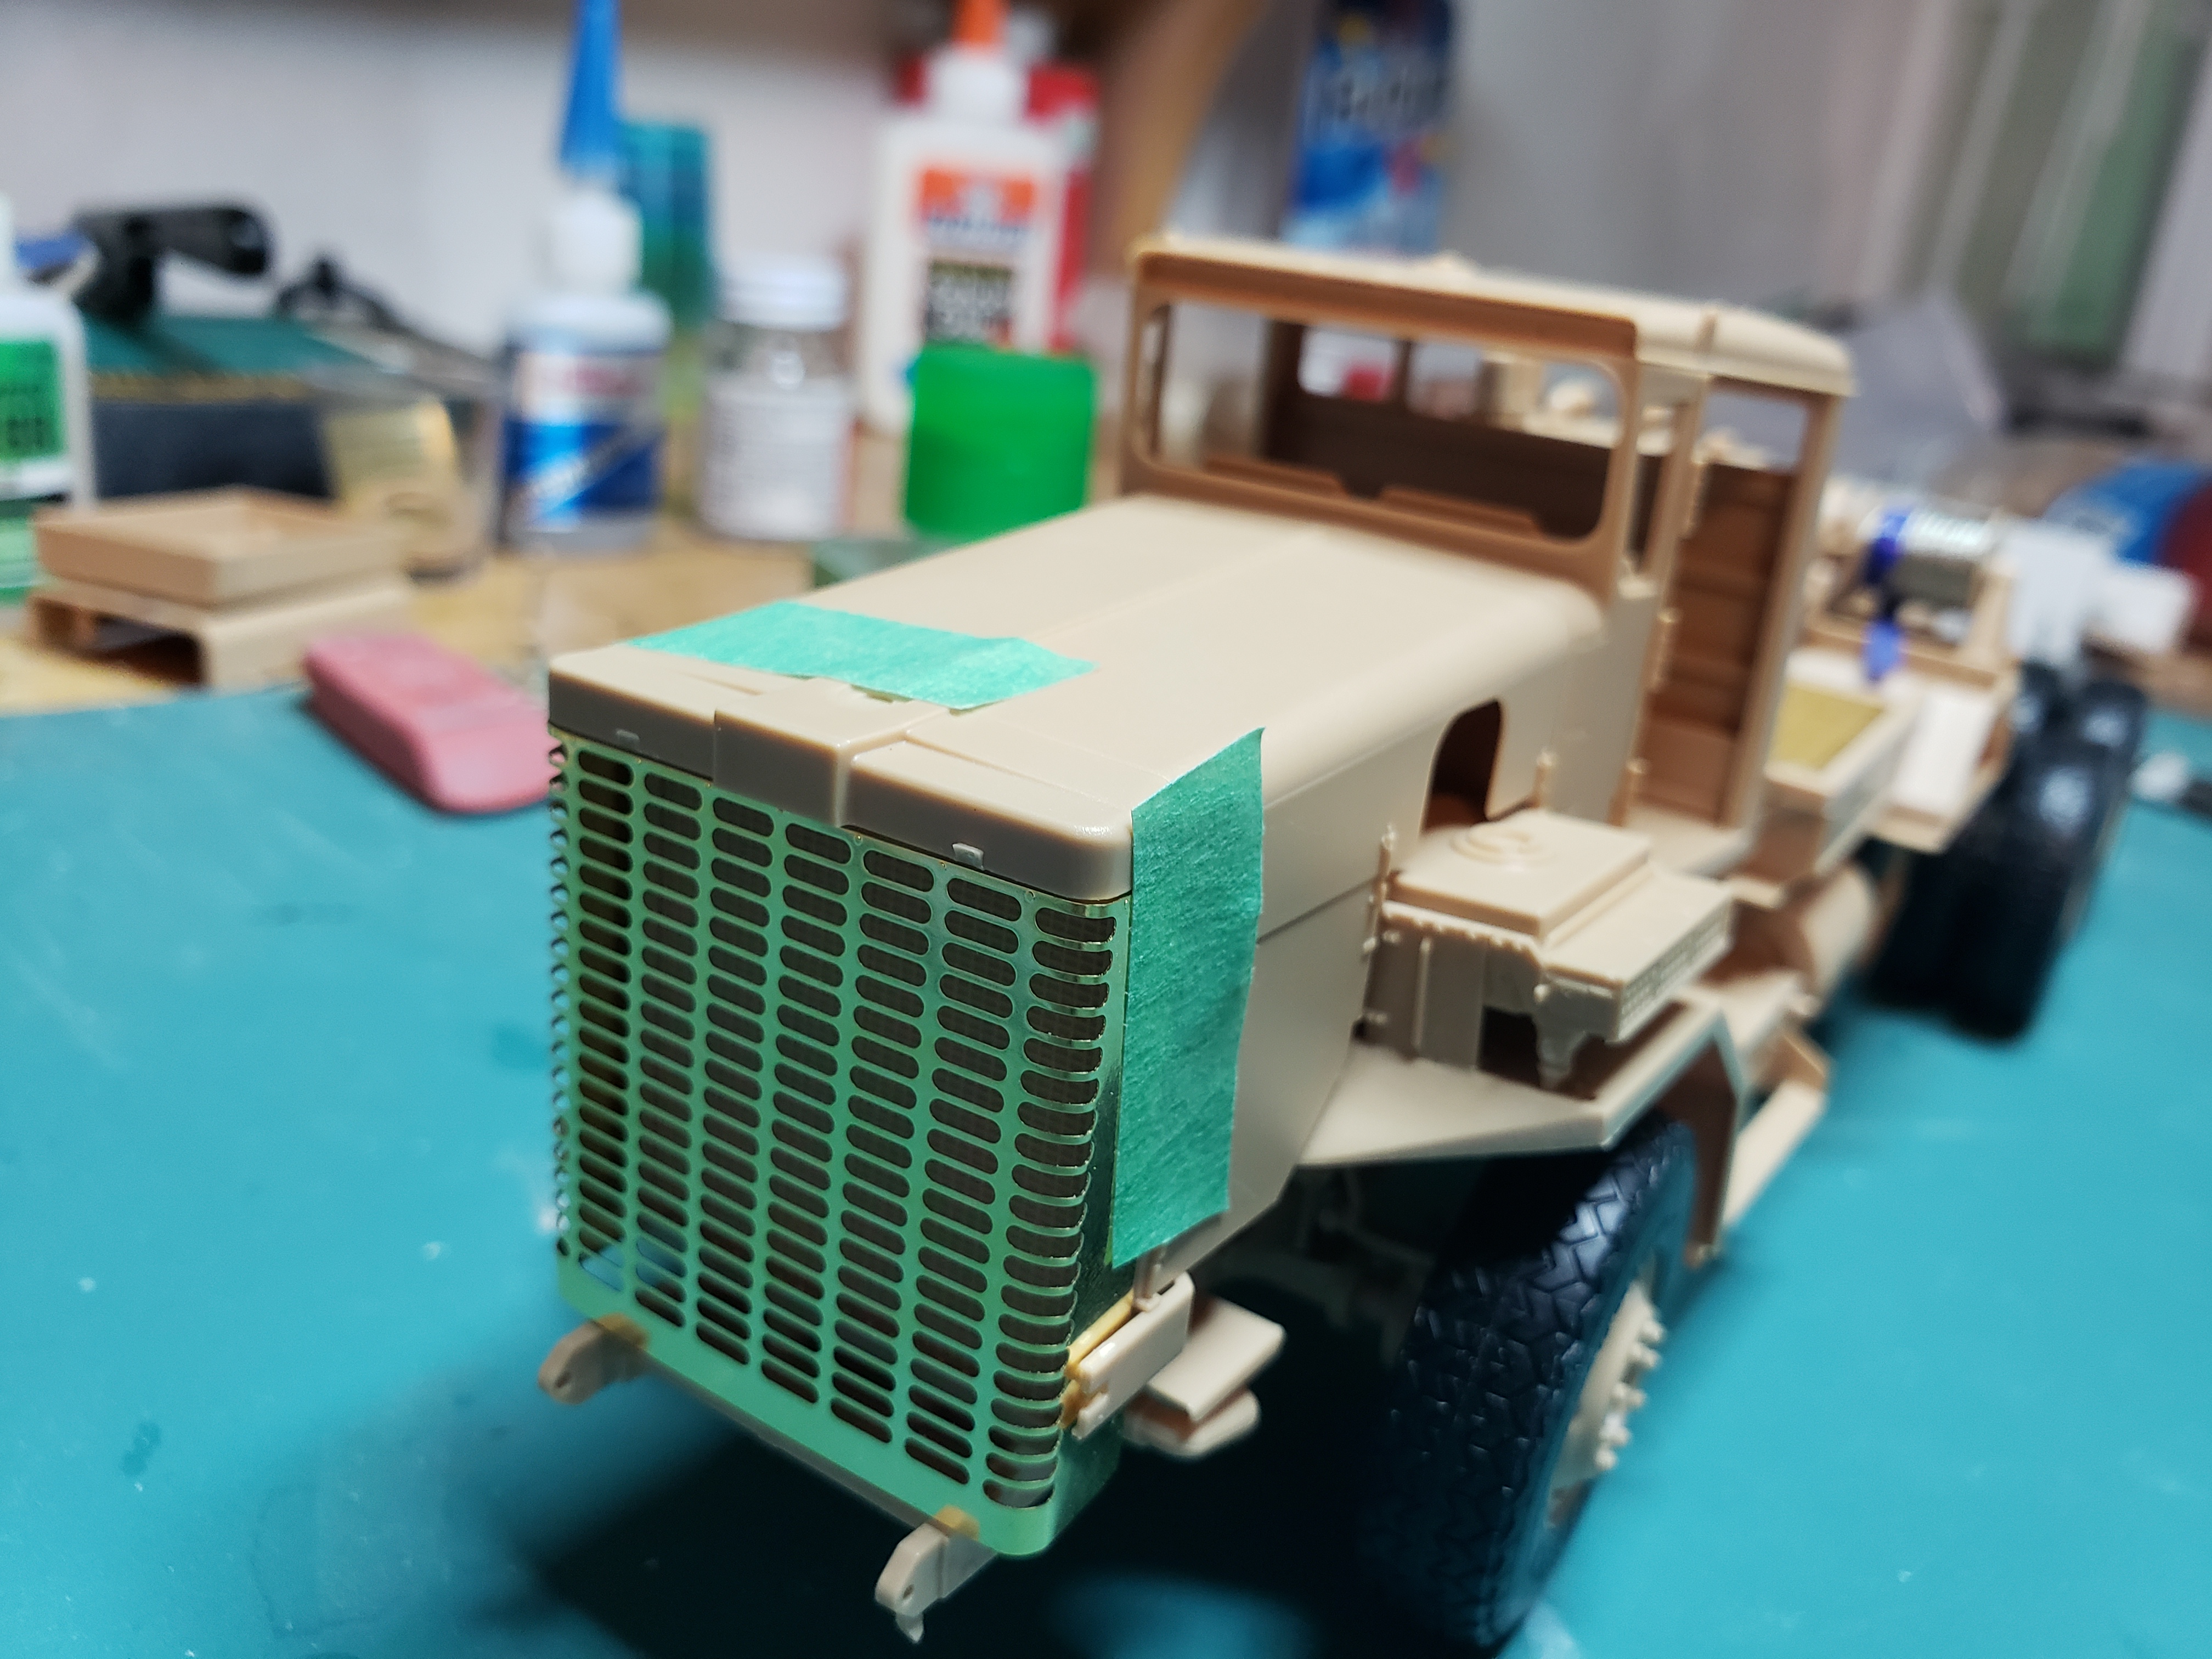
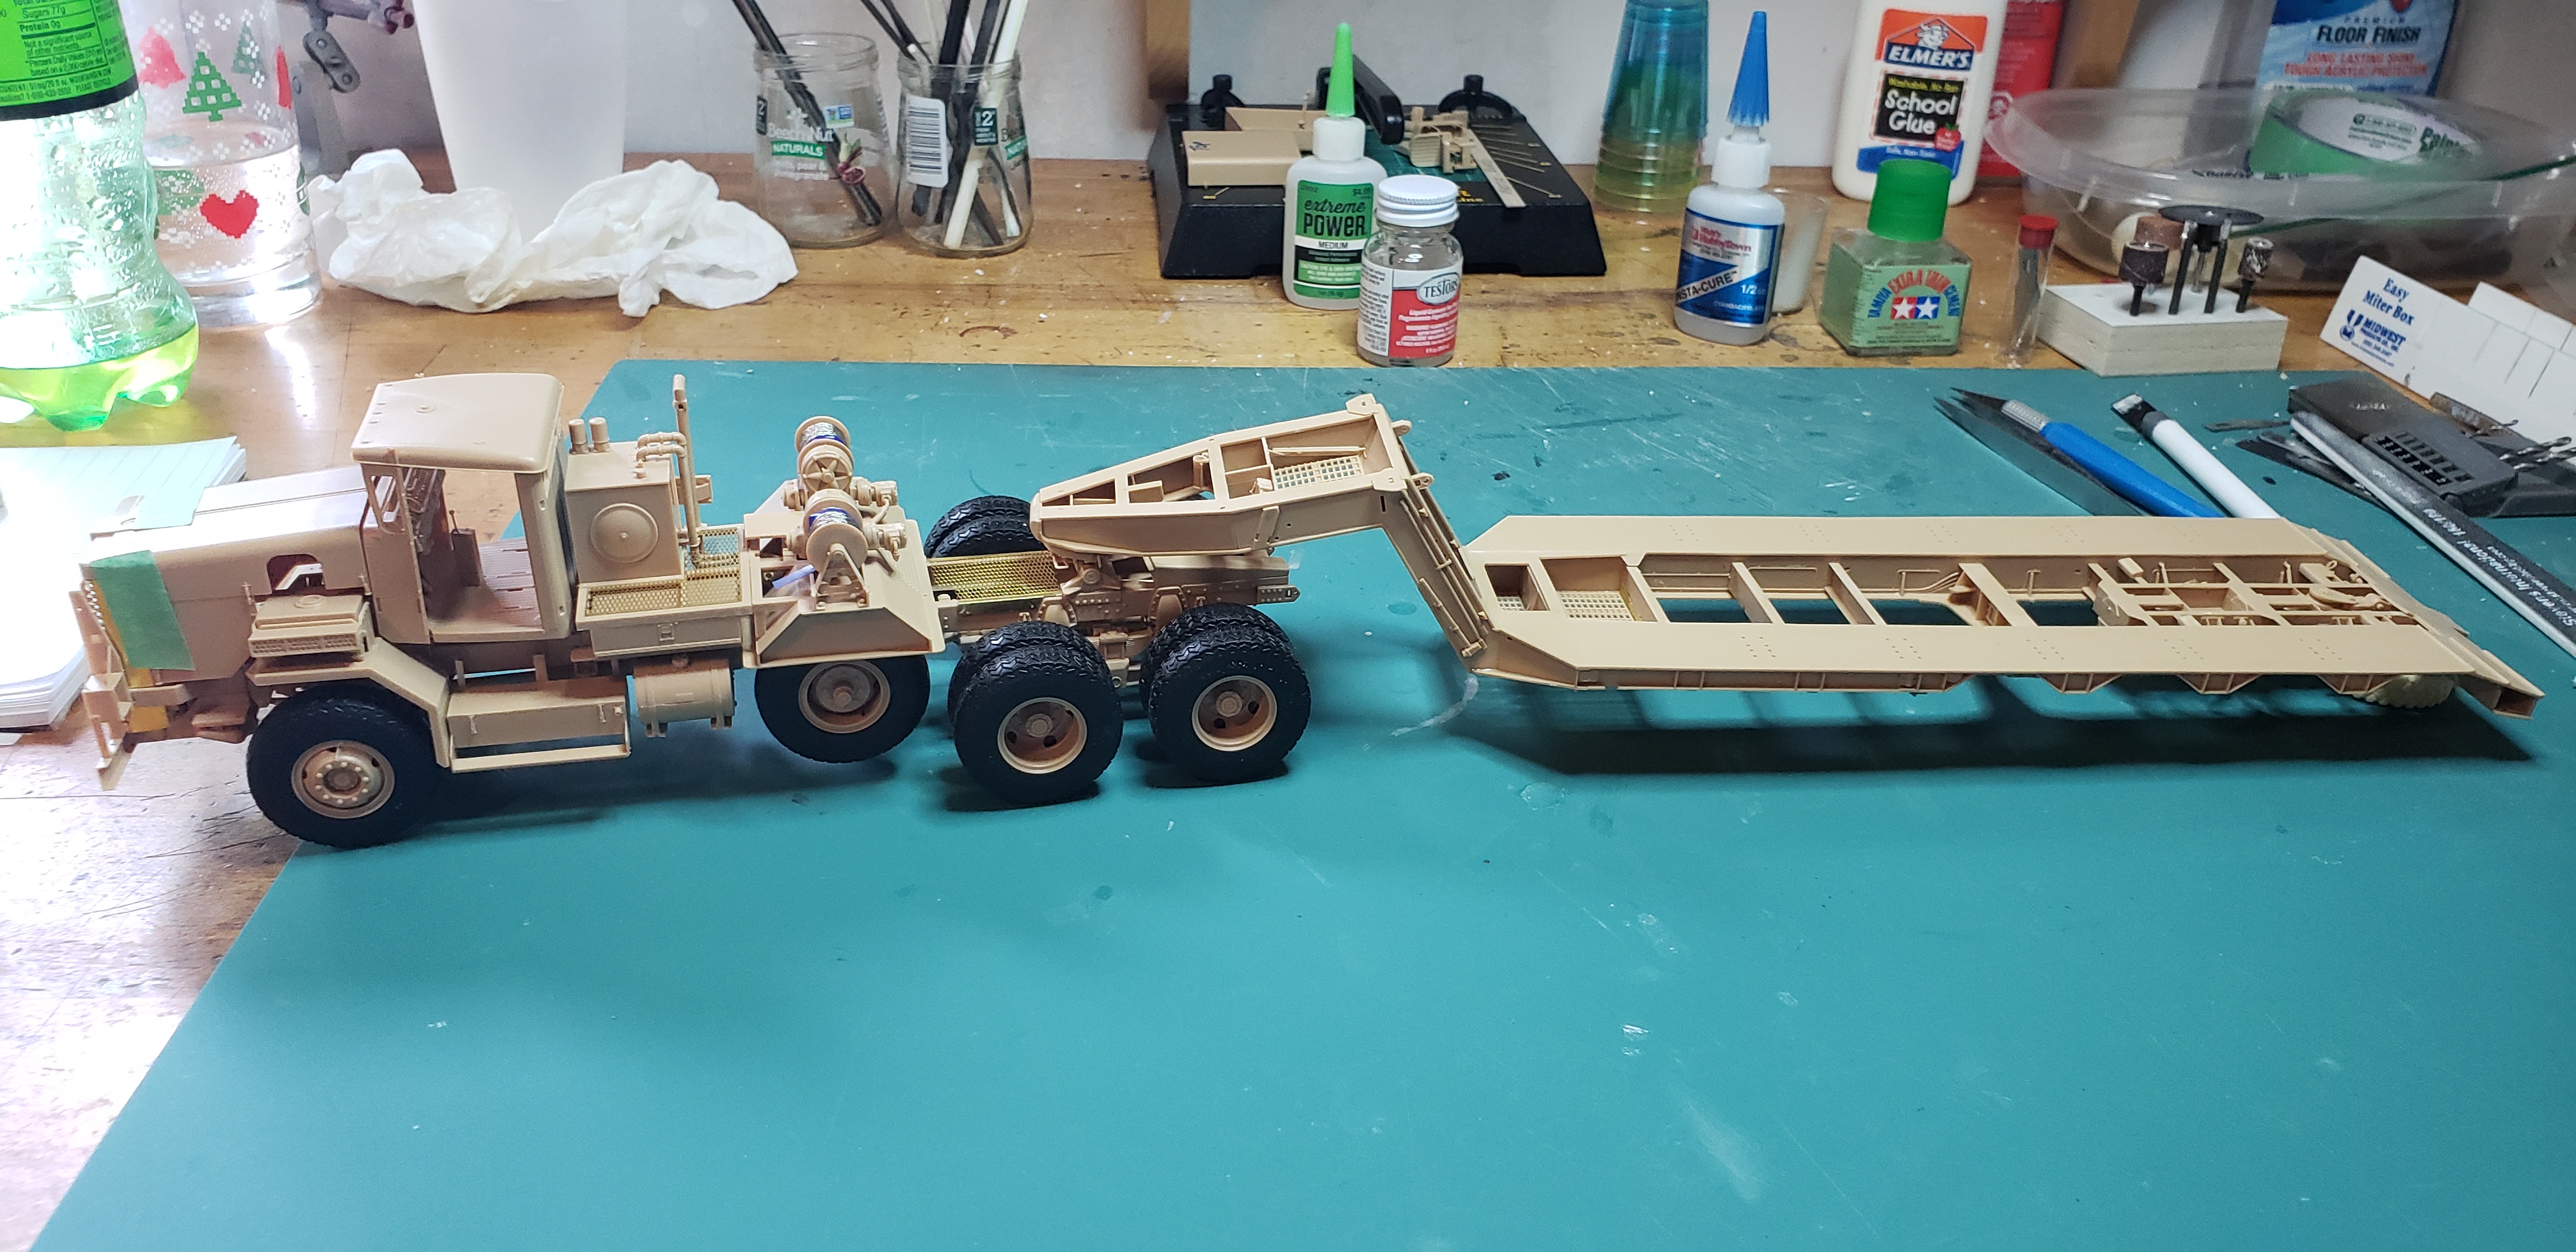
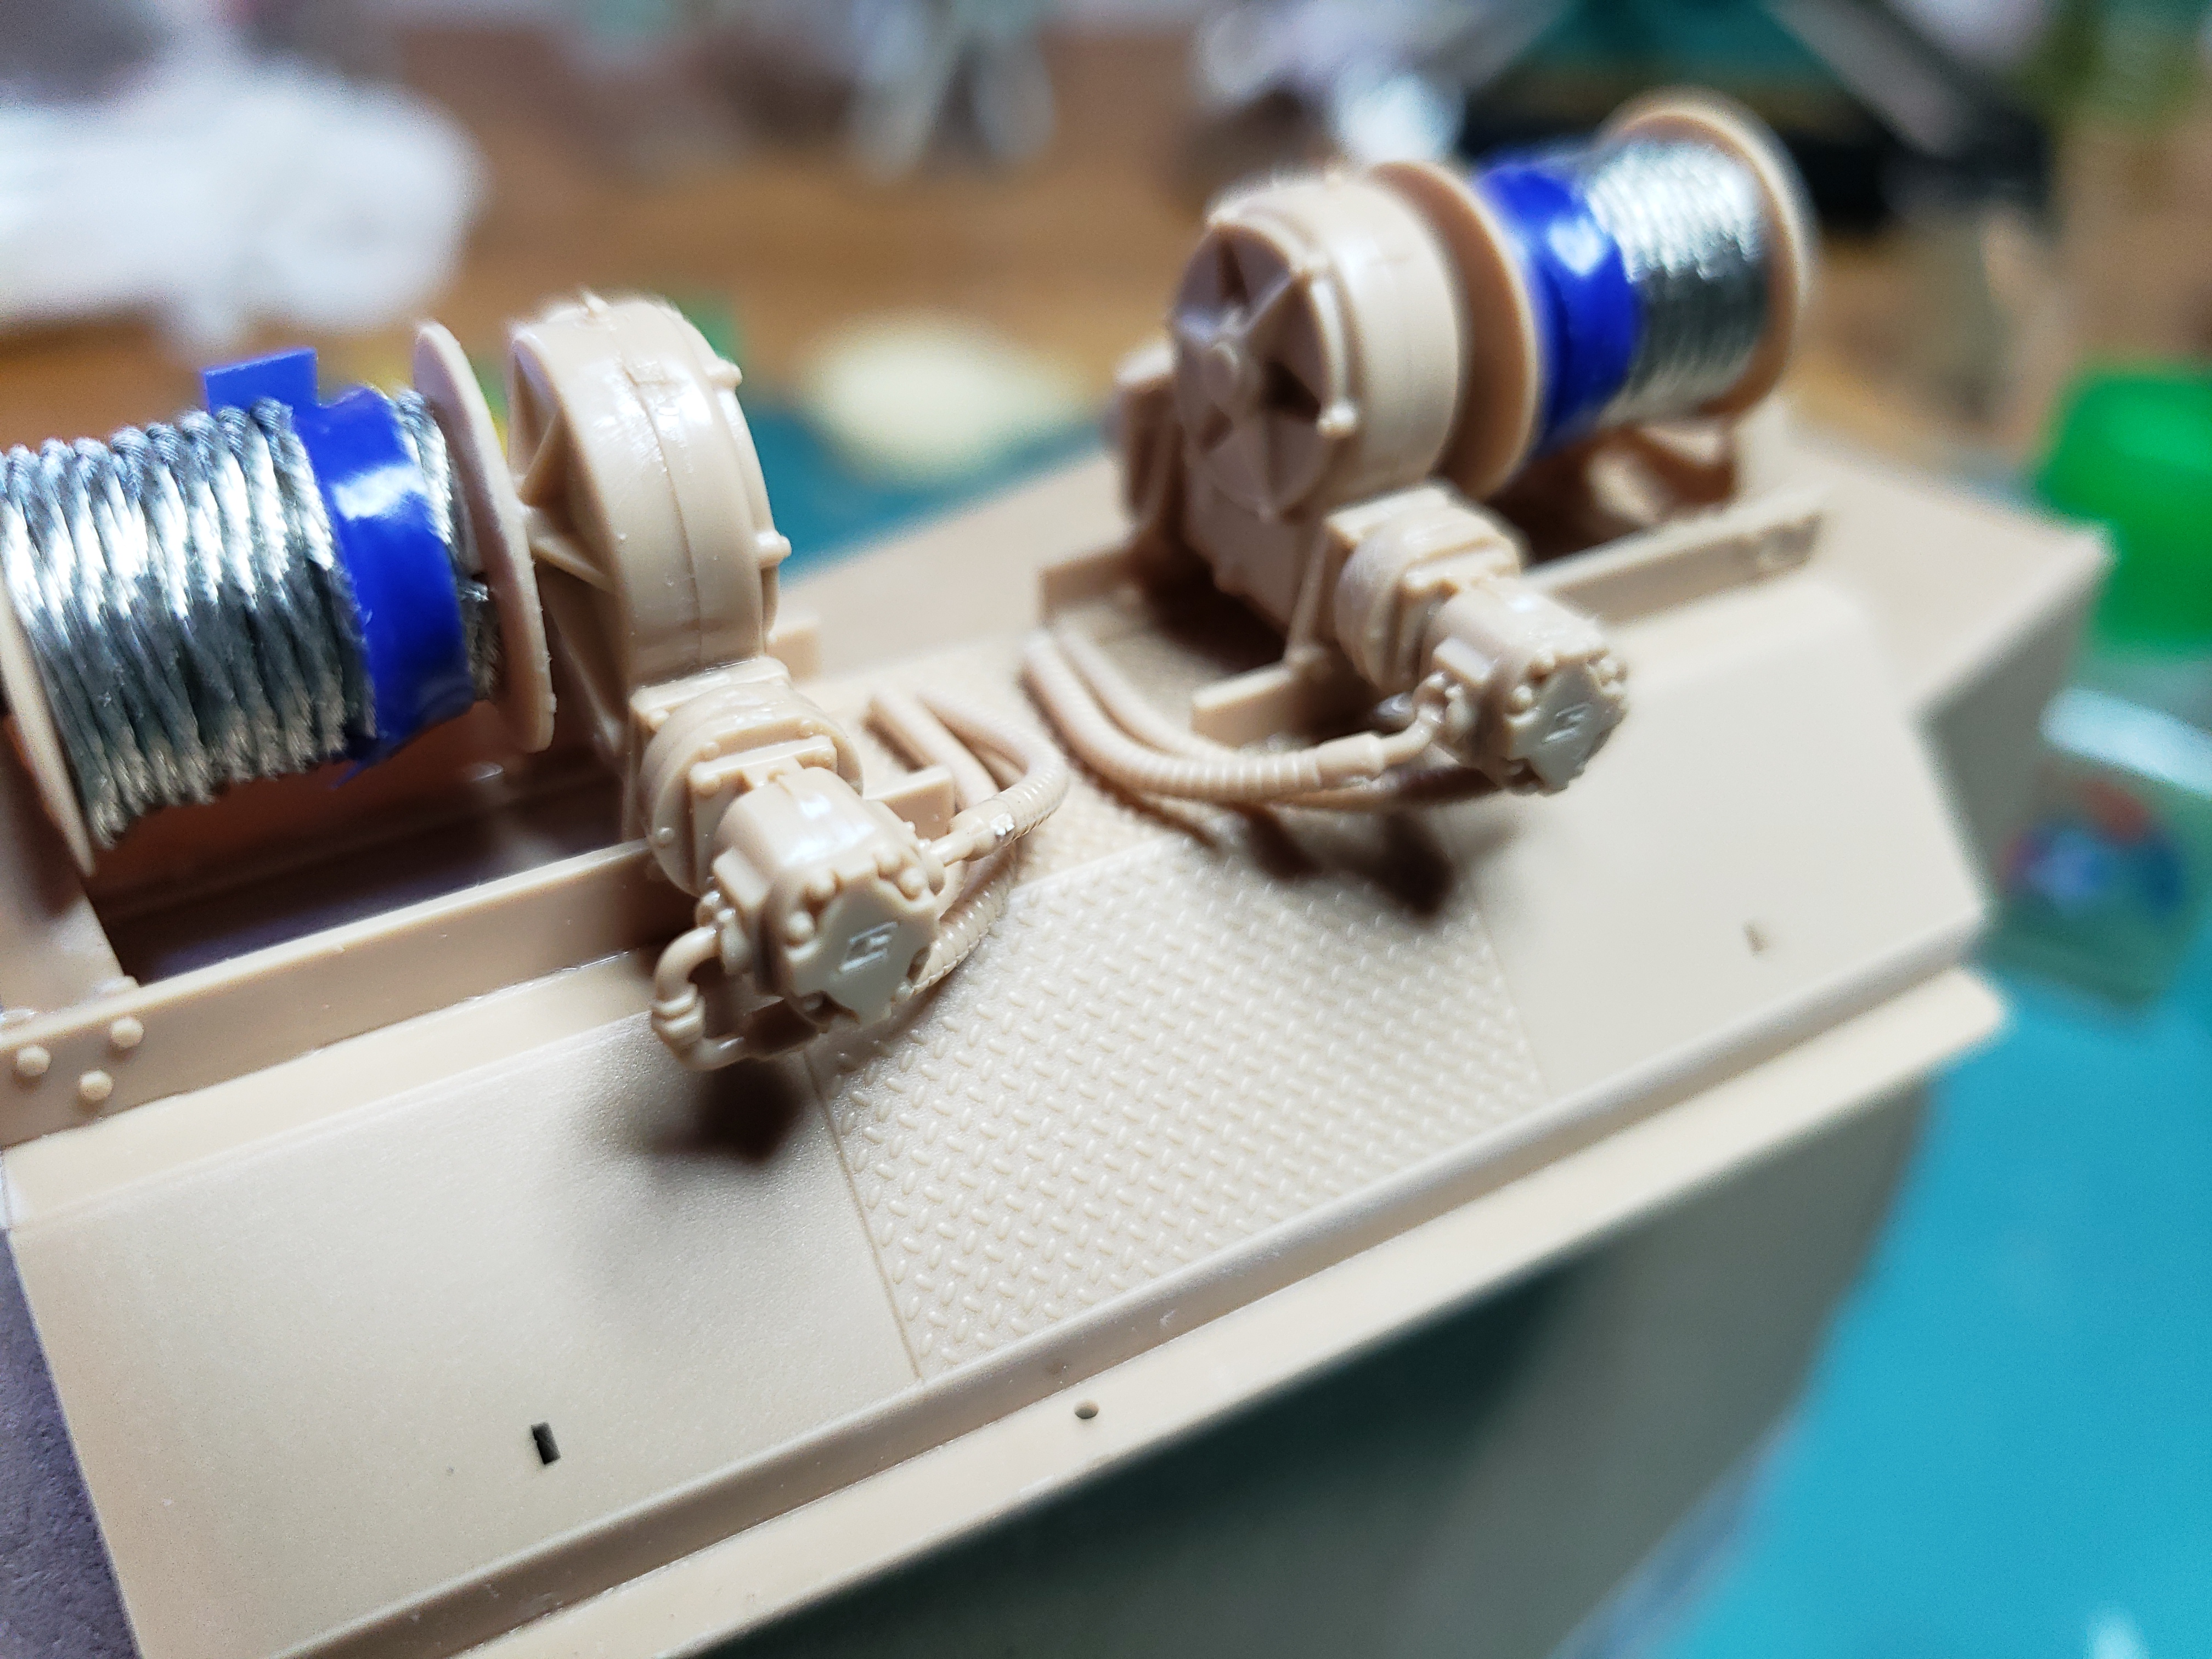
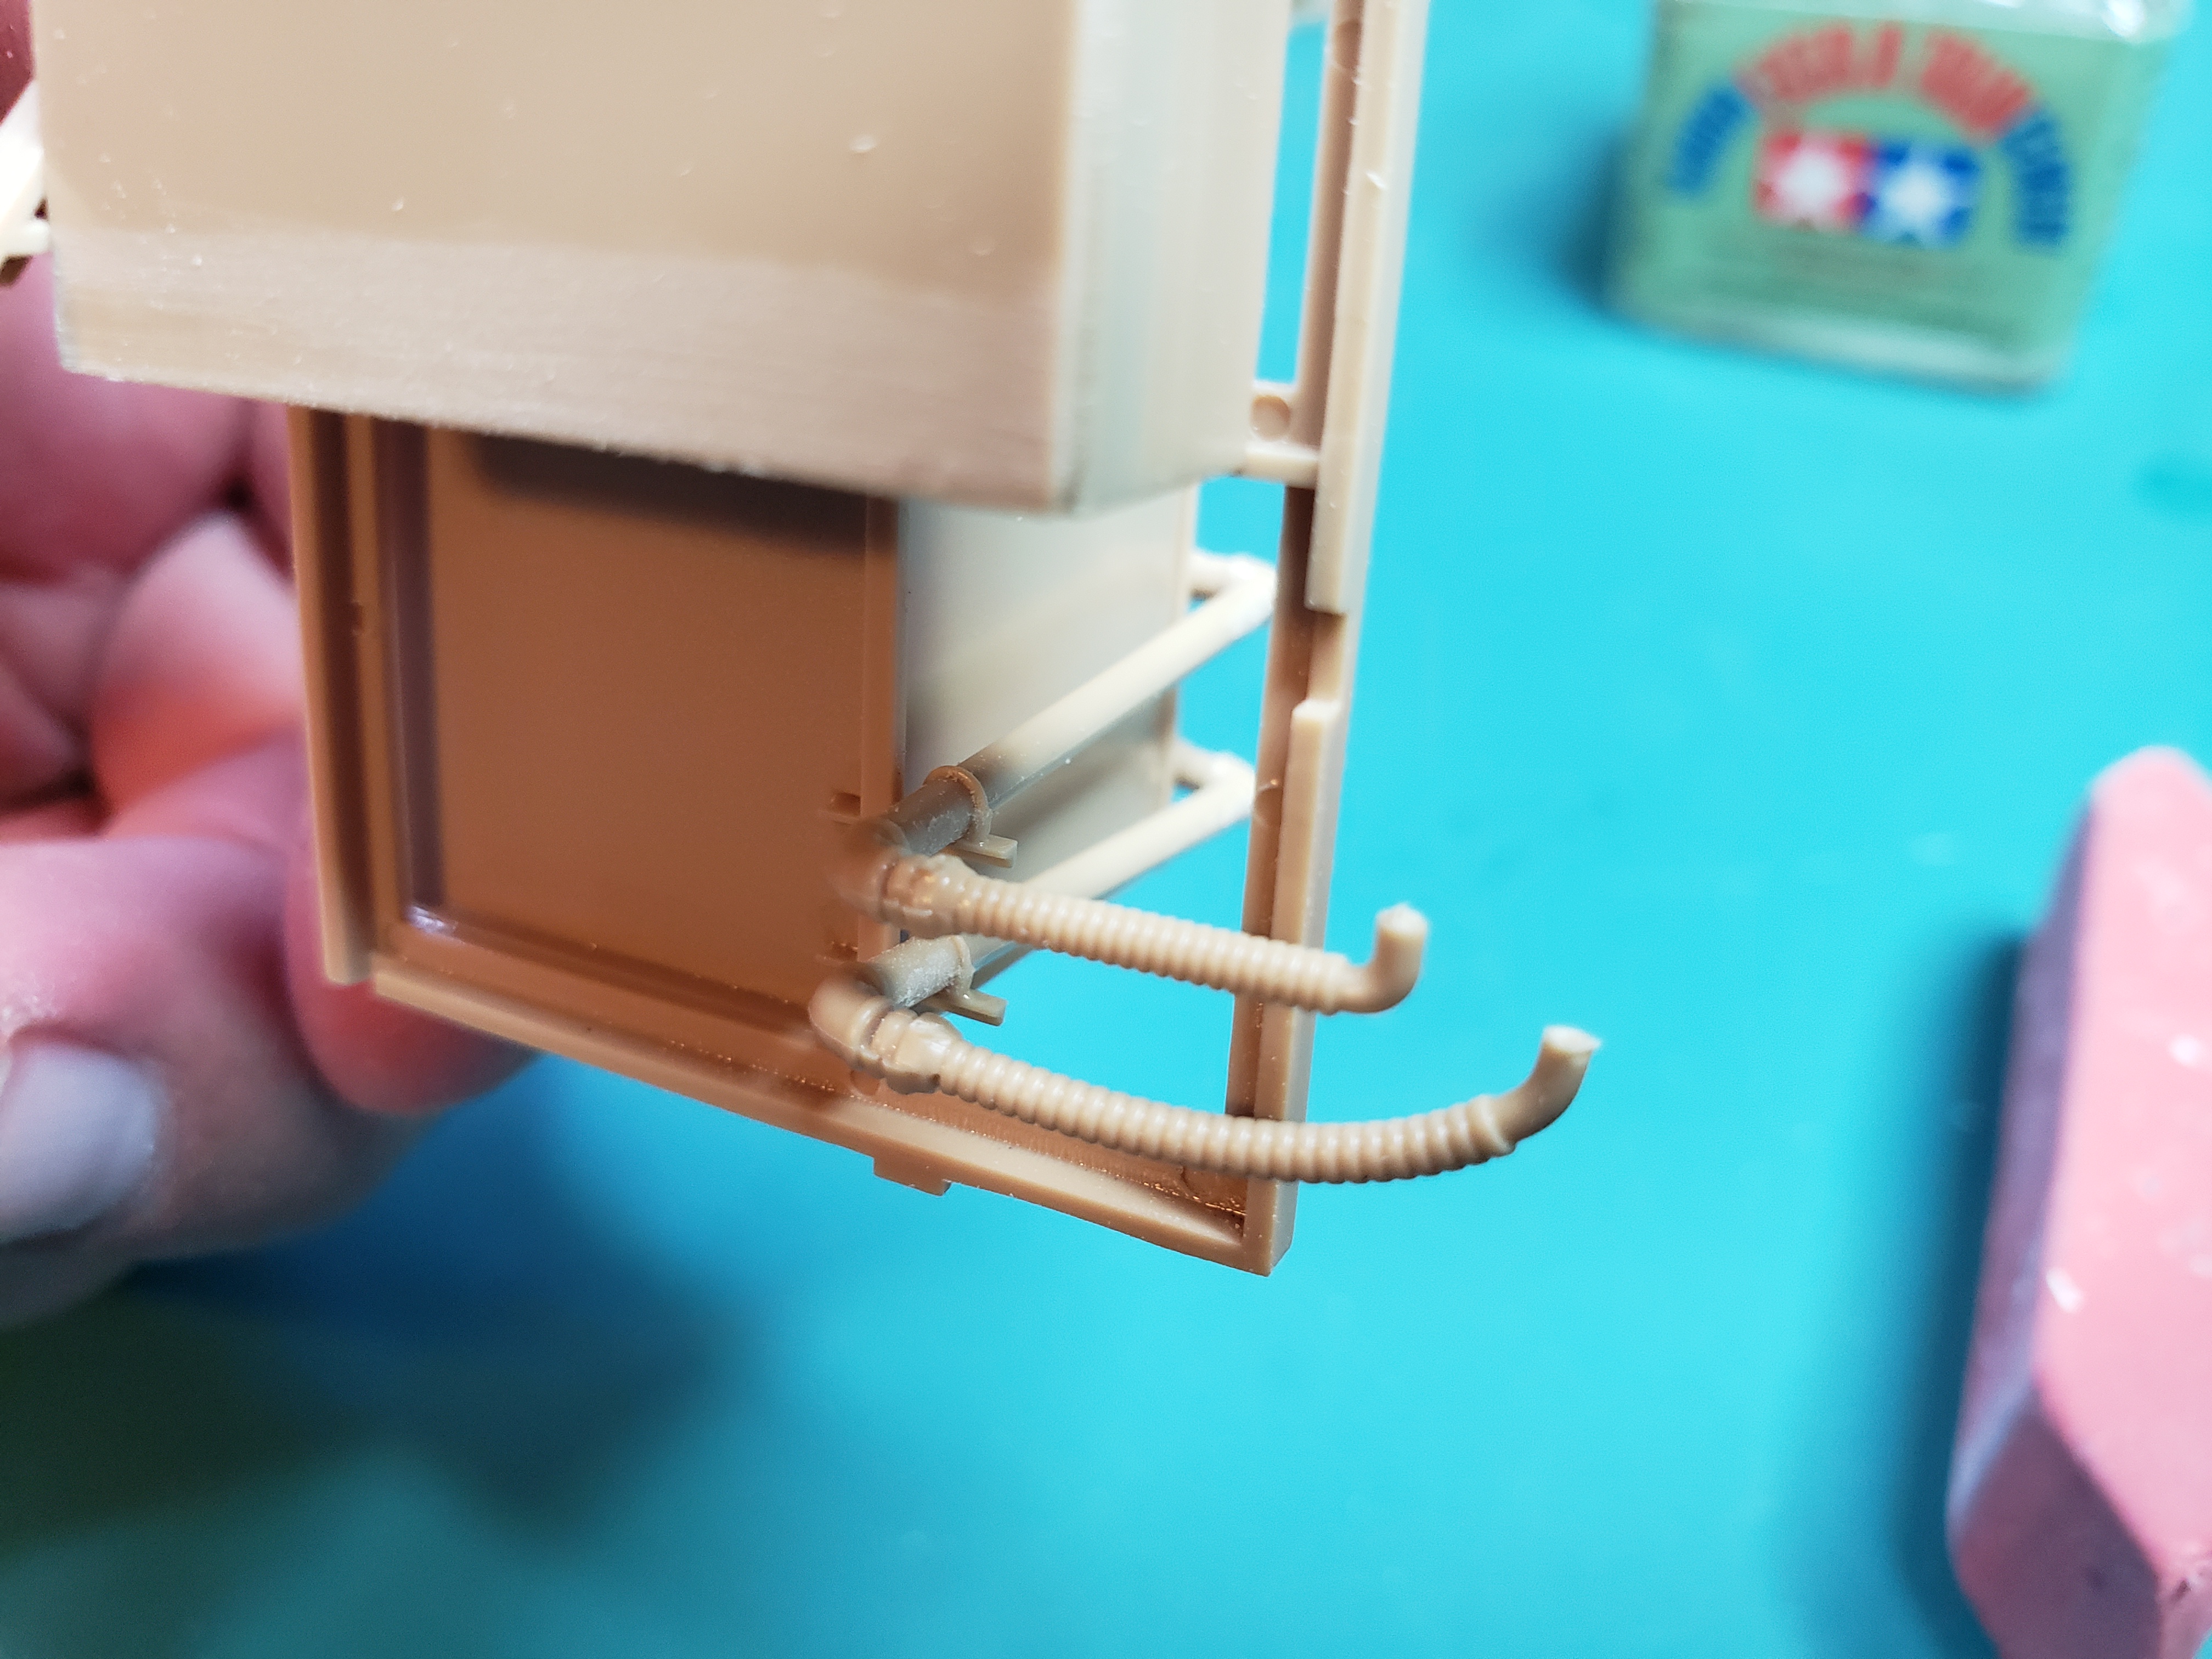
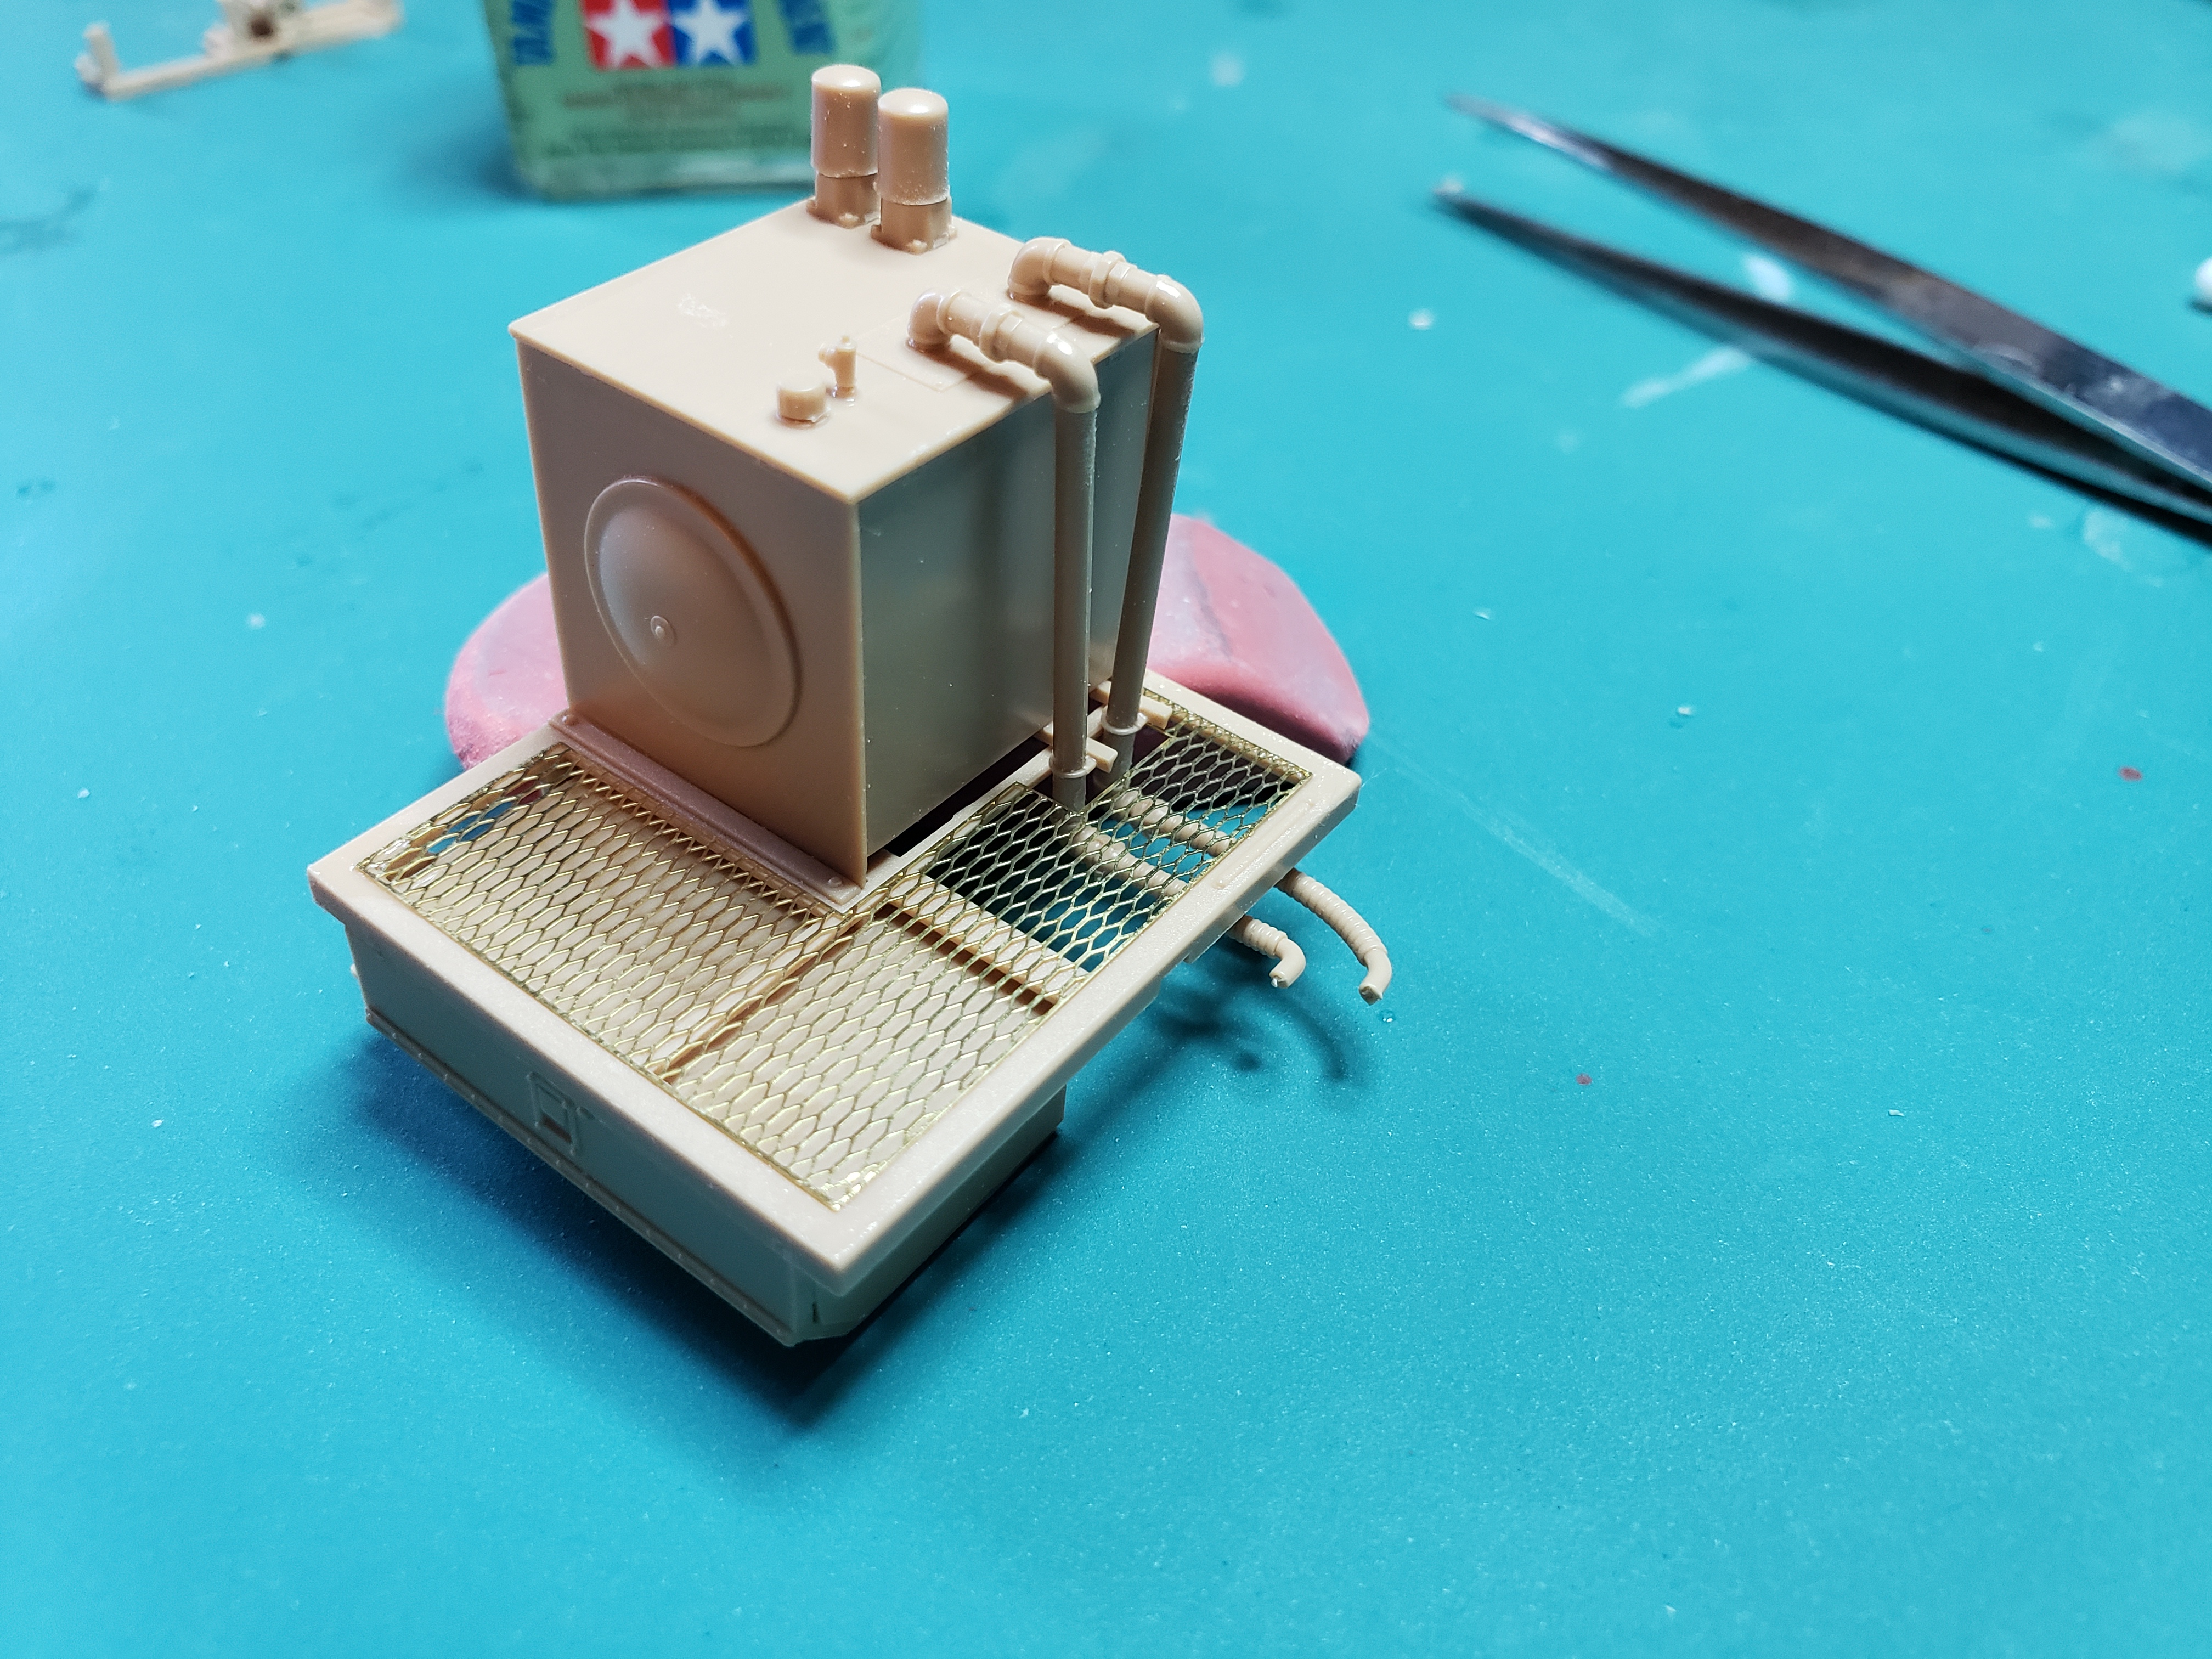
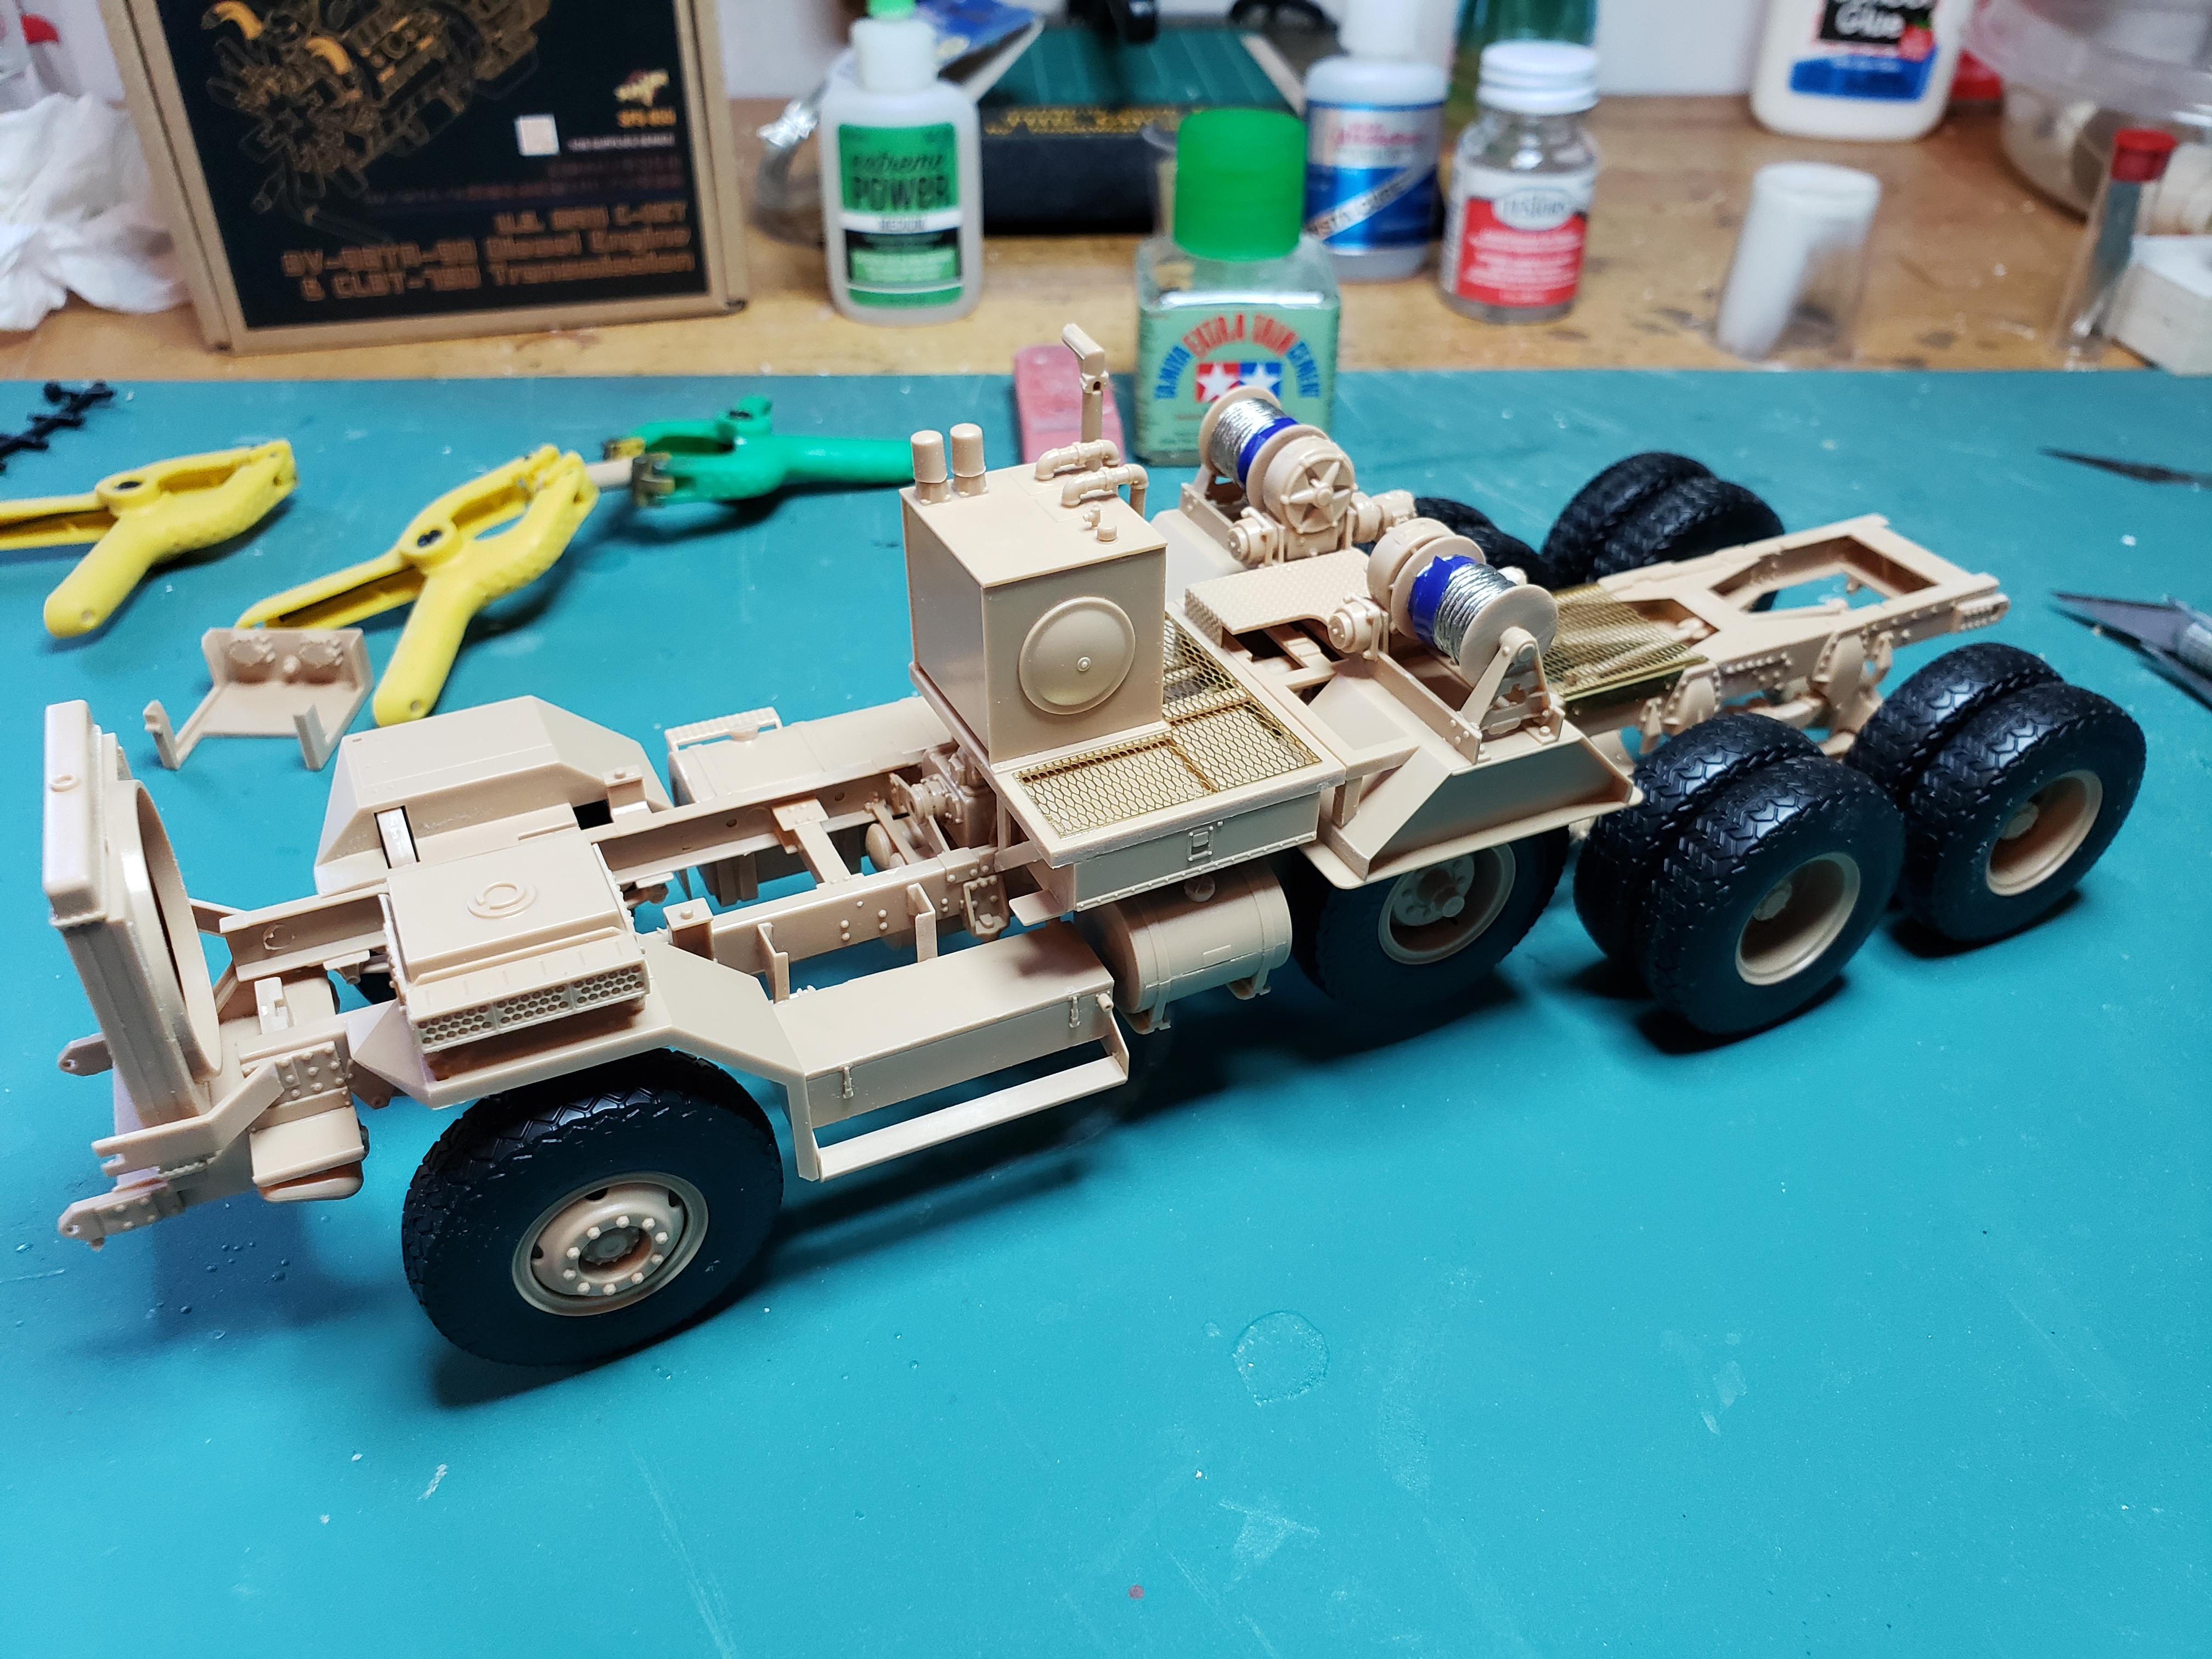
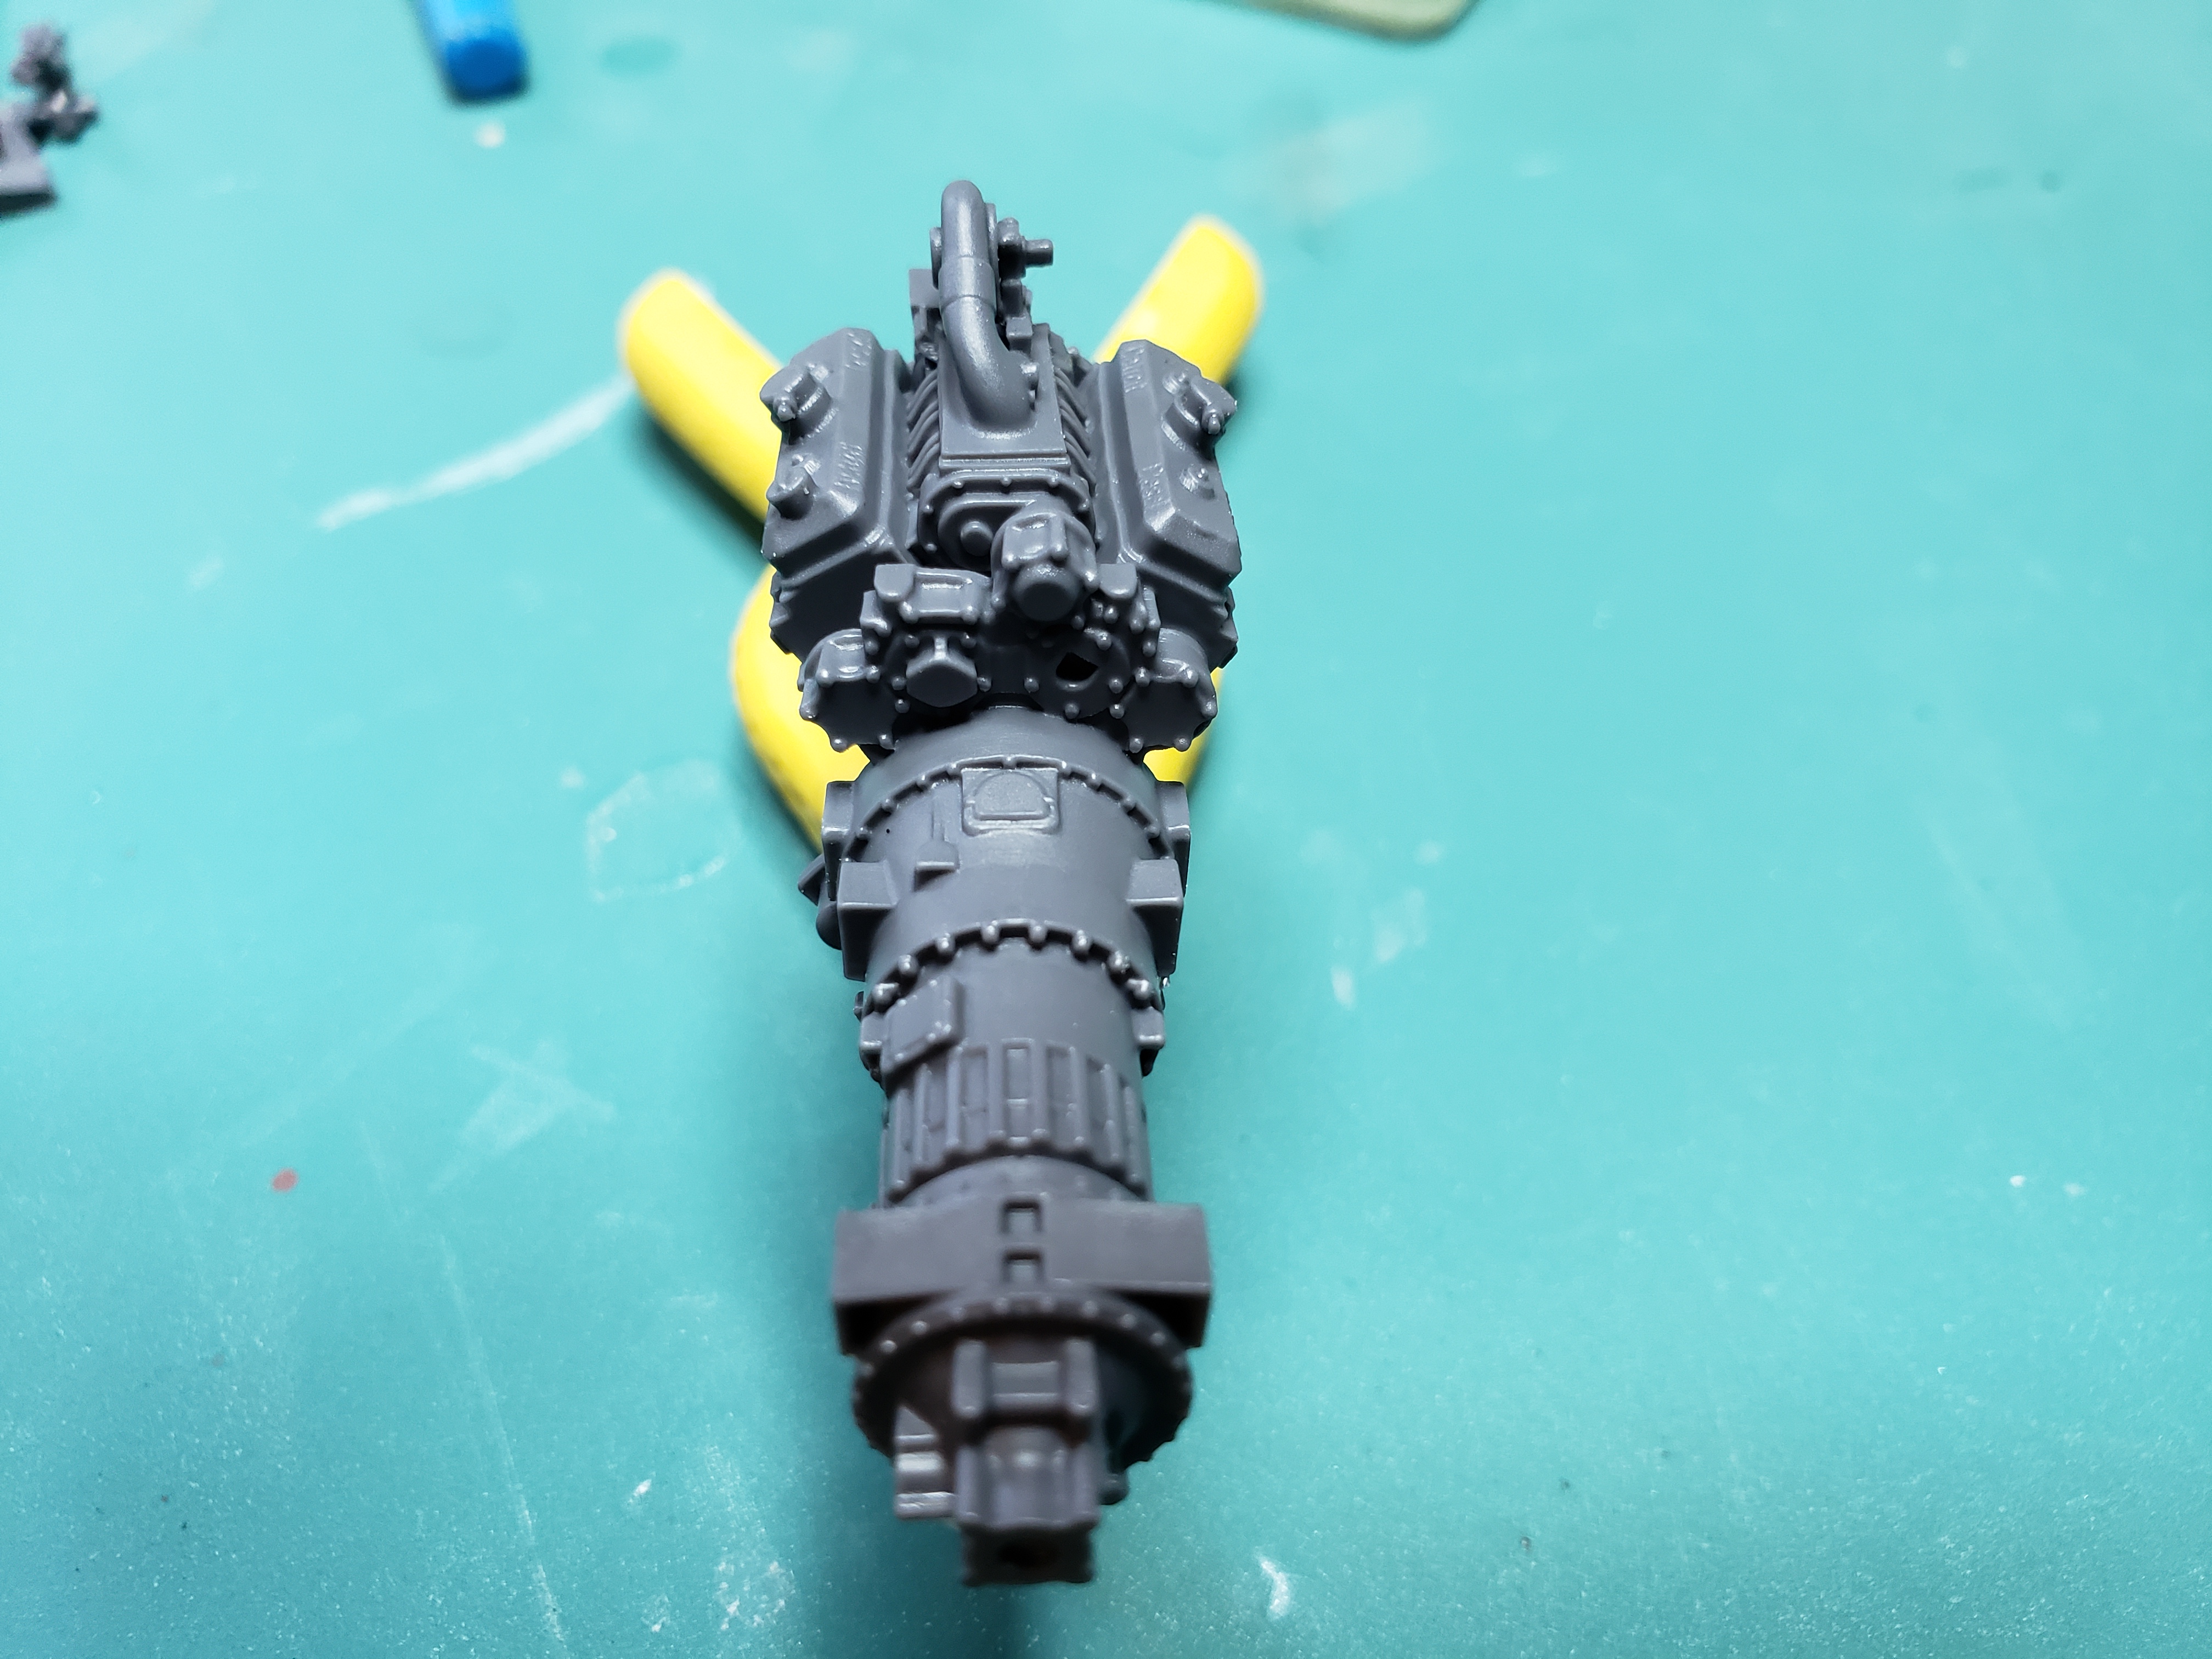
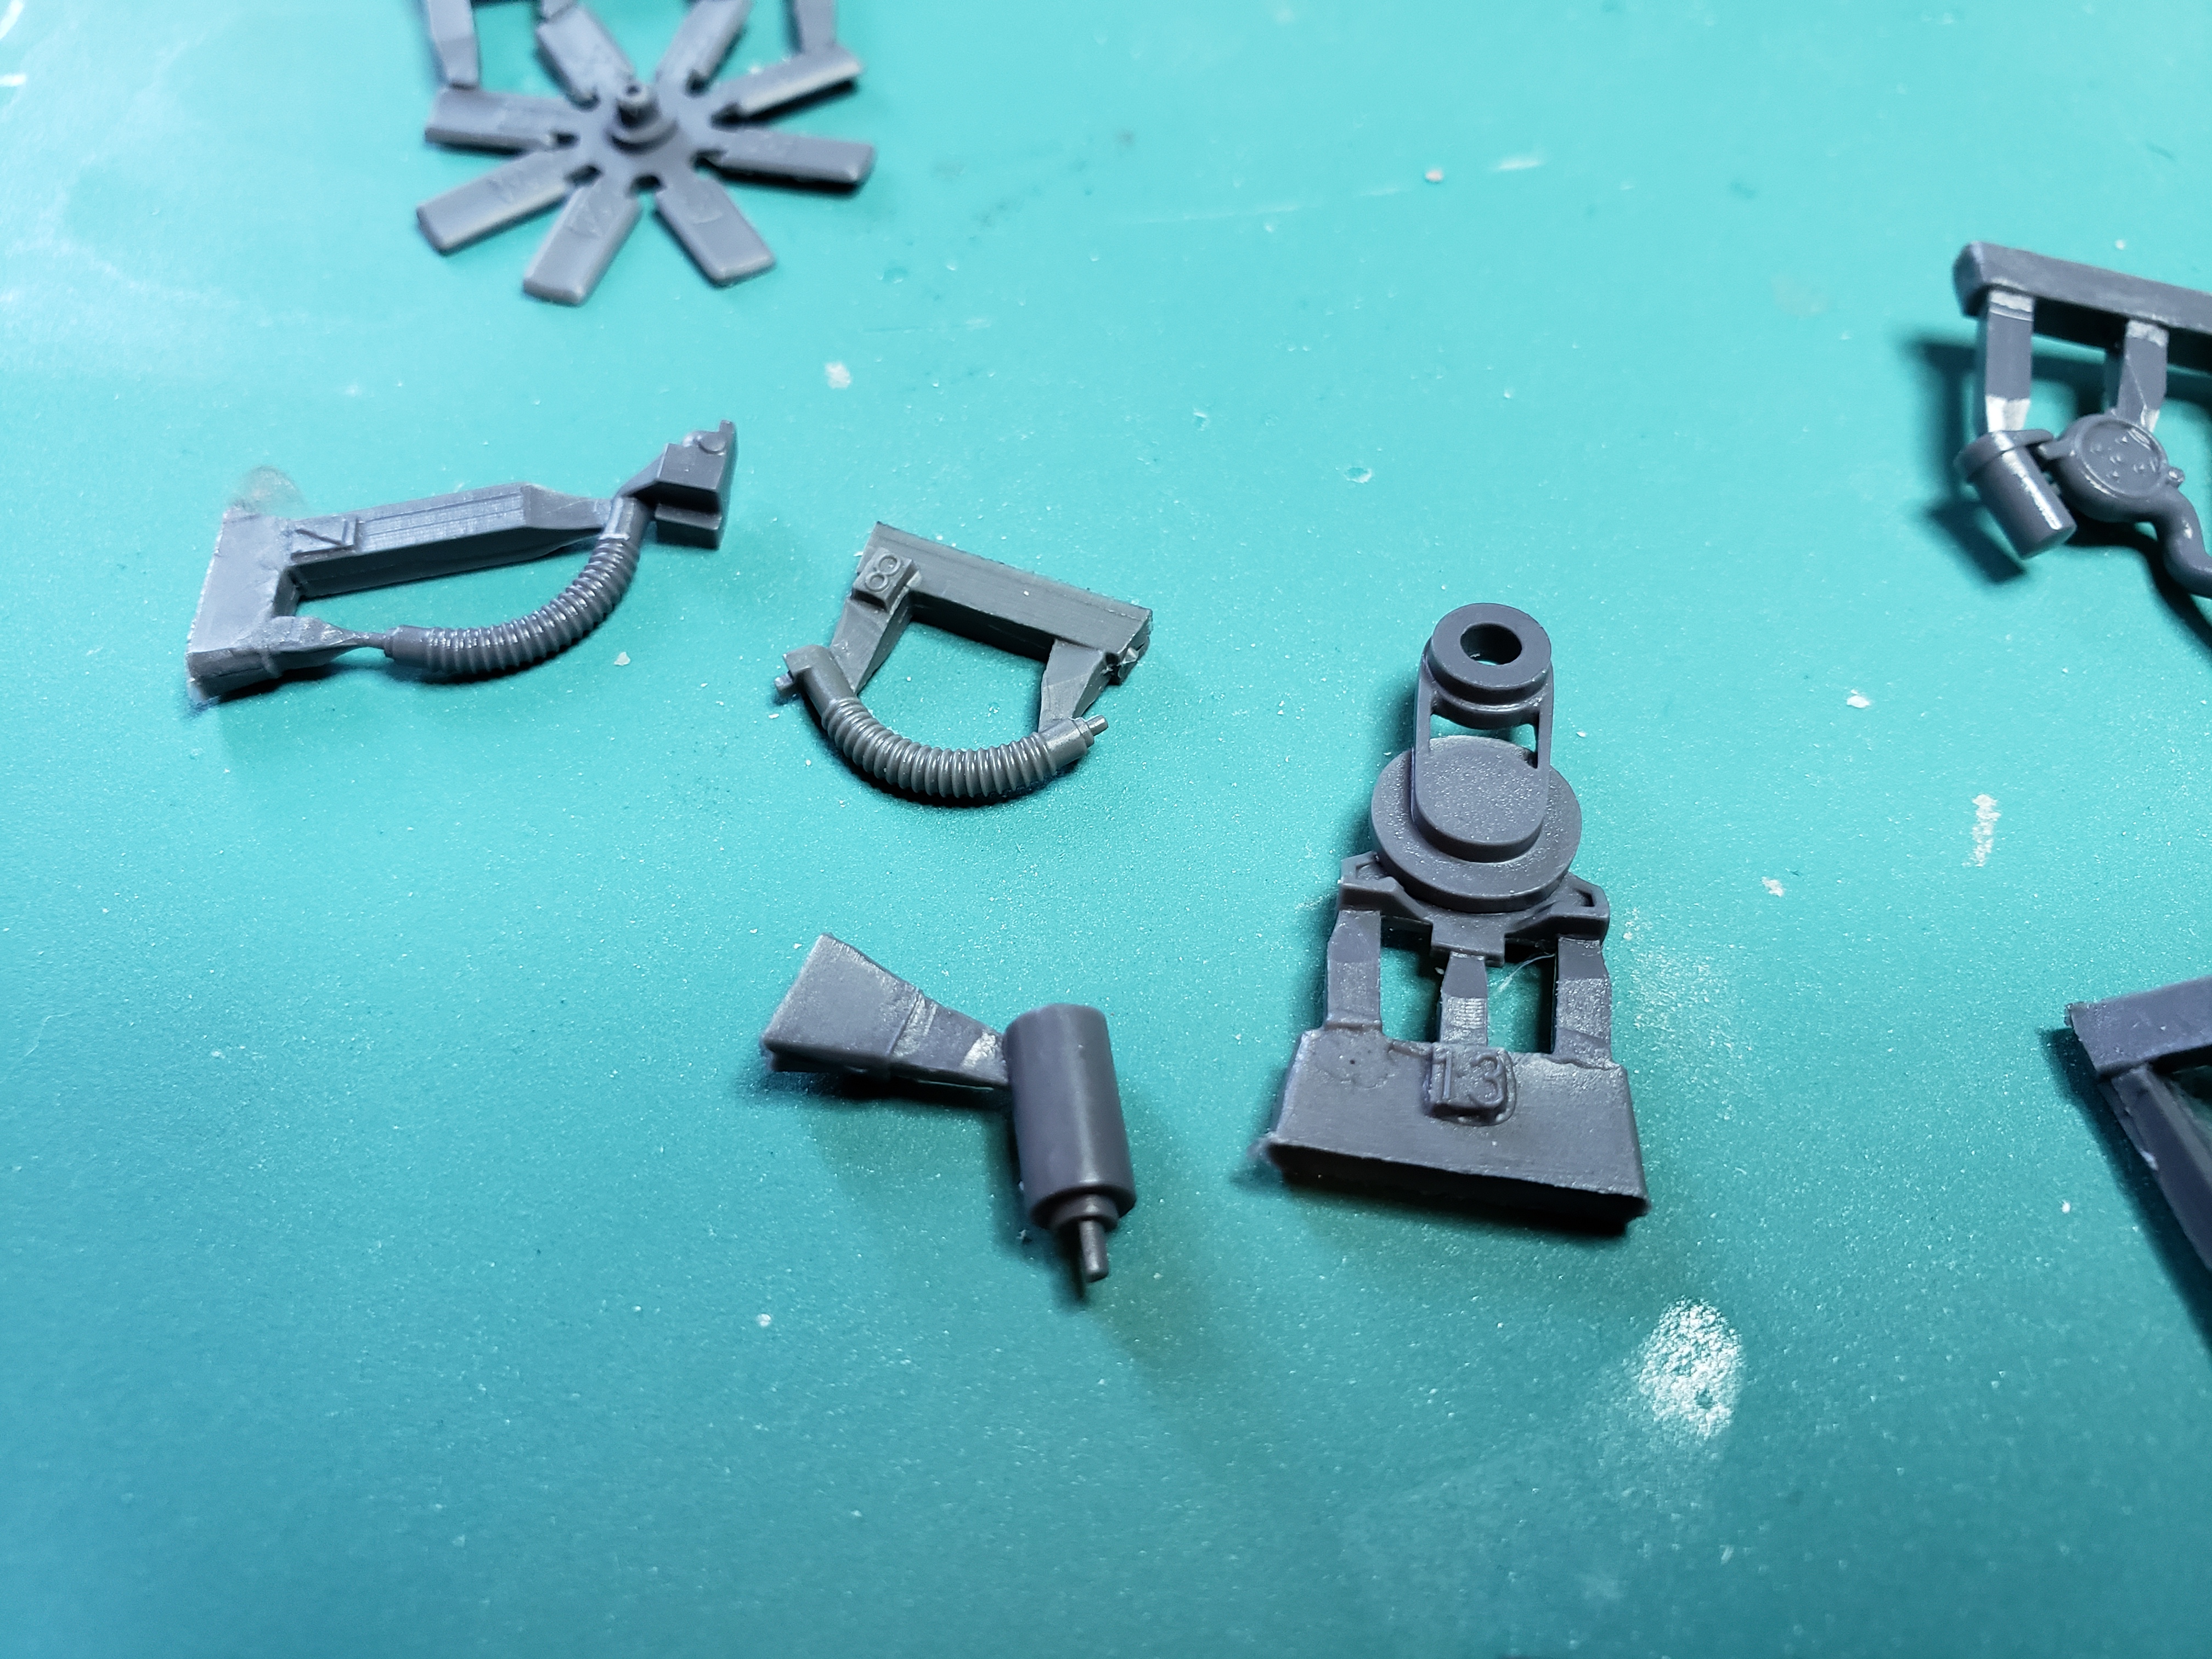
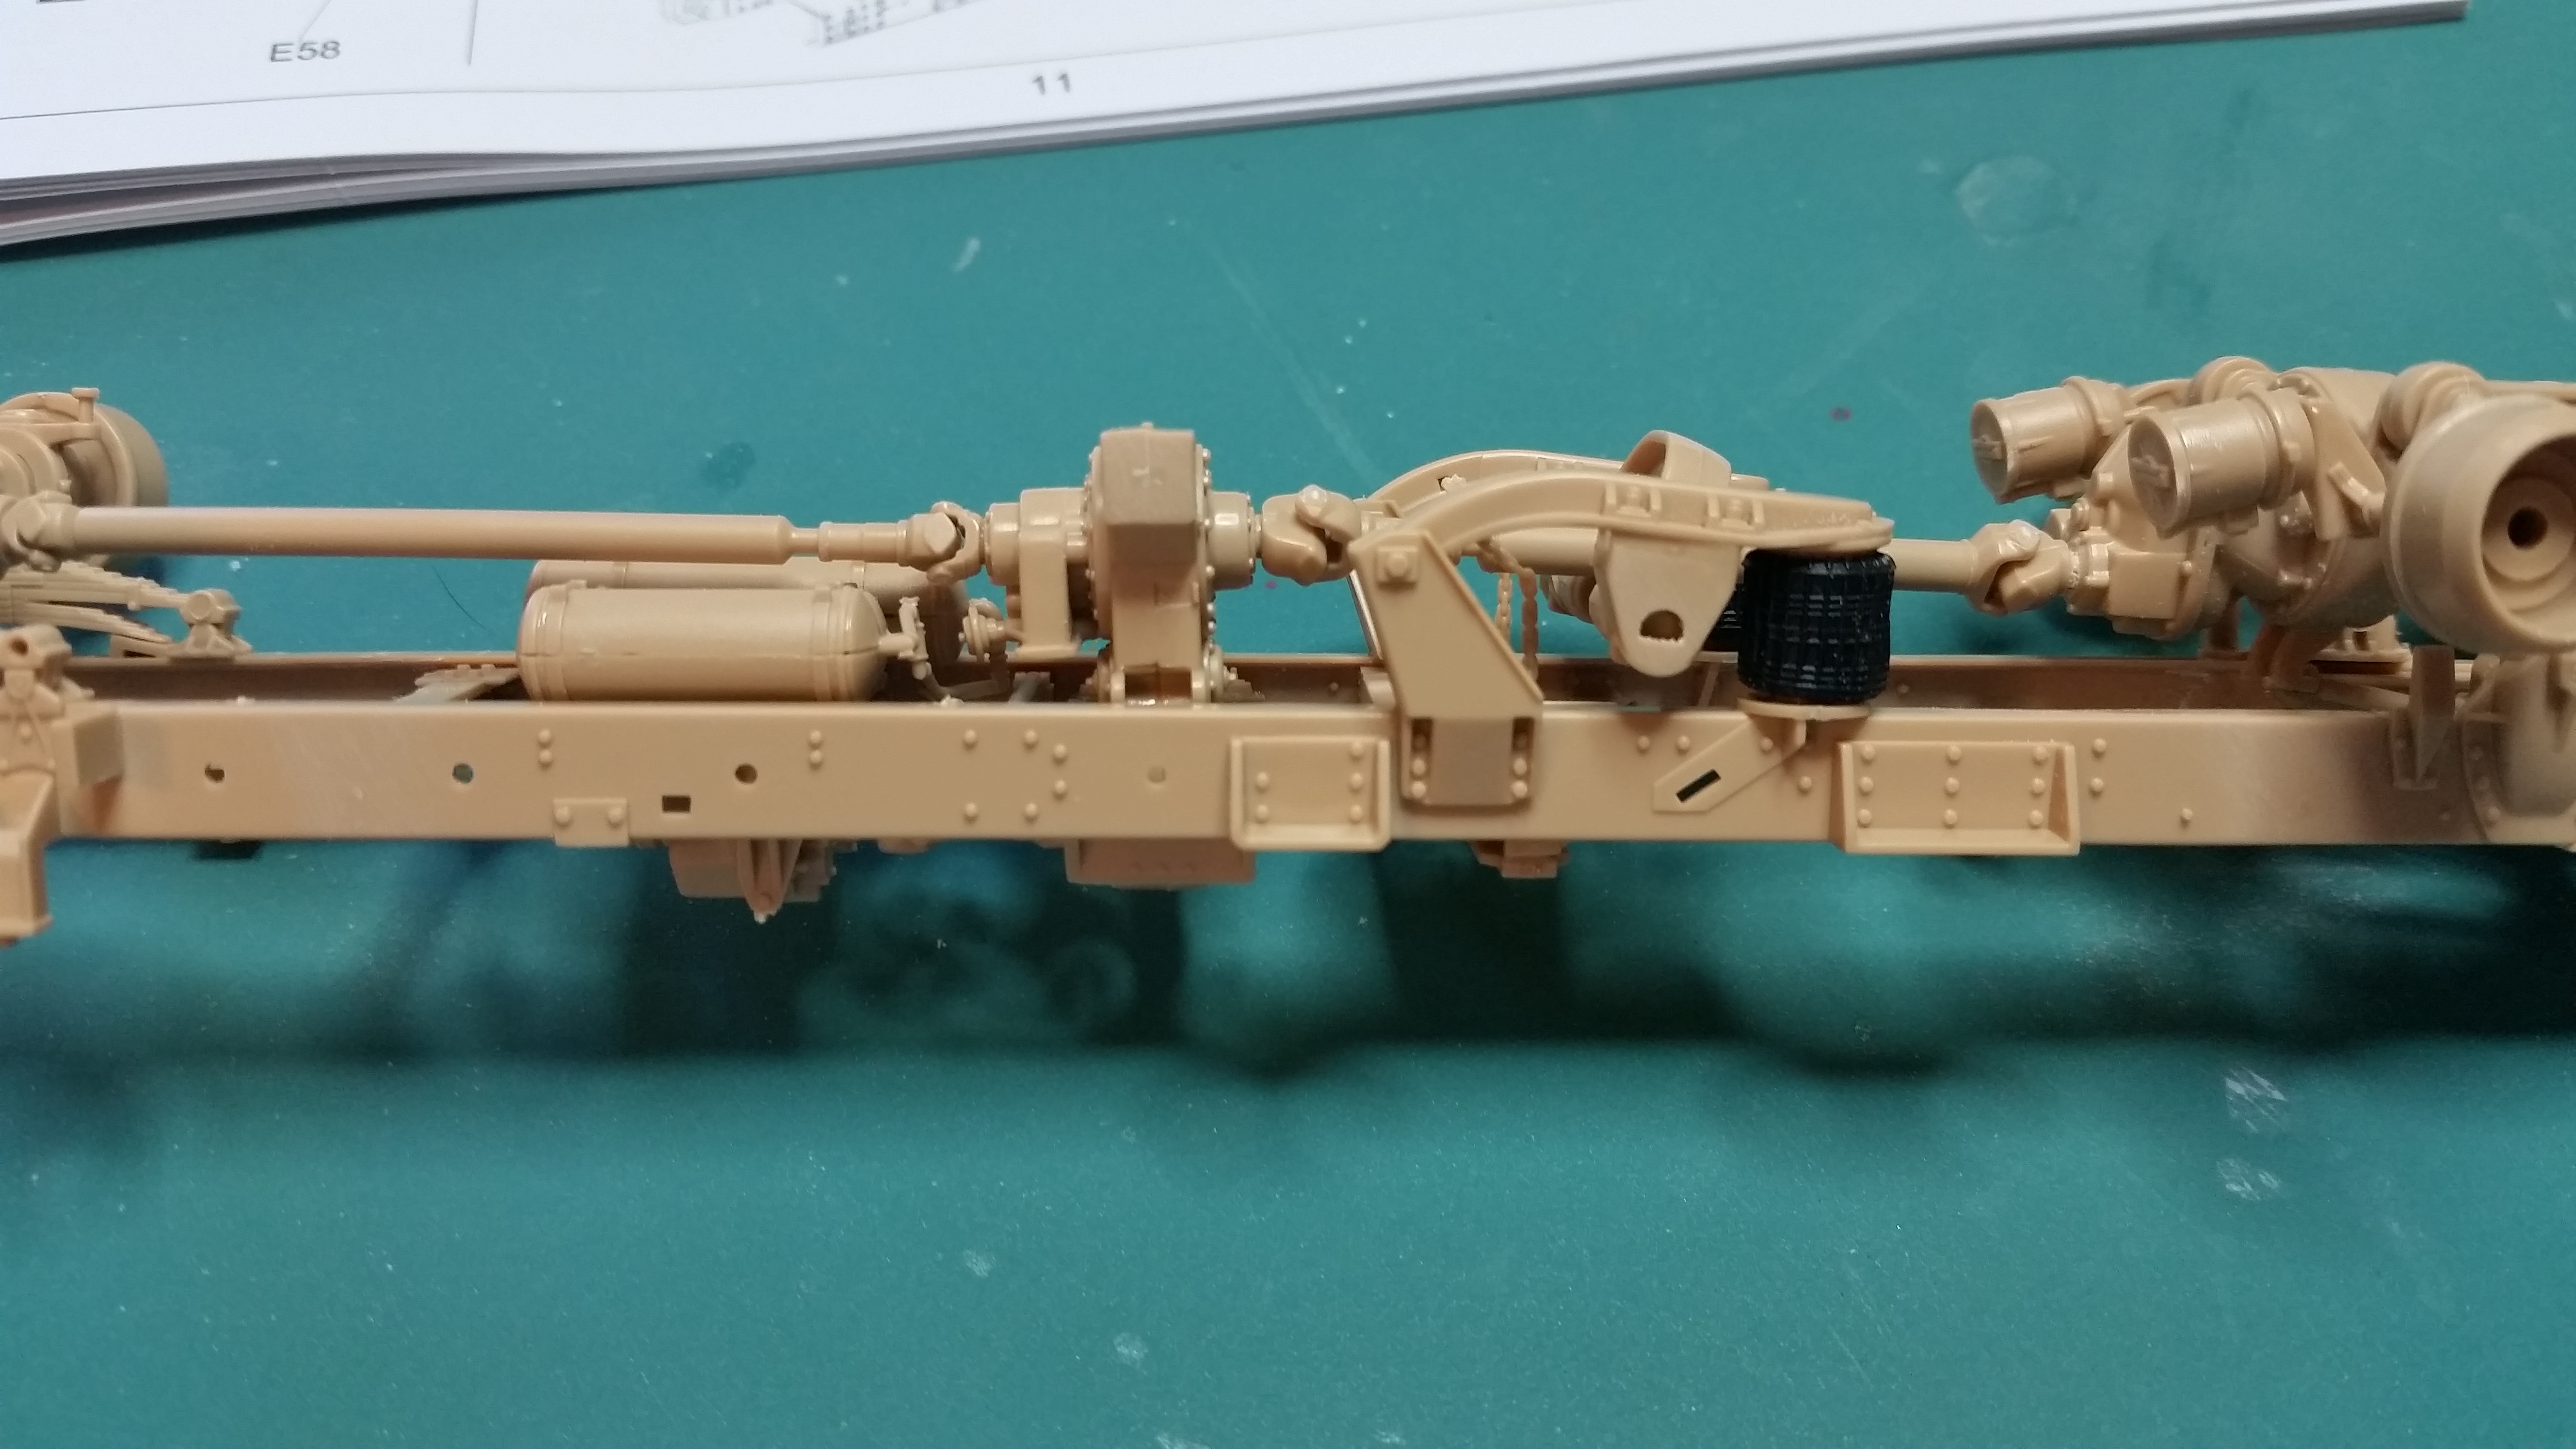
Update time !!! Its officially a rolling chassis!! The tire issue was resolved by taking time and fitting tire around the rim almost like real one on tire machine. They'll be removed for paint . This truck uses a twin "tulsa "drag winch to pull equipment onto the trailer, included was fine steel wire for the wire rope. Next up was the hydraulic tank and plumbing..I'm very impressed with the detail here..the hoses even have coiled look I favorite part..mock up !!! Small spots of ca glue holds it together.. Sharp eyed builders will spot the air cleaner riding on the fender and radiator....which means there must be a Detroit nearby...these pics show the excellent detail included. I literally pulled each part from package and snapped pic..still can't believe it's one piece molding...enjoy !! Any feedback welcome
-
The biggest difference is the out the door price...the Meng kit is more expensive. I've seen the HB for around 75, the Meng for around 120. The HB has a one piece cab, meng has multi piece...now don't jump to conclusions it's NOT the turd bucket fright liner kit type multi piece cab . I mocked mine up and the fit is perfect, nary a seam in sight. Both are curbside w a decent tranny showing. Meng offers the engine for extra, I'm reasonably sure it would fit the HB with tweaking. My biggest gripe so far with mine is the tires fit poorly on rims , the tires look properly inflated, but the rim has just enough " rim lip " to hold them from popping off. I did notice several parts including the all important hood and cab have a very fine surface texture ...ya can feel w fingernail...not smooth plastic. I know the CARC paint we painted our equipment was very rough..maybe they added that detail ..or buggered up making the mold. Either way it's military and it'll be dirtied up later on. Sorry for the long post
-
Thanks...but I'm Jeff ..lol
-
The hubs aren't the problem to making it steerable, the hubs have ball joints inside allowing full travel. The steering arm and link that attaches to hub is solid. Almost think drilling that out would likely work....more than I'm gonna attempt lol
-
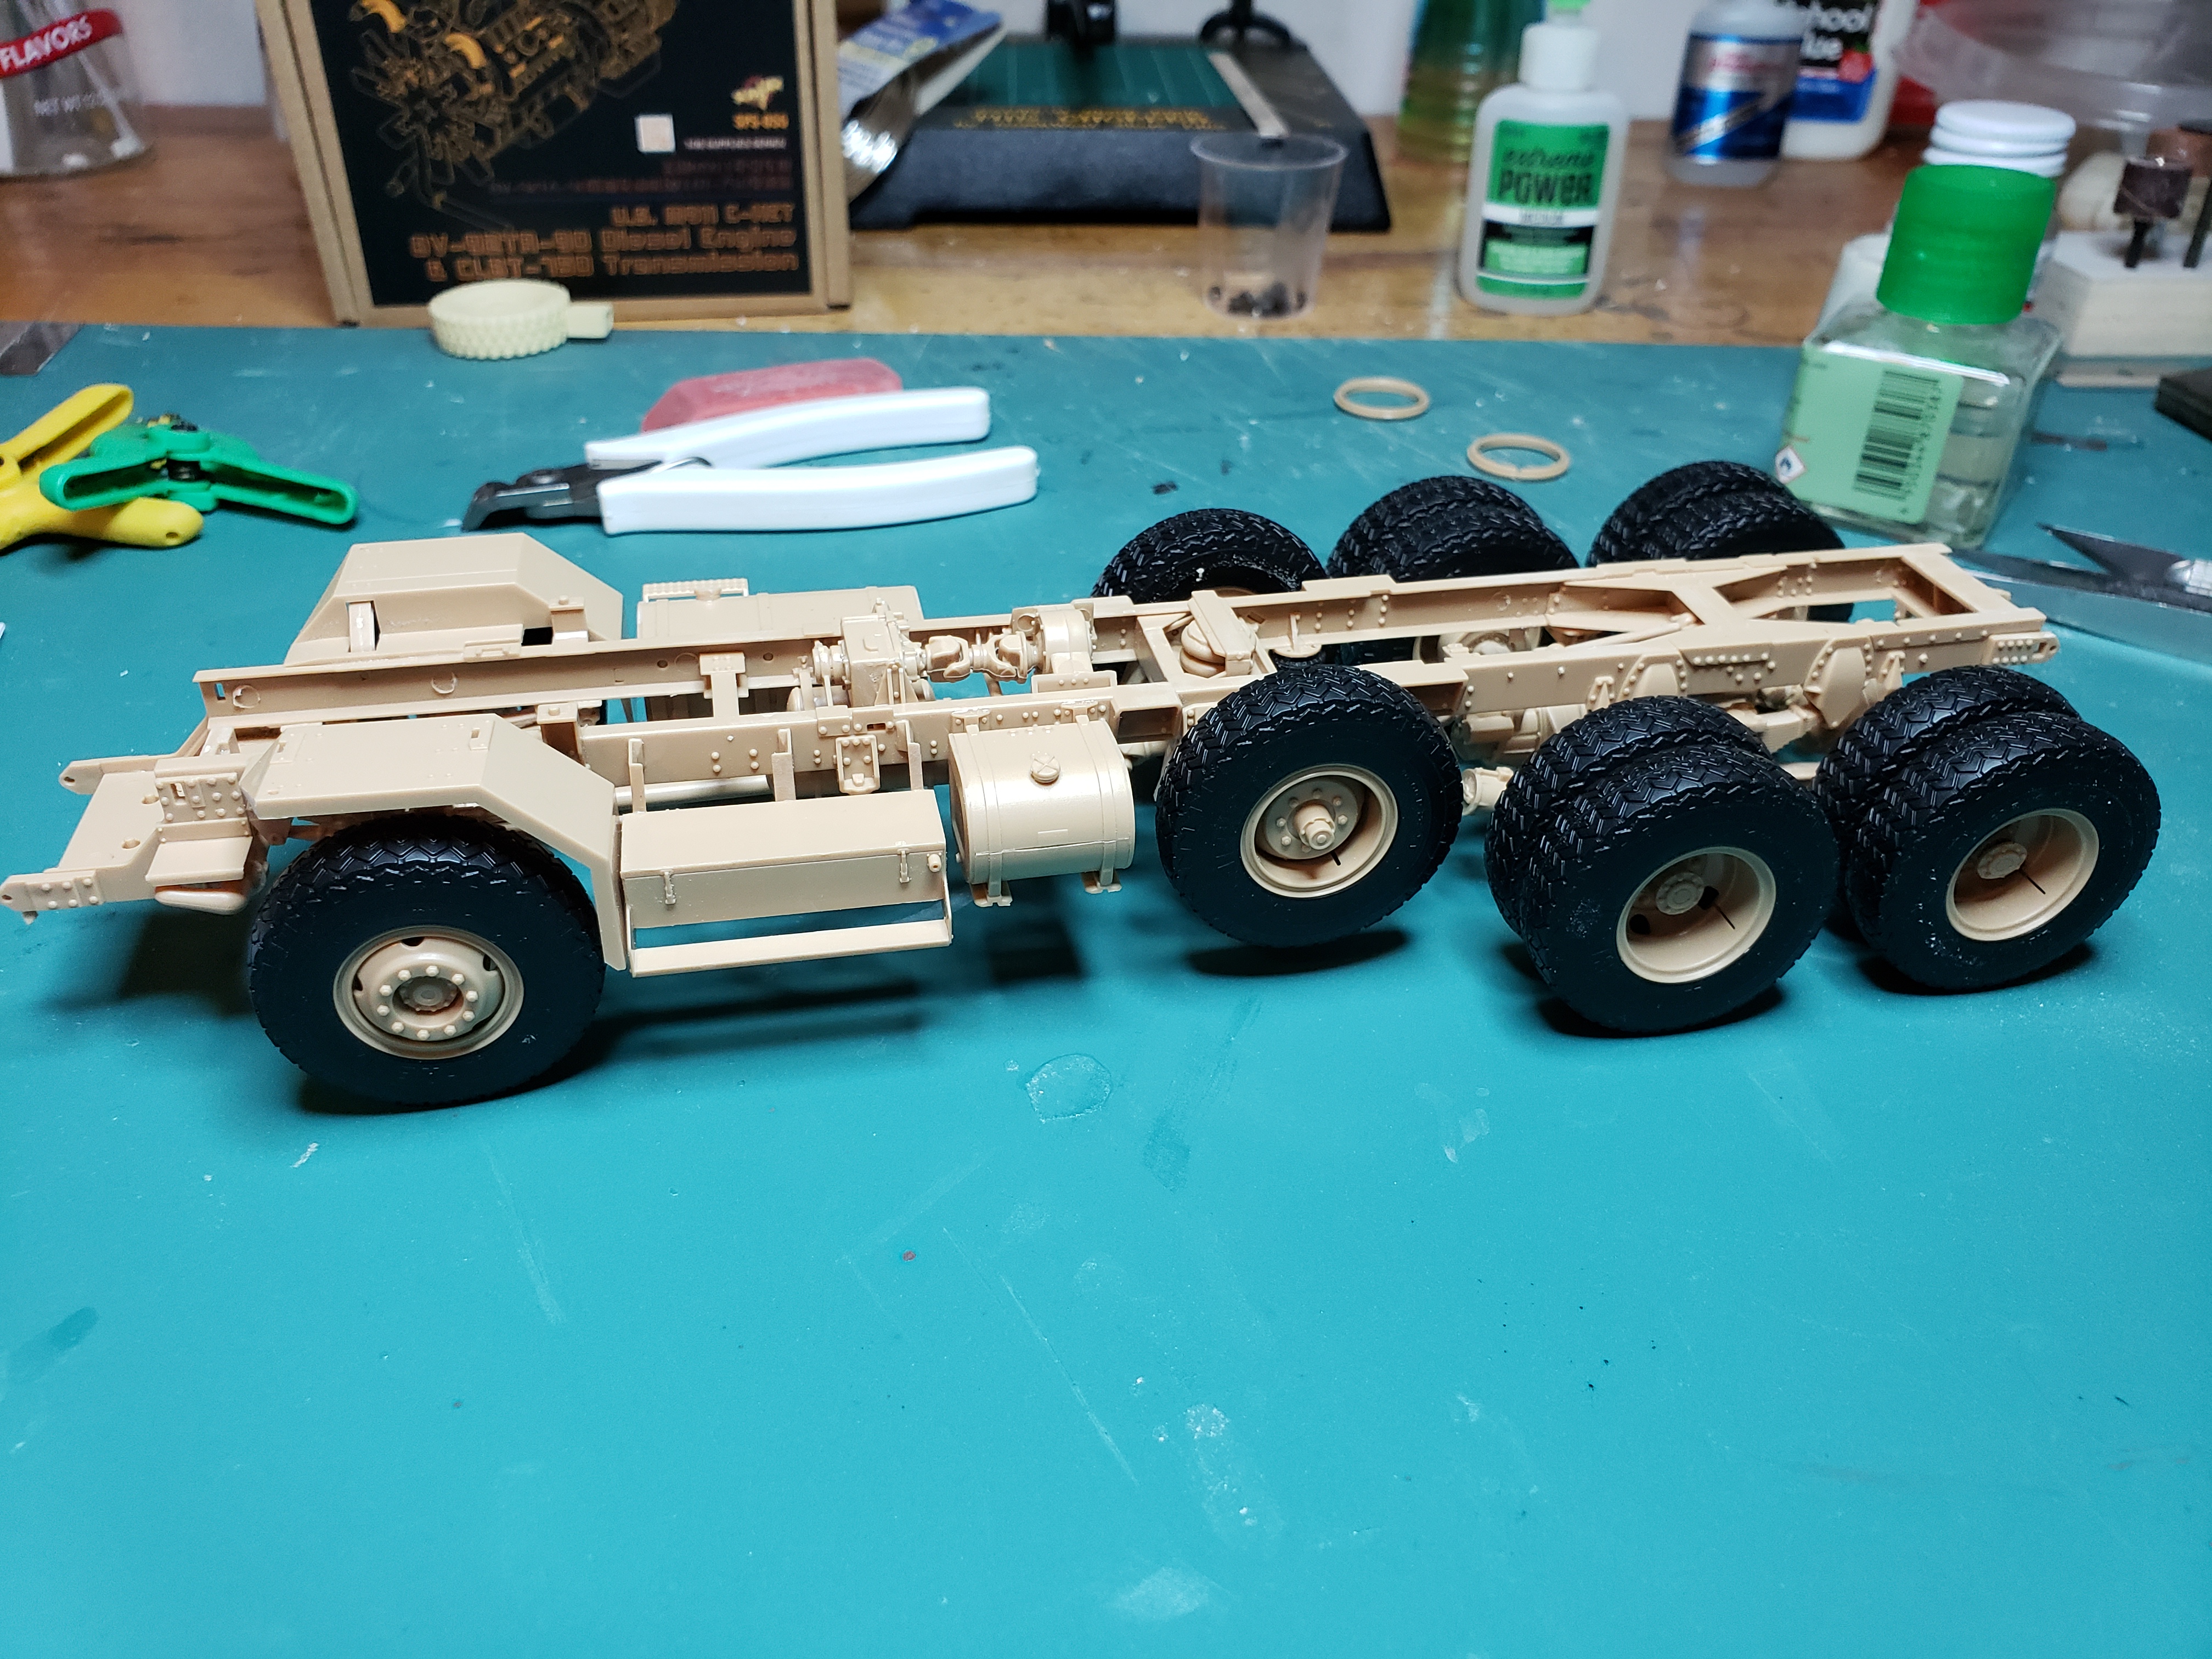
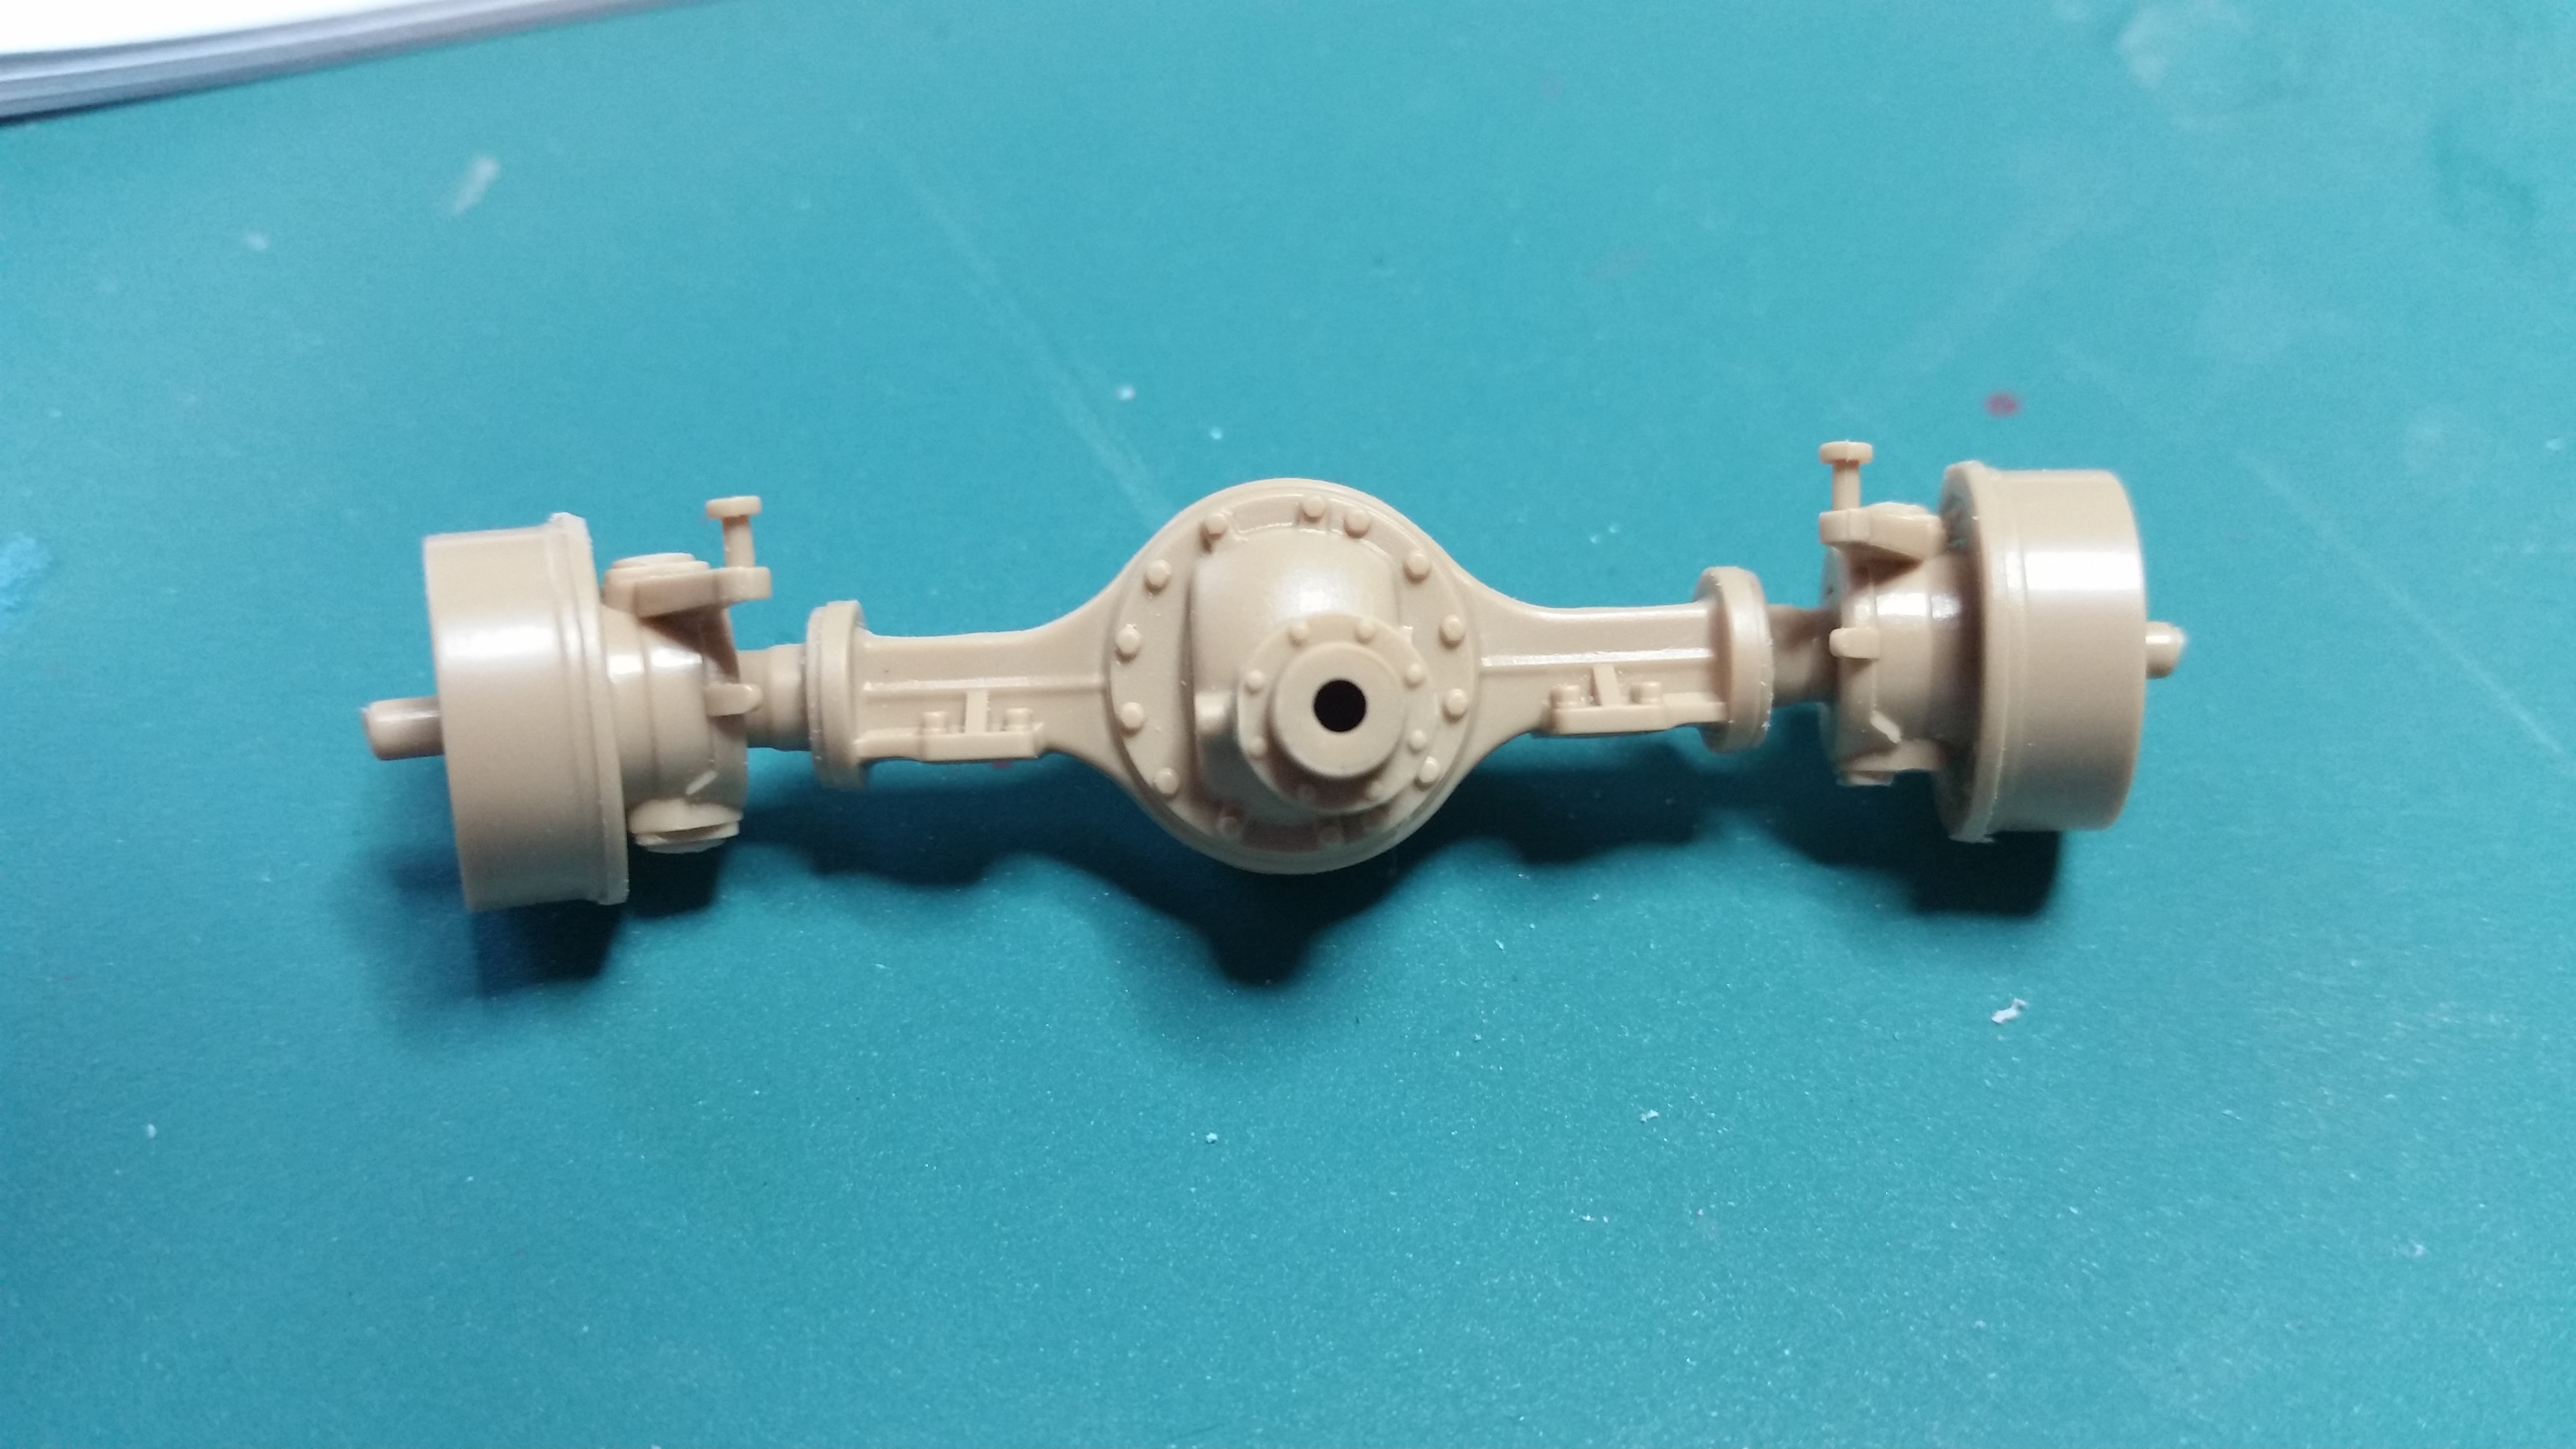
Working thru the chassis today thought I'd add a few detail pics showing off the incredible detail this truck has.. The completed driven front axle..I was surprised to find this won't be posable when attached really bummed me out . The pusher axle arm resting on a MRAP tire the pneumatic shock is a rubbery vinyl. I'll pose these raised So far the frame measures 10 inches long, the entire combo should be around 26..yeah big boy !! Off to grab some awesome BBQ and enjoy the holiday everyone have a great day
-
Hey Gator ! Glad ya dropped by , haven't heard much from ya hope your doing well. Blackbeard -thanks for looking in, I'm jealous hearing you've driven one of these behemoths..how were they to actually drive ?