gotnitro?
-
Posts
4,500 -
Joined
-
Last visited
Content Type
Profiles
Forums
Events
Gallery
Everything posted by gotnitro?
-

Looking for nice roof-mounted airhorns
gotnitro? replied to peteski's topic in General Automotive Talk (Trucks and Cars)
PM replied Your very welcome -
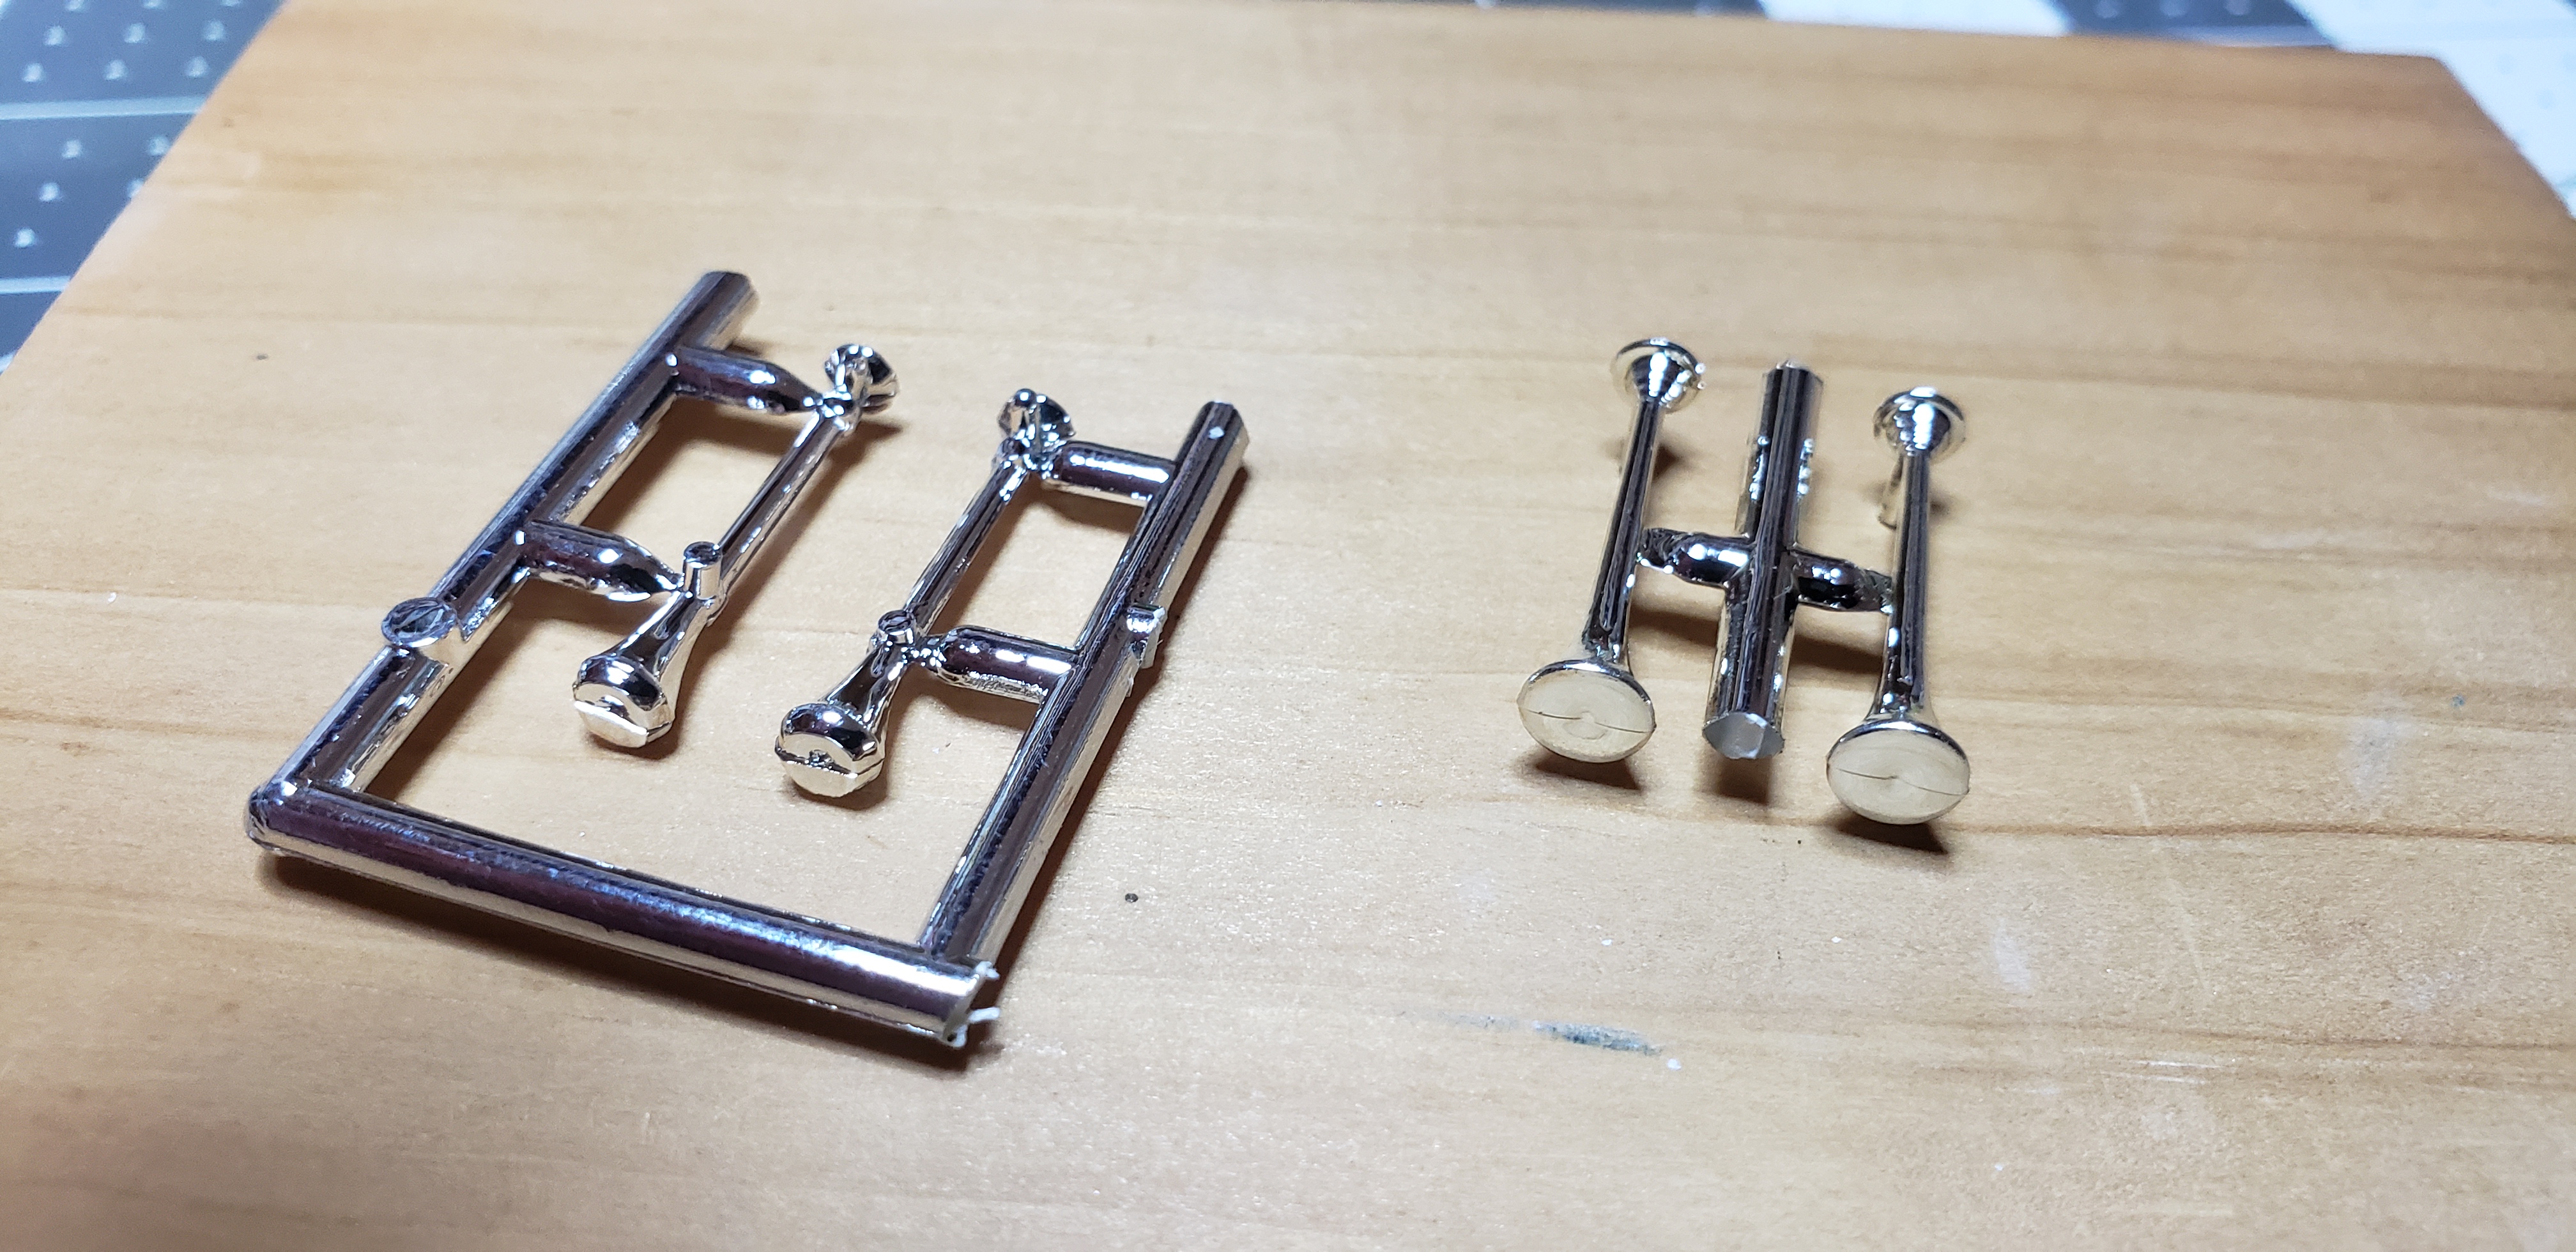
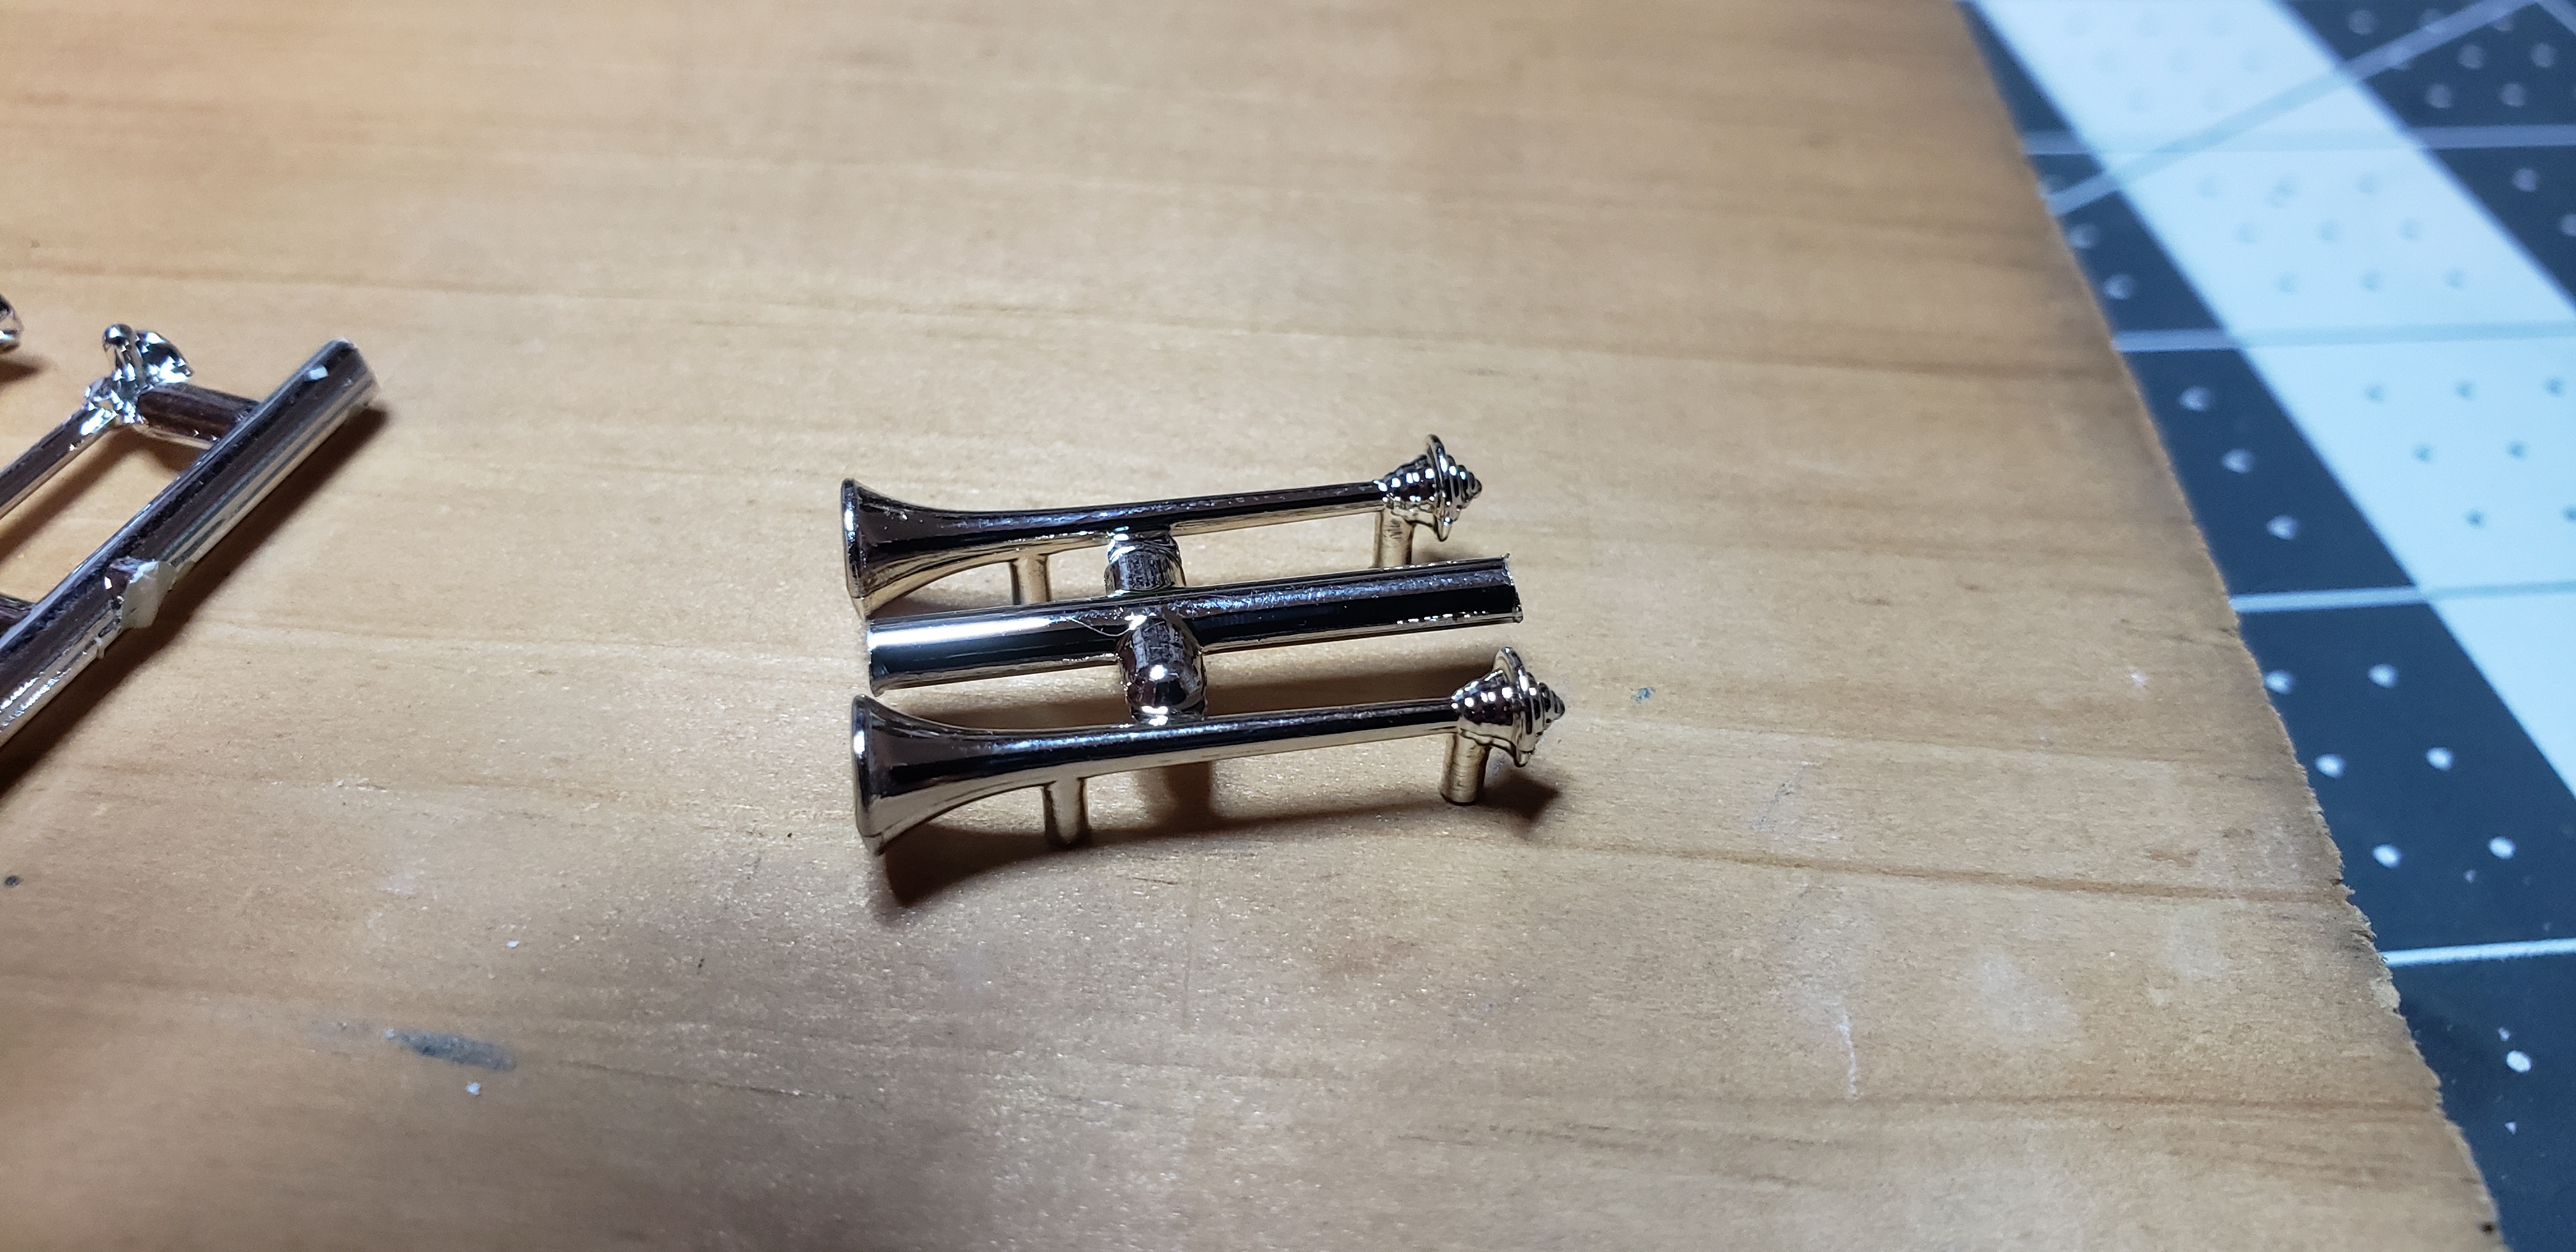
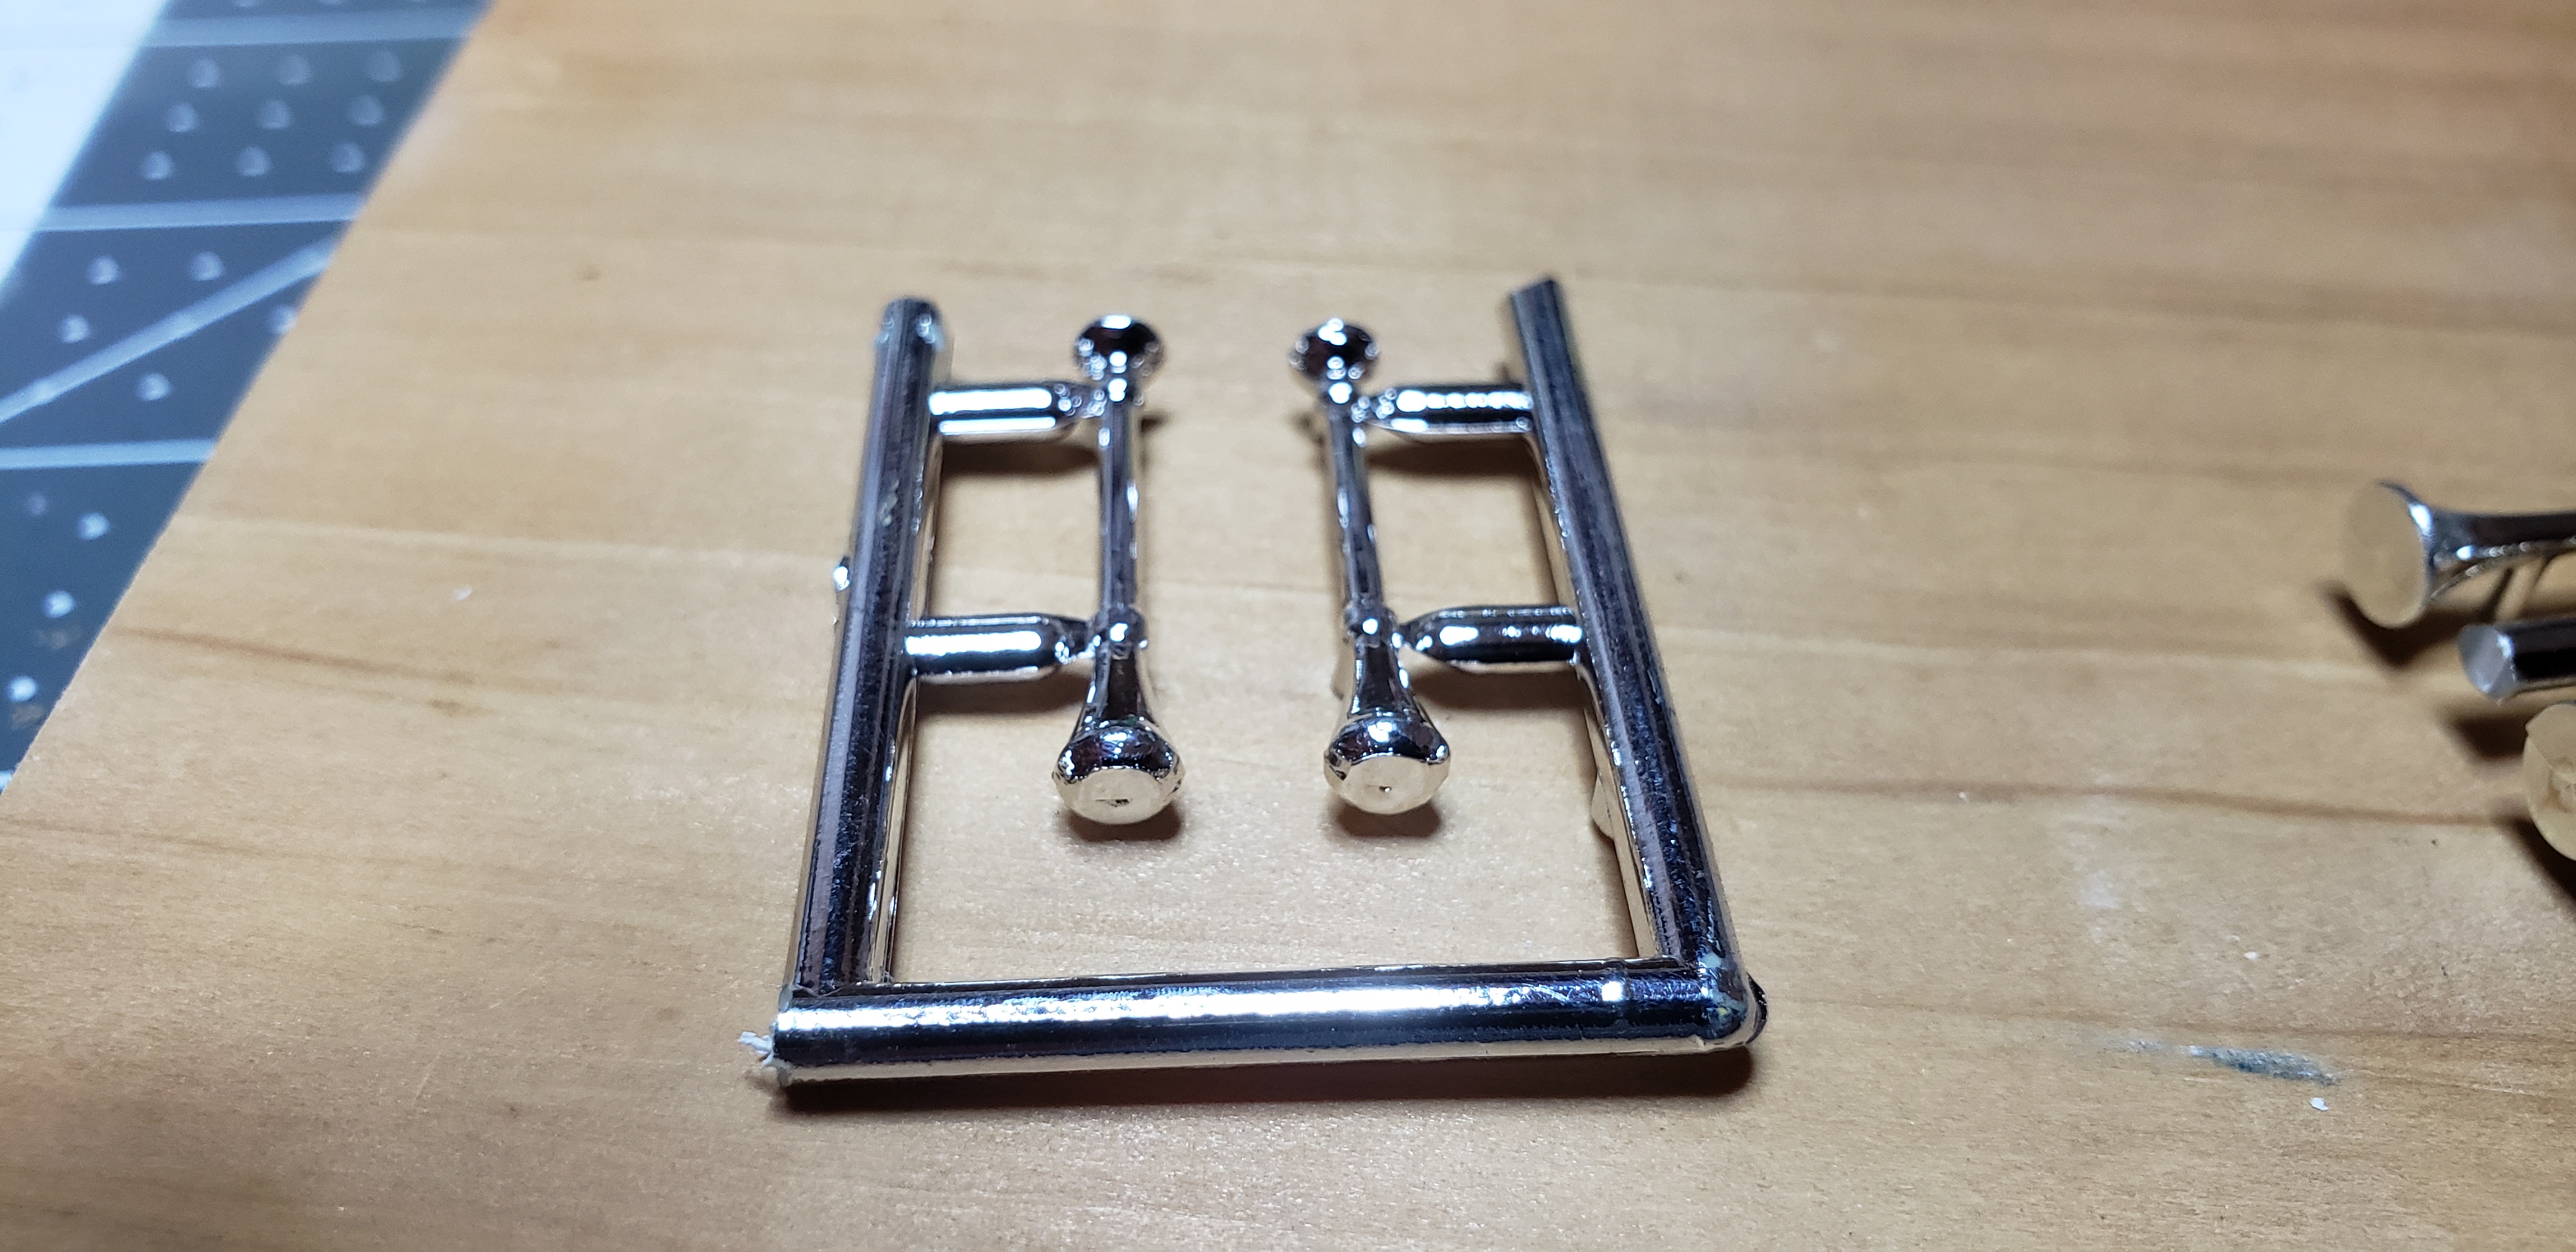
Looking for nice roof-mounted airhorns
gotnitro? replied to peteski's topic in General Automotive Talk (Trucks and Cars)
I probably have a set of mack ones if your interested, they'll be from the dm800 kits. I'll confirm tonite and let ya know. Ok here's what I have ..a set from an R model Mack, a pair from a paystar 5000 kit or a set w covers from the Peterbilt 359 can do wrecker . The set without the sprue frame are from the paystar, set on left from Mack R and finally the square end ones from pete 359 If they work just send me your address via PM and I'll send them asap HTH Jeff
-
MACK DM600, 5-th wheel dumper
gotnitro? replied to truckabilly's topic in WIP: Model Trucks: Big Rigs and Heavy Equipment
Nice job !! Like the work effects on the frame and engine really gives it a work horse appearance. Really like the wheels too, always thought the tires have an unusually wide appearance Mine didn't wear away as planned kept coming off in bigger spots than I liked. I cleaned it off and redoing the layers. I used tamiya acrylics for top coat..next time back to testors enamel..always been happy w wear -
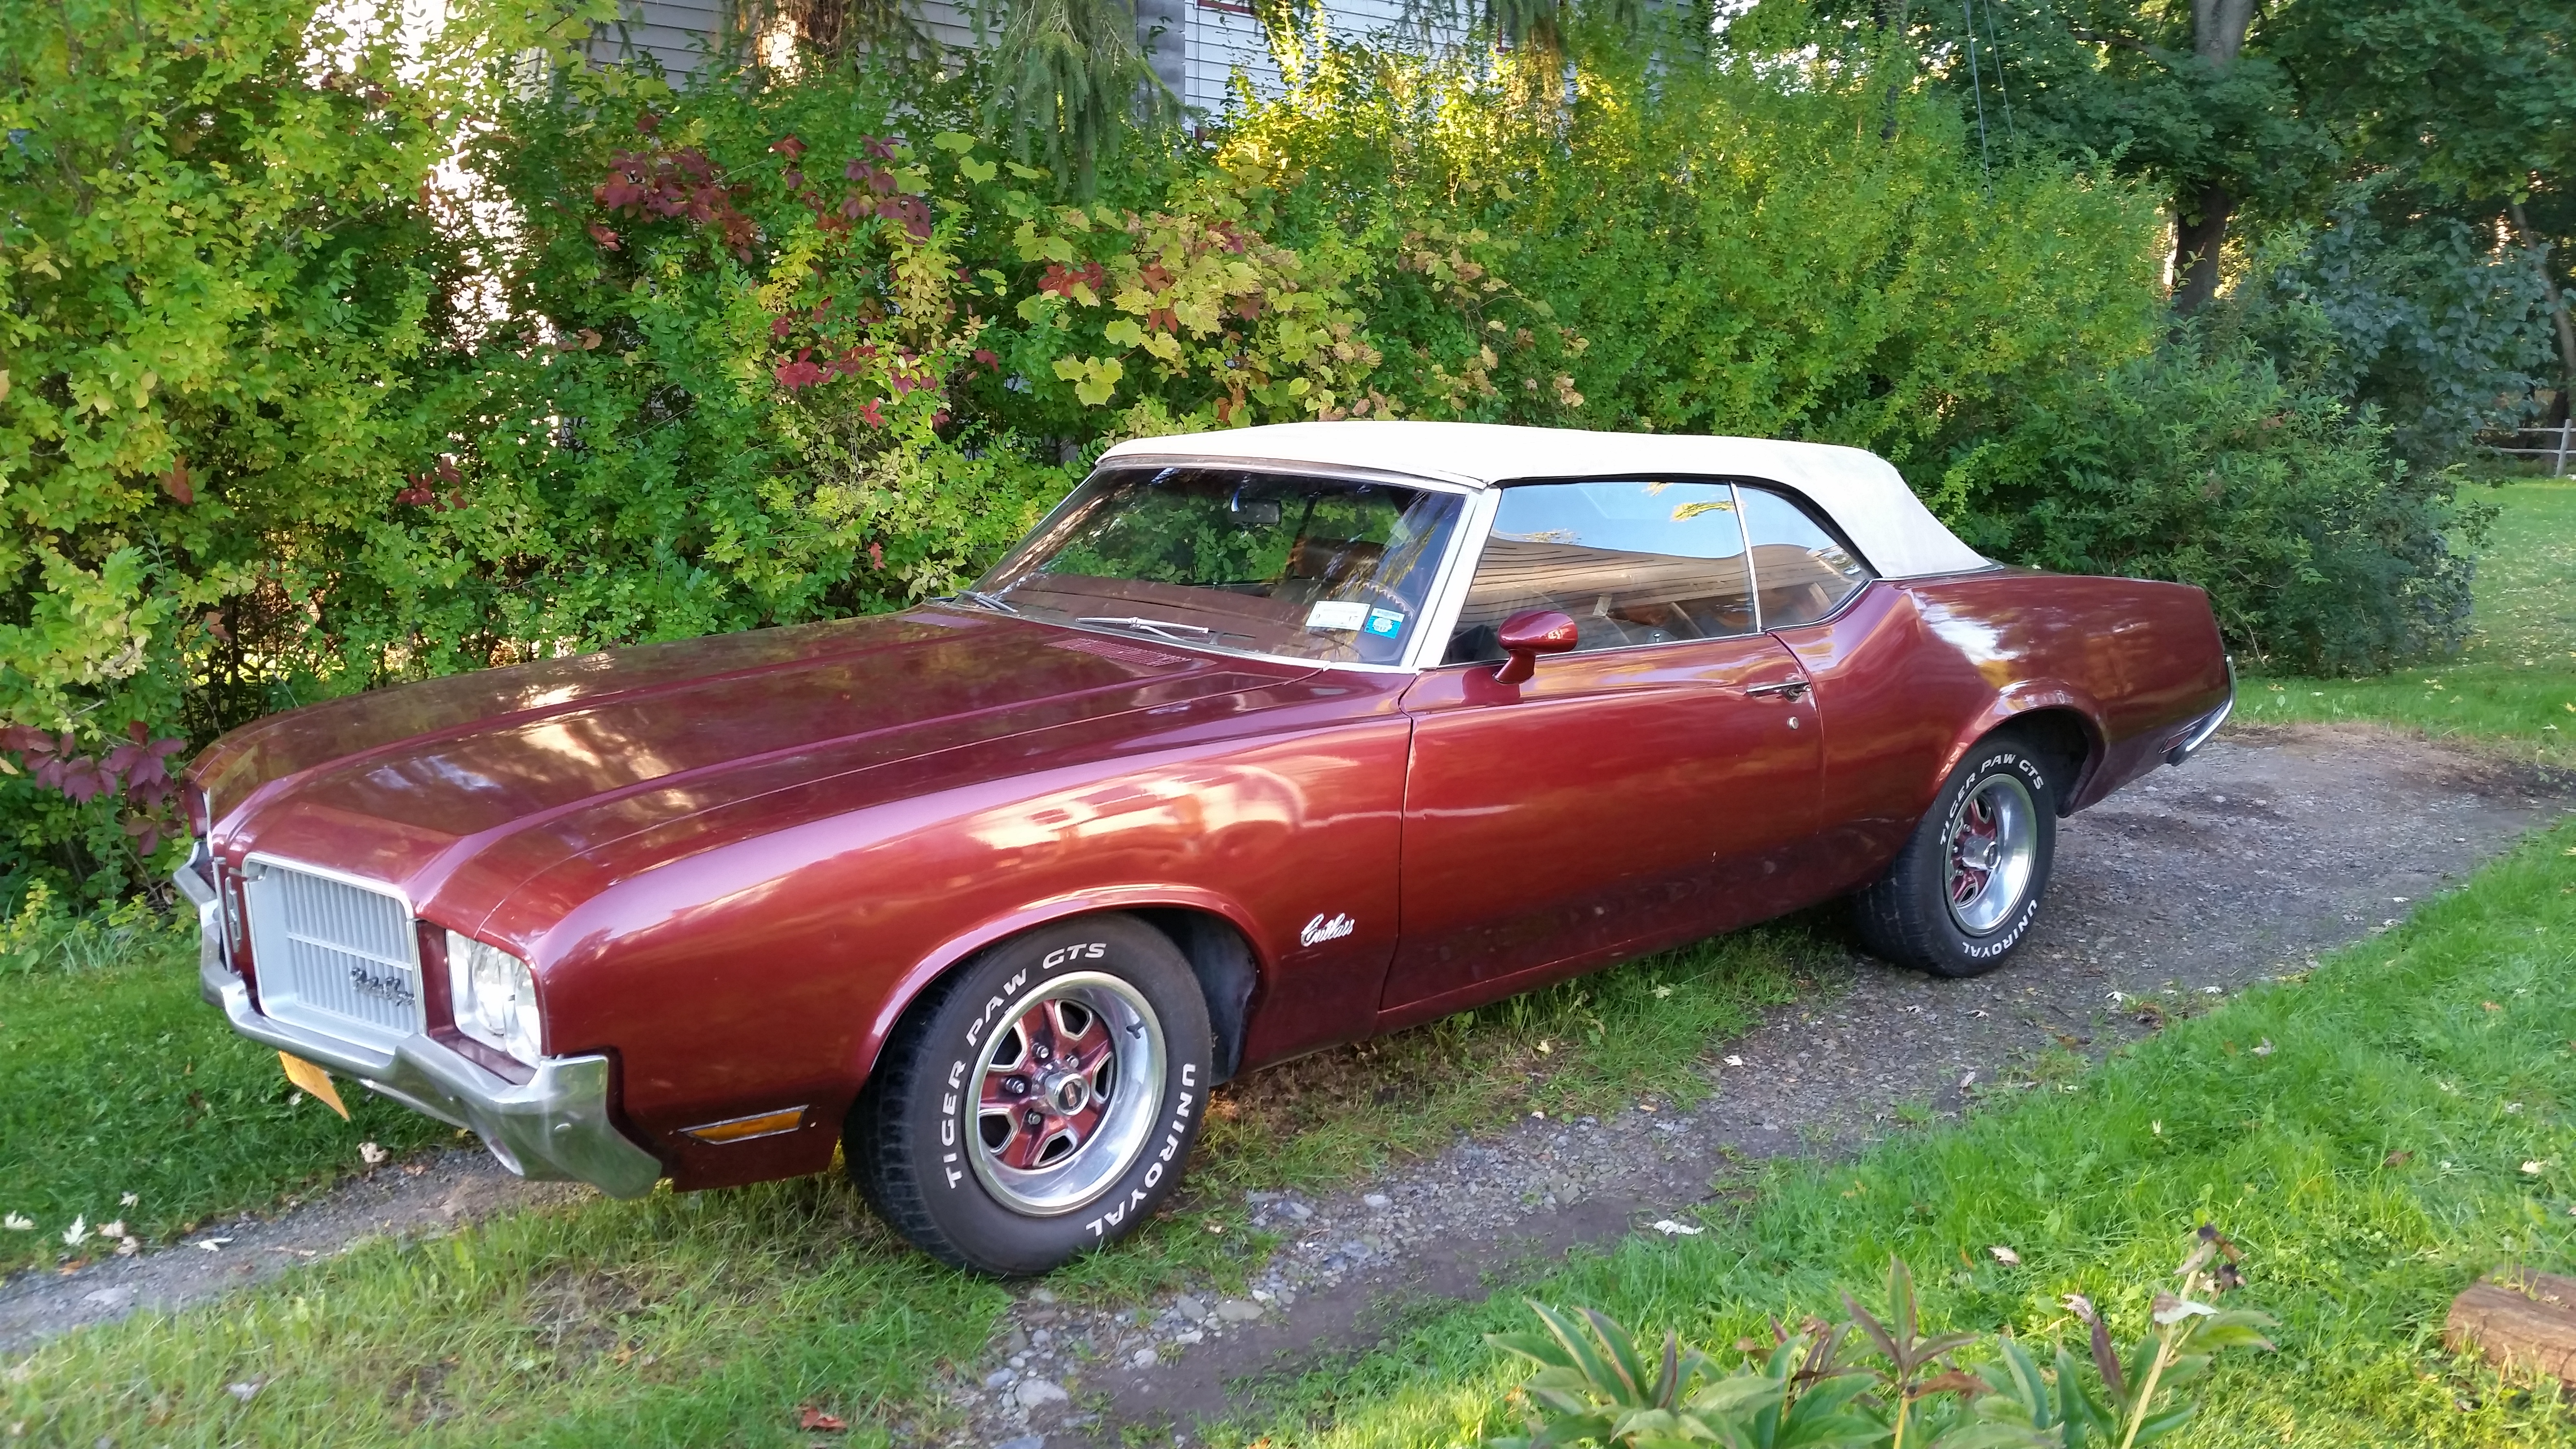
Man great minds think alike !! Mine is a 71 convertible w 350 rocket..rides like a caddy just plain fun car . I've always wanted a 72 442 convertible though
-
1976 Autocar A64B dedicated to JR
gotnitro? replied to Pete68's topic in WIP: Model Trucks: Big Rigs and Heavy Equipment
Beautiful work !! -
I started weathering the tractor while the trailer sealer dried..I used AK sand /desert camo Panel liner like a wash..then streaked the pigments w testors. I really like the used look it created..hopefully you'll agree More to come !
-
Very nice work !
-
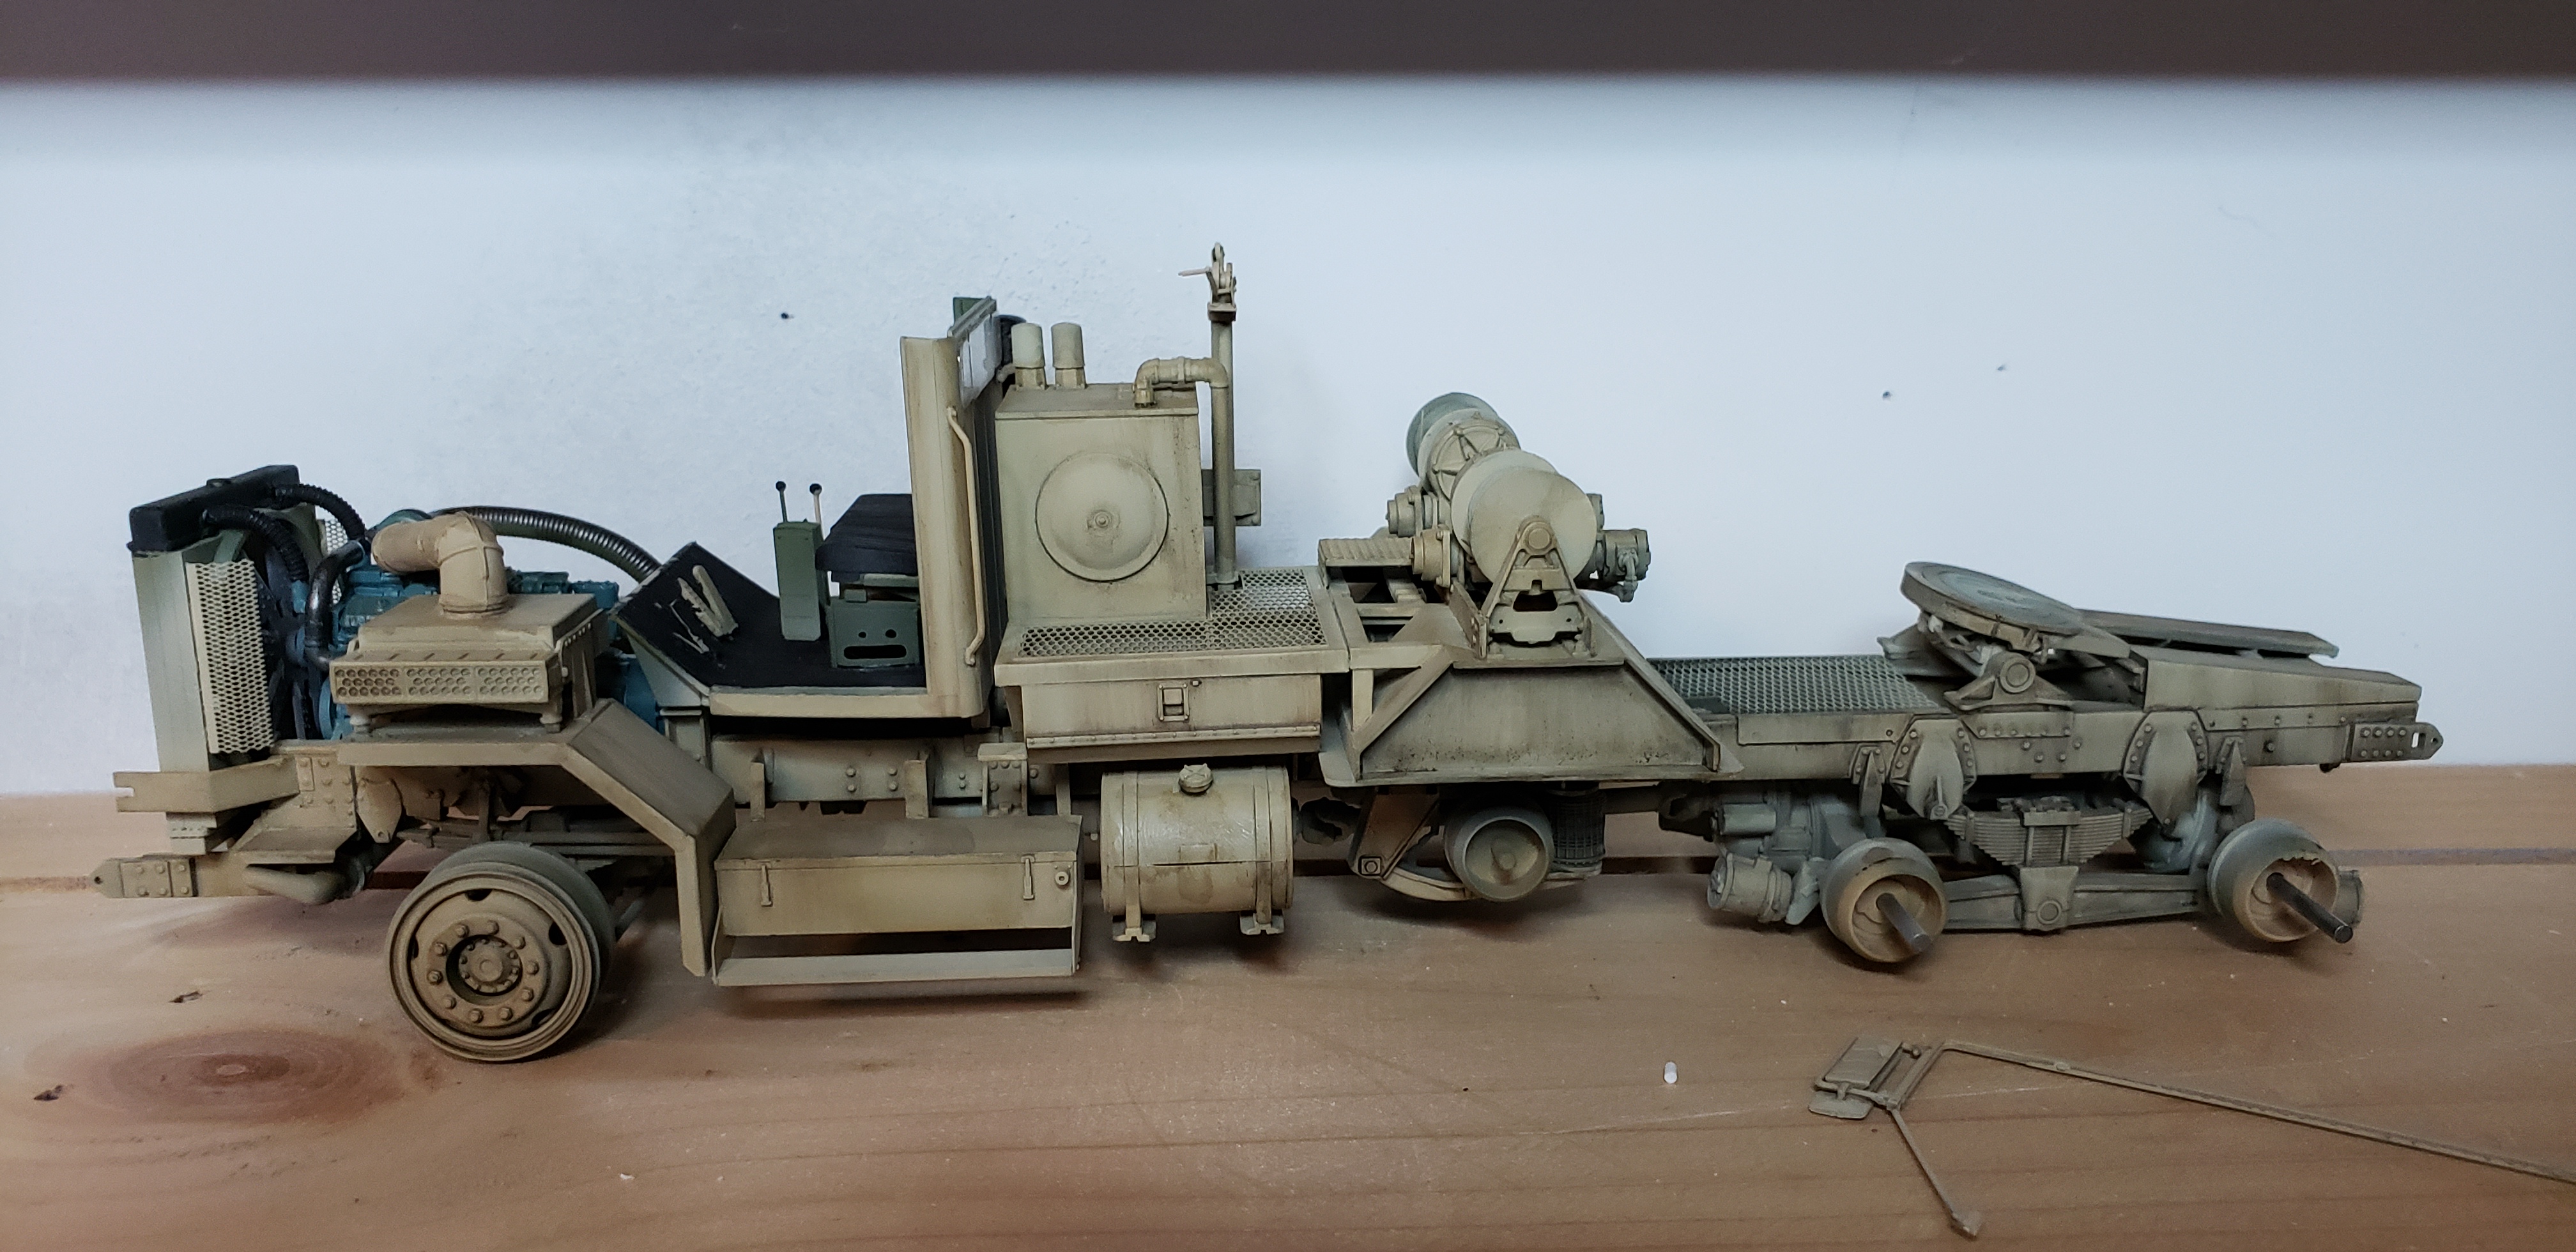
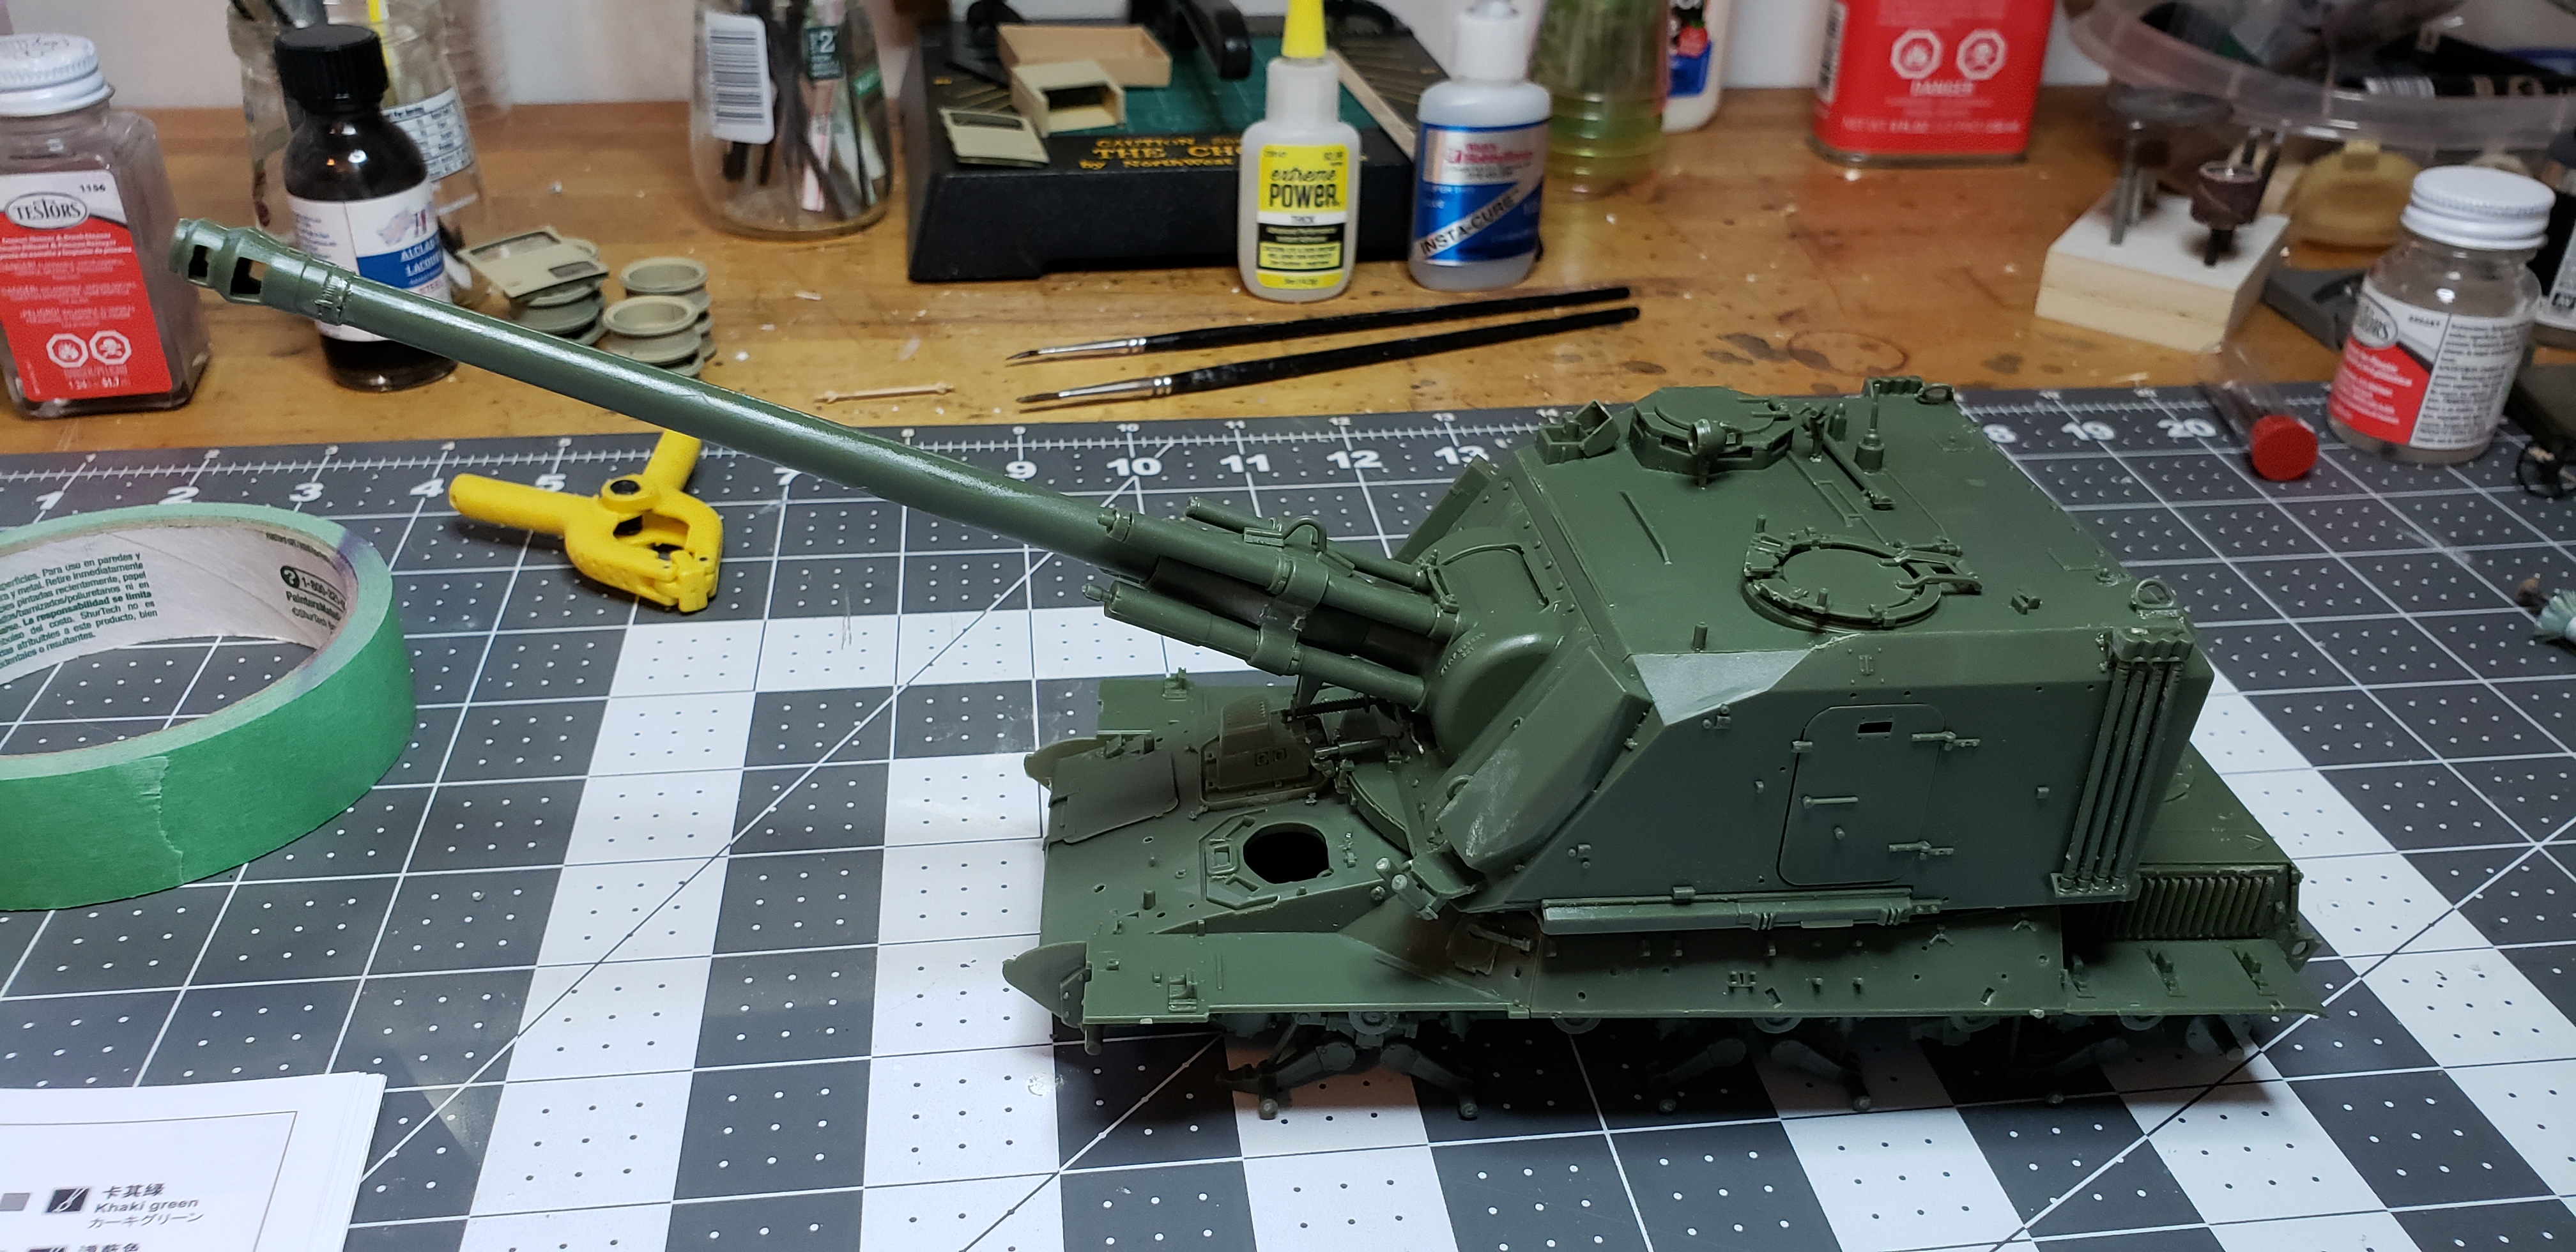
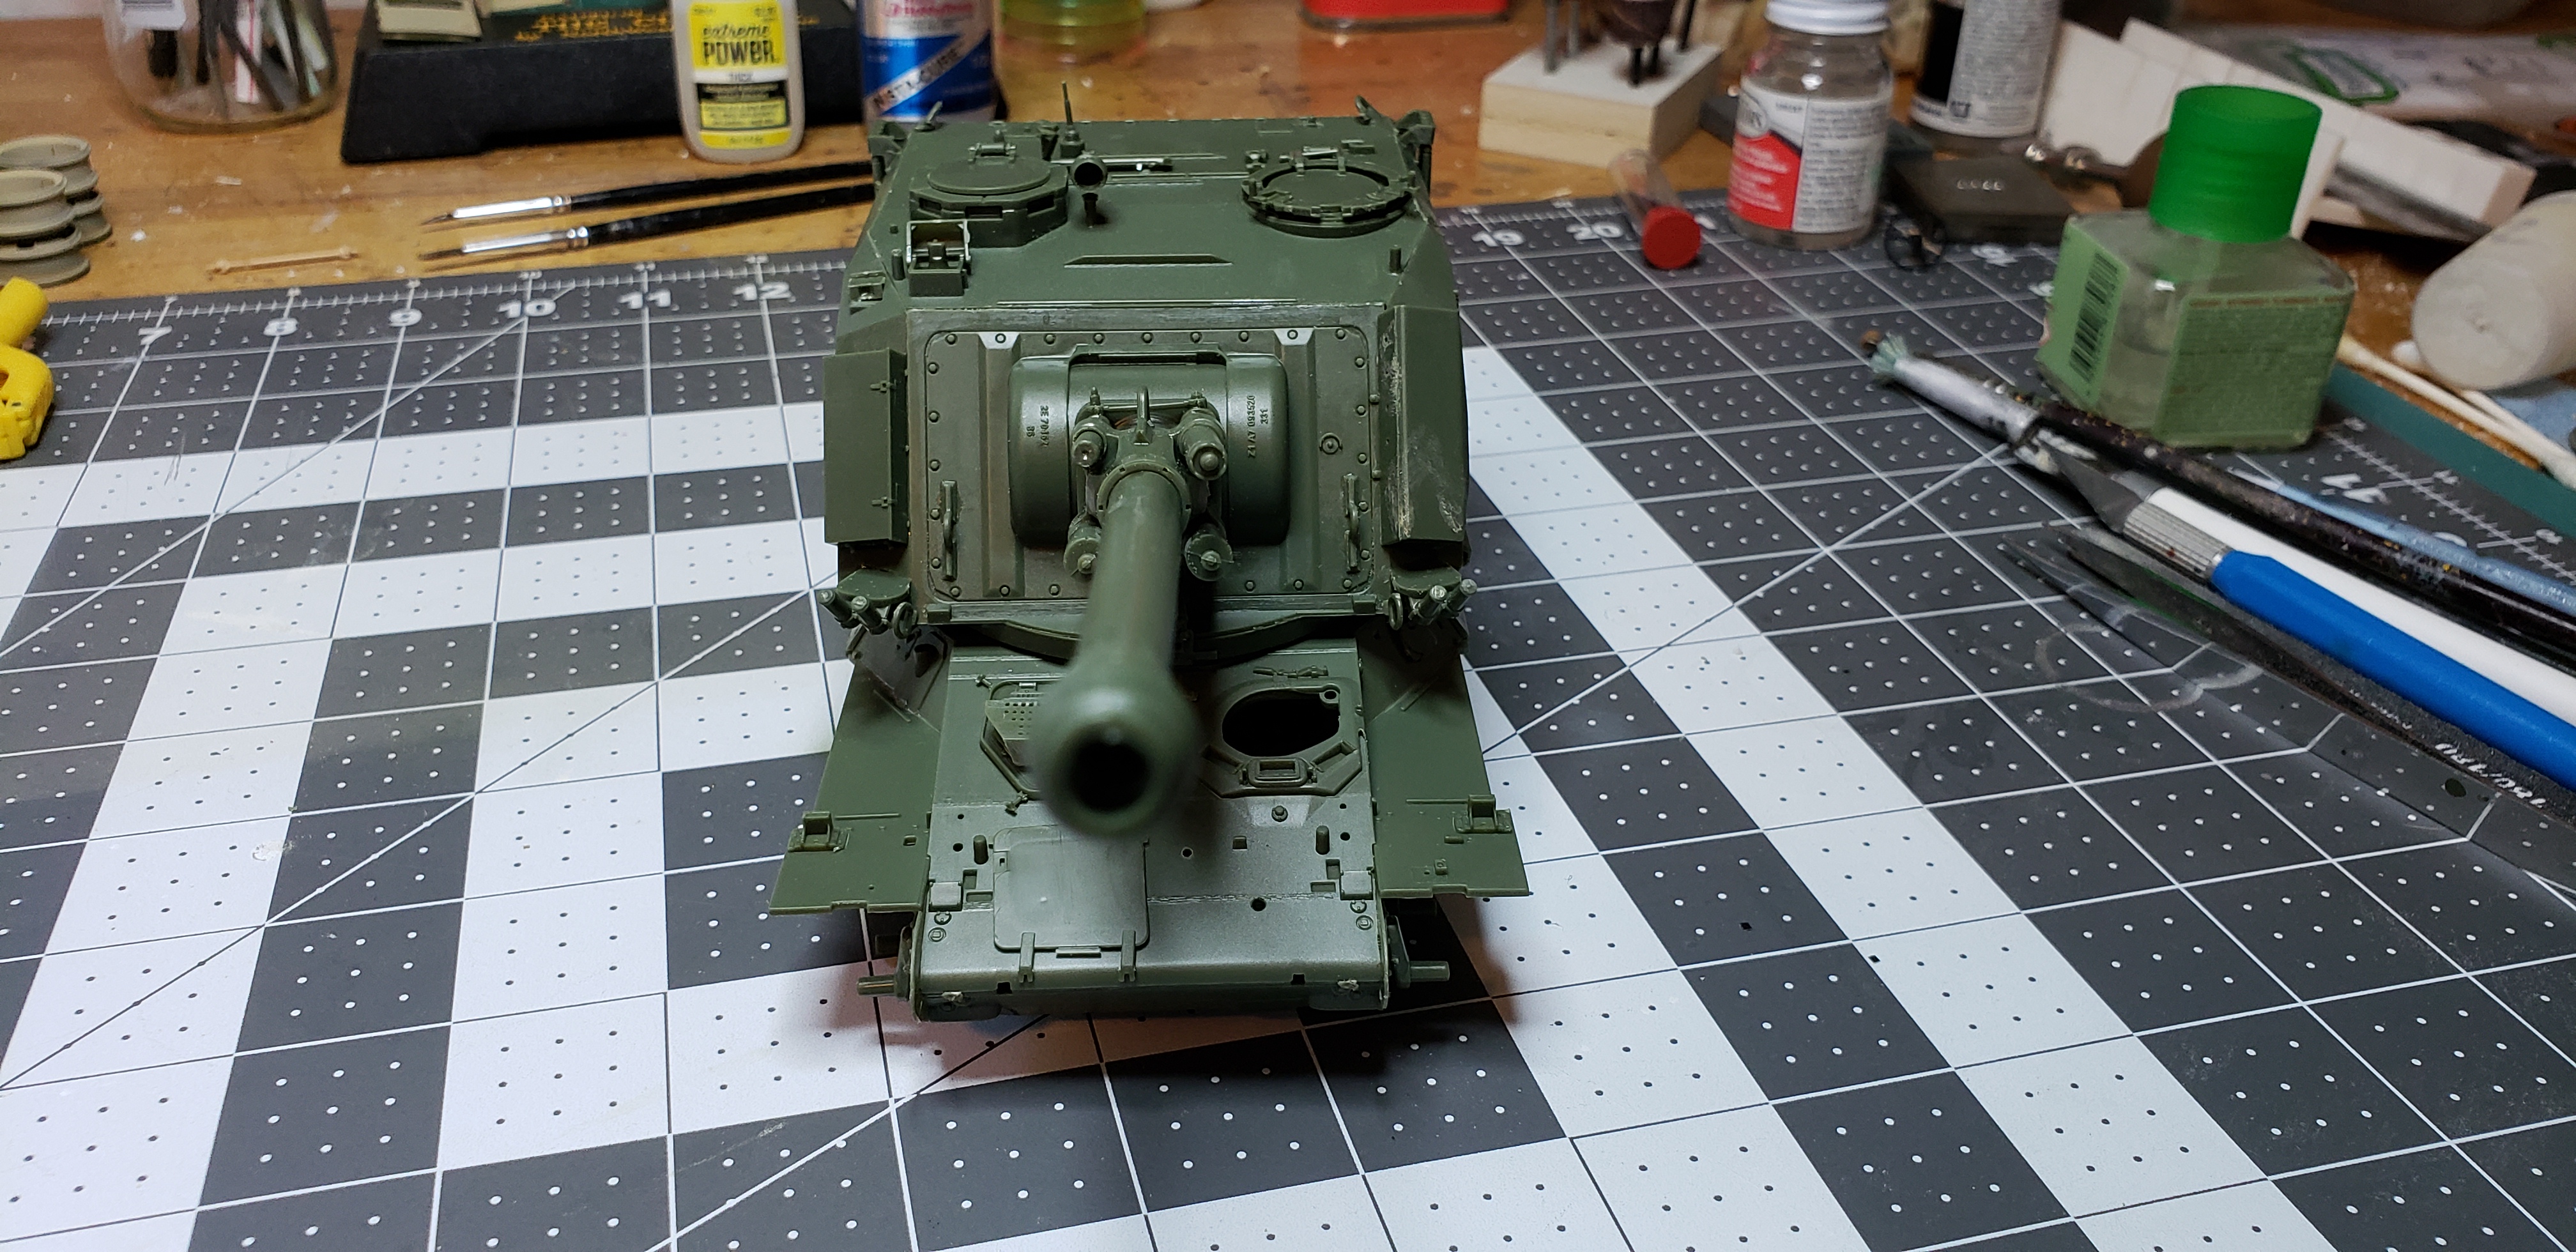
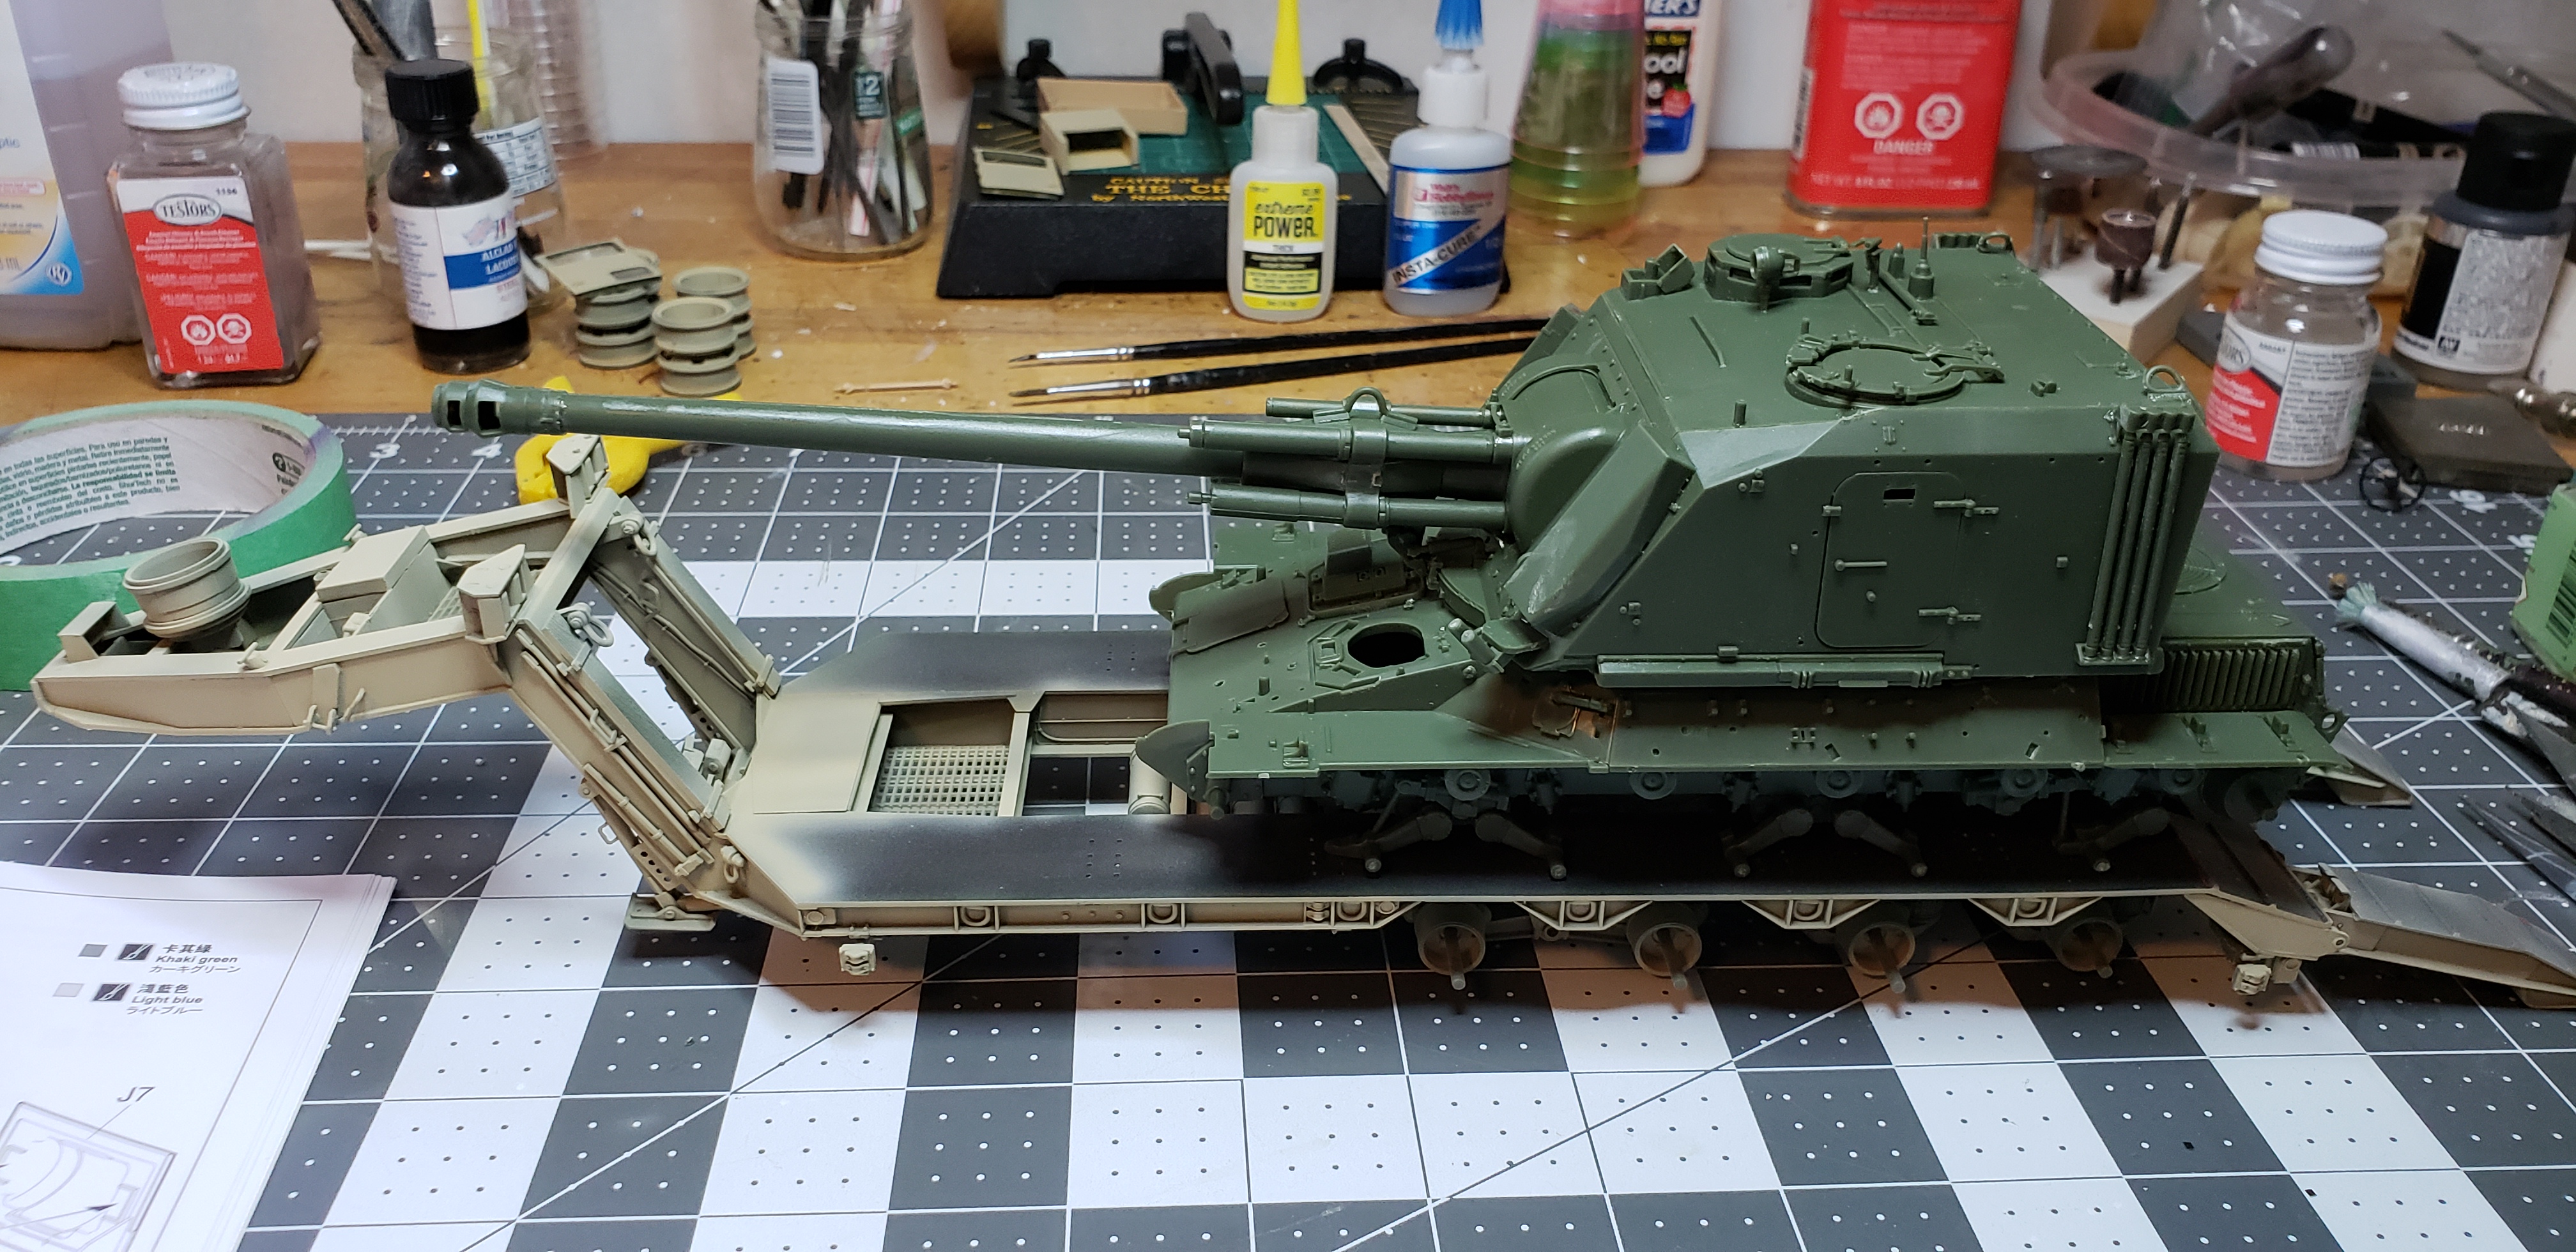
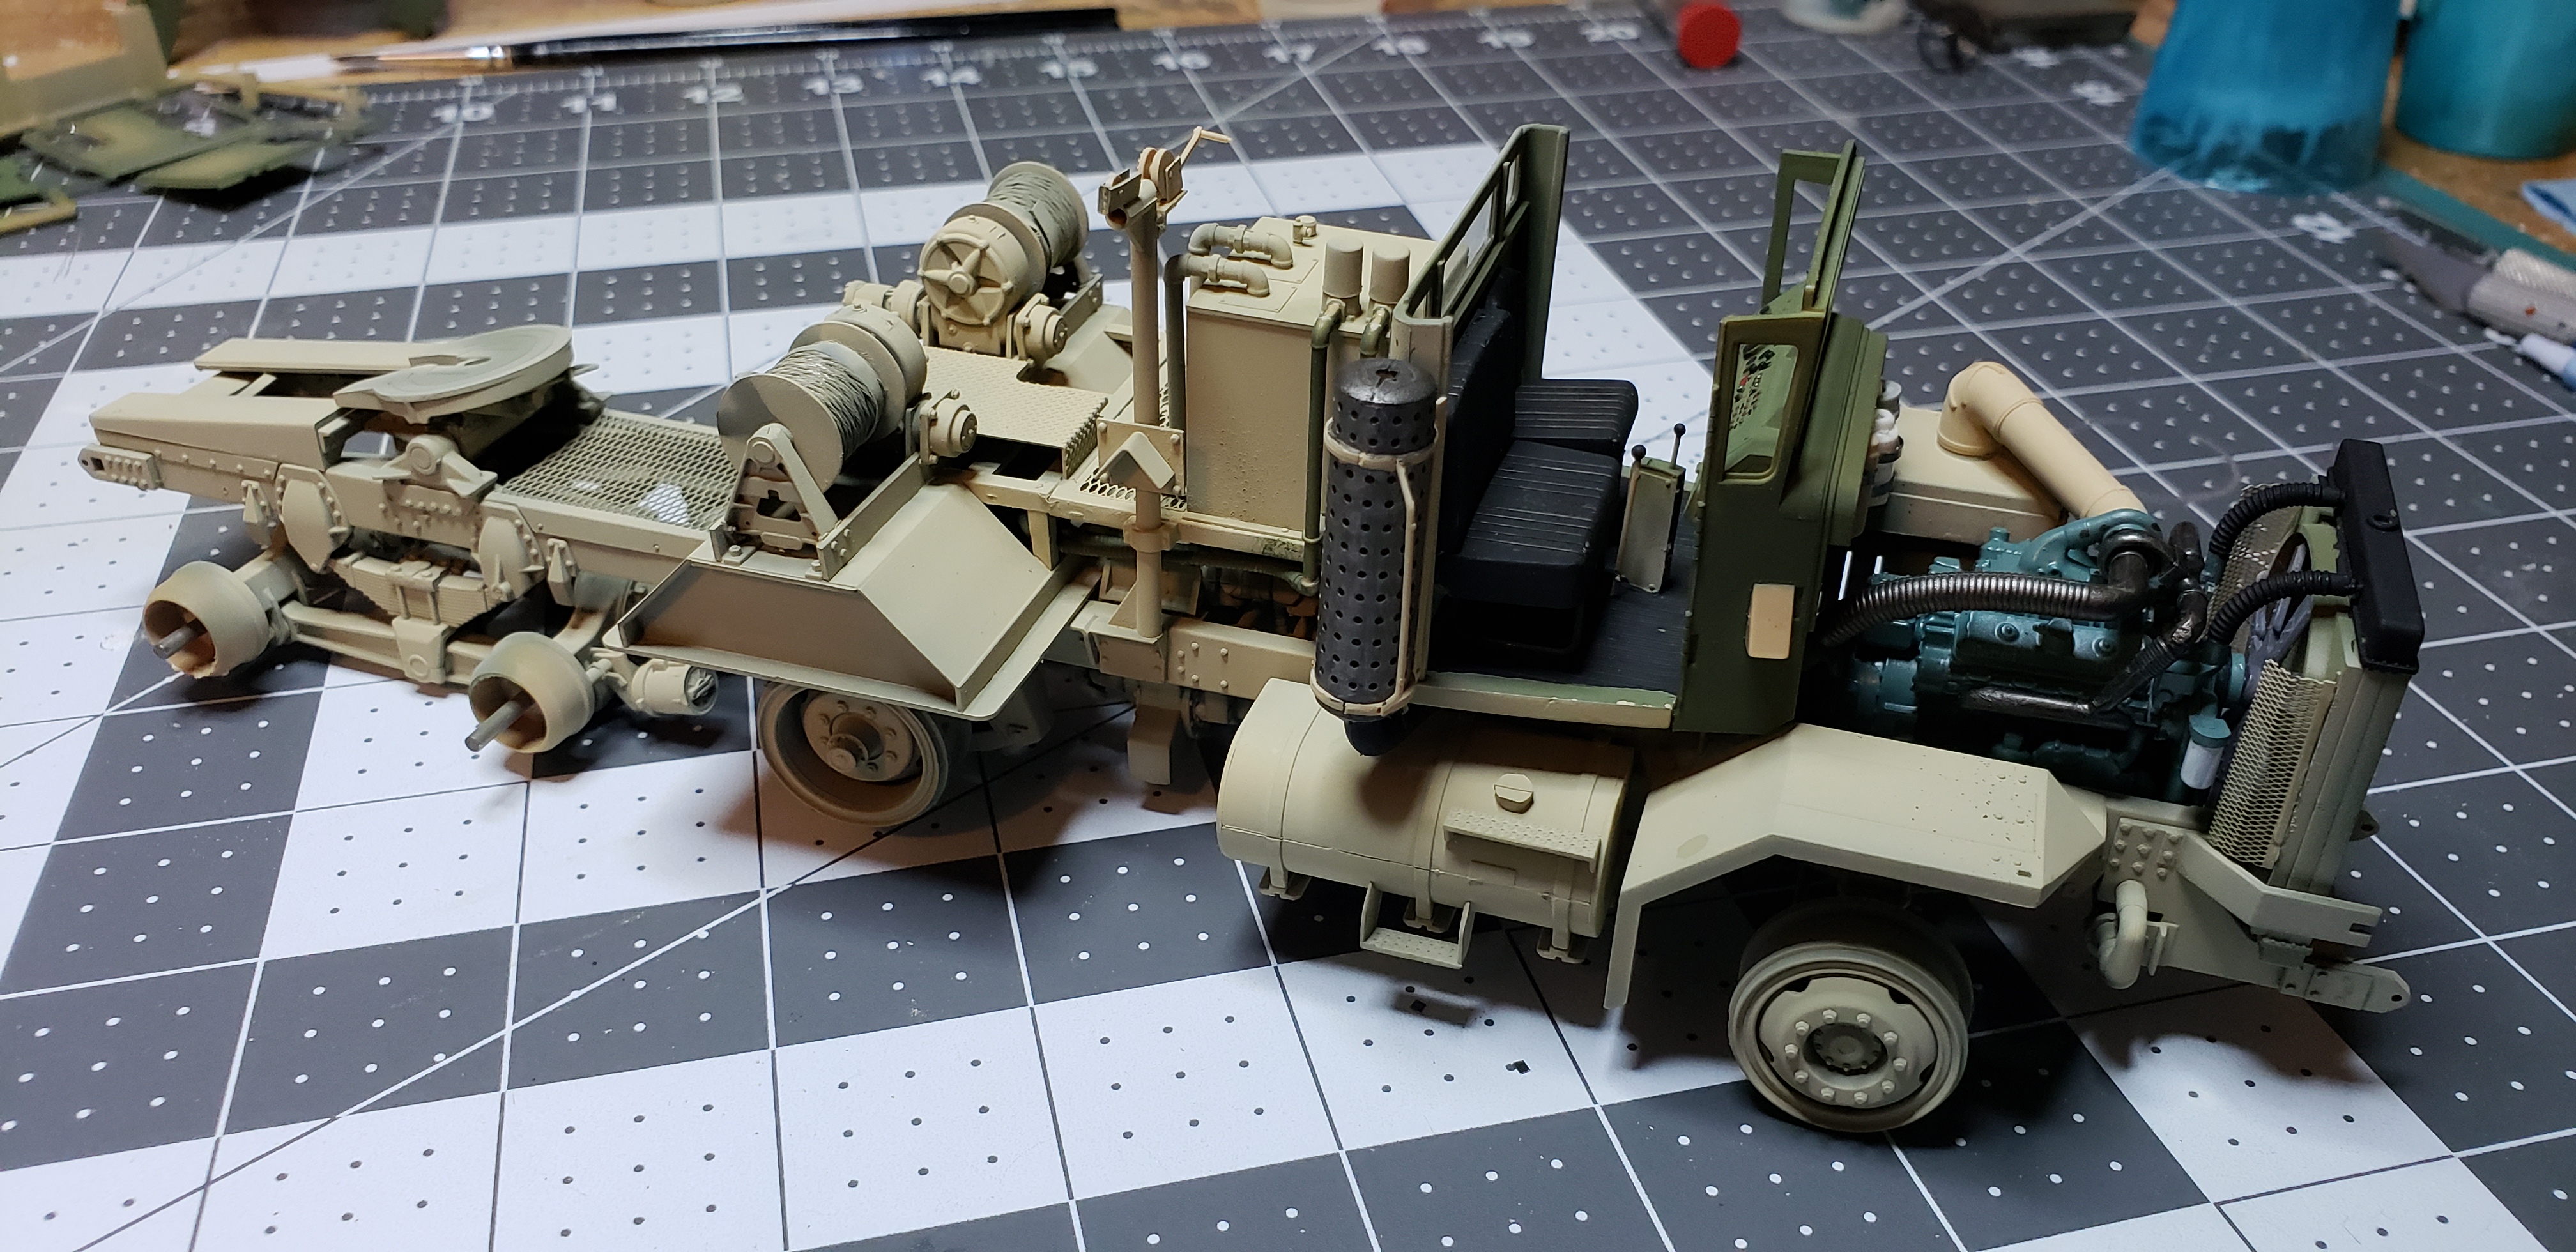
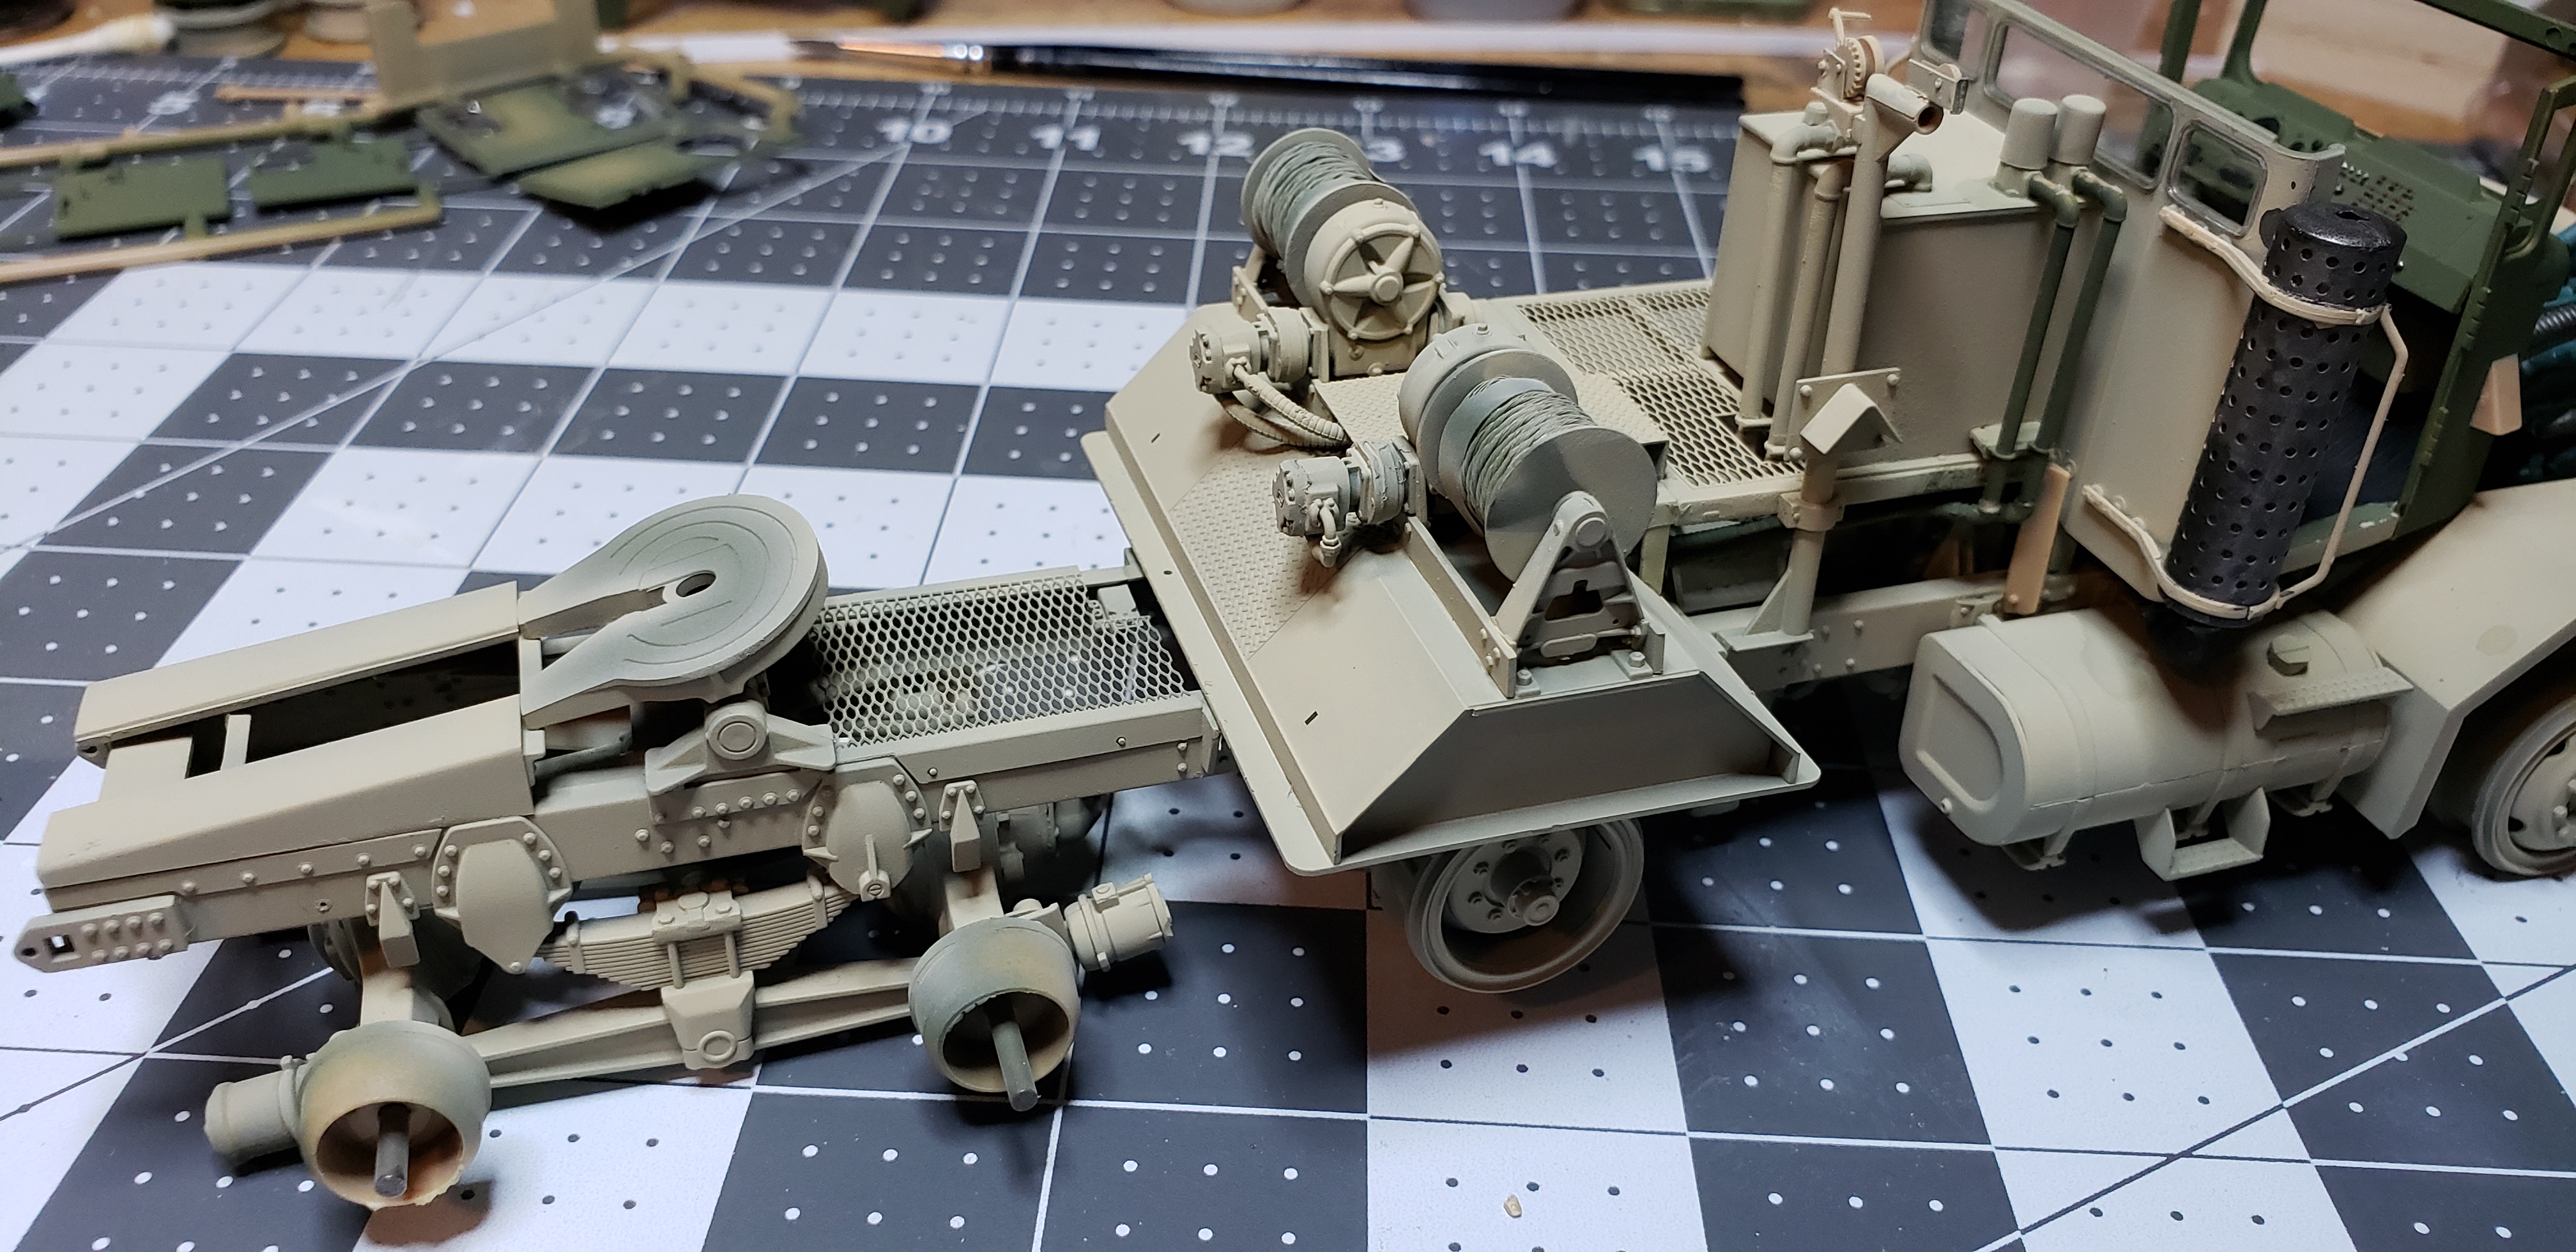
The options for a load were numerous, anything the US military used from mid 80s to early 90s would fit...the Abrams would be great option, this truck had just enough capability to haul one..just. My duty station on Ft Hood had a fantastic museum of captured Iraqi equipment brought back after Desert storm. I had chose an Iraqi Auf 1 SPG which France sold them years before. The huge turret and 155mm barrel looks cool..I had started years ago..ironically it was from Meng also ! Here's the load I'll spray this Iraqi sand..much lighter than the US used..should make an interesting contrast. The one issue I caused by loading trailer, I'll either need to replace the winch cables to reach this tank to appear as it's being loaded..or add chain binders to strap it down Thanks for following any comments welcome
-
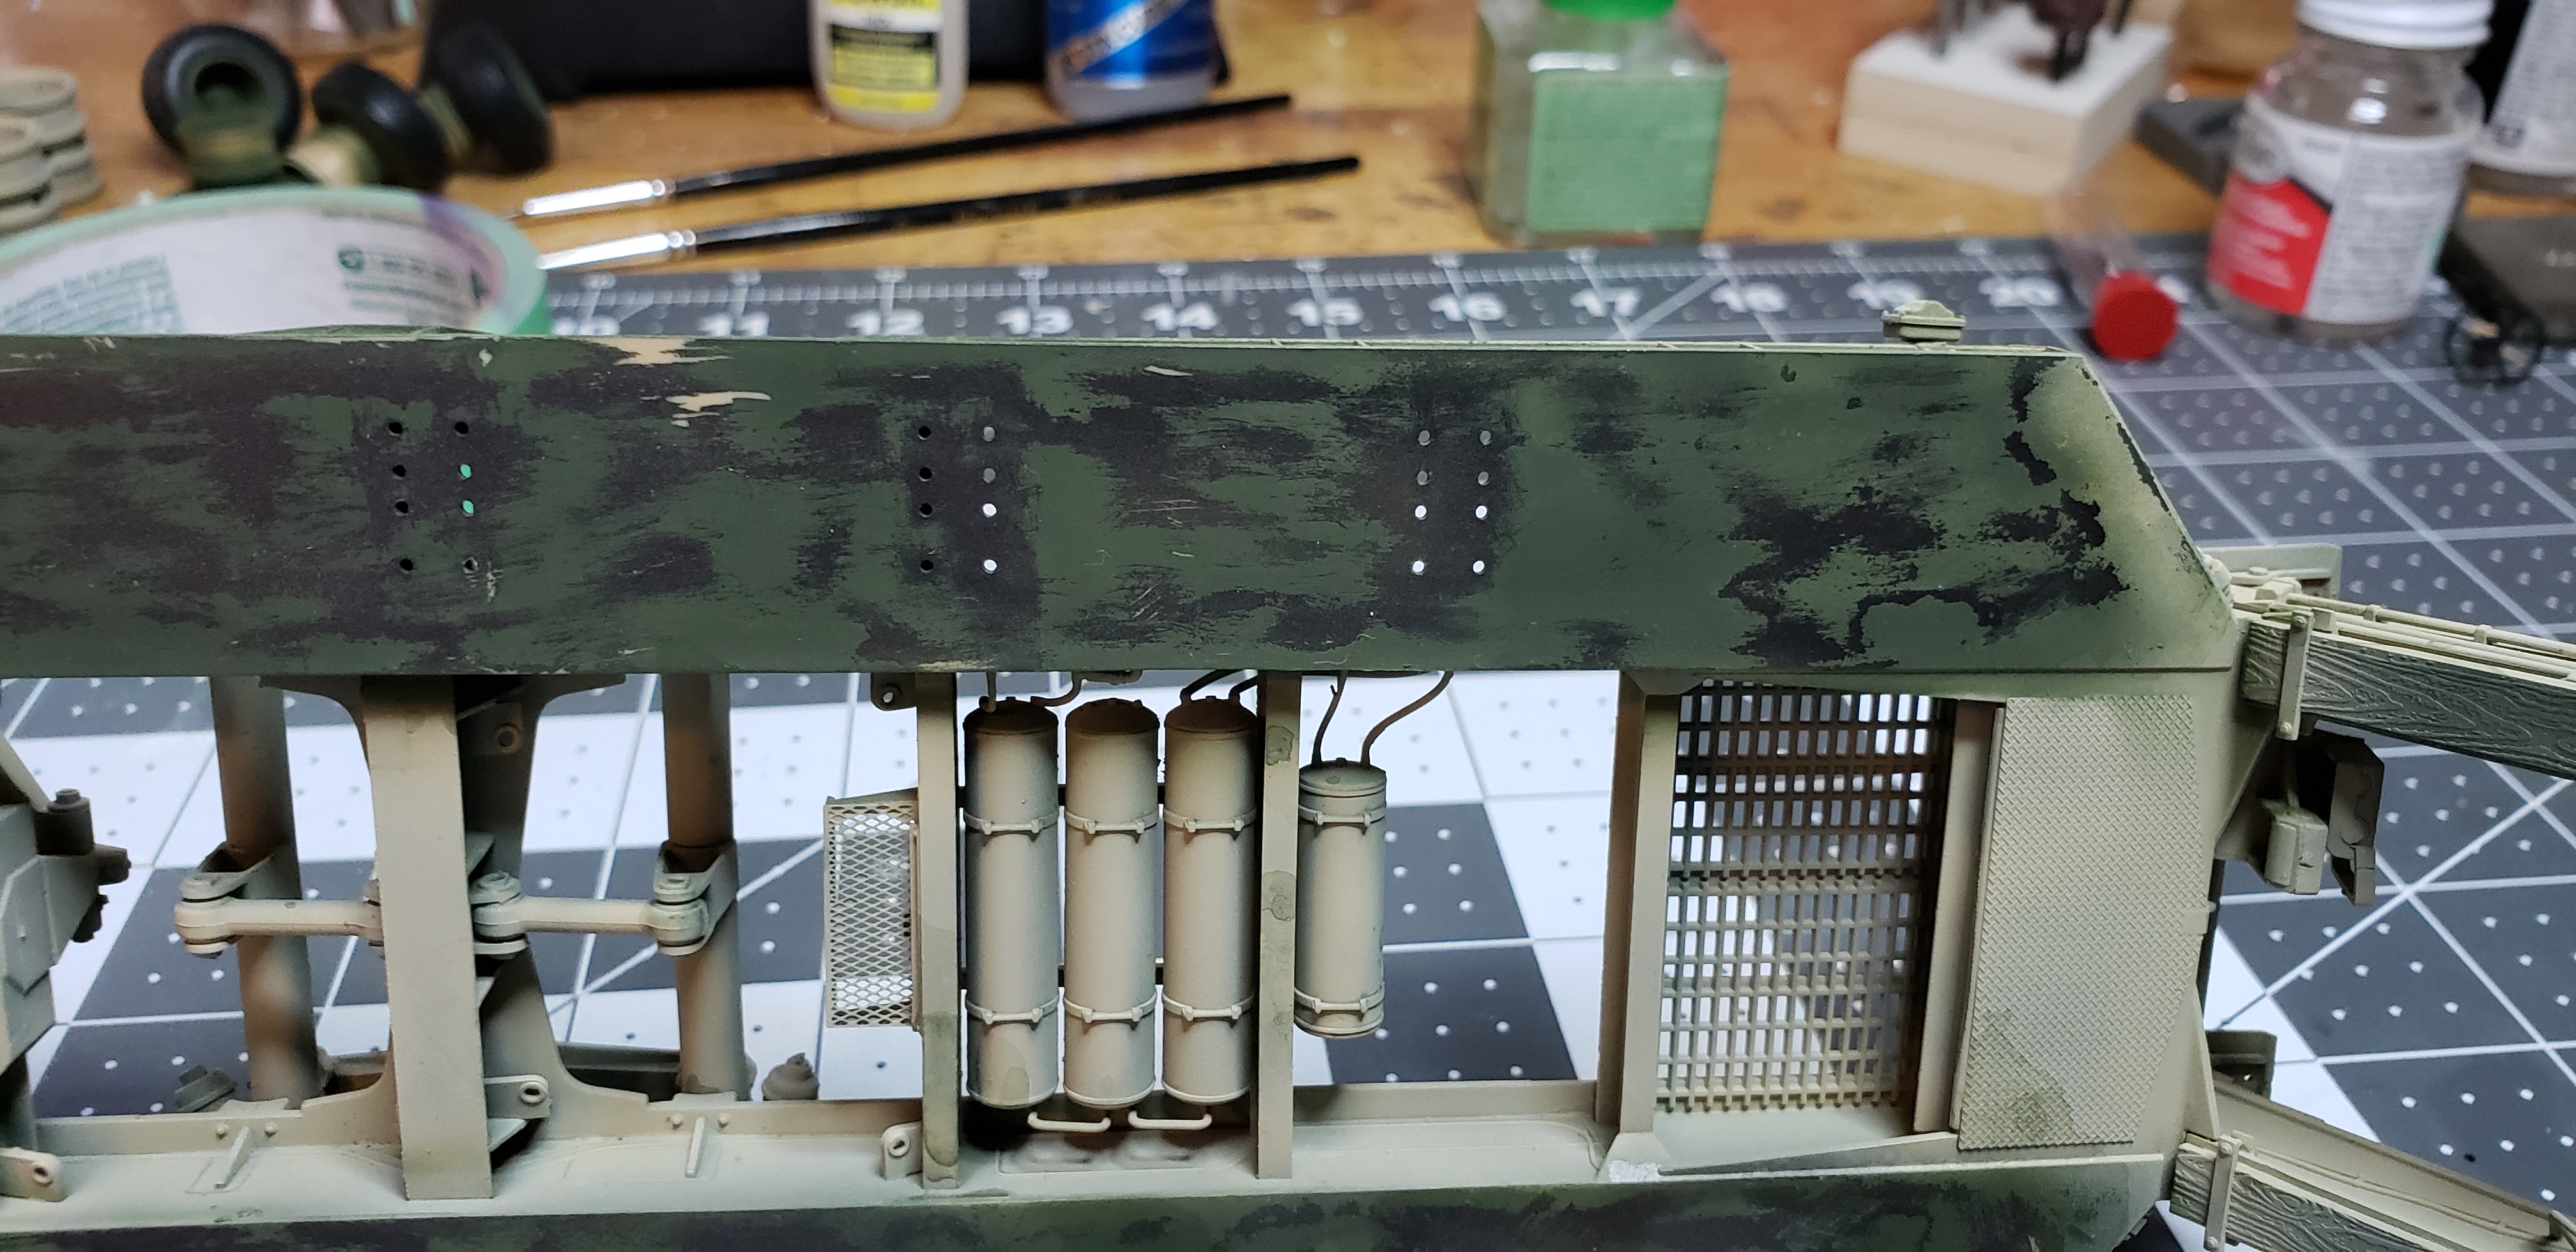
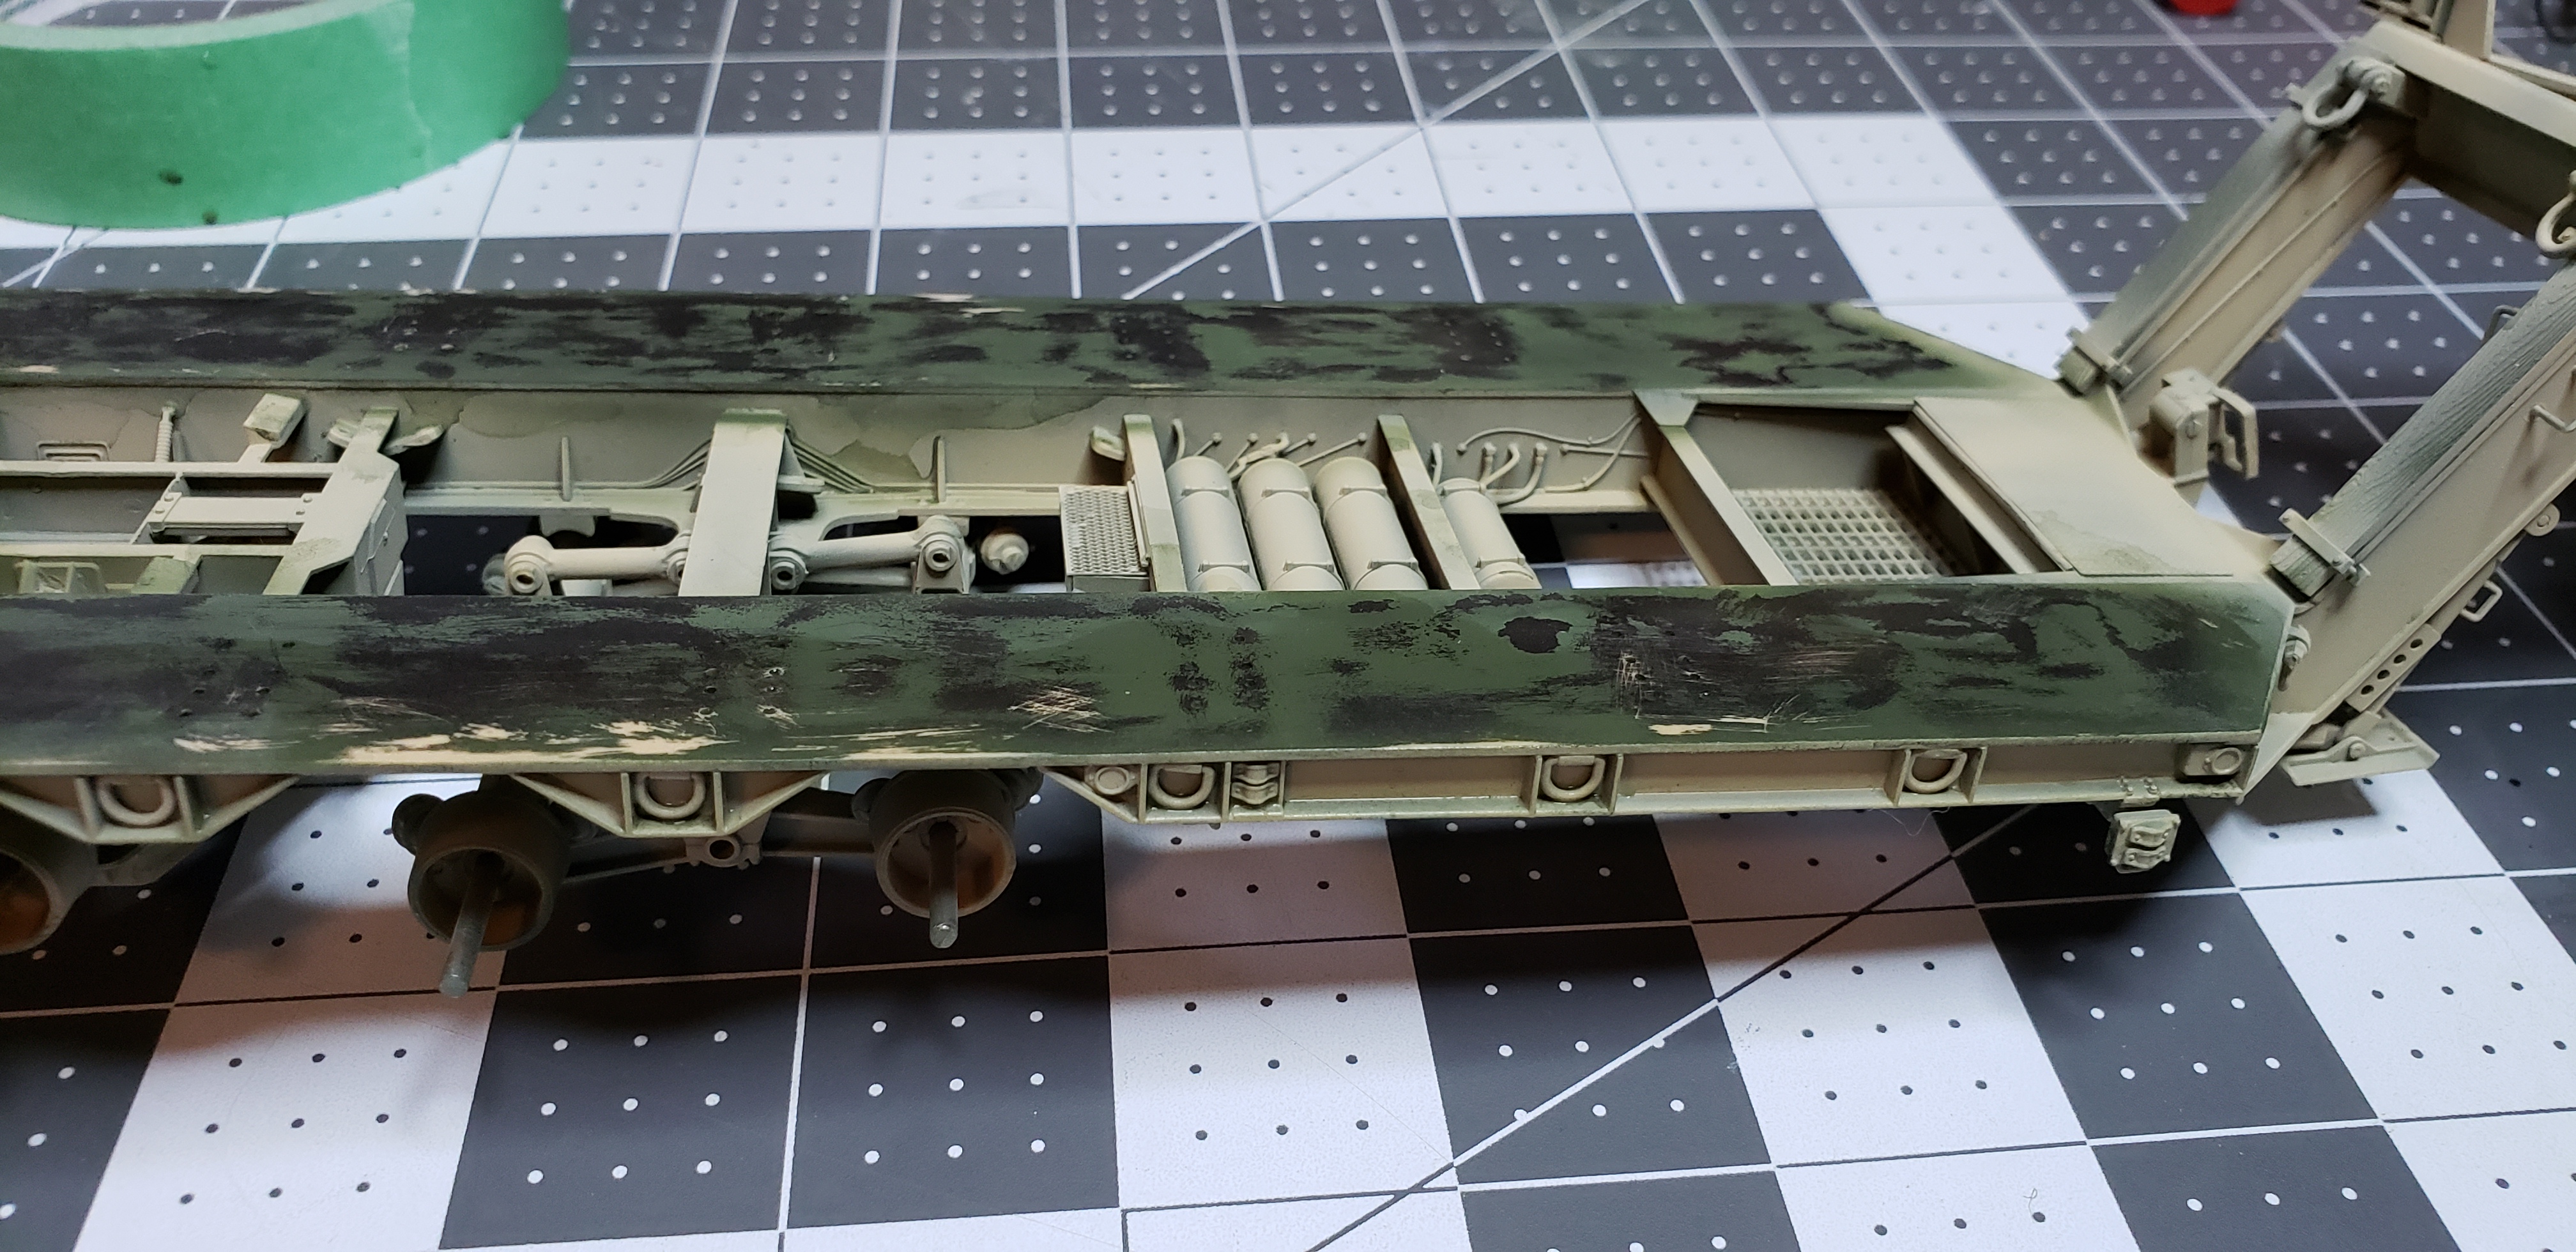
Thanks everyone I really appreciate you following along ! I started creating the worn paint on the M747 today, after giving it a light coat of dirt cheap hairspray. First up was a coat of NATO green over the HS , letting it dry about 20 minutes. Tools I use for the next step..warm tap water , fine sanding stick, and a couple old brushes w the ends cut very close to the ferrule. Anything works, this parts fun..use your imagination how tracks would move across the metal..and chip away. Working a small section, dabbing water first then scuffing, scraping, and chipping away . Te water dissolves the HS removing the coat above it !!! If ya mess up..spray another color coat and try again !! Keeping it random makes it more interesting imo. A few bare spots broke thru , but I'll fix that during the next cycle. After it dries, I'll seal w future, then add the next color and repeat! I stayed away from edges intentionally, I'll use the sponge chipping for that..more controlled. More to come !
-
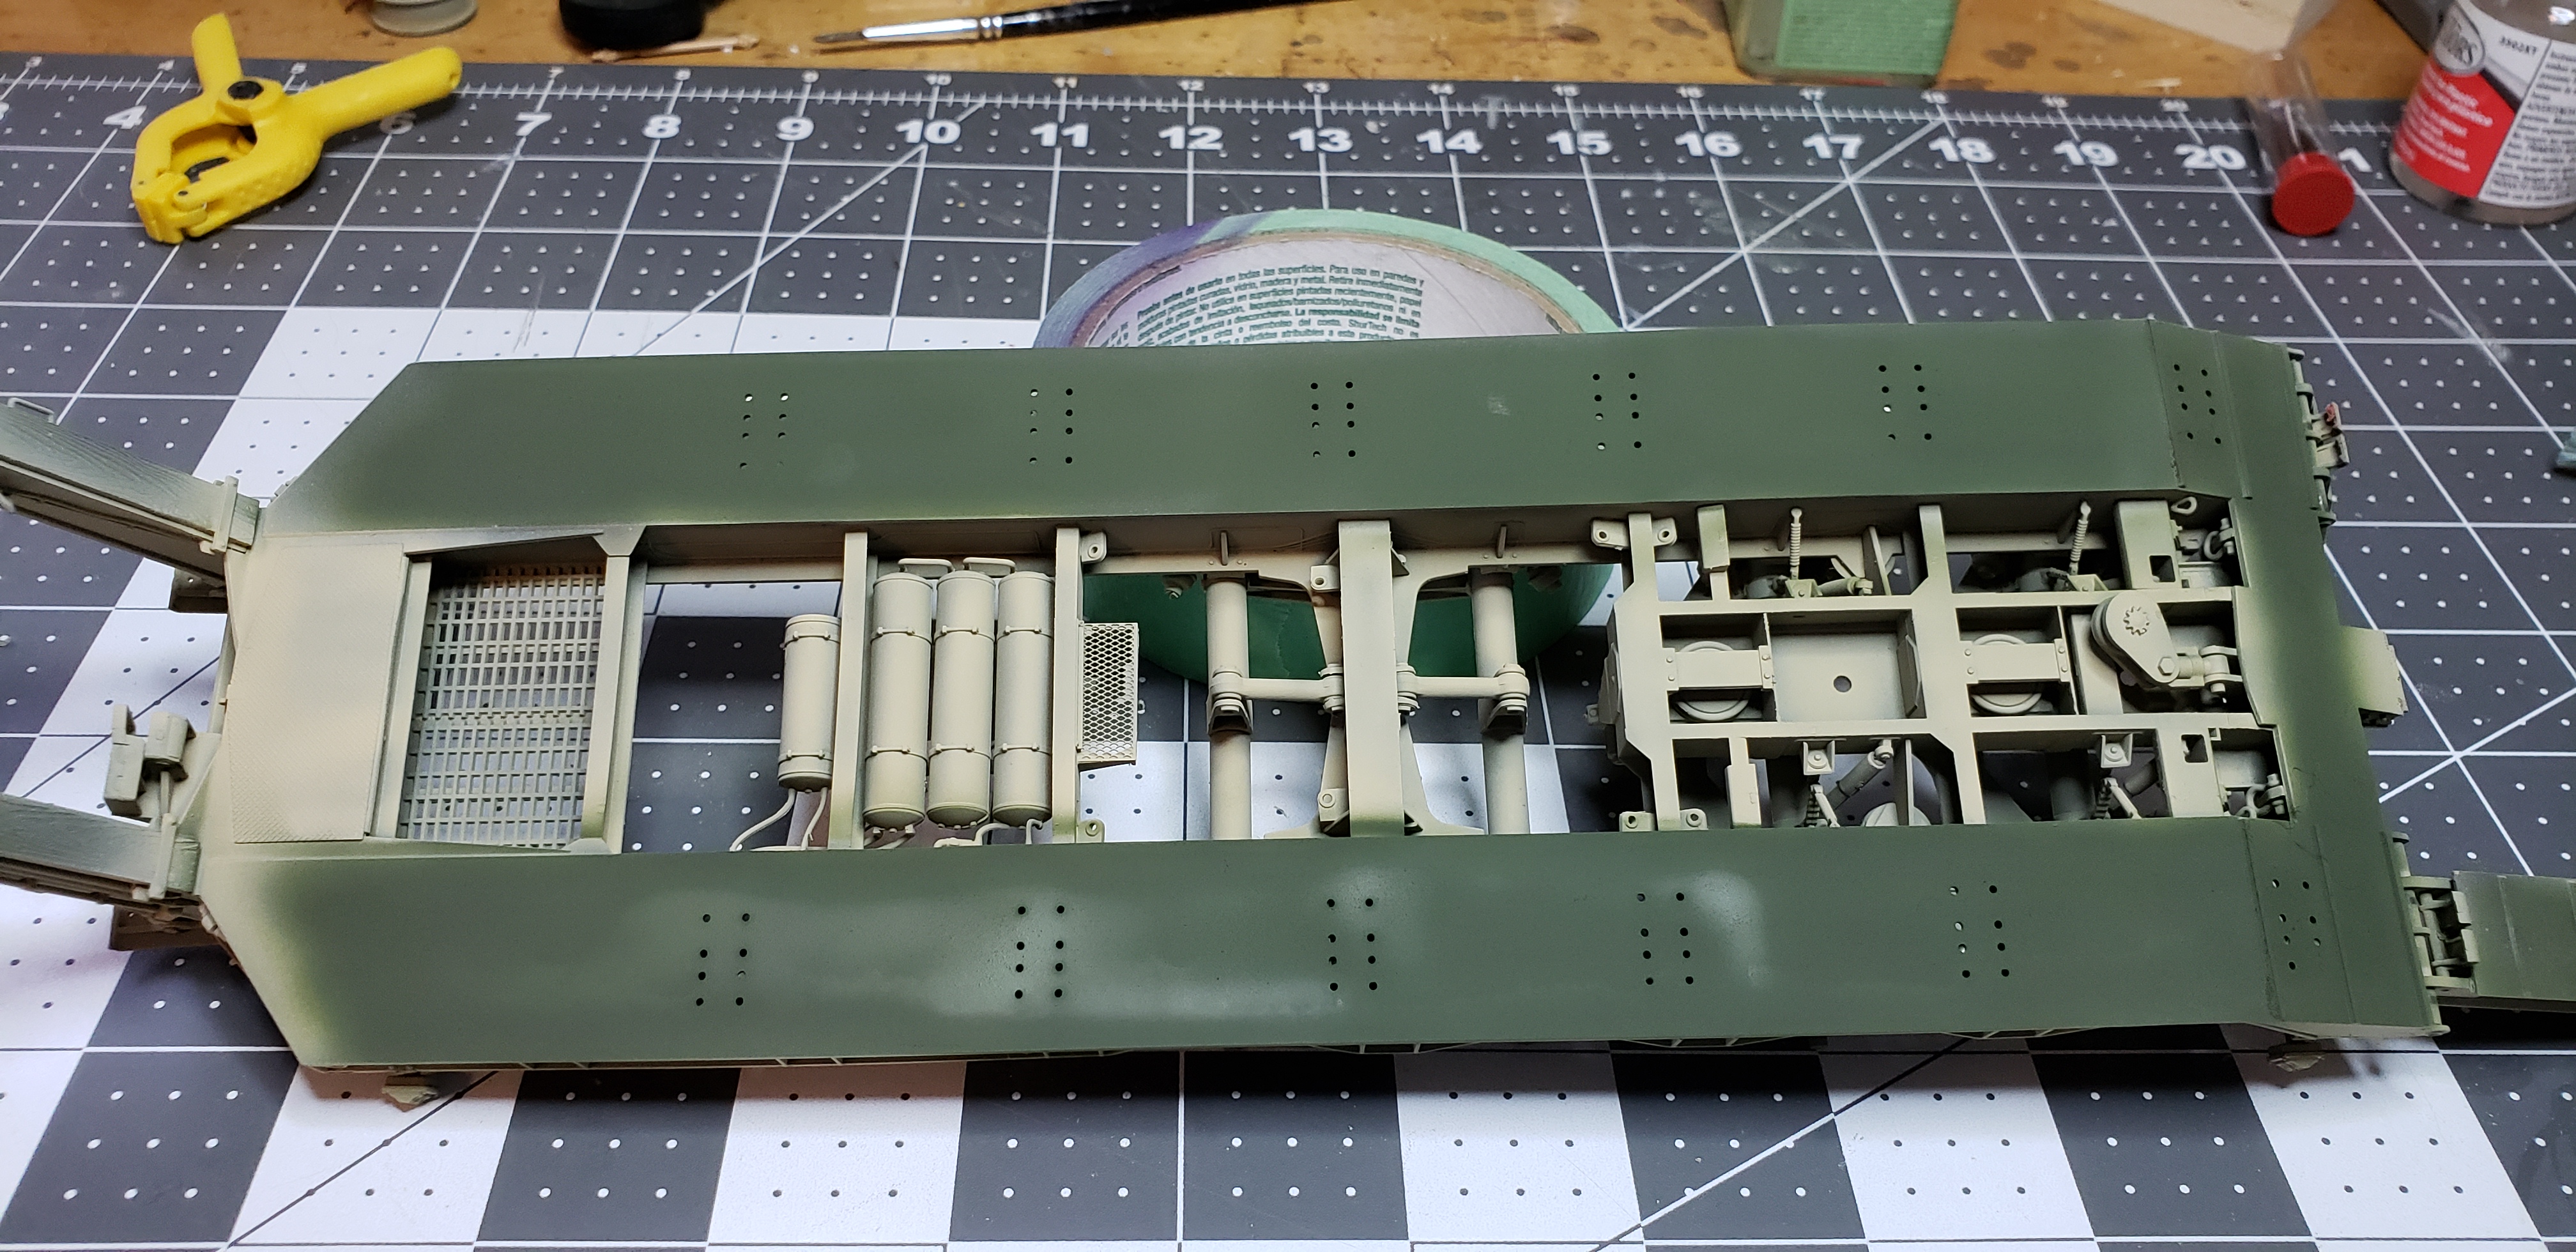
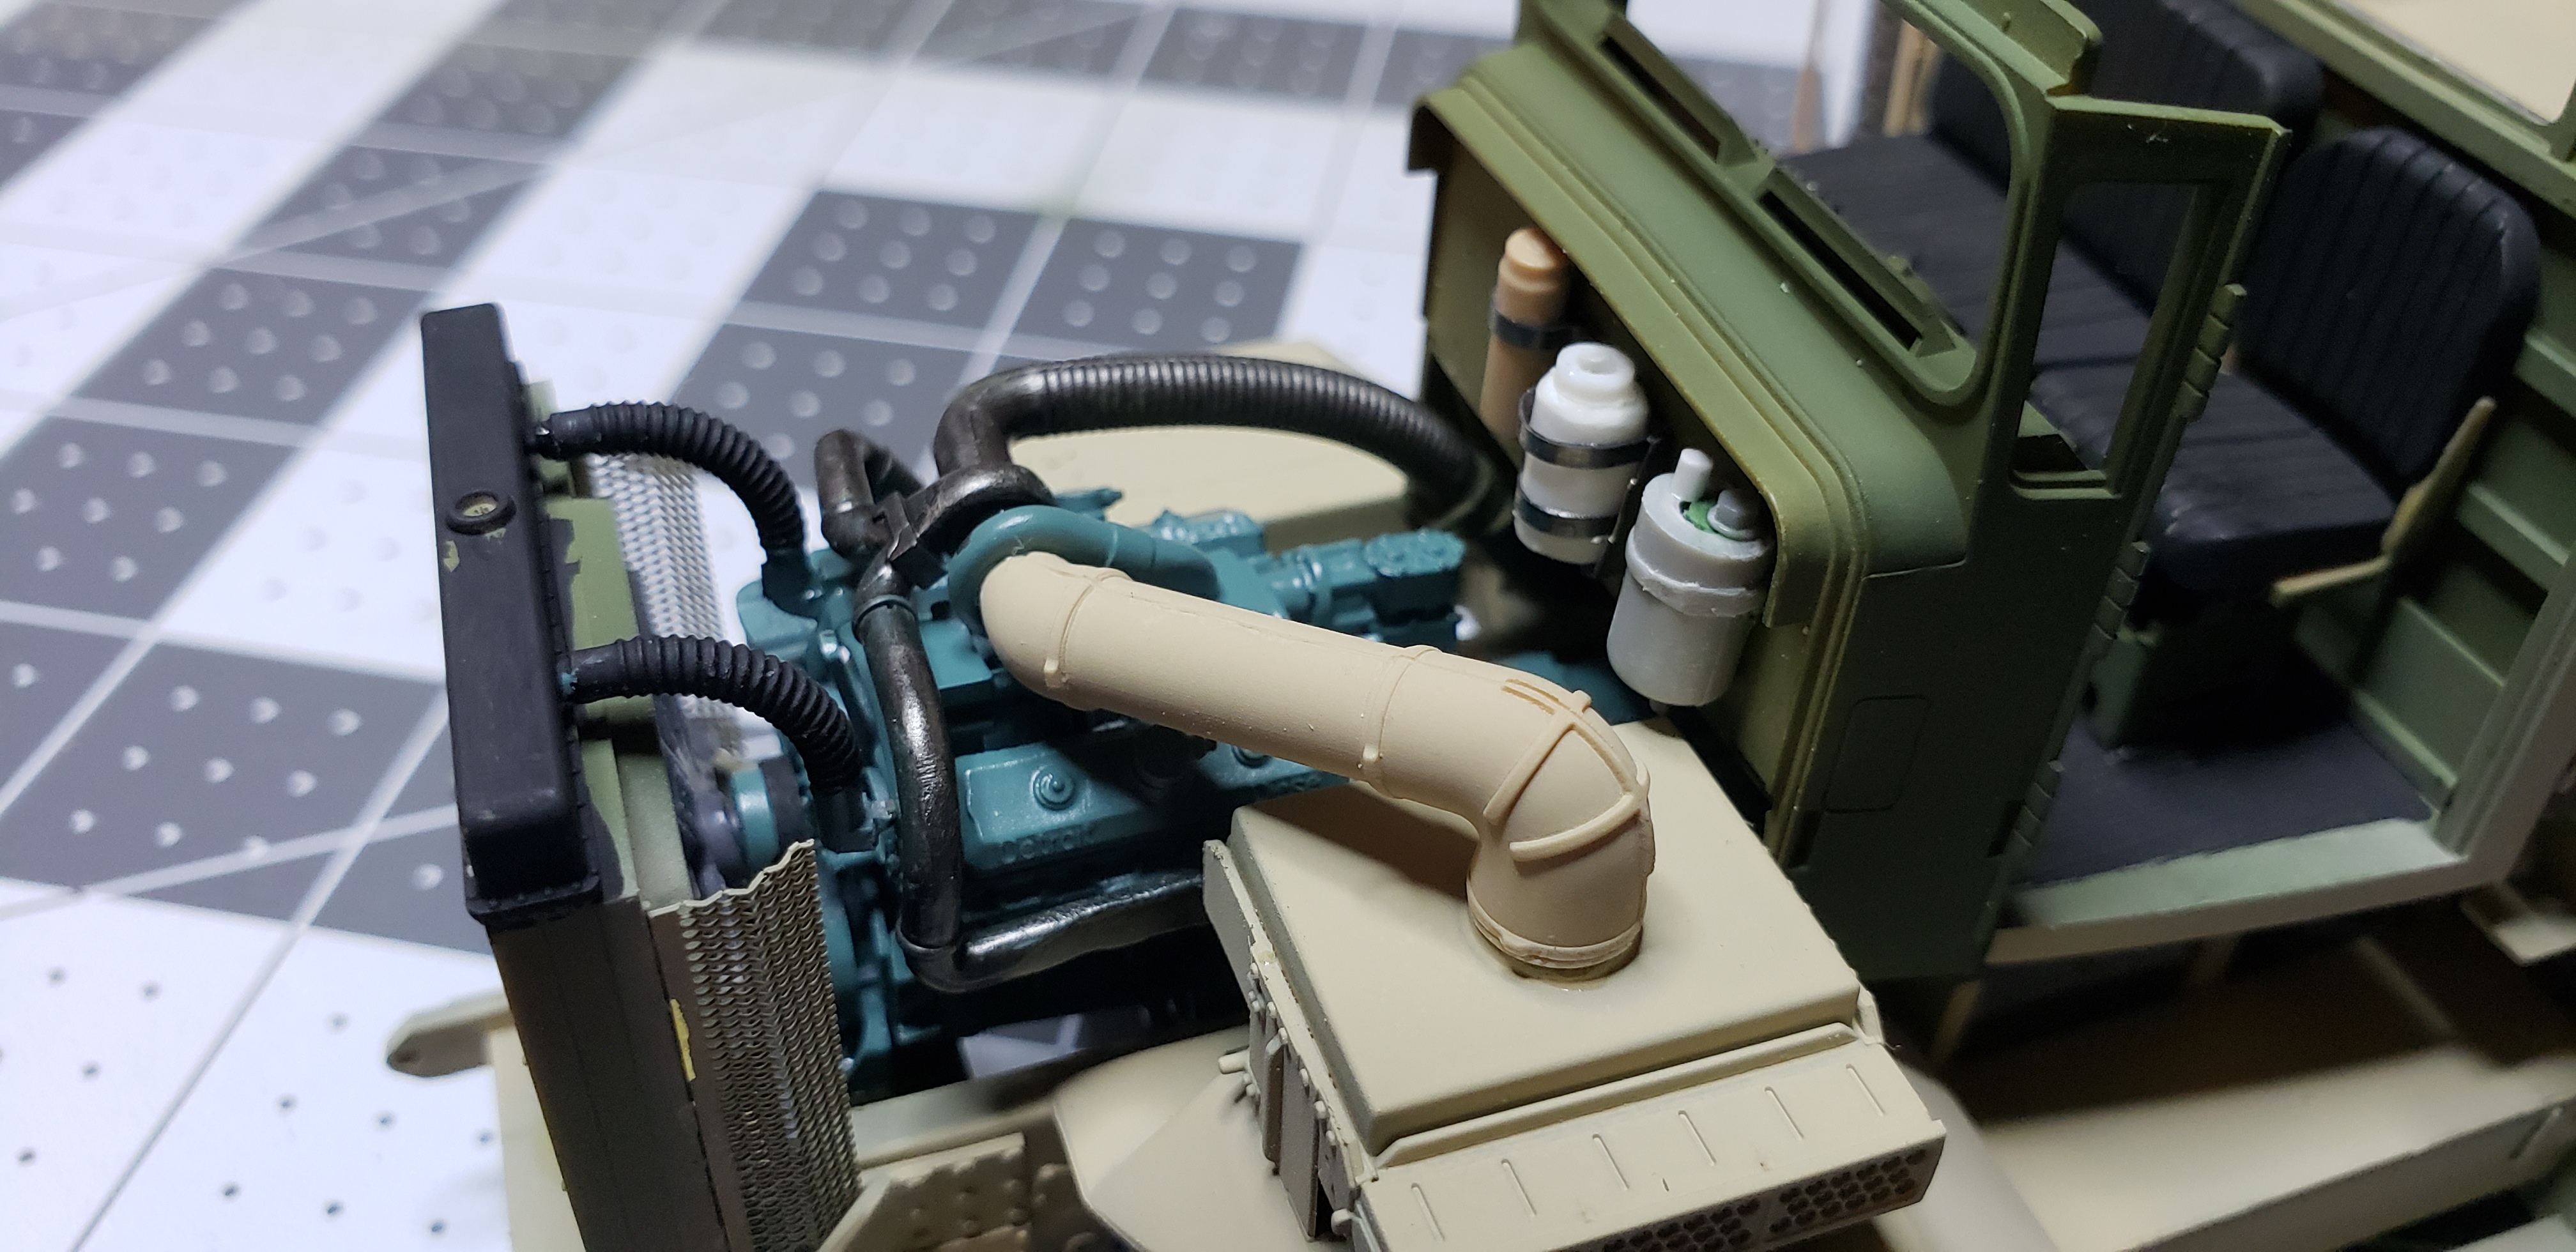
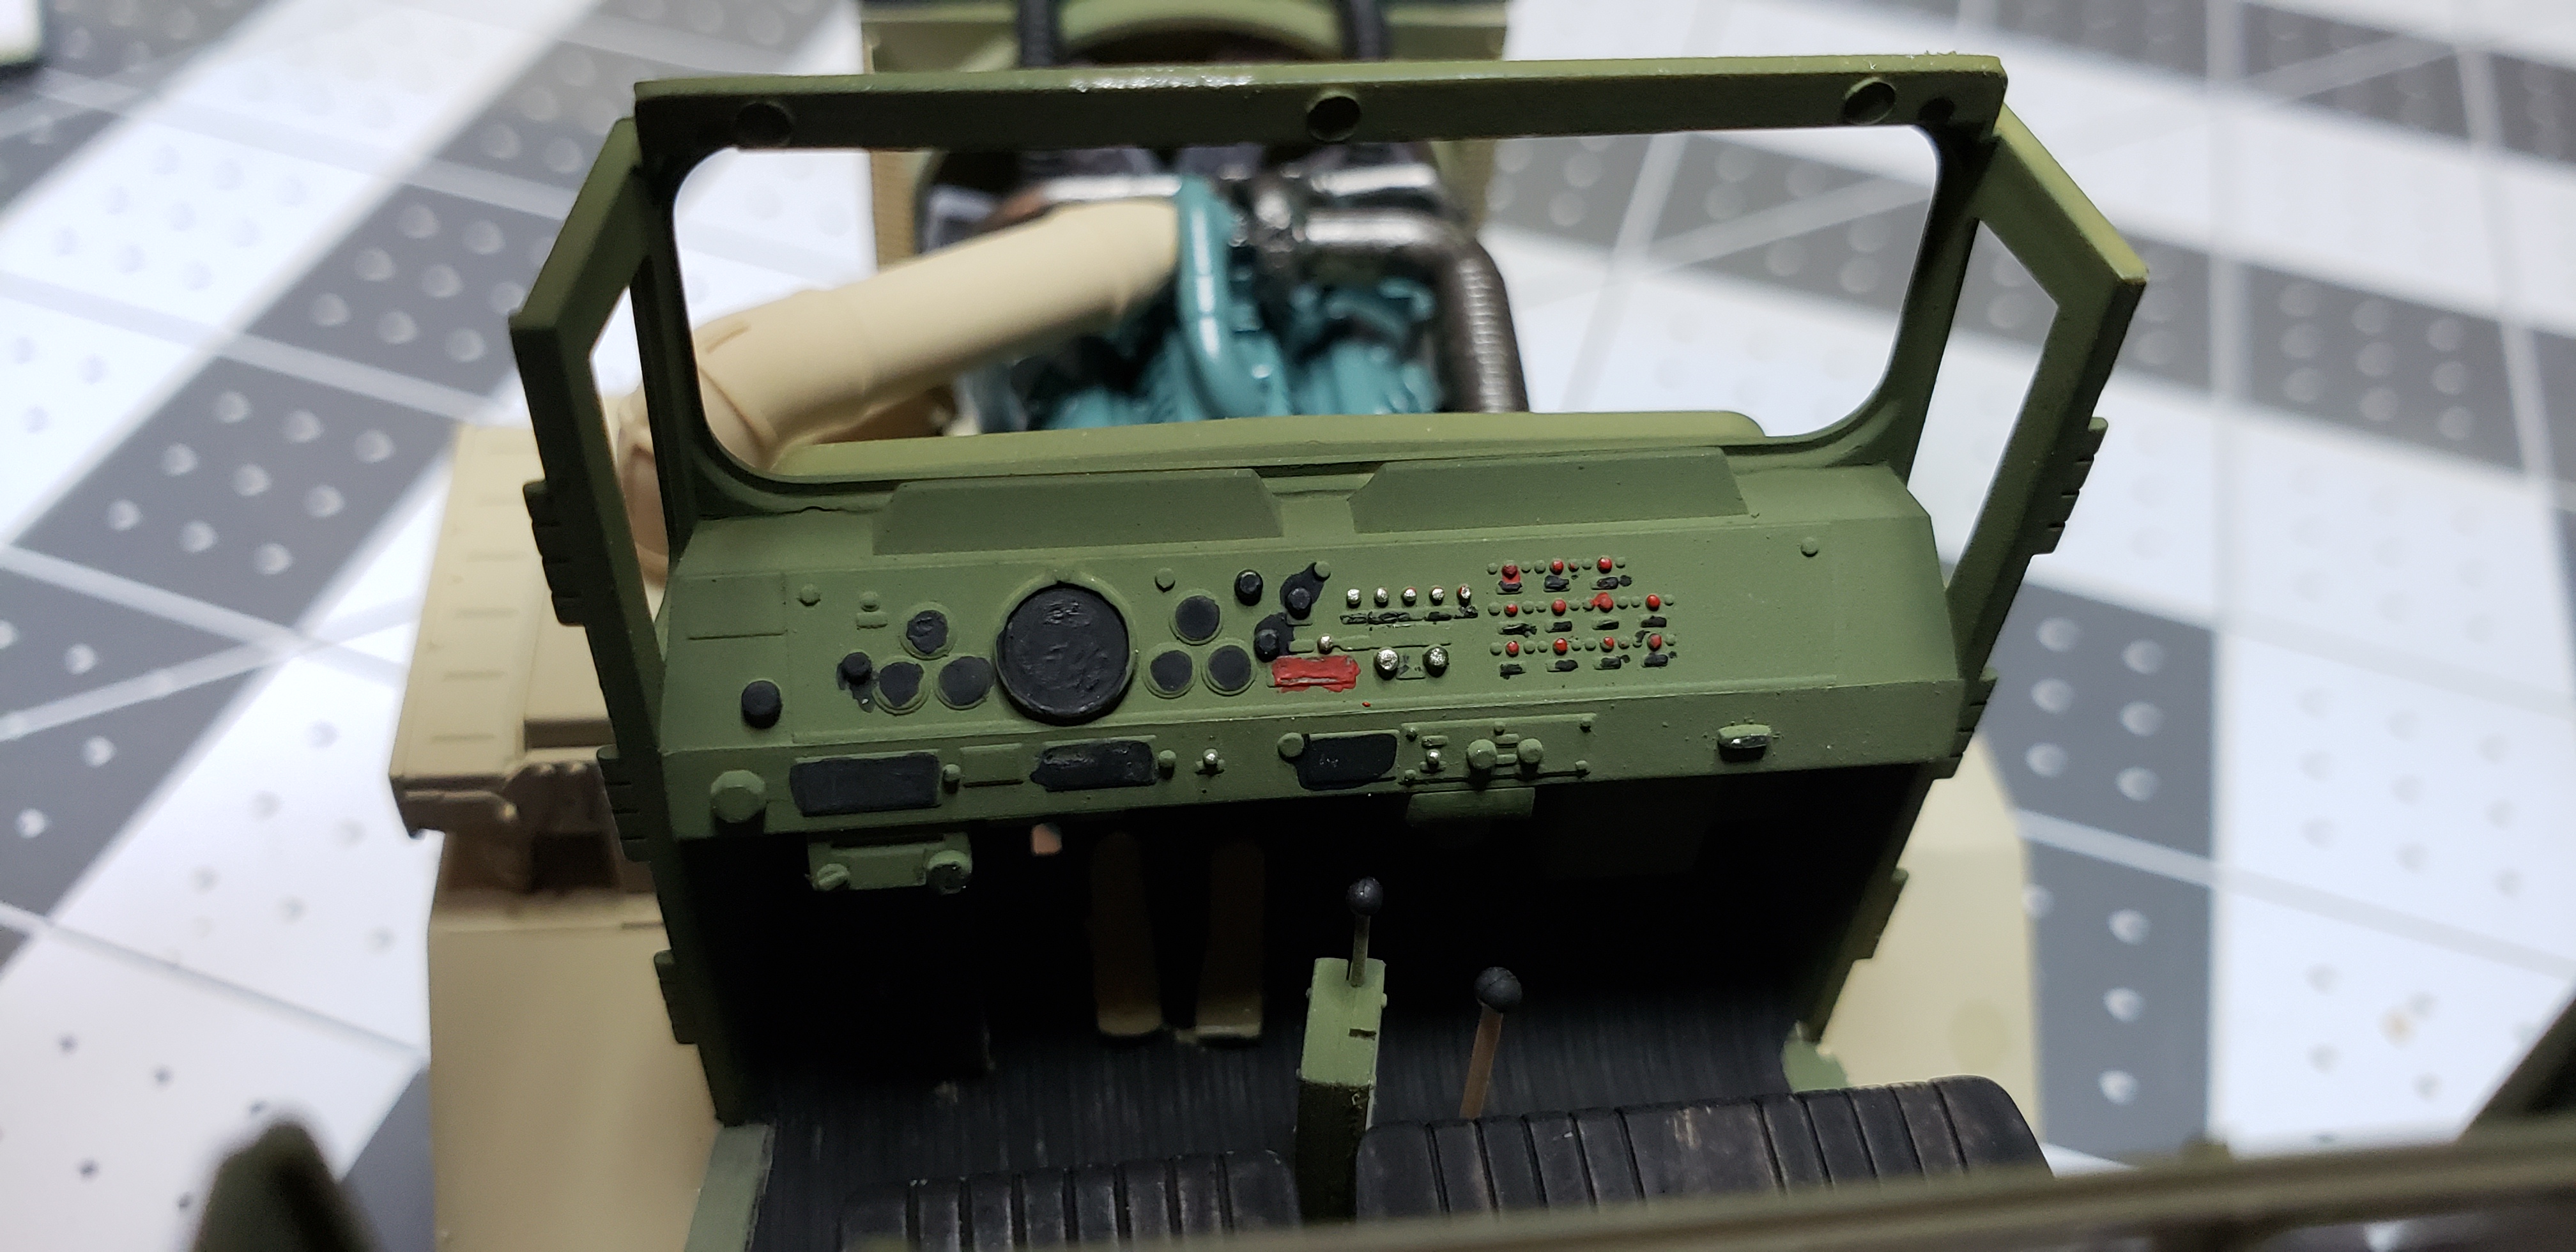
Thanks Charles ! I'll definitely check shapeways. Heard rumor resin tires were available around fall.! Just a small update tonite..the tractor is painted except a few cab parts ! I added a few bits on firewall to fill the empty space...after setting the hood on..it was all in vain. Oh well we know they're under it lol. The engine will get oiled up and exhaust rusted before closing up I'll seal the paint w future, then add oil leaks, fuel spills and wear n tear . Course our environmentally friendly military wouldn't spill any fuels lol I started the dash details, more to come. Those tiny red spots are circuit breakers !! The M747 has its base green applied, next will be sand along the sides and bottom. I'm trying something to show the worn paint on the deck . I sprayed alclad steel ( it looks more black than steel ) where I figured the most wear would be. Next a coat of hairspray then green. I'll chip that away, seal w clear..and repeat w the sand..eventually I hope for a scuffed metal peeking thru under the other layers More to come !
-
Ben - sounds good ! I used tamiya buff/ deck tan 50-50 for this w a NATO green base for shadows. I read these trucks..and everything deployed to Saudi Arabia were repainted before going into theater w local paints which faded and peeled off quickly. I figured a hastily painted truck , weathered mildly was appropriate. I did find out..meng sprues needed a good cleaning before paint..unusual for this brand. I hit areas of mold release i thought were clean.
-
Thanks !
-
Wow that box is terrible. I had bad luck ordering across the pond a few times , mainly broken and missing sprues. Cant wait to see your build start, mines in paint been too lazy to snap pics along the way
-
TAT 2018 Dodge LT1000 Wrecker
gotnitro? replied to DRIPTROIT 71's topic in WIP: Model Trucks: Big Rigs and Heavy Equipment
Love the interior color, and the fan is a great touch -
TAT GMC crackerbox
gotnitro? replied to jacobus's topic in WIP: Model Trucks: Big Rigs and Heavy Equipment
Just ordered a crackerbox w day cab from AITM after watching this build come together. Cant wait to see more, glad to hear it was common to have a 6v71 engine..just happen to have one from gw trucks . -
Where do you find YOUR inspiration ?
gotnitro? replied to Greg Myers's topic in General Automotive Talk (Trucks and Cars)
Inspiration for me comes from numerous places, most unexpected. Sometimes a vehicle will pass me , see one at car show or just a photo in magazine will kick start the mood. This one I saw pouring a sidewalk at work...course no kit existed..
-
Thanks ! I've wanted to cast numerous parts for later but the resin i was using always sets too quick for big parts..it does work for smaller parts ya drop though lol
-
MACK DM600, 5-th wheel dumper
gotnitro? replied to truckabilly's topic in WIP: Model Trucks: Big Rigs and Heavy Equipment
Excellent work looking forward to your weathered treatment! I've used it several times on armor it's fun to scrape and scratch the paint away. -
Charles - what resin are you using for your parts ? I ve used alumilite for quite a few but it tends to set too fast for making parts like your doing . Your work is incredible
-
Pete 579 "De-Toying Time"
gotnitro? replied to bandit1's topic in WIP: Model Trucks: Big Rigs and Heavy Equipment
Very cool " de toying " effort your making -
Let's see your Big Rig Wreckers!
gotnitro? replied to Jordan White's topic in Model Trucks: Big Rigs and Heavy Equipment
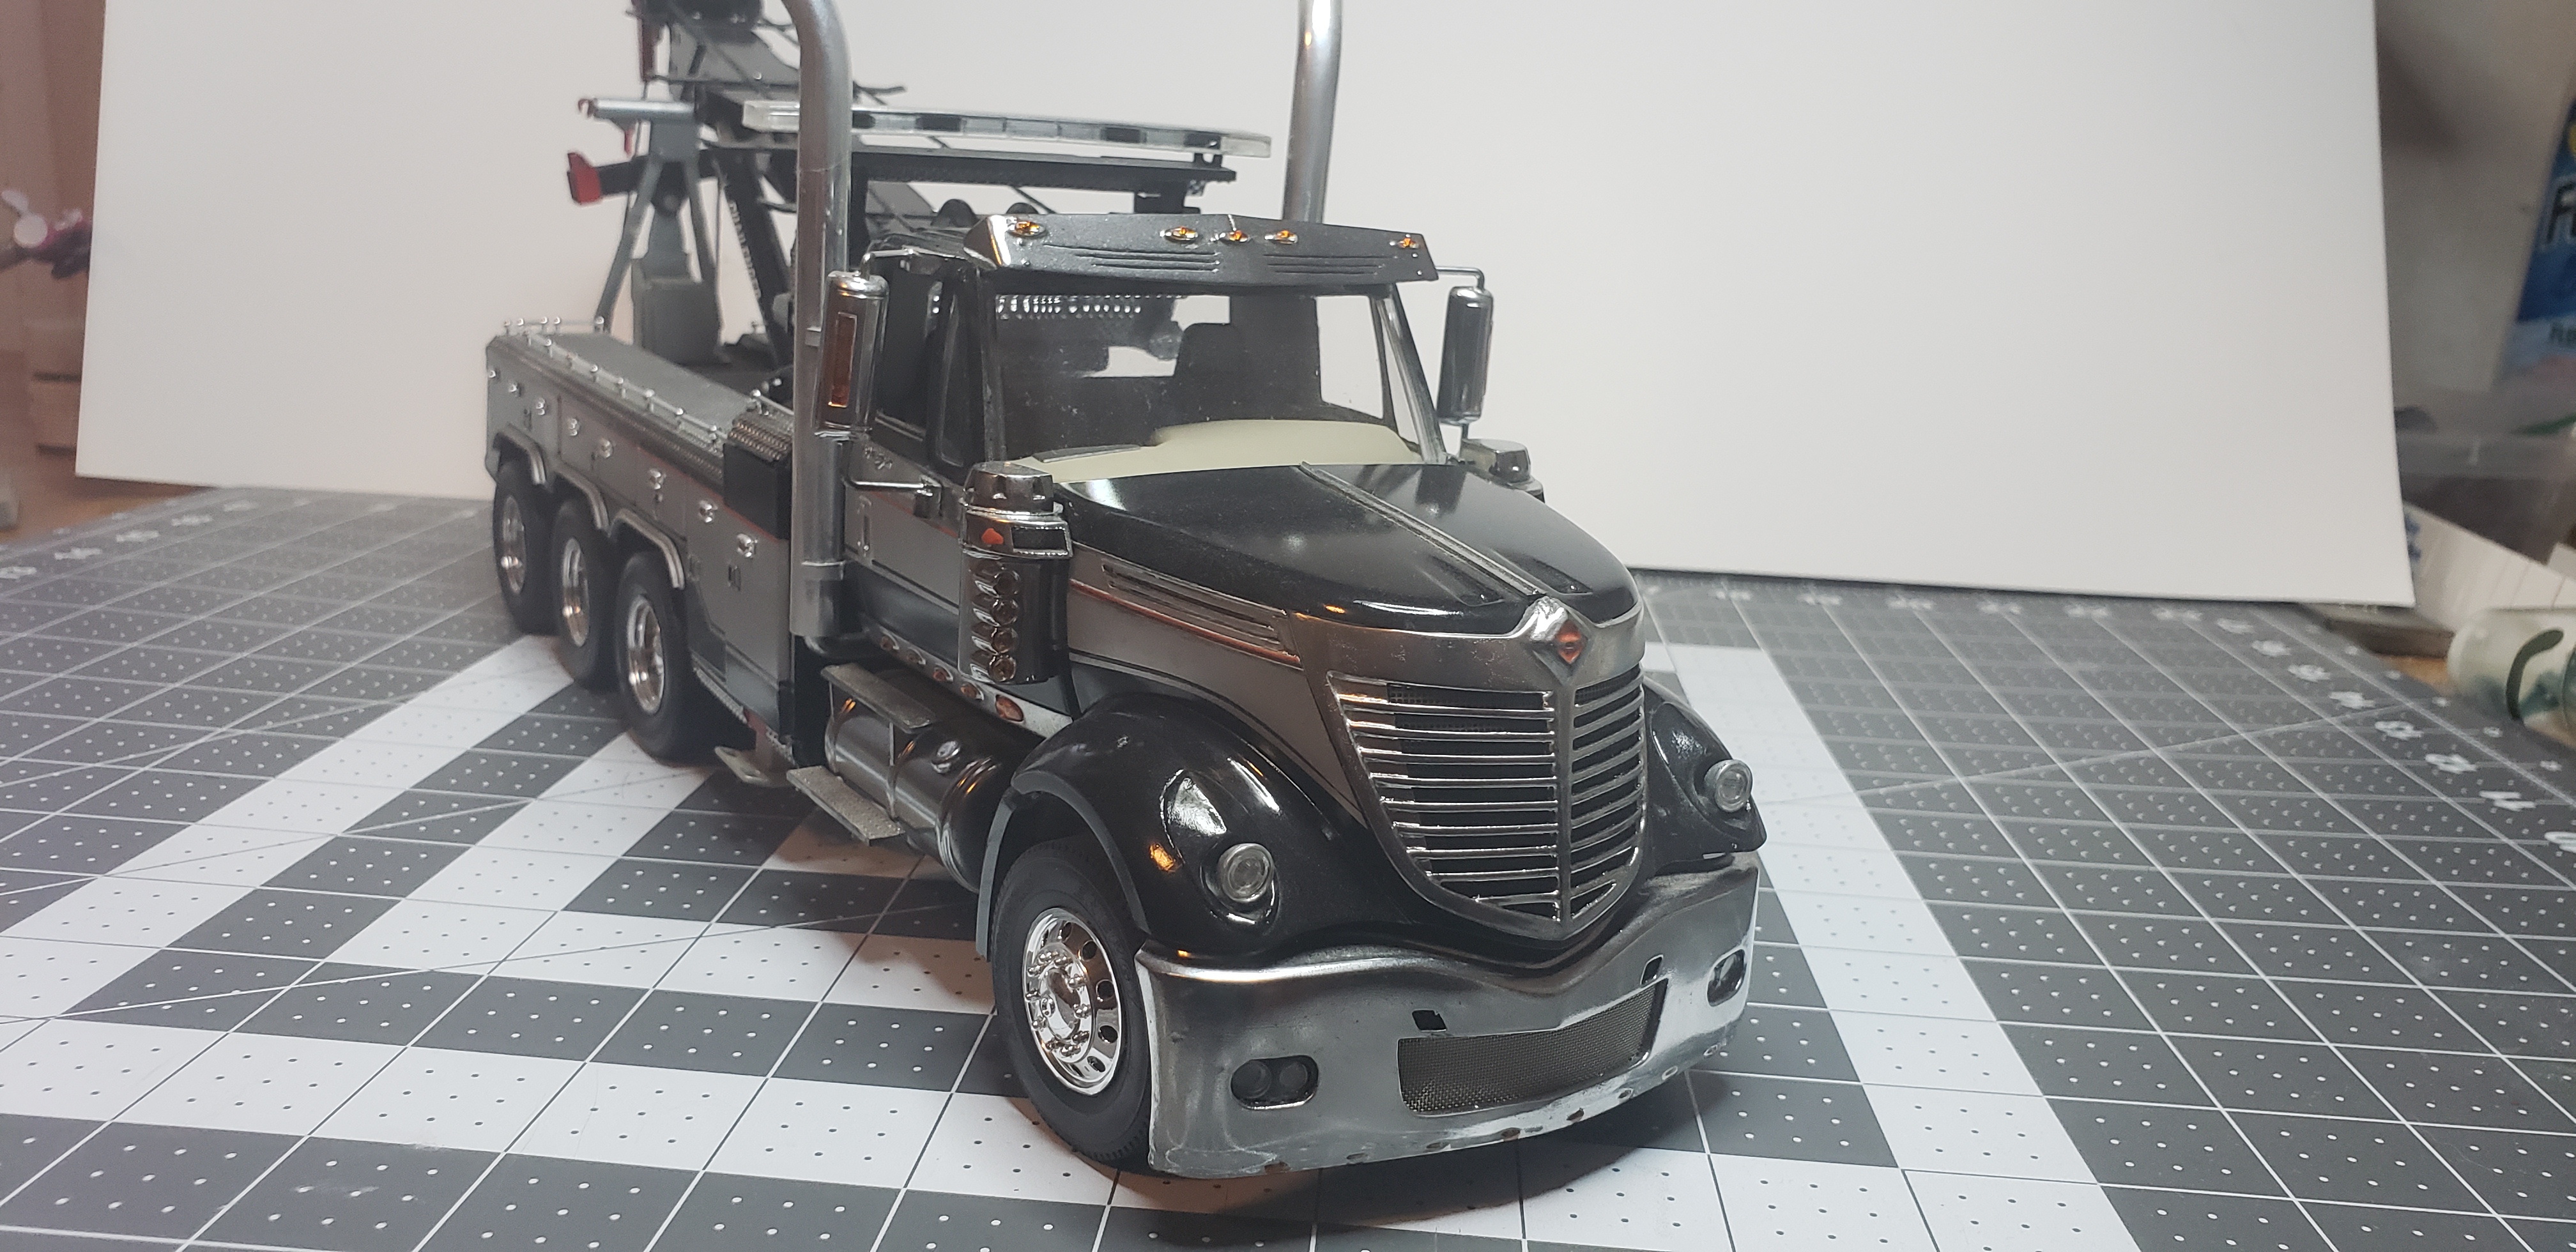
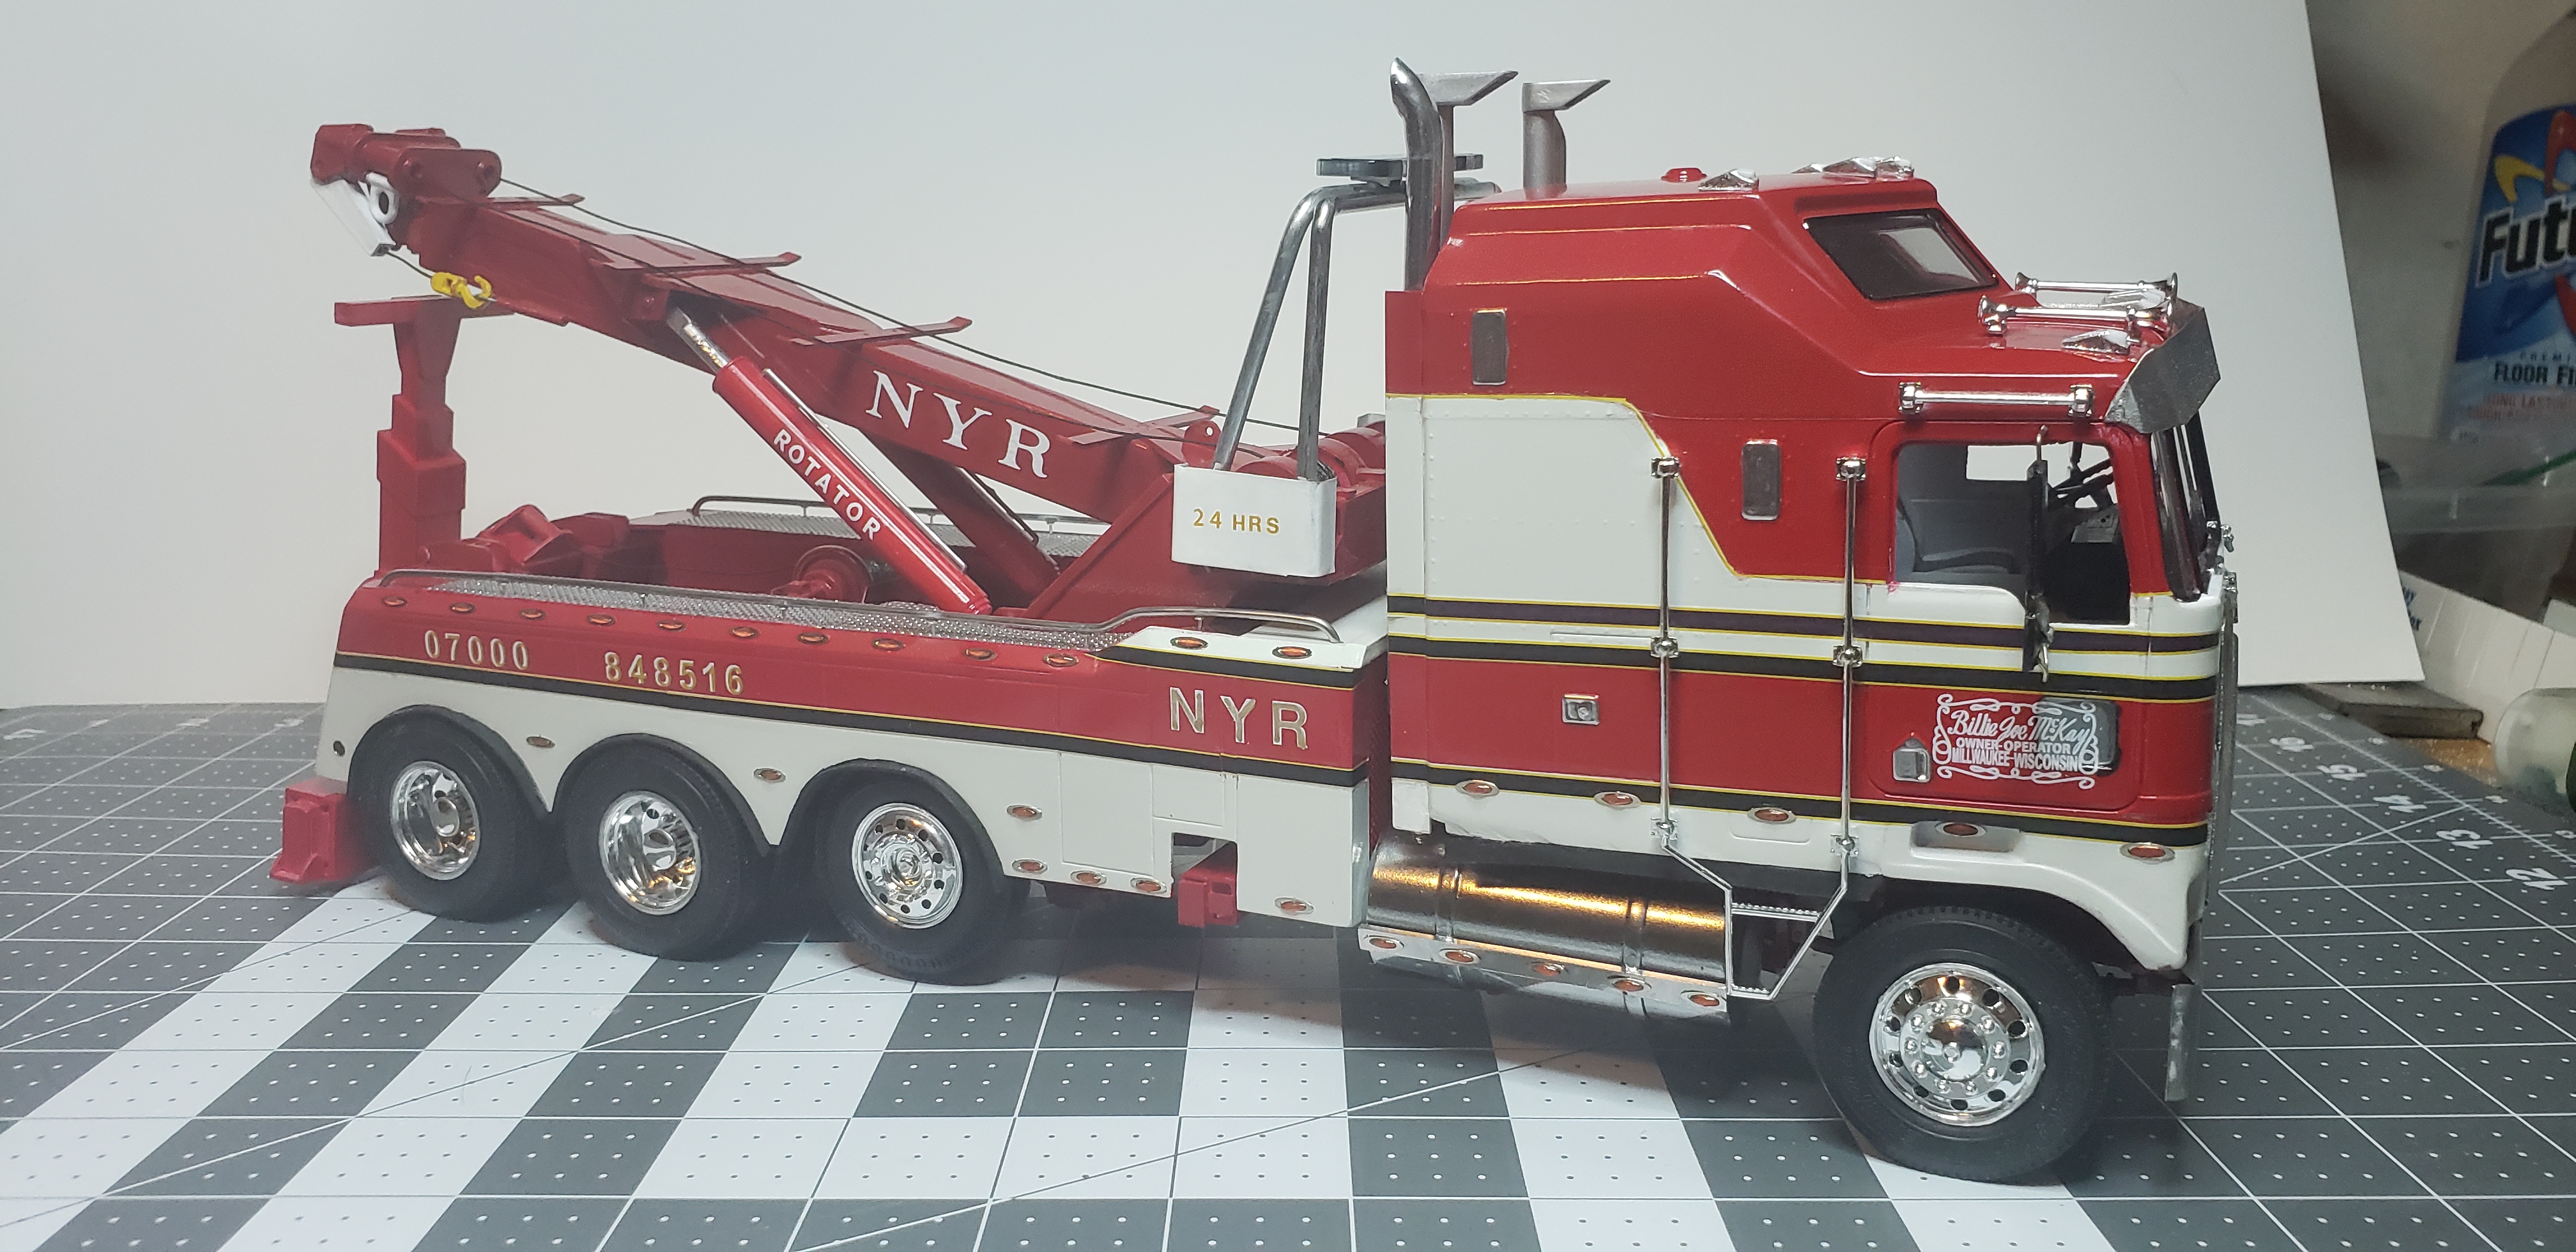
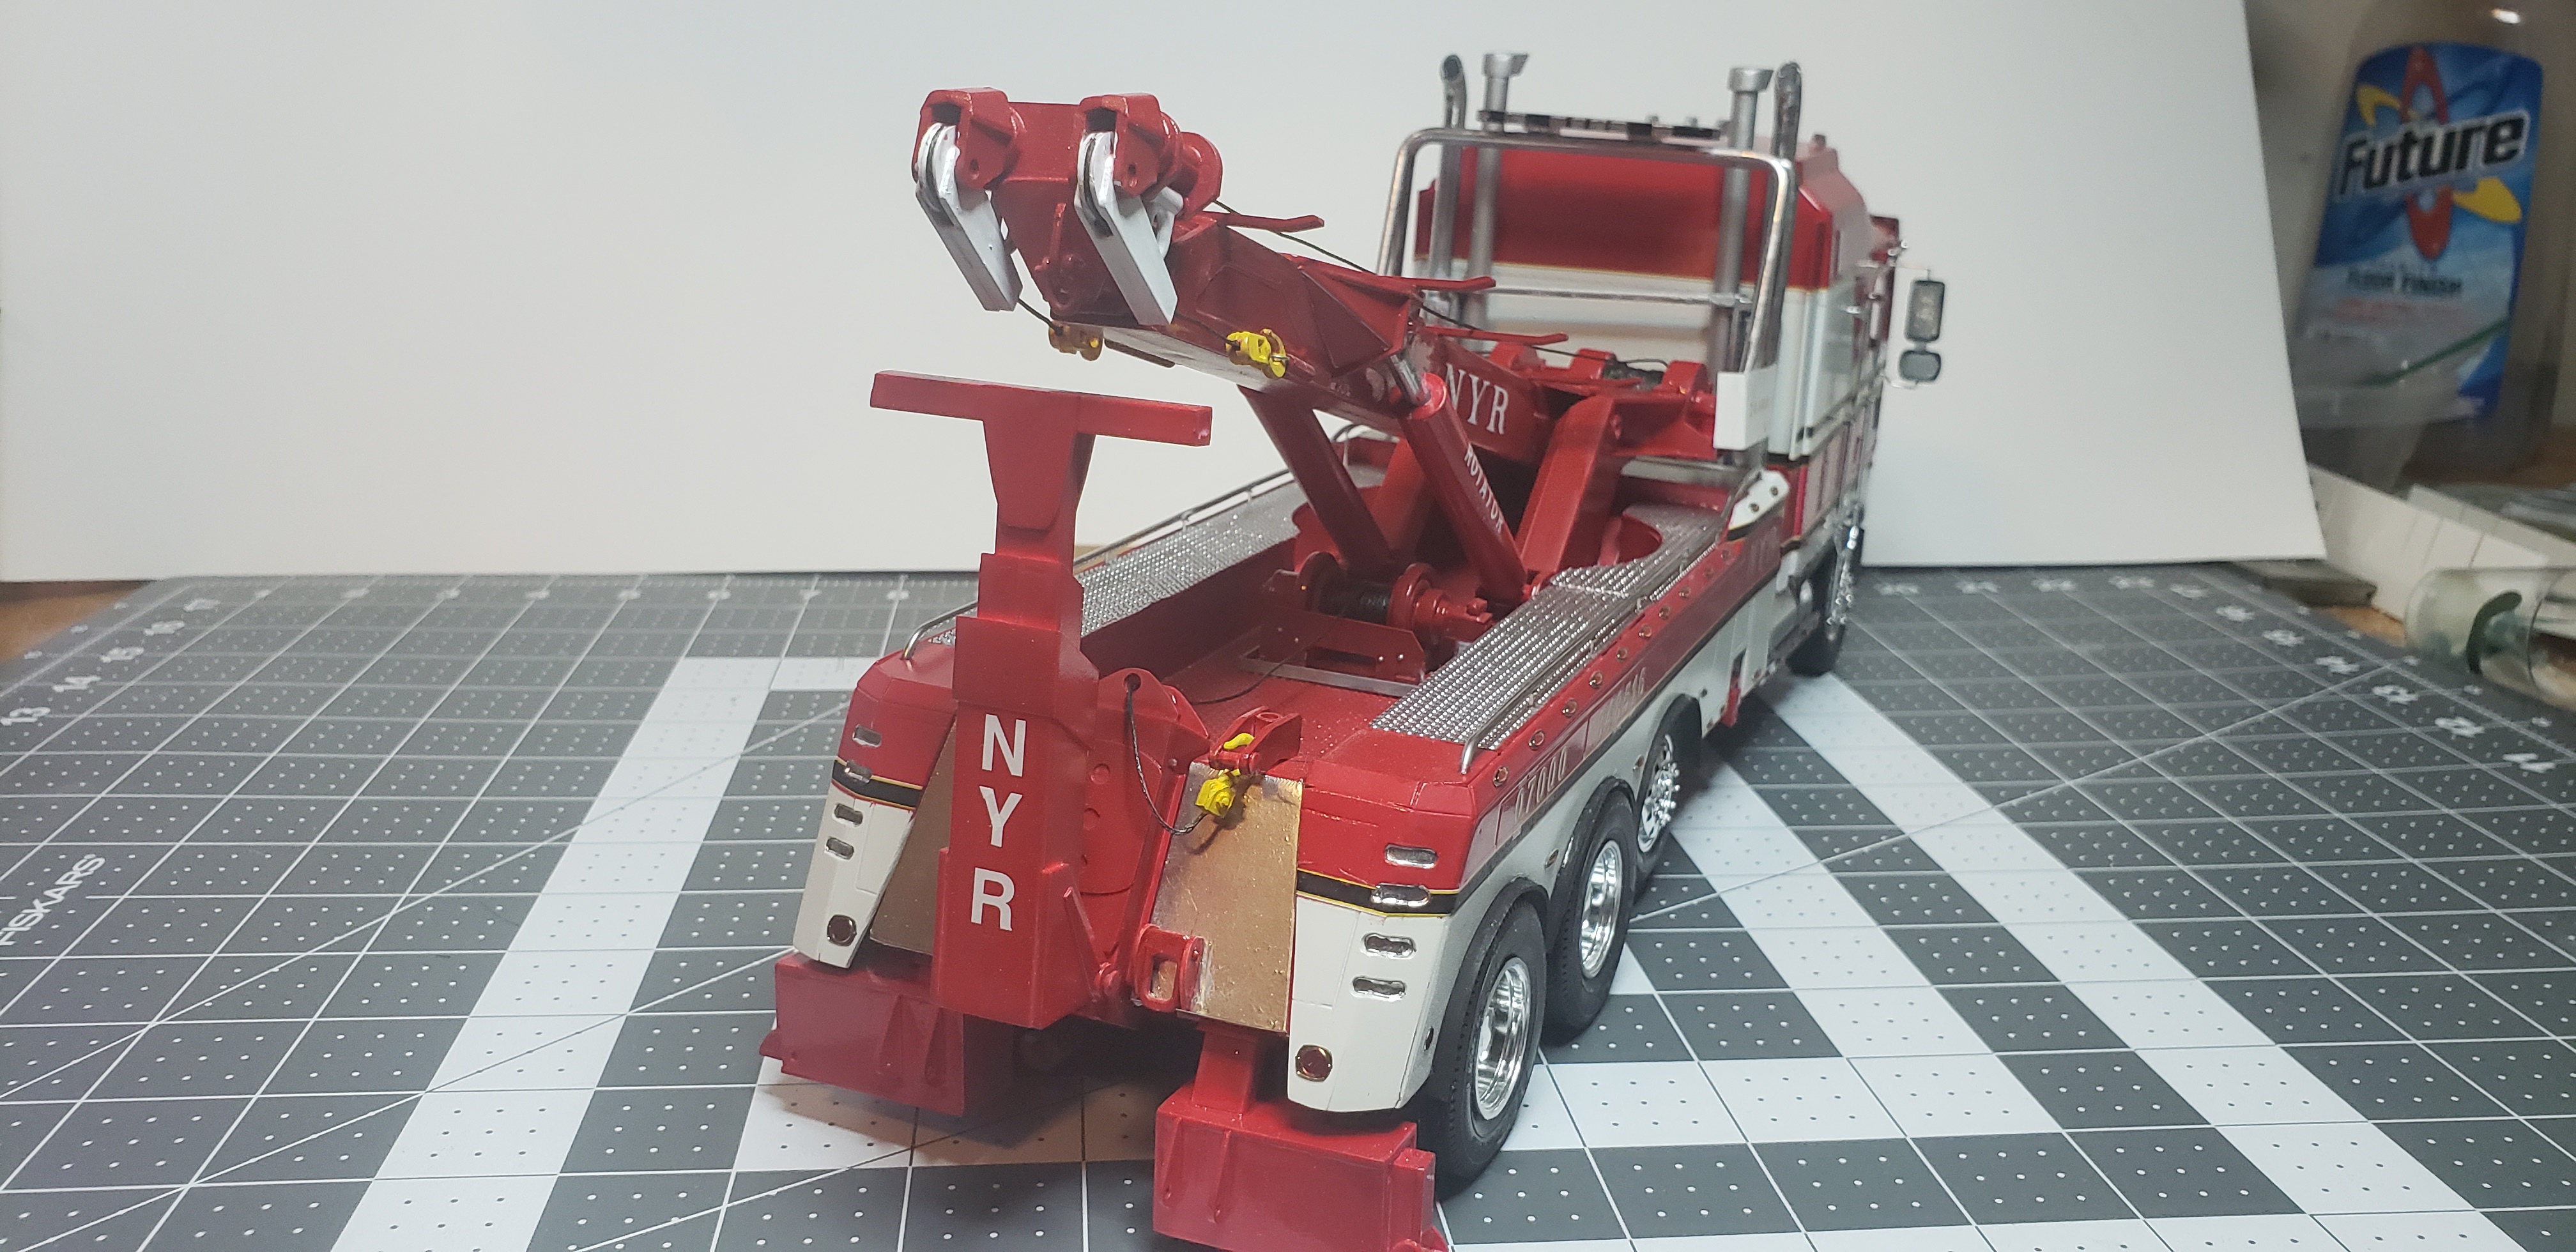
I'll keep the ball rolling.. the HD edition Lonestar. Mobius lonestar frame and hood, Dave Careys daycab and custom grill. Pete Can Do wrecker body , and my custom bumper and headlights I scratched for this project. NYR recovery' s BJ Bear tribute build...K papa truck cab, Can Do wrecker heavily modified, scratchbuilt wrecker body and model truckin decals by Jerry round out this build.
-
Let's see your Big Rig Wreckers!
gotnitro? replied to Jordan White's topic in Model Trucks: Big Rigs and Heavy Equipment
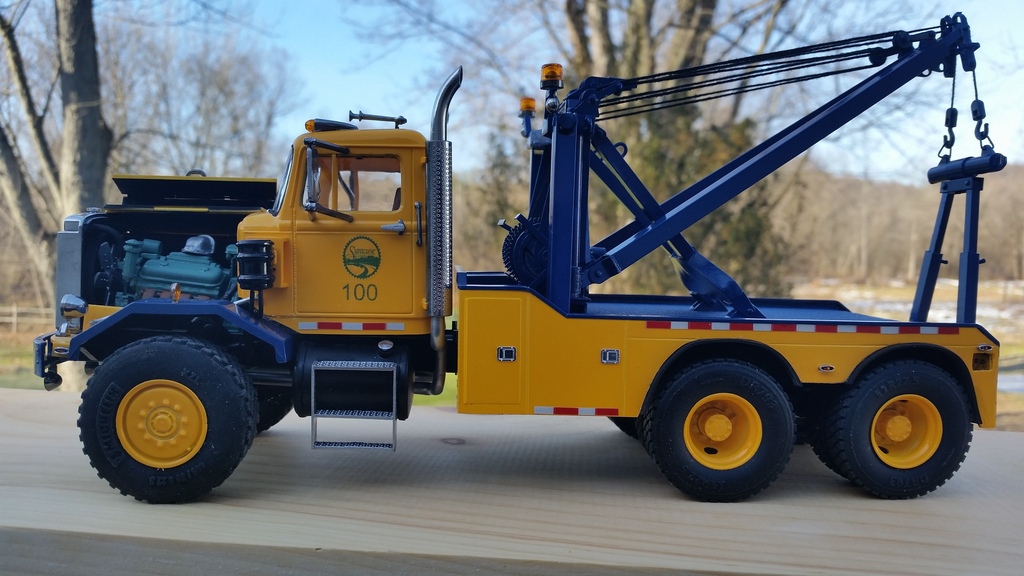
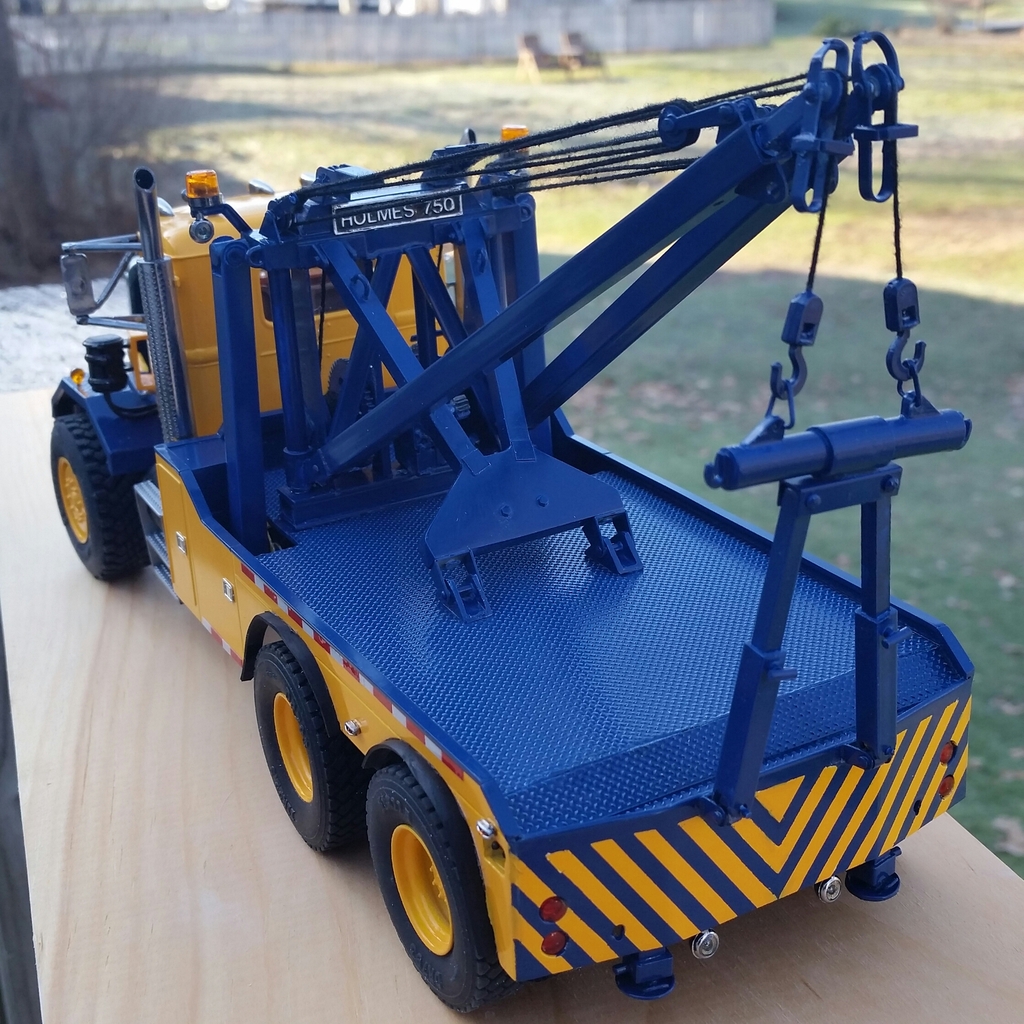
Here's one of my favorite wreckers I've built, the Syracuse NY DPW Autocar . I used the dump truck kit , KFS Holmes 750 parts, and my scratchbuilt wrecker body. I swapped in a proper DD engine Boy everyone's builds are great looking Let's keep em coming... I'm sure theres more...
-
Looks fantastic Kerry !
-
Peterbilt 281 Needle-nose "Duel"
gotnitro? replied to Rusty92's topic in WIP: Model Trucks: Big Rigs and Heavy Equipment
Your work looks fantastic so far ! I realized I've never seen the movie, guess I gotta check it out -
'90s GMC TopKick C7500
gotnitro? replied to Sergey's topic in WIP: Model Trucks: Big Rigs and Heavy Equipment
You should be able to order right thru his site, I've done it several times with absolutely n issue. Jamie is a great guy to work with