gotnitro?
-
Posts
4,500 -
Joined
-
Last visited
Content Type
Profiles
Forums
Events
Gallery
Everything posted by gotnitro?
-
yeah love the COE cab overs awesome work !
-

KW aerodyne wrecker finished !!
gotnitro? replied to gotnitro?'s topic in WIP: Model Trucks: Big Rigs and Heavy Equipment
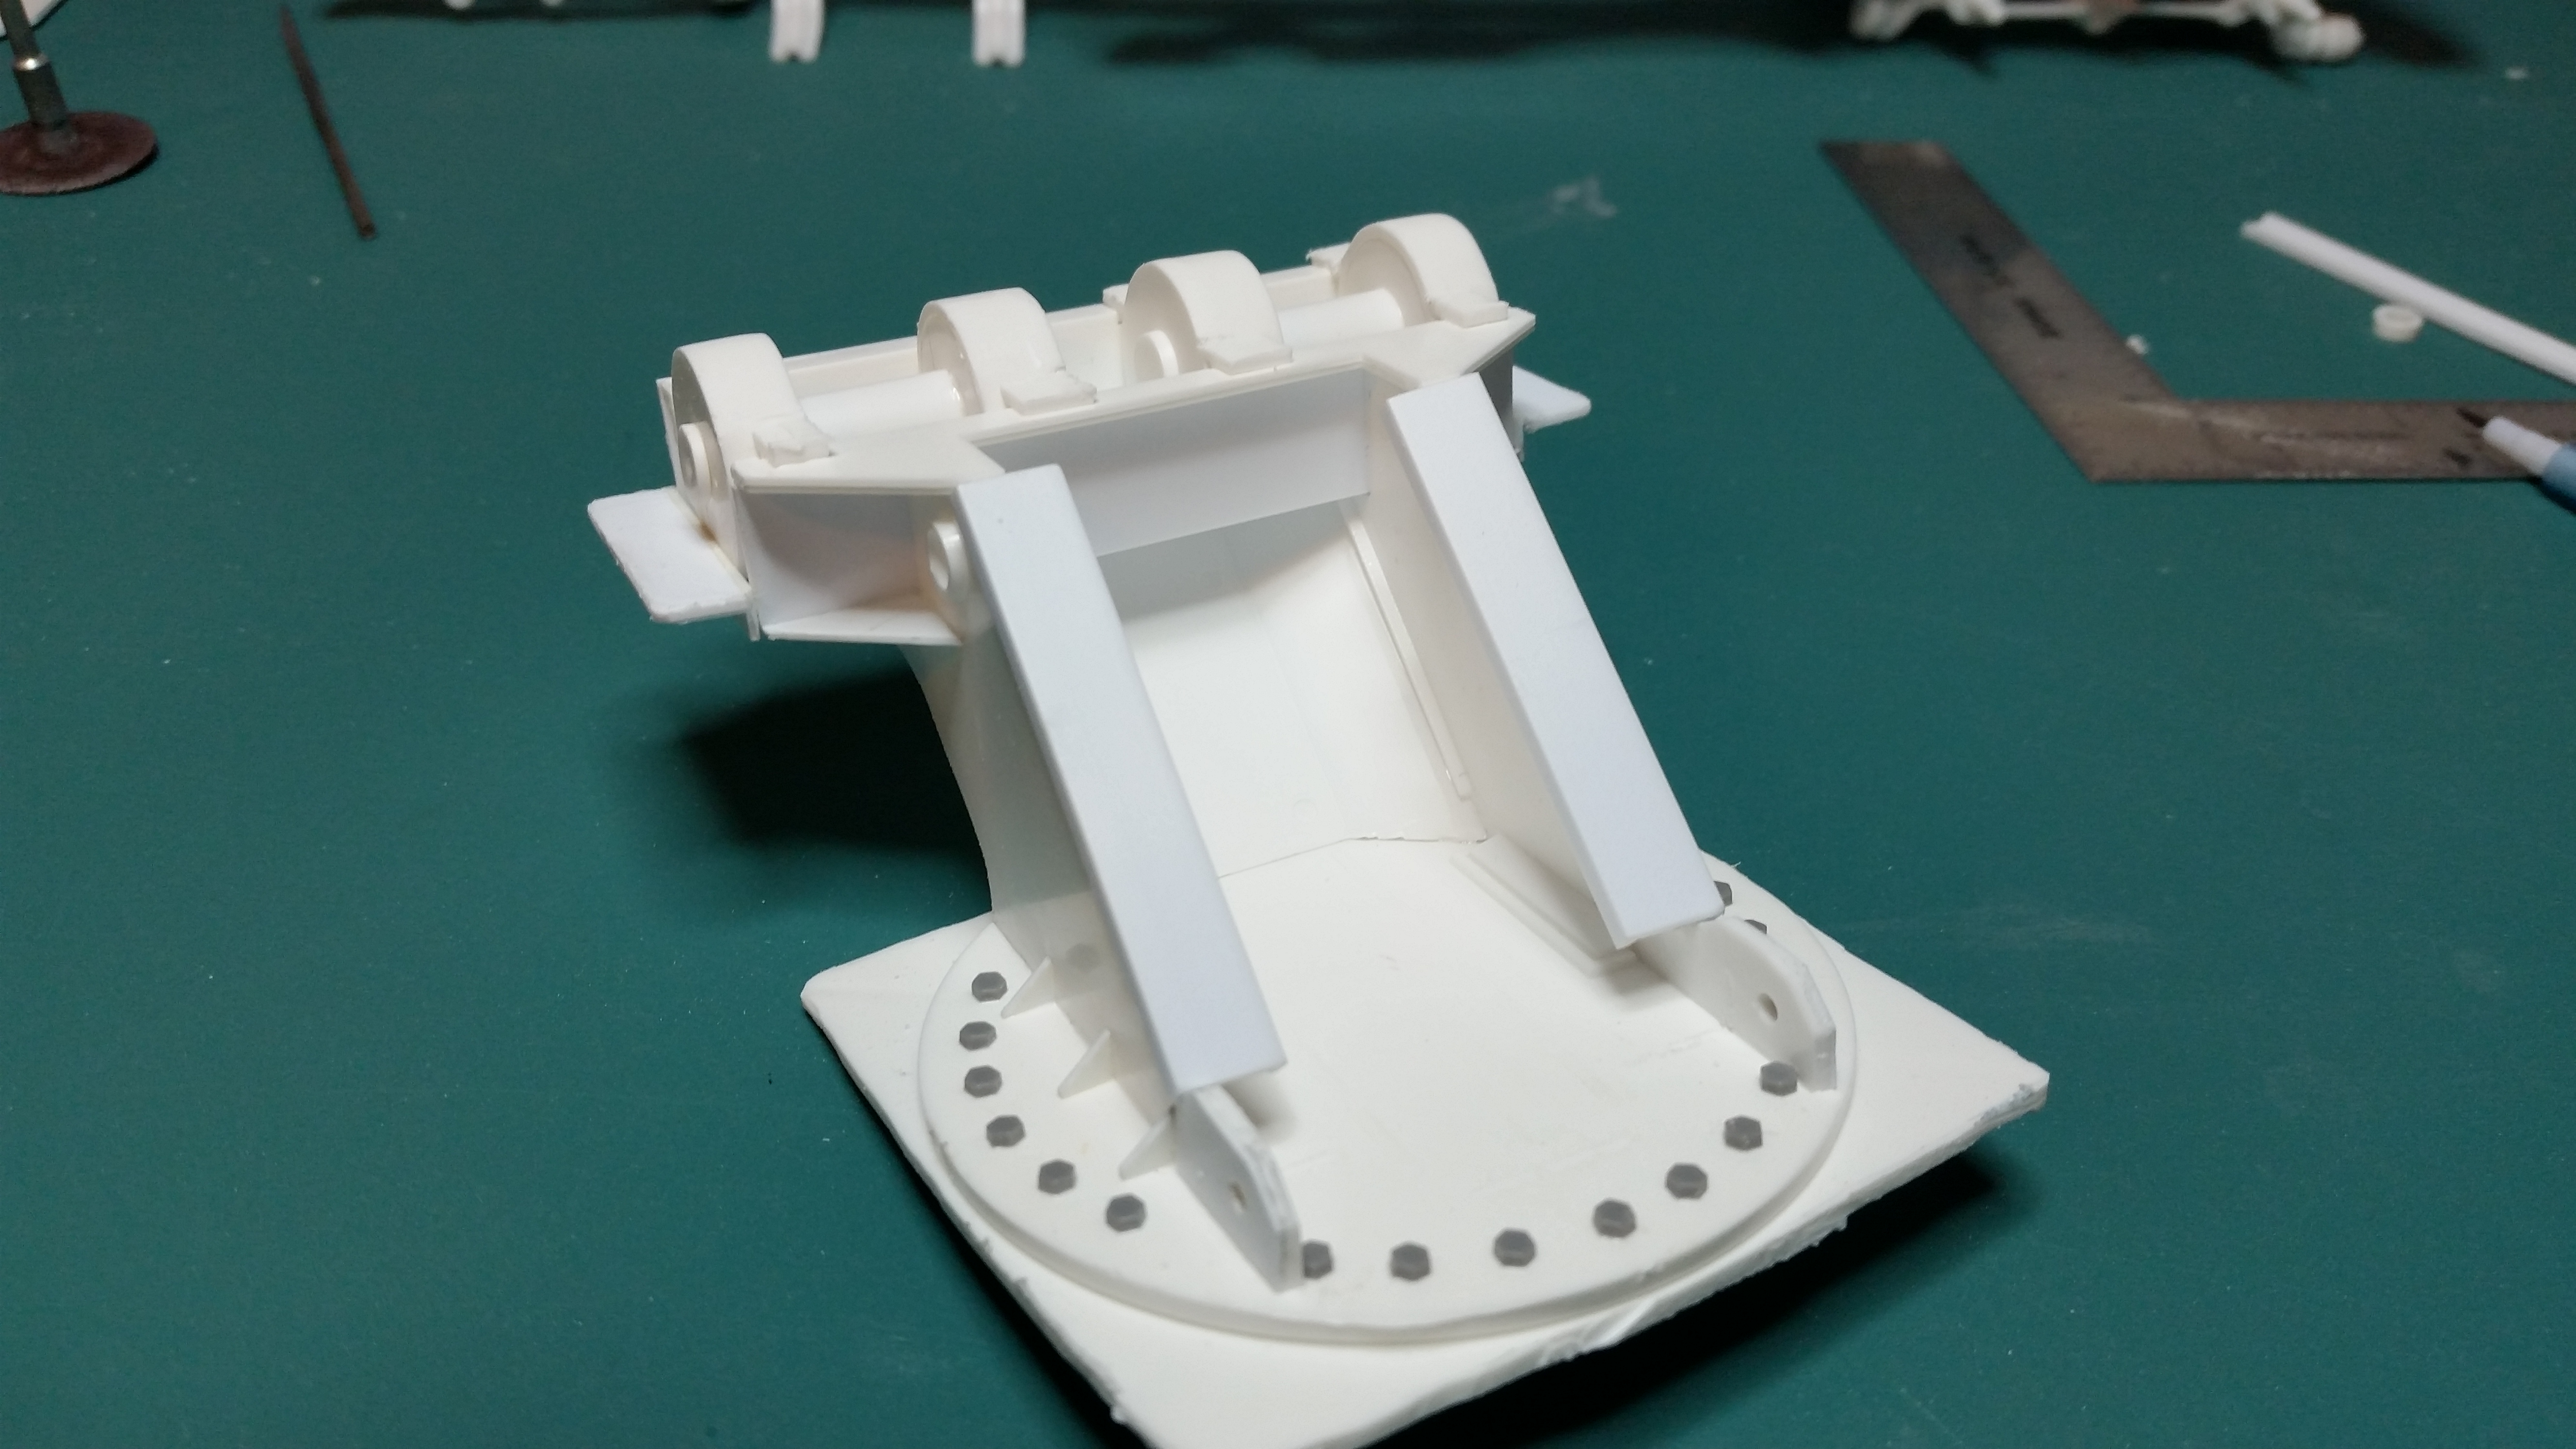
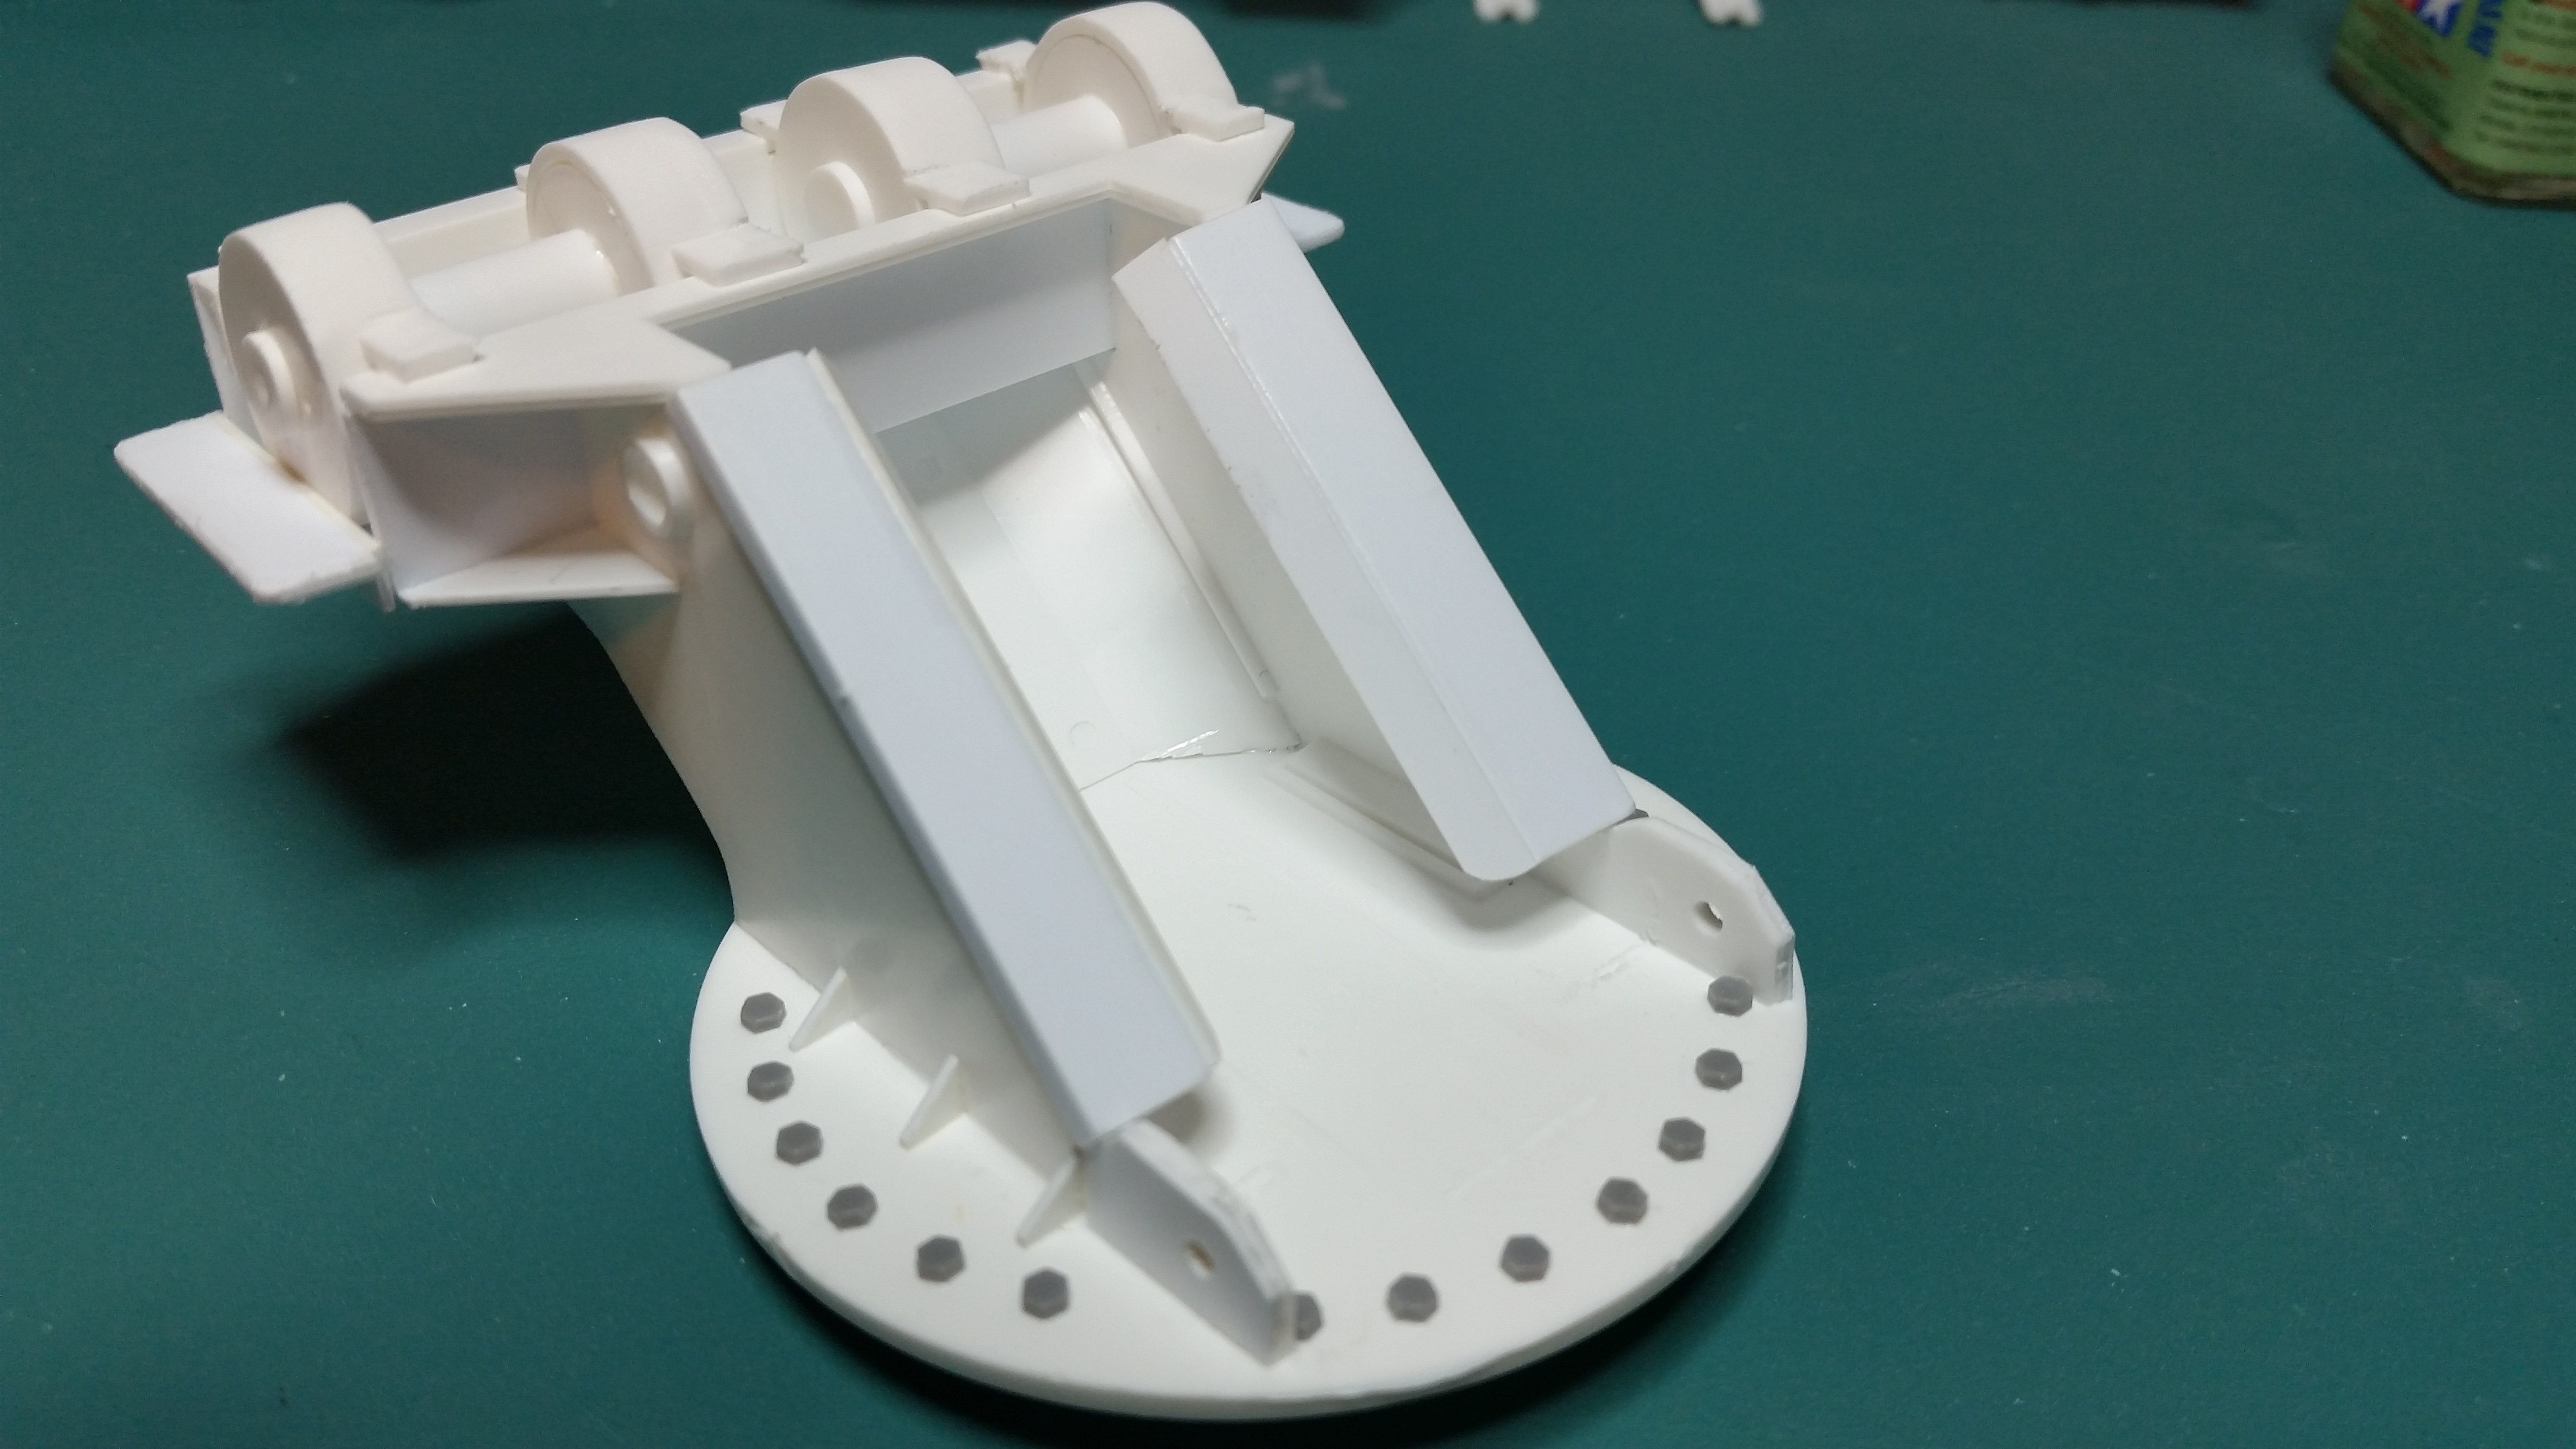
sorry..its been awhile !! The weather around here has been crazy and kept finding excuses to avoid the bench ...anyway I finally got around to starting the rear outrigger towers. A few angled plates of .040 thou and Meng bolts on the mounting plate finished it up ! I'll add the upper clevis' later along The bottom boxes will end up housing the actual stablizers, which hold the truck level during recovery ops last up the side panel mounts ! gotta love those craft stick photo bombs argg I'll try to keep the updates more frequent now lol stay tuned -
Rat Rod Pete 359
gotnitro? replied to Darren B's topic in WIP: Model Trucks: Big Rigs and Heavy Equipment
Awesome work -
KW aerodyne wrecker finished !!
gotnitro? replied to gotnitro?'s topic in WIP: Model Trucks: Big Rigs and Heavy Equipment
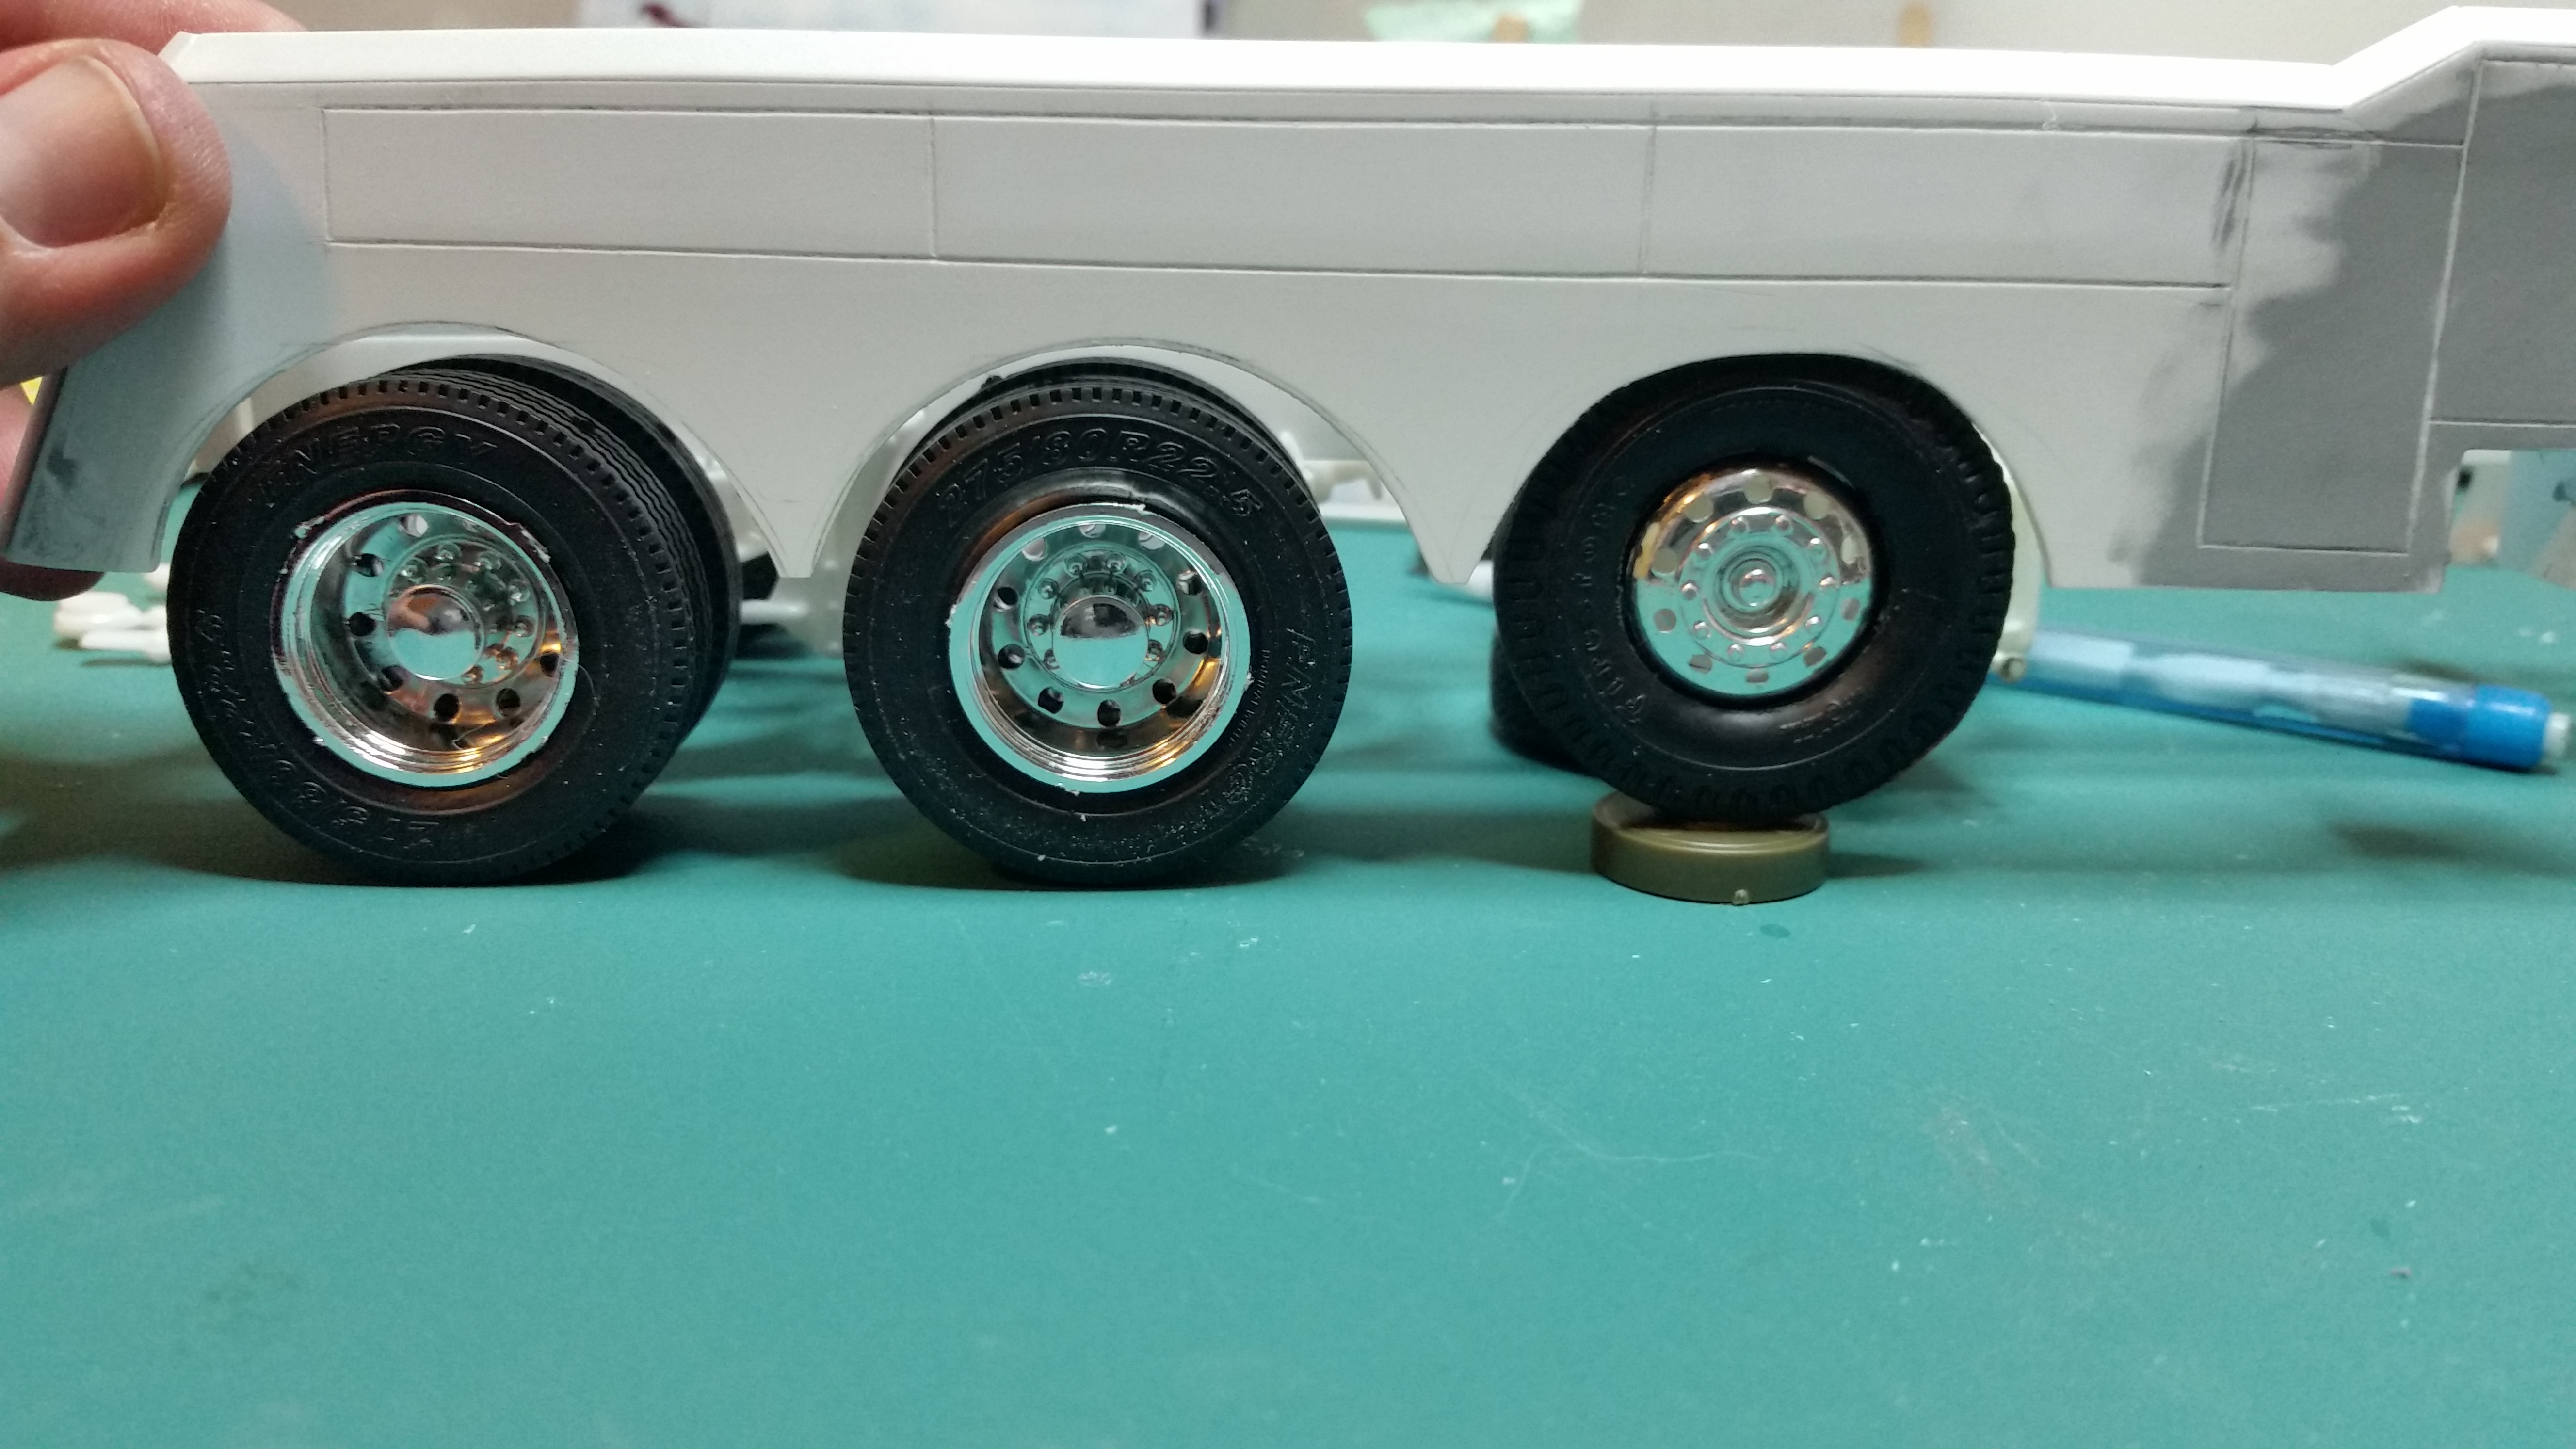
Thanks ! Sorry so few updates, daughter started getting her back teeth and haven't had much constructive bench time . I'm becoming the local expert on mickey clubhouse and Disney Frozen..lol tonites update was testing the wheels. I used a steerable drop axle from gw trucks and love how it actually works !! I haven't decided if wheels down or up will be final version . Thanks for being patient Jeff
-
Rat Rod Pete 359
gotnitro? replied to Darren B's topic in WIP: Model Trucks: Big Rigs and Heavy Equipment
Looking good !! -
Kenworth K100 with tanker trailer
gotnitro? replied to KJ790's topic in Model Trucks: Big Rigs and Heavy Equipment
I had the privilege of seeing this combo in person today at the Fulton show, and it's awesome! ! The pics don't even give it any justice , the small details and weathering really turn it into a work of art Congrats KJ on your build and new well deserved hardware -
Bighorn hooker
gotnitro? replied to Moparlover64's topic in WIP: Model Trucks: Big Rigs and Heavy Equipment
Love it The holmes is one of my favorite wreckers -
KW aerodyne wrecker finished !!
gotnitro? replied to gotnitro?'s topic in WIP: Model Trucks: Big Rigs and Heavy Equipment
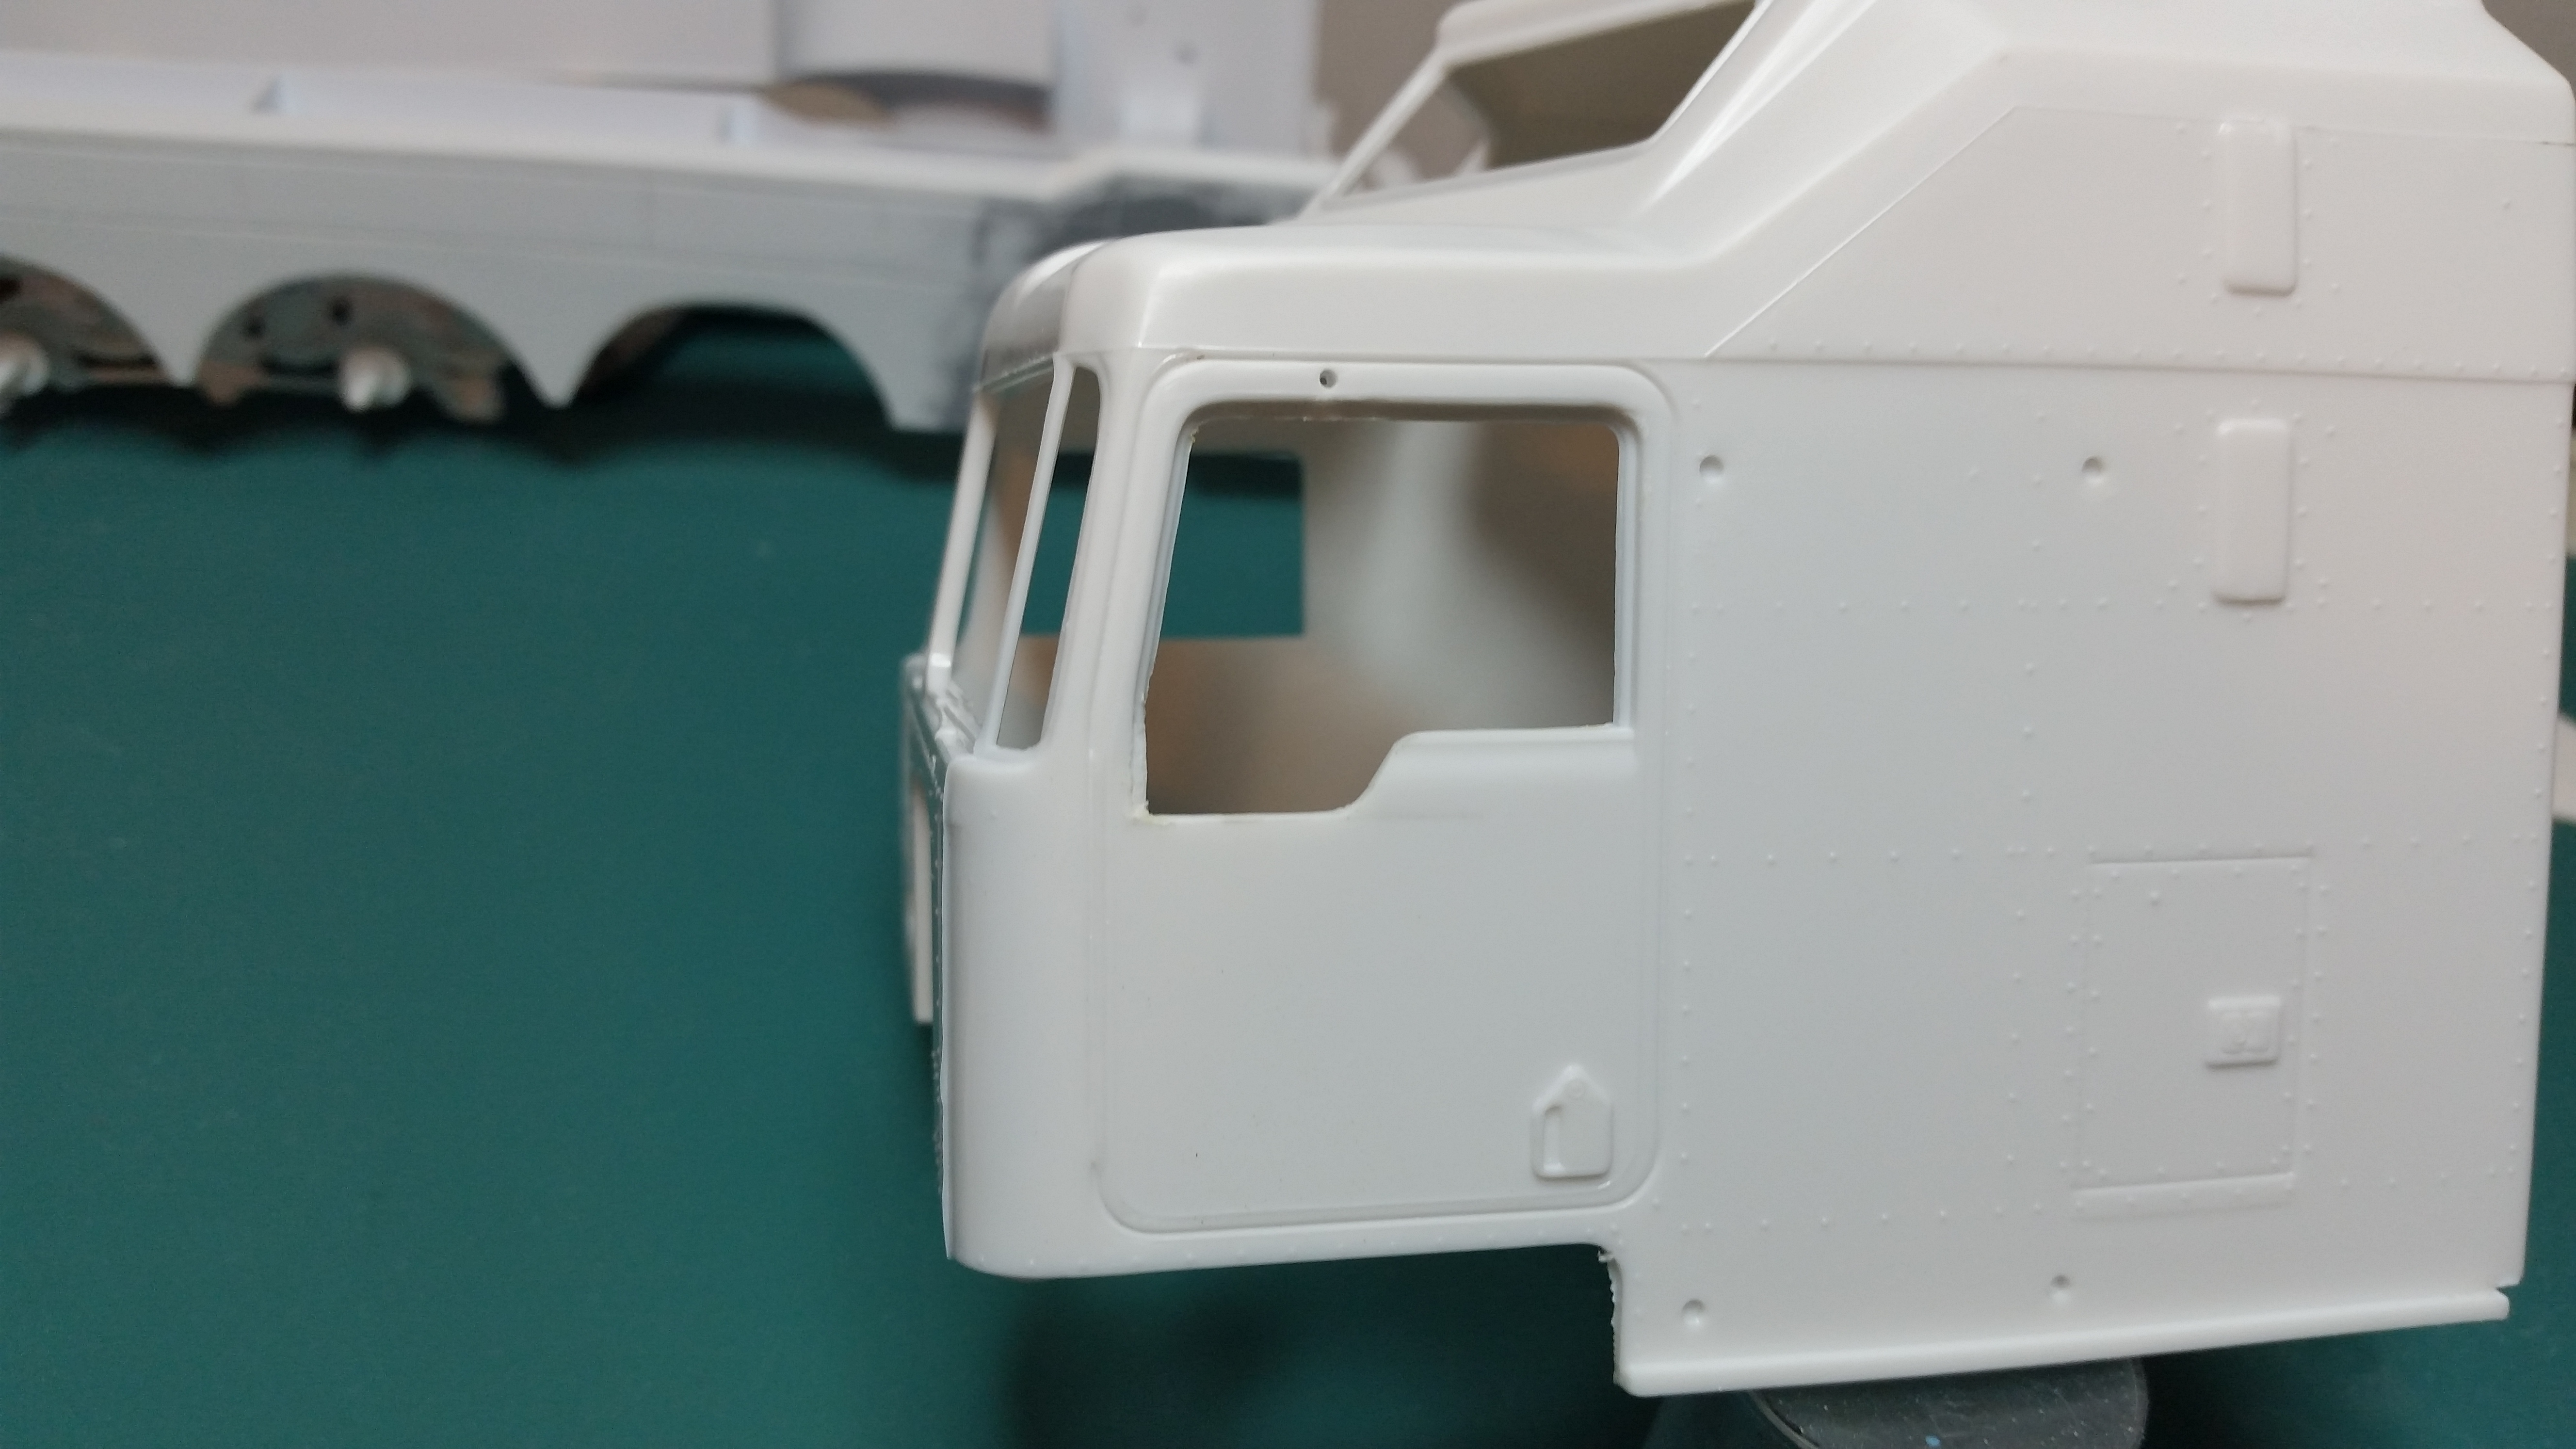
Thanks everyone I appreciate the comments! ! How about a friday update shall we ! Mr Neil Yates ordered up some new doors for his wrecker..and in proper fashion I figured why not grind up a perfectly good cab lol. They called them day lite windows. ..here's my interpretation now for the day lite conversion !! I'll straighten the door seals later along , but I'm really liking the look
-
Rat Rod Pete 359
gotnitro? replied to Darren B's topic in WIP: Model Trucks: Big Rigs and Heavy Equipment
About the hinges, do you want outside exposed type ? If so, maybe the method we've used for butterfly hoods would work here . It's super easy and functional. .did I mention it was easy ? Add a recessed slam lock on each door and bobs your uncle . -
The tank weathering looks fantastic
-
Hoist drive info needed
gotnitro? replied to gotnitro?'s topic in General Automotive Talk (Trucks and Cars)
Thank you !!!!I'm so illiterate about the correct terminology it usually keeps me from finding what I'm searching.for . -
I'm bashing a wrecker and looking for info about the hoist cable reel pumps. Anyone have any pics showing them ? They're the motors or pumps externally mounted on the reels.
-
Wow ..that's all I have my jaws dragging the floor
-
KW aerodyne wrecker finished !!
gotnitro? replied to gotnitro?'s topic in WIP: Model Trucks: Big Rigs and Heavy Equipment
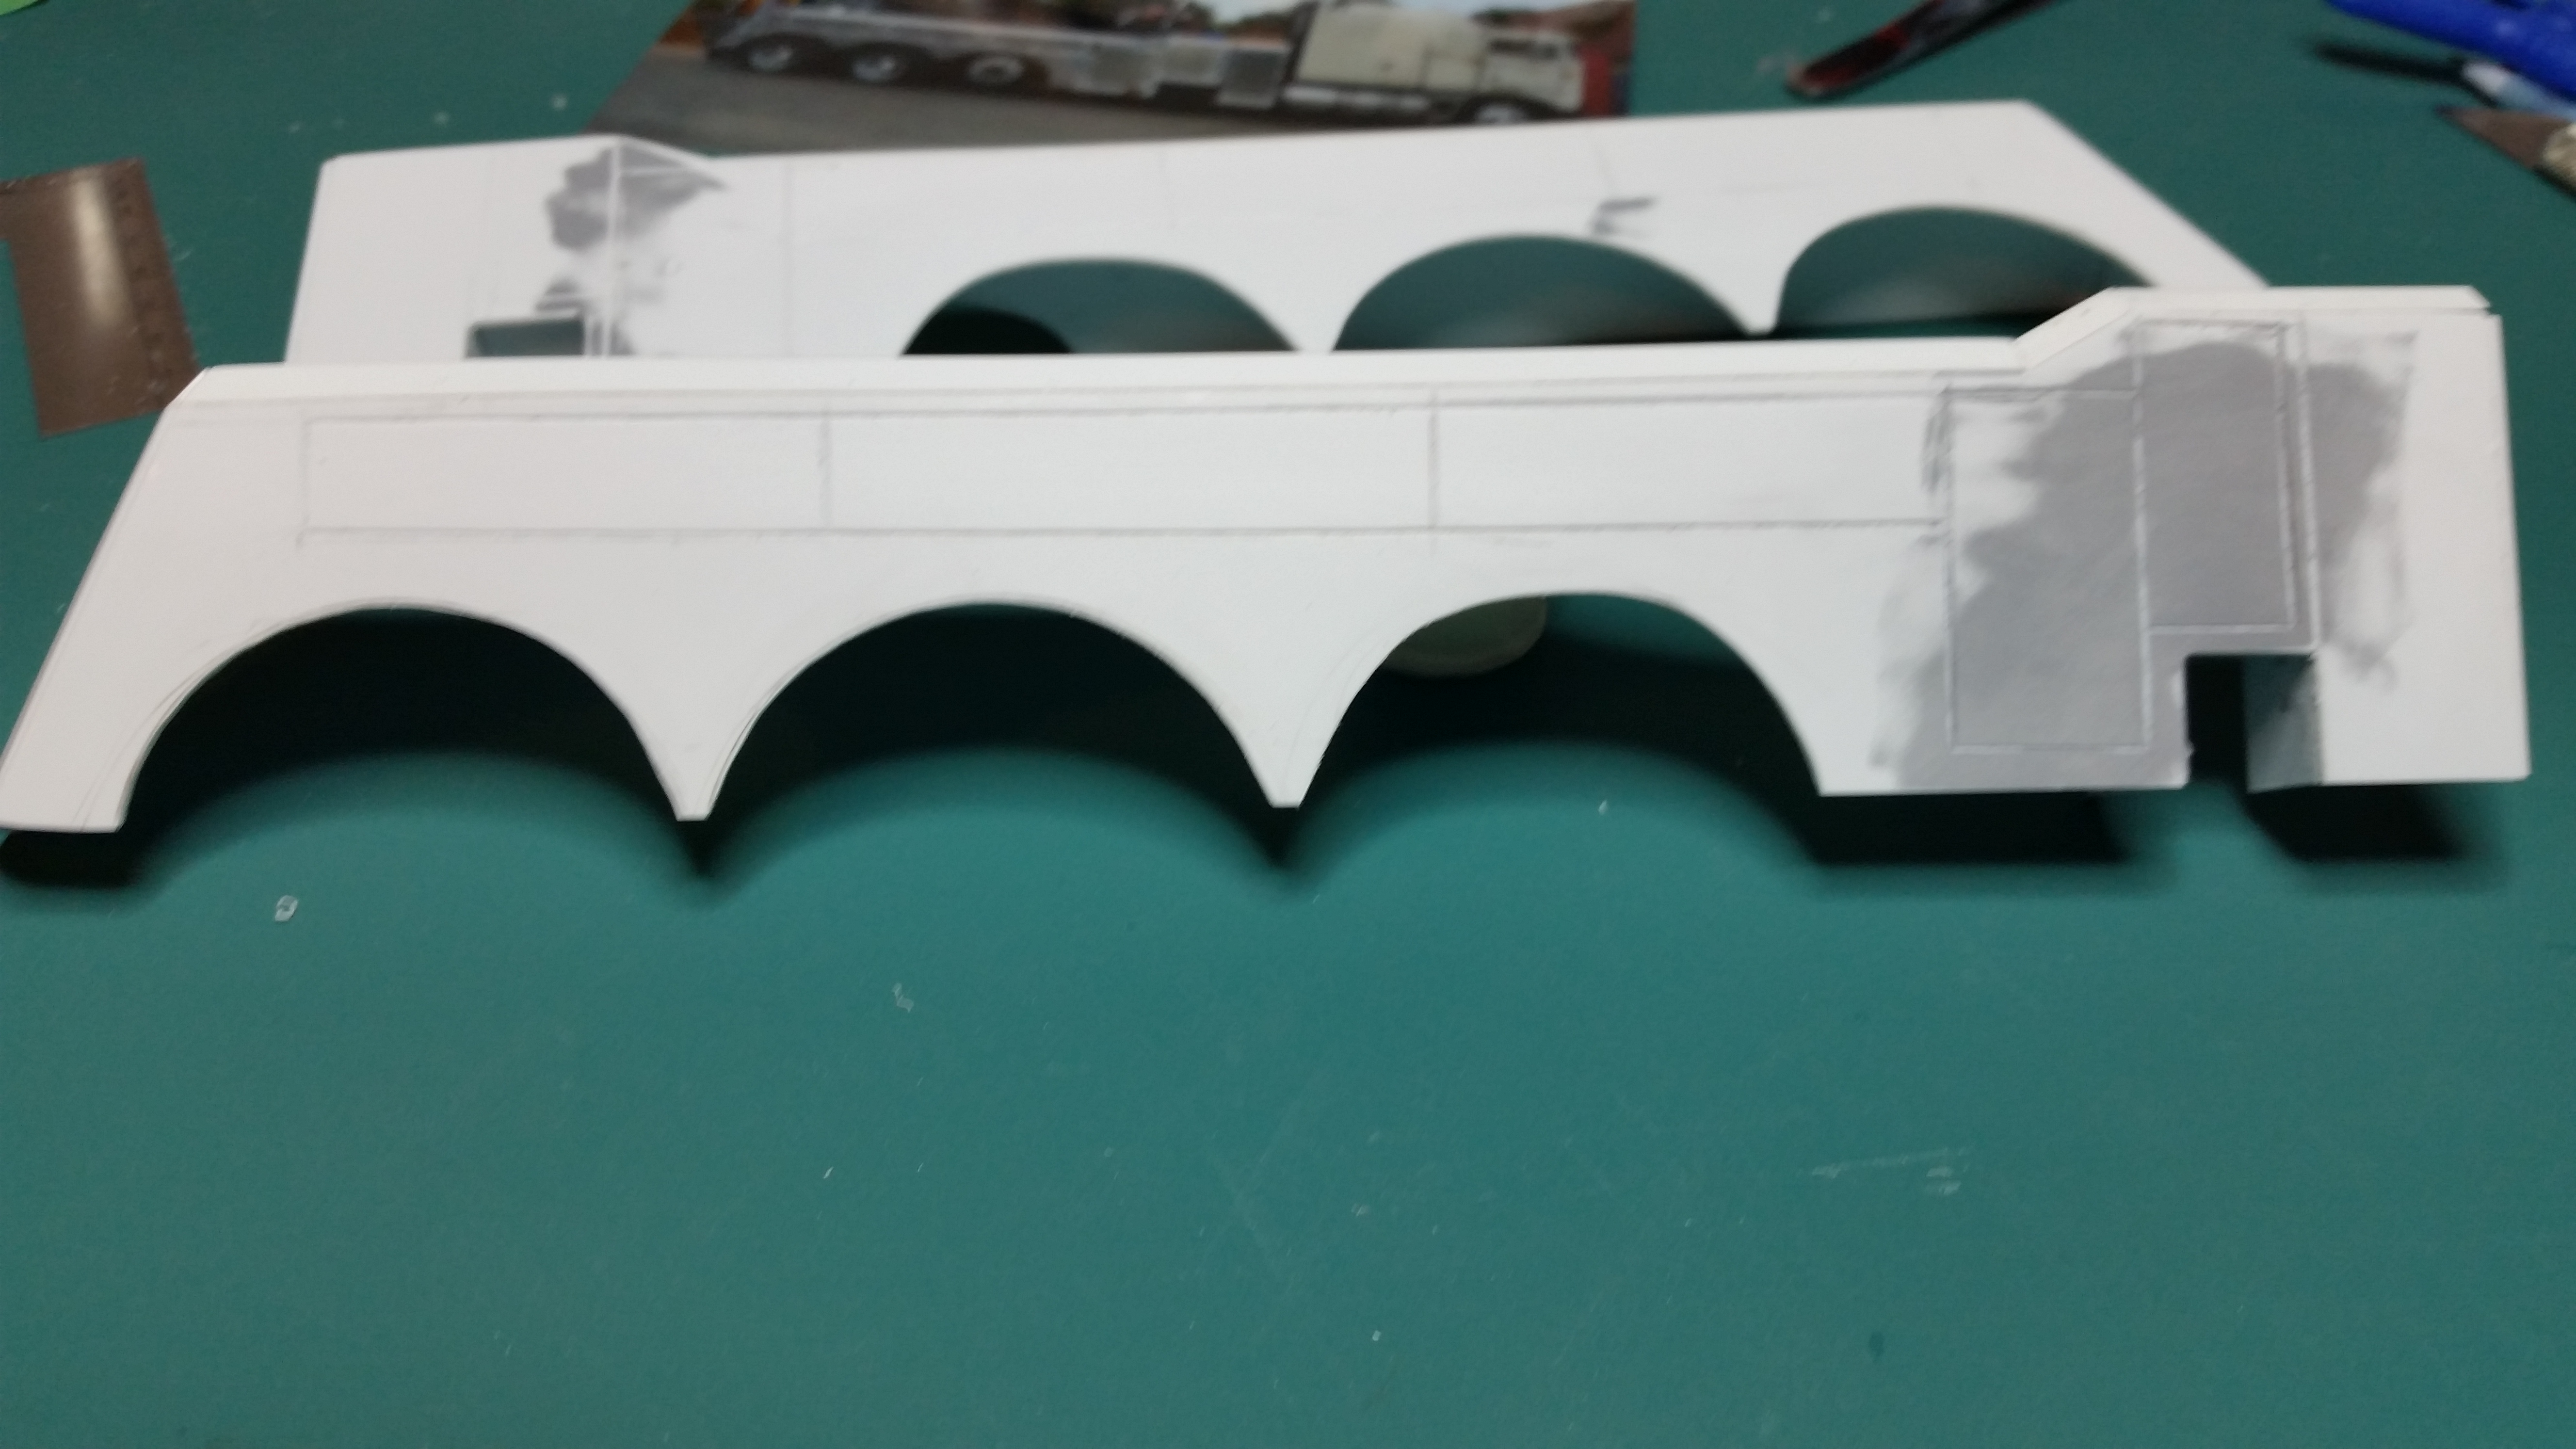
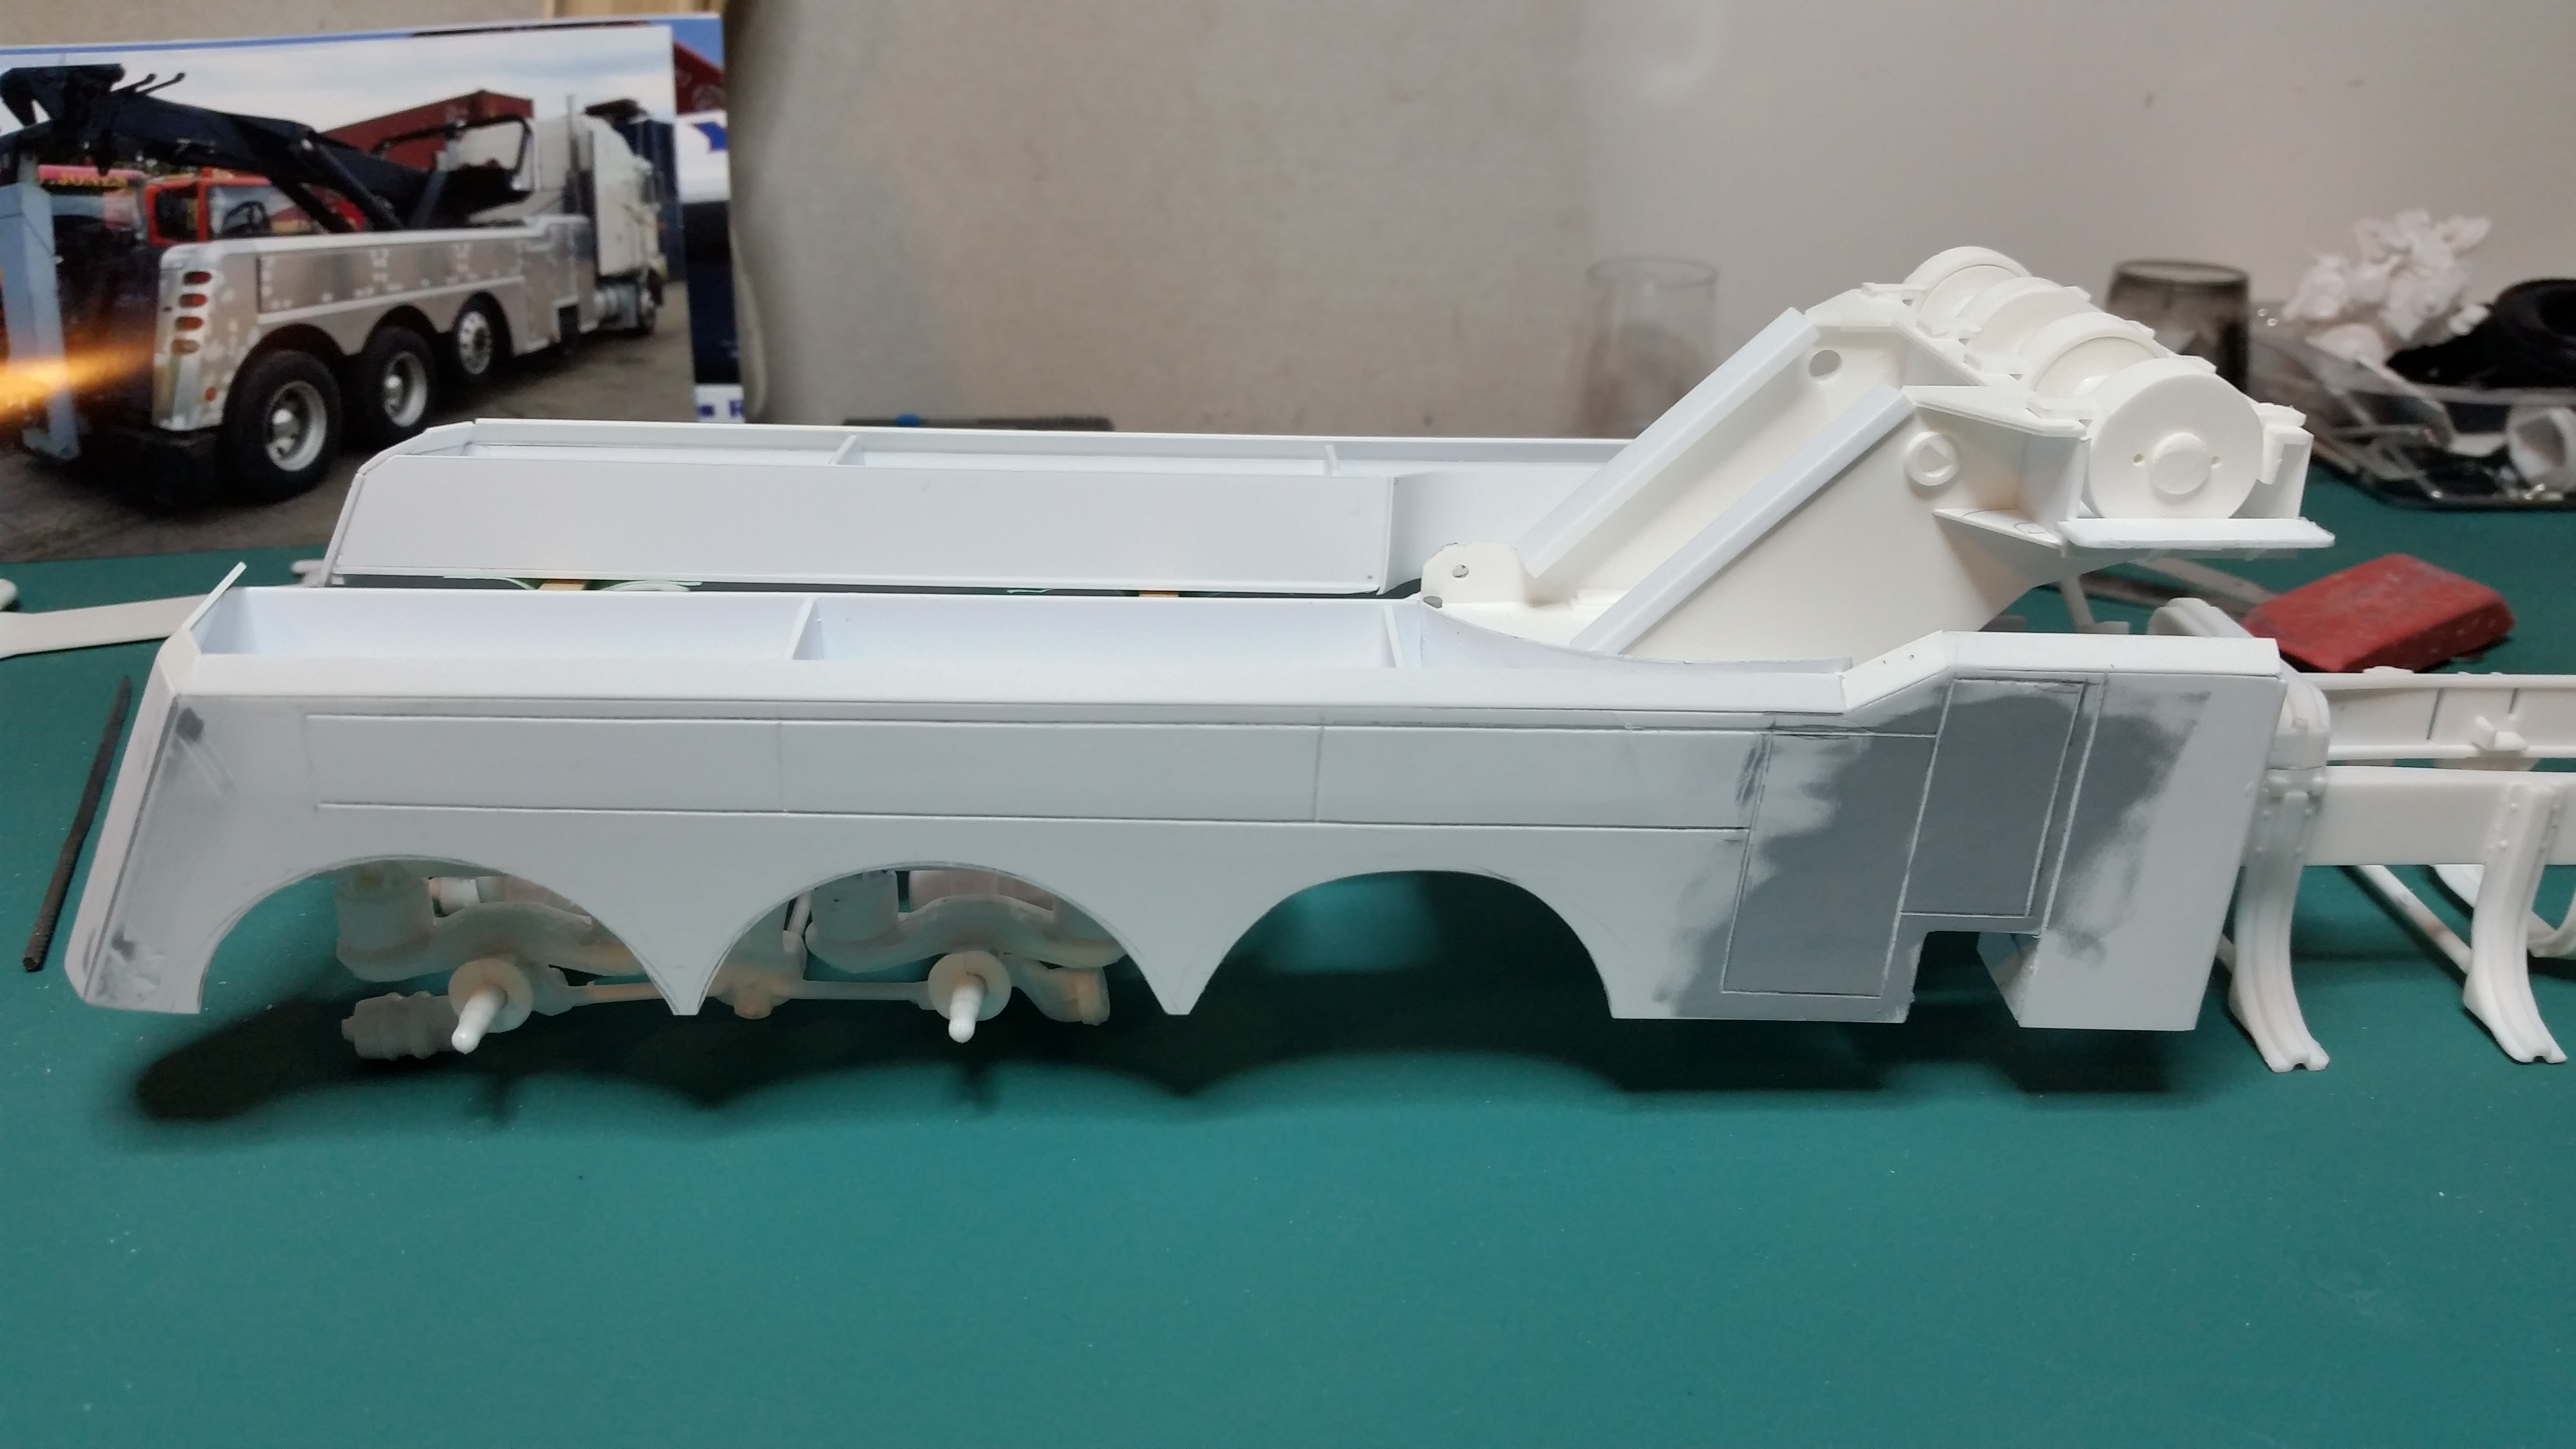
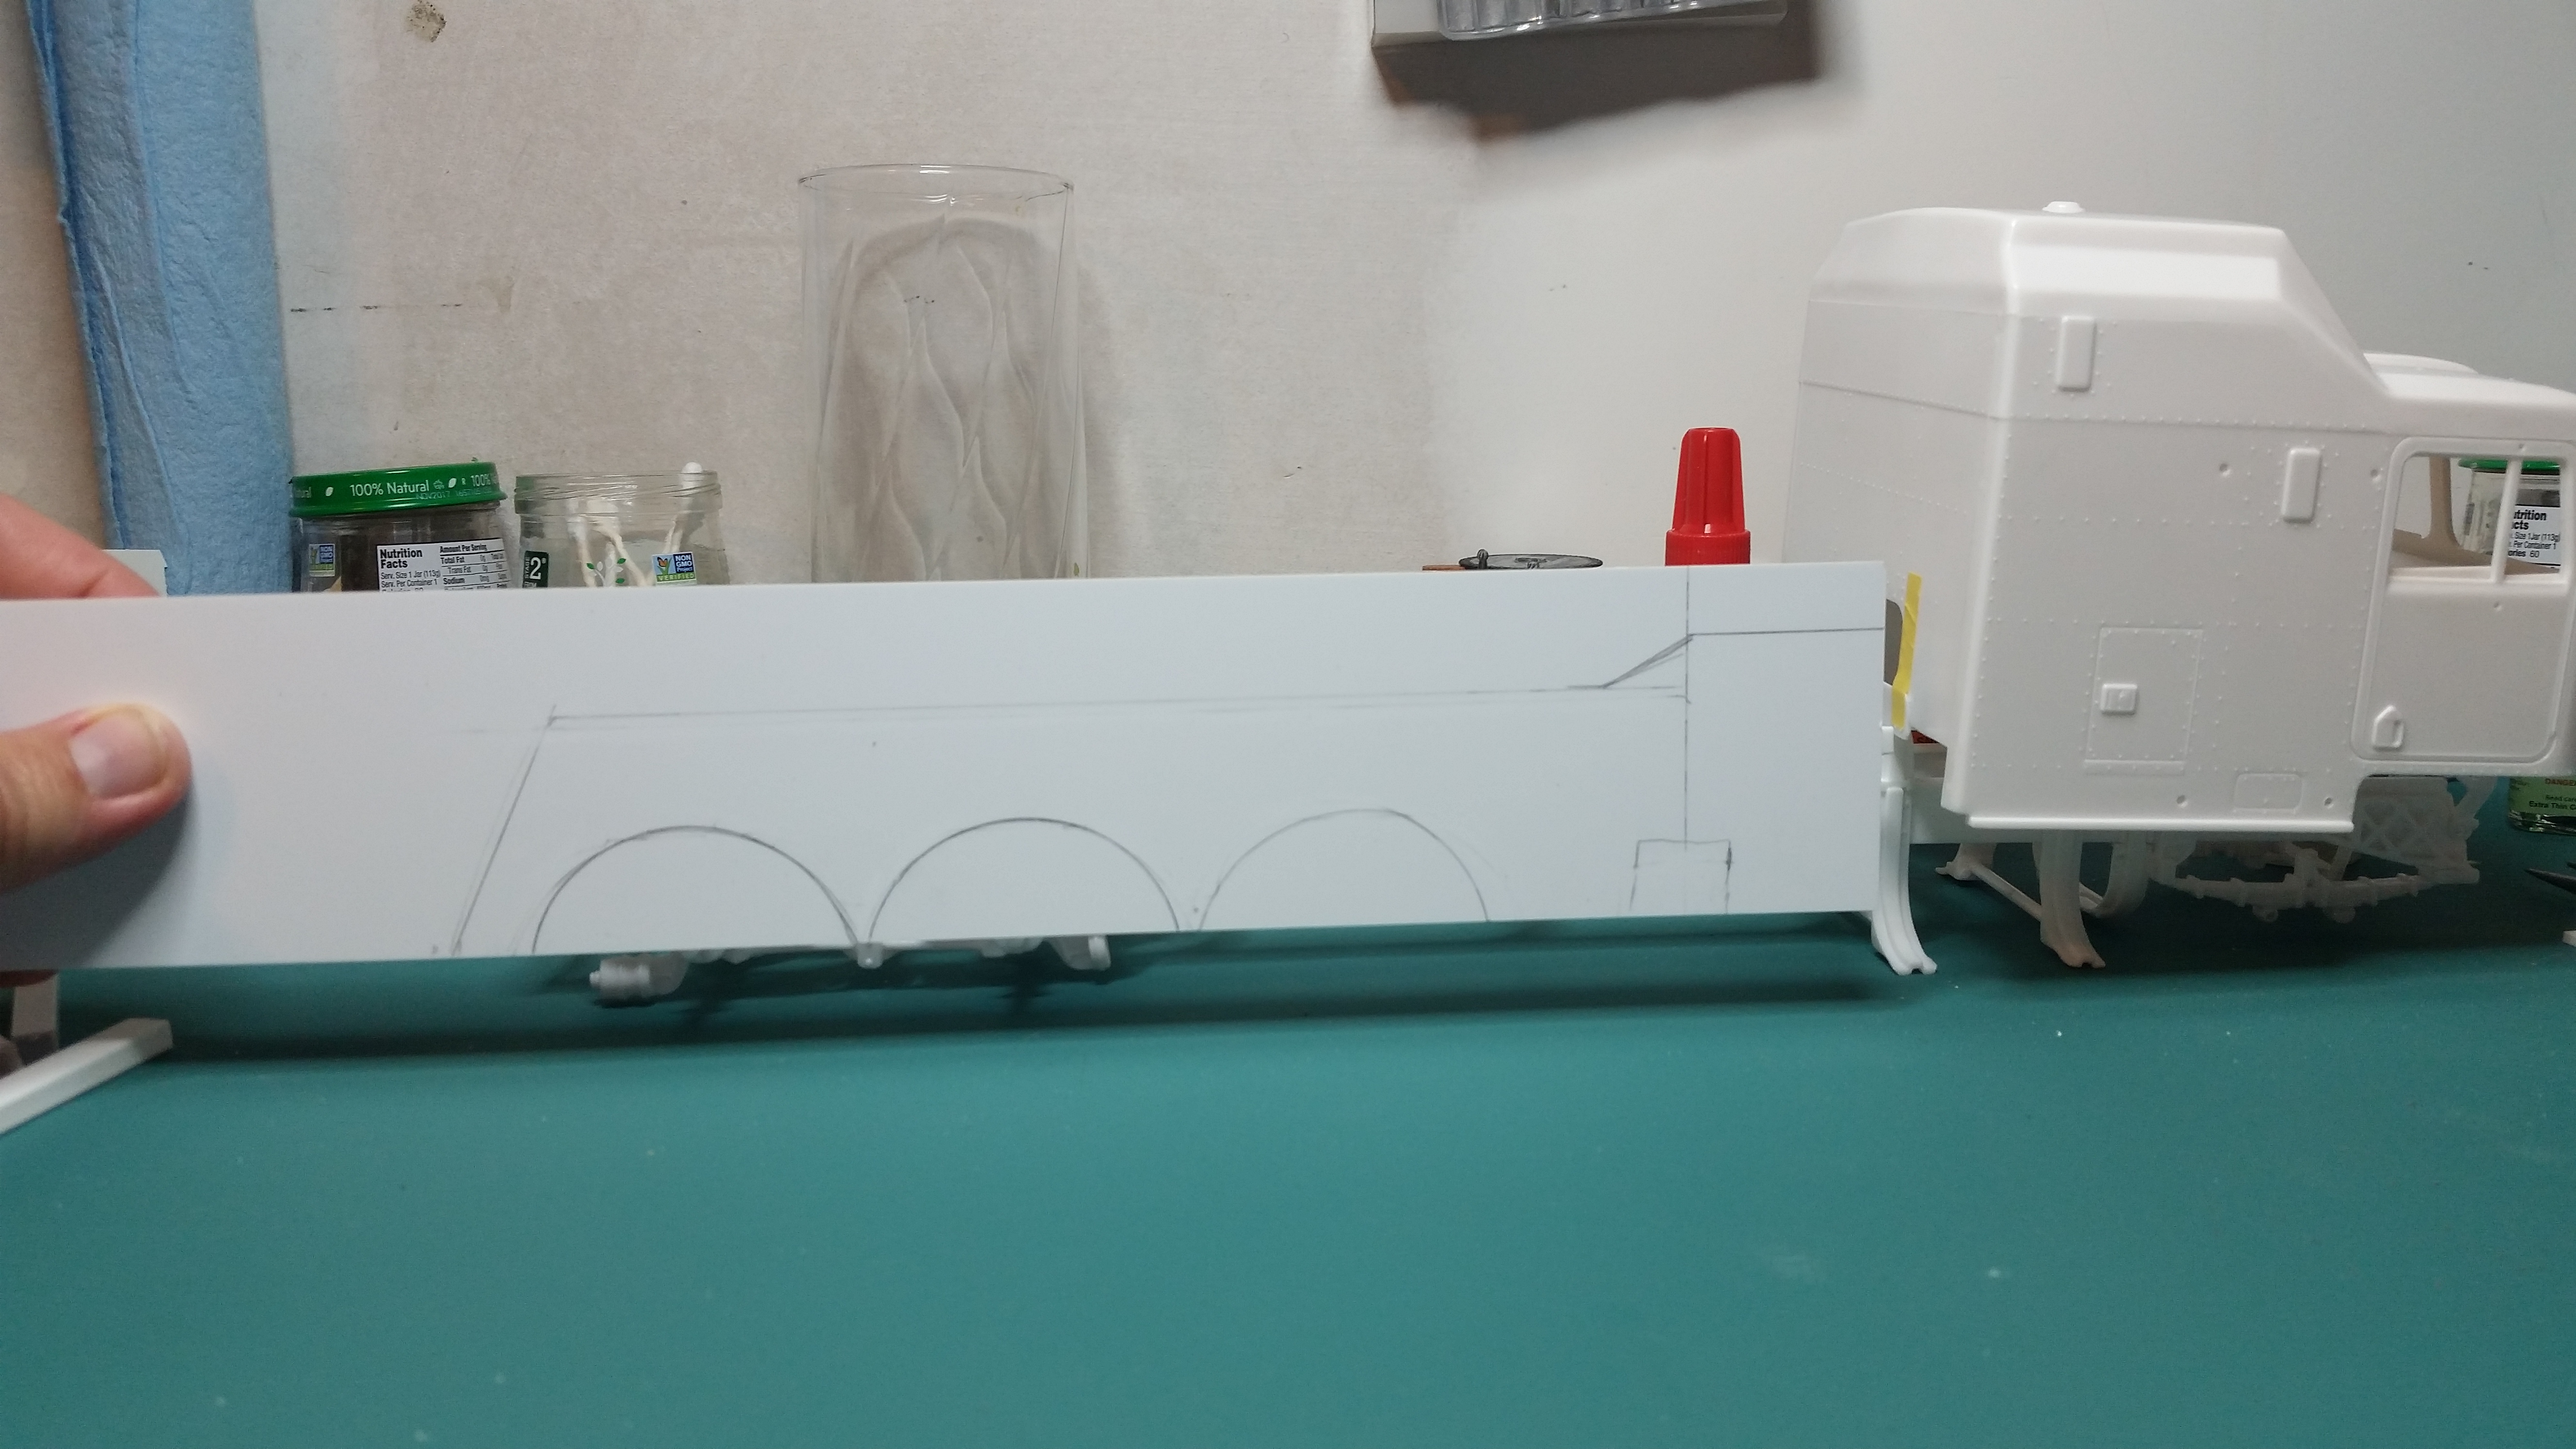
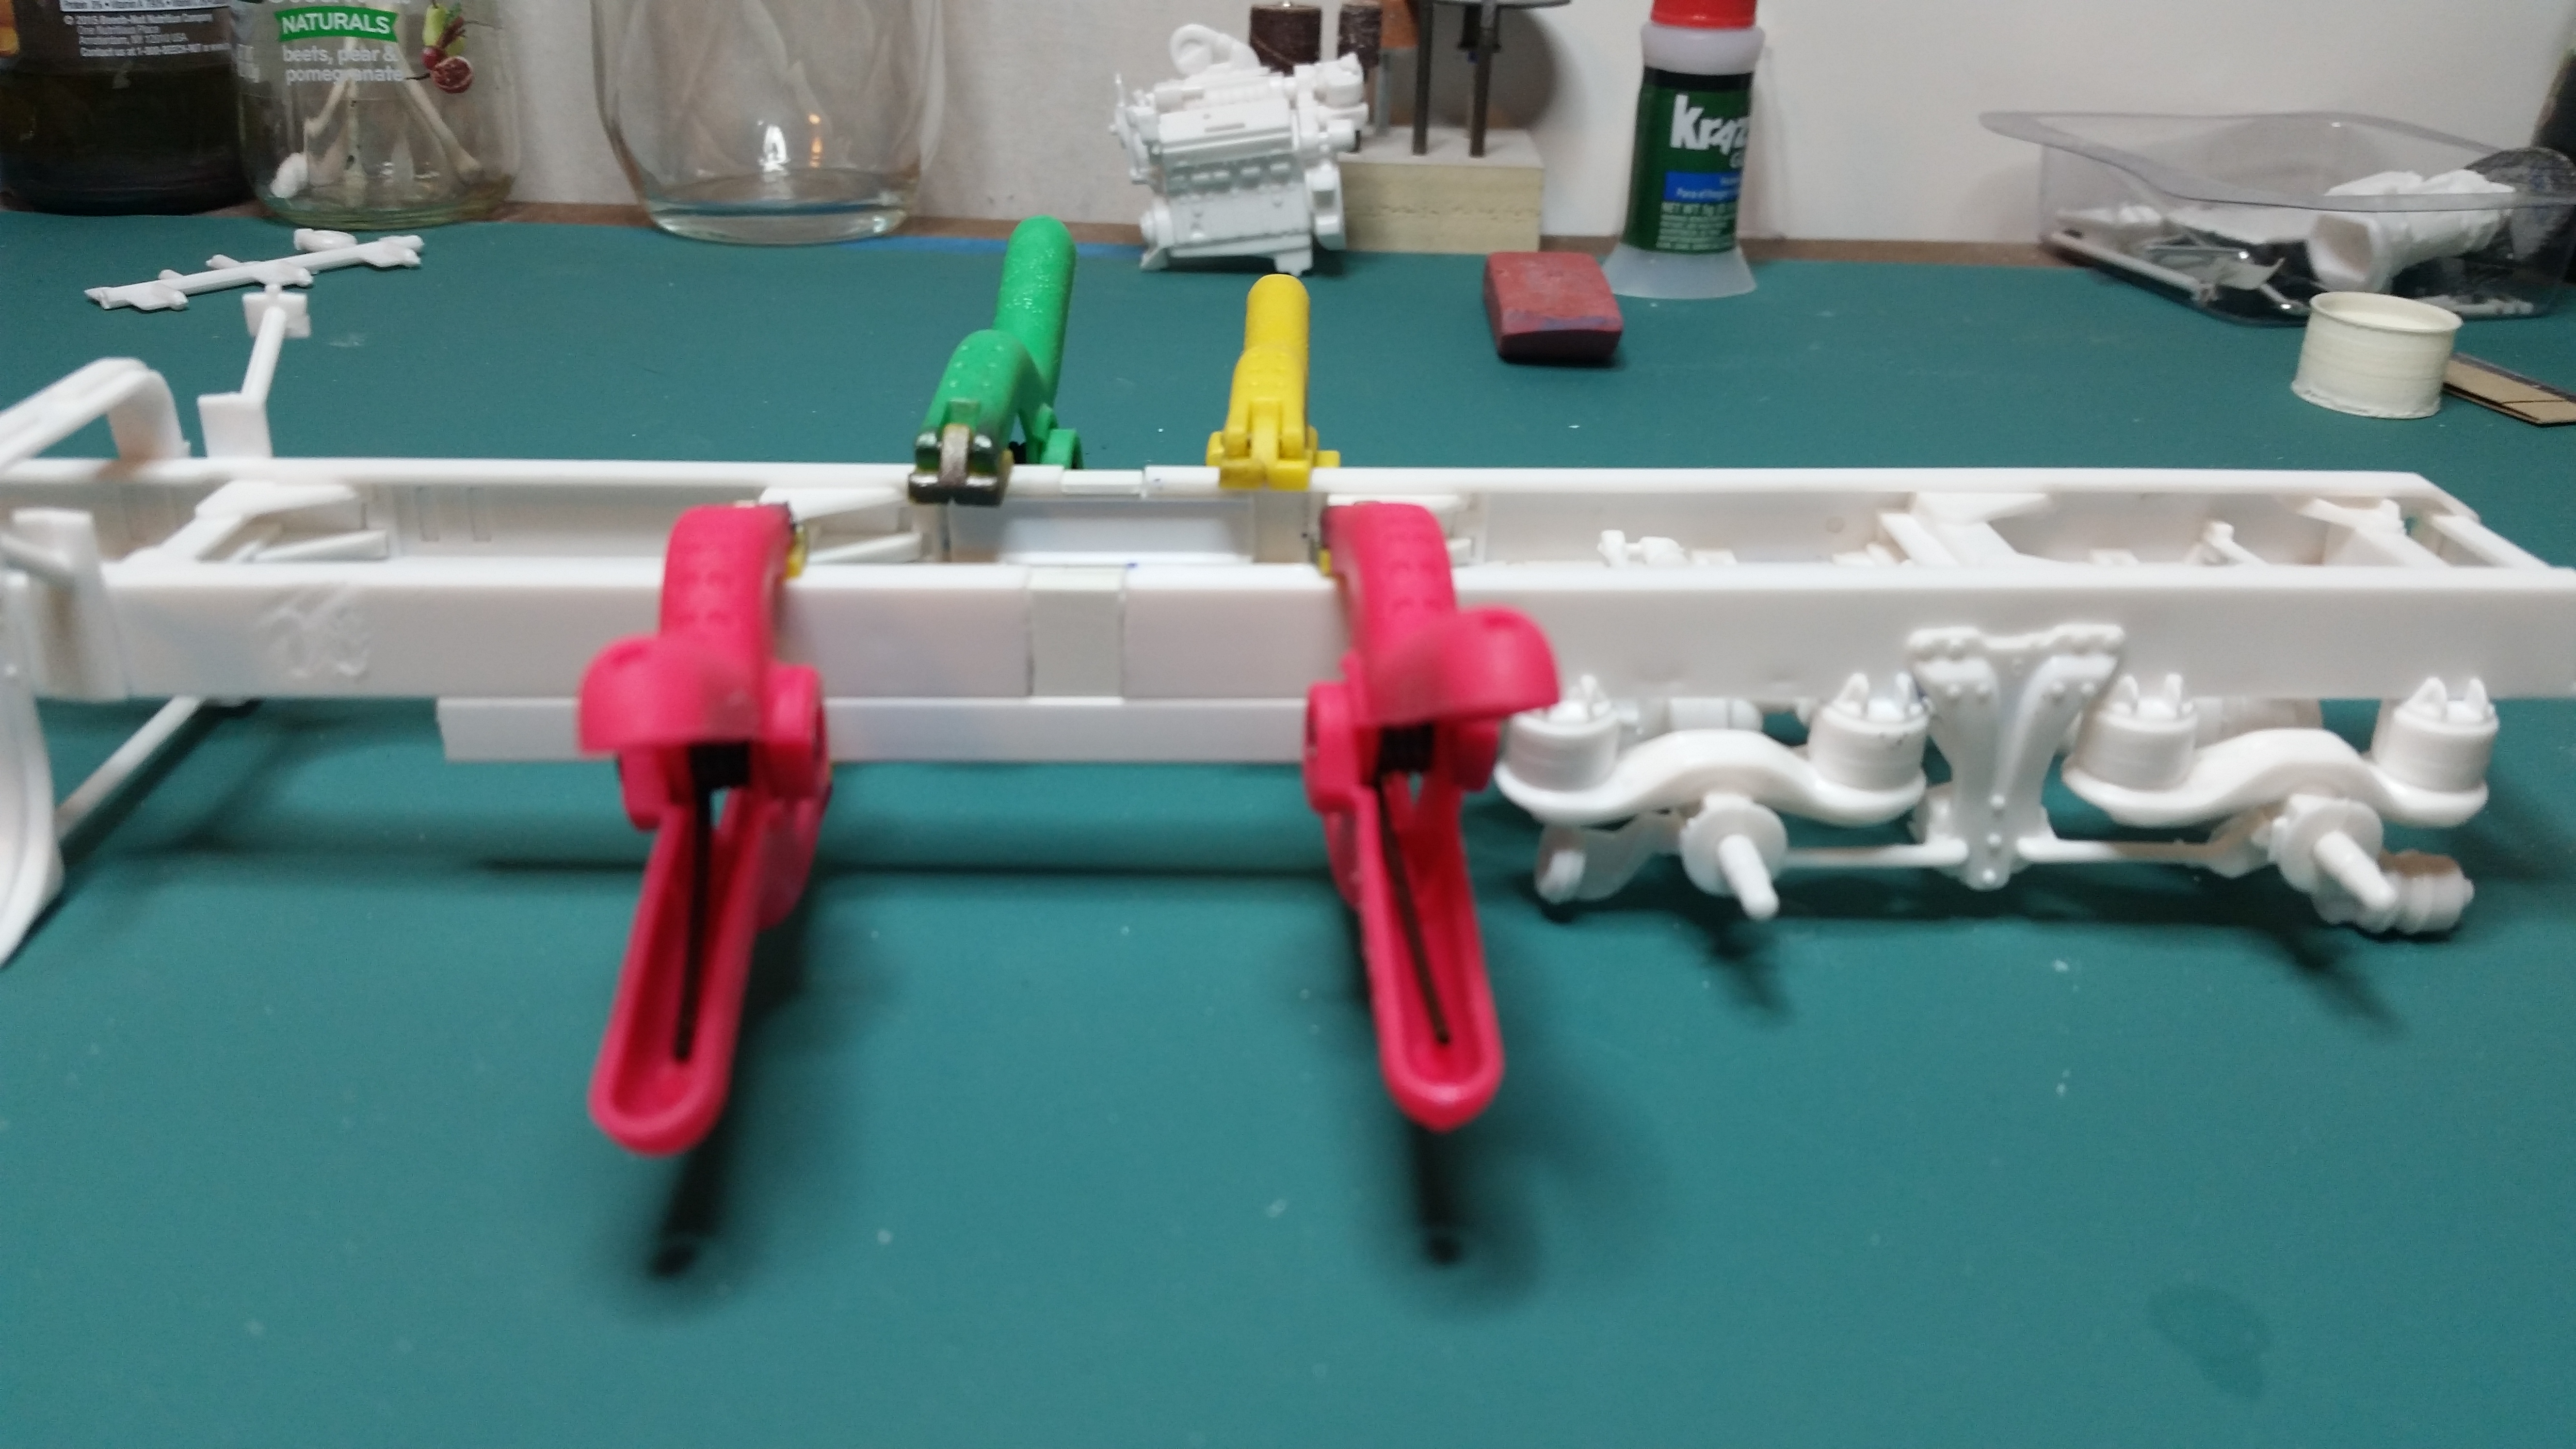
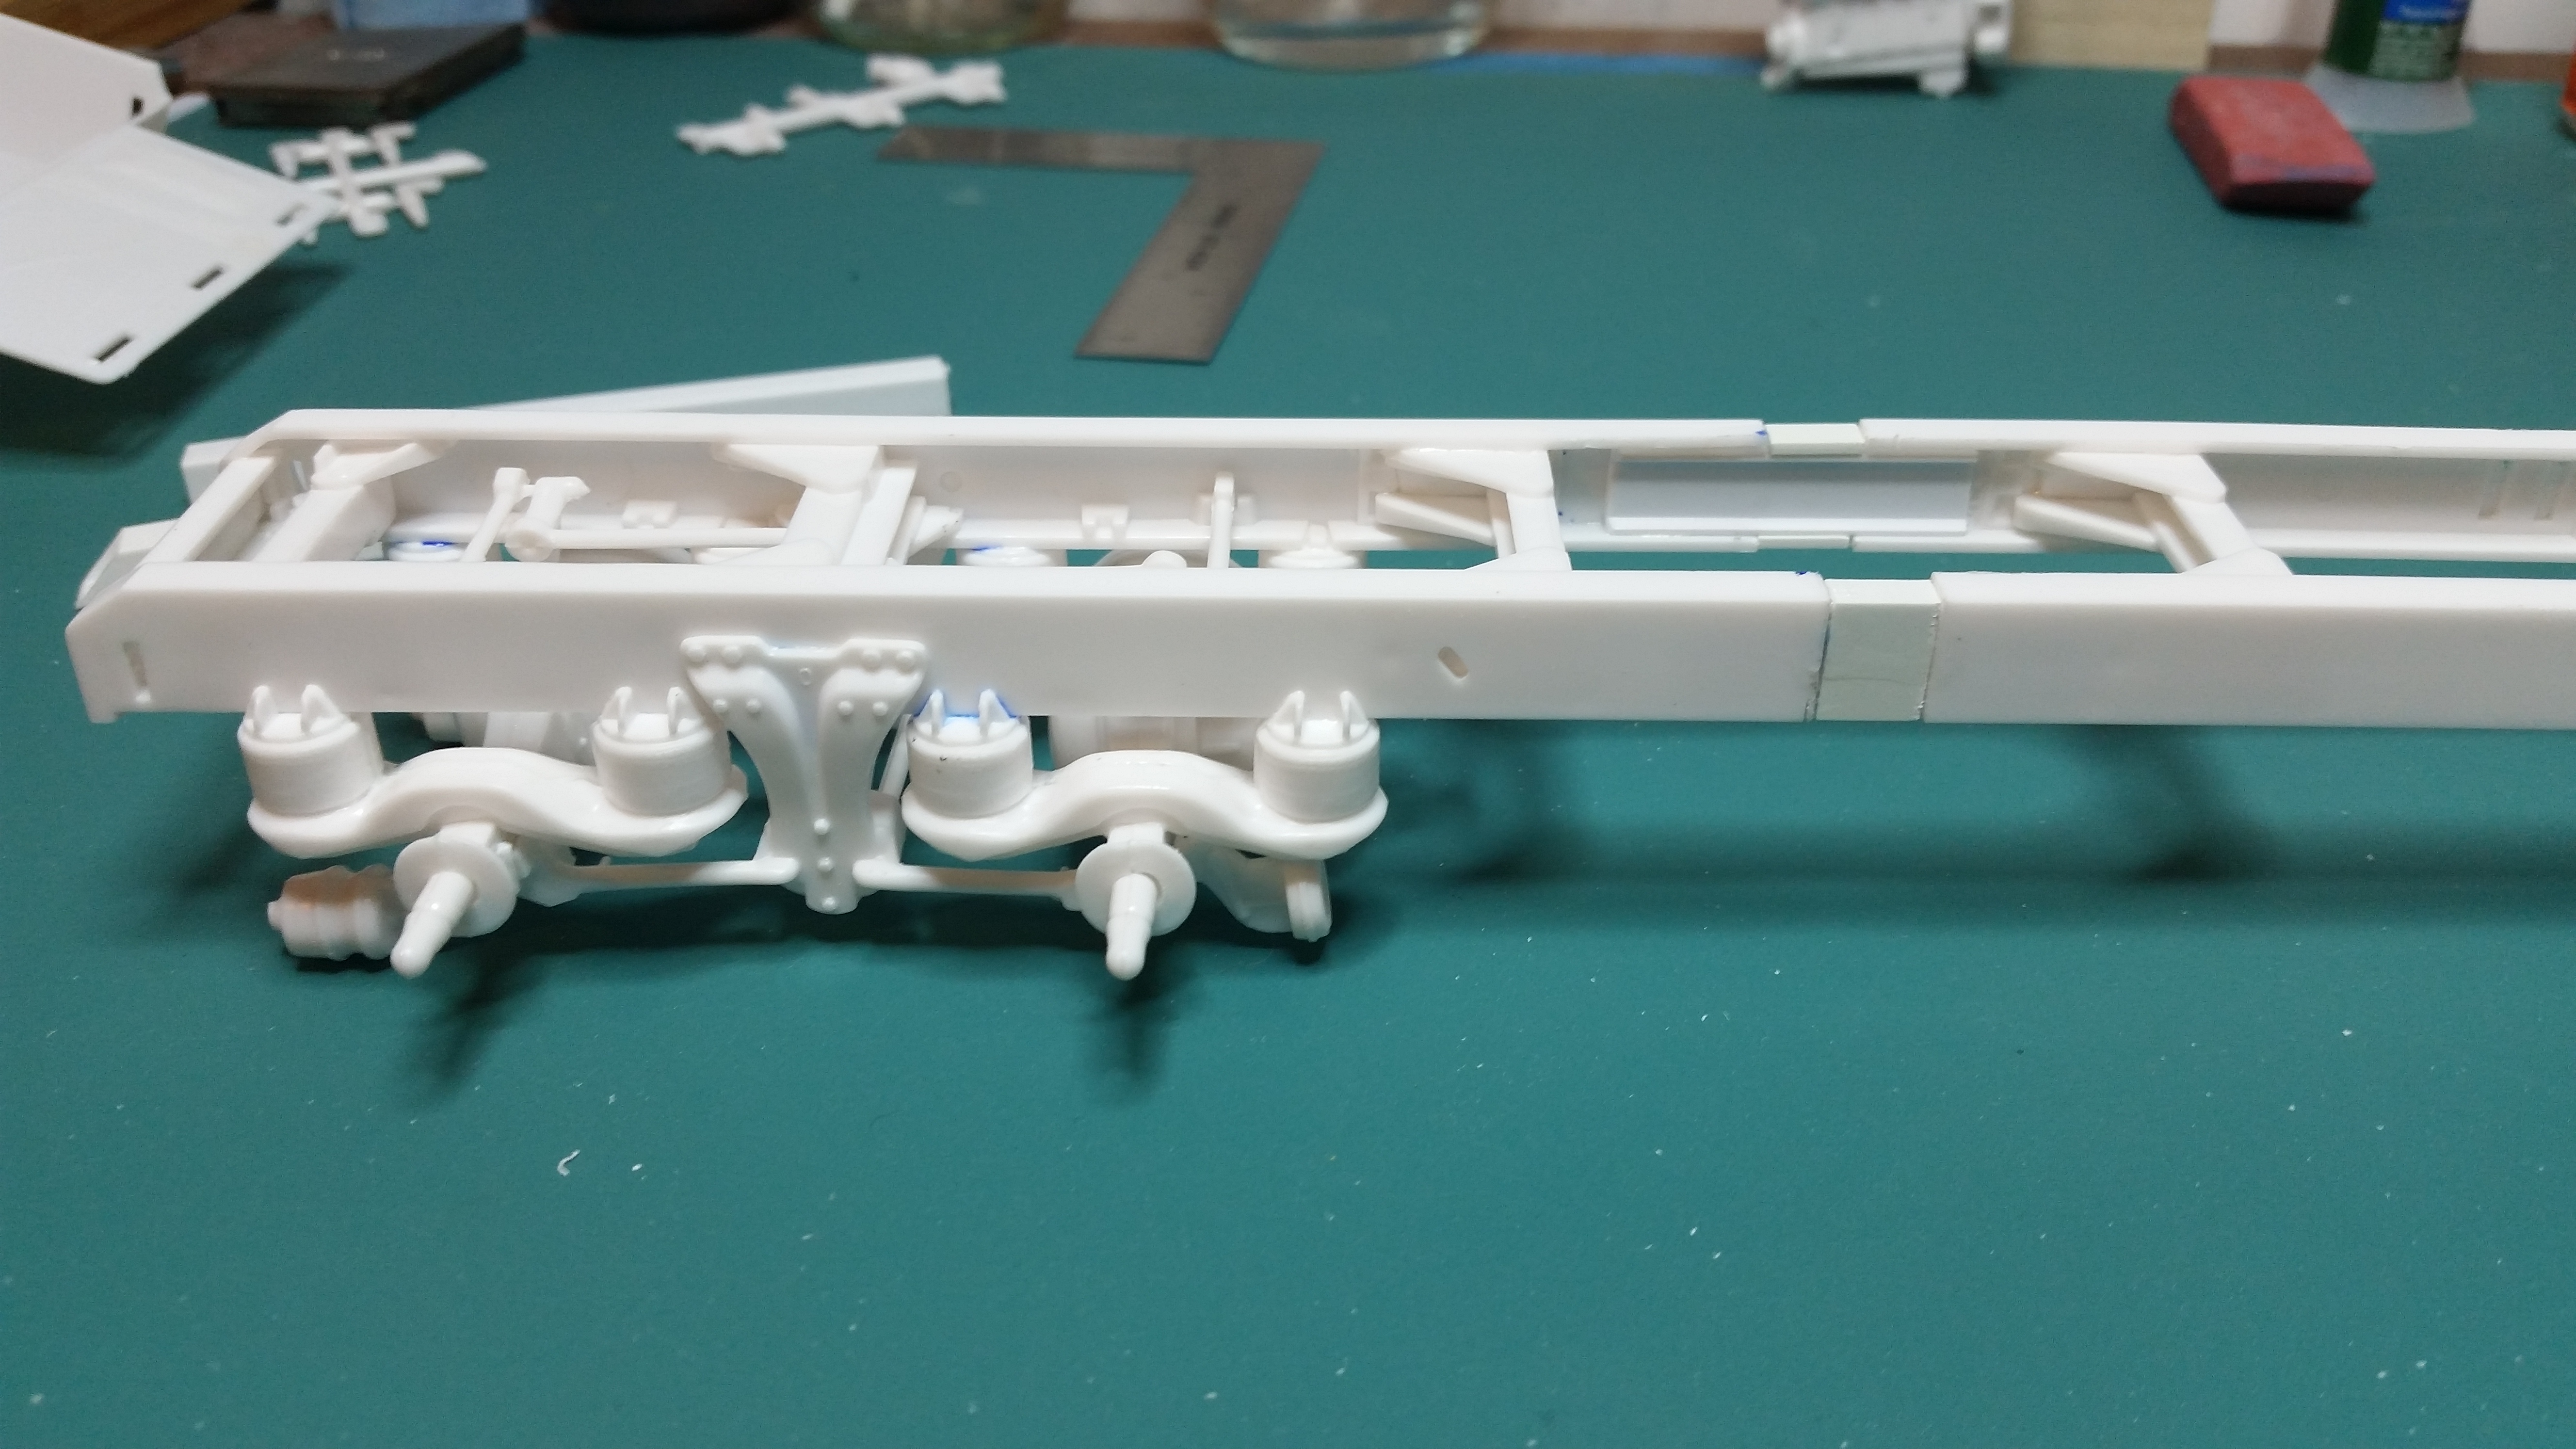
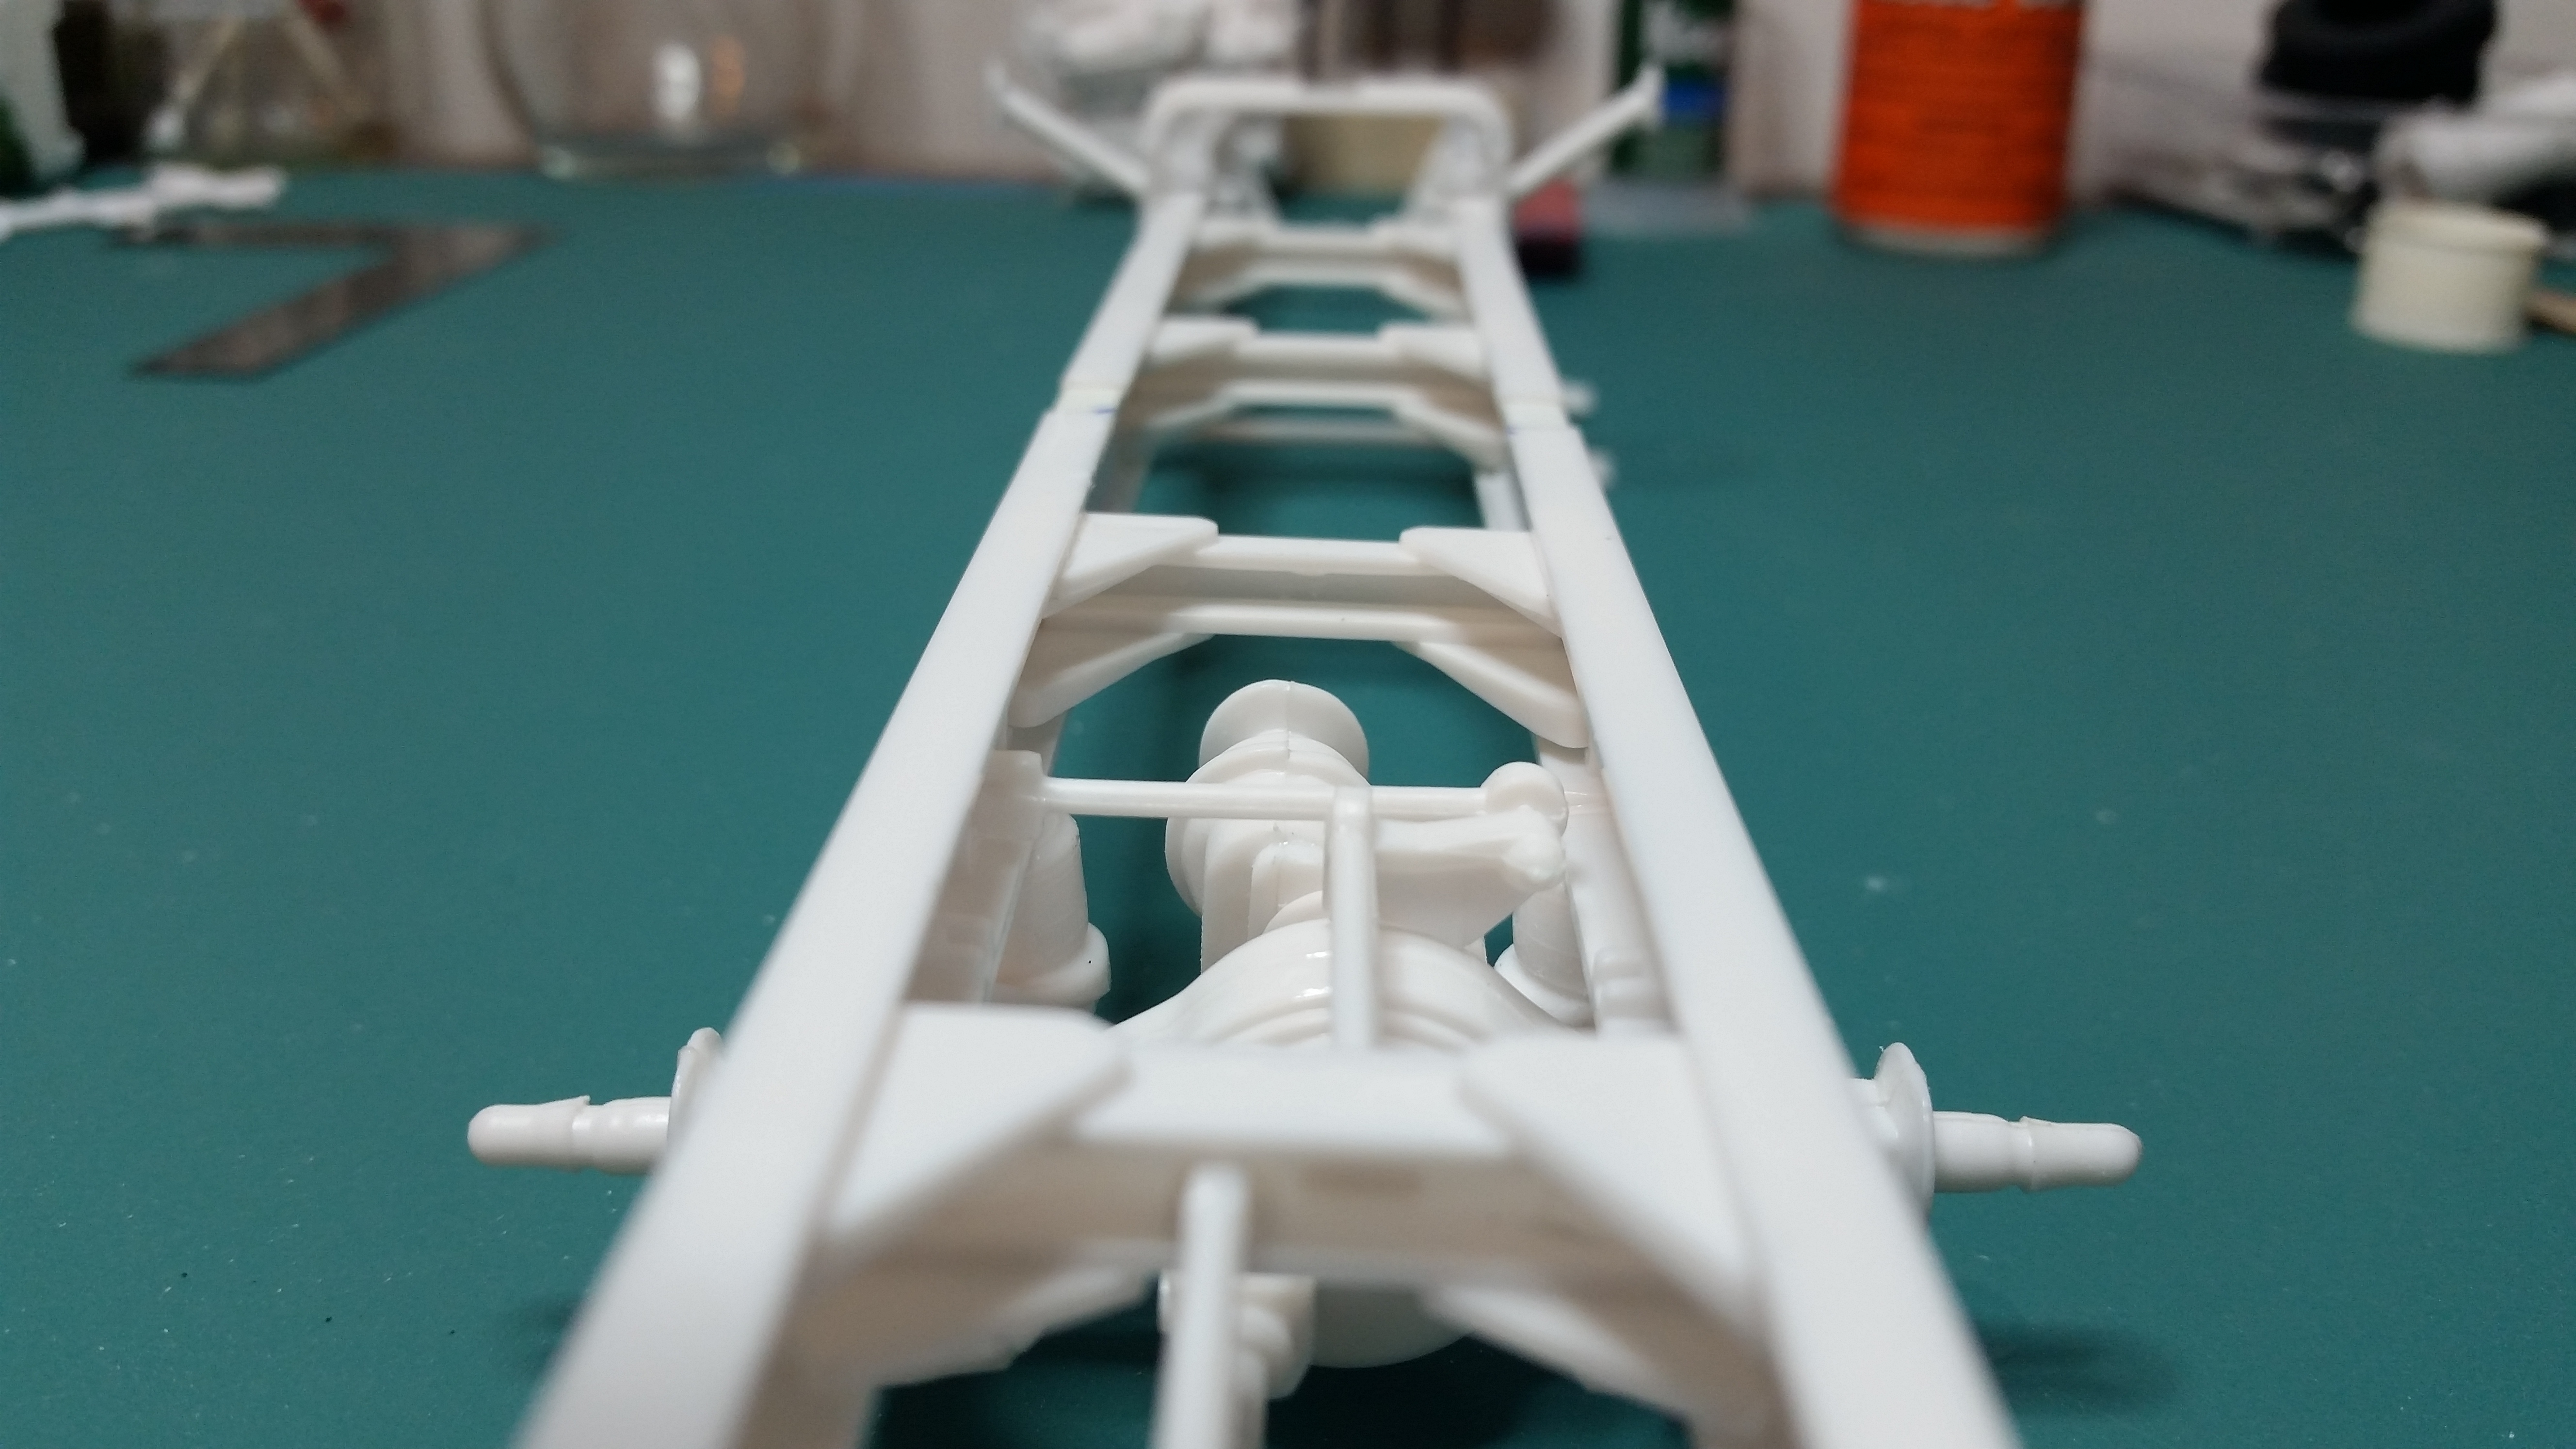
Thanks everyone I appreciate the comments it's definitely keeps me motivated !! I've been making progress on the side panels, scribing the numerous doors took so much patience to keep straight. .yet I still buggered up a few requiring putty . I used the back of a number 11 blade , then drew a small jeweler file along the lines to widen them. Should look good after a primer coat ! mock up !!!! I've modified several kit parts on the wrecker turn table . first to go...those odd gumball bolts. Meng 2mm hex bolts give a convincing look. The strips between the cradle will fill the space where the boom calls home. The outer plates will eventually become the light bar base Now...I've been struggling coming up with pics of how the cable winch drives should look. Does anyone know how these should actually look ? I'm referring to the motor or pump I guess that mounts outside the reels ? I'm seriously bumming here any help welcome !! Ok last pic for now..I stuck the boom section on for a treat thanks for following along
-
awesome work KJ ! what'd you use for the tank ? It fits your chassis fantastic !!
-
awesome work !! Love the shortened fenders, looks soo much better
-
Rat Rod Pete 359
gotnitro? replied to Darren B's topic in WIP: Model Trucks: Big Rigs and Heavy Equipment
good call using Papa for a hauler, like the idea of ratting it out fade the paint chip some edges, yeah just dropping an idea ..how about a motorcycle behind the pete ? -
Fantastic work !! Love the small details that keep the truck authentic. Another Humphreys truck is back in service hope ya plan to bring.it to Fulton model show
-
KW aerodyne wrecker finished !!
gotnitro? replied to gotnitro?'s topic in WIP: Model Trucks: Big Rigs and Heavy Equipment
Thanks everyone for the positive comments ! I'll have an update soon..I won't the let the popcorn and beverage get stale -
That's gonna be a bitchin ride lol Can't wait to see this progress Metal axles...still ????this is 2017 right not 1970 . Man the armor guys are so spoiled with updated kits and yet the car / truck kits languish back in the 80s..guess cost of updating tooling doesn't offer any incentive
-
KW aerodyne wrecker finished !!
gotnitro? replied to gotnitro?'s topic in WIP: Model Trucks: Big Rigs and Heavy Equipment
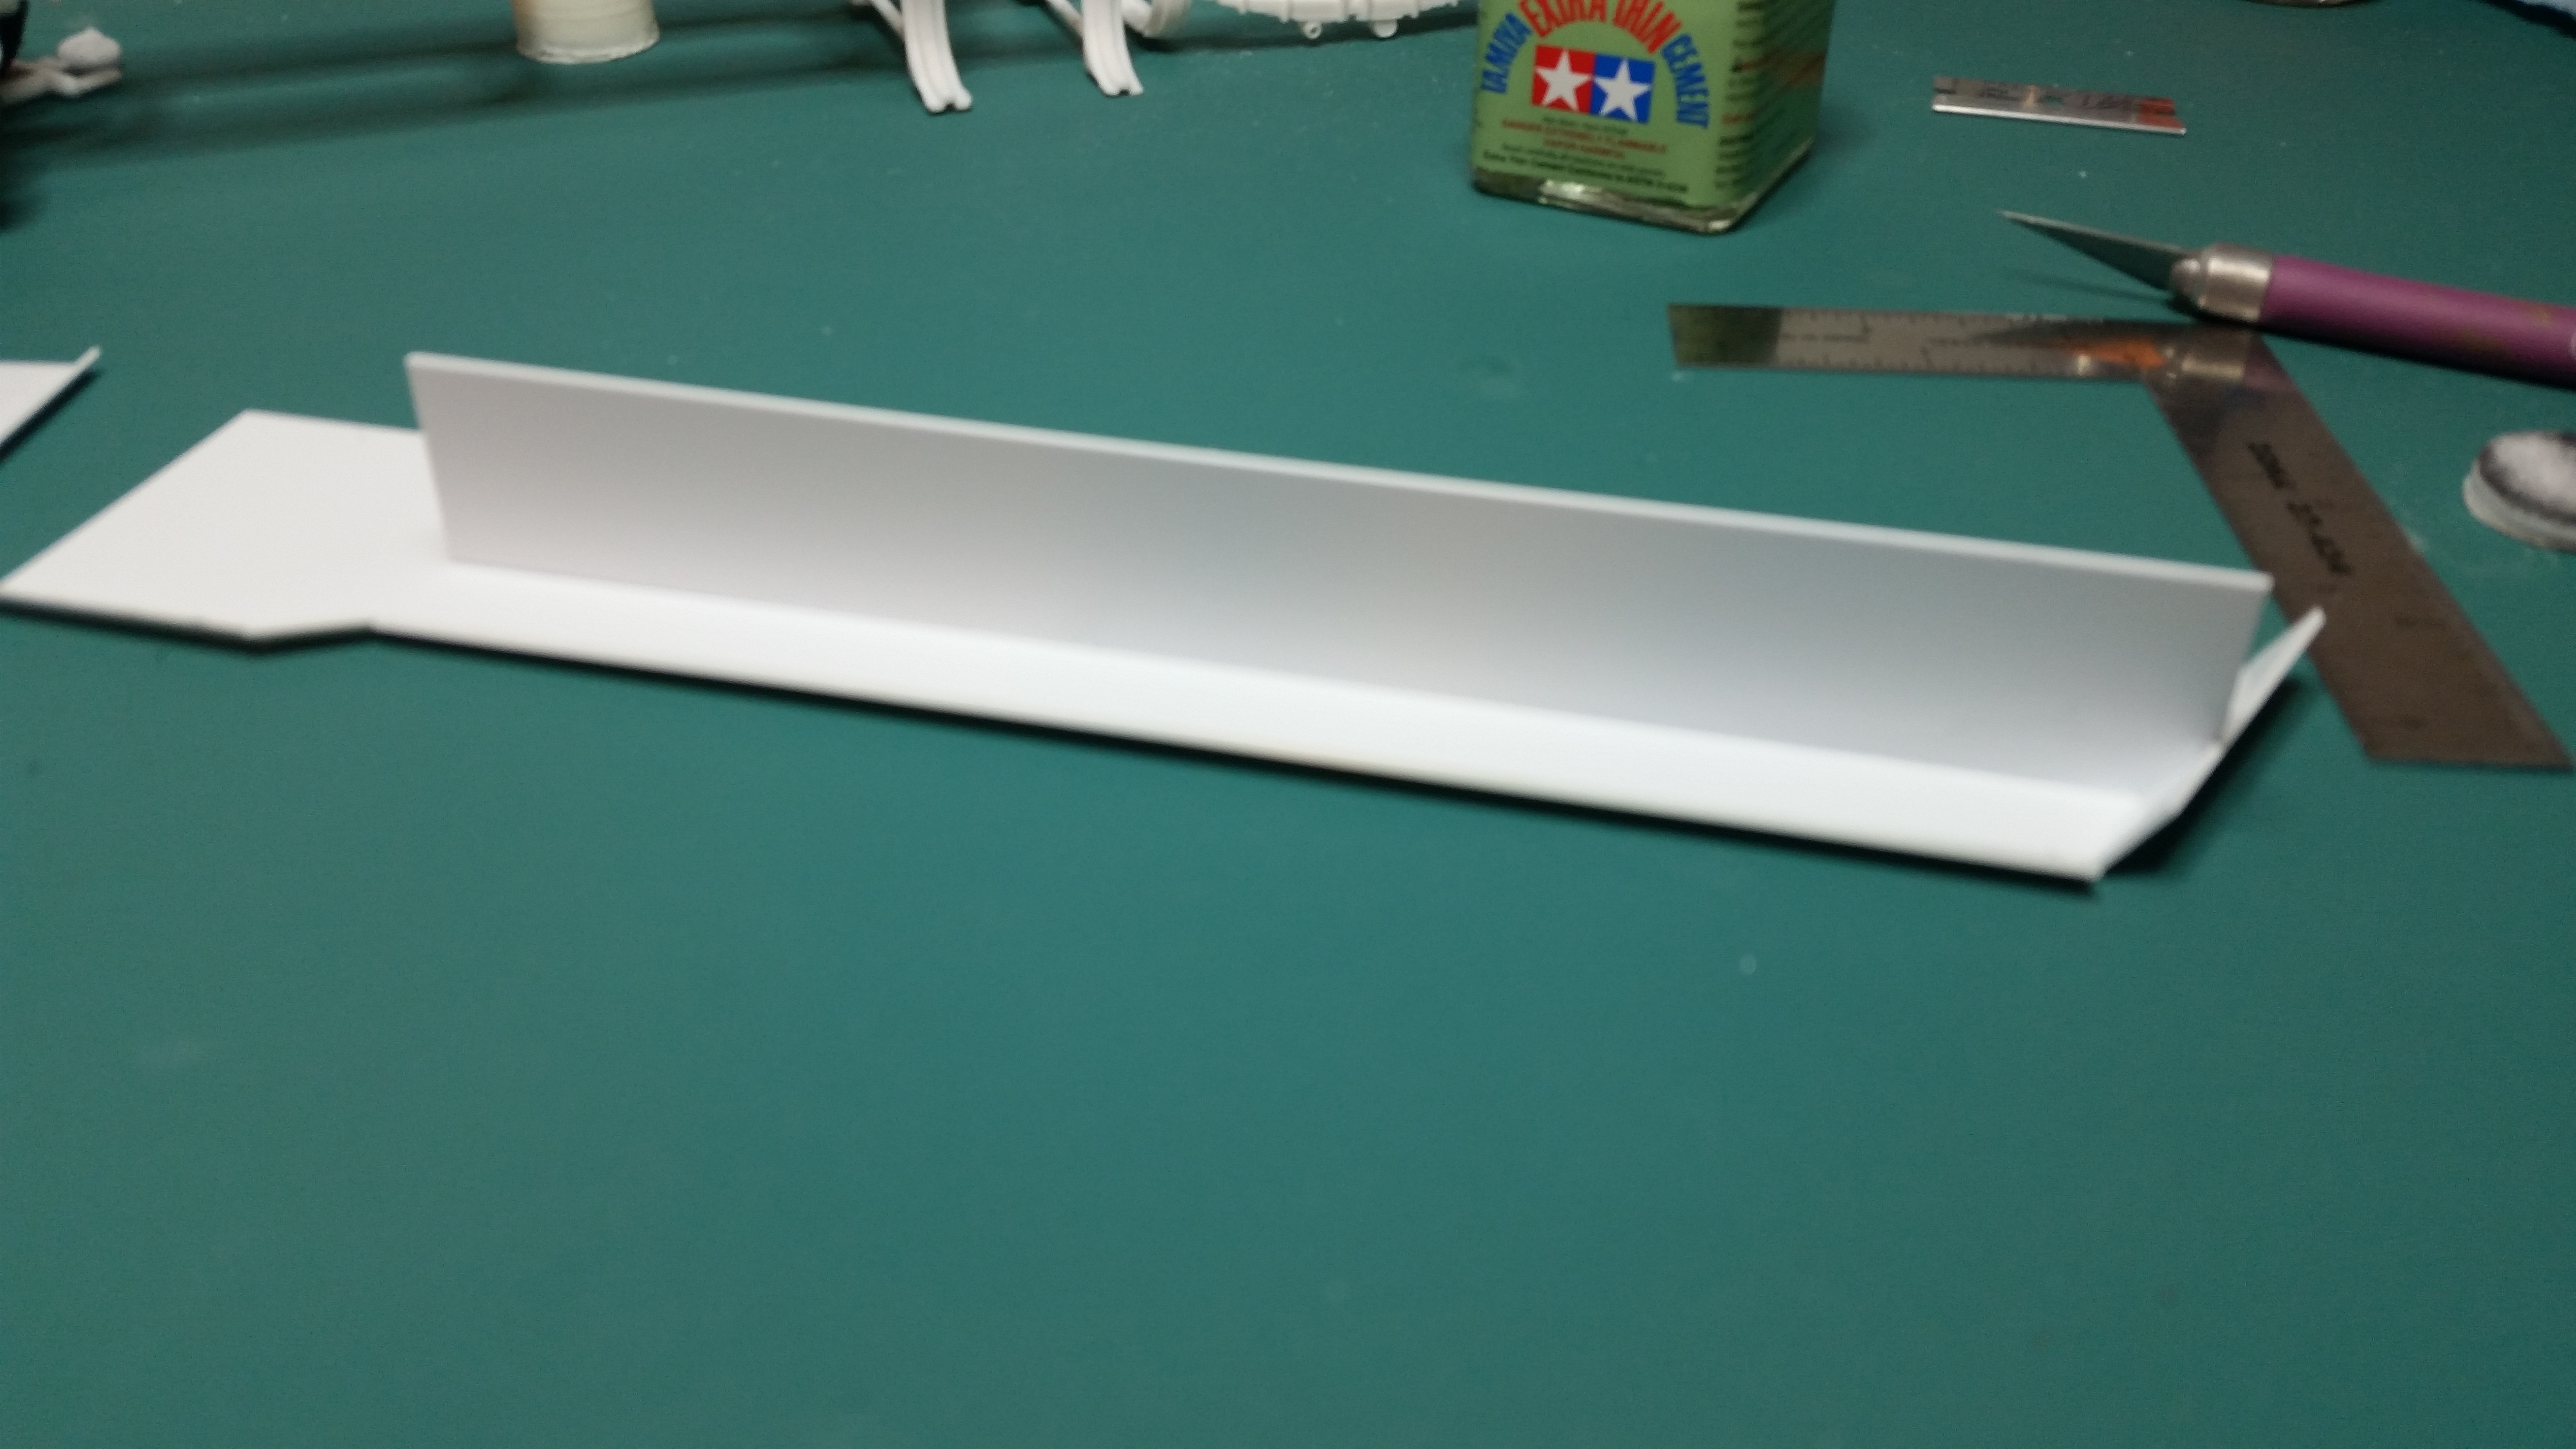
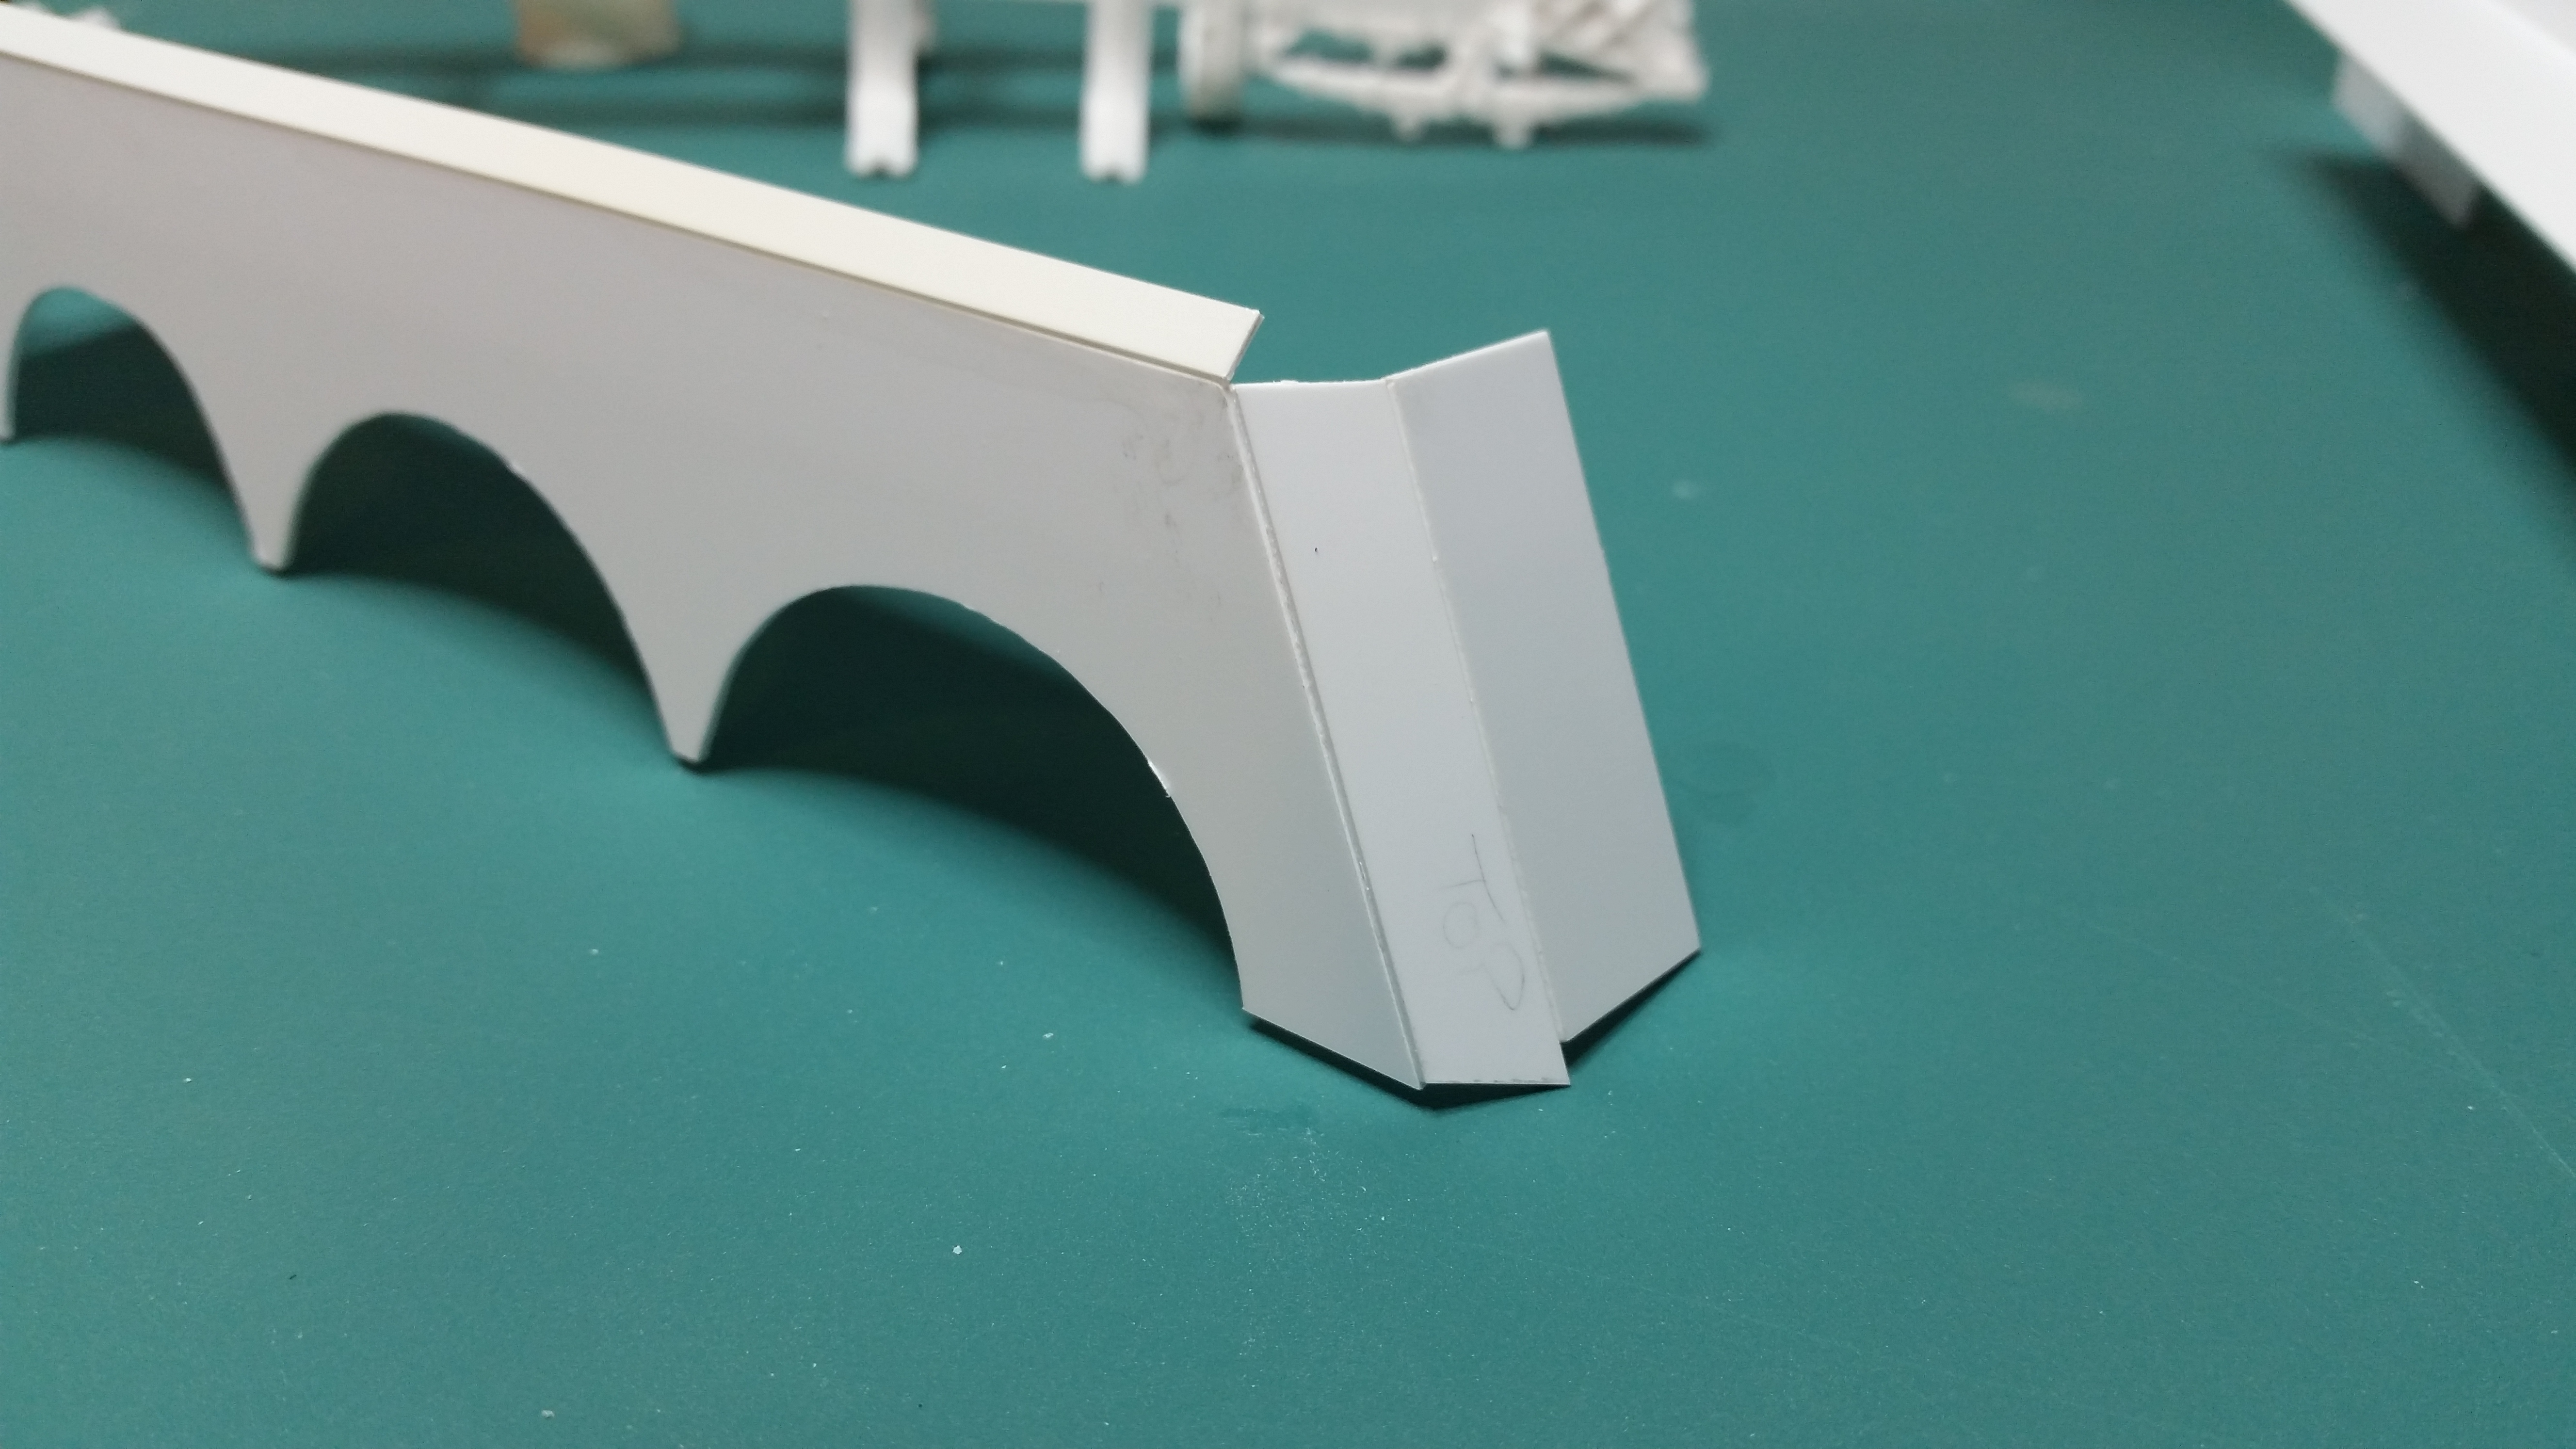
I used the pete slabs and dumb luck to line up the wheel wells. I probably drive others nuts using a doodle for making parts but works for me . after the slabs were shaped I started adding the structure behind..just a simple long box that'll eventually get diamond plate tops.. reinforcing the floor w 060 strip keeps floor flat and more gluing surface , plus makes it appear I know what I'm doing lol. waste not..I used the scraps for the angled corners..very rough fit right now. A quick swipe w sanding sticks later will hide my shoddy work. Another set of 060 rails hold the strips from behind . Therell be lights cut into these panels later along. any questions or comments welcome ! Till later
-
KW aerodyne wrecker finished !!
gotnitro? replied to gotnitro?'s topic in WIP: Model Trucks: Big Rigs and Heavy Equipment
lol! ! It's definitely making progress -
Kalmar Ottawa Yard Tractor
gotnitro? replied to hct728(Bob)'s topic in WIP: Model Trucks: Big Rigs and Heavy Equipment
Now that's scratchbuilding -
Loader Cat 966C
gotnitro? replied to mackd's topic in WIP: Model Trucks: Big Rigs and Heavy Equipment
Very cool project! Looking forward to updates ! -
KW aerodyne wrecker finished !!
gotnitro? replied to gotnitro?'s topic in WIP: Model Trucks: Big Rigs and Heavy Equipment
Lol no anesthesia here..stick a tongue depresser in its mouth and suck it up soldier! !The 1st Cav way lol Minor update..frames all patched together, my original 1/2 spacer was too extreme..ended up a modest 3/8 for the win. I used cnc cut channel from gw trucks for the surgery..and will graft in some sheet later to hide the scar. I used square tube underneath to assure the frame didn't hump up while curing over the patch