gotnitro?
-
Posts
4,498 -
Joined
-
Last visited
Content Type
Profiles
Forums
Events
Gallery
Everything posted by gotnitro?
-

Glue Bomb Great Dane **Finished**
gotnitro? replied to KJ790's topic in WIP: Model Trucks: Big Rigs and Heavy Equipment
Another great model saved! I can't wait to your treatment on it -
This is gonna be cool! Where ya gonna source the mcneilus /mtm mixer?
-
Gary doesn't have a website, but the photo on sourkrauts is the one I was thinking of. I'm not sure but his new castings are more off white color now not the dark gray..
-
Checked w Gary, the cab is in stock $50.00 hope this helps
-
I'm almost certain Gary Wallace sells a resin daycab Volvo. I'm just waiting for his text back..I'll let ya know. It was very reasonable price too, and knowing his parts very well done.
-
Nice start !! The engine looks fantastic and the proposed color choices sounds right for the DM
-
Autocar DC9964?
gotnitro? replied to guitarsam326's topic in WIP: Model Trucks: Big Rigs and Heavy Equipment
What a beast!!! Very cool -
PayStar Service Truck My Way..
gotnitro? replied to yh70's topic in WIP: Model Trucks: Big Rigs and Heavy Equipment
Great scratch built details! Can't wait to see what else you add to the service body! Awesome work on the cab too -
1974 Kenworth W900
gotnitro? replied to KJ790's topic in WIP: Model Trucks: Big Rigs and Heavy Equipment
Another awesome build you have going KJ !! Cool how small tweaks can give the trucks a completely new look and capturing that Ole school look along the way ! Very nice Hope your vacation was a great time too! -
Grandpoppa K-Wopper 123
gotnitro? replied to OlSchoolRedo's topic in Model Trucks: Big Rigs and Heavy Equipment
Nice looking k whopper! The combo looks great together -
Many of the trailer manufacturer websites have drawings online for thier products. I know of a few builders that utilized this for their builds, makes it much easier than trying to designing everything yourself. The cool part is you can scale the drawing by using say a known size like a tire..then print it for your own drawings. Jeff
-
Cool hauler idea you have going, really like the swept look of the front .
-
Oh man looks at that Autocar !!that's a great pic of a classic still working !!that baby has seen a few miles Nice pete too! My buddy just started driving a KW W900 and East frameless dump trailer , I'll try to grab a few pics.
-
Which Build Next? IH S Hood
gotnitro? replied to Warren D's topic in General Automotive Talk (Trucks and Cars)
I second that! Dump w plow would look great together. If ya decide to build that , drop me a pm I have the Montone dump box and hardware from the autocar kit I'm not using. That would work well on the back. -
AUTOCAR TRACTOR.
gotnitro? replied to Andrew Howard's topic in Model Trucks: Big Rigs and Heavy Equipment
Very nice !! -
Certainly a beautiful truck that presents itself well! Just my opinion, but all of the attendees were winners..they all drove Brockway trucks! Did anyone notice the "other"truck that arrived and was parked around the corner? Guess the bulldog felt left out
-
a few pics from today's Brockway truck show in Cortland NY. There was an excellent turnout considering the high , muggy temps and forecast rain. The forecast didn't dampen the celebration !!! This single drive really looked amazing.. The high temps made everyone comment about the other common NY weather around this snow plow! My personal favorite..finally seeing the infamous TWIN golden HUSKIES !!! That could only mean one thing ....HUSKI DRIVE !! Jeff
-
Mack DMM W Theam conveyor
gotnitro? replied to gotnitro?'s topic in WIP: Model Trucks: Big Rigs and Heavy Equipment
Thanks on the comments about my daughter, she's been keeping us on our toes! I forgot what 2 hrs sleep felt like...finally sleeping a full night! Glad everyone likes the progress, I started the first of the 3 folding sections, basically just square tubing for the boom body and telescopic tubing for the hydraulic cylinder that extends the sections . Found a couple pics didn't show the detail I'd hoped, so it's back to the plant ! Jeff
-
Kenworth heavy hauler
gotnitro? replied to Cummins1212's topic in WIP: Model Trucks: Big Rigs and Heavy Equipment
Thanks that makes perfect sense w the gears and power dividers..something I hadn't considered. -
Kenworth heavy hauler
gotnitro? replied to Cummins1212's topic in WIP: Model Trucks: Big Rigs and Heavy Equipment
Fantastic work going on so far!! If I may ask a rookie question, whats the purpose of the jeep? I'm assuming weight distribution for larger loads, but never being around the truck hauling field, I wanted to learn more. -
Mack DMM W Theam conveyor
gotnitro? replied to gotnitro?'s topic in WIP: Model Trucks: Big Rigs and Heavy Equipment
Thanks everyone, I keep all the dangers picked up and the room is upstairs away from her ...for now! She certainly makes sure to grab my attention every chance she gets. ..I think I'm trained already! -
Mack DMM W Theam conveyor
gotnitro? replied to gotnitro?'s topic in WIP: Model Trucks: Big Rigs and Heavy Equipment
Thanks everyone, I appreciate the feedback !! I had a surprise last night while working on a few parts. My little girl came and hung out , so I stashed all the toxic stuff and found a few toys for her to play with. Dan- about the truck, the DMM is usually a twin steer heavy duty truck. They also built several in single front axle, but normally all have all wheel drive capability. This truck is a 6X6. The Theam conveyor is a bolt on rear mounted assembly, allowing more flexibility to placing the cement. The unfolded belt on this model is around 40 ft. The cool part is the ability to swing the entire unit getting into tighter places then a "normal" mixer allows. I just received a large box from Egg Harbor so I'll have another update shortly Jeff -
Very cool !!
-
Mack DMM W Theam conveyor
gotnitro? replied to gotnitro?'s topic in WIP: Model Trucks: Big Rigs and Heavy Equipment
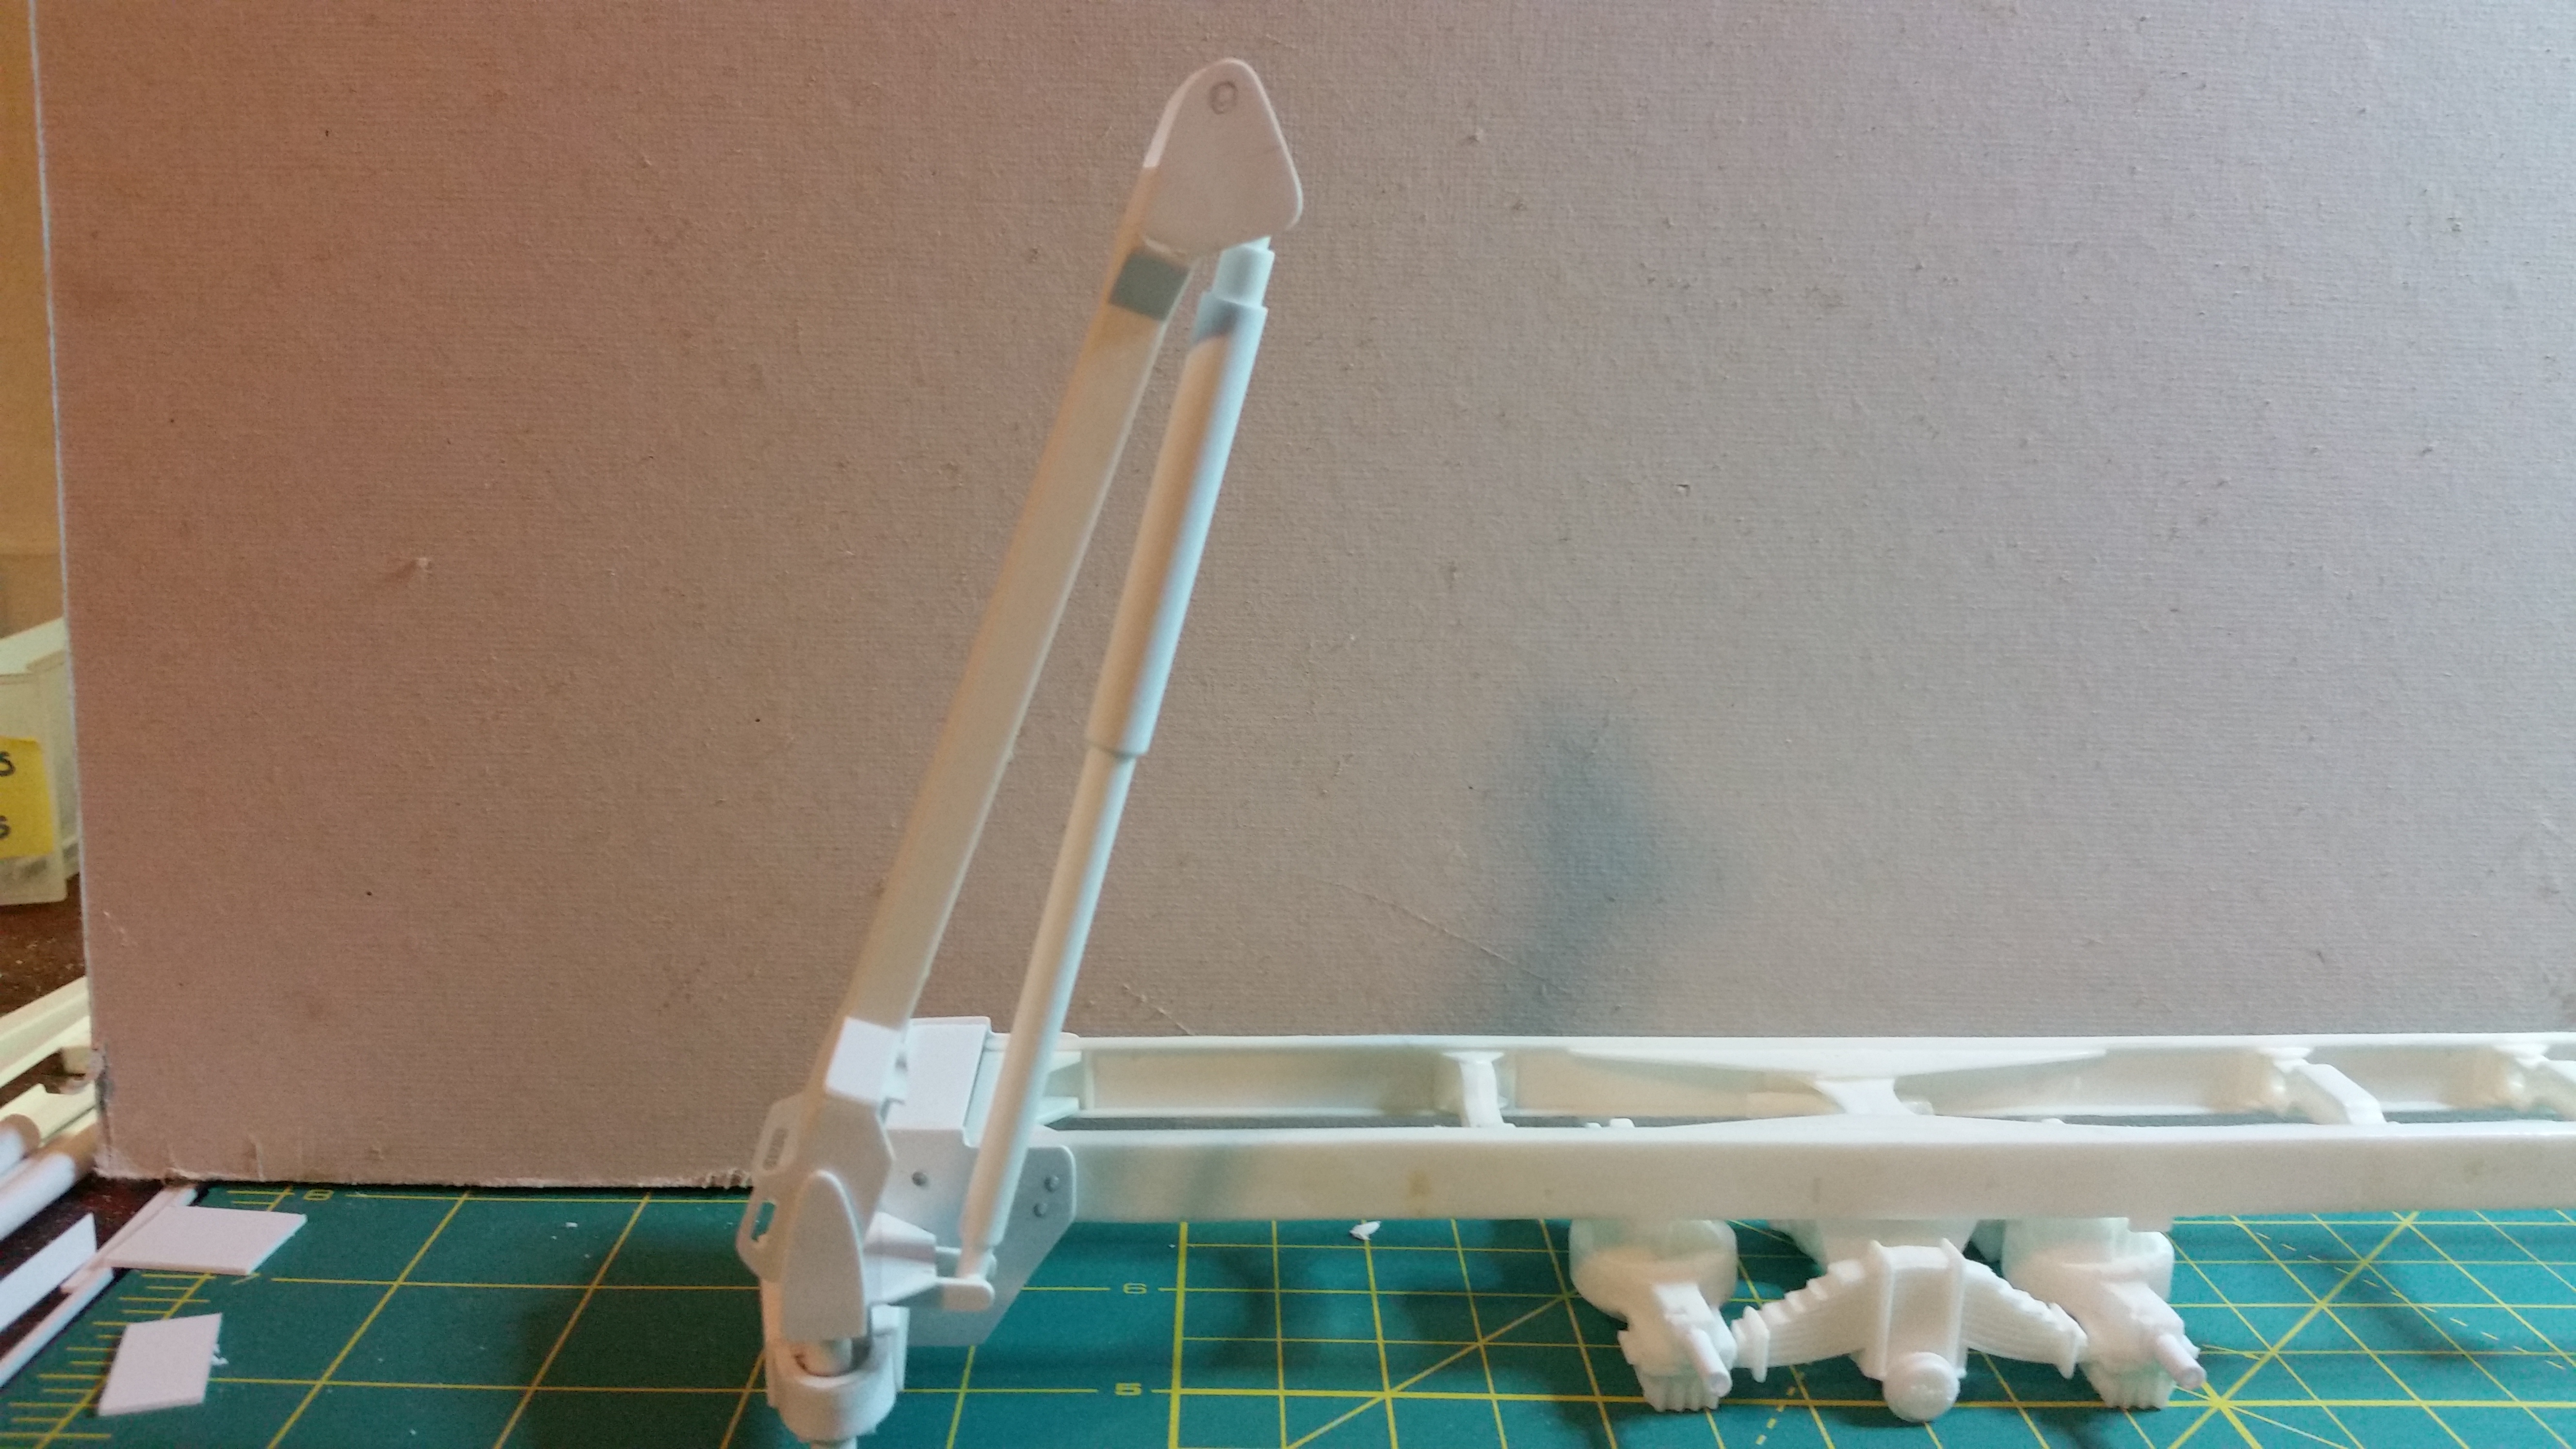
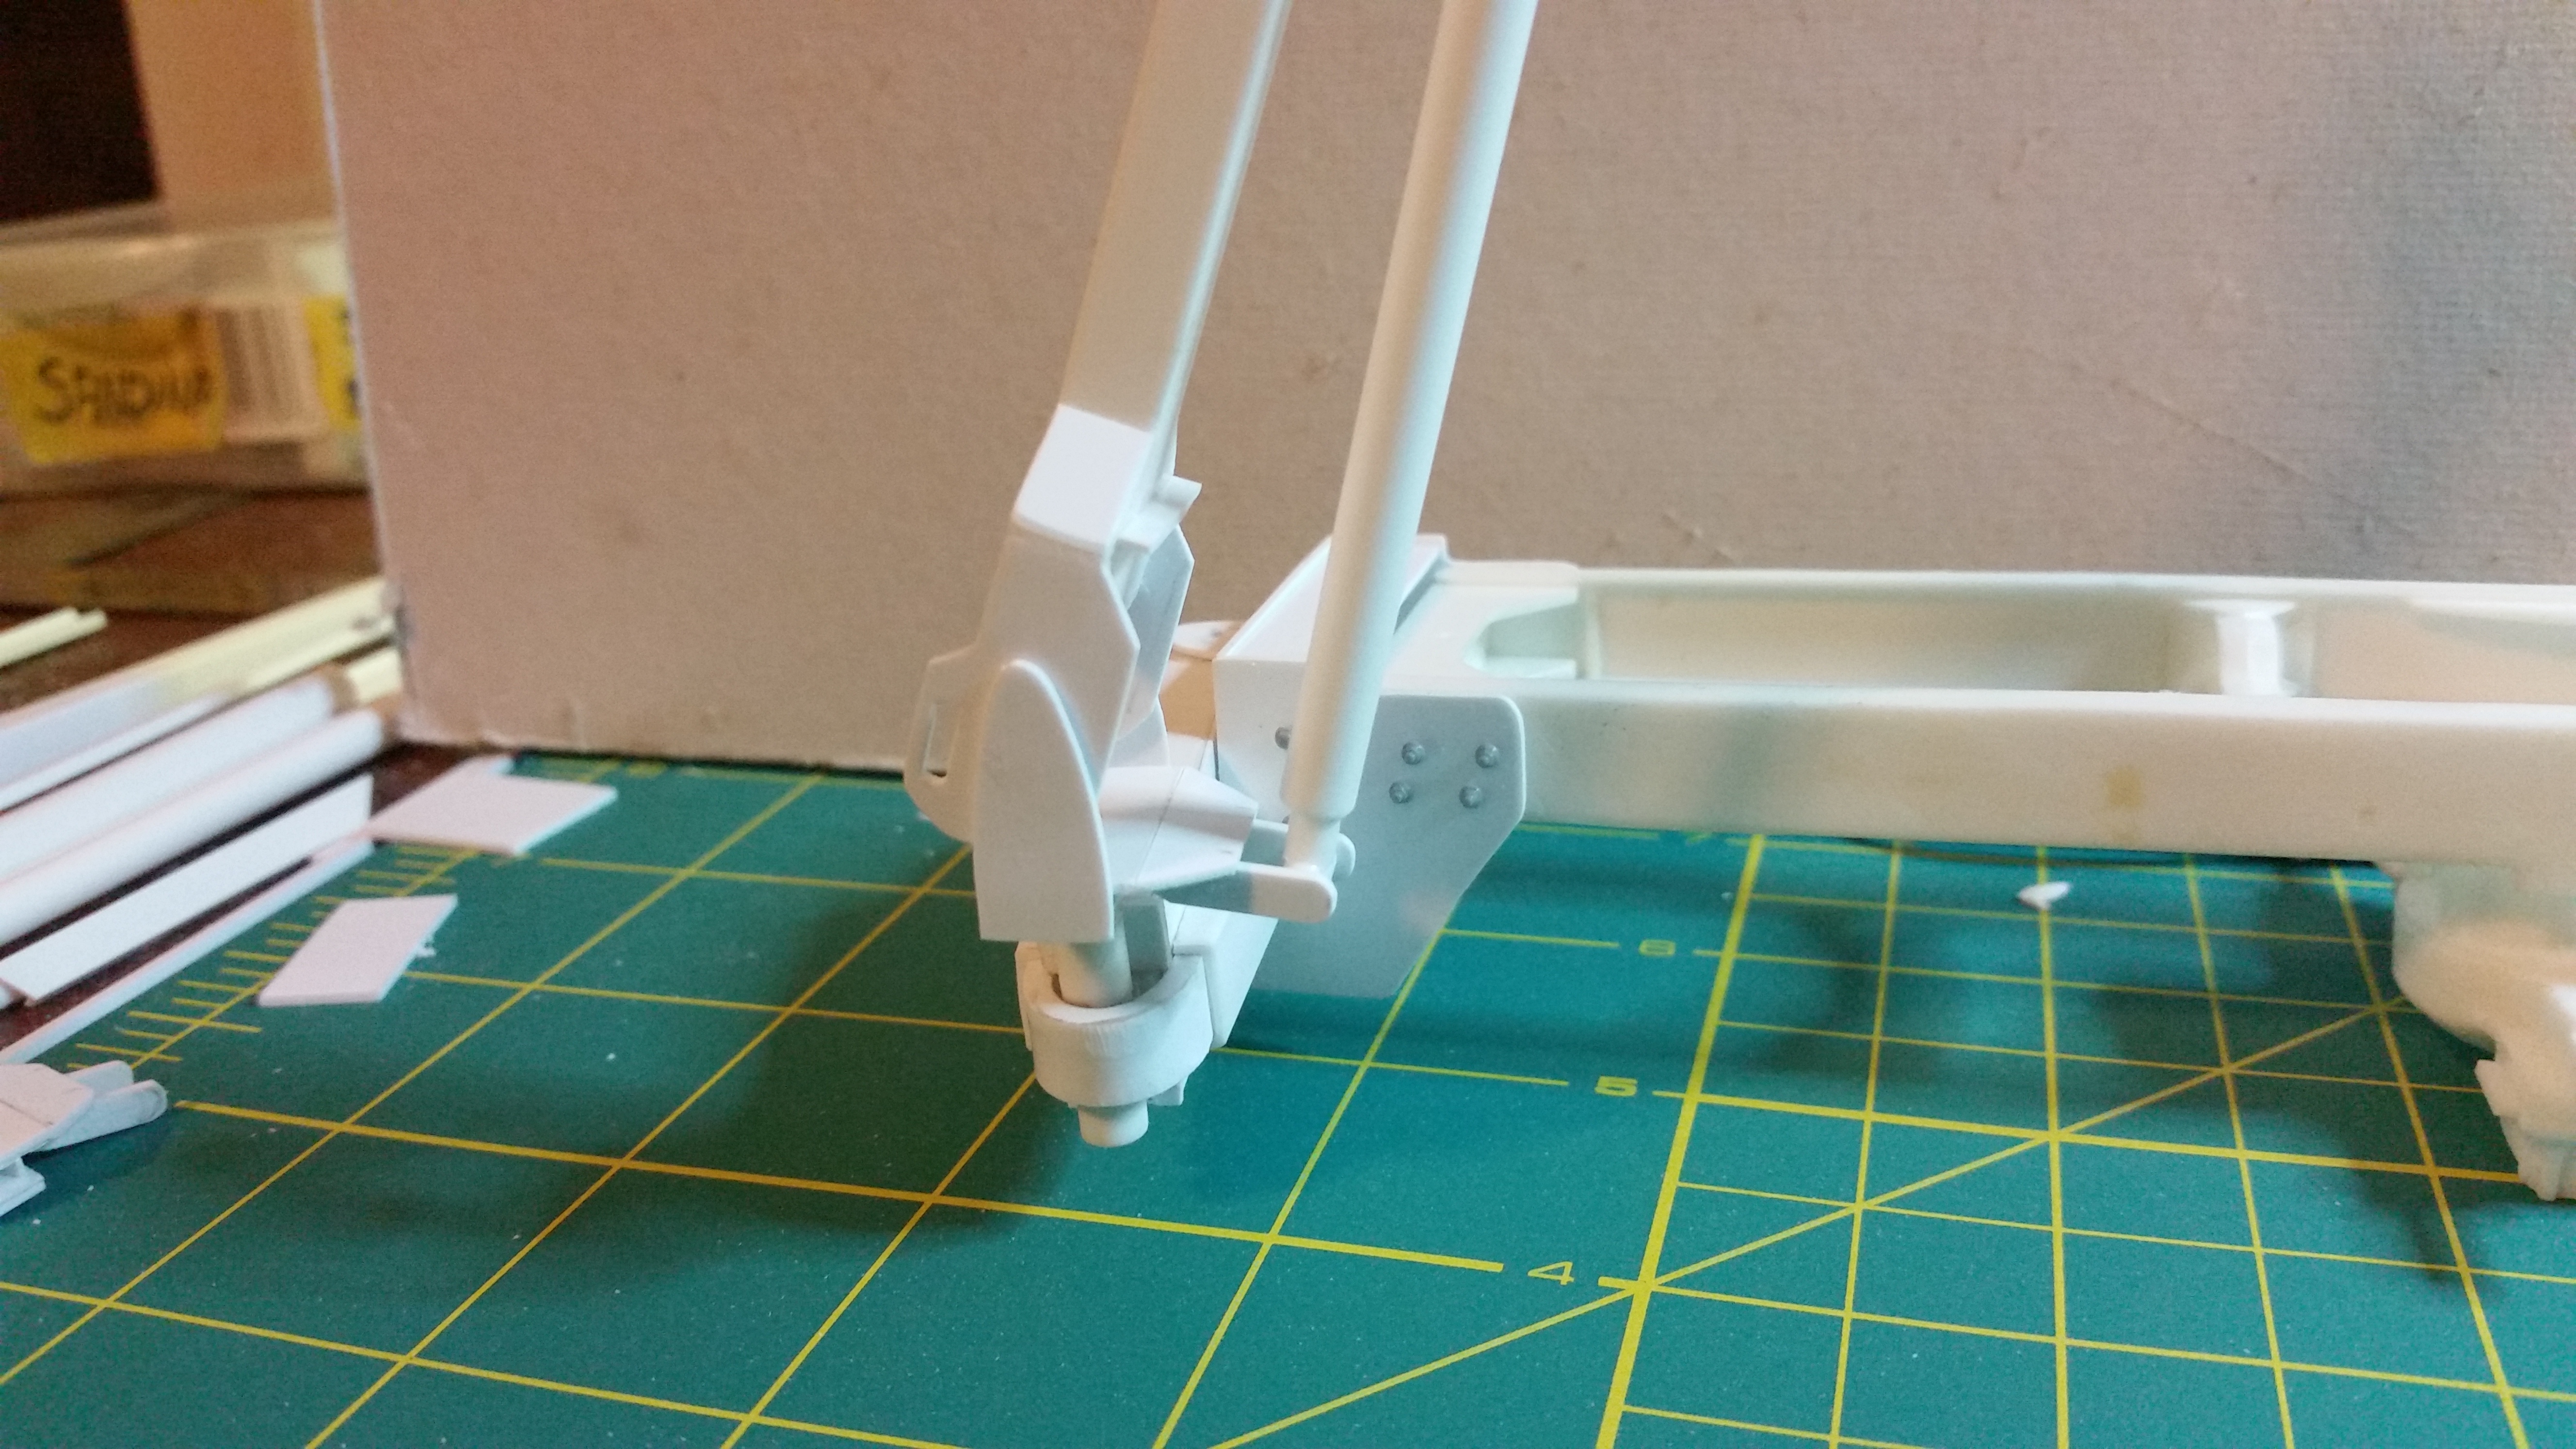
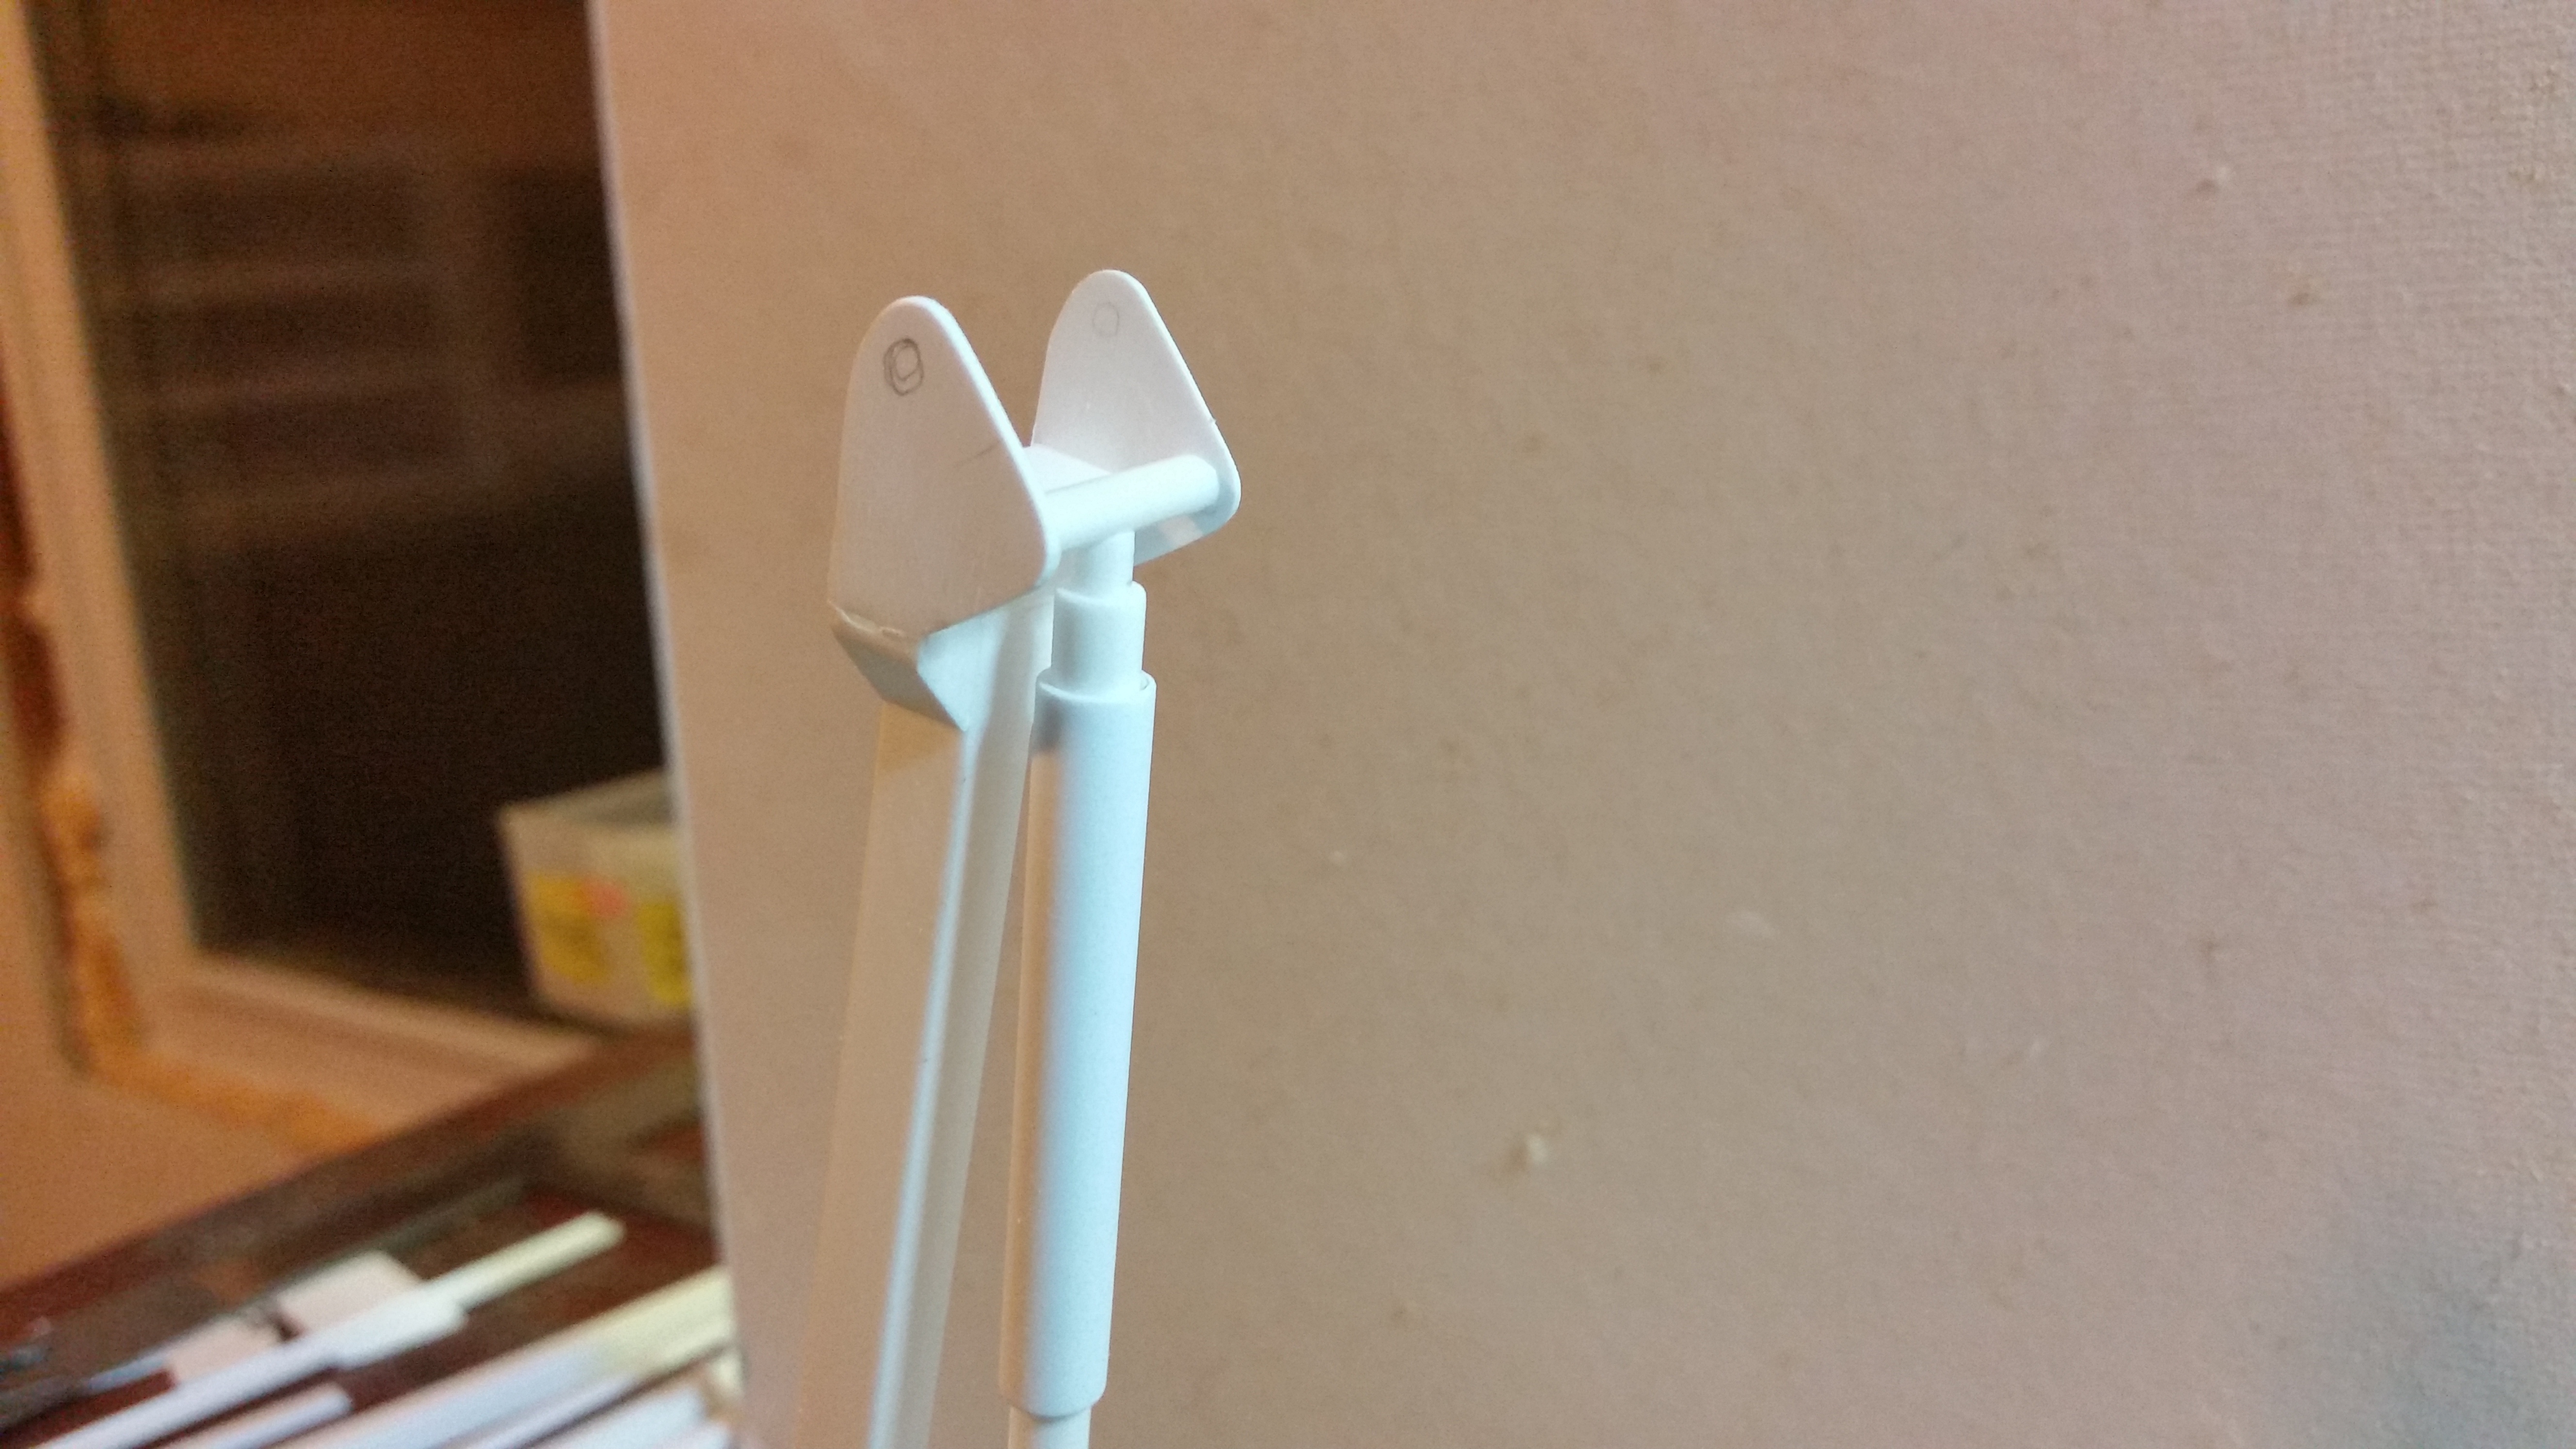
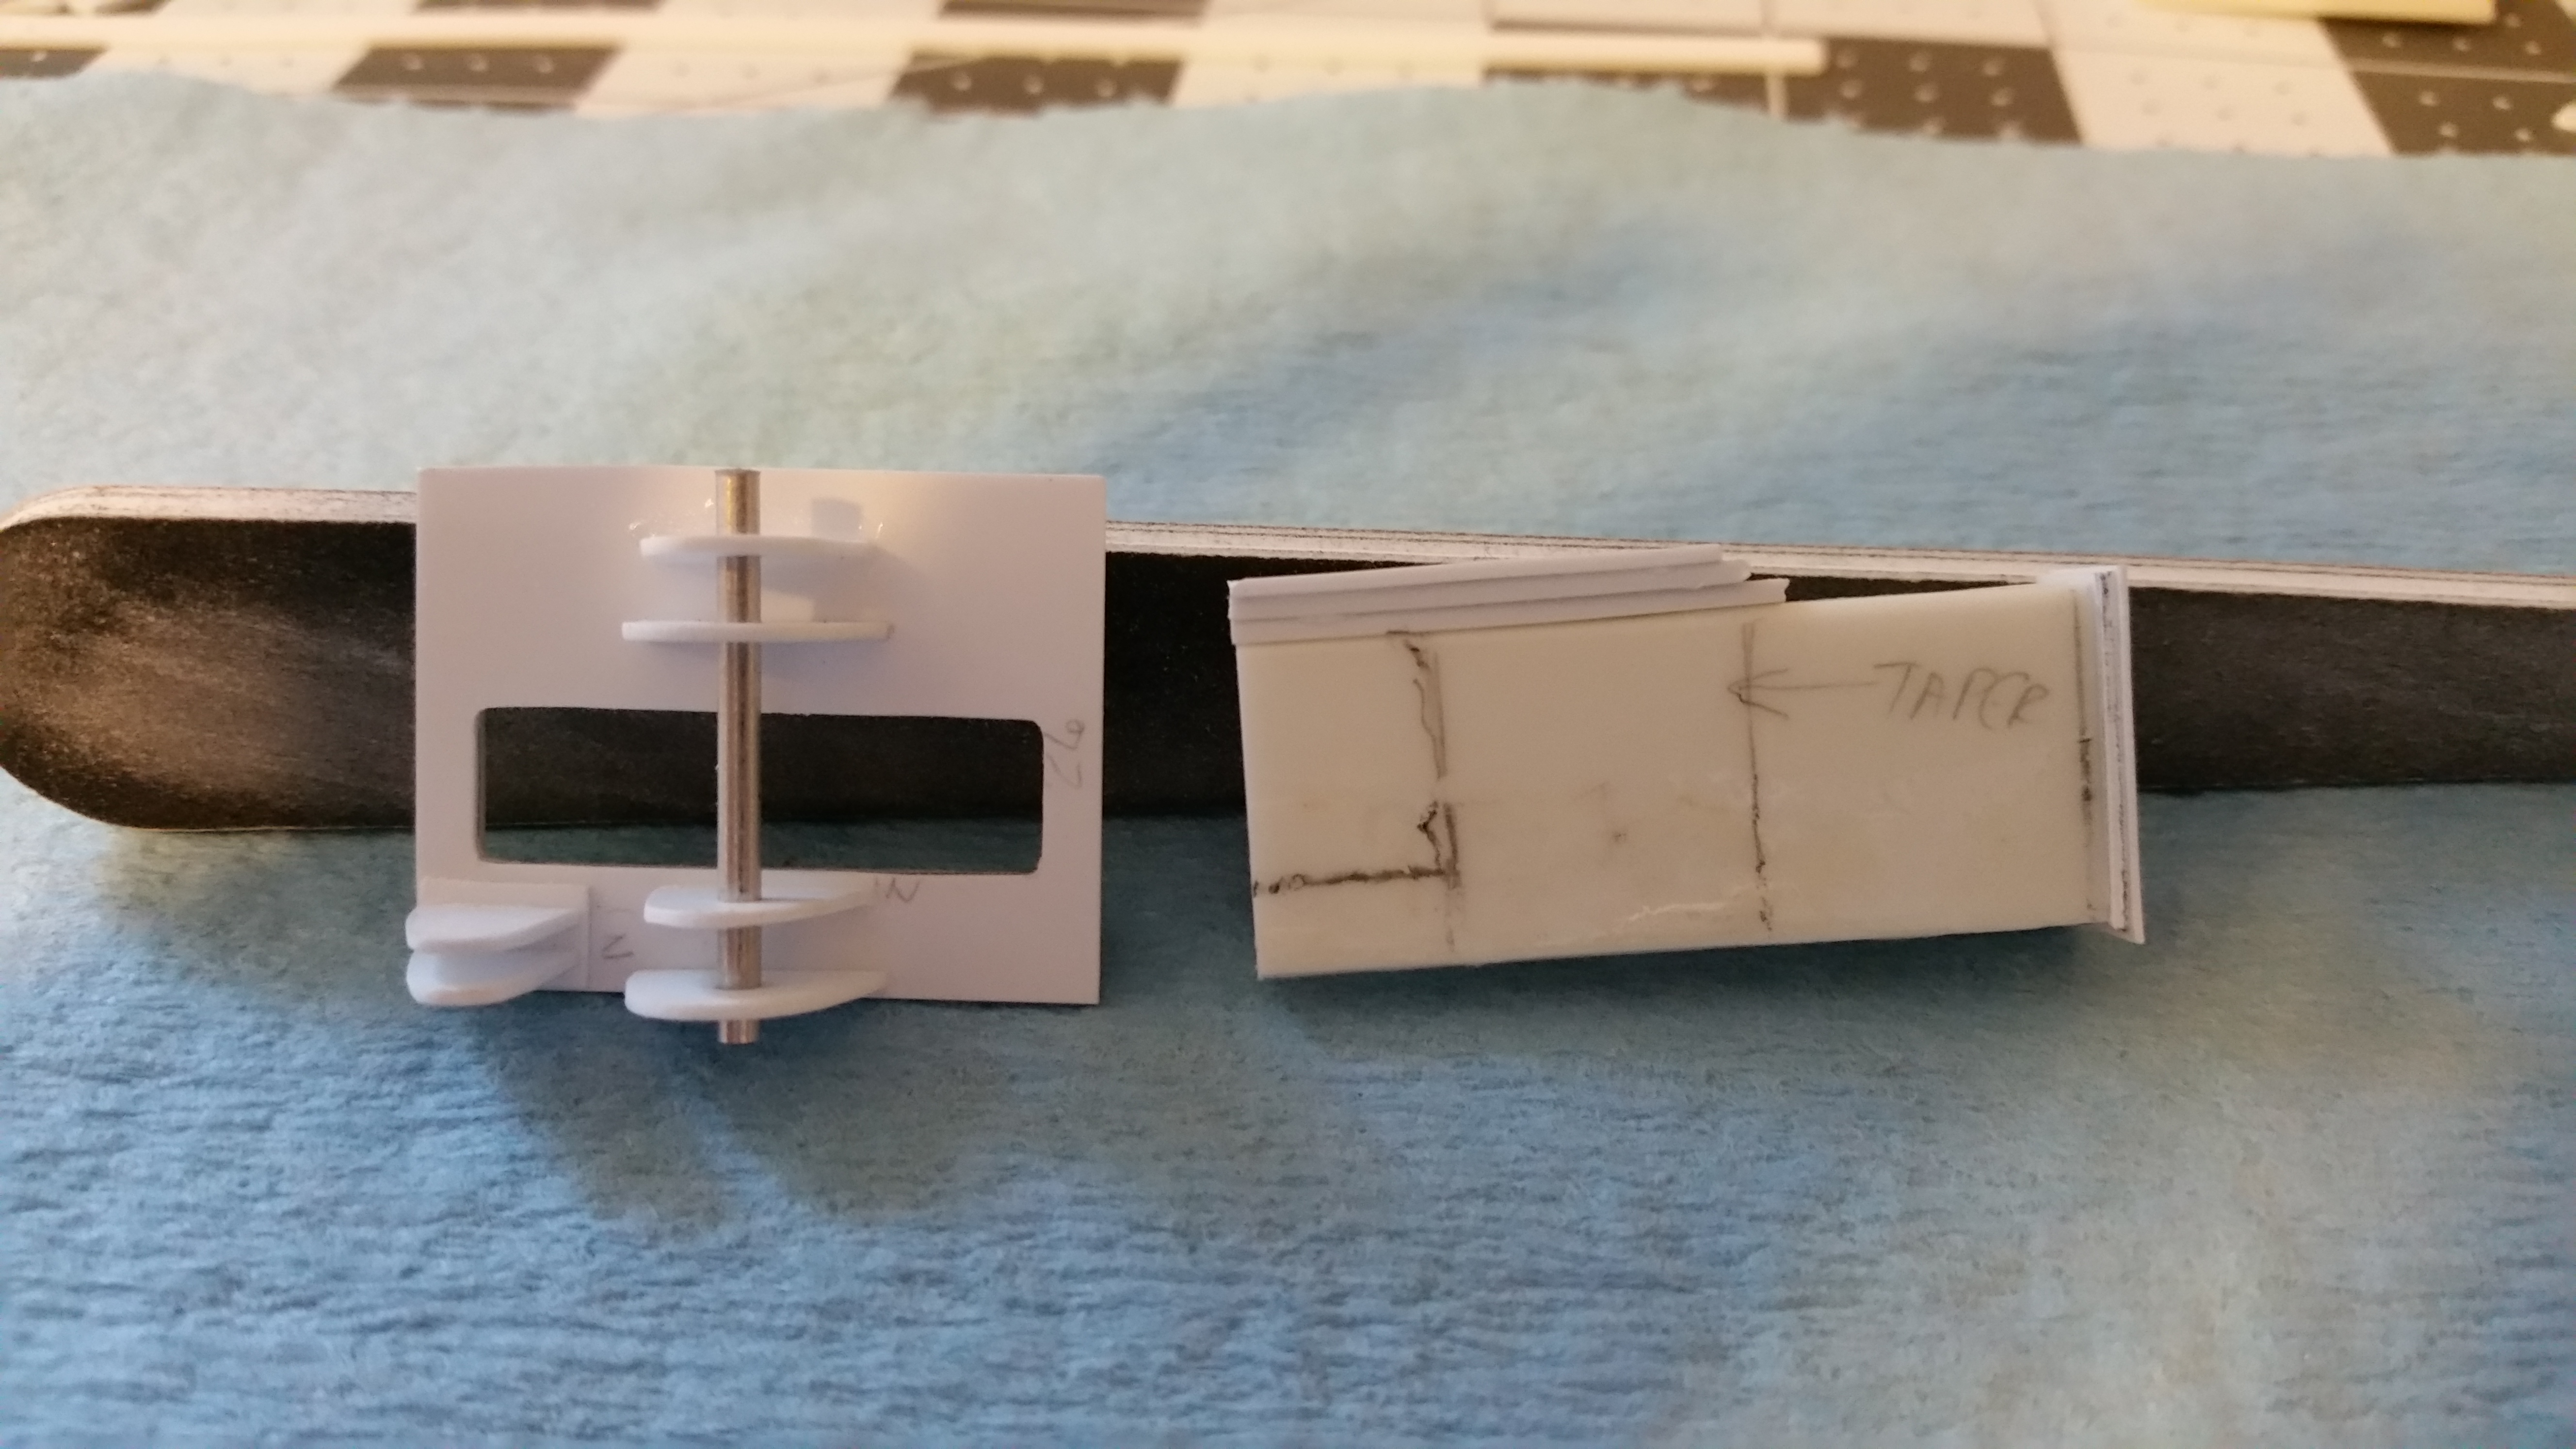
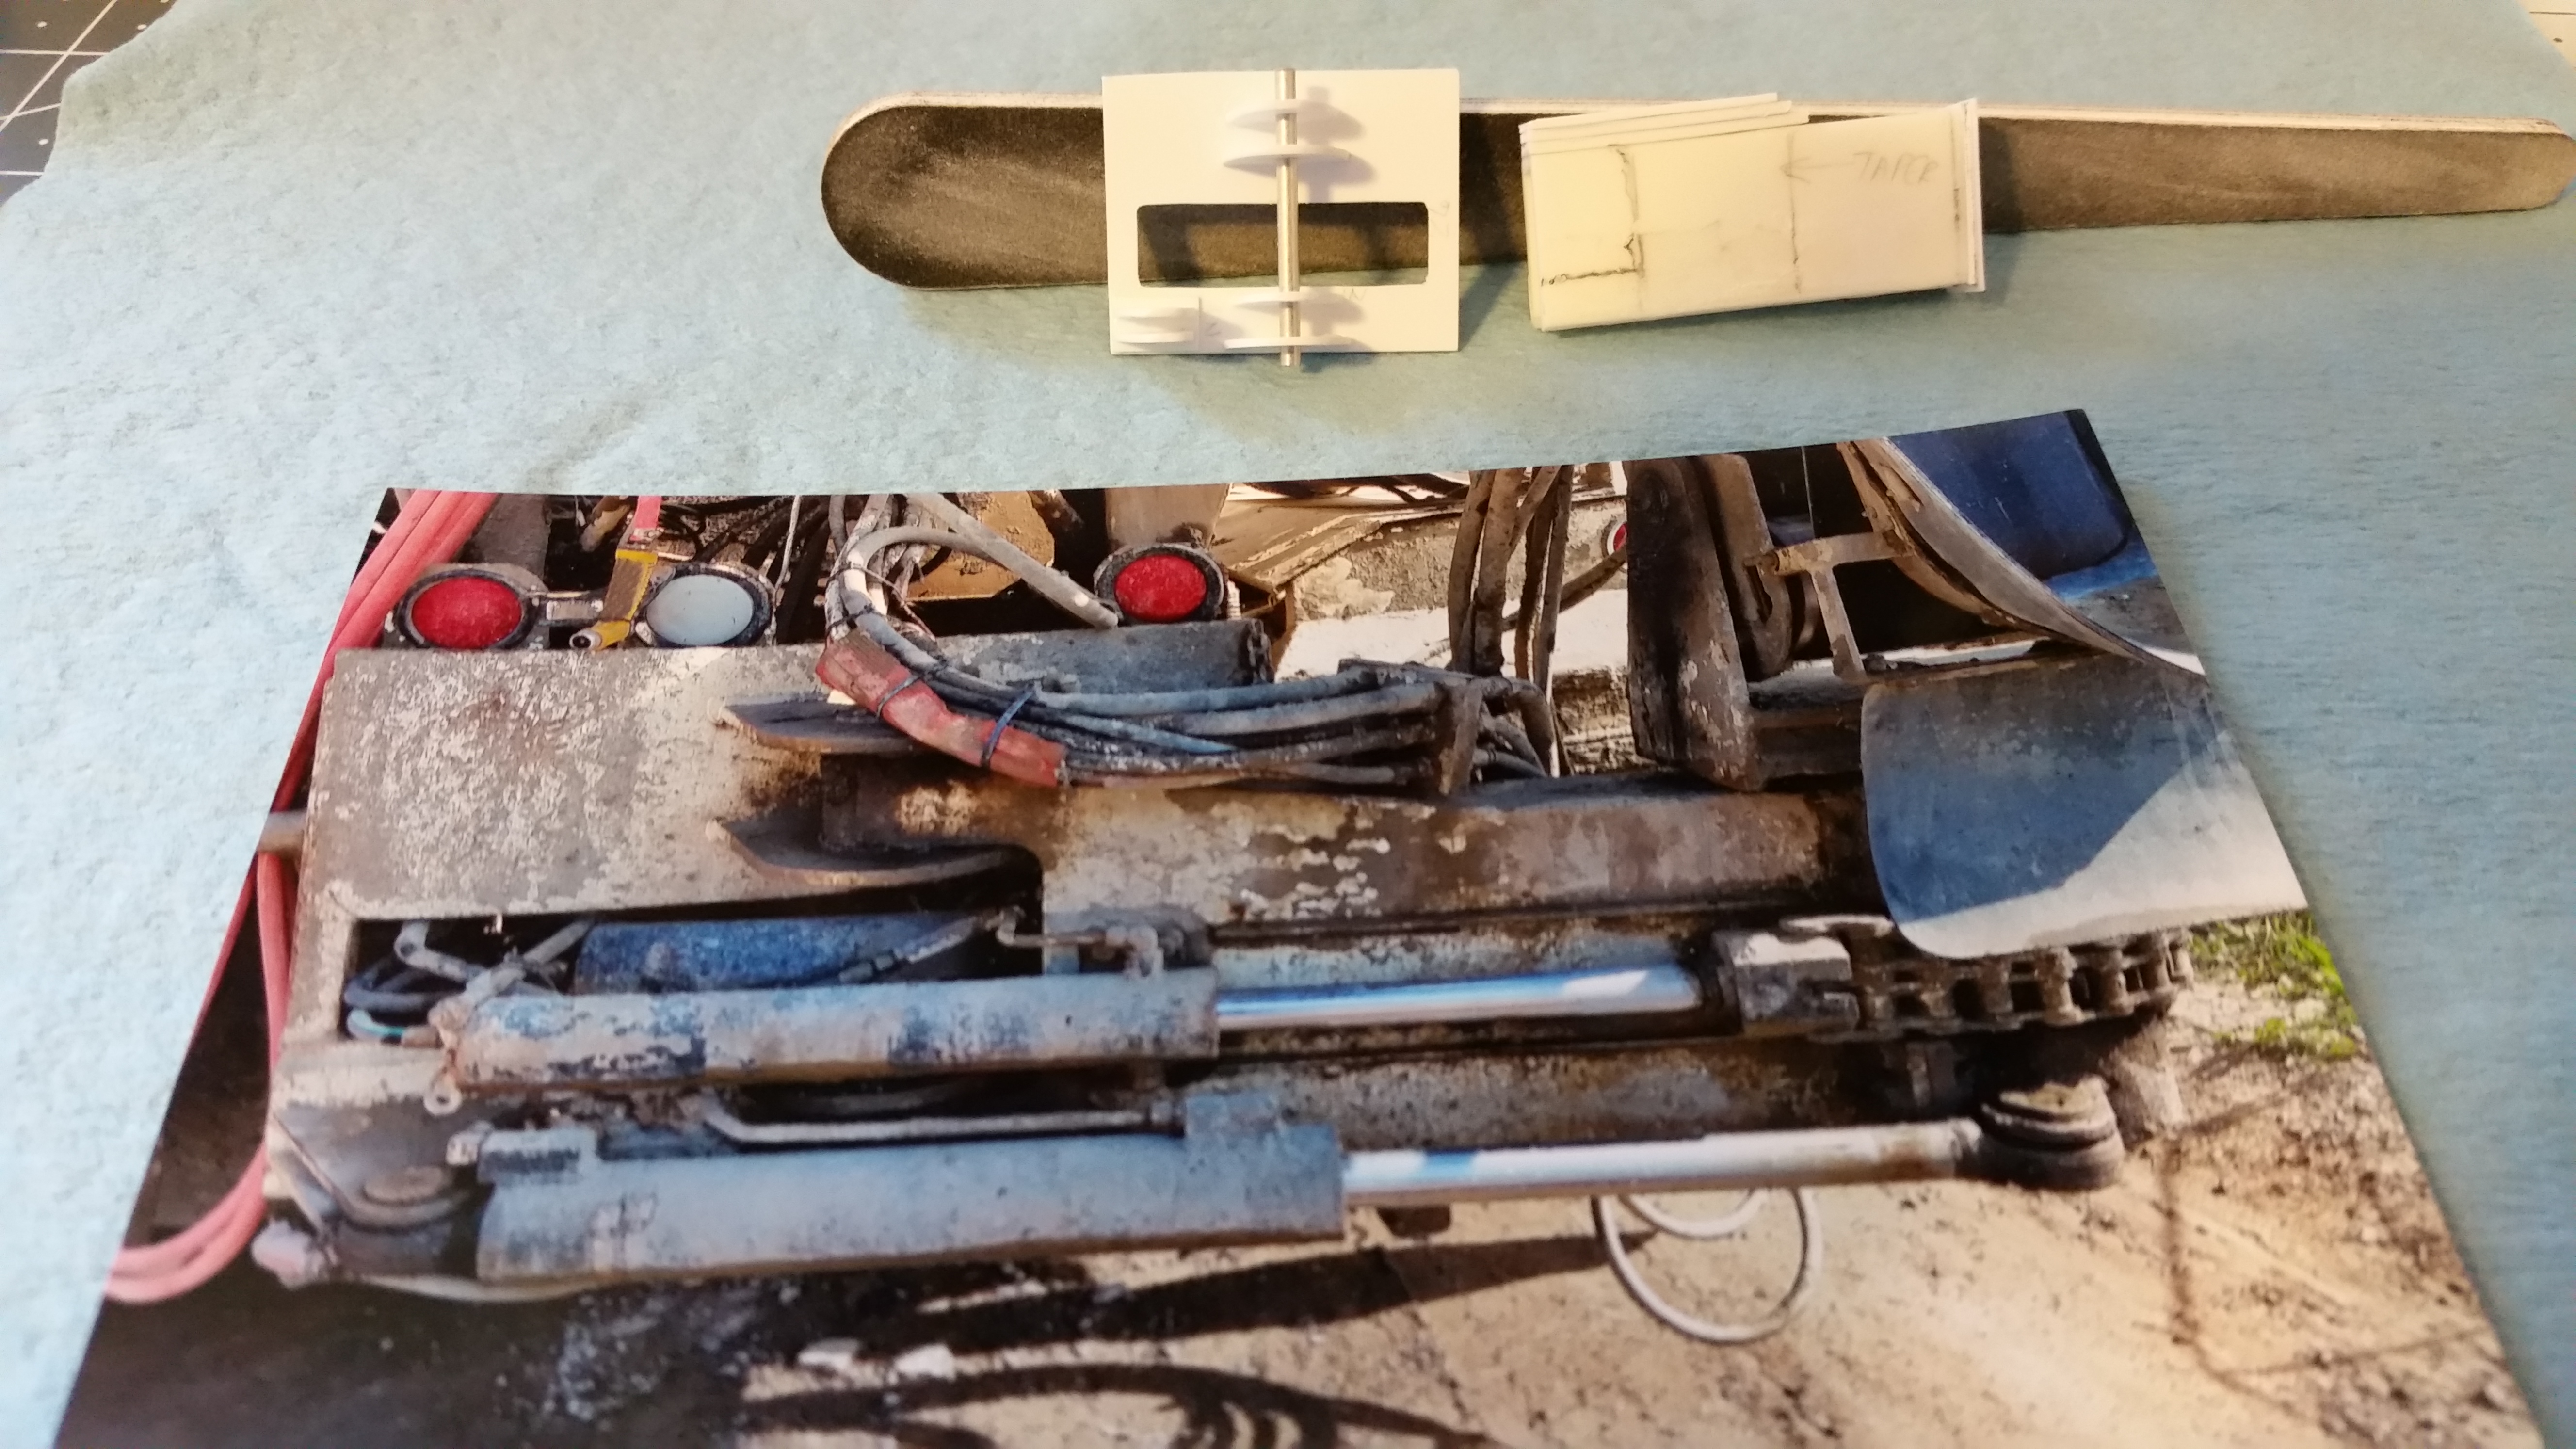
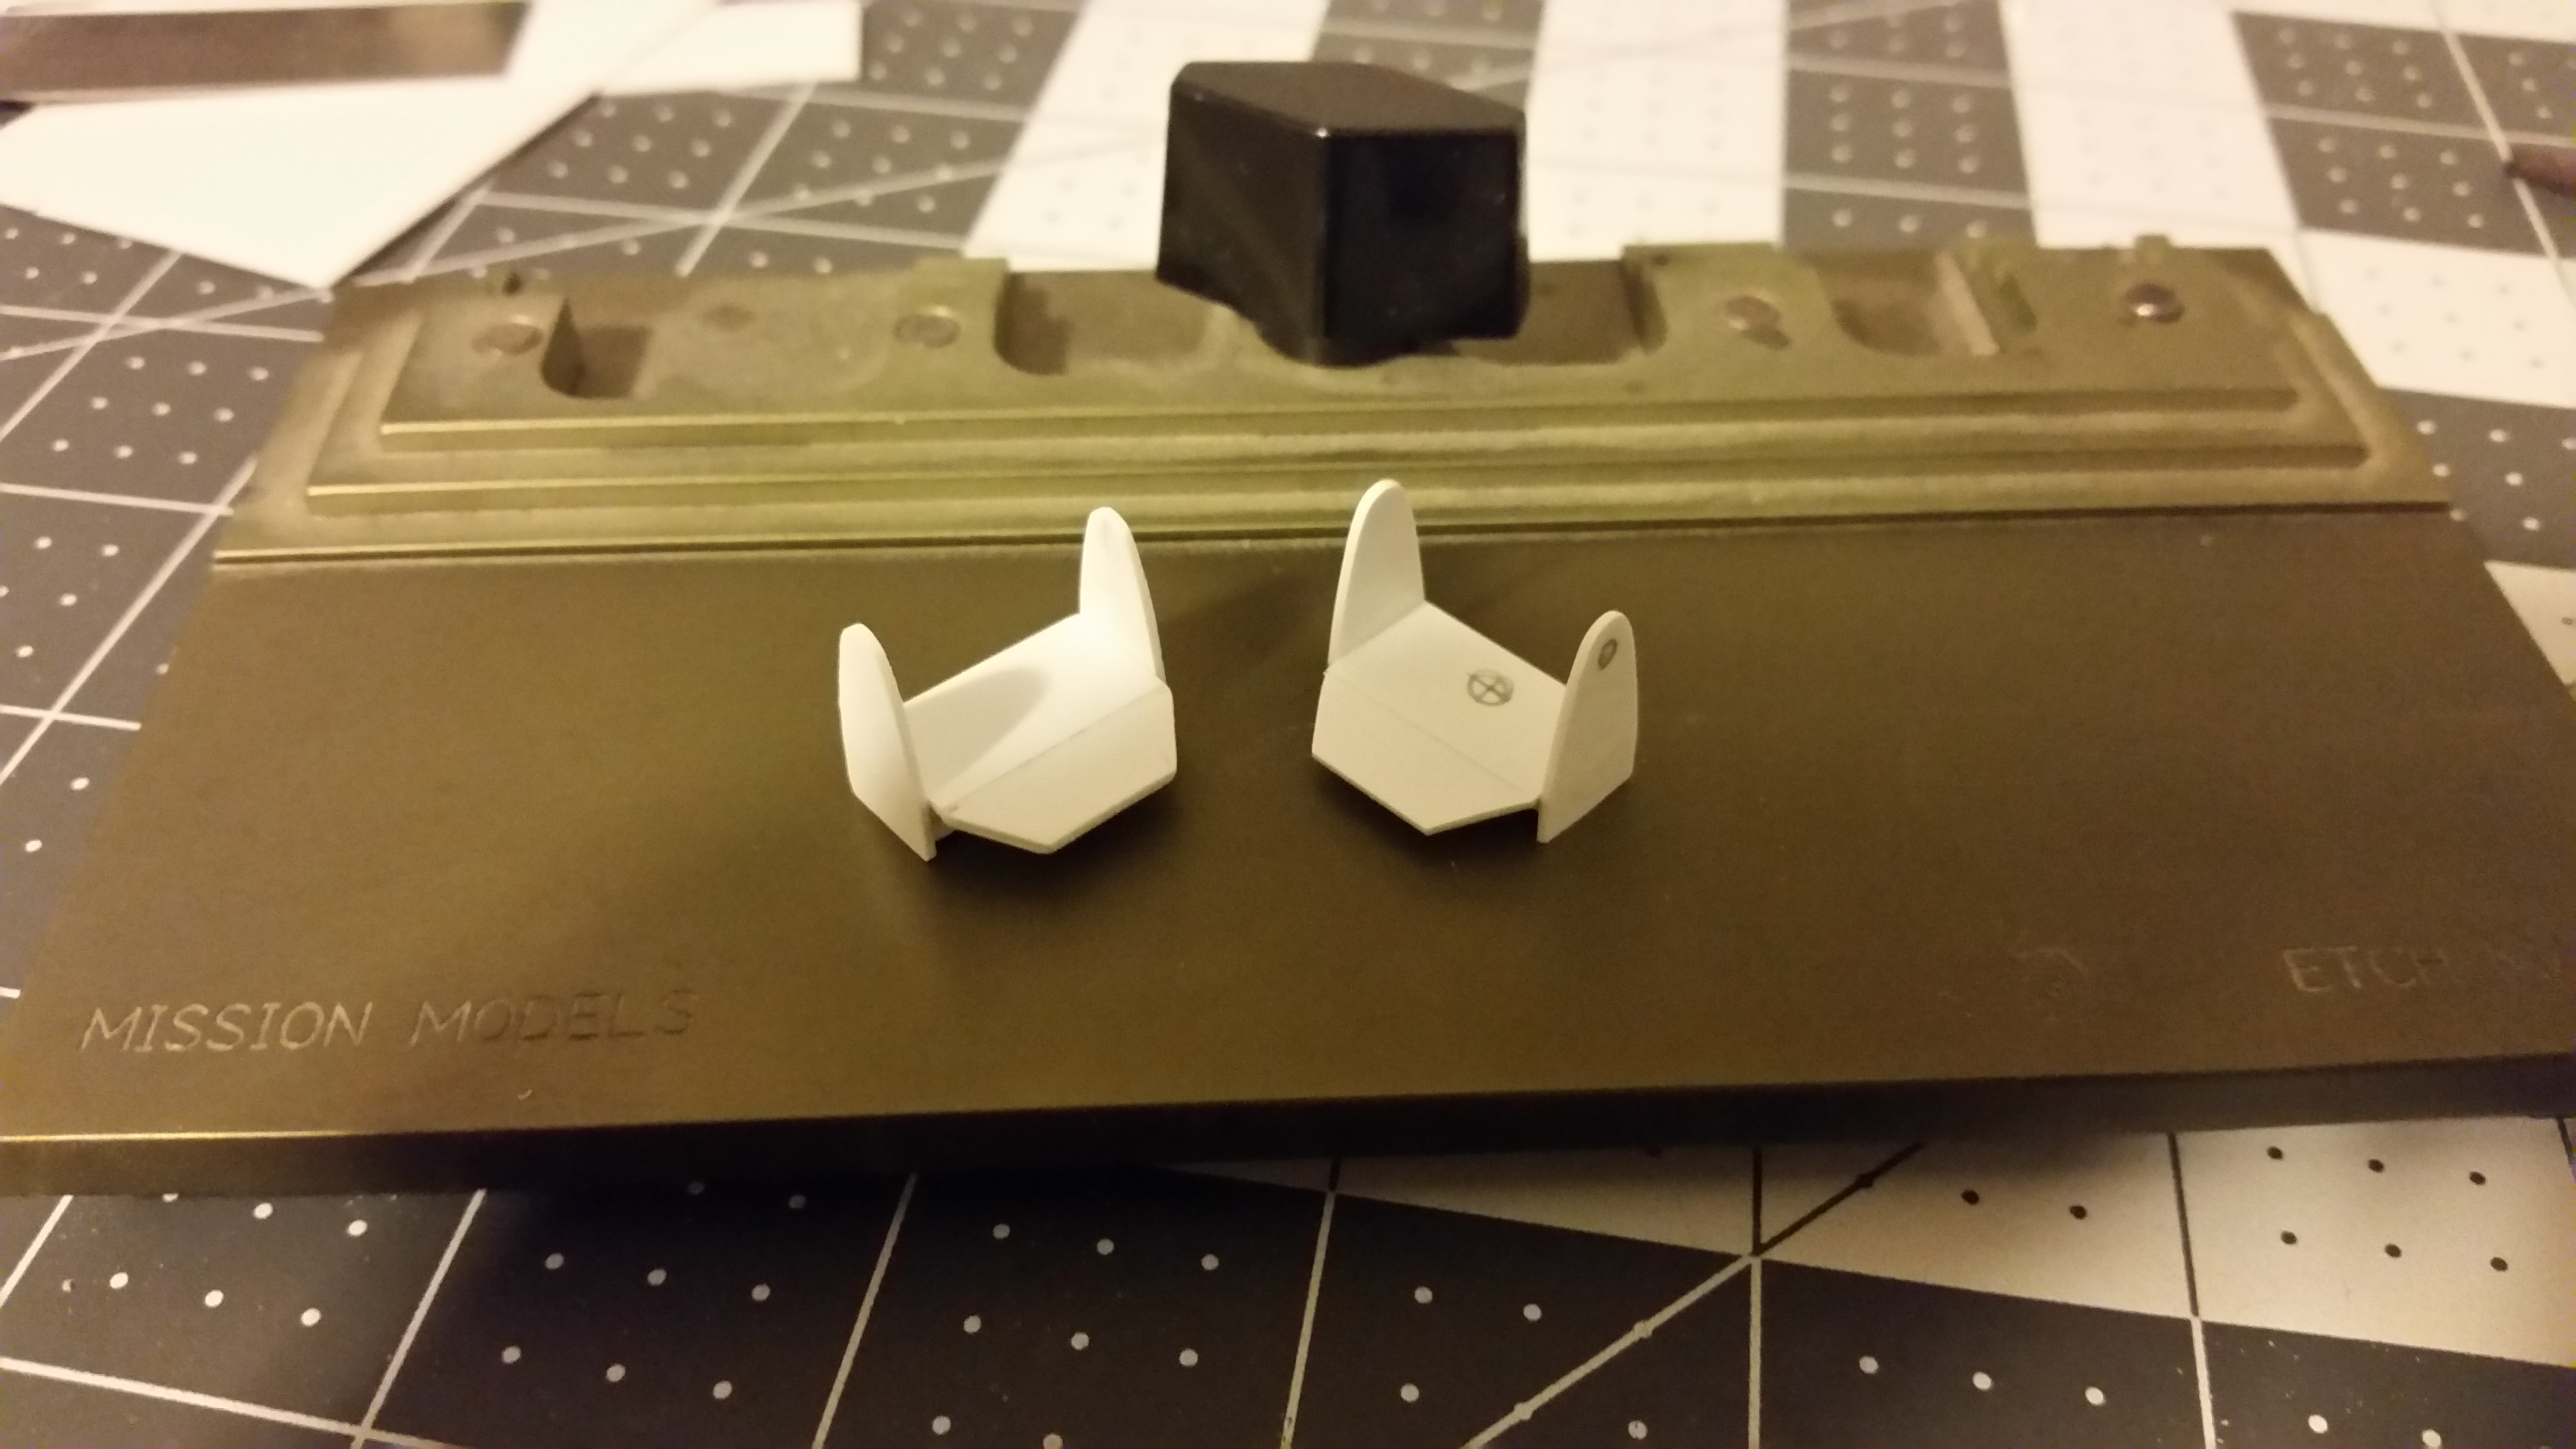
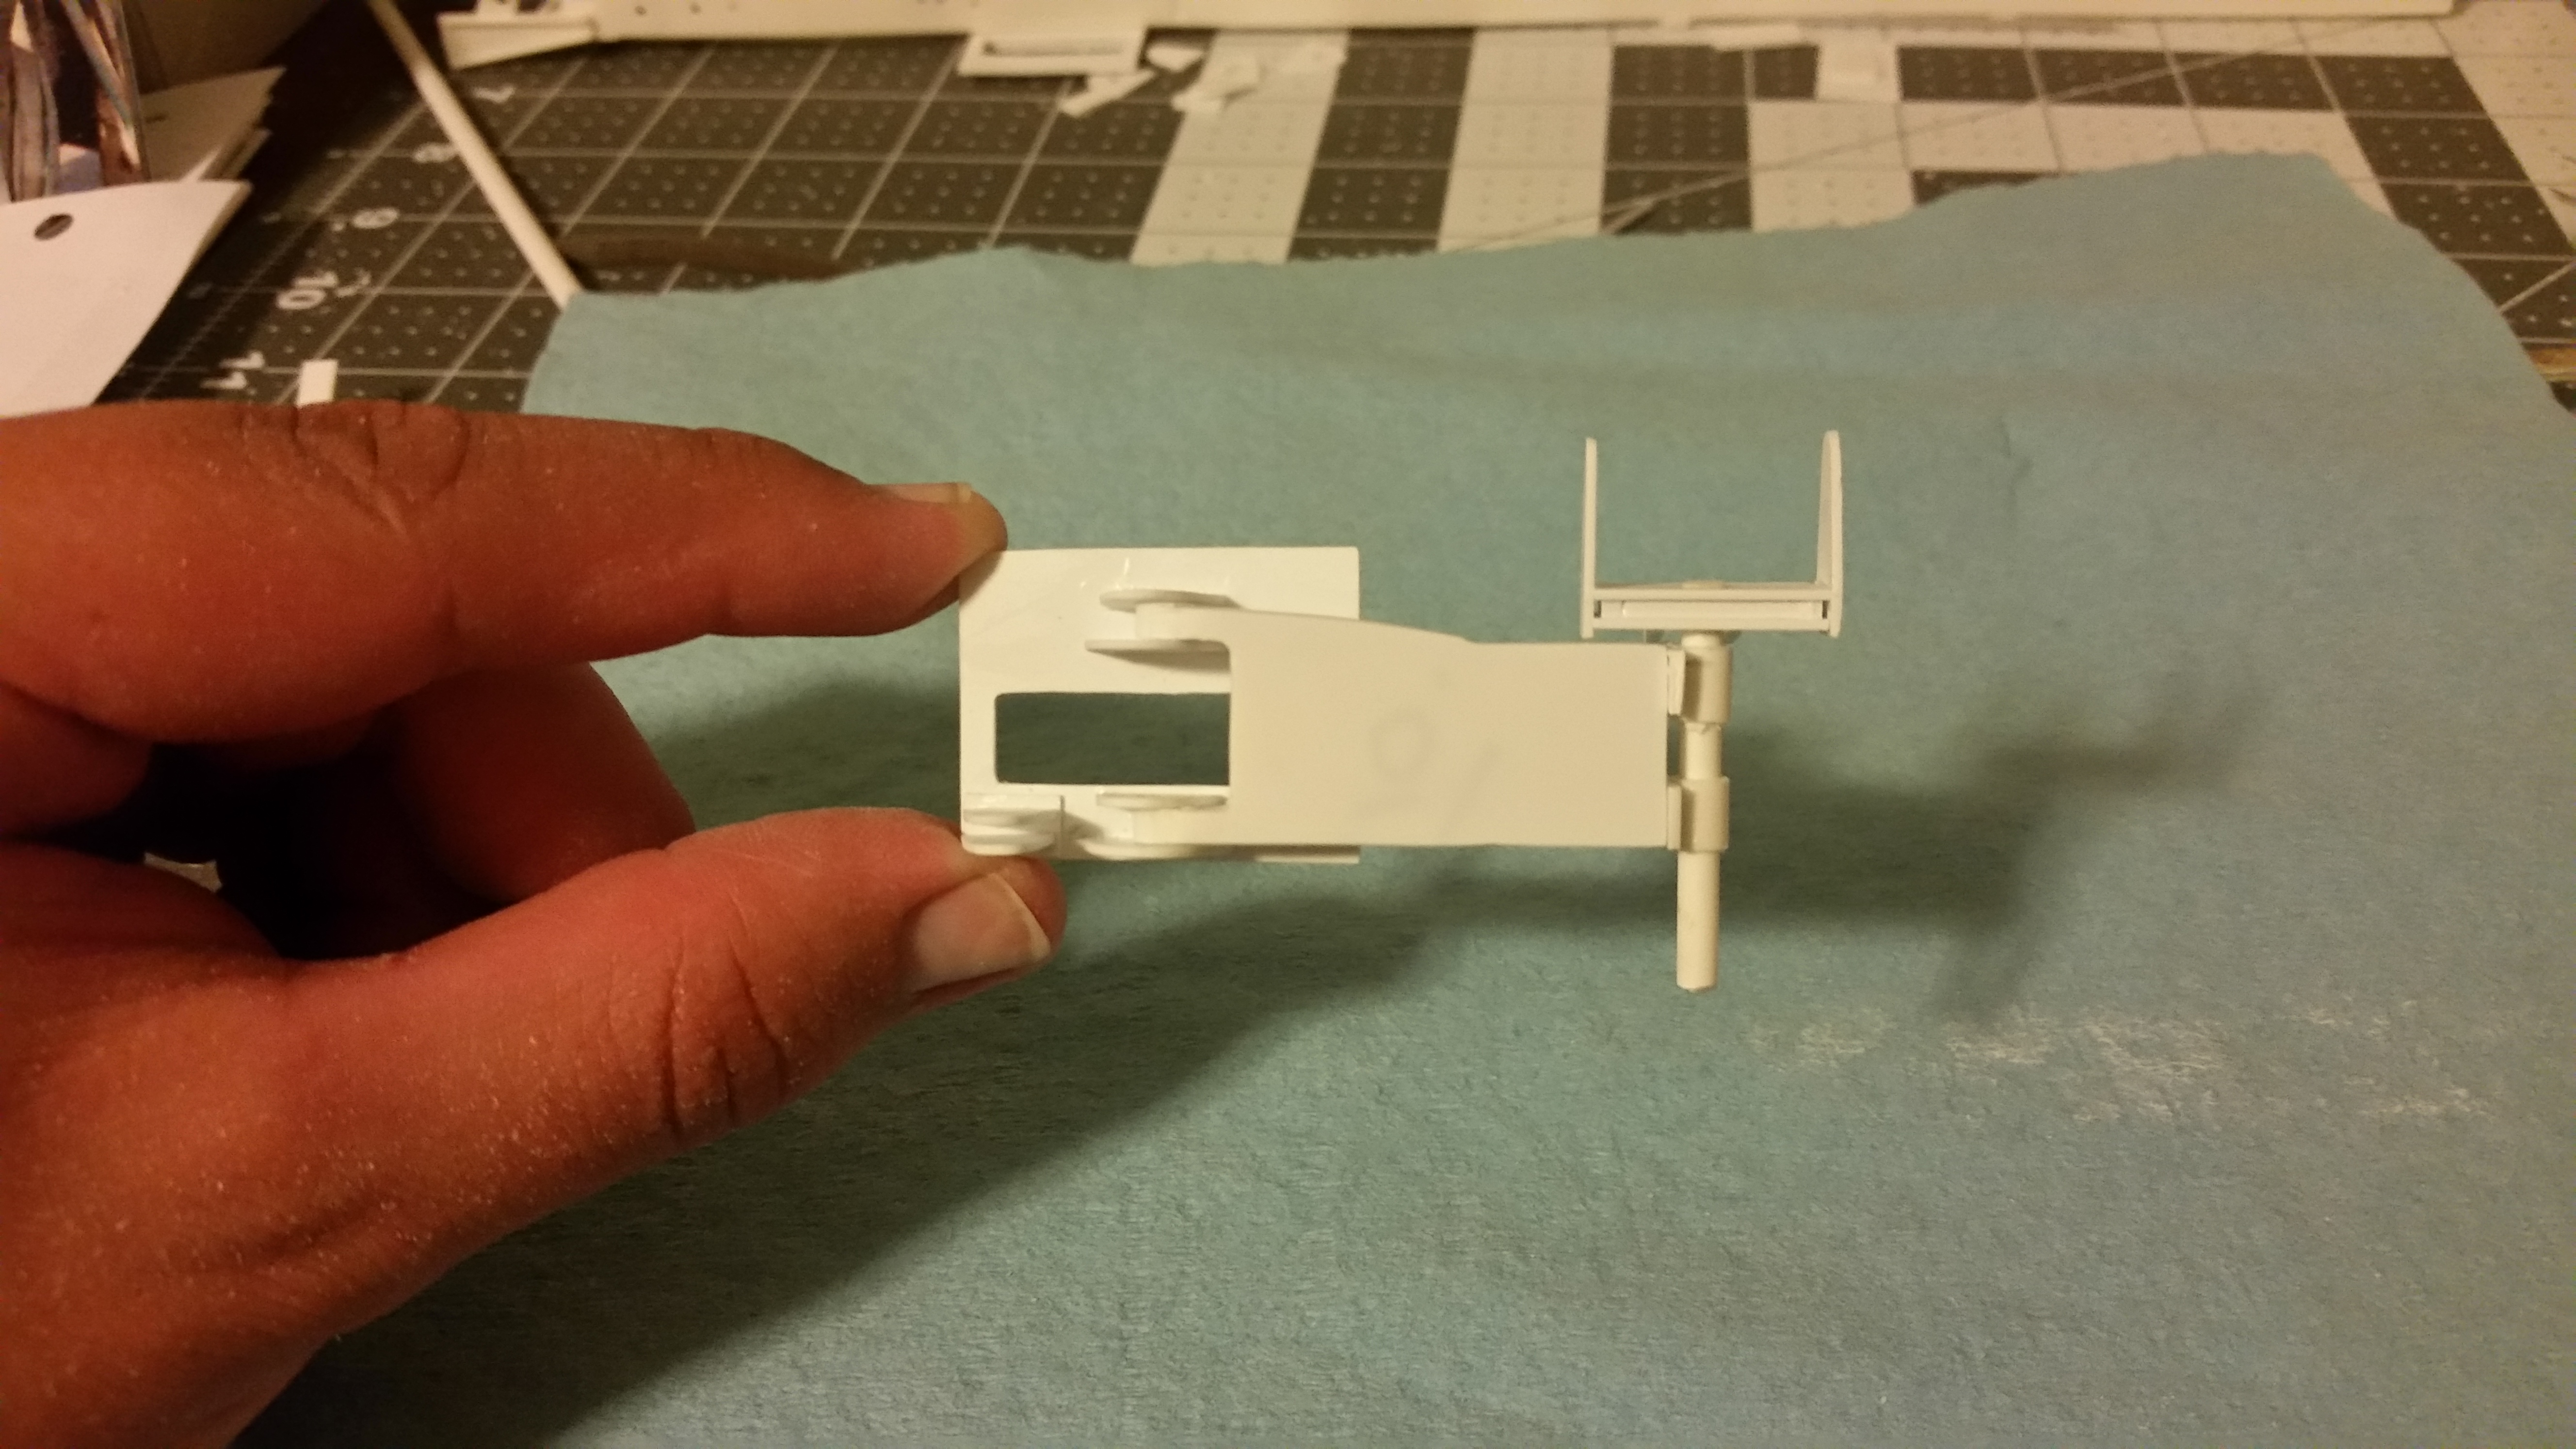
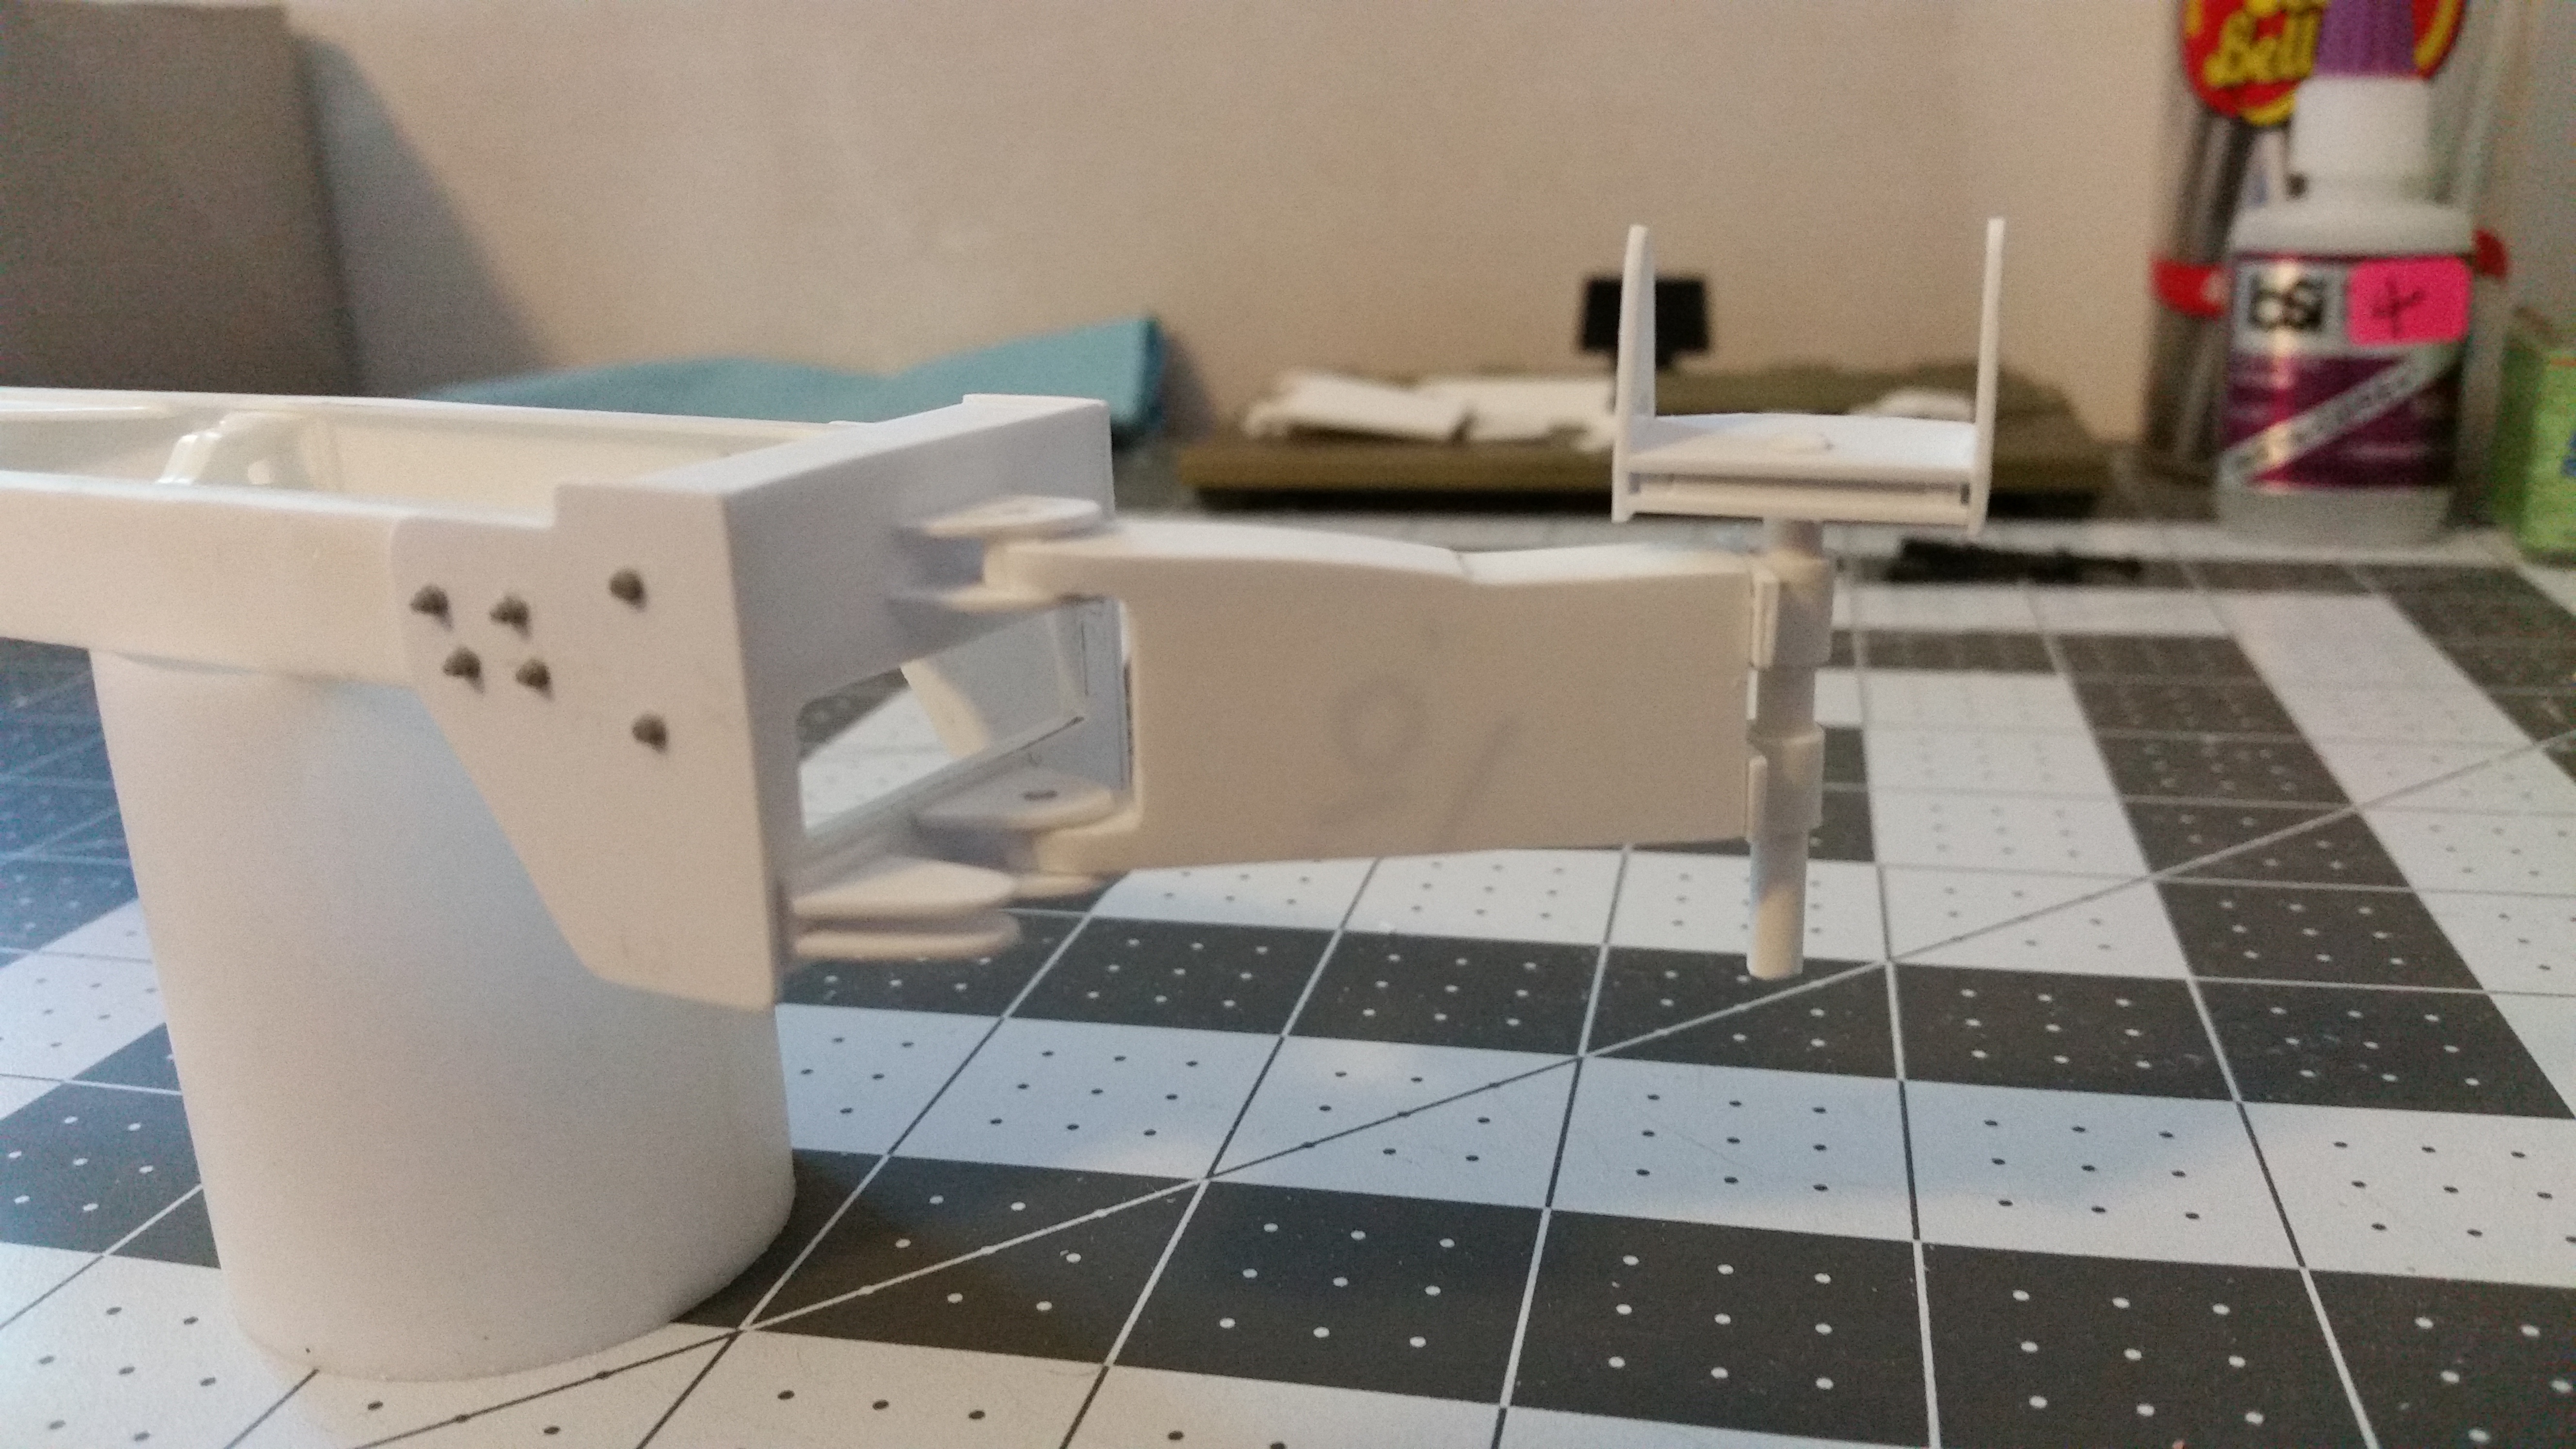
I started the main mount for the conveyor using .030 sheet. A few Meng bolts will add details later. The "Maxi -Pivot" arm is a focal point on these truck. This arm carries the entire belt on a chain driven , rotating arm. Normally stowed/ folded along the side of the truck , once at the jobsite, the operator will remotely unfold the arm, pouring the cement into place keeping the truck a distance away! Watching the driver curl the arm , reminded me of a scorpion. The arm was built using the fish plates, and laminated strips . Using pics, I later sanded the taper and profile into the main body. The conveyor pedestal came next, a few hours later I had this..a working Maxi Pivot arm !! Thanks for looking , any feedback welcome! Jeff
-
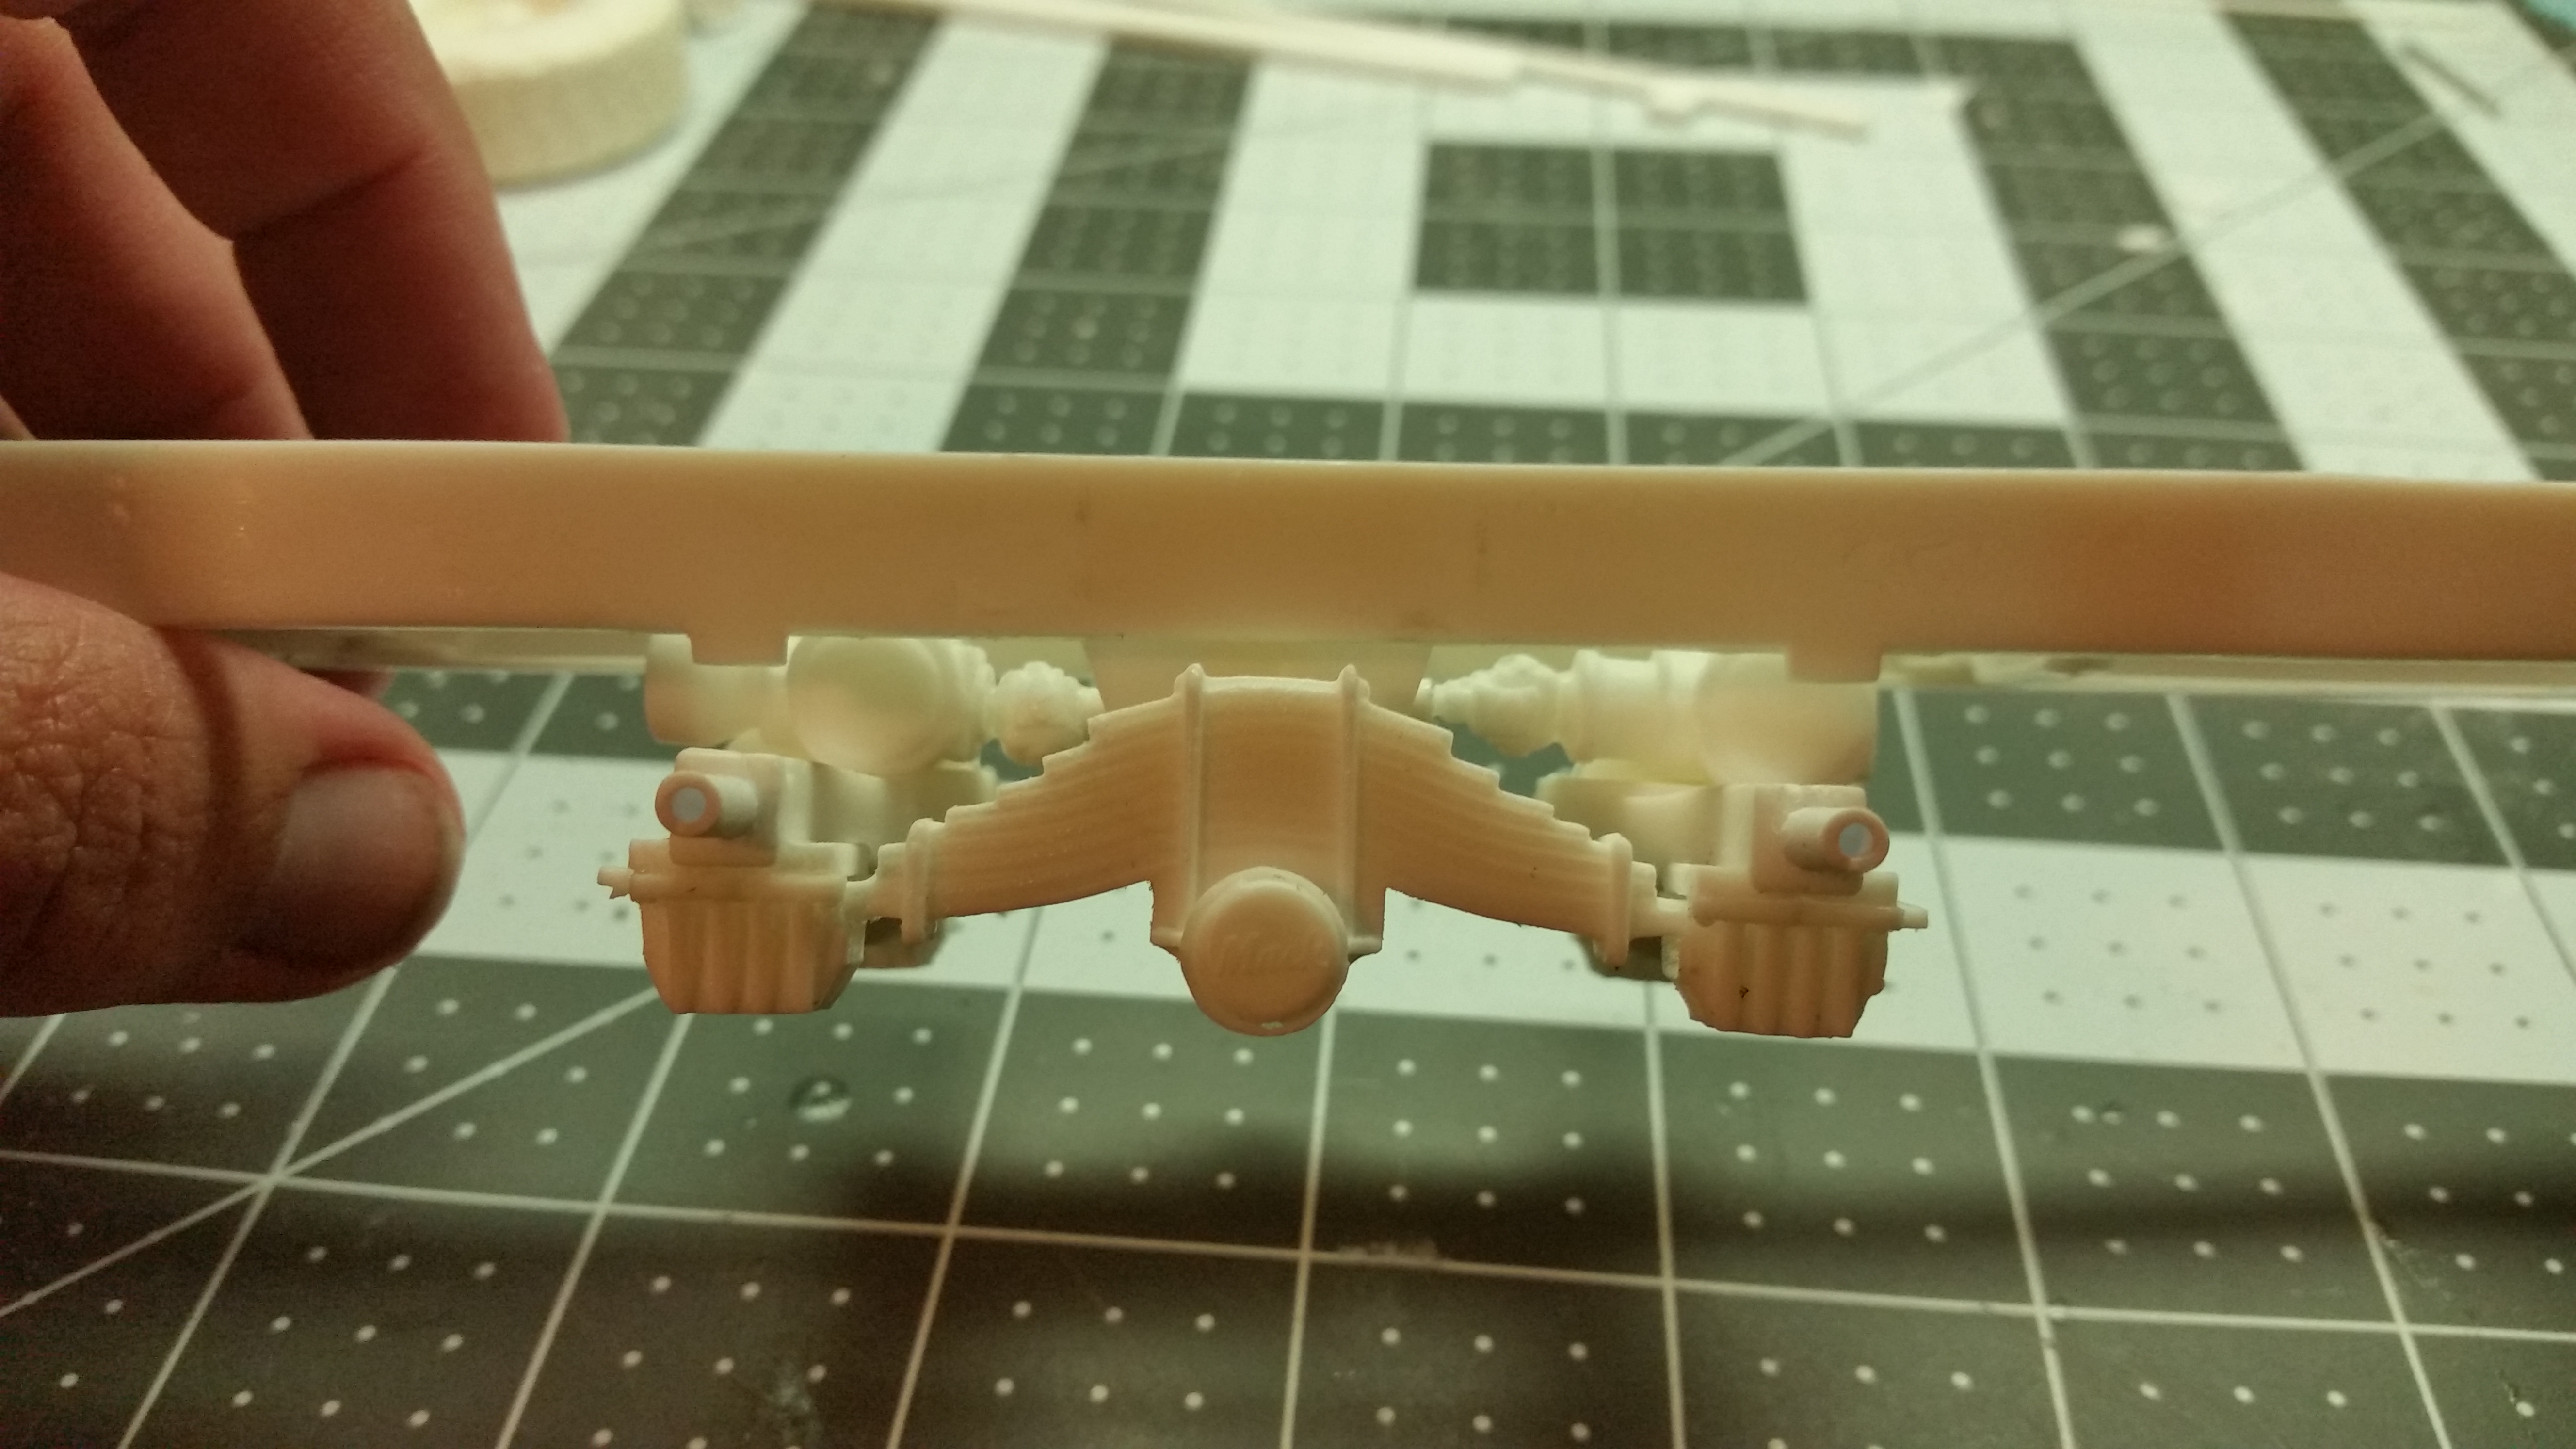
well guys, its been a long time since my last build. My wife and I was blessed to have a beautiful baby girl enter our lives!! A few months of getting into a routine..which I never thought would happen..well our little angel sleeps enough to grant me a few hours to build. This time around, I'll be building a truck commonly seen around our roads. This project is fun for me since the majority of the needed parts are available thru the AM, and I wont need to fab everything. The list of goodies includes- DM 800 mixer Frame, resin Mack 6 spoke wheels, MTM McNeilus mixer mastered by Chris Davis, cast thru AITM trucks. I'll be using a Mack 690 cab from GW trucks..and a few surprises along the way. The major part for me is the scratch built Theam conveyor belt . The main reference Ive been using is riding along on a Paystar.. I started by mocking up the DM 800 frame..which everyone here has seen..so pics wont be needed! I left off the fish plates so the new Mack camelback suspension Gary Wallace has, will properly fit the frames.These trucks commonly had double frames, and the mixer kit has these already. Adding the plates made an almost triple frame much heavier than the truck I'm portraying.