MeatMan
-
Posts
3,949 -
Joined
-
Last visited
Content Type
Profiles
Forums
Events
Gallery
Everything posted by MeatMan
-
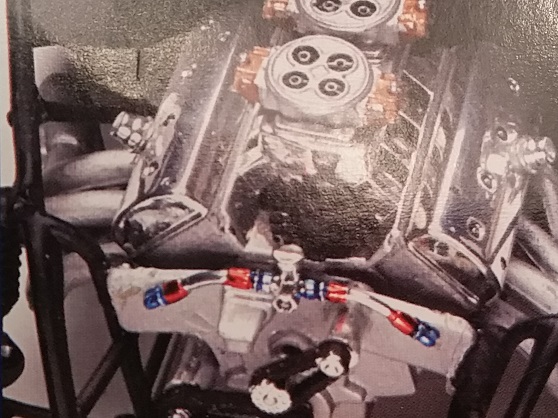
Maybe I'm being to OCD but I'm mocking up the Revell Jukebox Ford engine and I saw something strange. As you can see from the pic (sorry about the glare) there is a pulley running from the camshaft area to an unknown piece of equipment. I've looked at umpteen different engine pics and see nothing on any of them to explain what that might be. And, I've never seen anything but a distributor ever run off the cam. Something I also noticed, not related is that the instructions call for the distributor to be in the rear engine, when most of us know the Boss 9 distributor is in the rear, like the box shows. On top of that, the parts list shows a water pump, but the part on the tree with that number is a different set up pulleys, and there's no water pump in the kit but it magically appears on the engine but doesn't show where you would install it. Crazy eh! What's surprising, is that there is never any mention of these discrepancies on any of the build narratives I've read. I'm inclined to leave it off, or run a pulley from the crank and make it a crankcase evac pump. Any suggestions, or should I just let it go.

-
The Disappointments of Online Buying
MeatMan replied to Dieselhead's topic in General Automotive Talk (Trucks and Cars)
Glad to hear things worked out Joe. Also, if you use Paypal you can also get your money back. I have used that feature successfully when a seller refused to even reply to my requests. -
Nice build! I did one just recently and quite enjoyed it.
-
Painting inside of shells
MeatMan replied to Mixalz's topic in General Automotive Talk (Trucks and Cars)
I paint the inside for the same reason. You often don't know what shows until you build it. I try to build all of my kits as if they will be viewed from every angle. Just me being me. -
Looking good Dave!
-
Nice!!
-
I'm in the market for a 1/24 or 1/25 resin 1956 Chevy Belair or Sedan Delivery body. Has anyone worked with R&R recently? Are there any other casters you trust out there that have the 56 Chevy? Thanks in advance for your reply.
-
Very well done!
-
Nice work! Very thorough!
-
Hey! Where's the Pip Boy!! LOL! I love it. I'm a Fallout fan.
-
Stunning!! Great job!
-
Nice start Austin! I like where you're headed with this.
-
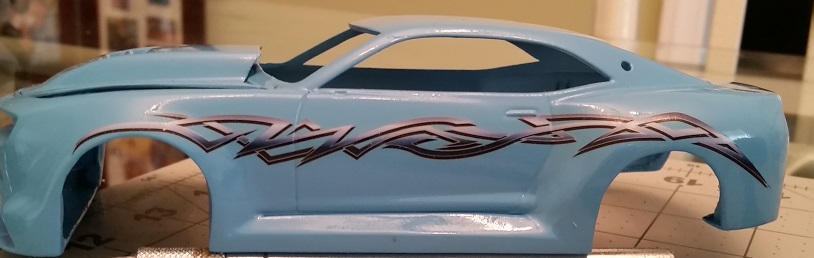
I added some graphics to the Camaro. Some of you will note that they are from the Revell pro street Chevelle, but I thought they matched well with the body & paint. I'm going to try to use magnets on the hood to see if it will keep it down a little better. Every time I got it to fit right it would just slowly return to this form no matter what I did. Oh well.
-
Nice work Rob. I'm taking notes. I have a 1960 Corvette I'm going to restomod next year, and its going to need some chassis work!
-
I have never gotten a reply via the website contact form!!
-
Great tutorial Steven! Thanks loads!
-
Beautiful!!
-
Pro Mod narrowing and streching question
MeatMan replied to HearMyTurboSpool's topic in WIP: Drag Racing Models
Great info Scott! Good luck Greg, that's more work than I have the patience for but I love to see it! -
Thanks guys. Mike, the area around the scoop, including the scoop will be the same dark blue of the wing. As will the door handle and front splitter. I'll also darken the door lines.
-
Sorry I haven't been updating my status. I've been busy with other builds but now I'm back on the Widebody Camaro. I've got the paint down but now I have a dilemma. I originally wanted to go with a matte finish but made the mistake of showing my wife the results prior to hitting it with dullcote, and now she thinks it should stay gloss. Any opinions on gloss vs. matte? I think the color is kind of feminine in gloss, but my wife has a really keen eye for color. Thanks for your comments.
-
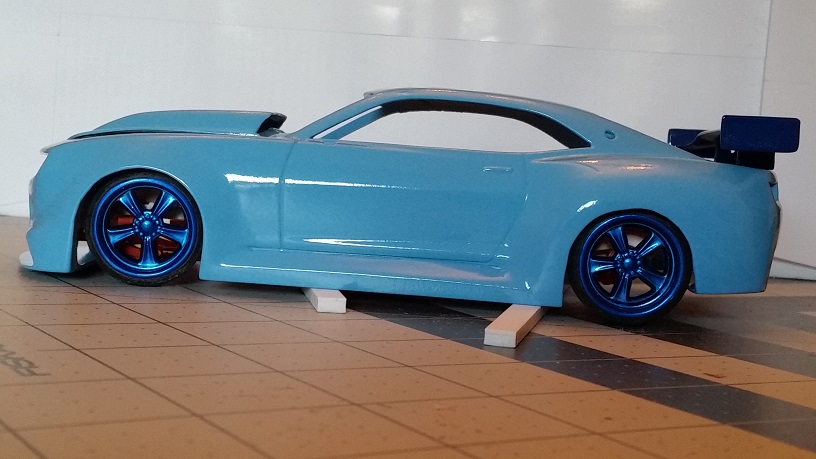
I've definitely been keeping an eye on this build because I plan to get one..someday. Nice work. I love the wheel switch, and the choice of color.
-
Drag racing staging lights / Christmas tree
MeatMan replied to cruiseliner's topic in Model Building Questions and Answers
Hey, I wanted to do something like this myself so I did some research this morning. There doesn't seem to be any NHRA specs on the distance between the lights, but there is a product called a Portatree that a lot of tracks are using, and it is 6 feet tall, and the literature says that it is a full-size tree. https://www.summitracing.com/parts/pts-3182led -
Very nice build!! Well done!
-
How does your family deal?
MeatMan replied to Jeff31293's topic in General Automotive Talk (Trucks and Cars)
My wife is very supportive, even when I make the occasional boo-boo as I don't have a dedicated space. She's very good with colors, and offers me tips on color combos and the like. She's also seen me moon over a kit that wasn't in the budget but insists I buy. She's a trooper! -
Nice start!