65slotcar
-
Posts
478 -
Joined
-
Last visited
Content Type
Profiles
Forums
Events
Gallery
Everything posted by 65slotcar
-
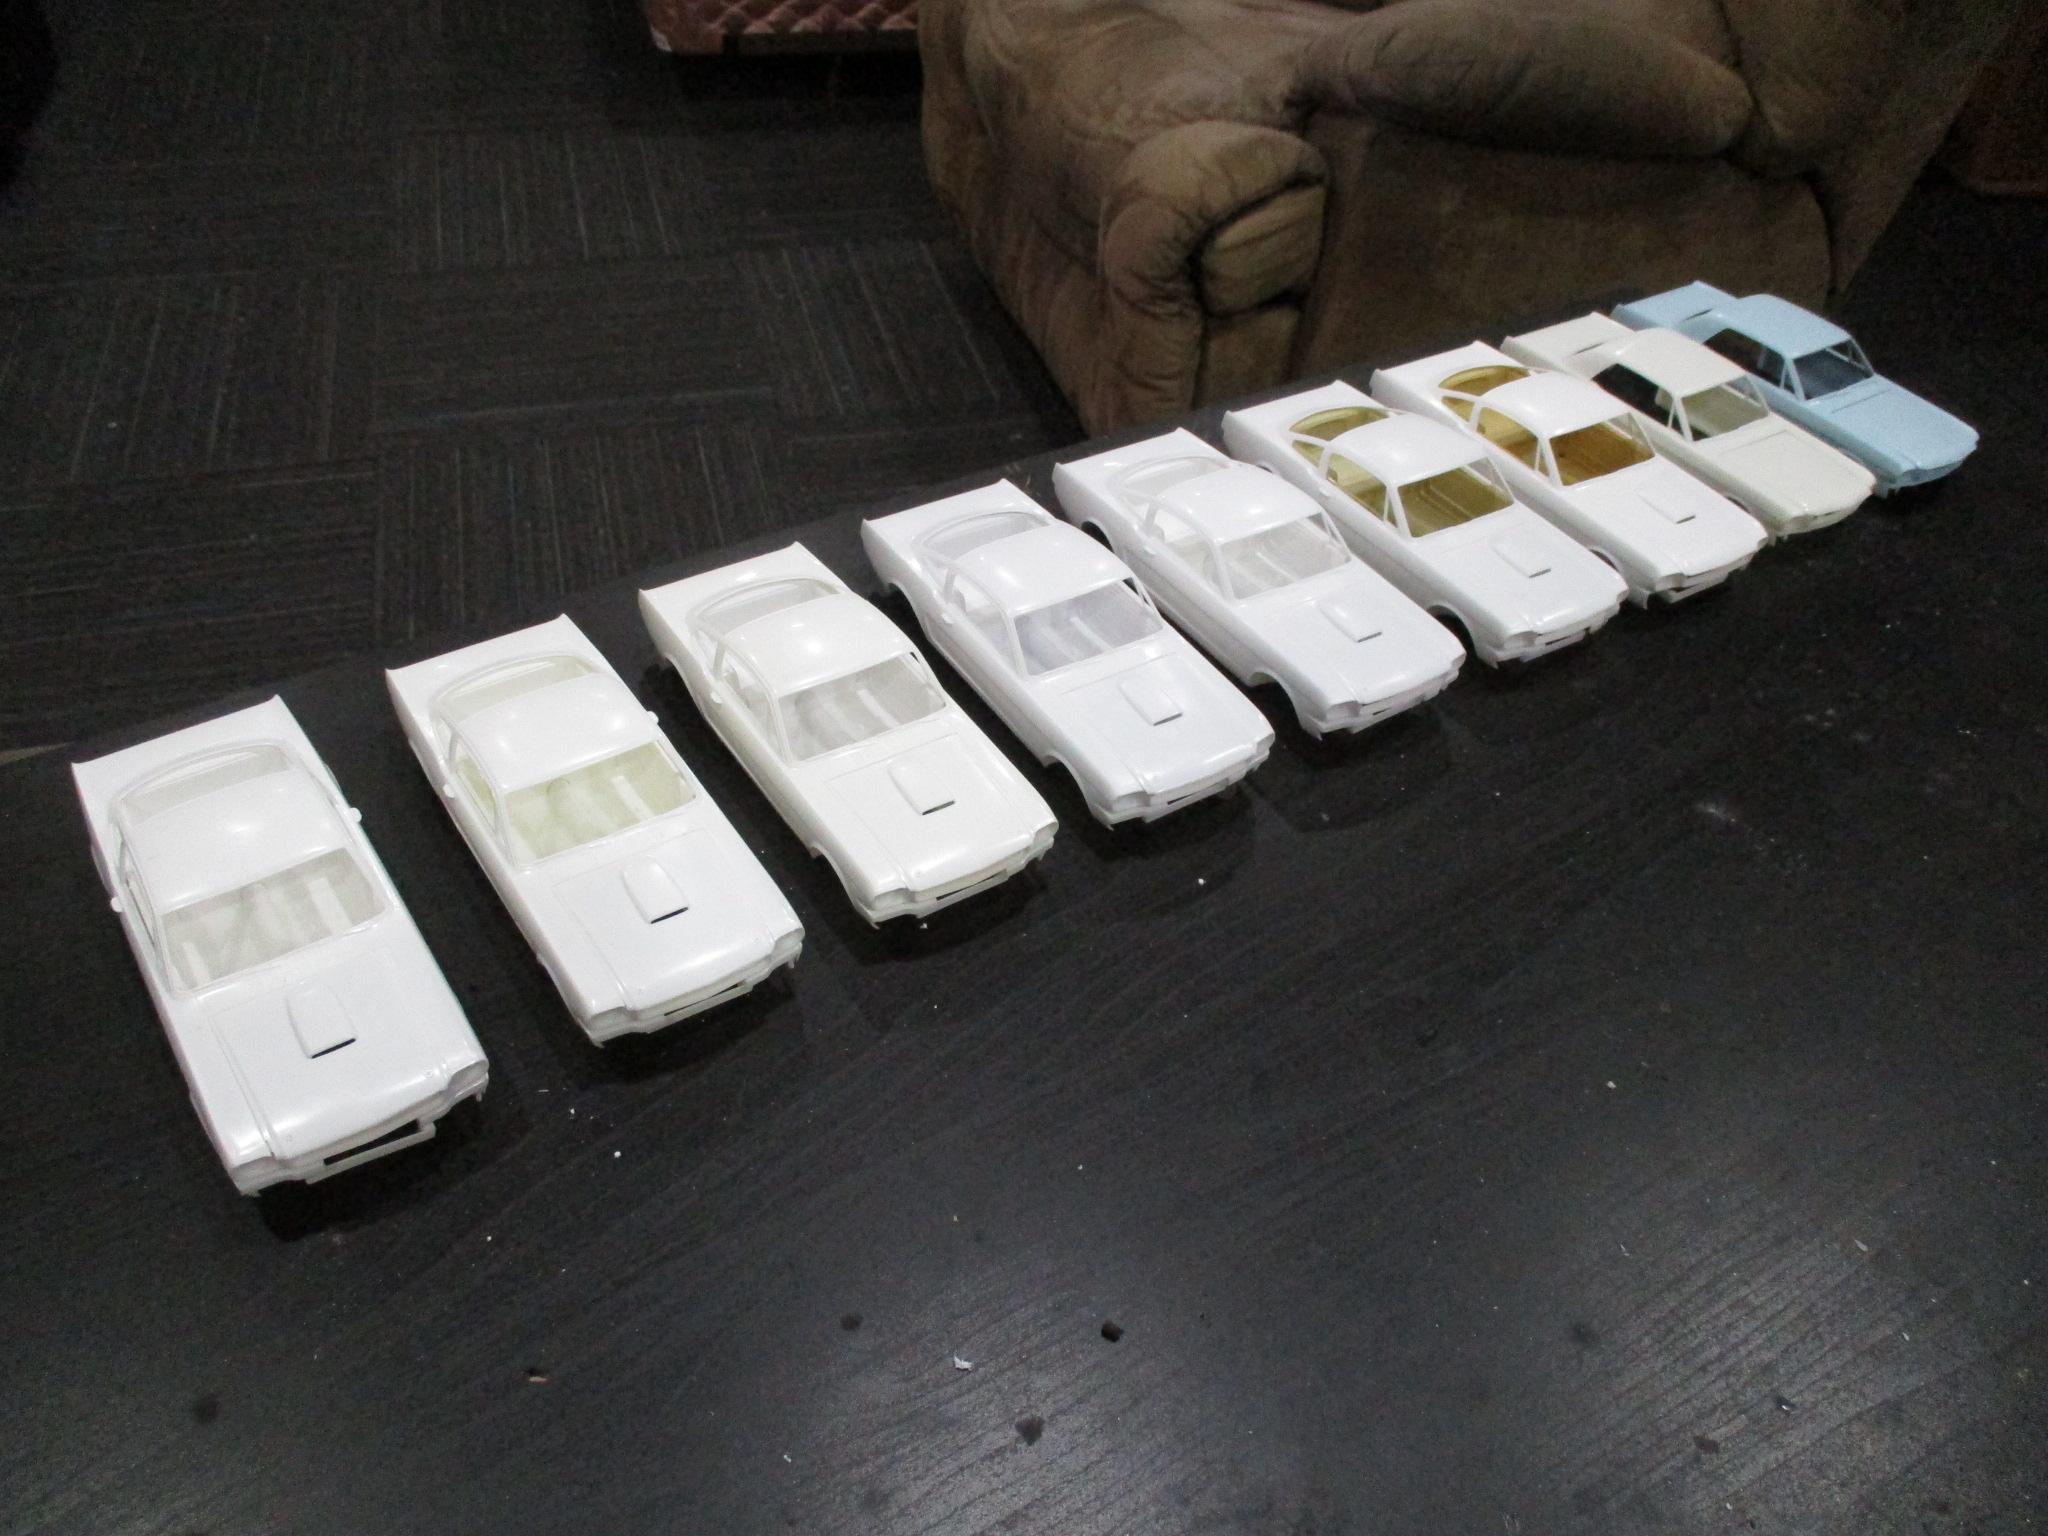
R-model Shelby Mustangs
65slotcar replied to 65slotcar's topic in WIP: Other Racing: Road Racing, Land Speed Racers
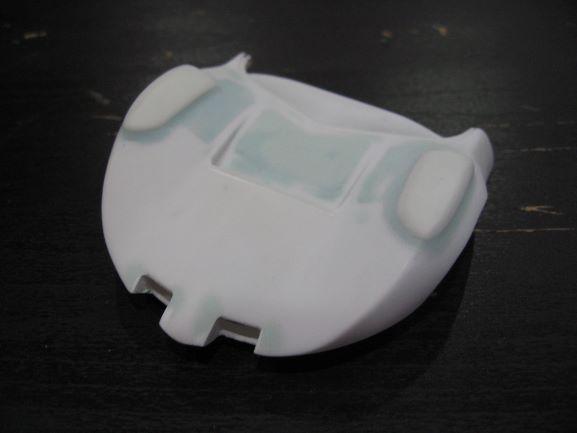
nice looking ride Dave, yah the high tech stuff can be cool but also a pain sometimes. a basic 289/302 with a 4 speed is easy to work on and a lot of fun. speaking of small block, starting with engine and first modification. Monogram/Revell kit has a big opening when oil pan is assembled. filled with super thin plastruct sheet. Metal pan is from Thunder Valley Miniatures transkit and looks great.
-
R-model Shelby Mustangs
65slotcar replied to 65slotcar's topic in WIP: Other Racing: Road Racing, Land Speed Racers
Dave , always great to meet other Shelby Mustang fans. no the avatar is not my car. but my project is a 65 Mustang fastback . not really a Shelby replica because the 351 windsor will not fit under a Shelby hood. it has a tremec 5 speed, 9 inch true trac and suspension by street or track (coil over shock). needs body and paint to finish.
-
Hello group, i took a break from modeling to work on the 1/1 scale project and now that winter is coming it's time to start another model project. A group of Monogram/Revell R-model Shelby's . Simple kit but needs many modifications. Limited on decals a side from a few Mark Donohue versions from Plattos Place. so any suggestions for decals or a decal maker would be great. Bill
-
i did the number 11 car and decals from kit are accurate. would like to find the 88 numbers. Great info from JC. another thing to look for is some comp cobras have a long battery behind passenger seat and driver seat is different then passenger side. a bit squared off at top. i used a 289 comp cobra seat on a couple builds.
-
can't add too much more to this that JC and Rex already stated. stay way from Fujumi kit . Most early race cars only had drivers lap belt and no cooling fans. Weber carbs were used mainly on 289 comp cobras. Most 427 race cobras had just a single 4 barrel. csx 3002 is a tricky one to build because grille opening is smaller like a 289 comp cobra. a reservoir under the passenger side fender would be a dry sump oil tank with a visible cap on top of right fender. very few cars had this. but not sure what the molded part is on revell kit. did you find 88 numbers for the Hal Keck csx 3008 car ? i have not seen these decals yet.
-
(HRM) Shelby Cobra Daytona Coupe
65slotcar replied to Venom's topic in WIP: Other Racing: Road Racing, Land Speed Racers
you are still working on this project?? ? Just kidding.....looks great Josh! it's going to beauty when done . -
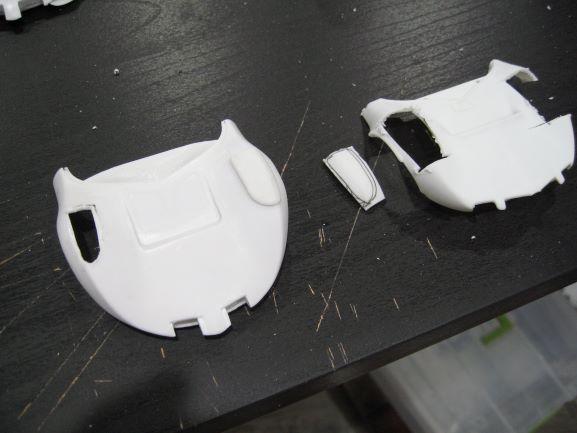
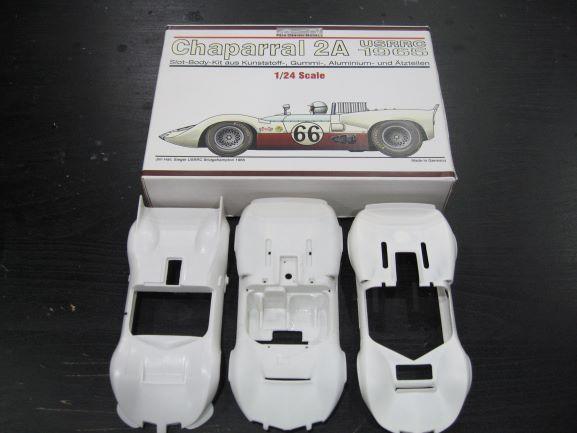
Chaparral 2A-2C
65slotcar replied to 65slotcar's topic in WIP: Other Racing: Road Racing, Land Speed Racers
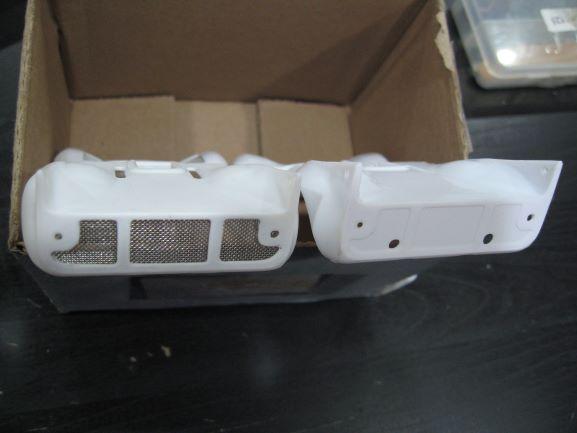
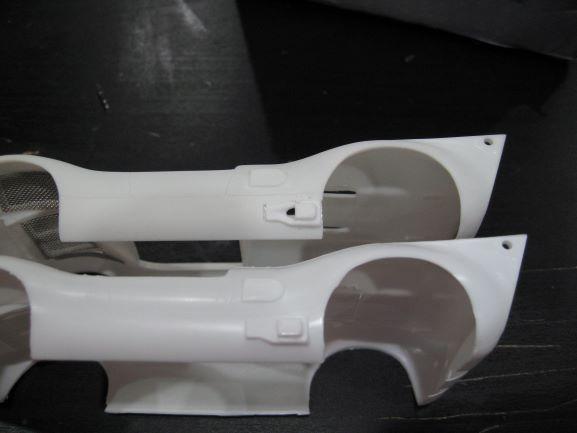
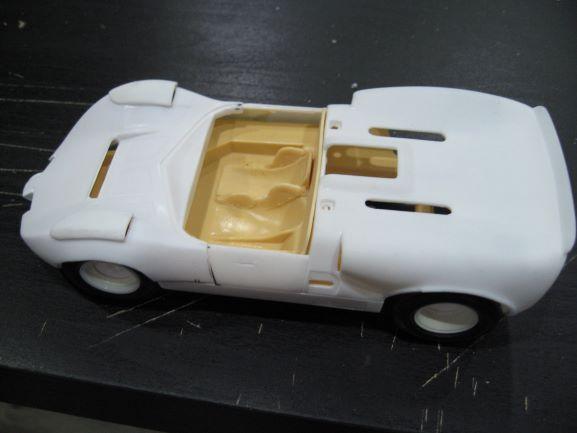
a little progress on the early 2A ....... body filler and ready for primer. 2C (LS kit) modified side scoop, opened up scoop and moved back to correct location. installed screens.
-
Chaparral 2A-2C
65slotcar replied to 65slotcar's topic in WIP: Other Racing: Road Racing, Land Speed Racers
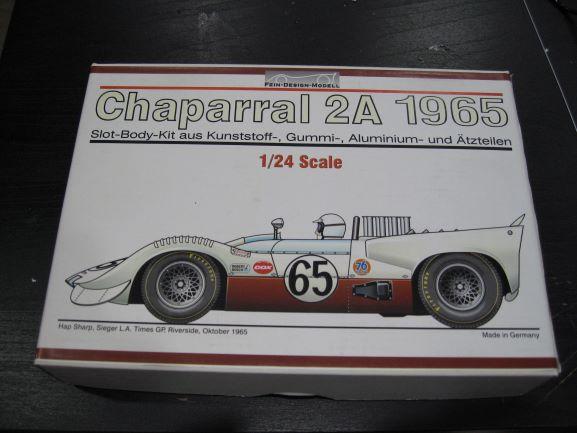
thanks guys, the grey body is a very detailed slot car body by Fein Design Modell only about 200 kits are made of each body produced.
-
(HRM) Shelby Cobra Daytona Coupe
65slotcar replied to Venom's topic in WIP: Other Racing: Road Racing, Land Speed Racers
Josh, details look great ! nice progress -
Zero paints - gritty finish question
65slotcar replied to Mcpesq817's topic in Model Building Questions and Answers
i have never used Rustoleum or Krylon primers on a model kit. They may spray ok and the actual primer itself may be fine. The one major downside to rattle cans is that you can't control air pressure and how heavy the material is being put on. Almost any primer used in an airbrush can be applied very light. Too much primer will just cover fine details like door gaps and any emblems. I have used Tamiya fine surface primer in a rattle can and it does spray very well and light, but not exactly cheap at $11.00 for a 180 ML can. -
this is Zeropaints # ZP-1080 guardsman blue sprayed over Zeropaints grey primer.
-
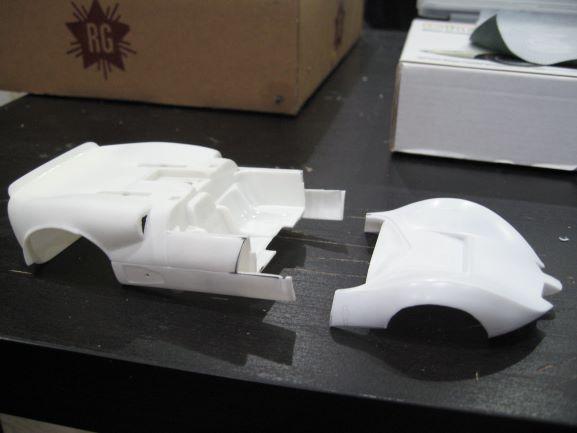
Chaparral 2A-2C
65slotcar replied to 65slotcar's topic in WIP: Other Racing: Road Racing, Land Speed Racers
did some work on making fender tire clearance humps.
-
Chaparral 2A-2C
65slotcar replied to 65slotcar's topic in WIP: Other Racing: Road Racing, Land Speed Racers
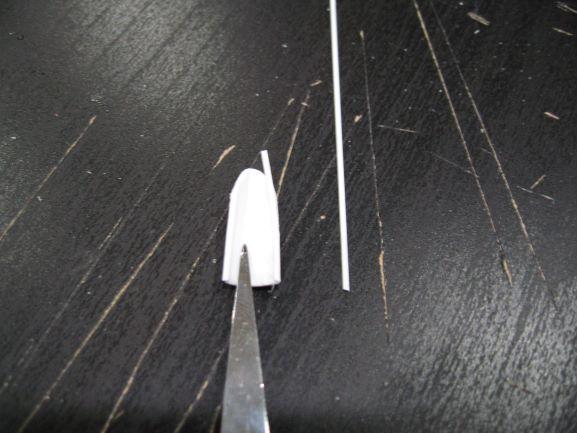
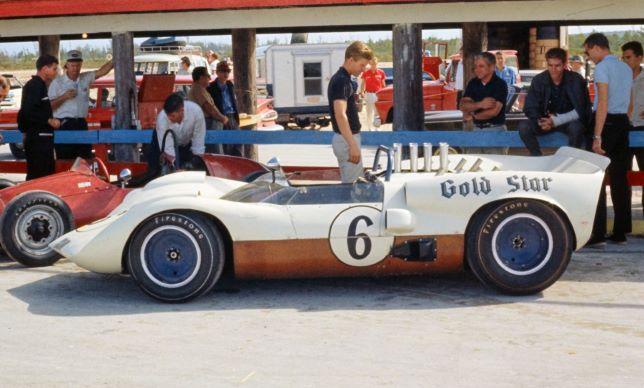
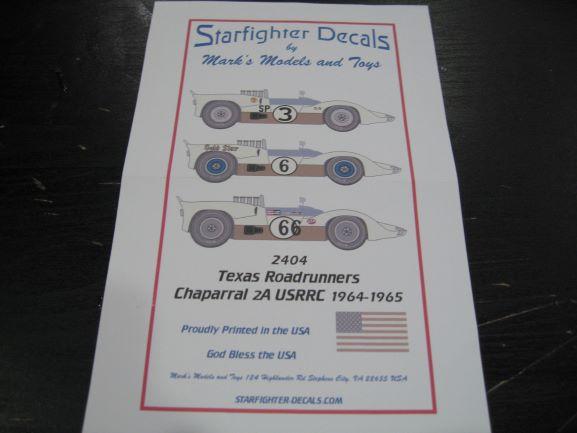
so the first one will be an early 2A and with Starfighter decals the plan is to make the Gold Star #6 Chaparral. starting with a cox re-pop slot car body i cut off front at body lines and used front from an LS brand 2C . shaved off front fins and filled in headlights slightly for smaller headlights. will be using chassis from mini exotics kit for a better interior and an engine.
-
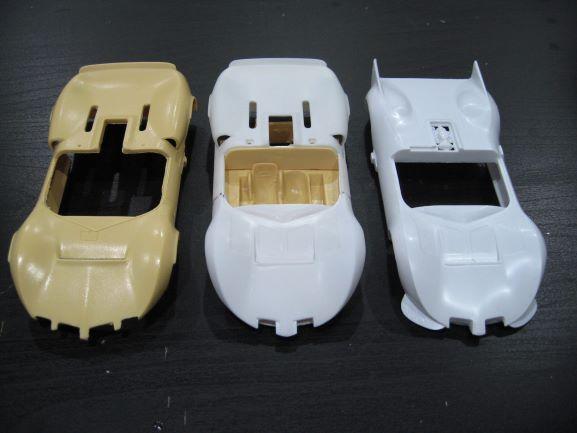
Chaparral 2A-2C
65slotcar replied to 65slotcar's topic in WIP: Other Racing: Road Racing, Land Speed Racers
the LS 2C kits can be found on e-bay and Chaparral 2A can be purchased at Modelbuilderswh. com and is a HRM kit. the Fein Design Modell (slotcar body kits) are close to impossible to find even on e-bay. only about 200 kits are made of each body made. waited about 5 years to finallly get the wide rear fender Chaparral 2G from Fein Design Modell. -
(HRM) Shelby Cobra Daytona Coupe
65slotcar replied to Venom's topic in WIP: Other Racing: Road Racing, Land Speed Racers
coupe is looking great Josh. The pre-wired distributors i get are from scaleproshop.com for $6.00 each. cap is separate to distributor and makes it great for painting. -
my next group build. Some of my all time favorite race cars.
-
(HRM) Shelby Cobra Daytona Coupe
65slotcar replied to Venom's topic in WIP: Other Racing: Road Racing, Land Speed Racers
oh no wrong firing order....just kidding. looking good so far. i am usually lazy when it comes to wiring distributors and i buy distrubutors pre-wired. -
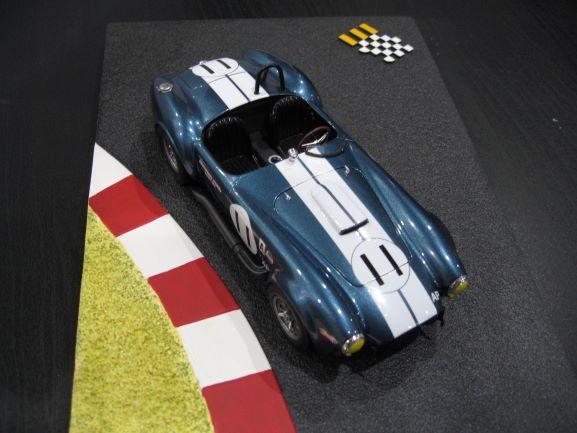
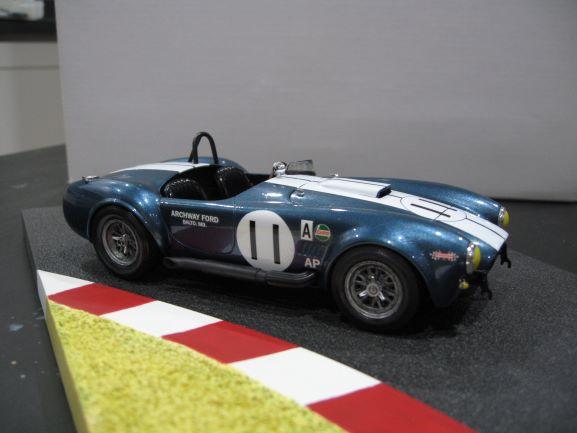
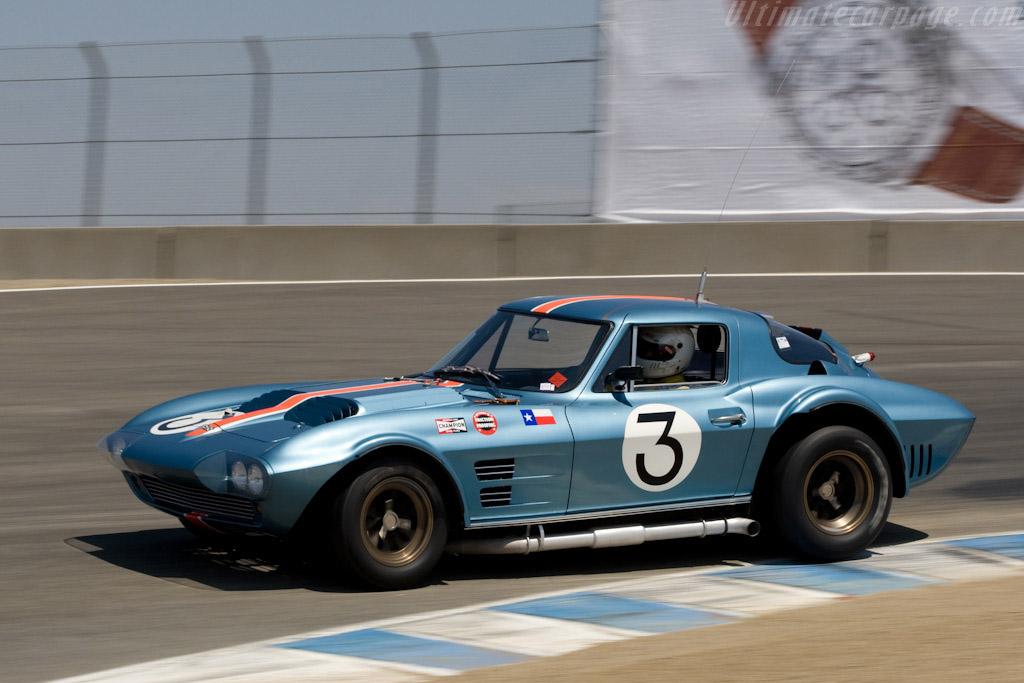
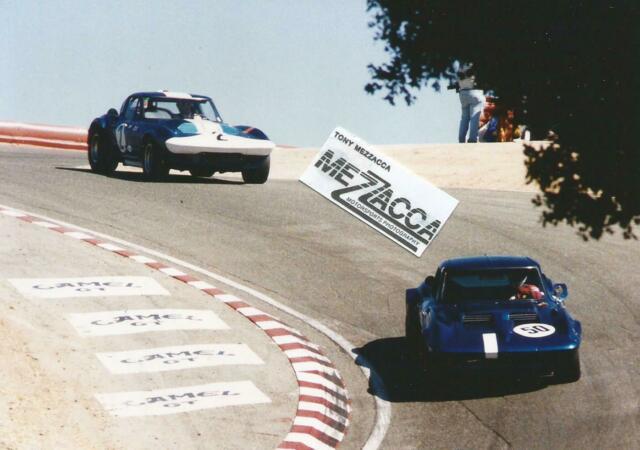
1964 Sebring #3 Grand Sport Corvette
65slotcar replied to 65slotcar's topic in Other Racing: Road Racing, Salt Flat Racers
thanks everyone for the positive feedback and comments. A group of Chaparrals might be next. -
GT350R rear opening
65slotcar replied to 250 Testa Rossa's topic in Model Building Questions and Answers
they look very close, and Shelby r-models never were perfect and refined race cars.
-
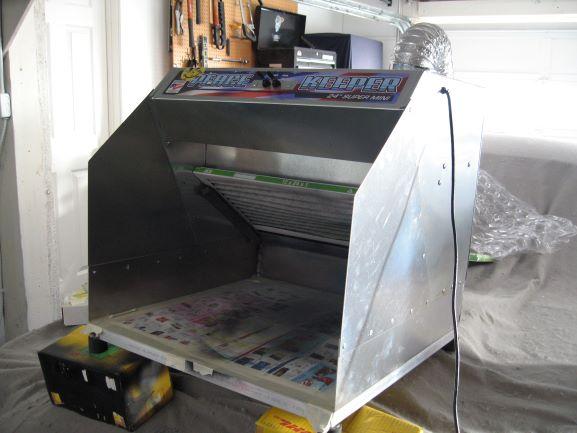
Spray booth recommendations??
65slotcar replied to 2zwudz's topic in Model Building Questions and Answers
i have the peace keeper 24 inch, i modified it by adding some aluminum sides and base. i love it, works great !
-
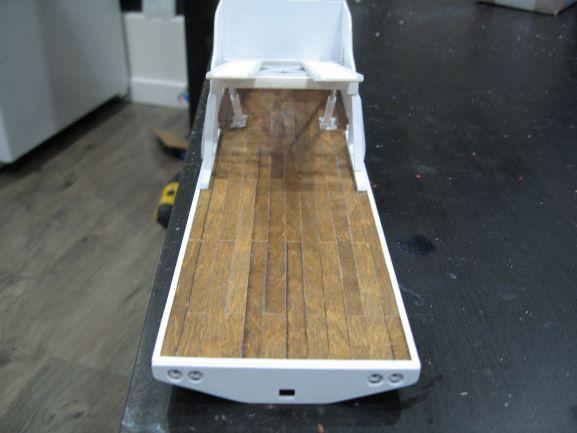
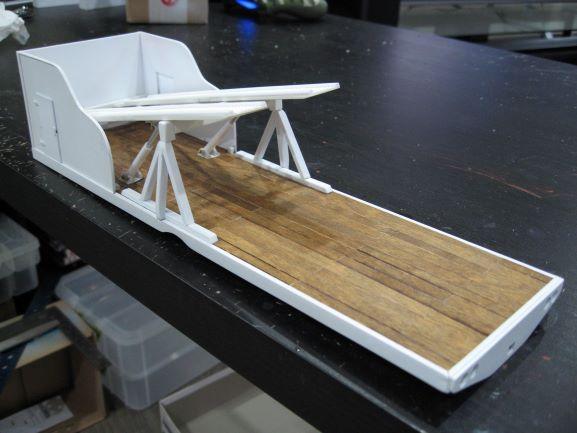
a little progress with flatbed wood floor done.
-
1964 Sebring #3 Grand Sport Corvette
65slotcar replied to 65slotcar's topic in Other Racing: Road Racing, Salt Flat Racers
no , just a picture i found on the internet. -
1964 Sebring #3 Grand Sport Corvette
65slotcar replied to 65slotcar's topic in Other Racing: Road Racing, Salt Flat Racers
i have attended many vintage car events at Laguna Seca and Sears Point, but can't remember seeing more then 2 at one event. i know i have seen 3 of them at different times.
-
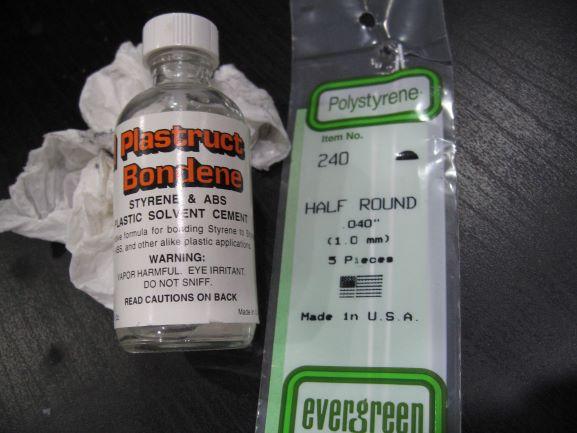
thanks Ralph, i used half round plastic strips by evergreen scale models for the trim and use plastruct bondene to glue in place. the strips are really flexible and i glue about 1 inch of trim at a time
-
1964 SCCA Corvette W.I.P.
65slotcar replied to MarkJ's topic in WIP: Other Racing: Road Racing, Land Speed Racers
great detail and work so far. what race car are you building? a little late now, but you could have purchased wheels from Randy at modelbuilderswh.com Bill

.JPG.35909ad5f38f6736f2297d0fd416306f.JPG)