Straightliner59
-
Posts
5,817 -
Joined
-
Last visited
Content Type
Profiles
Forums
Events
Gallery
Everything posted by Straightliner59
-
 Thank you, buddy! Much appreciated!
 -
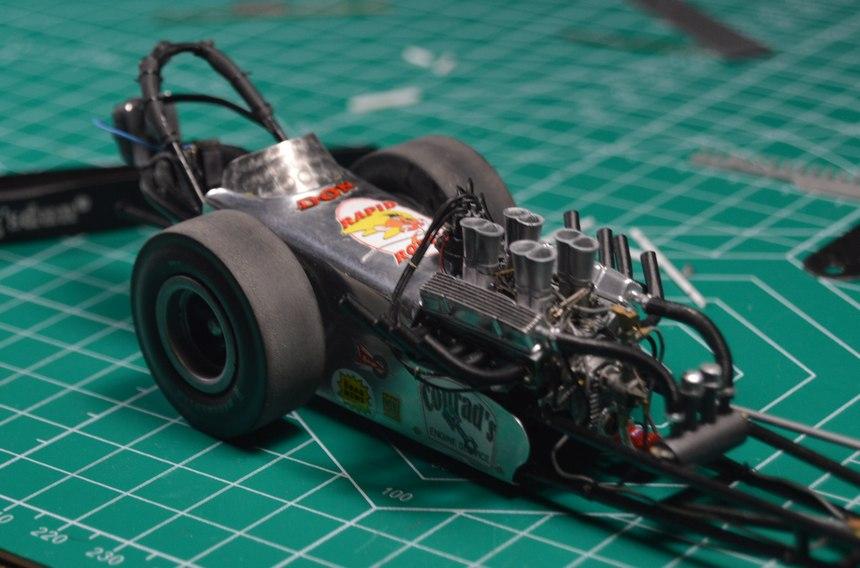
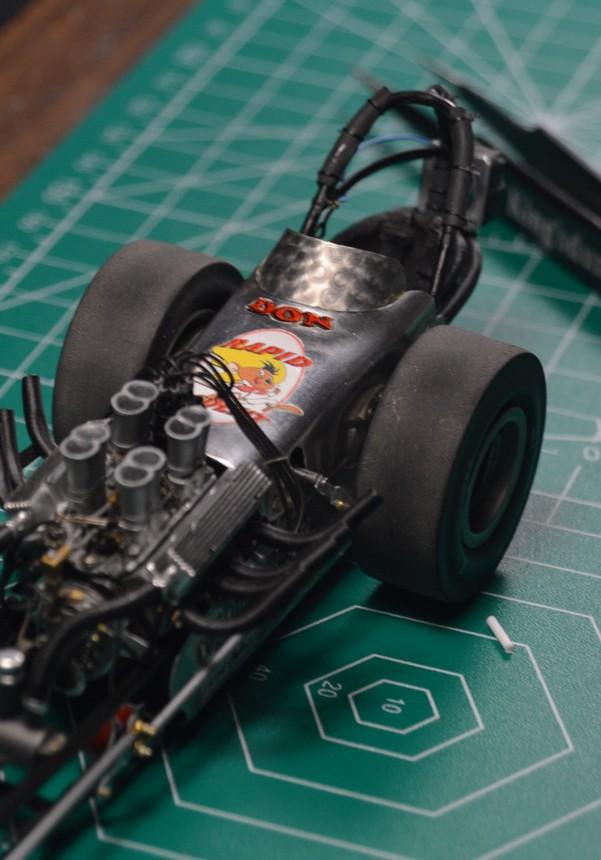
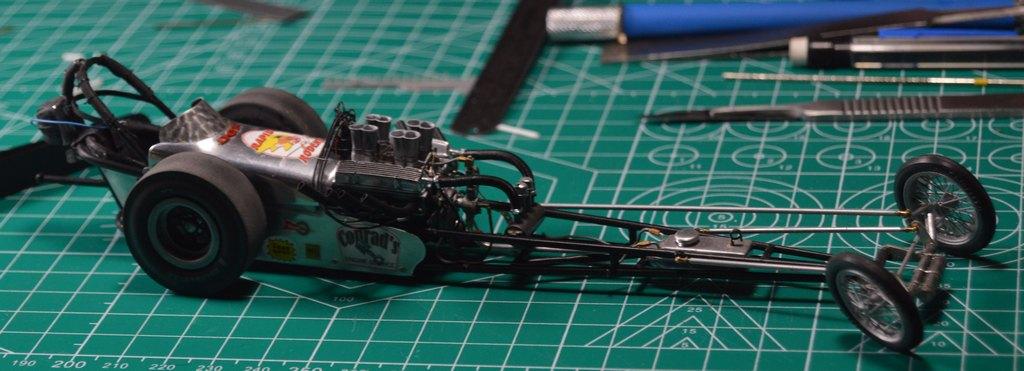
After four years or so, I finally got tired of looking at this windscreen, sitting on my workbench; It's now attached to its dragster.

-
Thank you, JC. I will be working on it, once I am home from work!
-
I think you guys are probably right. It shouldn't take too long to fabricate a new front stand. I am learning about these, as I go!
-
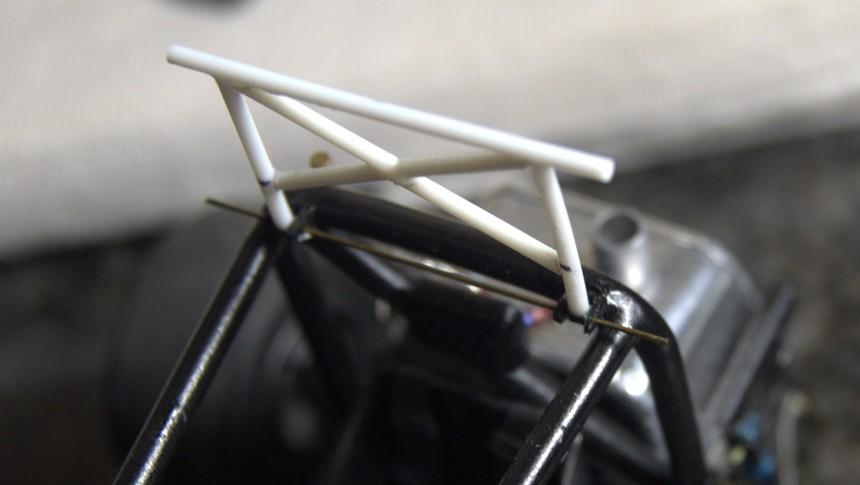
I don't think that's a bad idea, at all. I was already considering that, actually! I based my wing stands on Monogram's sprint cars, and, they may be taller than they should be, for my era.
-
Now, this is a pretty big step! I may adjust the rear of the wing, a tad higher--I have one more position. Thoughts? Thanks for looking!
-
I got the front wing tabs mounted. I used a technique Don Fahrni showed me, years (decades) ago, to make the mounting tabs: I smashed a length of aluminum tubing in the vise, and drew my pattern on the flattened surface. Once it's drilled, and cut out, it's two-for-the-price-of-one! The rivets on the brackets are drilled through the surface of the wing, and the brackets are glued to the wing, as well. It makes for a pretty sturdy mount. I made new end plates for the wing, as well. Next up, I will get the rear "tracks" completed, and mounted to the wing. That will make the wing somewhat adjustable, although I will fix it in position. As always...questions, comments and critiques are welcomed. Thanks for looking!
-
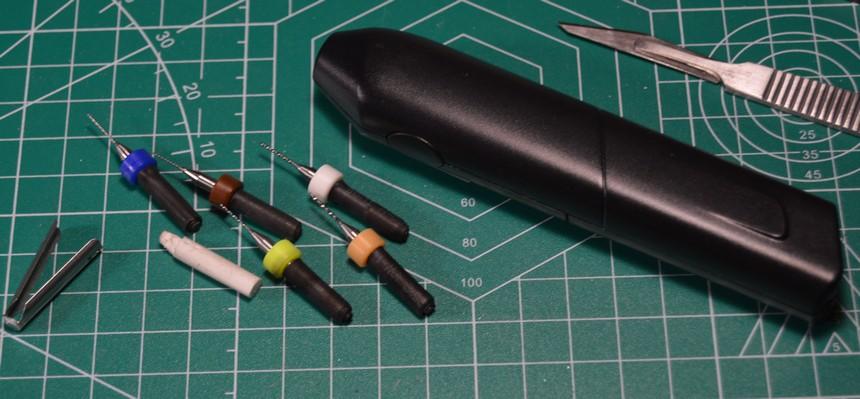
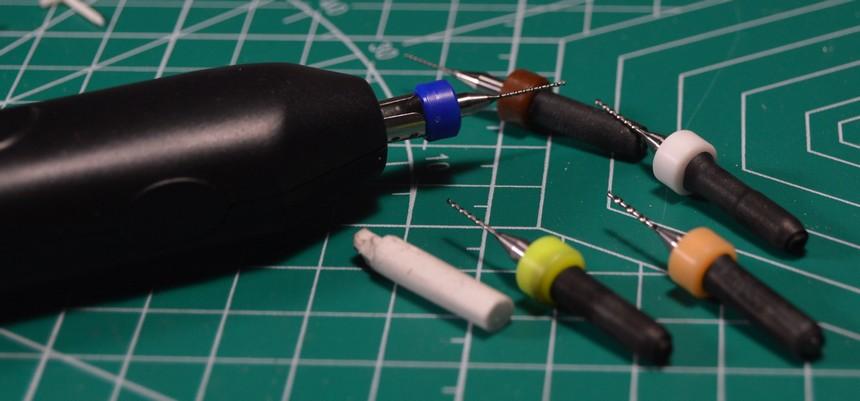
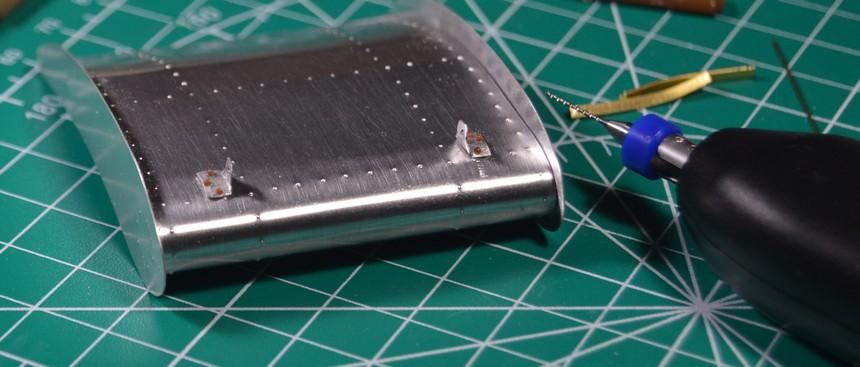
I bought this power eraser a while back, in my eternal quest to find an easier way to create engine-turned finishes on aluminum sheet. It doesn't really work, for that, so...Today, I needed to drill some holes in the surface of the wing for my Supermodified. I saw the eraser, and thought about how I could make a high speed bit fit in the eraser. Three layers of heat-shrink tubing later, I had my holes! It's high speed, and low torque, which is ideal for this application. The low torque doesn't snap the bit, if it binds. I decided to keep these all together, 'cause this is now a "thing"!
-
Engine suggestions please.....
Straightliner59 replied to iBorg's topic in Model Building Questions and Answers
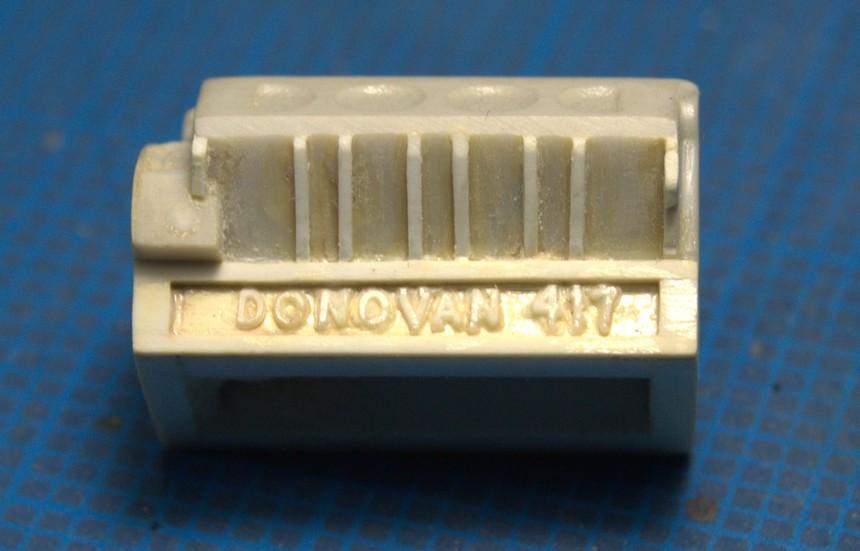
Yeah, I'm not sure I want to take on that one! The mold appears to be fine, but, my resin has gone bad, and it foamed up, when I mixed it. A ton of air in the casting! It should be pretty decent, once I have good resin. Thanks, Ian. The world needed a 1/25 417!? -
I'm already thinking about doing it yet again, and annealing it, first. I think either way will have advantages and disadvantages. They really did push the aluminum out of place! Thank you, Richard! I appreciate your kind words, sir!
-
ROYAL CANADIAN 1/16 SCALE TOP FUEL DRAGSTER
Straightliner59 replied to Ian McLaren's topic in WIP: Drag Racing Models
There's just something about a long-wheelbased FED! Beautiful replica of a beautiful car! -
Engine suggestions please.....
Straightliner59 replied to iBorg's topic in Model Building Questions and Answers
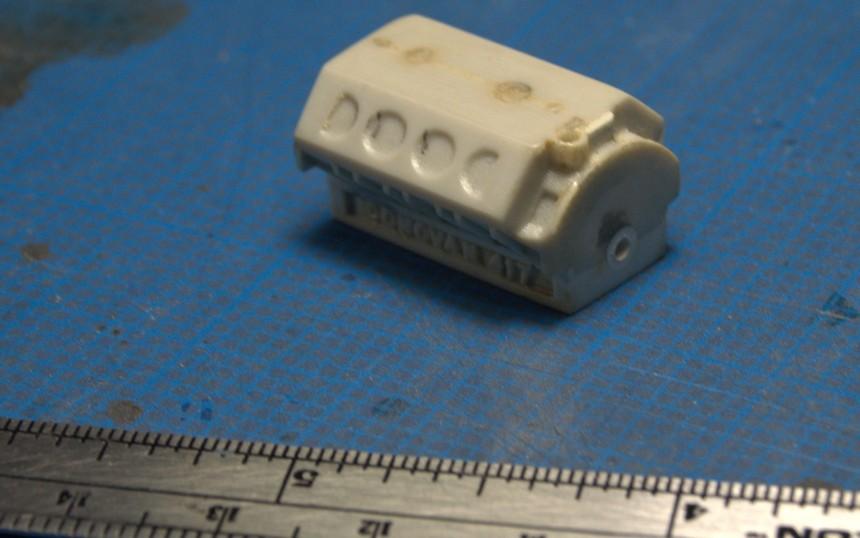
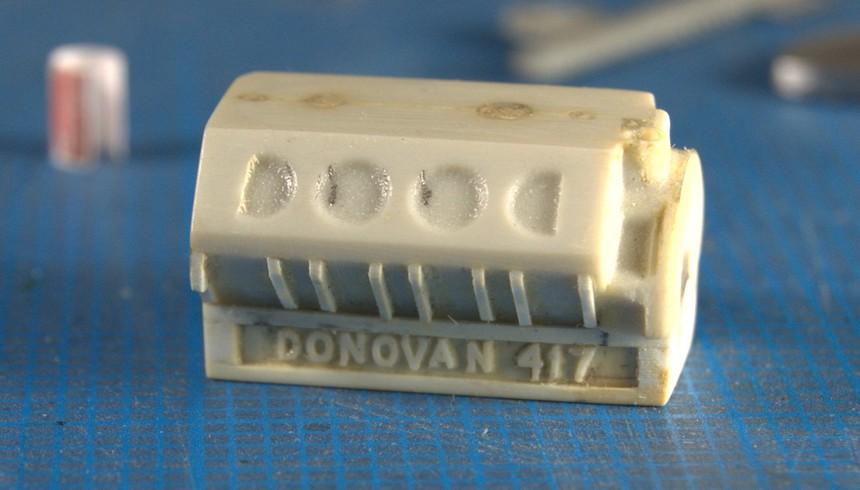
Speaking of Donovans...I just made a mold of this one, the other day. I used Plastruct letters. I built it using the original article from Hot Rod. I may yet add dimples for the head studs. Once I get some new resin, I may cast a couple up, and see just how detailed I can bet with it, separating the girdle, and taking the mill to the block--maybe.
-
Engine suggestions please.....
Straightliner59 replied to iBorg's topic in Model Building Questions and Answers
I agree with Brad, if you want an early Hemi, for sure! Small block Chevy, I would go with the one from AMT's '66 Nova. -
Thank you very kindly, Alan! I truly appreciate your kind words. I had one of those, almost exactly like the one you have. I don't know where it got to! I'm not sure it would work too well on this sheet, a least until it's annealed--then I think it would be fine. Otherwise, this is too hard. I felt like, in this application, it would work better without being annealed. The pounce wheel would also work great on tooling aluminum!
-
1963 Chevy Nova Wagon: Early 90’s Street Machine
Straightliner59 replied to Dennis Lacy's topic in Model Cars
It looks just like it ought to, for what it is. Nice job, sir! -
Those worked out, very nicely!
-
What are you using for your magneto color? For years, I used Pactra International Colors IJN Red. It finally went bad about five years ago, or so. Now, I'm using a Humbrol color that is very similar. I don't recall the number, off the top of my head! Not all that surprising, given the rate at which I have attempted, and succeeded at, killing brain cells!
-
That looks great! It adds some nice "depth" to the castings.
-
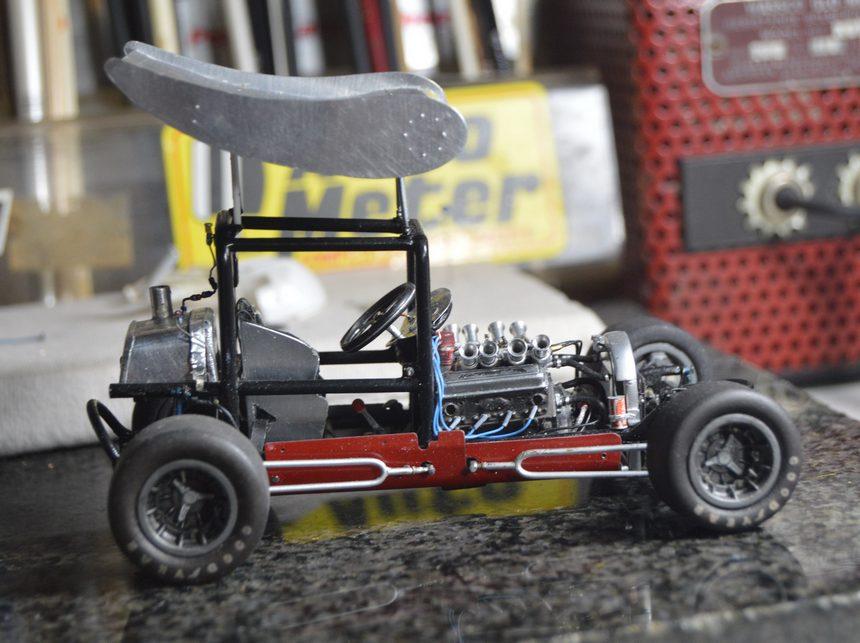
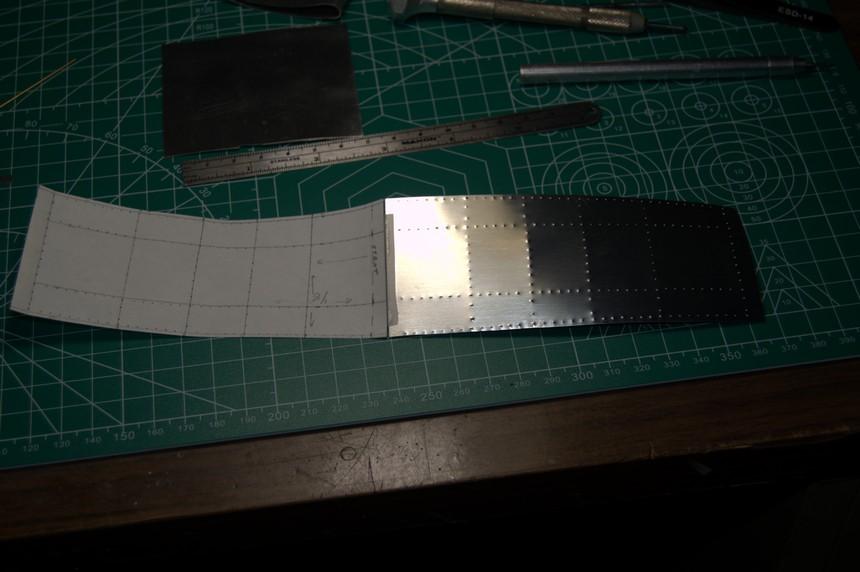
I am building a new wing. With rivets, this time. I used the old method of denting the sheet metal from the backside using a small punch. I'm in the process of making new end plates, now. I also installed the throttle return spring. Comments, critiques and questions are always welcome! Thanks for looking!
-
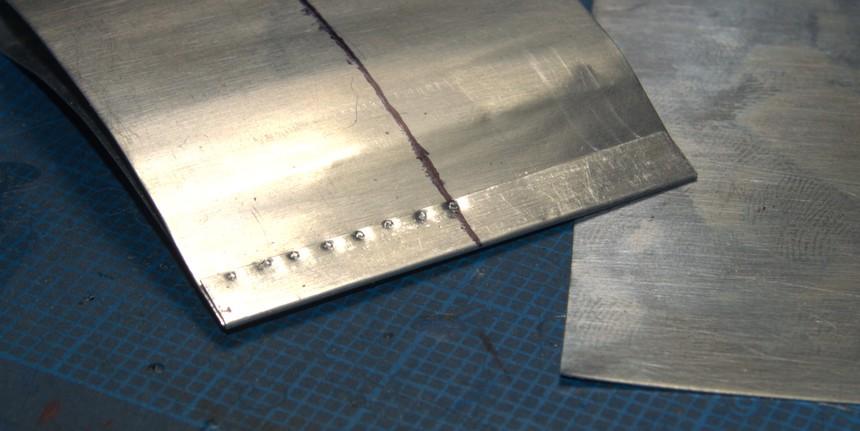
I've been working on the wing and wing stands. I made a tool to make flush/countersunk rivets, from a 4d nail. I am considering a new wing, so that I can properly "rivet" the wing. It will be pretty simple, making a paper pattern, using the current wing. I also got the wing stands figured out and mostly built, and mounts created. I found the throttle return spring (it did come back!), and got it mounted. Work continues...as always, questions, comments and critiques are welcome. Thanks for looking!
-
ROYAL CANADIAN 1/16 SCALE TOP FUEL DRAGSTER
Straightliner59 replied to Ian McLaren's topic in WIP: Drag Racing Models
I redid mine two or three times, because I didn't like the way those lines looked. Finally got it, but they're tricky! You'll get it! -
ROYAL CANADIAN 1/16 SCALE TOP FUEL DRAGSTER
Straightliner59 replied to Ian McLaren's topic in WIP: Drag Racing Models
Nice work on the cowl! It looks somewhat familiar. ? -
ROYAL CANADIAN 1/16 SCALE TOP FUEL DRAGSTER
Straightliner59 replied to Ian McLaren's topic in WIP: Drag Racing Models
Ian, this thing looks just right! It absolutely catches the essence of the car. Excellent work, sir! -
Bulk Squadron Premium Sanding sticks
Straightliner59 replied to chris chabre's topic in Model Building Questions and Answers
I think I recently bought 15 mediums for $12. I started using them about five years ago. They're all I buy, anymore!