Straightliner59
-
Posts
5,805 -
Joined
-
Last visited
Content Type
Profiles
Forums
Events
Gallery
Everything posted by Straightliner59
-

1975 Monza--Completed 12/25/2018
Straightliner59 replied to Straightliner59's topic in WIP: Model Cars
JC, those are from Johan's Sox and Martin 'Cuda. They are very nice! -
1975 Monza--Completed 12/25/2018
Straightliner59 replied to Straightliner59's topic in WIP: Model Cars
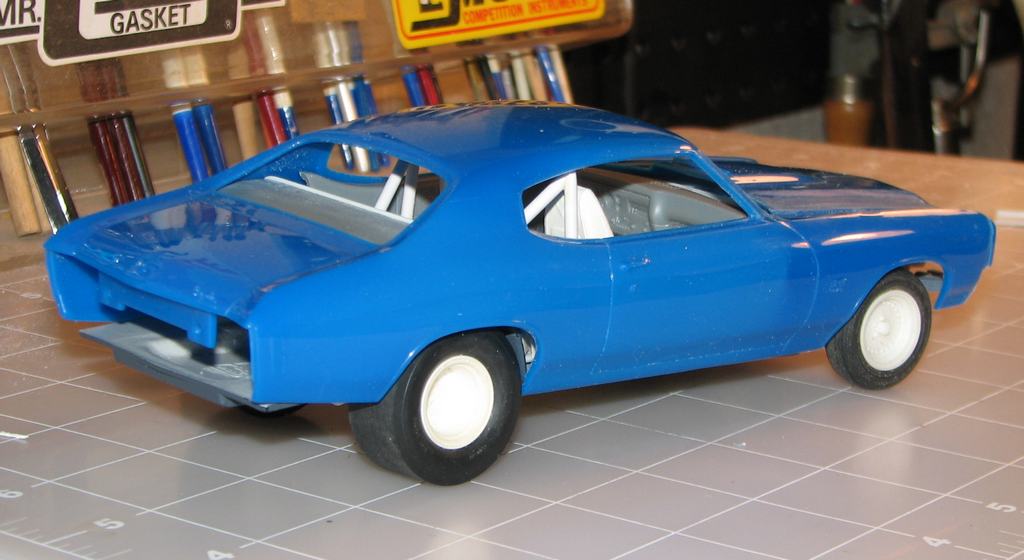
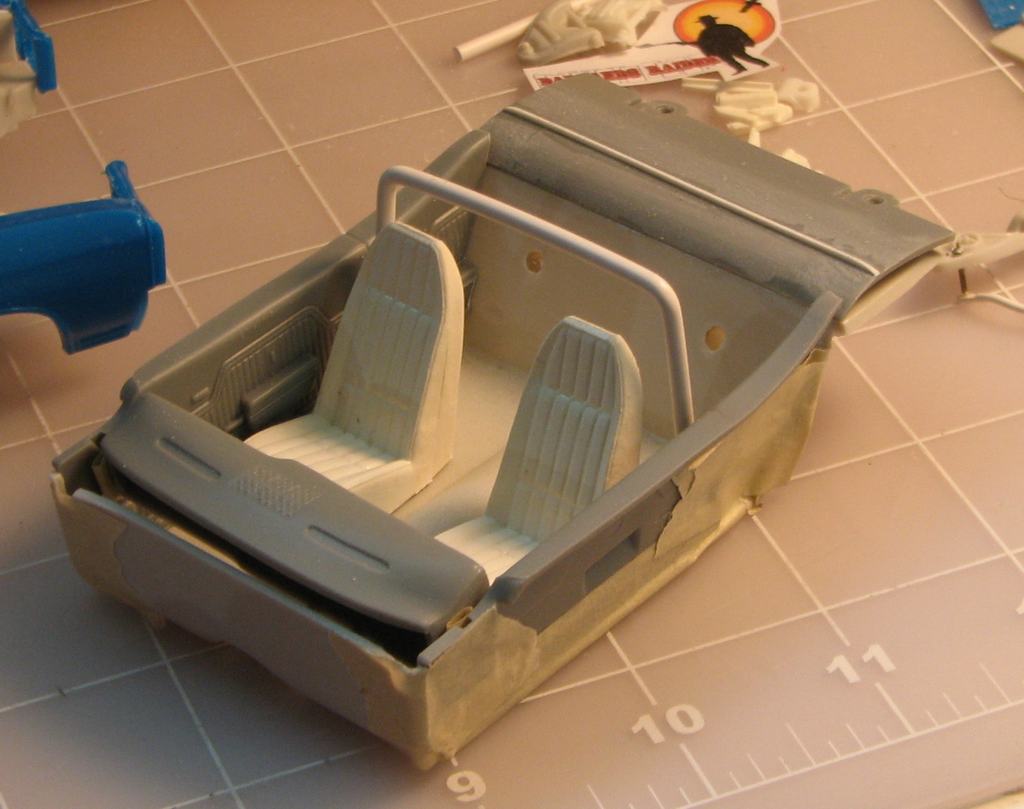
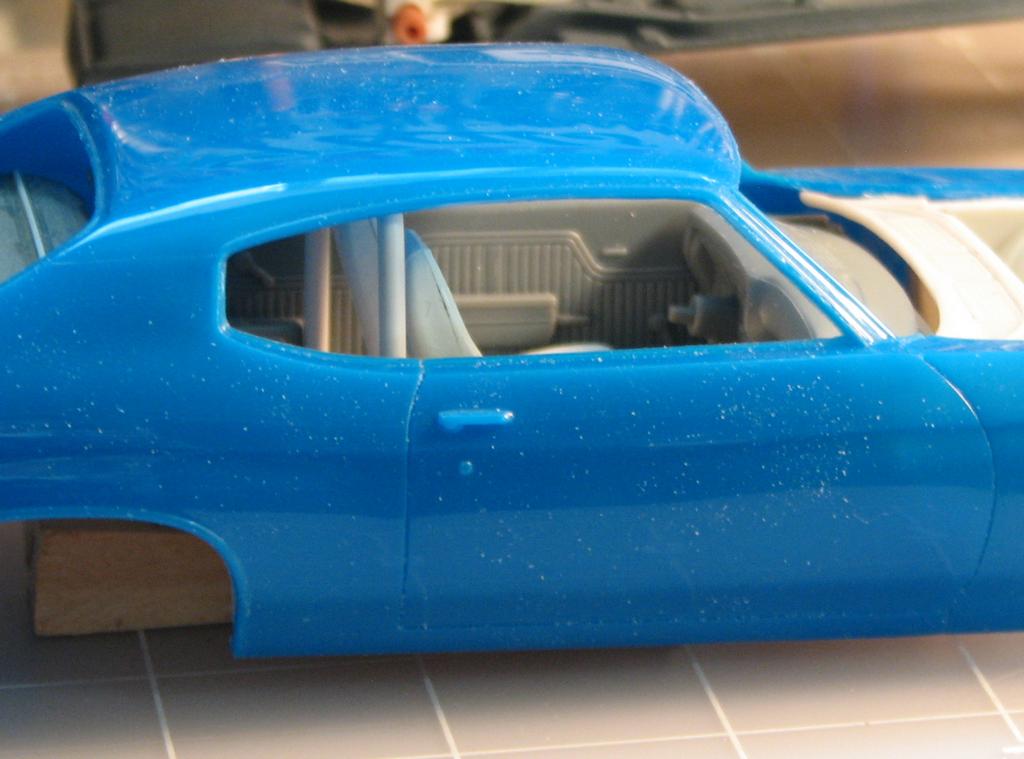
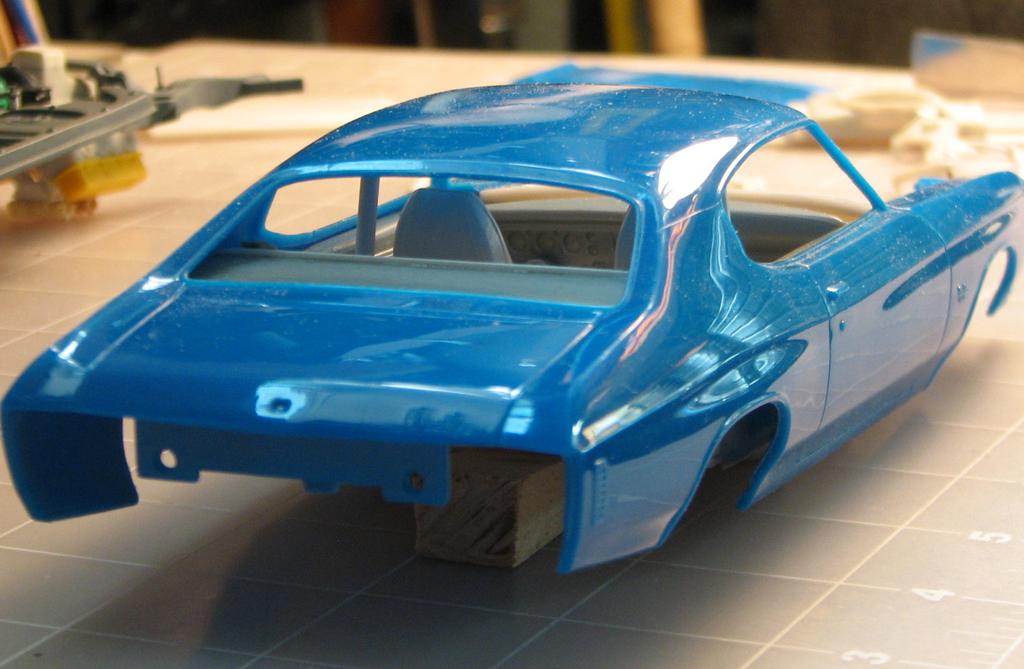
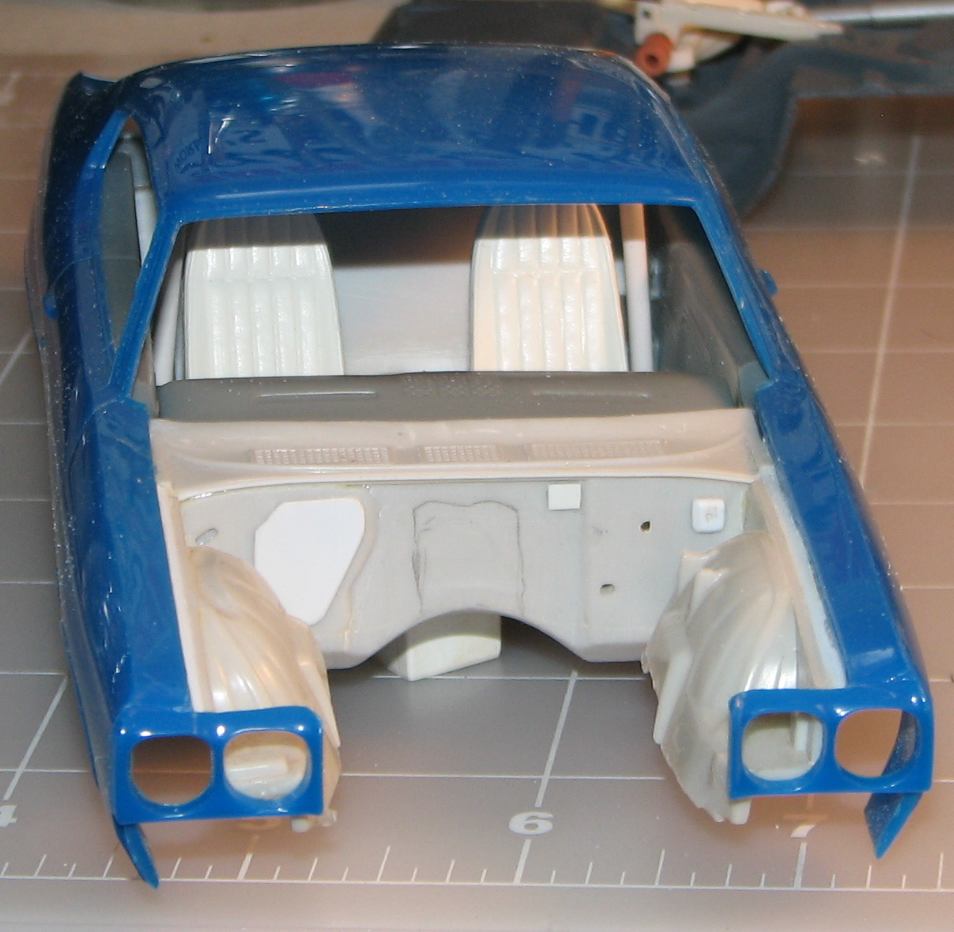
Snake, I hope I can inspire you to get your Monza out and work on it. Would enjoy seeing your vision! Thank you, Karl. The stance has to be right, or it just doesn't work, no? Thank you, Ron. I've been spending some time on the interior; The door panels, in particular. I cut them from .005" aluminum flashing (can't say enough, how much I love this stuff!), then rolled them at the top, over a length of 1/16" brass tubing, to create a rounded bend. As you can see, that left the upper edge of the panels straight, so they didn't match the window line. To correct that, I cut a section of aluminum door threshold I'd picked up, somewhere, and cut and filed it to the desired profile. Then, using a ball peen hammer, I formed the top of the panel to more closely match the window line. I'll do some fine tuning to the panels, yet, but, the improvement is apparent. Lastly, I cut the reliefs for the dash. I'll also add some rolled beads to the panels, along with window cranks and door handles. I'm planning to smooth the bumps on the promo's dash, and form some aluminum sheet over it, to make a new dash. I've also begun work on the trans/driveline hump. Attached are a few progress photos. Comments welcome, as always!
-
1975 Monza--Completed 12/25/2018
Straightliner59 replied to Straightliner59's topic in WIP: Model Cars
Thanks, David! I agree with you, the scoop will not be part of the finished model--I want to leave the lines of the body alone. -
1975 Monza--Completed 12/25/2018
Straightliner59 replied to Straightliner59's topic in WIP: Model Cars
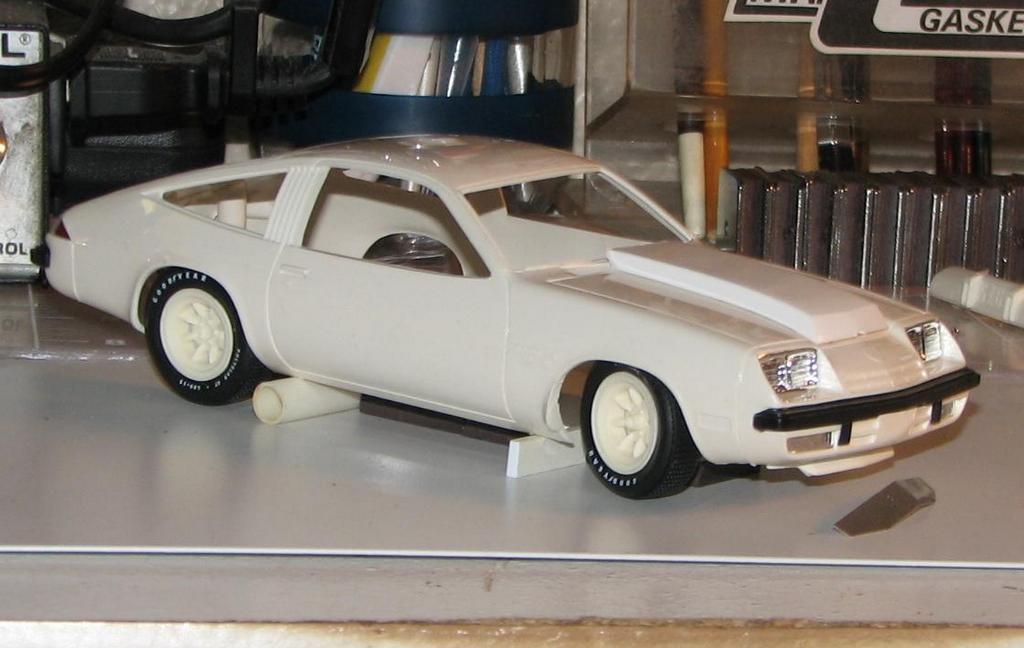
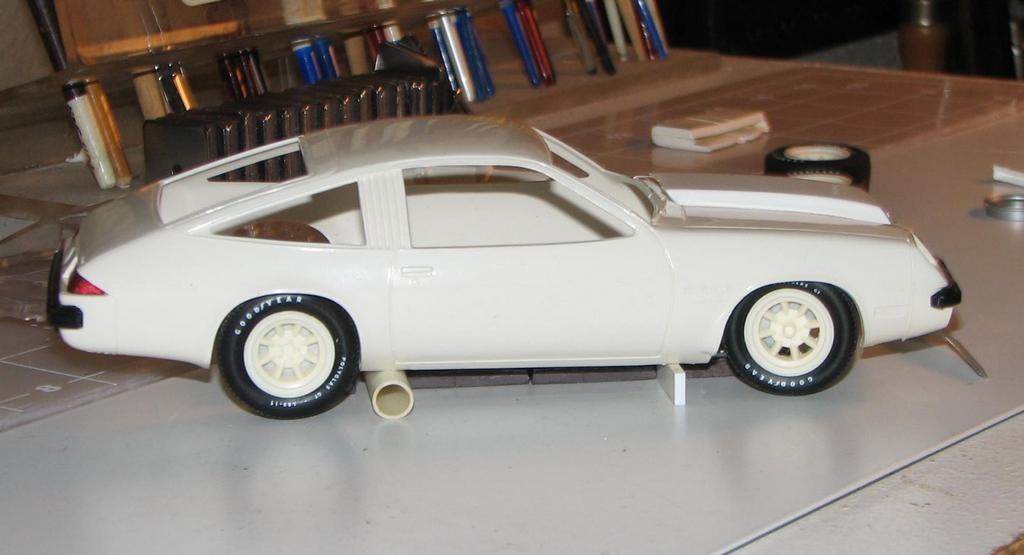
Thanks, Snake! I'm kinda' liking it, too! I've added a couple of items, now: exhaust tubes, a new chin spoiler (I'm going to reshape the bottom, to eliminate the optical illusion that it's got a concave profile--I know it's straight, because I cut it against a steel straightedge.) and the rear spoiler.
-
1975 Monza--Completed 12/25/2018
Straightliner59 replied to Straightliner59's topic in WIP: Model Cars
Thanks, Dave and Joel! Much appreciated! -
1975 Monza--Completed 12/25/2018
Straightliner59 replied to Straightliner59's topic in WIP: Model Cars
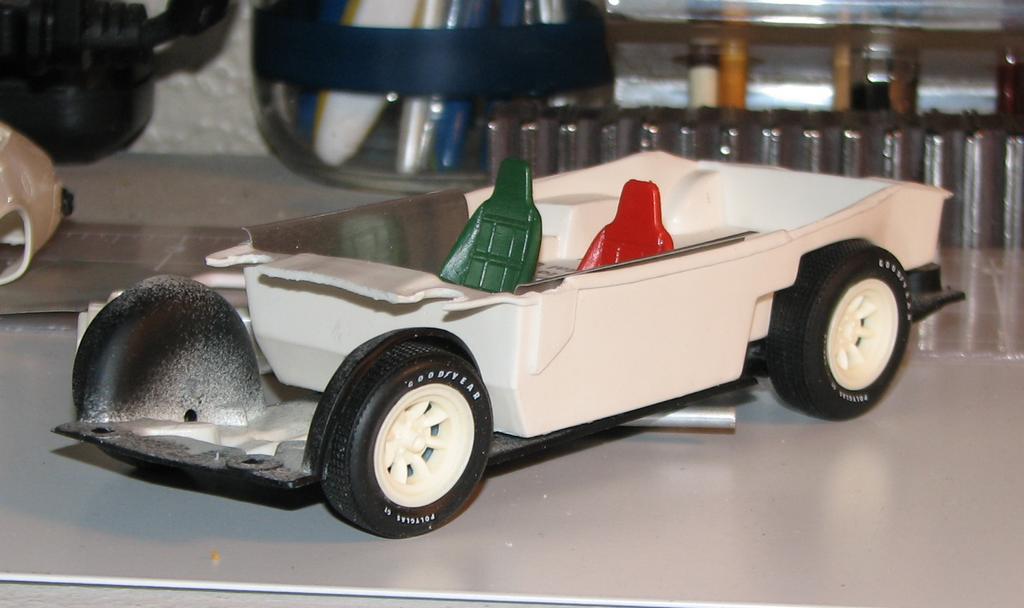
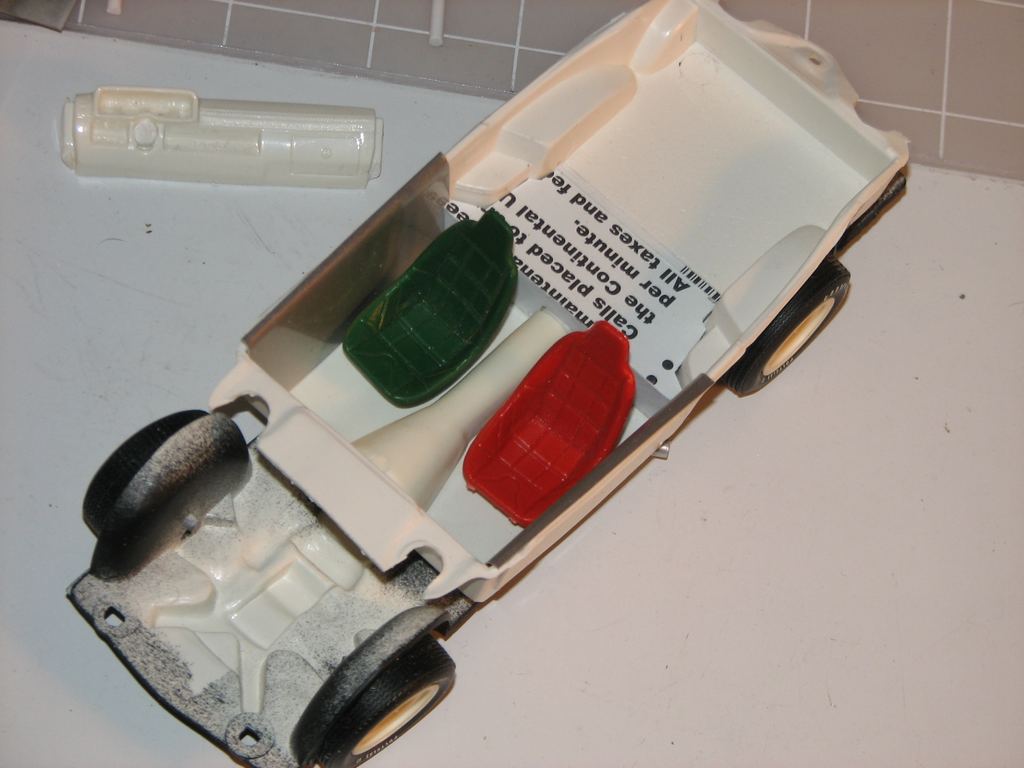
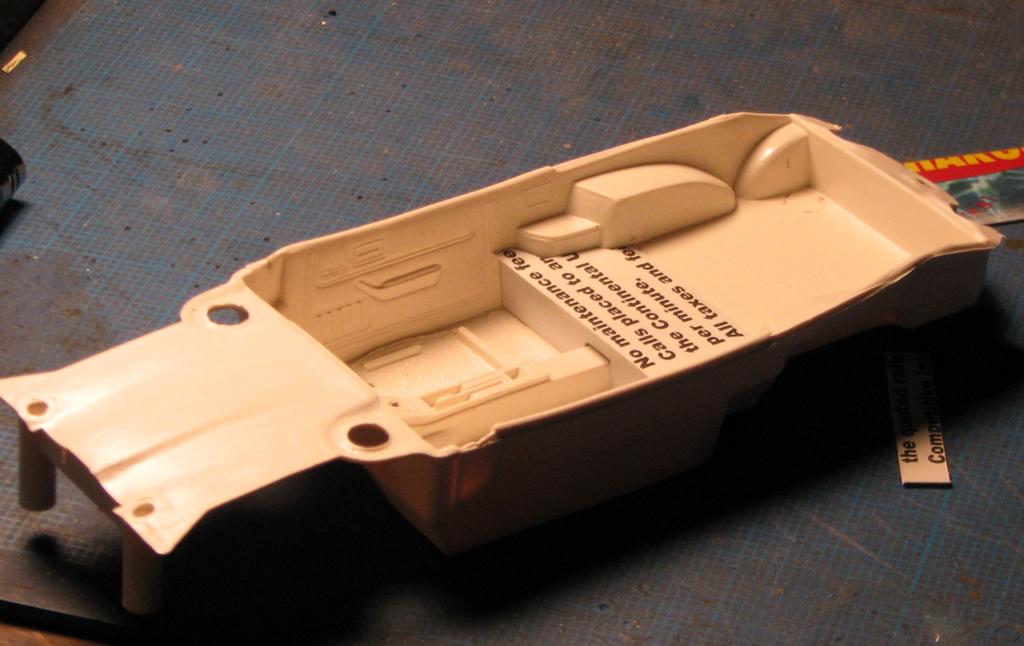
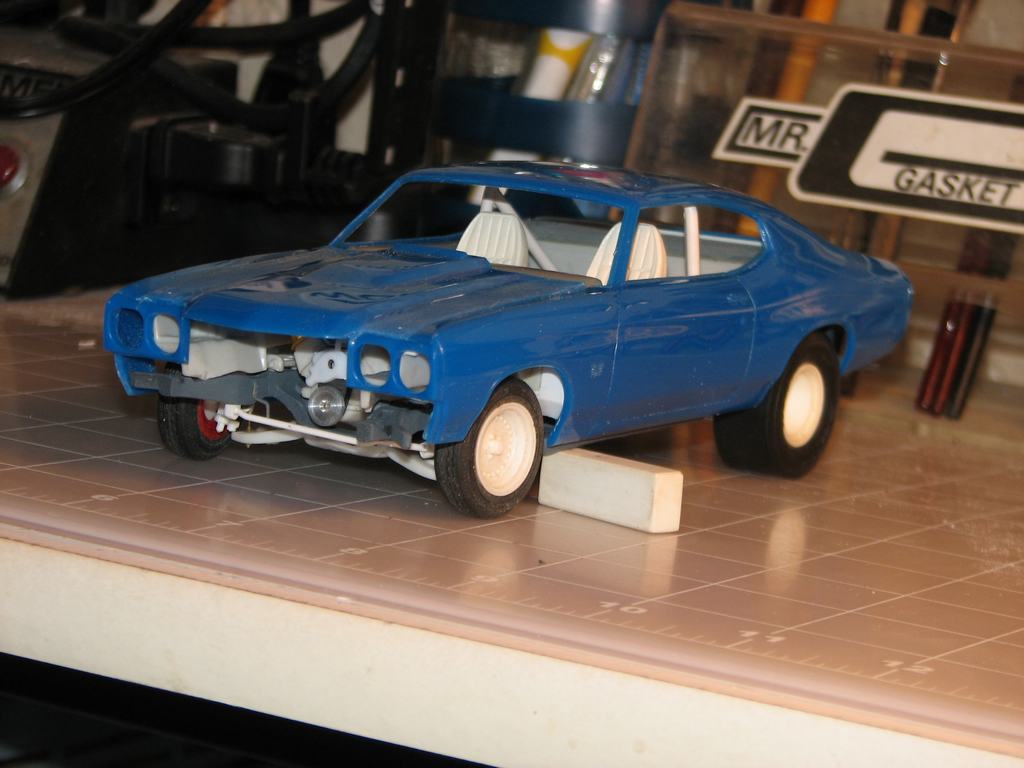
Sorry guys, I've been away for a bit. All your comments are much appreciated! Steve Milberry, thanks. I like a nice sleeper, and I never much cared for those pontoon flares. I've made a little progress, since my last post; I removed the floor and replaced it with styrene sheet--I still need to add the tunnel, which is why I am going with the new floor. I wanted to get rid of the console. I turned some rotors on the lathe (I use the term "turned" loosely, all I did was turn some aluminum rod to diameter, drill it, and cut it off--hardly a complicated operation!), and paired them with caliper castings from molds Don Fahrni and I made back in the '80s. Gotta' have that "eye candy"! Also, the car is now on the wheels (I still need to drill the wheels for valve stems and paint them.). I am very happy with the stance! Here are a few photos of the car as it sits, now. Future plans involve a dark, metallic green paint job, buckets from Johan's Sox and Martin 'Cuda, aluminum dash and, perhaps, door panels. Hope you guys continue to enjoy its progress!
-
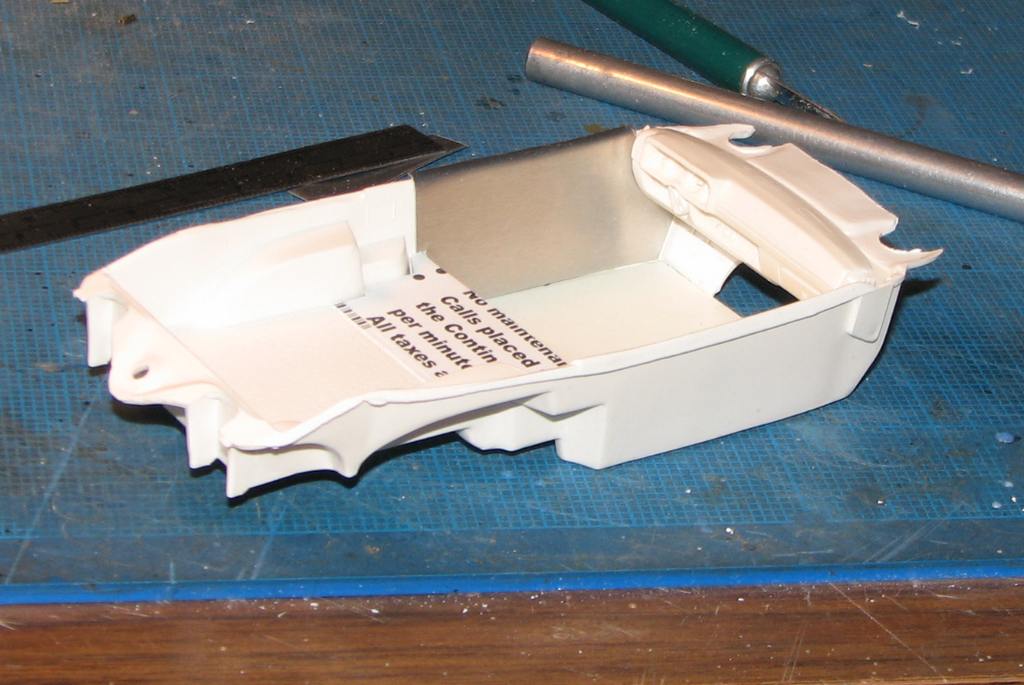
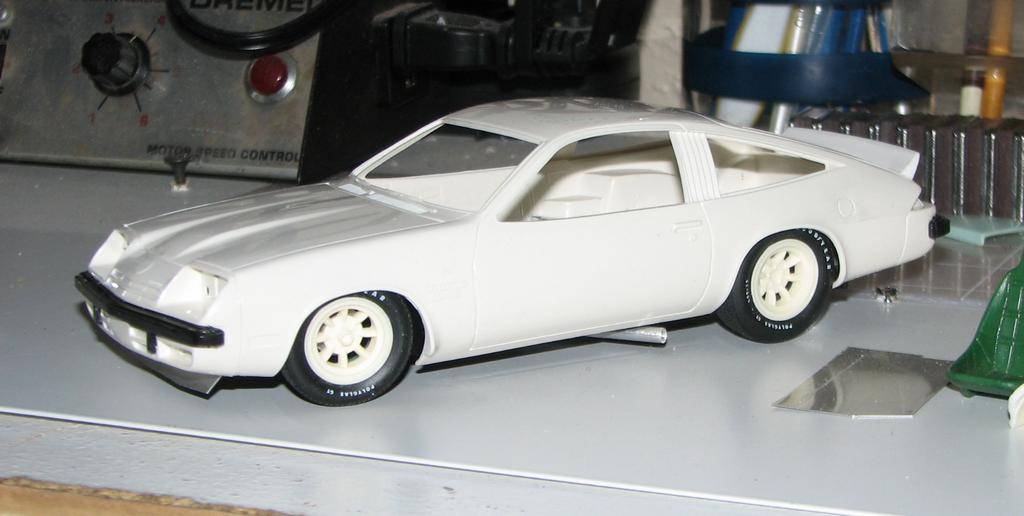
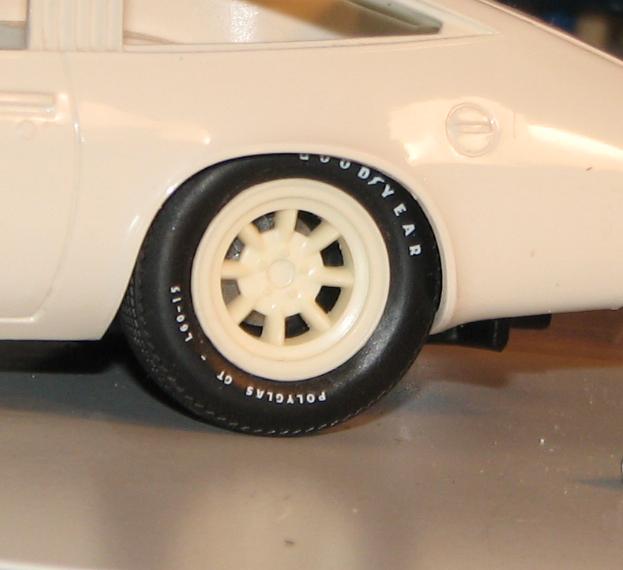
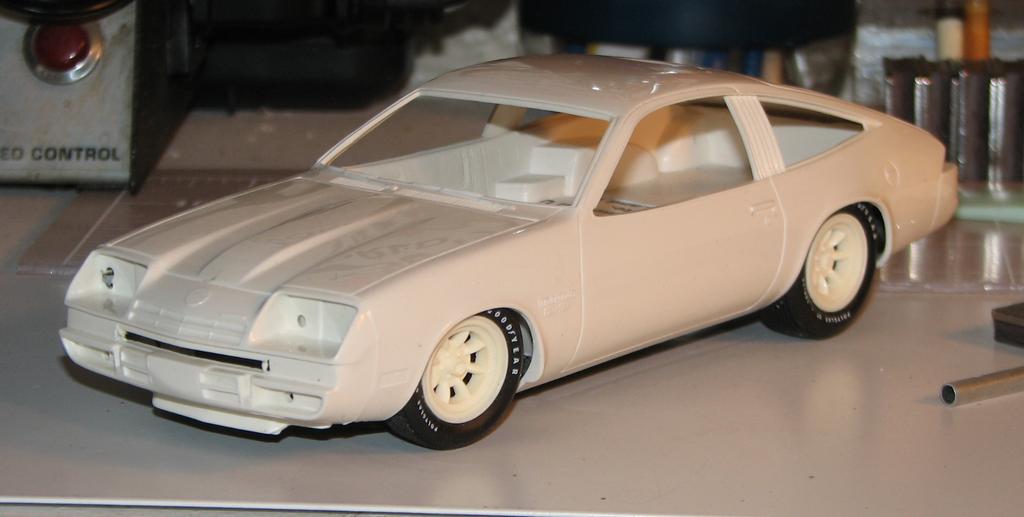
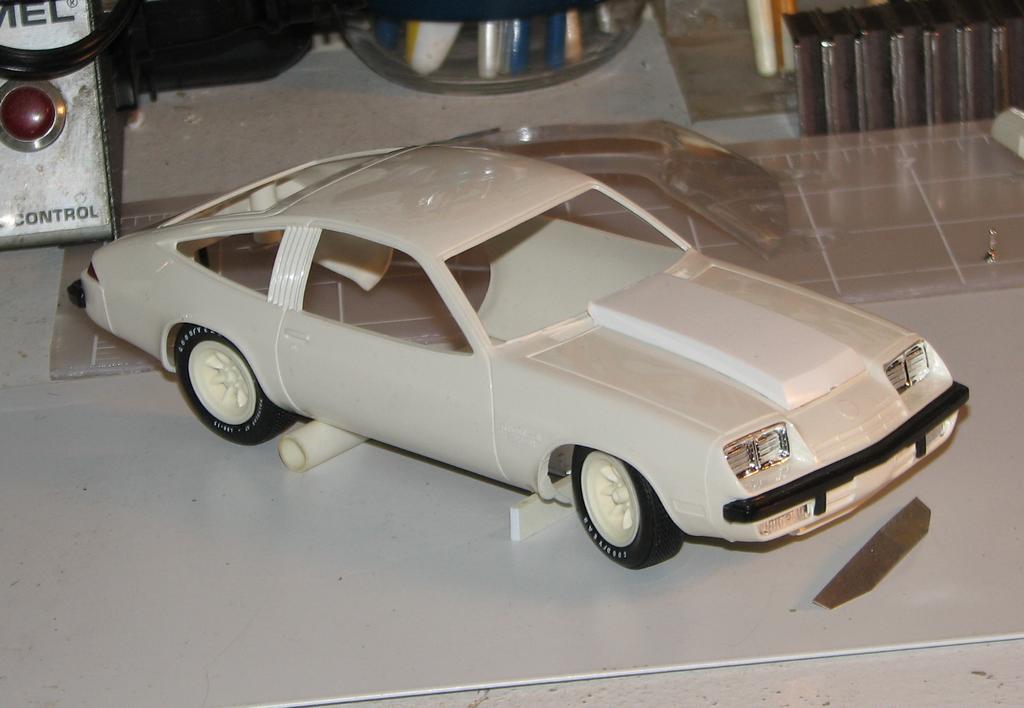
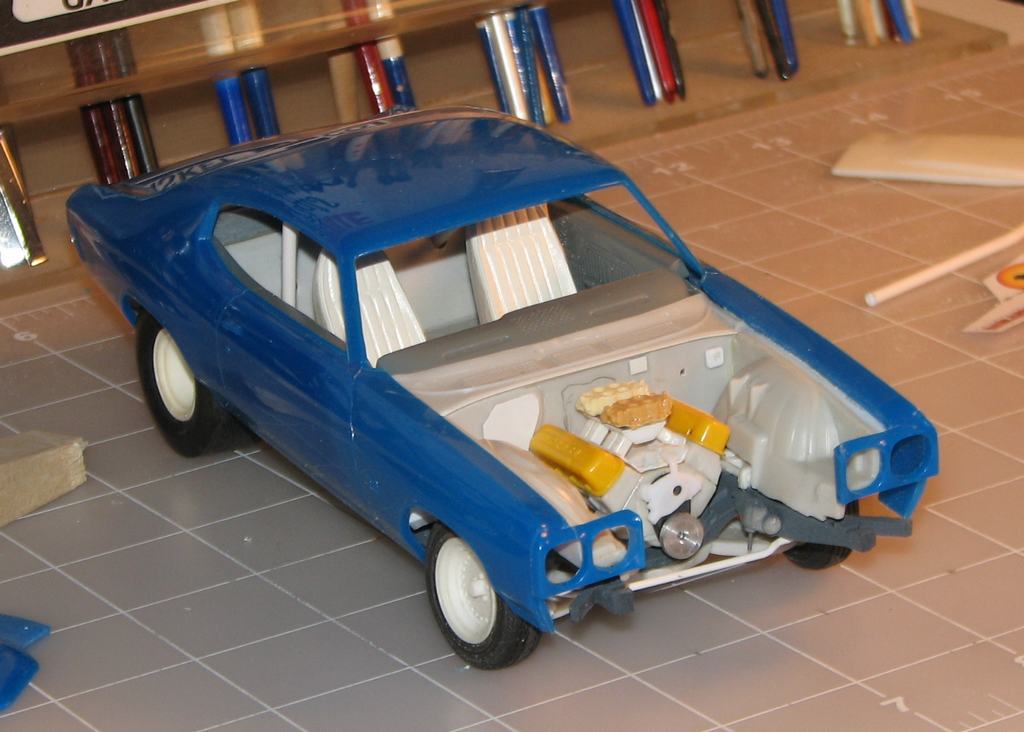
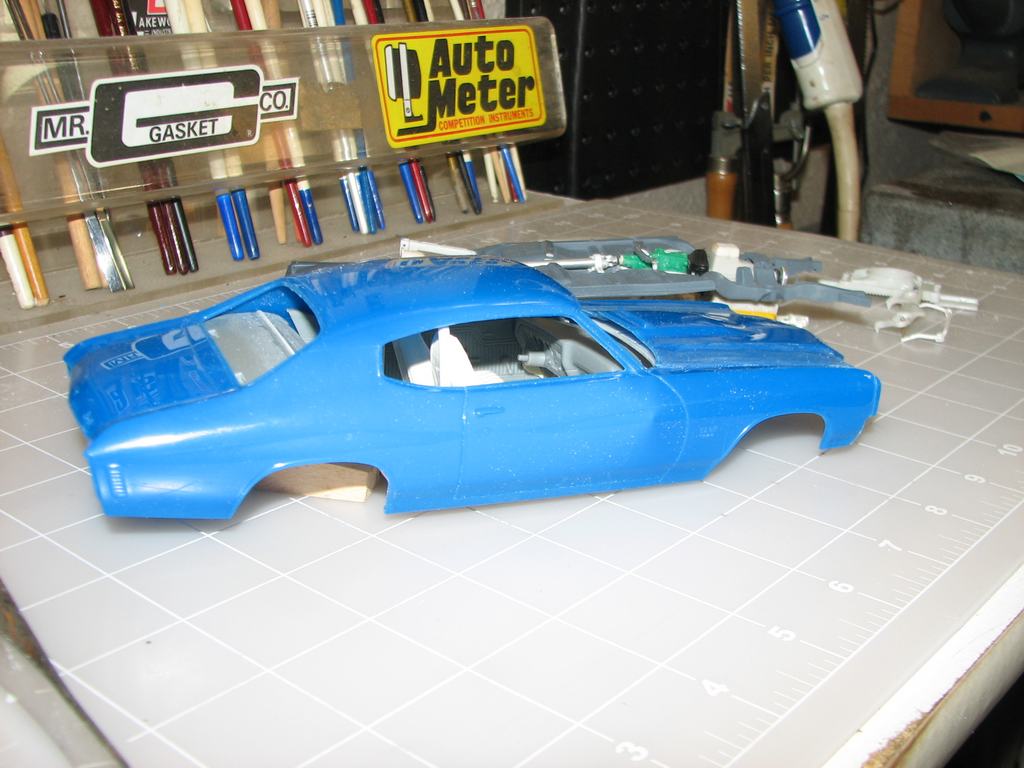
I really do have a thing for curbside models. I'm waiting to tackle a couple of clearance issues with the Chevelle, so thought I'd play with this thing, for a while. Obviously, it's a promo--I ain't afraid to modify them! I've accrued a few of them, over the years, because I've always loved the styling of this car since GM introduced it (I love Vegas, too!)--too bad the underpinnings weren't better. That said, I've also been hankering to build something road-racing inspired. I like the looks of the early Trans Am series cars. Unfortunately, by the time the Monza was introduced, "IMSA" flares were en-vogue, and I'm not nuts about those. So, I decided to build this as a street car with early T/A influences. I've removed the rear seat and covered that area. I'll probably replace the floor, as well. I've begun work on a basic rollbar assembly. It'll get a pair of racing seats, and a cleaned-up dash. I'm going with these Minilite wheels (I found them on Ebay, last year. They're very nice!). Tires are from the AMT parts packs. I will put disc brakes at all four corners--one thing I enjoy when I build curbside models is adding as much detail as I can, while still keeping it curbside (don't turn it over; it'll retain the promo chassis!) You can see the aluminum chin spoiler, and, I'll add a simple spoiler to the rear, as well. Not much done, so far, but here's a first look! Comments and questions welcome!
-
Bill Jenkins' Black Arrow 1965 Belvedere
Straightliner59 replied to Jim_Kampmann's topic in WIP: Drag Racing Models
Excellent work, Jim! That baby looks just right! -
Figured I was far enough along to put everything together for a test fit, and put 'er on the wheels. No tierod, at this time, because I haven't assembled it with the teeny-tiny nuts and bolts, yet. I feel that moment is coming soon. I like the way it sits. It looks pretty badazz--like a '70s race car!
-
That is nothing but cool, man! Subtle, low and sleek. Beautiful model!
-
Paul said:"This is about as close as I've been been able to get as far as used Magnesium dow coated. Its Alclad Mag over white primer. Of course the make up of the Magnesium will change the color of it" Hahahahaha! That looks almost perfect! And, that's closer than anybody else has got, as far as I've seen!
-
Thanks, JC. Now I need to figure out my next bit of insanity!
-
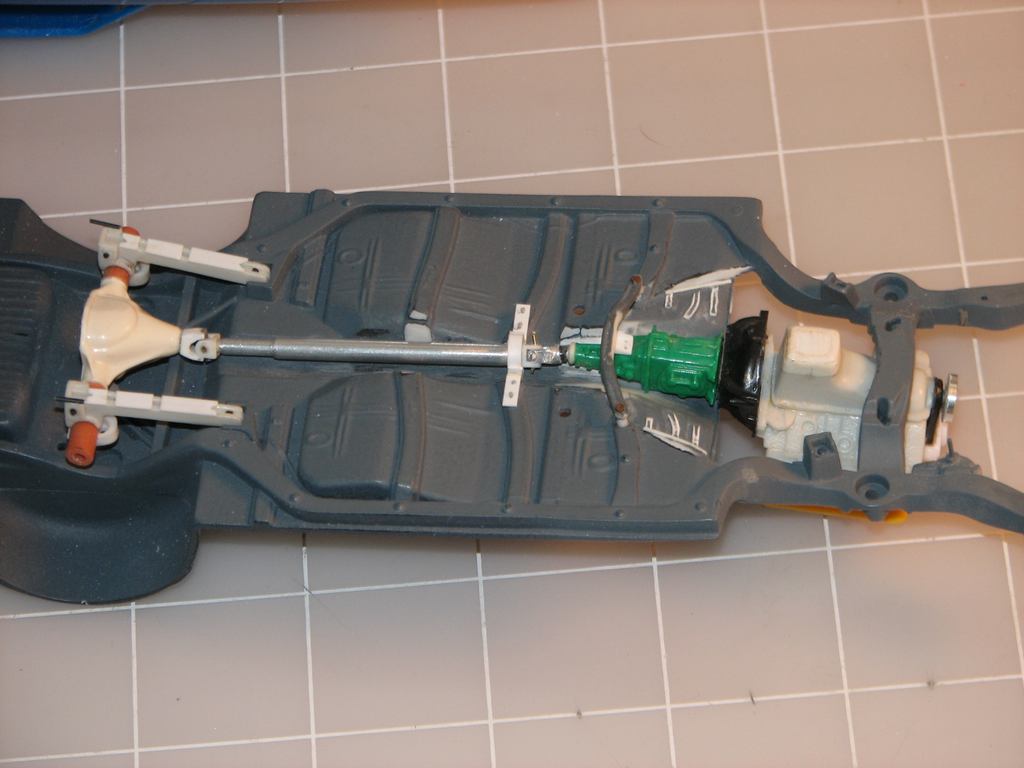
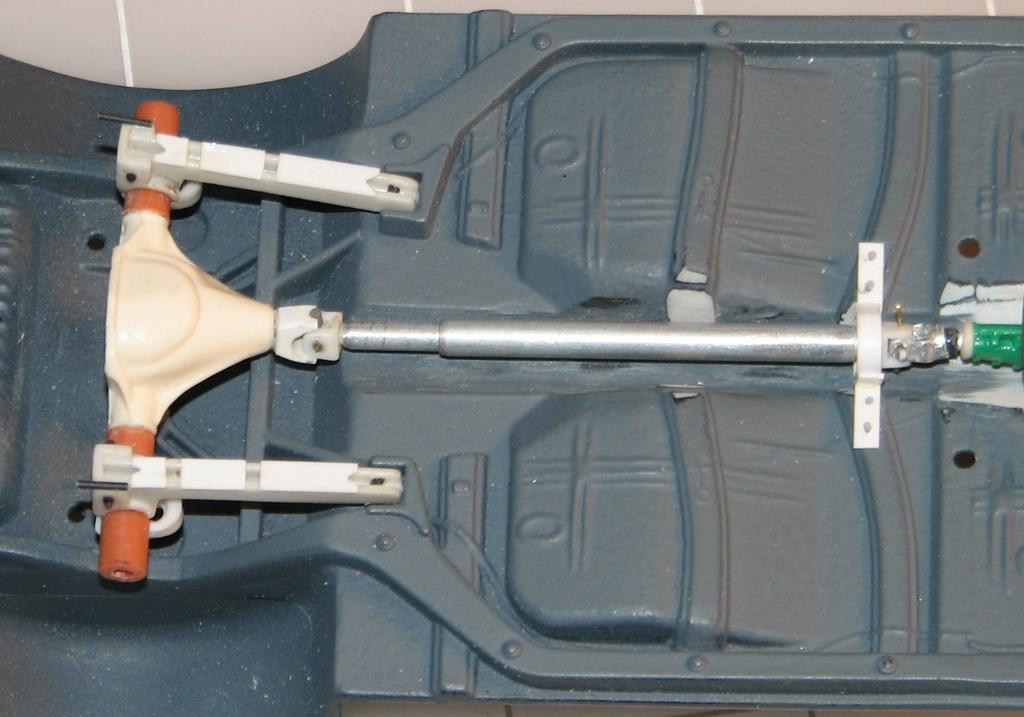
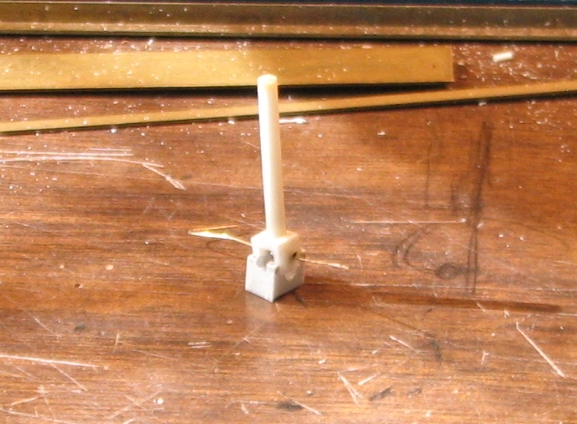
Got a bit more done! The drivetrain is assembled, complete with driveshaft loop. The interior is coming together. Seats are from a '74 Vega promo. I butchered the interior tub to extract them! I'm not sure if I'm happy with the trans u-joint. I may be able to rotate the assembly, to hide its shortcomings, but the diff yoke is tacky glued in place, at the moment.
-
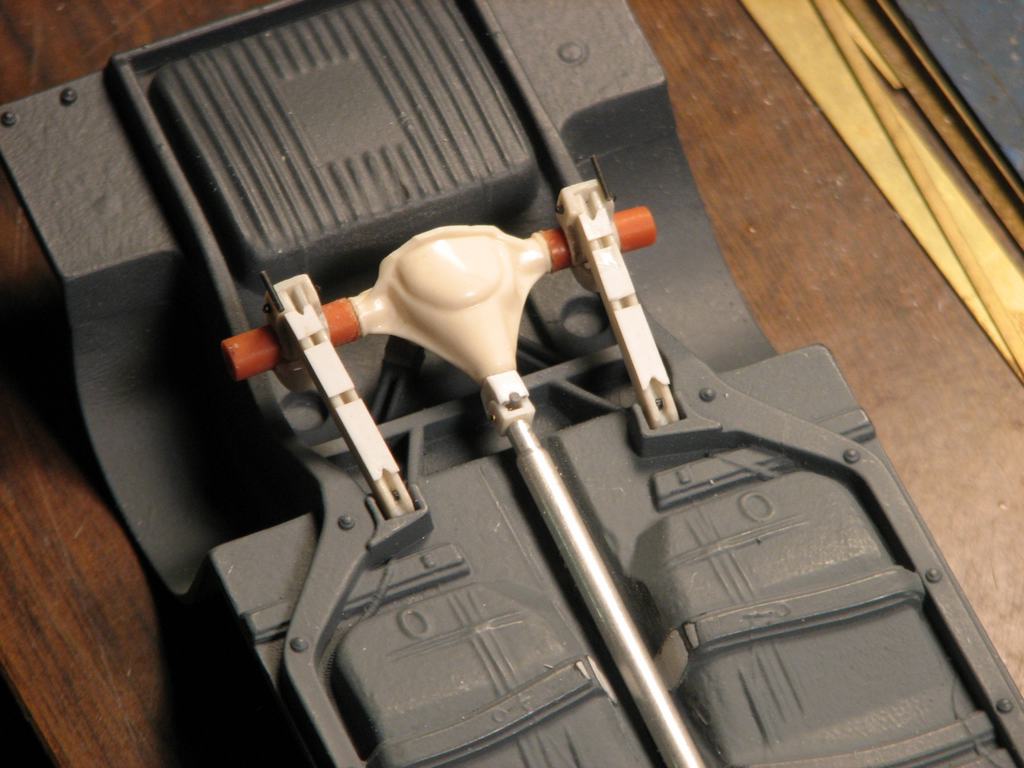
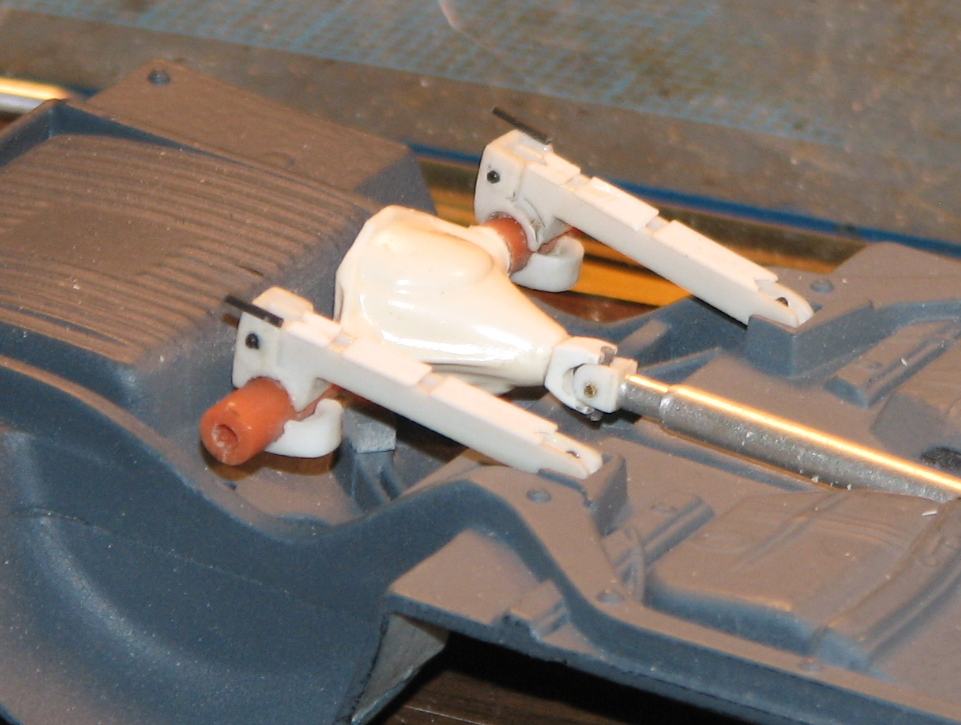
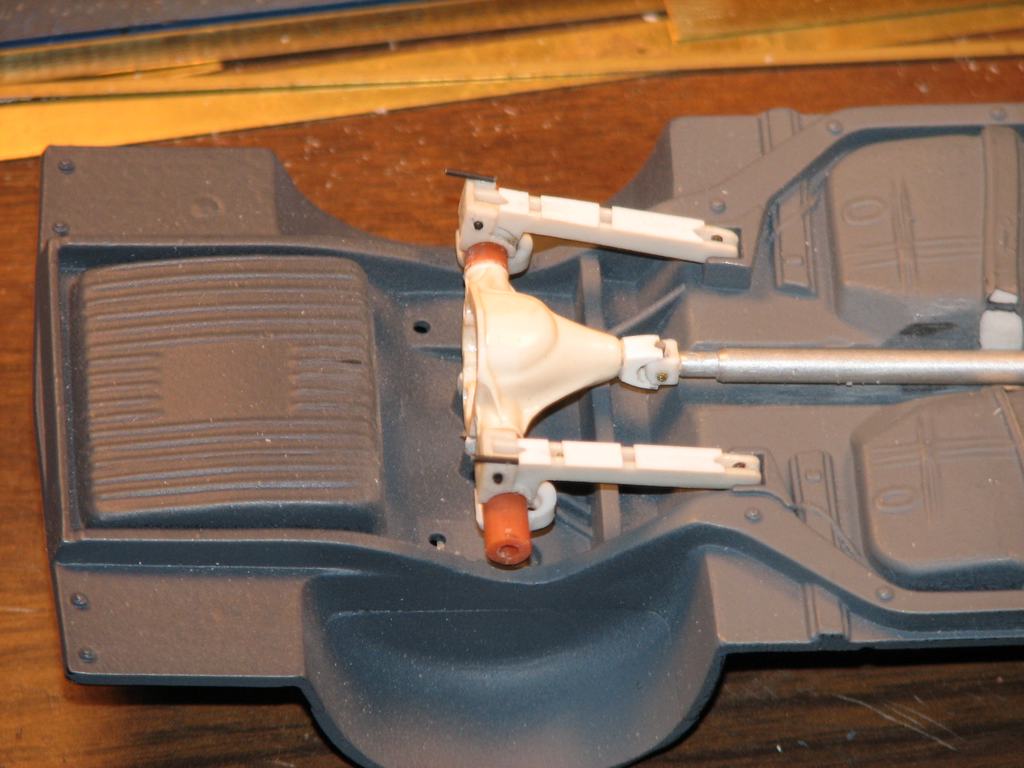
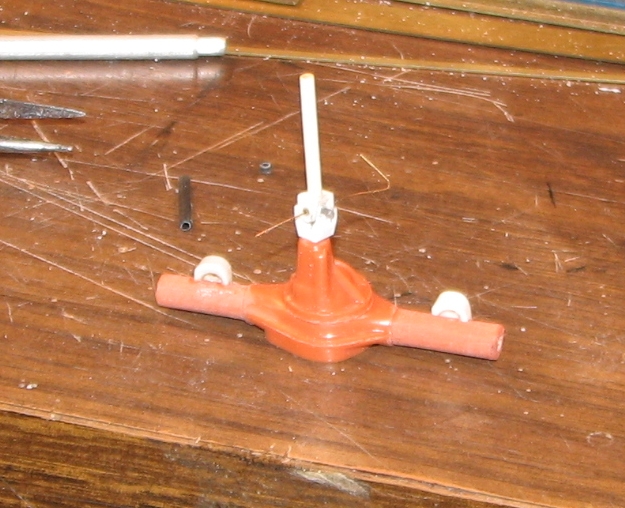
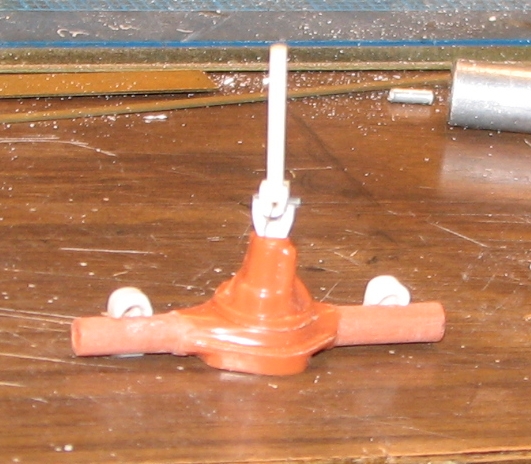
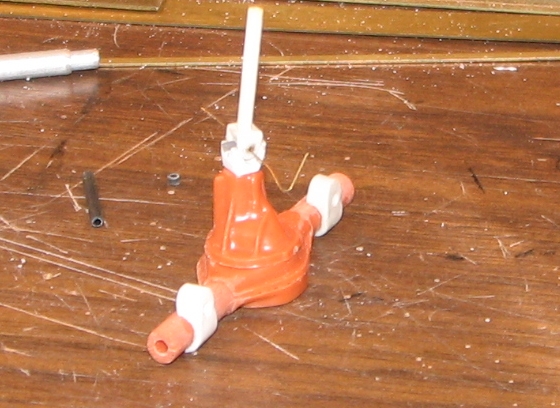
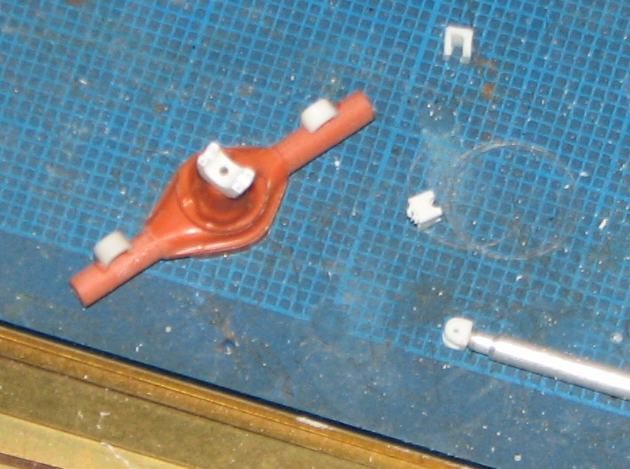
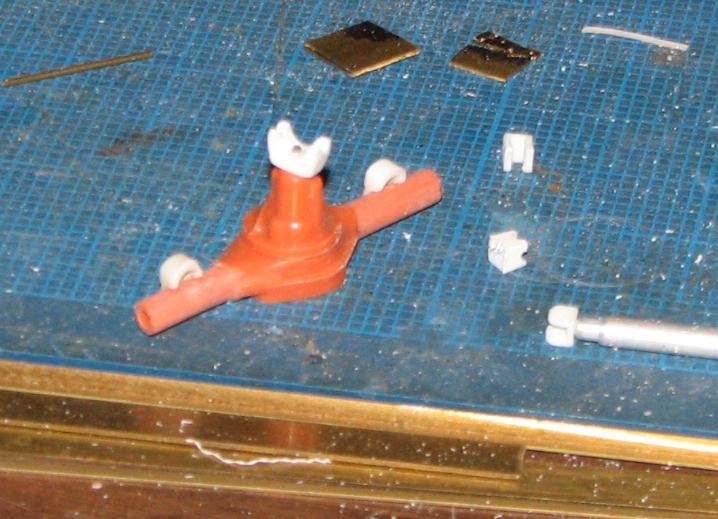
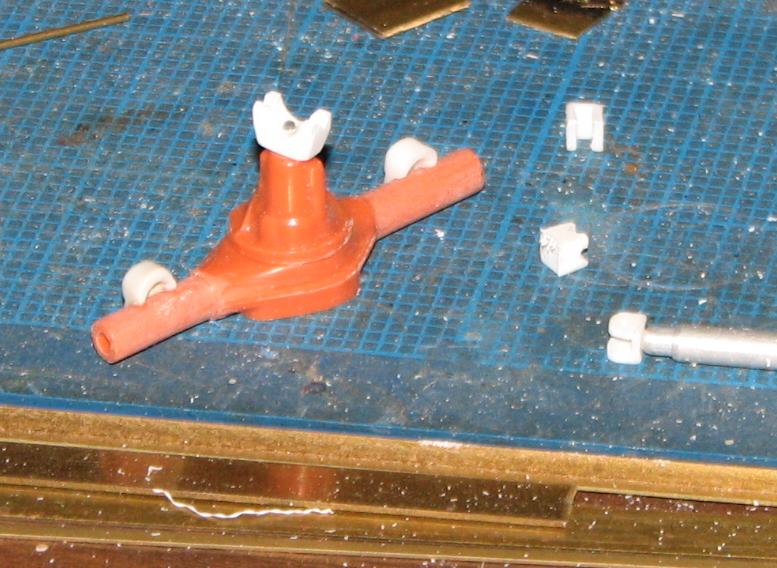
Swapped out the diff for one that's more of a Dana 60. Had never paid attention to the one in the Johan Sox and Martin, but, it's really only a Dana 60 in the rear cover. The new one is from a Monogram kit, I am pretty sure, but I'm not sure which one. Anyway, here are some shots of the new diff, with the driveshaft. I have the retainers formed for attaching the u-joint to the pinion yoke. I also got a bit farther along with the interior assembly.
-
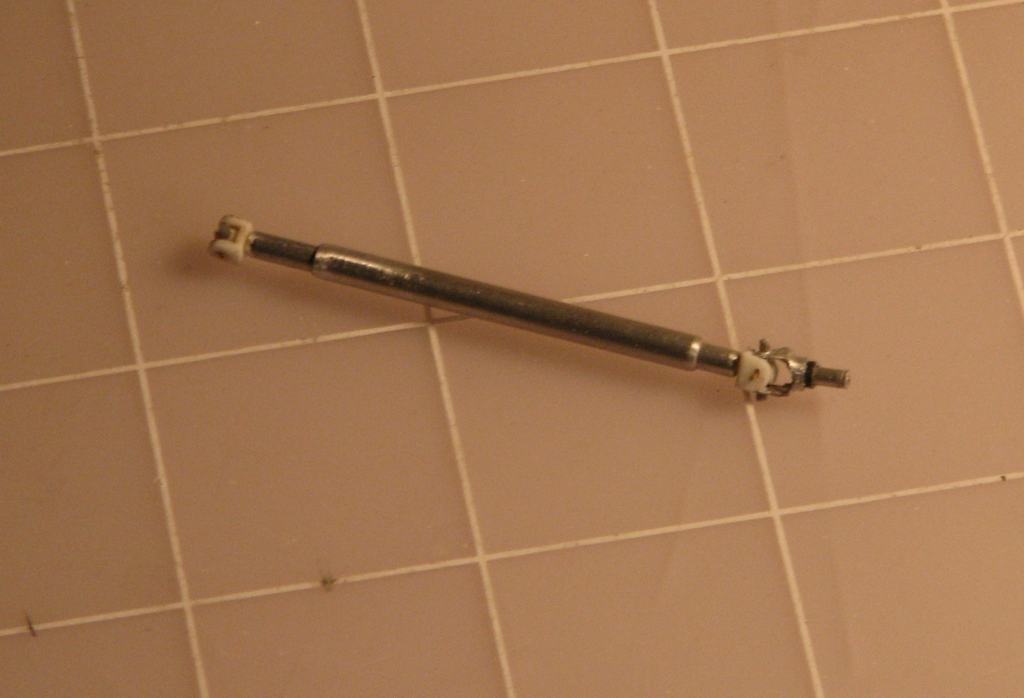
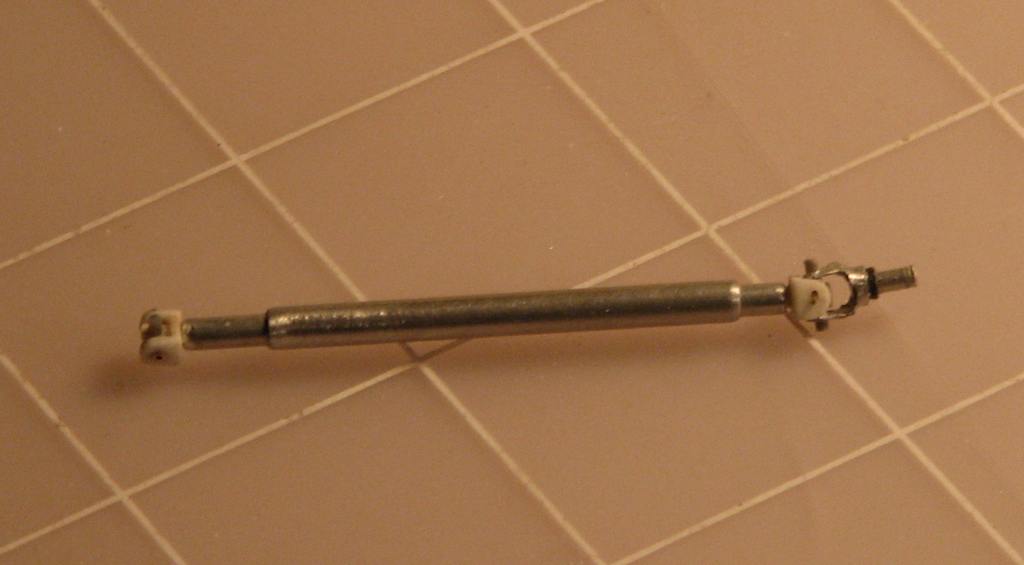
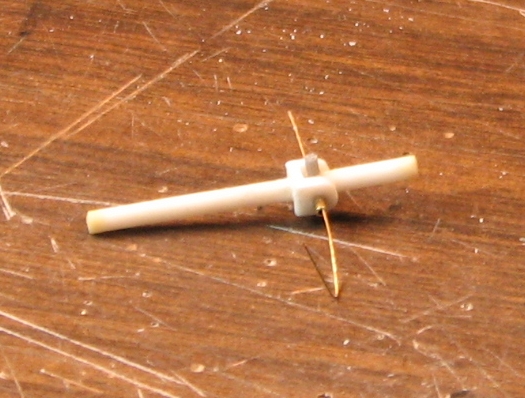
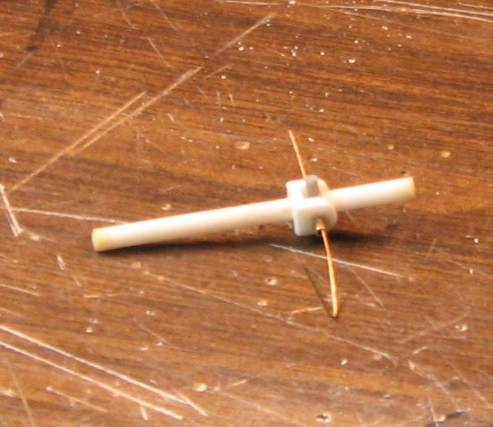
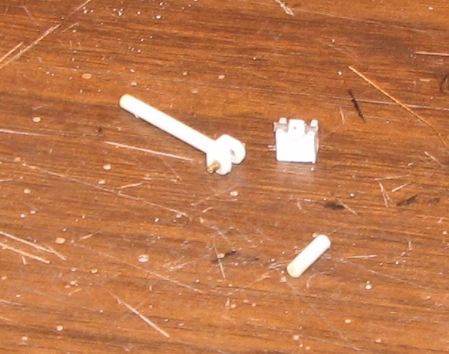
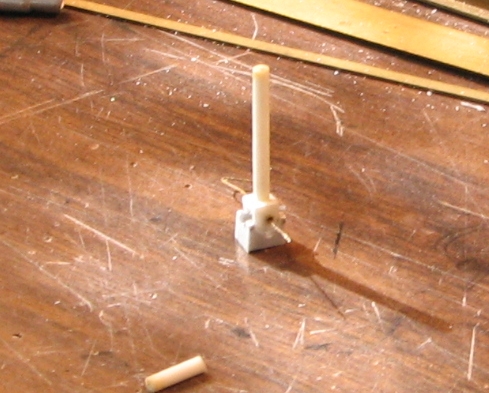
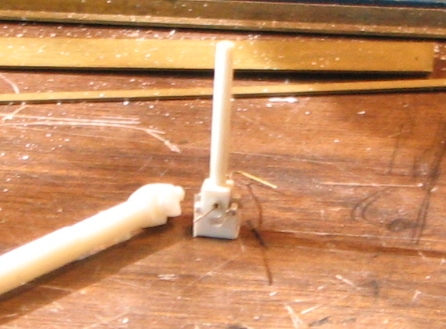
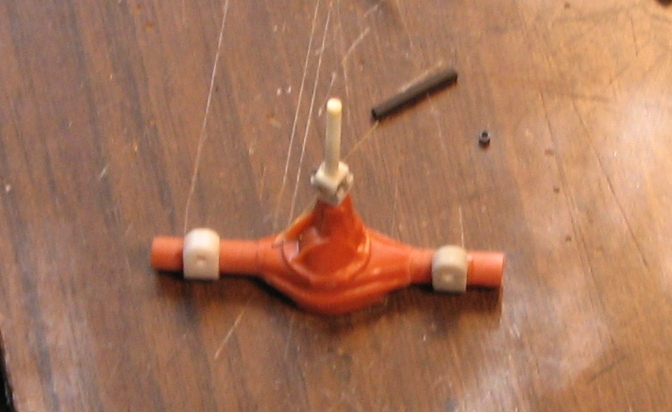
After a few tries, I am finally happy with this bit of weirdness! I the sixth photo down, the kit driveshaft is alongside, for size reference.
-
I enjoy building curbside stuff, if I think I can generate enough visual interest. In fact, I think most of my builds are curbside, since most dragsters, especially with bodies on them don't have much of anything to look at, on their bottoms.
-
Thanks, Ted! It's been a ton of work, but, I am happy with it, so far! After about six attempts, I finally have a pinion yoke that is small enough (the one pictured above is too big.). Going to head in and work on finishing the driveshaft, in a few.
-
Detail Master 1427 Coolant Hose
Straightliner59 replied to 250 Testa Rossa's topic in Car Aftermarket / Resin / 3D Printed
It appears that Slixx may have some left. http://www.slixx.com/dm-1427.htm?id=2902 -
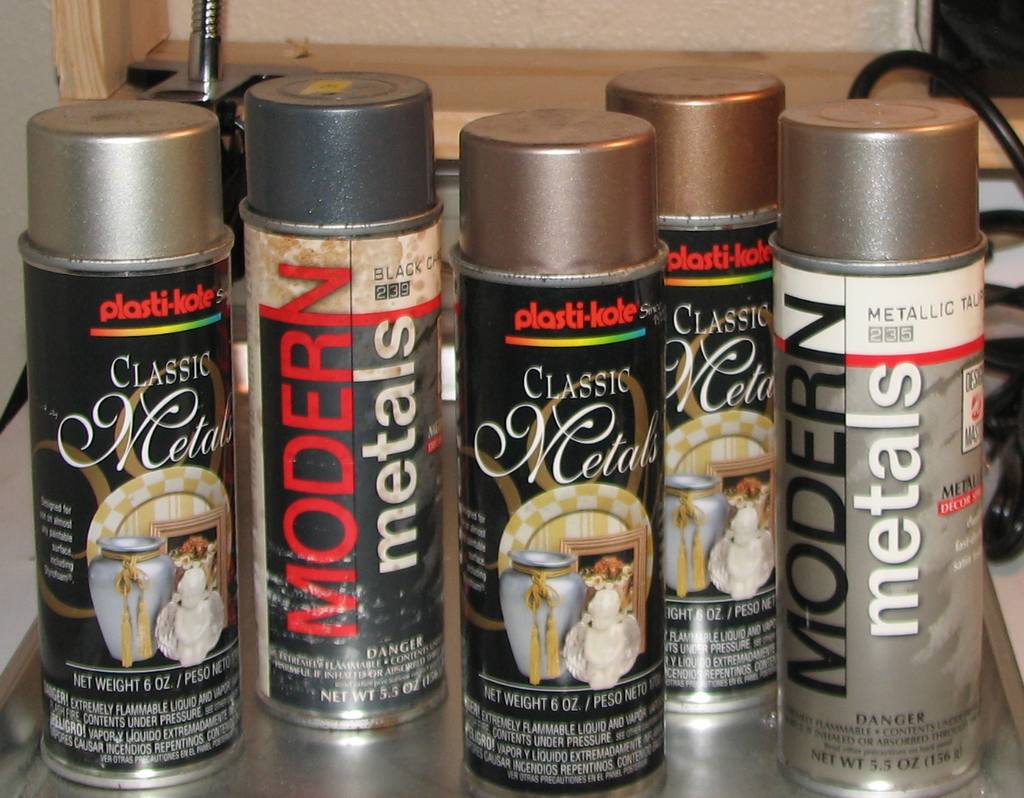
I picked these up several years back at various locations (Michael's, maybe Walmart, and Crafts Direct in St. Cloud, MN). I've used them for replicating different metal finishes. Yesterday at Hobby Lobby, I saw a can of Krylon that looked as if it might be perfect for replicating newly-treated Dow 7. Sorry I can't recall the color, but it was in a large can, and looked very close, and the flake appeared more metallic than metalflake. I wish I'd picked it up.
-
Absolutely beautiful work, JC! It sits just right; Excellent detail. Love this model!
-
Now that is cool, Bill! I didn't have a ton of research, when I started this, but found enough to get this close. I'm glad you like it! Thanks for saying so!
-
That's cool, Art. I guess I wasn't aware that it was their first!
-
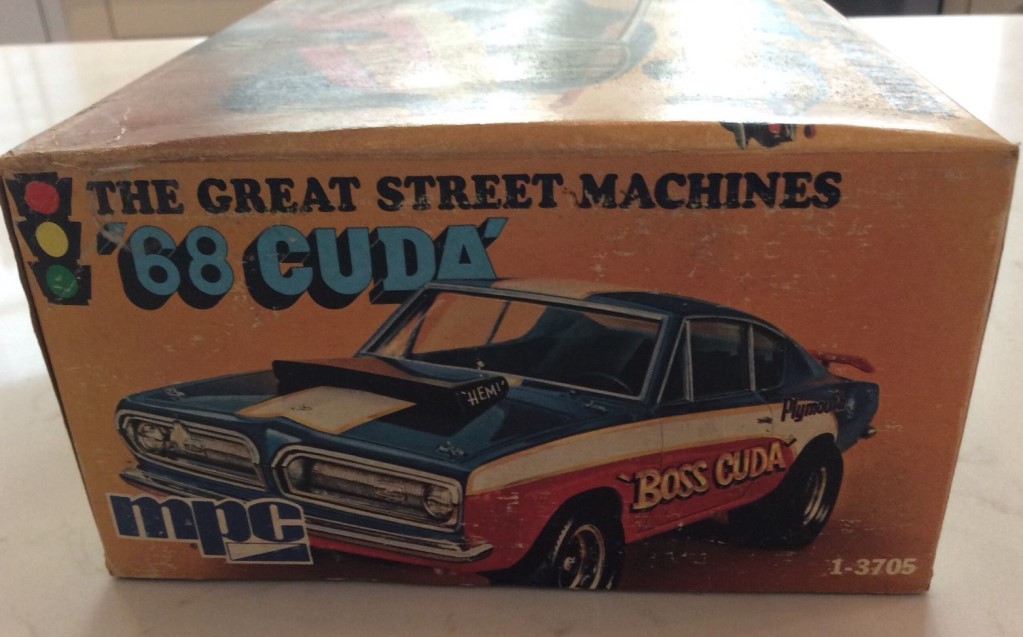
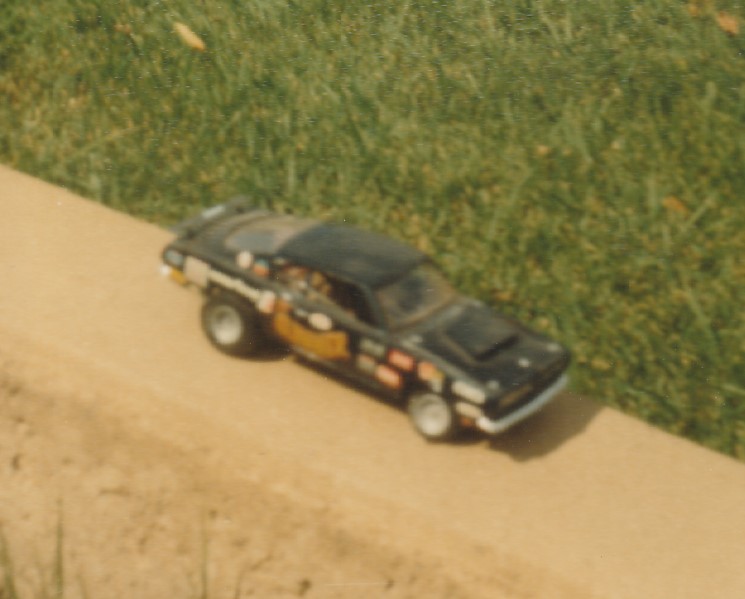
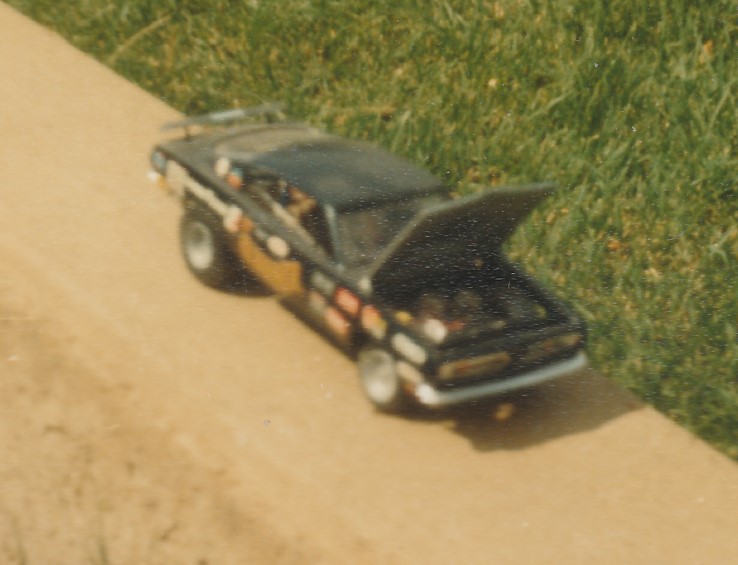
These are the only two photos I have of one of my early efforts. I built this in about 1975, I think, from the kit pictured. I recall having to remove the rear suspension from the kit chassis and replace it with leaf springs and scratch built shackles. Like my Chevelle, I built it per NHRA's 1975 rules for Modified Production--from the same rule book I'm currently using! Anyway, the photos are barely worth sharing (the model probably wasn't that great, either!), but, I was proud of it, even so!
-
I need to make this a tad smaller...
-
Thanks, John. I don't have anything fancy, just a Canon inkjet and some Blingasm inkjet decal paper I found on Amazon. You need both white and clear, since the ink isn't opaque. You have to print light colors on the white, and trim right to the edge. I'd never had much luck until I did the decals for my '34.