Straightliner59
-
Posts
5,805 -
Joined
-
Last visited
Content Type
Profiles
Forums
Events
Gallery
Everything posted by Straightliner59
-
While there's no doubt it could be fixed, it's just such a waste! The point is that no one will buy it and fix it, therefore it's pretty much ruined. :-)
-
I stumbled across this on Ebay. Such a terrible thing to do to a Racing Scenes Vega! It's ruined!

-

427 Ford SOHC engine source
Straightliner59 replied to Paul Payne's topic in Model Building Questions and Answers
I recall a discussion with Don Fahrni and Tom Hardy, years ago, about the Cammer, and best way to model it. We concluded that the only way to build an accurate replica, is through kitbashing. I don't remember all the specifics, but, the conclusion was that the best cam covers were from Monogram's T'rantula. -
That's cool! Kurtis Craft? I'm looking forward to checking them out, and seeing what I can do with them, to dress them up.
-
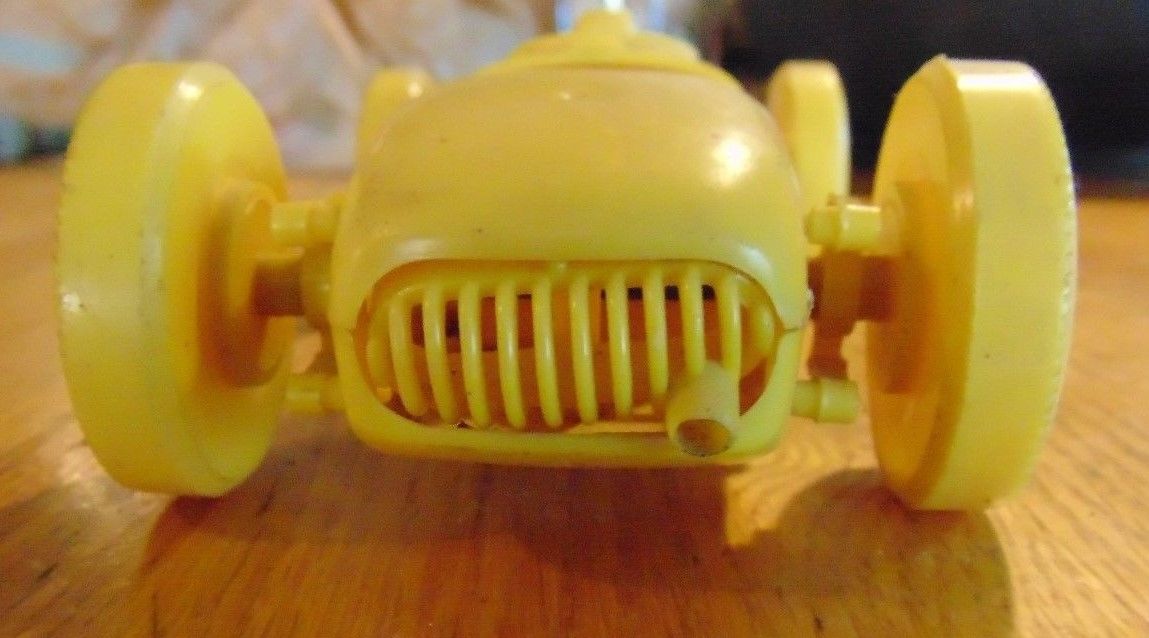
The listing on Ebay said the yellow one is Ideal. I won't know for sure, until it gets here. They should be fun to check out!
-
Honest opinion on my gangreen nova
Straightliner59 replied to mschlem66n's topic in WIP: Drag Racing Models
That perfectly captures the look of an '80s Super Gas car! -
Just bought these in separate deals on Ebay. They're really toys, but, I am sure i can have some fun with them!
-
Monogram BADMAN
Straightliner59 replied to Greg Myers's topic in General Automotive Talk (Trucks and Cars)
I'm considering doing a Badman with the engine and Lakewood bellhousing from Monogram's '66 Malibu (I have a red one) and a standard trans. It's in the early planning stages, but I have designed a possible set of decals for it. I don't want to stray too far from the Badman, itself. And, I am going to try to keep it fairly straightforward and simple...uh, yeah. -
1975 Monza--Completed 12/25/2018
Straightliner59 replied to Straightliner59's topic in WIP: Model Cars
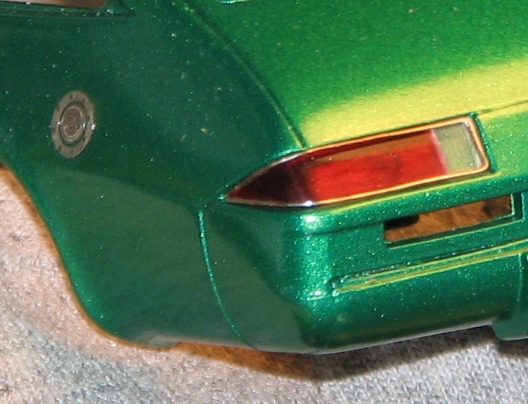
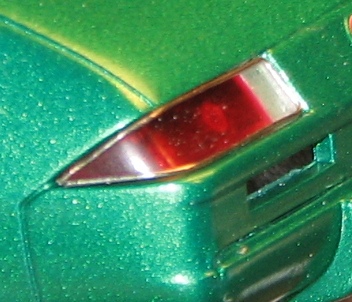
It's been a spell since my last update. I still don't have much to show, but, it ain't for lack of trying. These taillights are giving me fits! First off, MPC molded them with the texture on the outside, when it should be on the inner side of the lens. Secondly, while I "get" why they molded the entire unit in red, it's a real pain, trying to attach a section of clear, for the backup lamp, then re-scribe the texture on the inside of the lenses all while attempting to keep a 1/8" X .030" (approx.) butt joint in one piece. Therein lies the rub...the right taillight has had to be reassembled five or six times. Each time it comes apart, it needs to cemented again, then polished...all over, again. All the while, this process makes that butt joint ever thinner! Anyhoo--the right taillight is closer to finished, although nowhere near perfect. It still looks better than the straight MPC item. There's a parting line in the 1:1 that needed to be scribed into the outer side of the lens. I used a fine pen to darken it. I used textured foil to simulate the inner reflective surfaces. I still have one taillight to scribe, and to create the reflector pans. Here are a couple of updated photos, along with a couple of the prototype. Thanks for looking! Comments, criticism, advice always welcome!
-
This is freaking cool! Beautiful fuel coupe!
-
1975 Monza--Completed 12/25/2018
Straightliner59 replied to Straightliner59's topic in WIP: Model Cars
Thanks, Snake! I still want to see that Monza. No chickening out, man! :-) -
1975 Monza--Completed 12/25/2018
Straightliner59 replied to Straightliner59's topic in WIP: Model Cars
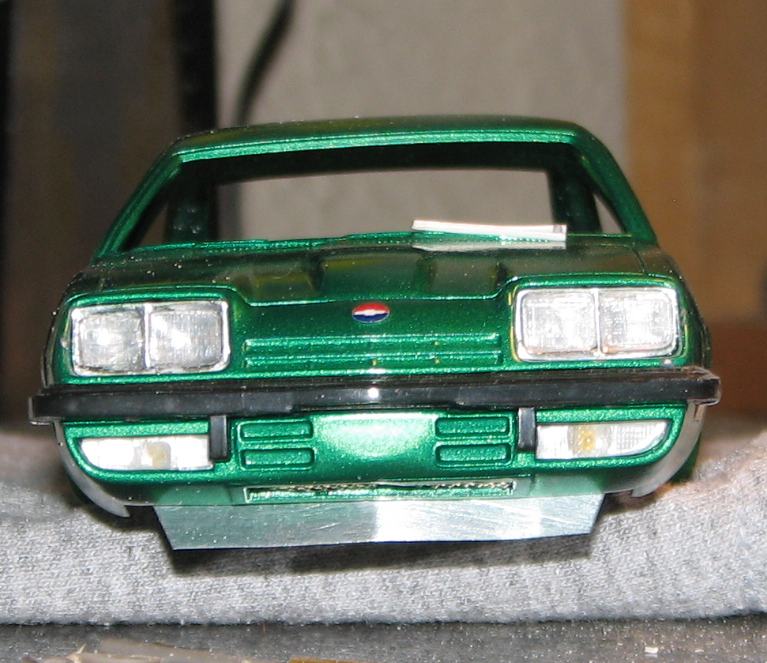
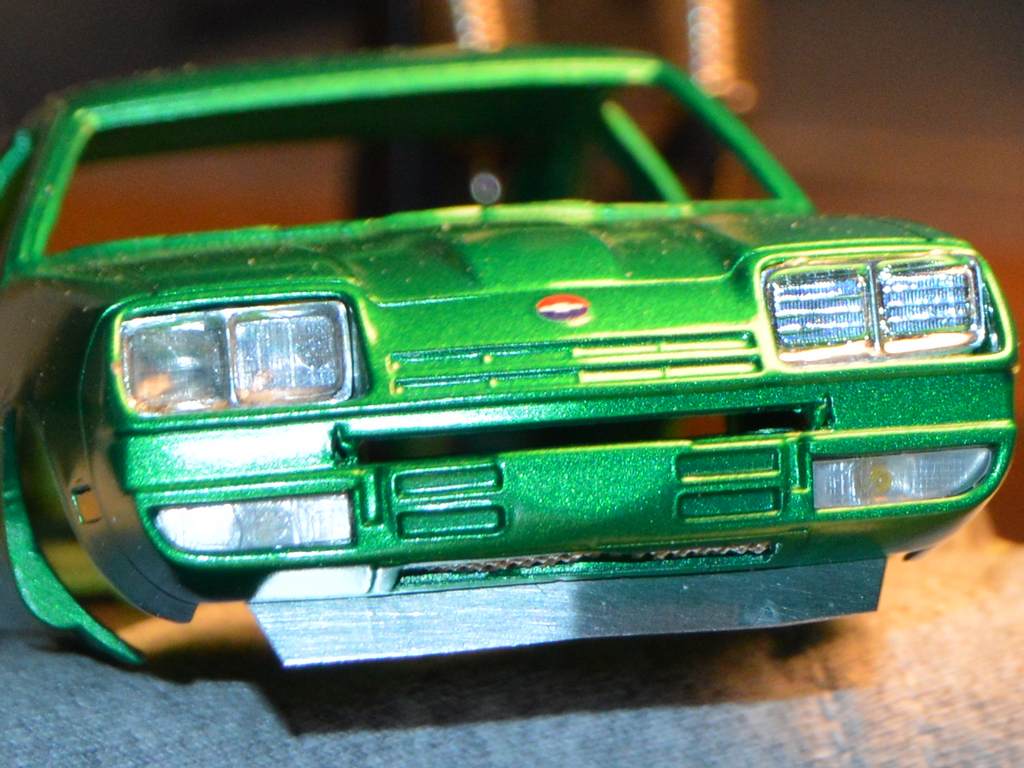
I've finished most of one taillight! Still need to make the reflectors pans and bulbs, and install the reflective inner surface. I may try to find something a bit softer, to make the decorative trim/bezel around the taillight, so I can make sharper bends. The MPC taillights have texture on the outside, which shouldn't be there, and had to be sanded off and polished. Obviously, they made the taillight/backup light lenses one piece, so, I fixed that, as well, adding a small section of clear lens, where I removed the red backup light section. Here are a few photos of the new taillight assembly, and a couple of comparison shots of the MPC promo, the real car, and my model, just for fun!
-
Not really anything special about the model, but, I think it's a fun/cool photo.
-
1975 Monza--Completed 12/25/2018
Straightliner59 replied to Straightliner59's topic in WIP: Model Cars
I ended up using a drafting pen. It doesn't look too bad. I will be headed to the hobby shop on Thursday to find some brush-on flat coat and a new sheet of Bare Metal. -
Thank you, Tom! It was a fun, quick little project. Those are rare, for me. I tend to get carried away!
-
1975 Monza--Completed 12/25/2018
Straightliner59 replied to Straightliner59's topic in WIP: Model Cars
BLAH_BLAH_BLAH_BLAH (Hahaha! suddenly, I'm Alex Lifeson!), Snake, as soon as the first coat of paint hit the body, I was kicking myself for not doing it! The project kind of blew up on me, after that. So...chalk that one up to experience I don't want to risk damaging any/everything, up front, so, I will see how realistic-looking I can get my shading! On to the taillights, next, and, then to see if I have any viable Bare Metal foil left (if not, I'll "have" to make a trip to the hobby shop!). I'm wondering if the "blacked-out" trim package may have looked better, but, the chrome will be fine. Thanks, man! Glad you like 'em. -
Thanks, all, for the comments! The tooling aluminum is an excellent medium for applications in which malleability is necessary. It's soft, like aluminum foil, but of heavier gauge. I used it to form the splash aprons on the '34 I completed, last year. It was a natural, for the skin, on this model. Today, I am playing with an open-mold to cast a half of one of these rear tires. I used the sidewall insert from a Revell/Monogram dragster/FC slick and rounded the shoulder, and sanded off the lettering. By casting it in two halves, I can insert plastic sheet between the halves to adjust the width of the tires, if necessary. If I have success, I'll post results, etc., on the appropriate board. Thanks again for looking!
-
1975 Monza--Completed 12/25/2018
Straightliner59 replied to Straightliner59's topic in WIP: Model Cars
Finally had a chance to finish the second headlight. I am deciding what to work on, next. I may get the taillights done. I am very happy with the way these look!
-
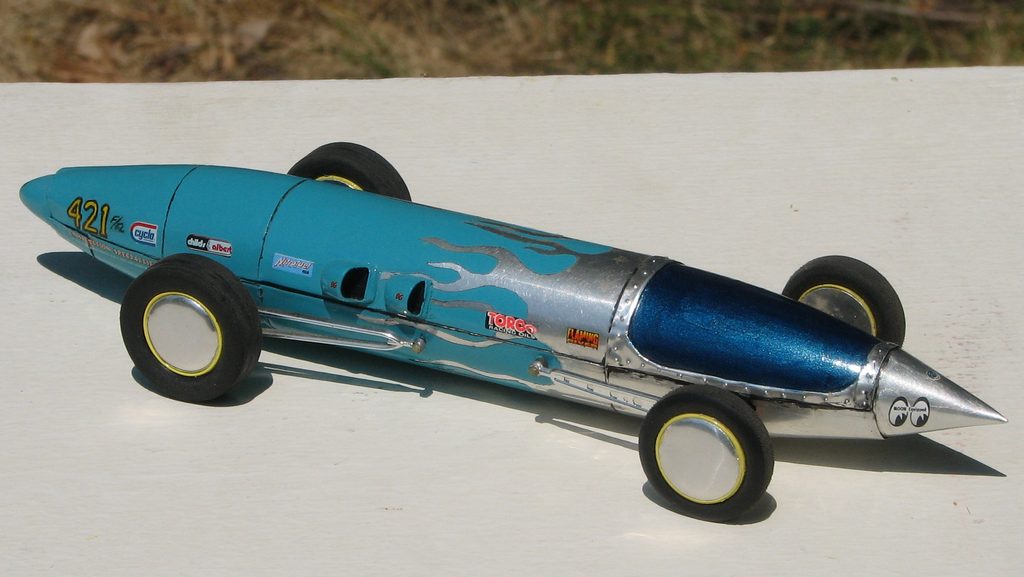
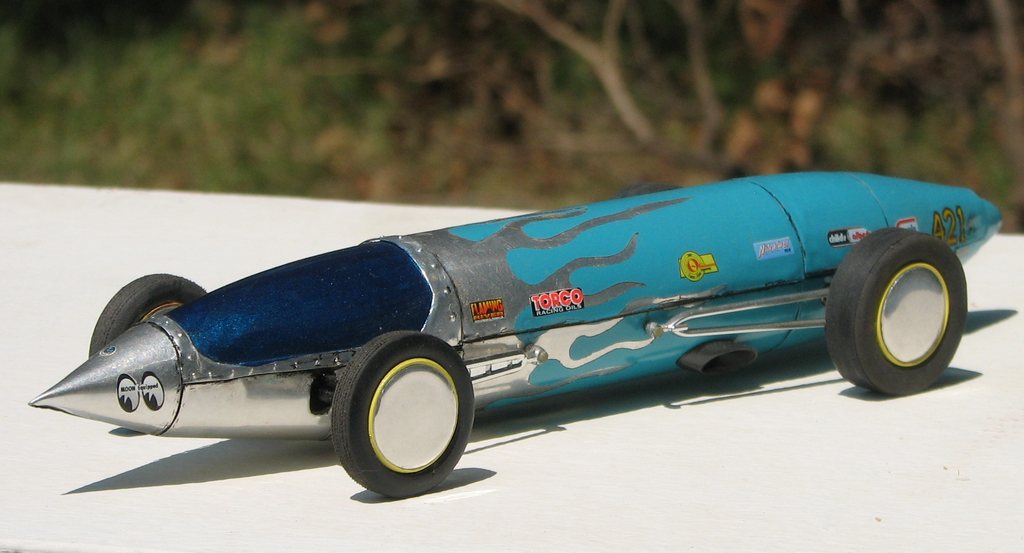
I built this 20 years, or so, back. It was built using a vac-formed drop tank that I found in a closeout pile at a local shop. I covered it with tooling aluminum. Tires and wheels are from the parts box. Rear tires were made by contact cementing two inserts from Revell's dragster/pro stock/FC kits together, then covering the seam with electrical tape. Wheel discs were punched from tooling aluminum sheet, as well. Radius rods, etc. are from the parts box. Rivets were made using the time-tested "scriber" method. I carved wood bucks to heat-form the scoops, and used an aircraft prop cone for the tail. The model was an exercise in trying new techniques, and design, and, clearly was never intended to be a detailed "replica" of a salt flats/dry lakes racer. Comments/criticisms welcome, as always! Mods, feel free to move it to wherever you think it needs to go!
-
1975 Monza--Completed 12/25/2018
Straightliner59 replied to Straightliner59's topic in WIP: Model Cars
You oughtta' know me by now, Mike! Hahaha -
1975 Monza--Completed 12/25/2018
Straightliner59 replied to Straightliner59's topic in WIP: Model Cars
Thanks, Ken! Yeah...I've started on the other one. I might have it done in another week!grin -
1975 Monza--Completed 12/25/2018
Straightliner59 replied to Straightliner59's topic in WIP: Model Cars
Yes, Mike. This one is a promo. I picked up one of the later kits a little over a year ago on Ebay for a fairly reasonable price. Thank you for your kind words! -
1975 Monza--Completed 12/25/2018
Straightliner59 replied to Straightliner59's topic in WIP: Model Cars
I messed this up, but, it looks better than the factory item on the other side. The bezels are very fragile, and difficult to clean up for installation of the reflector pans and lenses. I broke this one in two places, in spite of the care I took, working on it. I really should have planned ahead--well, I tried, but the project blew up, as I progressed! I wish I'd opened up the "grille", before paint --I won't be risking that, now. I already have a couple of spots to fix. Also, was I to do it over, I'd have carved out the backs of the headlight "buckets", before I painted, too. Anyhoo...Here's a look at one set of headlights, installed.
-
That makes me smile! Awesome!
-
1975 Monza--Completed 12/25/2018
Straightliner59 replied to Straightliner59's topic in WIP: Model Cars
Hey, thanks, Art! I appreciate your kind words, very much!