Straightliner59
-
Posts
5,803 -
Joined
-
Last visited
Content Type
Profiles
Forums
Events
Gallery
Everything posted by Straightliner59
-

Bantam Fuel Altered - New pics 1-7
Straightliner59 replied to Codi's topic in WIP: Drag Racing Models
That toggle bitch assembly is switchin'! Love the Cirello mag, too. Excellent work! -
There is nothing not to love about this piece! Just...WOW!
-
I don't guess I ever noticed that! I was simply referring to the block and heads.
-
I got a piece of 3/4"X12" Delrin rod, today. Roger Lee has used it to make slicks for some of his dragsters. I'm going to attempt to make slicks for an AMT 1/43 scale 'Vette stock class drag racer I've had sitting around, for years, because I couldn't find anything suitable for slicks.
-
I would go with the one from the Miss Deal, as well. It's the best early hemi going!
-
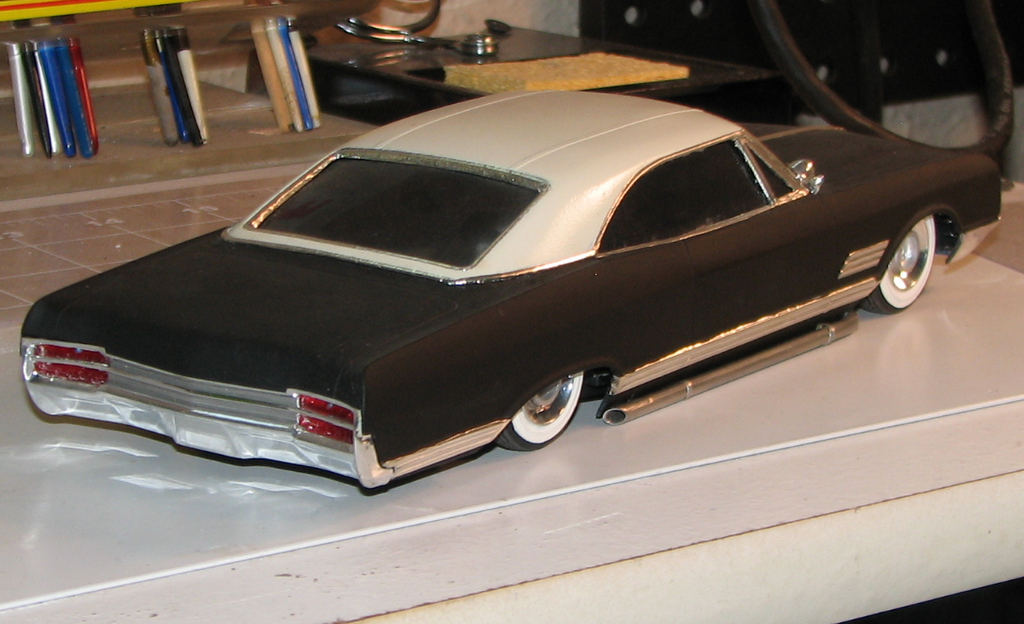
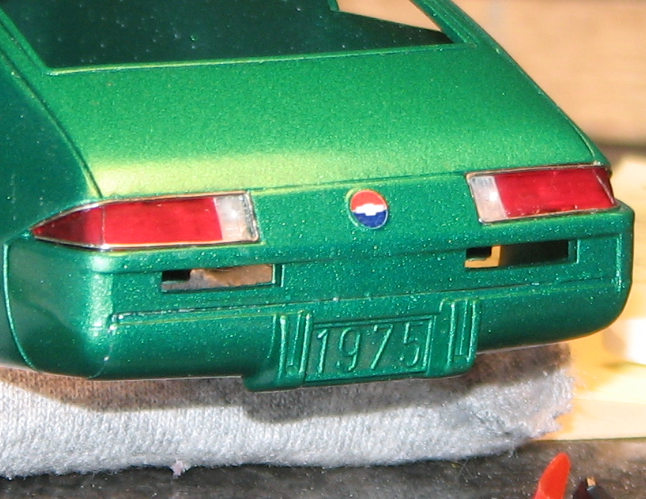
1975 Monza--Completed 12/25/2018
Straightliner59 replied to Straightliner59's topic in WIP: Model Cars
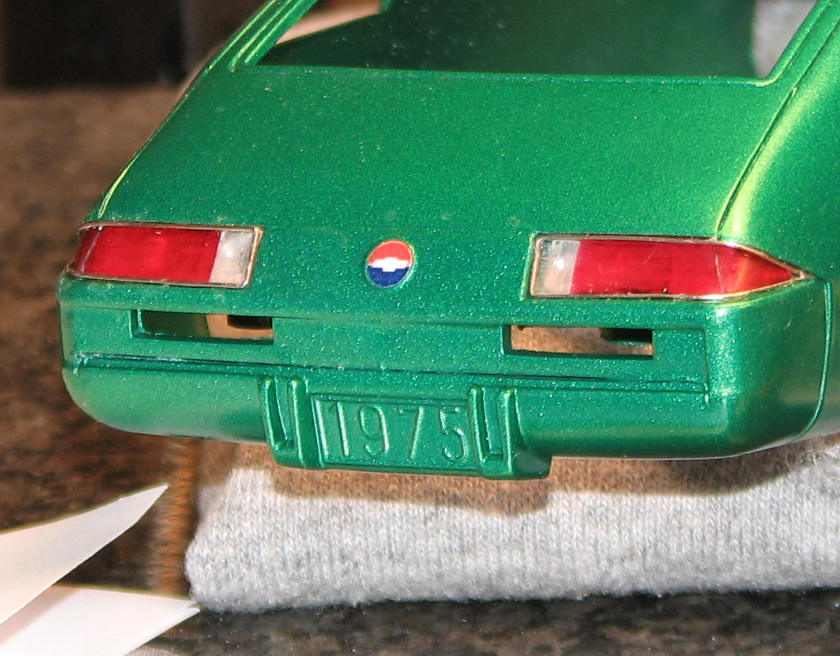
Thanks, Art! Well, it's done. It looks great, in some places, and not so much, in others. I found myself frustrated, at times, and just having to walk away, for a while, anyway...WHEW! Gotta touch it up, then, it's on to windows. I can see completion, now. -
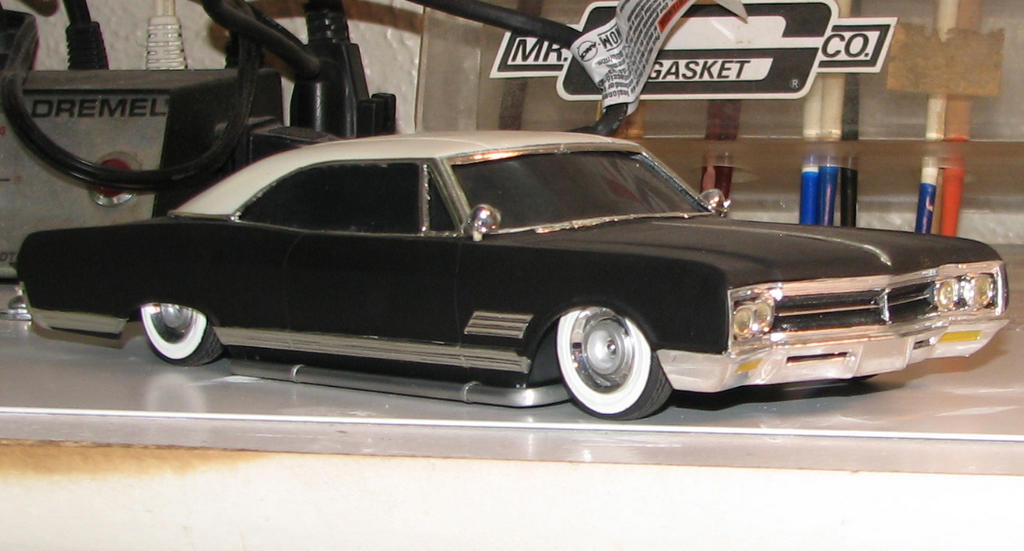
1975 Monza--Completed 12/25/2018
Straightliner59 replied to Straightliner59's topic in WIP: Model Cars
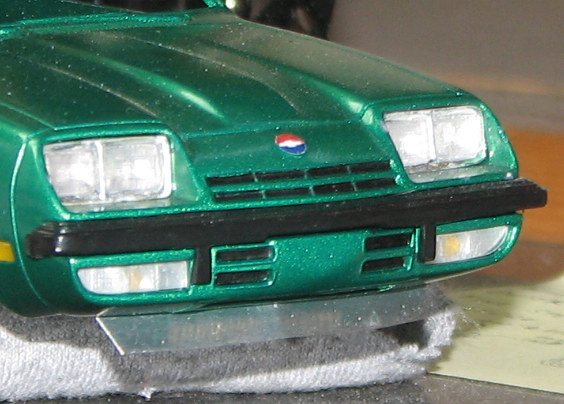
No wonder I prefer dragsters! This Bare Metal is kicking my arse! I'm about 6 hours in, and almost halfway done. I also wanted to add a shot or two of my final solution to the faux pas of not opening up the grille. I drew up and printed some decals to fit the slots. It really looks a lot better than it did with simply the "markered-in" slots. If anyone is interested, I'll find the file for them, and post it, so you can print your own set. I'm hoping to have this done within the next week, or so. Well see...
-
Bring Out Your Dead... Long Stalled Models
Straightliner59 replied to Tom Geiger's topic in WIP: Model Cars
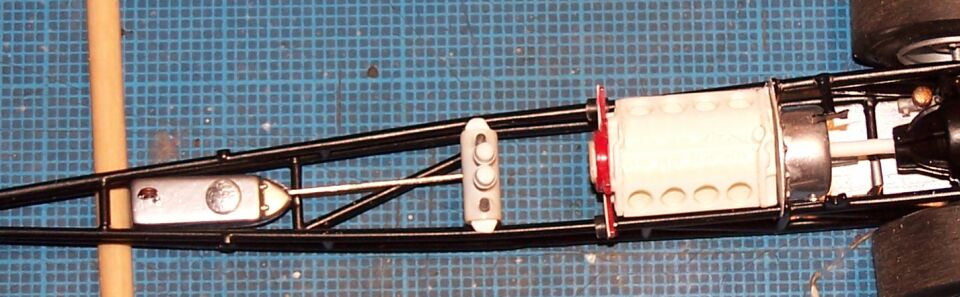
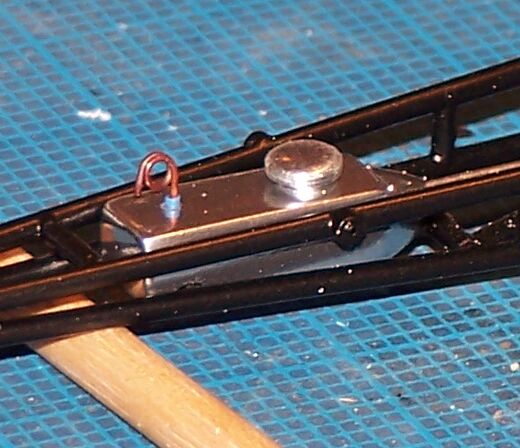
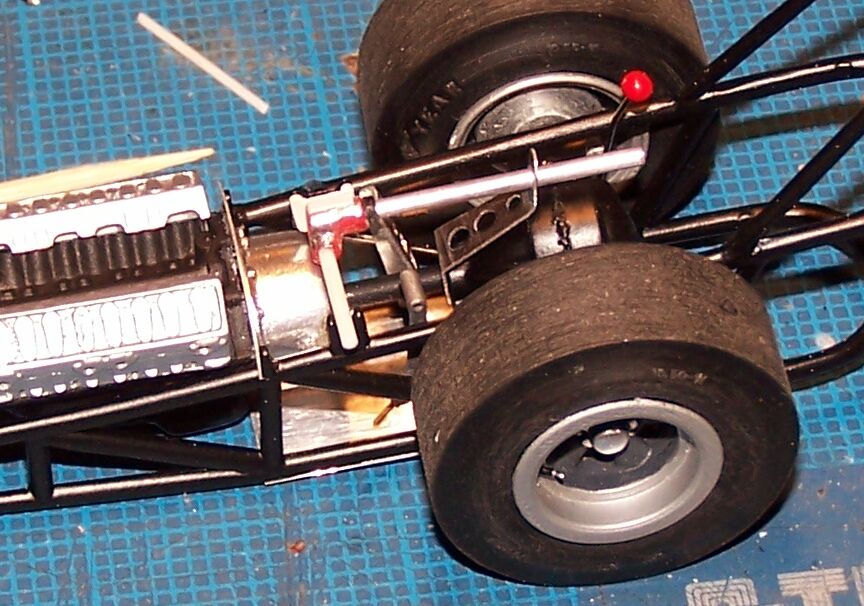
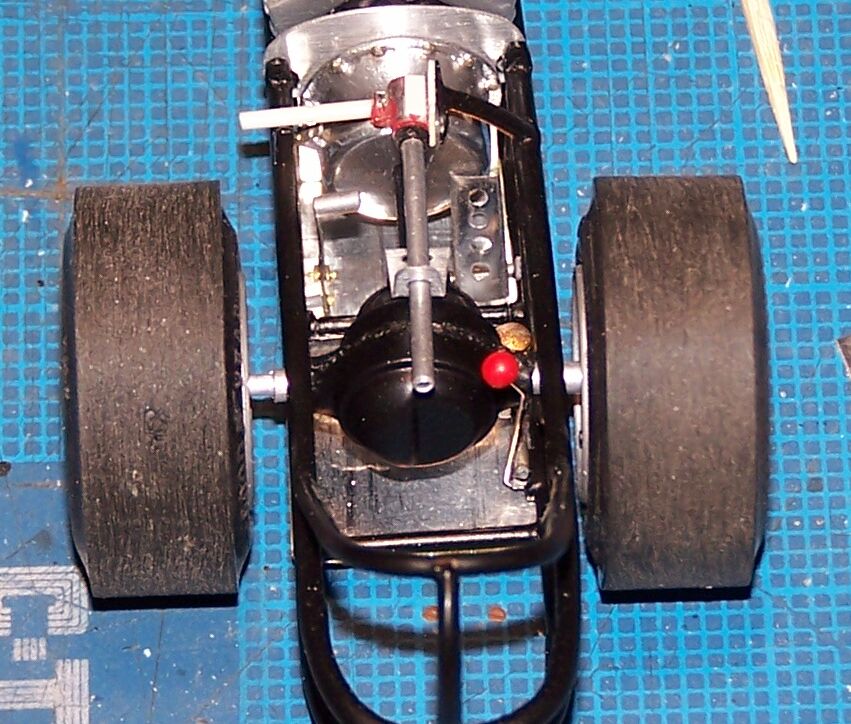
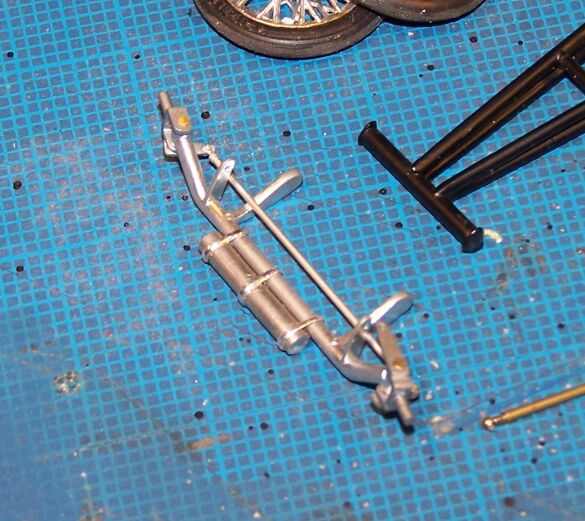
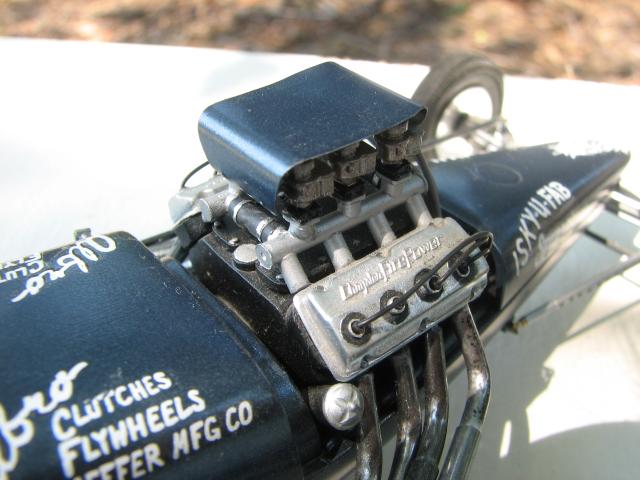
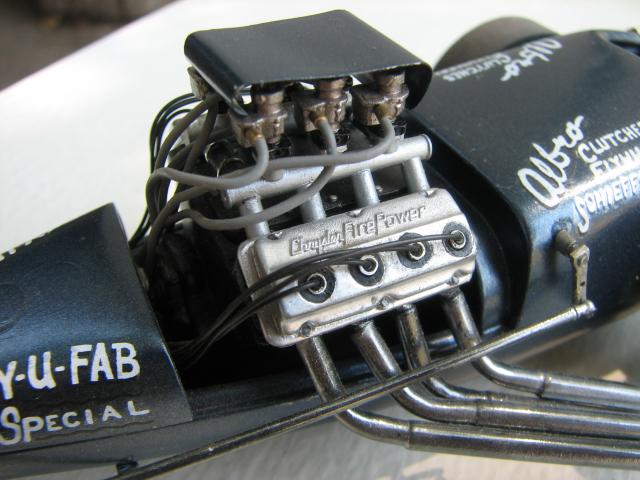
I had this thing almost finished, once, about 17 years ago. At that time, I decided that I didn't like my injector stacks, or the manifold. As I looked for a suitable replacements, I discovered that there had never been a set of decent Enderle stacks for a small block. I ended up making a set, but, never got around to casting them (I am rectifying that, as I type this). At some point, several of my friends mentioned that the Slingster had a nice set. Those were too small, and the manifold didn't fit the engine I am using (display small block from the '66 Nova), as it was too narrow. Then I heard that one of the resin casters made a, Enderle manifold and stacks. Better, but still didn't look right, to my eye. Next, I decided to use the car as a mule for a piece I was putting together for the old SLM site about building aluminum dragster bodies using a pair of articles from Hot Rod Magazine, back in '67 or '68. In the articles, Tom Hanna (Couldn't have a better guy to teach you that!) explains step-by-step how to build a "shorty" dragster body. That worked out. So, now, all I need to do is get myself a decent set of Enderle injector stacks (fingers crossed!), make a set of front wheels, finish the motor, and put it all back together. I have looked at it many times over the years, but, haven't touched it since I did the body, back in 2010. I'd love to have it done, but...
-
I'm not sure of the accuracy of the bodies, but, I really didn't care. I just wanted to say I had a lead sled! Thanks, Snake.
-
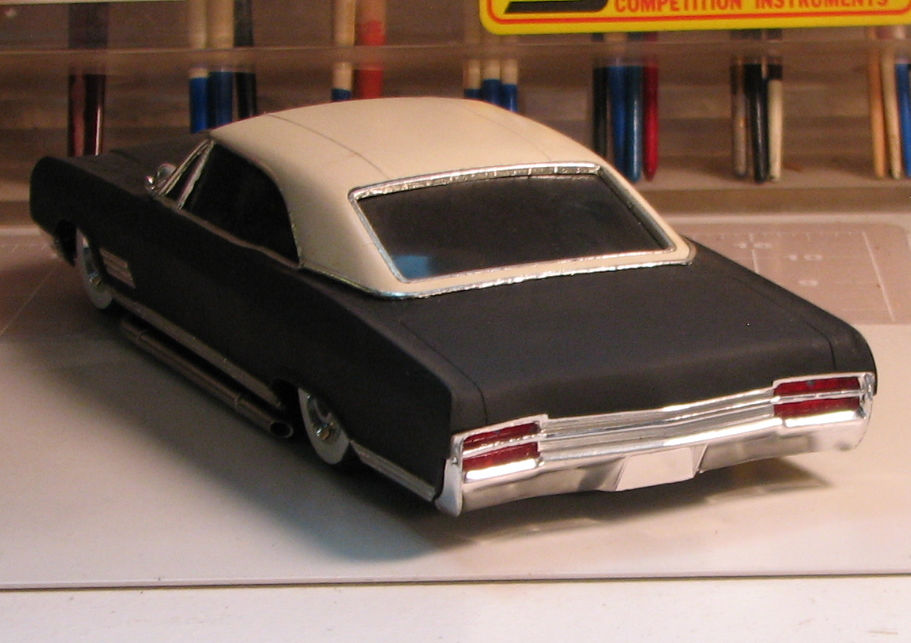
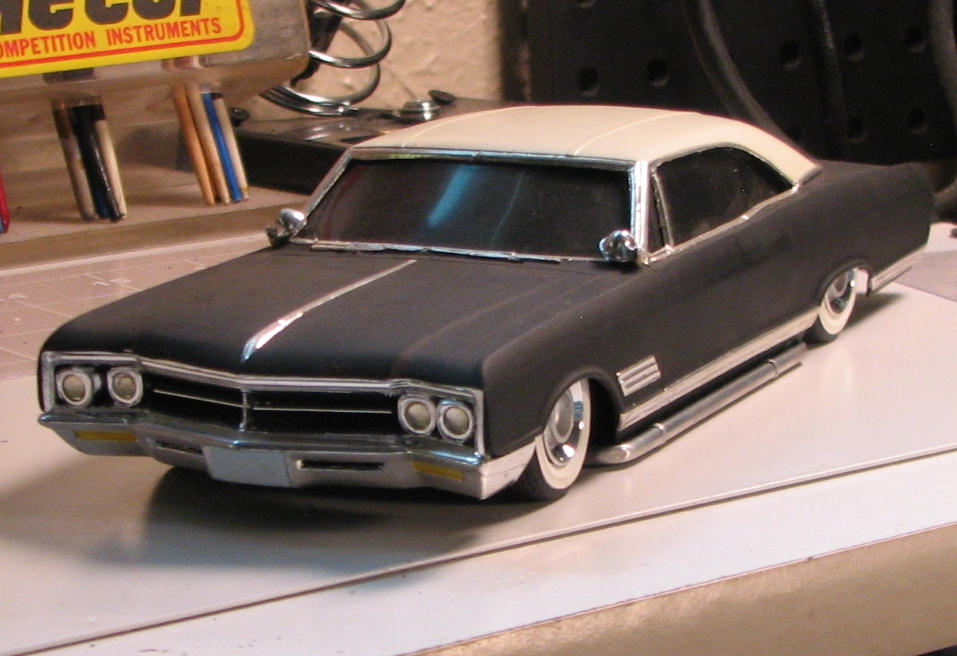
I built this about 20 years ago, or thereabouts. It's one of those Hasegawa kits of 1965 American cars. I picked up a couple of that series on closeout, and figured they'd make fun slammers. I also built an Impala Stock Car, even though I've never seen any that ran in NASCAR. I digress. I used some Evergreen strip and the "fogging" method to make the vinyl top. The spotlights are from the parts box. Lakes pipes are aluminum tube. I don't recall where the wheels and tires are from, other than the parts bin. I used some little, blue model RR "lights" for the Blue Dots. Clearly, I lowered the suspension. Being it's a slammer, the windows are blacked out. Anyway, I finally got around to taking some photos of it, today. It was a fun, really quick build. Any Qs and comments welcome! Thanks for looking!
-
"Bring Out Your Dead" Completion Build--ROUND 2 Is On!
Straightliner59 replied to Snake45's topic in WIP: Model Cars
I would love to! I have tons of options, as well, but, I think I want to see the Monza across the finish line by the end of the year! -
Porsche 917-10, Matchbox, 1/32, L+M Donohue
Straightliner59 replied to Matt Bacon's topic in Model Cars
Nice work, for sure. I love this series. I need to find this one. I have the Tyrrell, Bugatti, and Auto Union kits. They really are beautiful. -
Realistic Speed Racer Mach V - Completed!
Straightliner59 replied to Art Laski's topic in WIP: Model Cars
Man, Art, this is very cool! I can't imagine myself saying that about this kit. You absolutely aced the interior! Great work! Is it just me, or is there something in the lines of this car reminiscent of Jocko's 'liner? Nice work, sir! -
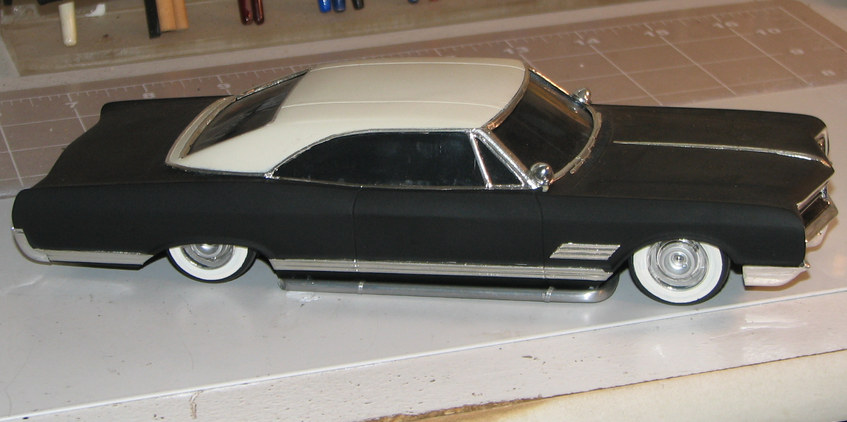
1975 Monza--Completed 12/25/2018
Straightliner59 replied to Straightliner59's topic in WIP: Model Cars
Thank you, Curt! Much appreciated. I am pretty happy with them, all the way around! Snake, you are correct about the "white" lights. After I scribed the detail on the inside of the lenses, I stopped short of fully polishing them. That left them a little hazy, and got rid of the complete transparency of them. It took me a while to figure out how I was going to tone them down, and have them look a little "milky". Thanks for your kind words. Thank you, Rooster! That means a lot, as that was kind of what I was hoping for. Until now, I'd never really noticed how neglectful of them, I'd always been. Because this is a curbside model, I figured it would be a good opportunity to stretch my "light-building legs". Thanks, Steve. I definitely put more effort into them, than I ever had, before! :-) -
1975 Monza--Completed 12/25/2018
Straightliner59 replied to Straightliner59's topic in WIP: Model Cars
I think these babies are done! Questions, comments welcome. I may have to do a little adjustment on the trim, but, I'm pretty happy with them. Certainly the most effort I have ever put into a set of lights, for a model. Now, to figure out where to go, next...
-
Scale Model Community Discord!
Straightliner59 replied to ziP's topic in General Automotive Talk (Trucks and Cars)
He's pining for the fjords. -
1940 Ford A/G or B/G Gasser Build
Straightliner59 replied to Oldmopars's topic in WIP: Drag Racing Models
Here's the one I made for my Cook and Bedwell dragster. Any thin metal sheet will work, and, it's very simple!
-
1940 Ford A/G or B/G Gasser Build
Straightliner59 replied to Oldmopars's topic in WIP: Drag Racing Models
I agree with Gary--a flash shield is the way to go, if you want to avoid having to detail them. It definitely looks the part! -
-
Hahaha! I was so busy looking at the engine parts, I didn't even notice the guns!
-
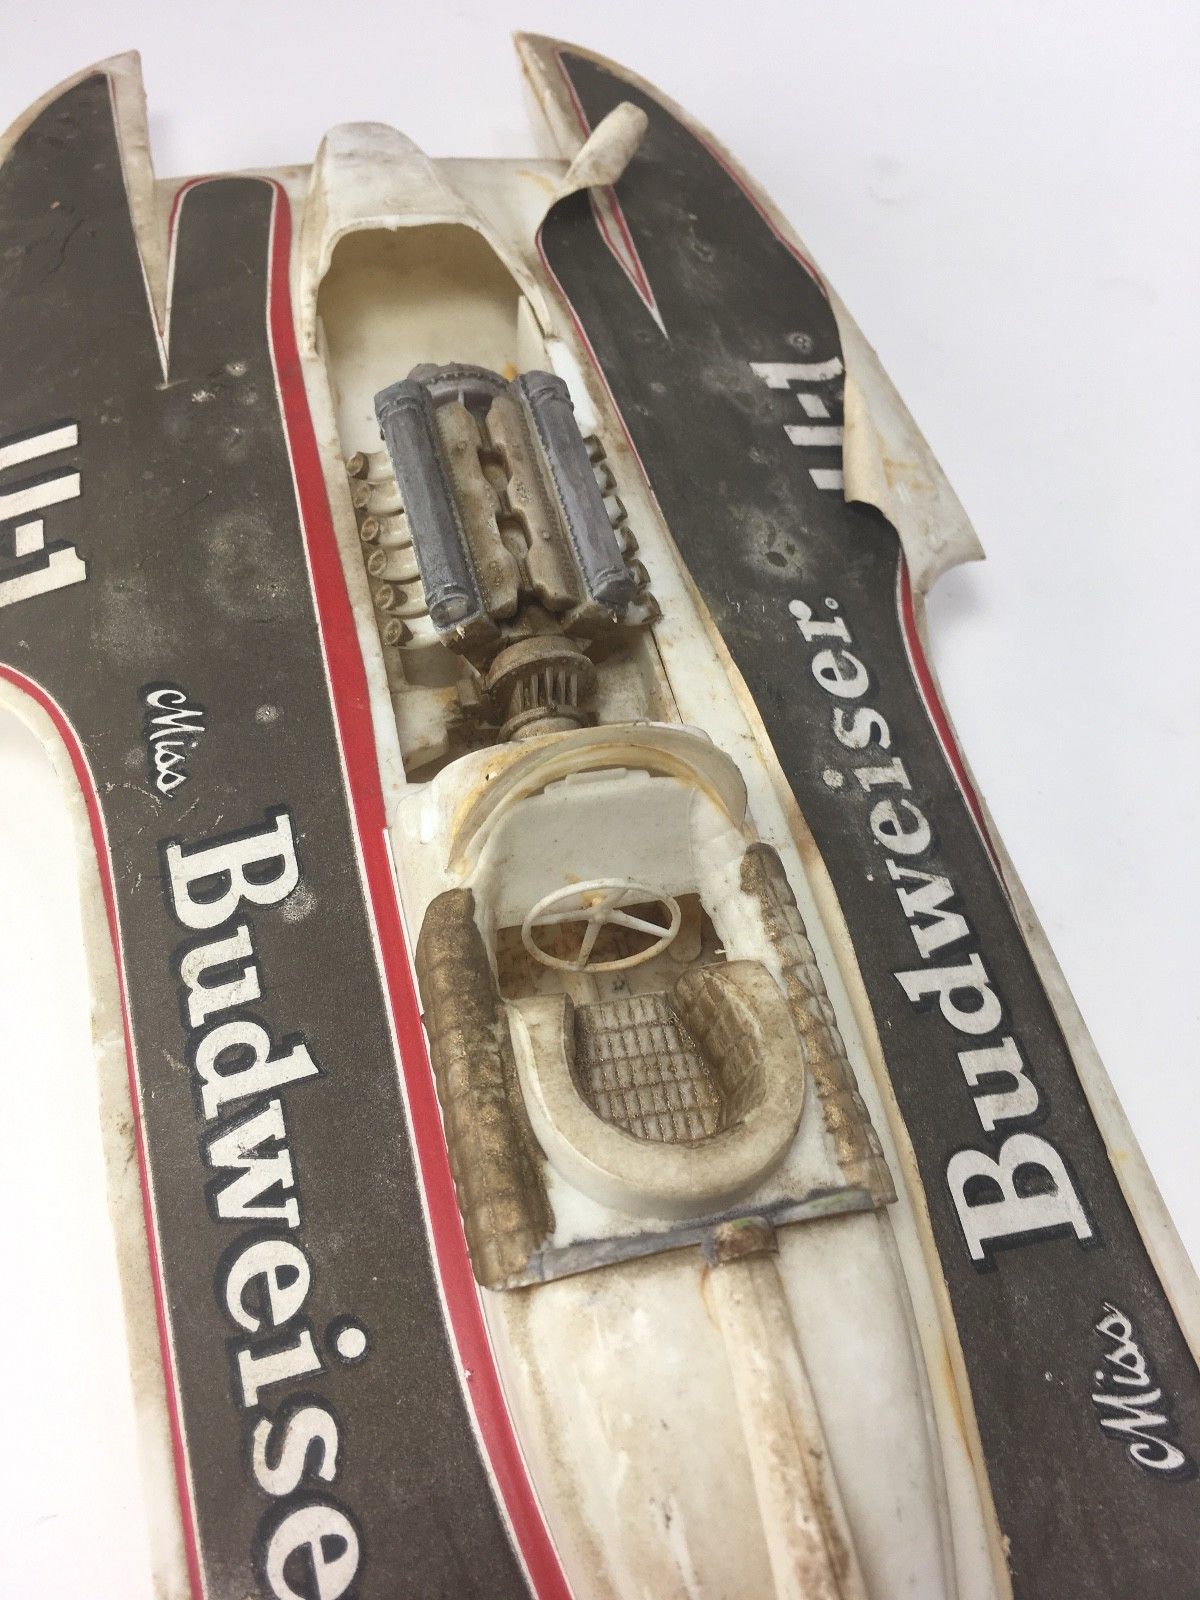
I just snagged this on Ebay for $30! Here's where your engine came from, I'd bet. The decals are shot, and it's missing the prop/shaft and a couple of other parts, but, there is another one on there less engine and they're asking seventy something bucks, for it. I think it can look pretty nice with a new set of decals (I'll likely have to make them, myself) and some TLC.
-
What was in the old Miss Budweiser kit?
-
AMT '67-'68 Camaro Review & Improvements
Straightliner59 replied to Snake45's topic in Tips, Tricks, and Tutorials
Great stuff, Snake. I think, after scribing/removing the bad trim, that by carefully cutting and fitting the rear window to the opening, you could pretty much eliminate the tunneled look. I saved this, too. It looks much, much better. -
1/16 Scale Army Vega Funny Car - Completed
Straightliner59 replied to Mooneyzs's topic in Drag Racing
Man, if you didn't have the "Workbench" posts for this thing, I'd swear you'd gone and stolen the real one! Excellent, excellent work, Chris! -
Absolutely wonderful work, Andy! She's gonna' be killer!