Straightliner59
-
Posts
5,799 -
Joined
-
Last visited
Content Type
Profiles
Forums
Events
Gallery
Everything posted by Straightliner59
-

Feeling ambitious? Try something new!
Straightliner59 replied to Straightliner59's topic in WIP: Drag Racing Models
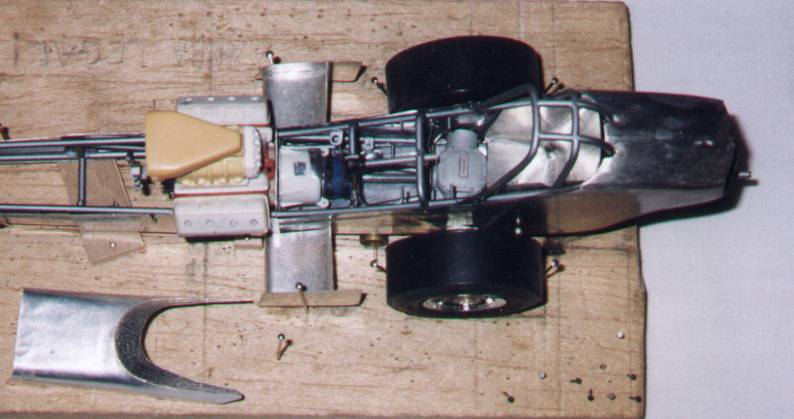
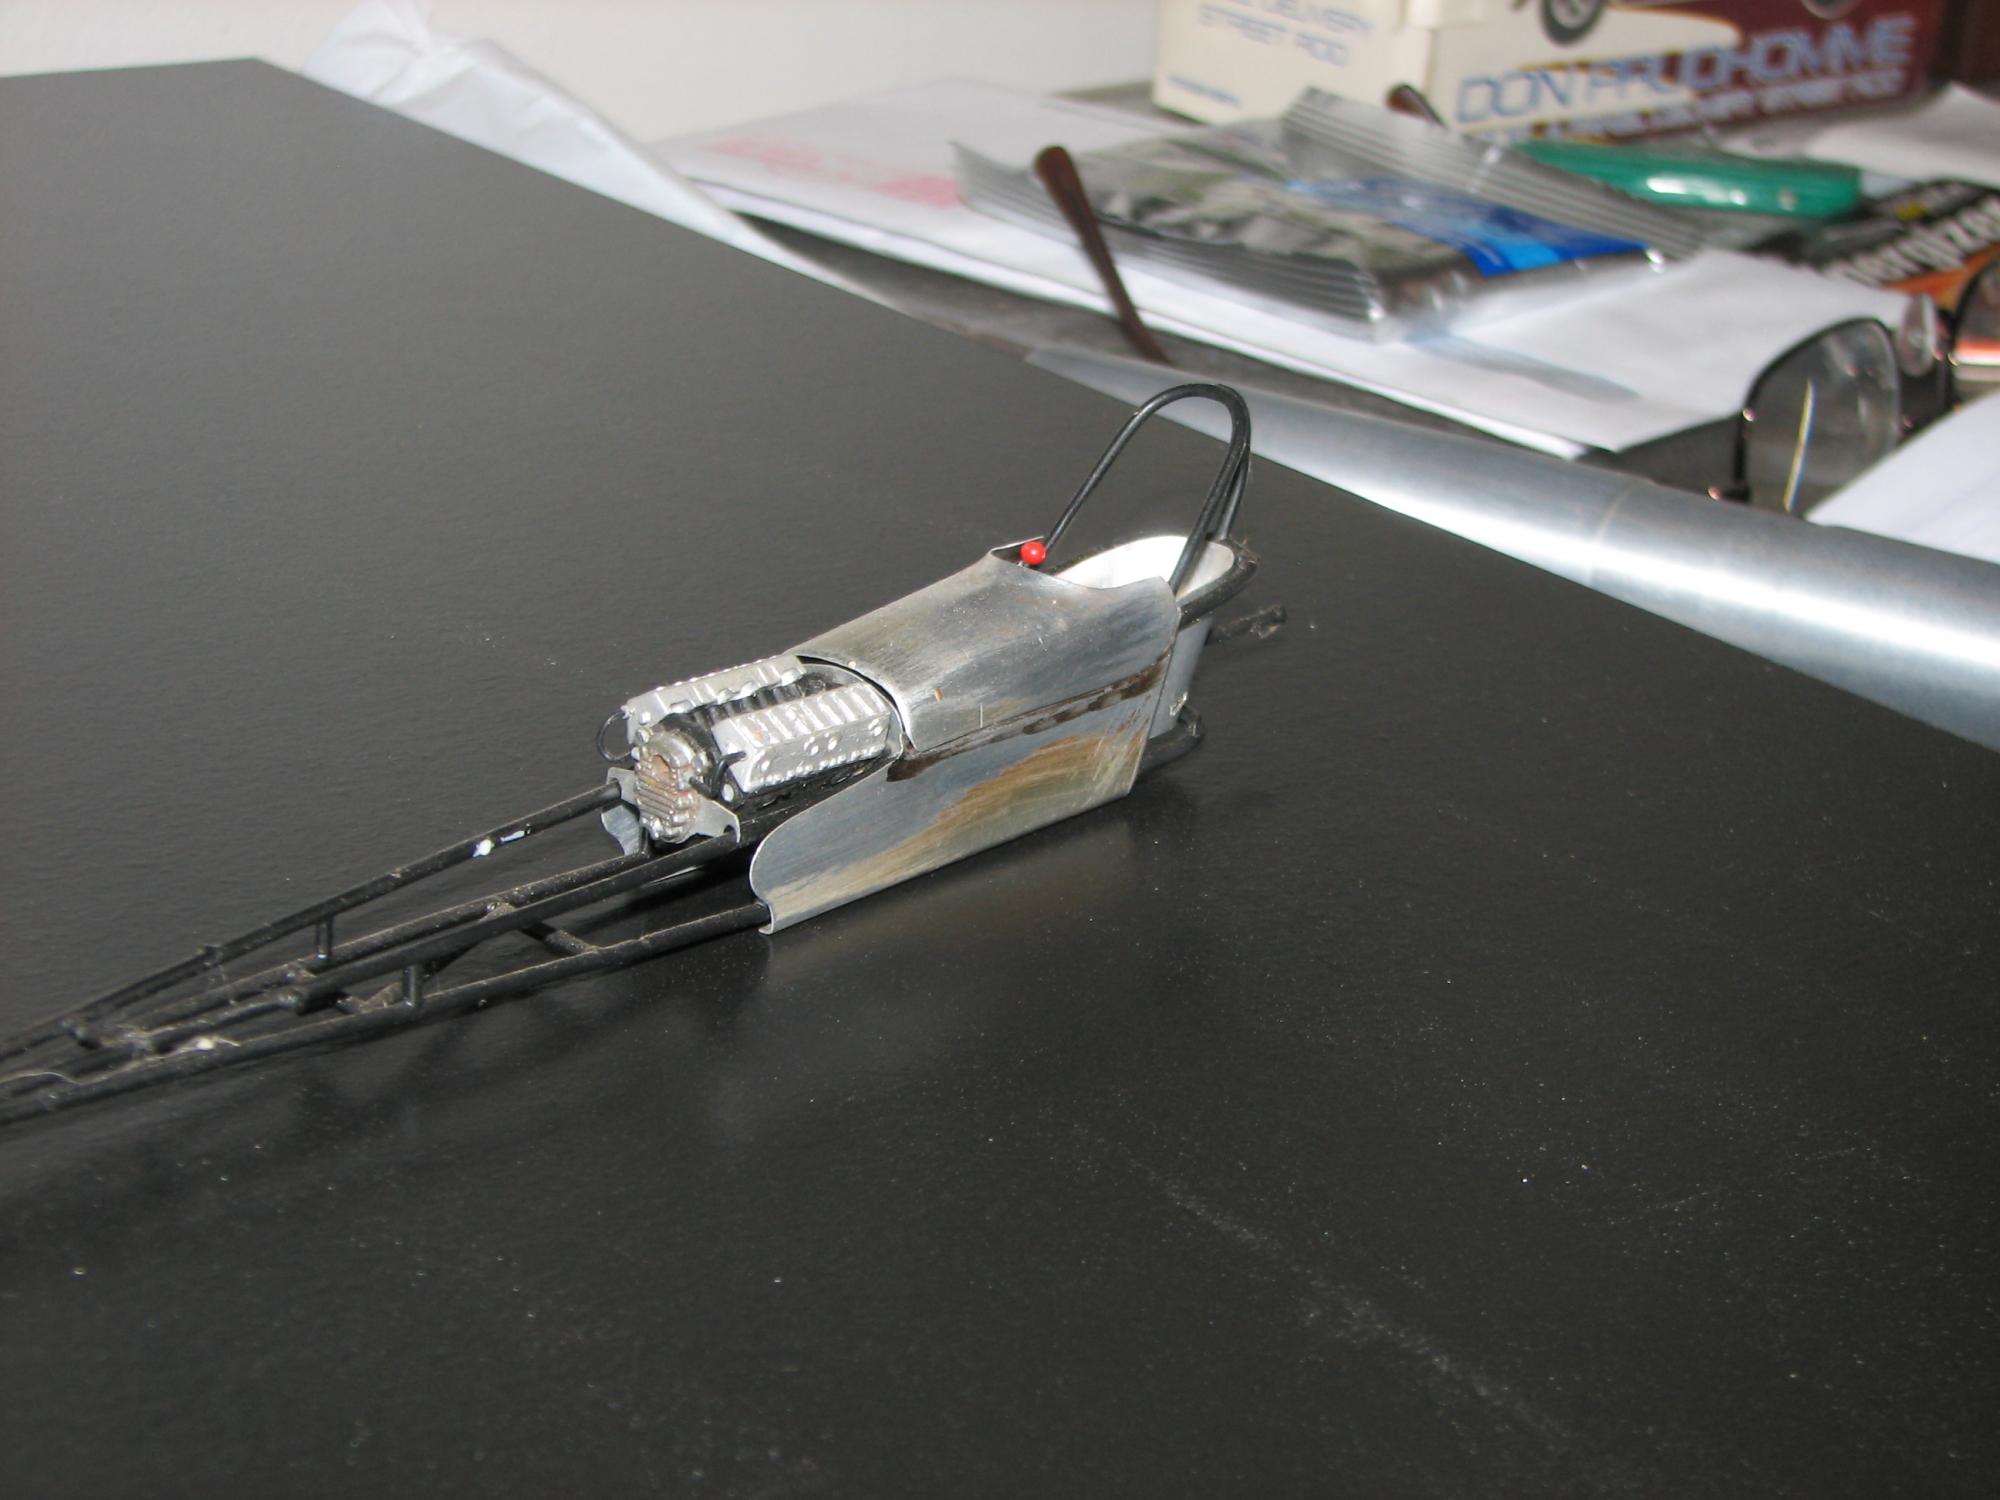
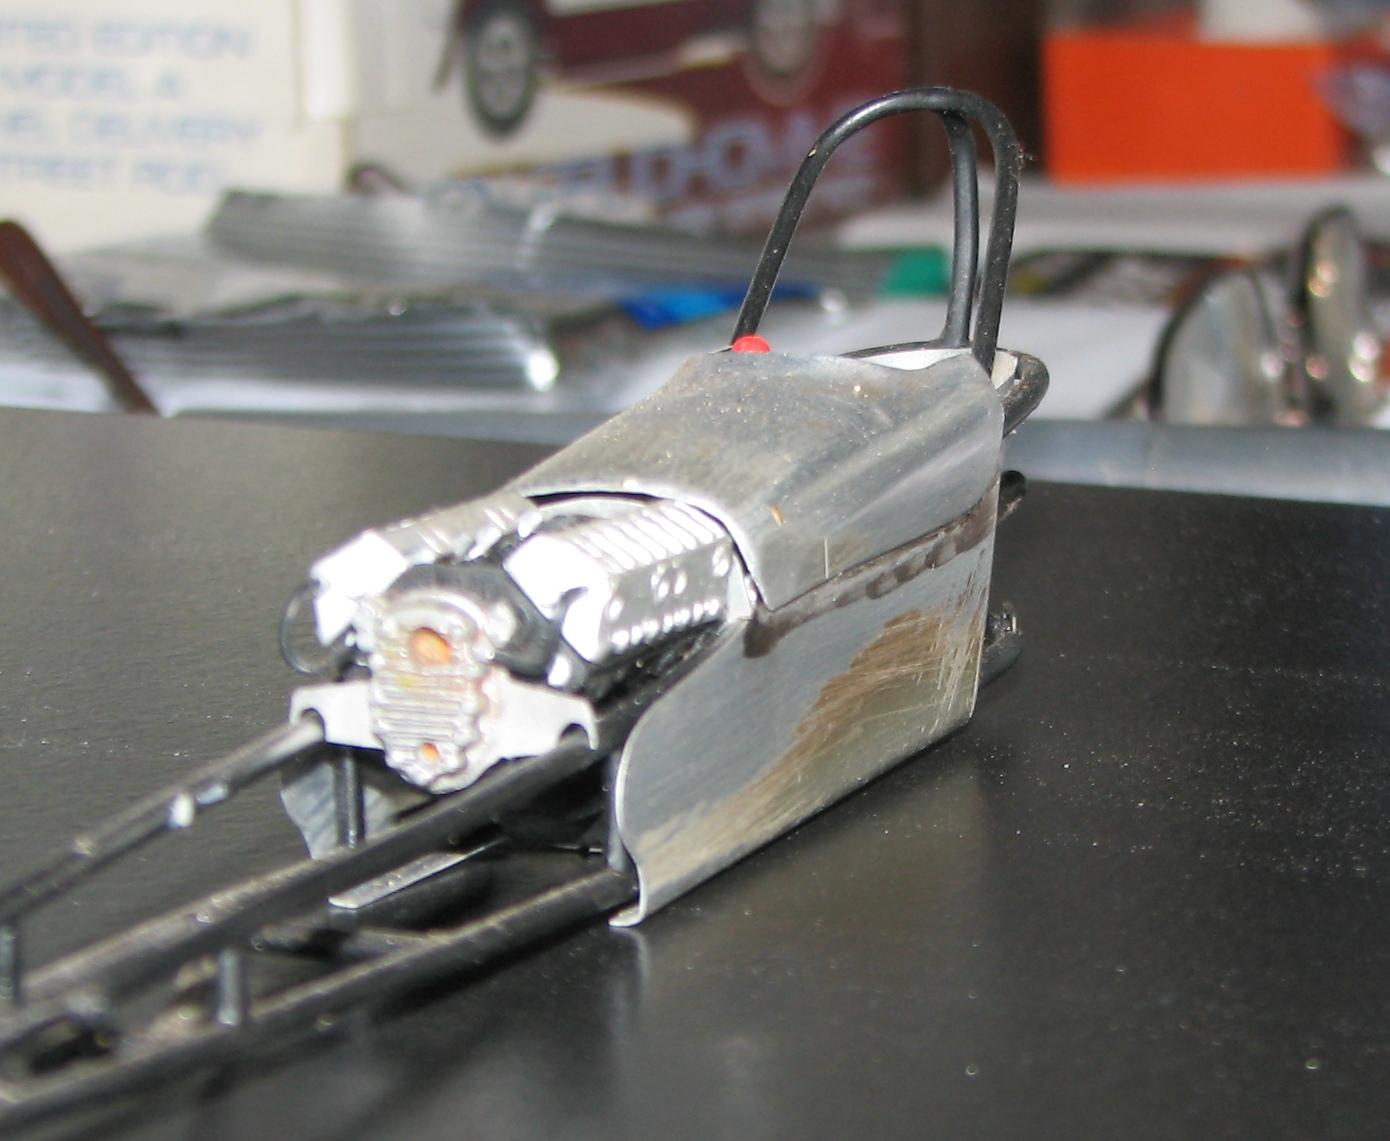
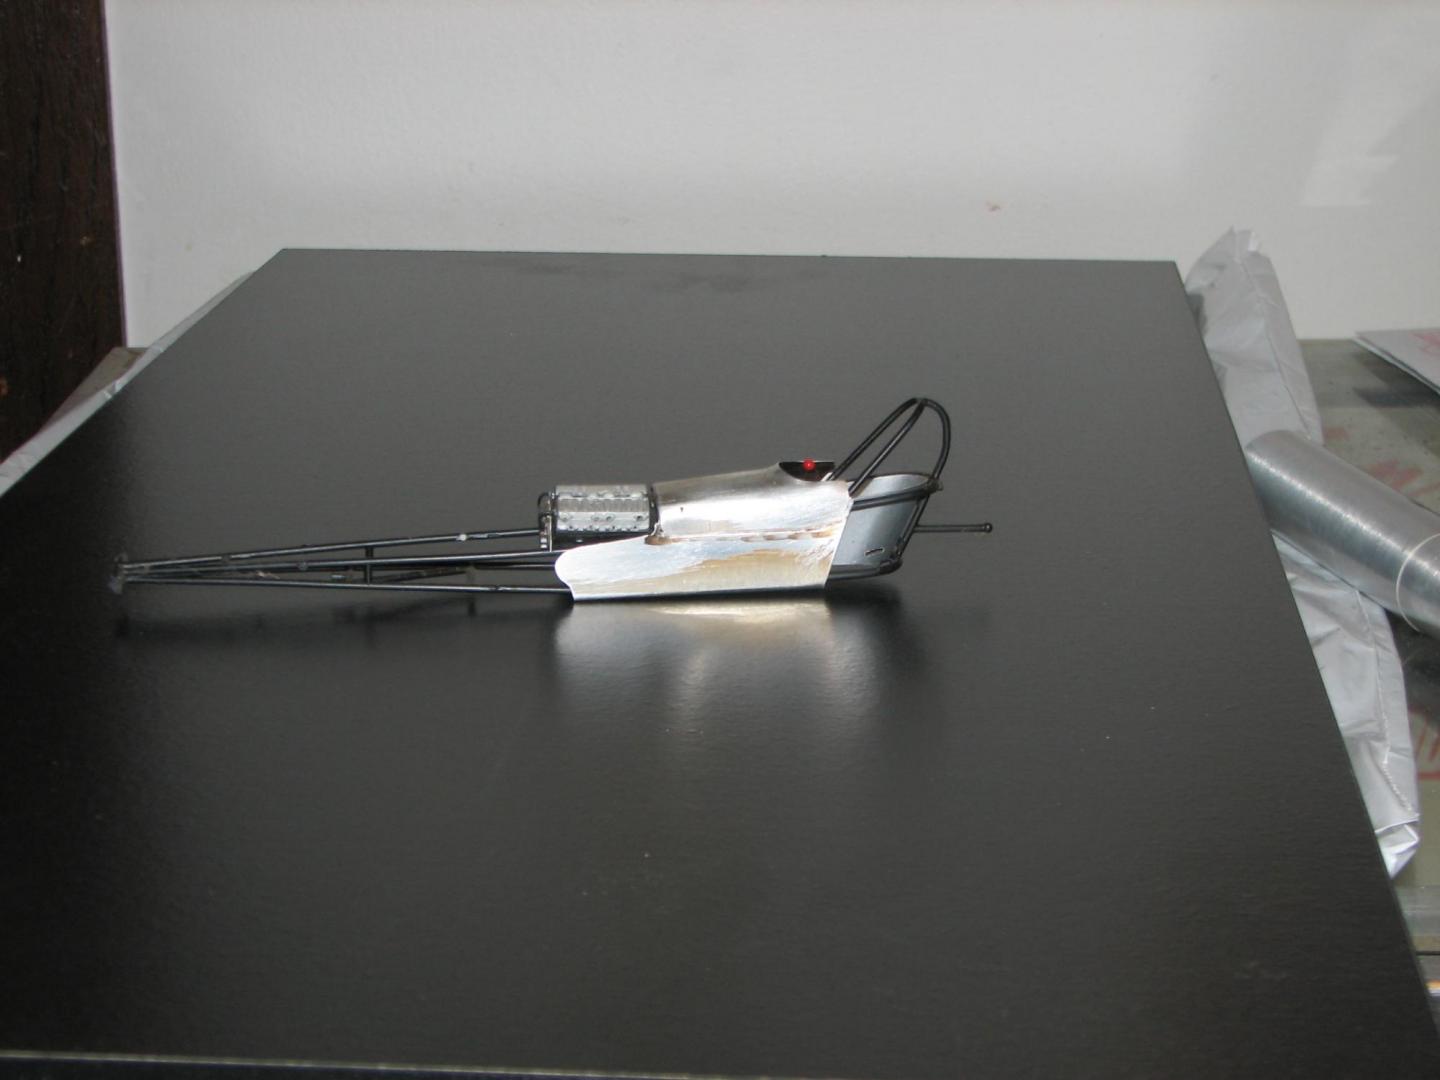
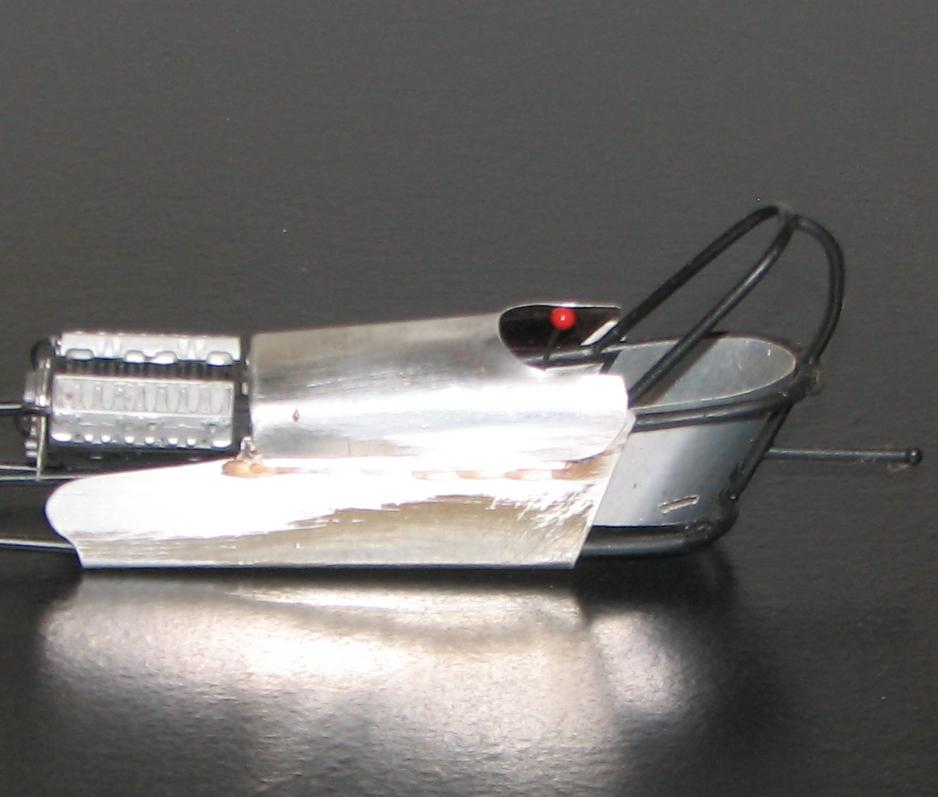
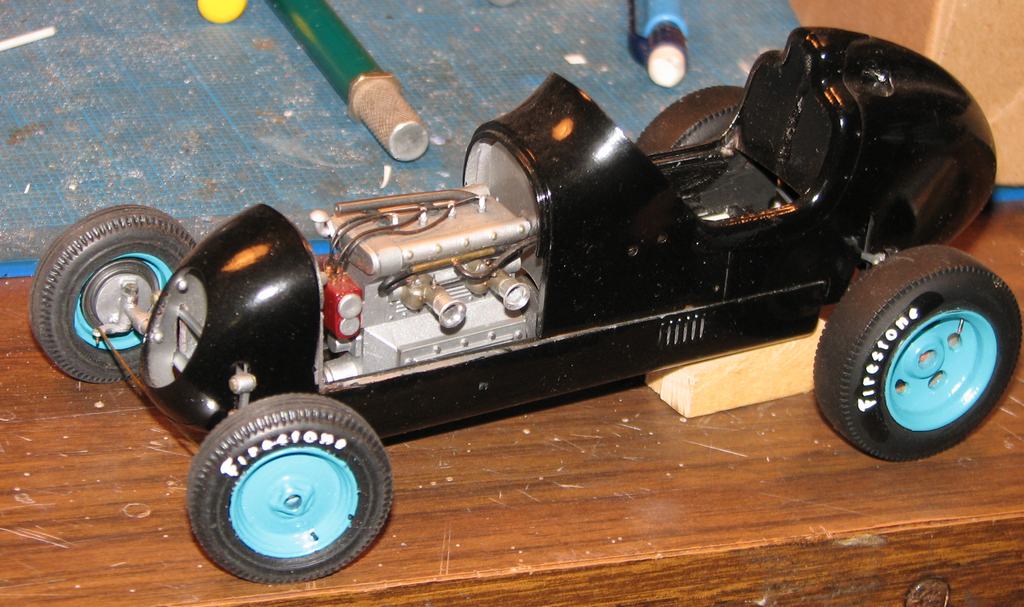
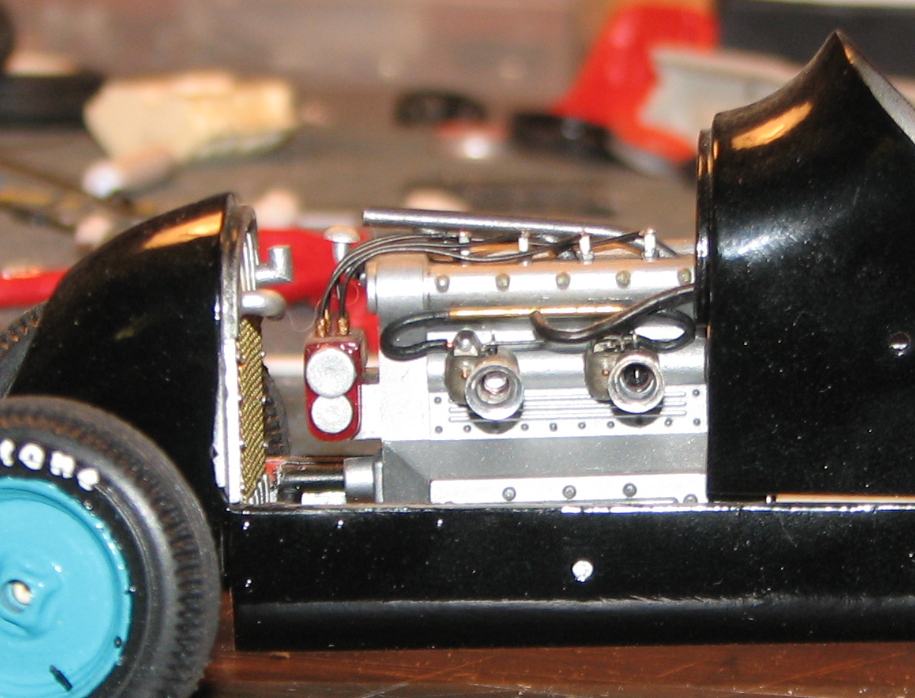
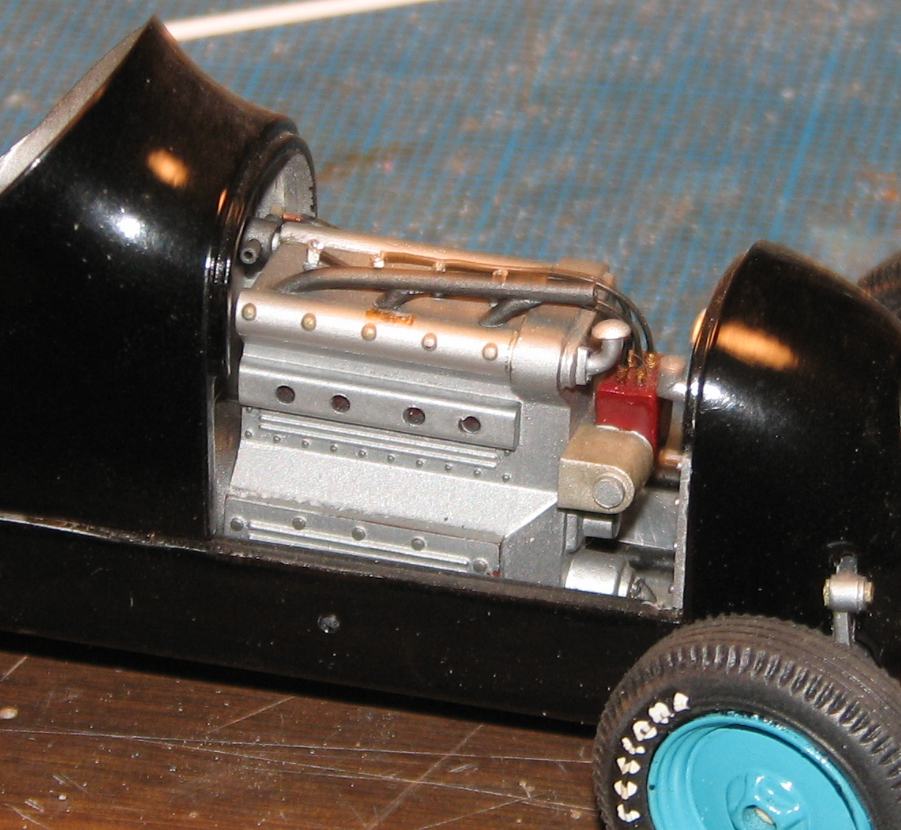
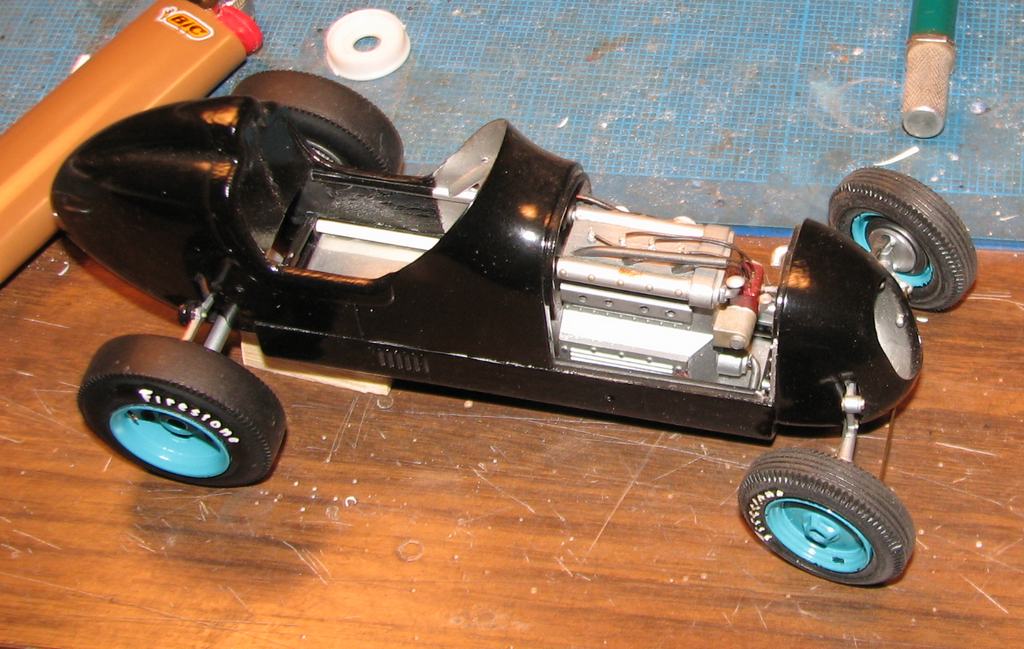
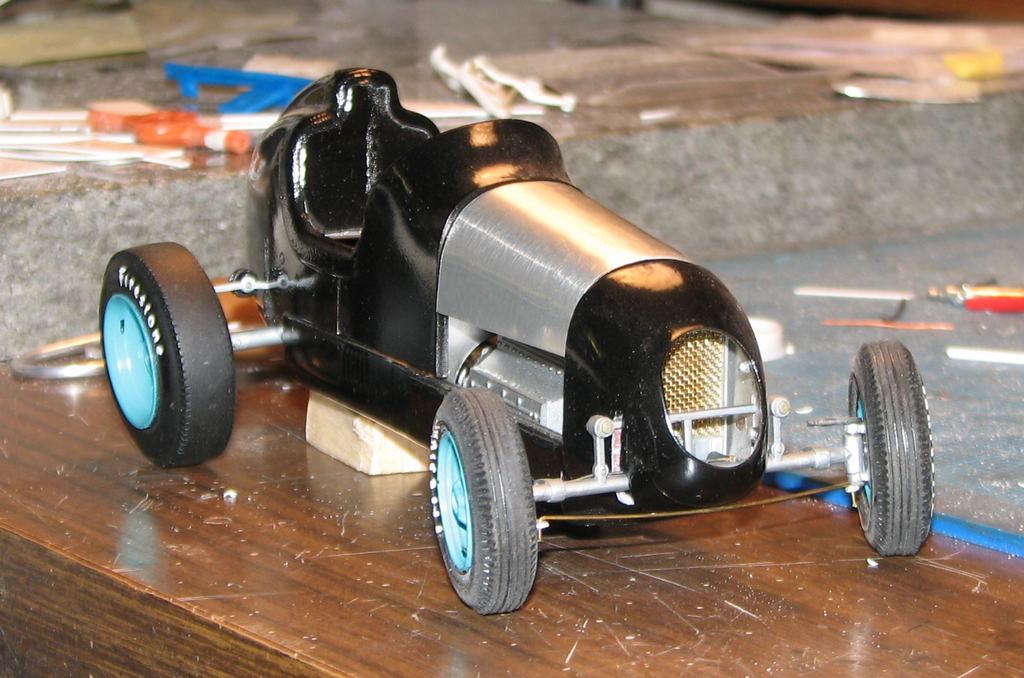
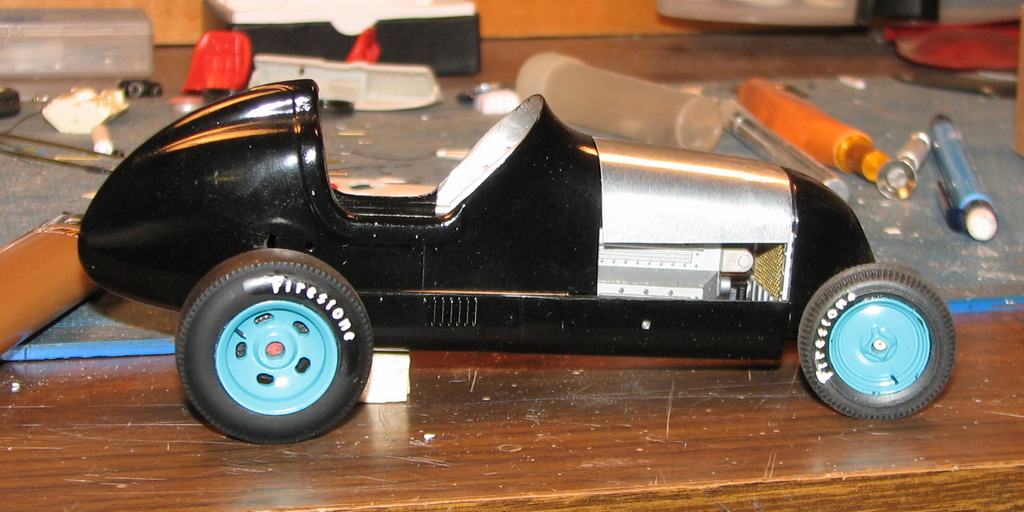
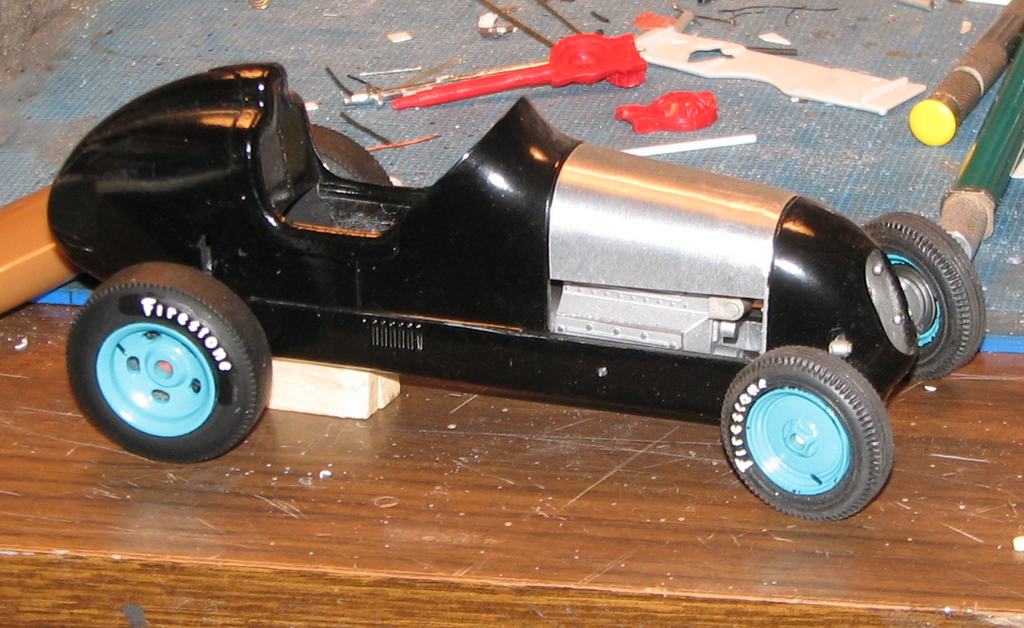
Thanks, Dave! I agree. It is more fun, outside the box! That dragster's looking great! Here's something I was working on, back in the late '90s. Never finished it, but I learned a lot during its construction. It's 1/25th scale, brass chassis, aluminum body panels, nose and tail hammered, formed and soldered tin. Sorry for the crappy photos. If I can dig this thing out and put it back together, maybe I'll shoot some new ones. Thanks again!
-
Feeling ambitious? Try something new!
Straightliner59 replied to Straightliner59's topic in WIP: Drag Racing Models
Thanks, Tim. I'll take that! I am awed by your FA. Boring a hole through a .5 mm shaft is simply astonishing! Love your work, man! Thanks, Joe! This junior fueler would be done, if I could come up with a set of Enderle stacks that looked right. I've checked kits and the aftermarket, and can't find any that are correct. I made on pair that I like, but, I need three more pairs! -
Feeling ambitious? Try something new!
Straightliner59 replied to Straightliner59's topic in WIP: Drag Racing Models
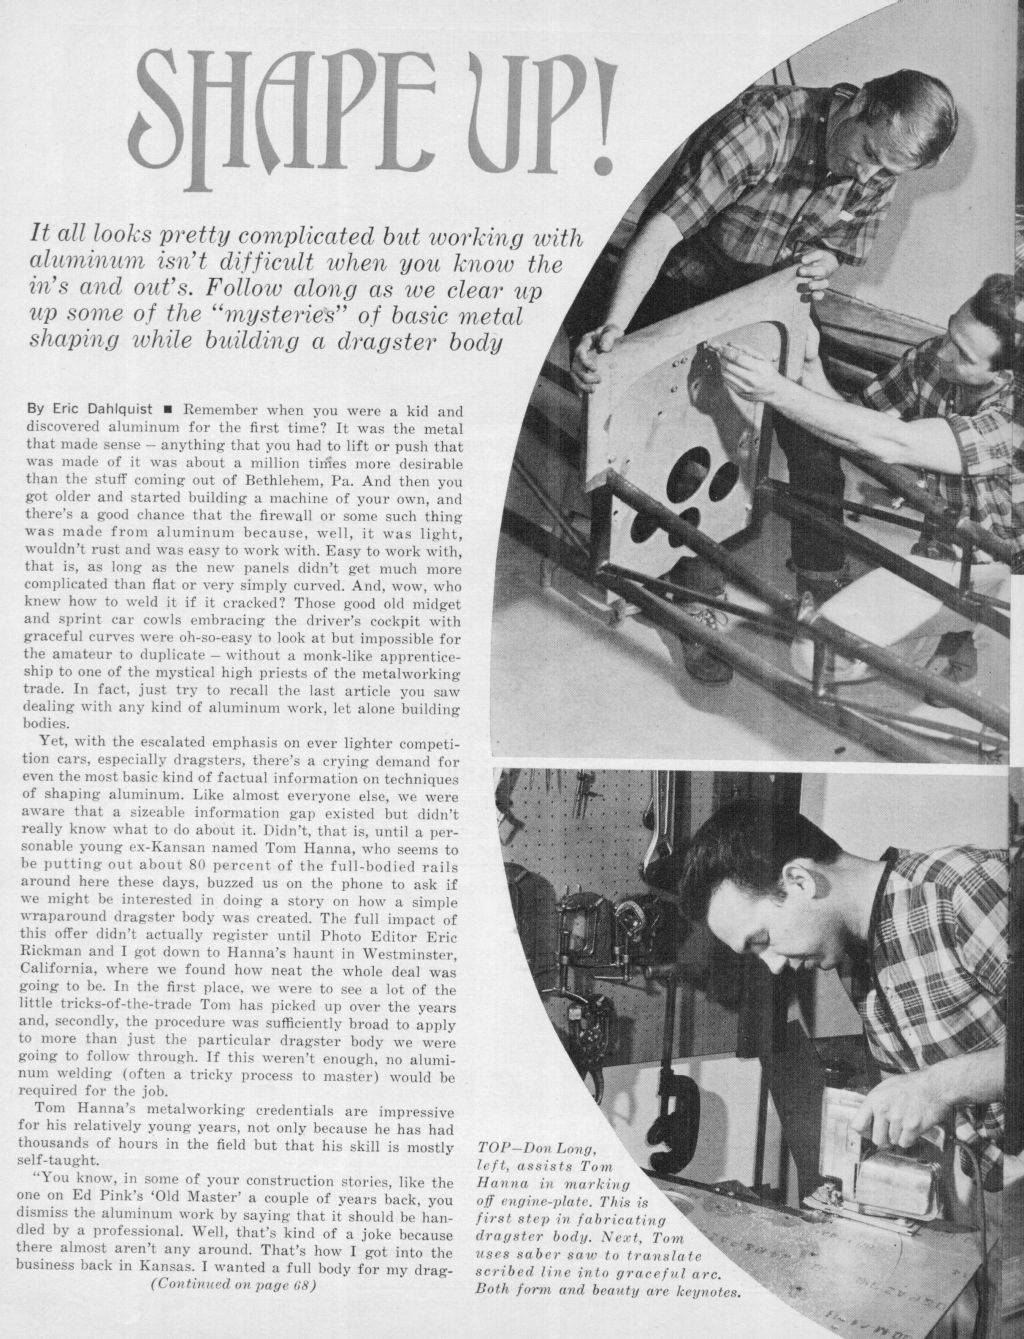
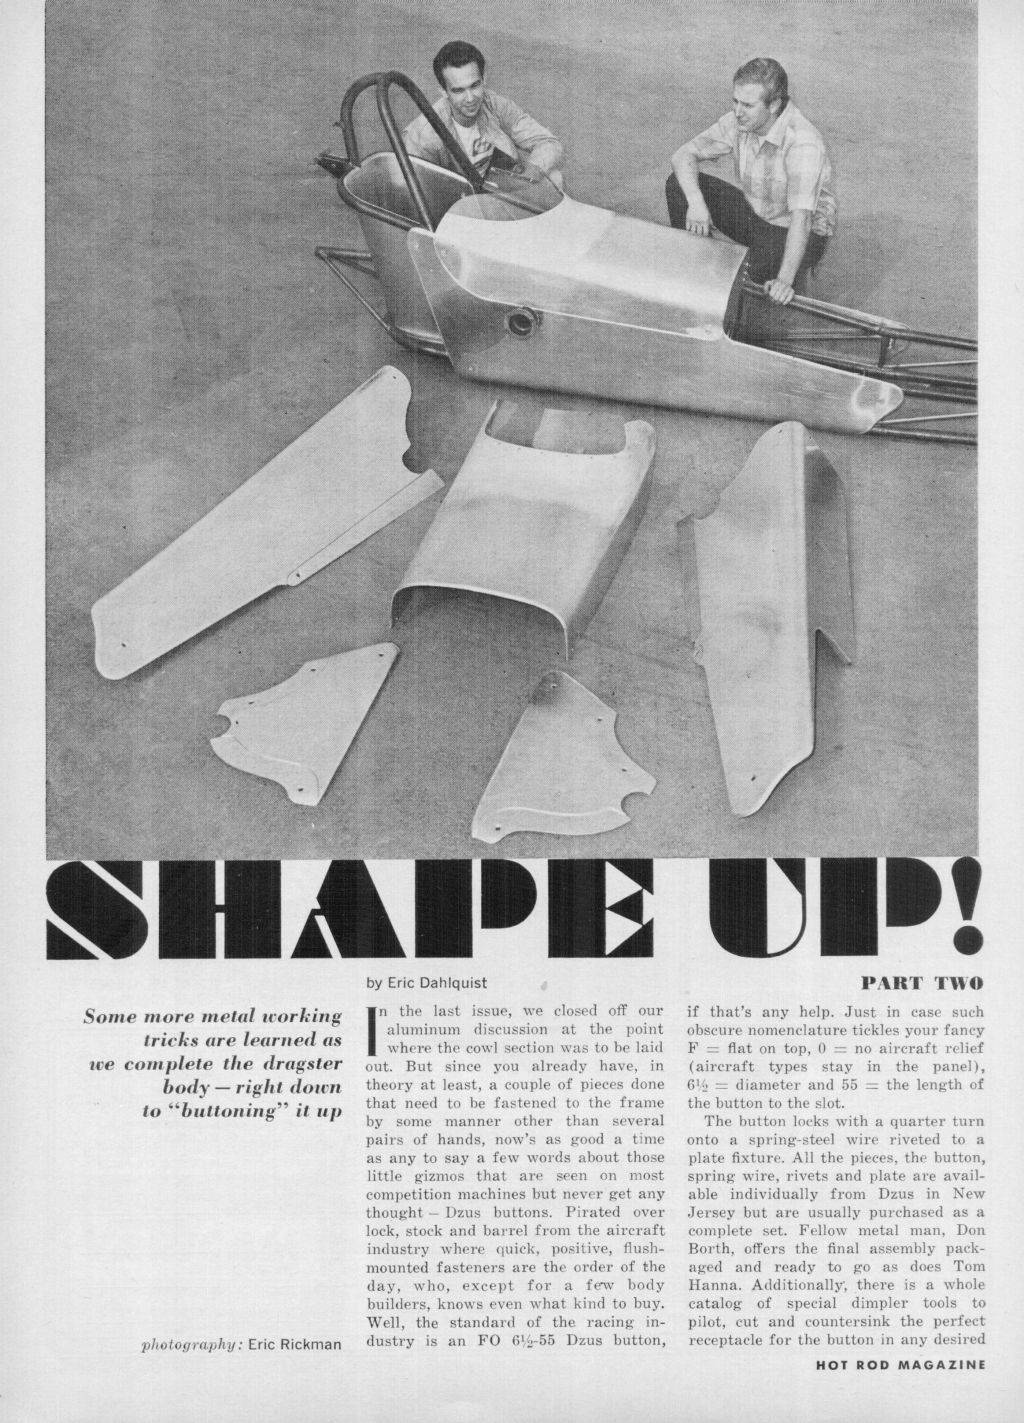
Thanks, Bill! When learning to build dragster bodies, I doubt there's anyone better equipped to teach it than Tom Hanna! -
Feeling ambitious? Try something new!
Straightliner59 replied to Straightliner59's topic in WIP: Drag Racing Models
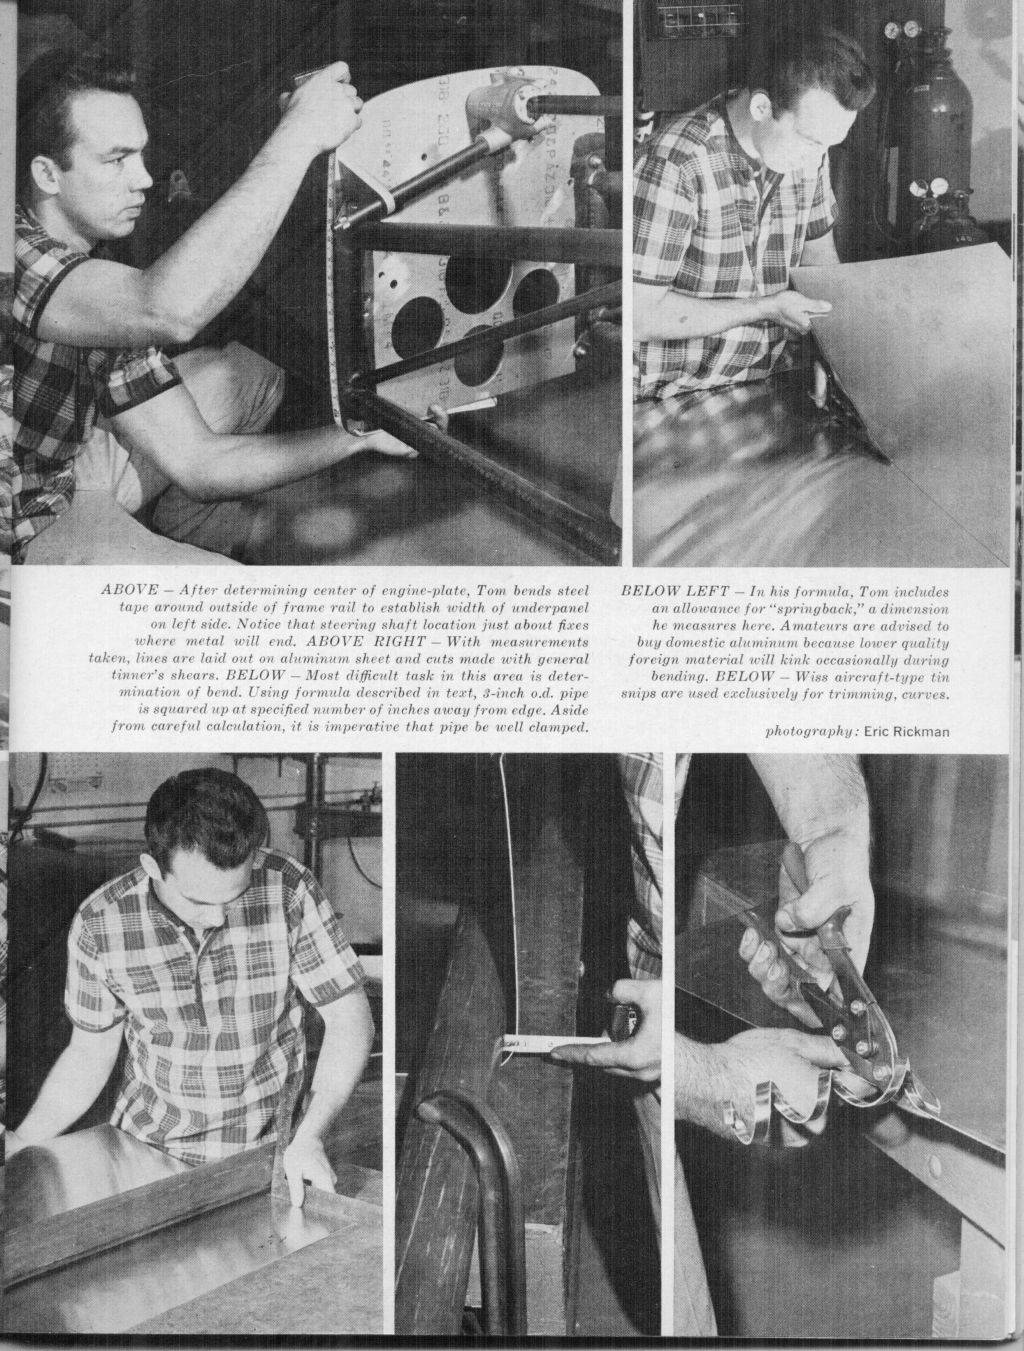
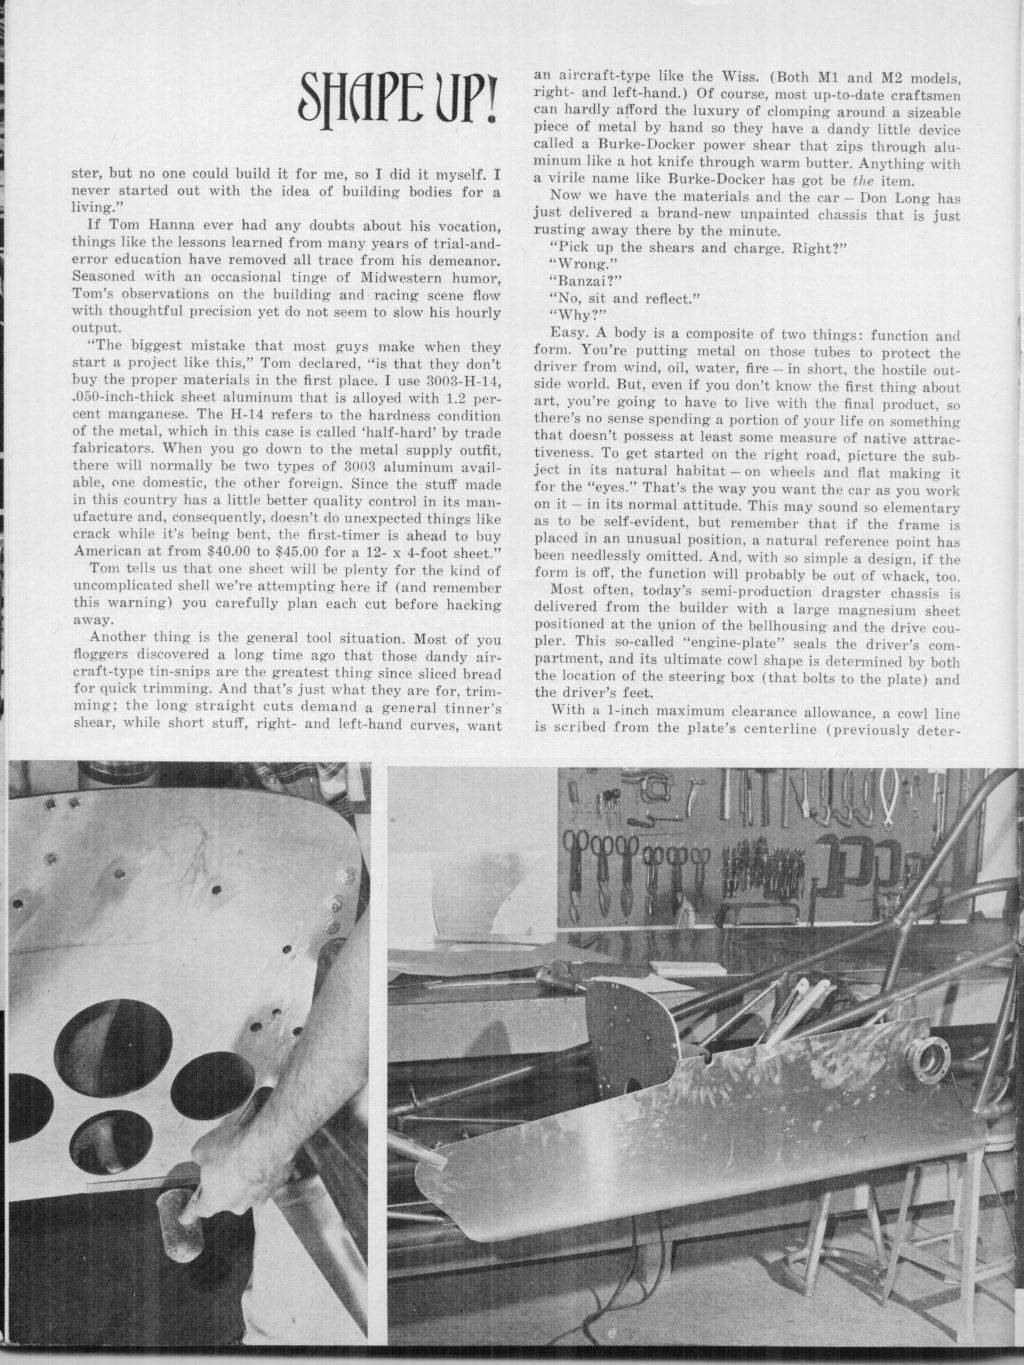
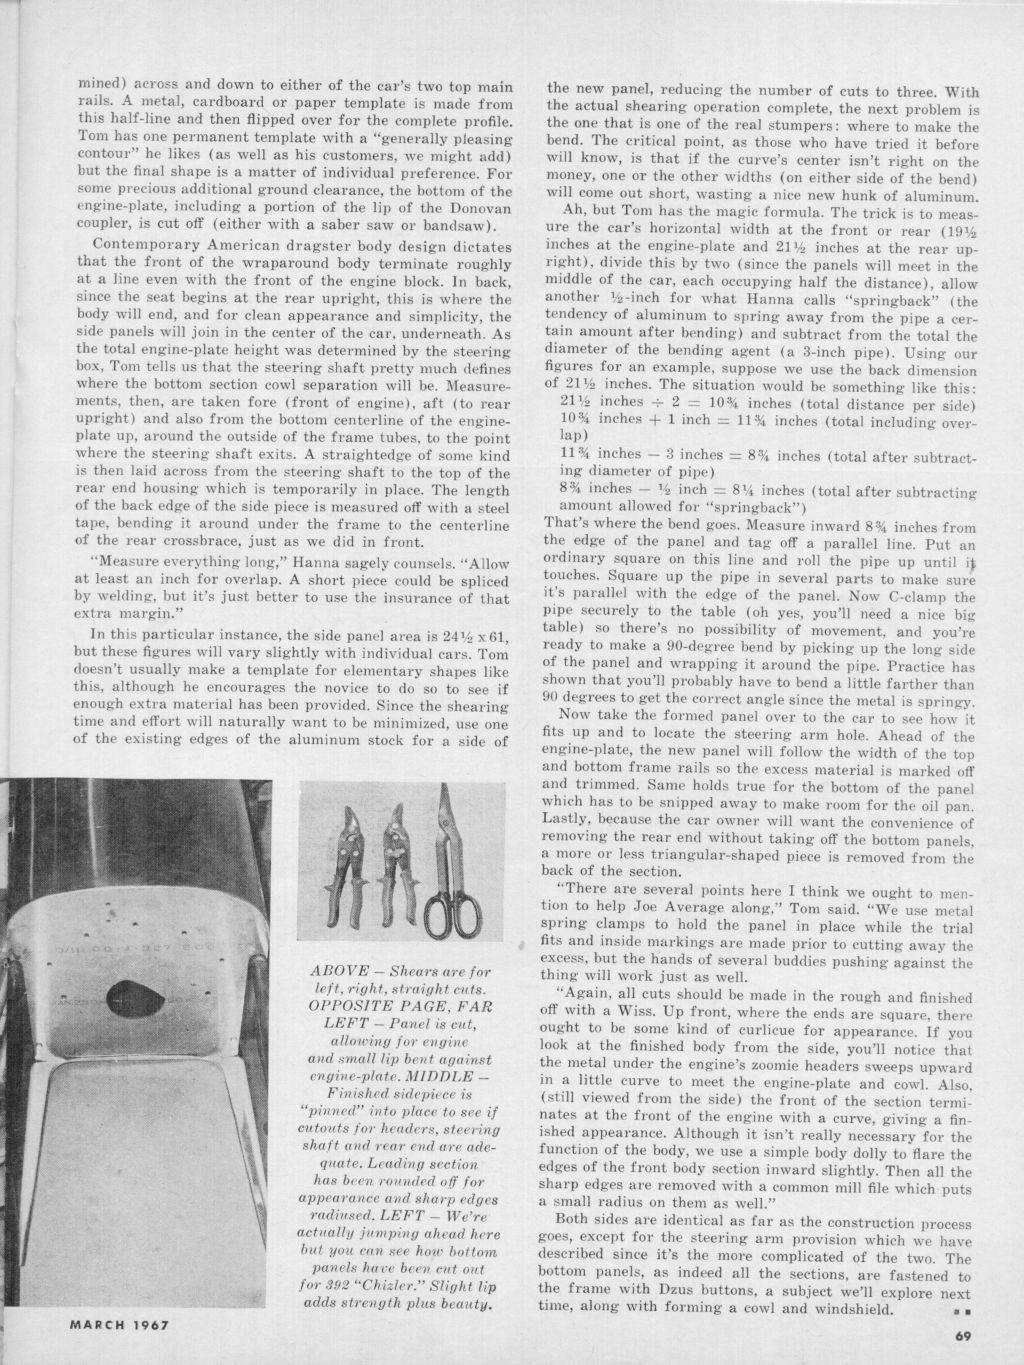
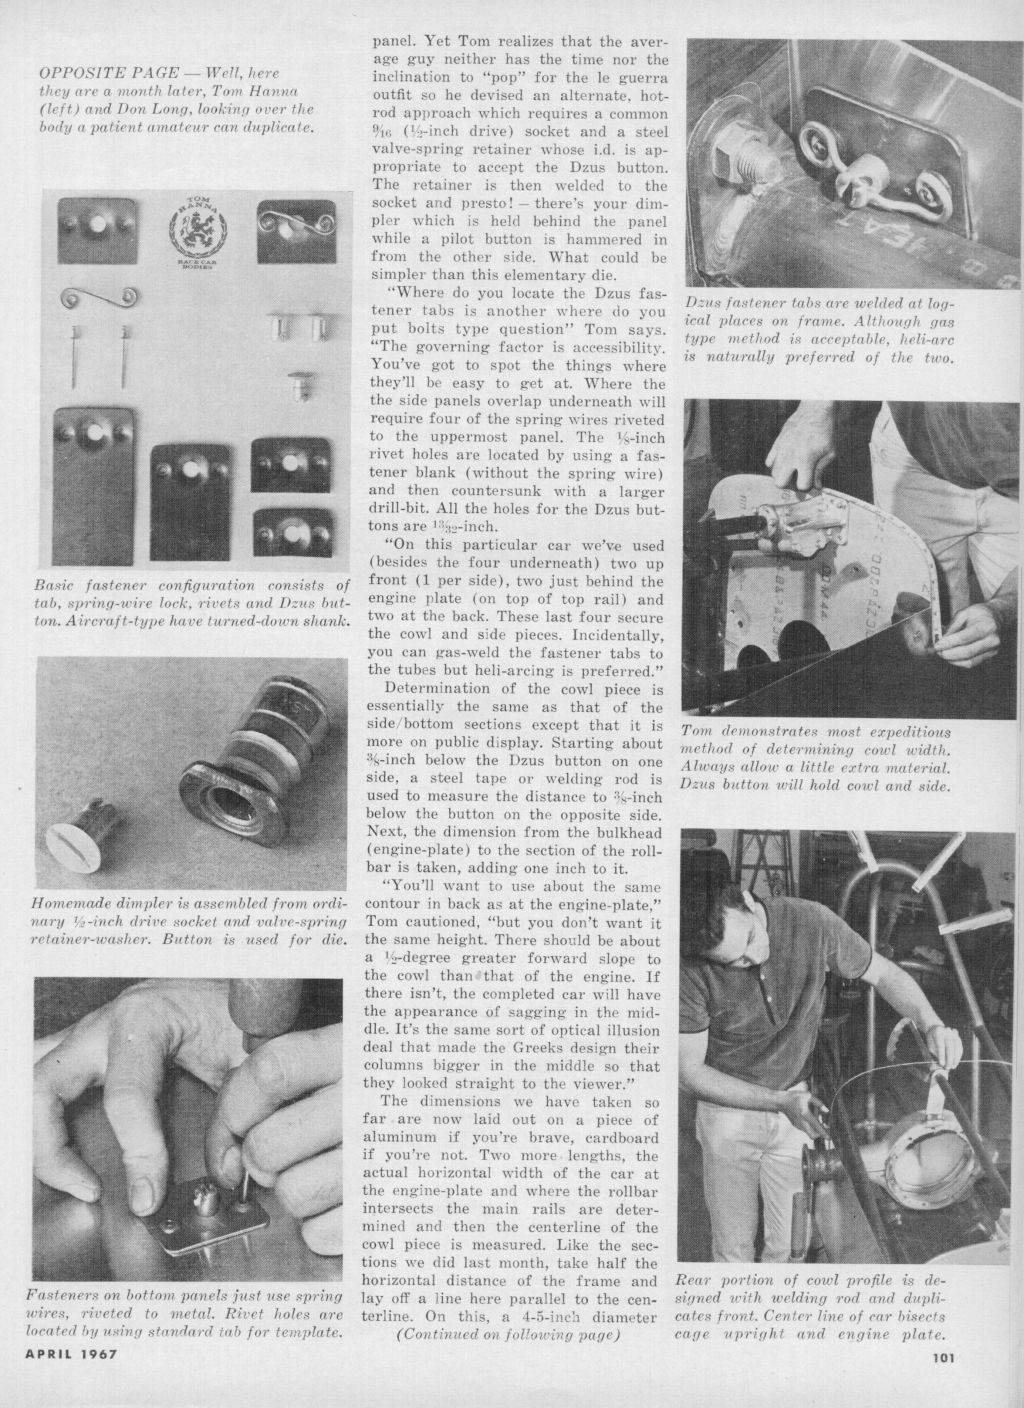
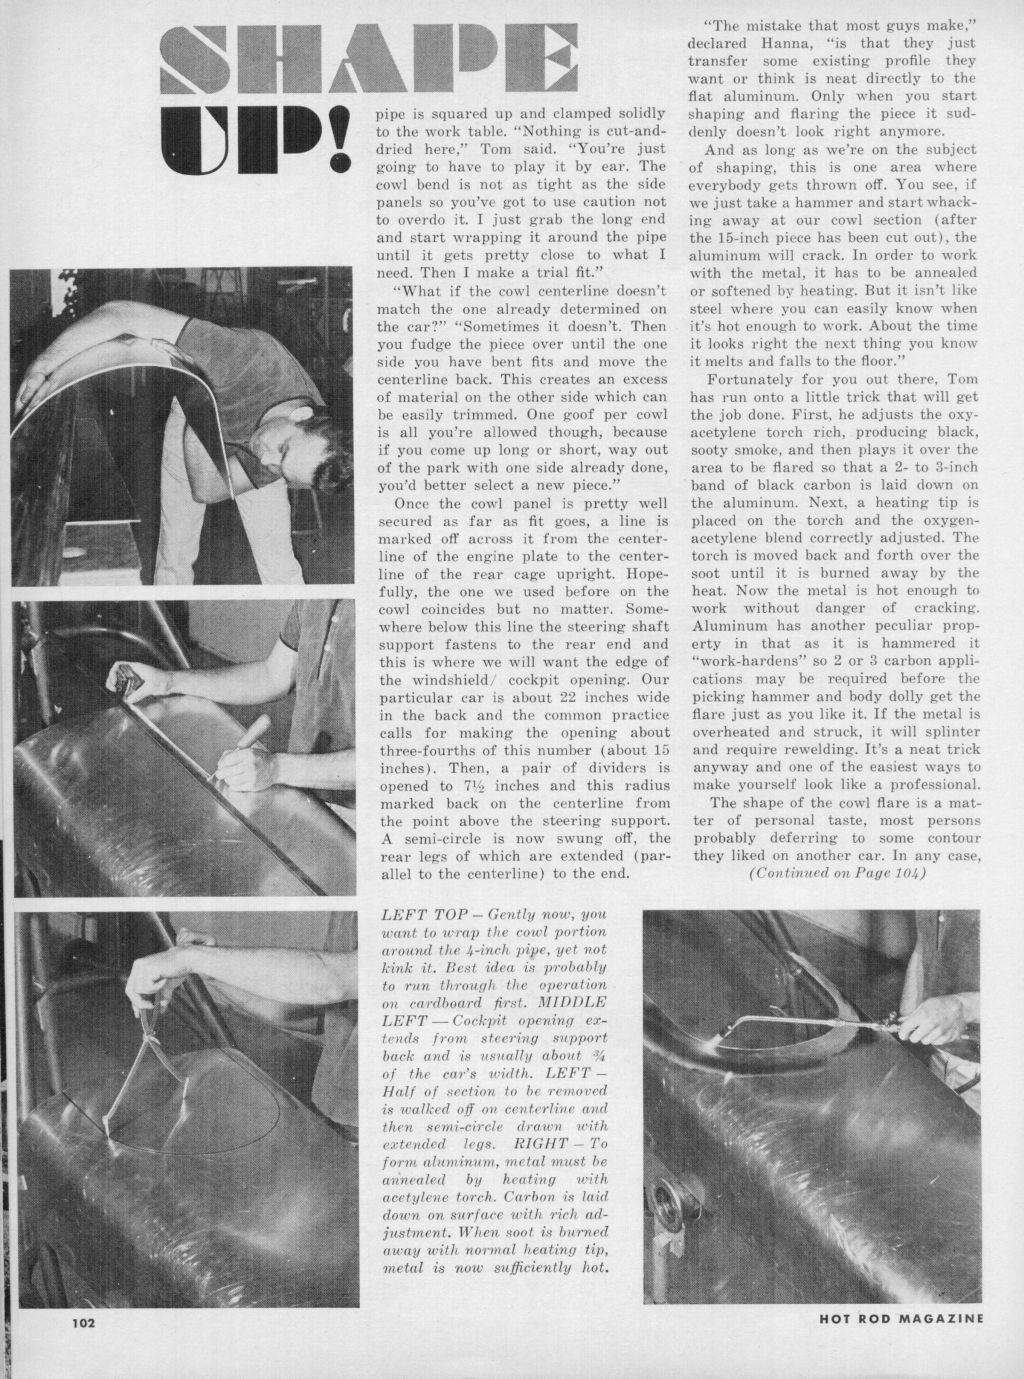
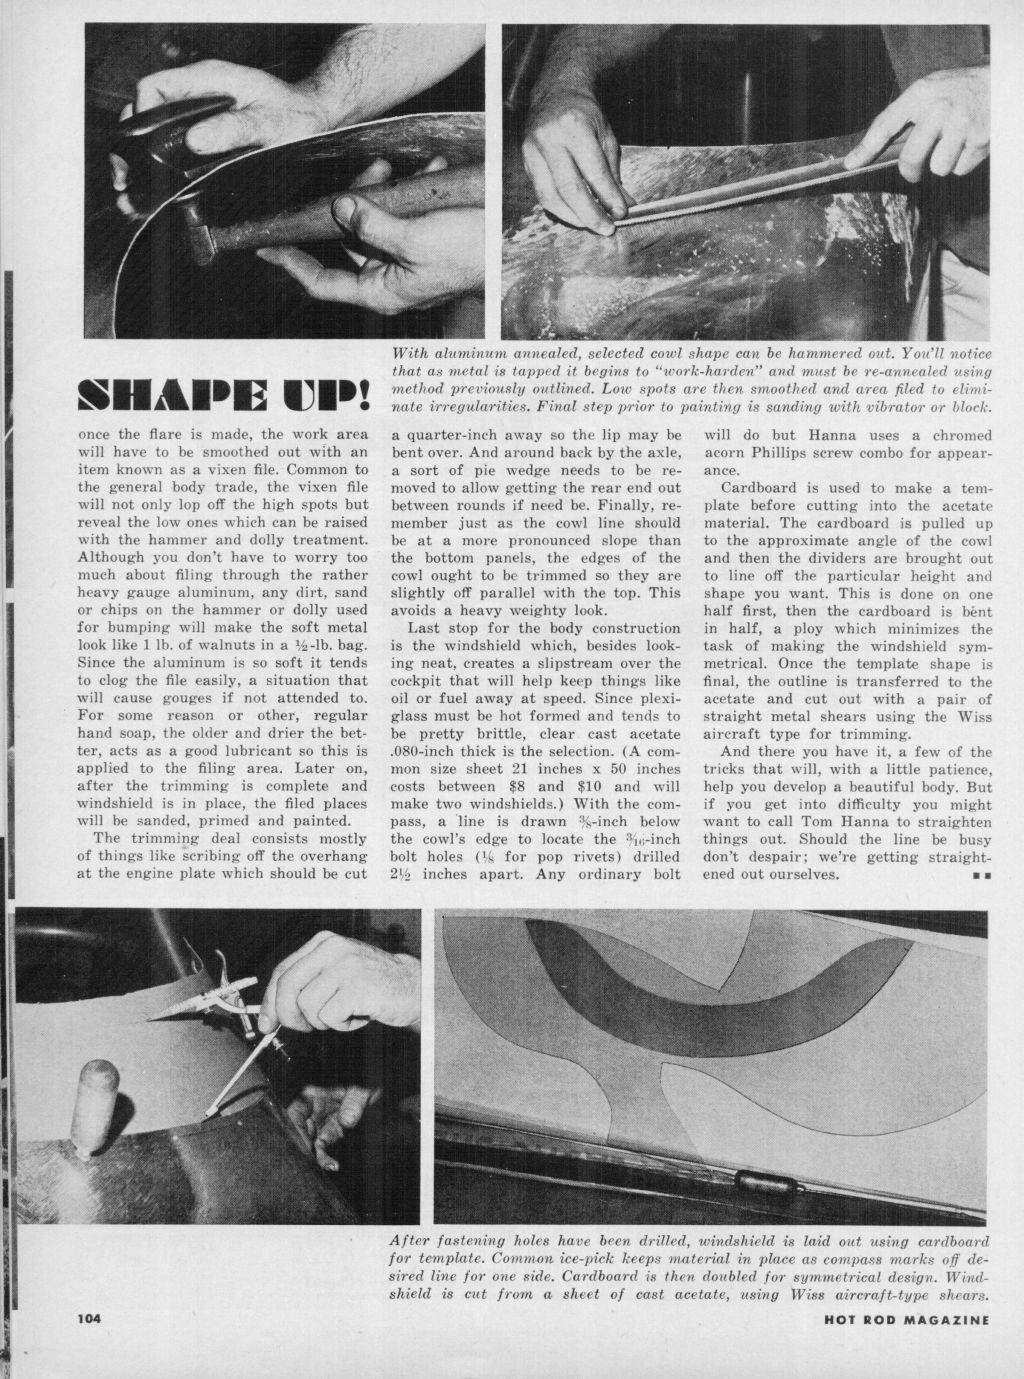
Here's a photo of the tools I used to form the body. 1. Dragster chassis. 2. Aluminum sheet. I used .010" aluminum flashing. Mine came in 5"X7" sheets. Any thin, somewhat rigid sheet will work (sheet must not be tooling aluminum or disposable baking pans as these are not rigid enough). 3. Wood buck for shaping cowl. Details below. 4. Ball-ended burnisher/scriber. 5. Shaping tools. Details below. 6. Ball pein hammers. Shown are an X-acto changeable head hammer and a small hammer from the craft store. I found the latter to be most useful. 7 & 9. Various shapes and sizes of metal and wood pieces for shaping panels. 8. 3/16" pin punch. 10. March and April, 1967 issues of Hot Rod Magazine or a copy of the article entitled Shape Up which is available as a .pdf file HERE. If you prefer, you can access the individual pages HERE. 11. A sheet metal nibbler is very helpful in cutting out the cowl opening, but the job can be accomplished using other methods. 12. Scissors or shears. 13. Since this photo was taken, I have also added a length of round steel rod 1/2"X10", based on Riceman's recommendation, to use as a slaphammer. 14. As always, you will need general modeling tools including measuring devices and a scriber.
-
Sorry for the file size. I didn't want to reduce the physical size, because the text is important. Tom Hanna tells you how to build a shorty body for a dragster. From HRM, back in the later '60s. Also attached are a few photos of a body I built, using Hanna's guidelines. It's not black magic!
-
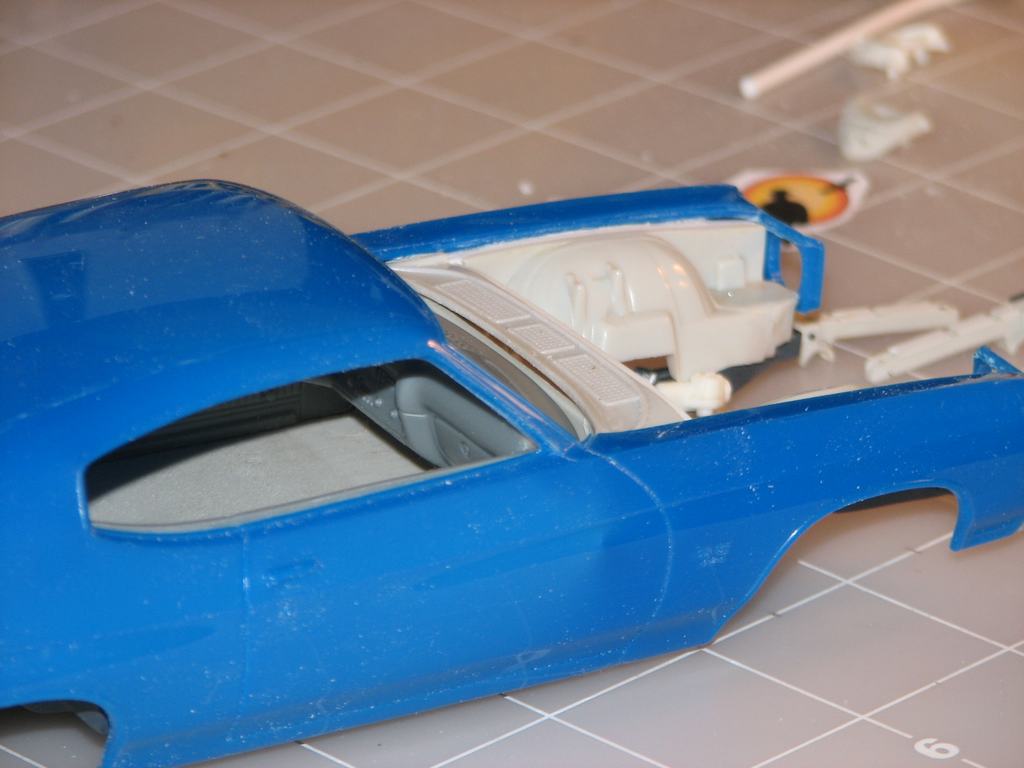
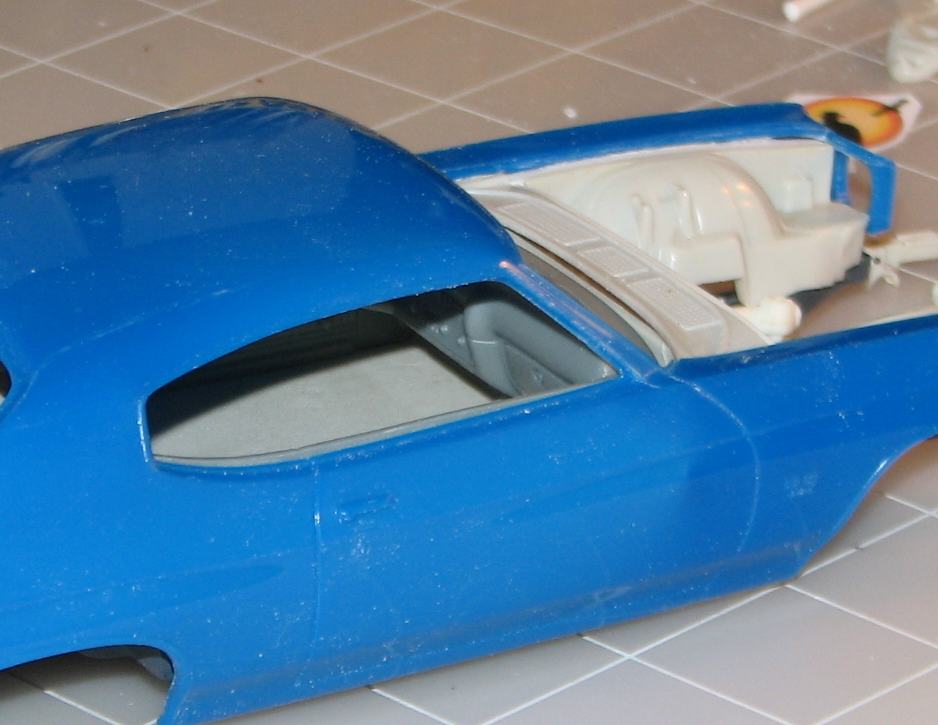
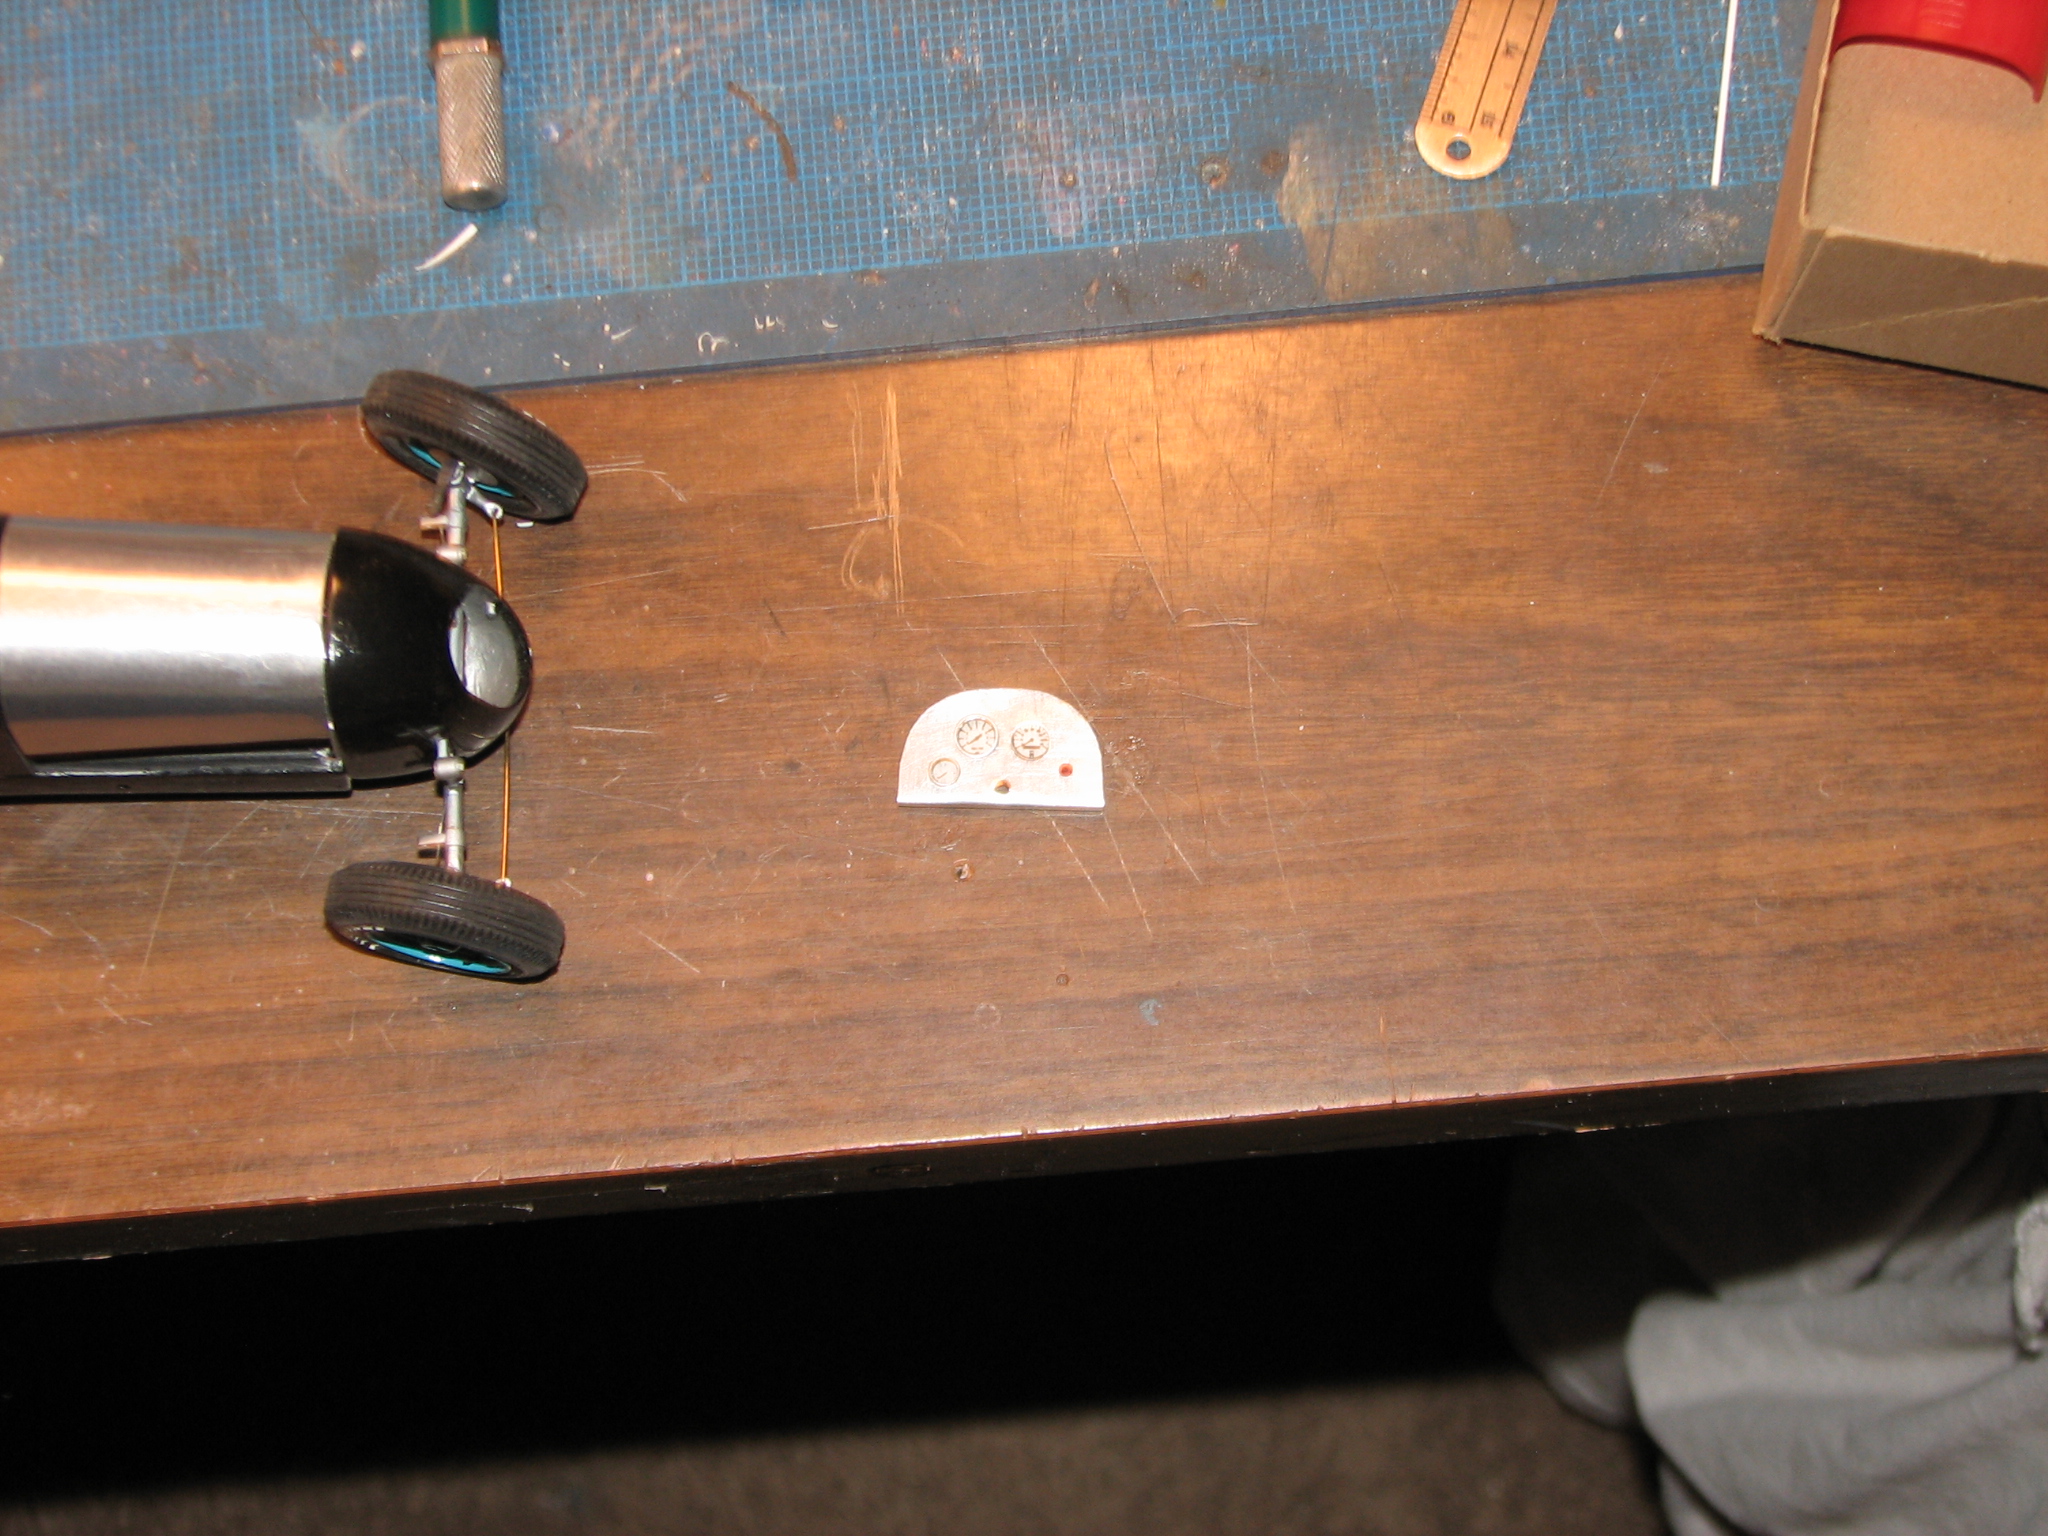
I've begun to adapt the interior components to one another, and the unit to the body.
-
New "material" for carpeting?
Straightliner59 replied to Straightliner59's topic in Tips, Tricks, and Tutorials
Awesome! Thanks! Now I know I'm not entirely nuts--at least by myself! -
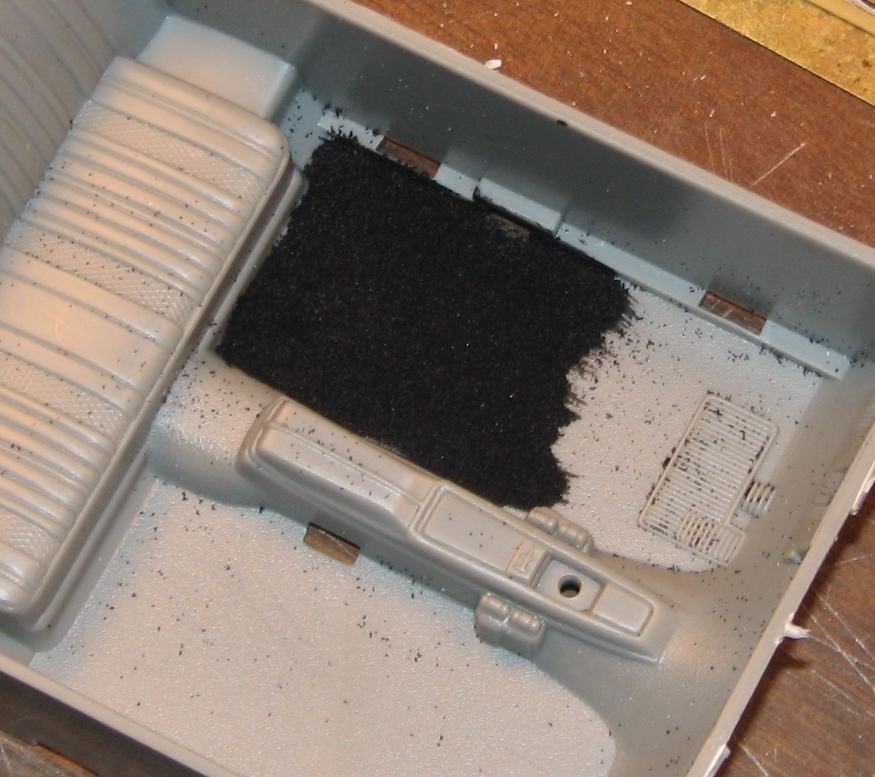
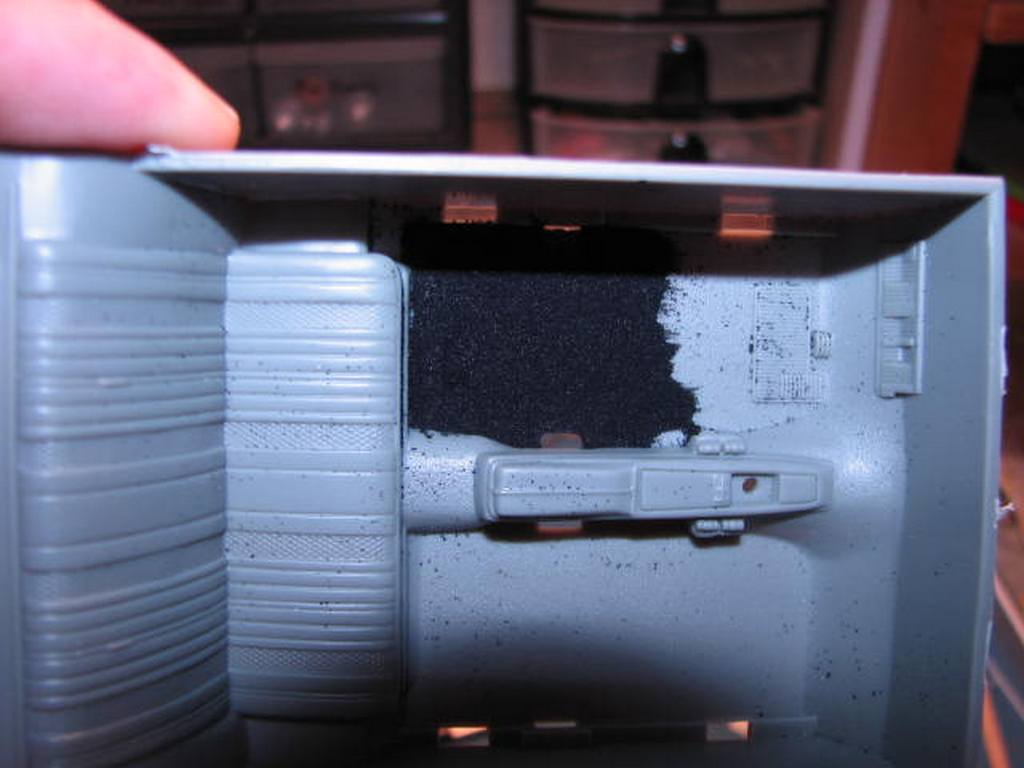
Yesterday, I was at a Michael's store, looking for flocking. After unsuccessfully searching, I asked an employee, who referred to their computer and informed me that they didn't carry it. So, I looked in the scrapbooking, stamping and card making area, and found something called "embossing powder". I was looking for black flocking, so, I neglected to look to see if there were other colors. When i got home, I tested the embossing powder over flat black paint. I am pleased with the result! I think it looks very nice as the short pile that carpets many cars. What do you guys think? Am I all wet, on this?
-
No problem, here! It's always good to learn new things--even for us old dogs!grin
-
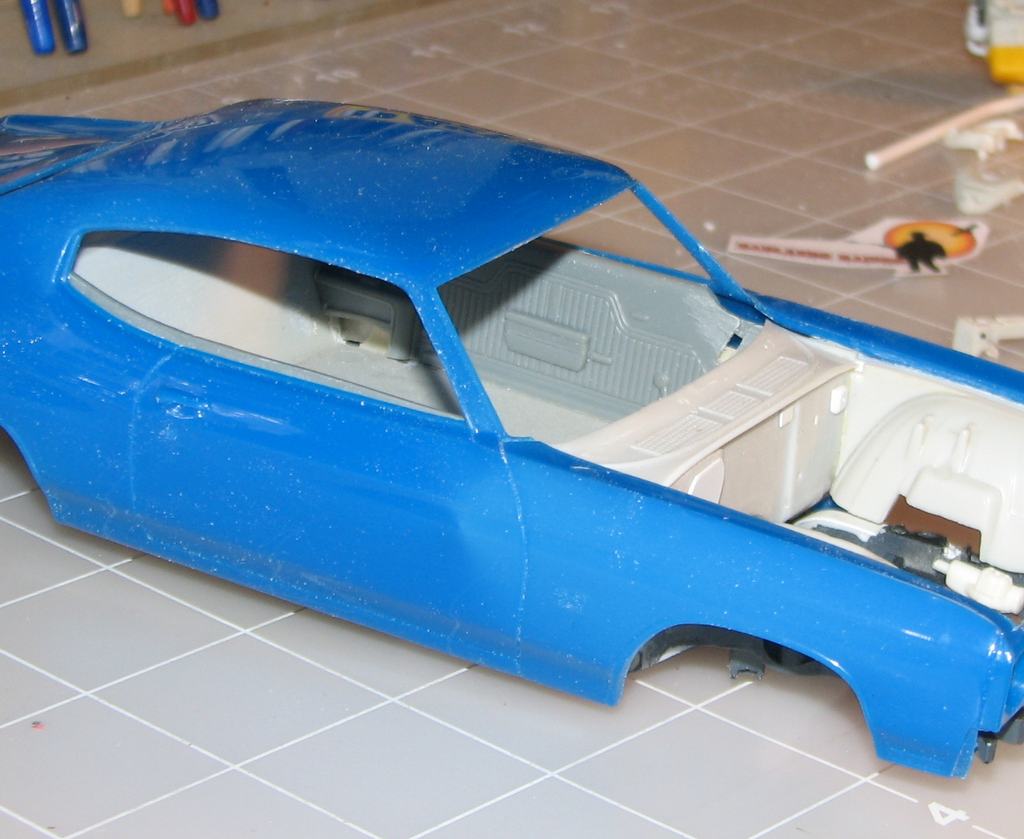
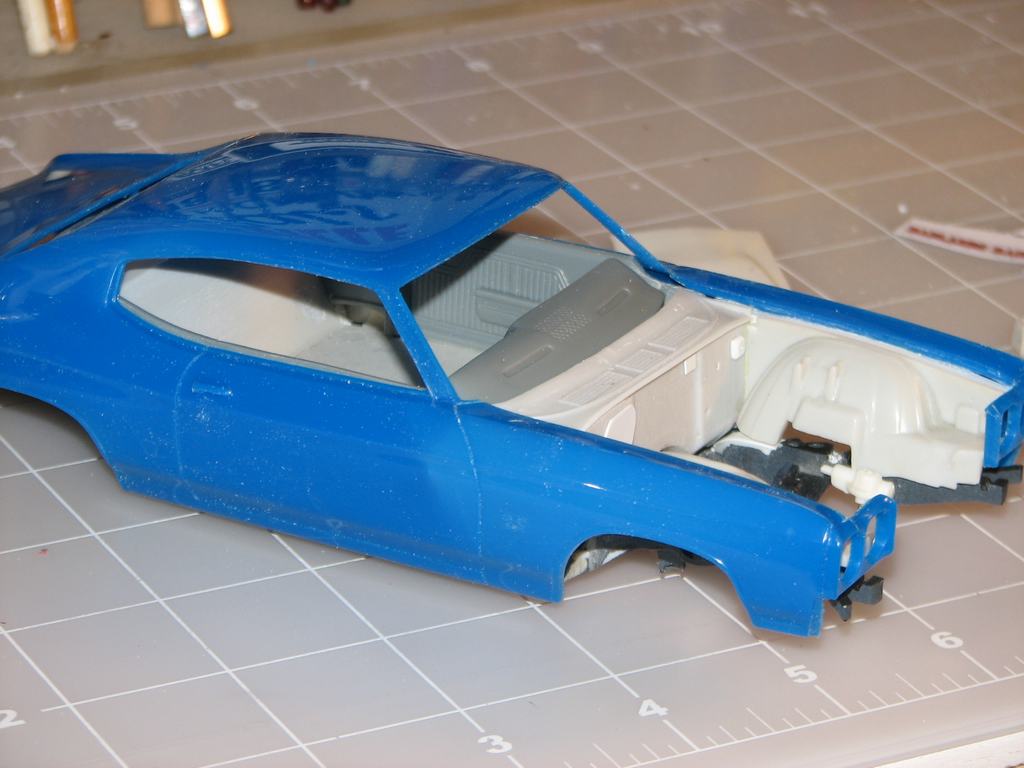
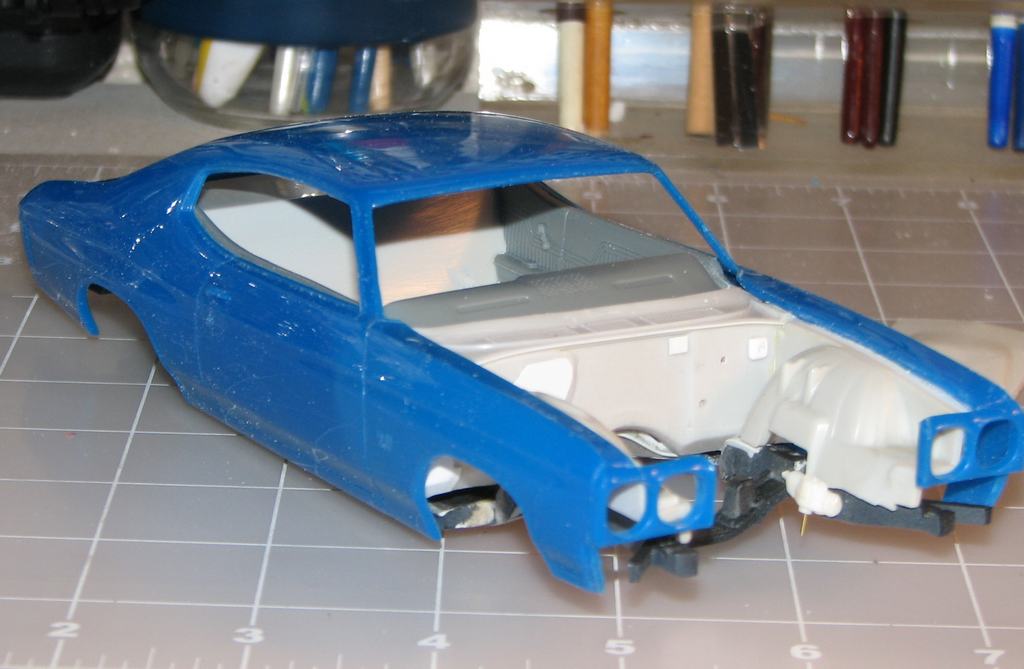
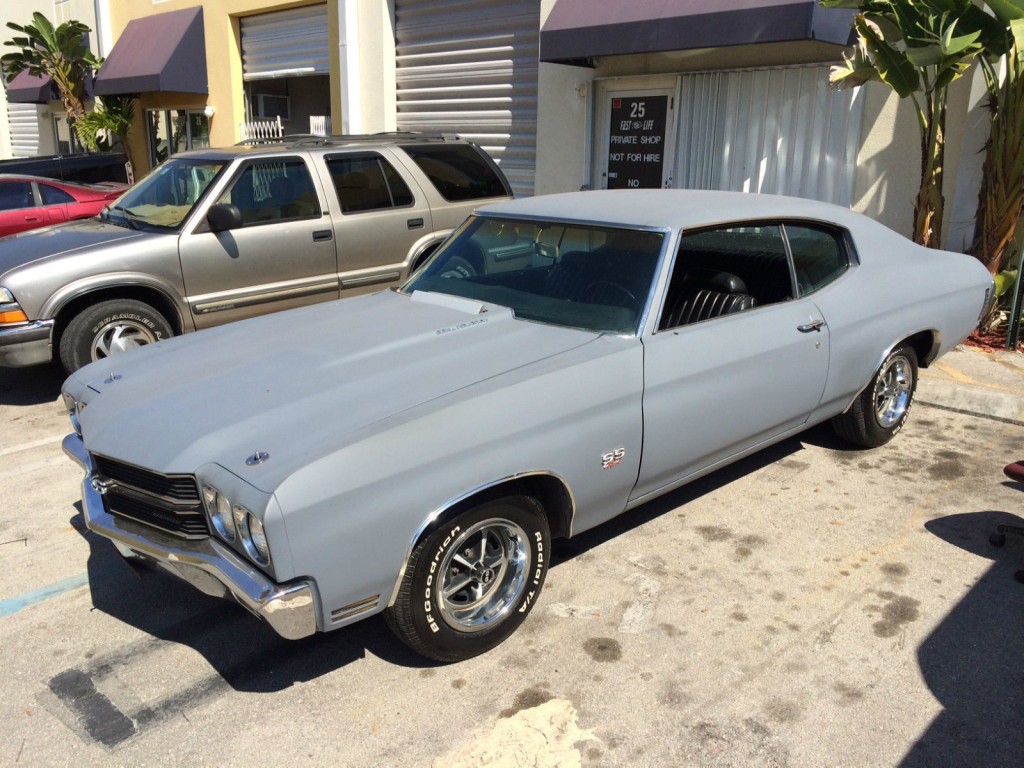
Thanks, Rusty! It's not perfect, but, it's better than it was! If I had it to do over? I'm having fun with it. This primered Chevelle really removes the illusion that led to the AMT body's warts. It's a lot of work to use the Revell snapper's body, but I am happy I chose it.
-
I do, too. It's a thing of beauty!
-
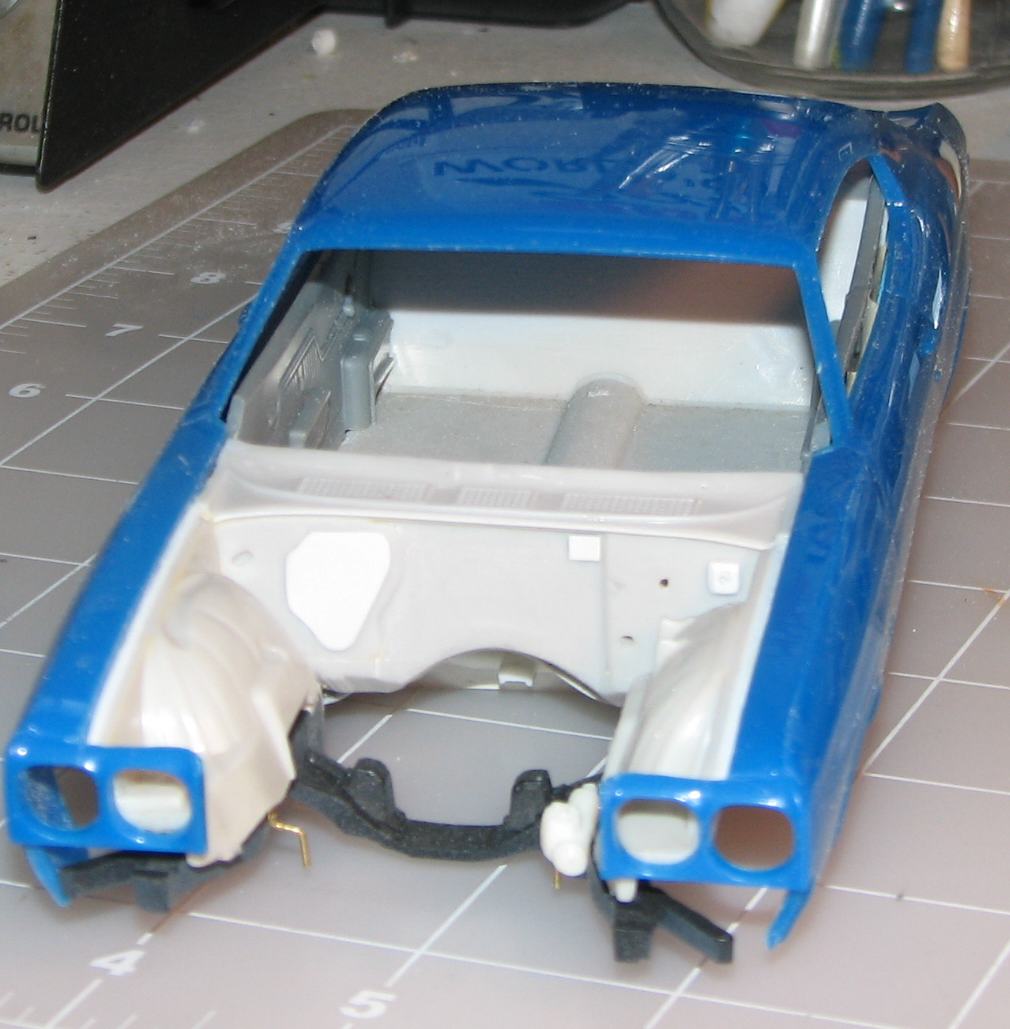
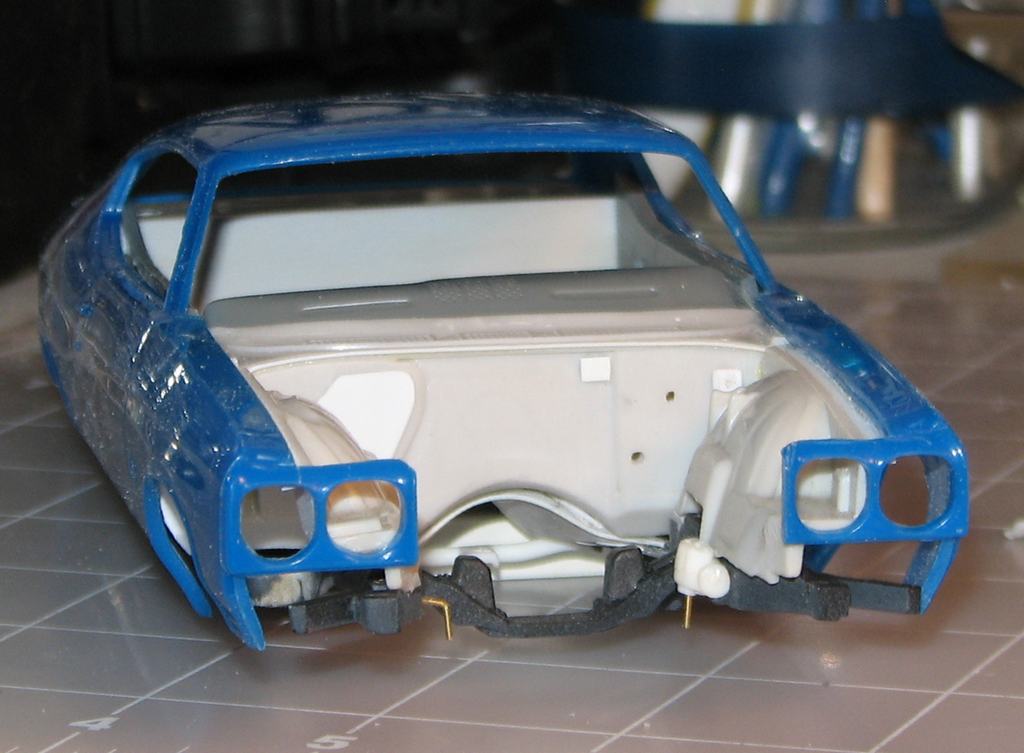
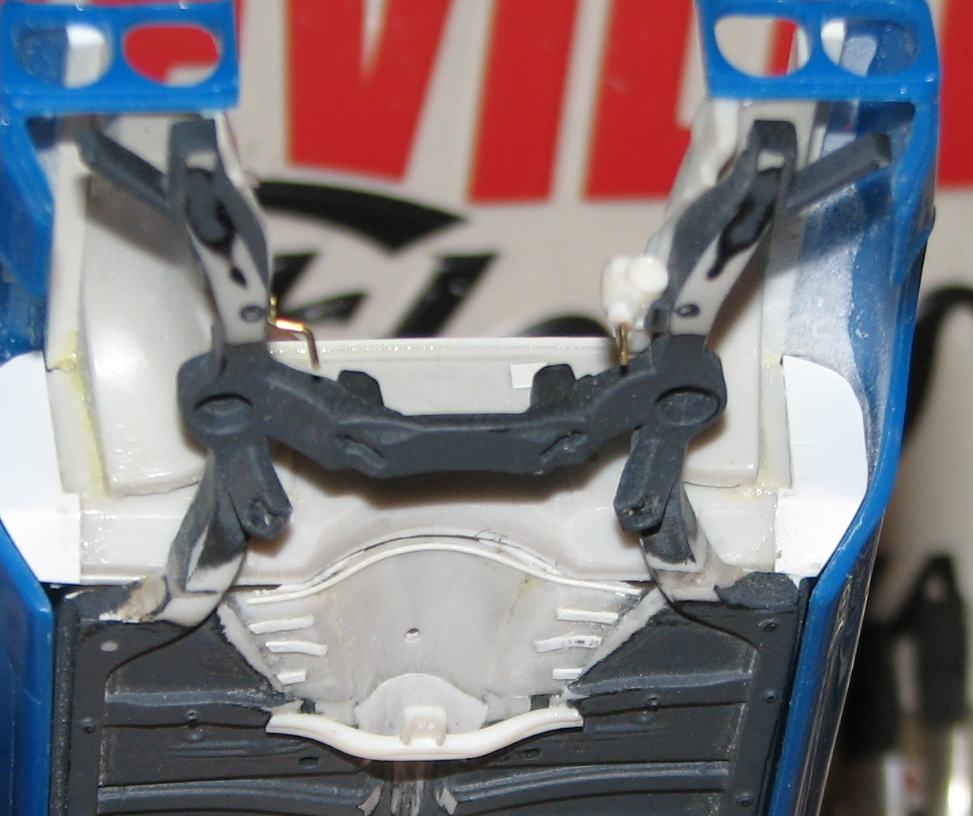
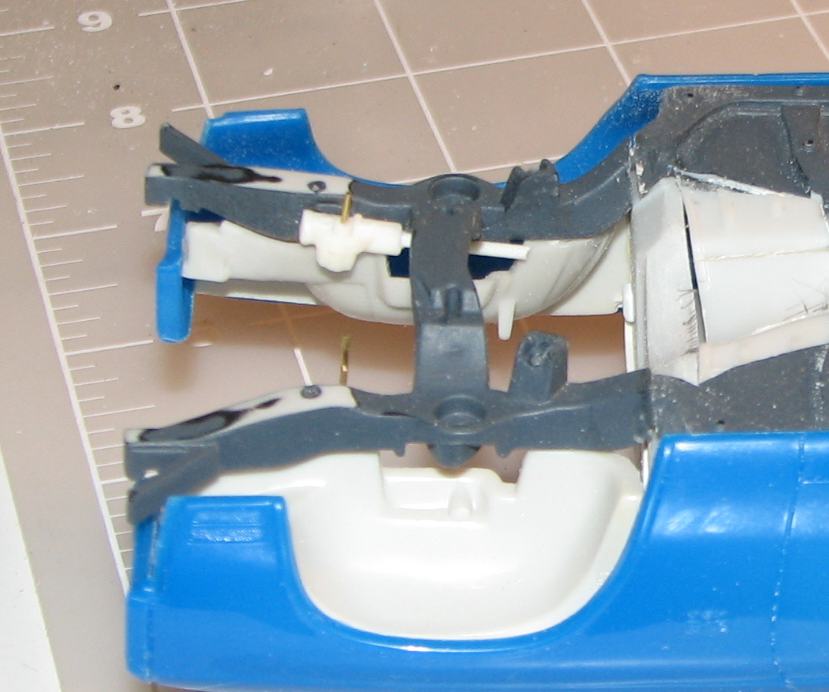
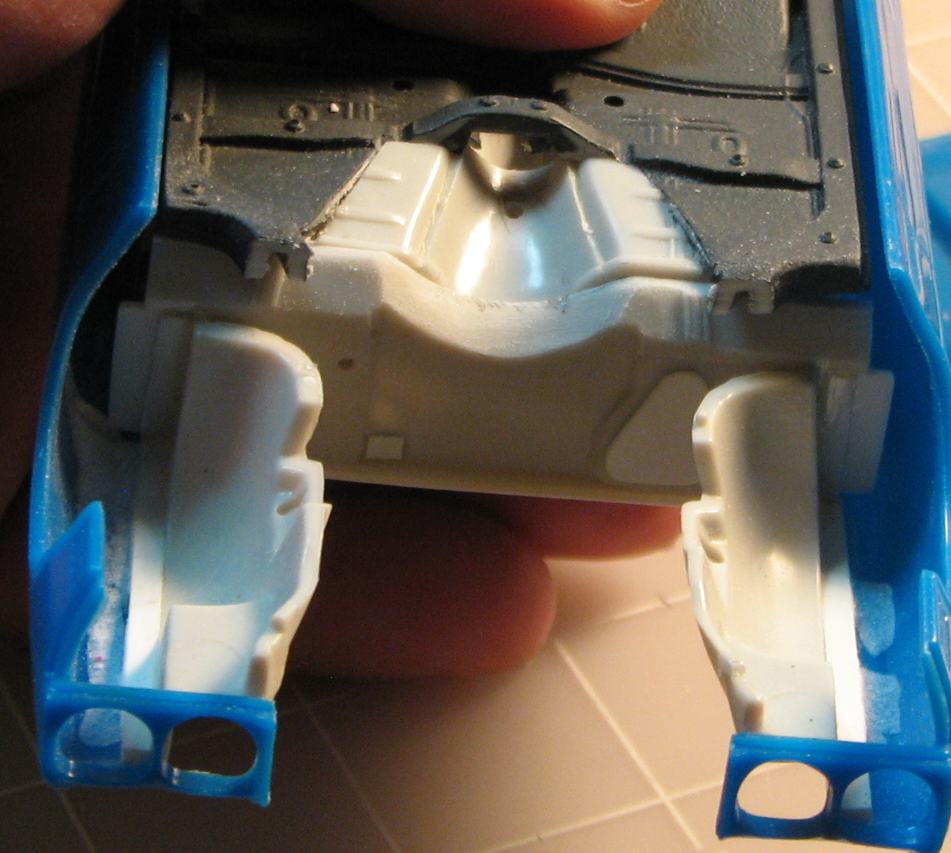
I added some detail to the area around the trans hump. I replaced the center of the AMT Chevelle's chassis trans mount with the center section of one from the Monte Carlo. I also made the ends of the firewall. I just about have this area all worked out, now. I've begun to rework the interior door panels of the Revell kit to fit the interior tub of the AMT kit, because the Revell's interior assembly is too deep to fit and have this chassis sit up under the body. I am going to attempt working hood hinges from brass. We'll see how that goes!
-
Very nice! The detail work is excellent; in scale, tidy, realistic. Great model!
-
Nice project! Always dug that lowboy trailer. Where are the drive tires from? They are beautiful! Thanks!
-
Thanks to all for your kind words! Alan, thank you, most of all. The best thing I can hope for as a modeler, is to inspire other modelers! I hope you'll go with that inspiration. I look forward to seeing how your project comes along, as well!
-
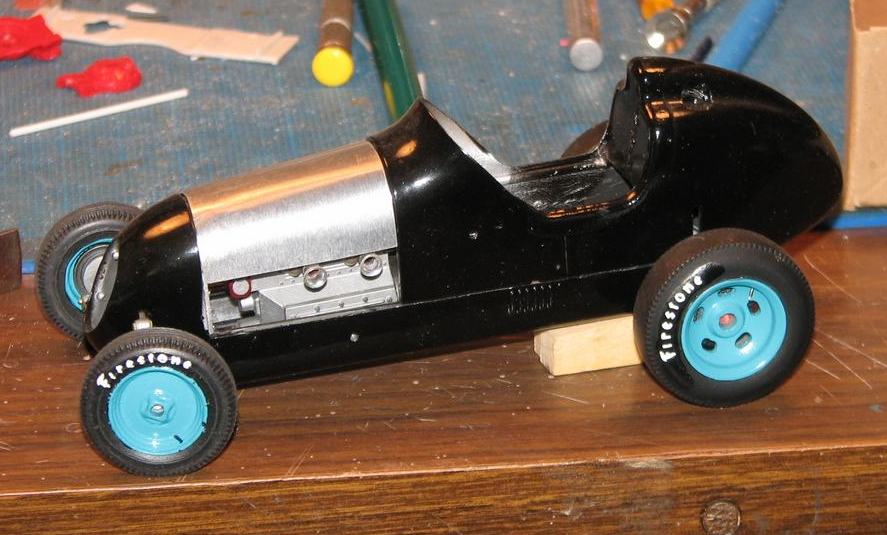
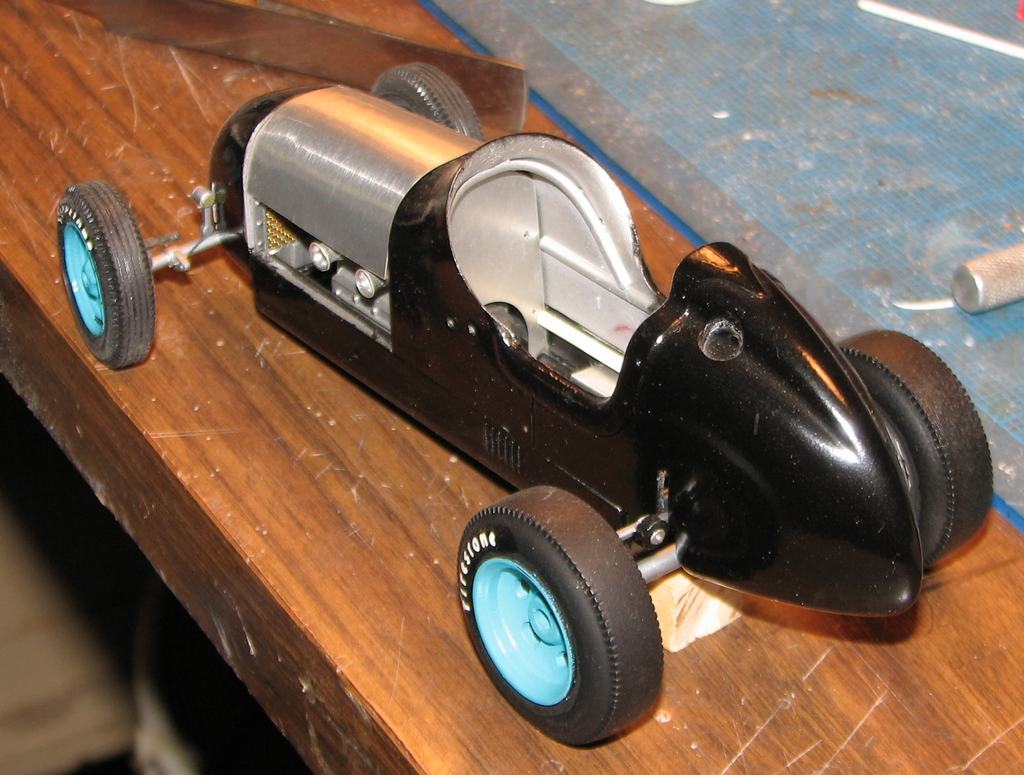
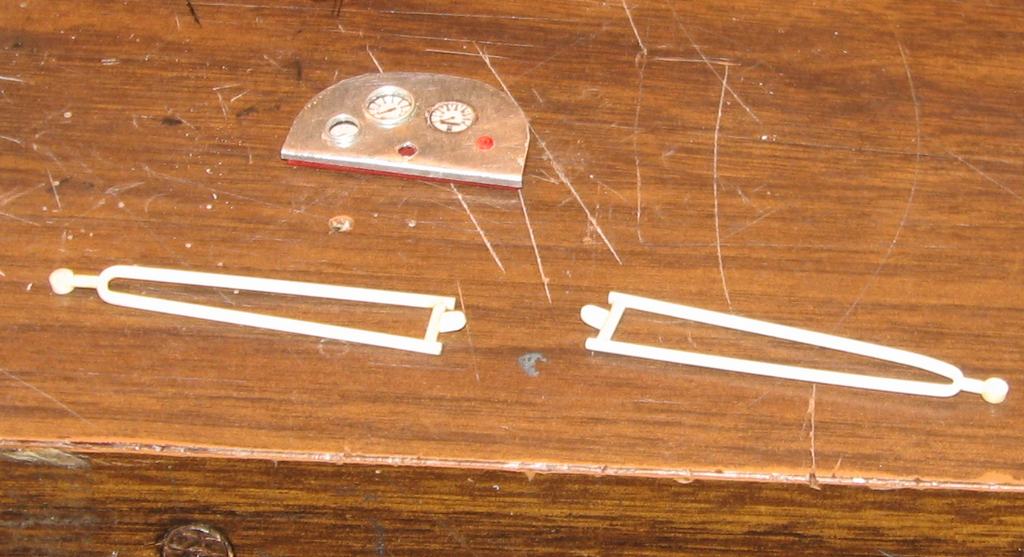
I started work on this almost twenty years ago, moved on to something else, and put it back in the closet. Last night, I decided to get it out and take some better photos of it. It began as Monogram's old off-scale Midget kit. Inspired by the old Belanger Special Indy car, I cut it apart and lengthened it, to better represent one of the "big cars". I am considering finishing it up, as I don't think it would require too much time (relatively speaking) to do so. The radiator is completely scratchbuilt. The firewall, hood and seat support are aluminum sheet. Evergreen styrene tube and half-round were used to represent the chassis tubing. The dash has photo-reduced gauges, is covered with "tooling aluminum" found at a crafts store, with bezels (one of which has detached and departed) made from aluminum tubing. Most of it is from the kit, with some modifications and/or enhancements. I've said before that I love these old Monogram kits! I've also been told that I do much more work on them, than they deserve! For me, they capture a real sense of Americana and nostalgia, and, given some attention, they look pretty cool, sitting in the display case. Comments and questions welcome. Thanks for having a look!
-
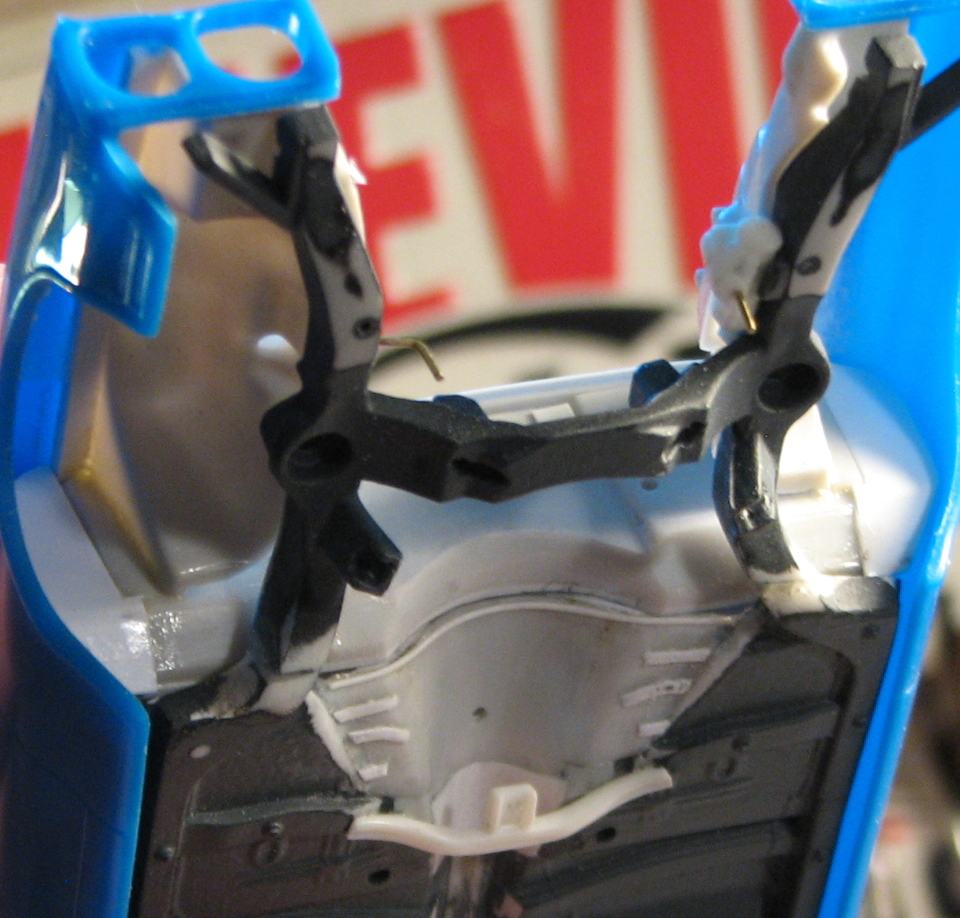
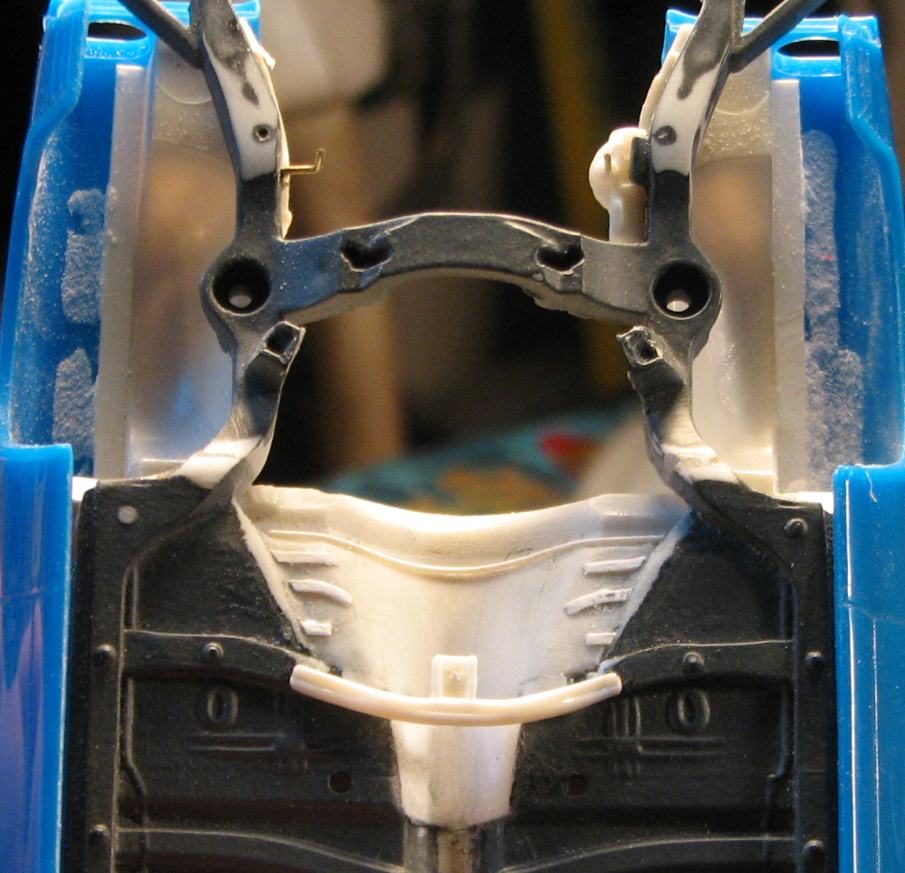
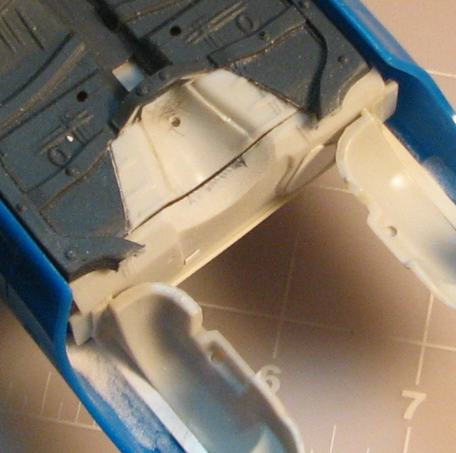
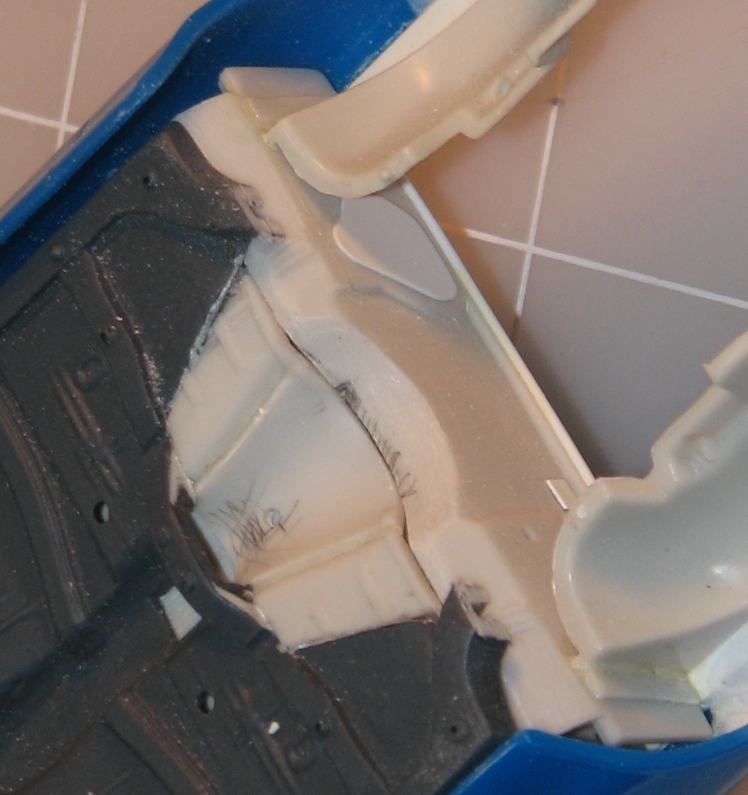
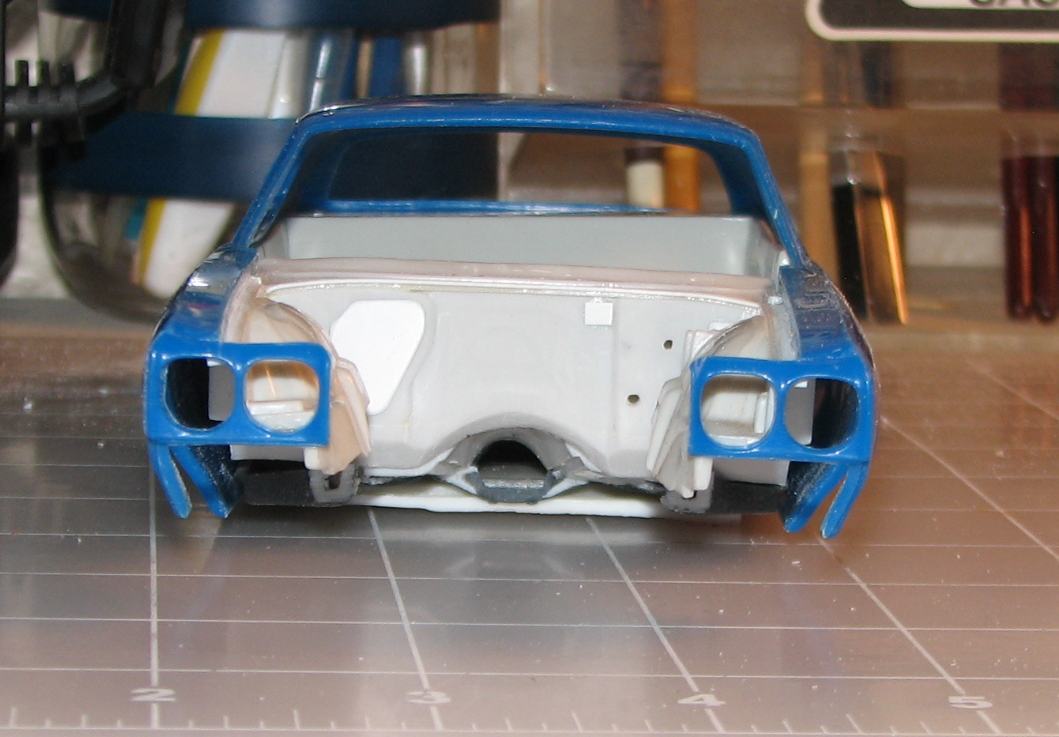
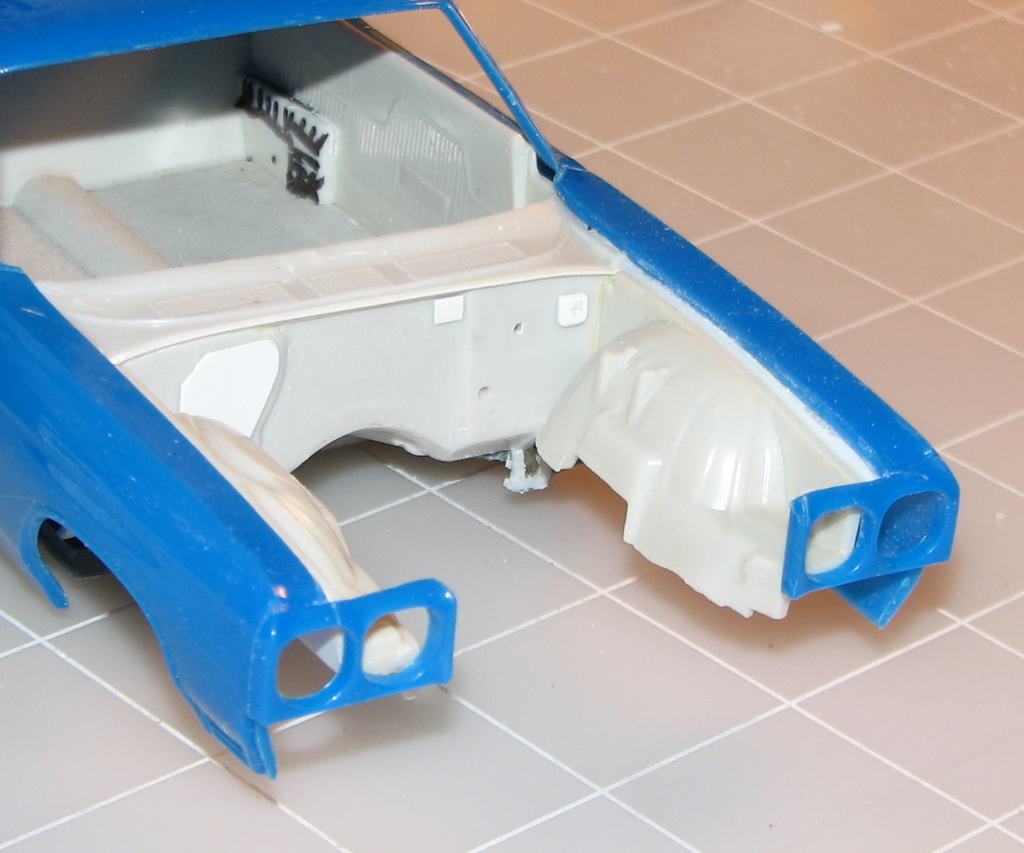
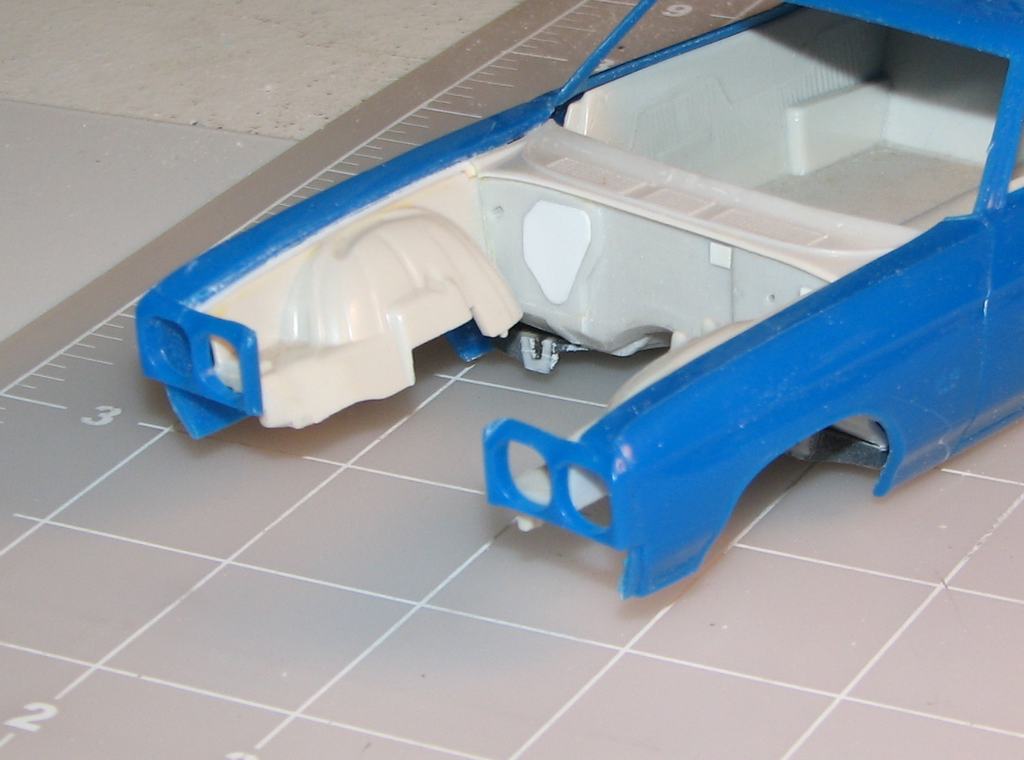
It's been a while since I've updated this. That's because it's been a while since I made any kind of progress on it. That's a long story...suffice to say, this project has been on life support. Everything that's led to this point has been a part of that story. Those white pieces at the front of the floorpan are from AMT's '68 El Camino, as are the firewall and the cowl. The El Camino's firewall didn't align with the older AMT chassis, partly because the area filled by those white pieces was empty, before. Fixing that led to a lot of judicious (and some not so judicious) cutting and sanding and fitting and repeating. Cutting the front clip loose was also a big help. It's finally close enough that I figured I could share it. I added a thin strip of styrene at the cowl/firewall joint. Also visible are the smoothed firewall and the heater block-off plate. I chickened out at the idea of opening the cowl vents and covering them with screen, although, you never know!
-
Thanks, guys! Your kind words are appreciated! Curbsides and slammers are a lot of fun, for me.
-
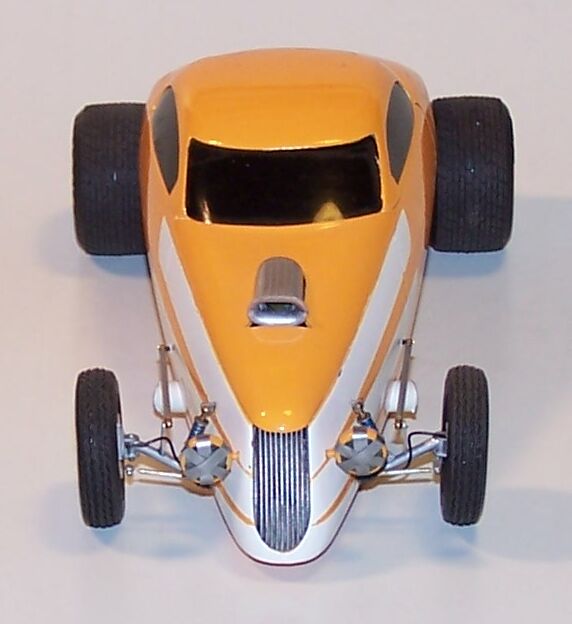
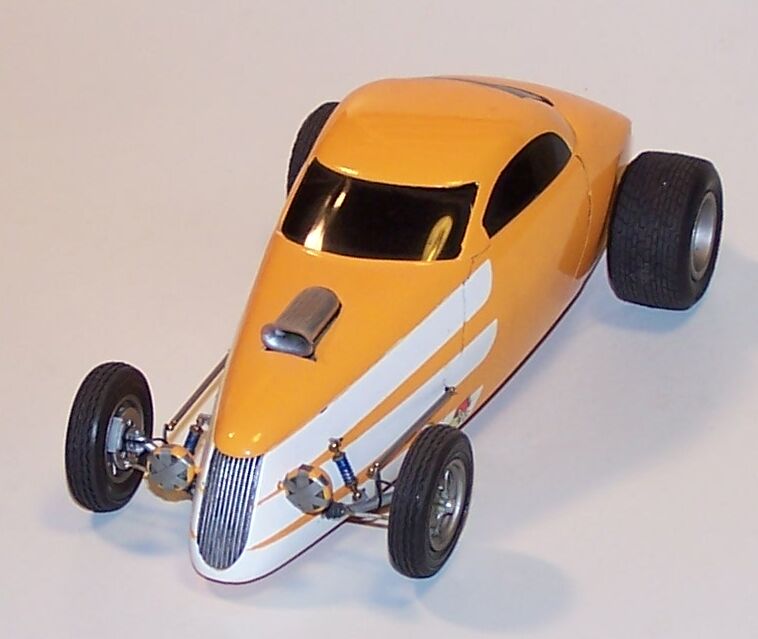
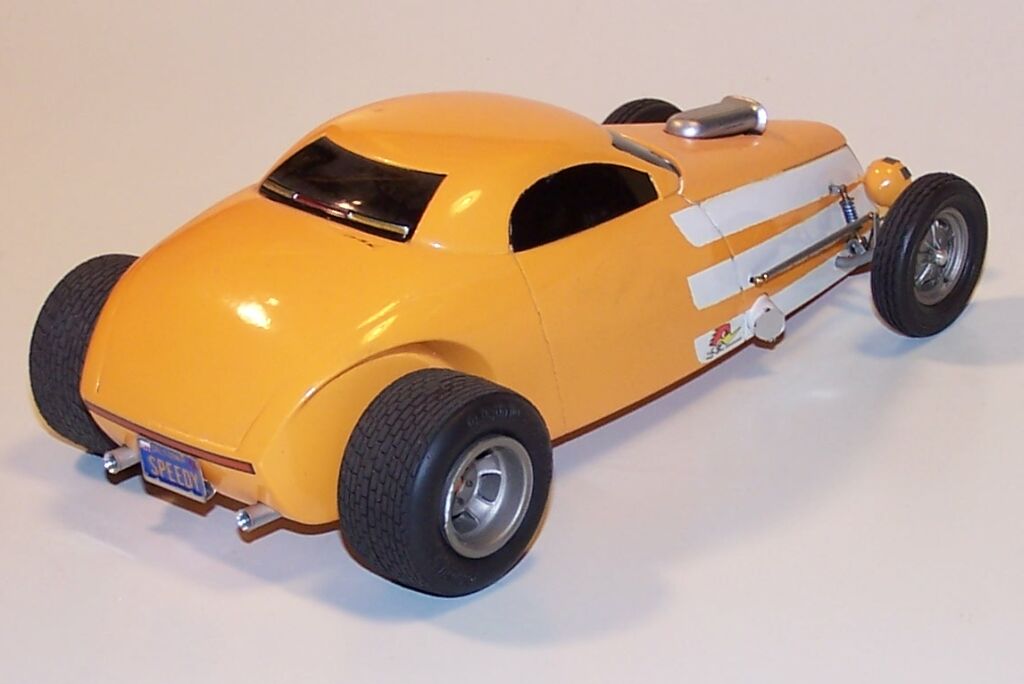
I built this a couple of decades ago, and ran across some photos of it in the computer, so, I thought I'd share some of them. It's my take on Boyd's Aluma Coupe. Since I rarely stray far from my drag racing "roots", I incorporated elements of '50s-'60s gassers, but kept it low to the ground. It's more or less a "slammer", given the blacked-out windows. The paint scheme is loosely based on the old Santa Fe Railroad "Warbonnet" scheme (although not the colors!). I used a dropped tube front axle and added front brakes. The wheels are from a Johan funny car kit. I found some old dried out and separated duct tape, stuck to something, and cut the surface film into strips to create the tape over the headlight lenses. Those, along with the capped headers were employed to create a street/strip look. The front wheel dust caps were turned on the lathe. Shocks and radius rods are scratched from brass tubing and HO scale model railroad handrail stanchions. The paint separations are a little rough--c'est la vie...Anyway, it was a quickie build, and a lot of fun, and I like it! Comments/criticisms welcome. Thanks for having a look!
-
Bantam Fuel Altered - New pics 1-7
Straightliner59 replied to Codi's topic in WIP: Drag Racing Models
That Cirello mag is awesome! Very, very nice work! -
Looking great, JC! Love these old Trans Am racers. Keep 'er rolling along!
-
Nice work, Bernard! Period perfect graphics!
-
Thanks, JC. Haven't had much time to work on it, the last few days. Hoping that'll change soon!
-
Terrible Too! '65 Chevy II FXer
Straightliner59 replied to Straightliner59's topic in WIP: Drag Racing Models
Thank you all for the compliments! Since I started it, before I left Denver 14-1/2 years ago, by the time I got around to finishing it, I had to wash it! I guess it's kind of miraculous that it survived five moves, during those years! -
Thank you, Brian! That could take a while. It won't be for a lack of trying, though!