StevenGuthmiller
-
Posts
15,071 -
Joined
-
Last visited
Content Type
Profiles
Forums
Events
Gallery
Everything posted by StevenGuthmiller
-
Thanks guys!! No, that's one thing I've never considered. A good idea I suppose, but the last thing I need is dealing with a bunch of wires and trying to integrate a battery box. I think I'll pass on that one. Now that the engine is finished, it's time to get started on the chassis. First order of business......boxing in the front frame rails. Steve

-

Have you seen this?
StevenGuthmiller replied to Rakentaja's topic in Model Building Questions and Answers
I was a little excited when I first saw the '57 Cadillac too! The box art is fantastic, but I soon realized that it was the same kit as this. Big disappointment. Wait till the "why do they give us unsuspecting noobs these lousy old kits over and over again" crowd starts getting their hands on this one!! It's good to see the 1/32 scale '56 Buick coming back though. For small scale, these old Revell 1/32 scale kits were pretty darn nice! Even with the multi-piece bodies. Steve -
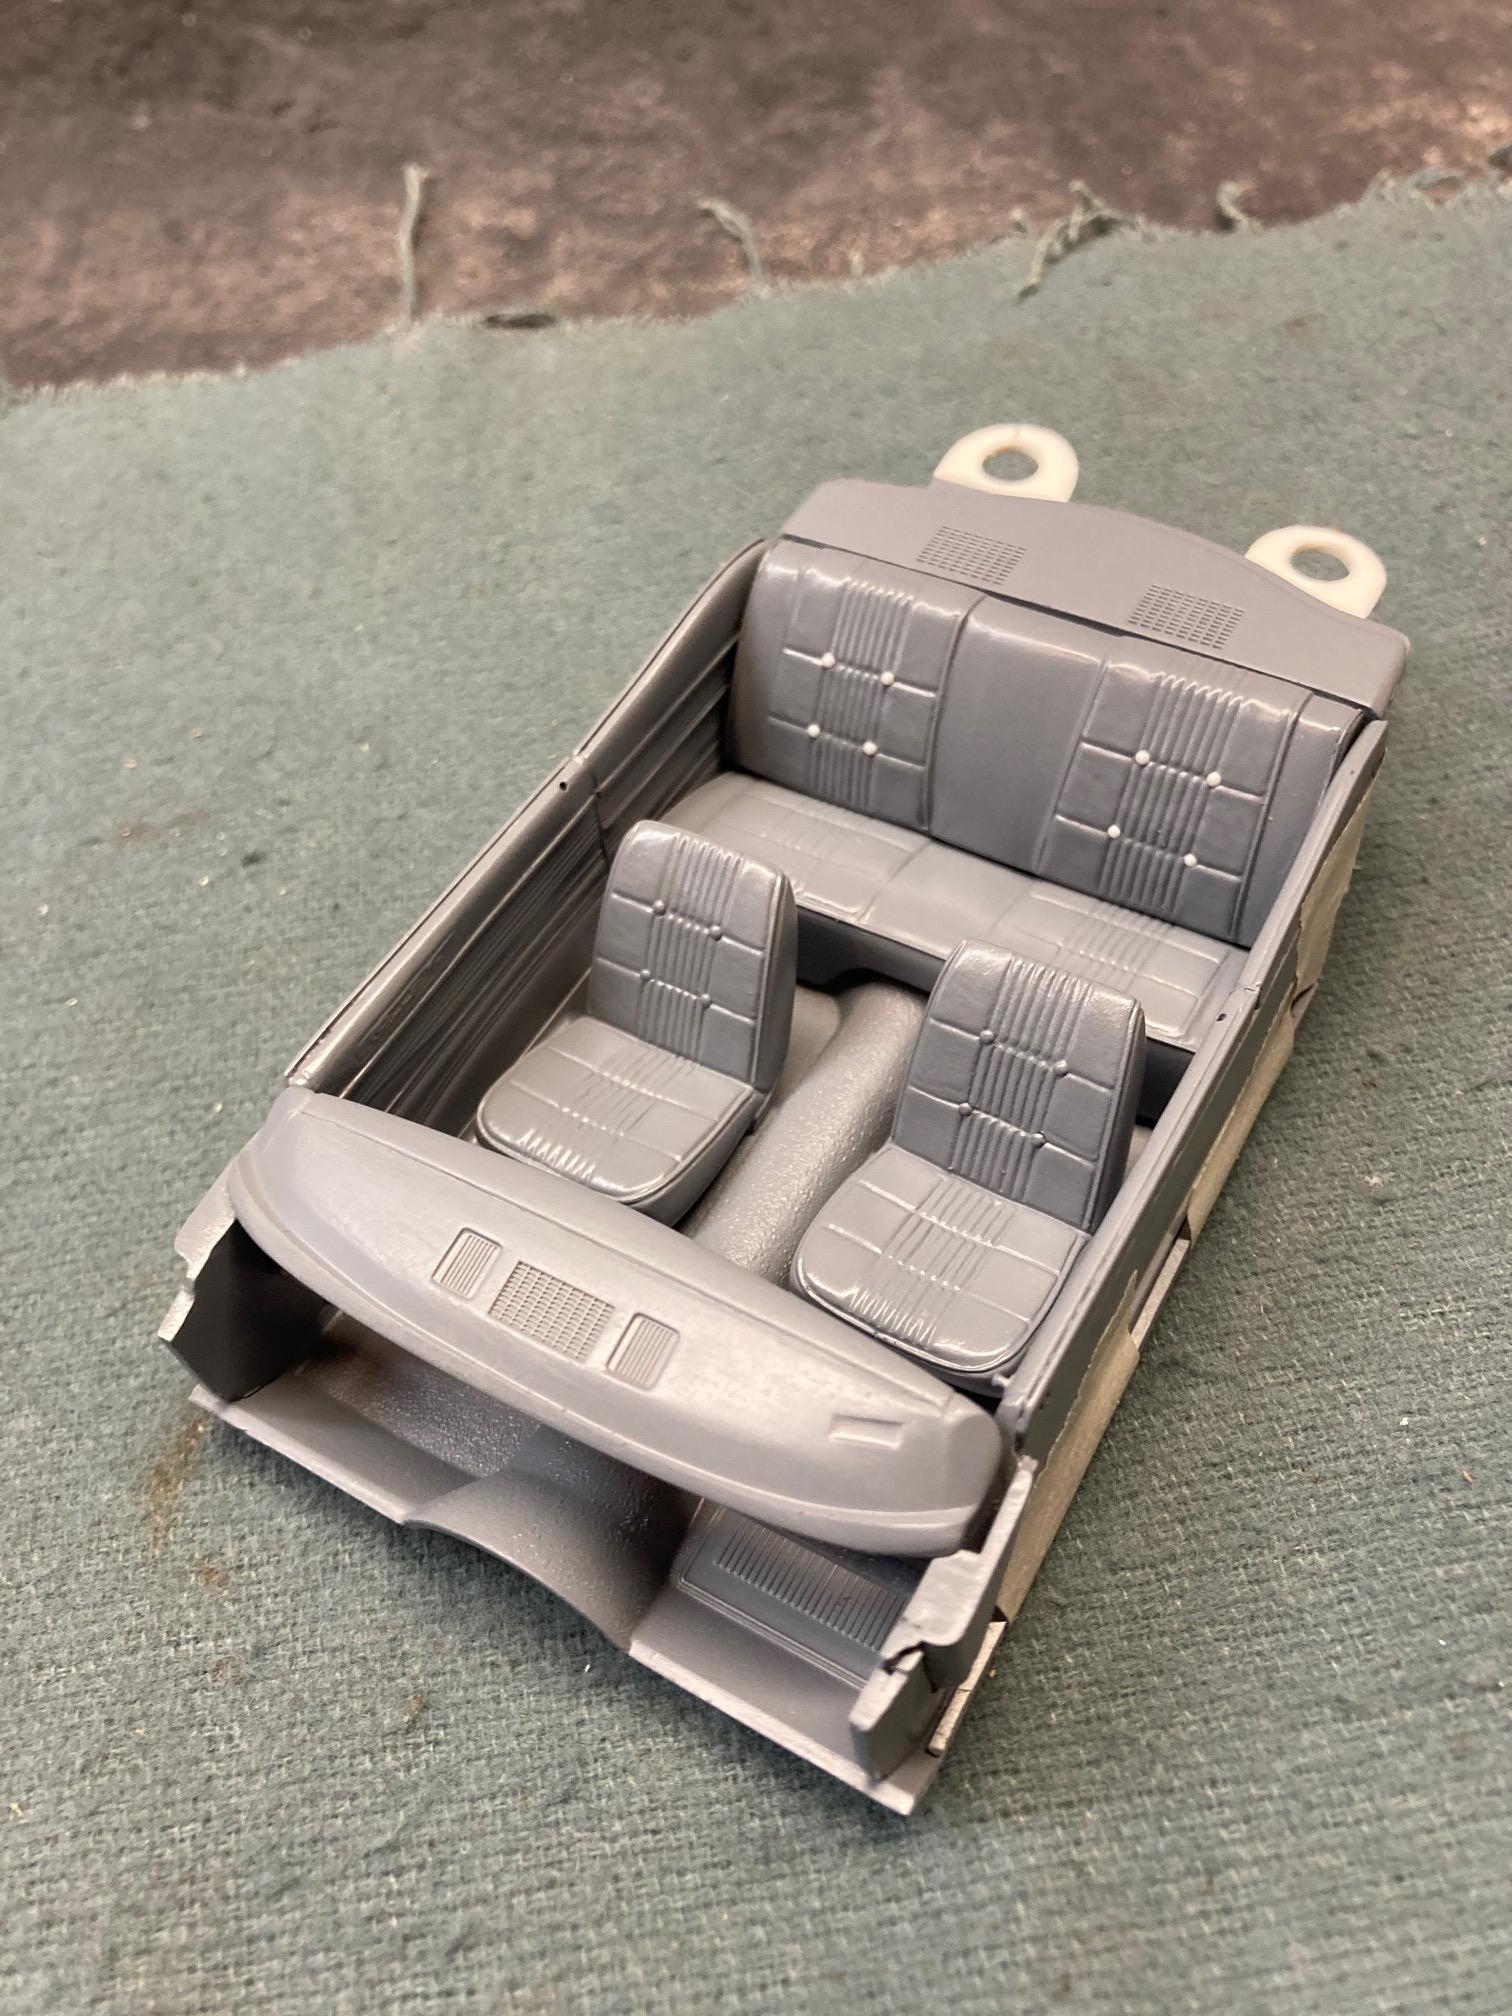
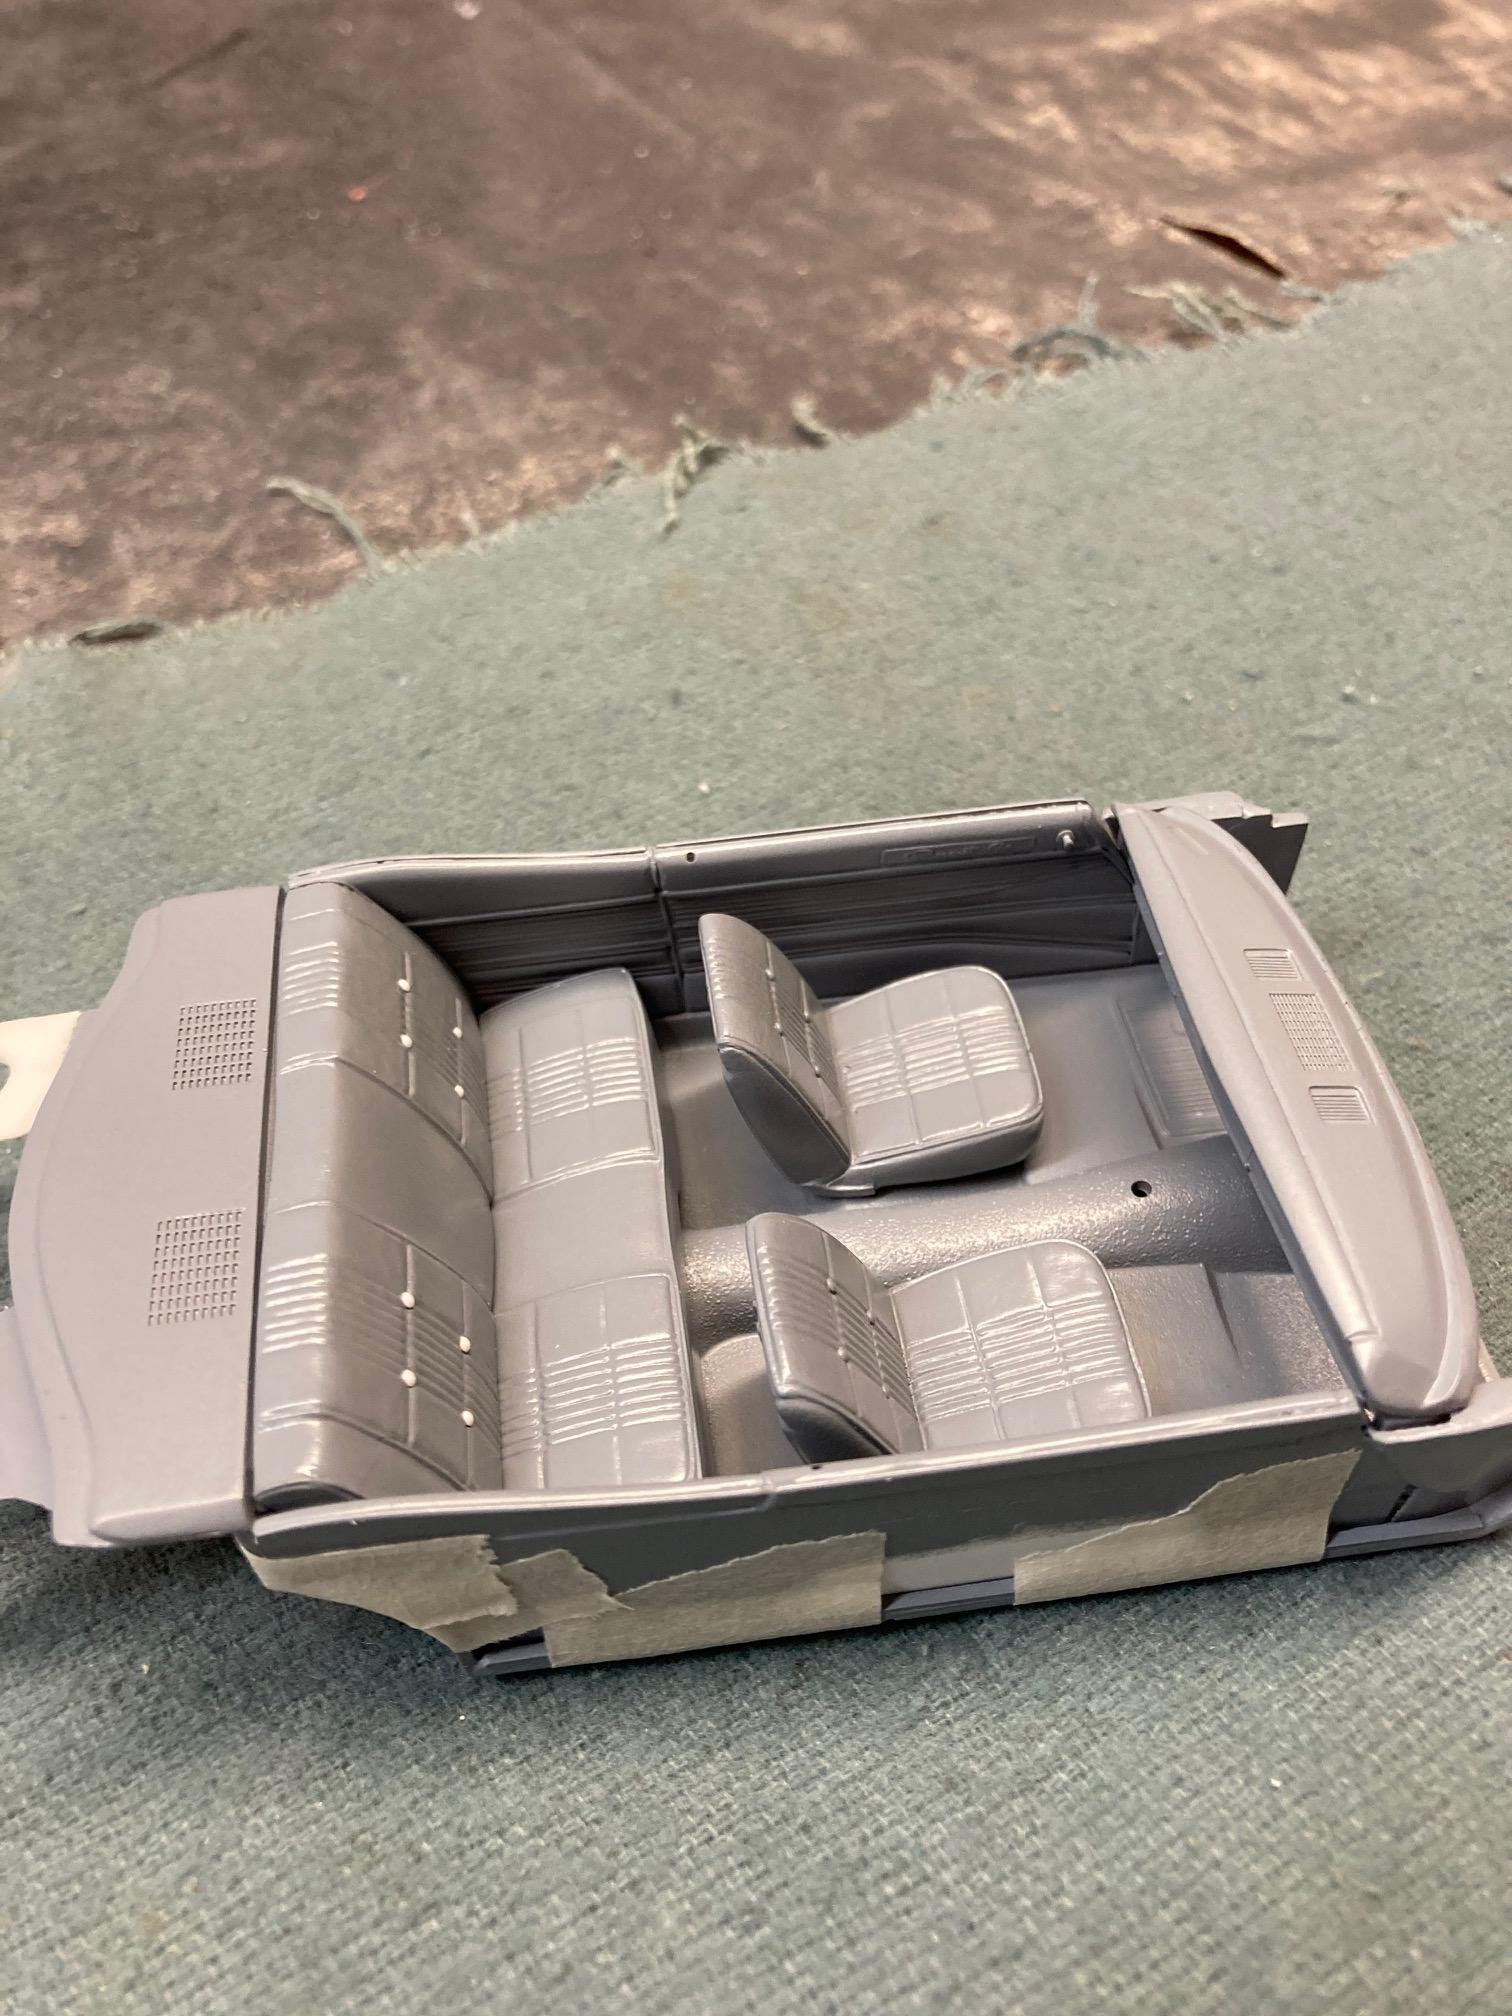
Just thought that it might be a good idea to include a couple of shots of the main interior parts mocked up. Steve
-
Adding a YouTube Video Link.
StevenGuthmiller replied to StevenGuthmiller's topic in Tips, Tricks, and Tutorials
Thanks a million Bill! Worked like a charm! Probably gonna have to write that down though. Steve -
Steve
-
Can anybody provide a tech illiterate like myself some guidance on how to add a video link from a YouTube channel into a post on the forum. I recorded a short tutorial on my phone and I made it all of the way to getting it loaded on my YouTube channel, but I'm not exactly sure of where to go from there. Thanks guys! Steve
-
Should be able to just make a couple of top mechanism wells to add the rear seat area. Steve
-
Terrific!! How many of these sets are sold will directly affect any future collaborations between Ed and I for possible parts for vintage kits. Steve
-
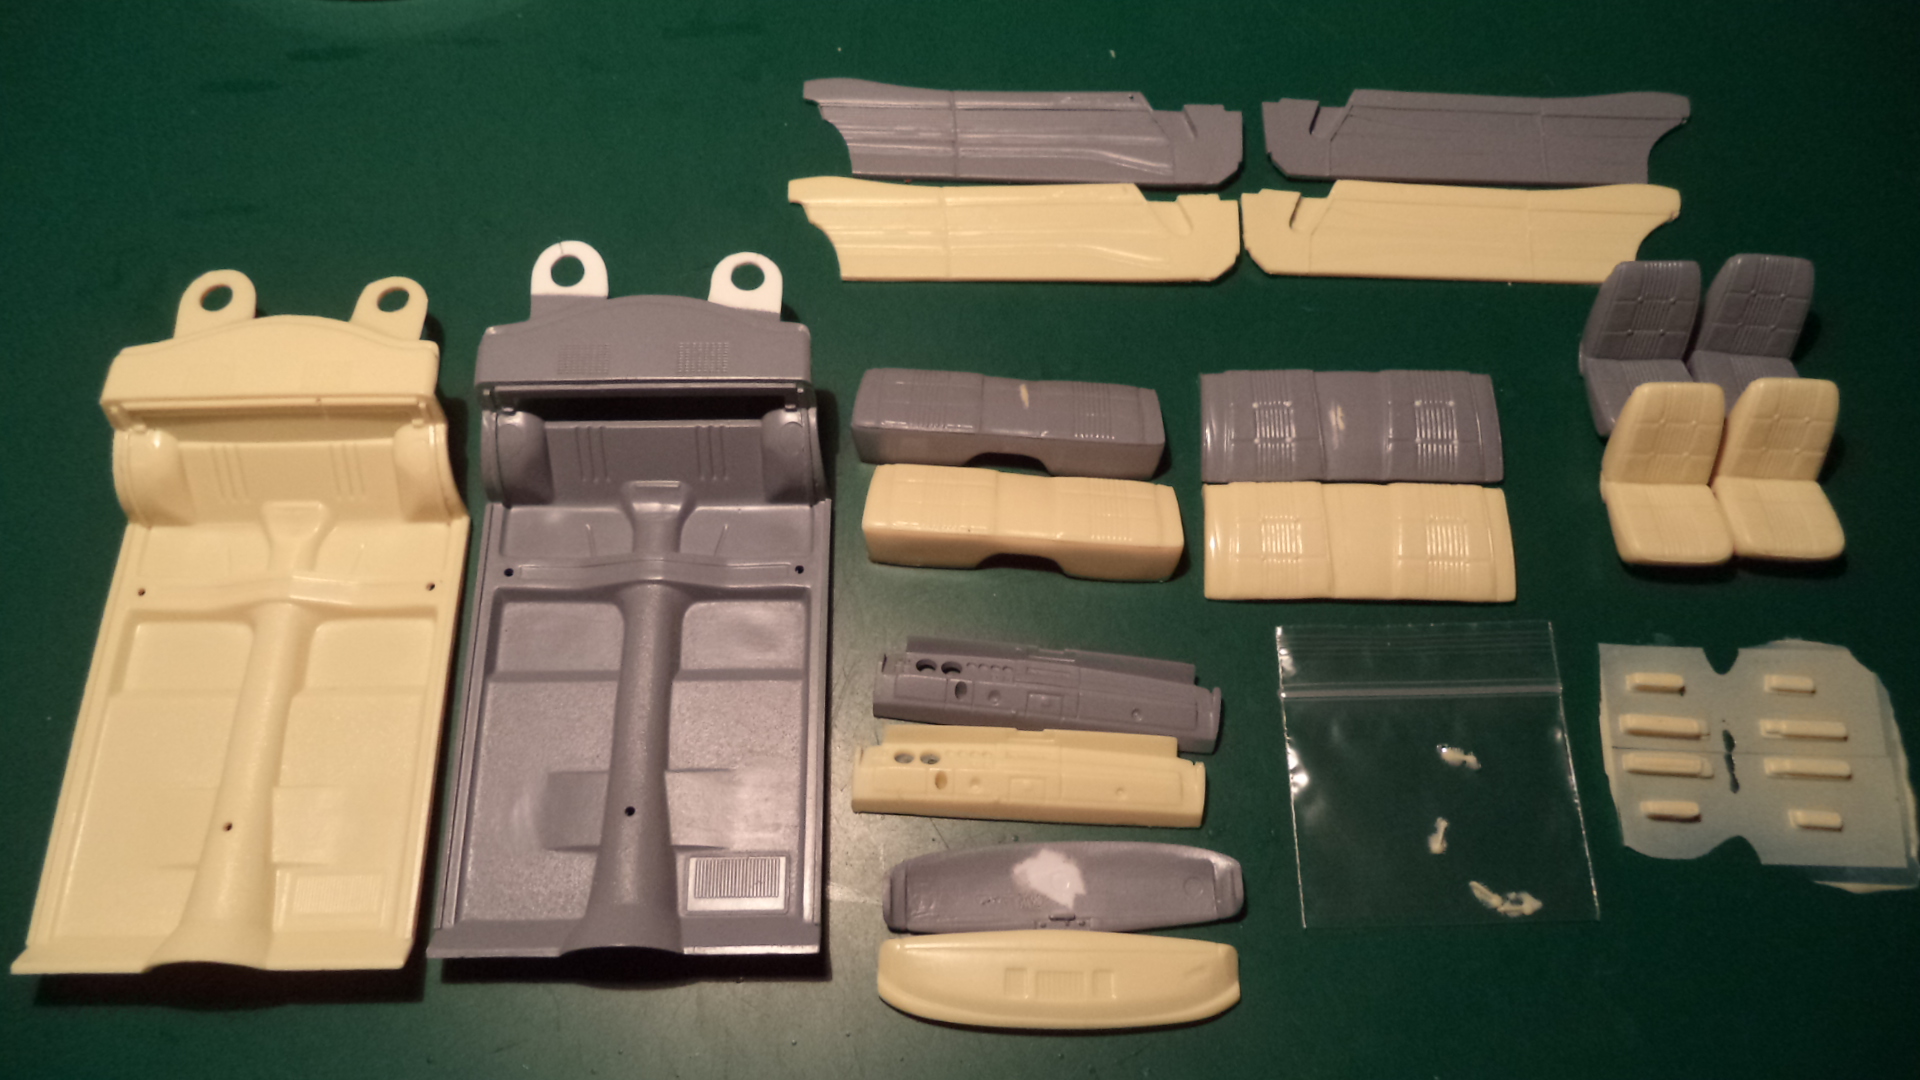
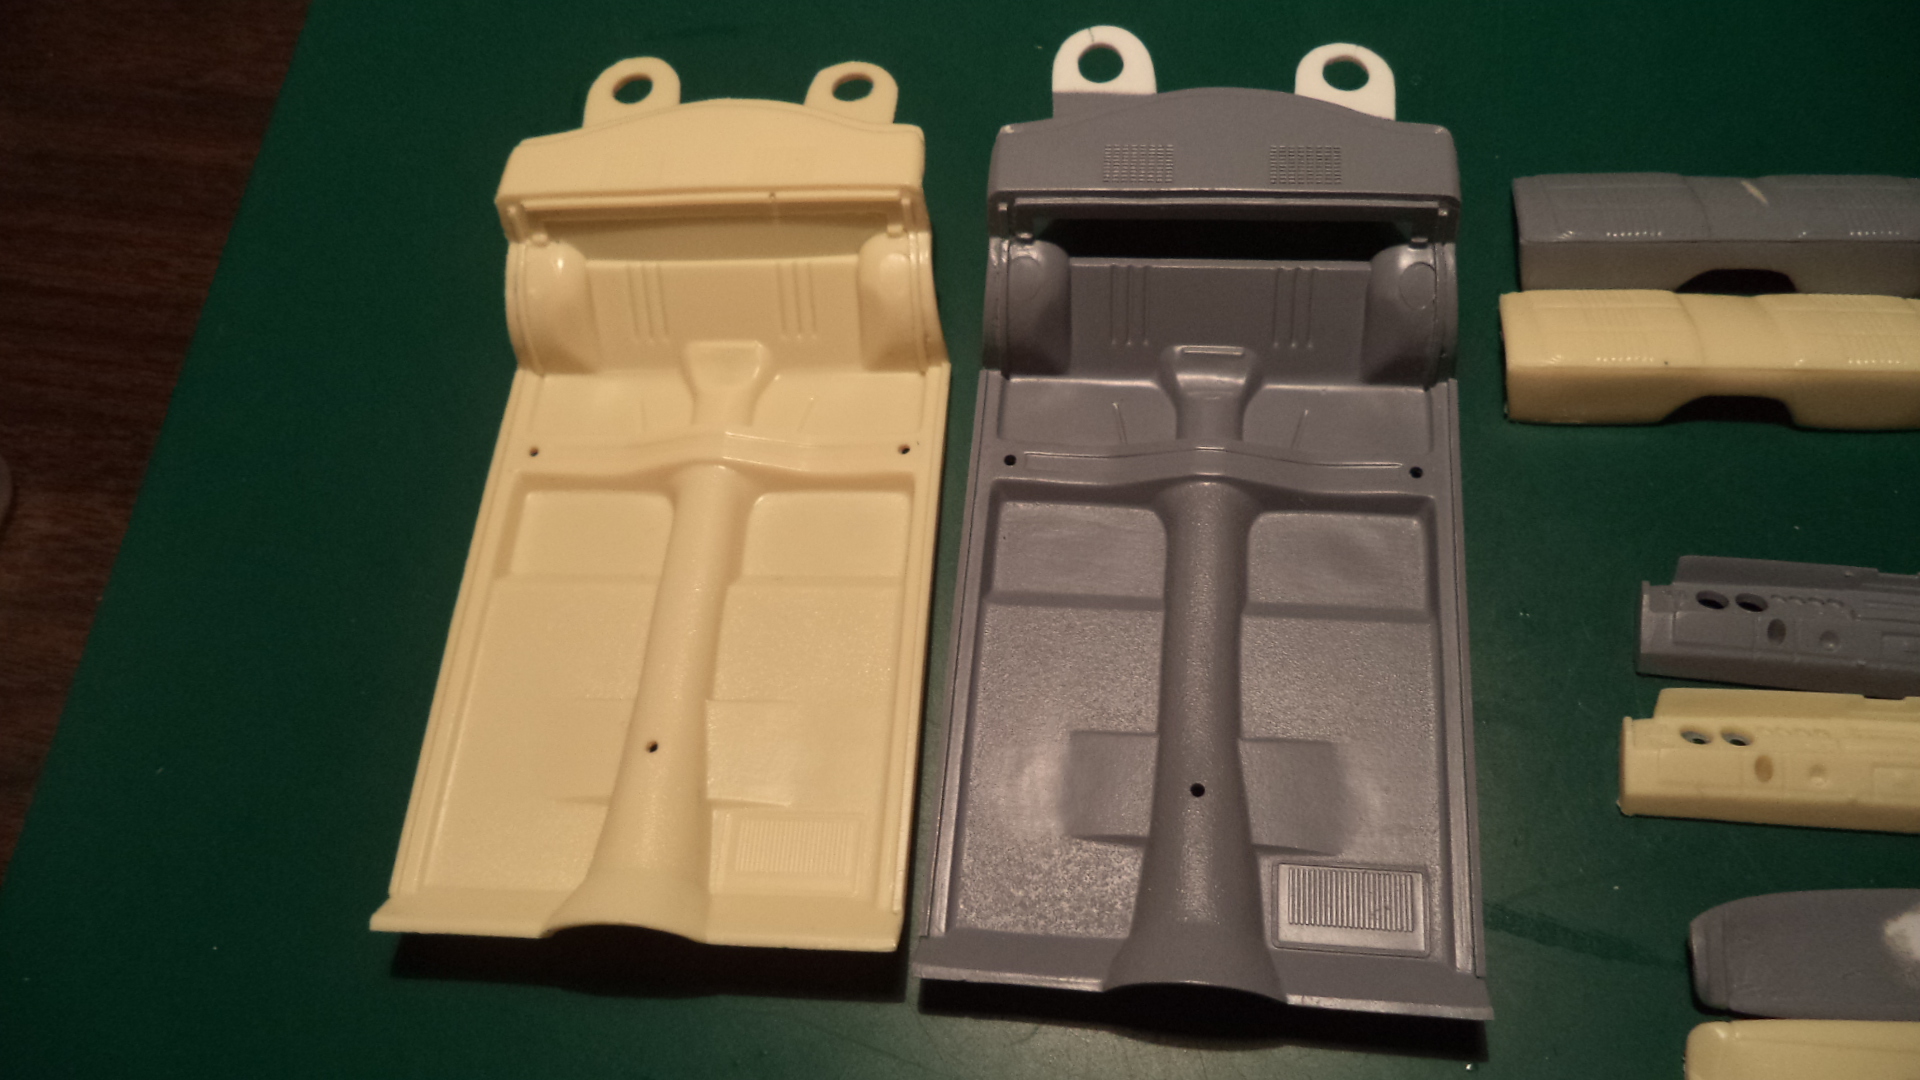
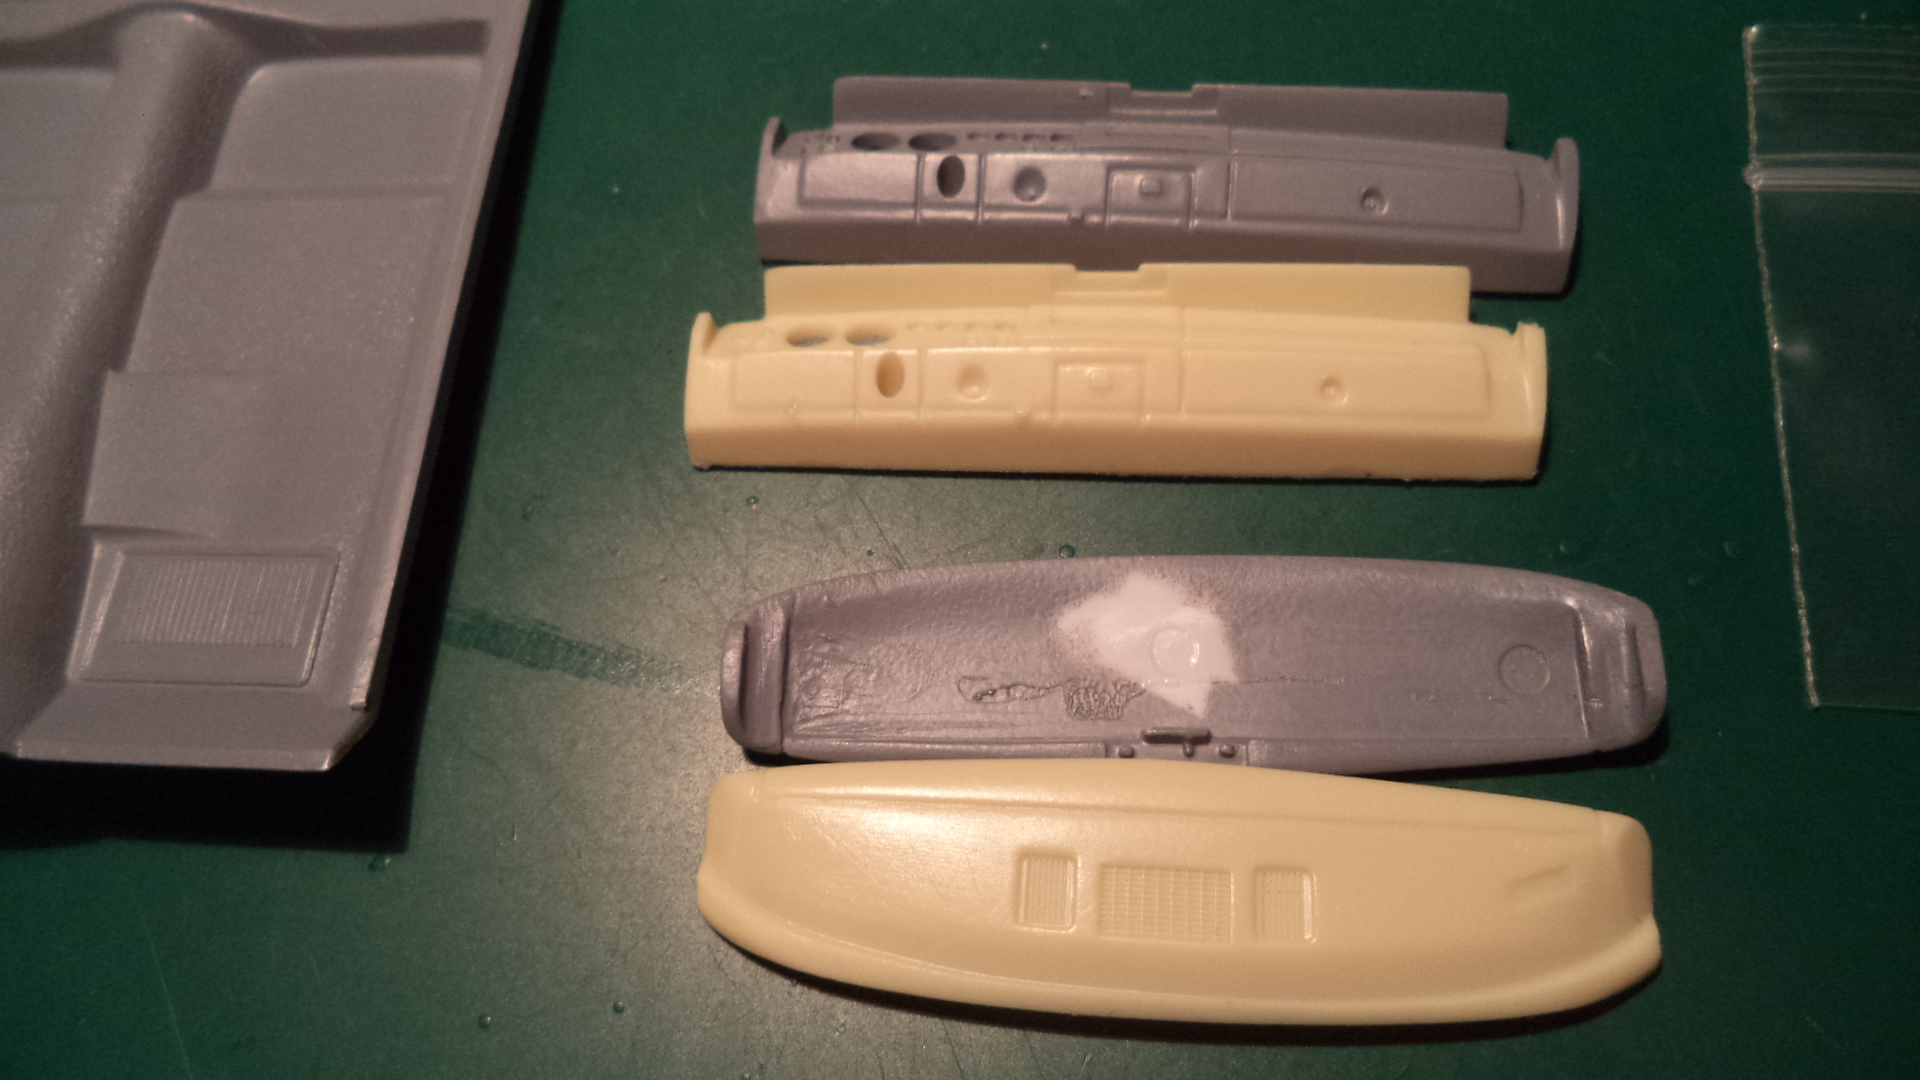
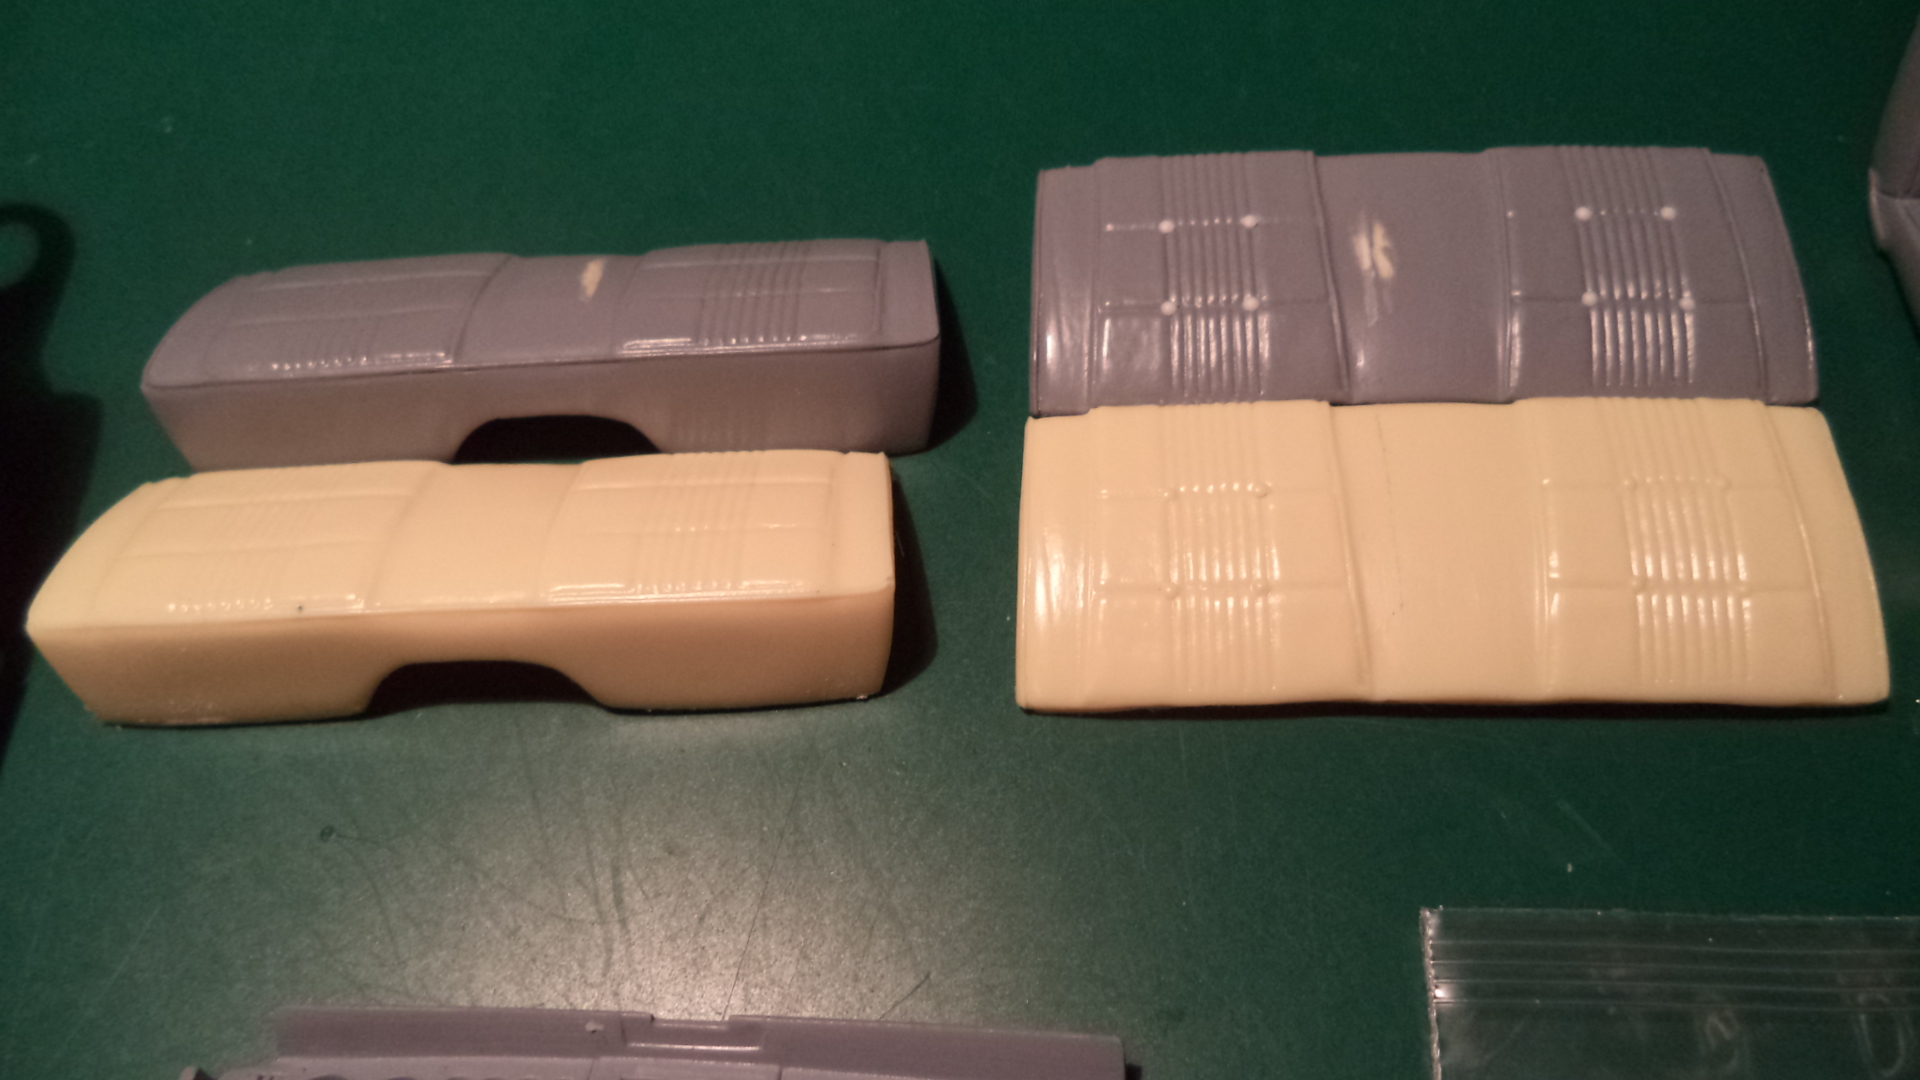
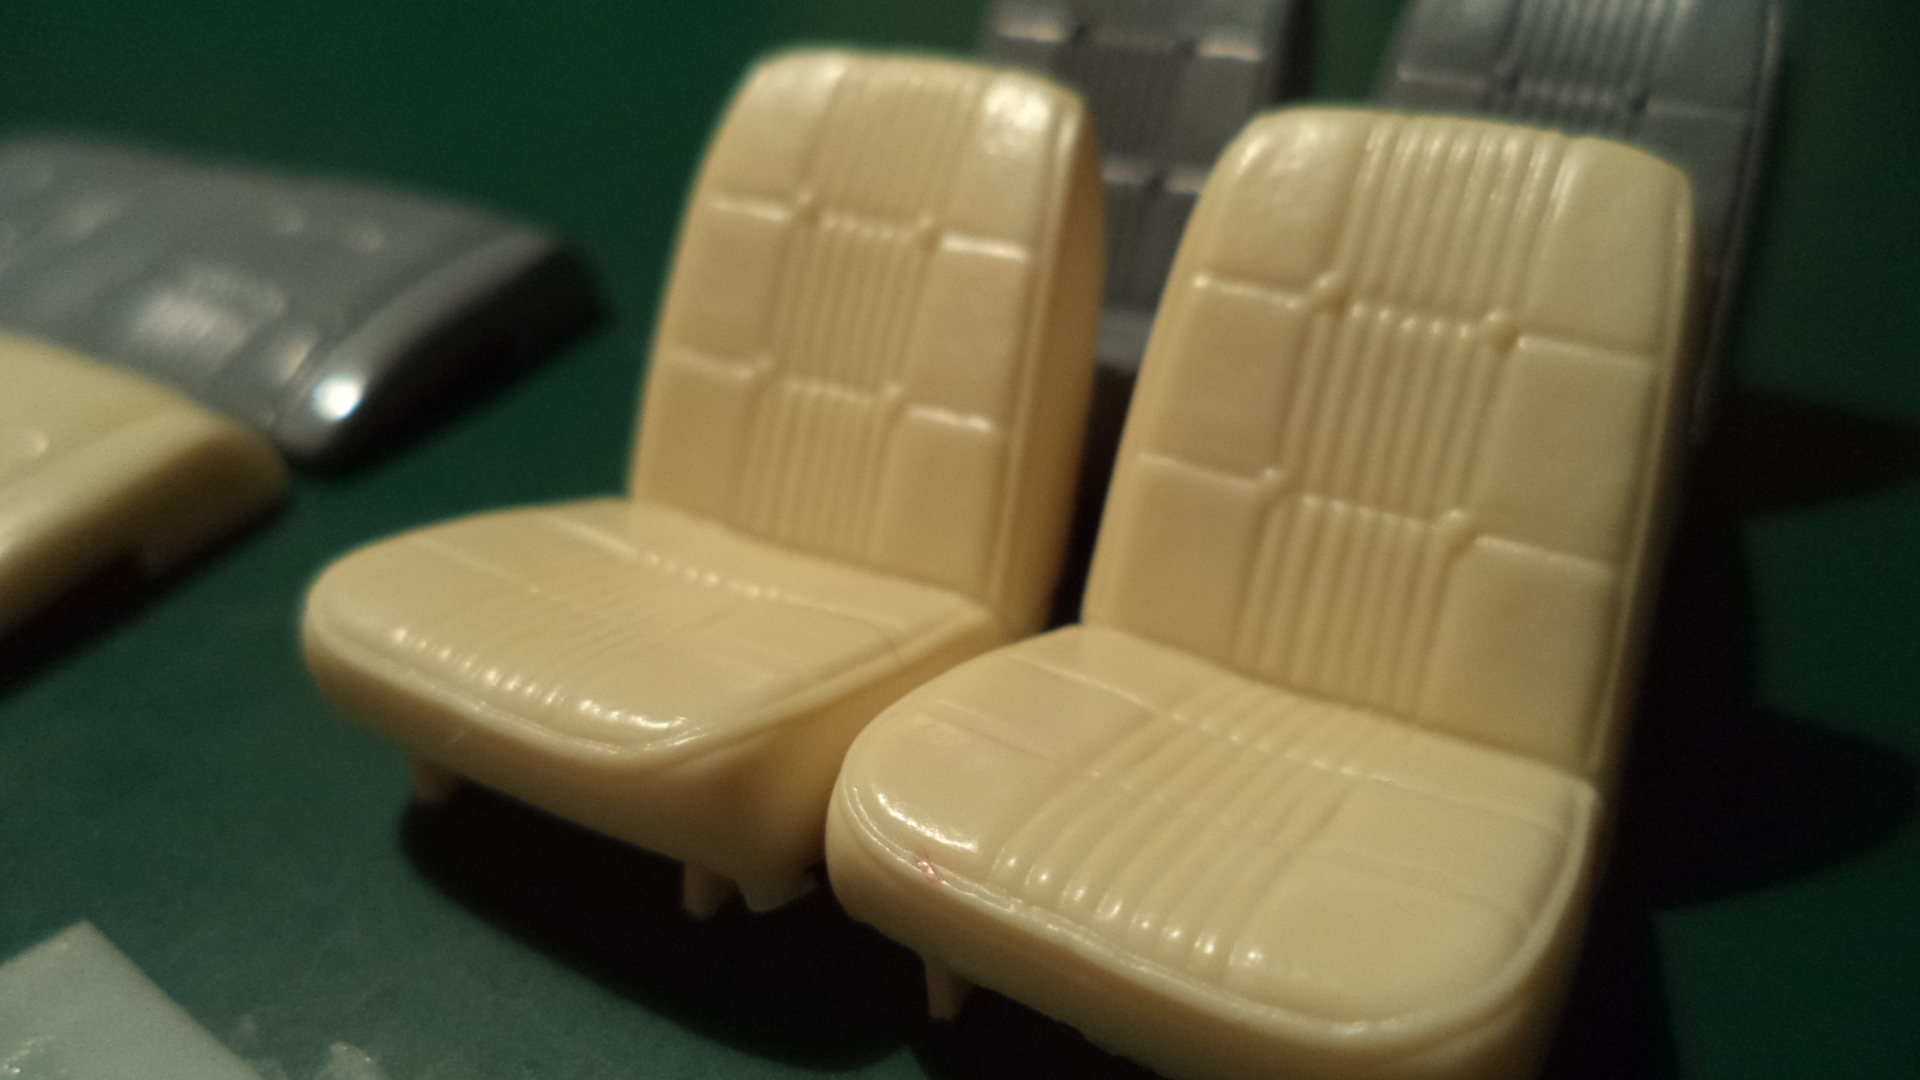
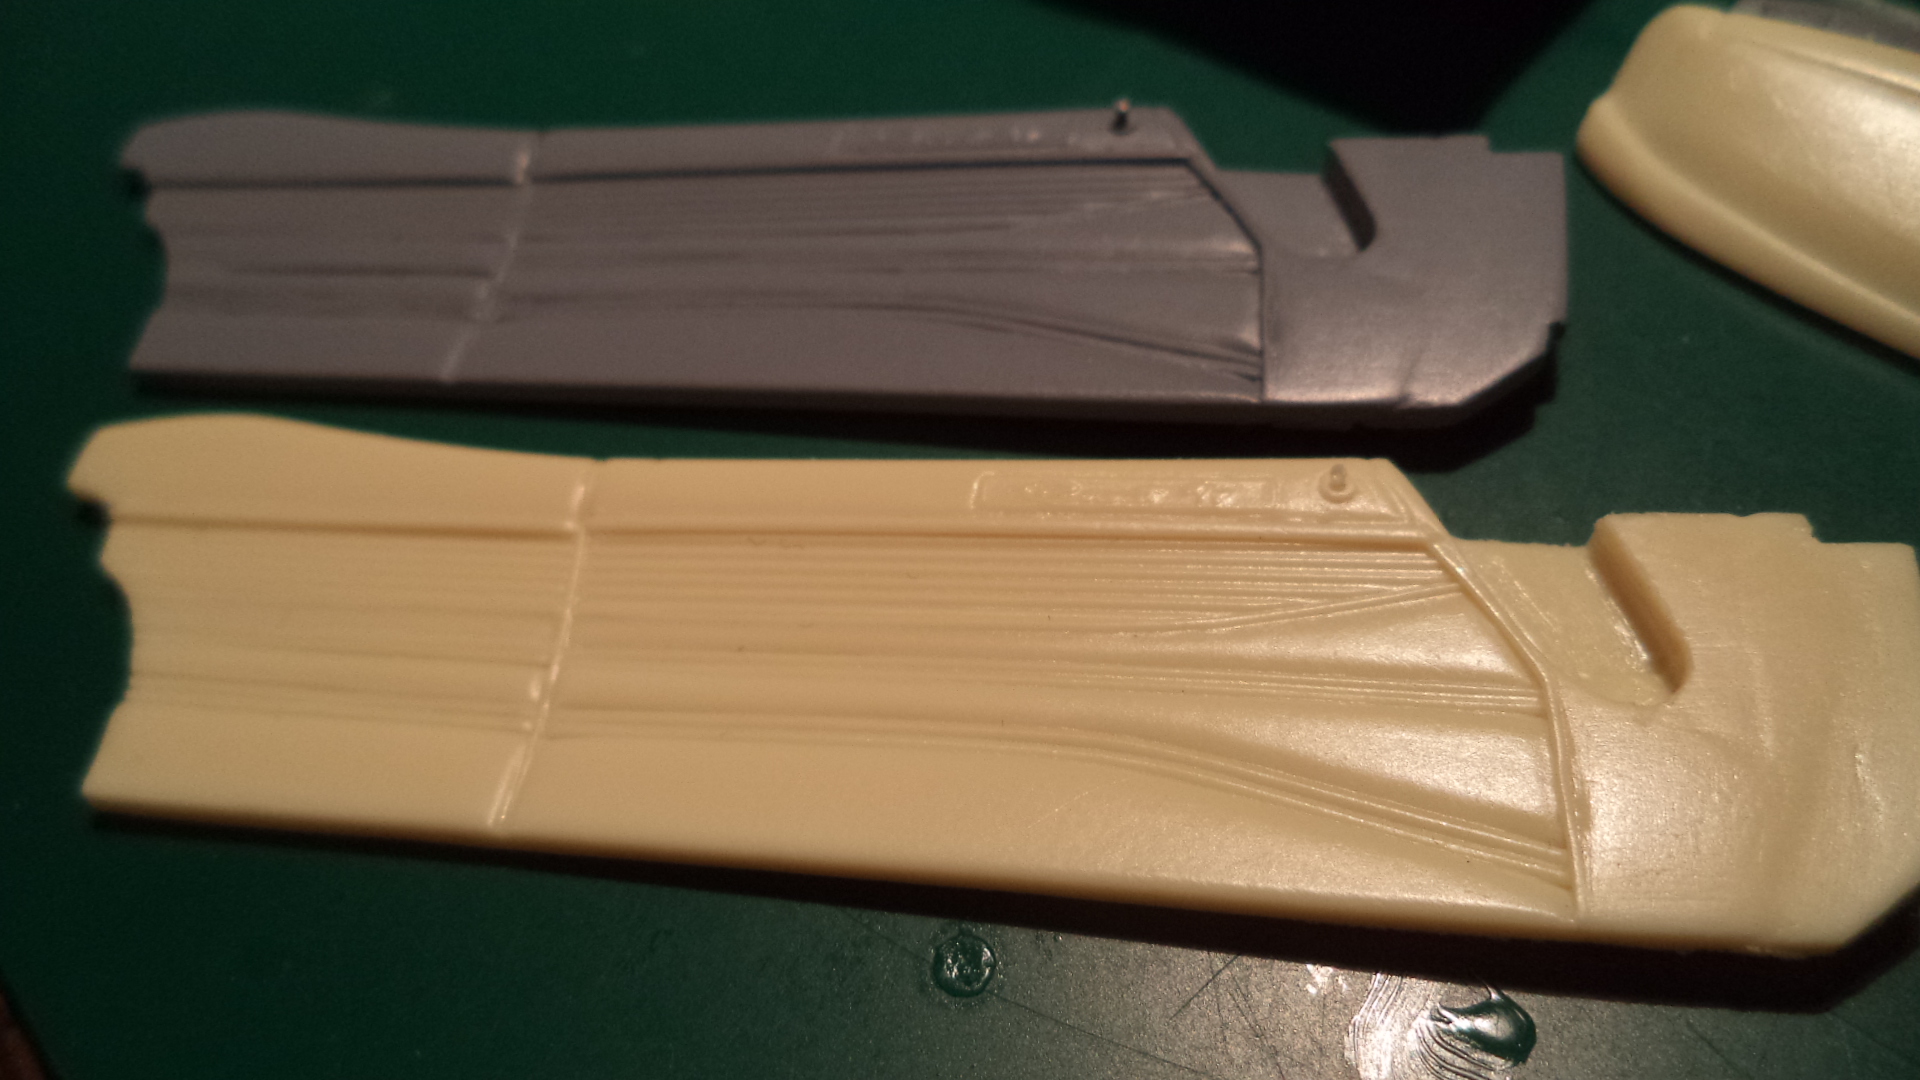
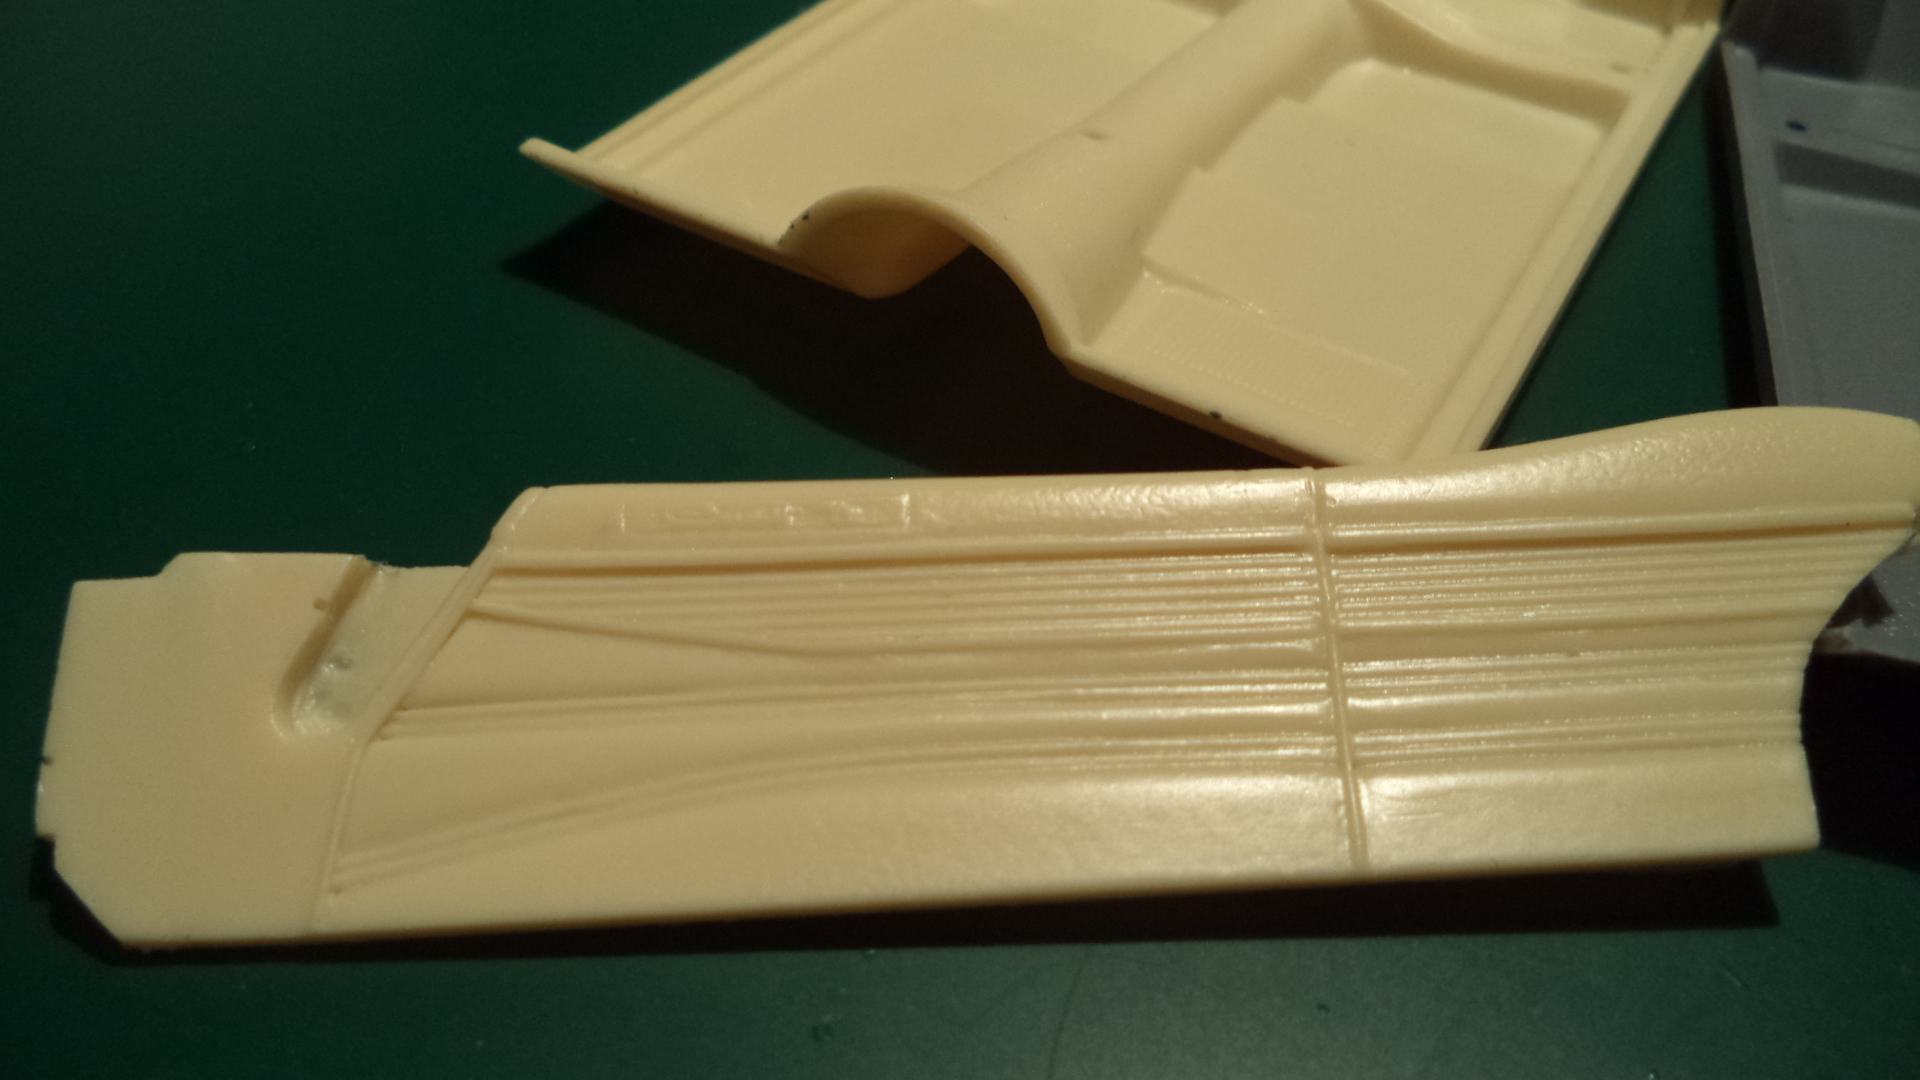
This complete Resin Interior is now available From Ed Fluck Junior! It was designed to fit the MPC '68 Coronet body in conjunction with the Revell 1968 Dodge Charger chassis and includes: 1. A reworked 2 piece Charger dash board. 2. A redesigned Charger interior tub. 3. A reworked 2 piece rear seat with molded in seat belts removed and enhanced seat buttons. 4. Reworked front bucket seats with molded in seat belts removed and enhanced trim and seat buttons. 5. Almost entirely scratch built door panels in a hard top configuration. 6. A complete set of separate front and rear arm rests. 7. A set of 4 window cranks. The steering wheel and center console, (if desired) will be the responsibility of the builder. The photos provided are test shots only and depict the original parts in gray along side the fresh resin parts. Again, Ed wanted me to remind everyone that these are only test shots and the finished parts that you will receive will be of the highest quality. The cost for the entire set will be $35.00 plus shipping and you can order by contacting Ed directly via email at: lowcab36@epix.net Get 'em while they're hot boys!! Steve
-
The '69 Impala is probably my least favorite style wise of all of the pre-1970 Impalas, but this promises to be a real barn burner! There's nothing I love more than seeing an old obsolete kit such as this get the full "modernization" treatment. I'm following along intently. Steve
-
My daughter raises a few chickens and sells and gives away the eggs. Her chickens vary in color, but they all produce brown eggs. I agree that they taste better than a grocery store egg and the yolks are closer to orange than yellow, but the most notable difference I have noticed is the toughness of the shells and the weakness of the yolk membrane. They're tough to crack, and very tough to keep the yolks from breaking. On a sad note, she recently lost eight chickens and her rooster, Walter, to a fox. Steve
-
I hate to say it, but I’m really beginning to believe that the time is approaching when the good lord will feel compelled to hit the reset button on humanity. Steve
-
Doesn’t surprise me in the least. It seams to me that it’s always the stupidest people on the planet that don’t know when, or even how, to keep their mouths shut! Steve
-
HUBLEY kits
StevenGuthmiller replied to 1959scudetto's topic in Model Building Questions and Answers
The only one that I think I would enjoy building is the Metropolitan. Steve -
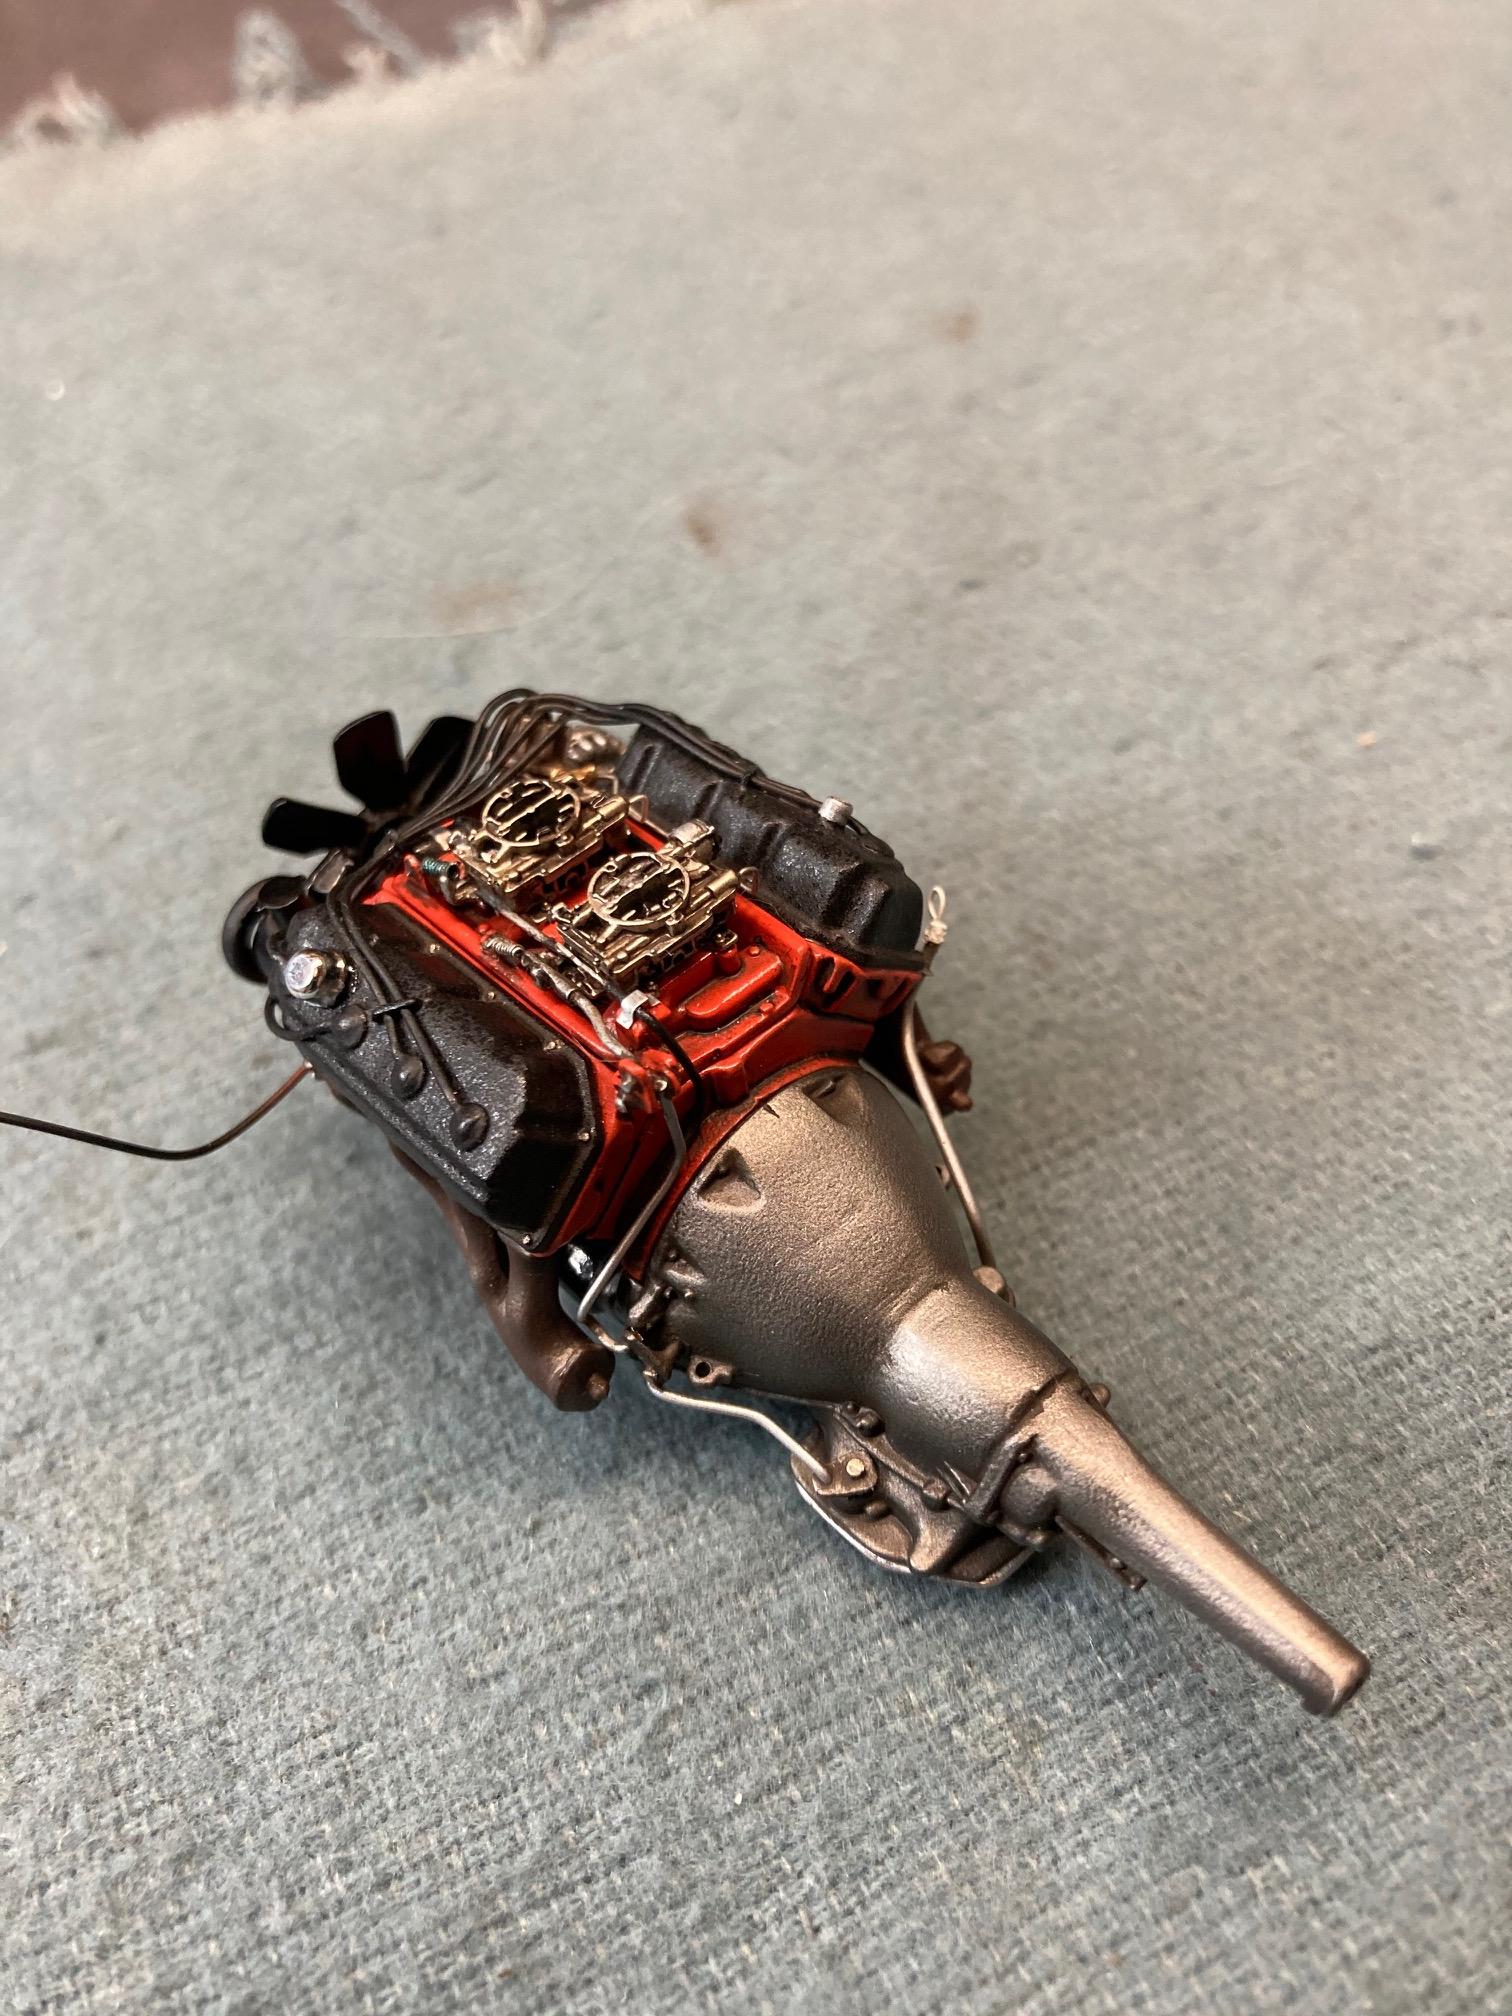
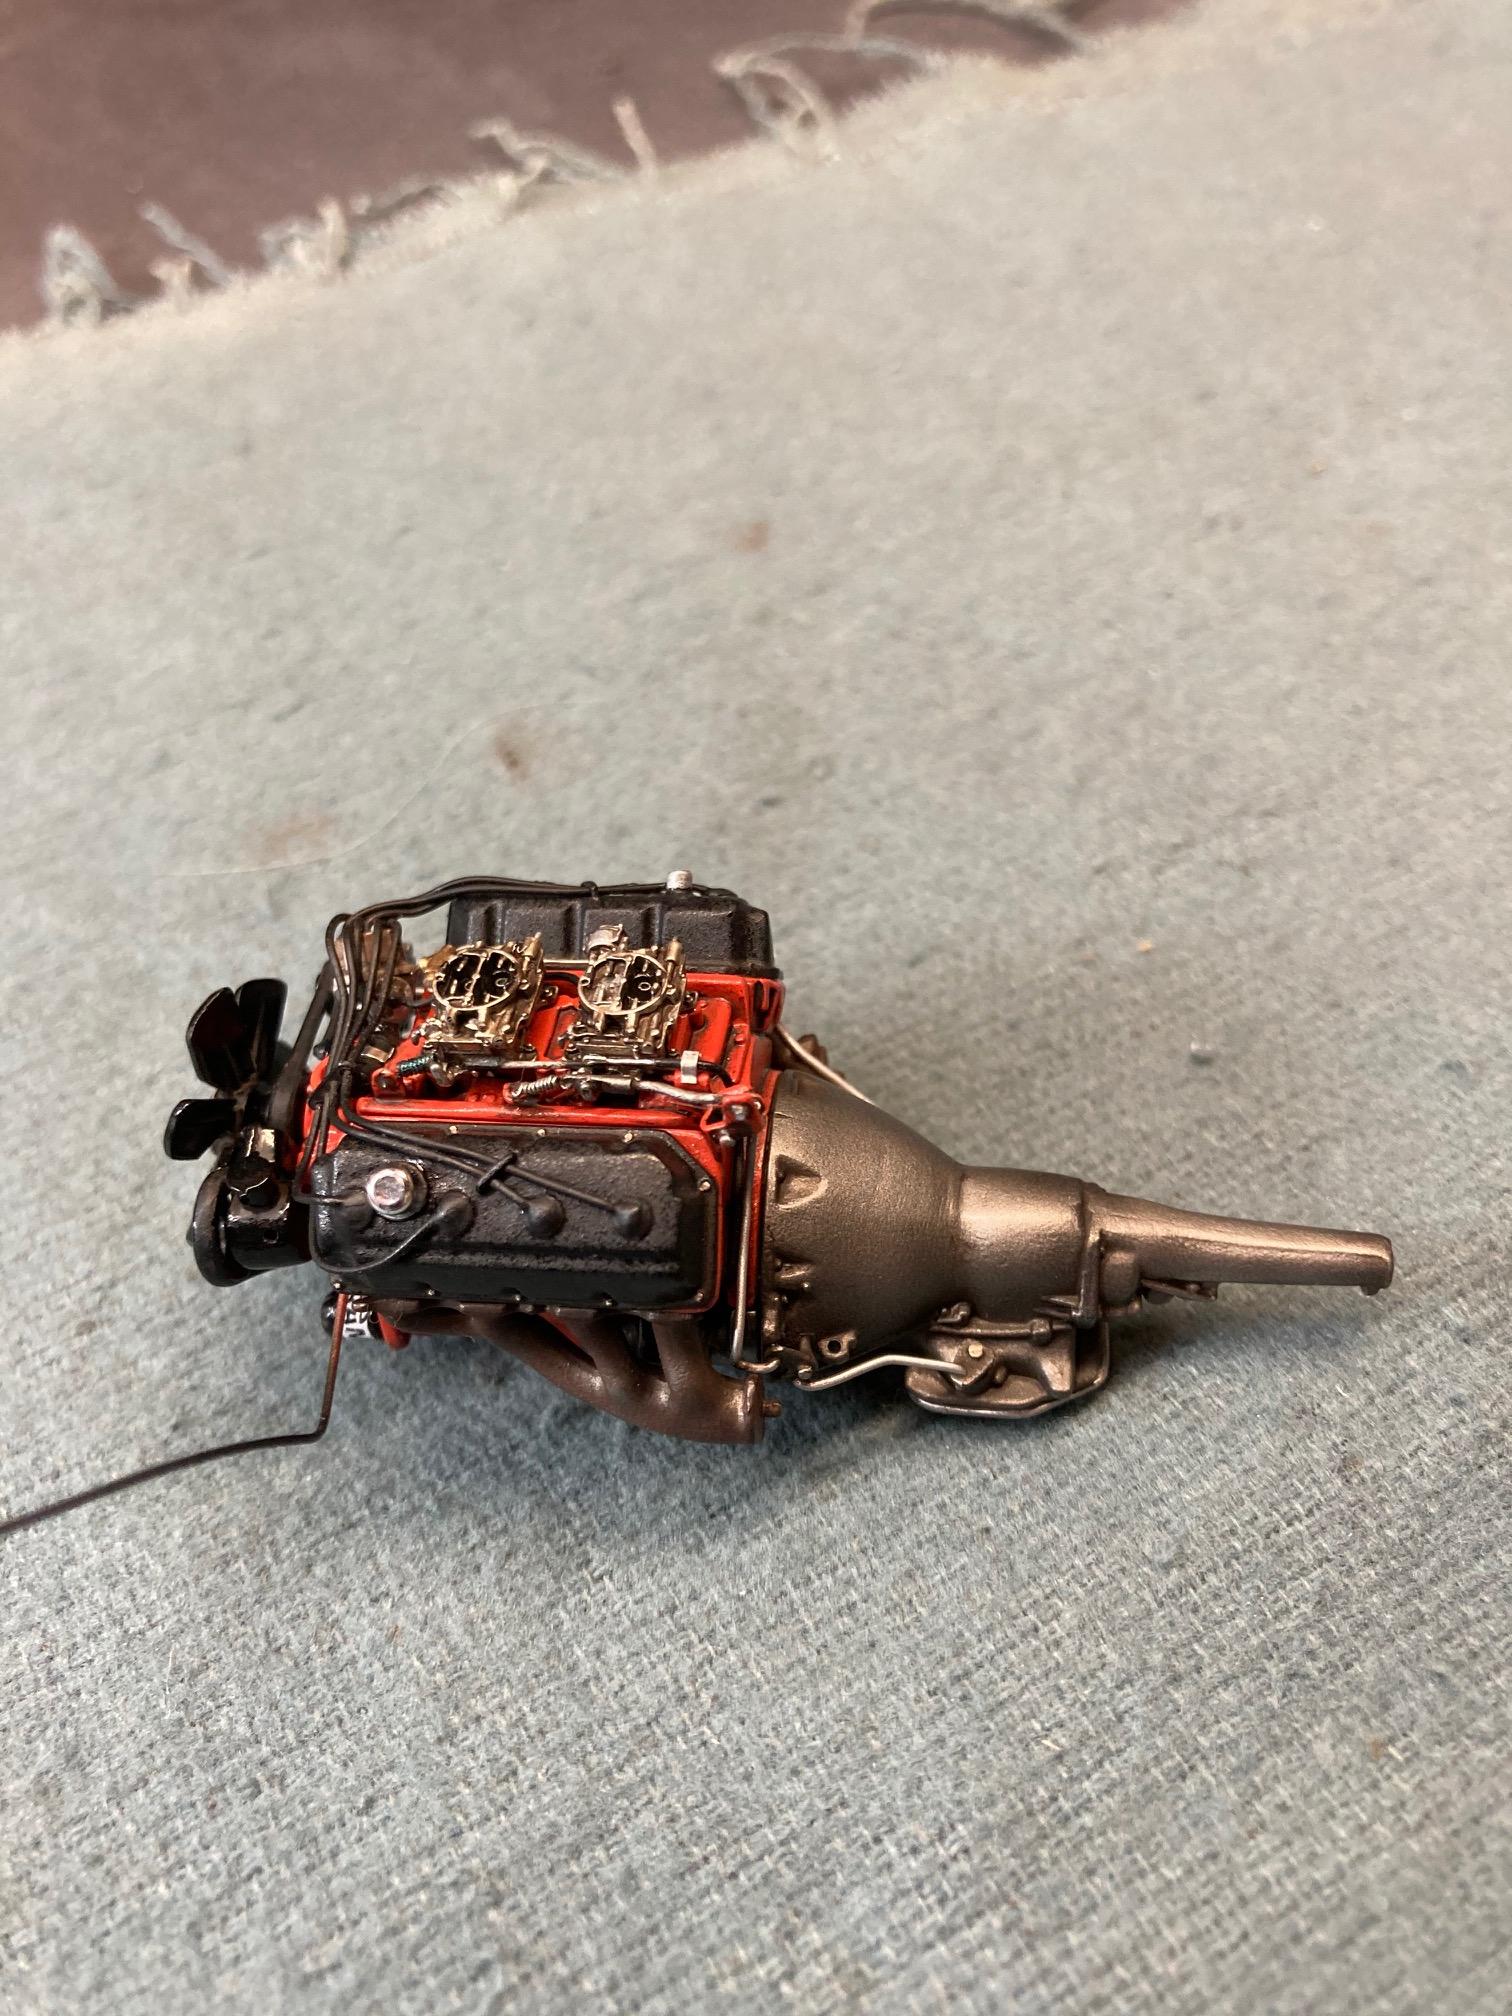
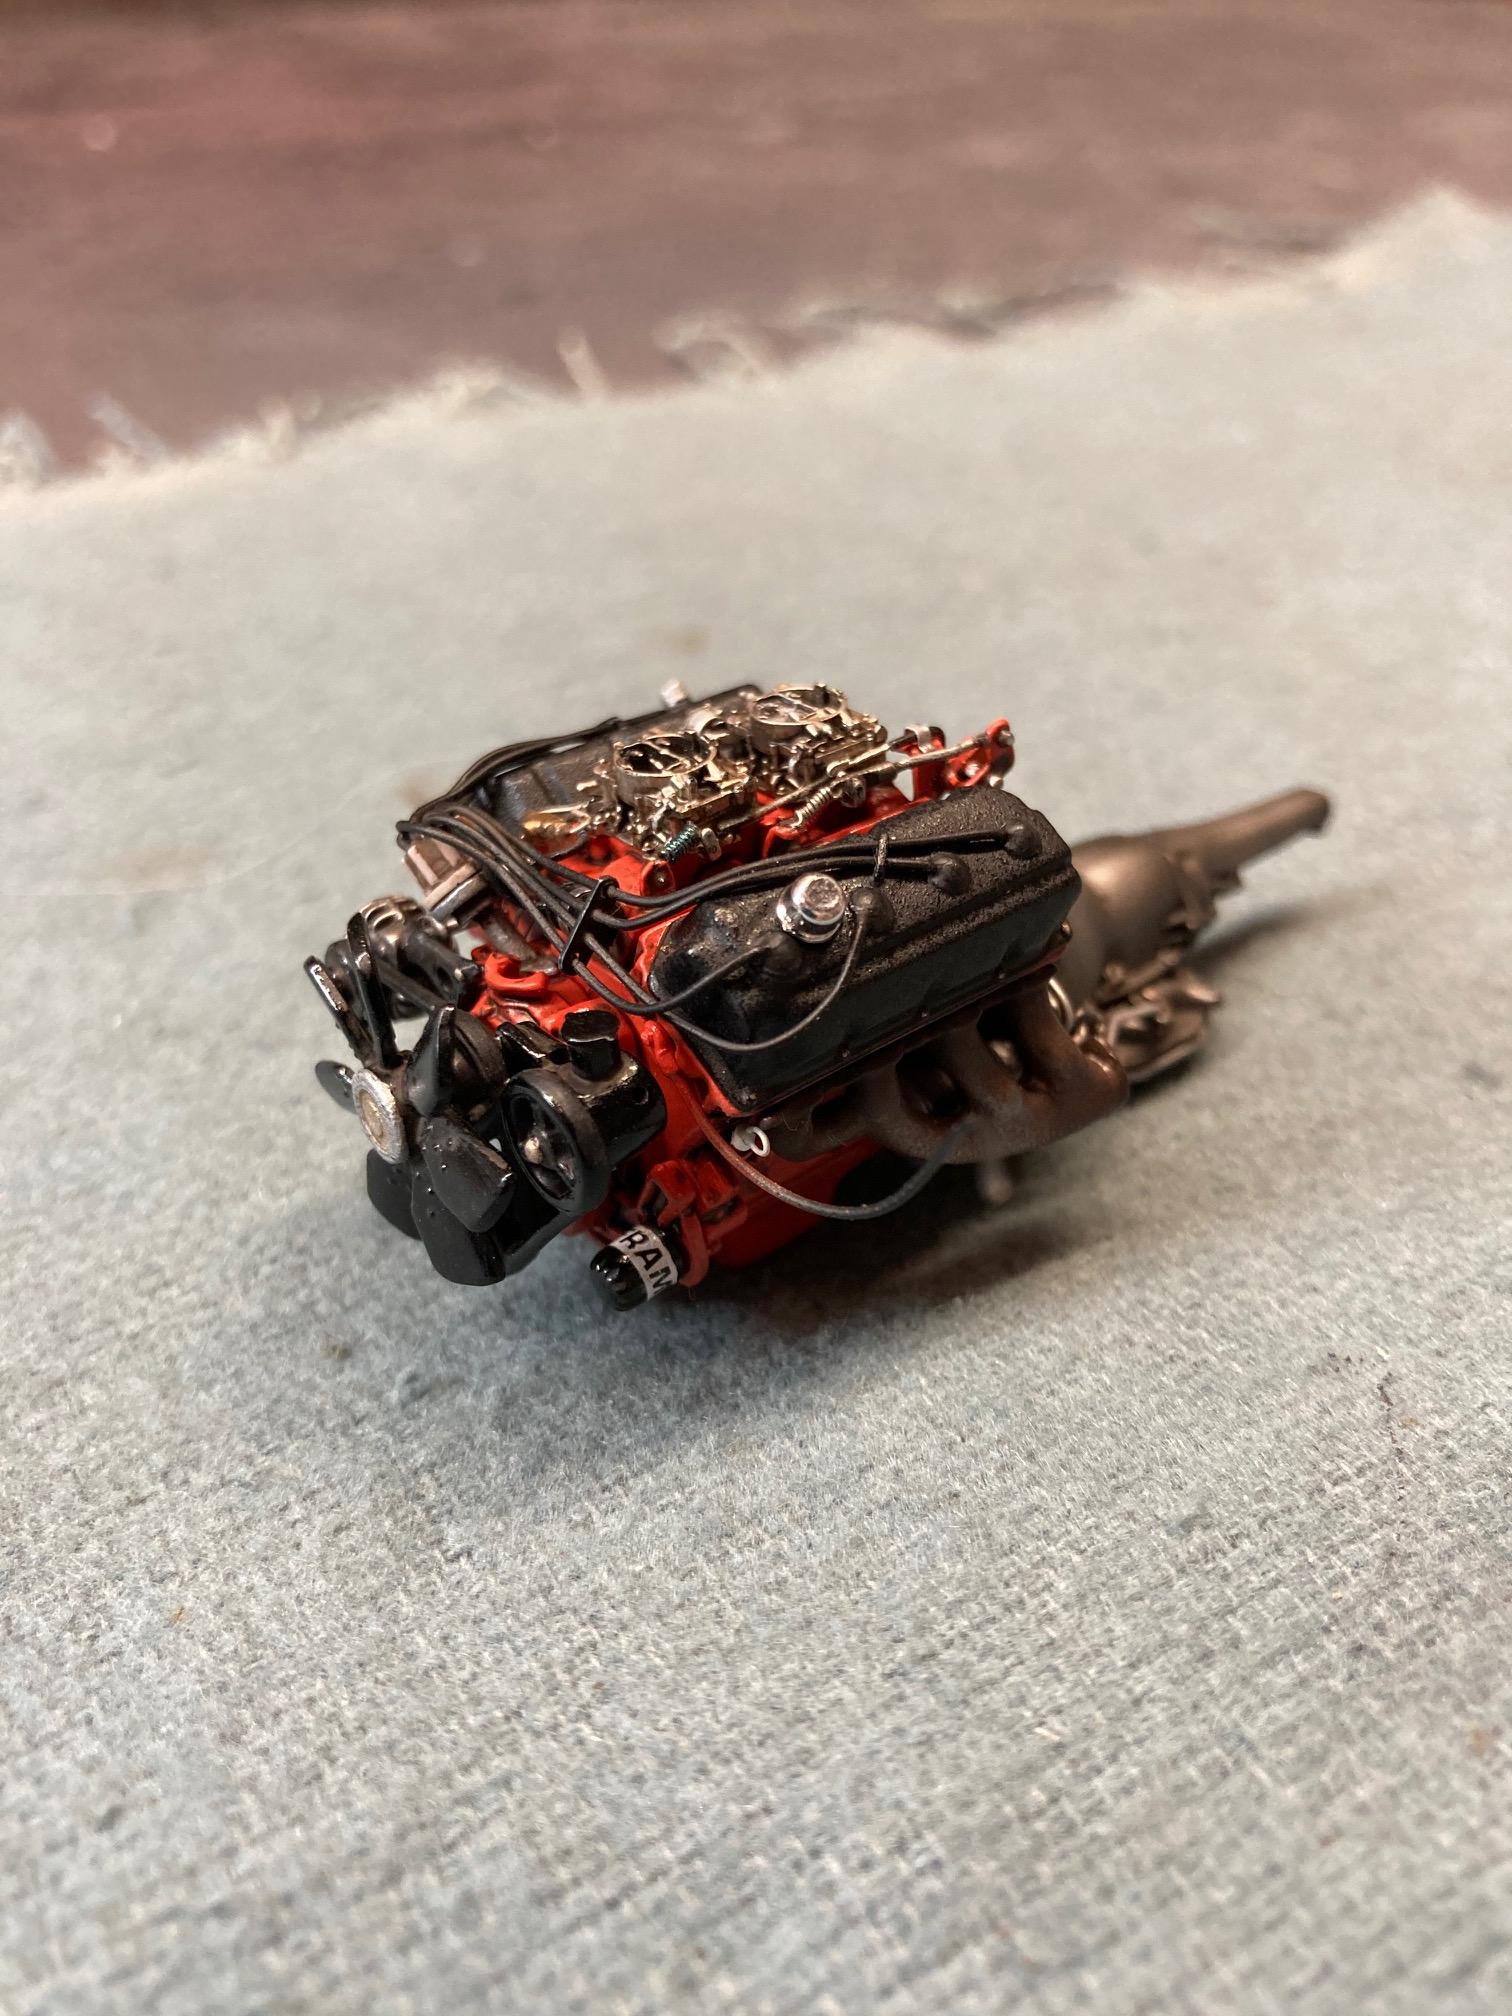
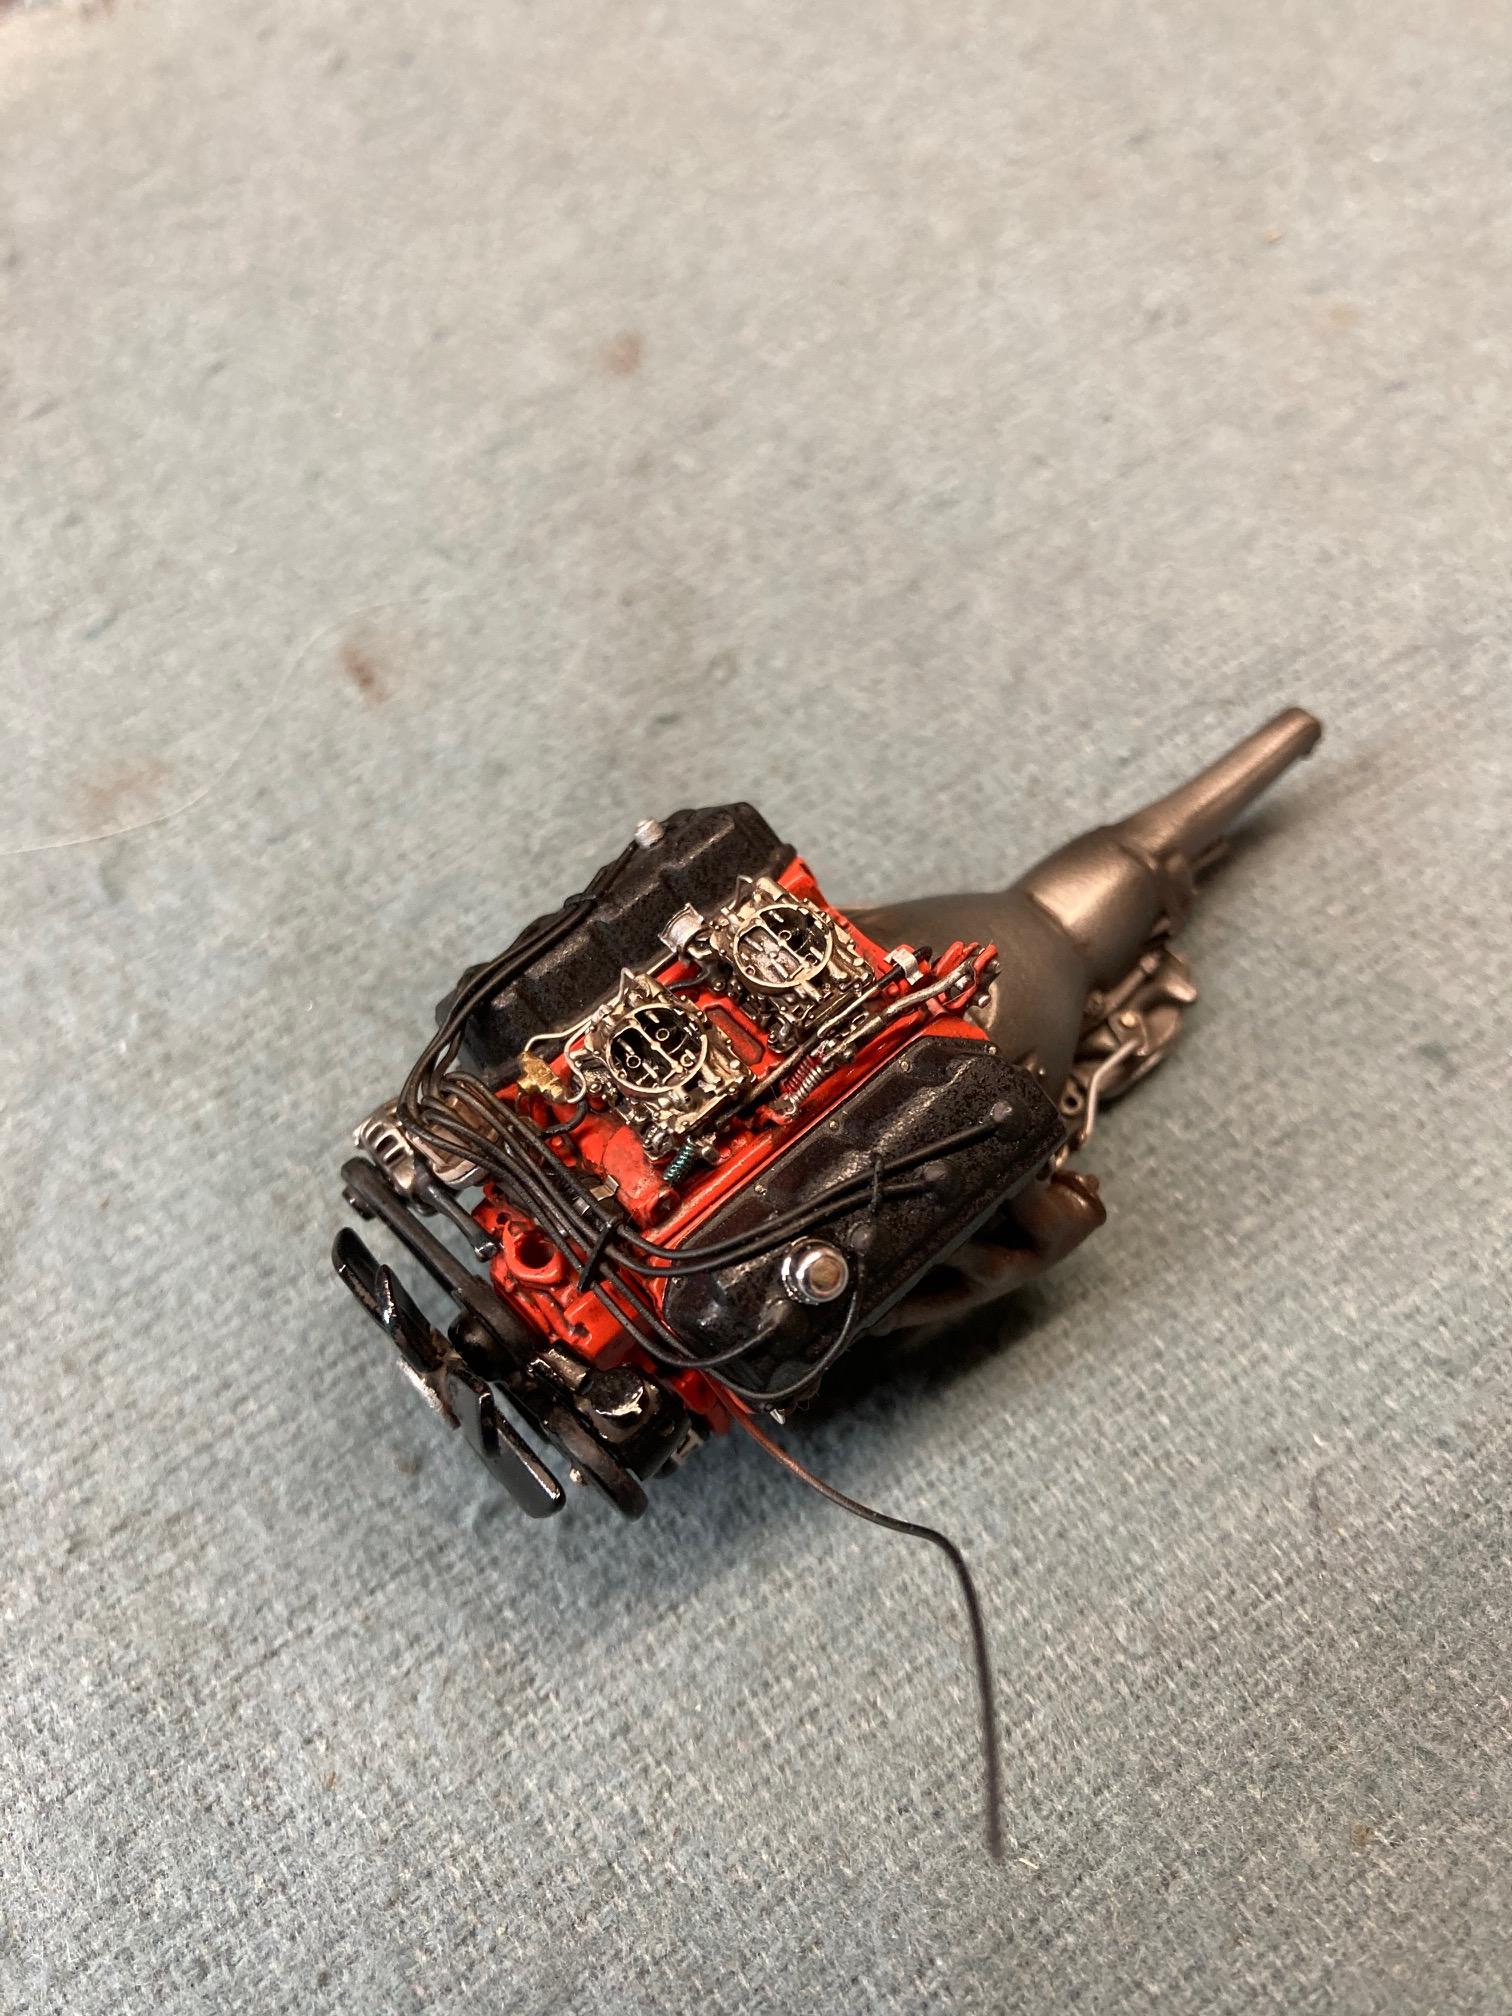
Hi Bill! Sorry it took me so long to answer your question. Got a little distracted you might say. If you go back and look at some of the earlier photos, you'll see that I started by sanding off the original boots and replacing them with thin disks of styrene rod. I then sanded them down slightly to form a relatively smooth, slightly domed boot. Then I drilled the holes for the wires slightly off center and at an angle. I did this to allow the wires to lay down more flatly to the valve cover. Once the wires were installed, I added a dab of 5 minute epoxy to each boot to smooth the transition between the boot and wire and to fill the gaps. Finally, I painted each boot with flat black enamel. From the look of your photo, I think that I would tackle the Ford boots a little differently as it appears that they stand straight up. I would use the same general technique except I would drill a hole straight down the center of the boot base, insert a short piece of the jacket from a slightly larger wire than the plug wire, and then use a little epoxy around the base of that piece to blend the upper and lower sections of the boot into one seamless piece. Once the epoxy is dry, paint each boot flat black, insert the wires into the jacket pieces, and you're done. Steve
-
You're right about the perception of some progress posts appearing boring, but I can speak from experience when I say that it's much less boring than answering the inevitable repeated "how did you do that" questions. Steve
-
*Novus Polish Caps Clogging*
StevenGuthmiller replied to Zippi's topic in Model Building Questions and Answers
Or just ignore the caps. I just take off the cap and dab the polishing rag in the polish. Steve -
Ah, the joys of having to completely re-engineer half of the parts to get things to fit properly!! I think sometimes when people hear the term "parts swap" they occasionally don't understand the work that may be involved. When I did my '64 Pontiac Grand Prix, I saved the original vintage kit floor board, but removed the tunnel, and fit the floor over the tunnel of the AMT '62 Catalina kit. There are a ton of details that need to be taken into consideration when mating mismatched chassis, interior, engine bay and engine parts to another kit. It's hard to find an instance where everything just plops into place. Very nice "engineering" so far Bob!! Keep up the great work! I know she's gonna be a jaw dropper!! Steve
-
Thanks Bob! I guess that’s the name of the game. Always trying to improve. ? Steve
-
Thanks guys!! Steve
-
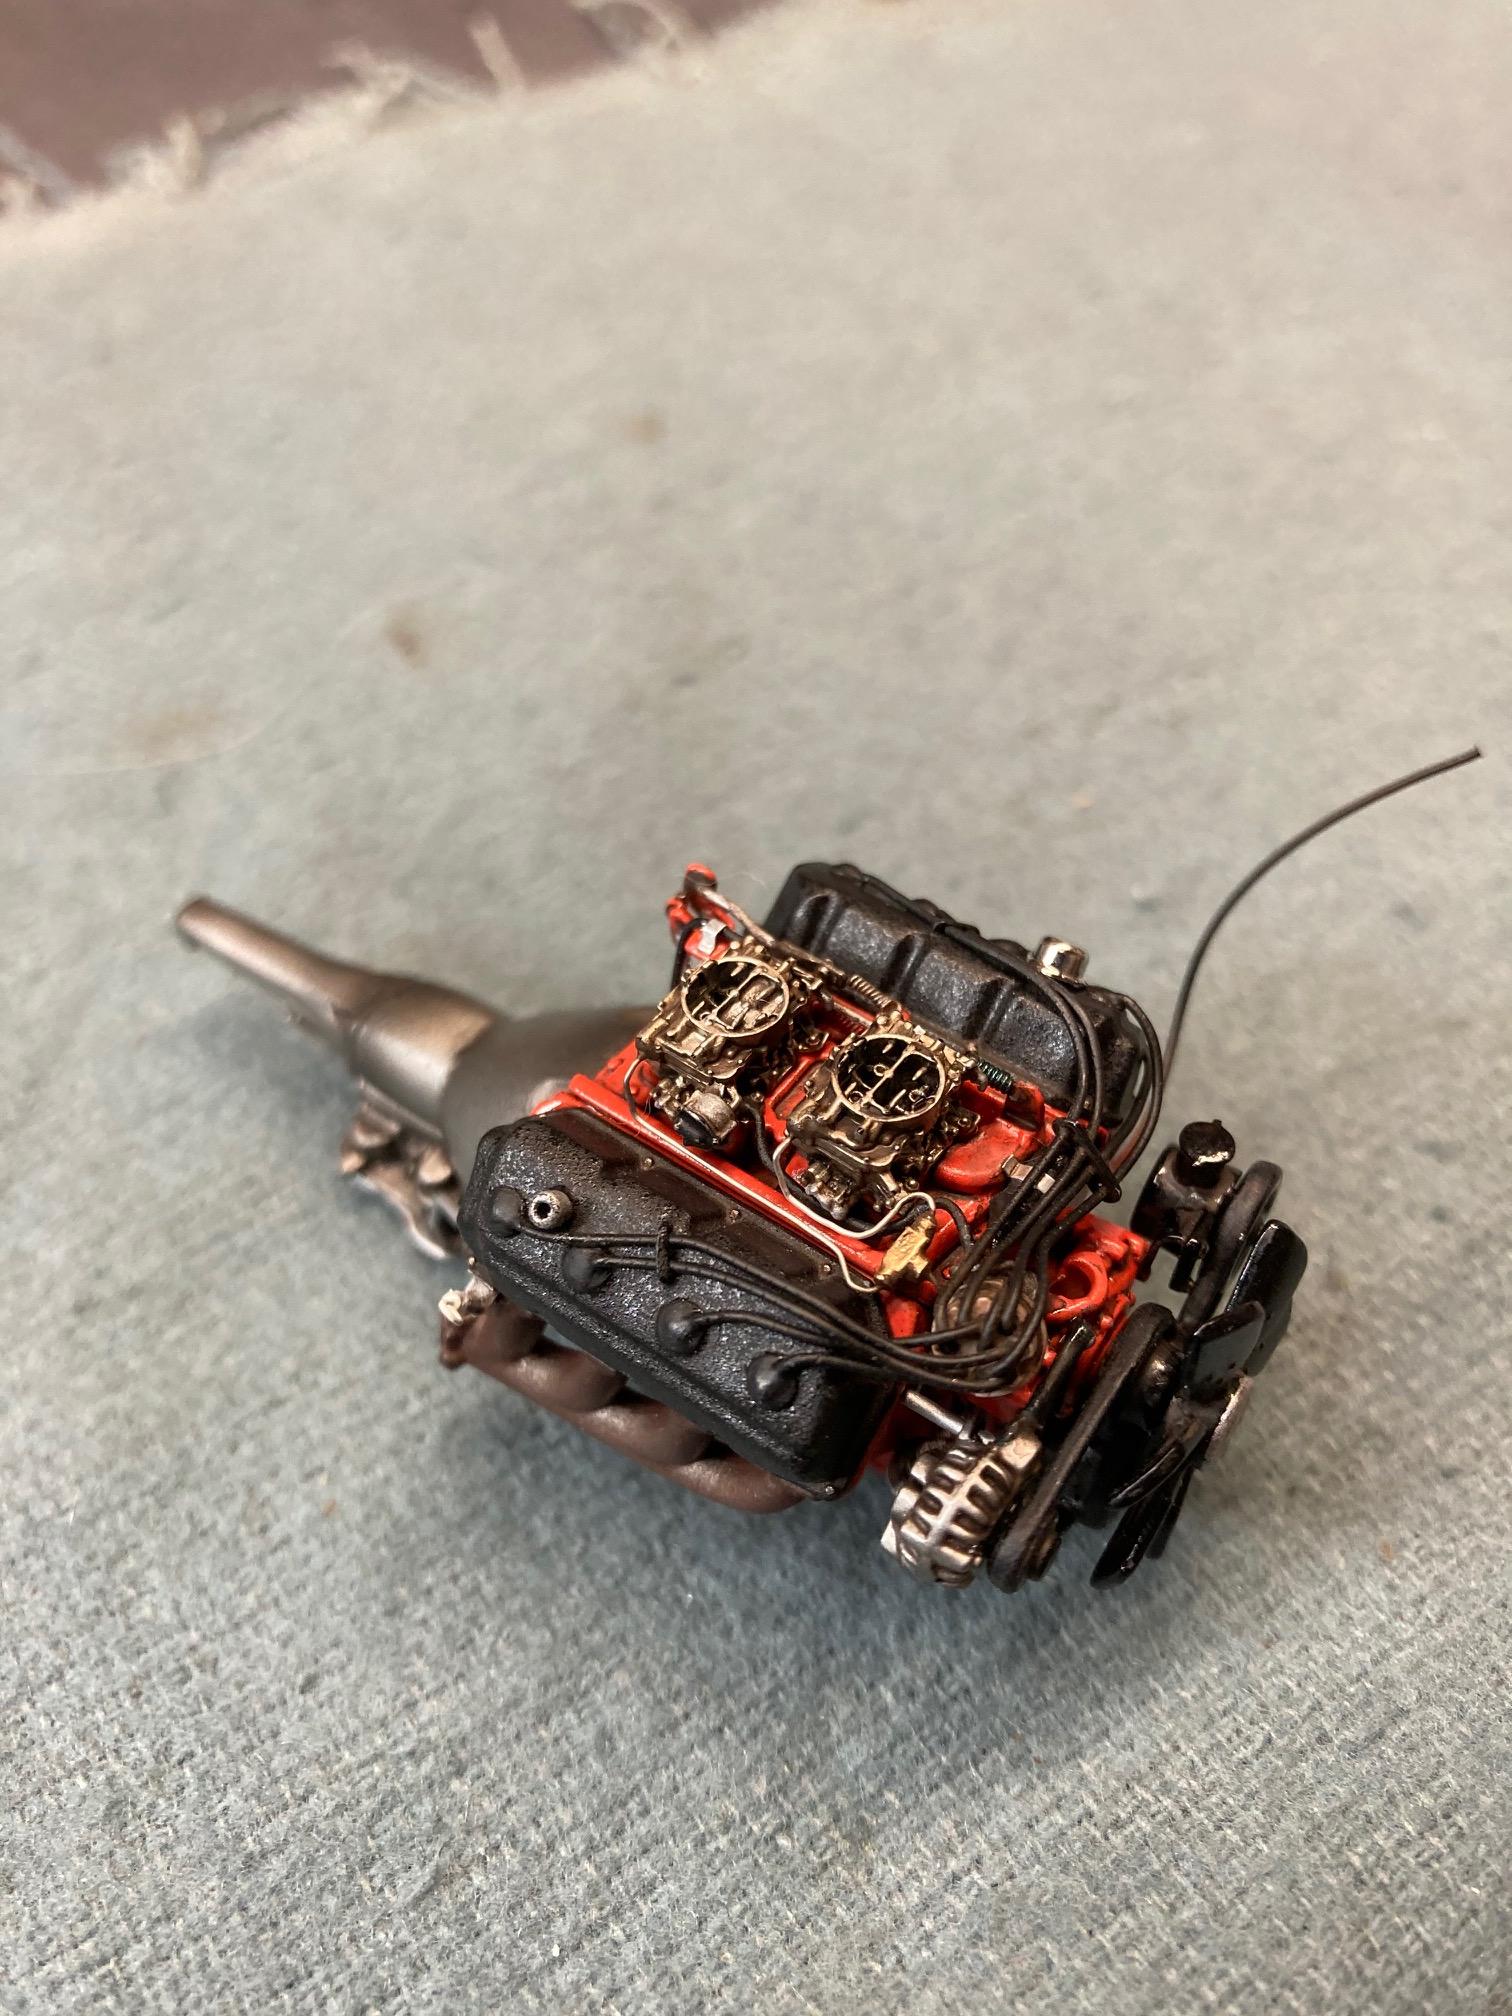
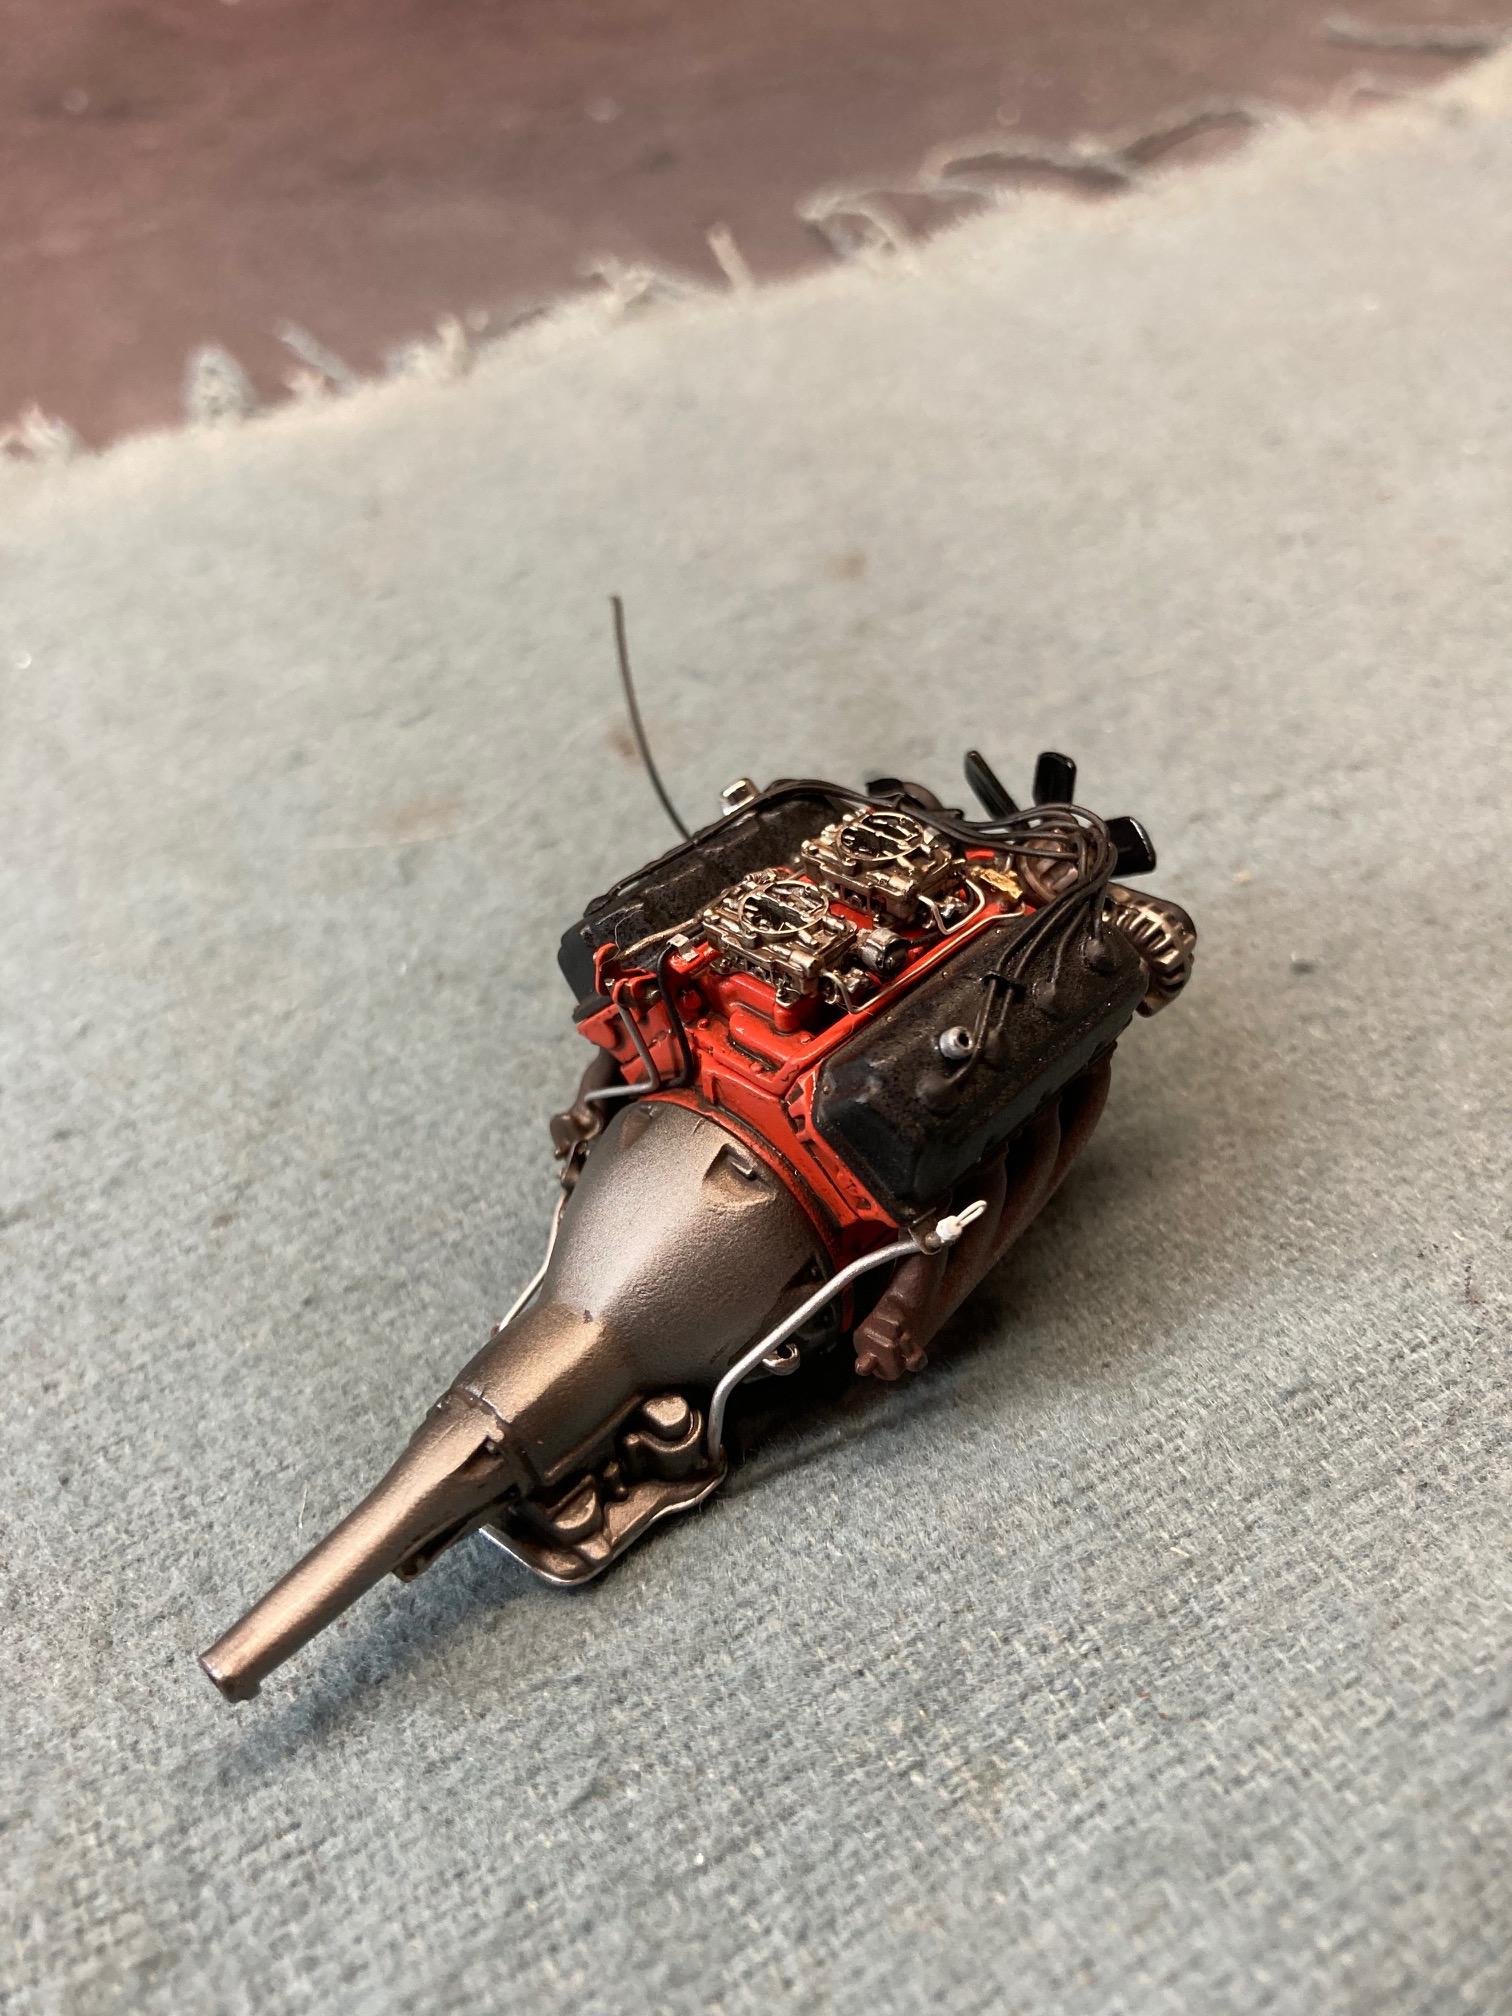
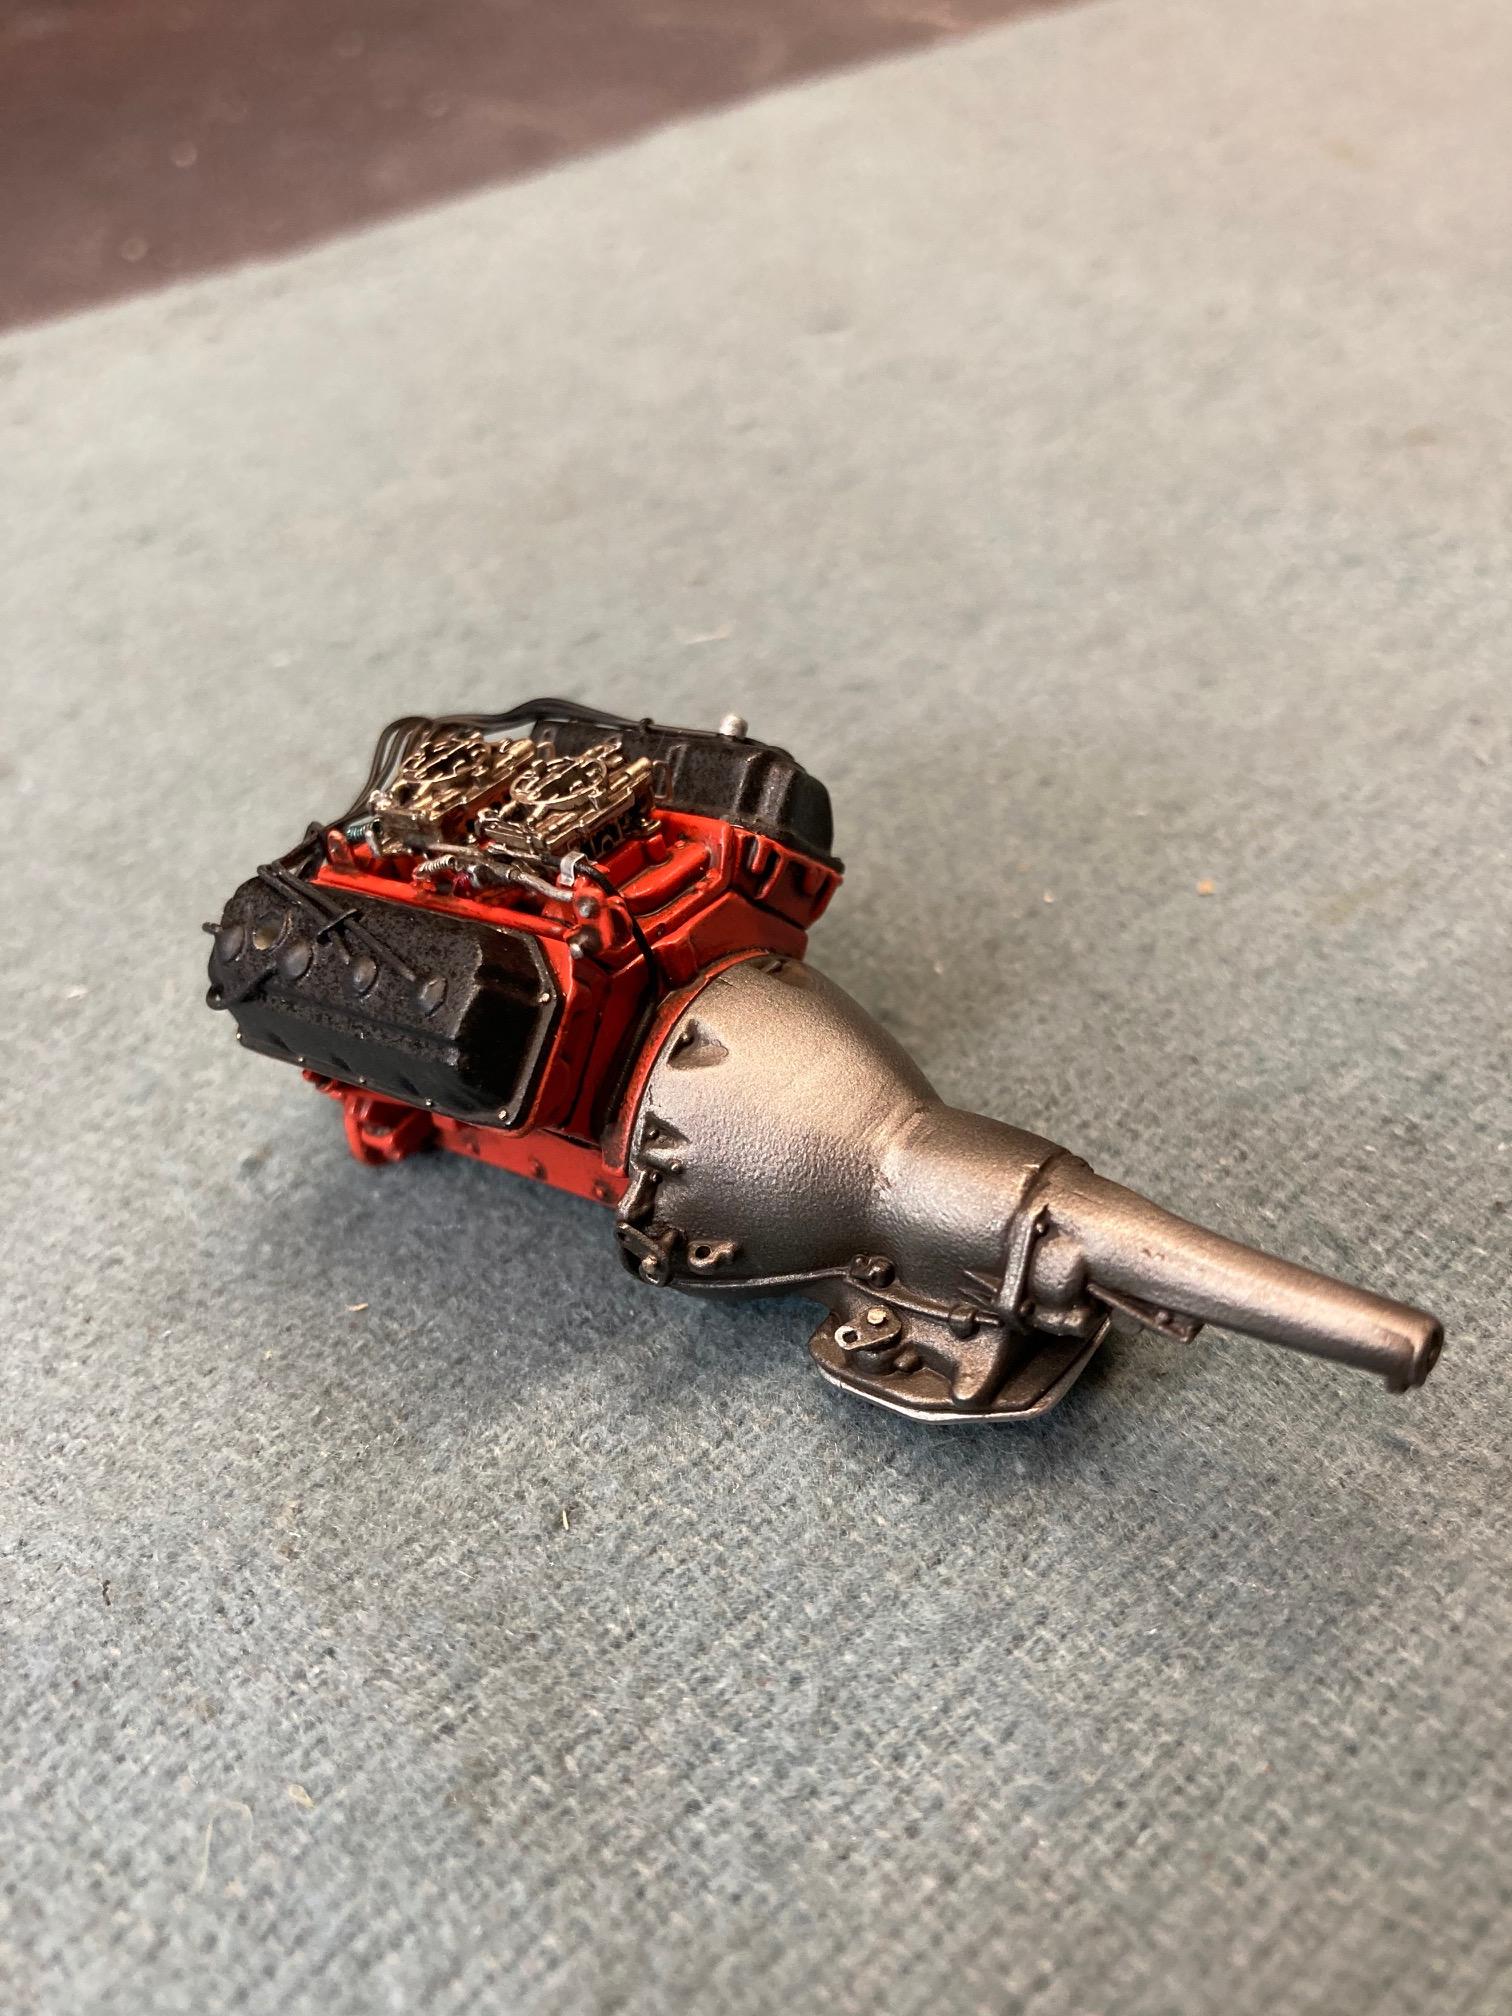
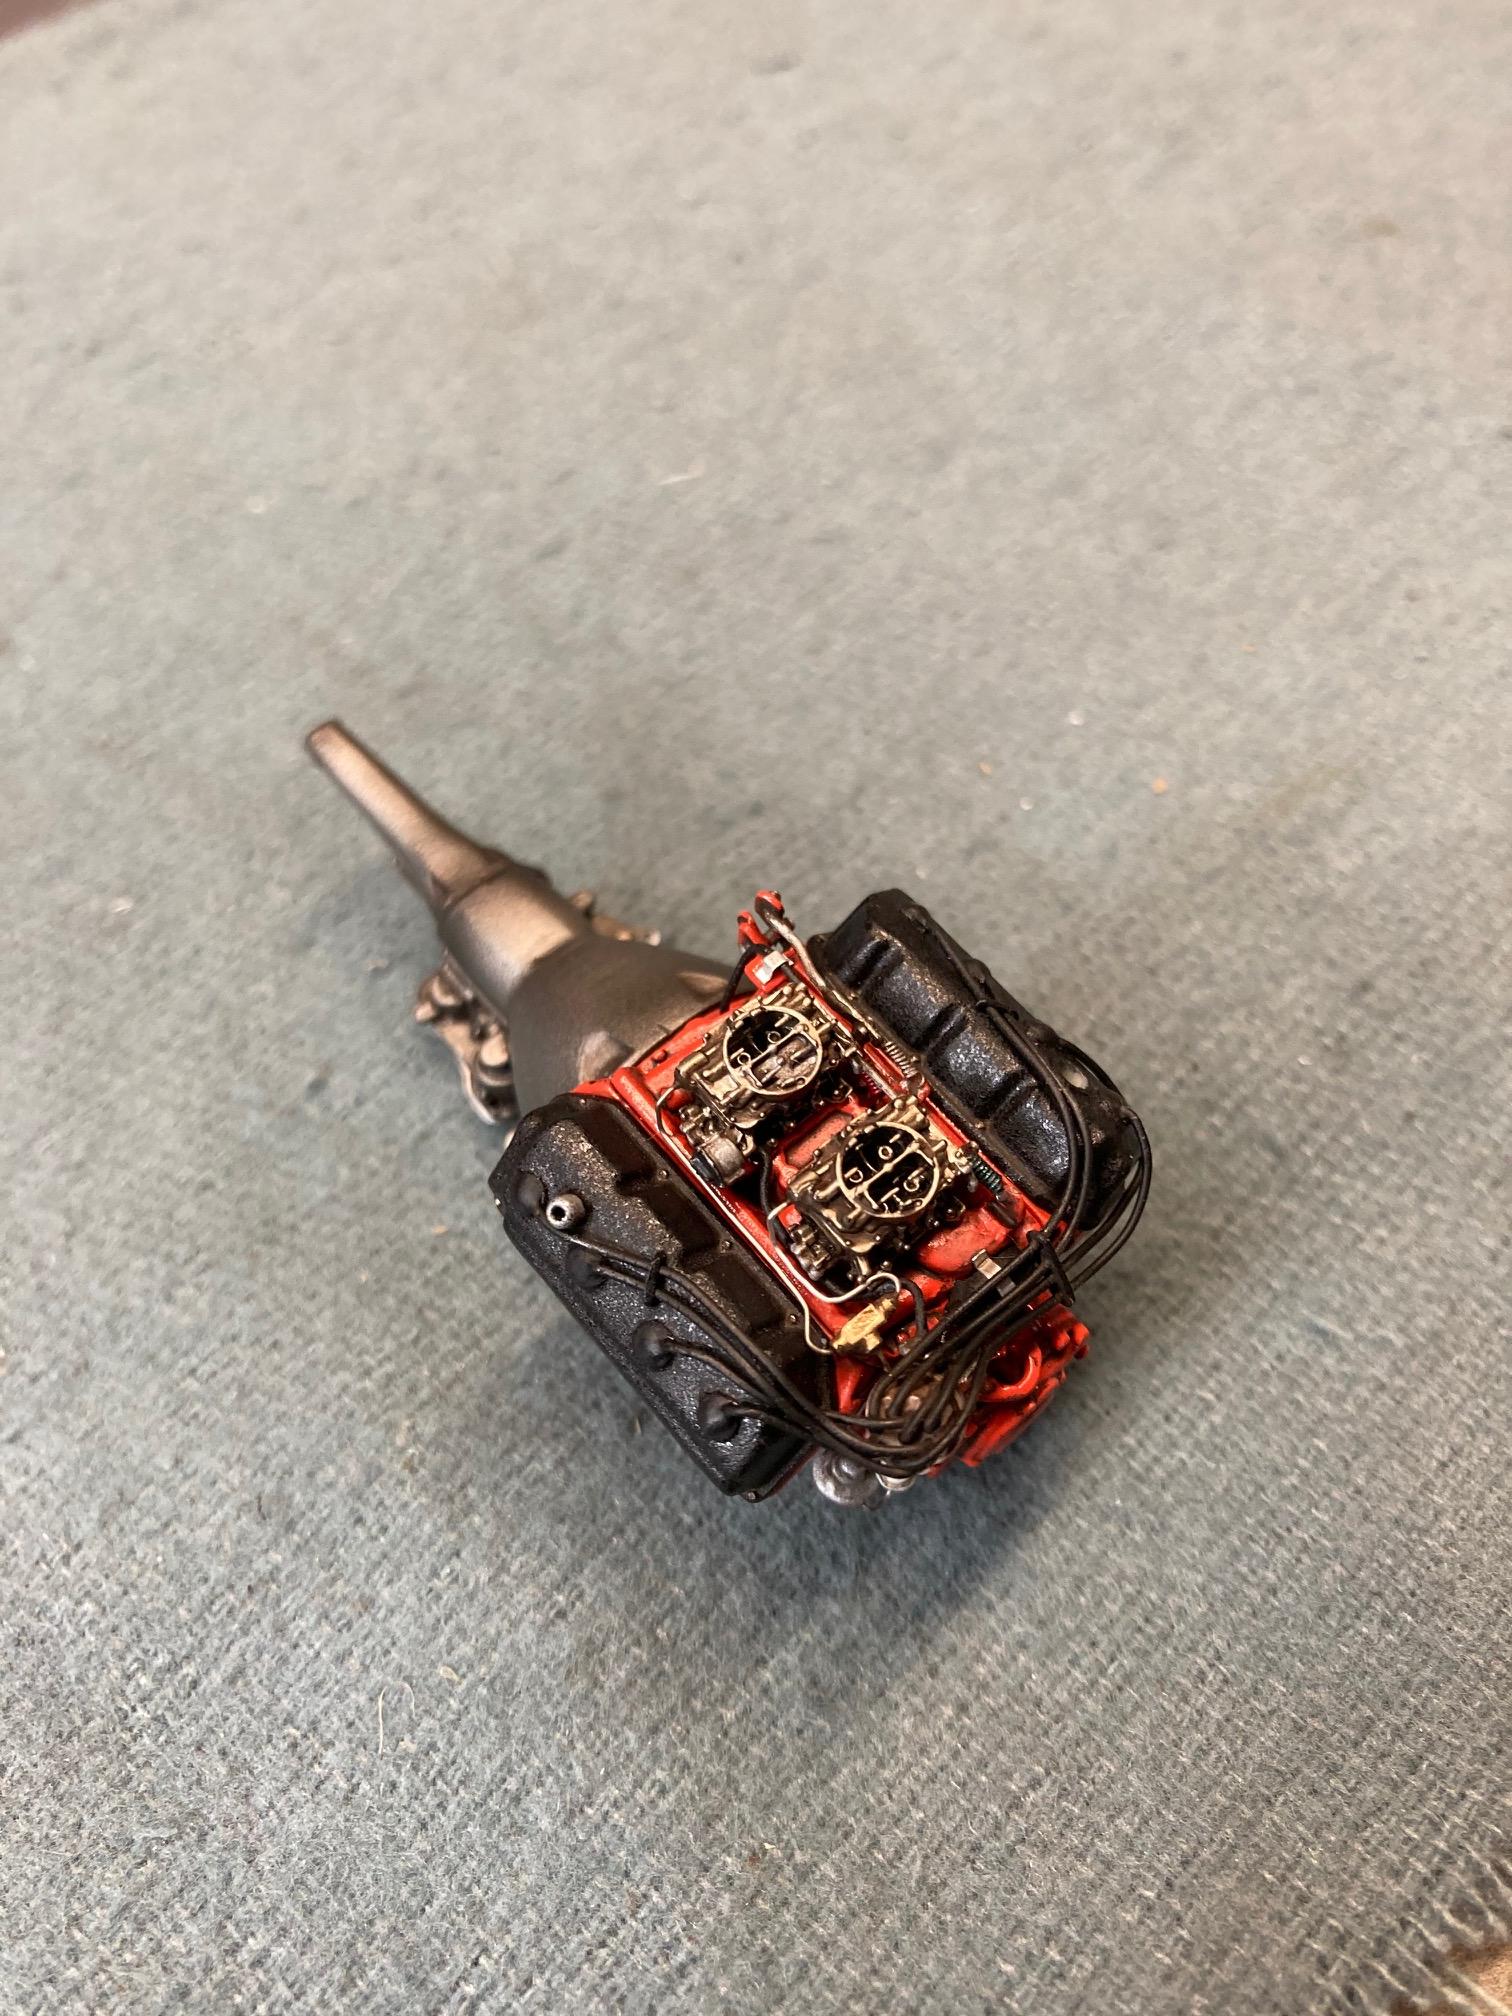
Thanks Charlie! Pretty much finished up the engine today. Steve
-
Thanks. I appreciate that. But I'm going to say that there are lots of better candidates out there. Steve
-
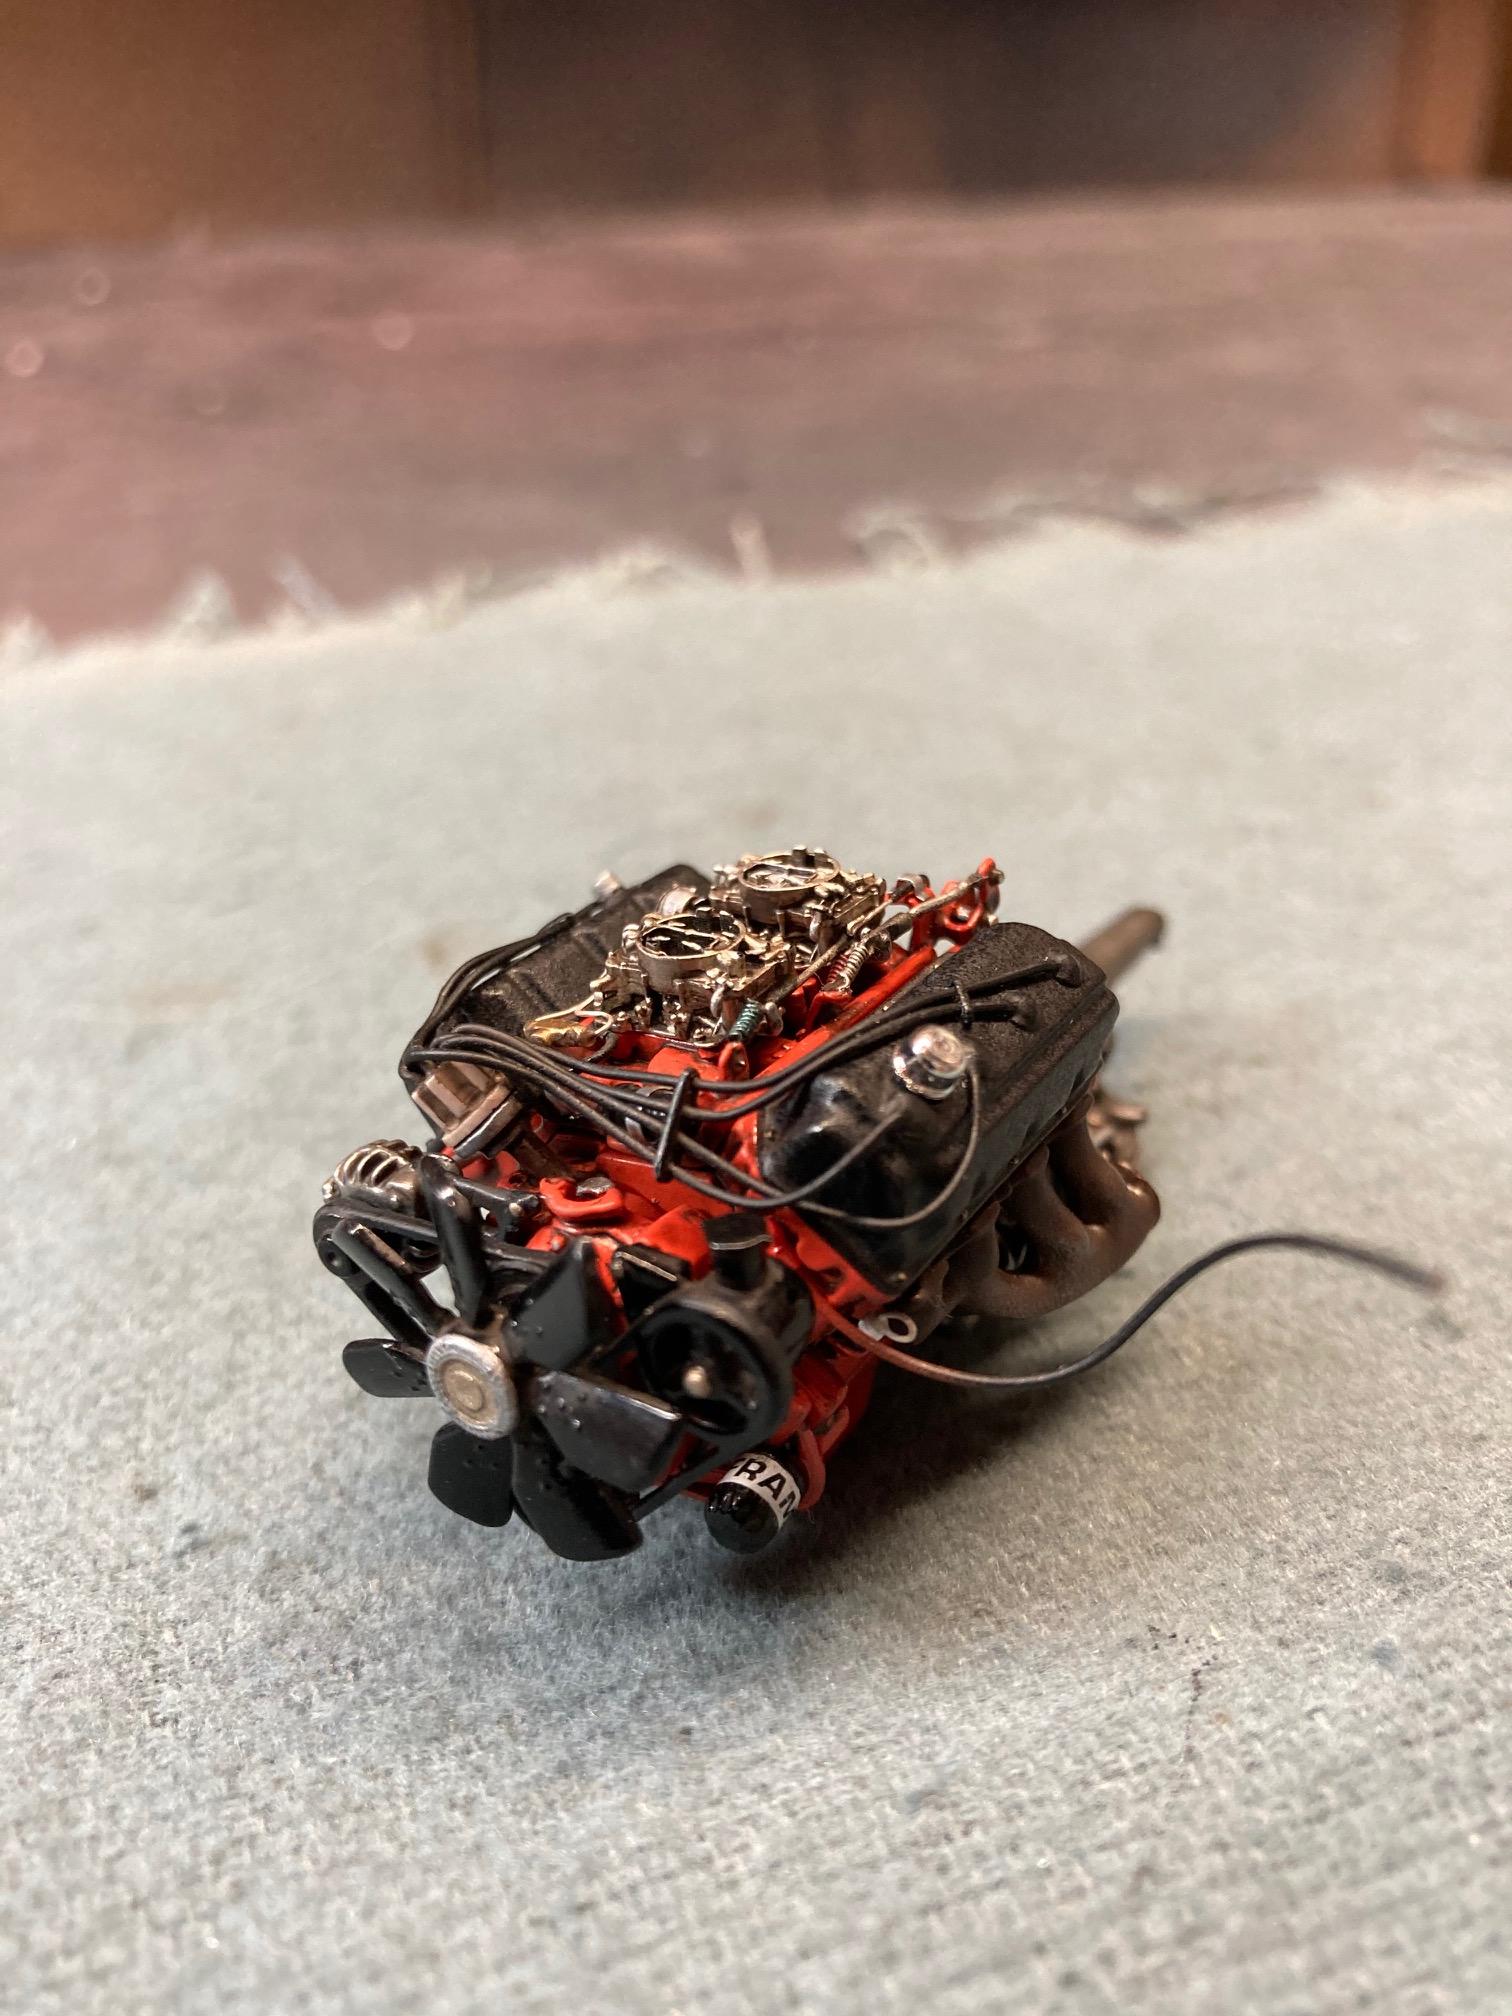
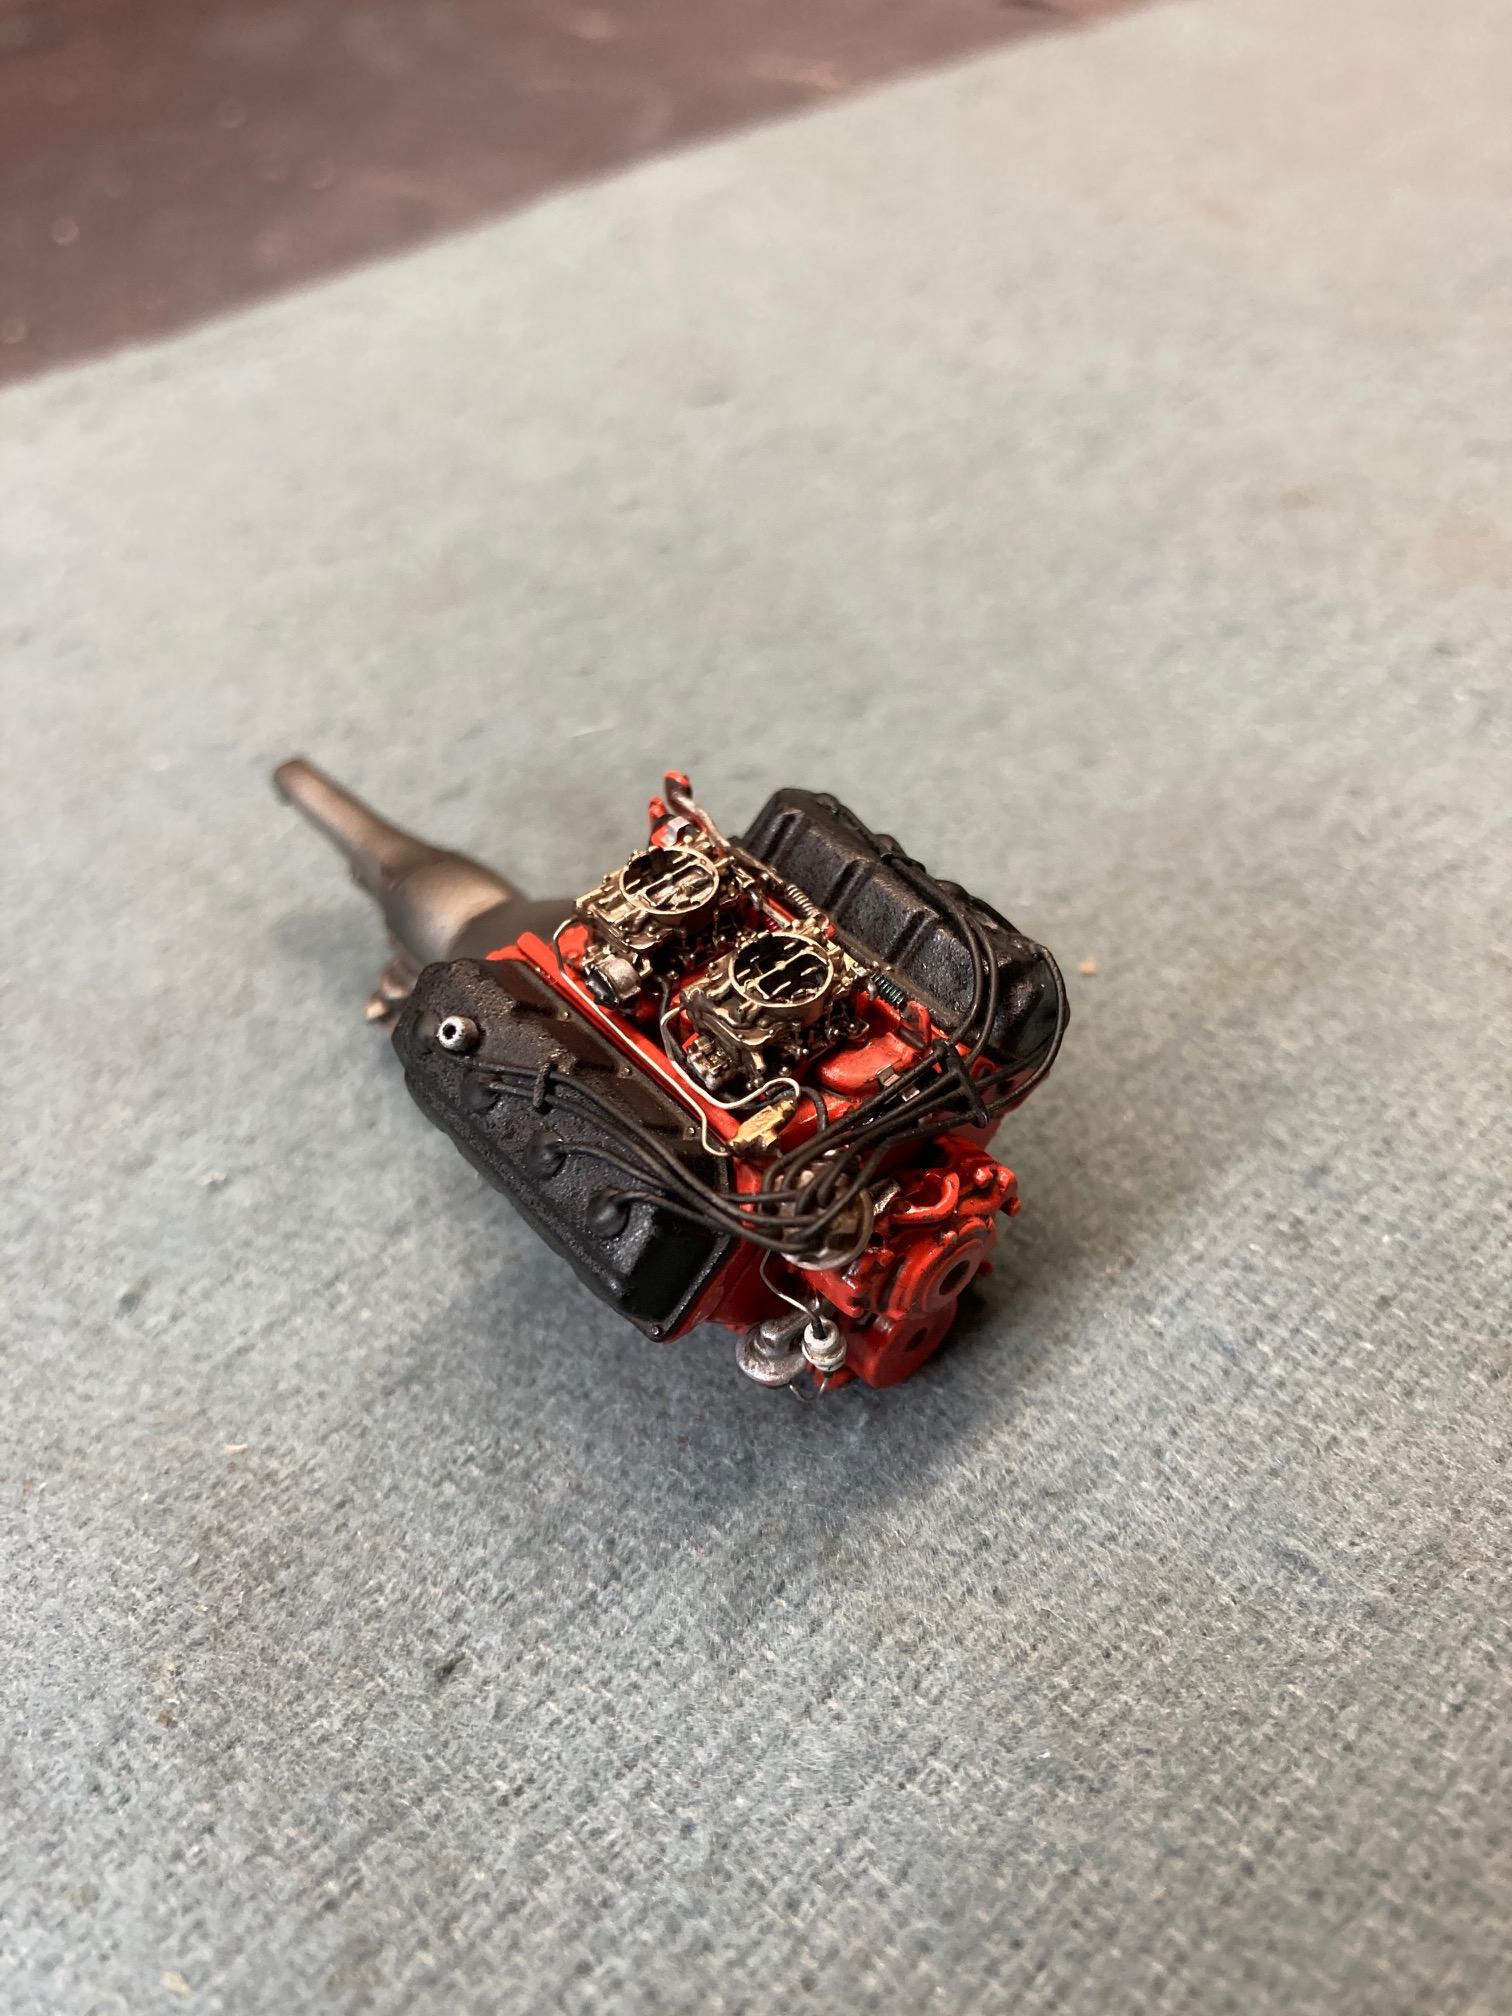
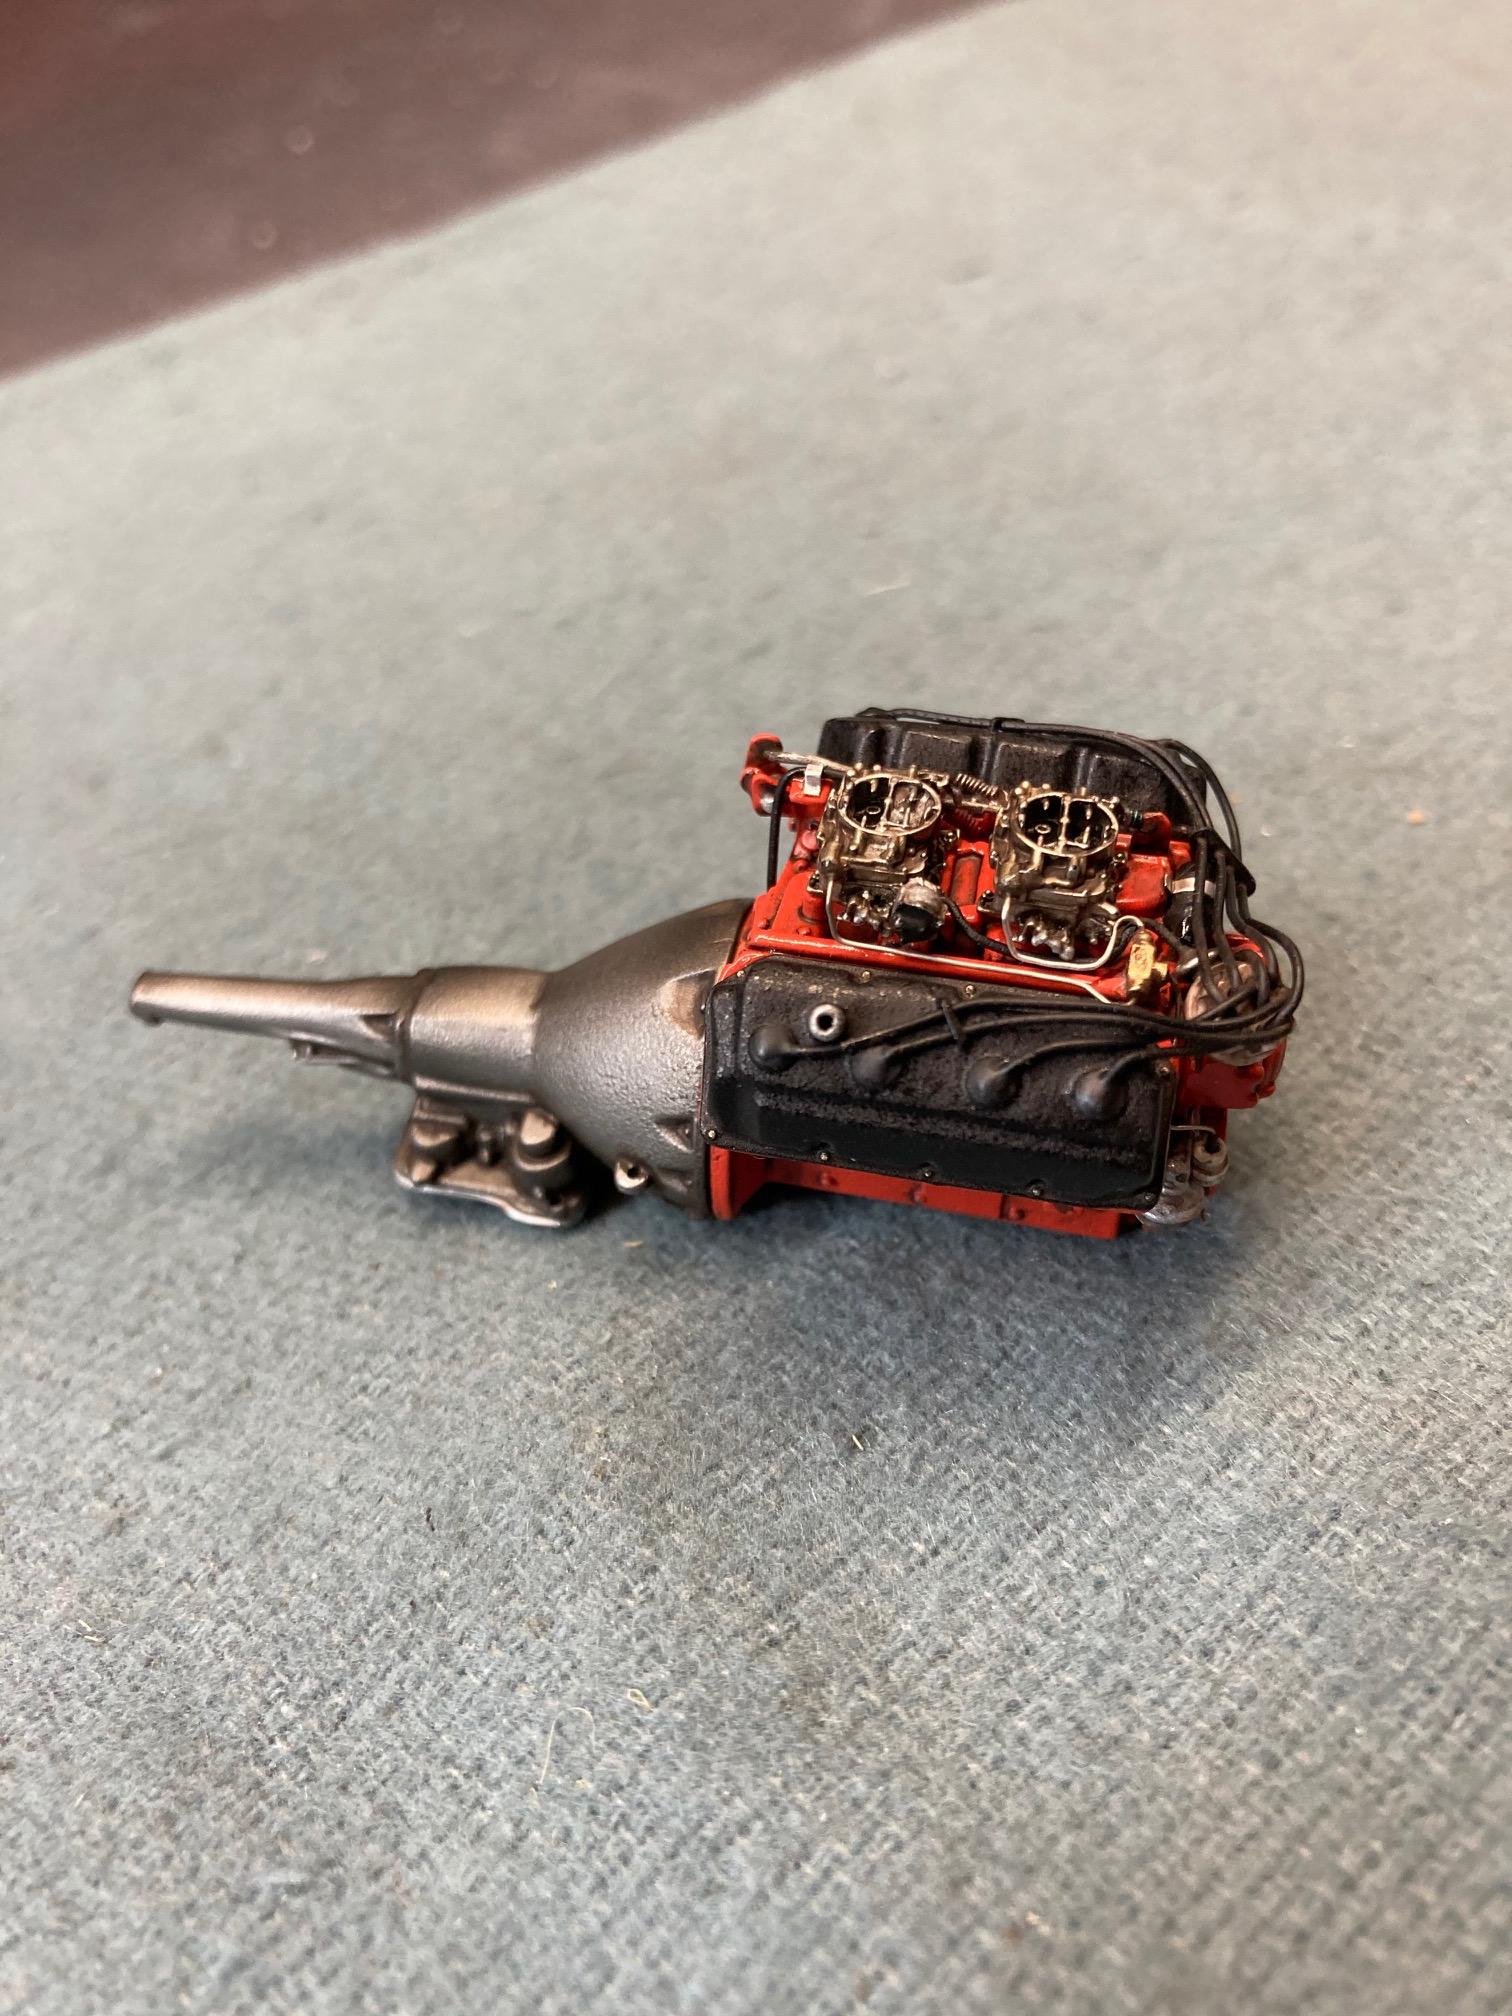
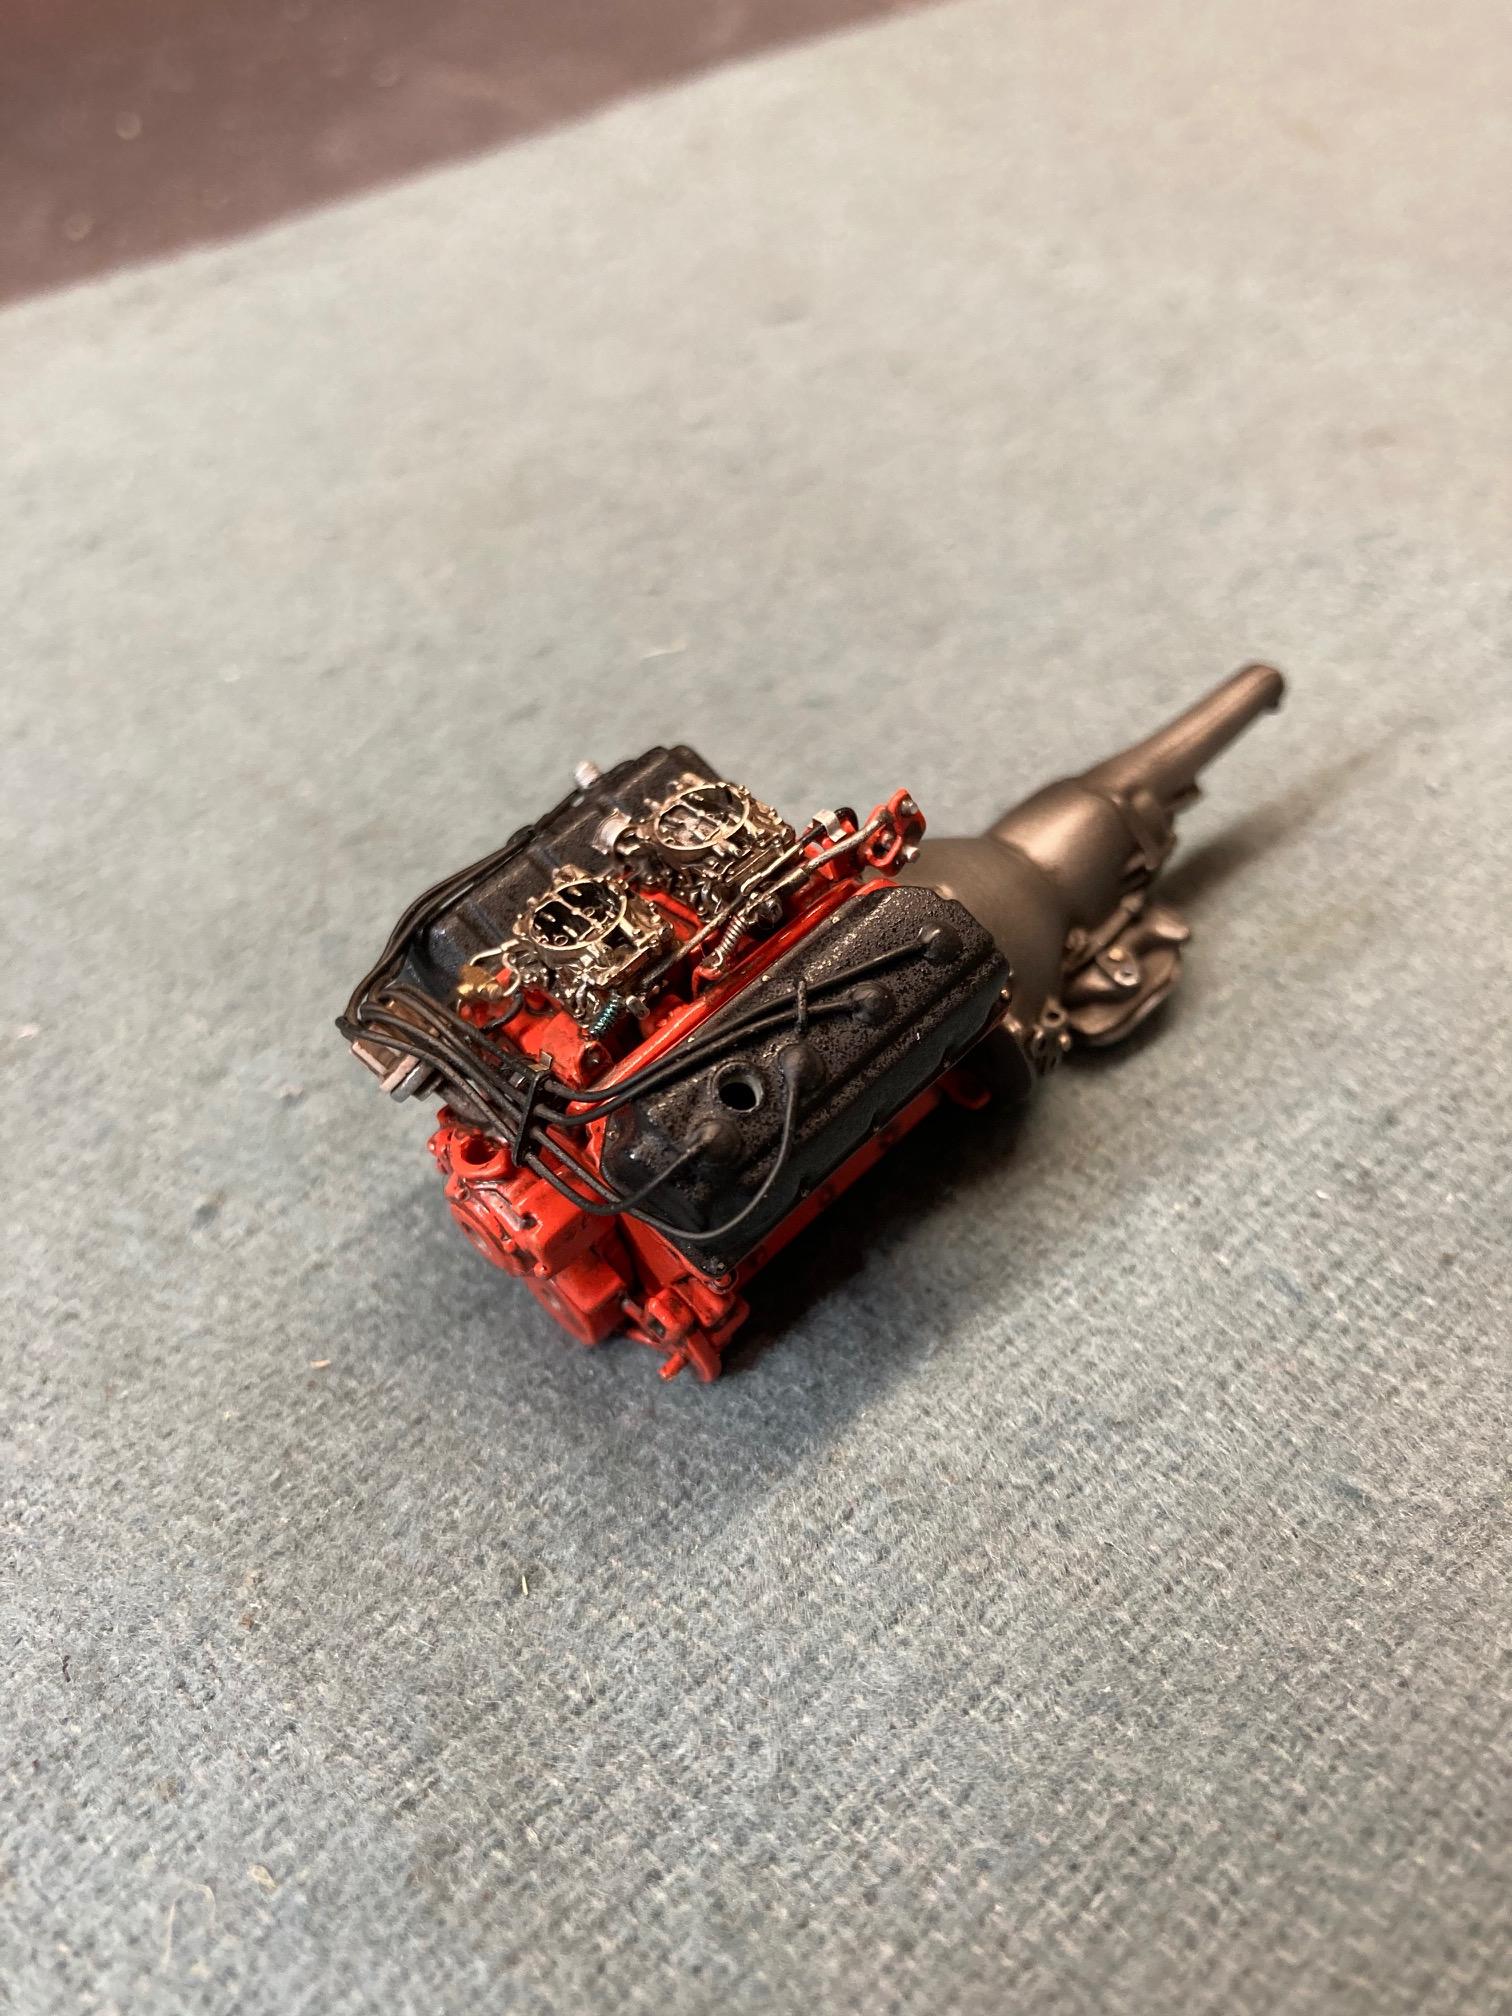
Today I finished up the distributor, wires and boots and added the transmission. Steve
-
Build Sequence
StevenGuthmiller replied to bluestringer's topic in Model Building Questions and Answers
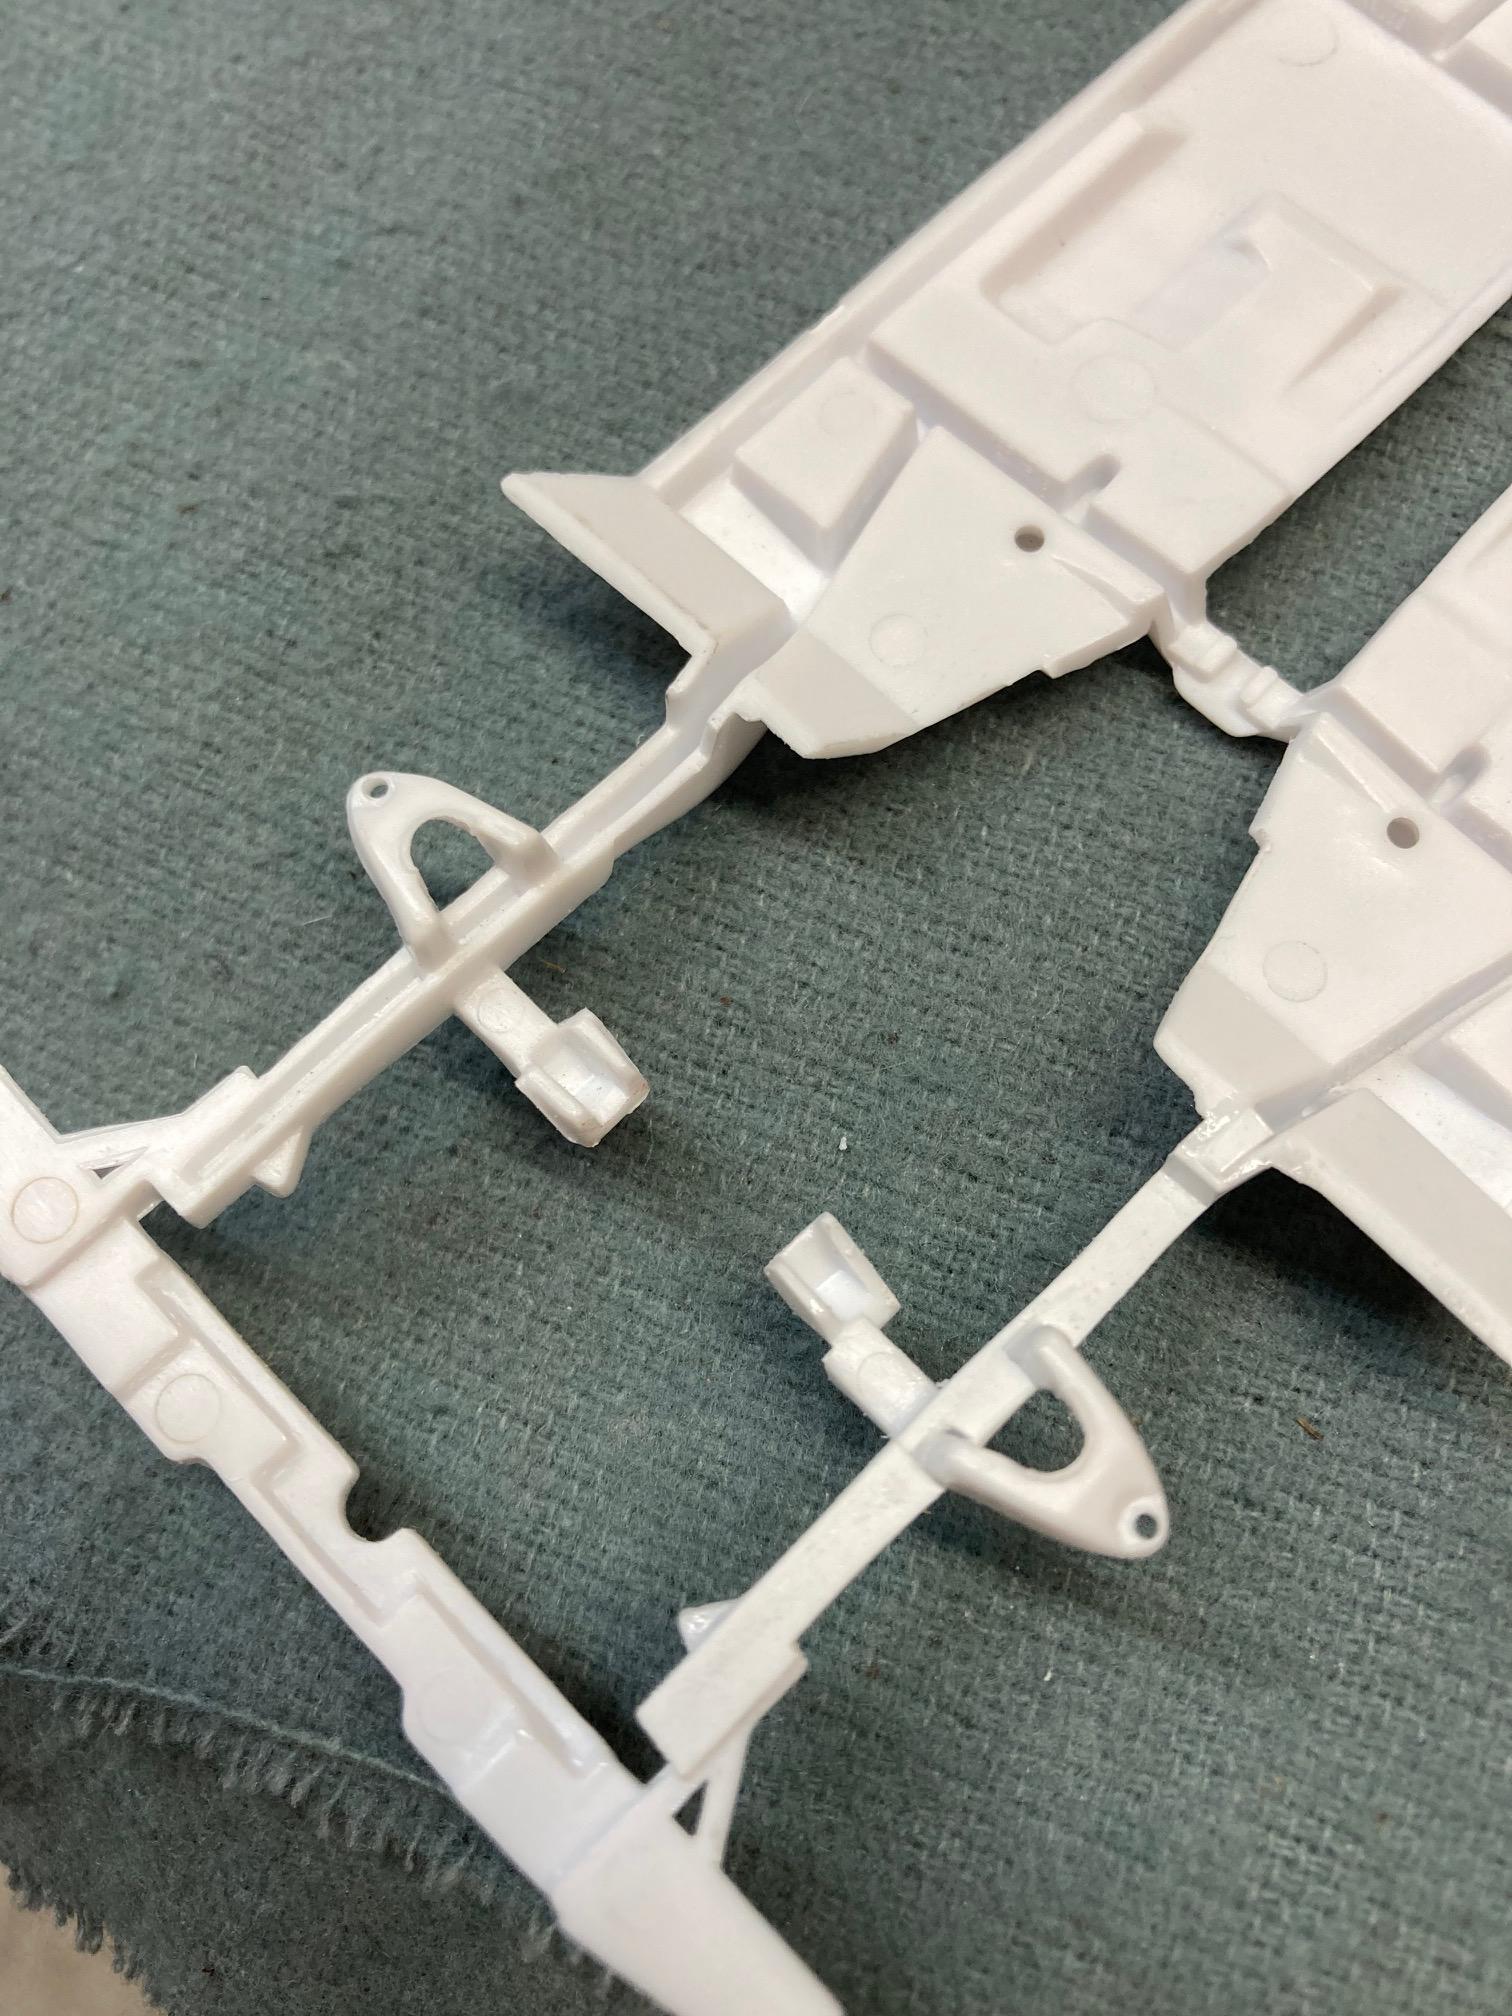
The majority of the linkage in this case is constructed from stretched sprue. Steve