StevenGuthmiller
-
Posts
15,081 -
Joined
-
Last visited
Content Type
Profiles
Forums
Events
Gallery
Everything posted by StevenGuthmiller
-
I hear you. The backgrounds depicted here so far are very nice, but as you say, not enough time in the day. It gives me heart palpitations to think that the weeks spent making a back drop could have been spent on working on one of my models. But hats off to the guys who will take the time. Steve
-
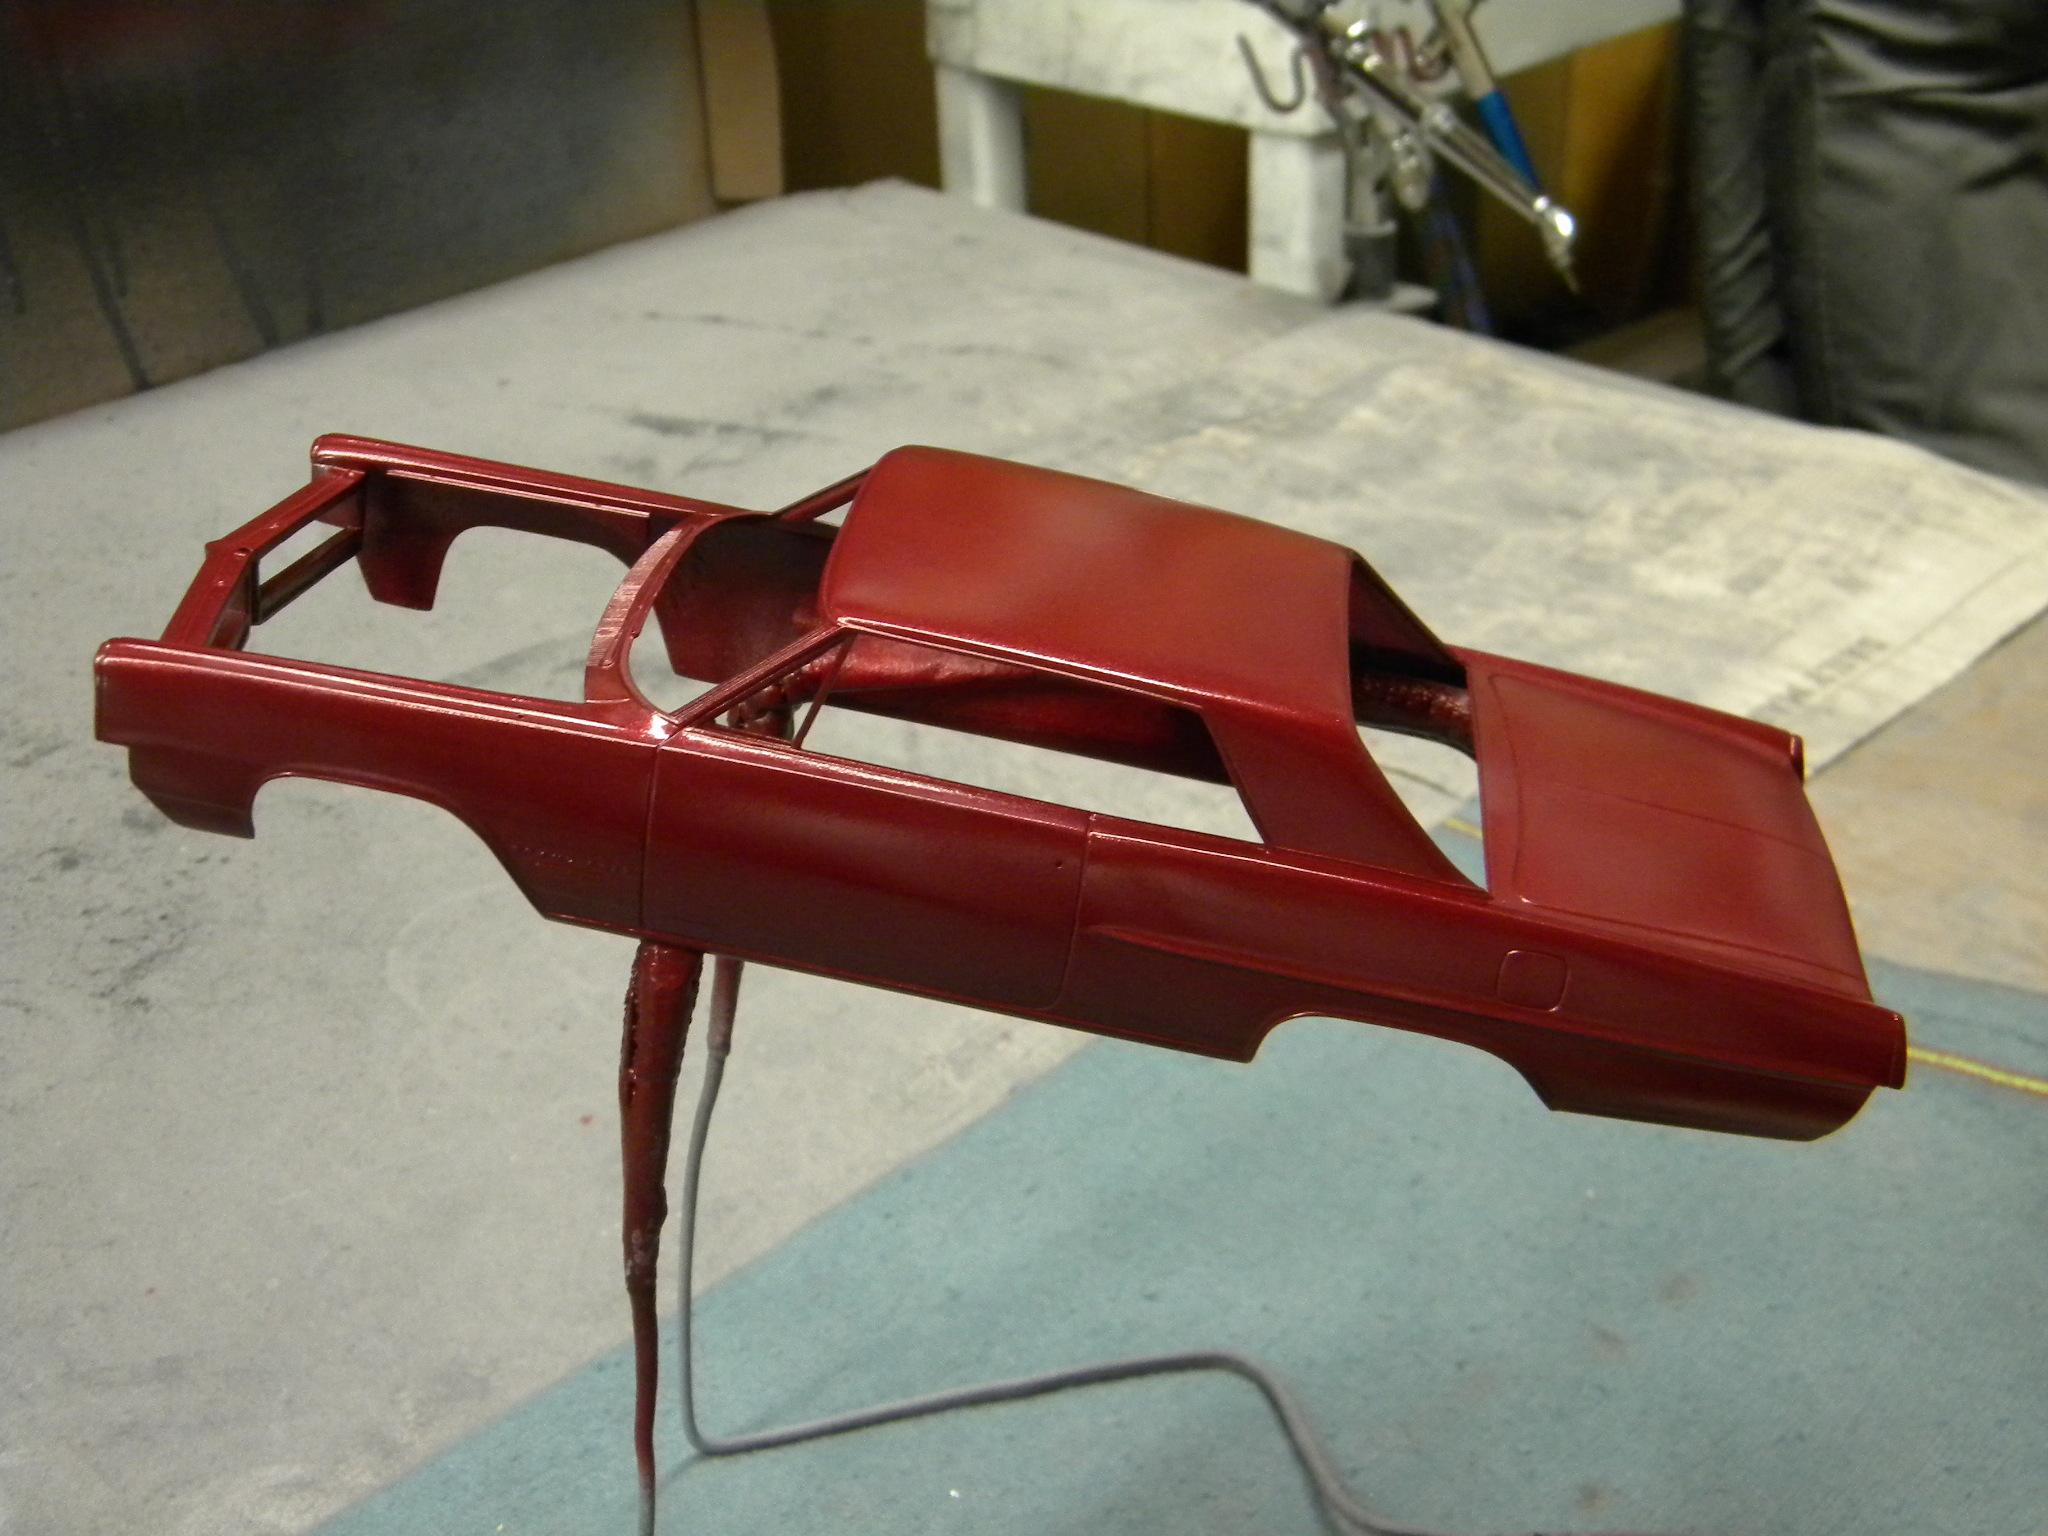
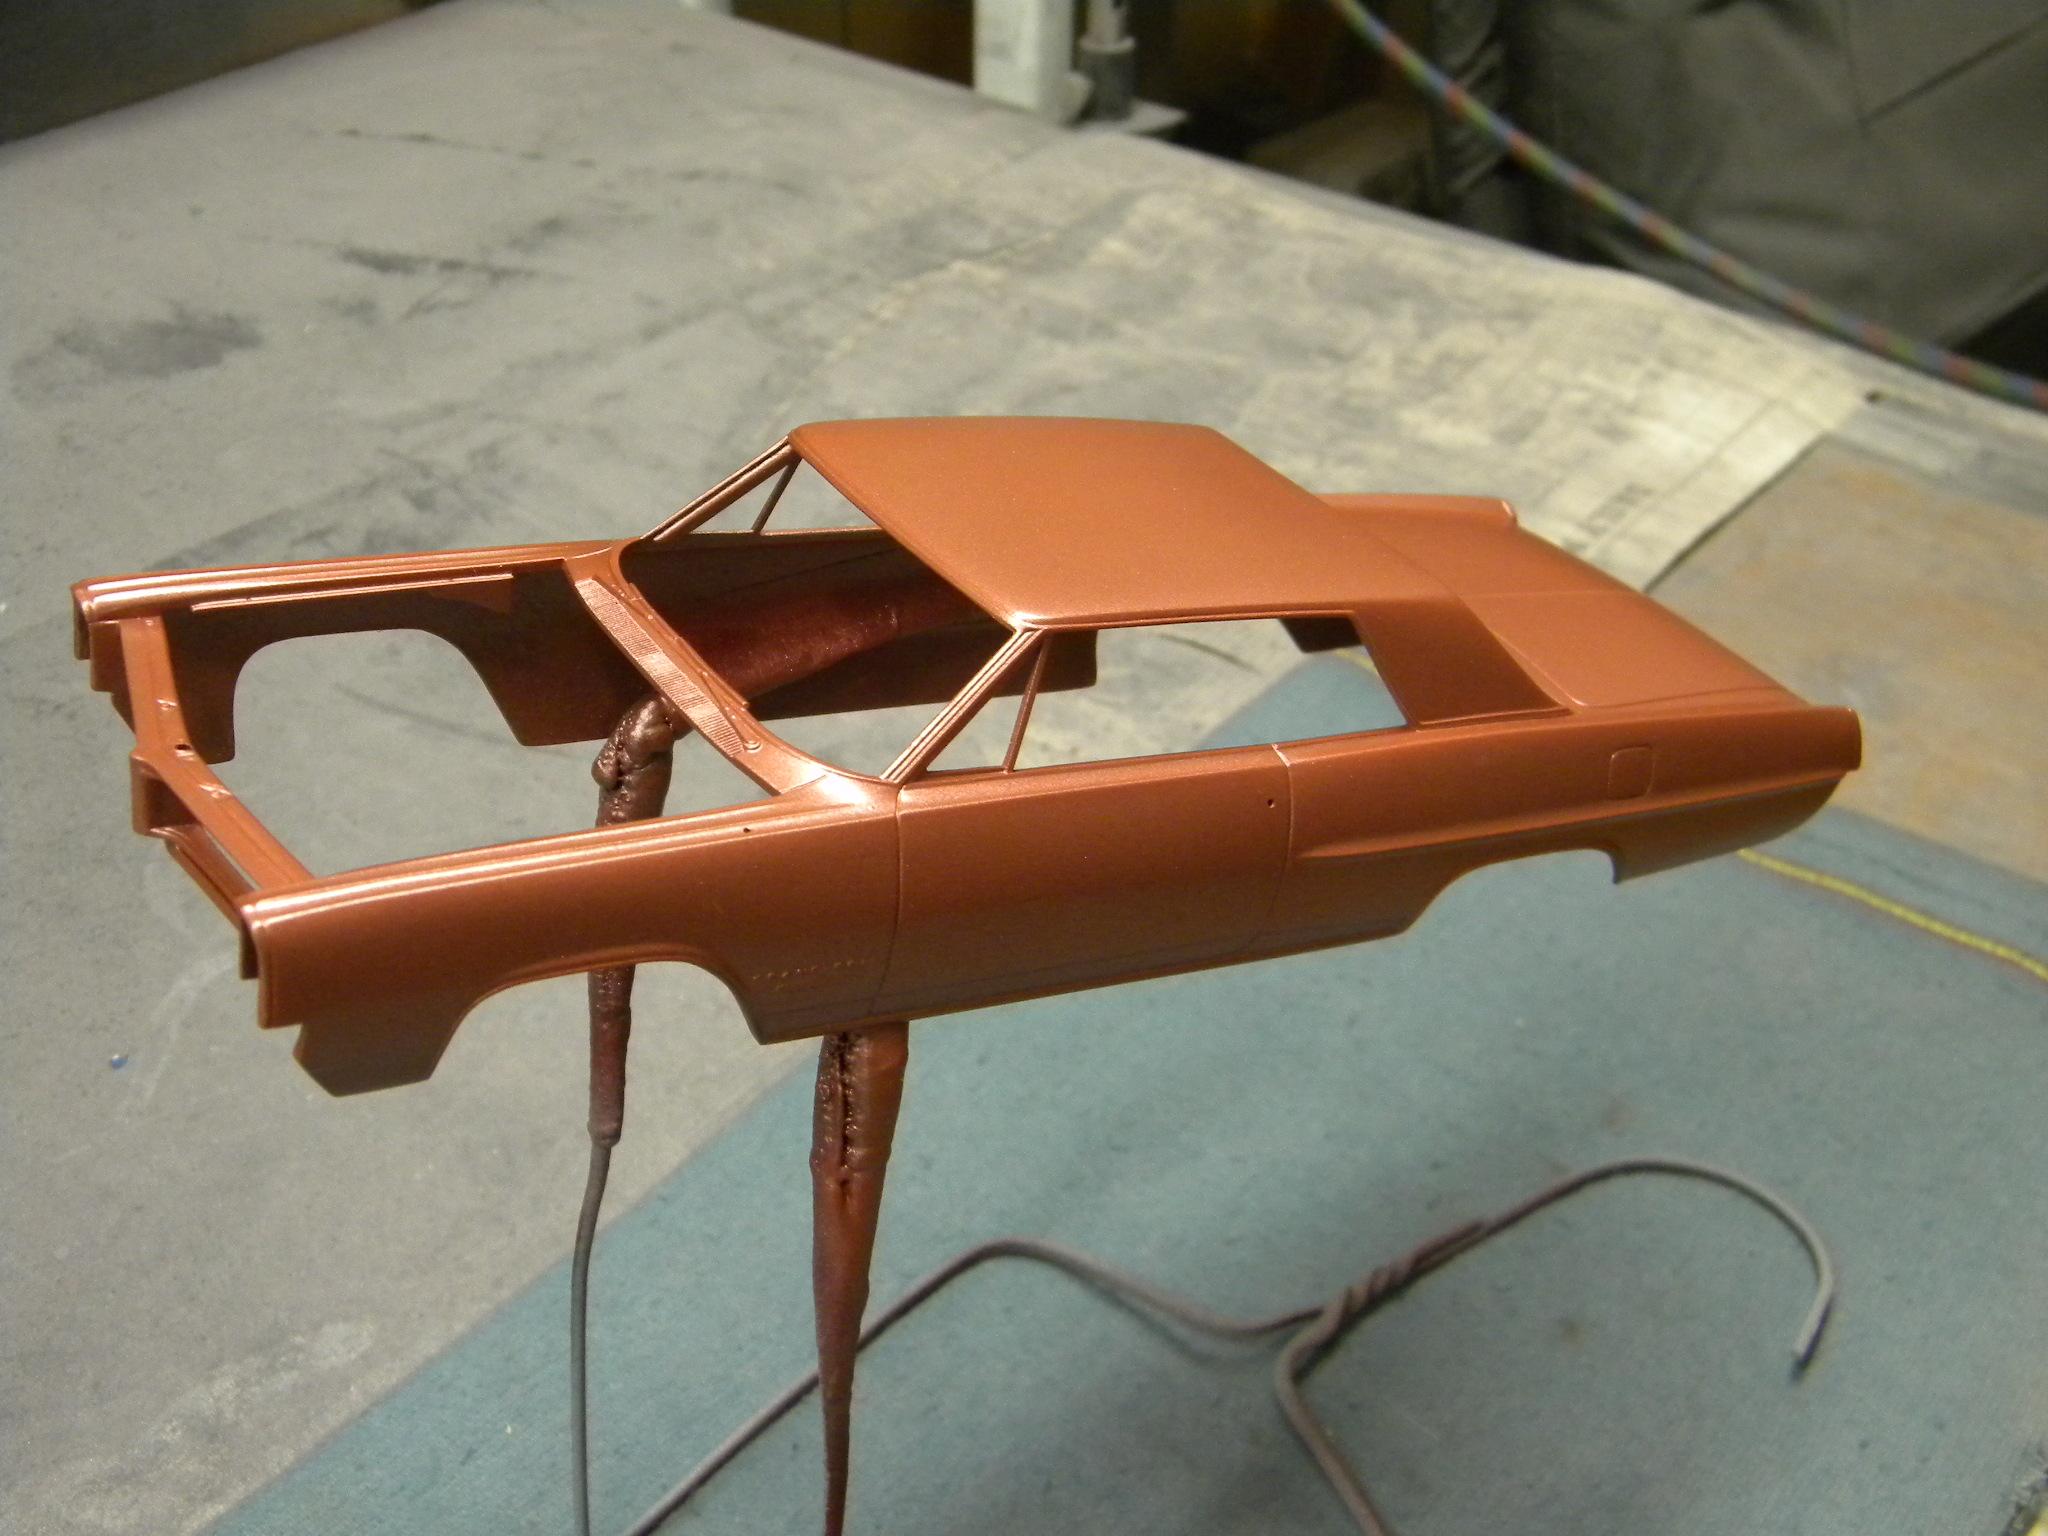
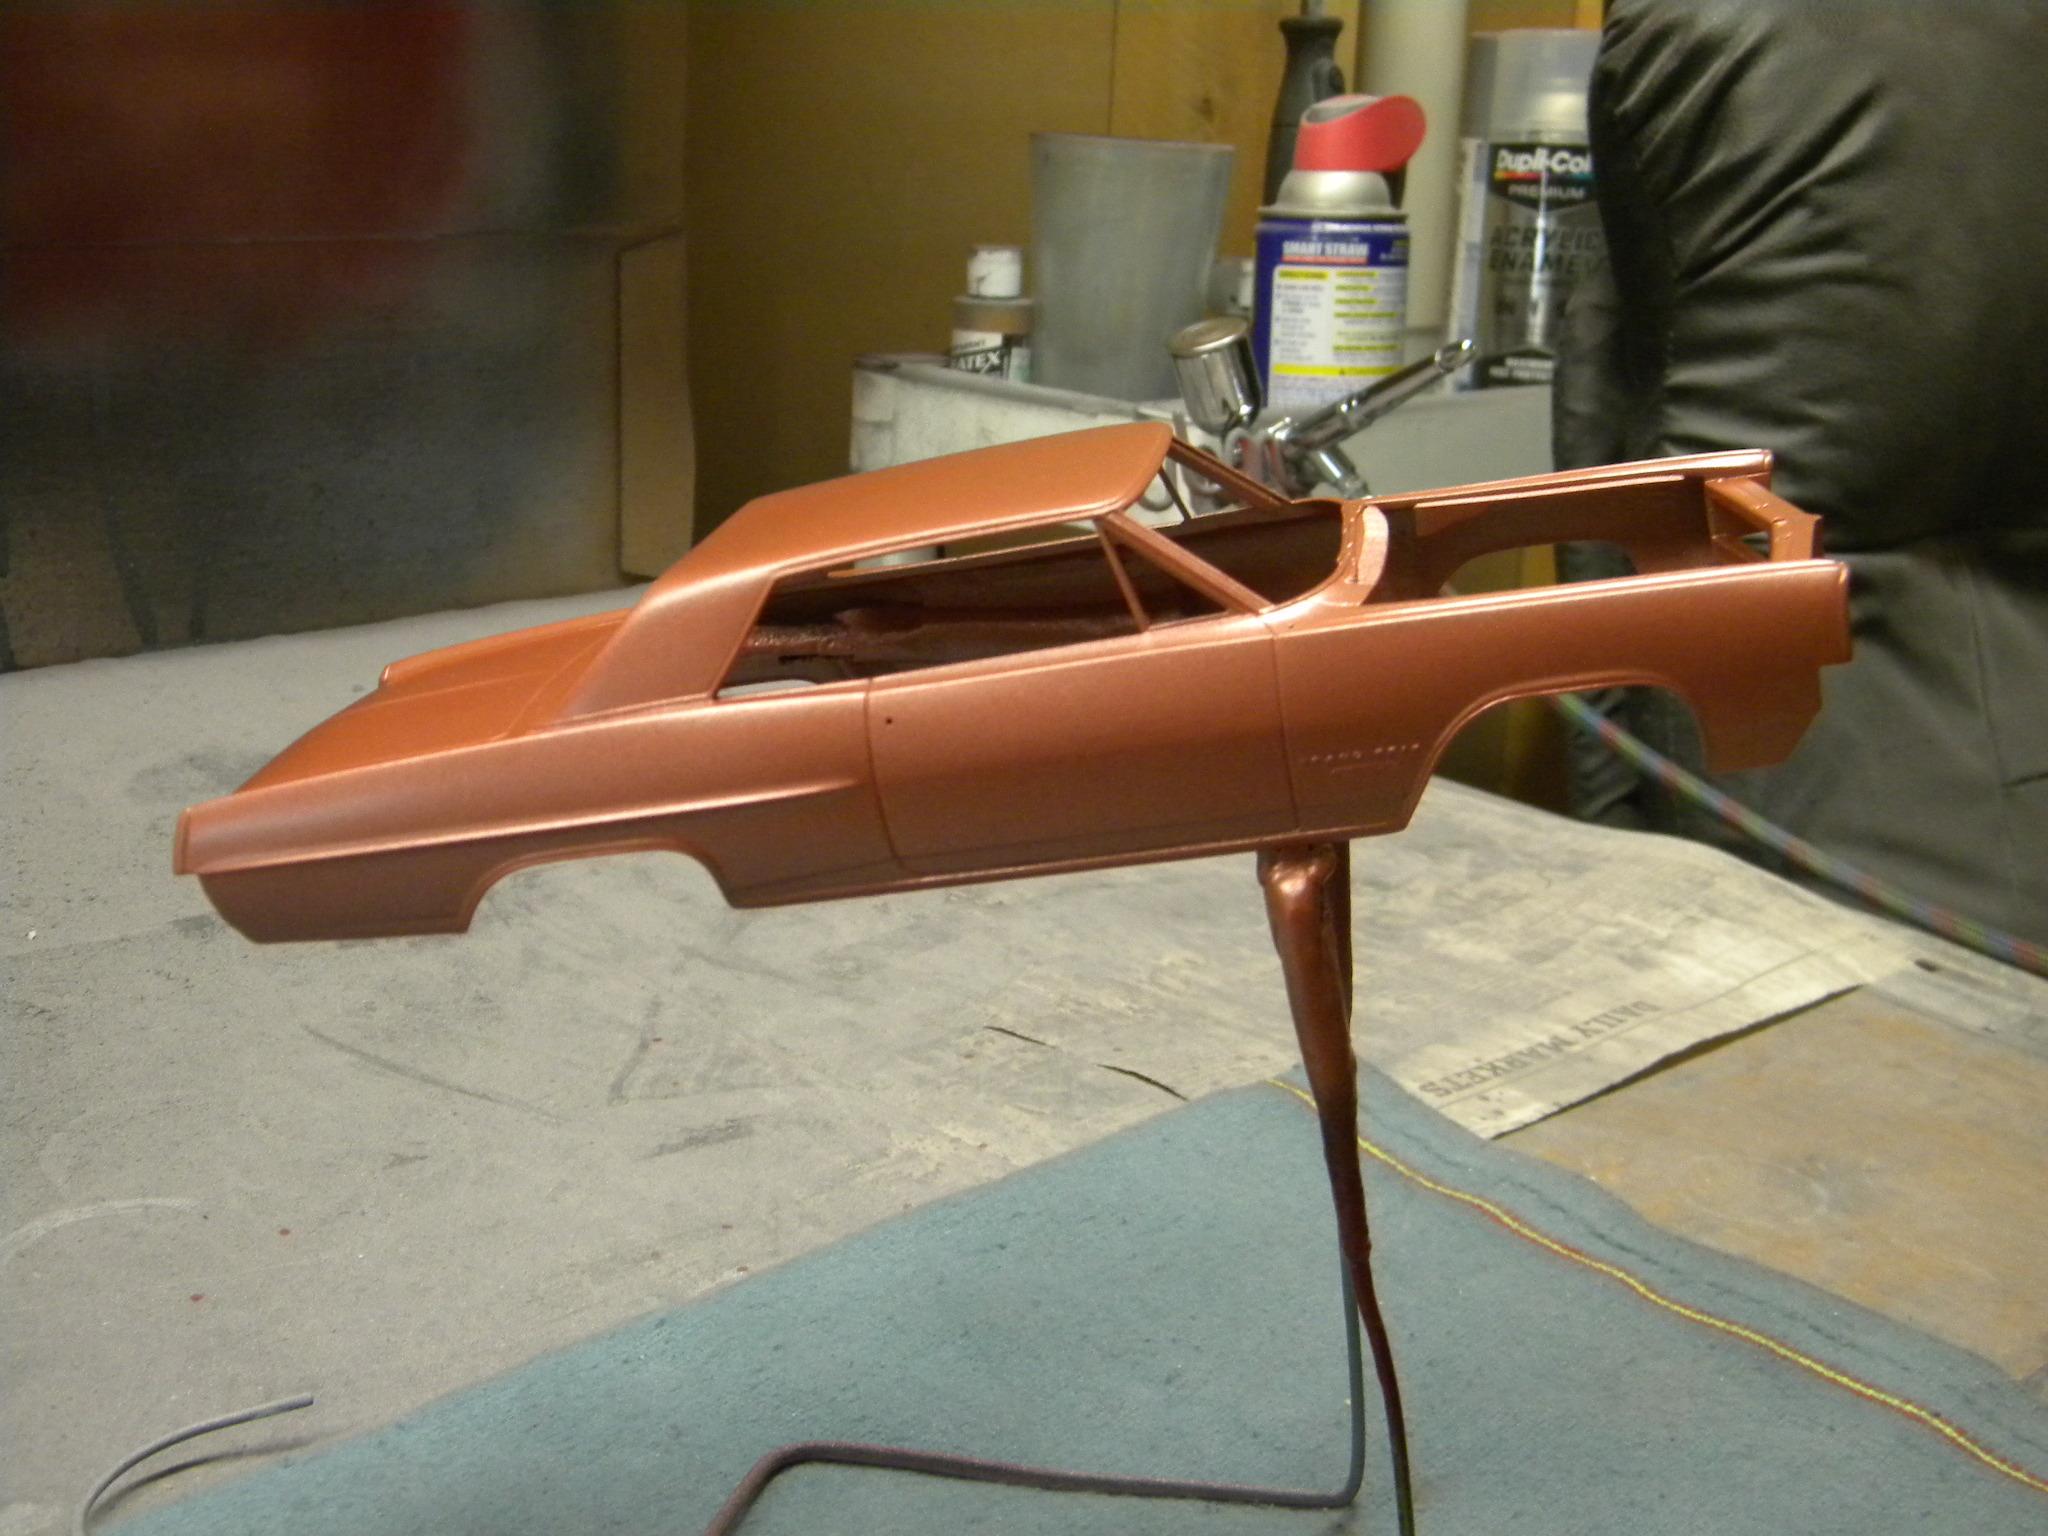
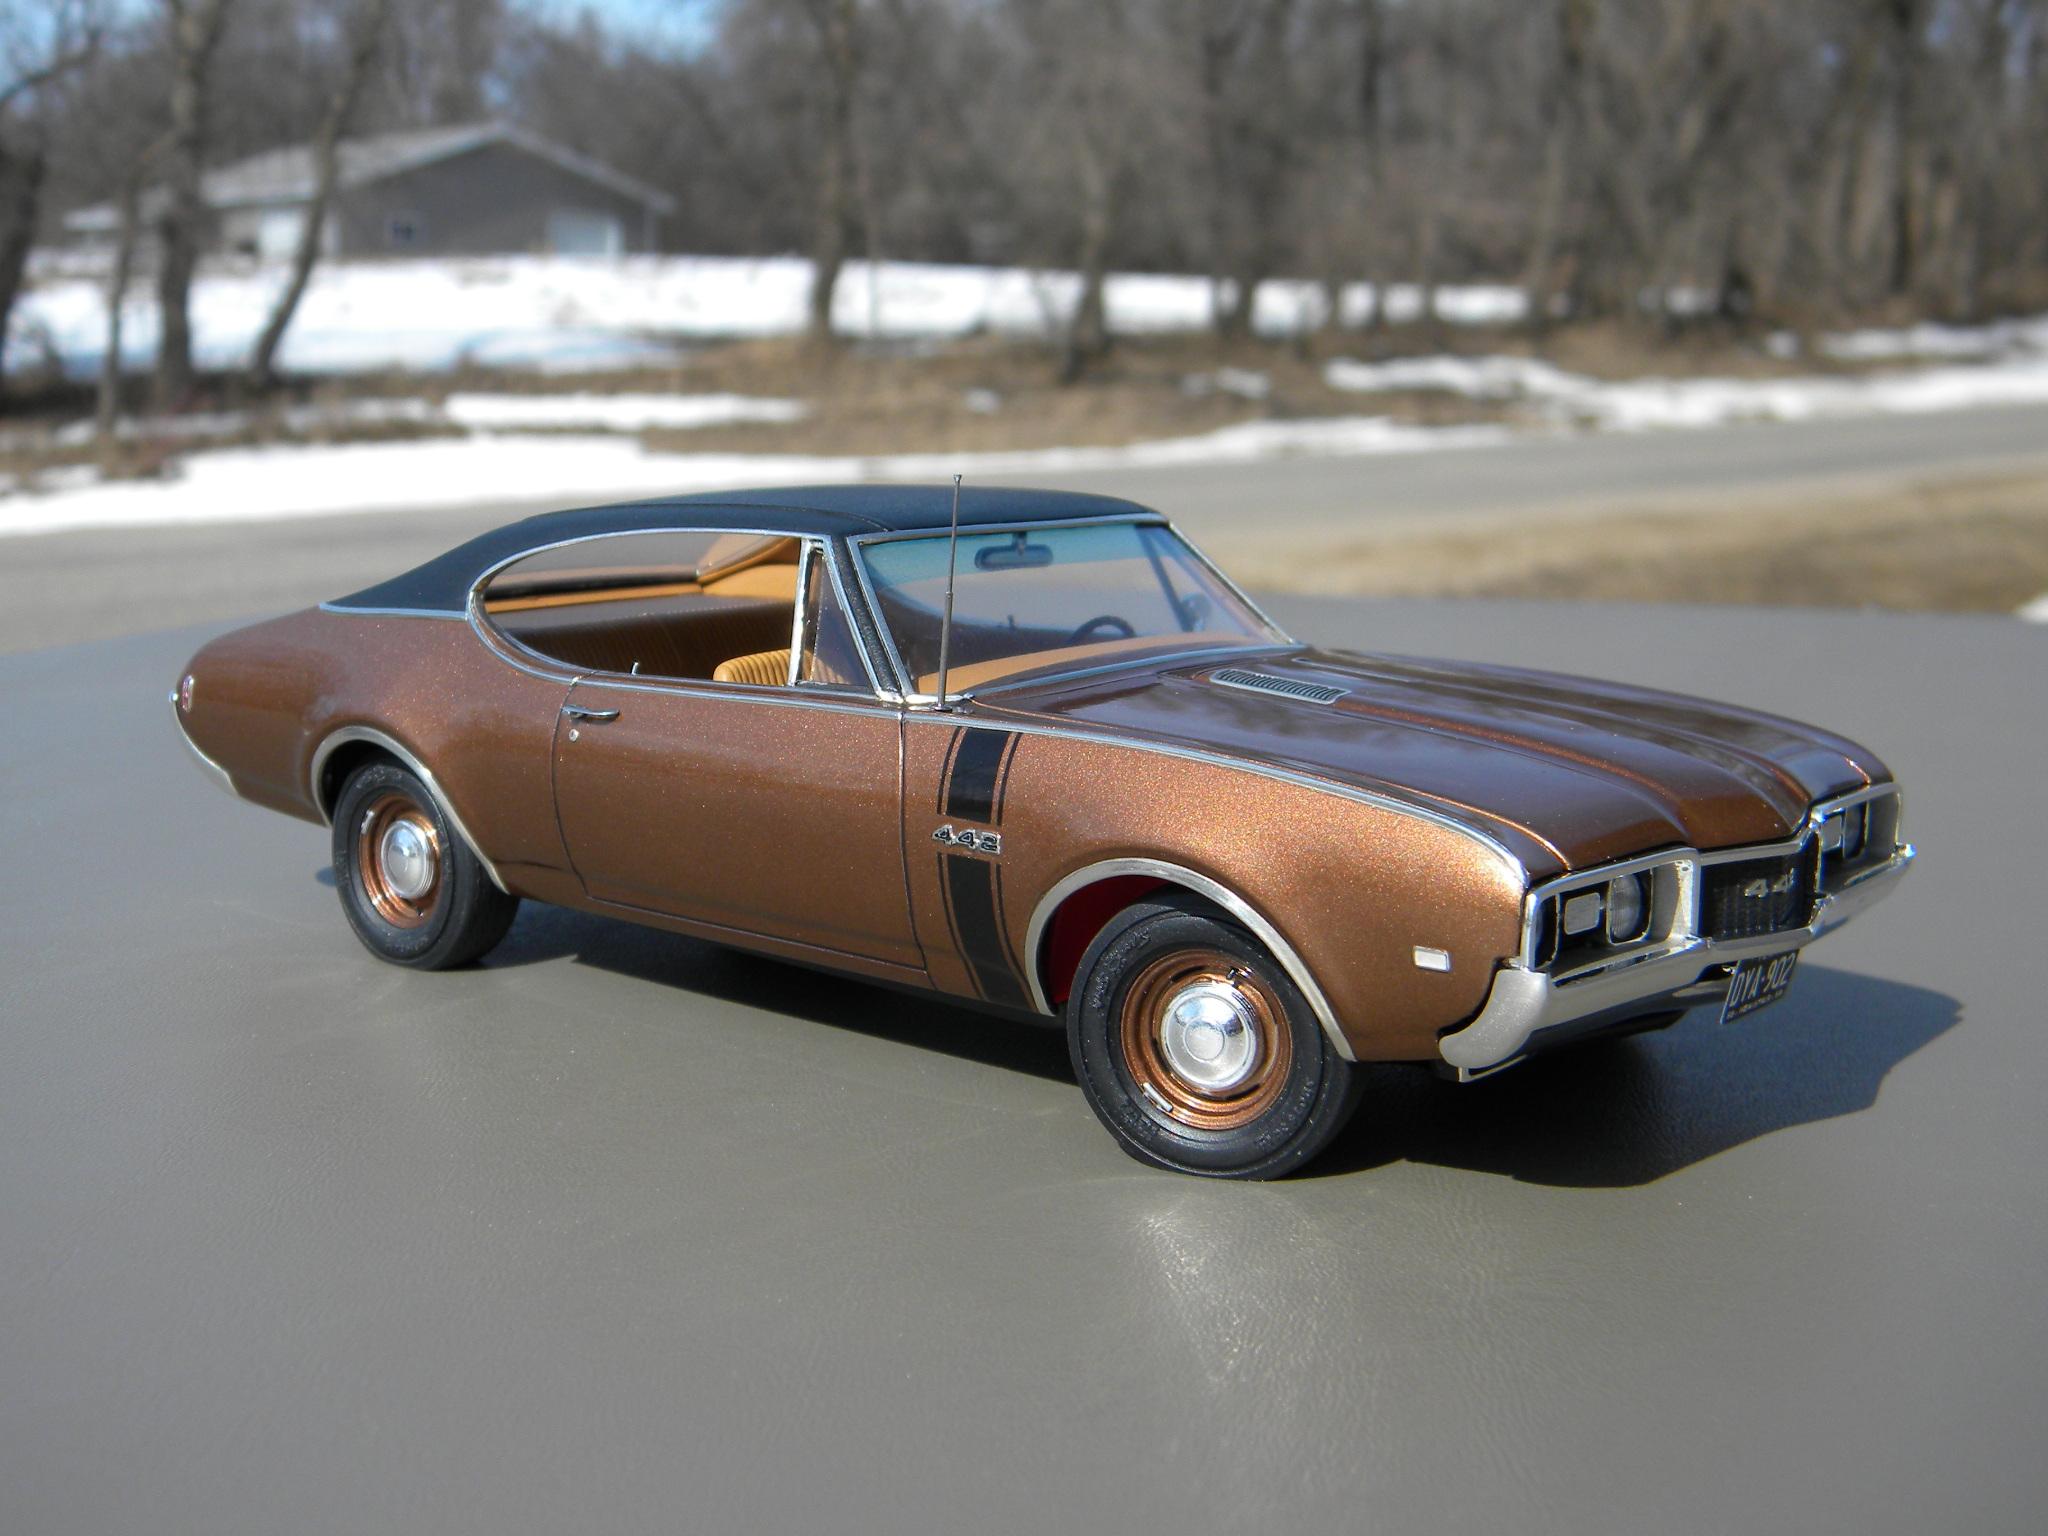
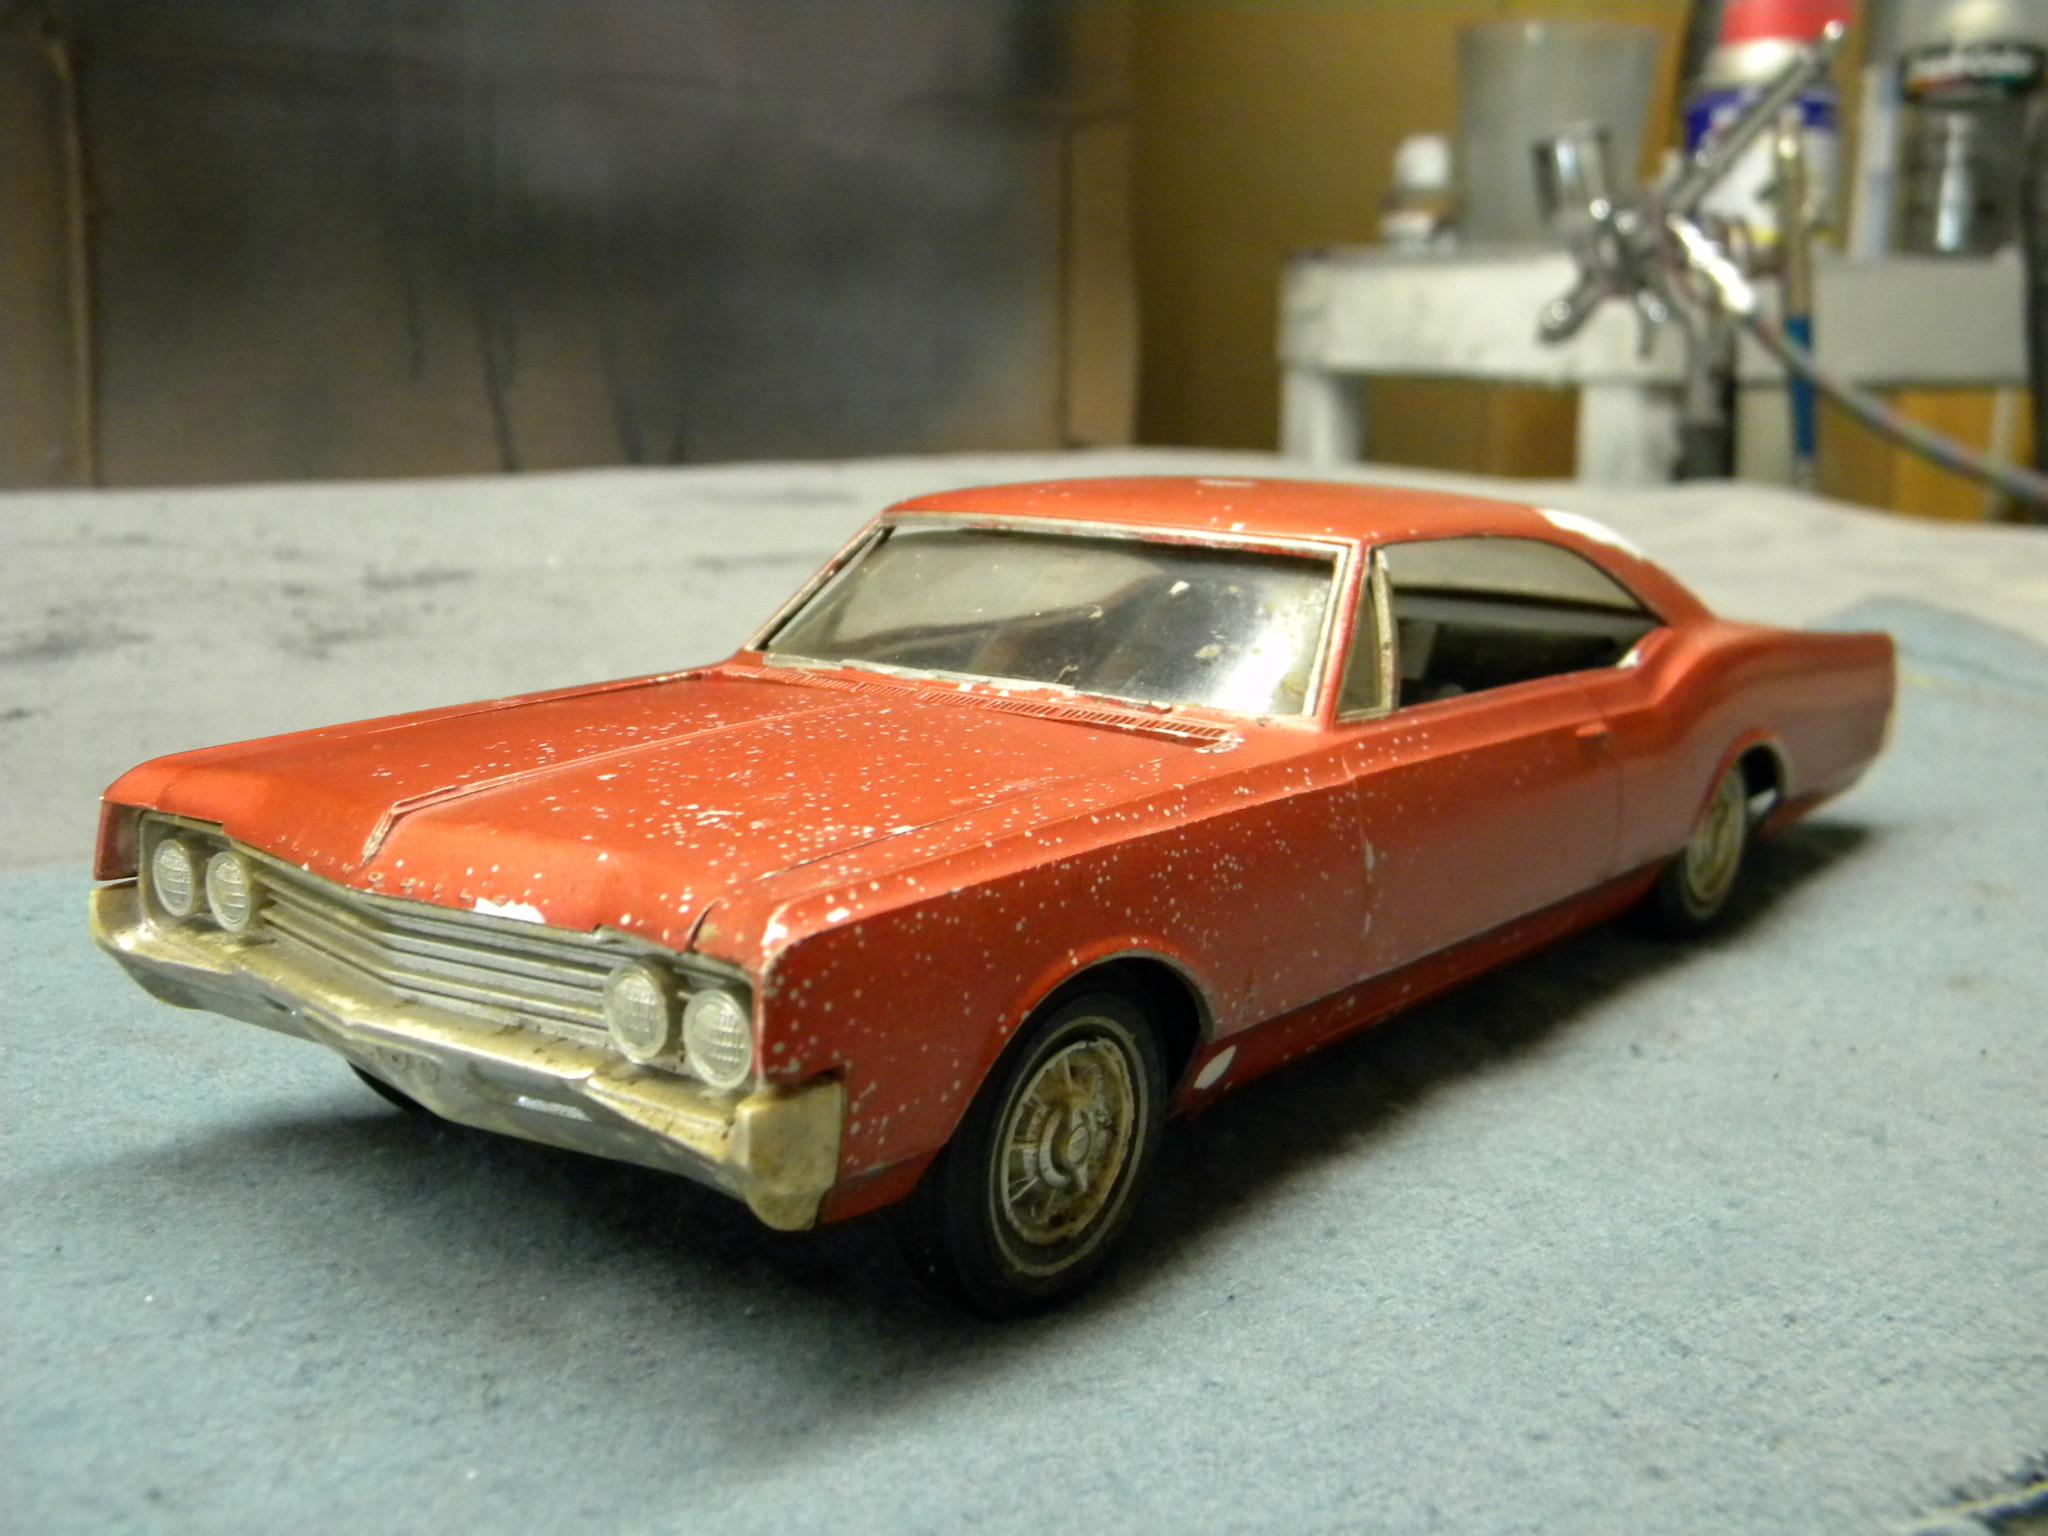
Painting has resumed. I thought that I would try using a darker base of Duplicolor garnet red to see if it would darken the finish a bit. Doesn't appear to have done much, but that's okay. I was perfectly happy with the color anyway. So, a couple of quick coats of dark red, followed by a couple of Sunfire Red is where I stand until my next order of Scale Finishes paint arrives. A couple more light coats should do the trick. With any luck I can avoid the paint issues that arose last time. Steve

-
I concur! My trade with Scott was as smooth as silk! Couldn't be happier!! Steve
-
Yeah, I wish that I would have snapped one up some time ago when Modelhaus was still in operation. But, as they say, "wish in one hand and poop in the other, and see which one fills up faster". Steve
-
I've thought about making some sort of background for photographing models, but I'm not worth a BLAH_BLAH_BLAH_BLAH taking photographs anyway. It's difficult for me to justify spending the time to make a back drop when I could be spending that time working on a build. Too many projects, not enough time. Like Tom, I use an area of my yard and a folding card table. Steve
-
 And this is the one that I finagled from you! Thanks a million Scott! After less than an hour in the pond. Steve
-
Perfect! I too have restored a '60 Buick hardtop and a '63 Pontiac hard top. The Buick silver and white with a red and white interior, the Pontiac black with a blue interior. Steve
-
What Did You Have for Dinner?
StevenGuthmiller replied to StevenGuthmiller's topic in The Off-Topic Lounge
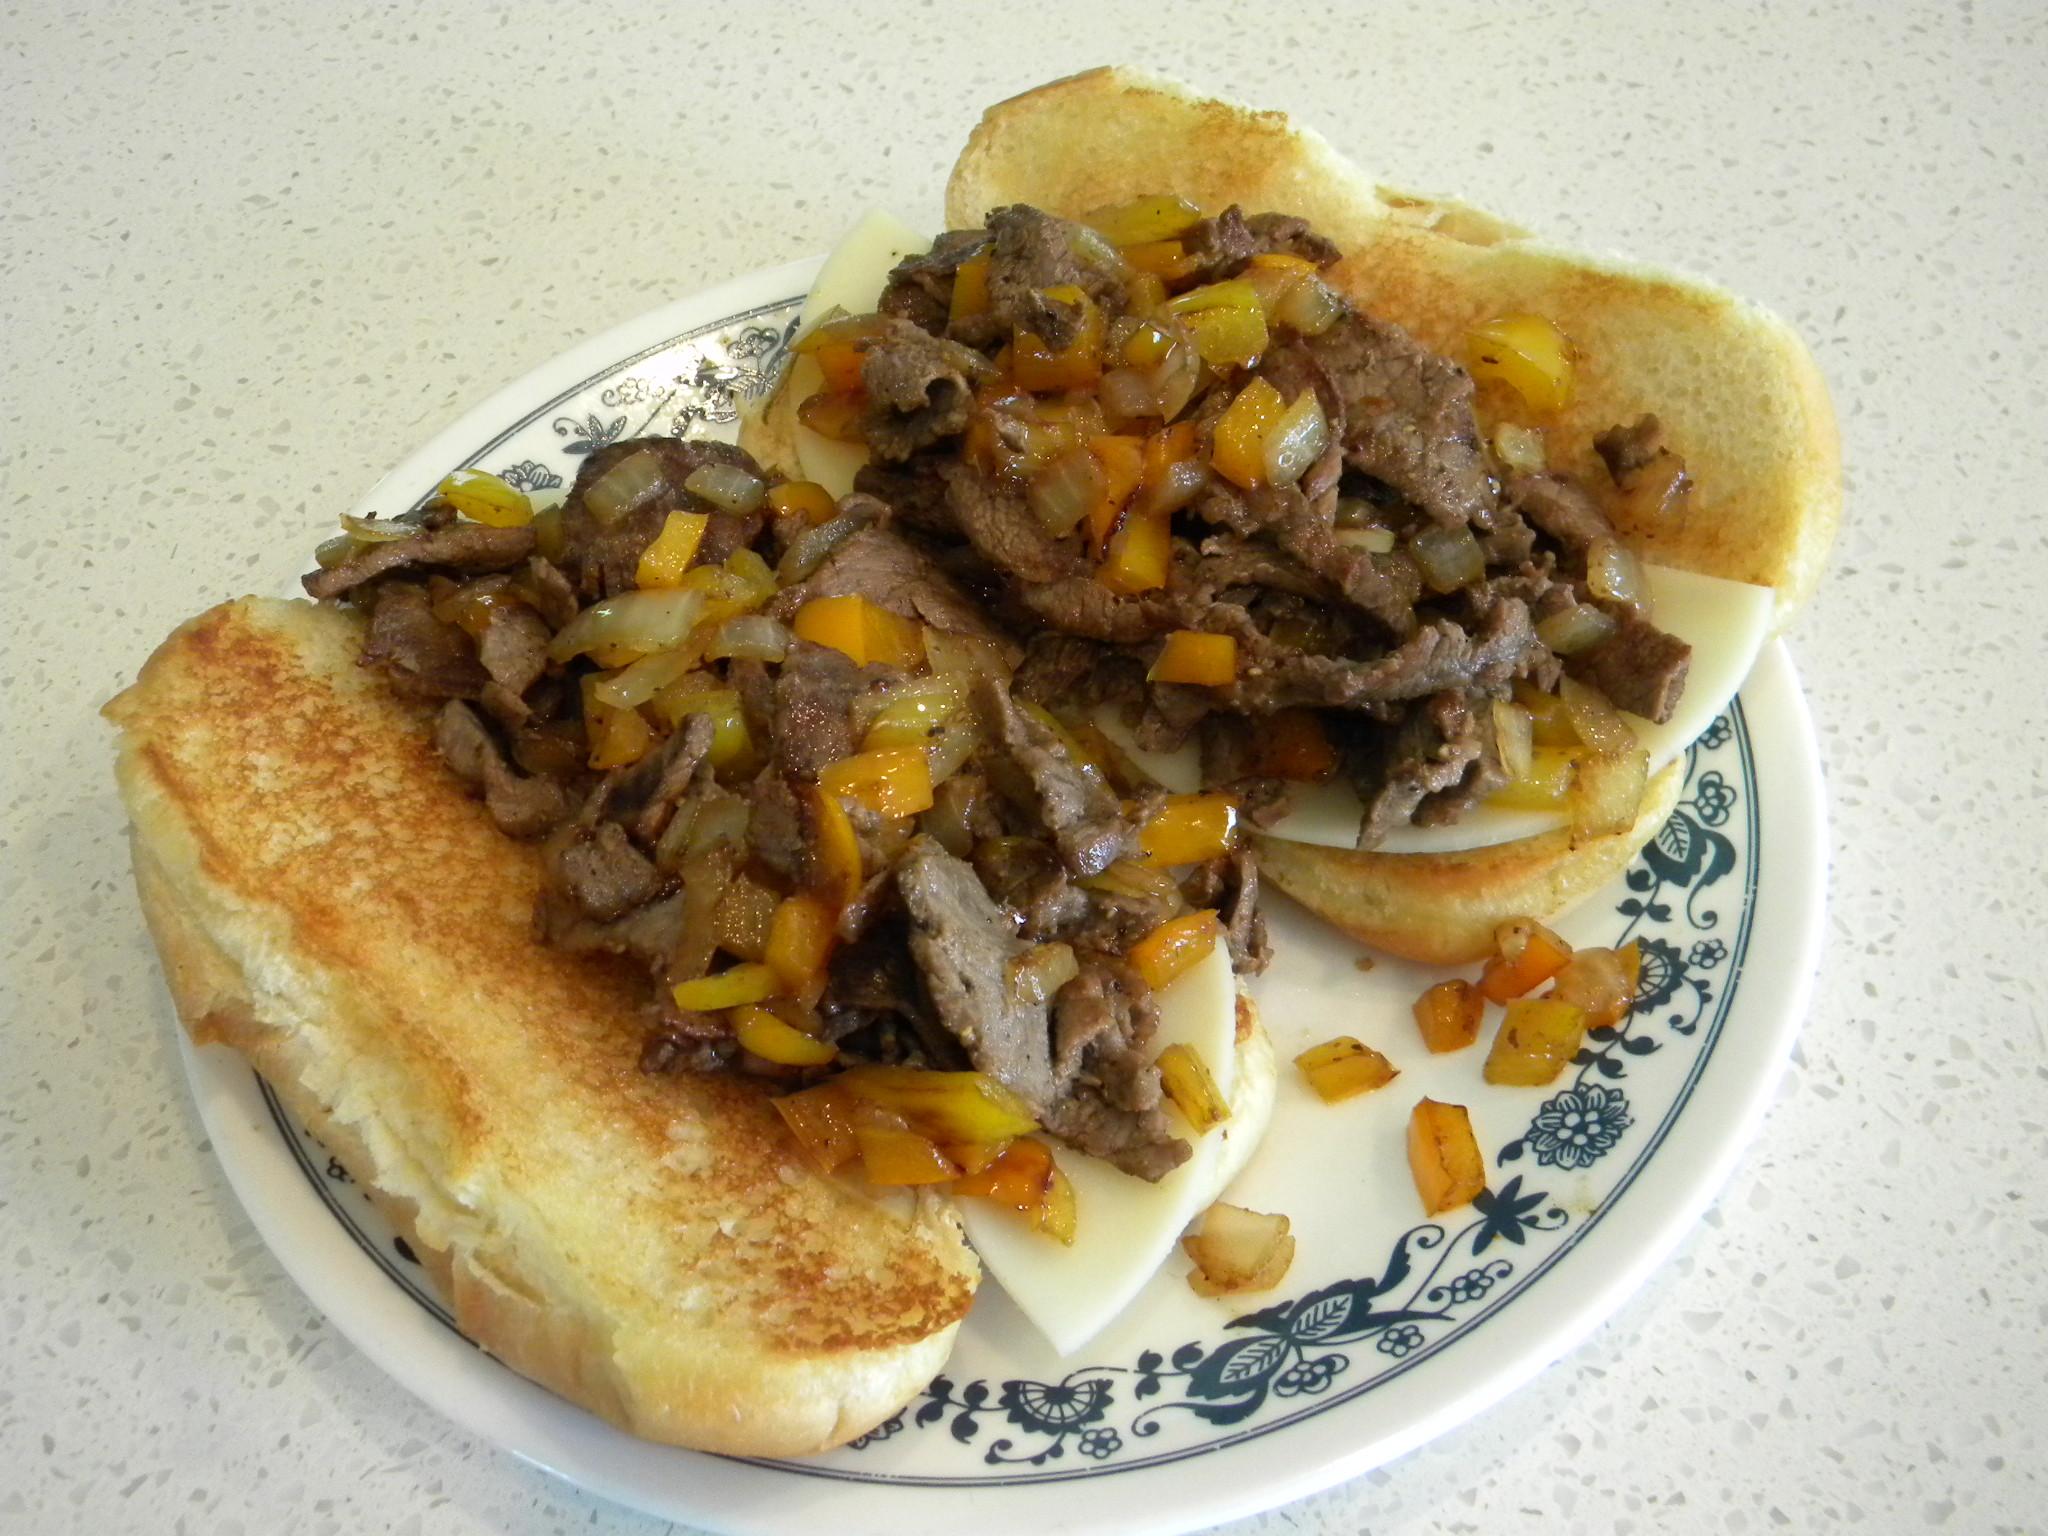
Thin sliced ribeye with bell peppers, onions and provolone cheese. Steve
-
Very nice stuff Rick! All three are becoming increasingly difficult to find. The '60 Buick in a hard top configuration is a particularly tough one to locate. Steve
-
Some of the very best available! Steve
-
Opinions wanted-future project
StevenGuthmiller replied to 64Comet404's topic in General Automotive Talk (Trucks and Cars)
Good idea. There are many pics of this car on line with the poverty caps. Another good option that might suite this car better than a spoked wheel is a set of chrome reverse wheels and moon caps. Steve -
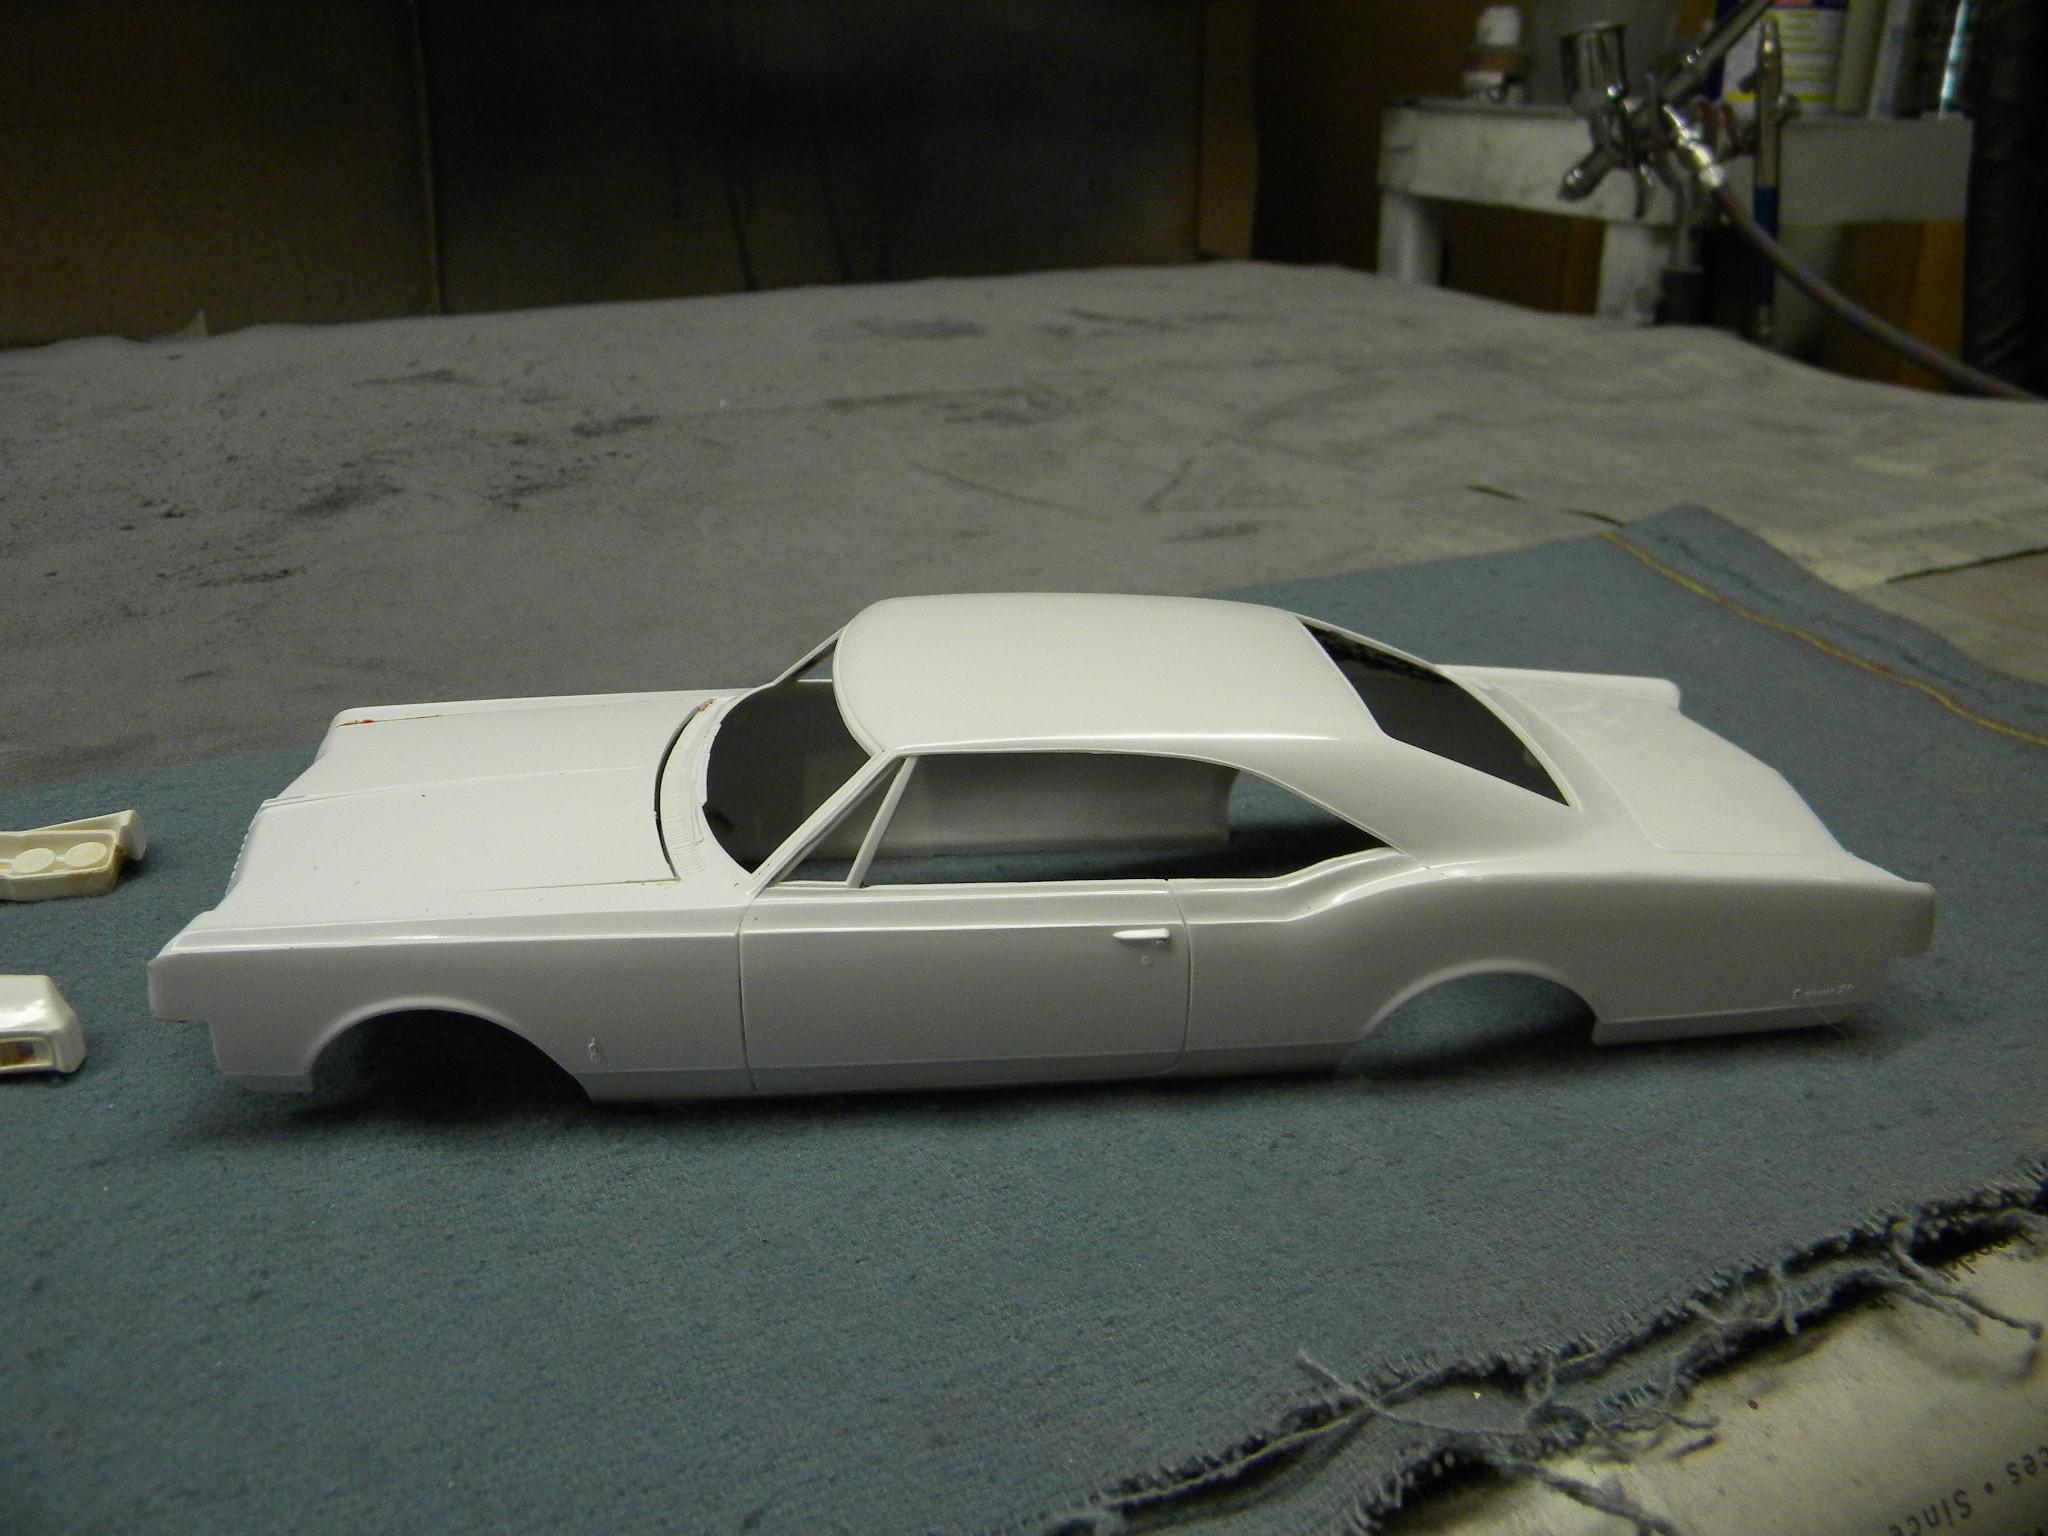
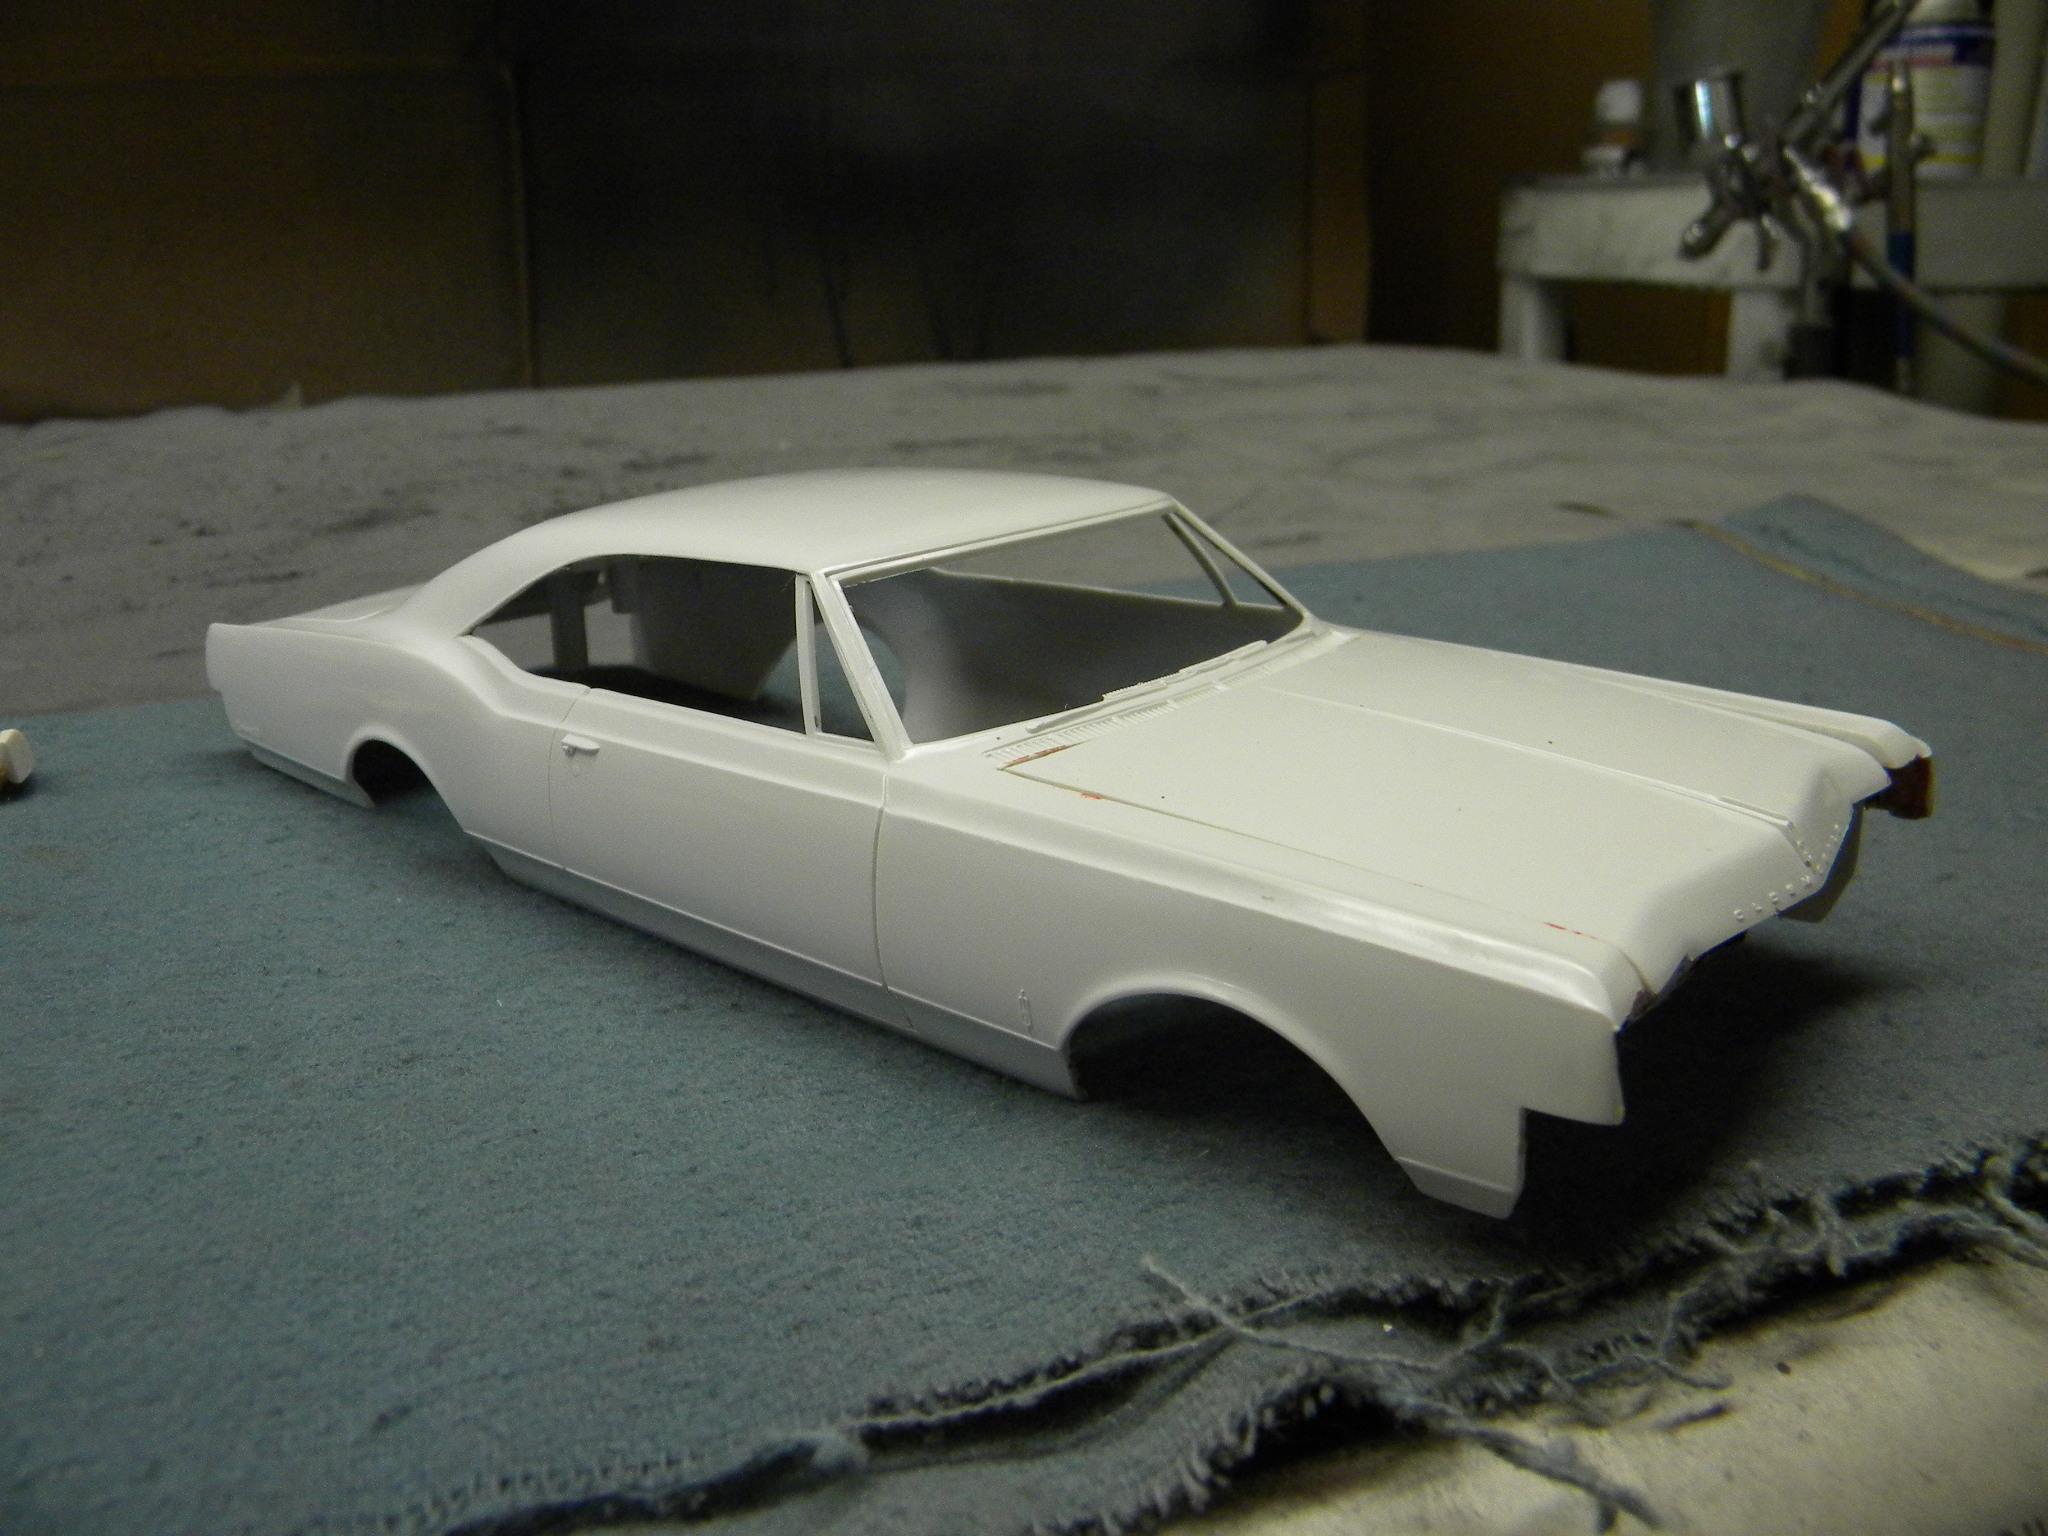
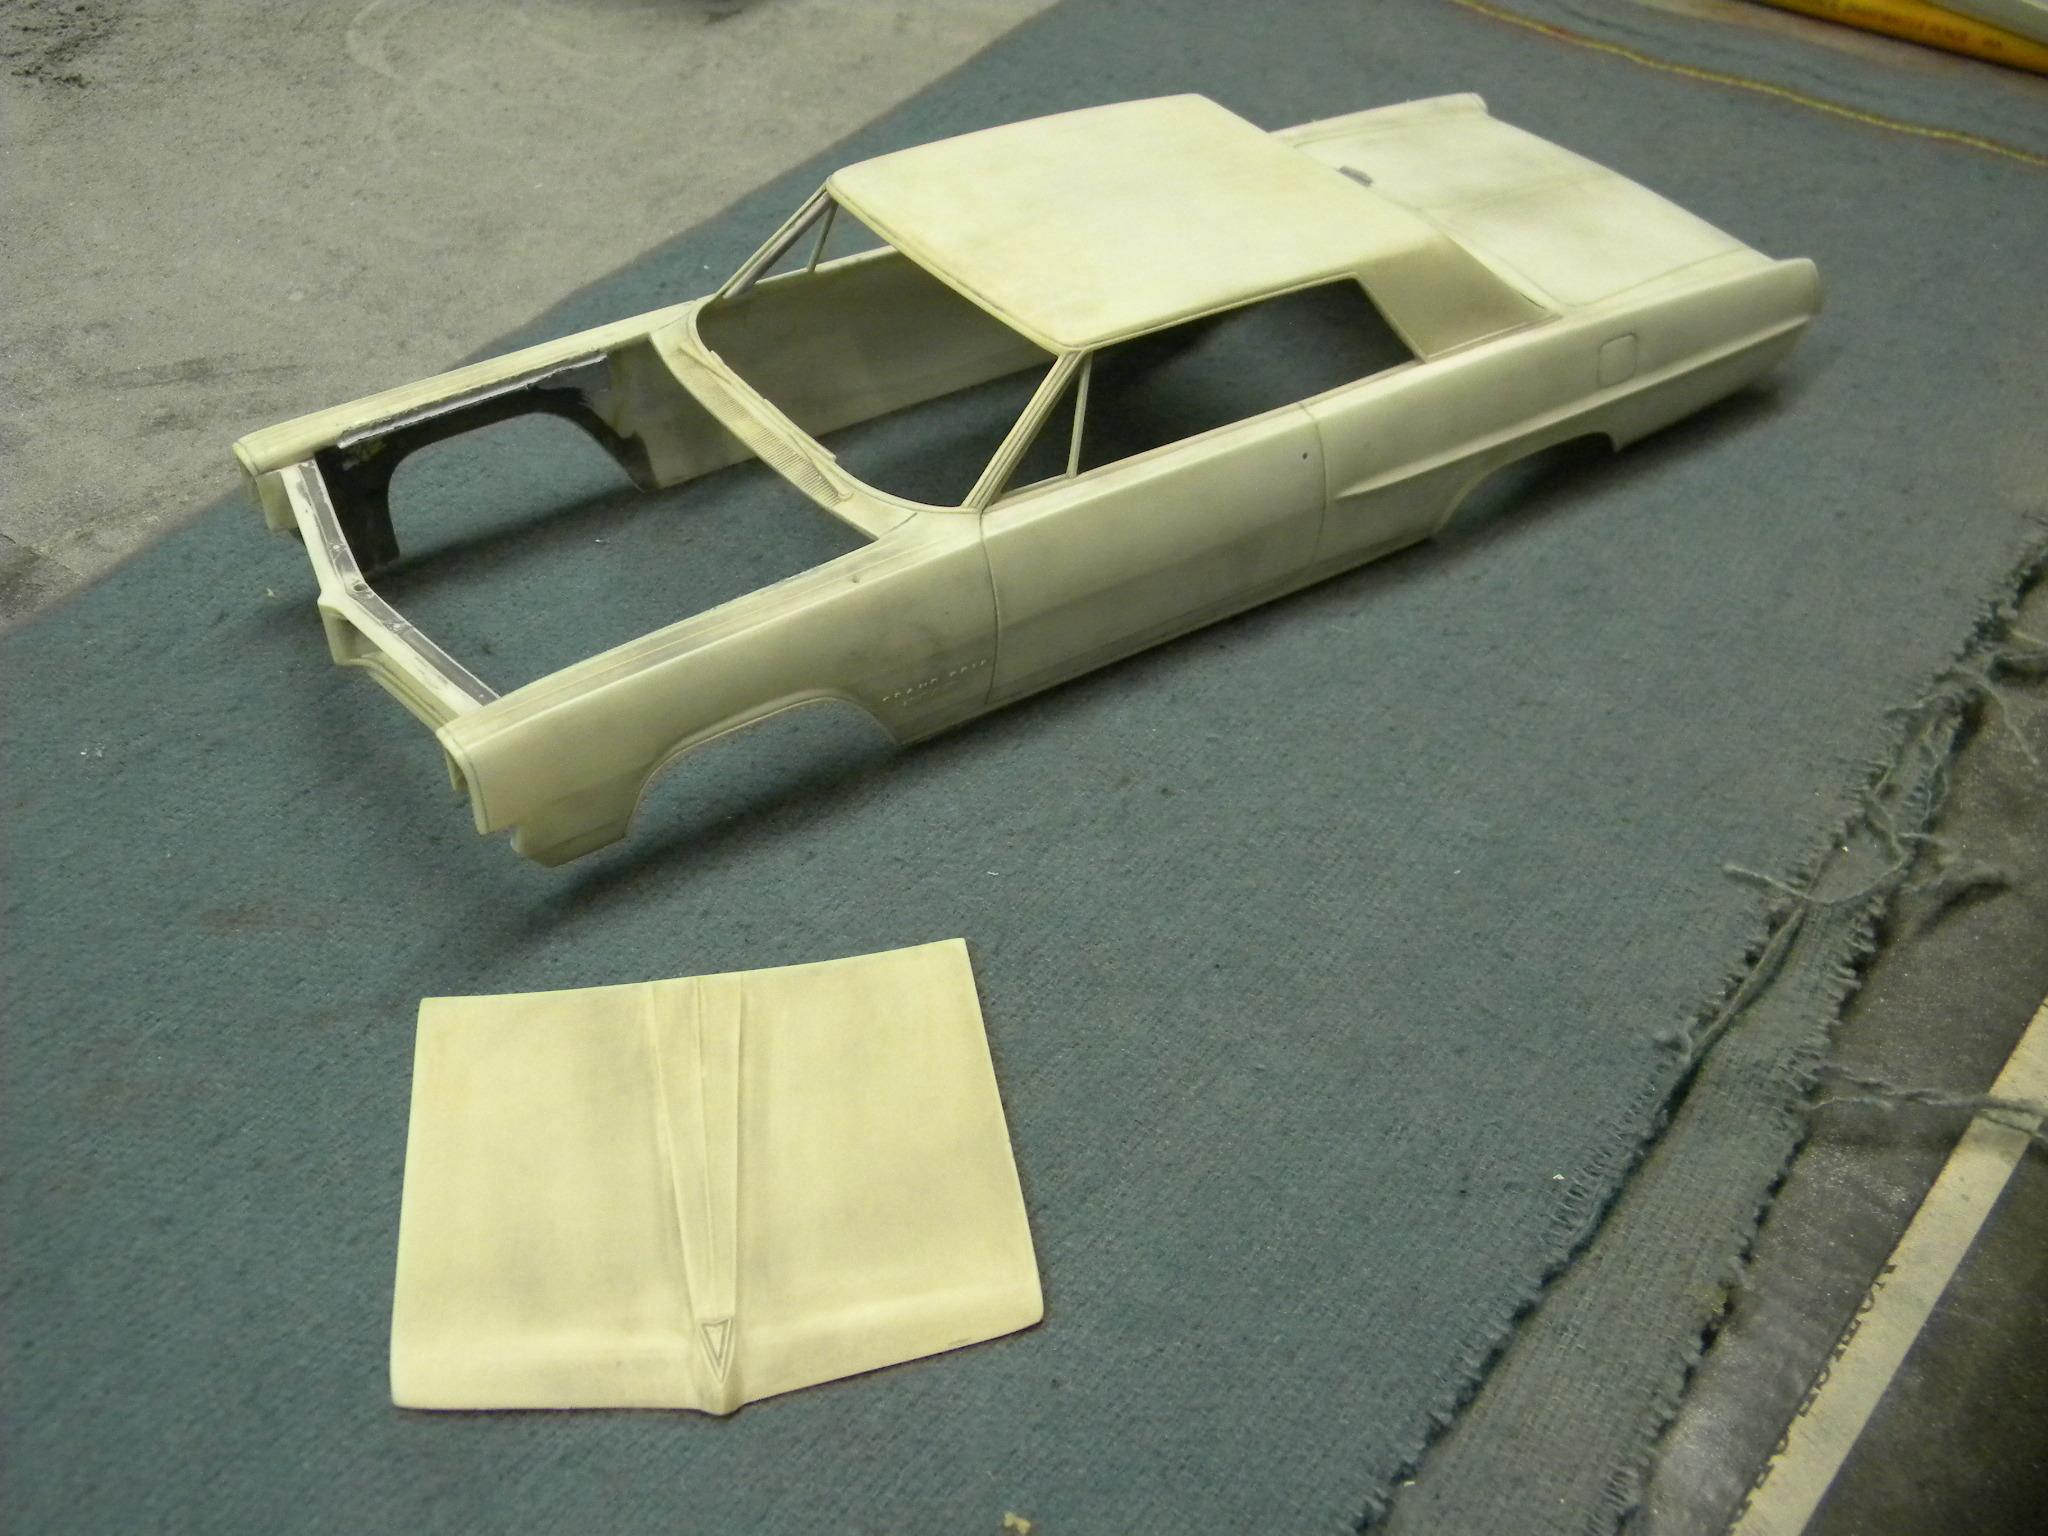
Out of the pond. A little filler sanding and it will be ready for attempt #2. Steve
-
Nice work Carl! The paint looks great! Steve
-
Opinions wanted-future project
StevenGuthmiller replied to 64Comet404's topic in General Automotive Talk (Trucks and Cars)
Or here's another interesting option. These came on a built 1963 Dodge Polara. Not correct for that car, but they are a pretty good looking hub cap. I believe they are 1961 Dodge caps. Steve
-
Opinions wanted-future project
StevenGuthmiller replied to 64Comet404's topic in General Automotive Talk (Trucks and Cars)
That looks pretty good! Seriously, I think nearly any "stockish" looking wheel might look pretty good. I have a set of the custom wheels from the AMT '62 Ford that I had re-plated a few years ago. Even these might give it a custom look without making it look like you're trying too hard. Steve
-
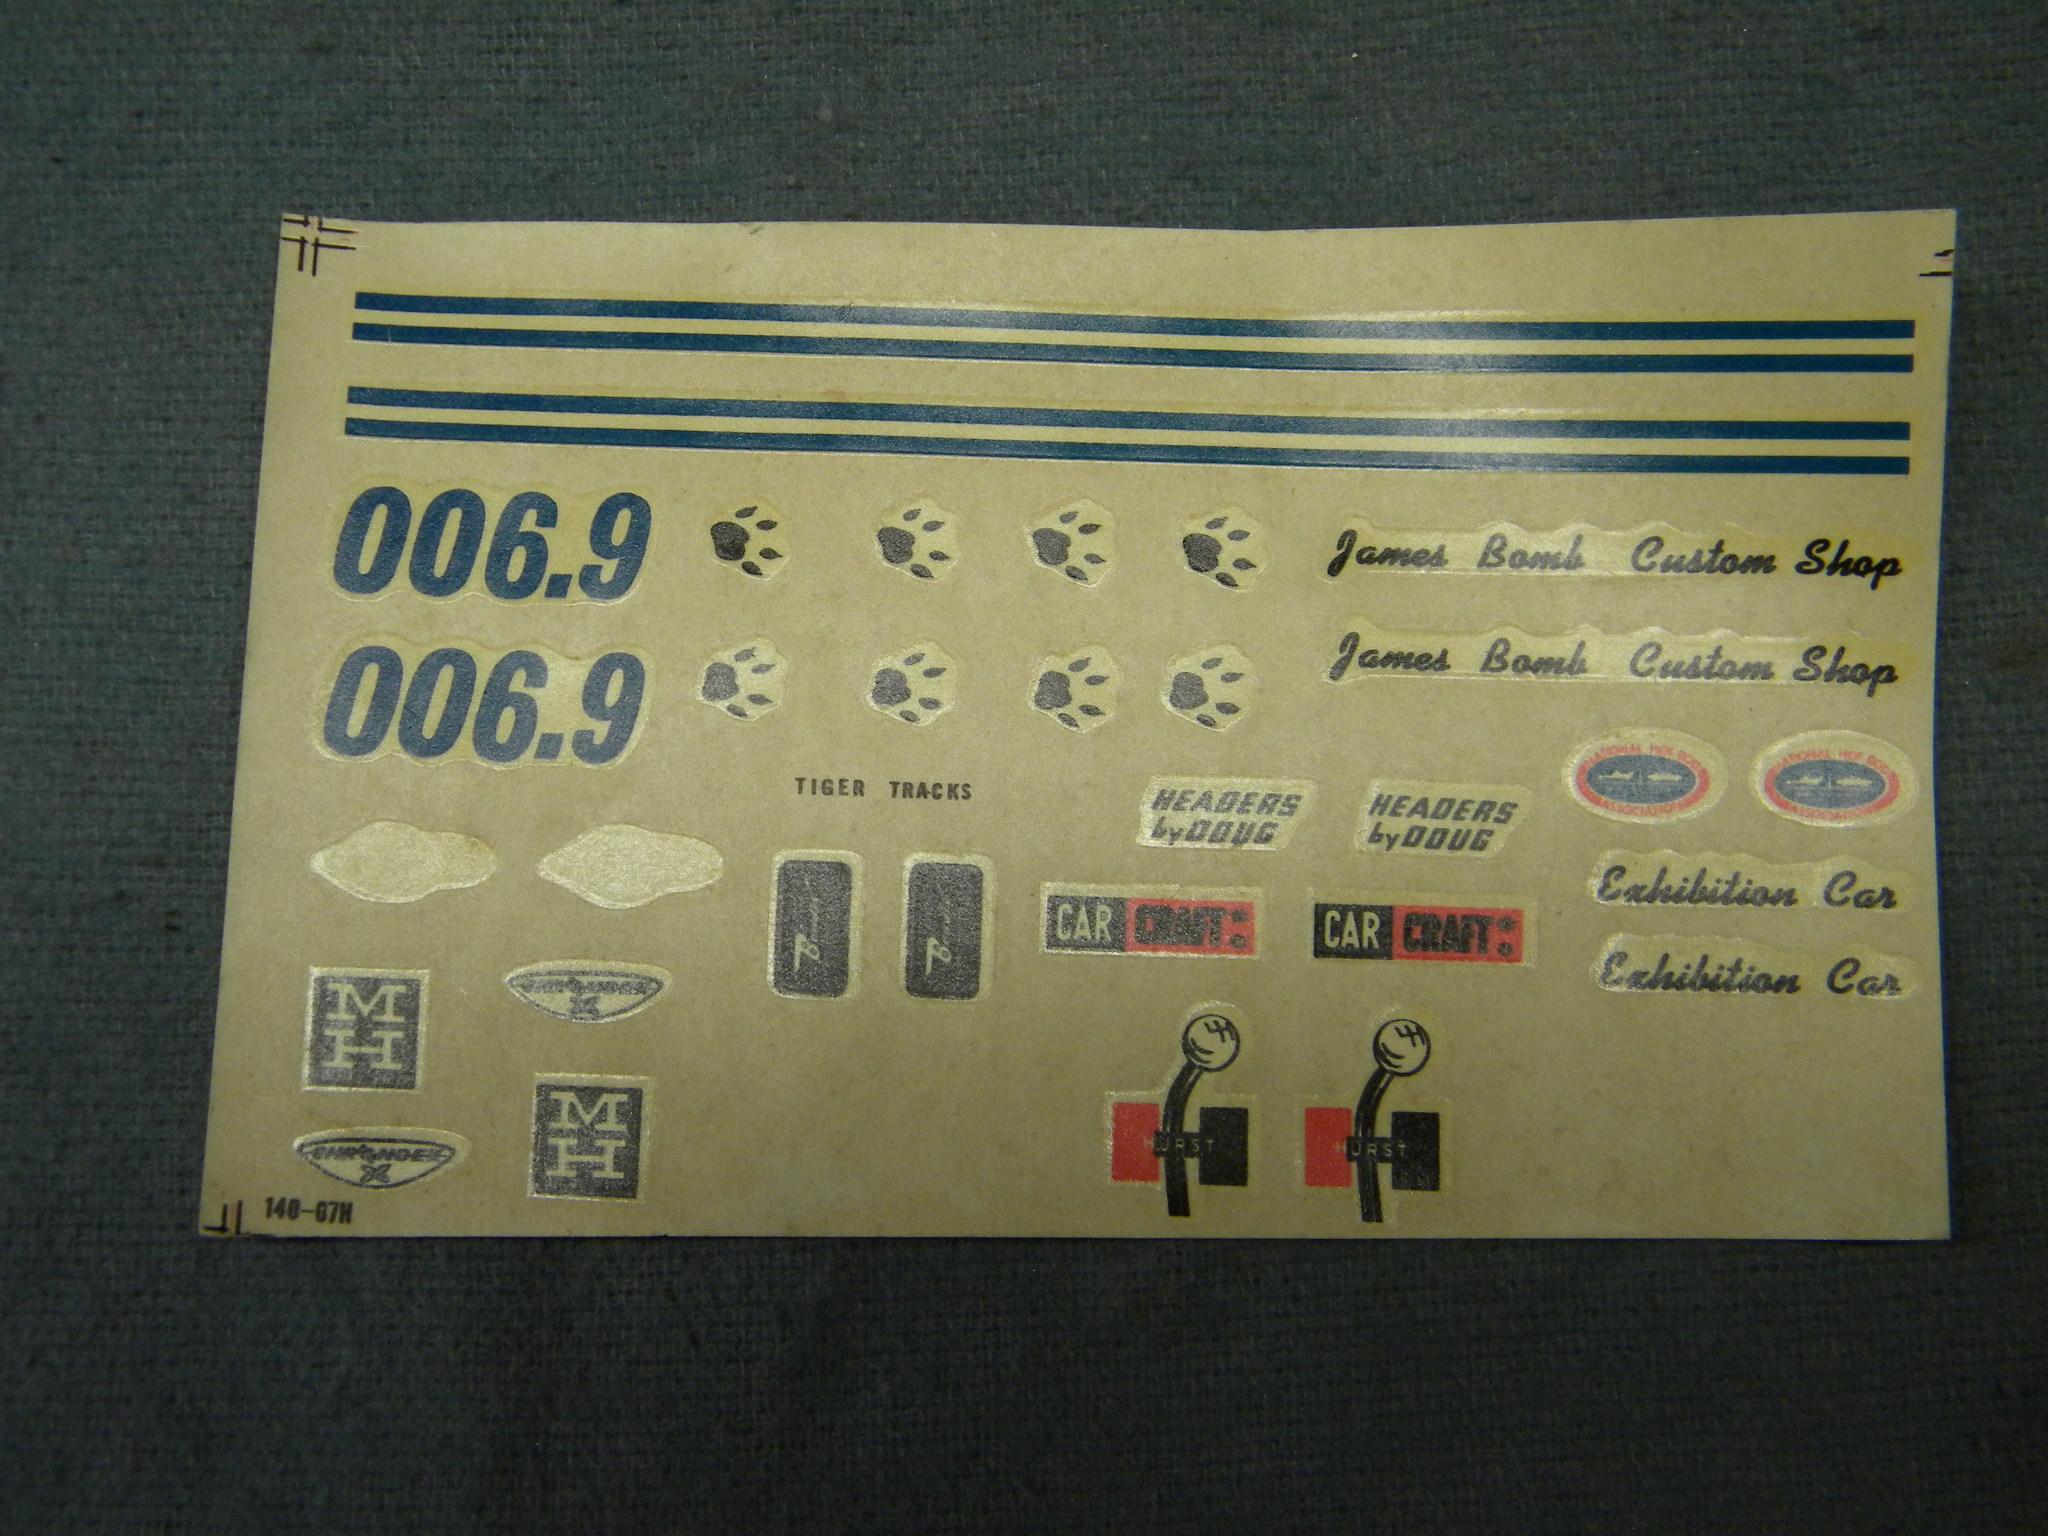
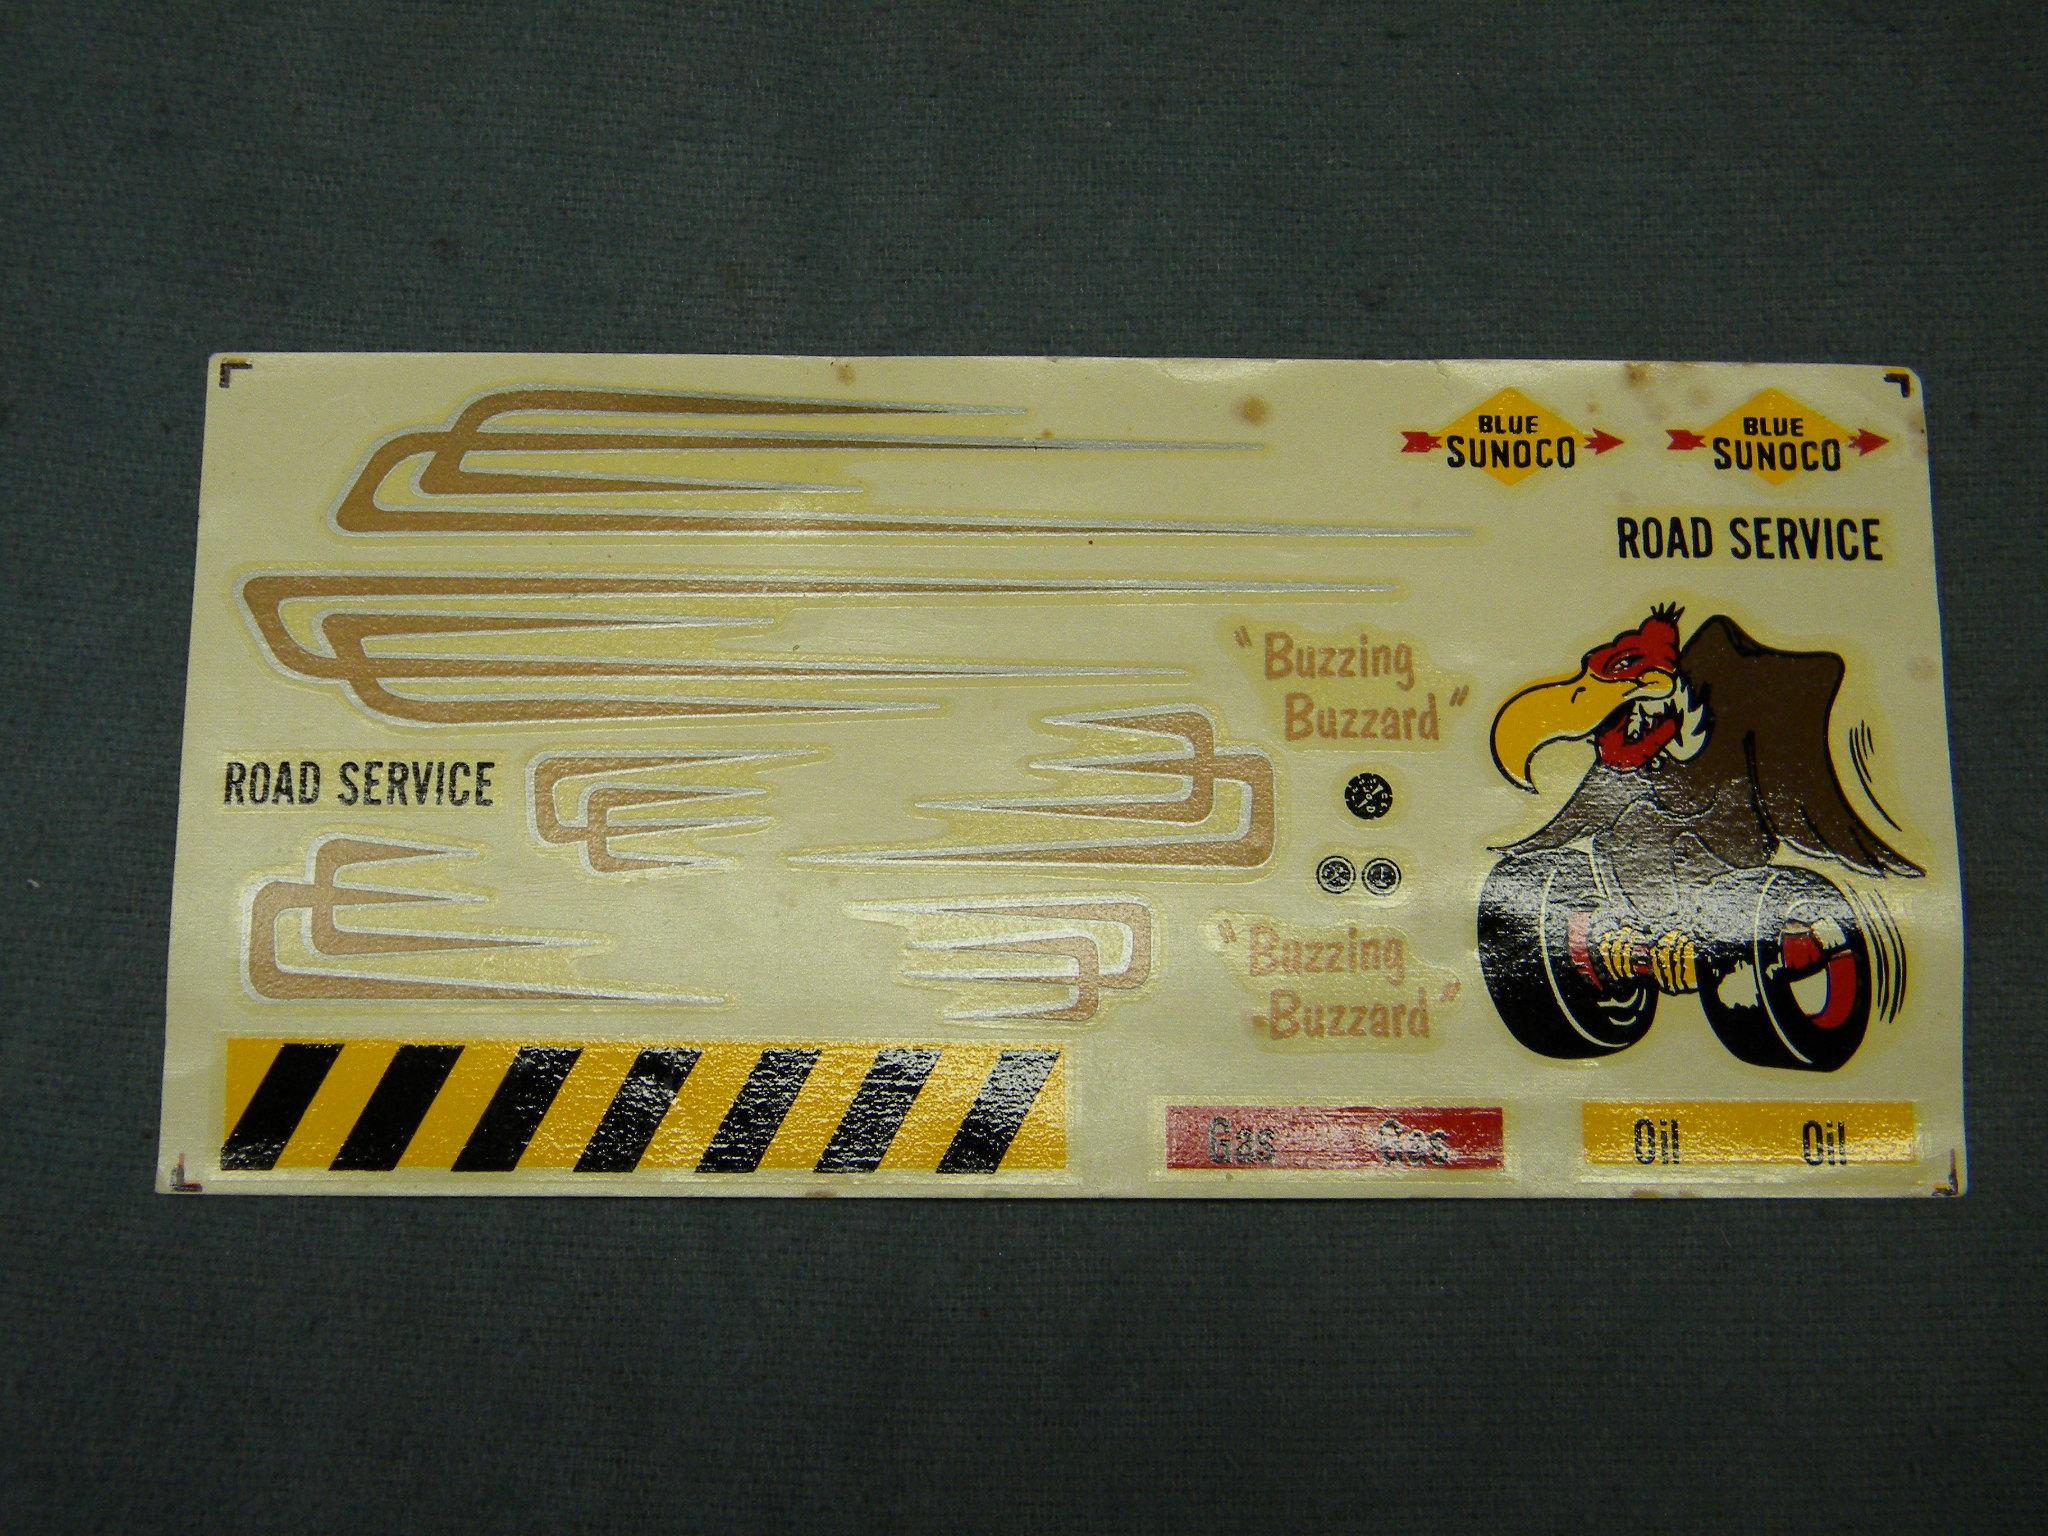
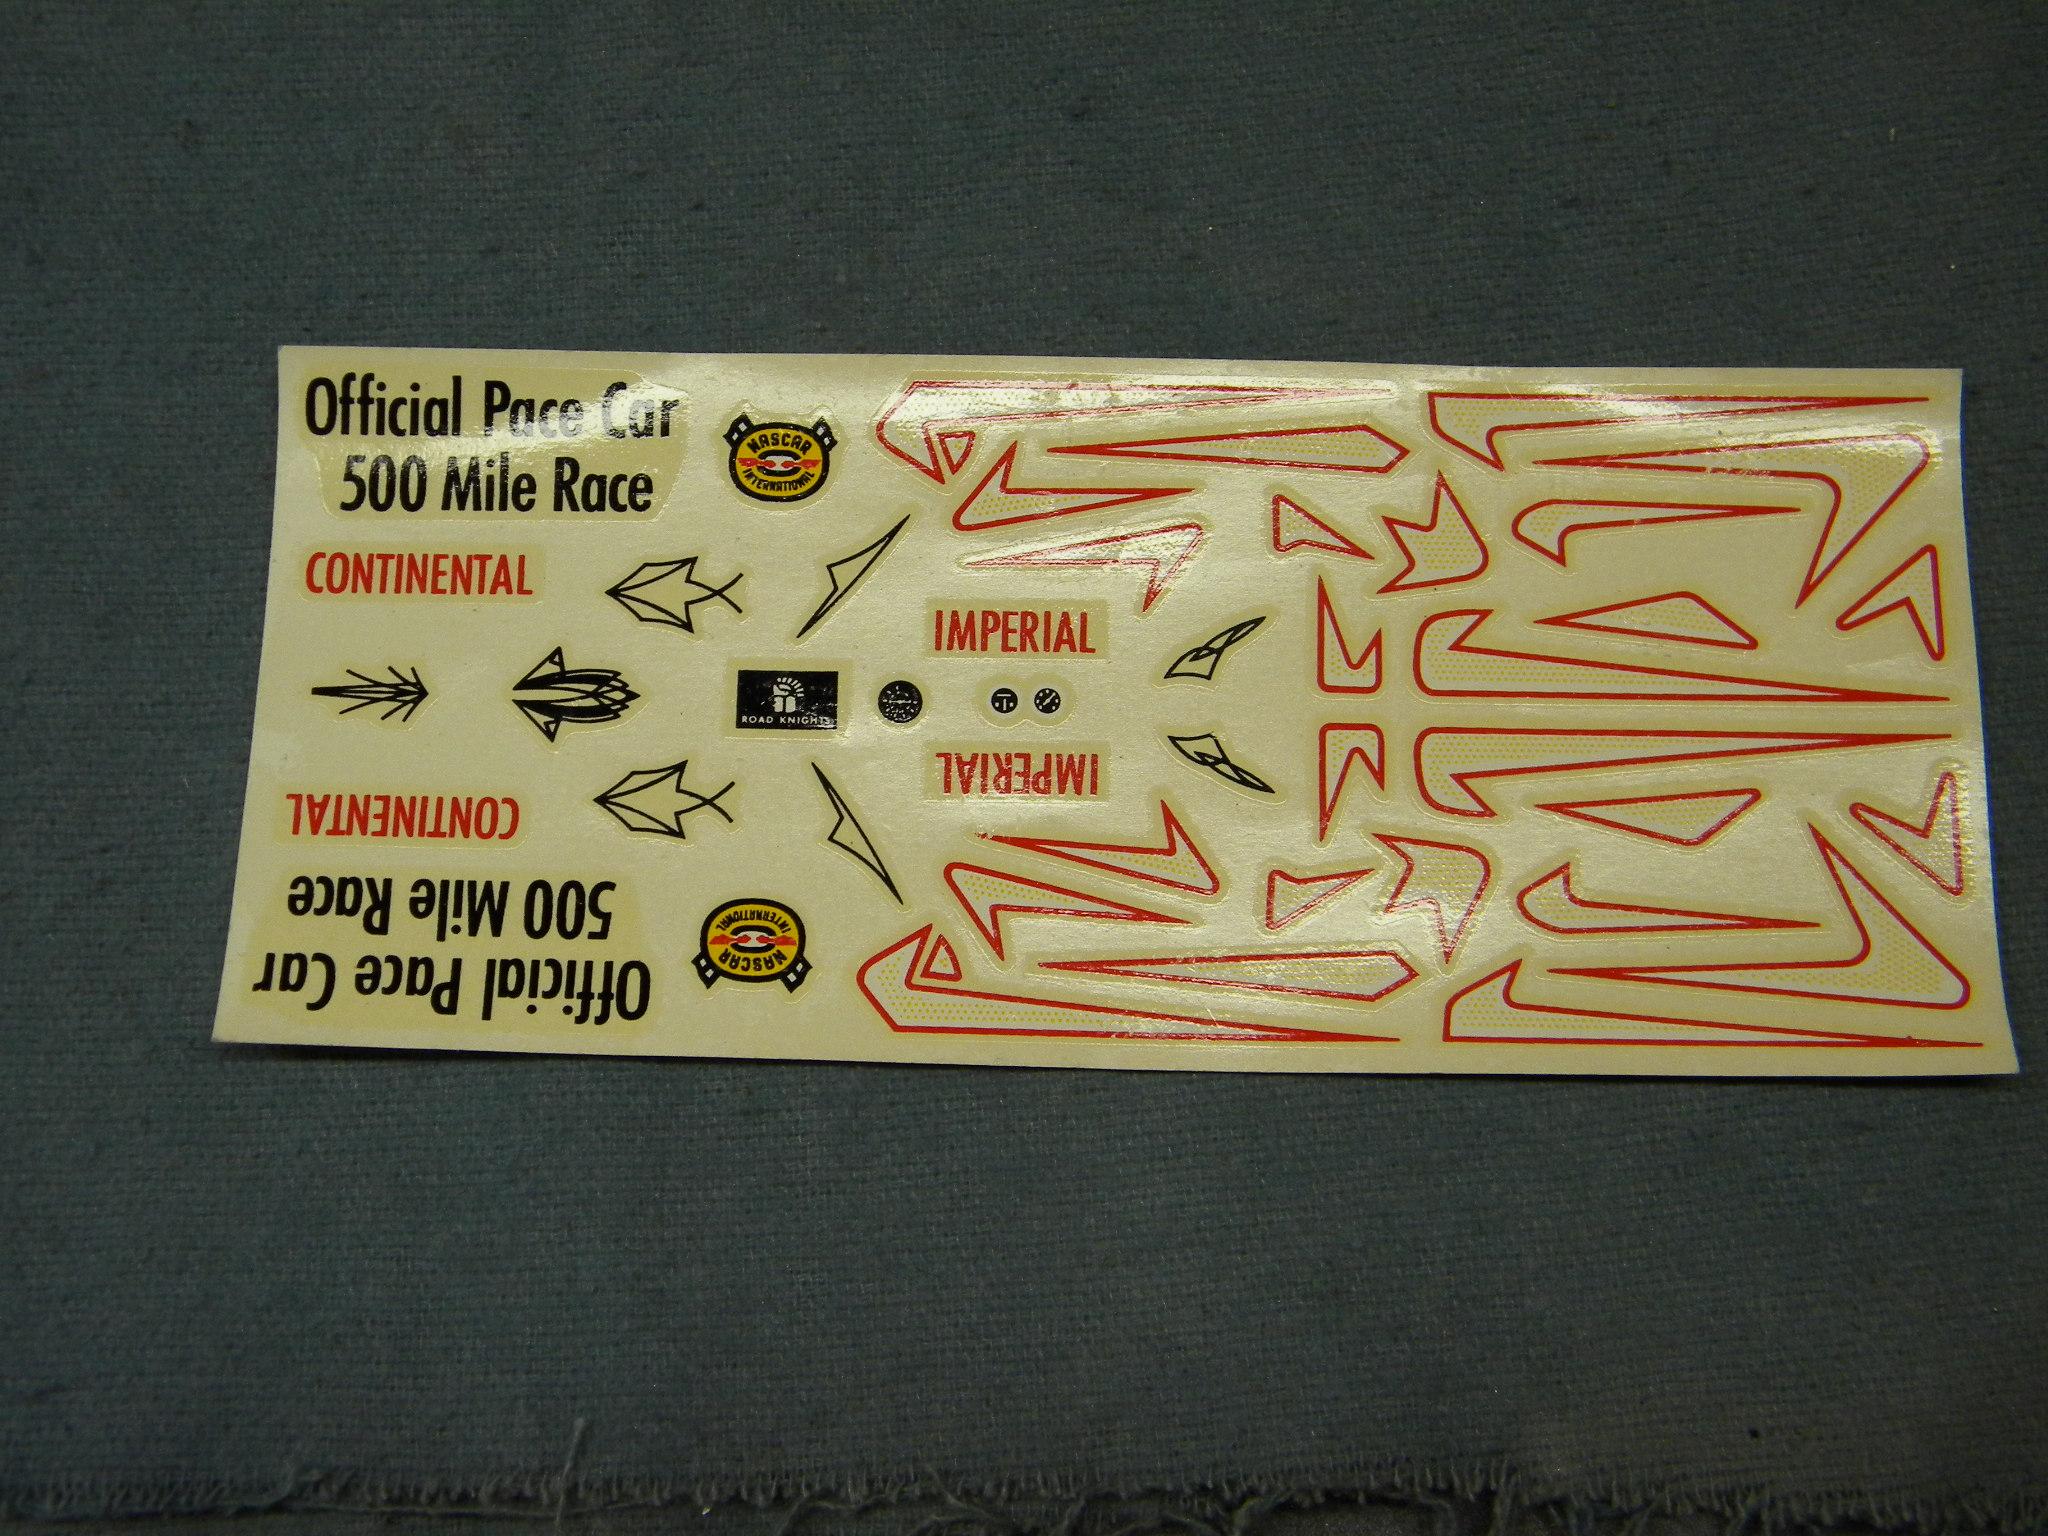
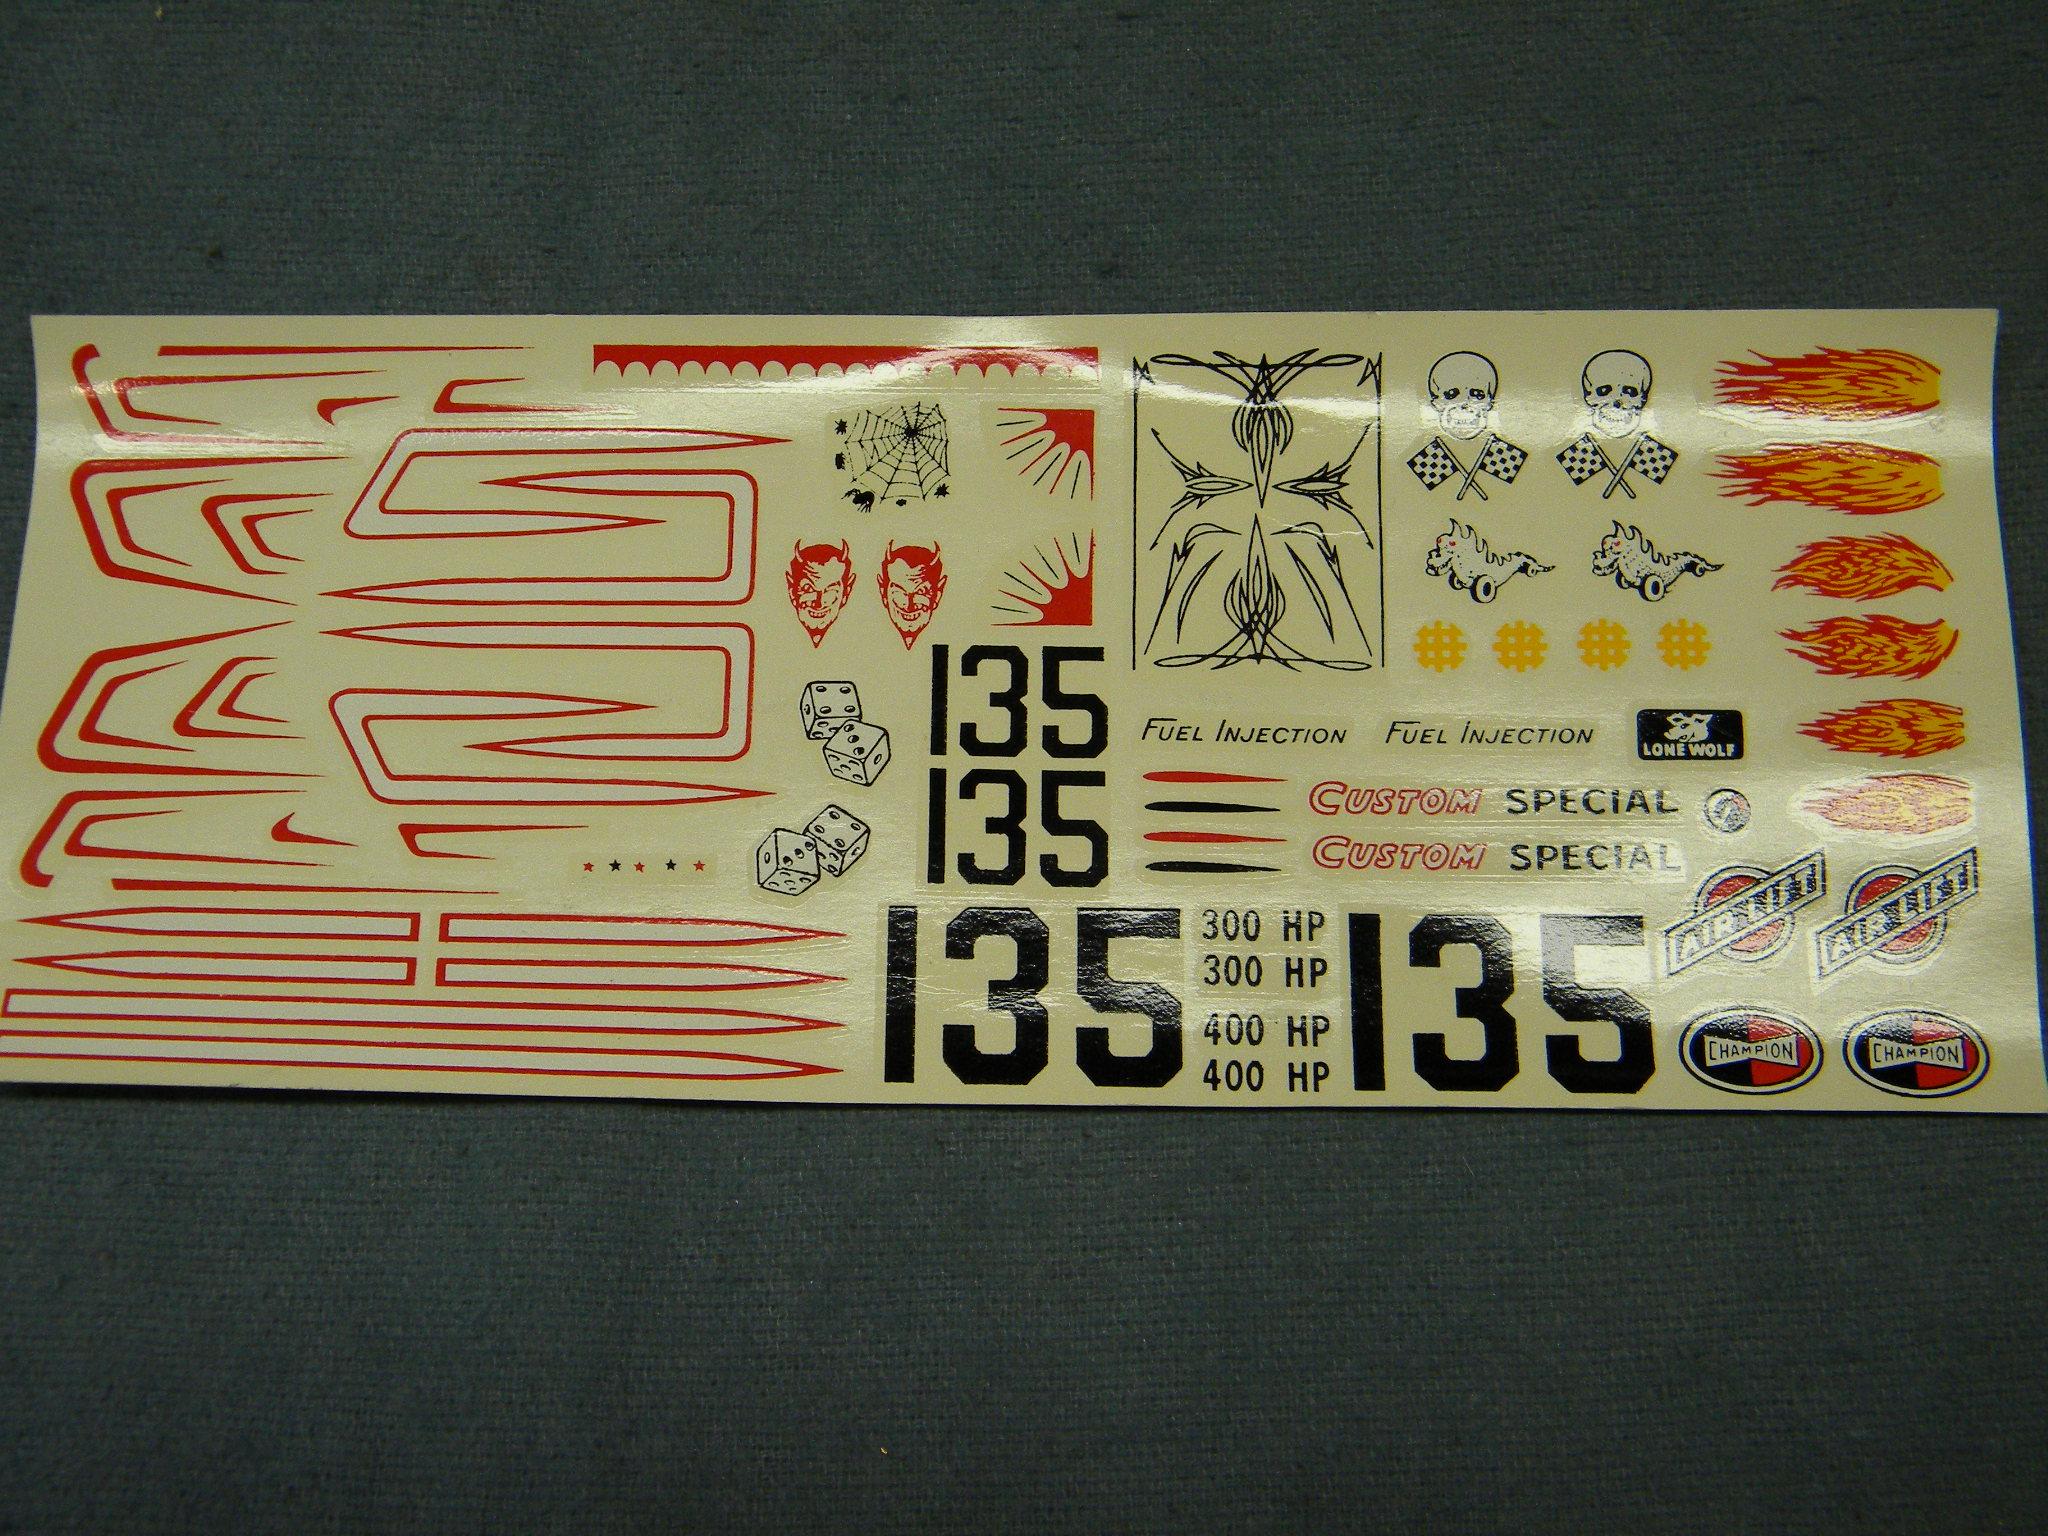
Very Vintage decal sets question
StevenGuthmiller replied to ranma's topic in Model Building Questions and Answers
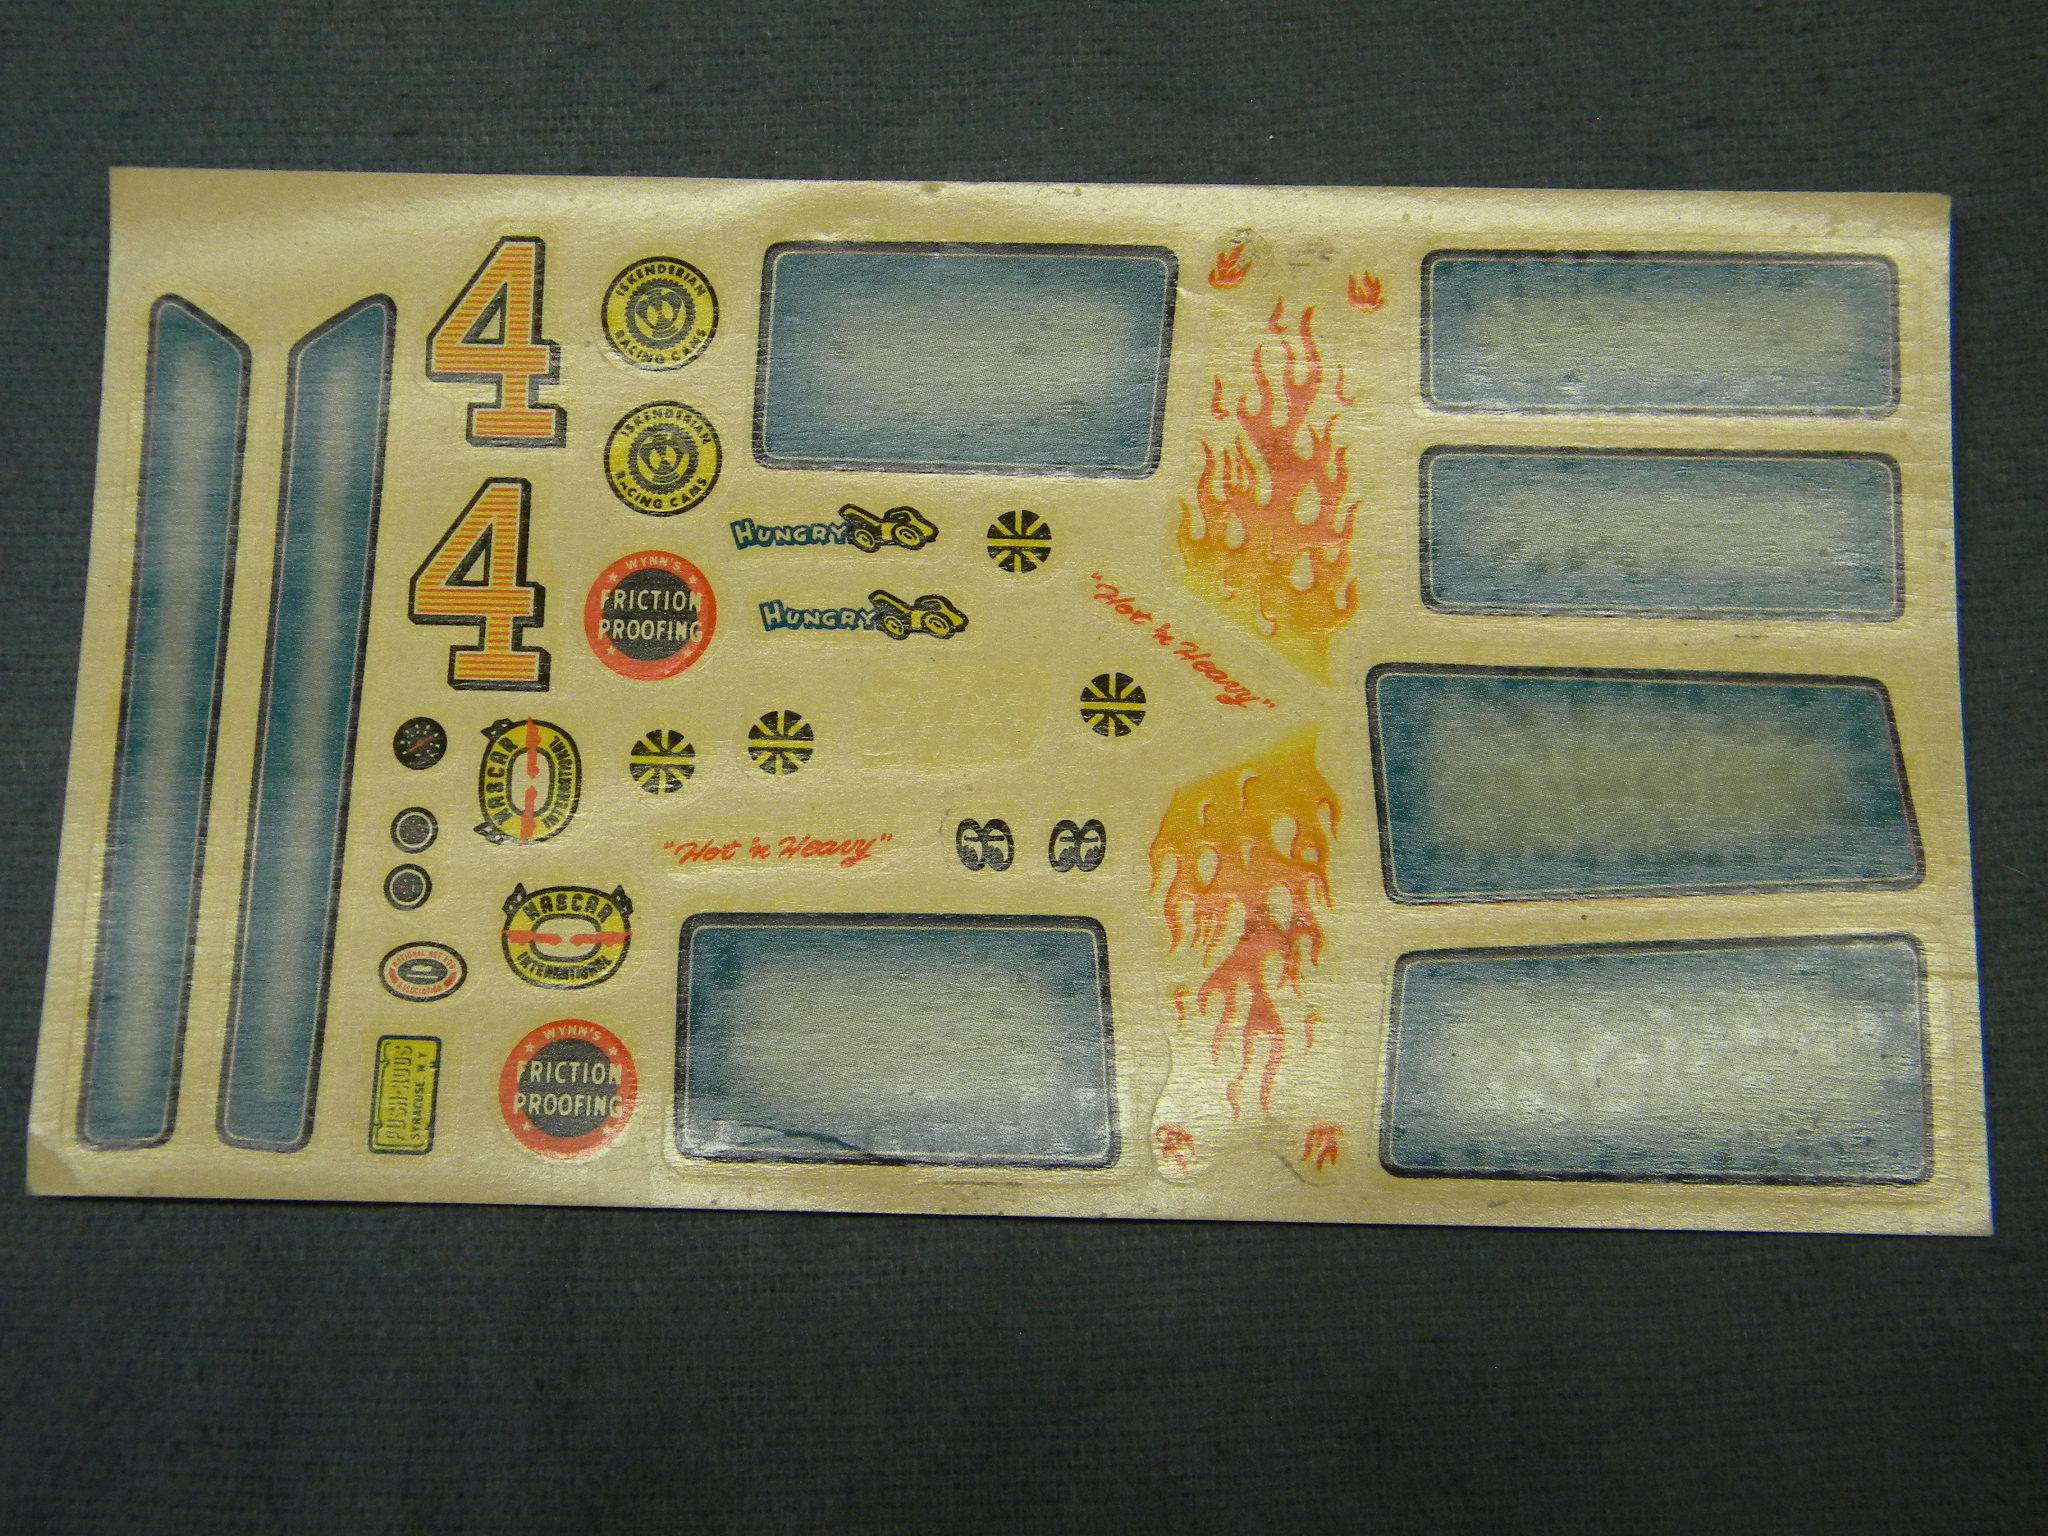
I assume that the kits had different decals. While I see no mention of the "Golden Commando" decals on the box art, it does feature the Petty #43 decals. Just in case anyone is interested, here are the answers to the other sheets in question. Generic 1961 AMT kit decals. This set came from a '61 Bonneville kit MPC 1966 Pontiac Bonneville AMT 1962 Chevrolet Apache Pickup. Steve
-
Opinions wanted-future project
StevenGuthmiller replied to 64Comet404's topic in General Automotive Talk (Trucks and Cars)
Honestly, I don't like any of them, even the ones that I suggested. Call me a purist, but I don't think that you can beat the look of the stock wheel covers on this particular car. Everything else just looks like an after thought to me. If I had to pick, I would without a doubt go with the chrome reverse wheels in the final photo. Just my opinion, but the Pegasus Dodge caps would look better on a larger tire as well. I used a set of these caps on different tires for a '60 Dodge Dart build and they look entirely different. Steve -
Very Vintage decal sets question
StevenGuthmiller replied to ranma's topic in Model Building Questions and Answers
You did well Bill! The first set is indeed from the Johan '64 Plymouth Fury, but as stated by others in this thread, I believe that the same decals were included in other kits. I have the same set in my Johan '65 Plymouth kit as well. The '68 Coronet one was pretty easy. The last one could have also been a generic set included in other models, but in this case, it was not a Johan 300, but an SMP 1960 Chrysler Imperial. Steve -
Very reminiscent of the AMT 1960 Mercury Park Lane. Seems like the majority of the built examples that you see have those dopey "bubble" tail light lenses even if the model is bone stock otherwise. Steve
-
Nice work! I really wish that someone would have done styrene kits of the '60-'62 Cadillac coupes. I've always loved the look of the '61 especially. Steve
-
Very nice! The color is very reminiscent of factory correct 1961 Pontiac "Dawnfire Mist". Not available on the Buicks, but it wouldn't surprise me if it could have been a special order color. Steve
-
Opinions wanted-future project
StevenGuthmiller replied to 64Comet404's topic in General Automotive Talk (Trucks and Cars)
If it were mine, I would get a set of Pegasus Dodge 4 bar spinners and white walls, but then again to be honest, I would do my best to find a set of close to stock wheels like Christopher's '64 El Camino suggestion. Just my opinion, but I think the black wheels in the first pic are hideous and do nothing to enhance the body style. Steve -
Very Vintage decal sets question
StevenGuthmiller replied to ranma's topic in Model Building Questions and Answers
Here are a few other sets that I scrounged up. I can tell you which kits these came from, but does anybody want to make a game of it and guess? Steve
-
Very Vintage decal sets question
StevenGuthmiller replied to ranma's topic in Model Building Questions and Answers
It is a Johan set. Same set as 1961 This set is from the Johan 1961 Plymouth Fury. First $20.00 can have it! Steve
-
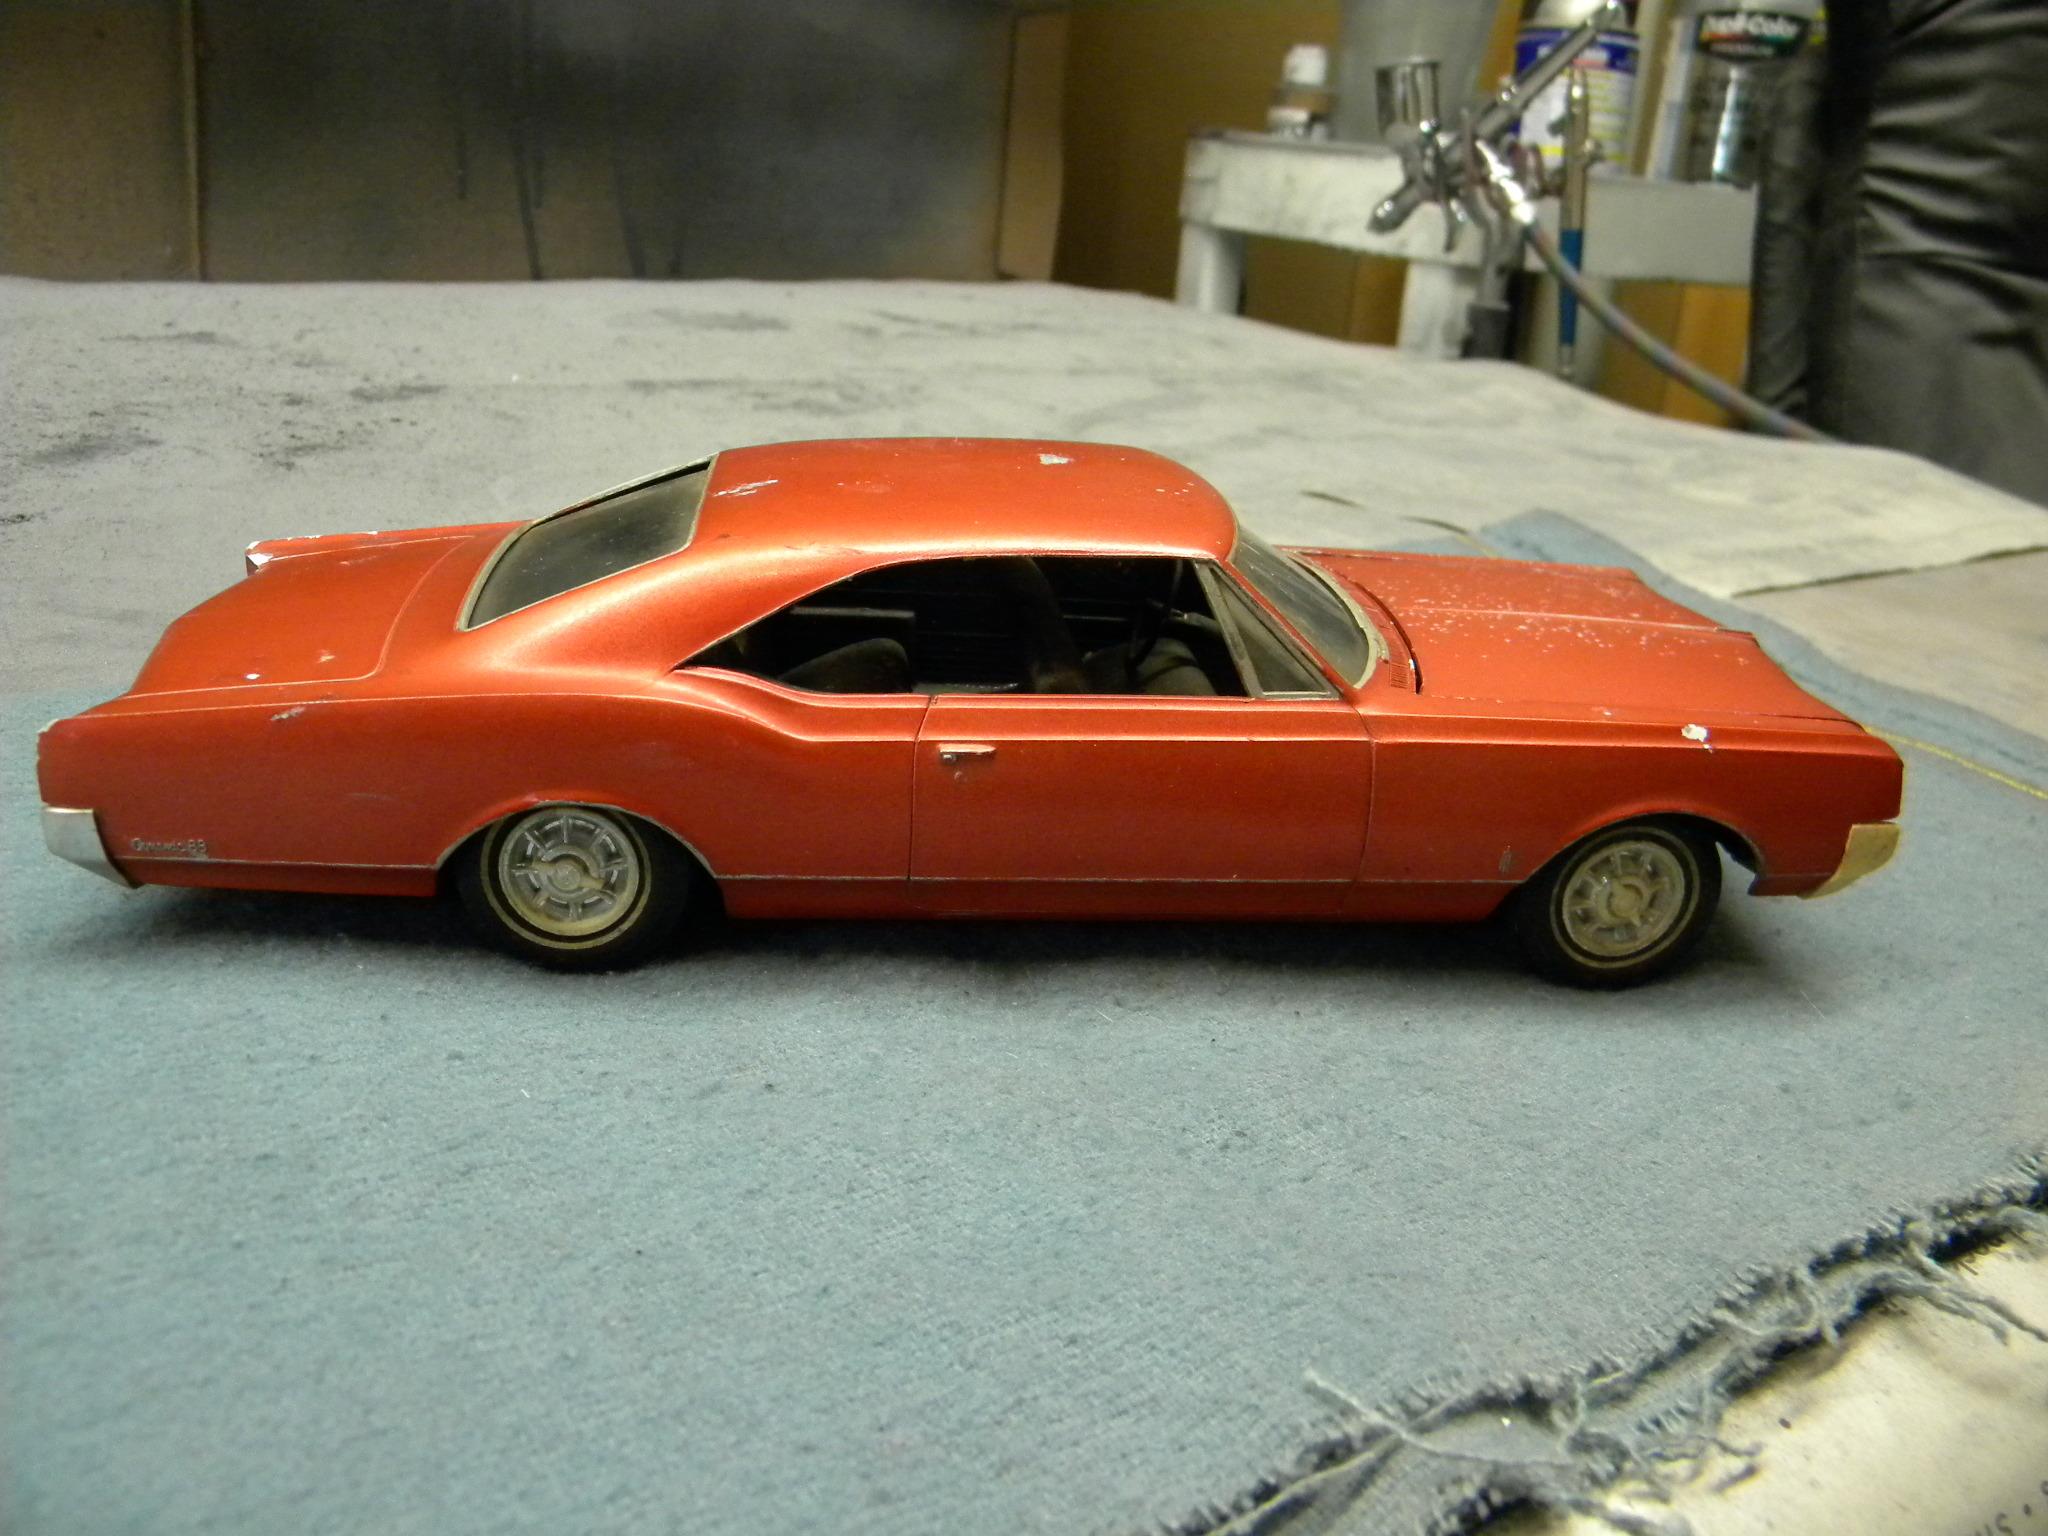
Thanks David. I appreciate that, but I now know that I would continually kick myself from now until who knows when if I didn't correct it. I'm sure that you know how it is. When you know that there is a flaw on one of your projects, no matter how small, or whether or not anyone else would notice it, it's the first thing you yourself notice every time you look at the model. I just decided that it wasn't worth that. It's already coming along pretty well. I checked the body this afternoon and there are already big blisters all over in the paint. I'll leave it for another 24 hours and see how it looks. The longer I leave it in the soup, the easier the paint will come off. Barring any major prep issues, with luck it will be ready for more color very soon, possibly by this weekend. Steve