StevenGuthmiller
-
Posts
15,078 -
Joined
-
Last visited
Content Type
Profiles
Forums
Events
Gallery
Everything posted by StevenGuthmiller
-
 Congrats Jay! I have to confess, I don't remember seeing this one. Nice work! Steve
 -
I agree wholeheartedly with all of this. I have, and still do build simplified, curbside builds when it's warranted in my view, but I do often look back on some of my simpler models and think that I would like to do them over again. When I look at my more highly detailed projects, I'm proud of them and wouldn't change a thing. I would rather have a dozen of the latter, than 100 of the former. But, with that said, I find myself over the years wandering back and forth with how much detail I choose to add to a project, and that's still okay with me. I greatly prefer to detail them, but they don't all have to be that way. Steve
-
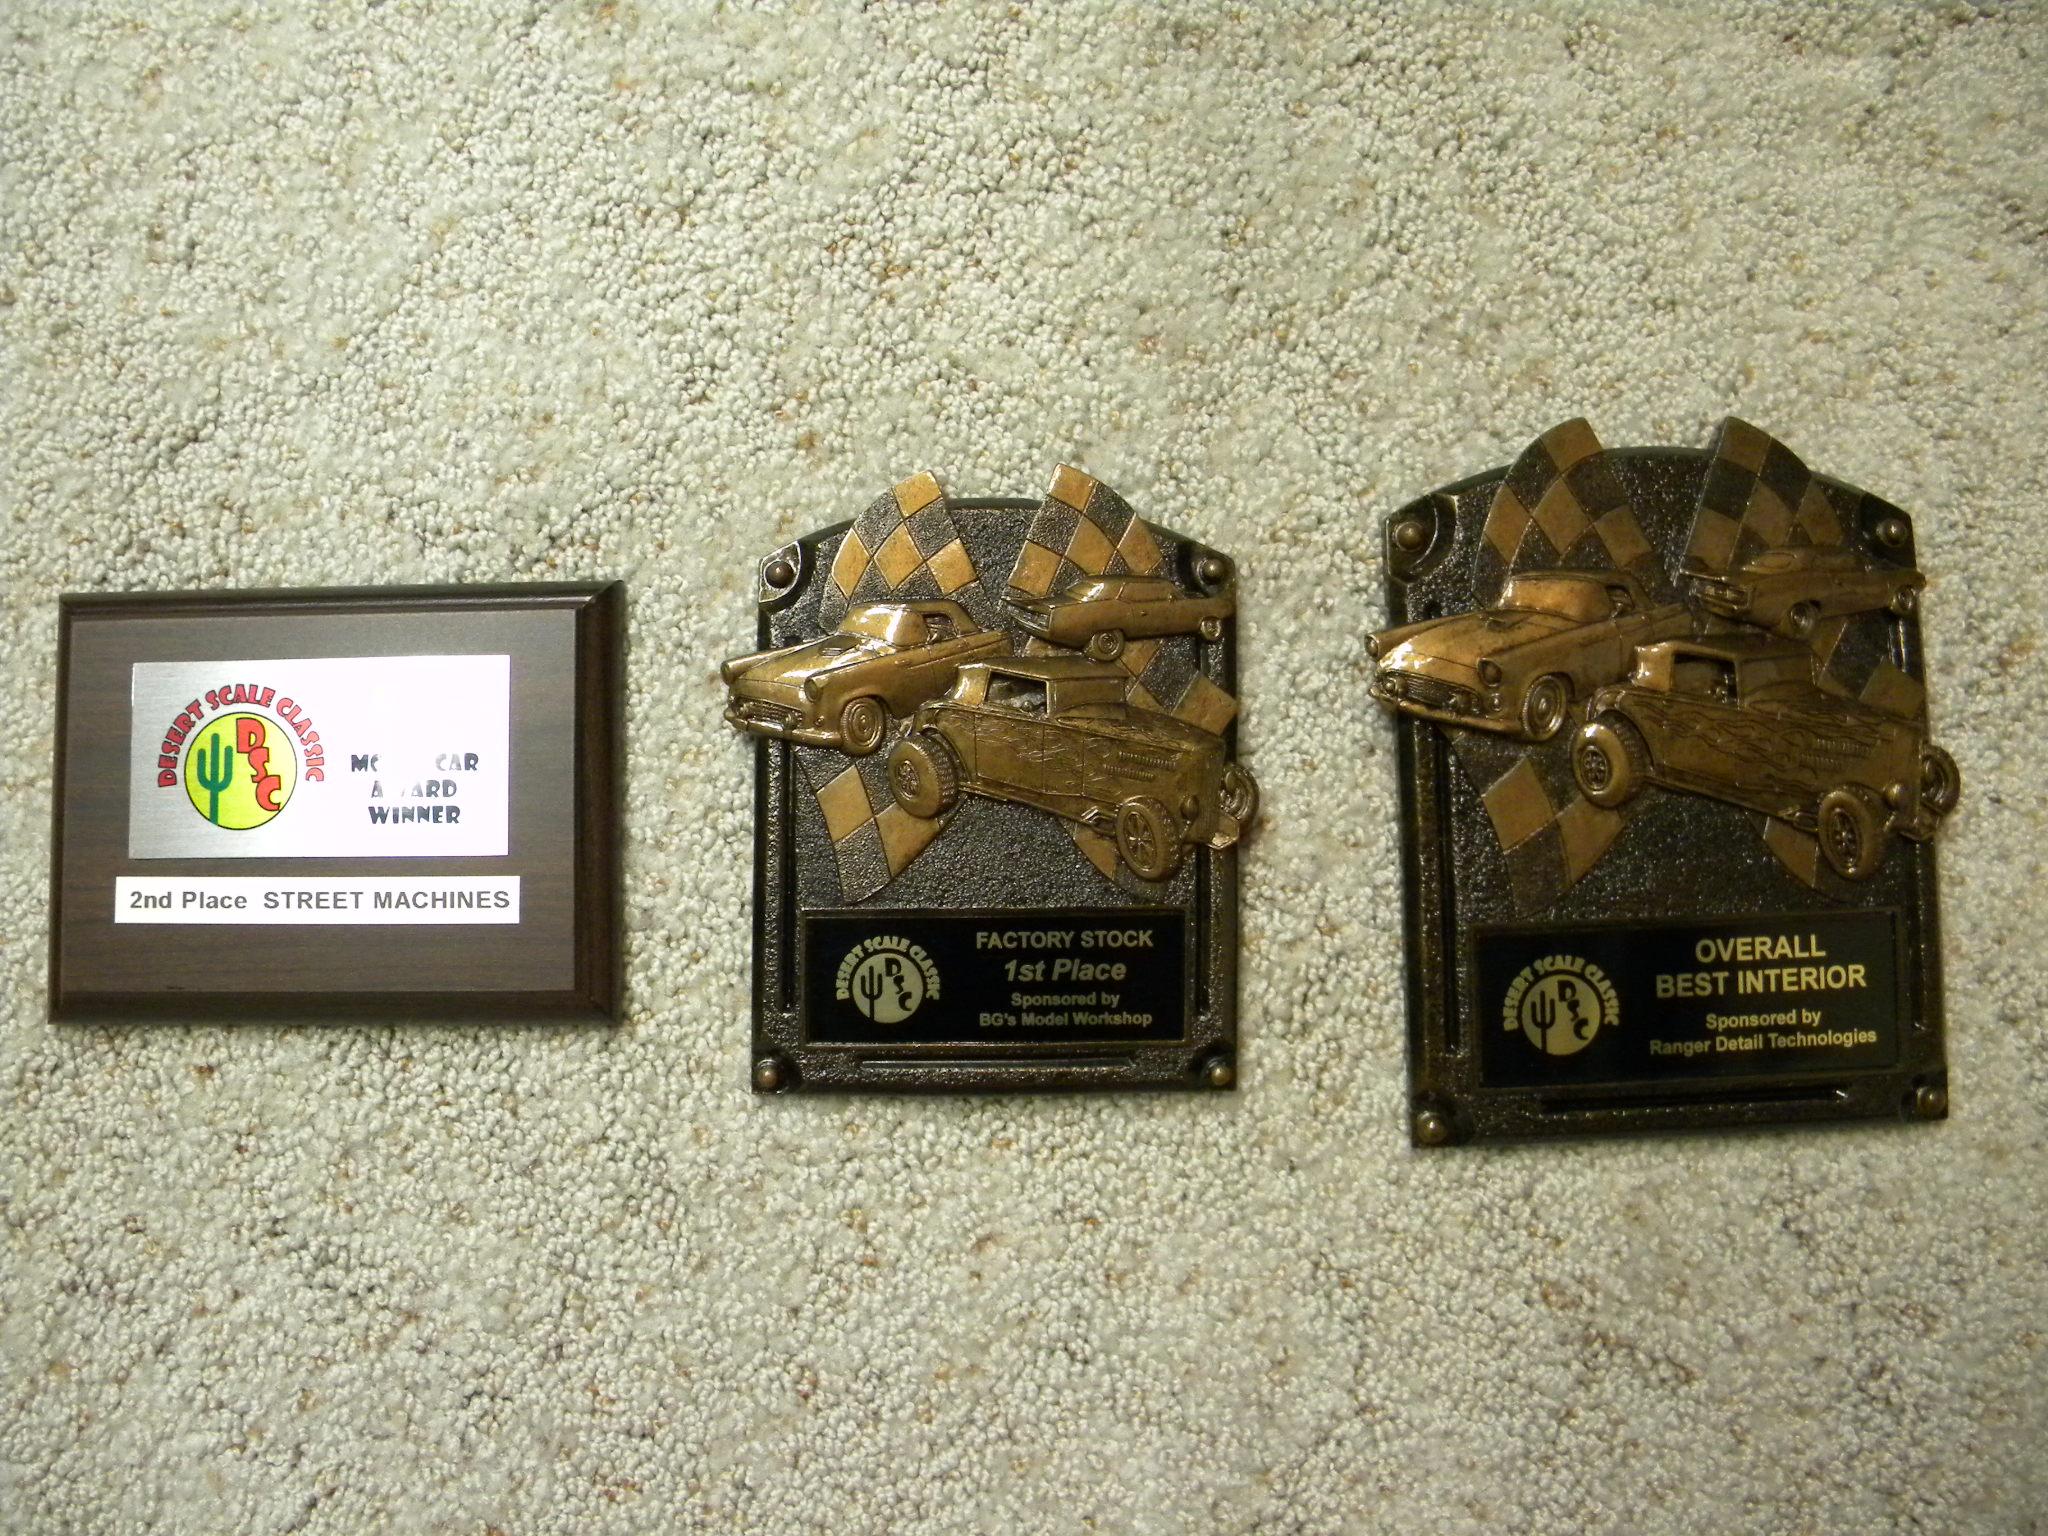
I was honored to have been able to participate in the first ever Desert Scale Classic virtual model car show and contest. Unlike most of the shows scheduled during this COVID crisis that were either canceled or postponed, the guys in Arizona decided that the show must go on. I decided that it was a perfect opportunity to participate in at least one show this year, and I didn't even have to get out of my Lazy Boy to do so. I was extremely honored and very happy to have been awarded a 1st place in the factory stock category, as well as a "Master Award" for best interior for my '68 Olds 442 W-30. I also received a 2nd place plaque in the Street Machine category for my '65 Plymouth Fury. The plaques arrived today. Thank you to the judges at the DSC V16!! Steve

-
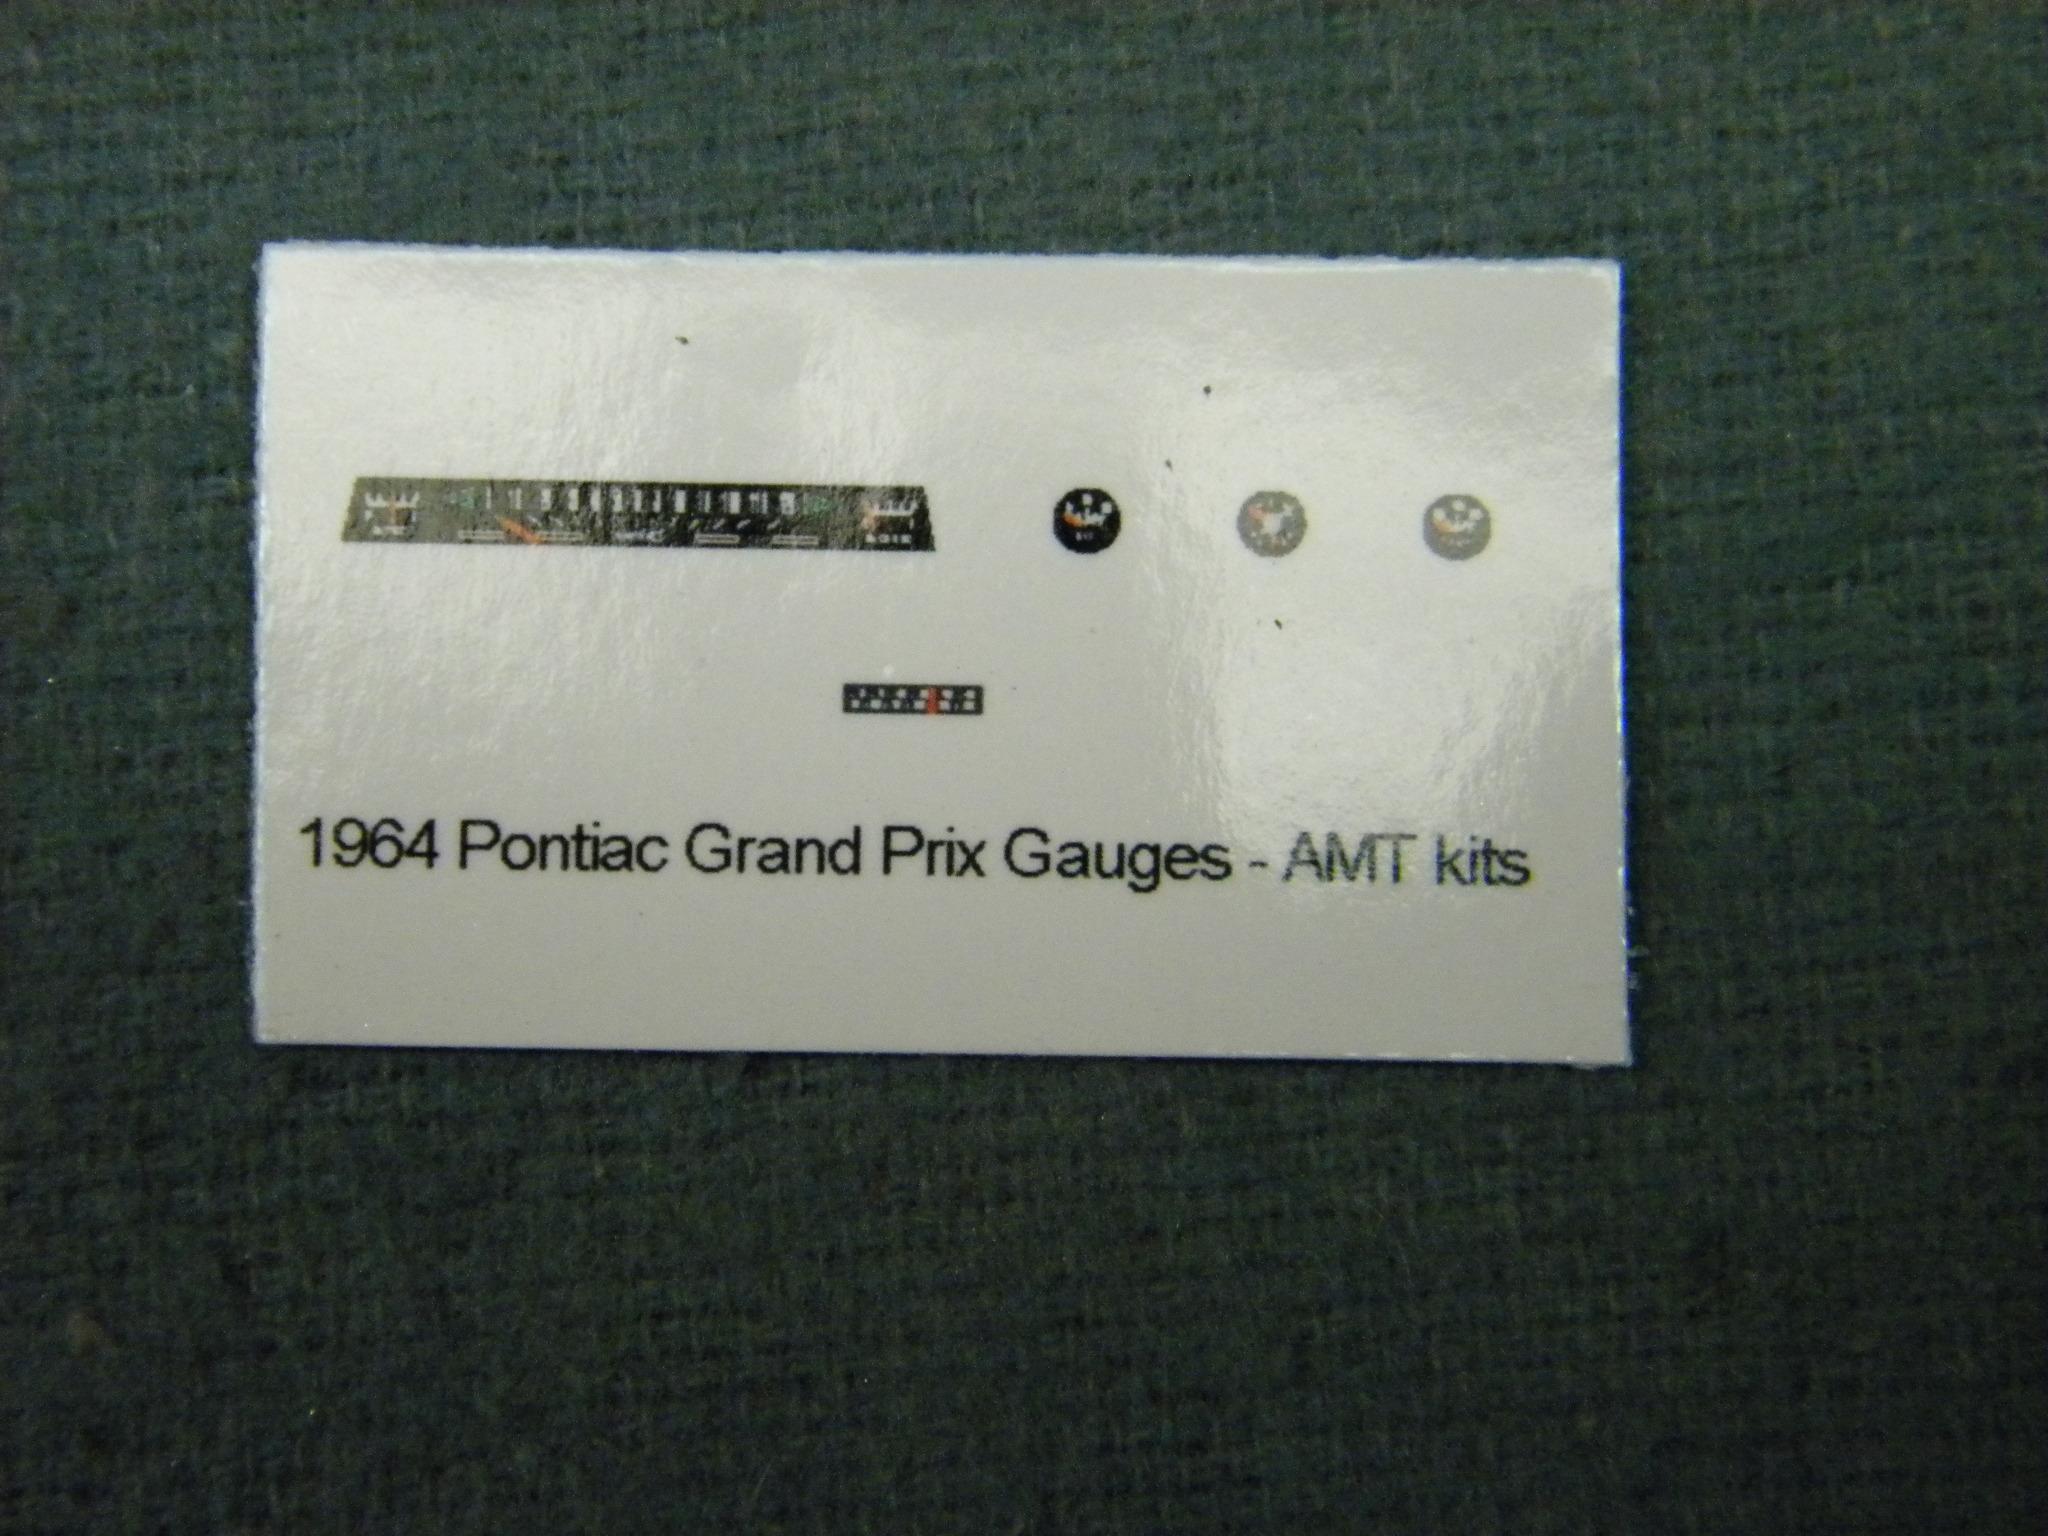
Thanks everyone!! As Dirty Harry so eloquently stated, "A man's got to know his limitations". They are Best Model Car Parts decals. Lucky for all of us, Michael offers some great gauge decals for a few vintage annual kits. Steve
-
'63 T-Bird yellowed glass
StevenGuthmiller replied to hedotwo's topic in Model Building Questions and Answers
Be sure to add the 1961-1963 Thunderbird annuals to your request in the wanted section. There were a ton of these models and promos produced during that 3 year period. There's a good possibility someone might have a spare that they can offer. Steve -
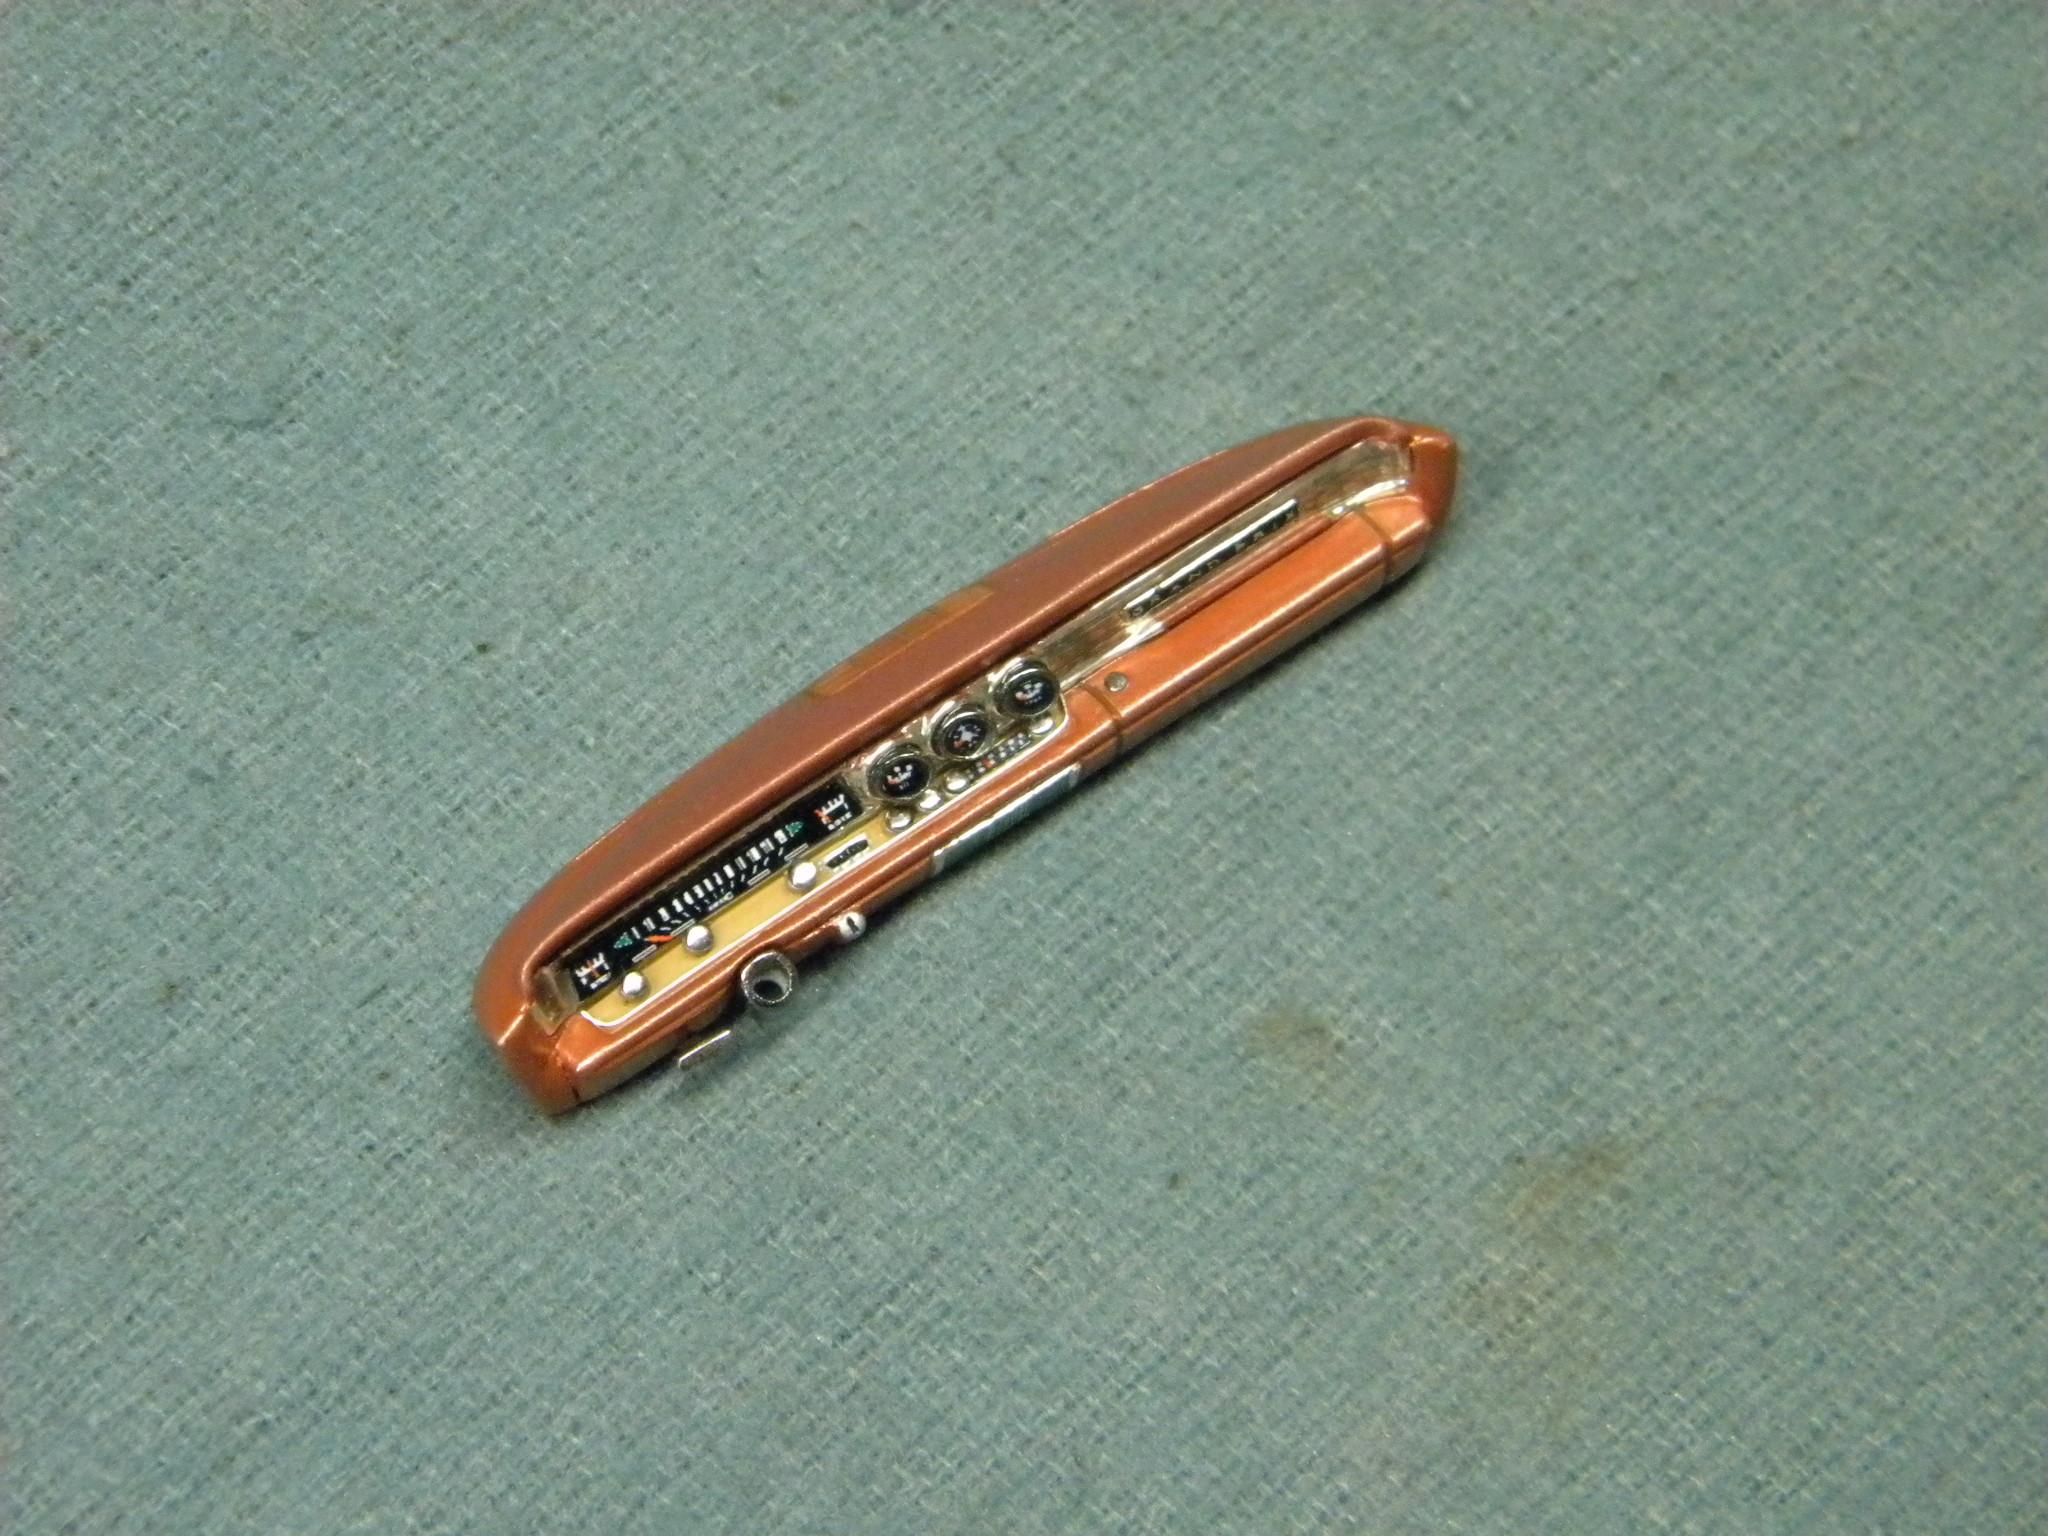
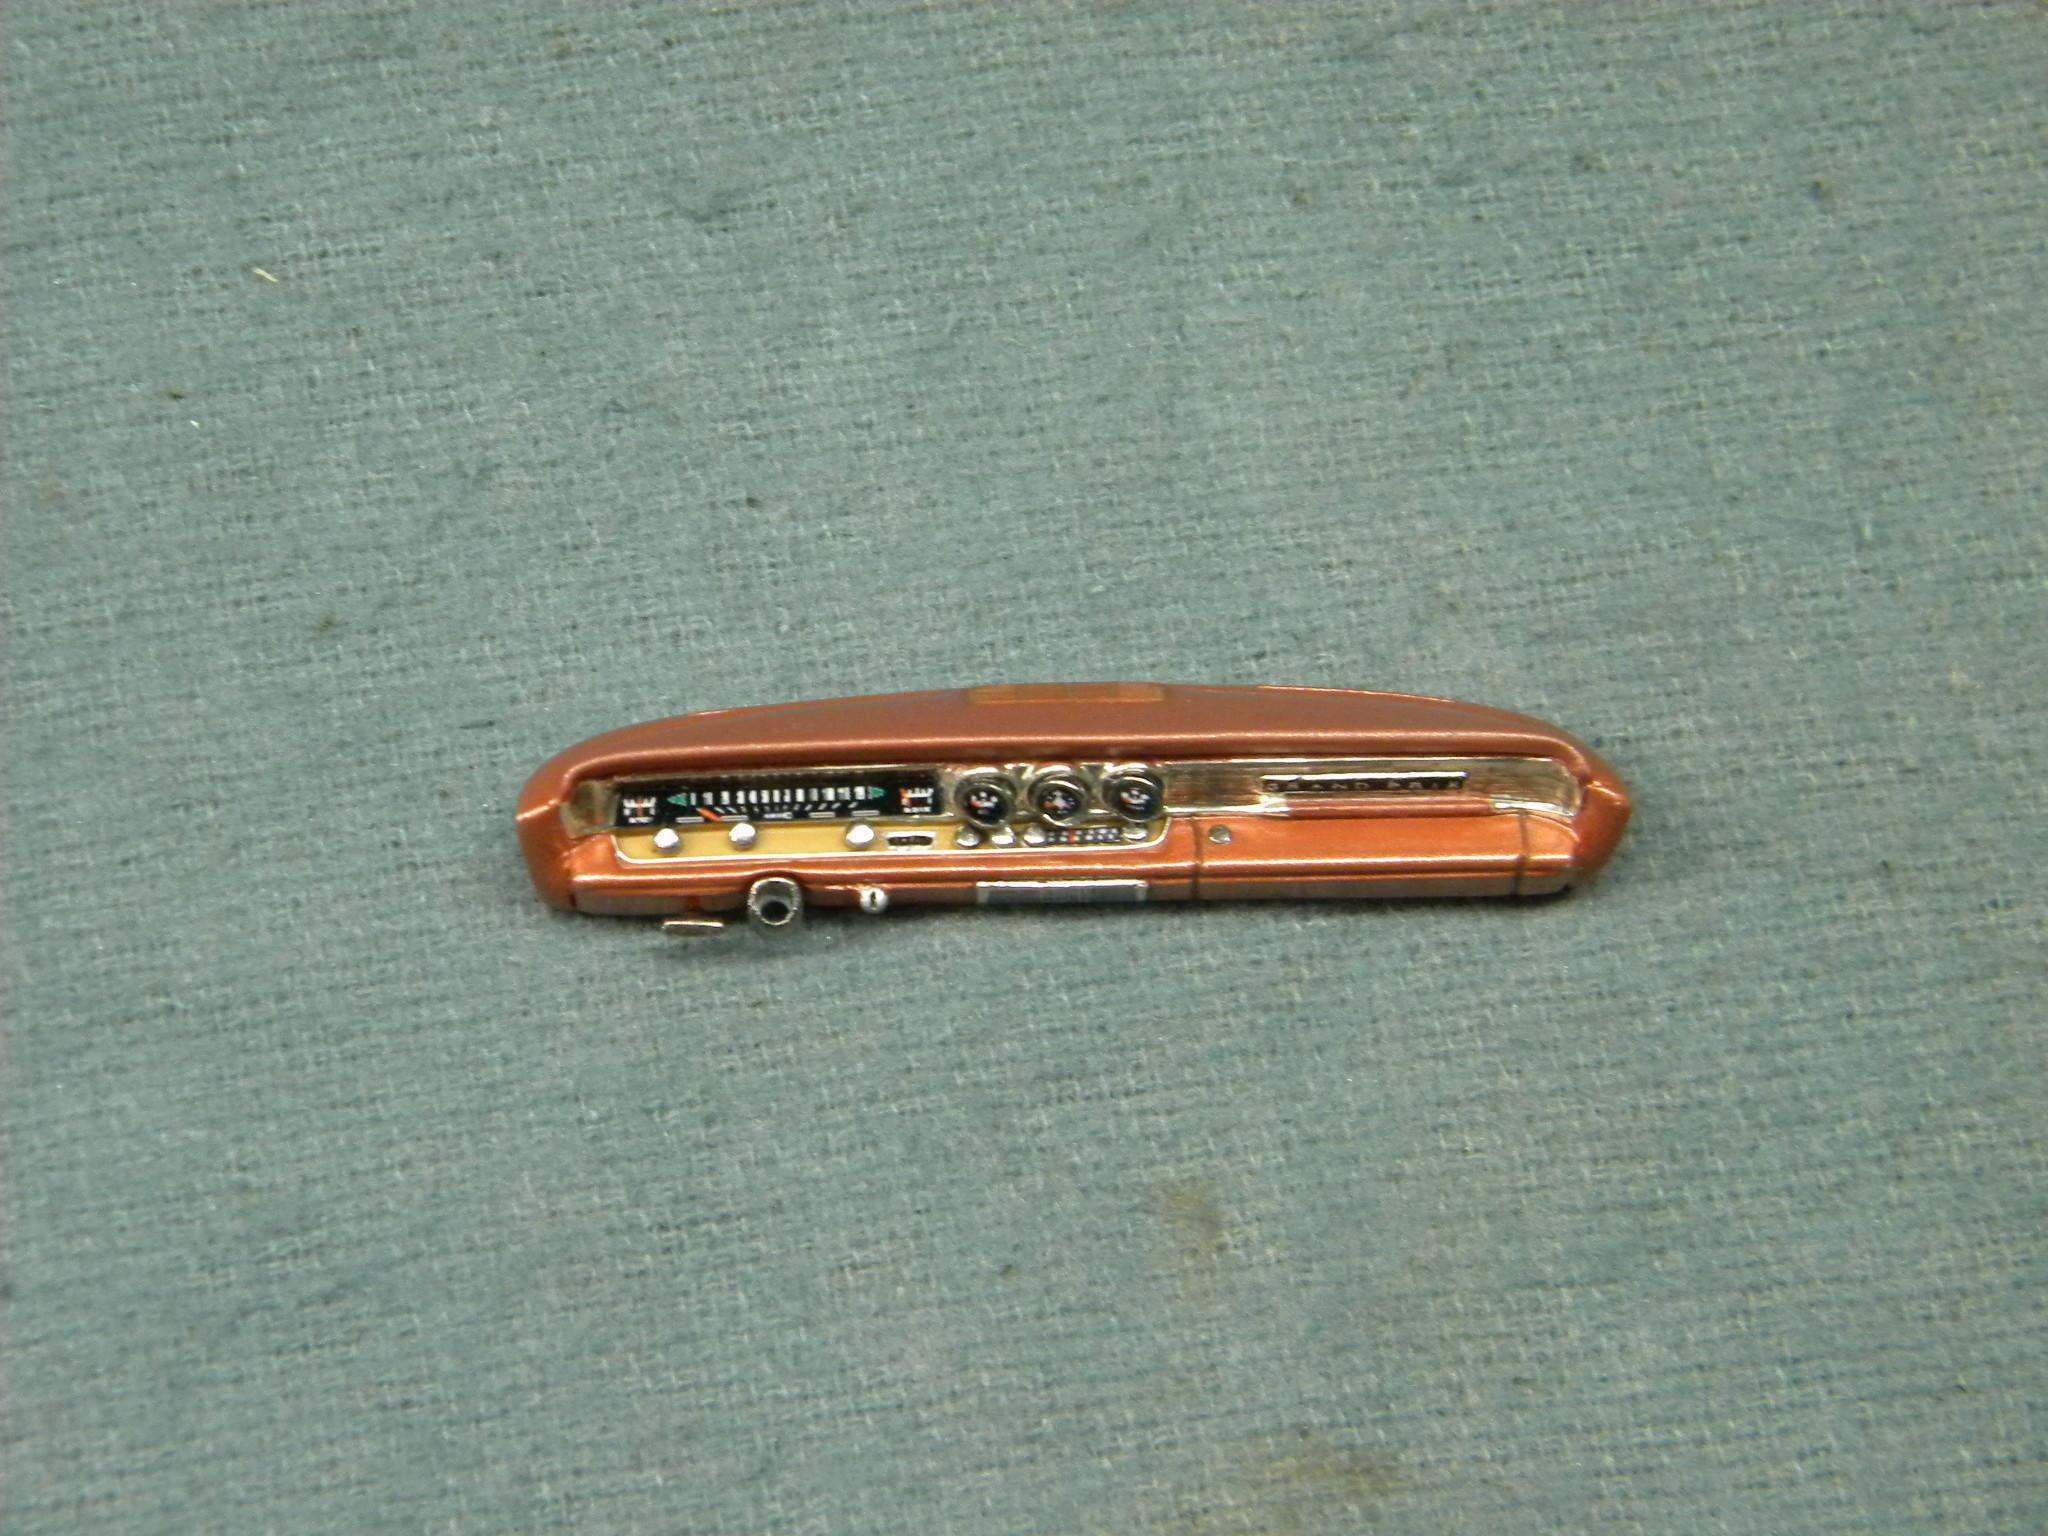
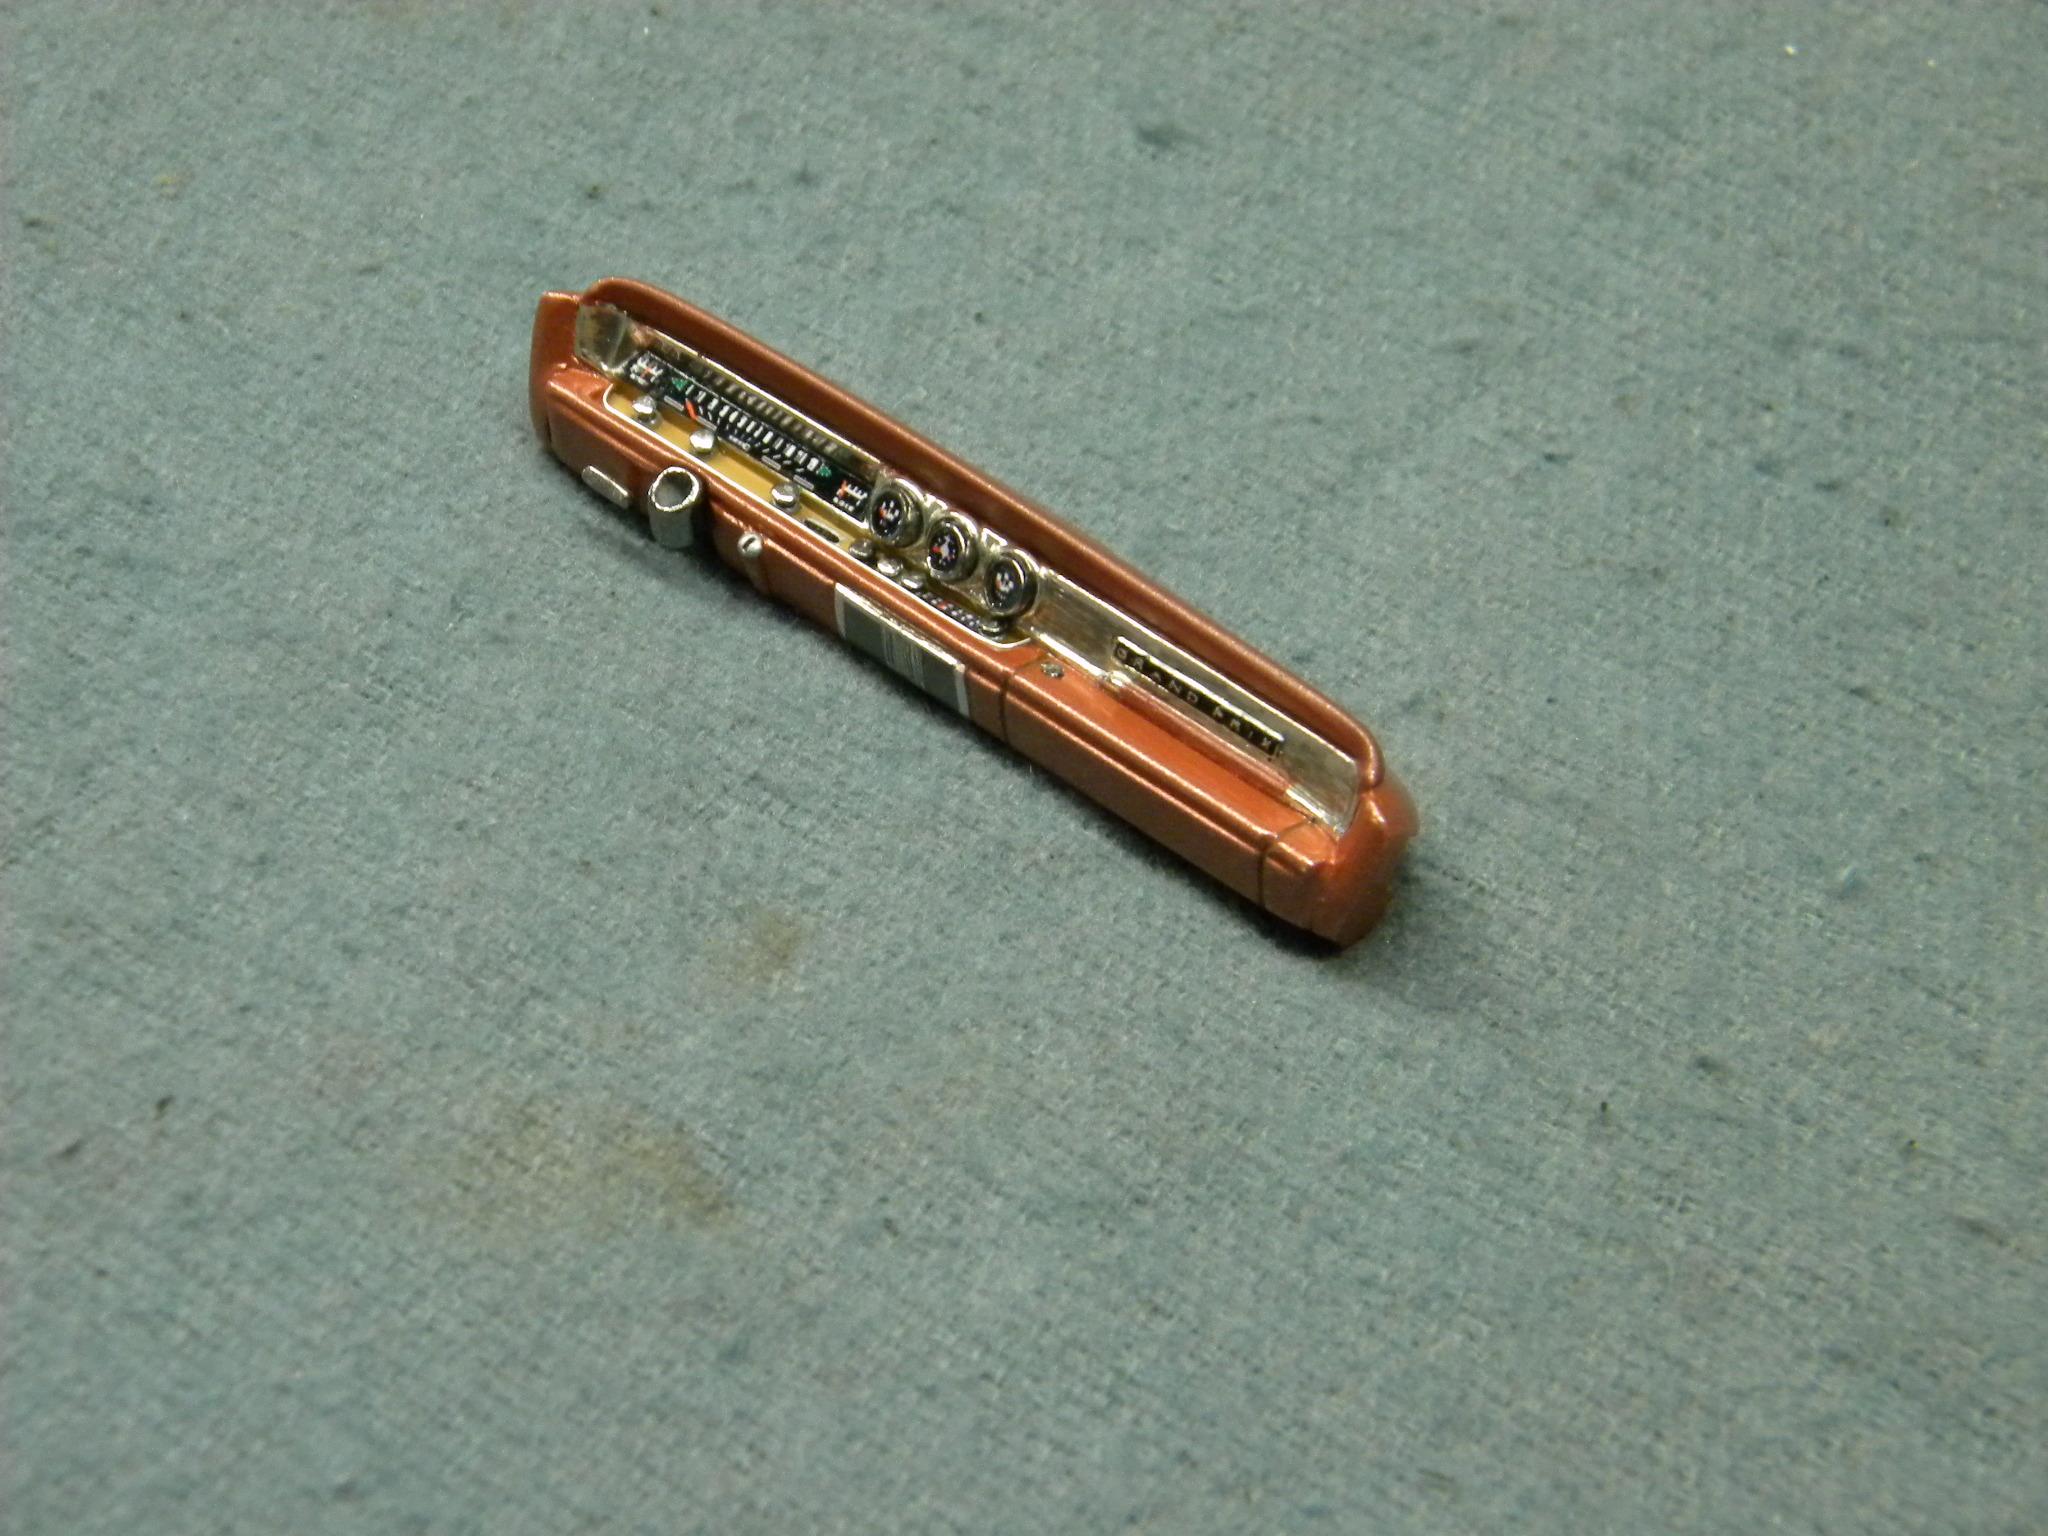
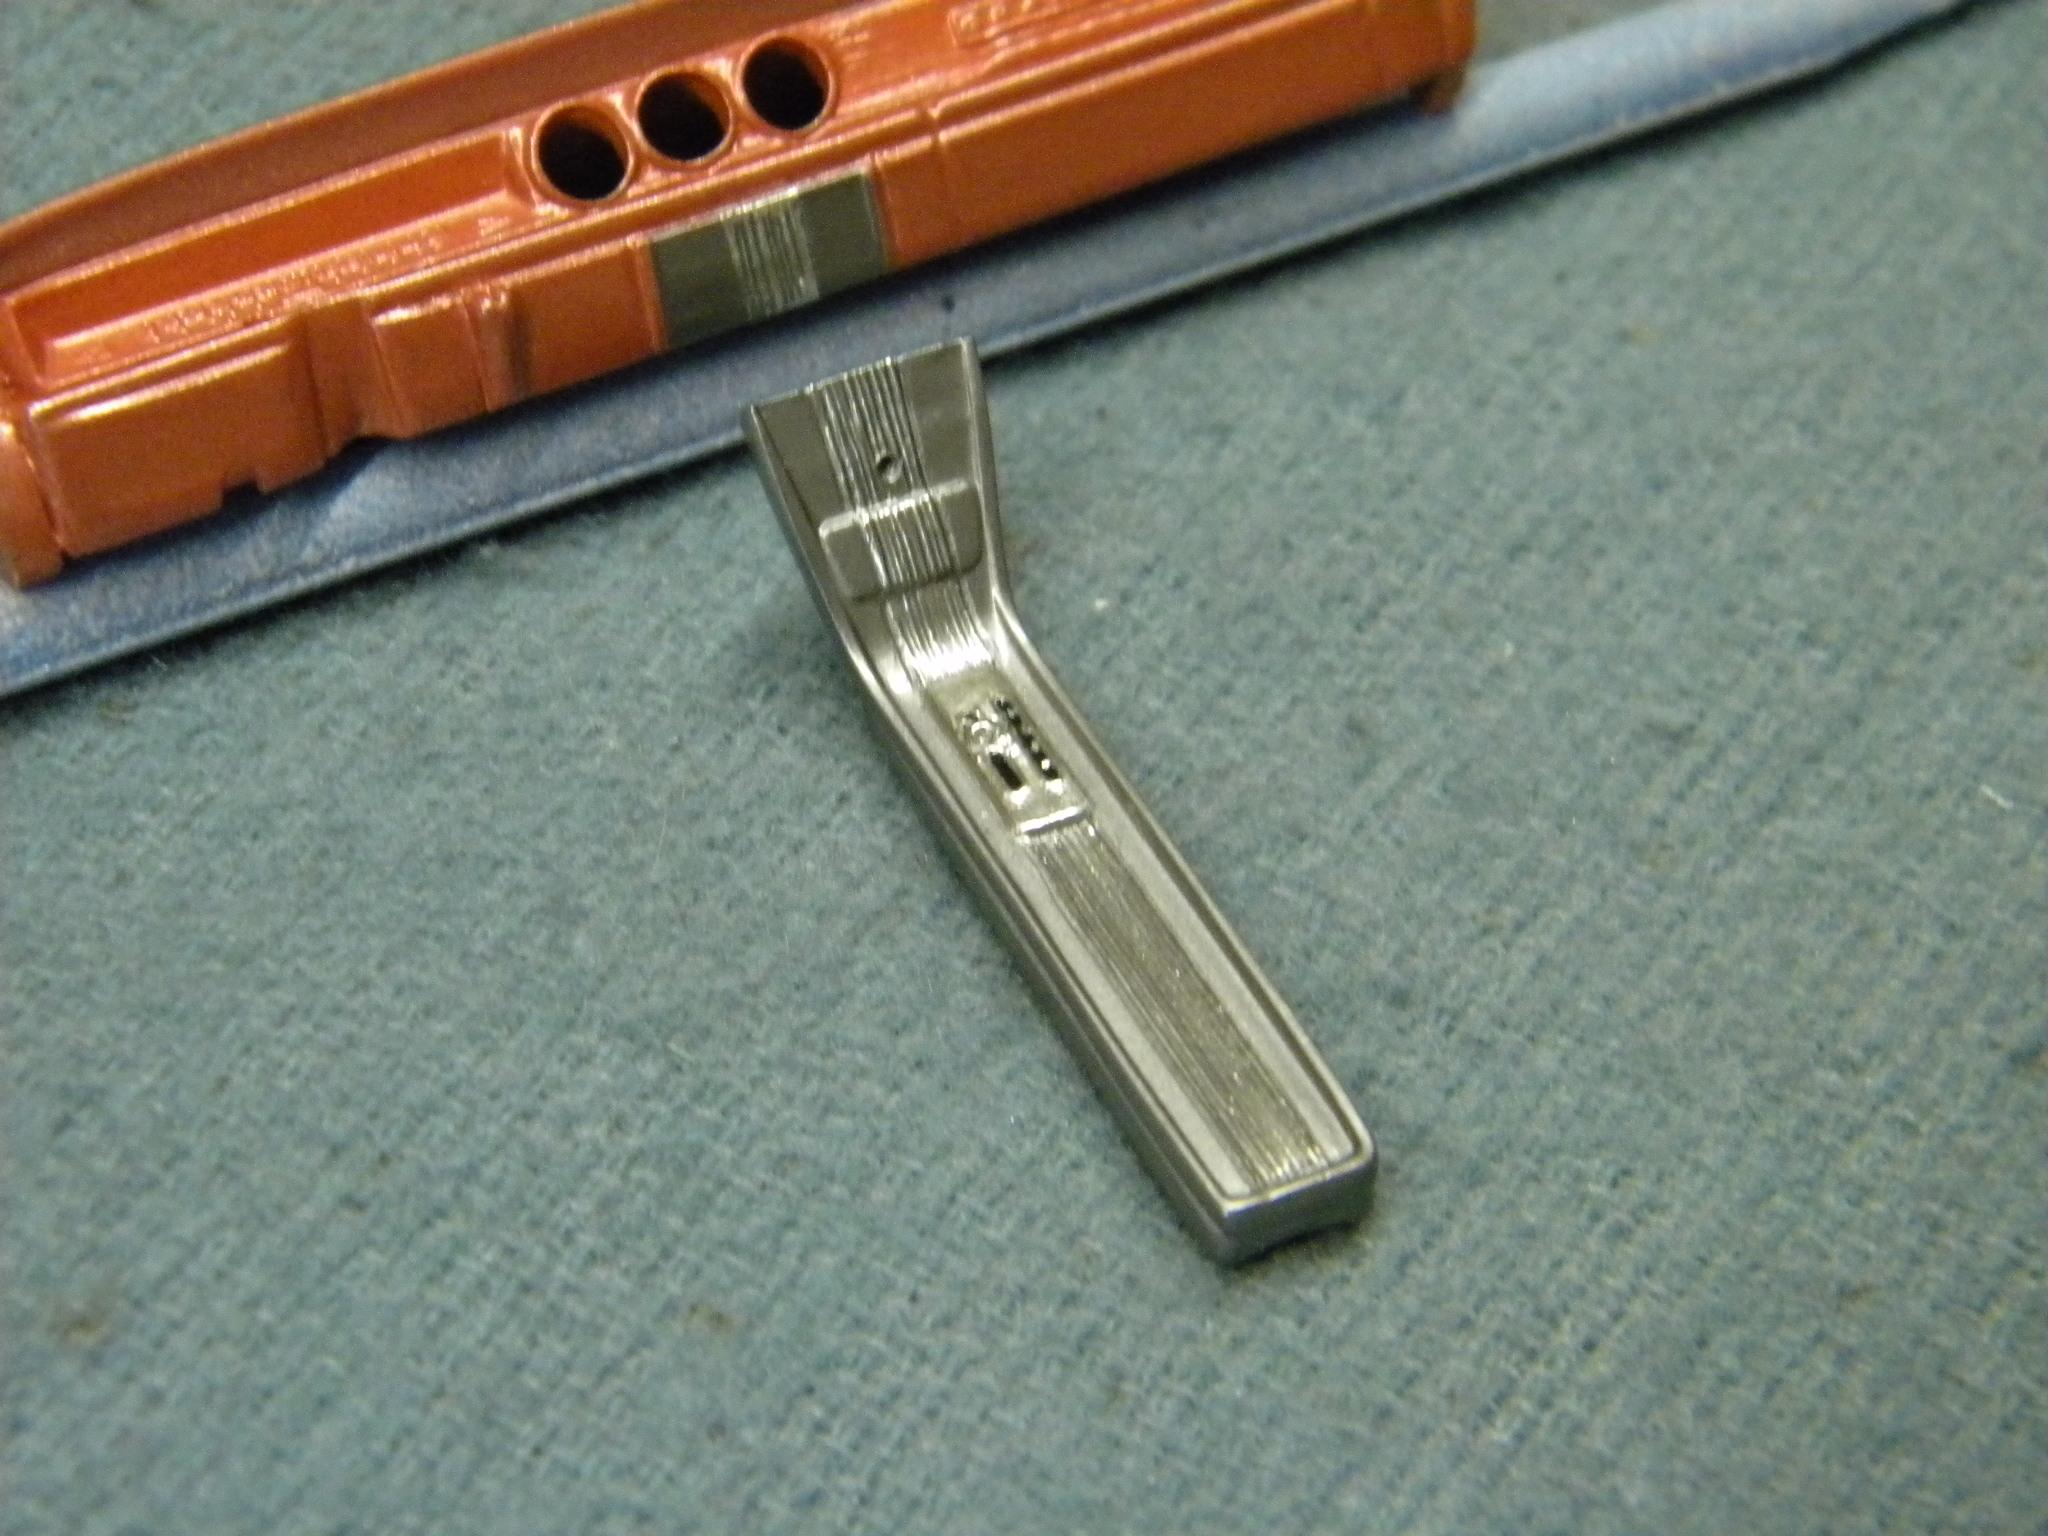
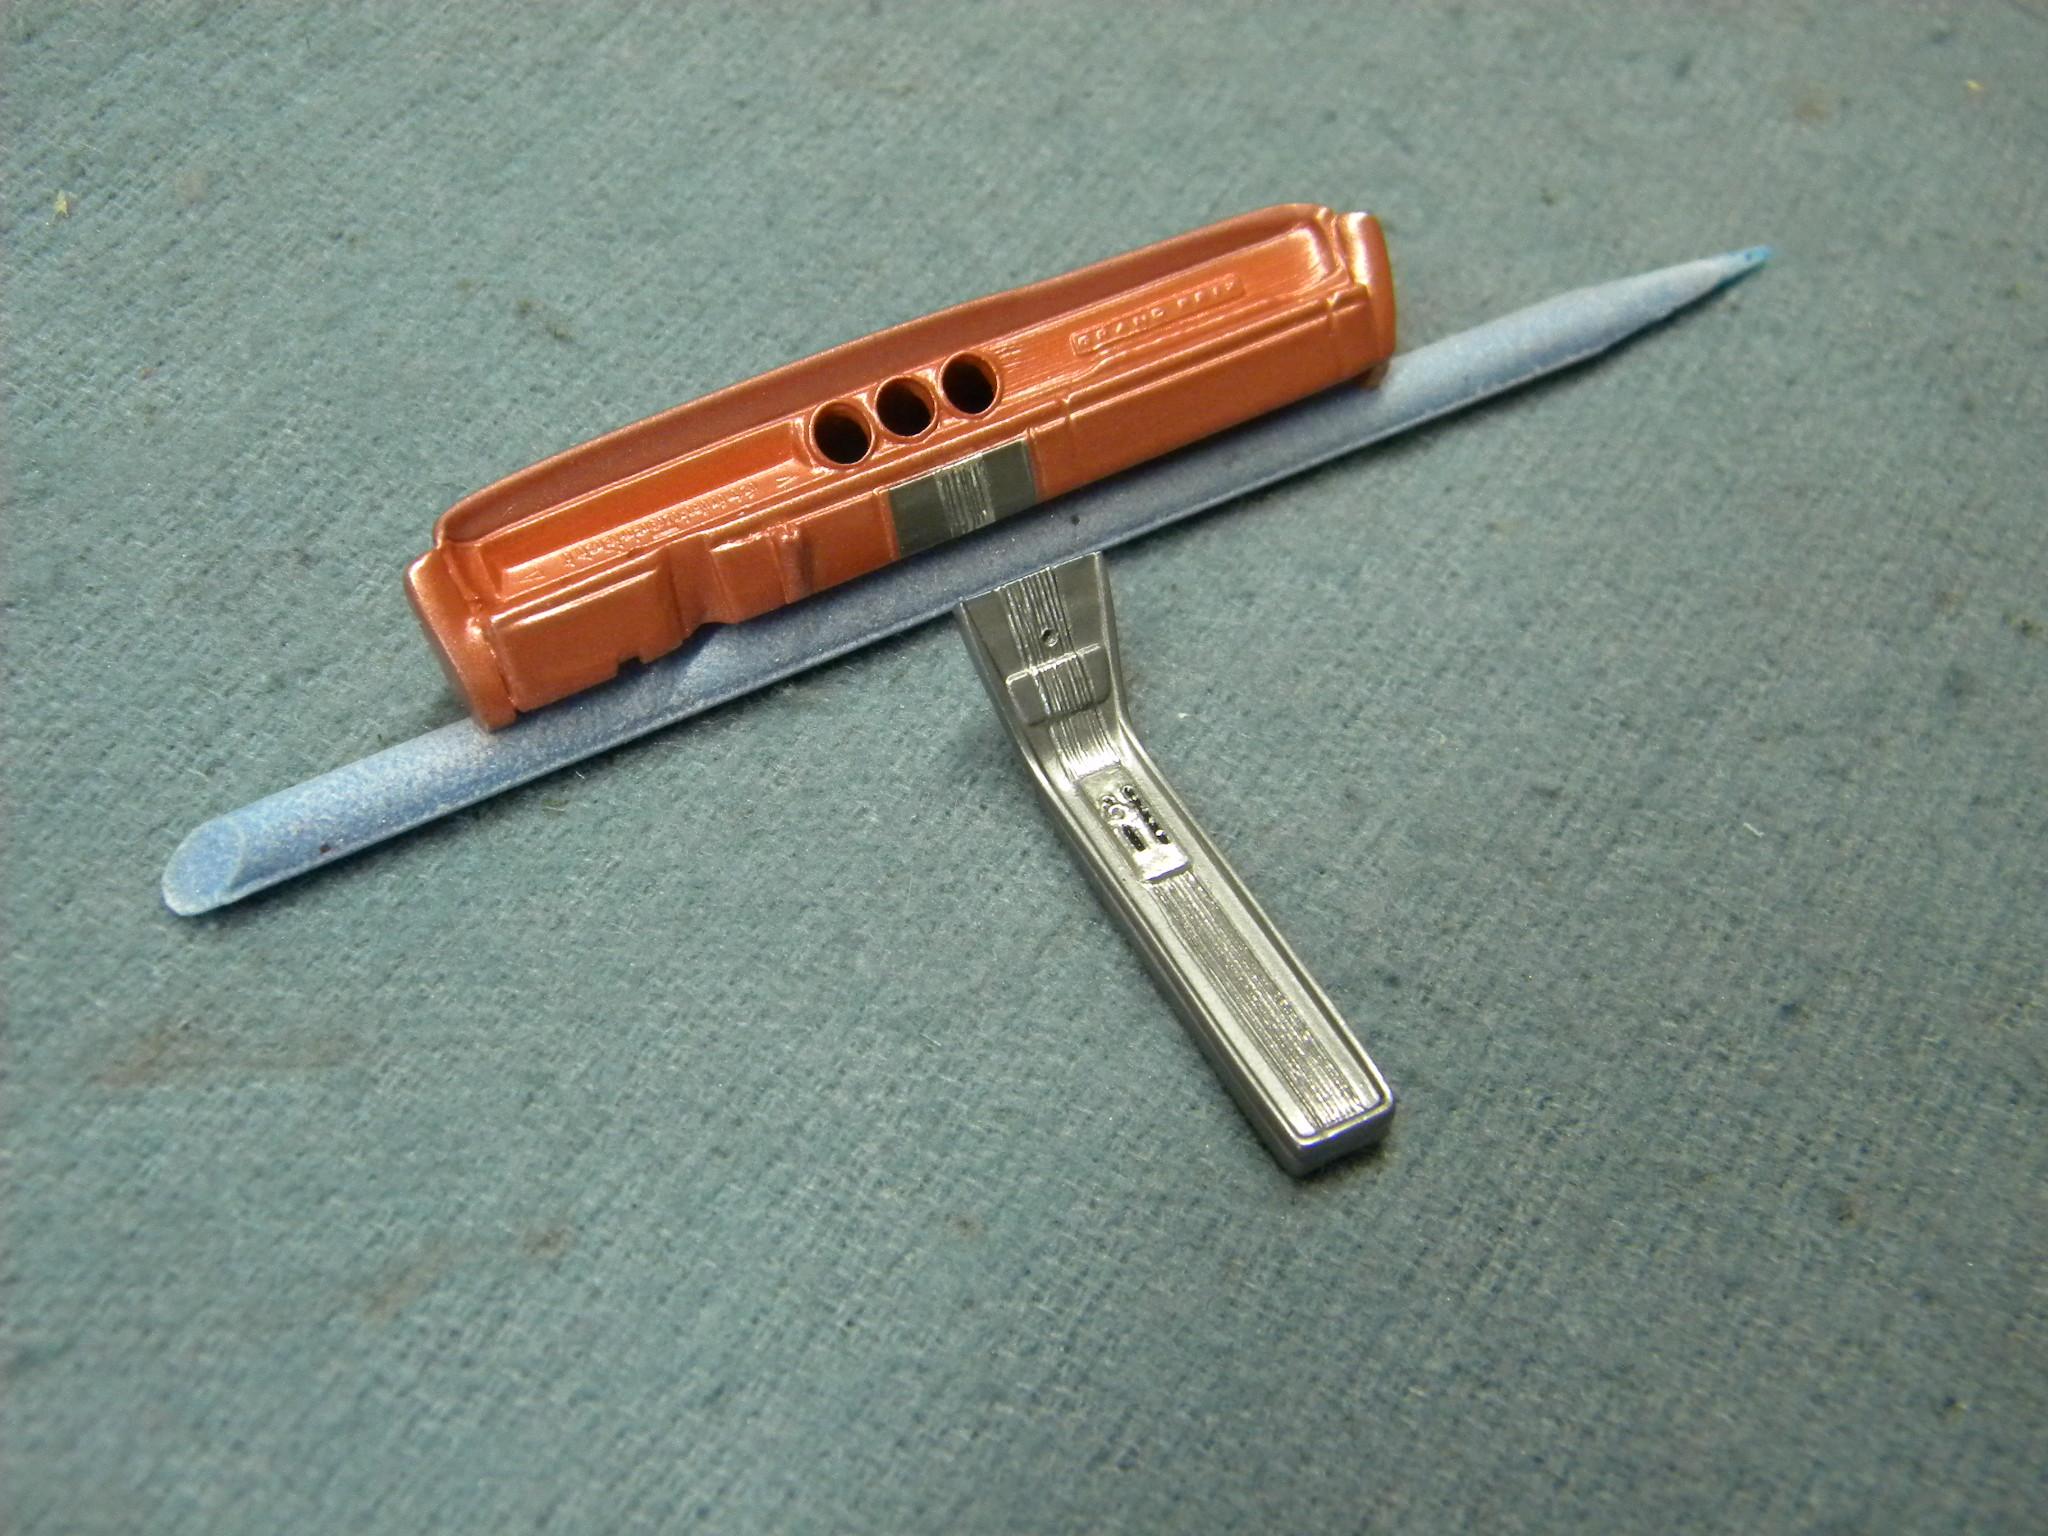
Just finished up a dash board using Best Model Car Parts gauge set for the '64 Pontiac Grand Prix. Terrific stuff! Steve
-
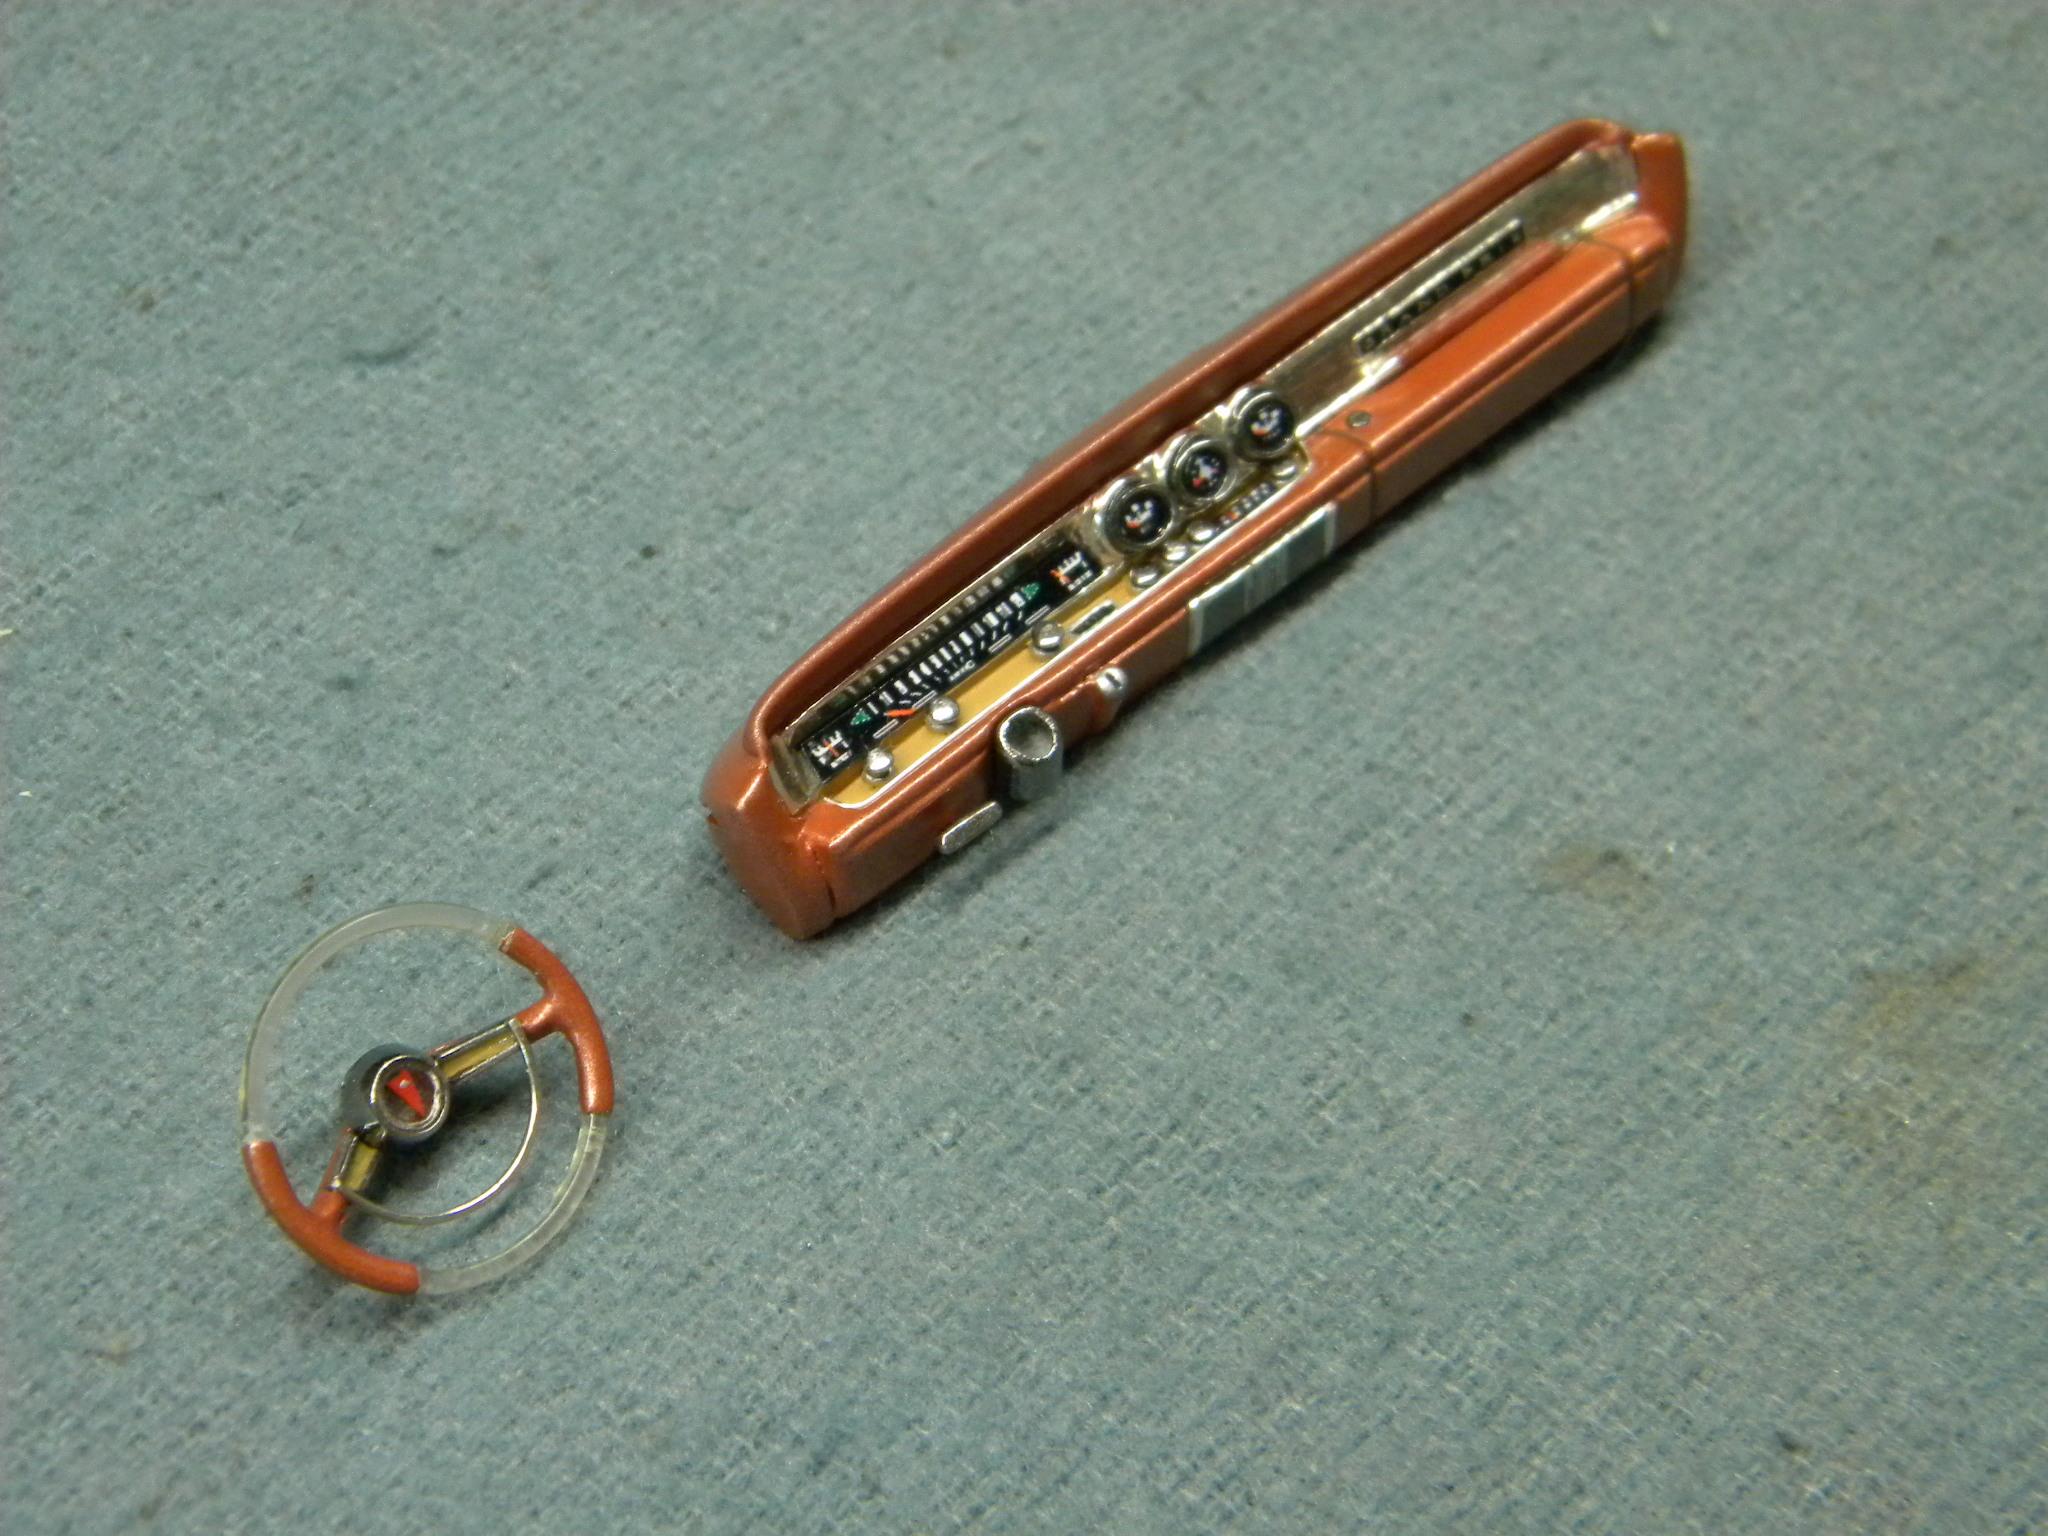
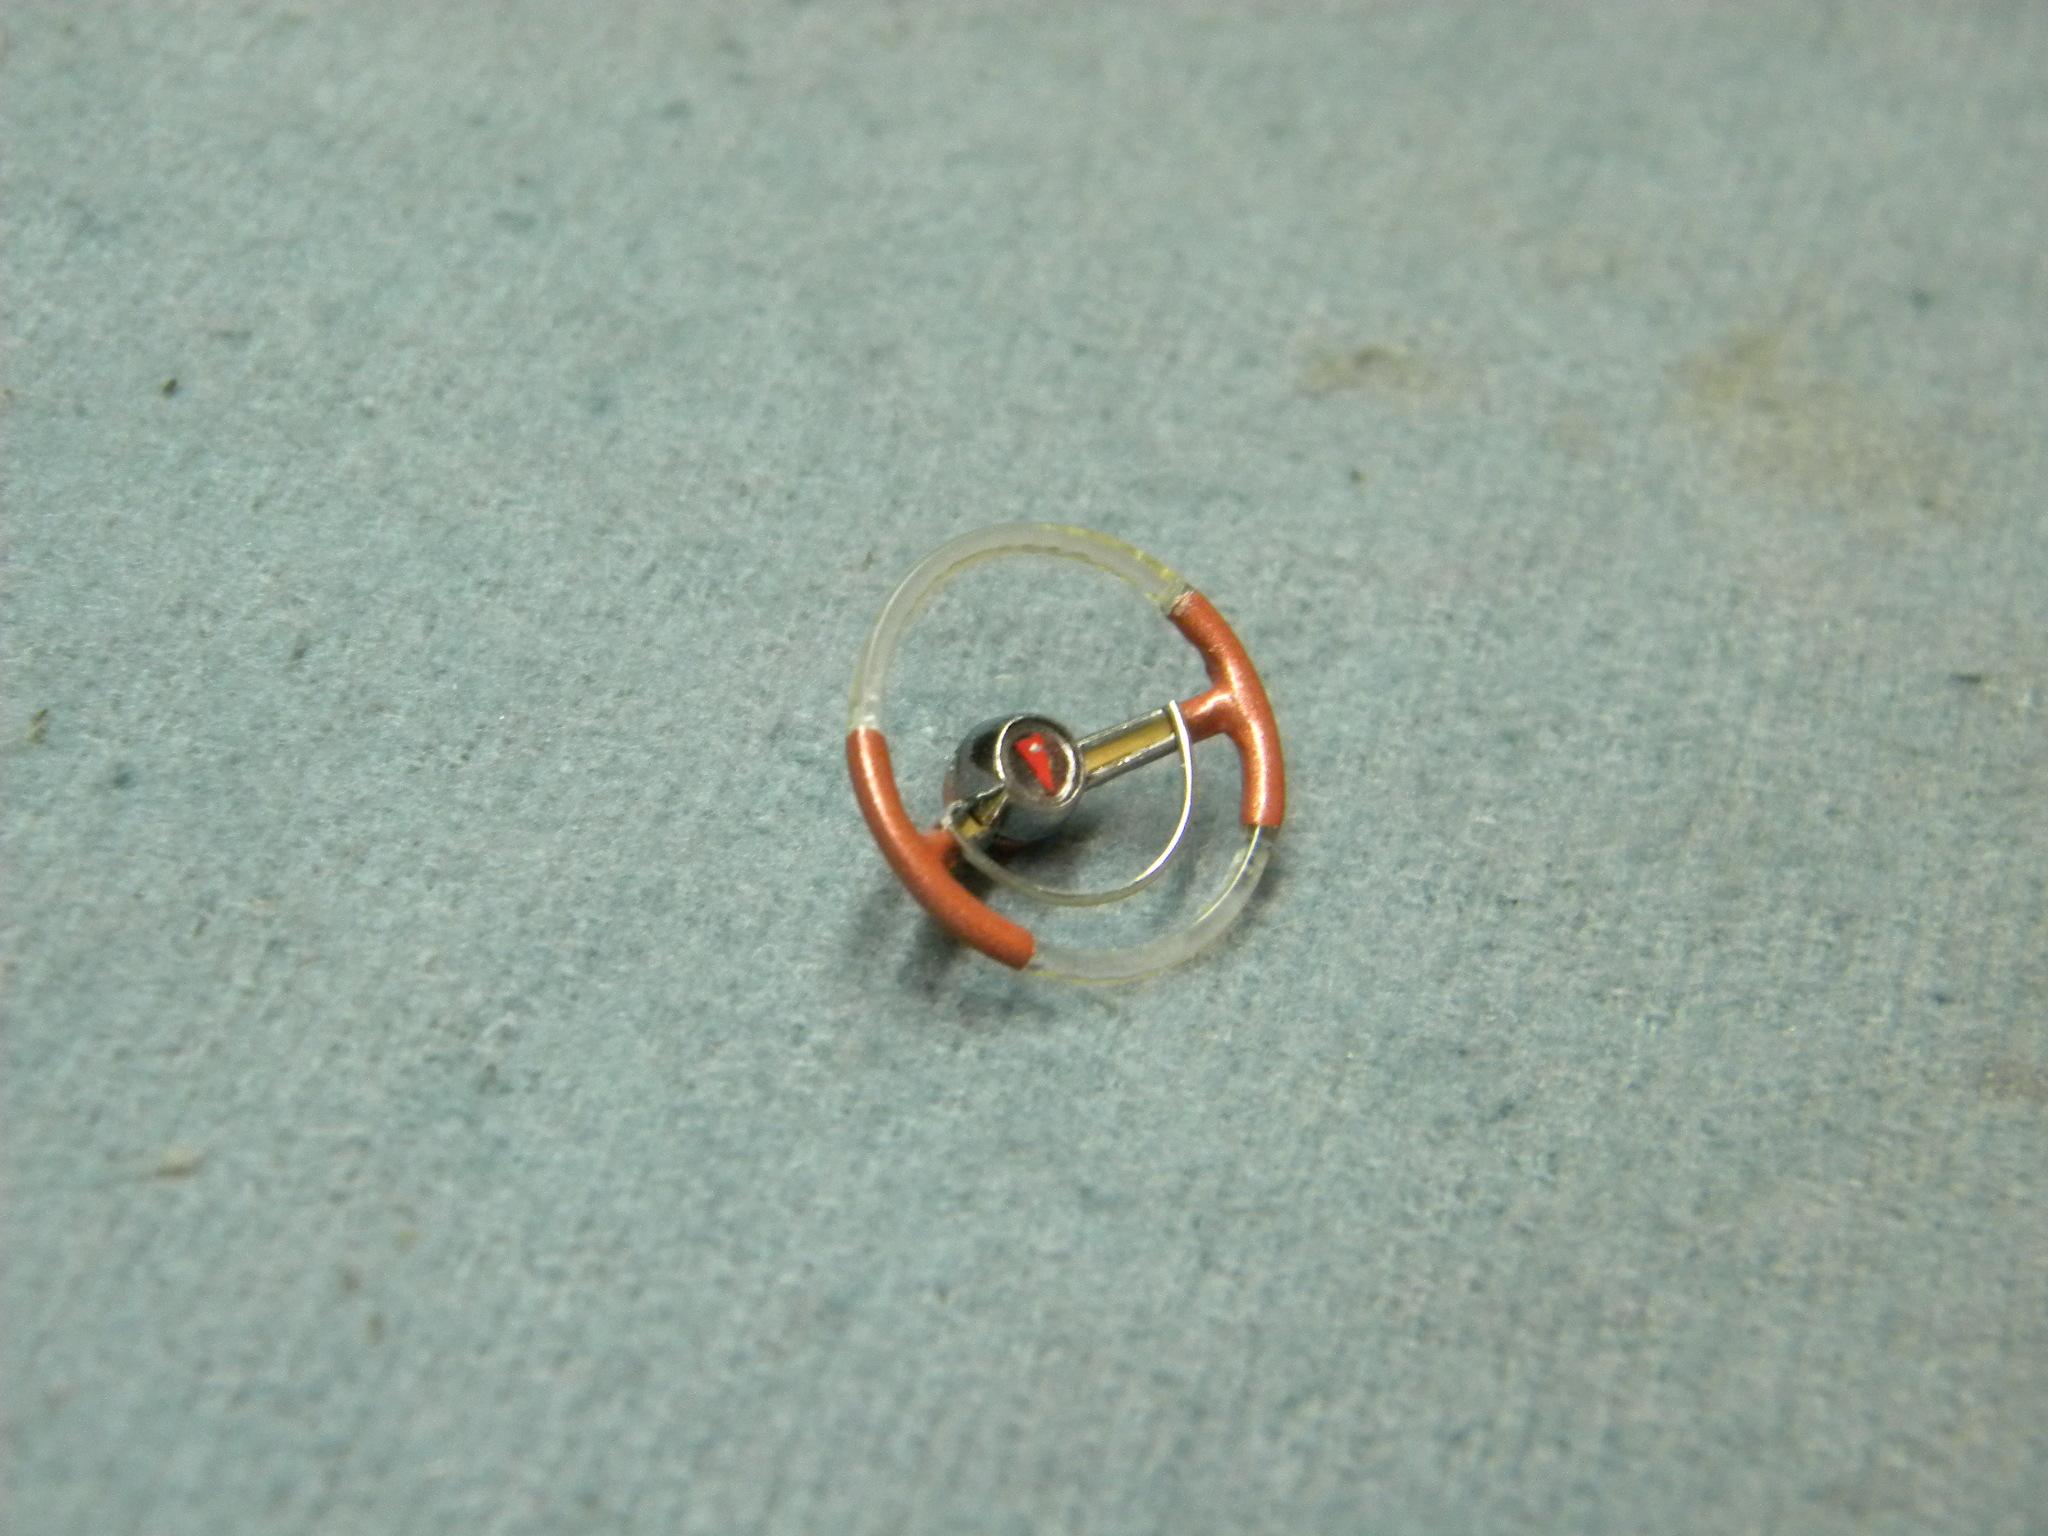
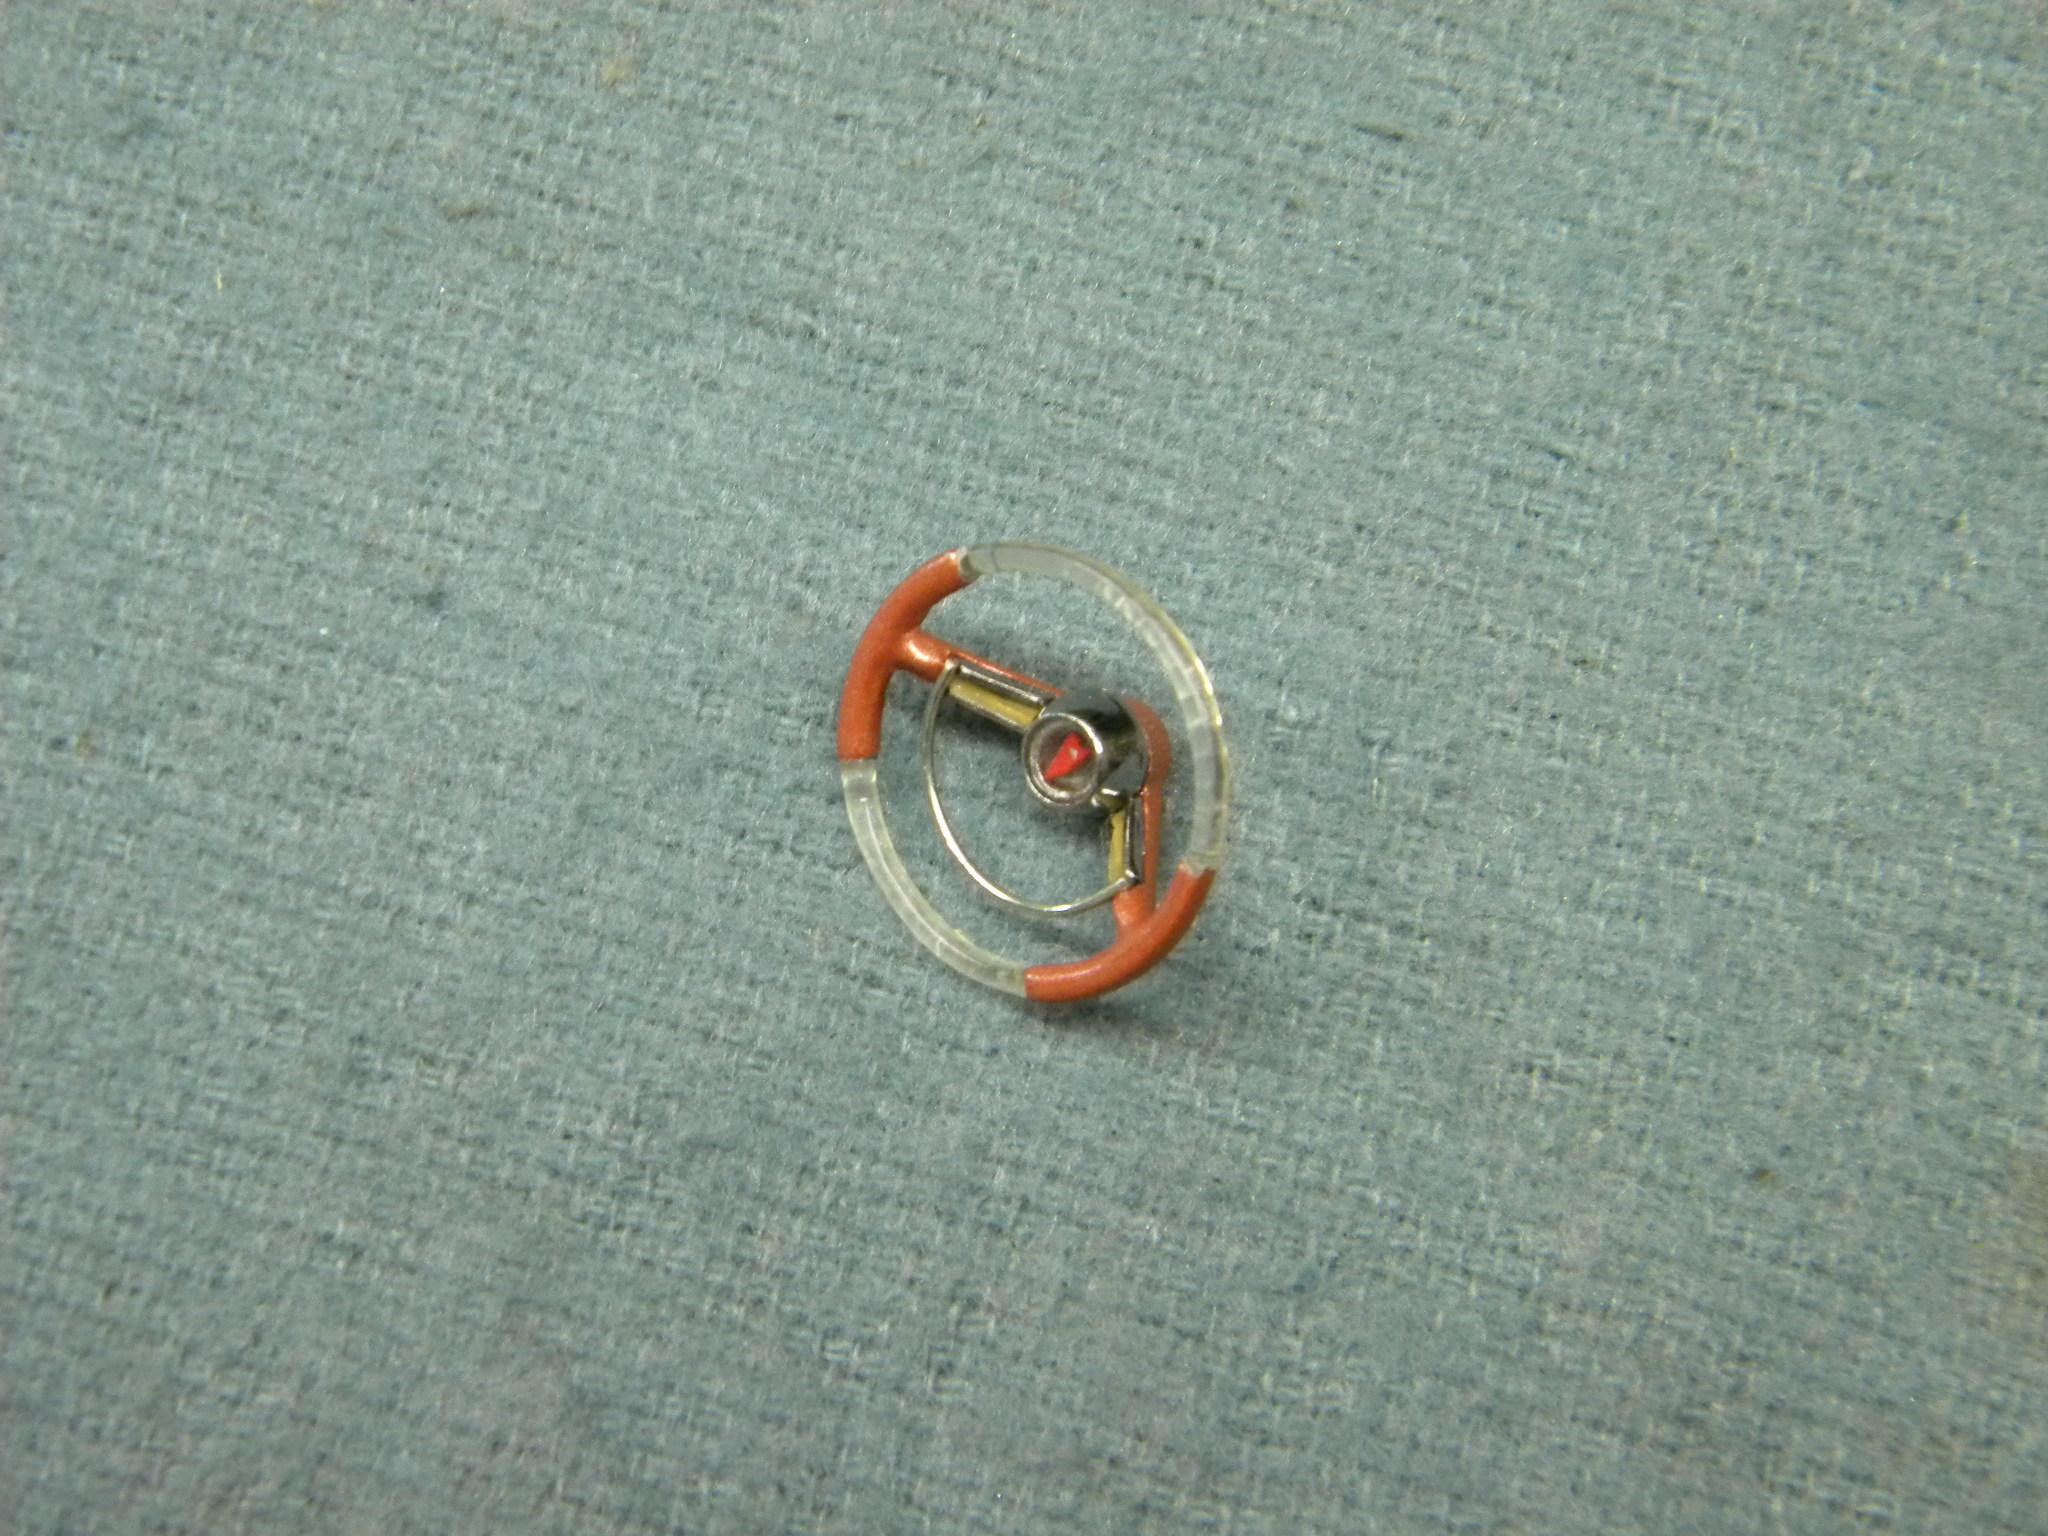
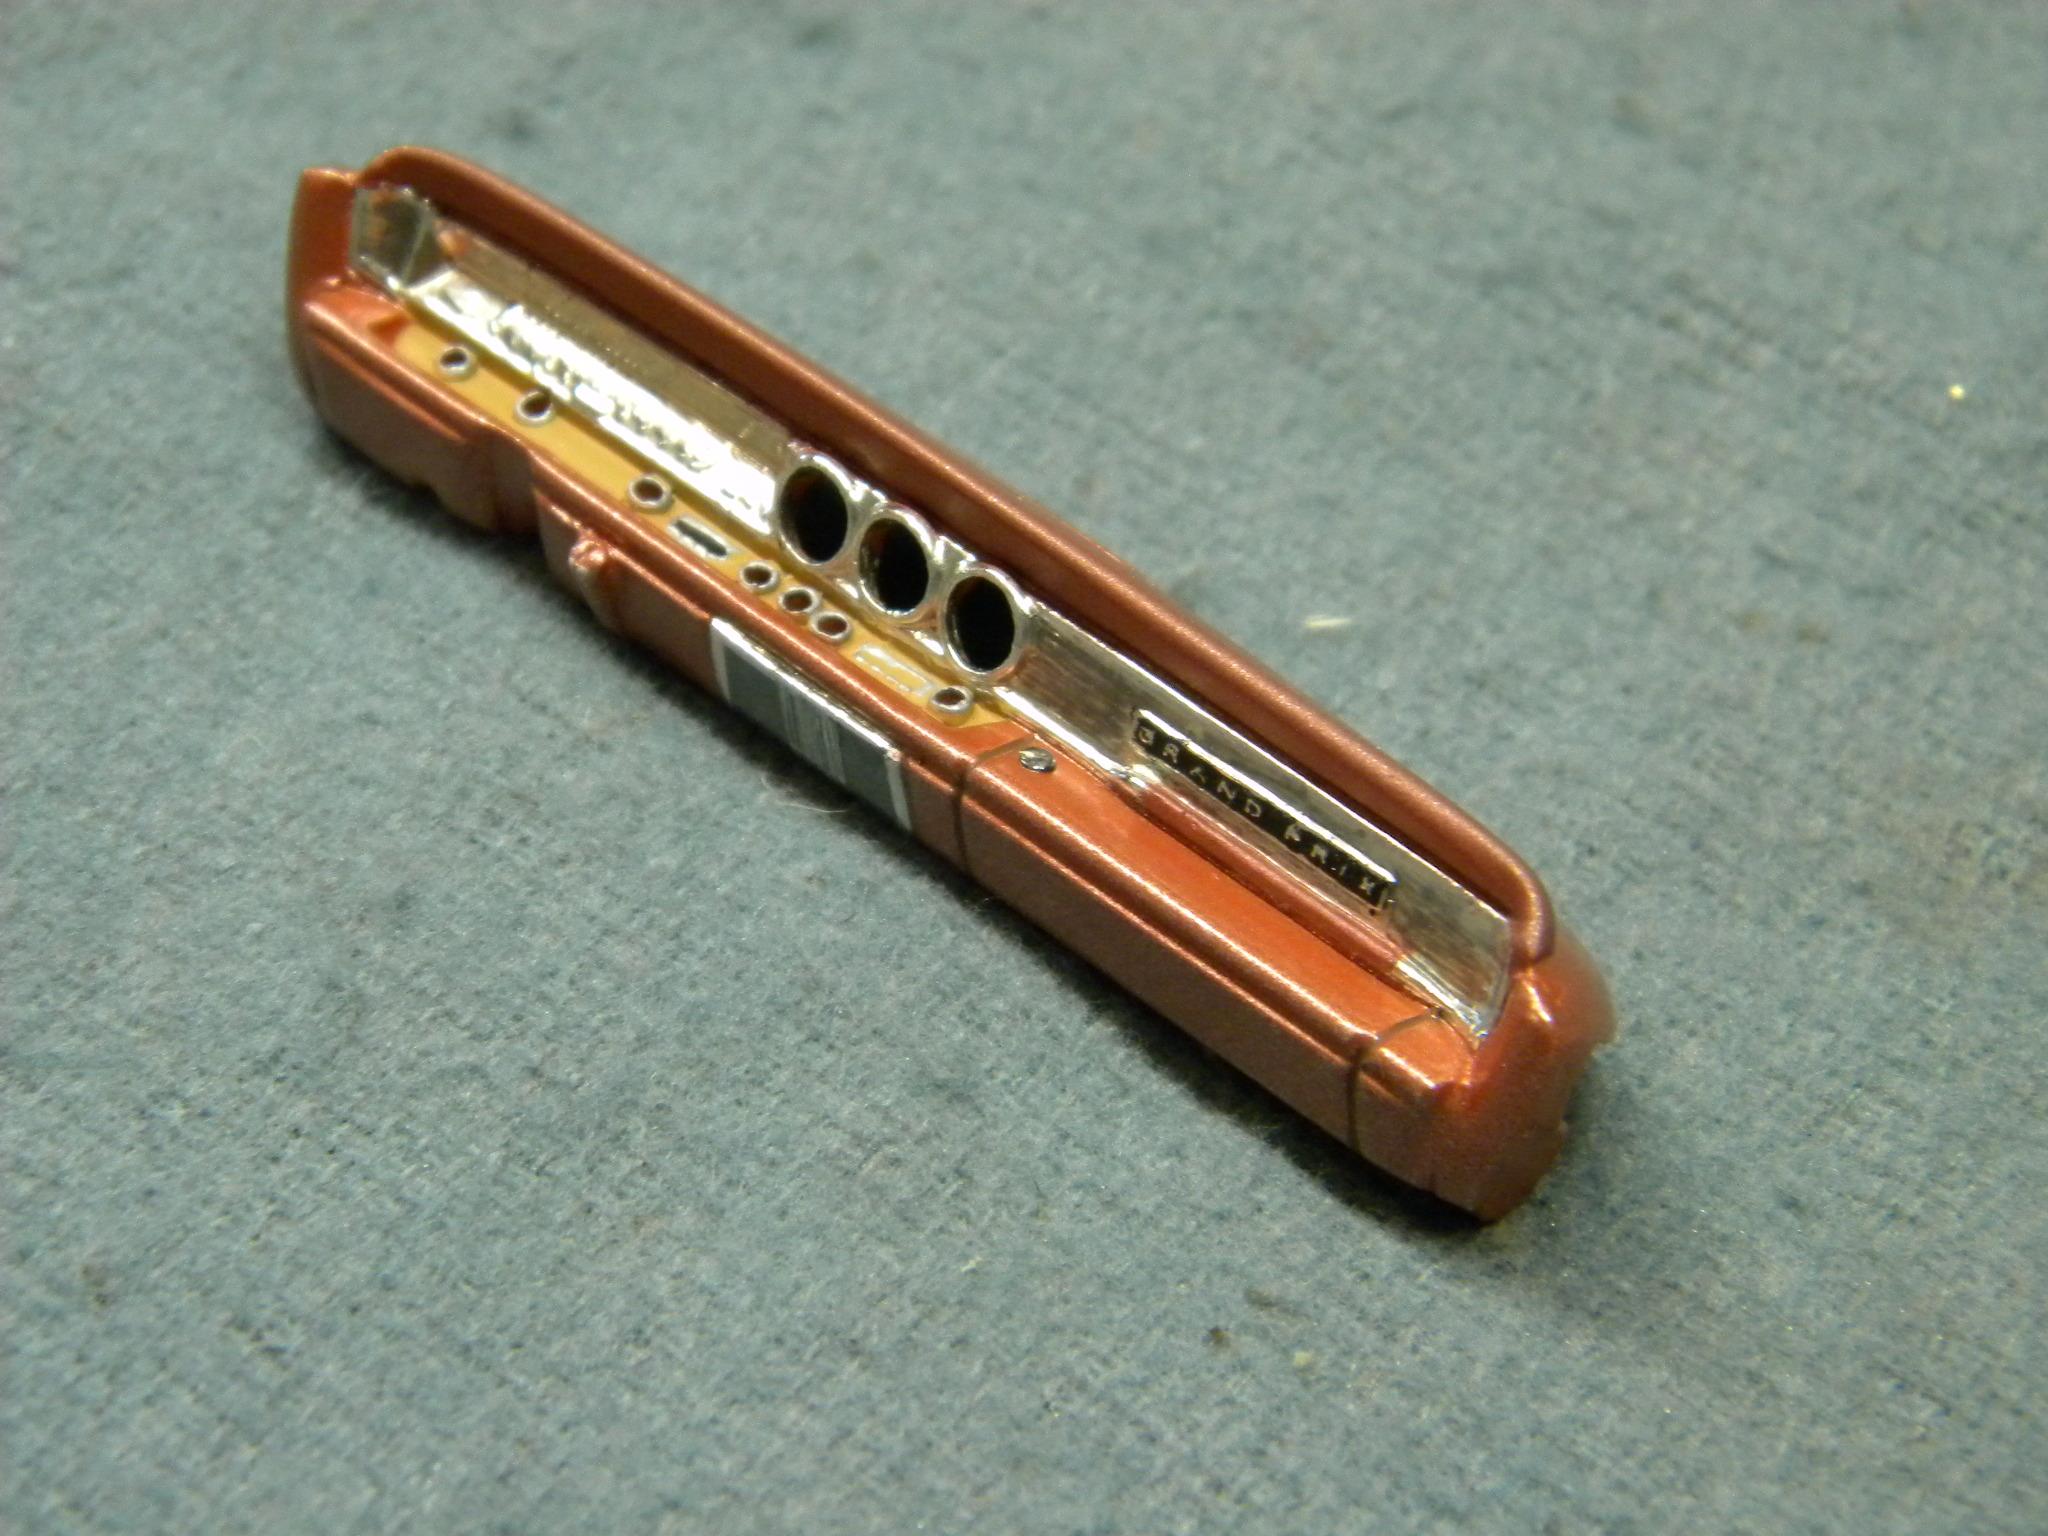
Proudly, I've finished the dashboard and steering wheel for my '64 Pontiac Grand Prix project. Steve
-
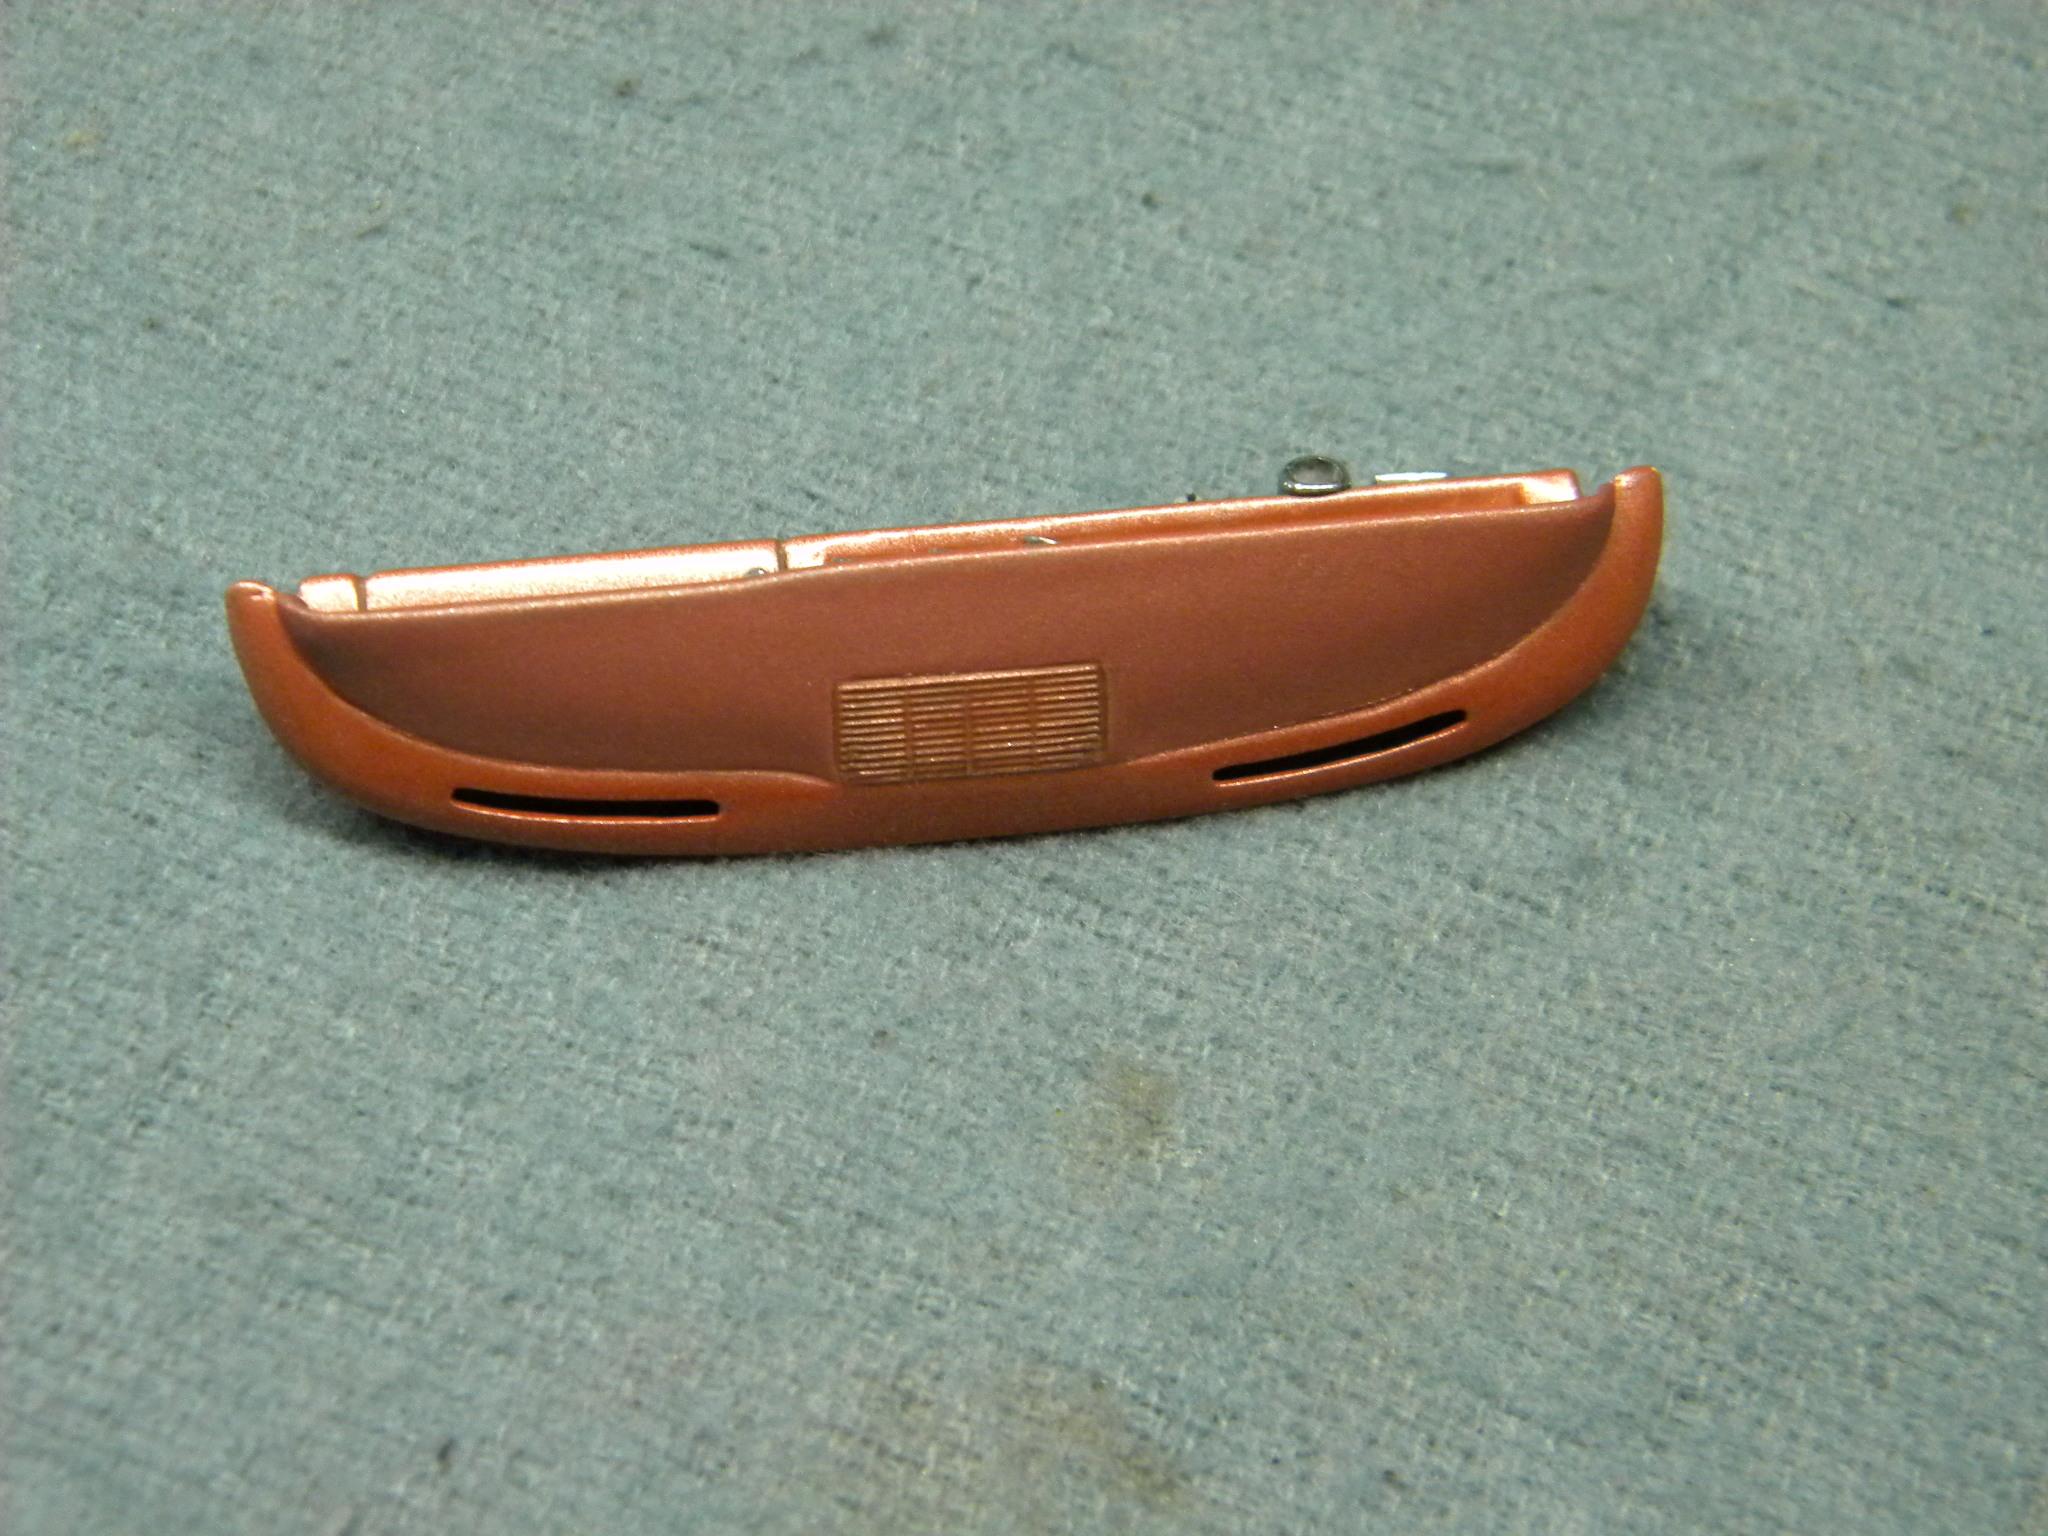
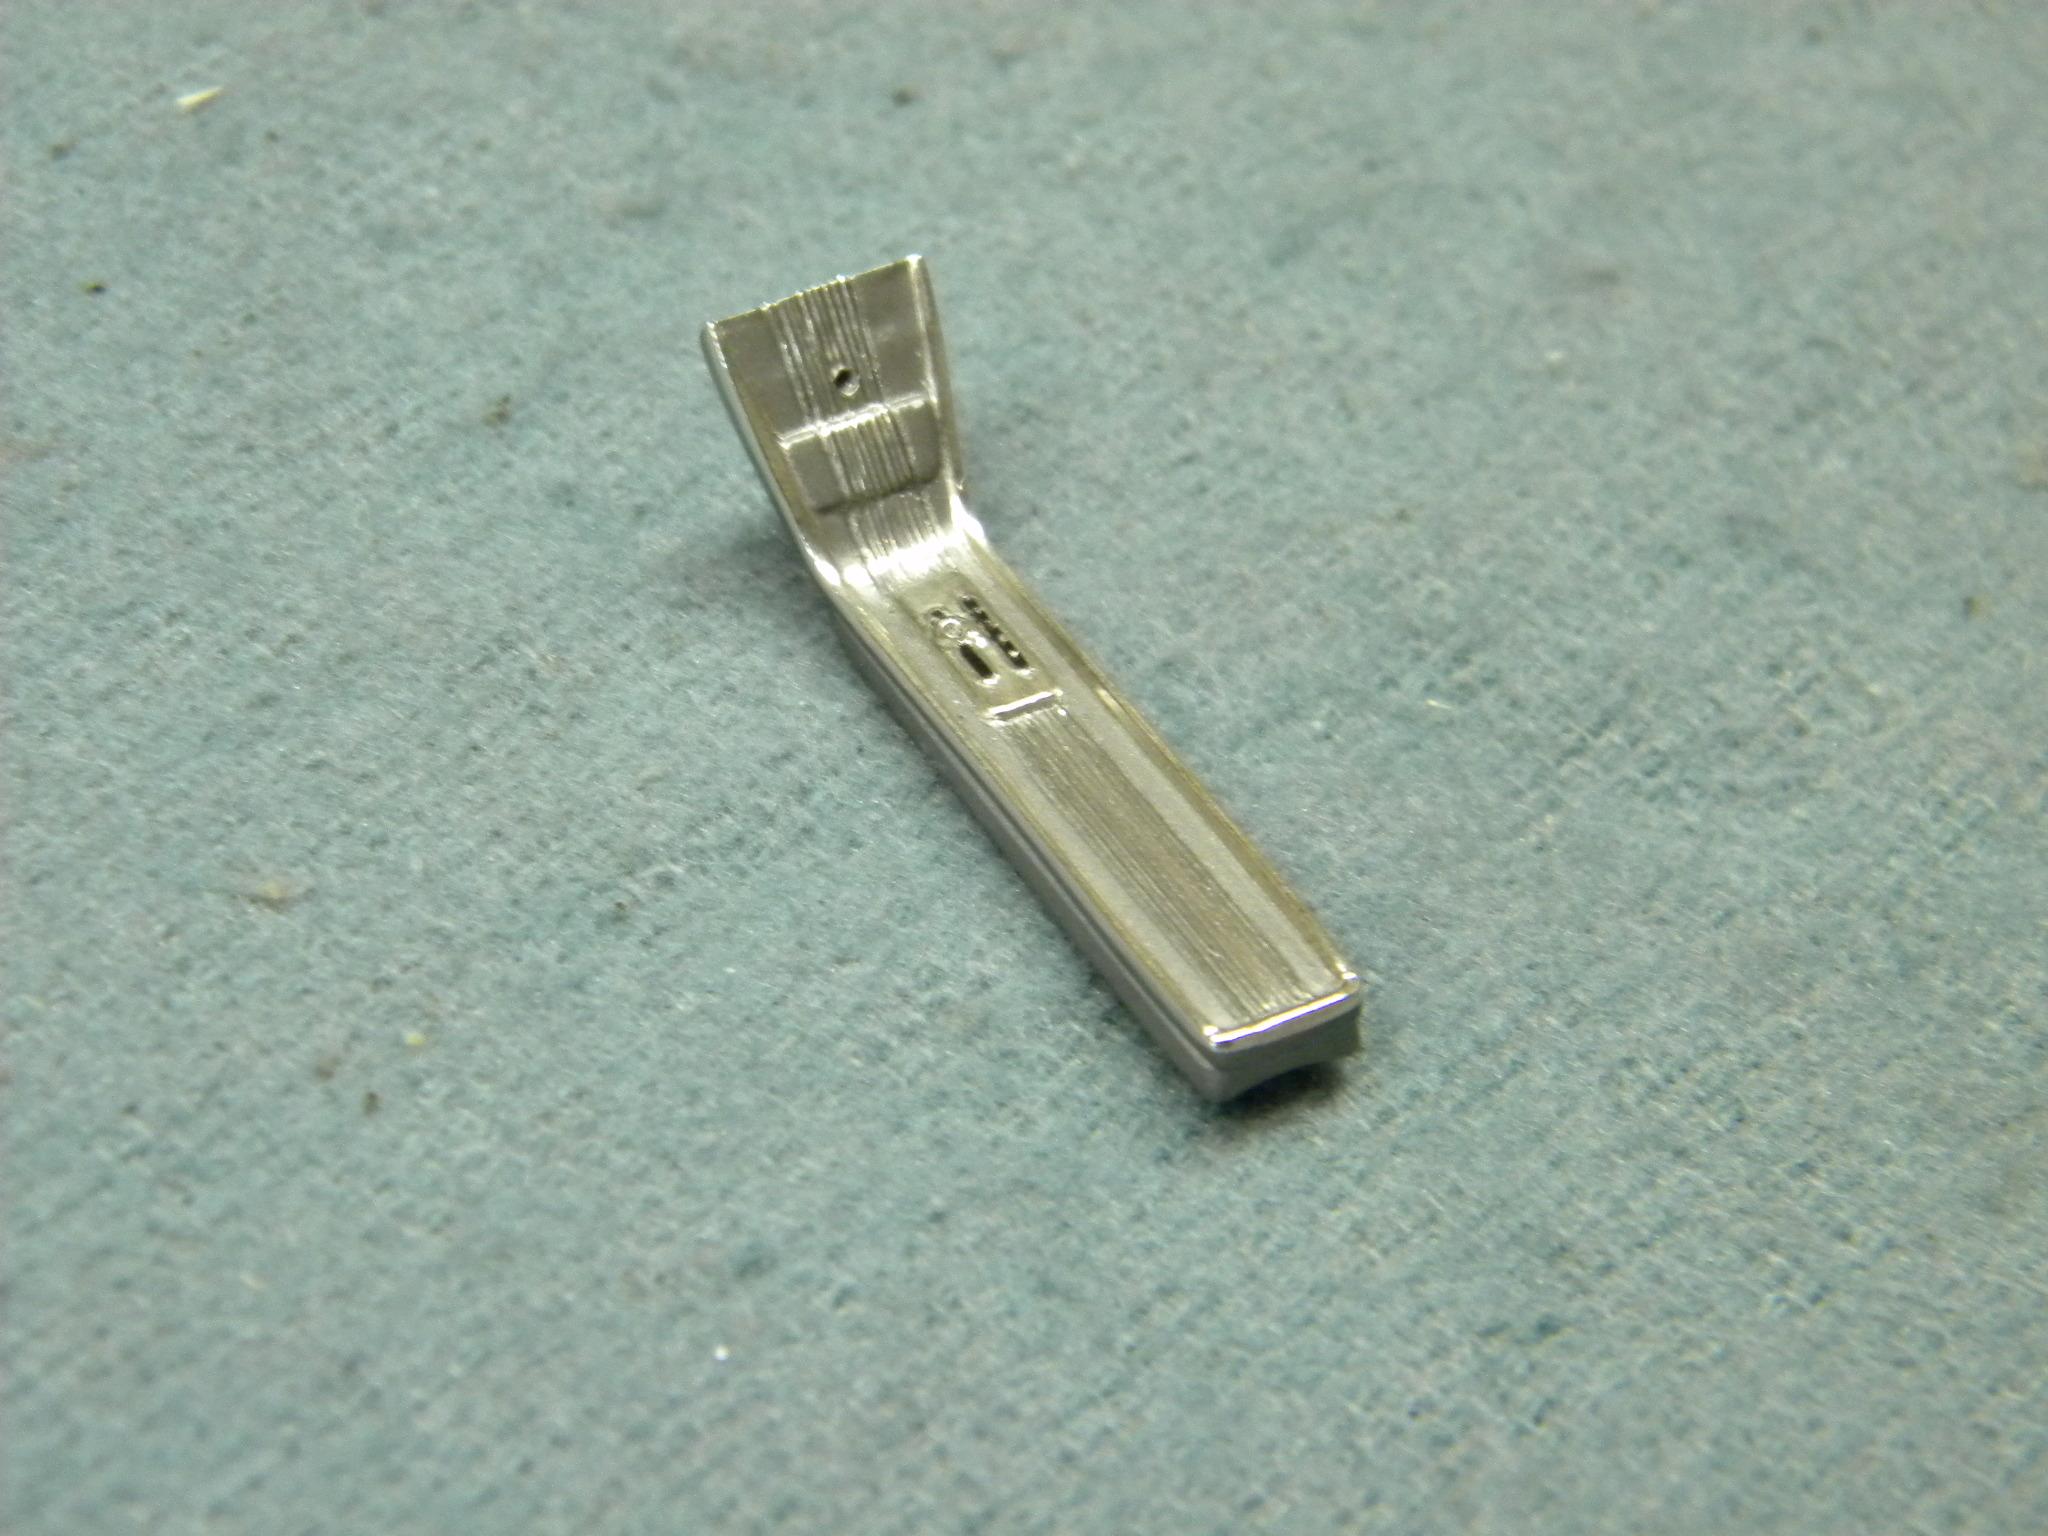
Well, the dash and steering wheel are complete. I'm happy with them. Here is a re-cap of the modifications made. Dash: Defroster vents added. Original gauge pods, dash knobs, steering column collar and ignition switch removed and replaced. Trim around wood area, parking brake release and Best Model Car Parts gauge decals added. Steering wheel: Center cap and badge, spoke pieces and horn ring all scratch built. Steve
-
I'll remember that. Maybe I can goad him into producing a few more sets for some of the old annuals that I need gauges for that he doesn't already offer. Steve
-
Best part is that he offers gauge sets for some long gone annuals that never came with gauge decals from the beginning. I have a set from Best Model Car Parts that were made for the AMT '64 Pontiac Grand Prix that I will be using on my most recent project. Steve
-
It is. Very simple and quick to use with no drying or curing time. Steve
-
'63 T-Bird yellowed glass
StevenGuthmiller replied to hedotwo's topic in Model Building Questions and Answers
I didn't say that I knew anything about the '63 T-Bird glass, and I don't. I was merely providing an option if in fact it didn't have compound curves. And as we all know, parts provided in model kits do not necessarily mimic the real thing. The only way to know for certain whether it will work or not, is to try it. Steve -
You do some exceptionally nice work Gary!! Very cleanly done with top notch paint work! Excellent!! Steve
-
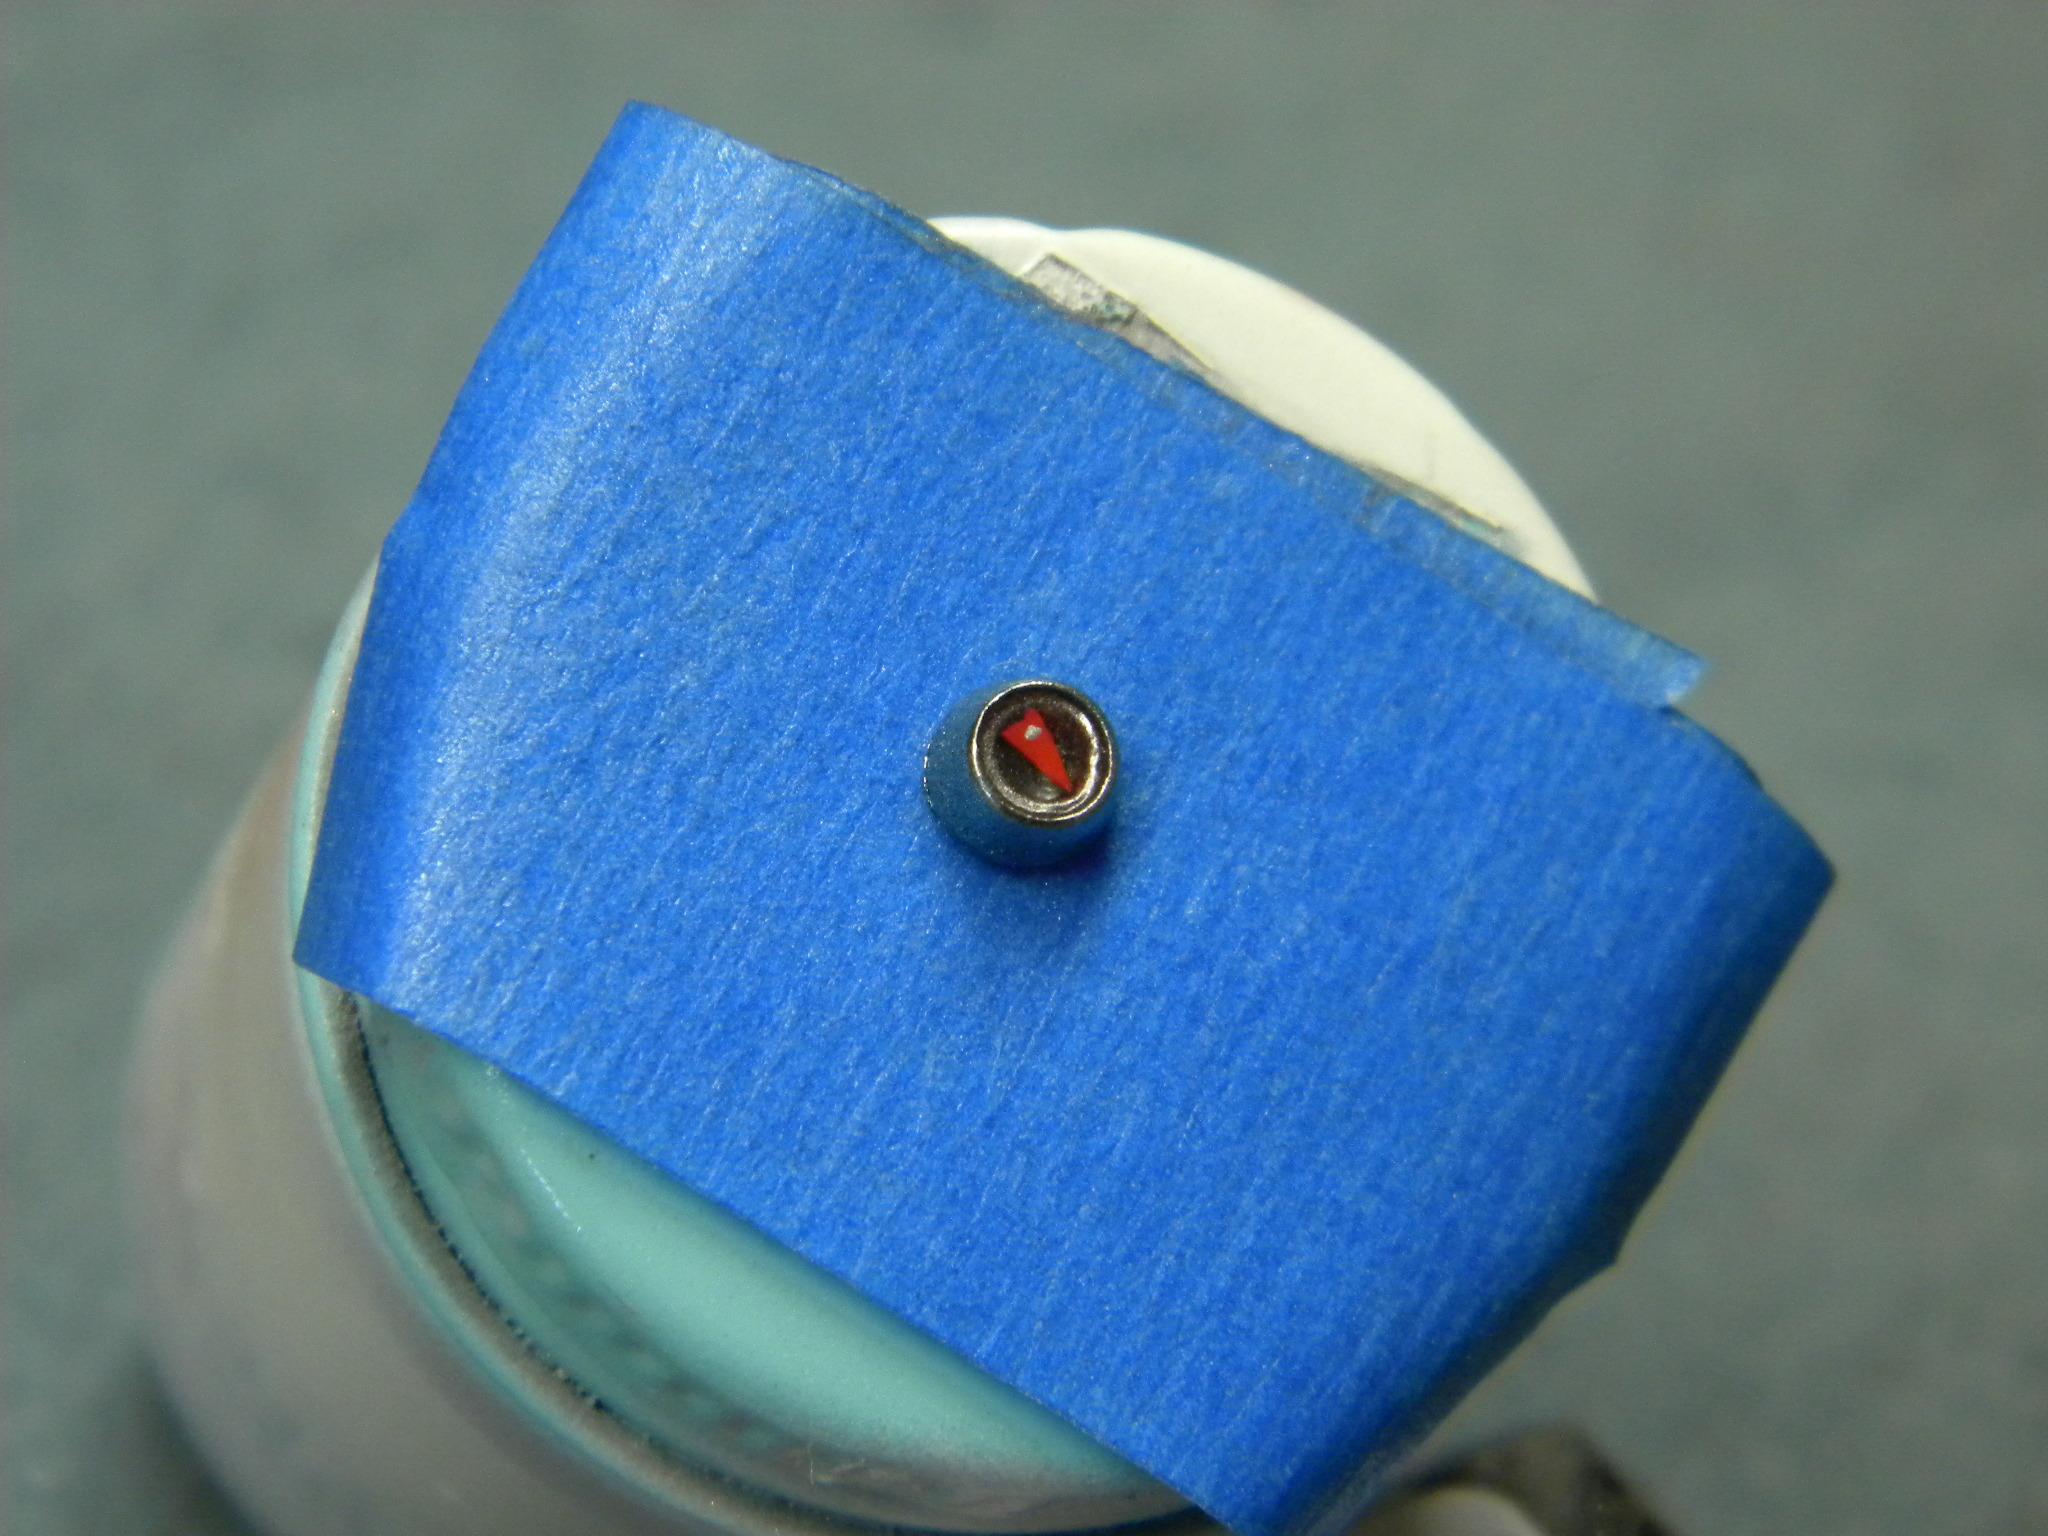
A little more progress on the dash, console and steering wheel parts. The dash still needs knobs, gauge pods, gauge faces and a few other small items to be finished. The foiling is done and the shifter and tach is all that is required to finish the console. The addition to the steering wheel center cap might get a few laughs from some of you, but it was something that just popped into my head, and literally took 10 minutes to complete, so I thought, "what the hell". The red in the Pontiac "crest" is not correct for a '64 Grand Prix, but being as the factory faint crest and "Grand Prix" lettering on a clear lens would be imperceptible and impossible to do, I decided to dress it up a bit. I started by cutting a small V shaped piece of styrene strip, filed a small notch at the top and then painted it red and added a small dab of silver for the "star". Then I filled the bottom of the hollow with Laser Bond, positioned the crest and hit it with the UV light. Then I filled the hollow completely with Laser Bond to give the impression that the crest is floating in the center of the button. Not something that will be easily seen, but it was fun to try and took no time at all. Steve
-
'63 T-Bird yellowed glass
StevenGuthmiller replied to hedotwo's topic in Model Building Questions and Answers
Glass yellowing on these old annuals is actually pretty common. I've acquired several built models over the years with yellowed glass. If the Hydrogen peroxide trick doesn't work, You could try the tinting avenue. Yellow and blue makes green, so you could try a very pale blue tint in the hopes that it will result in a pale green tint, which is what most cars of this vintage had in the first place. Another option is to replace the glass with thin clear sheet plastic. It will give you a clearer and more in scale appearance than the thick original glass provides anyway. As long as the windshield doesn't have any compound curves in it, (which I don't believe the '63 T-Bird should have) it won't be difficult to do. Steve -
Wow! That's nice! Great paint work! Steve
-
Opinion on"craft" acrylics
StevenGuthmiller replied to Ctmodeler's topic in Model Building Questions and Answers
I use the Ceramcoat stuff as well, but just about exclusively for washes for things like grilles and panel lines. The stuff is not very durable, so I don't use it for much else. Steve -
Apparently you have yet to see the "air hug". ? Steve
-
Thanks Jerry. I should have guessed that the tires were Modelhaus. They make such nice stuff! Steve
-
Very nice work Steve! It's always nice to see something that you once held in your hand transformed by someone else. Great job! Steve
-
'63 T-Bird yellowed glass
StevenGuthmiller replied to hedotwo's topic in Model Building Questions and Answers
You could try soaking in oven cleaner or Super Clean, but I have little hope that you will ever see this glass clear again. It's been my experience with these old kits that once the glass begins to discolor, the yellow goes all of the way through the glass. Steve -
Thanks everyone! I appreciate the kind comments. I managed to find a few minutes this afternoon to sit down and work on a couple more small details. If my research is correct, it appears that the consoles in these cars were all a dark metallic gray with chrome accents, so I started by covering the ribbed center section of the console and corresponding part of the lower dash with foil. I then shot the console and dash section with some Alclad dark aluminum, and much like I do the body scripts, I then cleaned the paint from the ribs with some lacquer thinner to the best of my ability. Then I foiled and detailed the shift gate, followed by covering the whole thing with a light coat of Testors clear lacquer. The trim around the outer edge will be foiled once the clear has cured. Not much, but I guess every little thing counts as progress. Steve
-
Nice work Jerry!! Which kit did the tires and wheels come from? Looks like a nice set! Steve
-
Wow! Someone must have had a sale on AMT '57 Chrysler 300s! I believe this is the third finished build posted in the past couple of weeks! But I have to say, I think this is the best one yet! Mostly because I really like the color! This car looks particularly nice in white. Absolutely beautiful model Anthony!! Steve
-
It was! Steve