StevenGuthmiller
-
Posts
15,078 -
Joined
-
Last visited
Content Type
Profiles
Forums
Events
Gallery
Everything posted by StevenGuthmiller
-

Sprayguns over airbrushes
StevenGuthmiller replied to aurfalien's topic in Model Building Questions and Answers
You can kind of kill 2 birds with one stone by purchasing one of the "trigger air brushes" like the Creos PS-390 that I purchased some time back. It operates like somewhat of a hybrid between an airbrush and a spray gun. It functions much like most airbrushes, but with the ease of a trigger like a spray gun. No button to try to get used to air/paint feed, and with the "fan spray" tip, you can get a nice wide pattern for painting bodies with minimal overlap. Steve -
I've never used a dehydrator to cure paint. I don't think that option was really on the radar 30 years ago when I was using enamel. I use exclusively acrylic lacquer for bodies now. No need for a dehydrator with that. Steve
-
Testors enamel gloss is great stuff........as long as you're using it over very dark colors. Don't even try to use it over a lighter color! It yellows almost instantly. For example, if used over a nice pale blue, it will quickly become pale green! And if you do want to use it, just make sure that you have a month or two to let it cure. Steve
-
Chrome headlights
StevenGuthmiller replied to gjorenby's topic in Model Building Questions and Answers
For the past few years, I've been drilling them out and replacing them, but before that, I usually mixed some clear gloss with a tiny dab of white and used that, I still do the same for parking lights. You can even cast your own lenses from one of the UV setting glues like Laser Bond if you choose to replace them. I used Laser Bond for the lenses in my '63 Bonneville. Steve -
It doesn't come out of the can that shiny guys. That is the result after polishing. But it's tough as nails and looks great when finished. Steve
-
I have used Duplicolor black with Duplicolor clear on several occasions with good results. It does require polishing, but it will give you a good shine and a durable finish. Steve
-
Hello from South Wales
StevenGuthmiller replied to doorsovdoon's topic in Welcome! Introduce Yourself
Welcome Gareth. As you will soon discover, every level of skill is represented on this board, from the beginner to the advanced. Don't be afraid to post your work. From what I can see of the models posted above, you do very nice work! Steve -
Thank you so much folks! The body is now completely polished, cleaned and ready for foil. Steve

-
I personally would go with Ray's suggestion, (cobraman). Or I should say that I would order a jar of Matador Red from Scale Finishes, but if I had to use a rattle can, the Chevrolet engine red would be a good choice. It looks to be very close, plus you would have plenty left to paint a boat load of Chevy engines. Steve
-
Very well could be. The "Jalapena Red" on the chip chart doesn't appear to have any orange in it at all, but the example of the color provided by "paintref.com" is definitely orange. Almost too orange to even be called red. Steve
-
Maybe, but it still looks a little too "red" to me. Steve
-
The hue of the Chevy engine red looks very close to me, although I will agree that straight from the can it would be intense. But the '57 Nomad pictured has some patina that might tone it down. I agree completely with the Matador Red option. That is probably the color that is supposed to be represented on that car. Another good option might be 1957 Chrysler "Gauguin Red" which is also a orange-red color. They are both very attractive colors in my opinion, but unfortunately, for the OP's purposes, these colors are available from MCW or Scale Finishes in air brush form, but not readily available in a rattle can. You can obtain these colors in a spray can from one of the custom mix paint providers, but it's going to cost you $25.00 to put it in a spray can. '57 Chevy "Matador Red": 1957 Chrysler "Gauguin Red": Steve
-
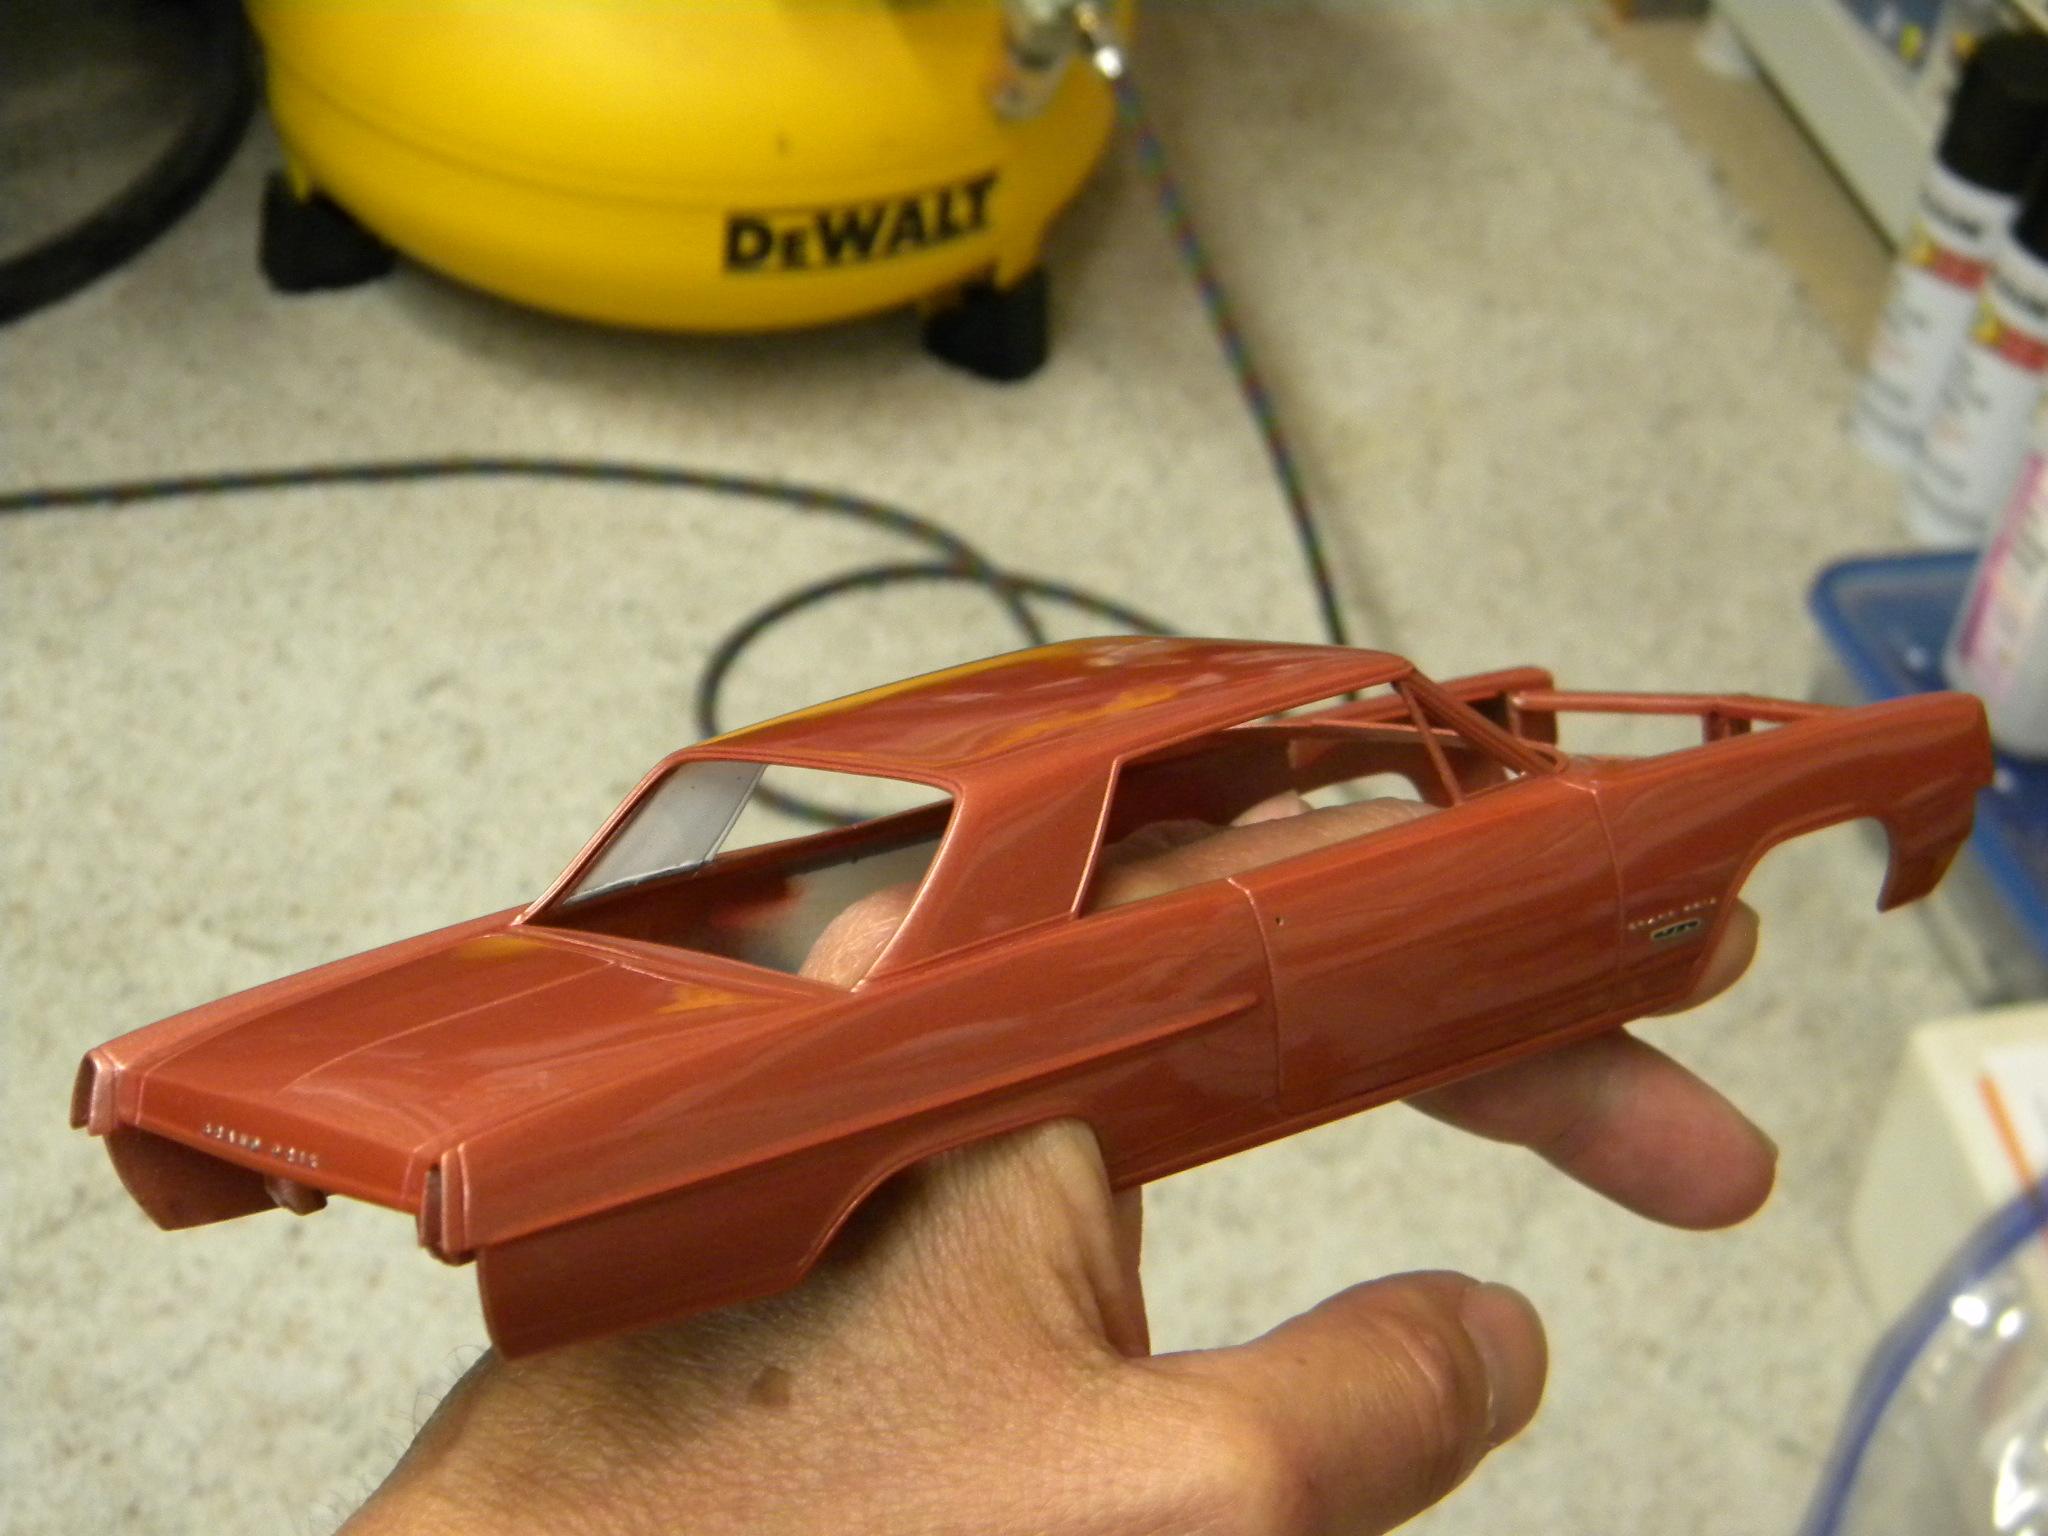
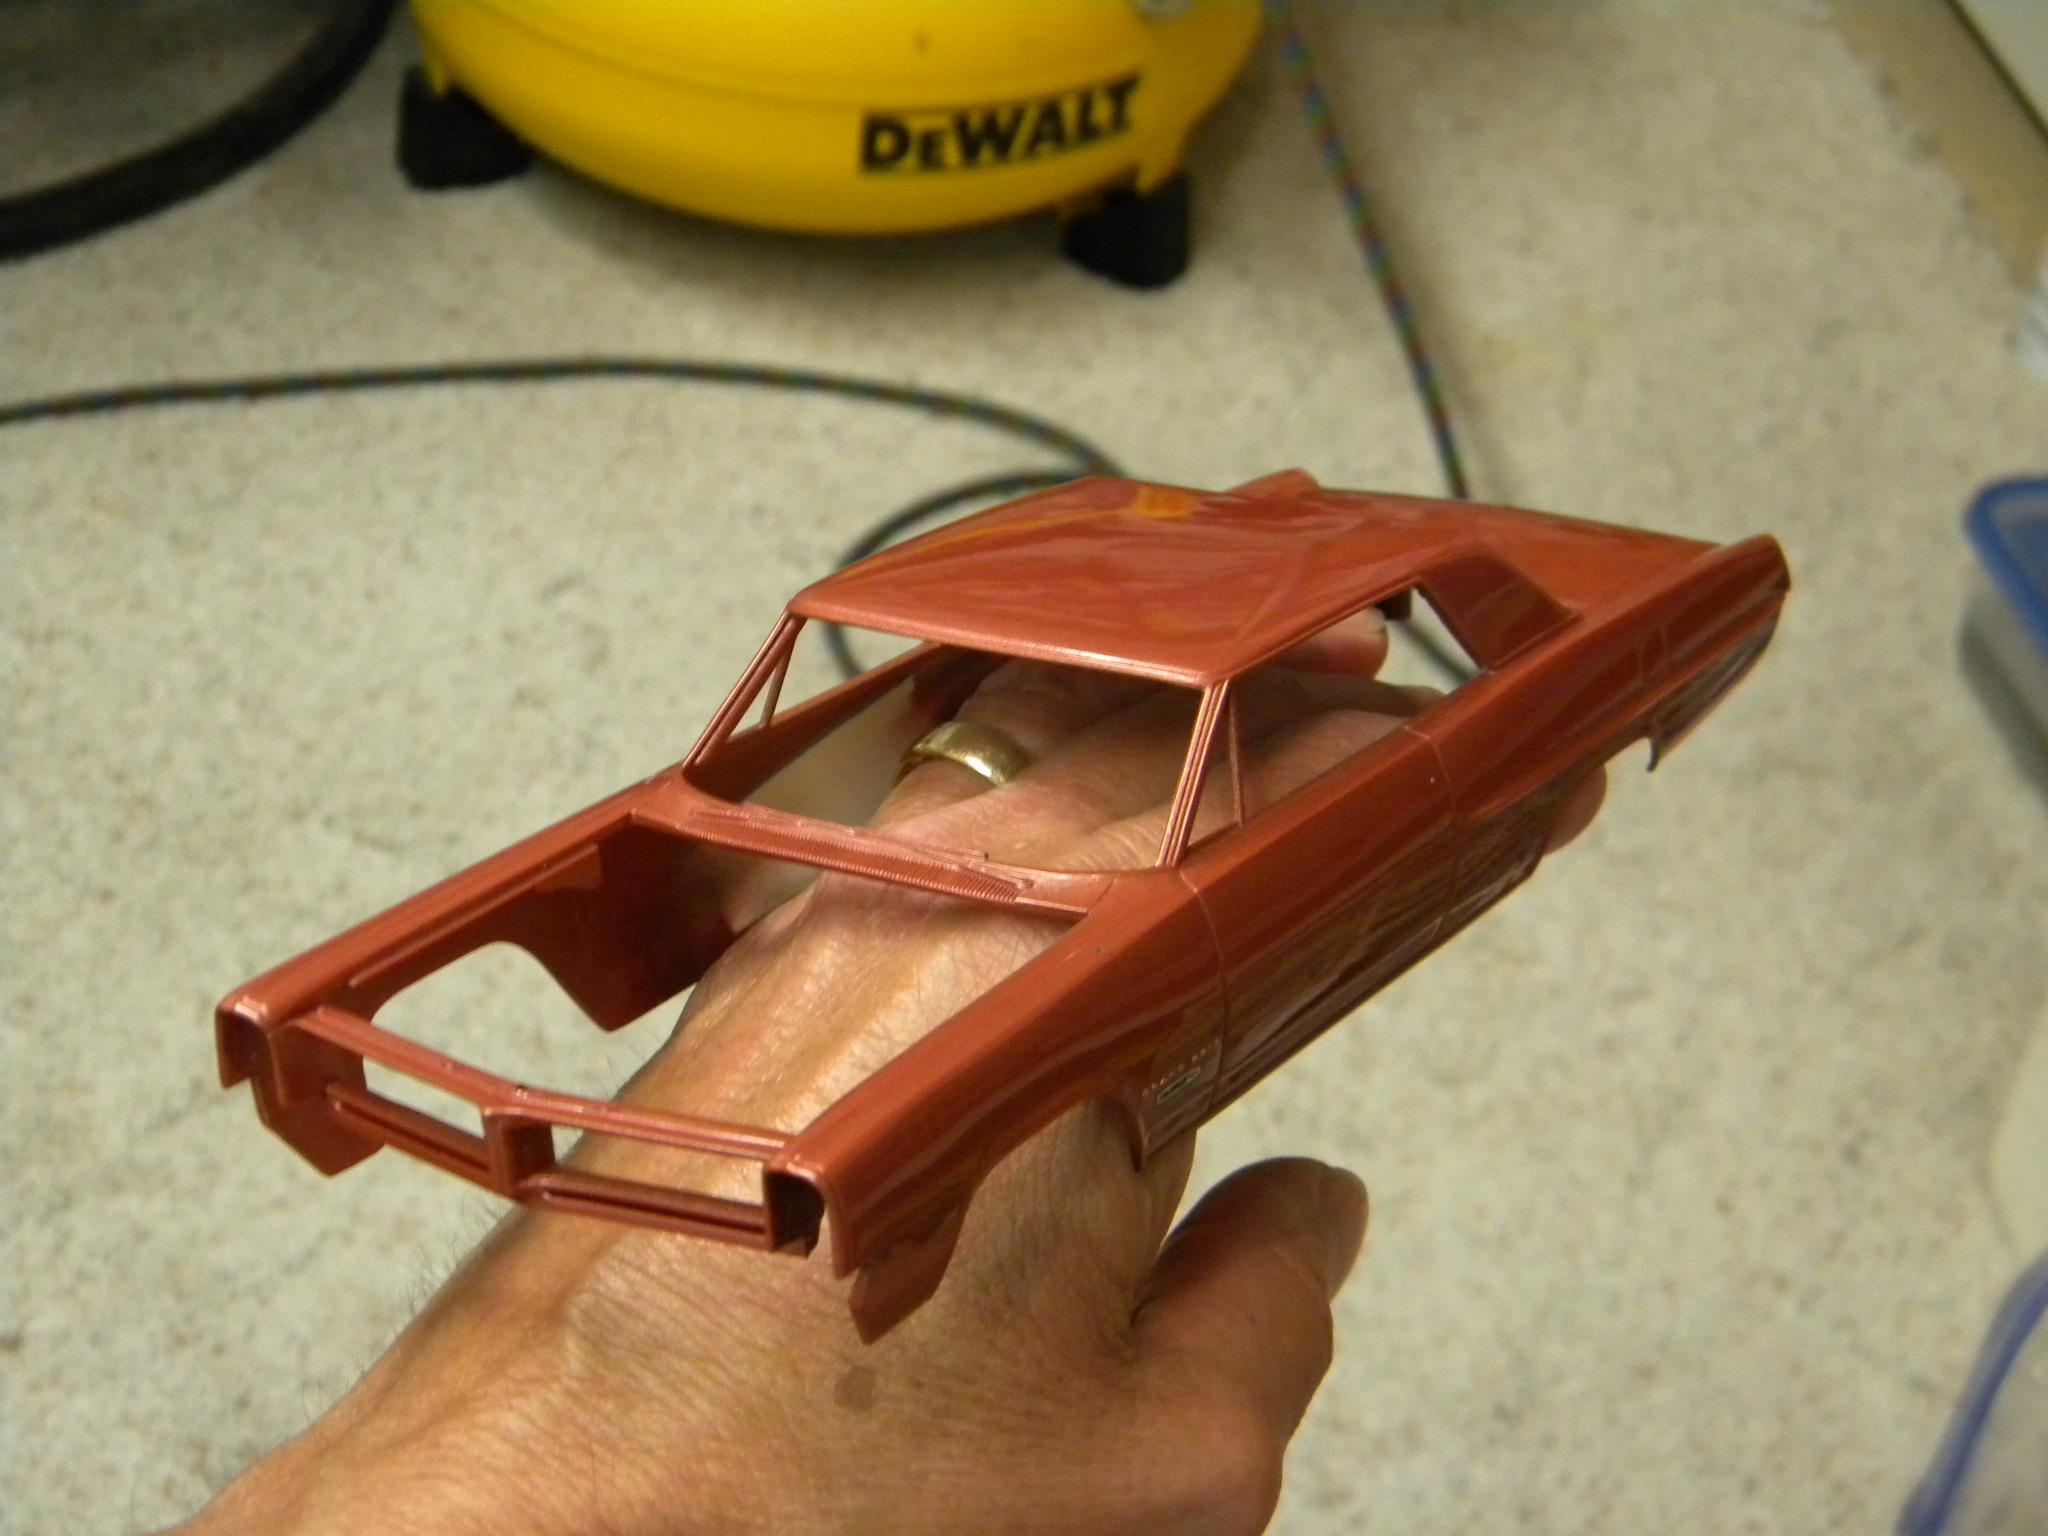
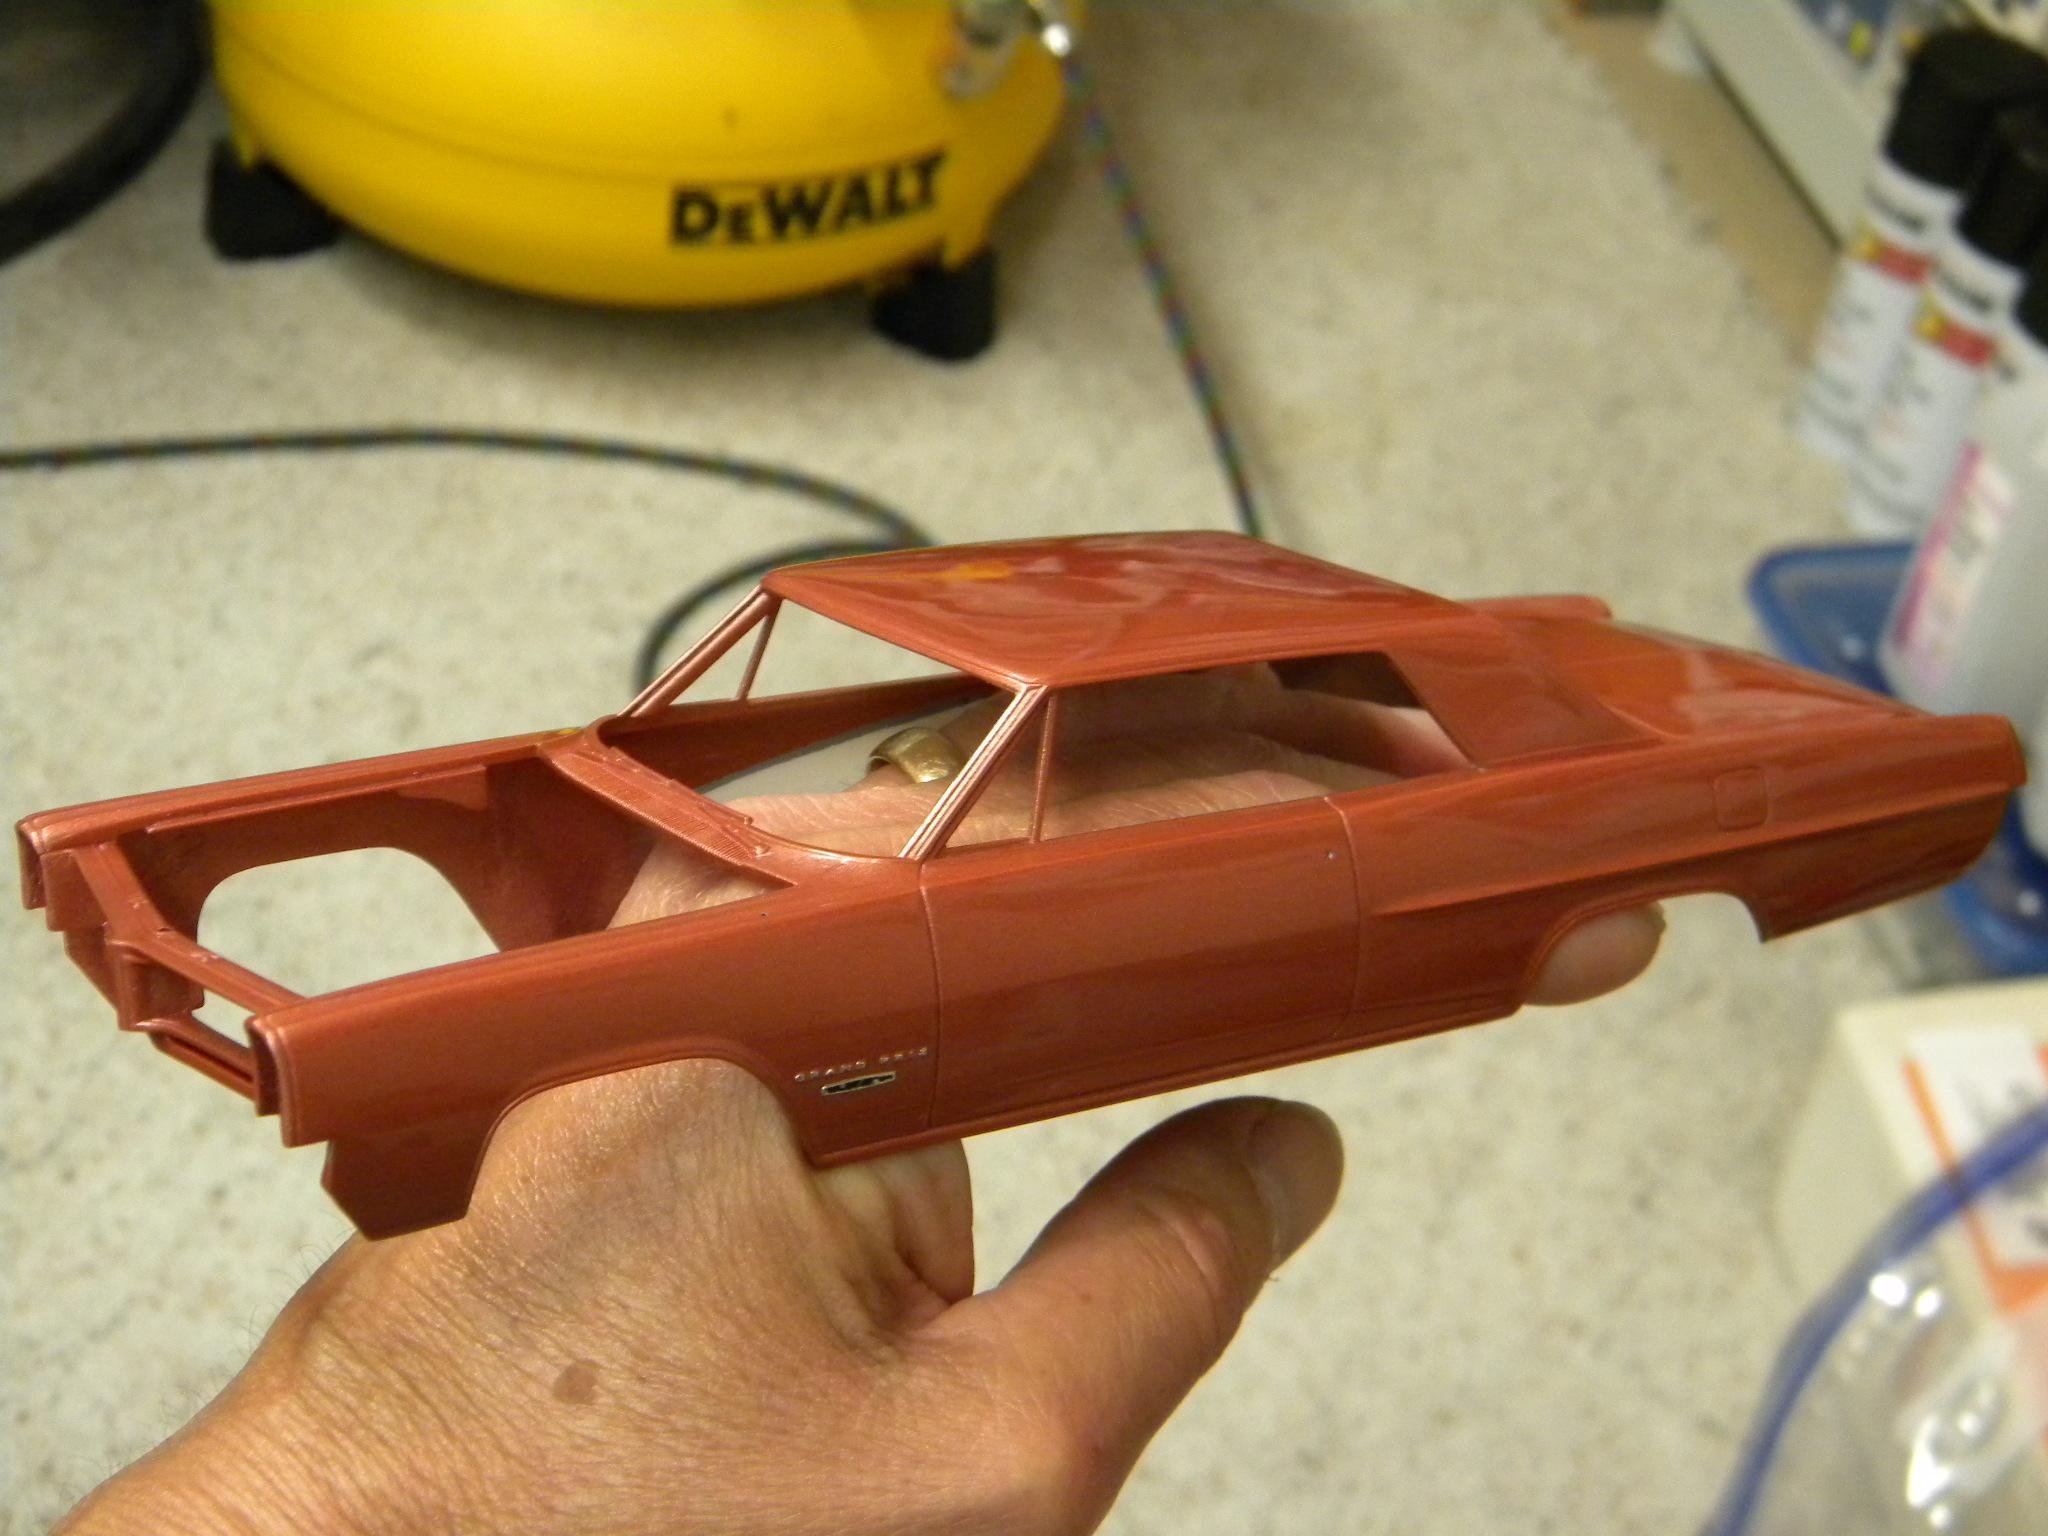
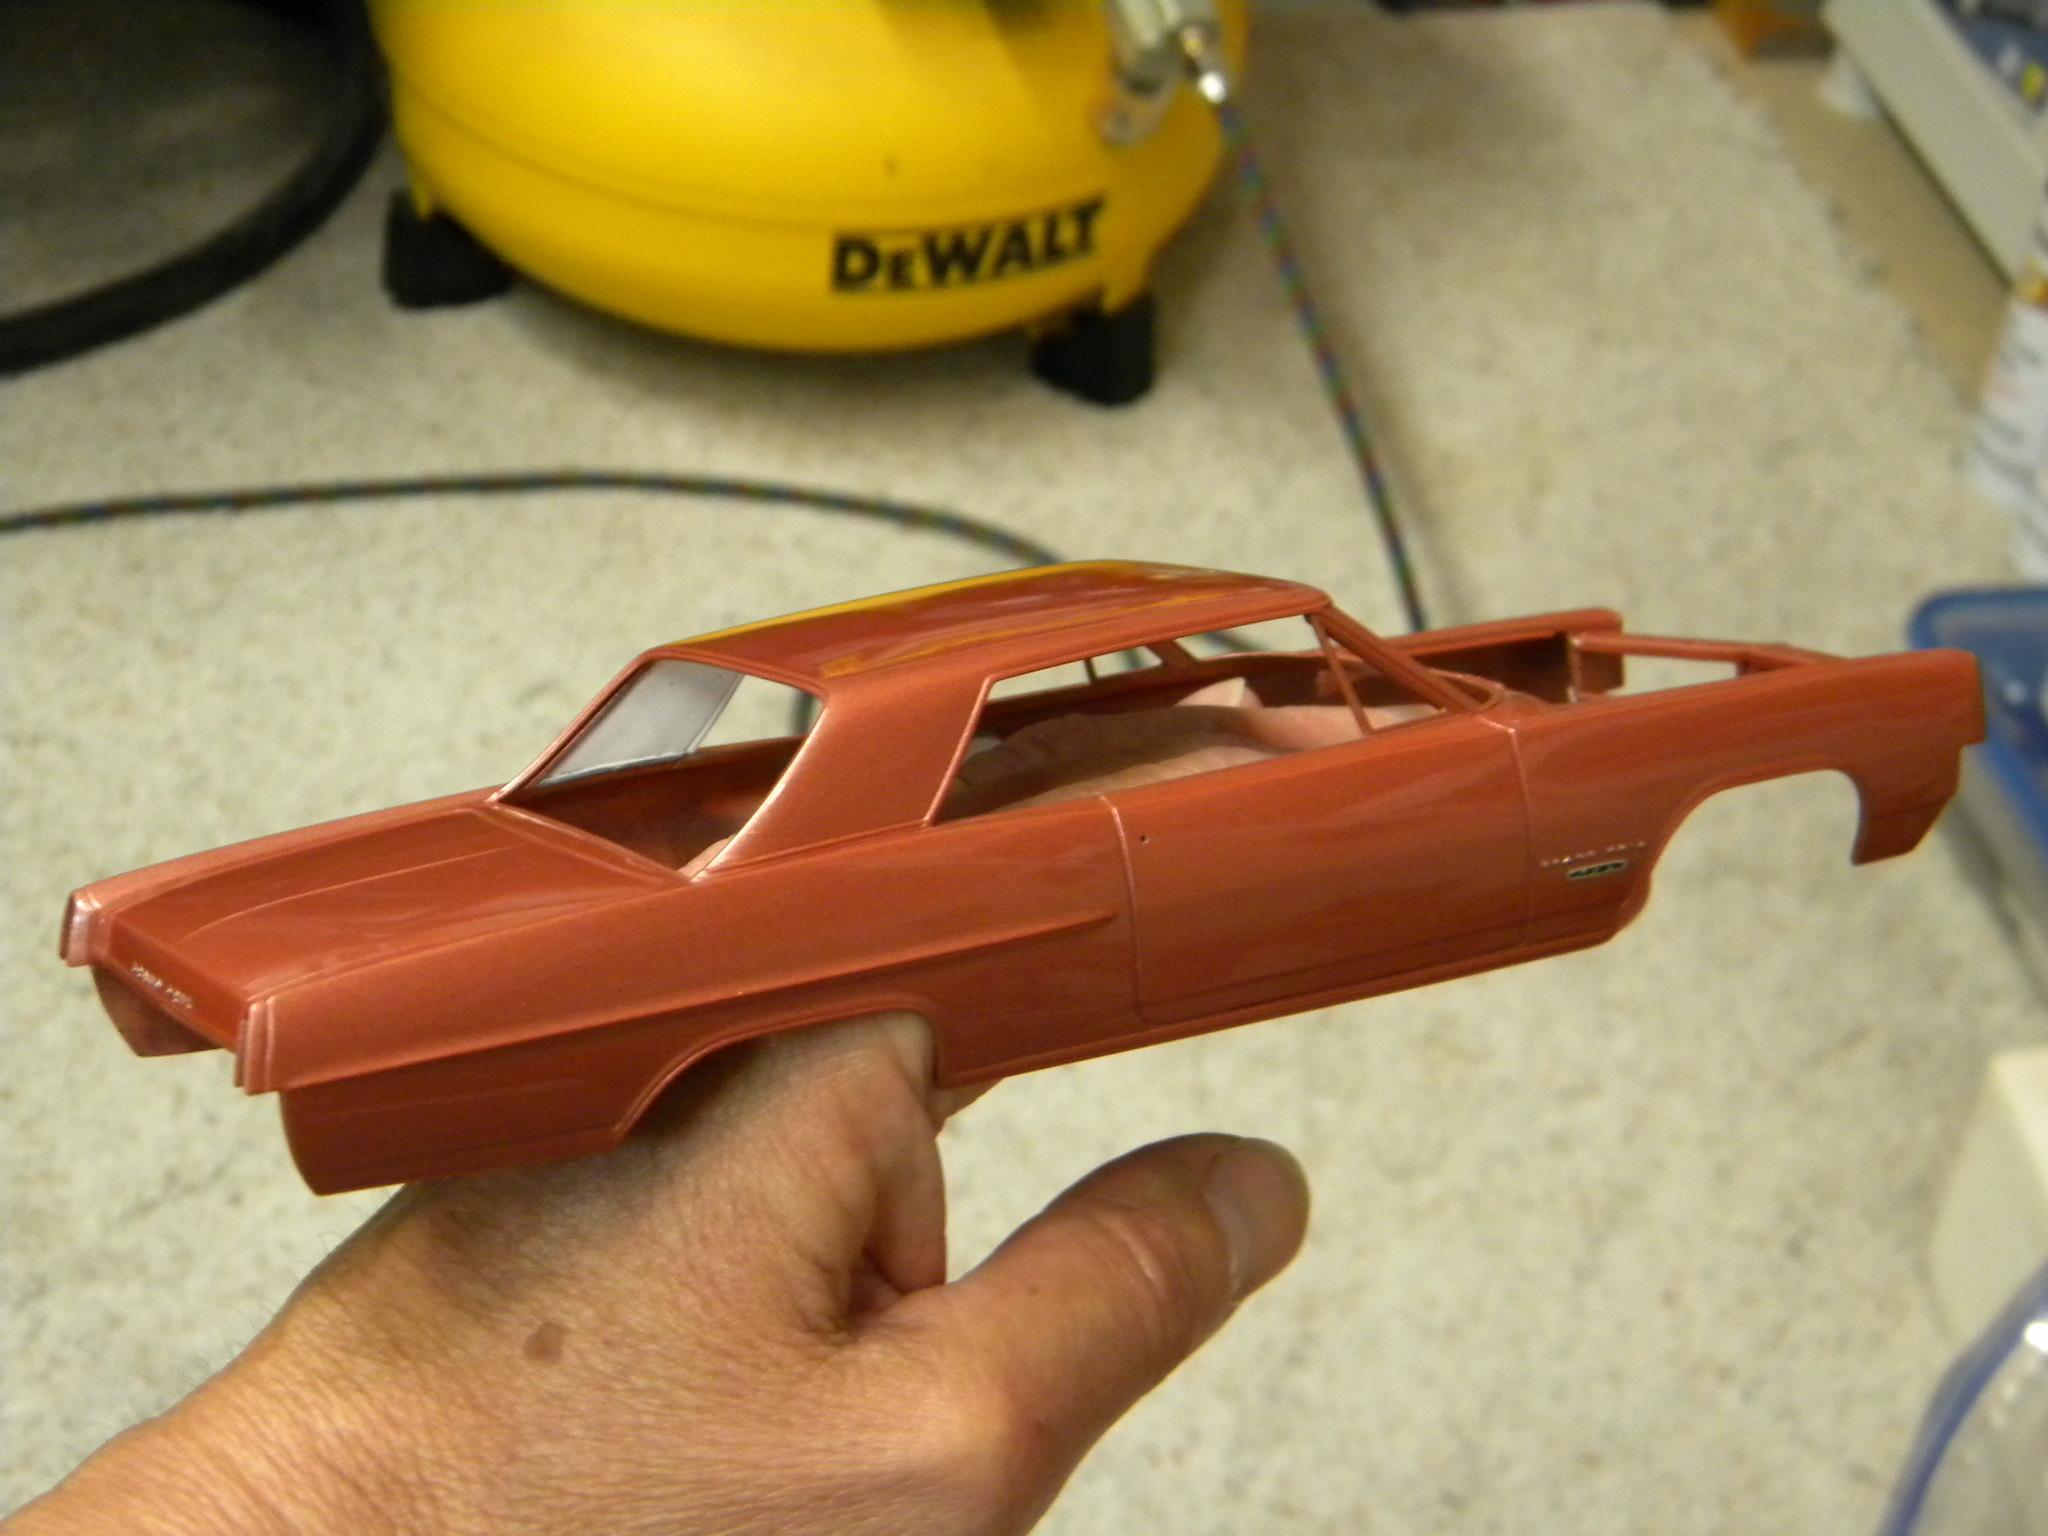
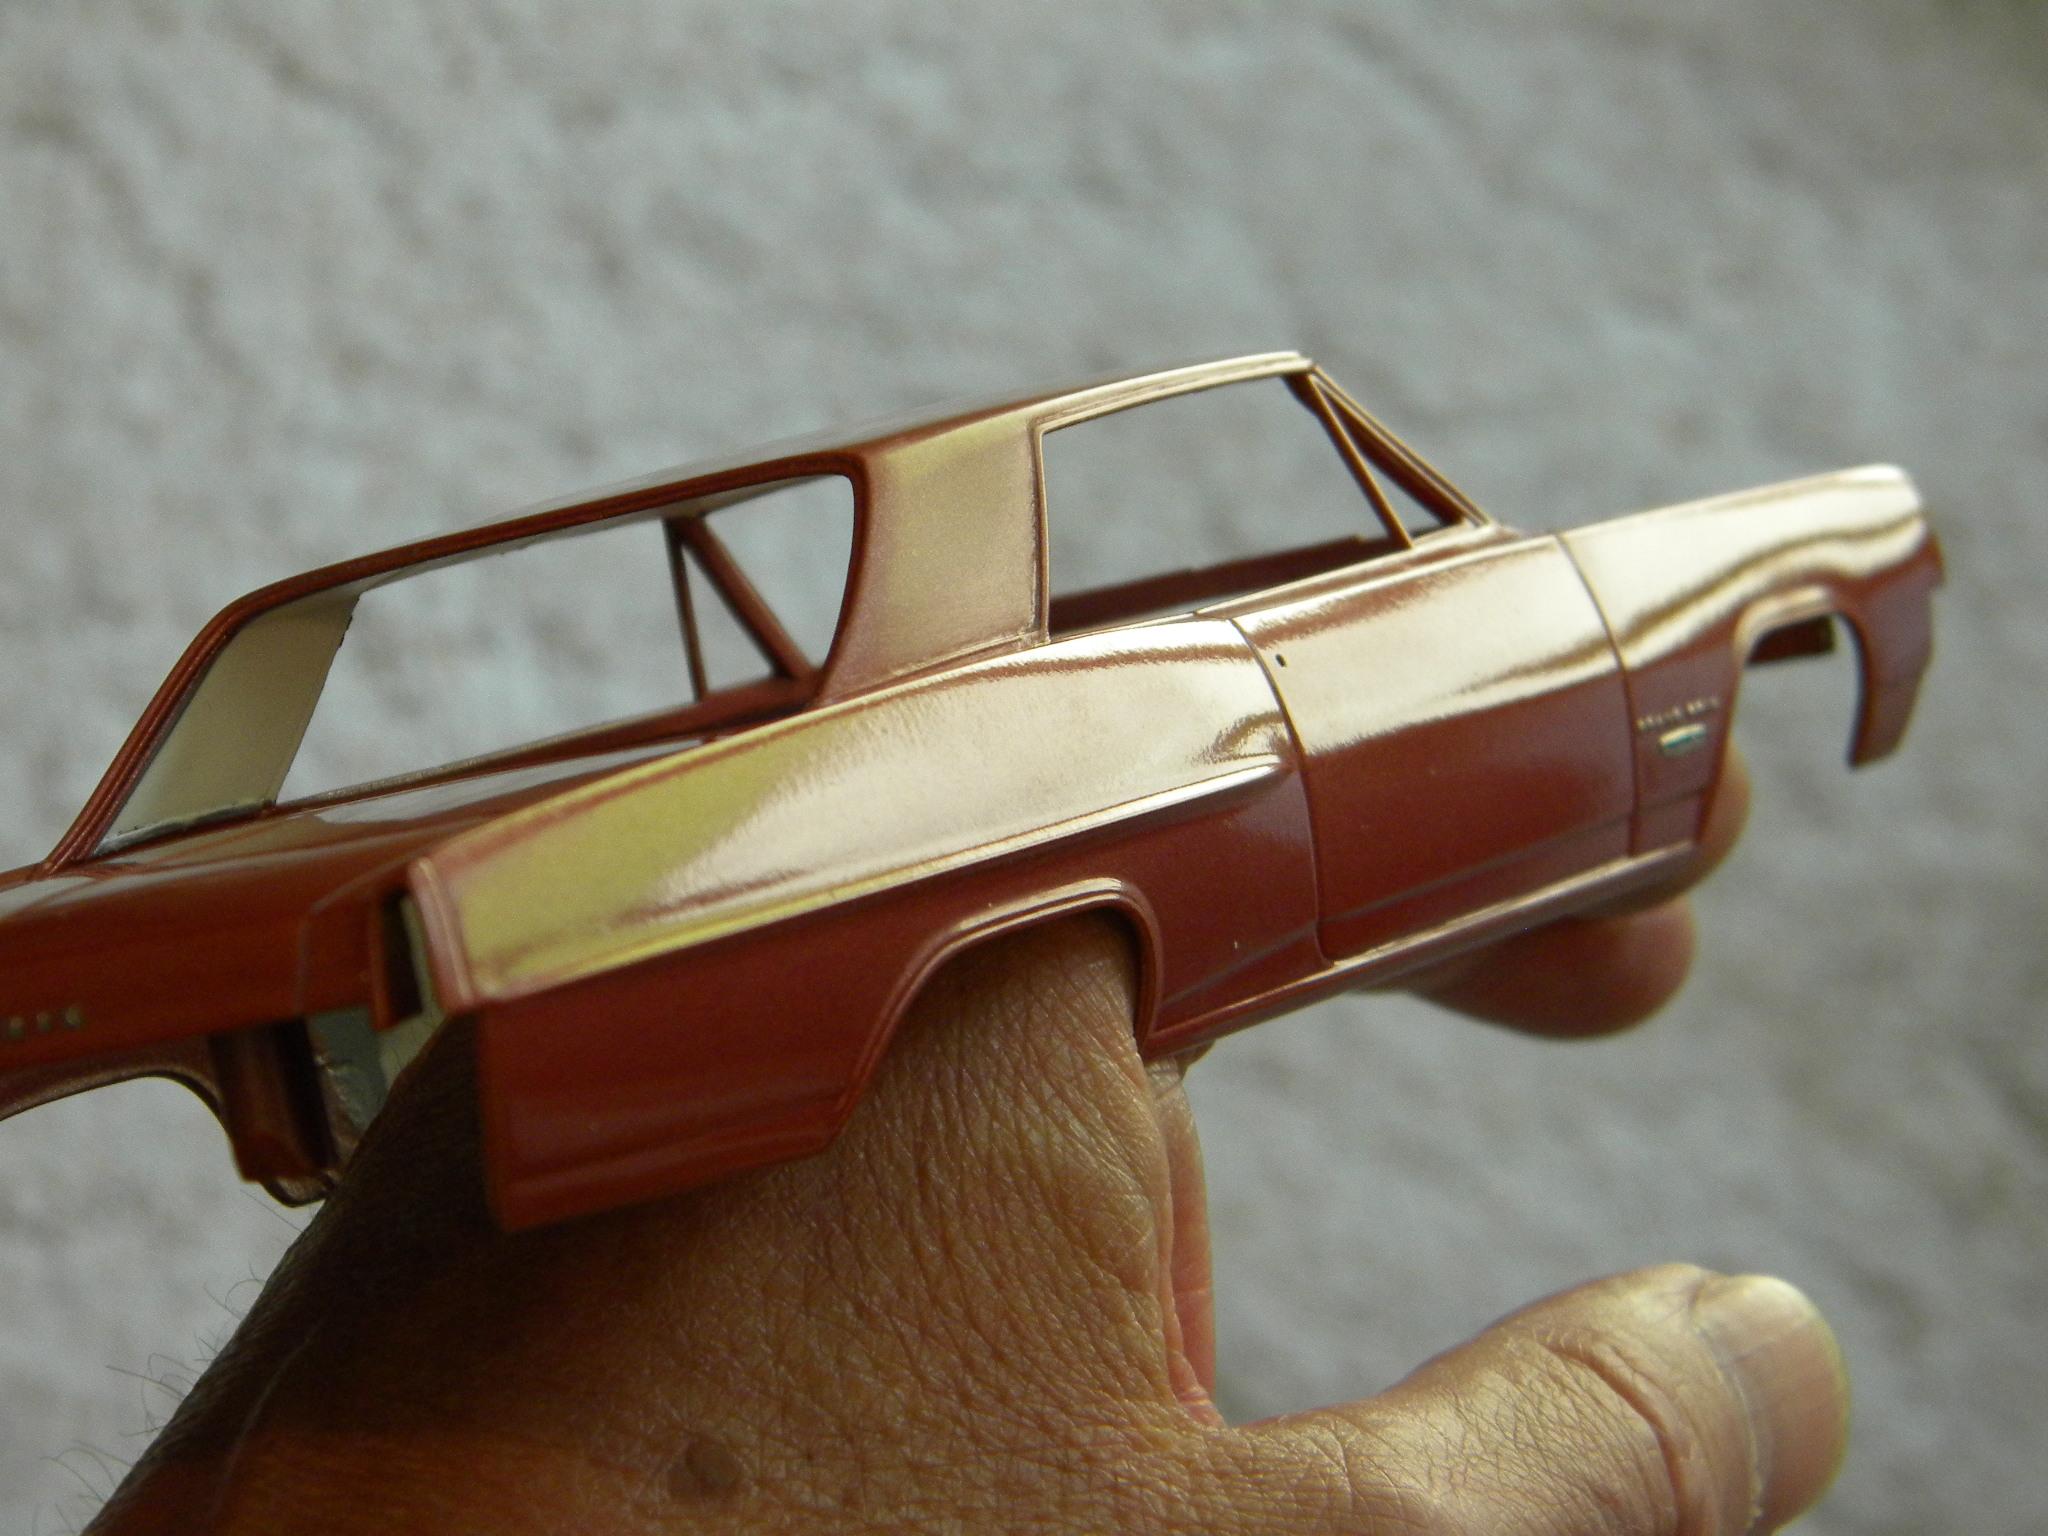
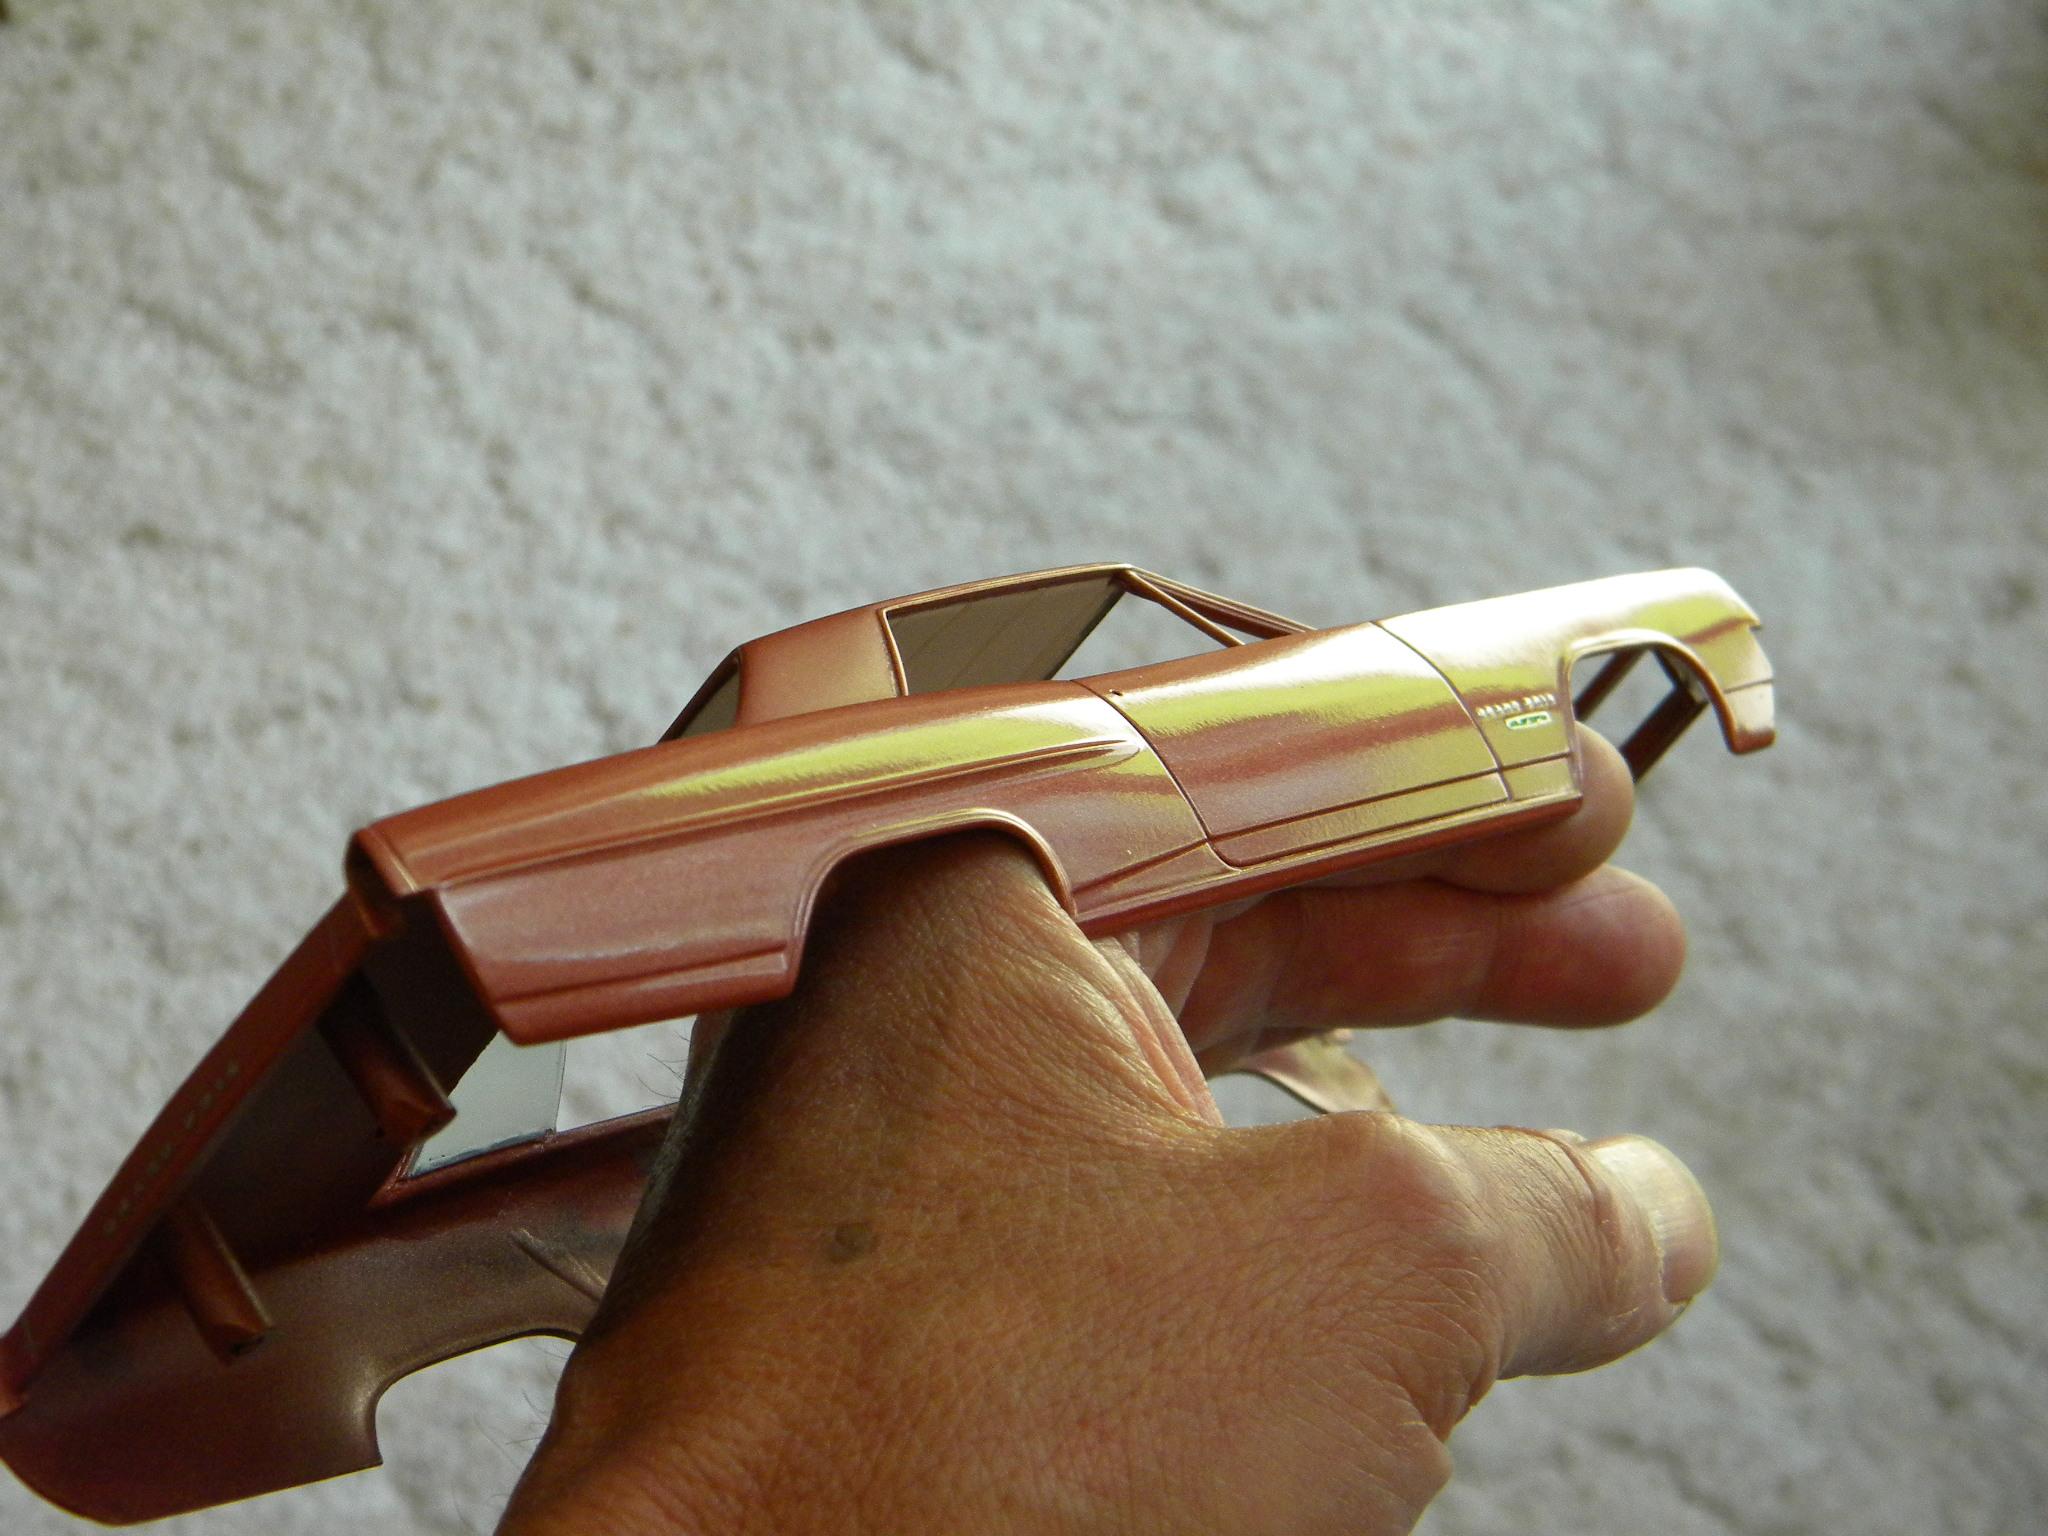
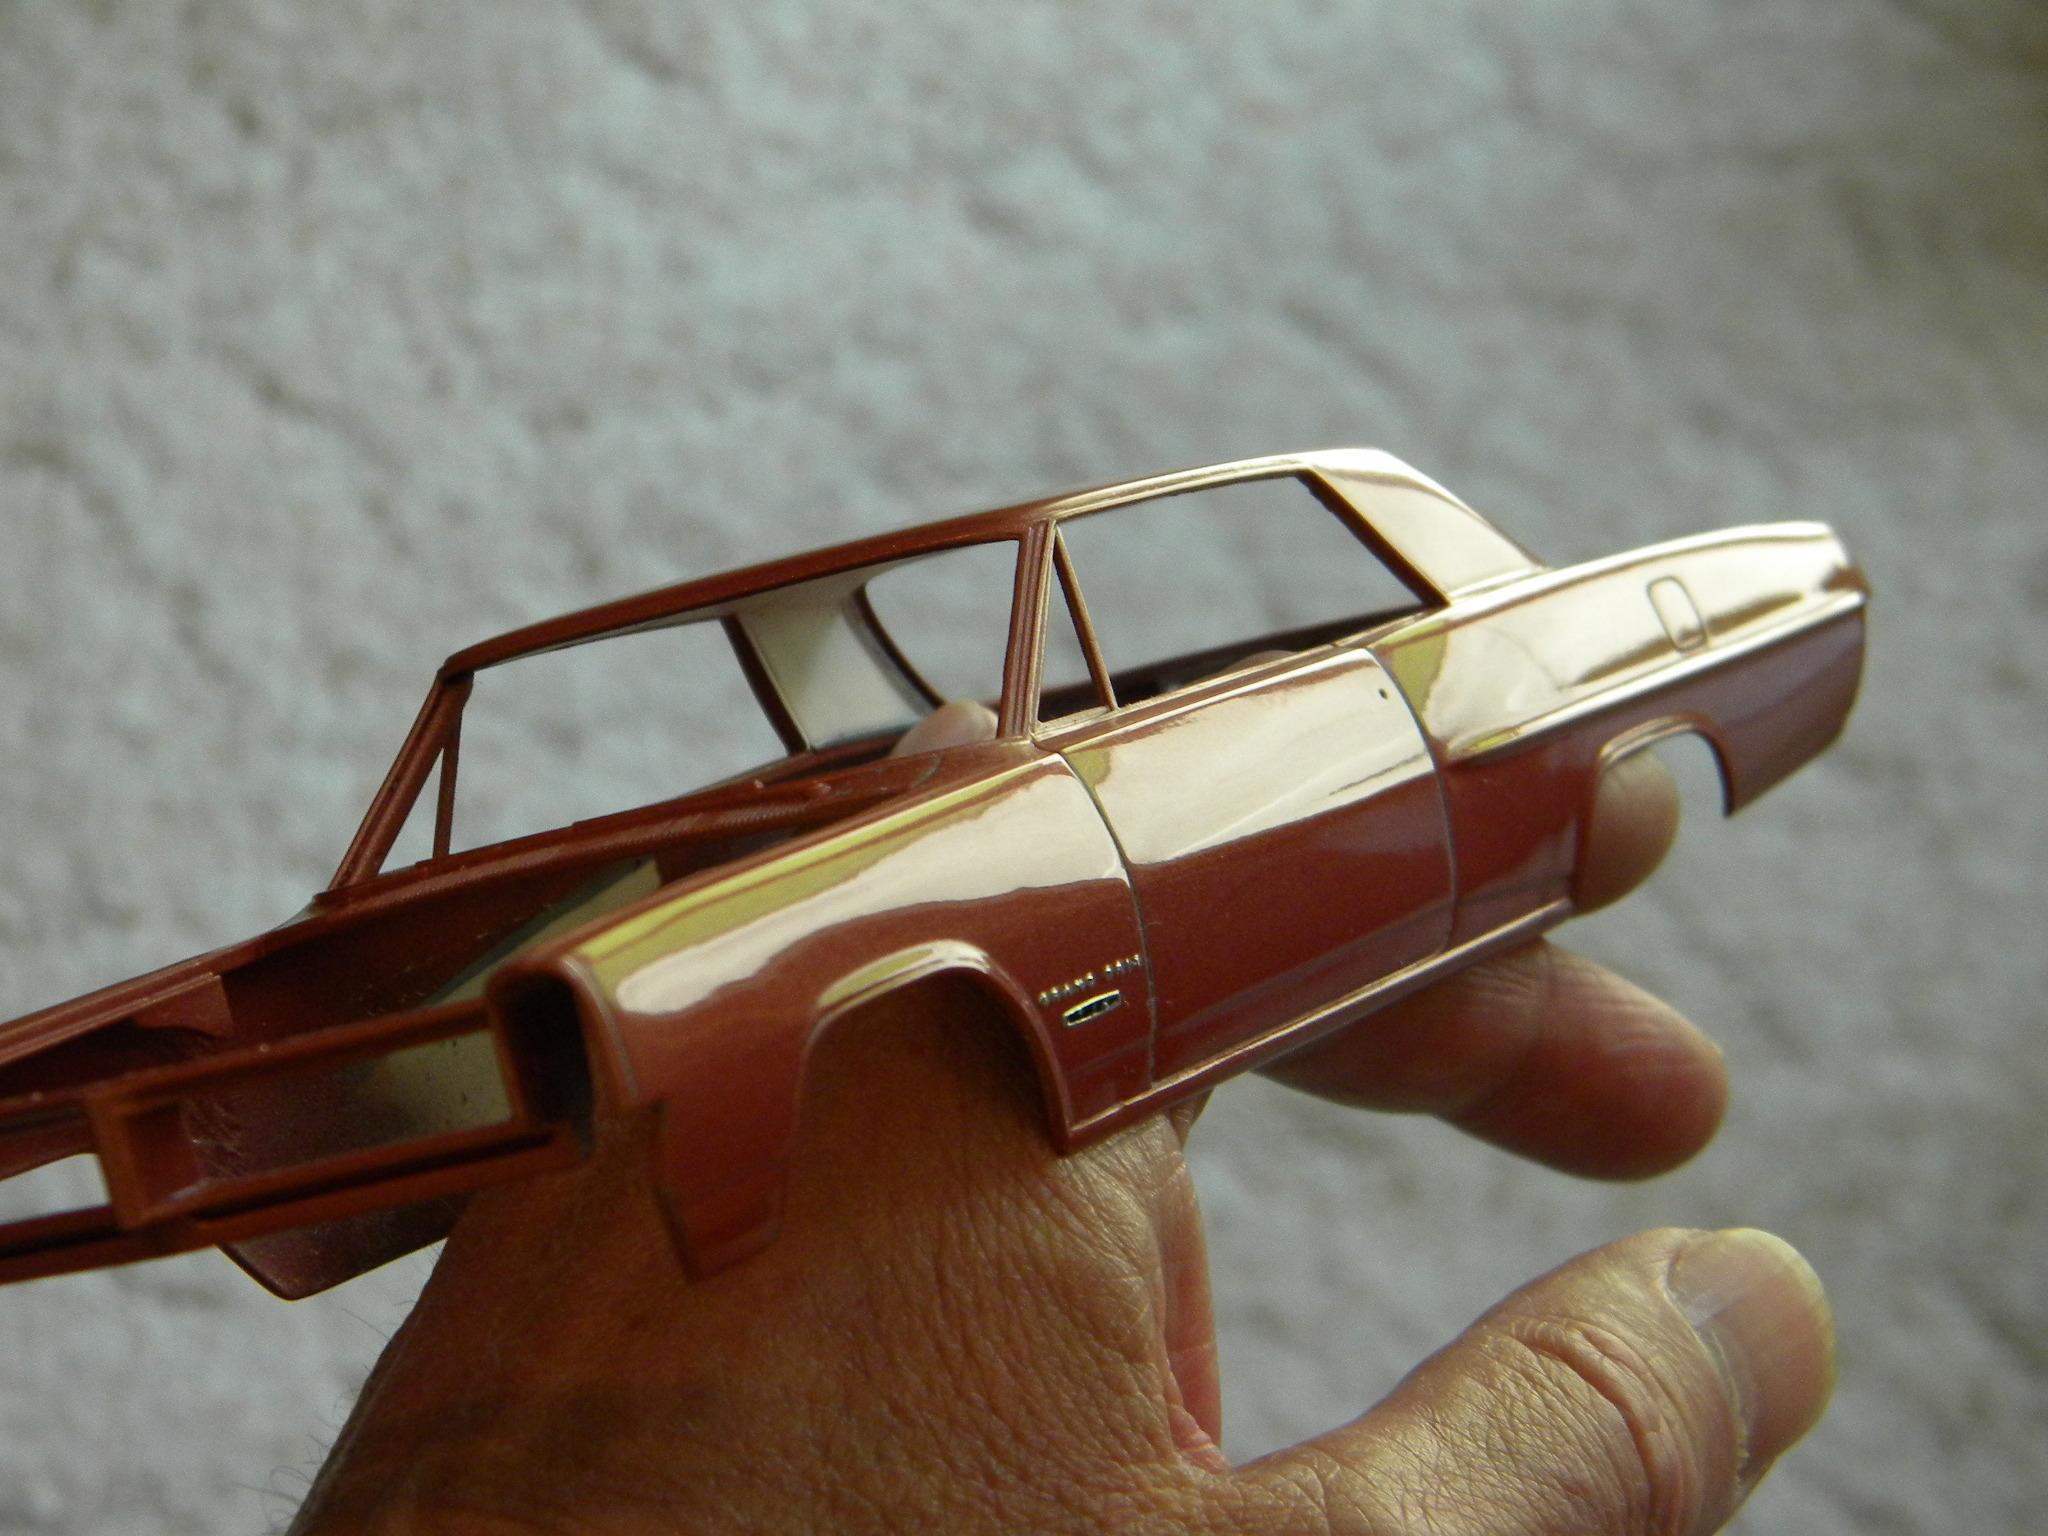
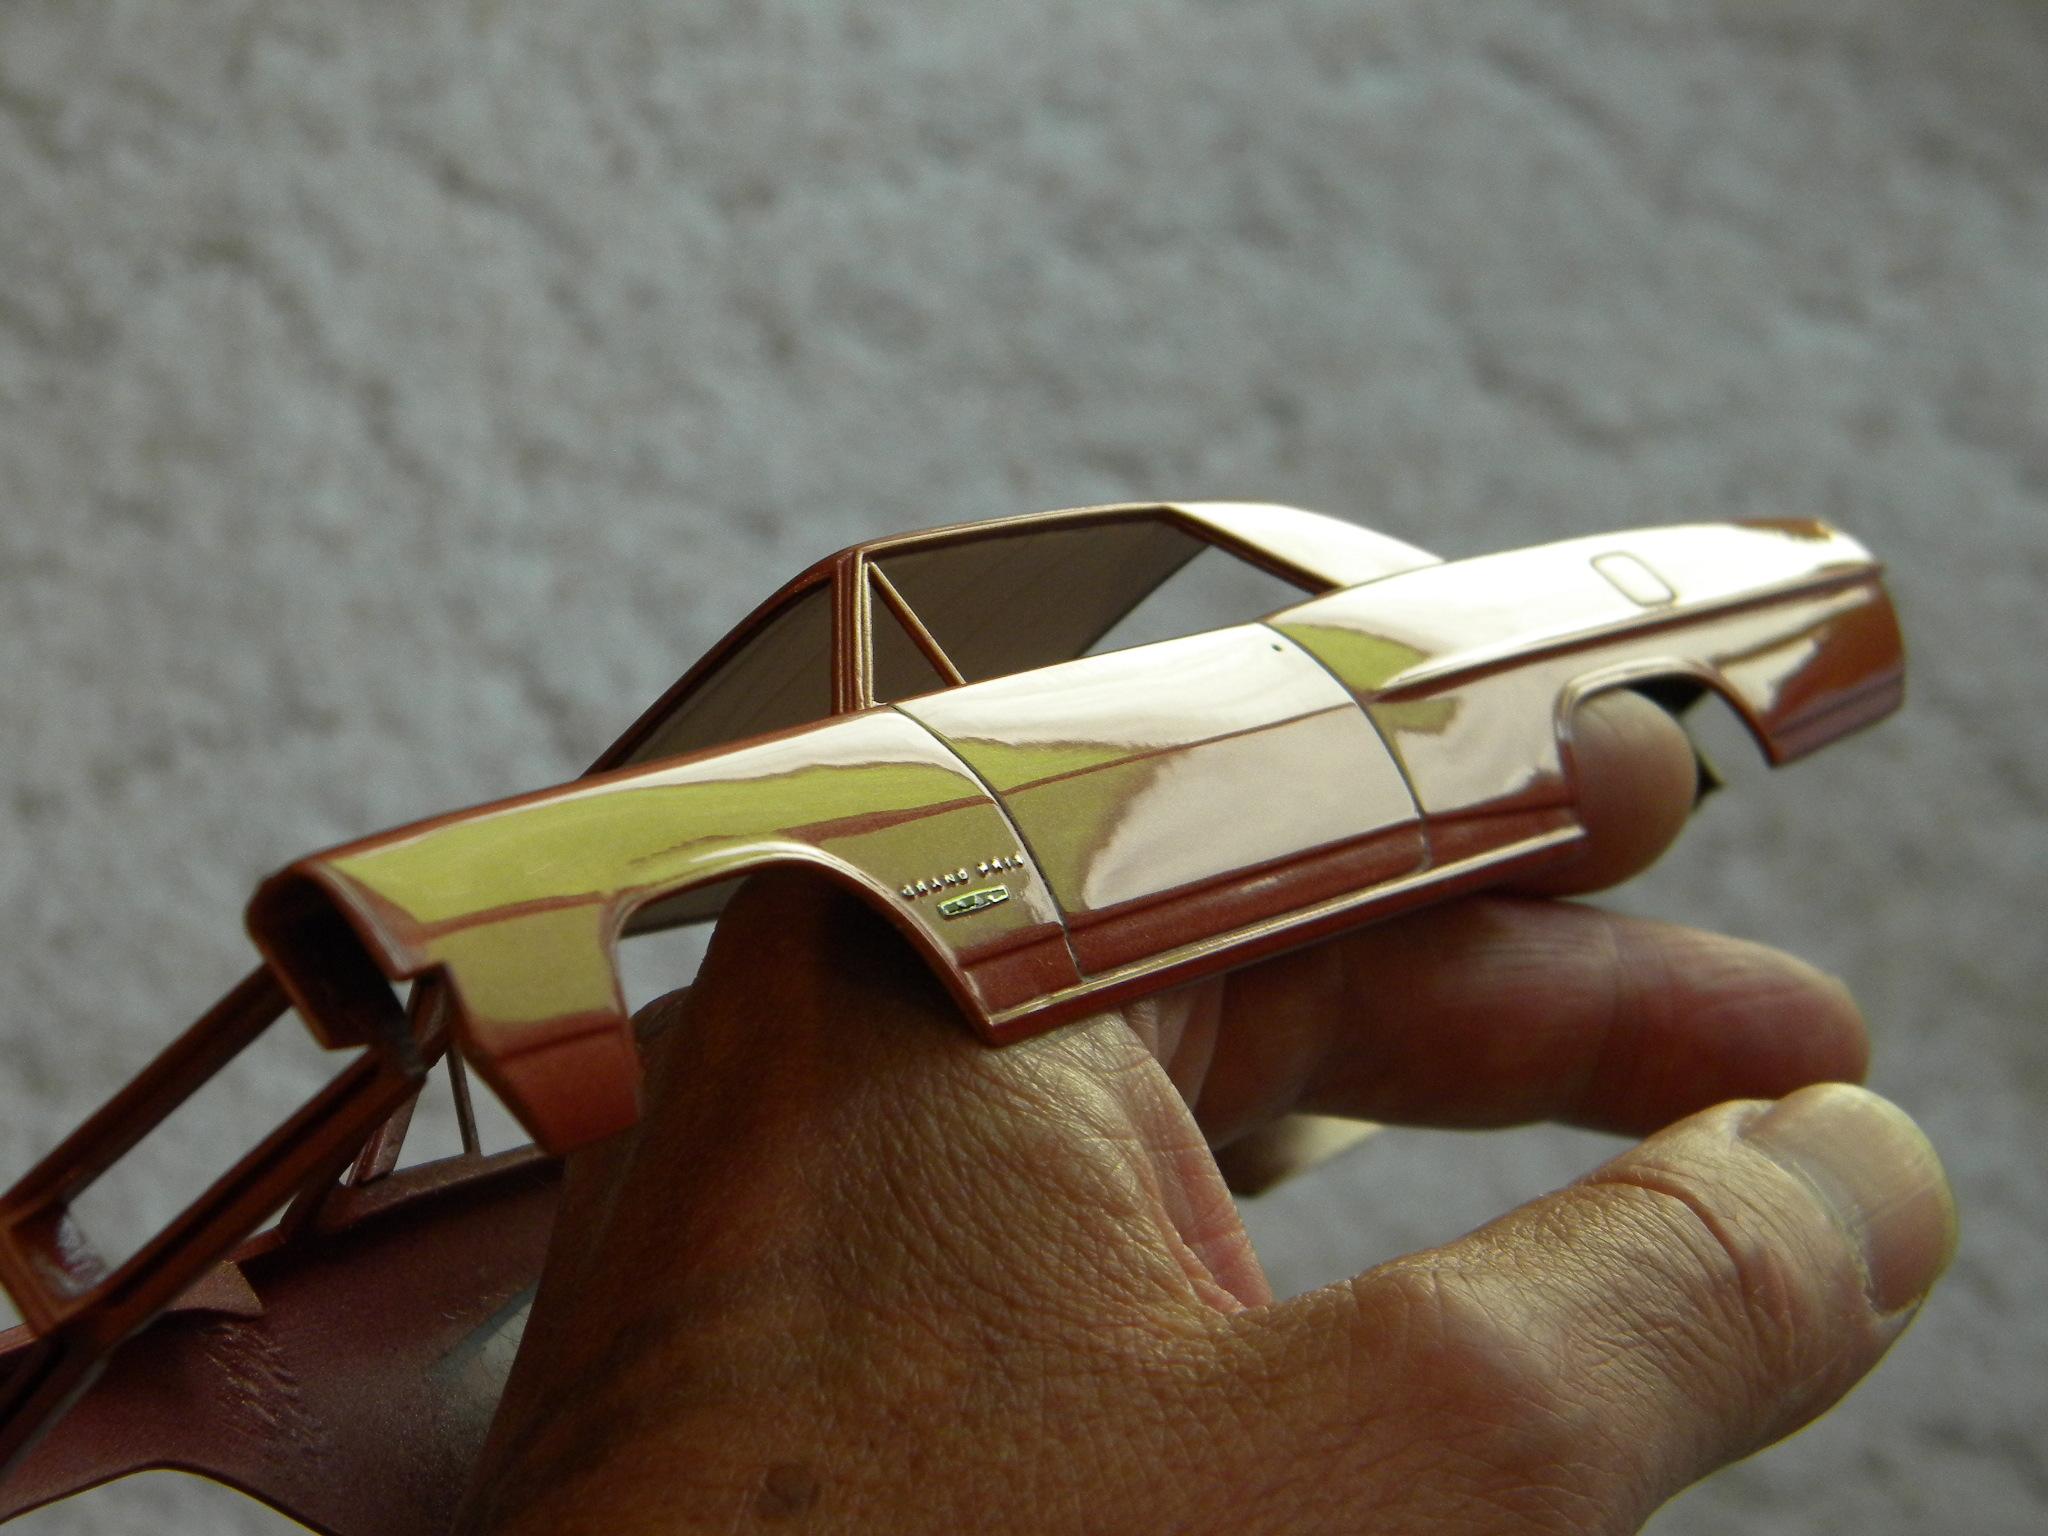
Thank you guys!! For the time being, I've decided that I need to move on to the polishing of the body. Why do I polish? Well, in short, it's because I'm not a good enough painter to get a perfect paint job straight from the can or air brush. But these photos will illustrate that you do not need to have expert painting skills to achieve a great finish. All that is required is some elbow grease and some time. I often get asked how I get my paint jobs so uniform and shiny? There is no secret. Just a little extra effort. Before: After: Steve
-
Ray's suggestion looks very close. Testors Italian Red is too red, and Competition Orange is too orange. Steve
-
Shut the dryer off. Who needs dry clothes when there's modeling to do! Steve
-
I've heard of that issue as well. Don't know anything specific, but I have never used it. Masking paper and tape have always worked well for me. Steve
-
Yeah, that is pretty horrendous, isn't it. Hmmm, too short and doesn't fit the contours of the rear quarter panel or trunk lid. Looks great! Throw it on! Steve
-
I agree Tom. I usually fiddle around with fabricating a part that has to be replicated many times until I get it the way I want it, and then I start making the individual components and start the assembly line. My problem is that sometimes during the fabricating stage, I can't stop myself from changing the part numerous times before I'm satisfied, making the part more difficult to mass produce. I've already added another small detail to the base and knob by drilling a small shallow hole in each to add some more depth to the part. Somebody stop me! Steve
-
Thanks guys! The base of the crank and knob are just thin slices of styrene rod. The center "arm" are just two pieces of thinly stretched sprue cemented to the base. The knob is just positioned at this time, but cementing it will improve the strength of the part. I'm going to continue to refine these ideas and decide which route to take. Steve
-
Or, I could do them this way. More fragile to work with, but actually easier to make and closer to how they should look. What do you guys think? I'll begin to "mass produce" them once I make a decision. Steve
-
Thanks so much guys! I was getting ready to start casting some window cranks for the interior, but I was curious as to how difficult it would be to scratch build some. Surprisingly, they're quite easy to fabricate using some styrene rod and strips. They won't be exactly the same as the '64 Pontiac cranks would be, but they should give a crisper look than the cast cranks that I usually make. I might use a slightly smaller rod for the knobs. I'll keep you posted on how they go. Steve
-
Agreed. It brings to mind a comment that I hear often about interior work on a hard top. "Too bad it's not a convertible so that everyone can see the detail that you added". I understand the sentiment, but I don't do it because I "need" everyone else to see every detail that I've added. I do it because I enjoy detailing interiors, and I know what I've done. I figure that anyone viewing one of my models that is interested, and knows anything about the particular model I've built, will ask, and I can fill them in then. If their not truly curious, I'm not particularly interested in trying to educate them anyway. Steve
-
I was thinking the same thing. The bronzes go well together! Steve
-
Engine question
StevenGuthmiller replied to porschercr's topic in Model Building Questions and Answers
I don't believe there is any difference externally. I used the 390 from the AMT '67 Mercury Cyclone kit to represent a 427 R-code in my '67 Galaxie. If I recall correctly from that project, they are basically the same. Steve
-
Here you go. Steve