StevenGuthmiller
-
Posts
15,071 -
Joined
-
Last visited
Content Type
Profiles
Forums
Events
Gallery
Everything posted by StevenGuthmiller
-
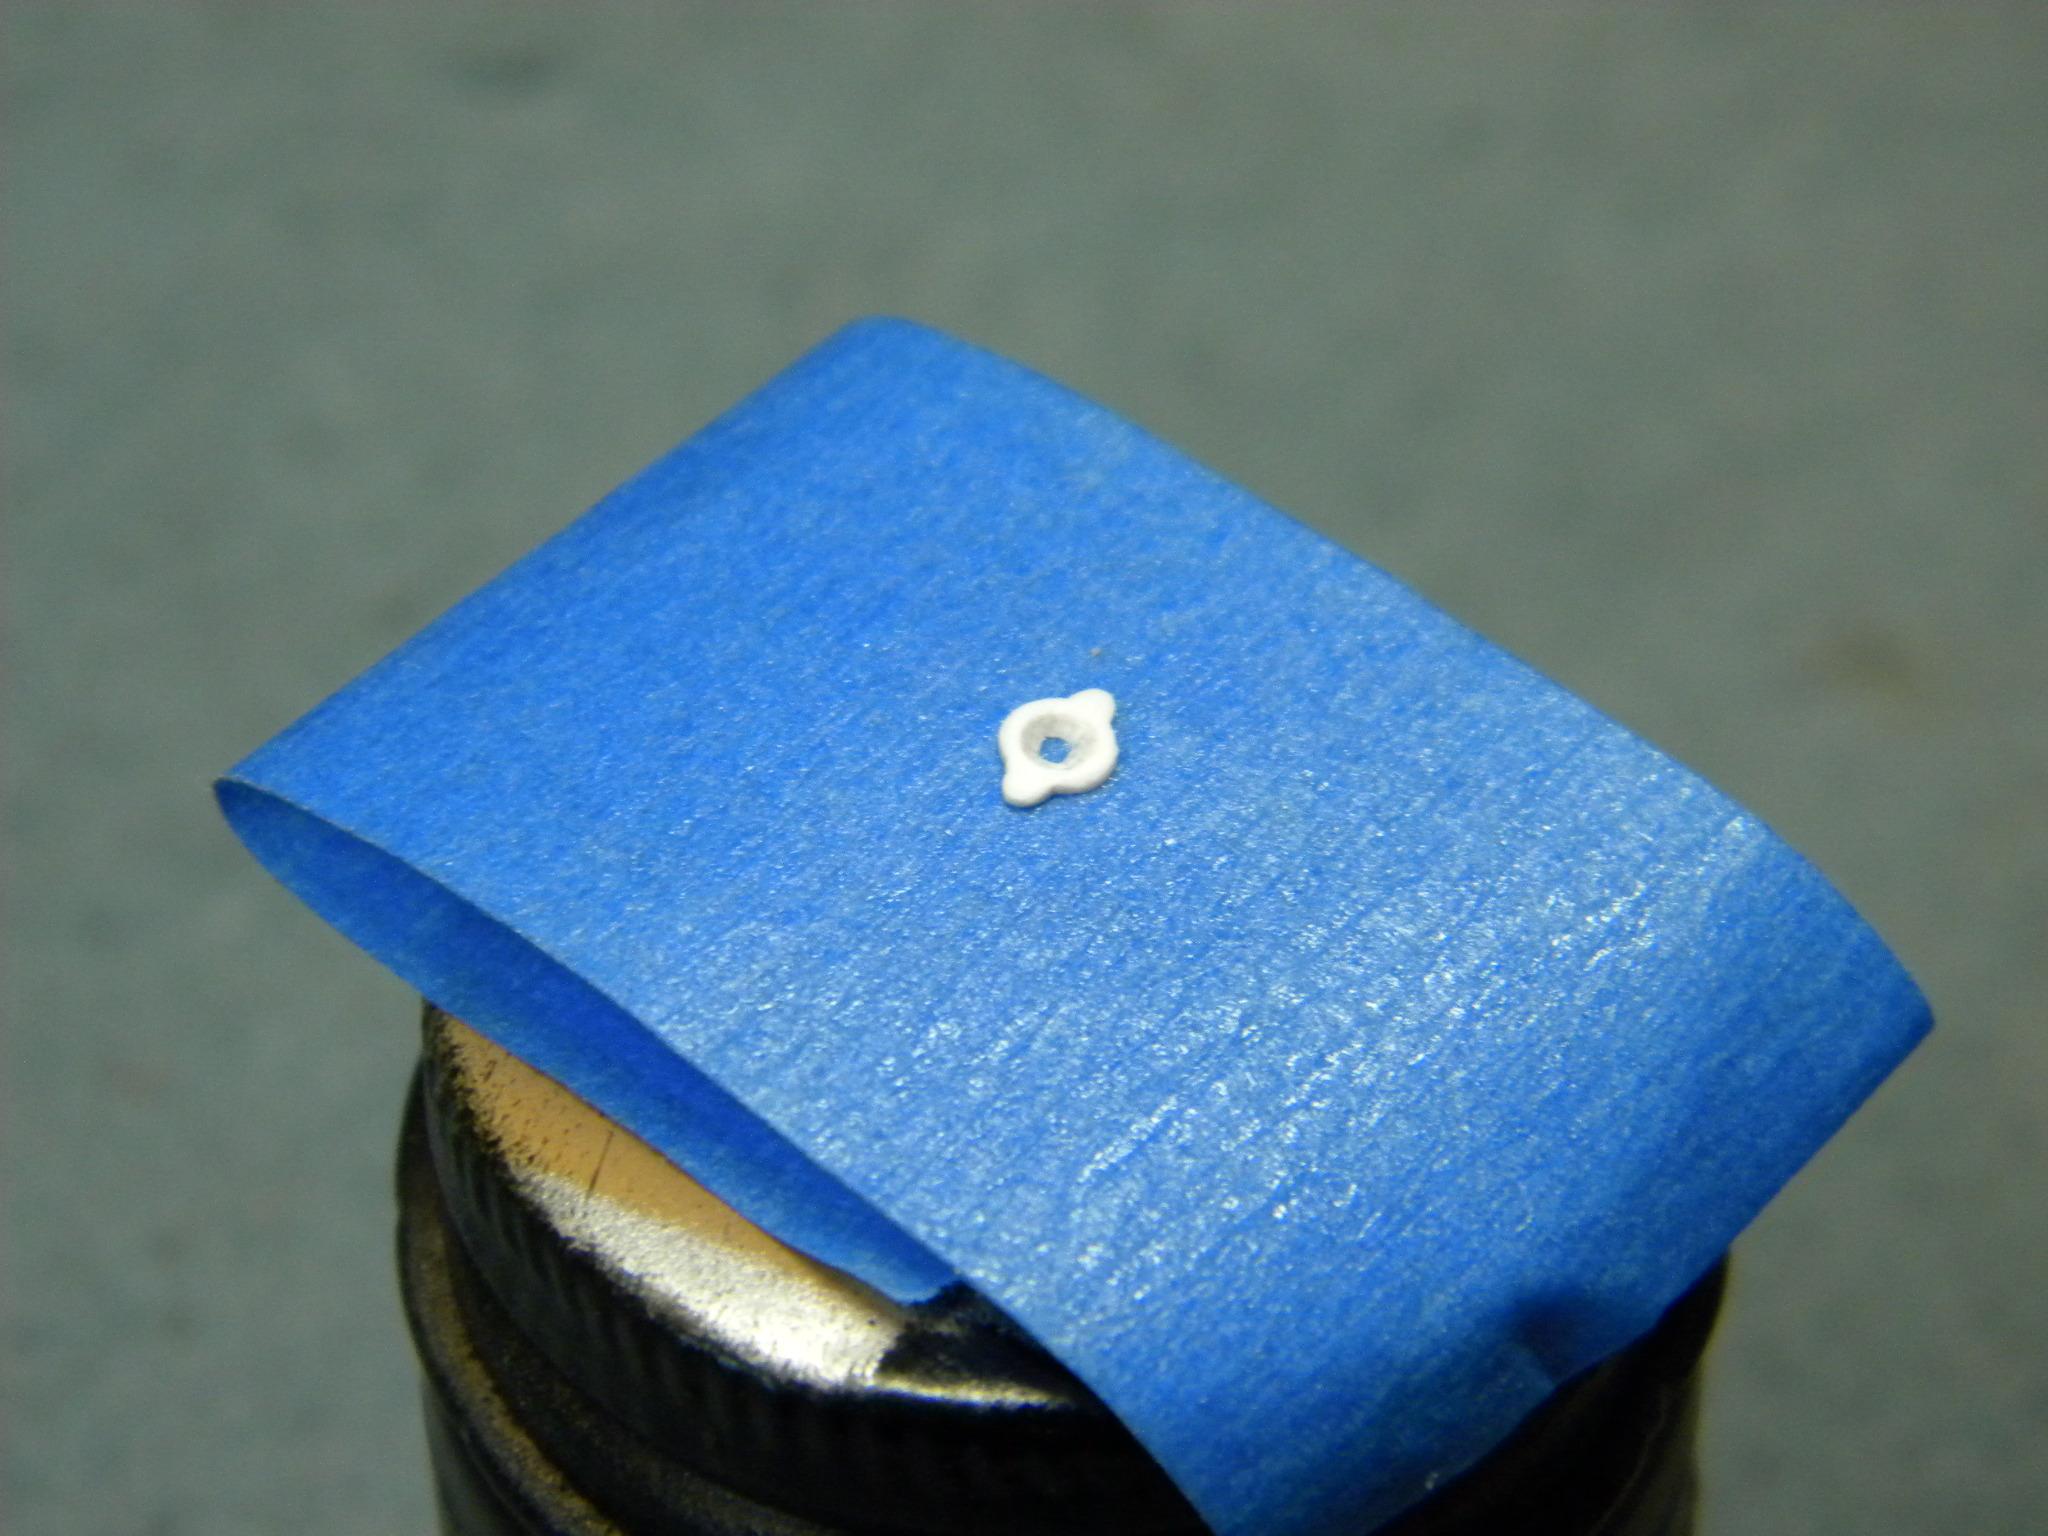
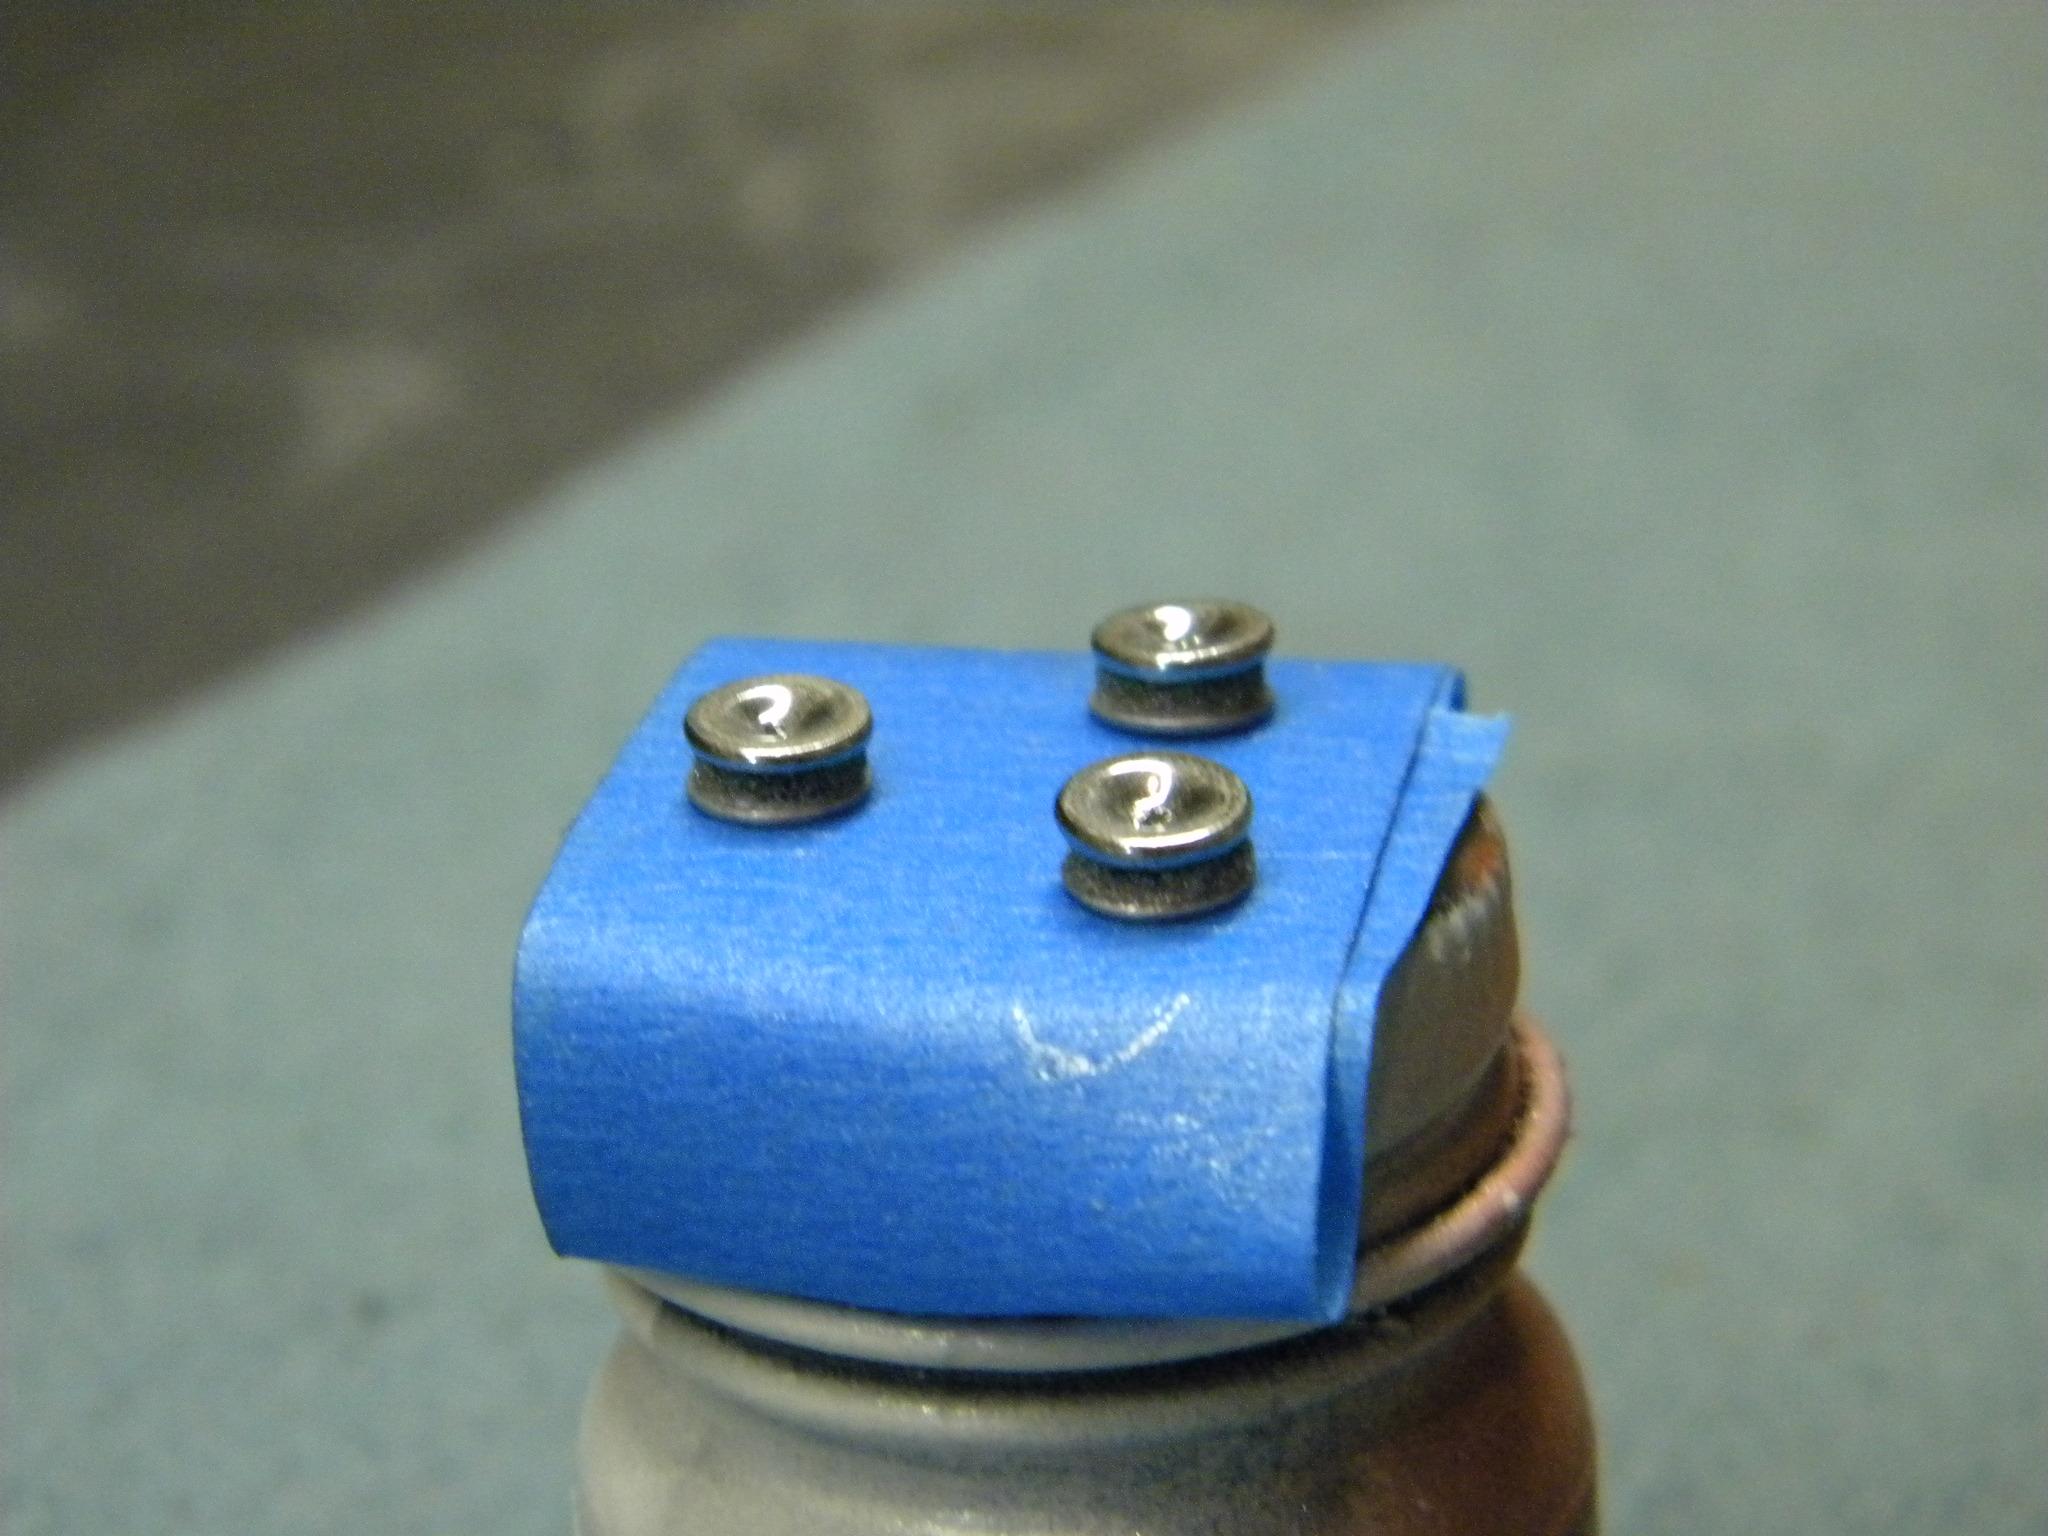
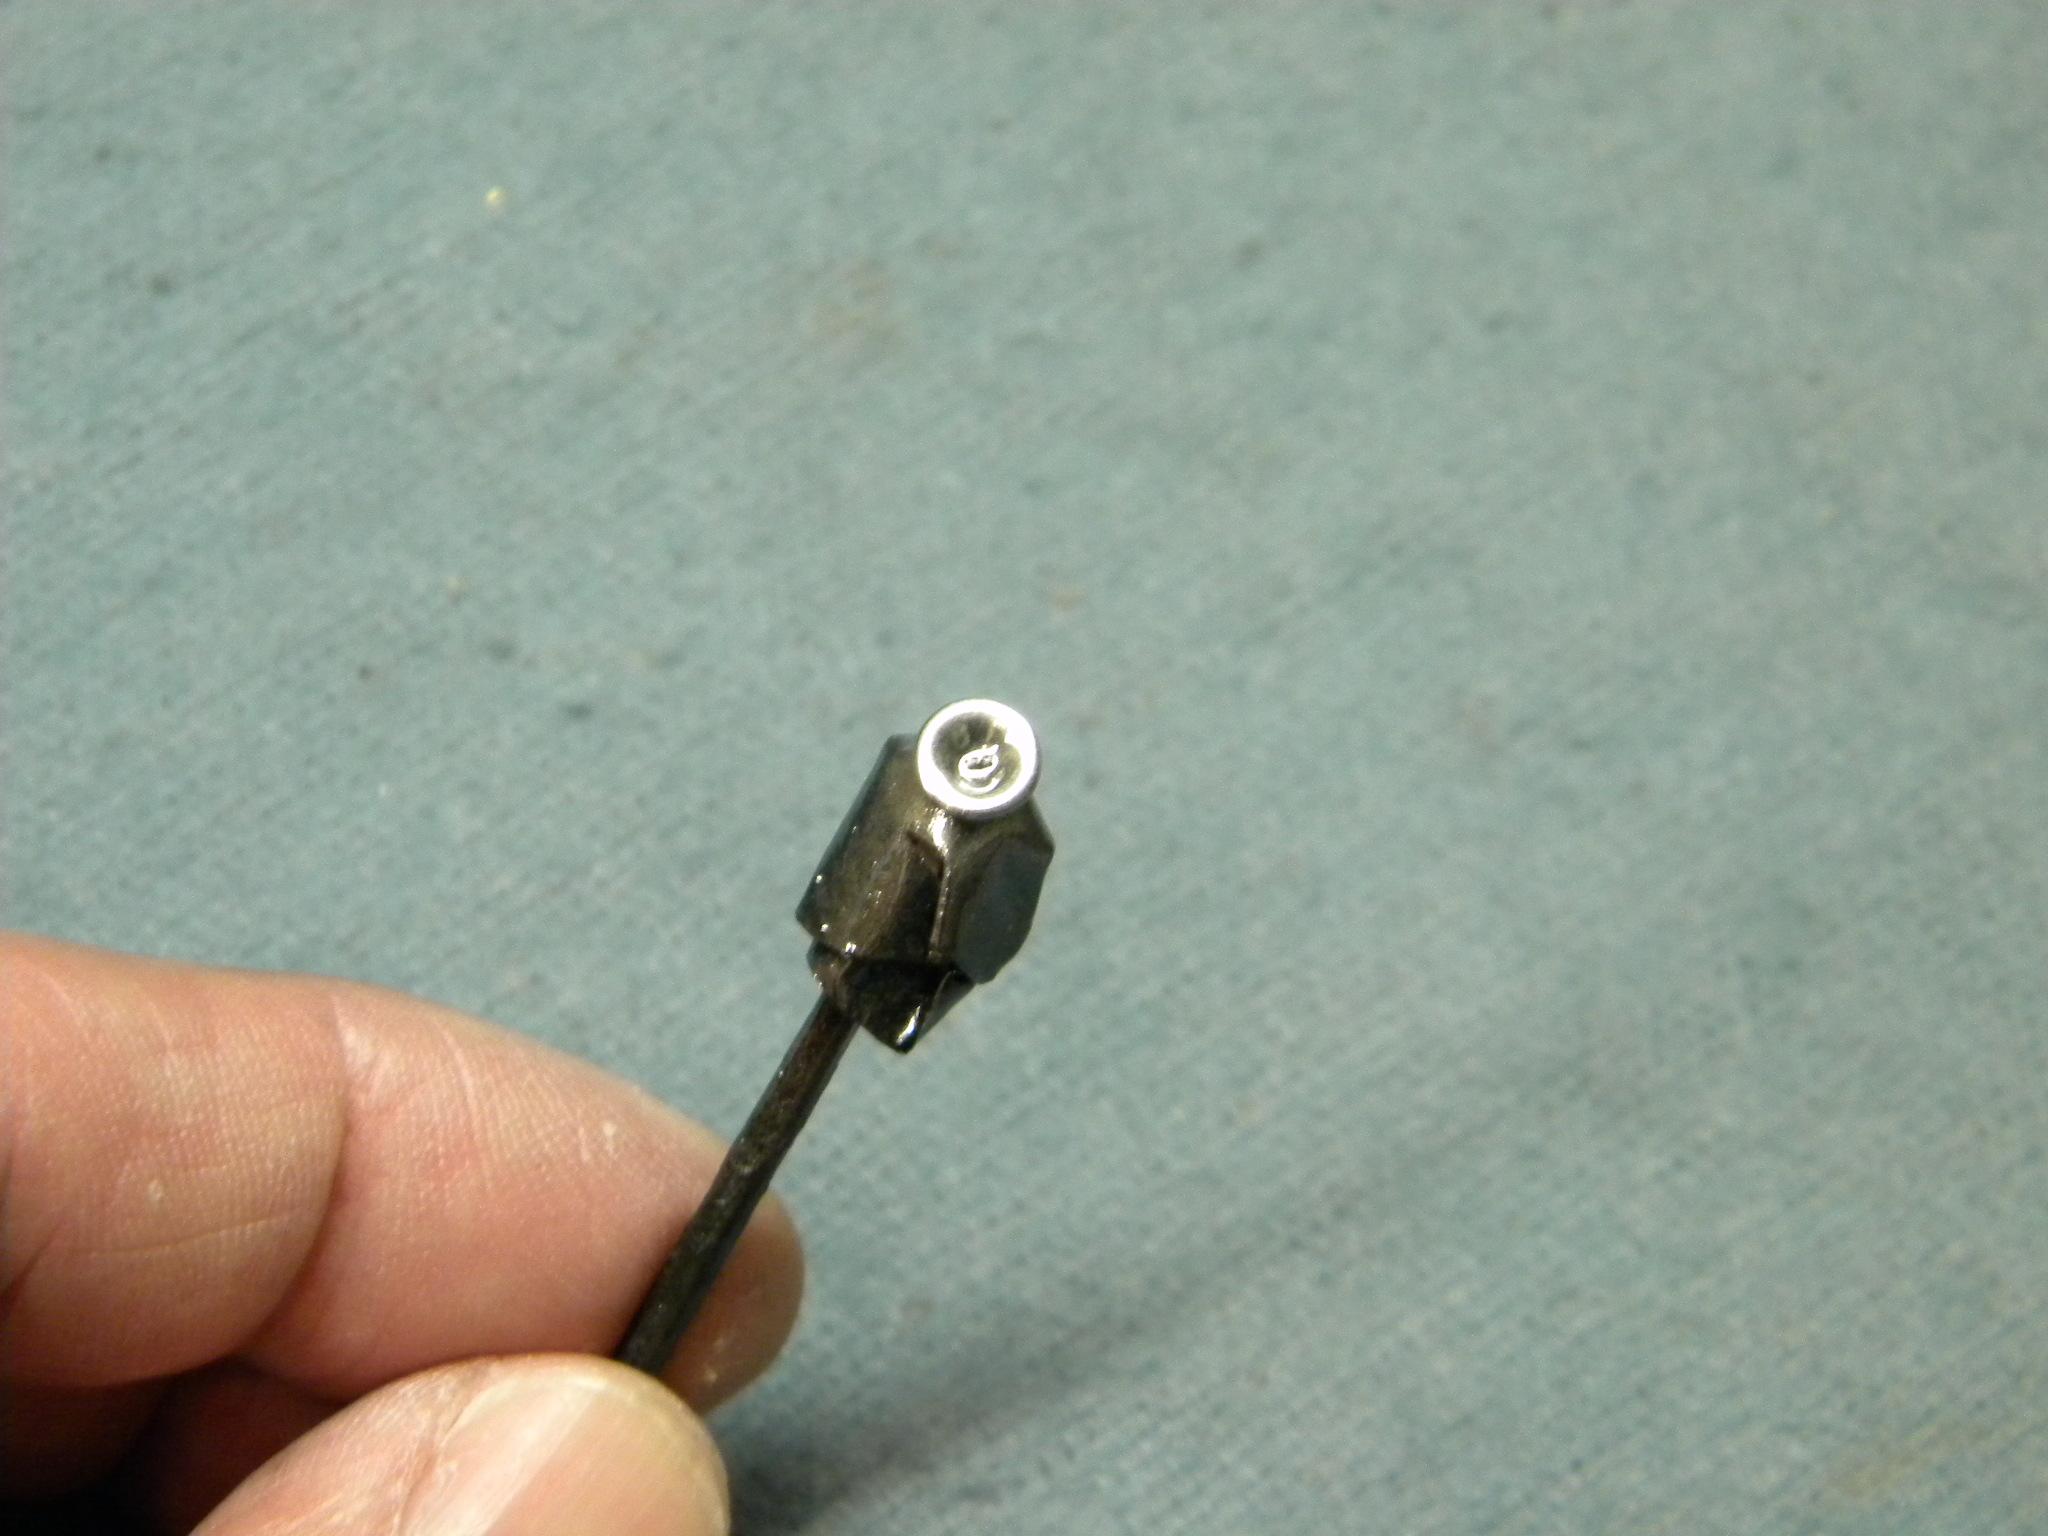
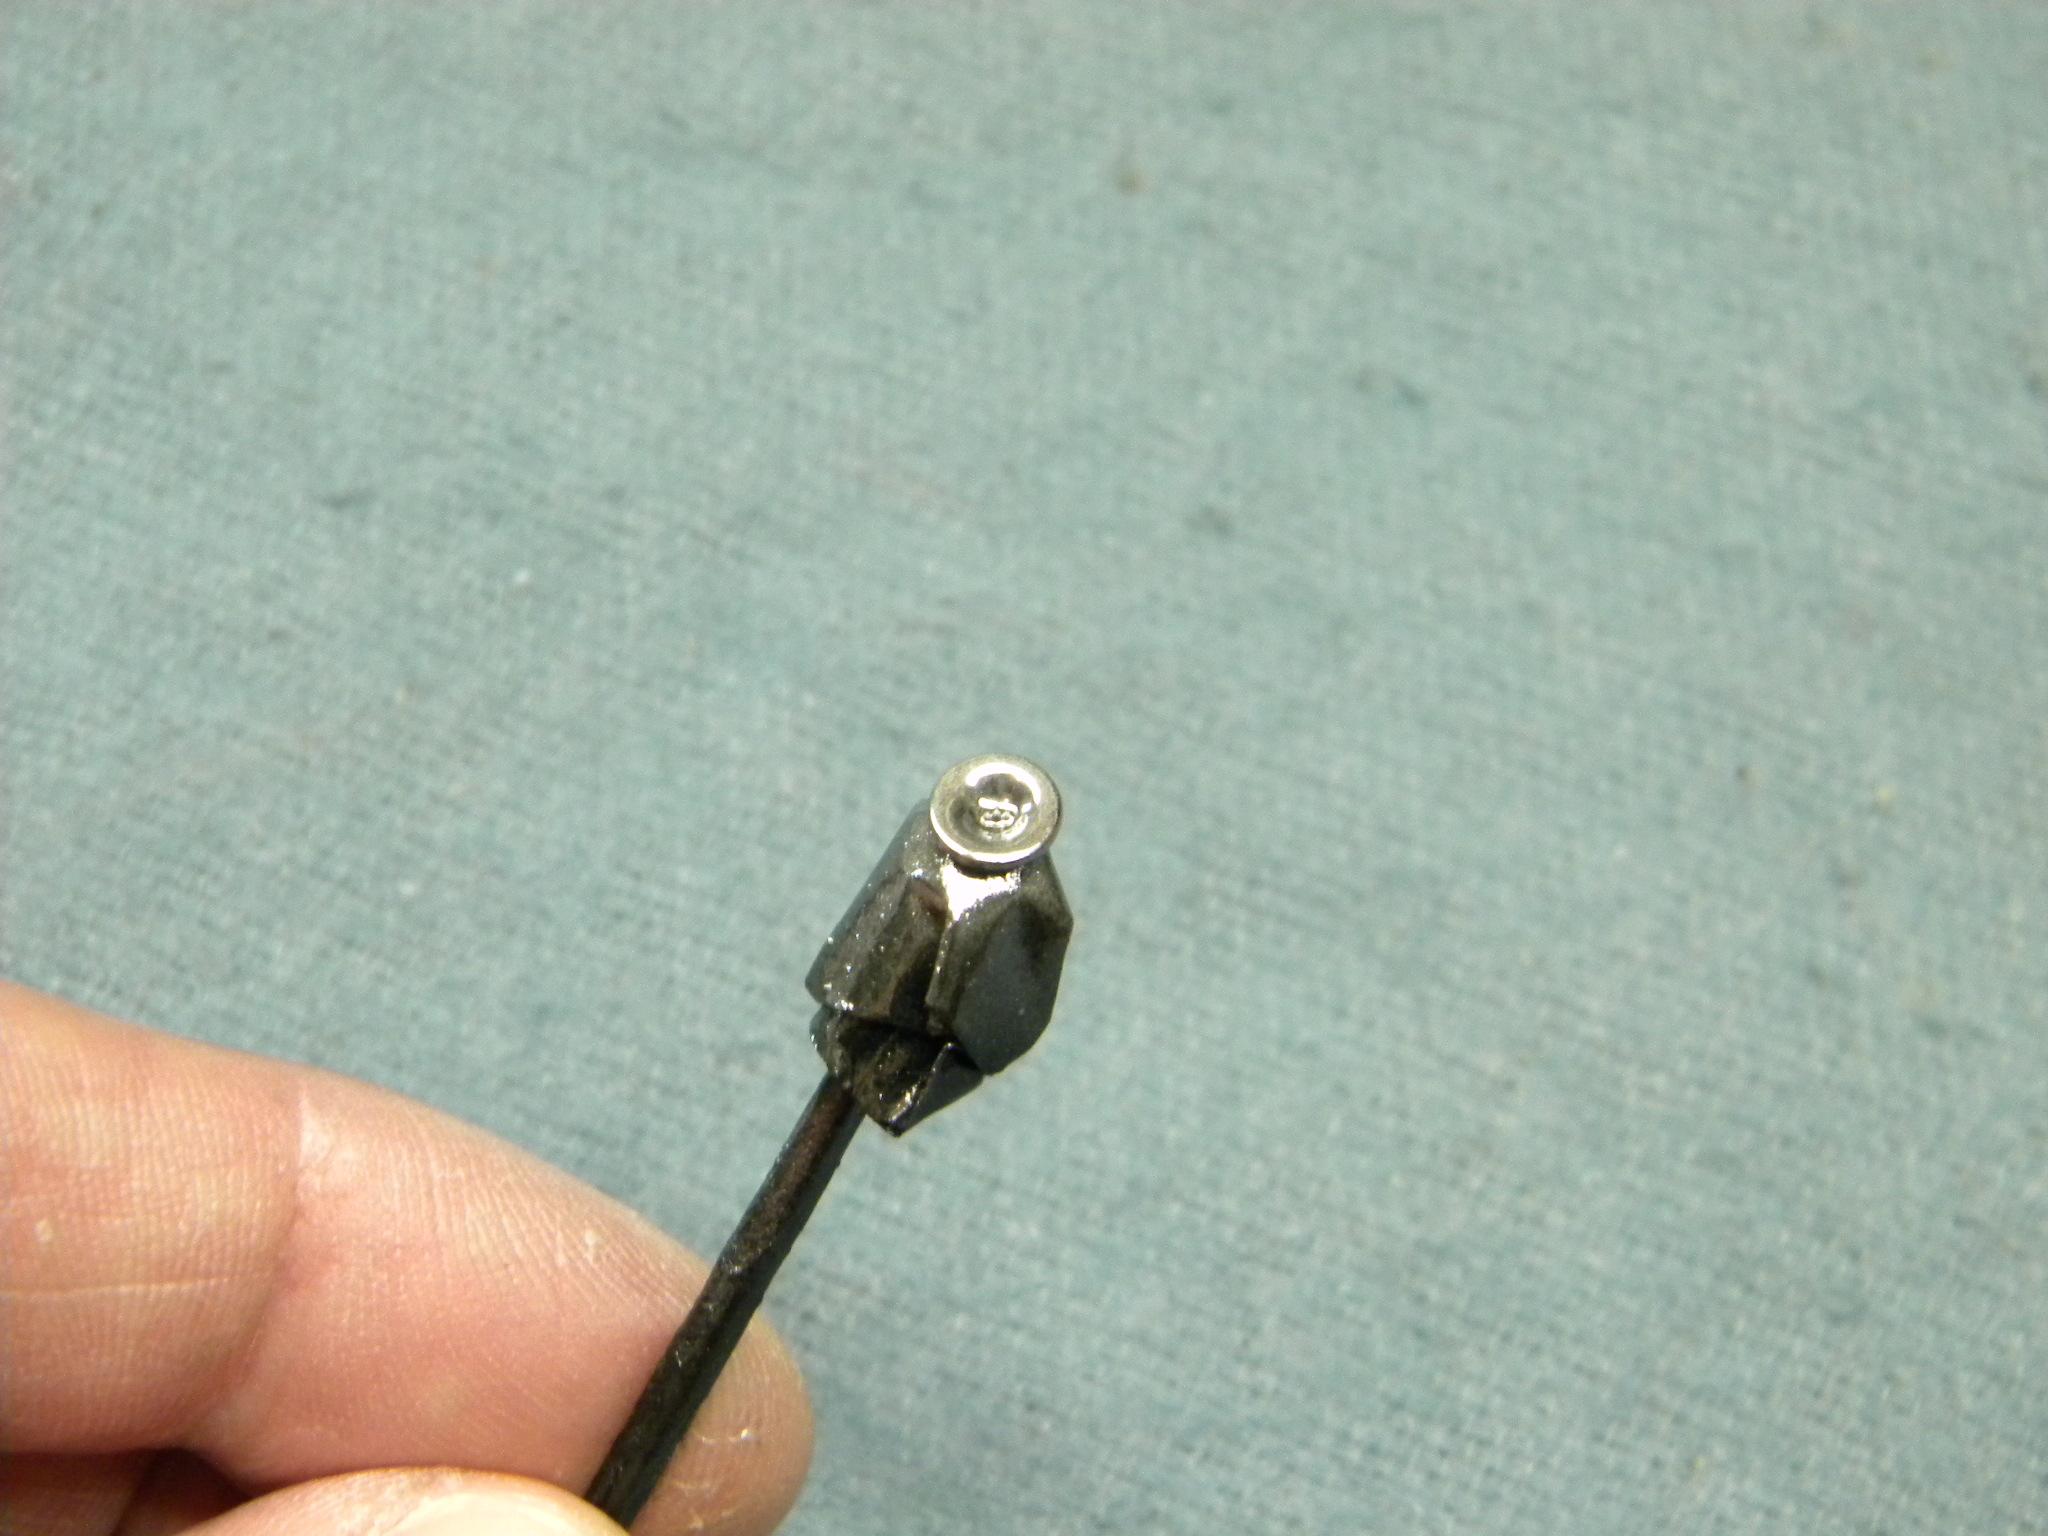
I guess it depends on the part that I'm making. Often, as the case with the radiator cap, I can figure out a way to make the part by leaving it on a larger piece of the material I'm using until the very end and then trim it off. I made the radiator cap by gluing a small piece of thin sheet styrene to the end of a piece of plastic rod a few inches long that was about the same size as the center round portion of the cap. After the glue set, (I usually use MEK) I then trimmed the sheet around the outside of the rod in the general shape of the cap with a #11 blade using the other end of the rod as a handle. Then I used files and sand paper to refine the size and shape of the cap, then drilled out the center. (a small center "button" will be added later) Finally, I trimmed the cap off of the rod. This is just one of the techniques I use for these small parts. If you go back a page and see how I began the shape of the power steering pump, you'll see that I pretty much built the entire thing while still attached to the tubing that it was made from, and then trimmed it off later. Steve
-
Thanks guys! Testors flat white enamel with a fine brush. Steve
-
Good suggestion, as long as you're not spraying it over a light color. Unless you would like your white paint job to be yellow. Steve
-
Nice work. The top looks like it is from the modern Monogram '59 Impala kit. Steve
-
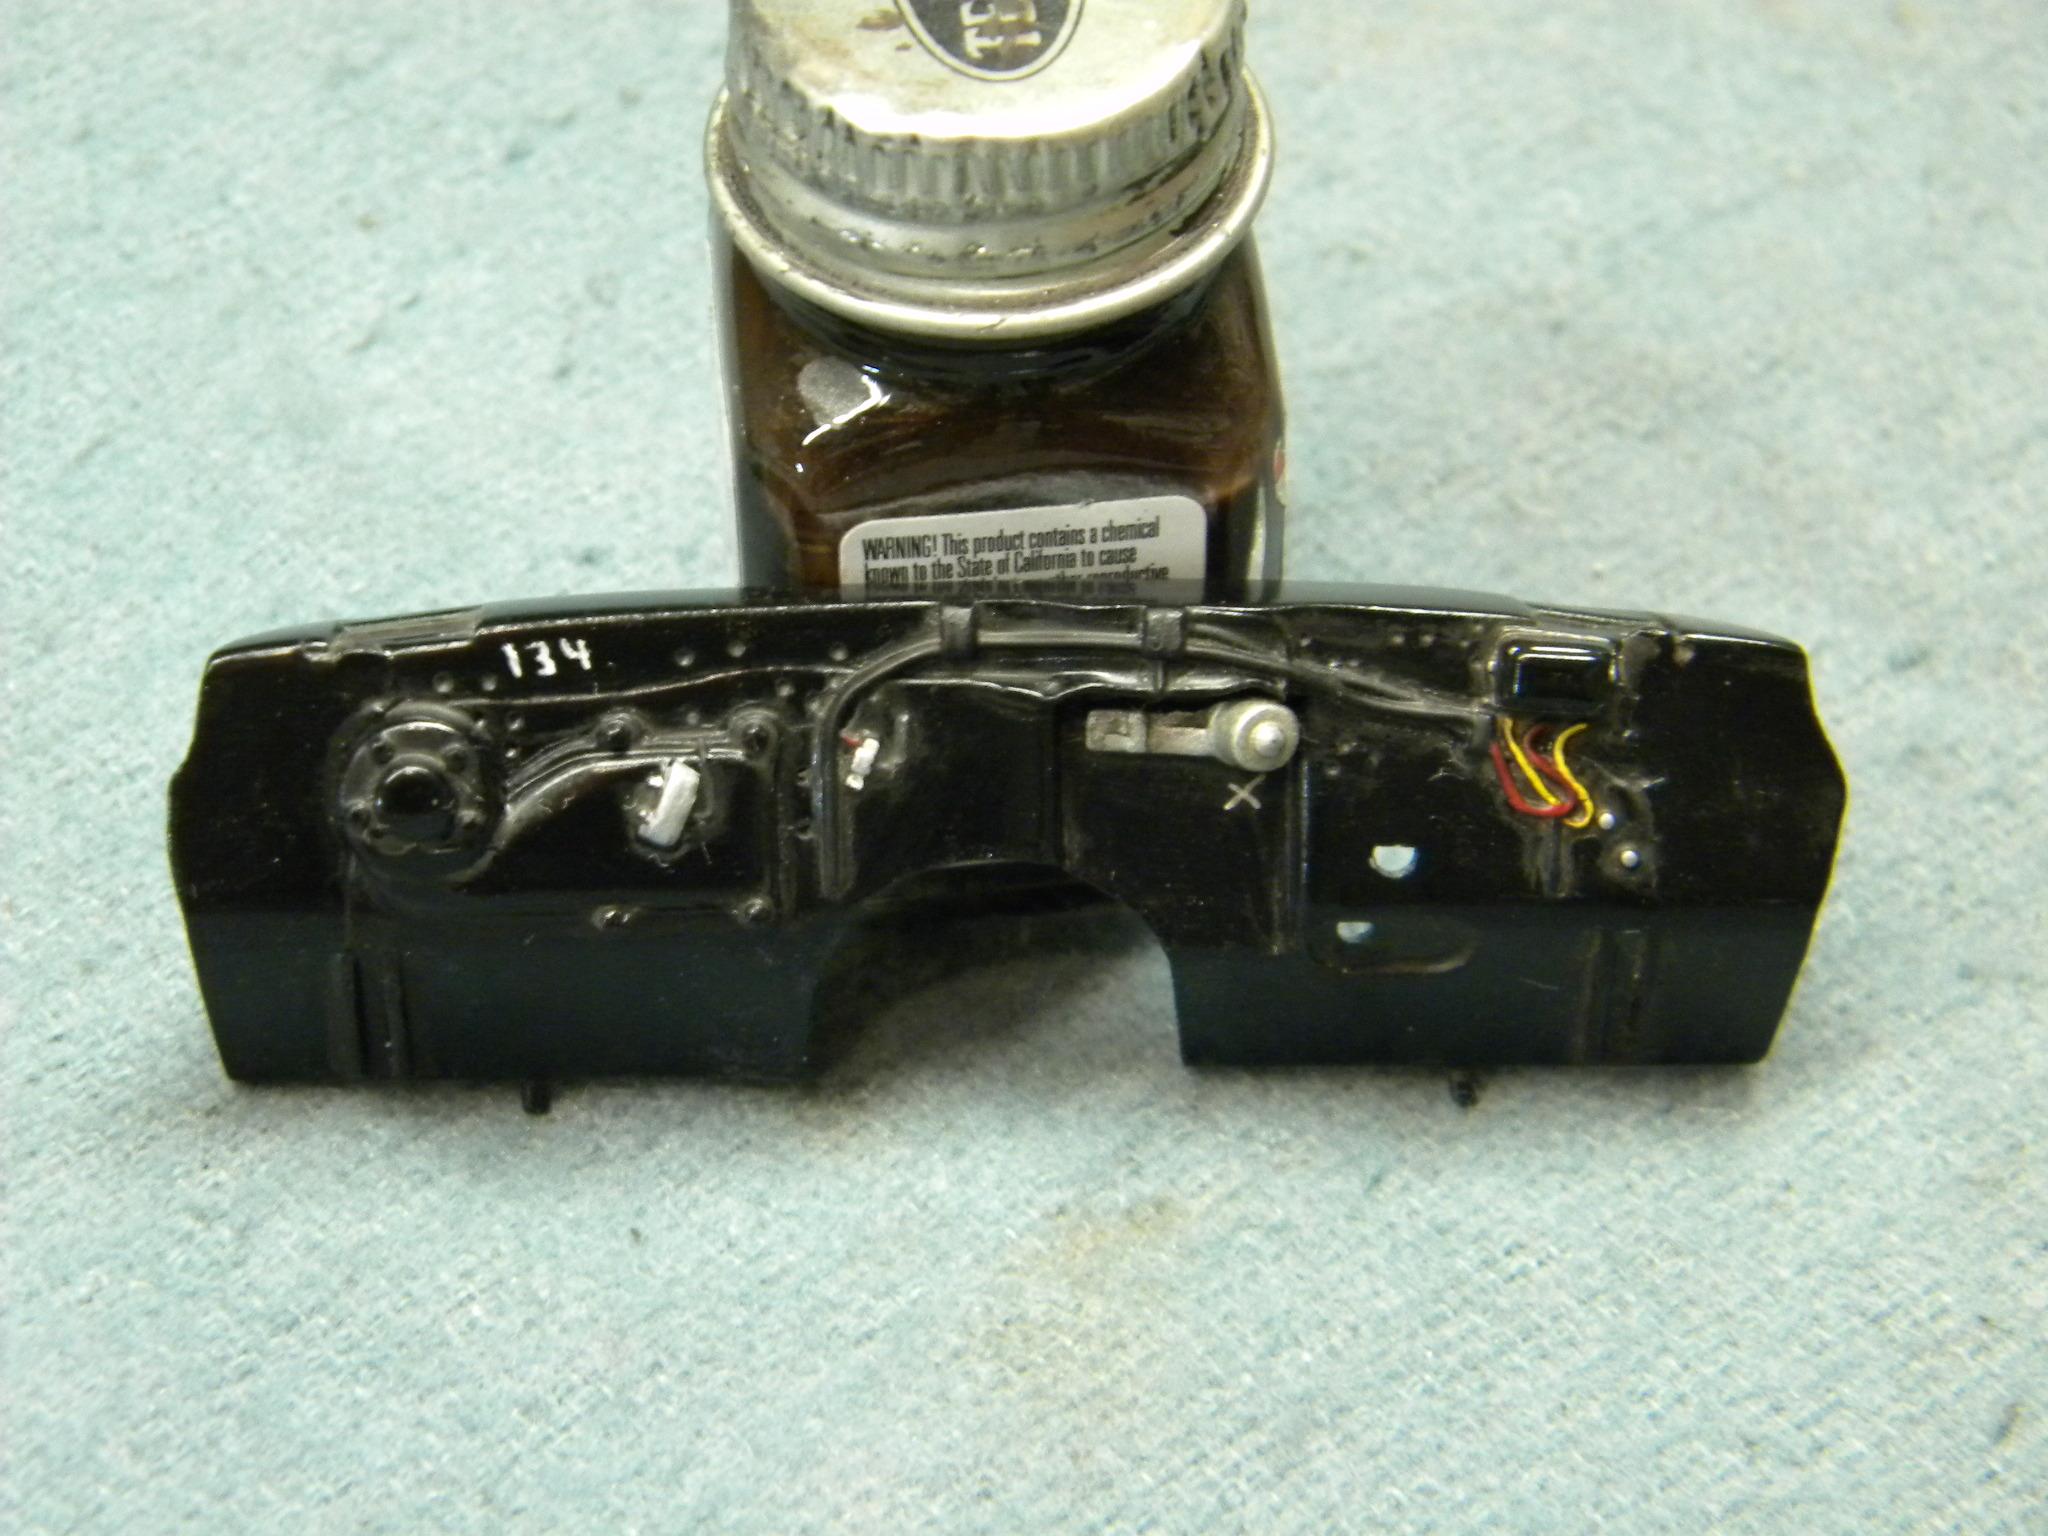
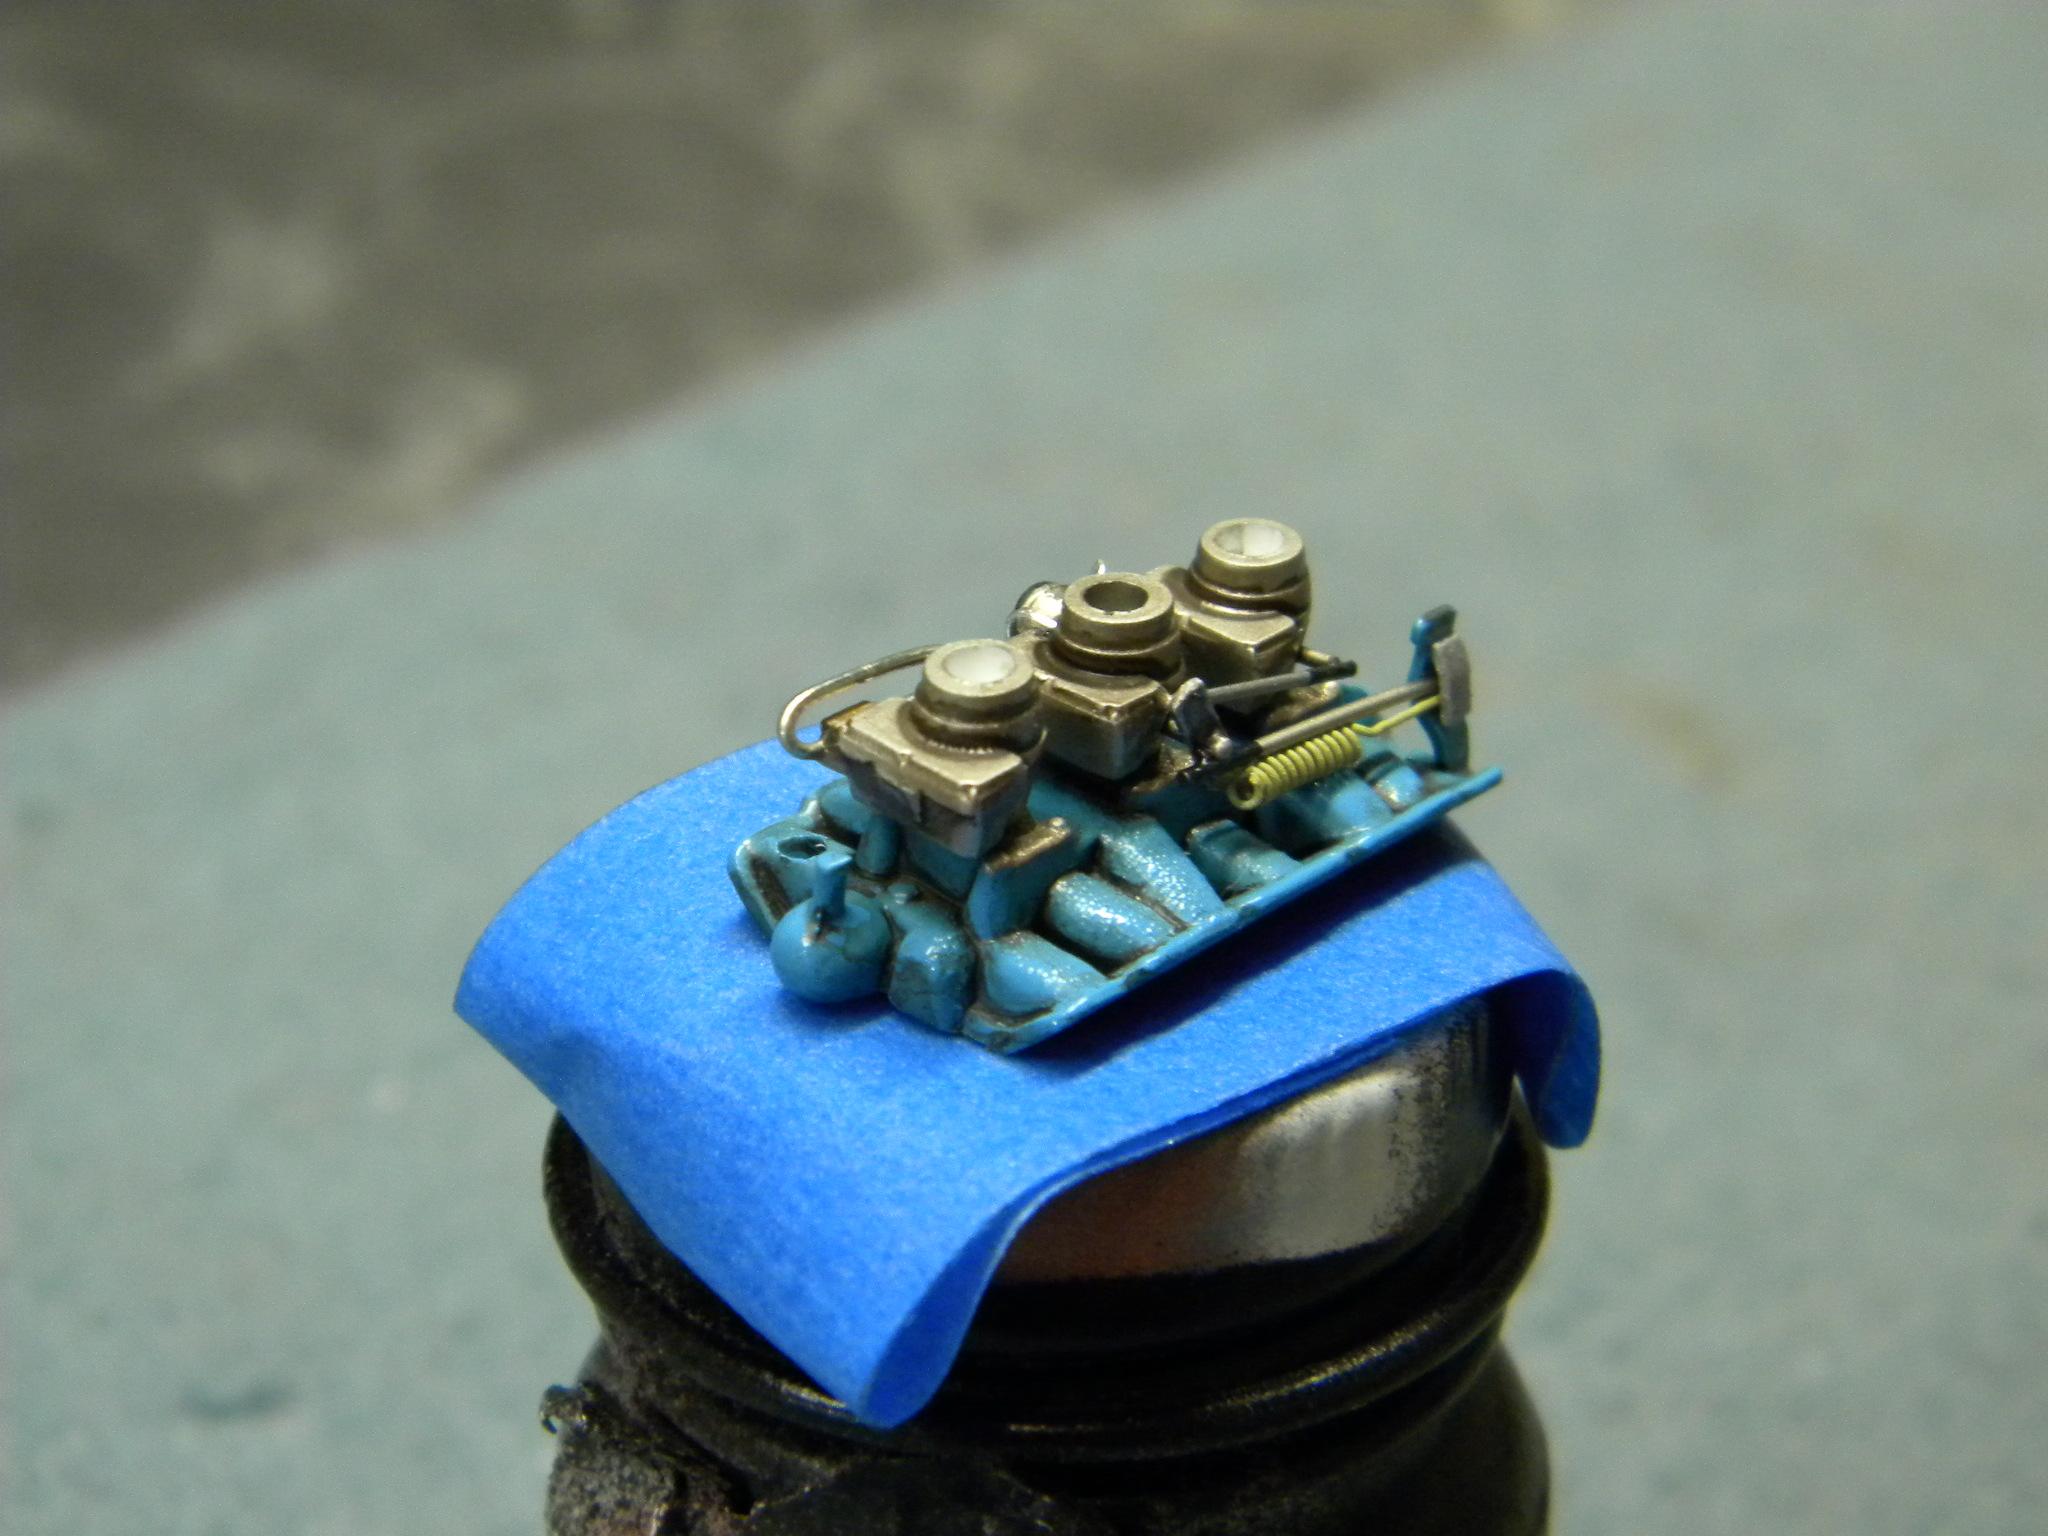
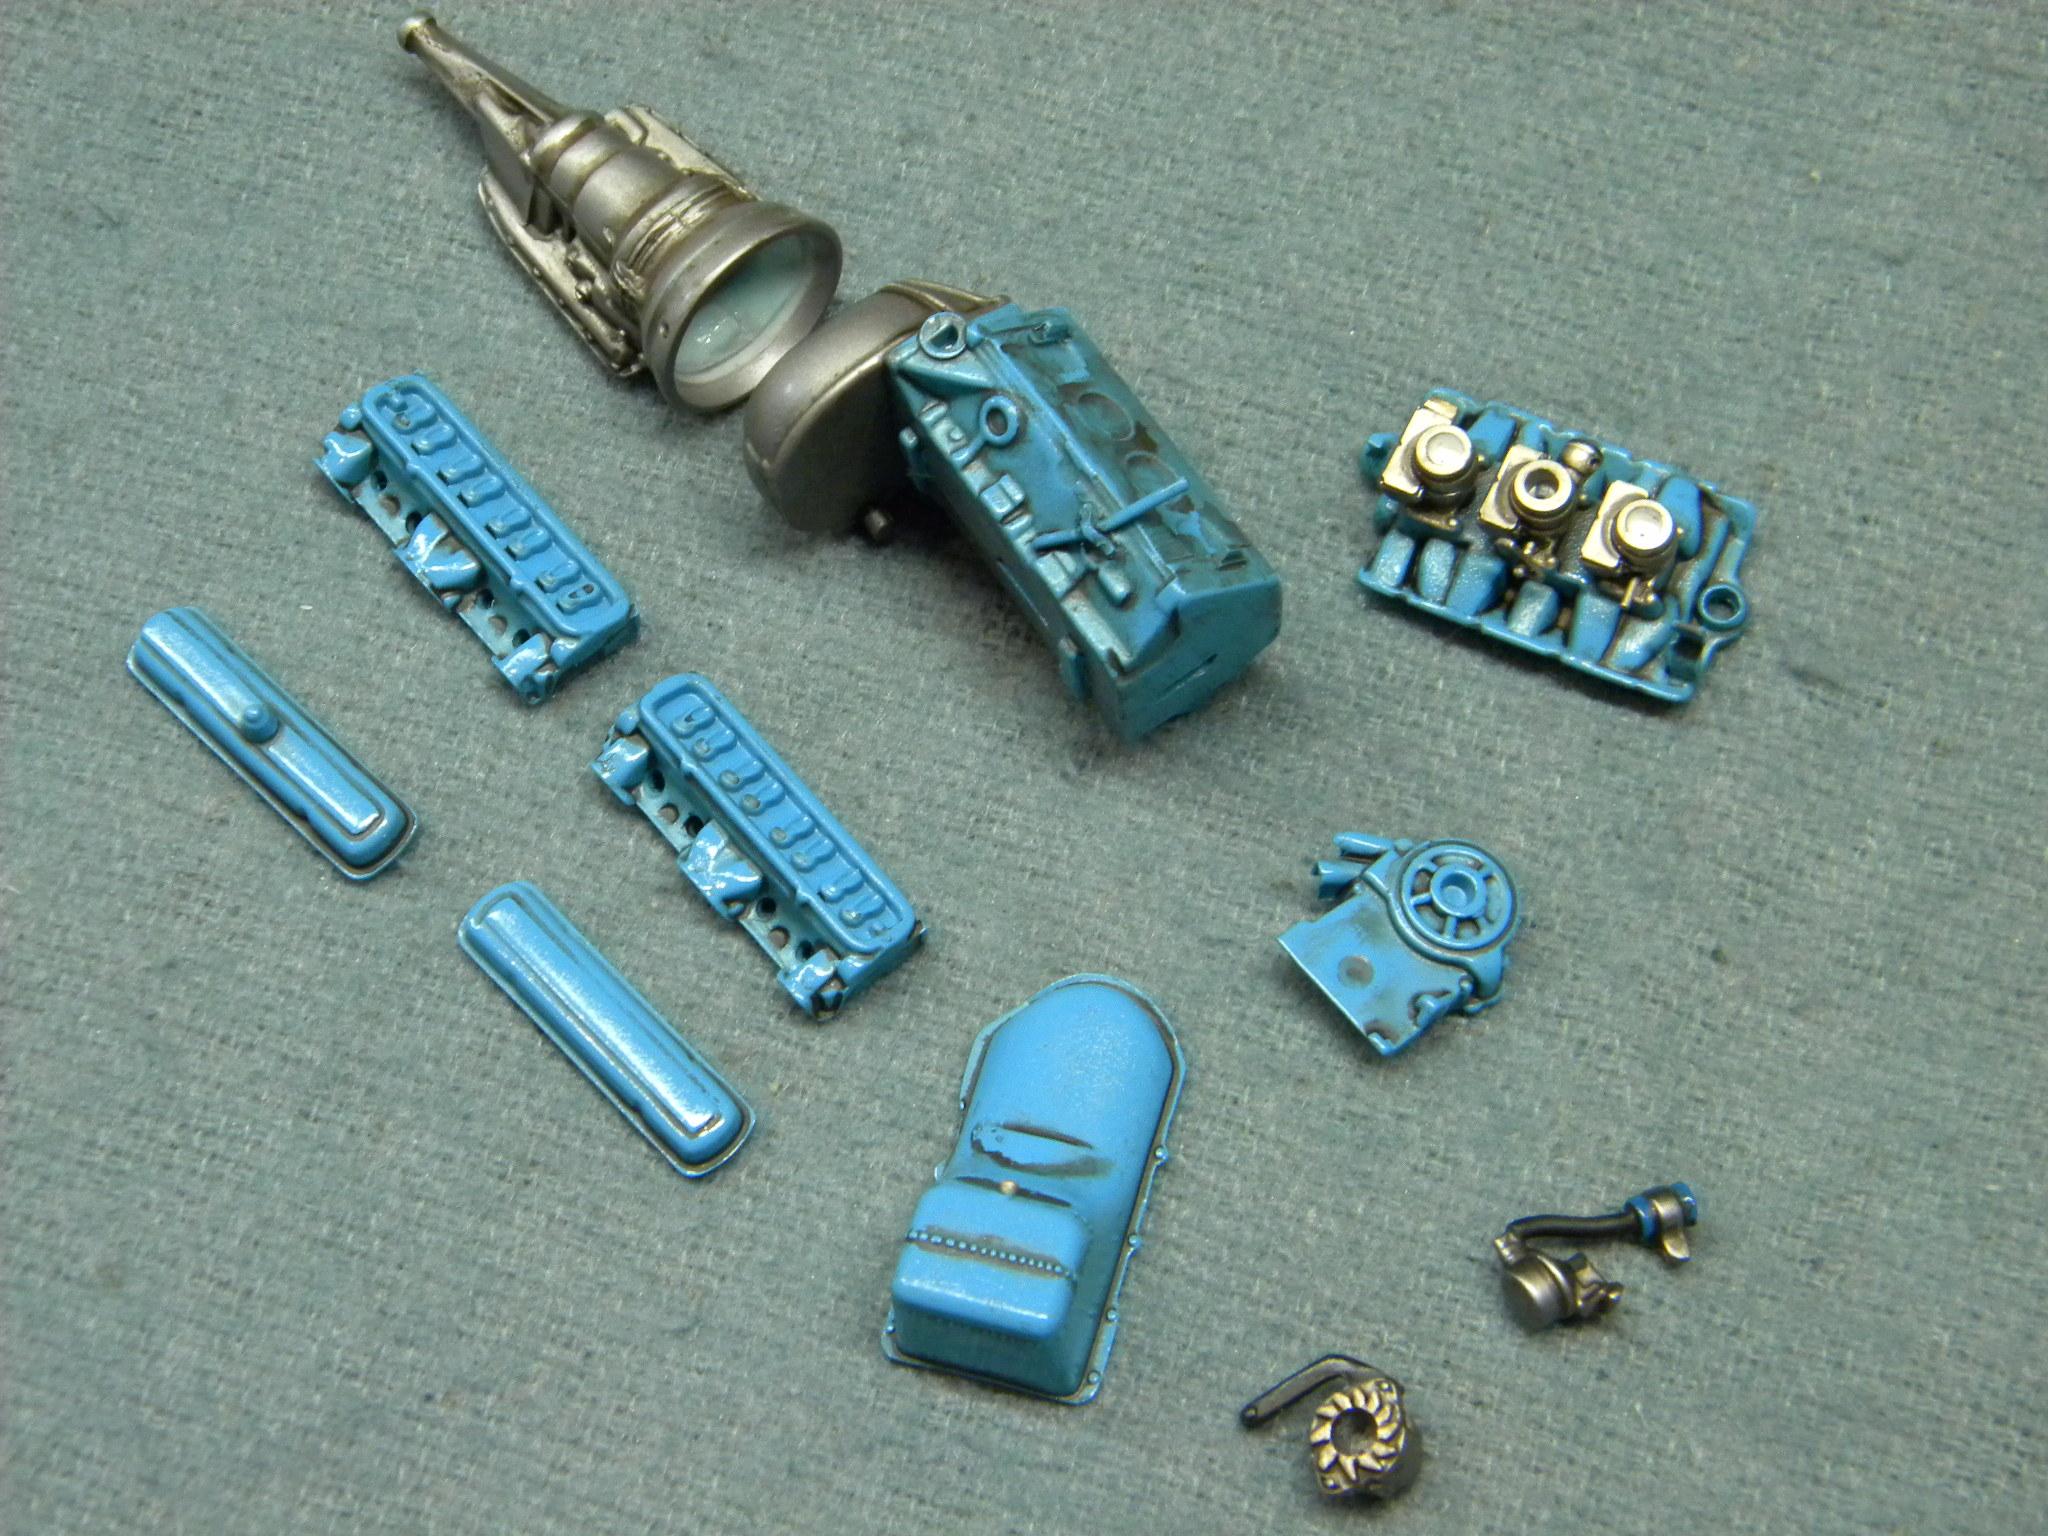
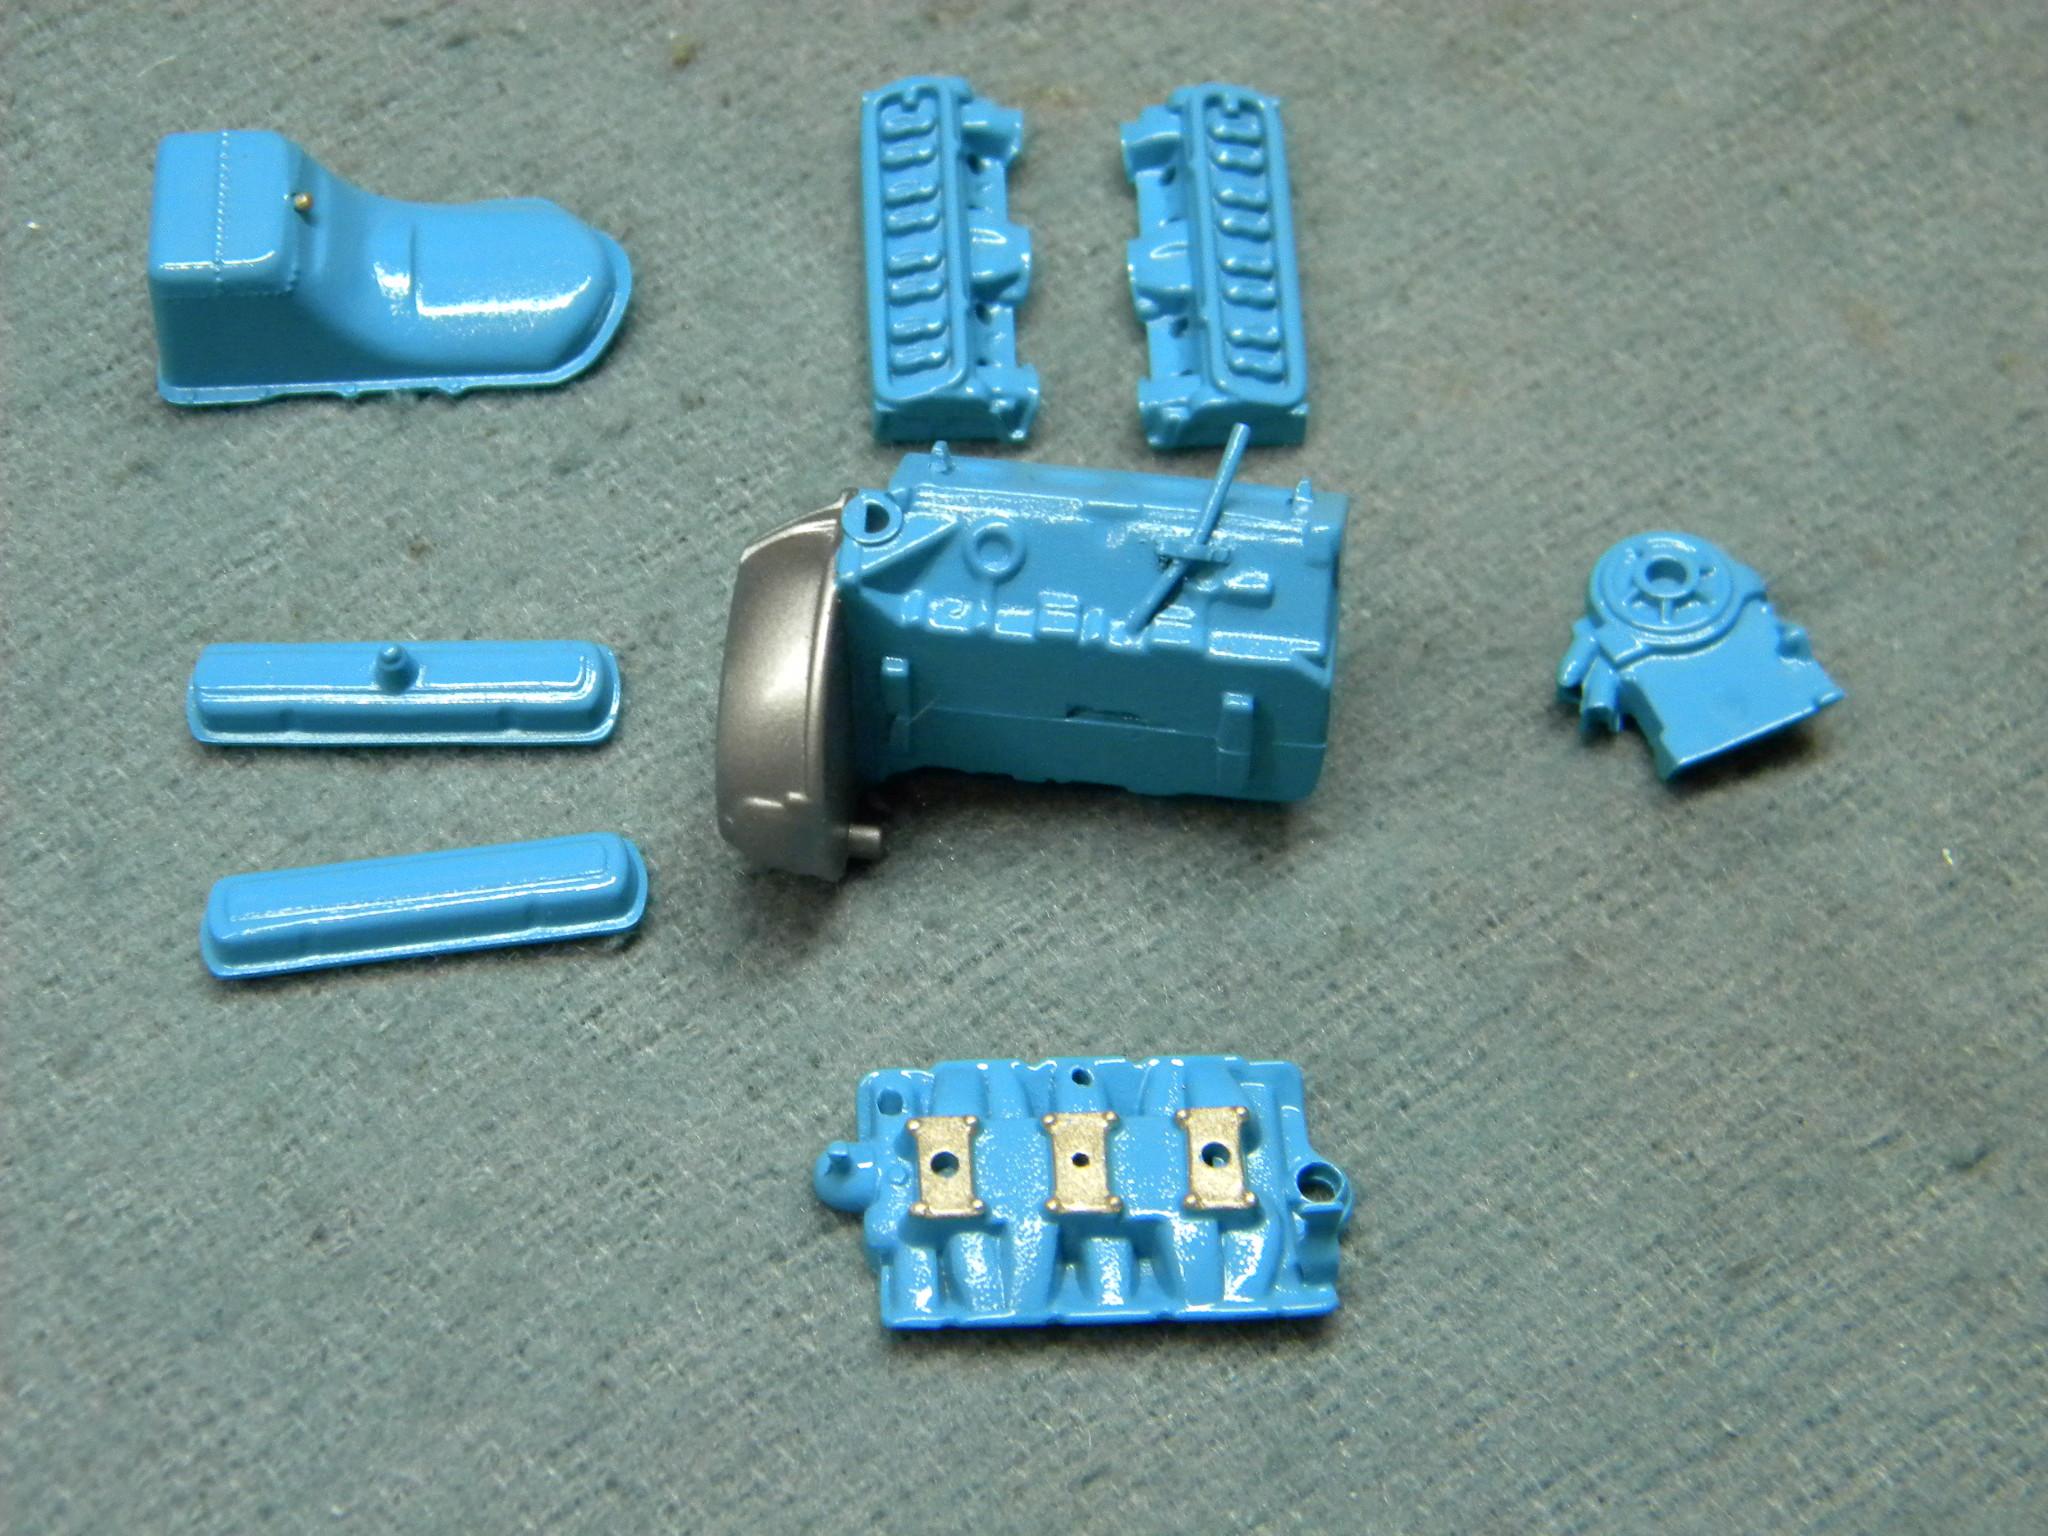
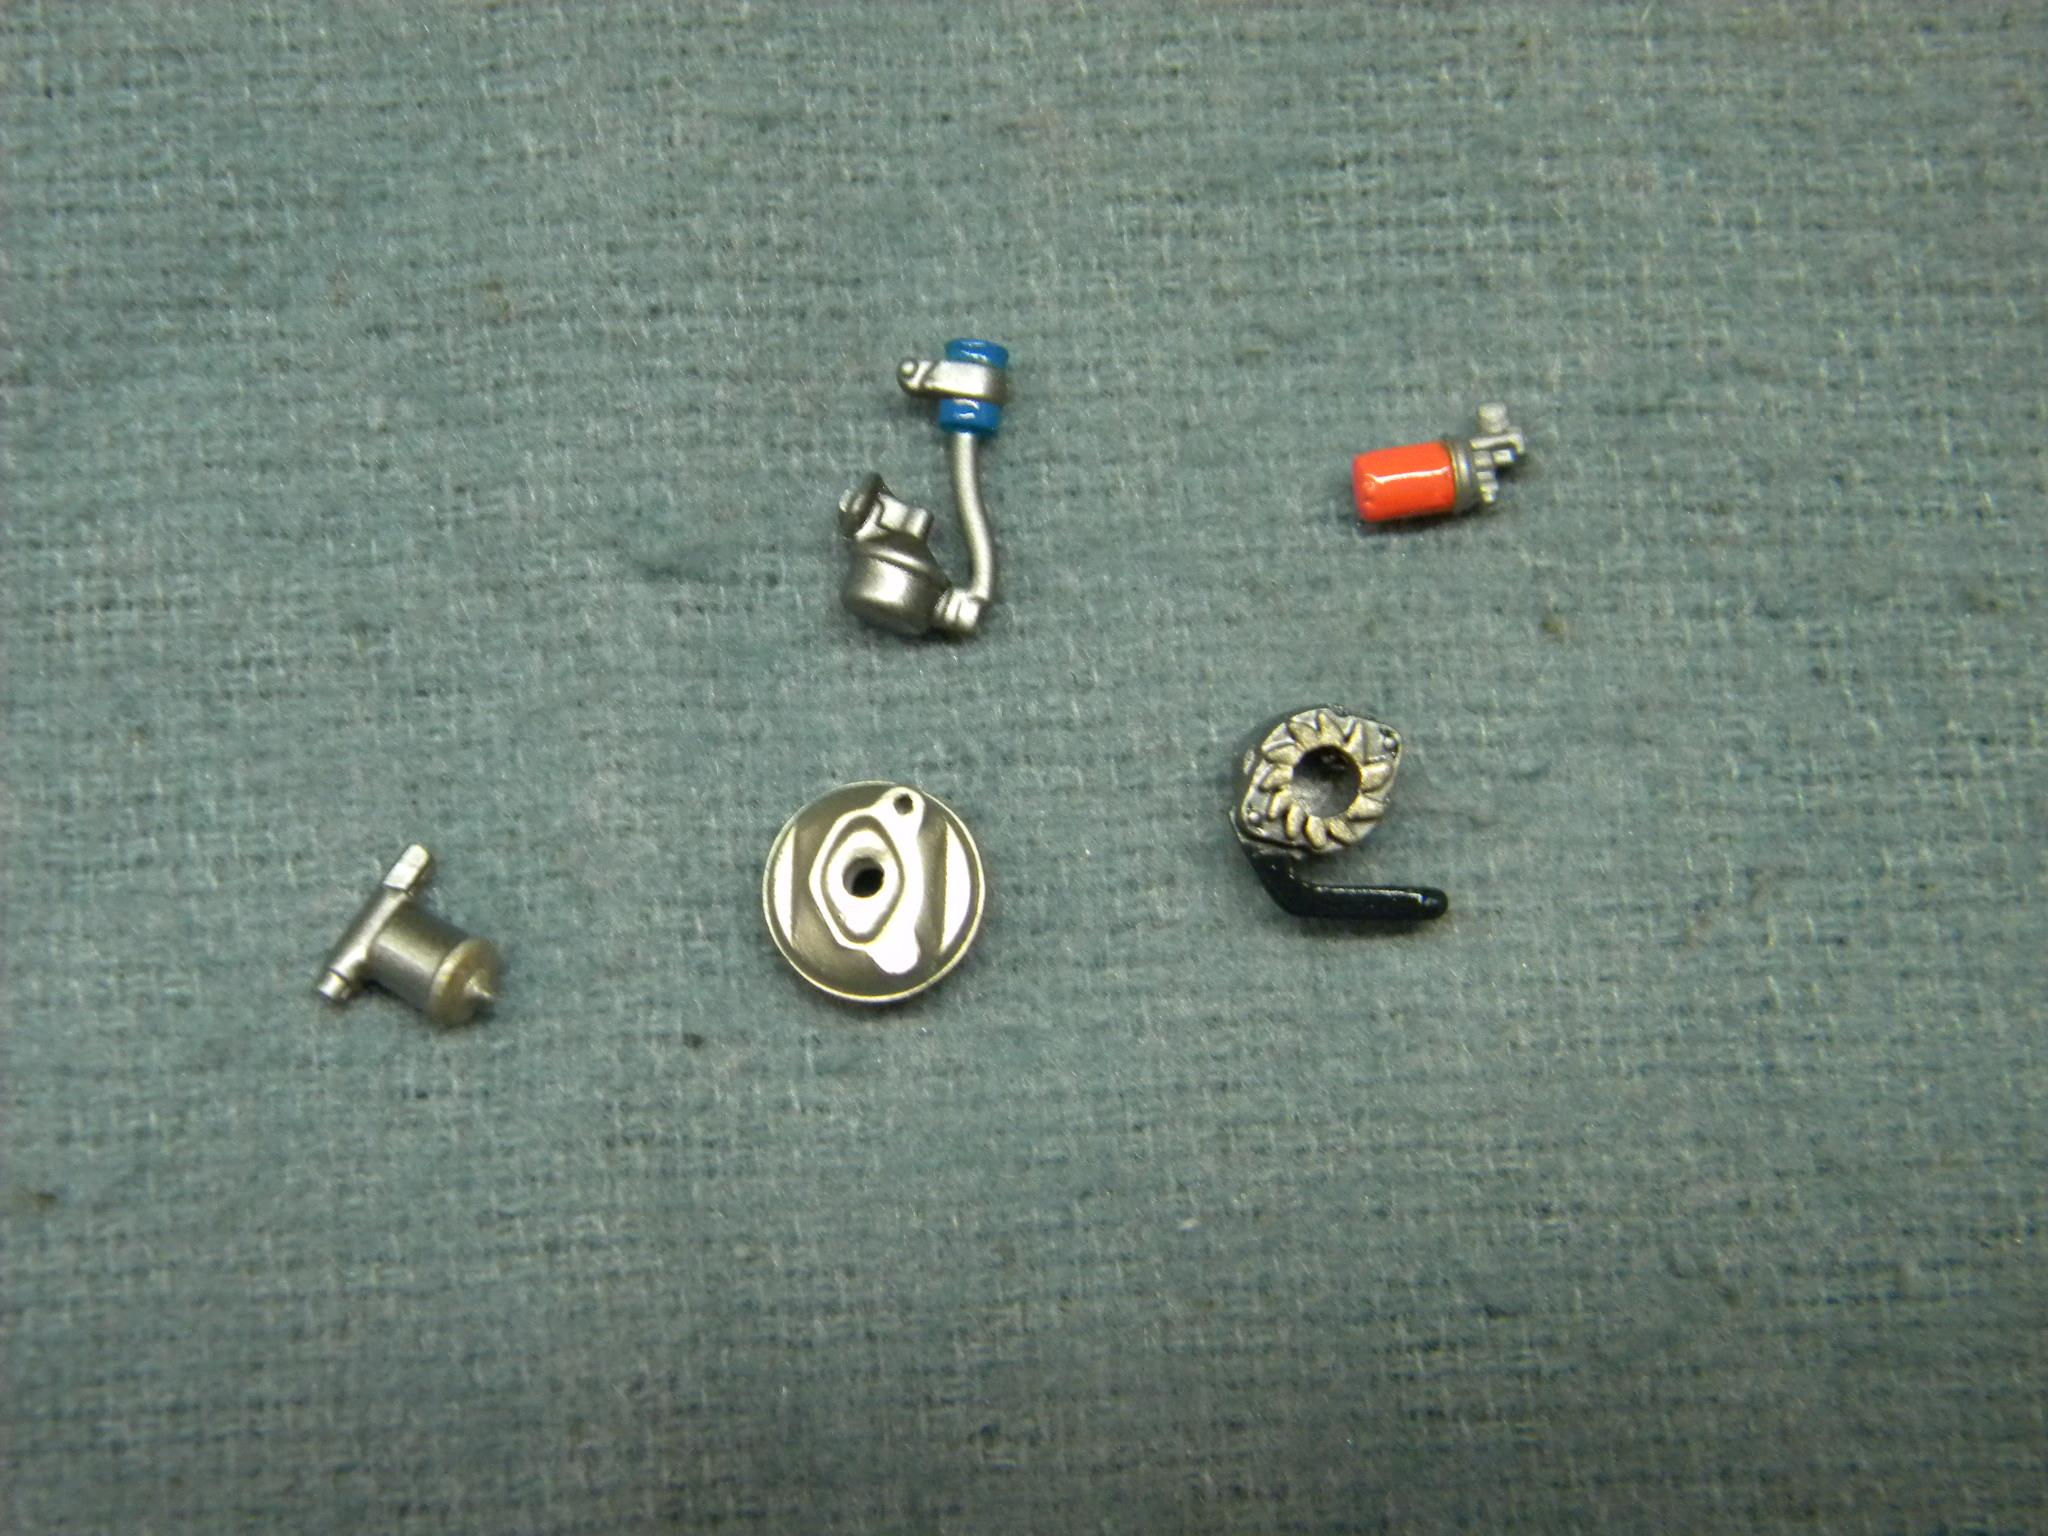
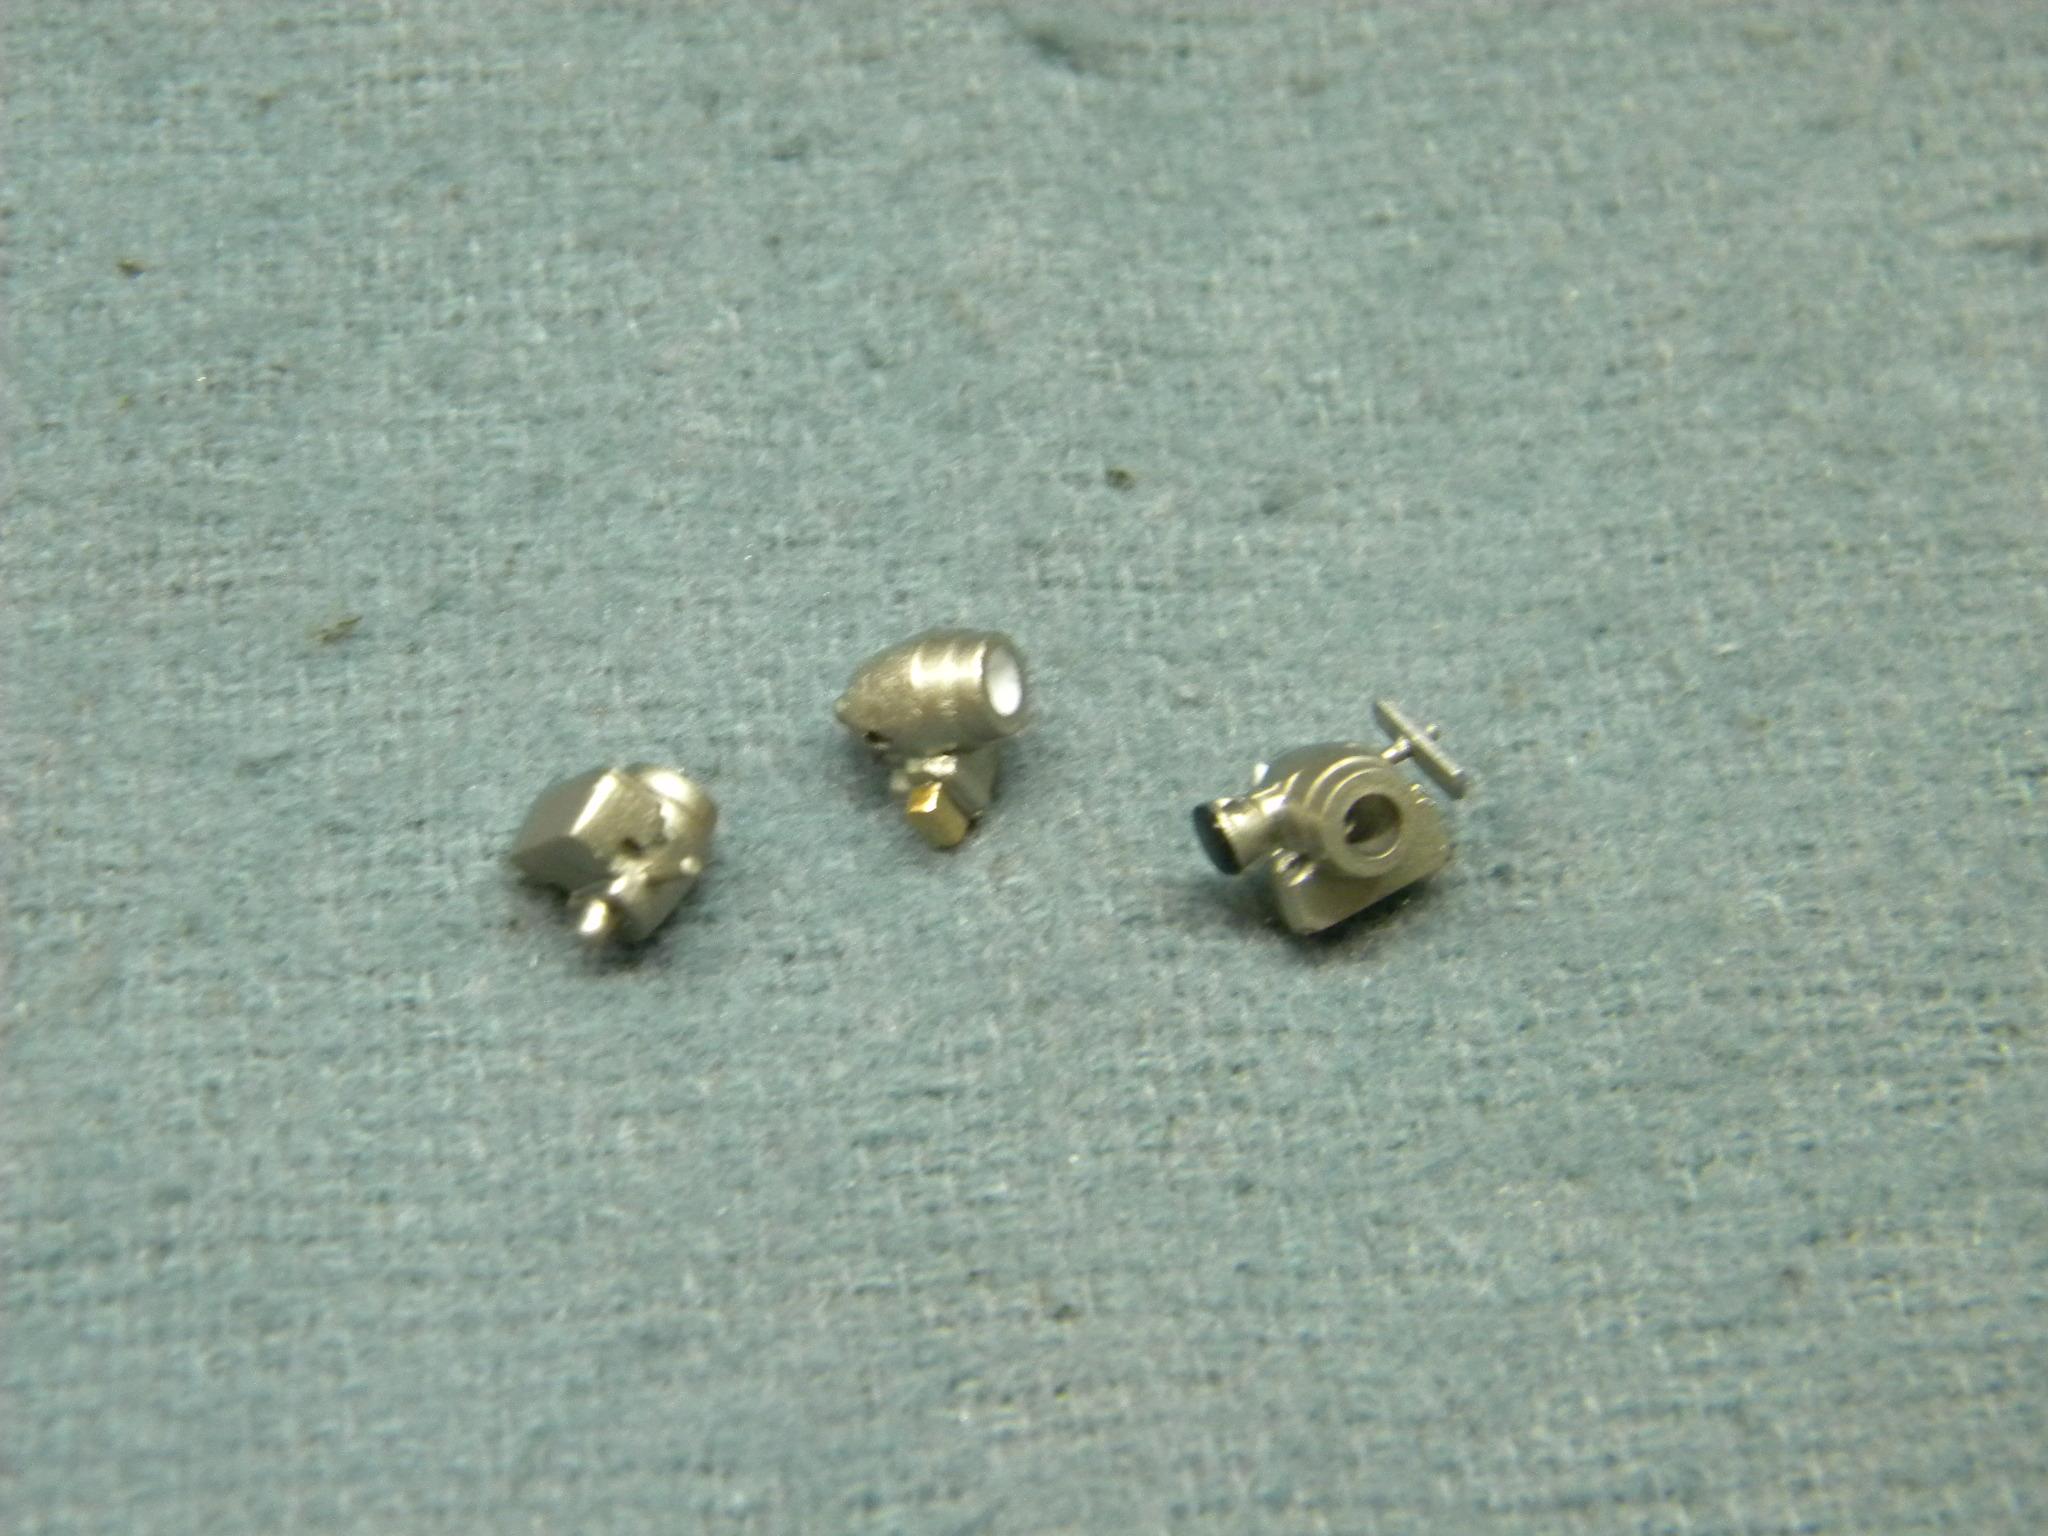
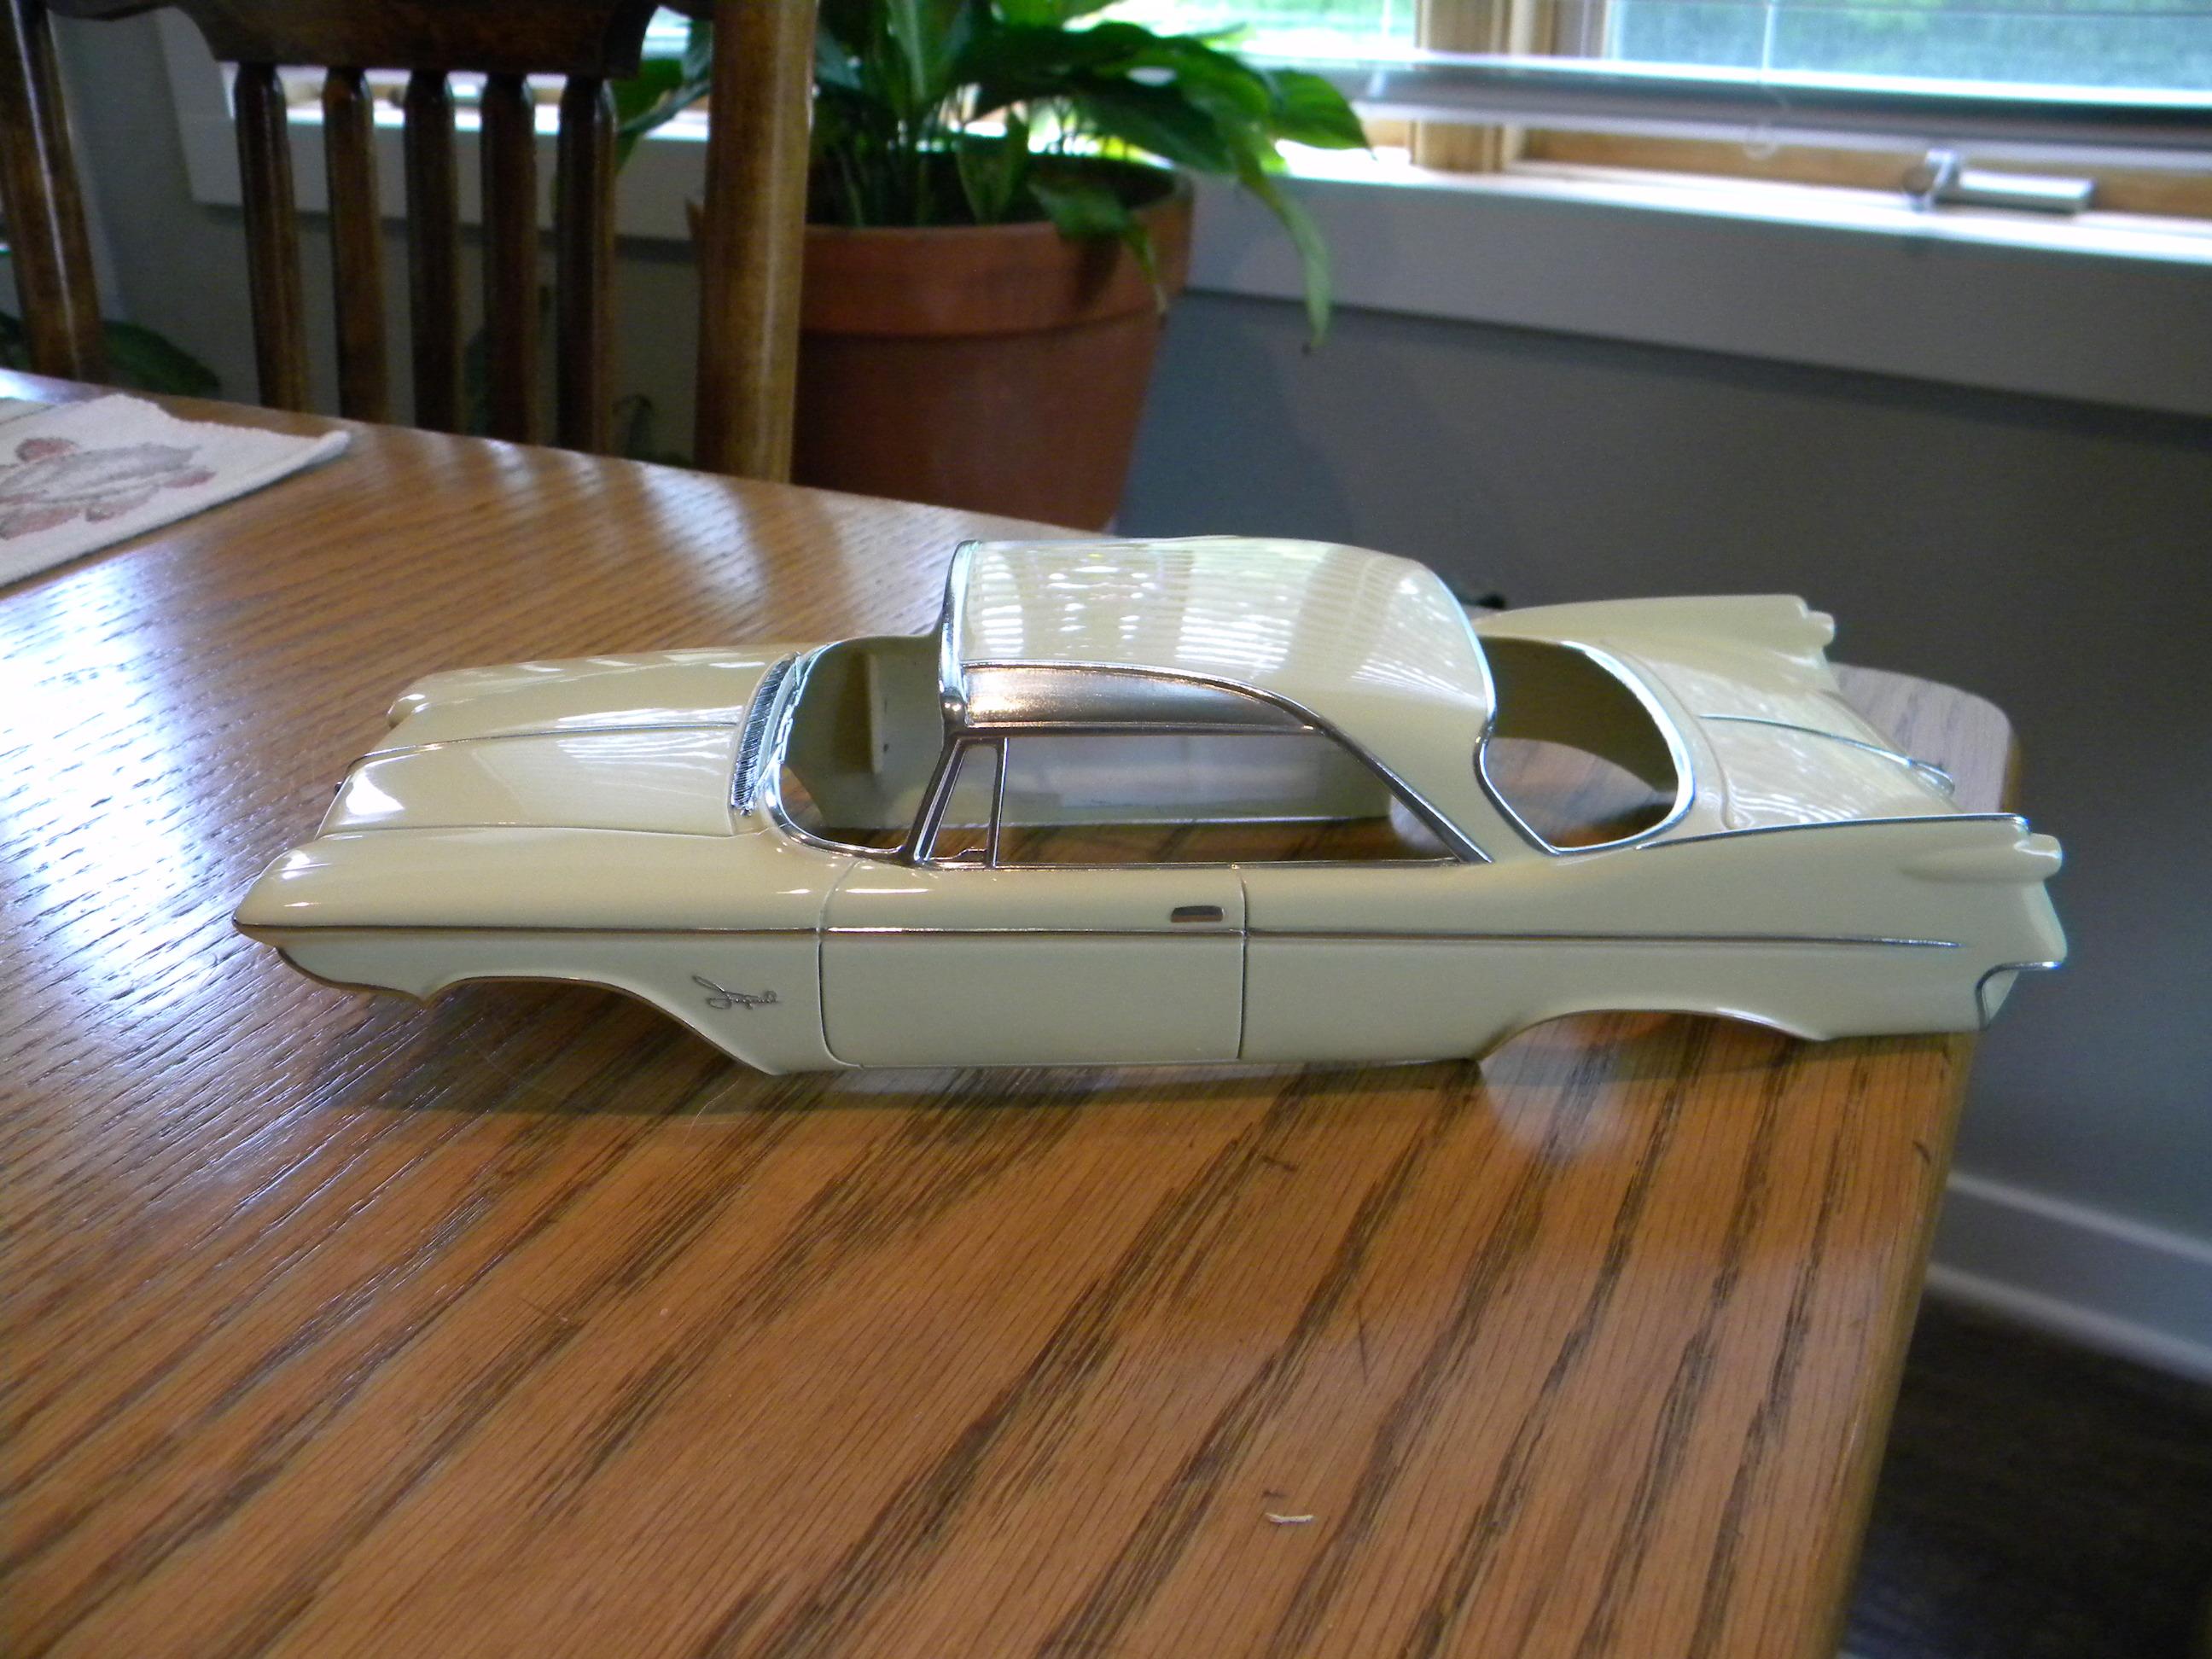
Thanks for all of the kind comments gentlemen! Today, I managed to spend some time detail painting the firewall and the majority of the remaining engine components. While I was doing that, I also started some work on the radiator by adding a filler neck and overflow tube. I also scratch made a radiator cap. Assembly of the engine has also started and I think it should come together pretty quickly. Steve

-
 Not really. I find that I get a much better finish with air brush paints than with a spray can. That being said, I do use a lot of rattle can paints. All of my primers, clear coats, chassis paints, etc, are all done with rattle cans. As a matter of fact, about the only thing that I use the air brushes for is the body, engine, (most times) and anything that I'm spraying with Alclad or custom mixed colors, such as interior colors. I also will often use basic non-metallic colors for bodies such as red, black, white, etc, from a spray can, most often Duplicolor touch up paints. I have no desire to go back to hobby spray paints for painting bodies. I never really liked the vast majority of them anyway. Steve
 -
I feel the same way about midget racers. If you gave me one, I'd give it to someone else. Wouldn't be any point in even keeping it in my stash. Steve
-
Duplicolor. Steve
-
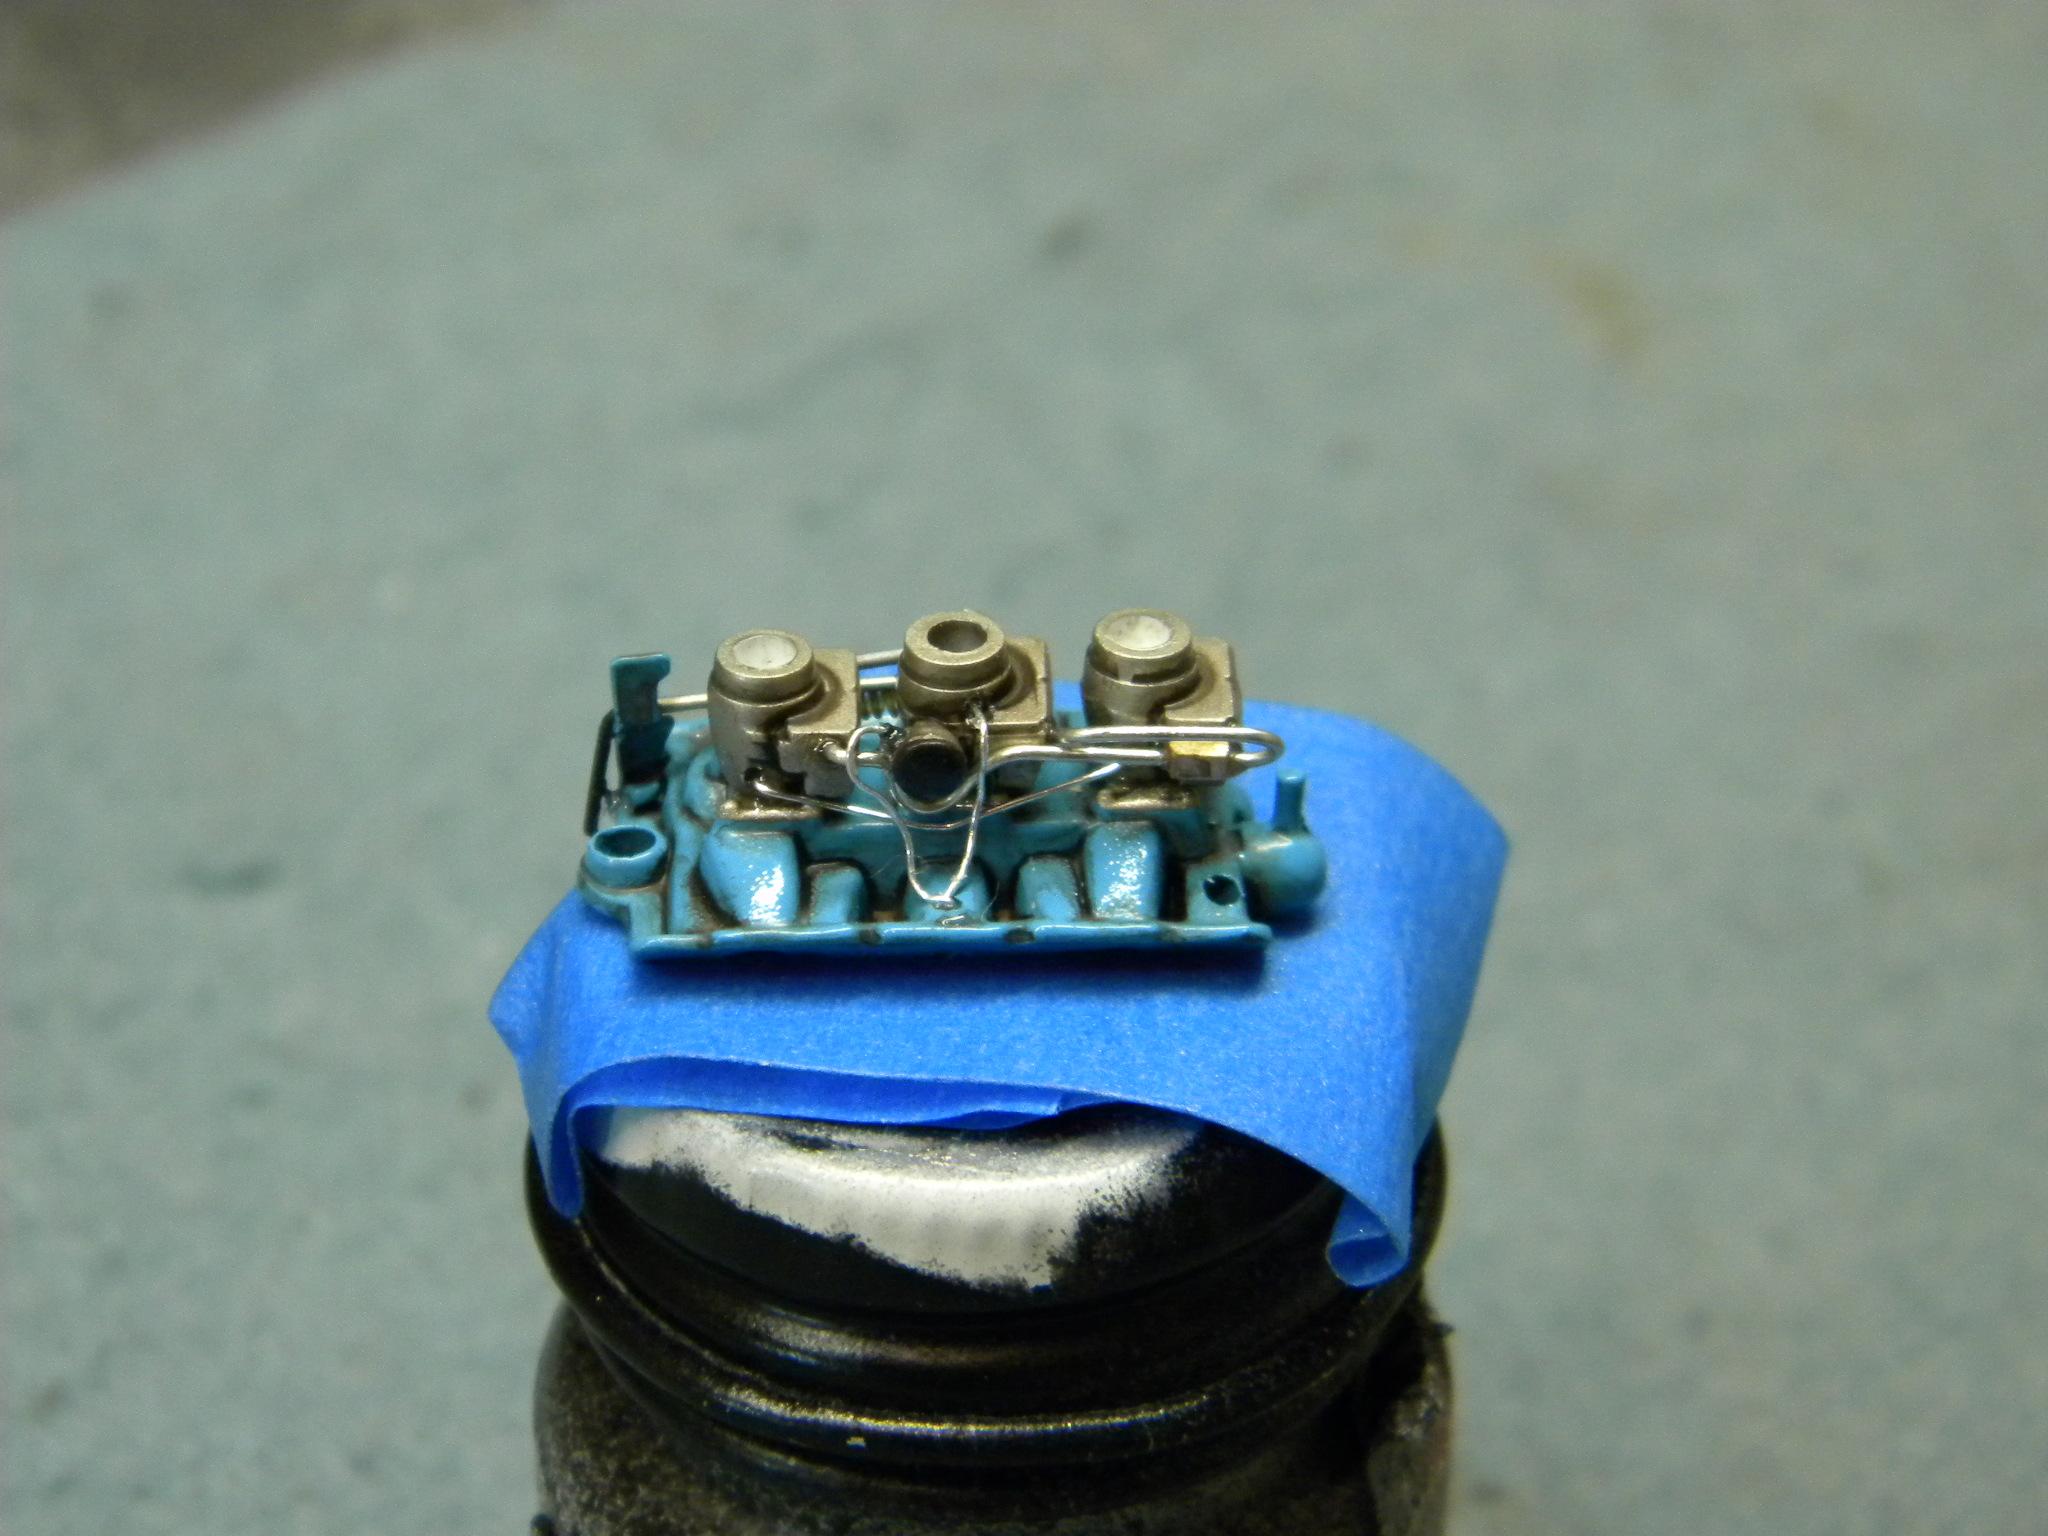
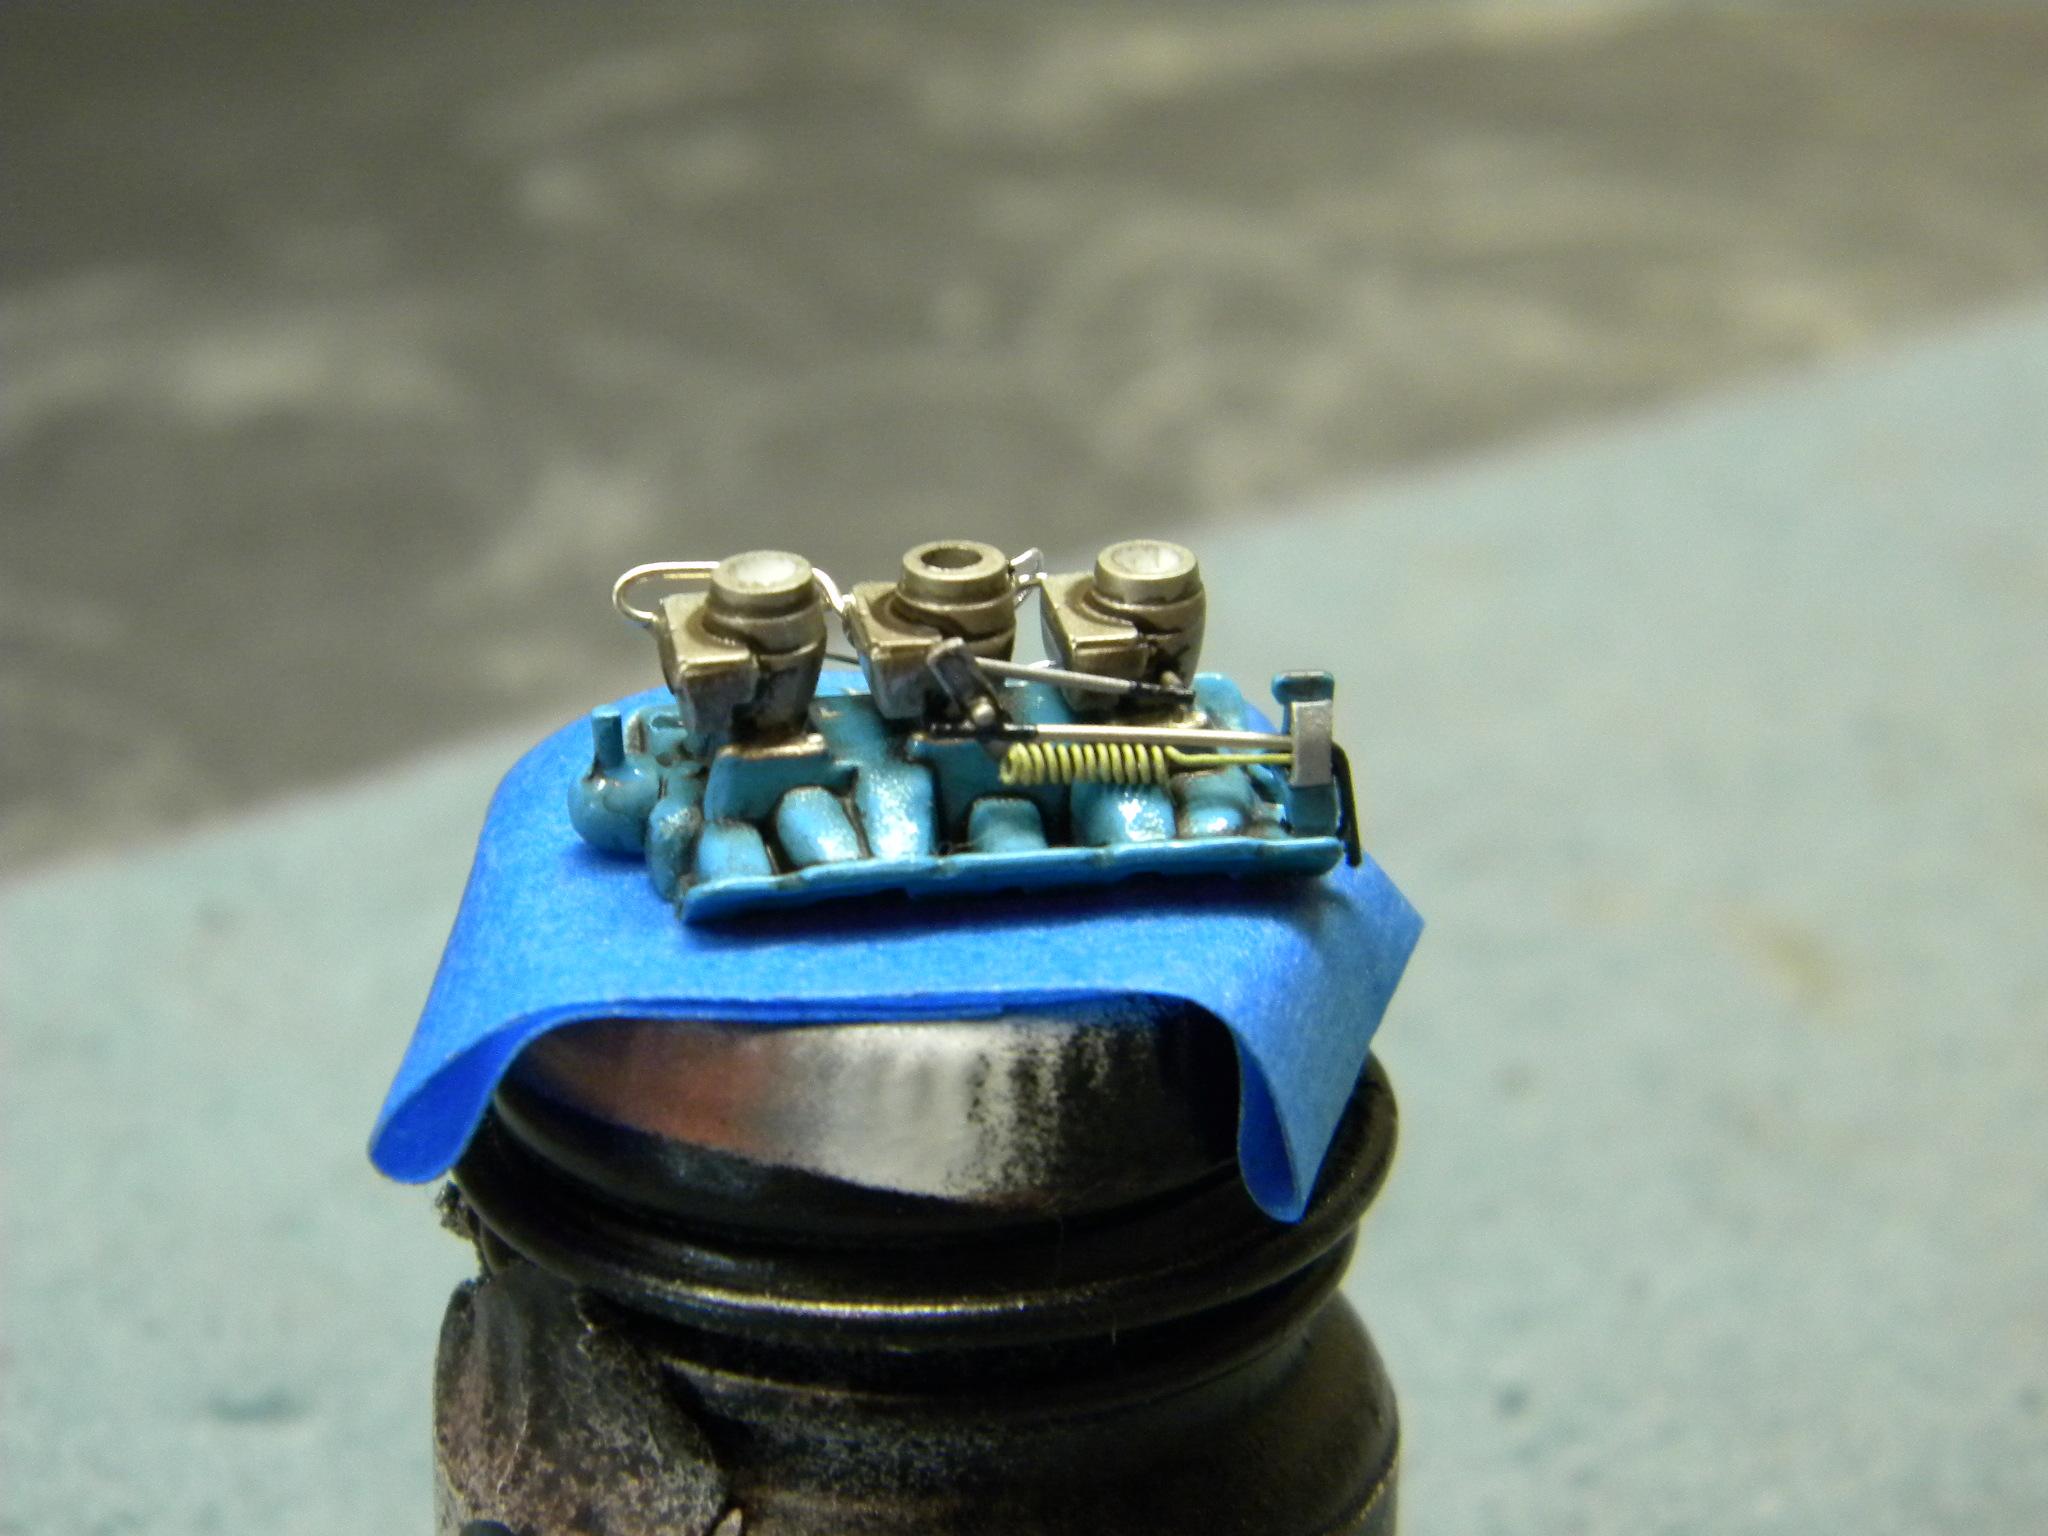
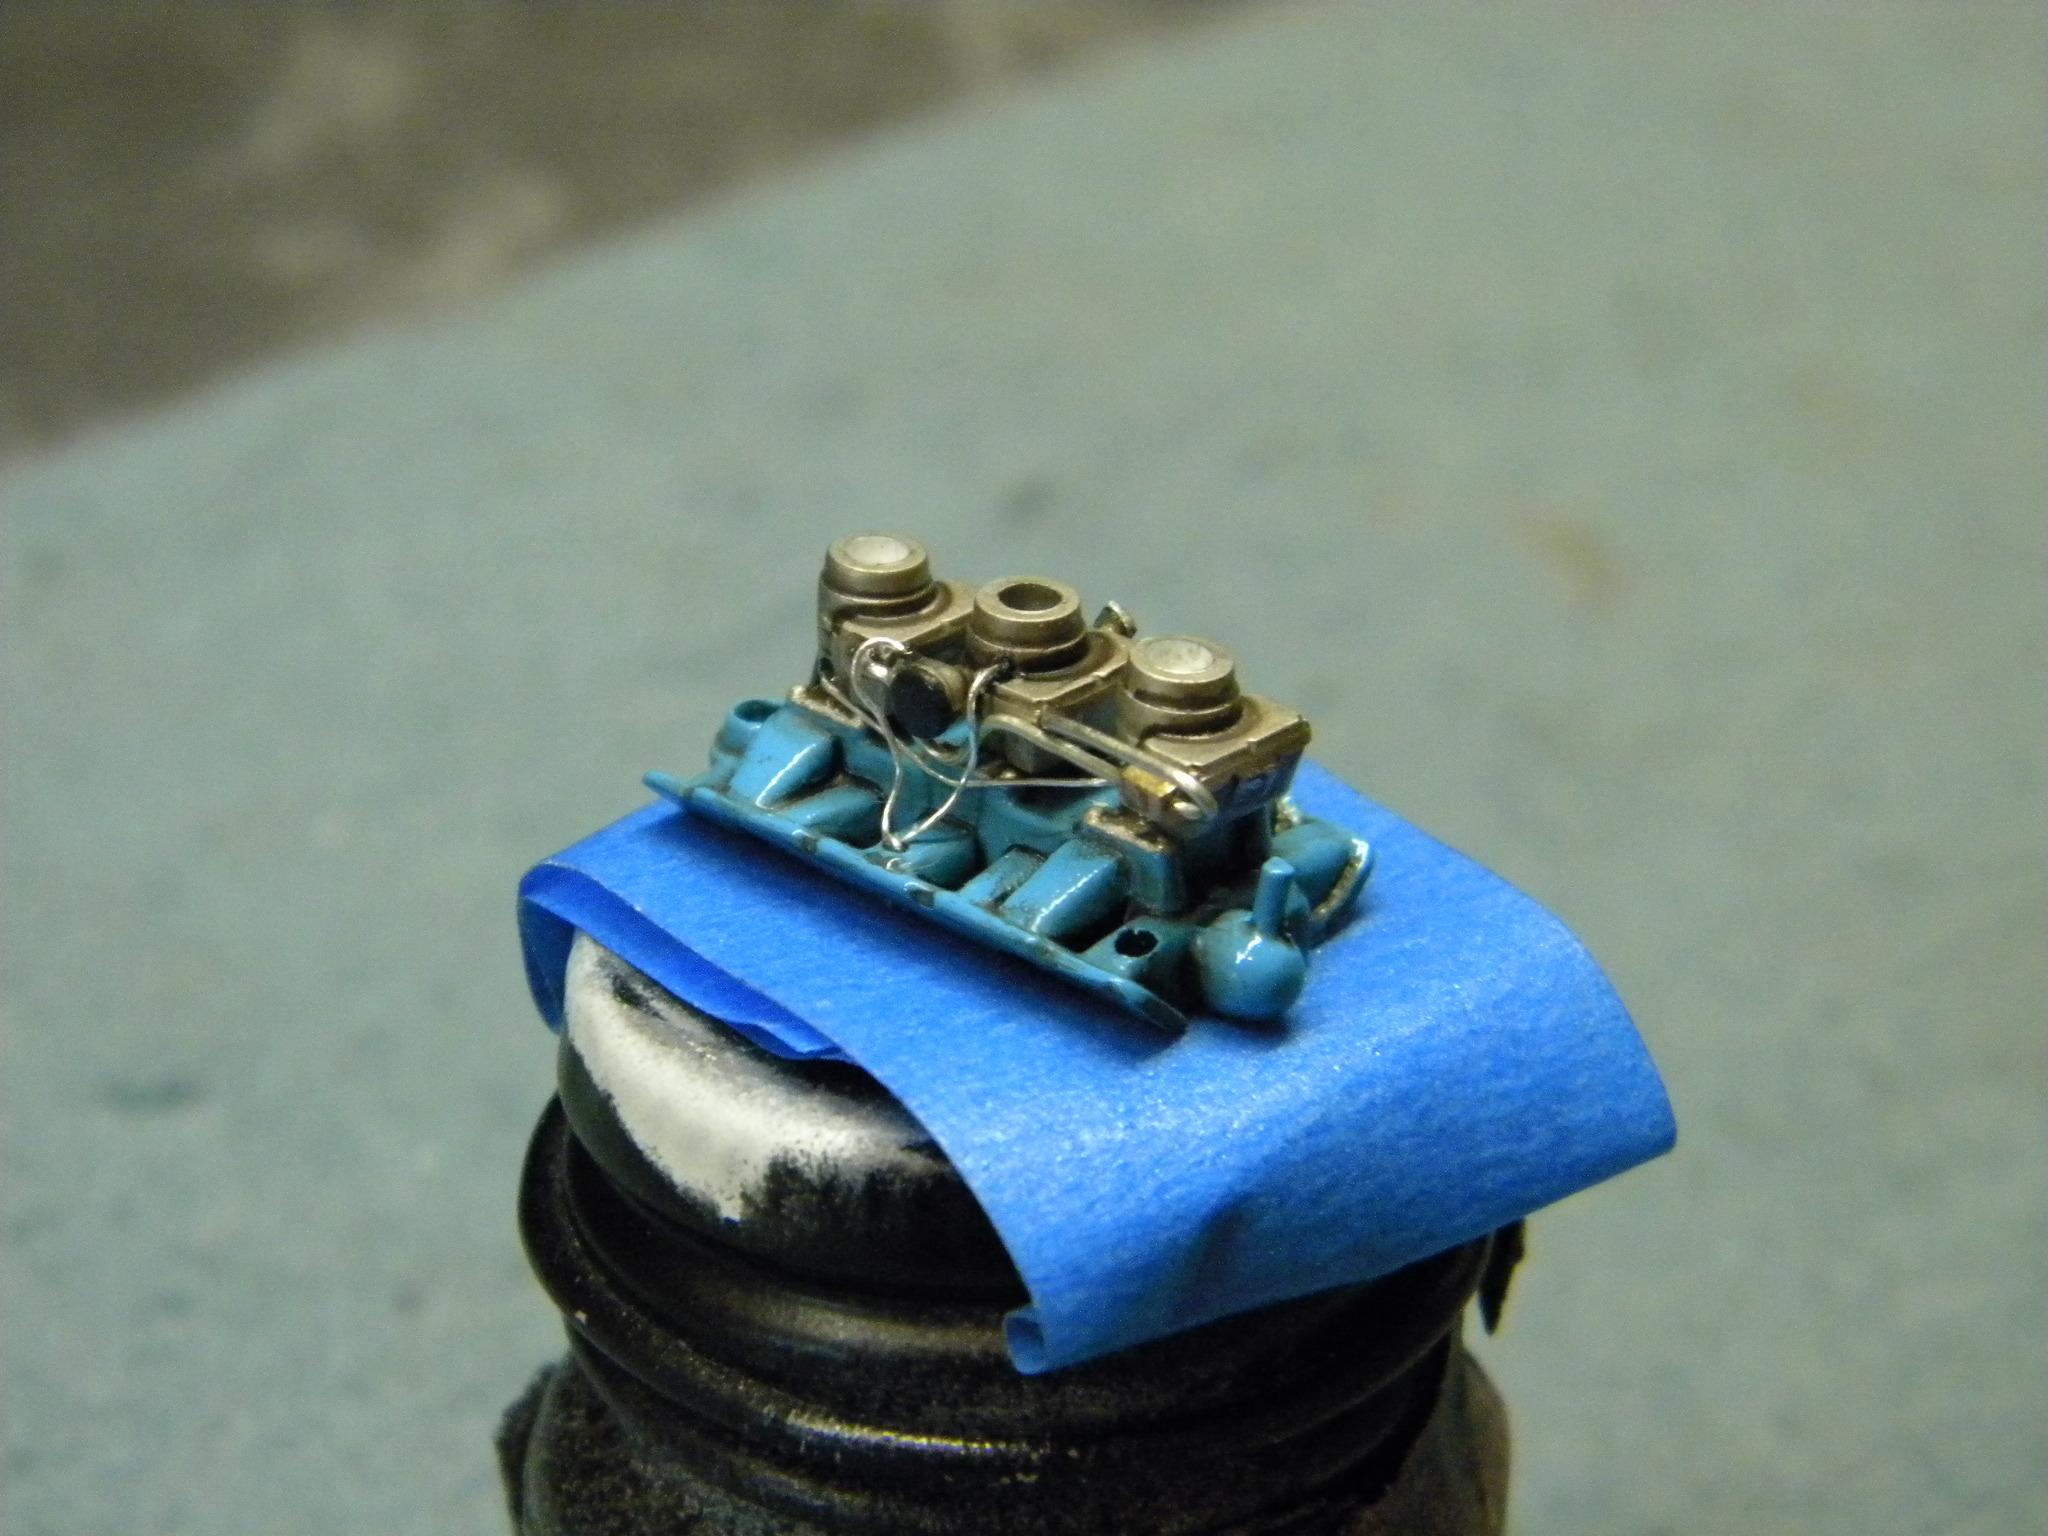
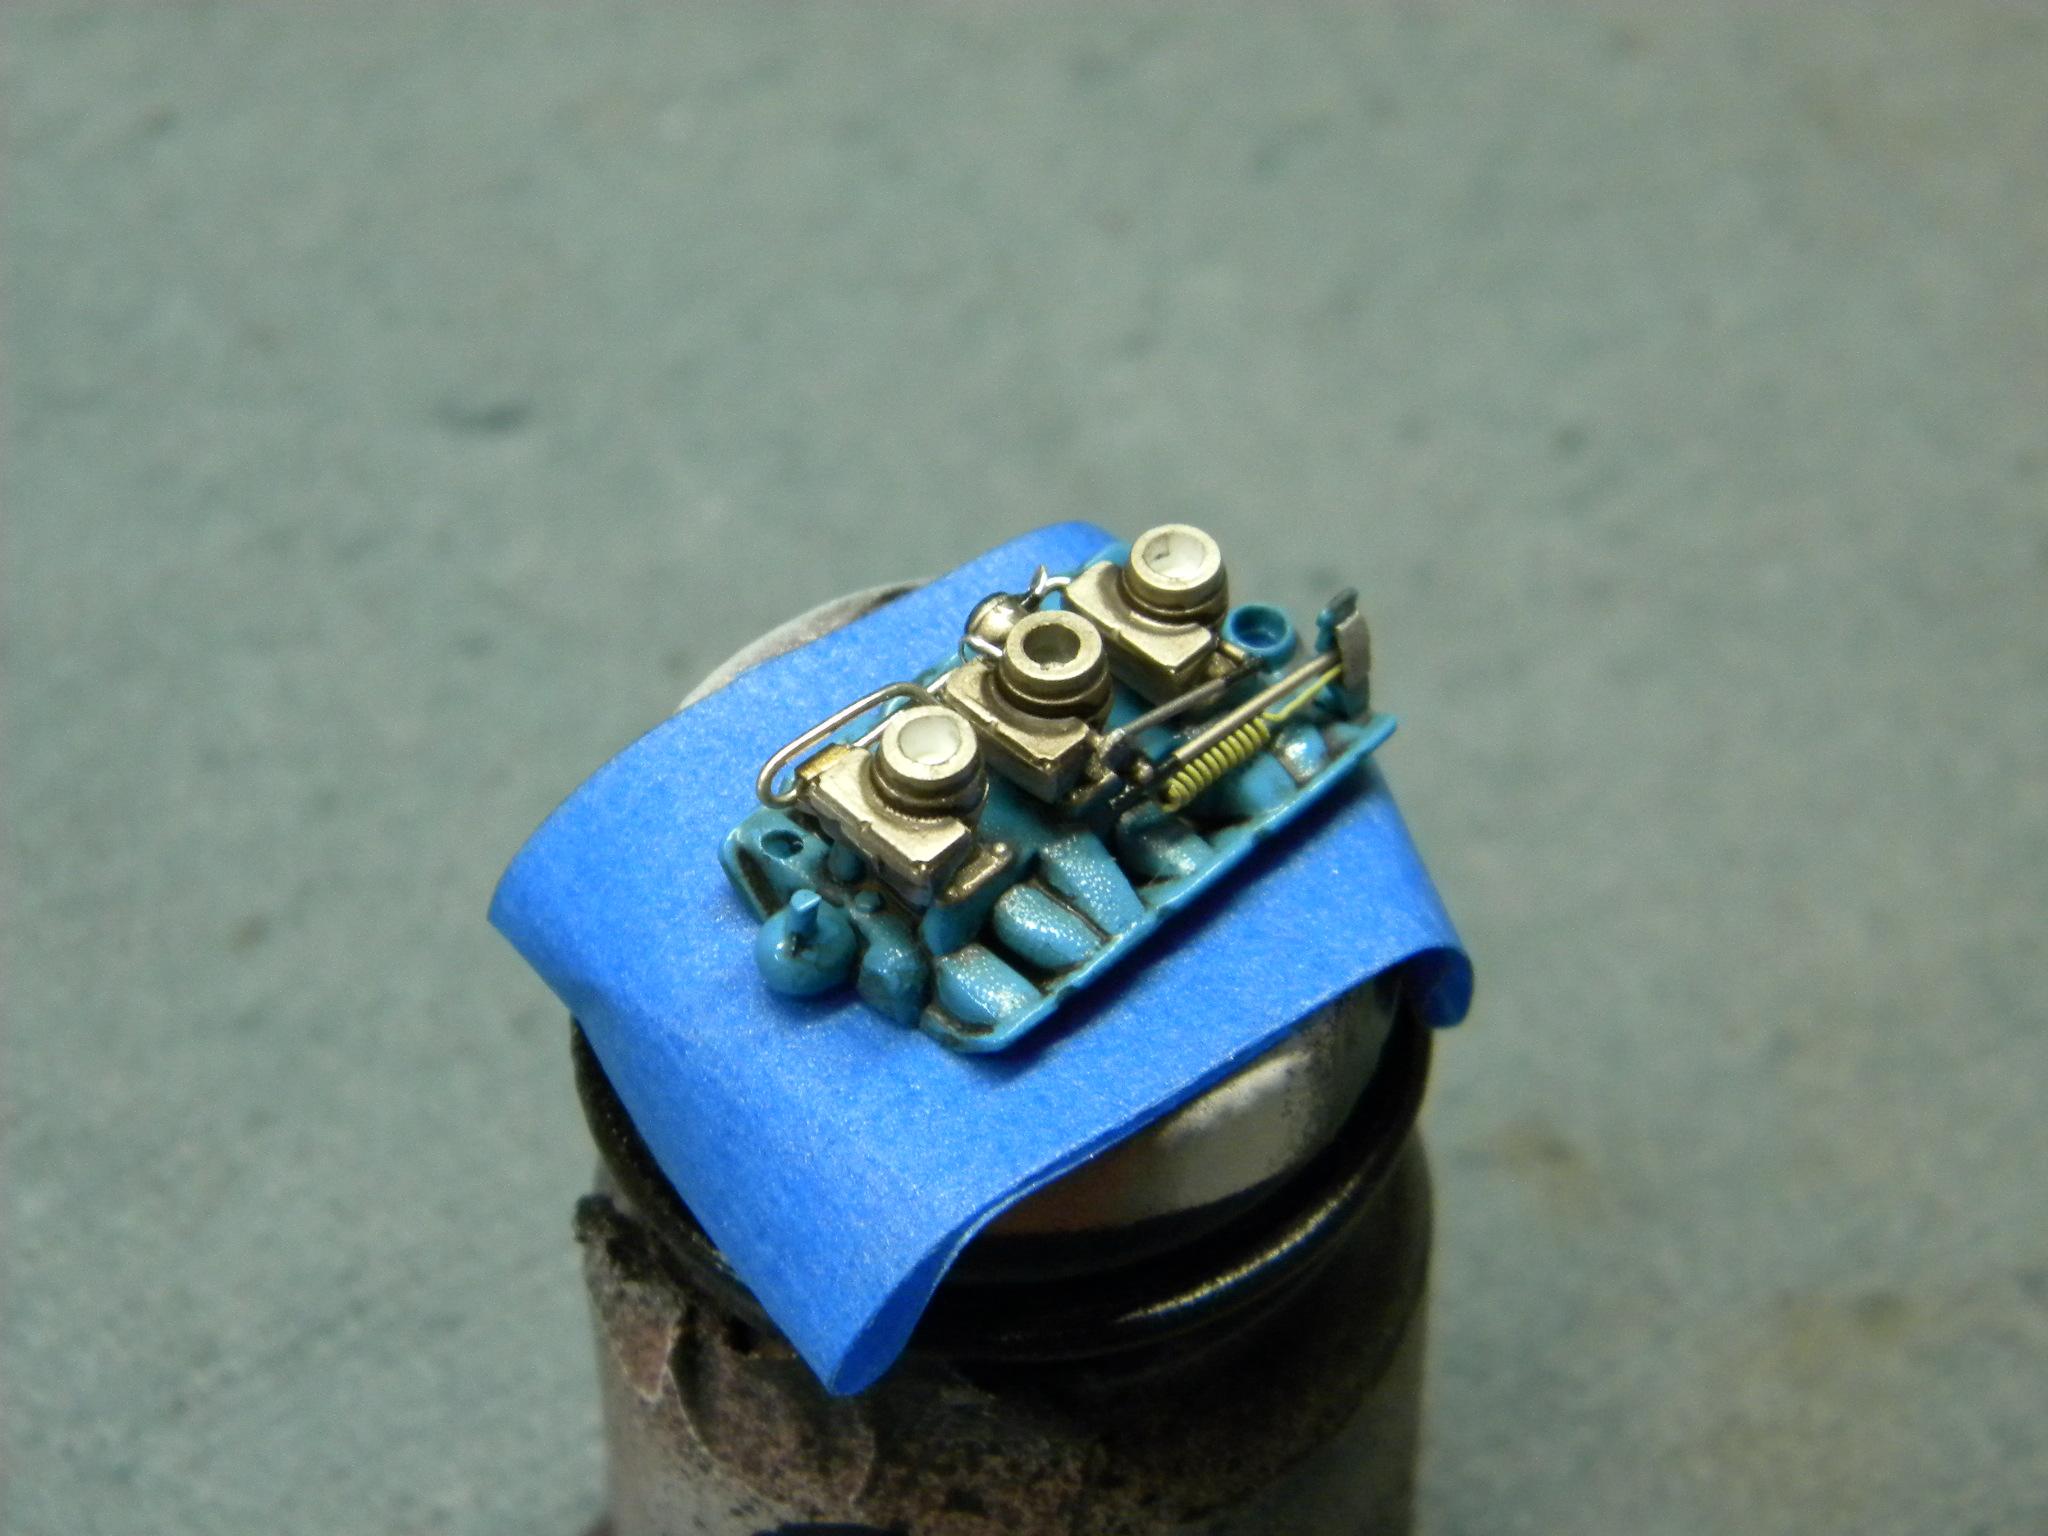
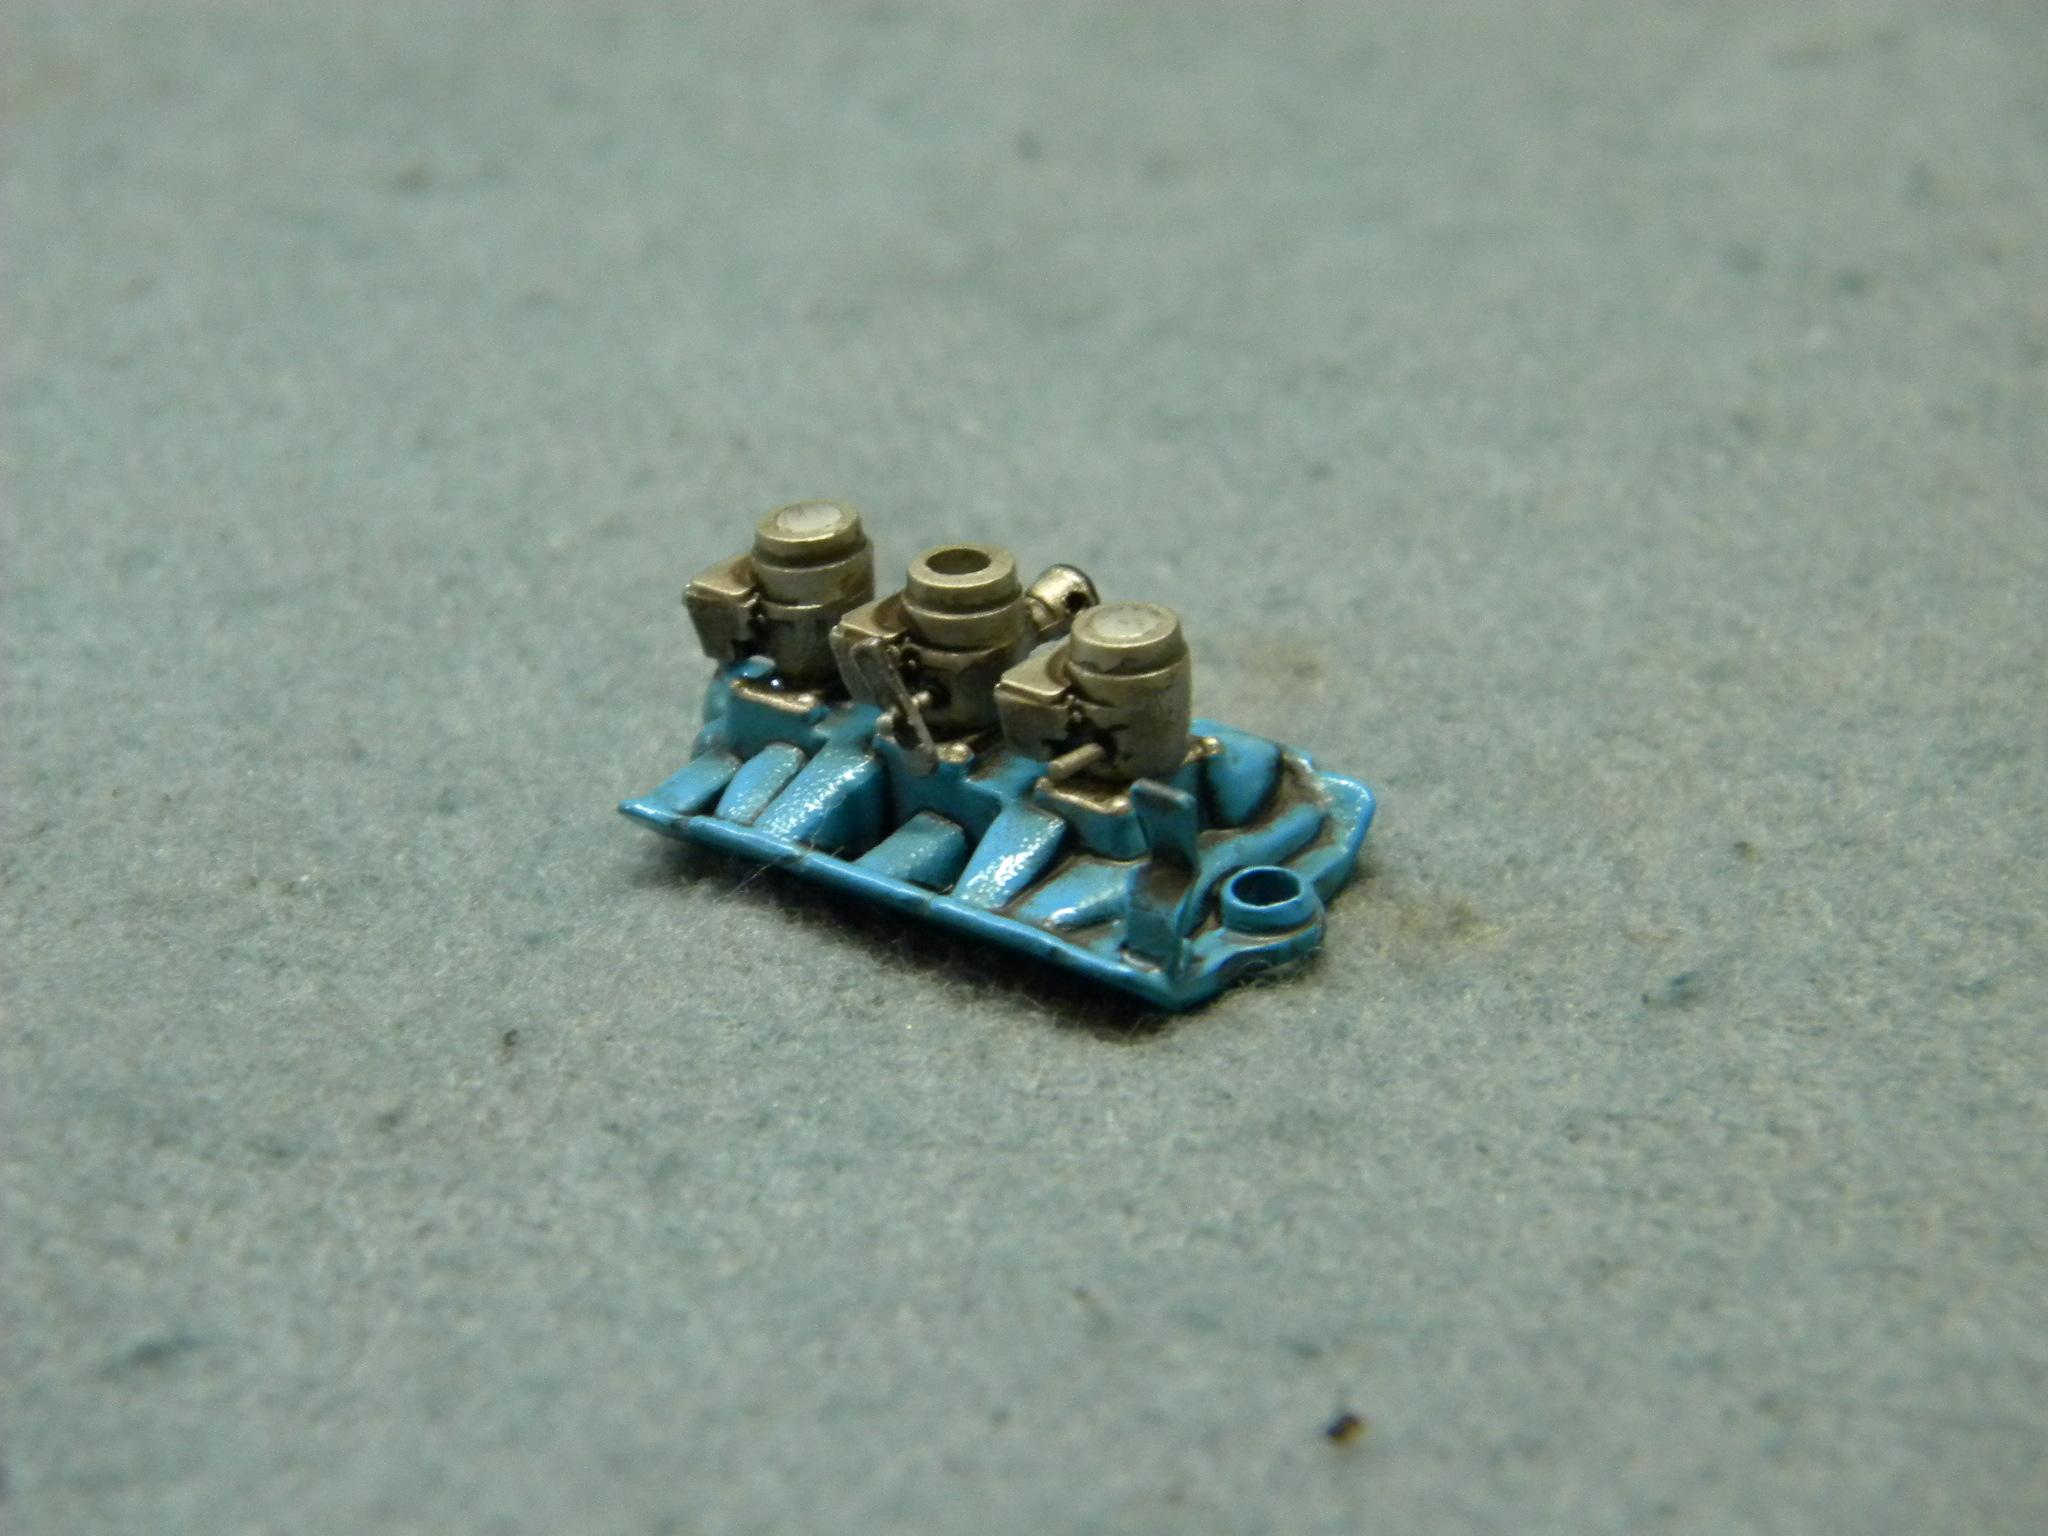
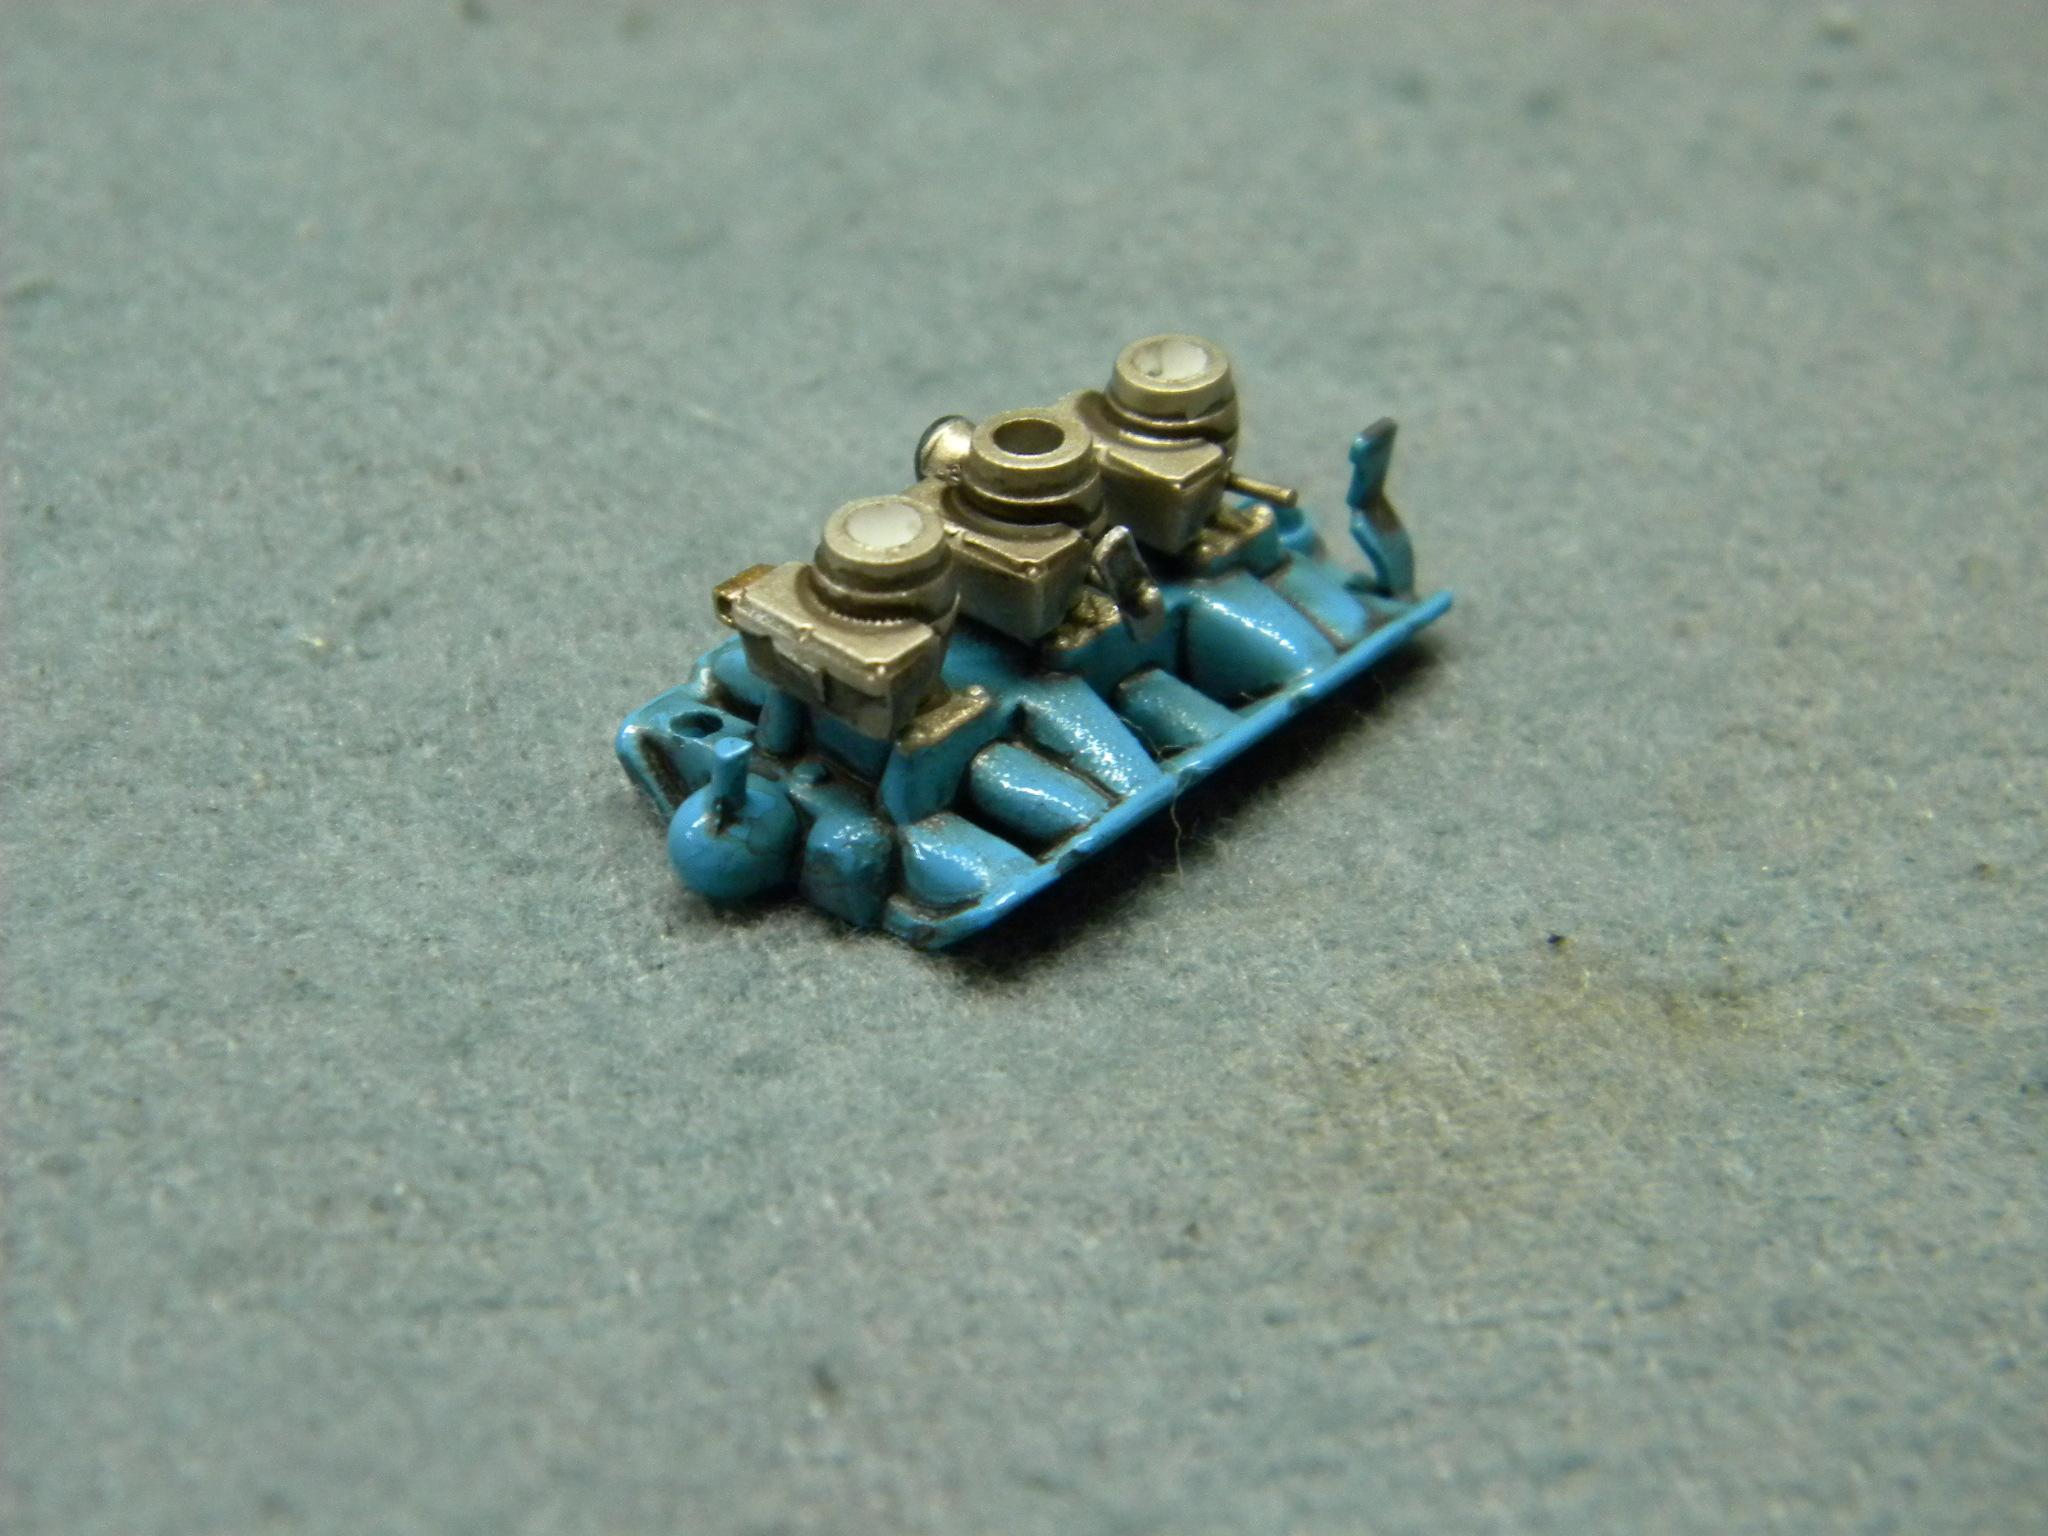
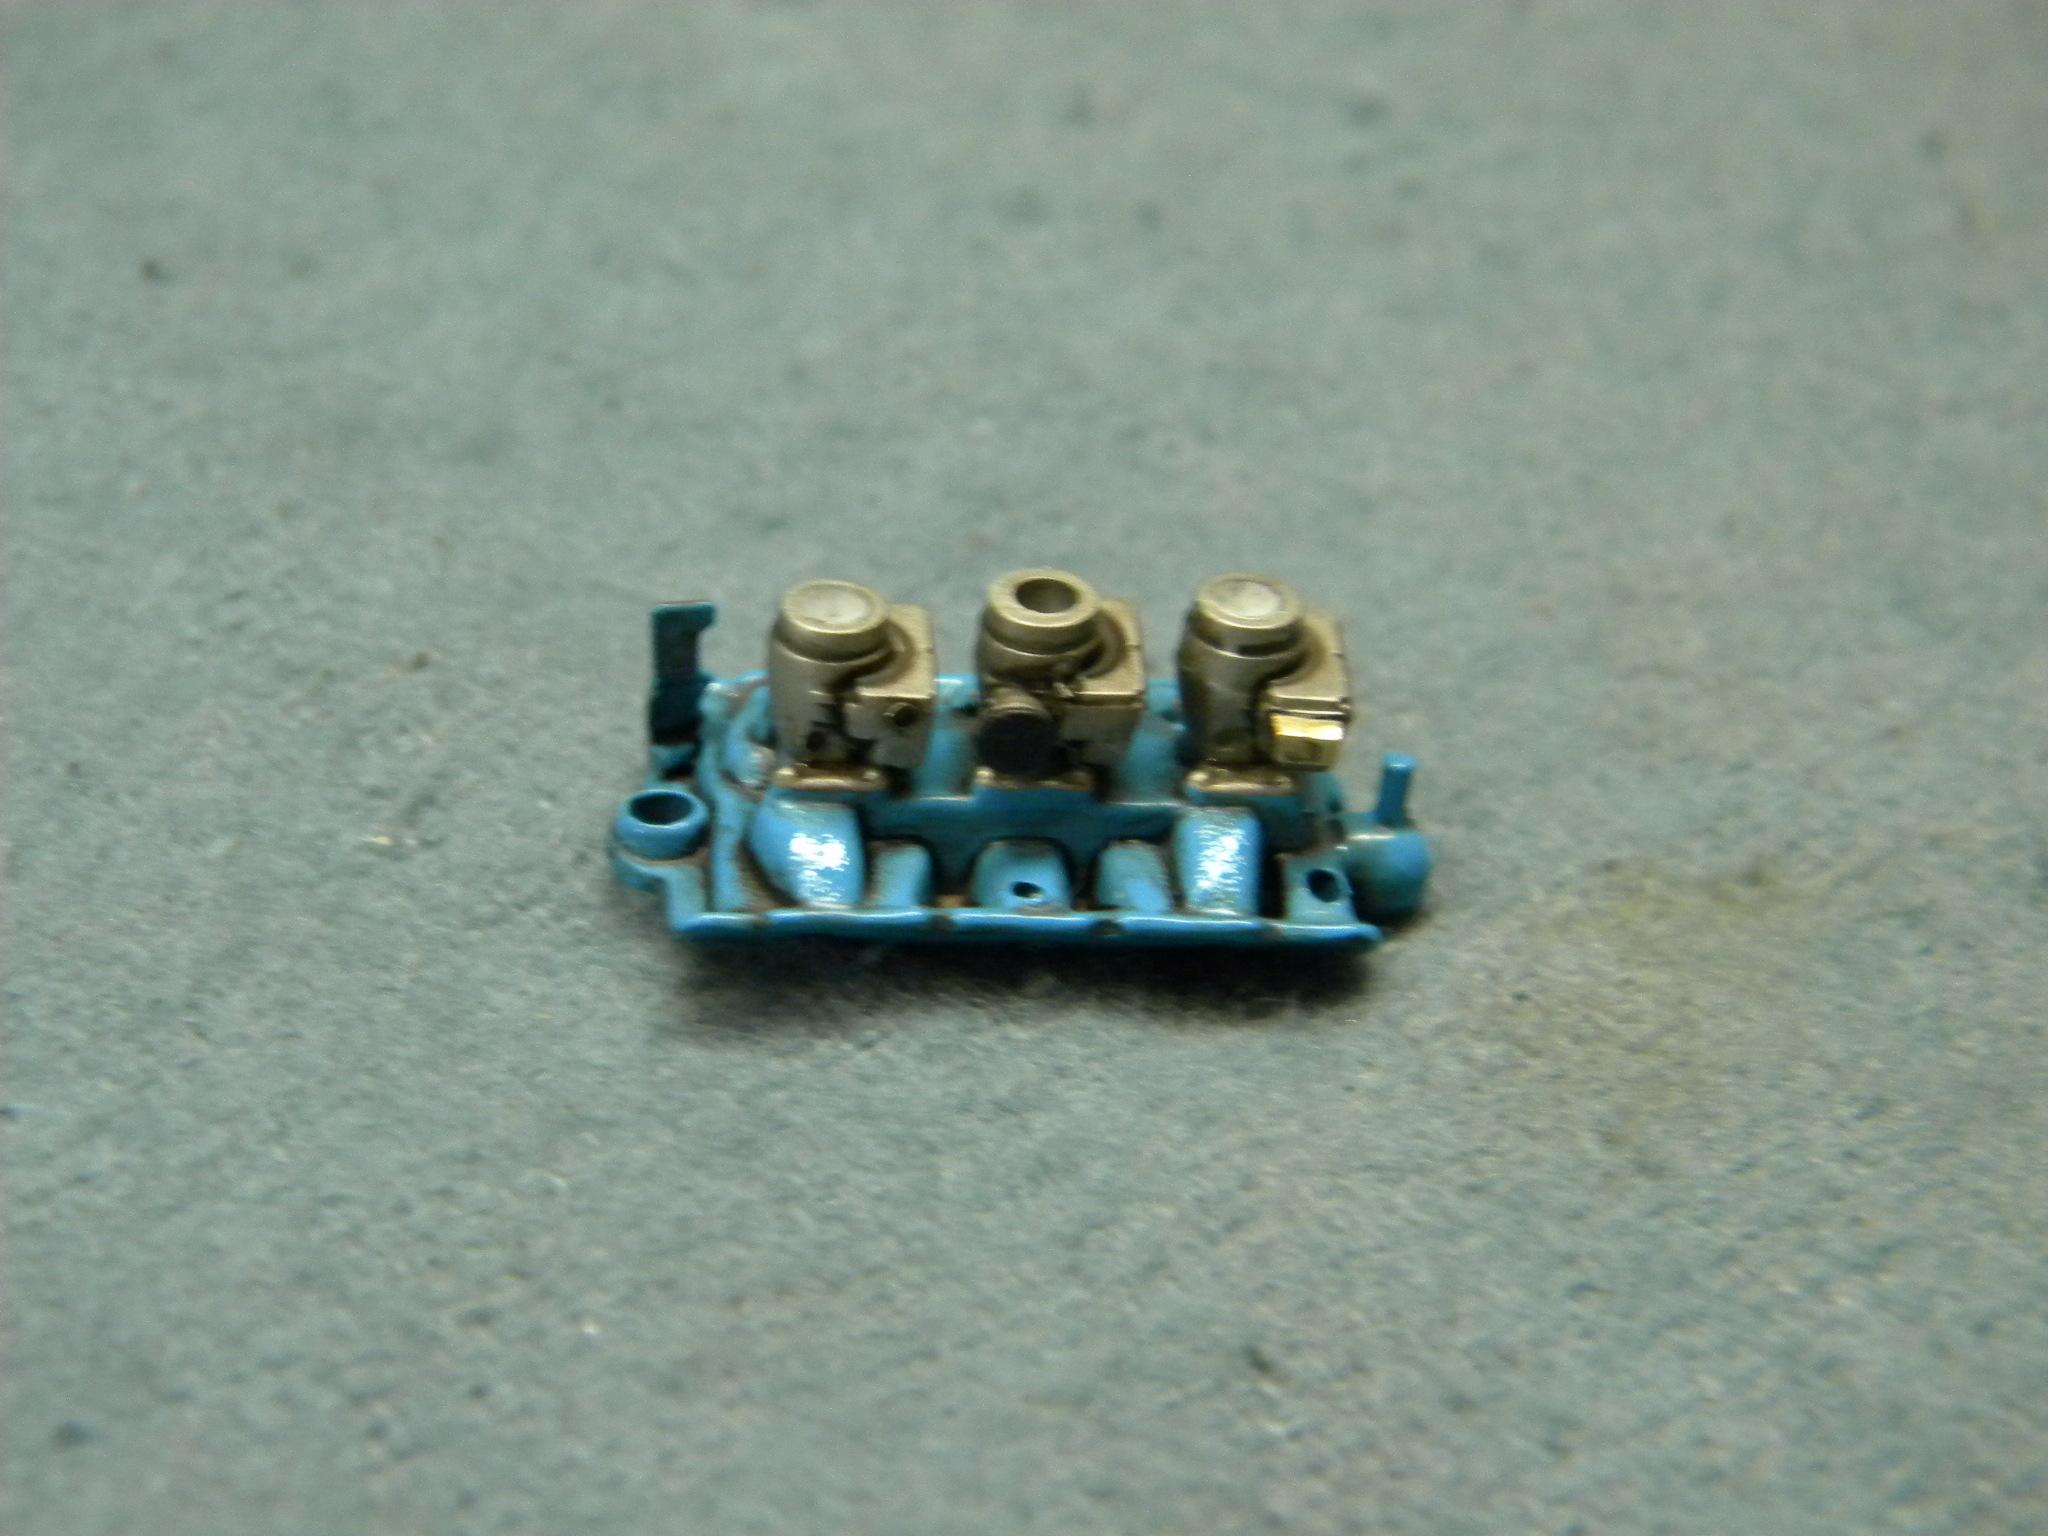
I used photos of an actual set up to build this intake and tried to keep it as close as I could. Things are not proportioned exactly as they should be, but according to my research photos, there is no linkage to the front carb on the left side. It appears that there is linkage between the front and rear carb on the bottom of the right side, which I represented on the model. Steve
-
As long as you're not heavy handed with the first 2 or 3 coats, you can get by without my suggested use of a first coat of Testors, or other mild primer. I've done it many times as well. Where people sometimes get into trouble with a hotter primer like Duplicolor is the misconception that they can spray on one heavy coat and call it good. The longer that primer sits wet on the surface, at least for the initial coats, the more likely it is to craze the plastic. Steve
-
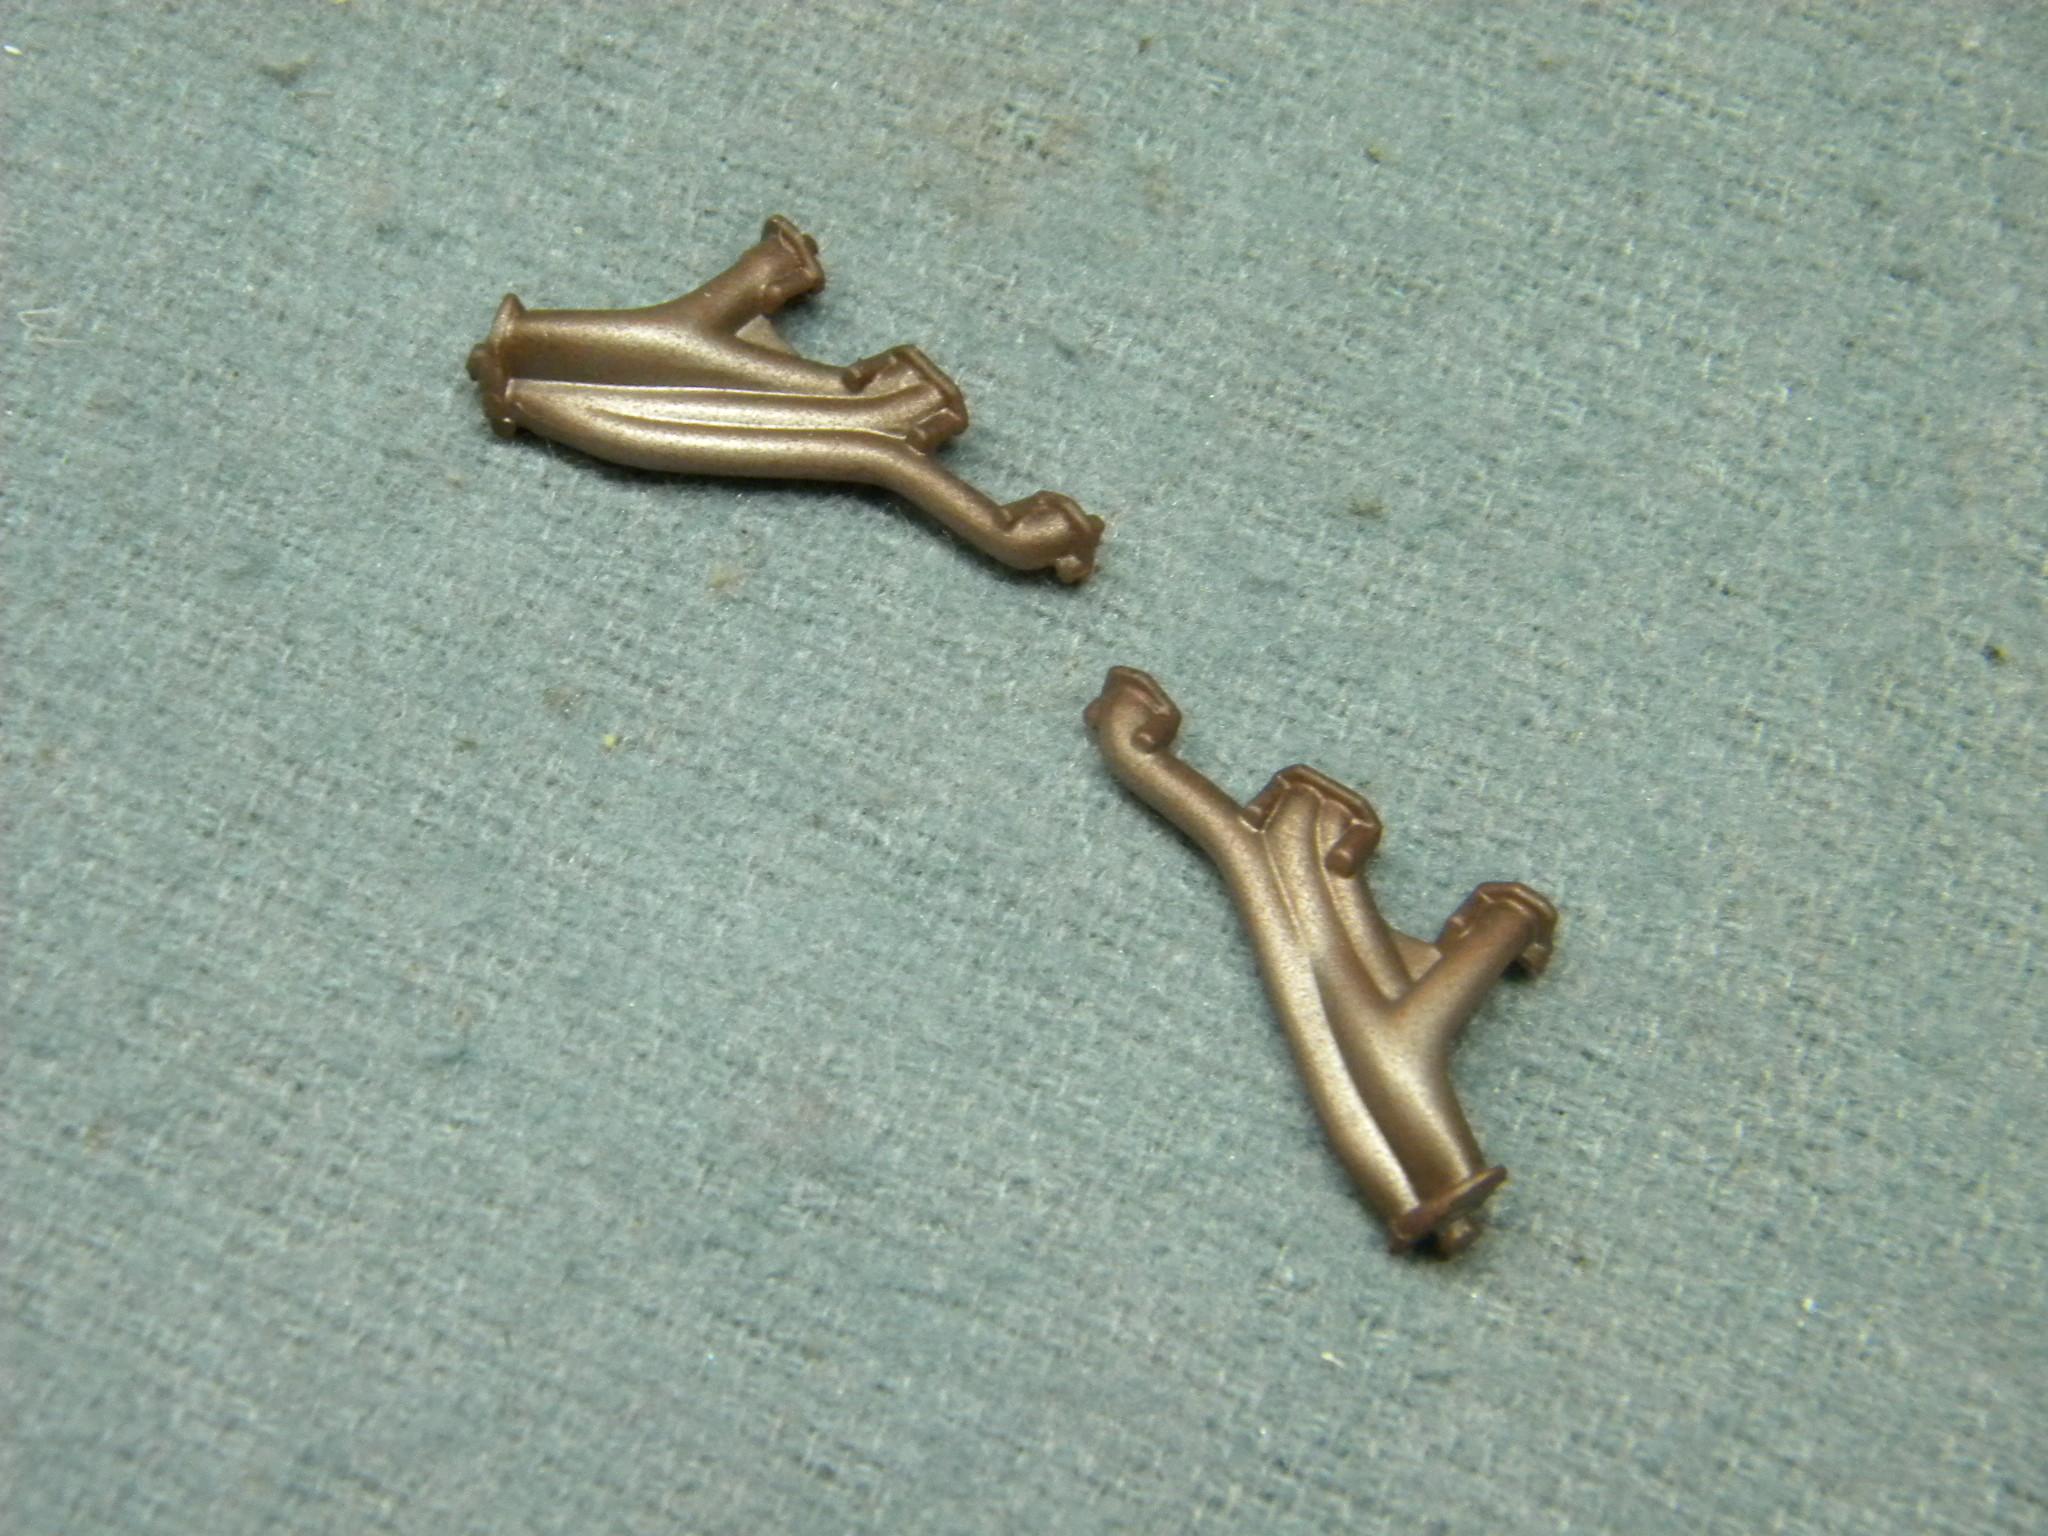
I appreciate that guys! I really couldn't tell you John. This is the oil pan supplied in the AMT '62 Catalina kit. That engine is a 421, so possibly unique to the 421 HO? If that's the case, I guess this becomes a 421 instead of the intended 389. In the end, it would make sense anyway as I opted to use the exhaust headers from the 421 versus using the 389 manifolds supplied in the Revell '66 GTO kit. The intake is now finished for all intensive purposes. I still might add a dab or 2 of grime, and of course the air cleaners will be added at the time of final engine assembly. Steve
-
I agree completely Tom! The paint is the first thing that will be noticed, and therefore, probably the most important component of building a model car. Why you would "cheap out" on materials for this step is baffling to me. Often times, these are the the same people that will spend $3.00 on some discount store finish paint, but have no issues with spending $100.00 on all sorts of after market parts and decals. Steve
-
I couldn't tell you. I've only used Tamiya primer a few times and I didn't see any cost benefit over Duplicolor. I use Duplicolor "sandable" and/or "primer sealer" on every project. You just need to be aware that it is a hotter primer than any hobby primer, and adjust for that accordingly. Granted, most of my projects are old kits with more robust plastic than many of the new kits, but I've done some newer kits with the same paint regimen that I use on old ones, and the Duplicolor primers worked fine. My method is to spray a coat of hobby primer, (usually Testors lacquer primer) as my first primer coat. This helps to seal up the plastic to some extent for the following Duplicolor coats. It also gives better initial coverage than the Duplicolor primers. The Testors covers well, but it is not as fine or smooth and does not protect as well. The Duplicolor primers are finer, and go on much thinner and smoother than Testors, especially with the aid of the unmatched "fan spray" nozzles that they have. When I begin with the Duplicolor primer, I start with at least a couple of very light coats, followed by a few more successively heavier ones. By the time 4 or 5 coats of primer have been applied, I have an extremely smooth base with no sanding between coats. Let's just say that I have had crazing issues with automotive lacquers in the past and my entire painting process has been formulated over many years to avoid it, and with the techniques I use today, with Duplicolor primers, I have zero issues with it. I'm completely confident going into every paint job that there will be no problems with crazing. In closing, I'll just say that I don't think any paint needs to be "avoided" in conjunction with plastic modeling. You just need to know how it's going to act before you just leap in and start spraying. Spraying a pretty heavy coat of any hotter automotive primer over bare plastic right off the bat has an even chance of giving you disappointing results. Steve
-
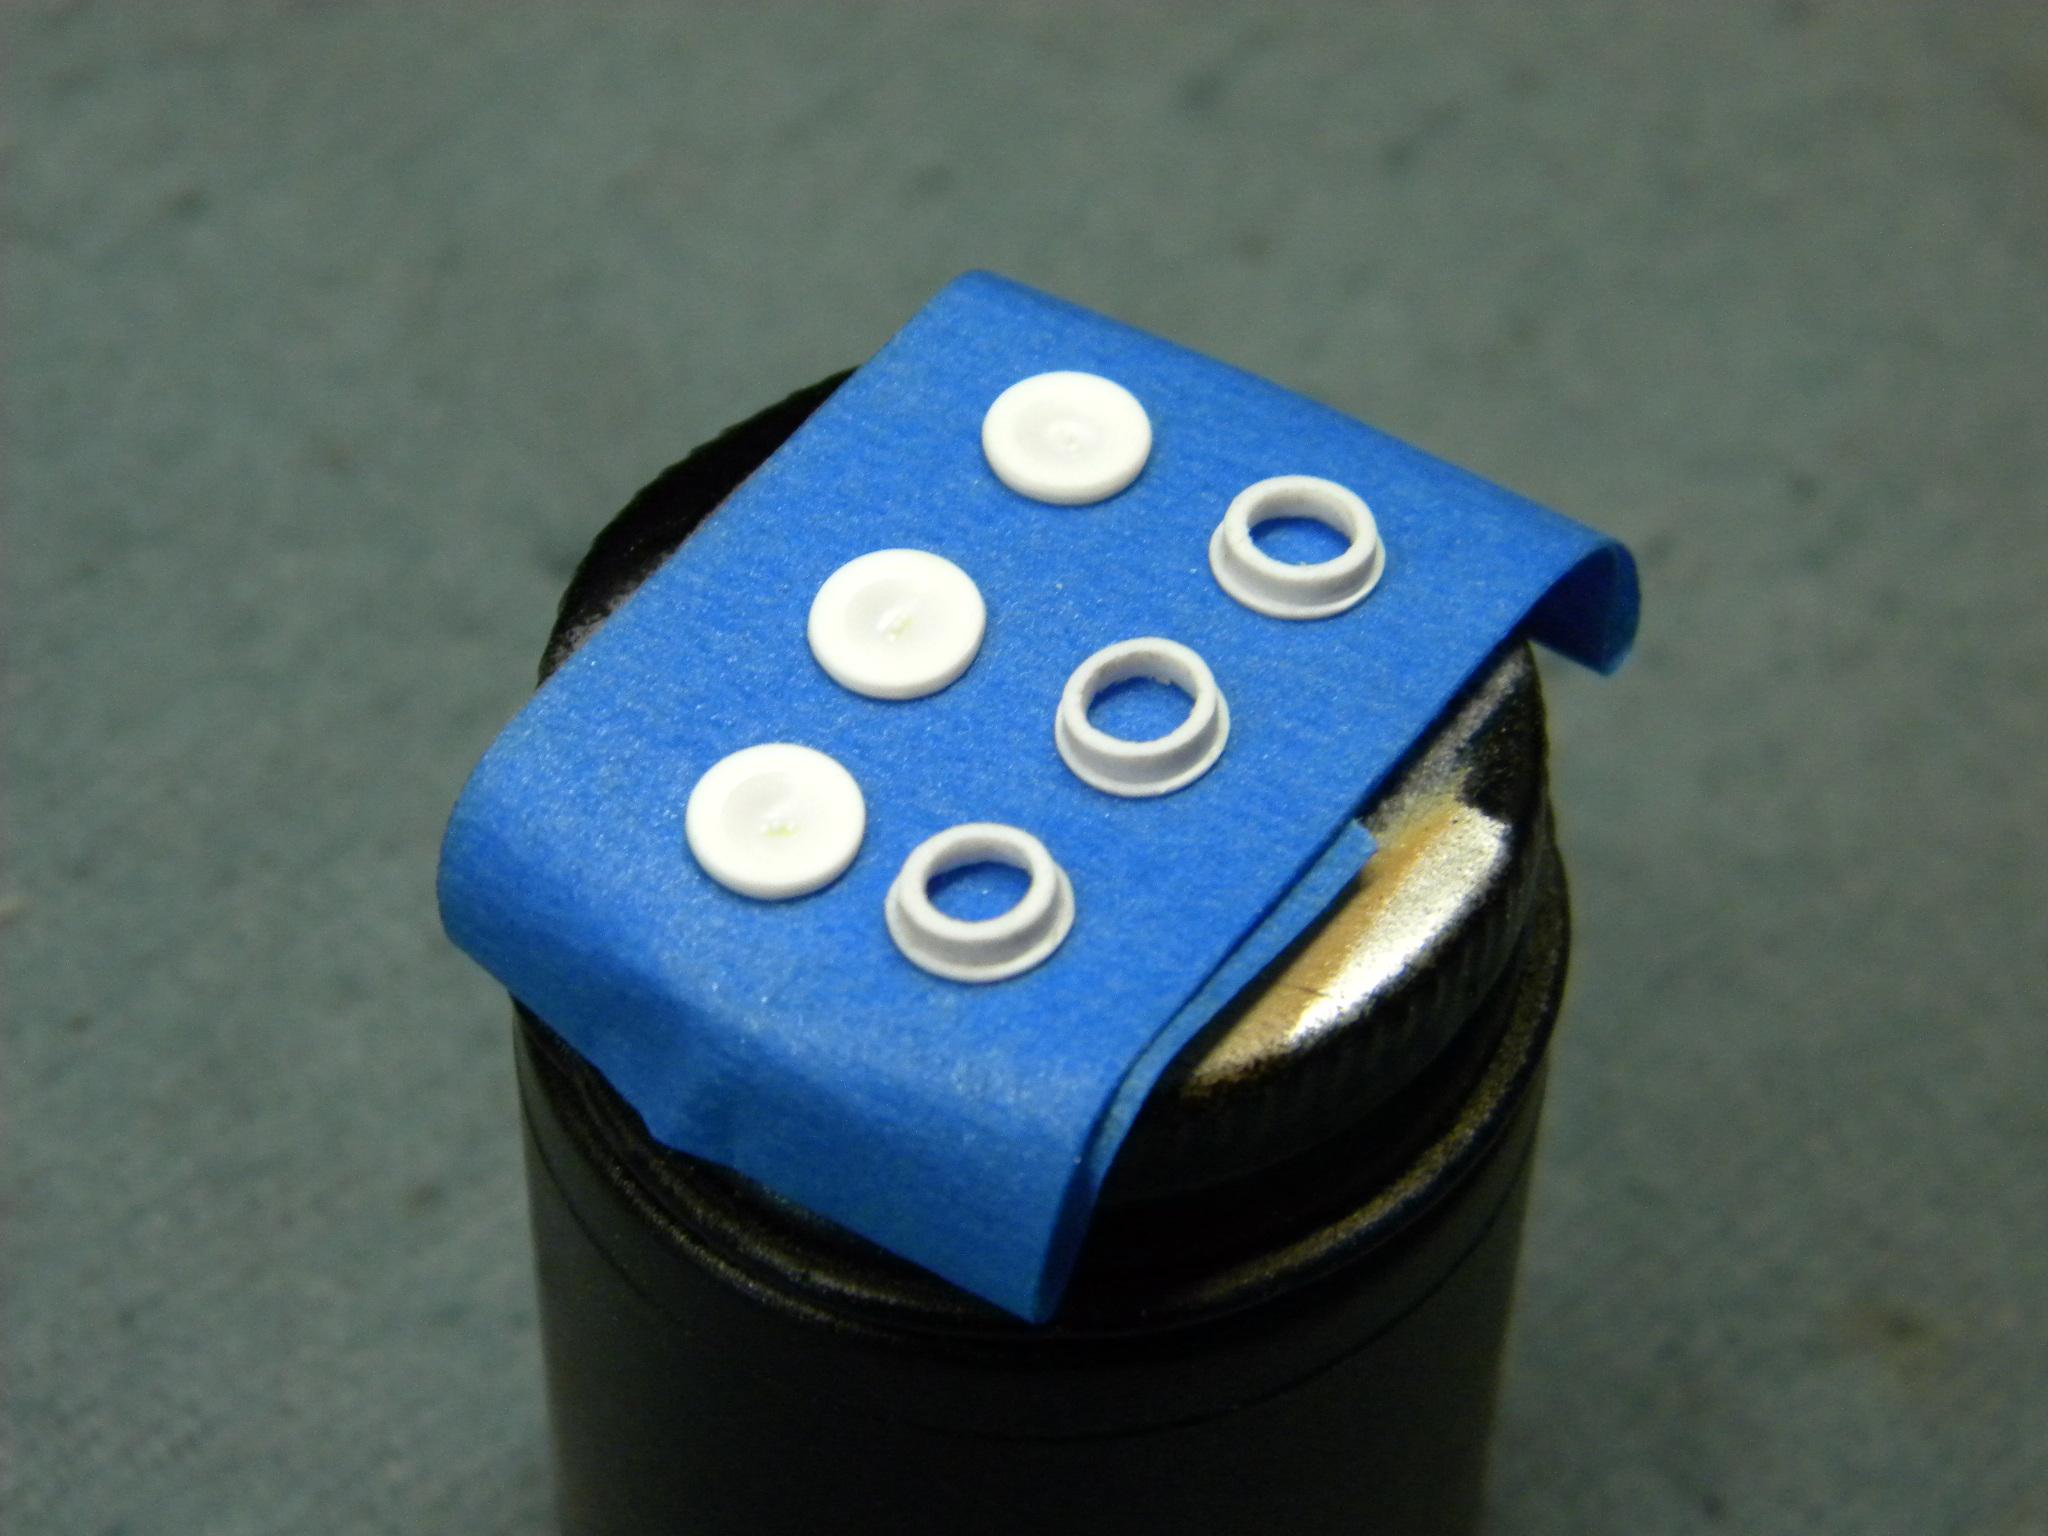
Thanks Nigel. Glad to hear that someone is thinking about me. Continuing to make some pretty good progress on the engine. First, I threw the lids on the air cleaners just to see how they will look. I think they will do pretty nicely. I'll assemble and add them permanently at final assembly time. I also added a "grunge" wash to the majority of engine parts and then glued on the carbs. Believe it or not, I'm really looking forward to running all of the linkages, fuel lines, and other lines on this intake. Sick, I know! Steve
-
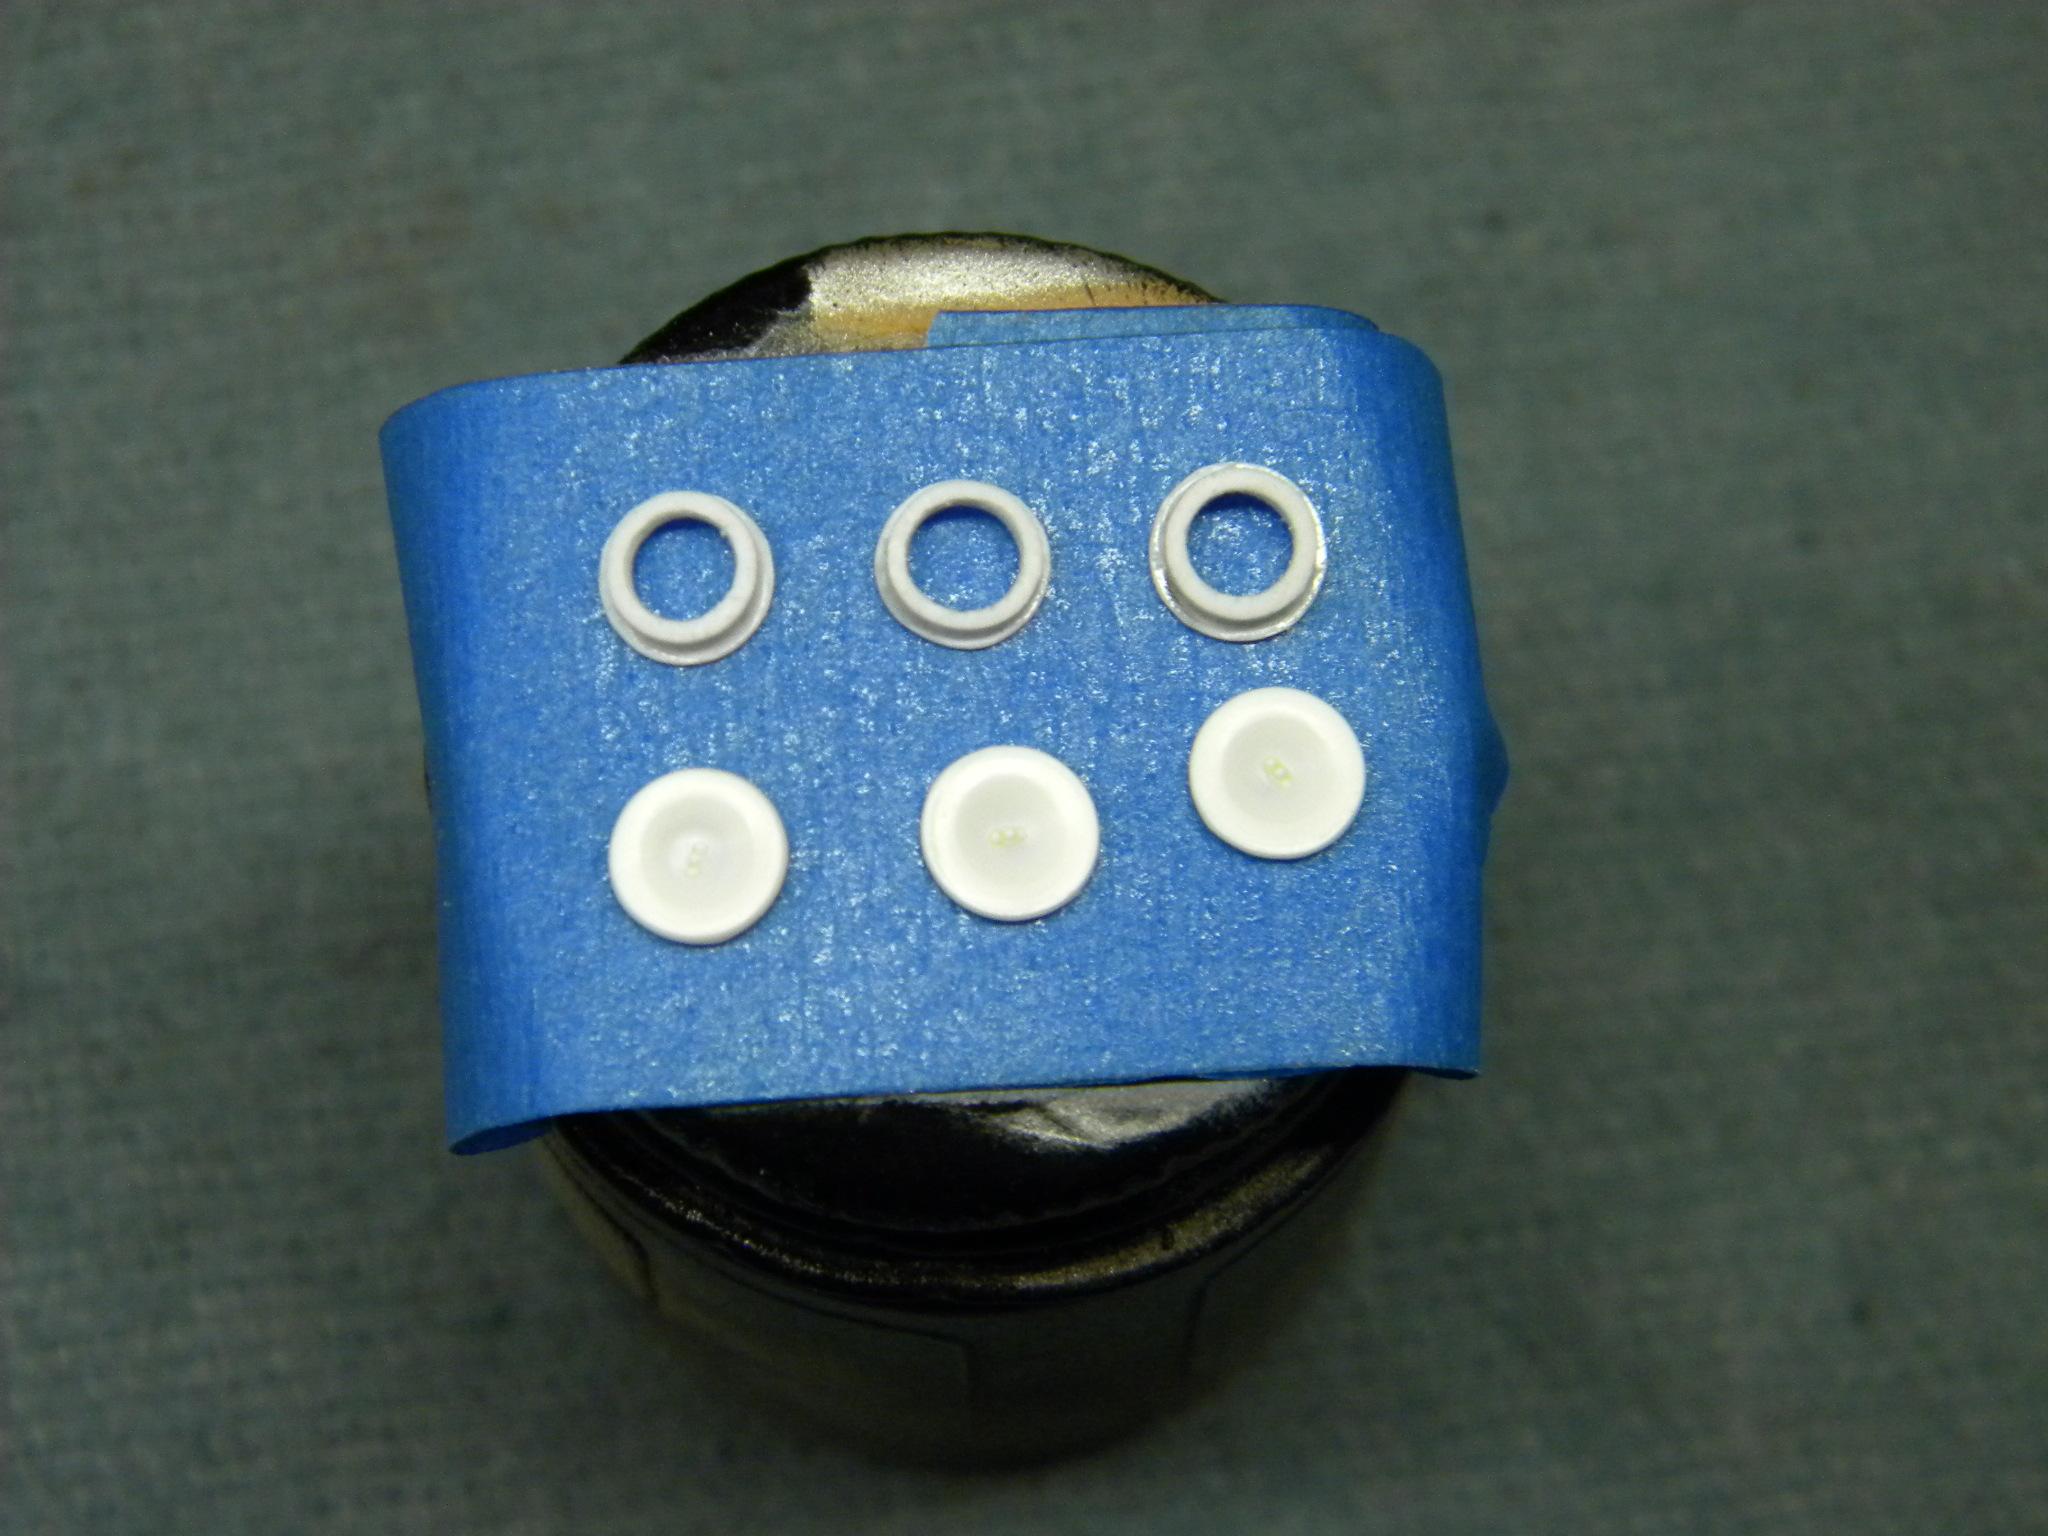
Thanks guys! I think the air cleaner assemblies are finished satisfactorily. The embossing powder on the air cleaner elements is not a perfect solution, but it should look okay with the lids on. The Alclad on the lids turned out great! Steve
-
As I was fiddling around with the air cleaner thing, I also managed to get some detail painting done on some of the engine and engine bay parts. I found some time ago that it's a good practice to finish as much of the detail painting as possible, and then shoot on a coat of clear when finished. This eliminates the tendency for the detail paint to rub off due to handling during the assembly process. Steve
-
Thanks guys!! Okay, am I the only one who routinely gets sidetracked with details? I find myself doing this all of the time where I start looking at a part, and suddenly ideas begin forming in my brain about how it can be improved, even though I really had no intention of changing it. Before I know it, I'm experimenting, followed by complete commitment to the alterations. This time it was the air cleaners. I started contemplating how I could add some texture and detail to some rather boring looking air cleaners for this tri-power engine and settled on removing the lids from the existing air cleaners, and fashioning new bases and elements for them. My thought is to cover the elements in a gray embossing powder to more closely replicate the exposed foam elements. Let's see how it works. Steve
-
What's the best way to replicate this?
StevenGuthmiller replied to Monty's topic in Model Building Questions and Answers
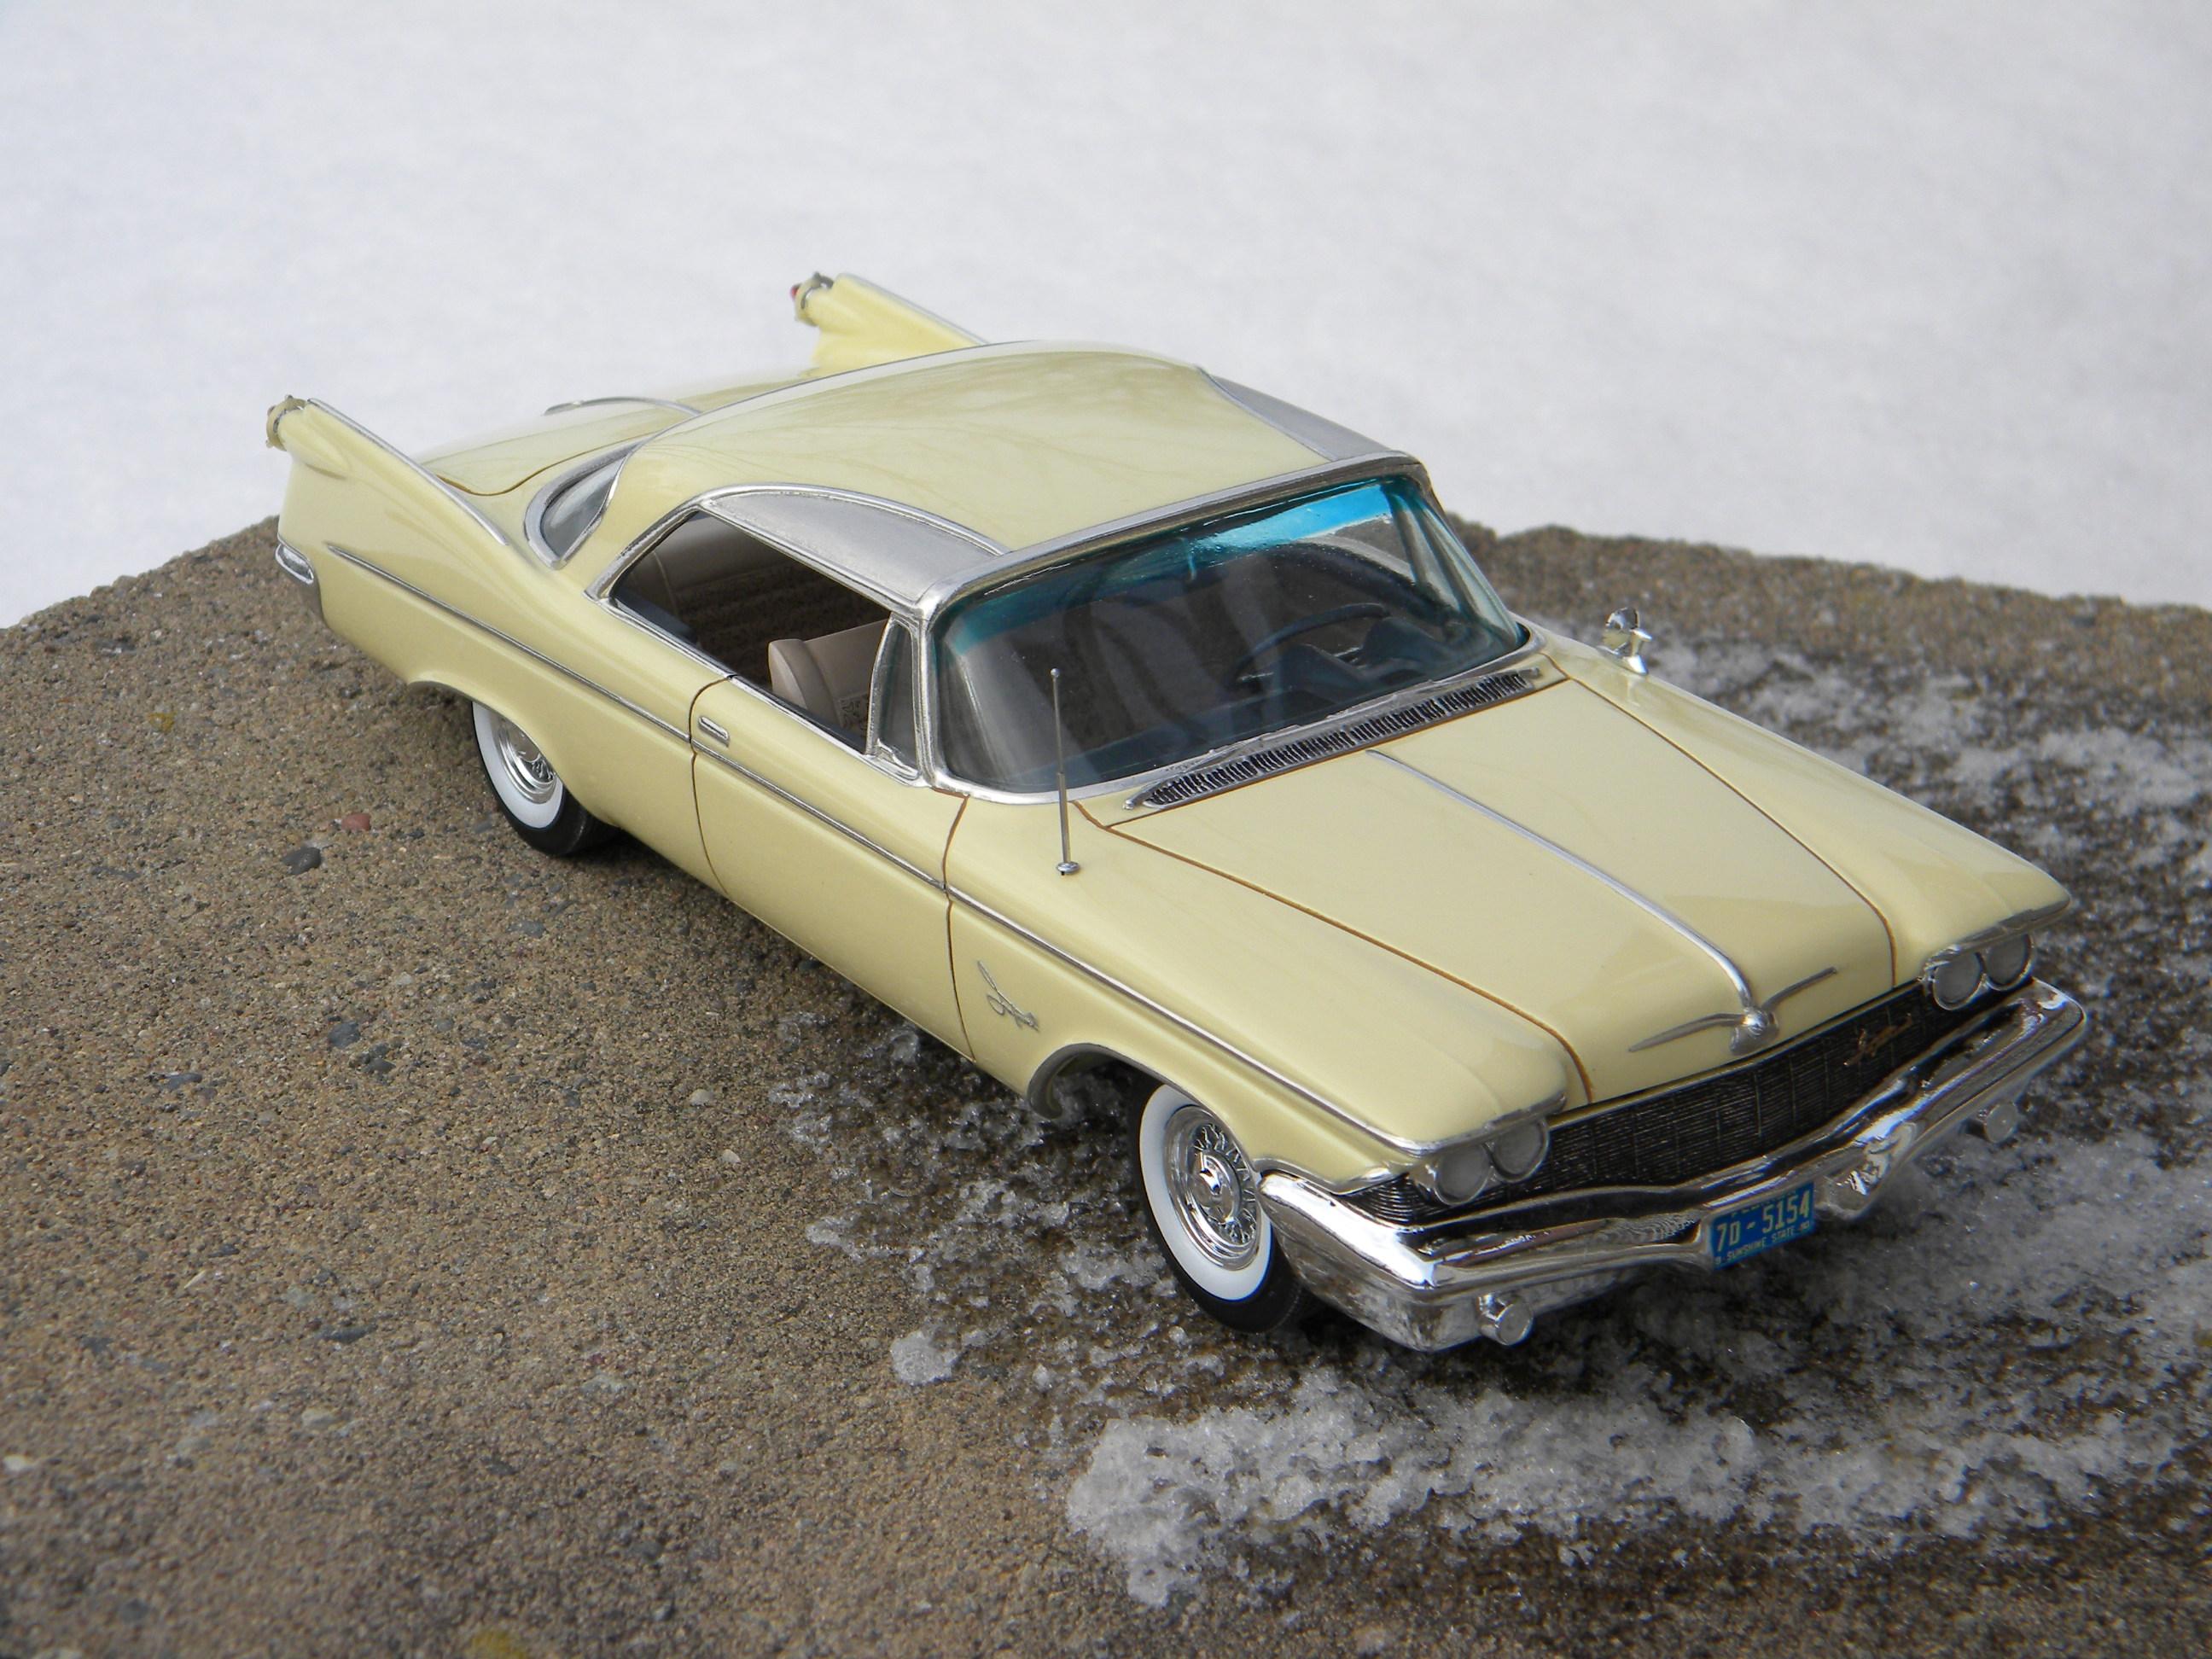
There are a couple of ways that you could tackle this. If you don't mind a flat finish to the panels, foil them as you do the rest of the trim and then brush on some flat clear to the panels. Another technique that I like is to sand a section of regular foil while it's still on the backing, in one direction. This gives you a nice "stainless steel panel" look. I recently used this technique for the stainless roof panels on a '60 Chrysler Imperial. Steve
-
13 years on MCM, & 10,000 post
StevenGuthmiller replied to Greg Myers's topic in General Automotive Talk (Trucks and Cars)
Unless you're from Wisconsin! Steve -
It doesn't have to be a promo. The older kits prior to about 1960 or '61 were basically exact copies of the promos, but they had the added bonus of being made from styrene plastic. I've restored quite a few of these simple "screw chassis" kits, and they can be quite fun to tinker with. As an example, this 1958 Ford convertible "kit" is no different from the promo in the aspect of the parts count and manner of assembly. It basically started as a 24 part kit. The break down is, a body, front bumper, rear bumper, a set of head light lenses, tail lights, a hood ornament, glass, a top boot, interior tub, dash, steering wheel, chassis plate, a set of wheels and a set of tires. That's it. Very typical of these early kits/promos. They can be a lot of fun, but remember that these early "annual" kits can be quite hard to find and very expensive. This one had a few extra parts added, most notably a Modelhaus convertible up top and continental kit. Steve
-
13 years on MCM, & 10,000 post
StevenGuthmiller replied to Greg Myers's topic in General Automotive Talk (Trucks and Cars)
Thank you Dave! Well said. Steve -
I'm not saying anyone is wrong either. This is just my experience with the stuff. I did everything possible to correct the situation, but nothing worked. I've given up on Molotow. It's not worth the aggravation to me. I've done well with BMF for decades. I don't see any reason to change anything at this point. I've been much happier with the performance and durability of Alclad chrome over Molotow anyway. Steve
-
I really don't think it has anything to do with the tips. I believe it's the ink itself. As I said, I rarely used the tips in favor of a brush, and mine did the exact same thing. Steve
-
Yes. Keith Buckner was so kind as to send me the engine from a Johan '62 Olds F-85 that I then proceeded to butcher. Steve
-
I've tried both approaches with my 1mm and 2mm pens. Neither produced any better results. Actually, I rarely used the tips anyway. I usually preferred to apply it with a brush. I also tried thinning the ink as suggested by several members, also to no avail. I just chalk it up to another inferior product that I really don't need anyway. If I can't do it with foil, (which is very rare), I'll use a dab of Testors chrome silver or a shot of silver Sharpie as Snake suggests. Steve