StevenGuthmiller
-
Posts
15,086 -
Joined
-
Last visited
Content Type
Profiles
Forums
Events
Gallery
Everything posted by StevenGuthmiller
-
I'm sure the heater box bolts should be black, but what the hell! Steve
-
 As long as we are moving towards a fix, I'm okay with it. But we do need to get it back to where it was. I use the edit function all of the time. Not everything changes within 45 minutes or 3 days! Steve
 -
That's not necessarily true. Just because a build thread in the "On the Workbench" section bounces to the top of the list on occasion doesn't mean that I'm going to read it again, unless there are updates. I want to go back and review any new material by the builder. I'm not interested in reading everybody else's comments on it. I don't want to have to go back and check the thread a half a dozen times if there is no new progress on it. It all seems kind of dumb to me. Steve
-
Just a couple more photos of where I'm at. All of the chassis and engine parts are painted and in the process of being detailed before assembly. I thought that some of you might like to see the firewall now that it is, for all intensive purposes, finished. I still might add a couple of decals, but other than that, it's ready to install. The engine is nearly ready for assembly in lieu of a little more detailing. Steve
-
Sweet bird Randy! Steve
-
Factory Colors
StevenGuthmiller replied to StevenGuthmiller's topic in General Automotive Talk (Trucks and Cars)
Thank you Dennis! This site will be very helpful in the future. Got it bookmarked! Steve -
Looks sharp in that color! Will take a little work to change from a Park Lane to a Monterey, but not horrible. The biggest issue will be the Monterey scripts. Steve
-
Not necessarily. If there is no, or little paint on the inside of the body, The Super Clean will eventually work it's way around to the outside. It will just take much longer. Steve
-
Another '67 Ford Question
StevenGuthmiller replied to StevenGuthmiller's topic in General Automotive Talk (Trucks and Cars)
Thanks guys. I appreciate it. The bag it will be. I was just wondering because even the AMT '67 Cyclone kit that I'm stealing a lot of the parts from has the bag and the jug included. The tooling shares a large portion of the parts with the '66 Fairlane kit, so my guess is that the bag is a carry over from that car. The instructions for the Cyclone utilizes the jug. Steve -
I once had a '72 Fury with the 360. Biggest dog I ever drove! (175 horse power) By the time 1975 rolled around, even the 440 that my dad ordered in my mother's '75 Dodge wagon was a toothless boat anchor. My dad cussed constantly about the lack of power every time he drove it. Steve
-
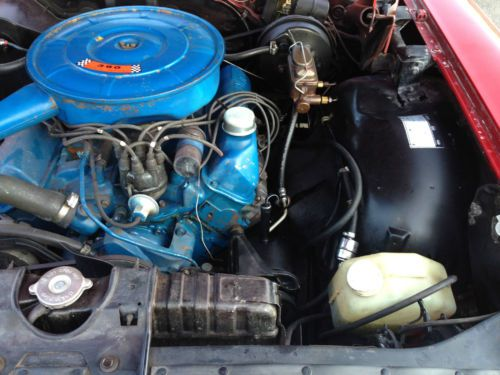
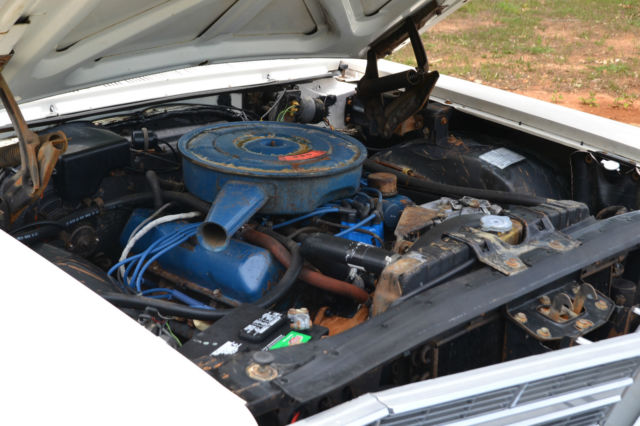
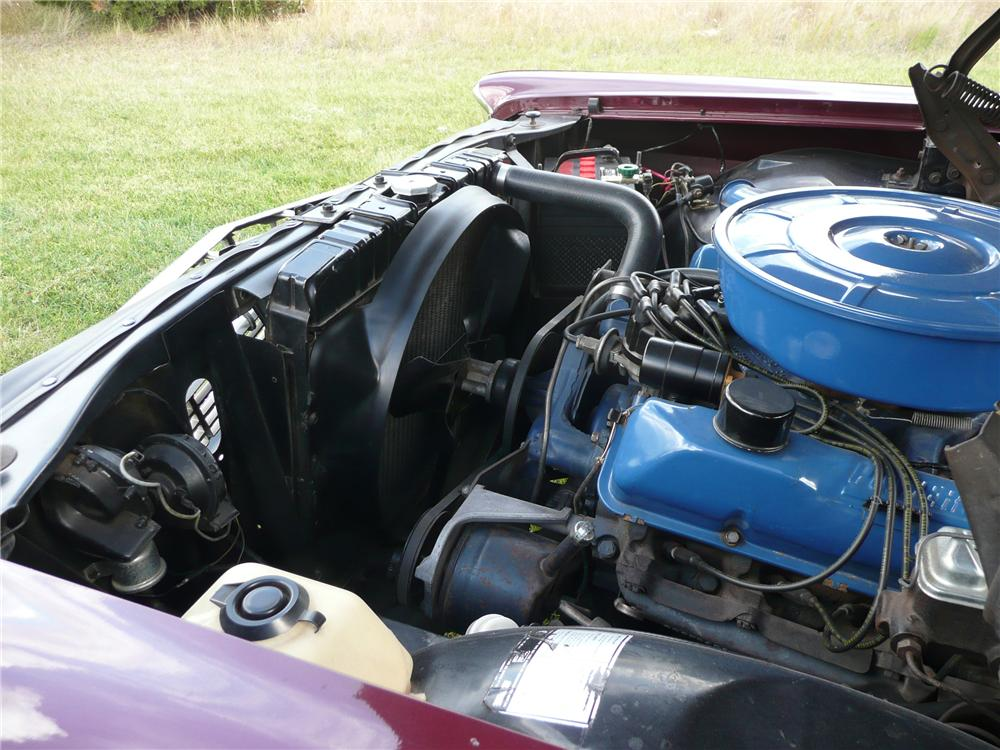
Does anybody know if the '67 Galaxies had a windshield washer bag, or jug? I'm finding conflicting information. I'm thinking the bag? Is the jug in these photos a radiator overflow jug? The first pic looks like it has both a bag and a jug. Steve

-
Factory Colors
StevenGuthmiller replied to StevenGuthmiller's topic in General Automotive Talk (Trucks and Cars)
Thanks! I have some Autolite "Sta-Ful" battery decals, so that will be perfect. Unless I hear different from a Ford aficionado, I'll probably go with red for the shocks as well. Steve -
Depends a lot on what type of paint you're removing. Enamel is pretty quick. I will usually just drop in my parts and let them soak overnight if I'm removing enamel. No re-applications or scrubbing should be necessary. The next day, you will most likely be able to remove the parts, give them a rinse and light scrub, and they should be clean as new. Remember to give the parts a good cleaning with dish detergent and warm water before repainting. Mind you, there are some paints that are resistant to a lot of these degreasers. Lacquer can take a while. A good rule of thumb is to put some scratches into the paint down to the primer in a few spots to help the solution to get under the paint. Super Clean will not dissolve the lacquer itself. It works by getting under the paint and dissolving the primer, loosening the paint. The paint will then peel off in sheets. I've had entire sections of paint, like a roof, fender or door lift off in one piece. Most times, I will drop in a body painted with multiple coats of lacquer and just forget about it for a week. That period of time is probably not necessary in most cases, but the longer you let it work, the easier it will be to remove the paint, so I figure, let the Super Clean do the work for me and leave it alone. Chrome will usually dissolve in a matter of 10 or 20 minutes, but the base coat could take a bit longer. Some flat paints and primers can be mostly unaffected by Super Clean. If I have stubborn primer left after the paint is gone, I usually remove it with alcohol. Sometimes a once over with an alcohol wipe is all that's needed. You have probably seen these photos before, but this is what an overnight soak in Super Clean will generally net you with enamel paint. Steve
-
Terrific! I was of the understanding that Walmart didn't carry Super Clean. I always buy mine at the local auto parts store. Walmart is my anti-Christ! Steve
-
Would anyone happen to know what color the battery caps would have been in the '67 Fords? And what brand of battery? Autolite? Motorcraft? Most of the Autolite and Motorcraft batteries that I'm seeing online would have had red caps. I'll probably go with Autolite as I have decals for them. How about rear shocks for the same year? I'm seeing mostly red, silver and black. Any ideas? Steve
-
If you got it at Walmart, it's probably Purple Power, in which case, it will not work as well as we say. Believe me, you would be much happier with Super Clean. Steve
-
Wheel Arch Moldings
StevenGuthmiller replied to StevenGuthmiller's topic in Tips, Tricks, and Tutorials
I have not tried the 3M stuff, but it might be worth a try for the wheel wells. The thickness of the tape is key in this circumstance. I have no idea how thick the 3M tape is, but the idea is to have something for the blade to ride up against while cutting. My guess is that blue painters tape is cheaper than the fine line tape, so for straighter sections of trim, it would likely be more economical. That plus the fact that you don't need a tight seal in this instance, so cheap painters tape is good enough to do the job. That being said, a more flexible tape would absolutely make sharper radiuses easier. Steve -
Very nice Al! I'm surprised at how quickly and nicely the windshield frame swap went. Nice work! Steve
-
I have to admit, as far as full sized Mercurys go after about 1956, the '60 is my favorite. Steve
-
What Did You Have for Dinner?
StevenGuthmiller replied to StevenGuthmiller's topic in The Off-Topic Lounge
I haven't had pheasant in many years, but my family used to eat it all of the time, and LOVE it, when I was growing up. Being originally from South Dakota, pheasants were like squirrels every where else. My mother used to cook them very slowly in a frying pan with lard! Almost like a German version of a pheasant "confit". One of the most delicious things I've ever tasted to this day! Steve -
Thanks guys, but I don't want to hi-jack Al's thread. Sorry Al! Steve
-
What Did You Have for Dinner?
StevenGuthmiller replied to StevenGuthmiller's topic in The Off-Topic Lounge
That's a strange combination. Steve -
What Did You Have for Dinner?
StevenGuthmiller replied to StevenGuthmiller's topic in The Off-Topic Lounge
Here are a few pics from a couple of our favorite Cancun Mexico restaurants last week. My wife had "El-Conquistador Shrimp" and I had a creamy "Seafood Pasta". Both were wonderful. One of my favorite meals of the week was at a restaurant called "La Palapa Belga". An entire pot of Belgian style mussels! The overall theme here is, I LOVE MUSSELS! Steve -
What Did You Have for Dinner?
StevenGuthmiller replied to StevenGuthmiller's topic in The Off-Topic Lounge
Looks delicious! I had a teriyaki BBQ glazed meat loaf and some stewed potatoes and carrots tonight. Sorry, no pics. Steve -
This kit has been around since the dawn of time! I haven't built one since I was a kid, but it always seemed like a terrific kit to me. Steve