
landman
-
Posts
7,921 -
Joined
-
Last visited
Content Type
Profiles
Forums
Events
Gallery
Everything posted by landman
-

Ford Race Car Hauler
landman replied to landman's topic in WIP: Model Trucks: Big Rigs and Heavy Equipment
I have been busy with other things. Will get back at it soon. -
Ford Race Car Hauler
landman replied to landman's topic in WIP: Model Trucks: Big Rigs and Heavy Equipment
-
I remember building one around 1974.So when the car was current.
-
Looking good Joe. What size bit do you use on your distributors?
-
Any year. I've had an 89, a 98 and currently own an 08. But it doesn't have to be like my 1:1.
-
I'd like to make one of those preferably Dodge. I see Modelhaus has a wheel kit. I suppose if there aren't any dually kits there must be after market boxes. Where do I start to look?
-
Thanks Fabrizio. By J10 I had in mind the old ones with the vertical grille. I think they were also called Gladiators. https://www.google.com/search?q=j10+jeep+images&rlz=1T4NDKB_enCA533CA534&tbm=isch&imgil=ouRdSzUegihJmM%253A%253B_y2XL0m-Y0lD9M%253Bhttp%25253A%25252F%25252Fcloudlakes.com%25252Fgallery%25252F2708605-jeep-j10.html&source=iu&pf=m&fir=ouRdSzUegihJmM%253A%252C_y2XL0m-Y0lD9M%252C_&usg=__UIsop-X8e96txOlysvJbyhtAaBI%3D&biw=1536&bih=630&ved=0CDEQyjc&ei=0mYoVdLPOcPfoATzloGgDQ#imgrc=ouRdSzUegihJmM%253A%3B_y2XL0m-Y0lD9M%3Bhttp%253A%252F%252Fcloudlakes.com%252Fdata_images%252Fmodels%252Fjeep-j10%252Fjeep-j10-07.jpg%3Bhttp%253A%252F%252Fcloudlakes.com%252Fgallery%252F2708605-jeep-j10.html%3B2969%3B2235
-
Have they ever made a model of the following? The J10 Jeep pickup The Honcho The 2 door full size Cherokee
-
What scale is this one and who makes it?
-
Coming from you sir, That is definitely a compliment! Thank you.
-
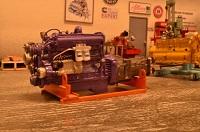
Flatheads to Boxers has just completed this 331 Cu.In. Chrysler Hemi . It is from a 1955 300.

-
I wonder if anyone ever built a 1:1 Boss 9 F-100.
-
Found on eBay, an Avanti and an AMT Blueprinter parts pack. 4 engines and some grilles. I attach a list of the grilles in case some of you get interested.
-
It was indeed a 78. Here's its engine after a rebuild. It was so heavy it bent the support plate of the engine stand and that is why there is a piece of wood under the front.
-
My Olds had the same body as the big Pontiacs. we did a side by side comparison one time at a show and the shells were identical. So, yes the Chevy would be too small, but it is as far as I know the only kit of a 40's GM fastback.
-
Couldn't wait any longer. Changed the oil & fired her up. Backed her outside in the sun and let it idle. Throttle foot is extremely itchy.
-
Ford Race Car Hauler
landman replied to landman's topic in WIP: Model Trucks: Big Rigs and Heavy Equipment
Thanks guys. Now I am debating whether to put on the 5 clearance lights on the roof or not. -
Ford Race Car Hauler
landman replied to landman's topic in WIP: Model Trucks: Big Rigs and Heavy Equipment
My first crack at Alclad. Adapted the Louisville's steering shaft & installed. Added the tanks, bumper, turn signals. The mirrors were a hard fought battle. I had to improvise and cut off one of the braces to make them fit the N600 cab.
-
Played at photographer. All shots taken with a 200 mm. lens at 1/15 and f22.
-
Just a "Nit" to pick: "Cobra" VS "Mustang"
landman replied to Greg Myers's topic in General Automotive Talk (Trucks and Cars)
My guessis Mustang is the "Make" in this case while Ford is the manufacturer. Who knows? -
Just a "Nit" to pick: "Cobra" VS "Mustang"
landman replied to Greg Myers's topic in General Automotive Talk (Trucks and Cars)
Shelby is the "Make", Cobra is the model. That is why you find it in several places. -
Just a "Nit" to pick: "Cobra" VS "Mustang"
landman replied to Greg Myers's topic in General Automotive Talk (Trucks and Cars)
Spider/Spyder is a European name for the convertible body style. -
Ford Race Car Hauler
landman replied to landman's topic in WIP: Model Trucks: Big Rigs and Heavy Equipment
Thanks guys. We now have Glass and some color on the body. Just wishing I had painted the treadplate first and masked it.
-
Join the club Stray. I'm an older returnee as well and I find my body hasn't kept up. But it is still fun despite the frustration. Love your build. Will steal some ideas for sure.
-
Ford Race Car Hauler
landman replied to landman's topic in WIP: Model Trucks: Big Rigs and Heavy Equipment
I suppose so. I also thought a bit of a guardrail, so when they're half lit they don't fall off.
.JPG.bc29e06d63bd3e0353b0c04218b984ac.JPG)
.JPG.ea5d401297120ed49deadbc7ac812a59.JPG)
.JPG.cb2b66be84c2d1594162adf6b2d5d812.JPG)
.JPG.1a42bbf81bcae6dba1505791d3493353.JPG)
.JPG.e89230748554d6ec7d739bdb74af3cd2.JPG)
.JPG.ecef663aaff9c84a26d55410f0ca2442.JPG)
.JPG.f0398906a573e6c57198477a0c90efee.JPG)
.JPG.98c6ed77c23a552007083bbe51cd119a.JPG)
.JPG.58e141e6605acc9201dcd4365616cede.JPG)
.JPG.116d395ab5fce1ab8c4ce370c4ed455e.JPG)
.JPG.f6822b130cf2387c6cd1fc1ba7a3cb32.JPG)
.JPG.c8fc8dc227dda7f301a42bd67faaa359.JPG)
.JPG.3ff561f2217bf2f4b9dd3b6a17d3cde1.JPG)
.JPG.b9475c1fee136fa5b2591f240a03993b.JPG)
.JPG.02171581b613a093112c6e9899052008.JPG)
.JPG.b7f1334c394e072e1e9ab56c085d1156.JPG)