1hobby1
-
Posts
714 -
Joined
-
Last visited
Content Type
Profiles
Forums
Events
Gallery
Everything posted by 1hobby1
-
 Really awesome photos. Truck looks amazing. Well done!
 -
What an epic idea! Love it
-
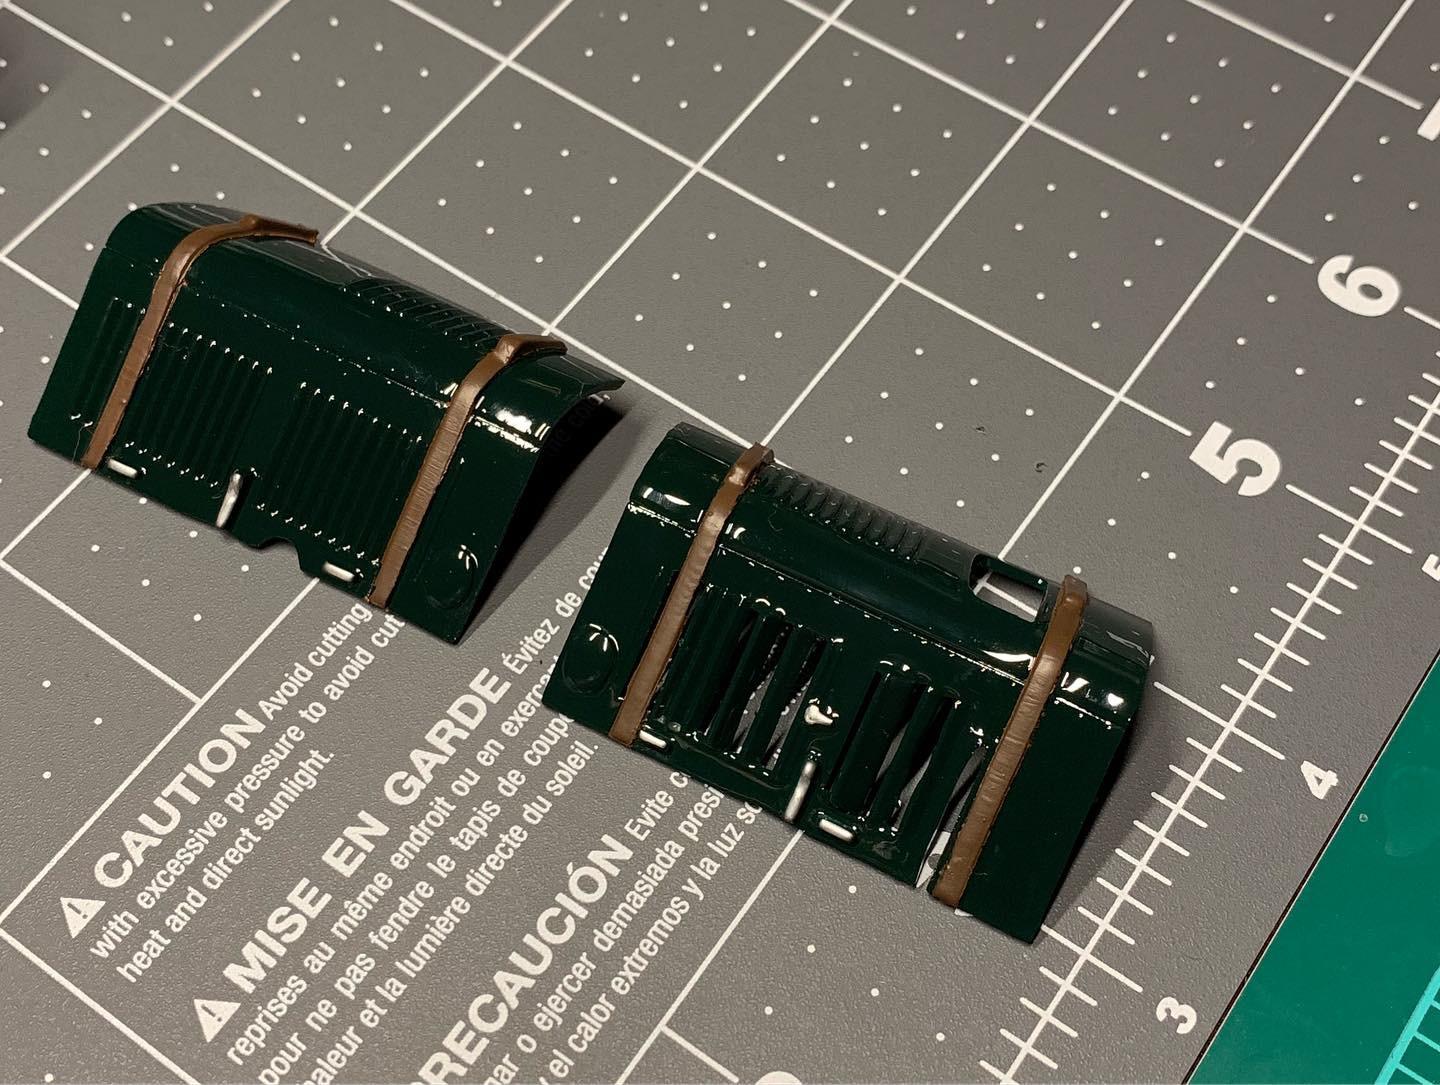
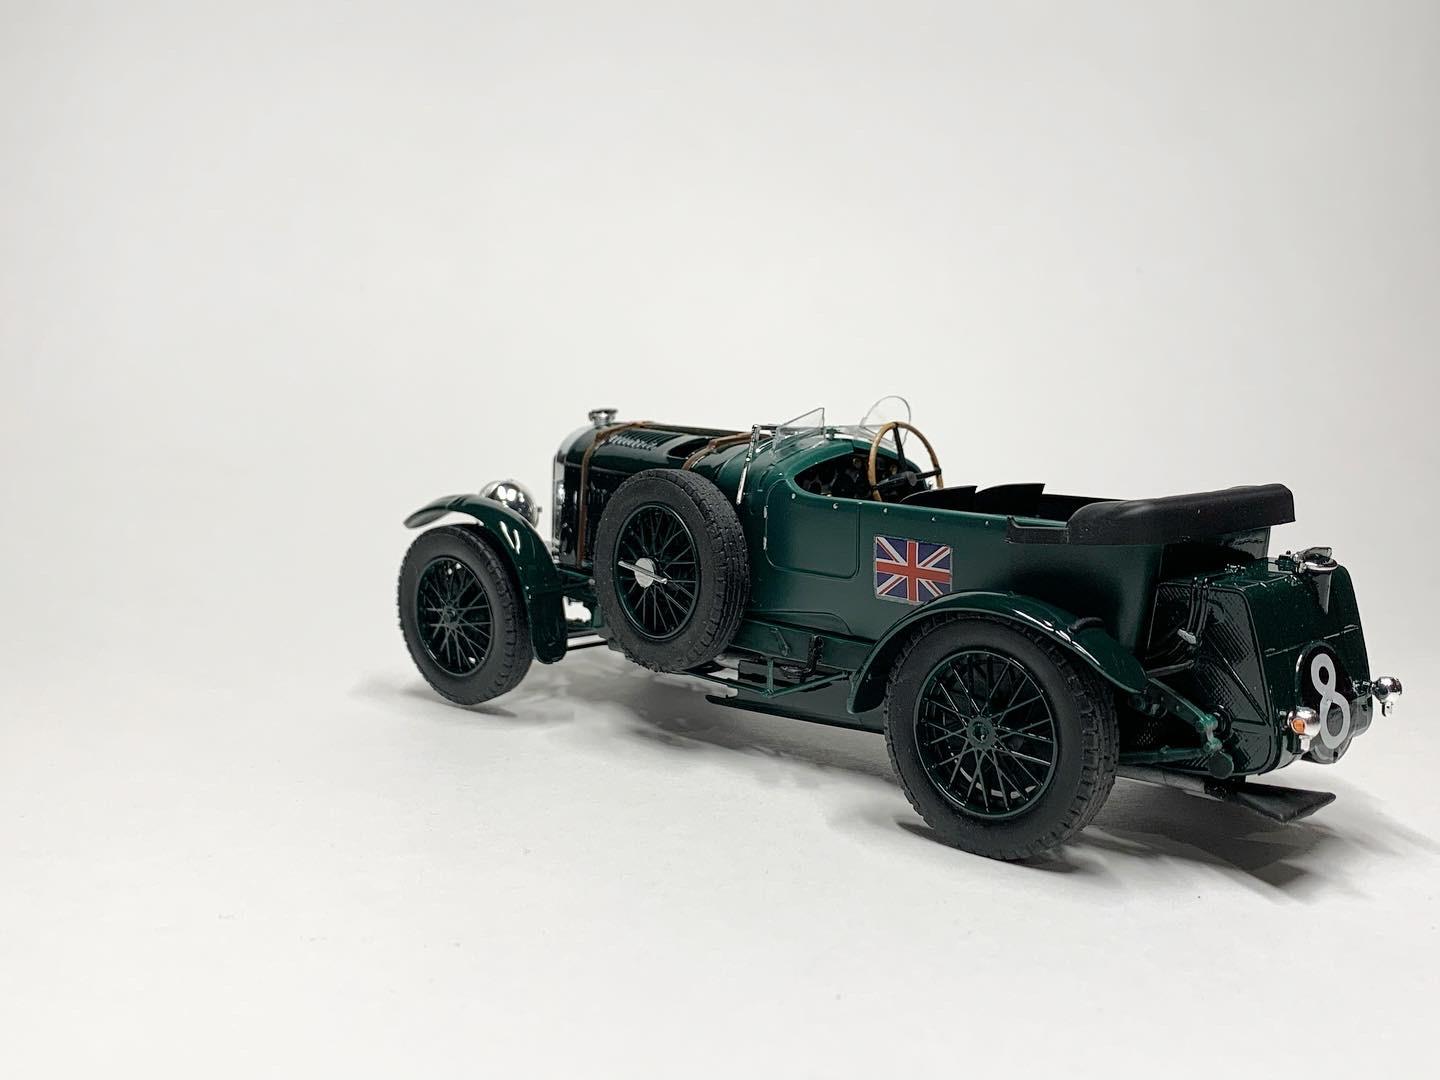
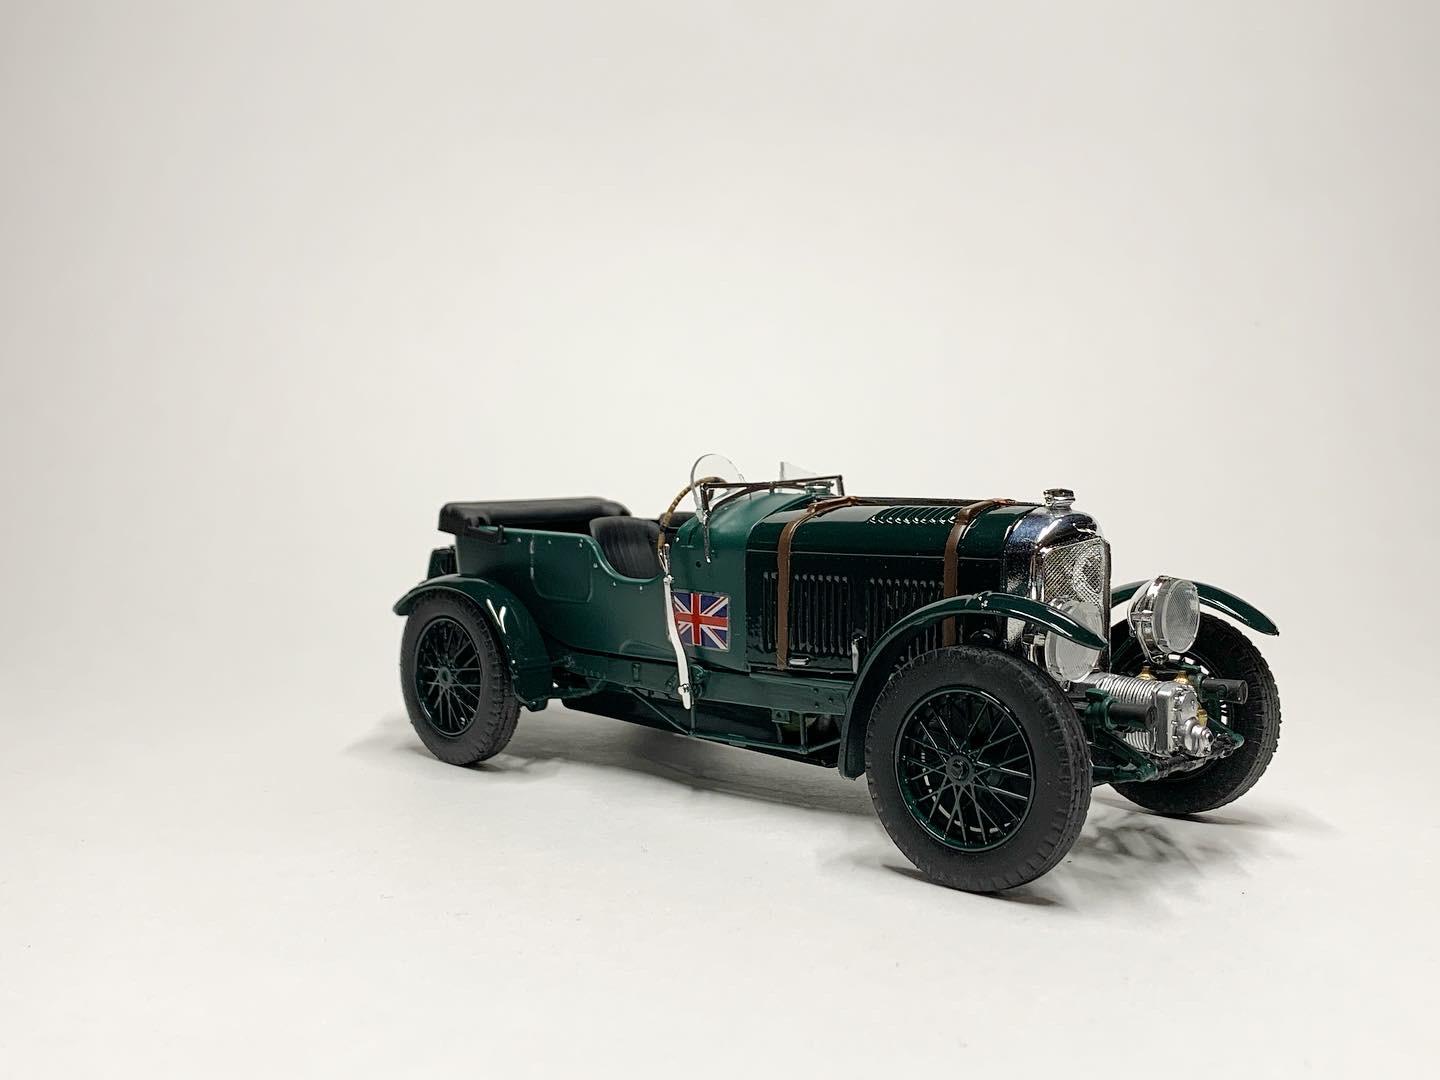
Thanks everyone! Here are a couple more from the build:

-
Thank you very much! That is correct there were knock off center caps however... I lost them somehow haha
-
Got it - thanks! Figured I would clear coat it to seal in the decals.
-
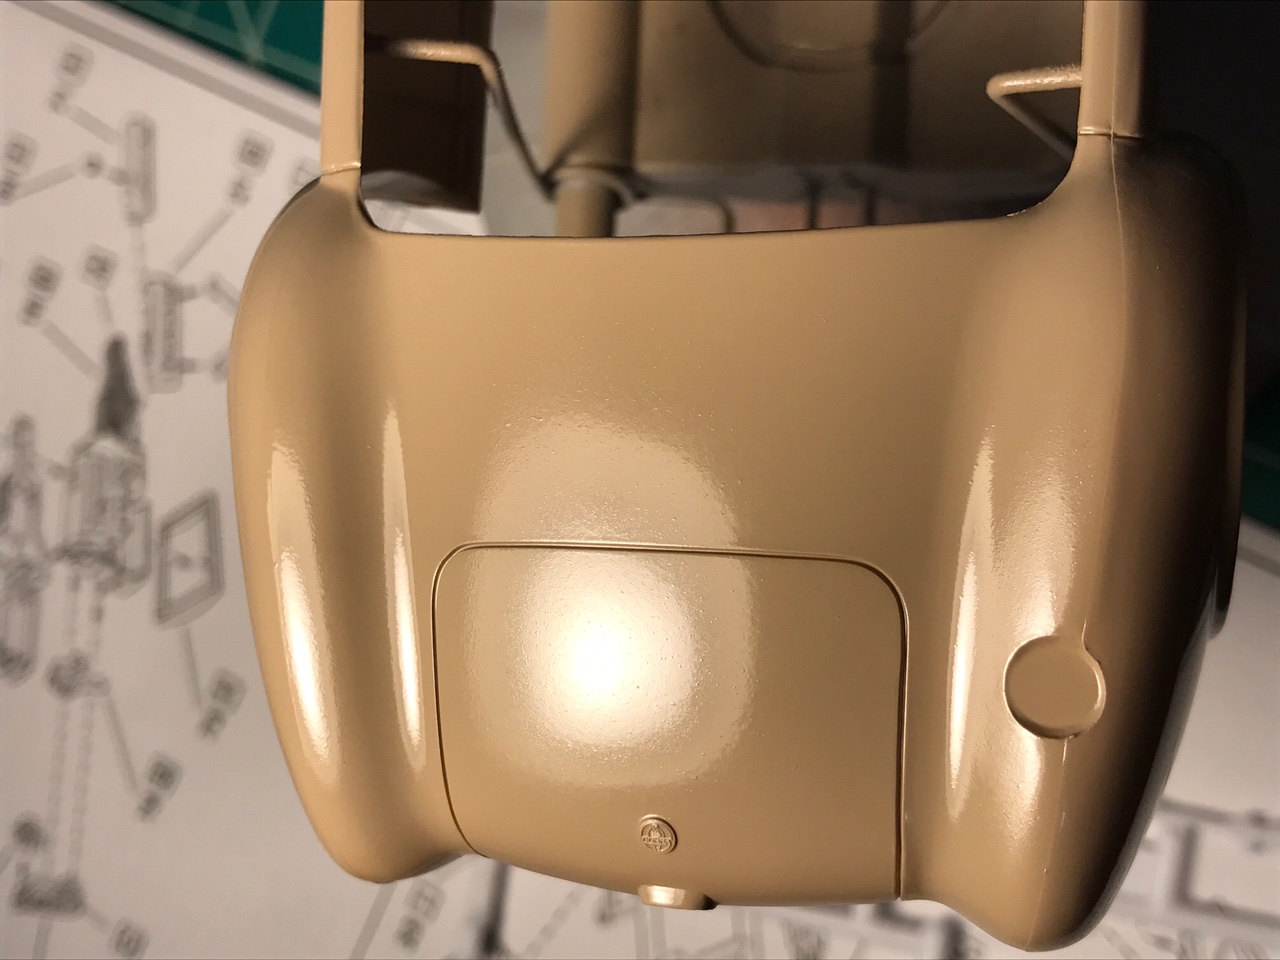
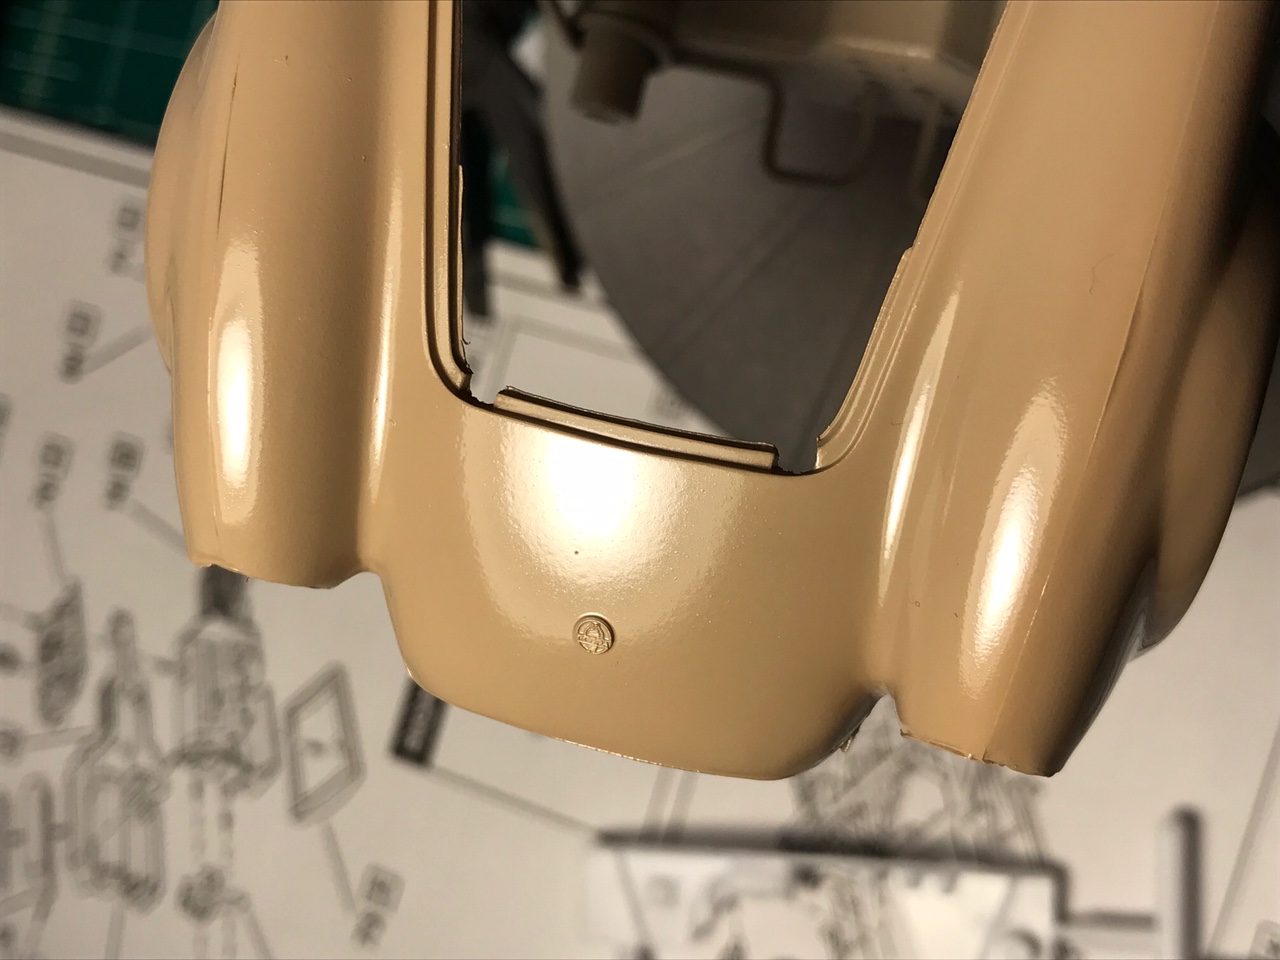
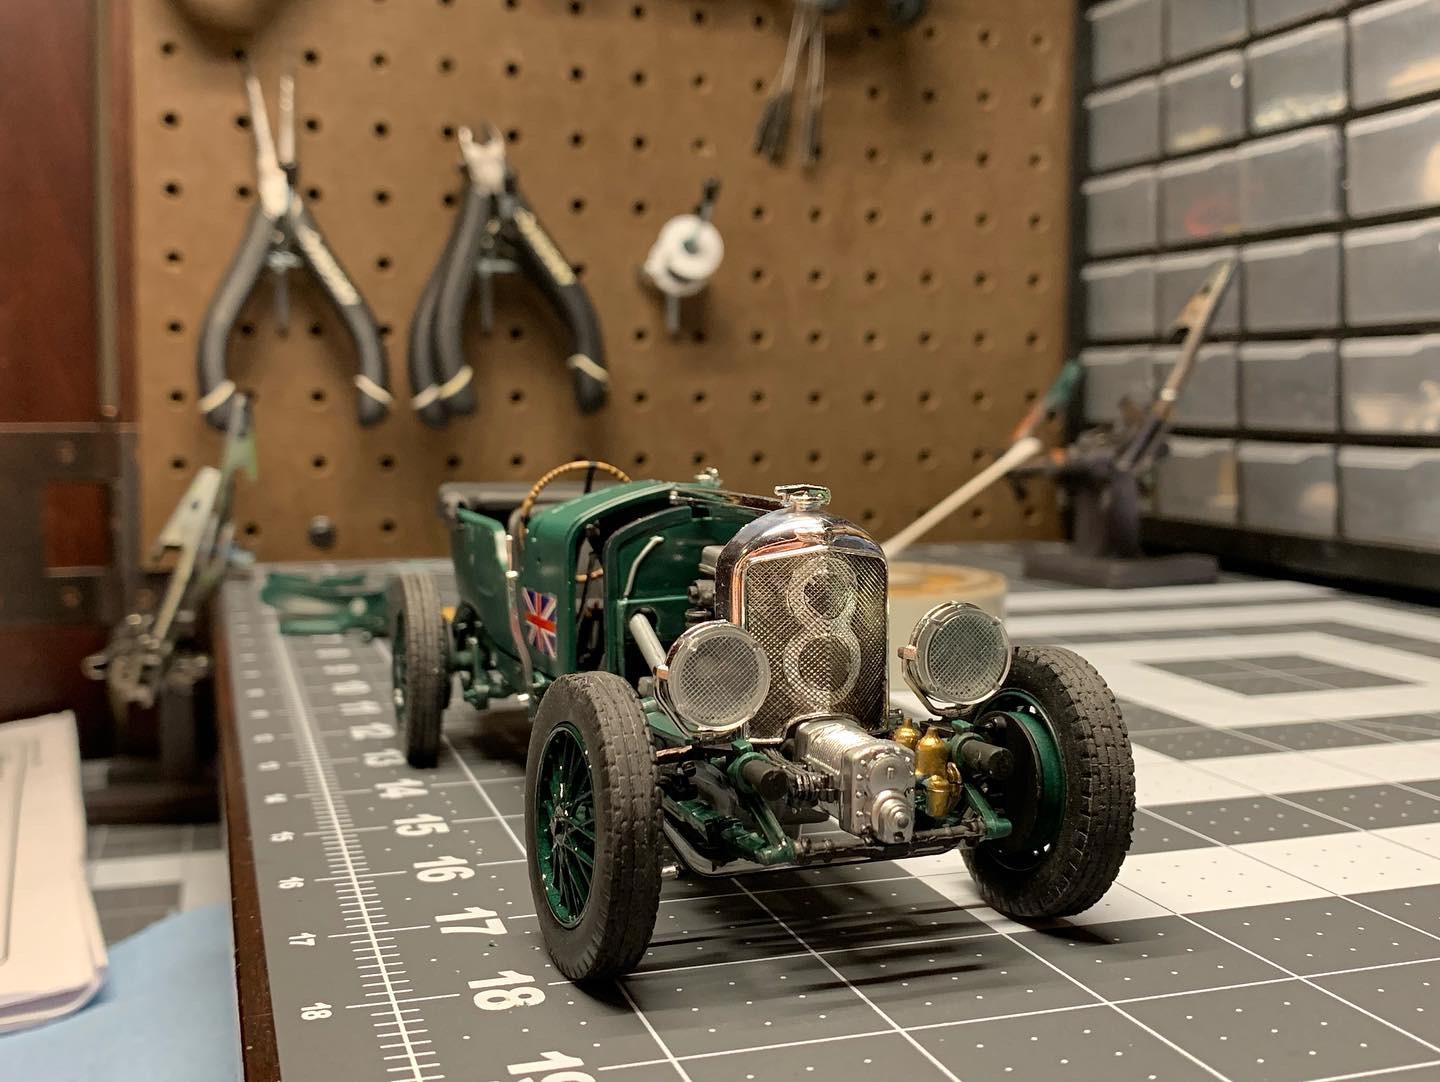
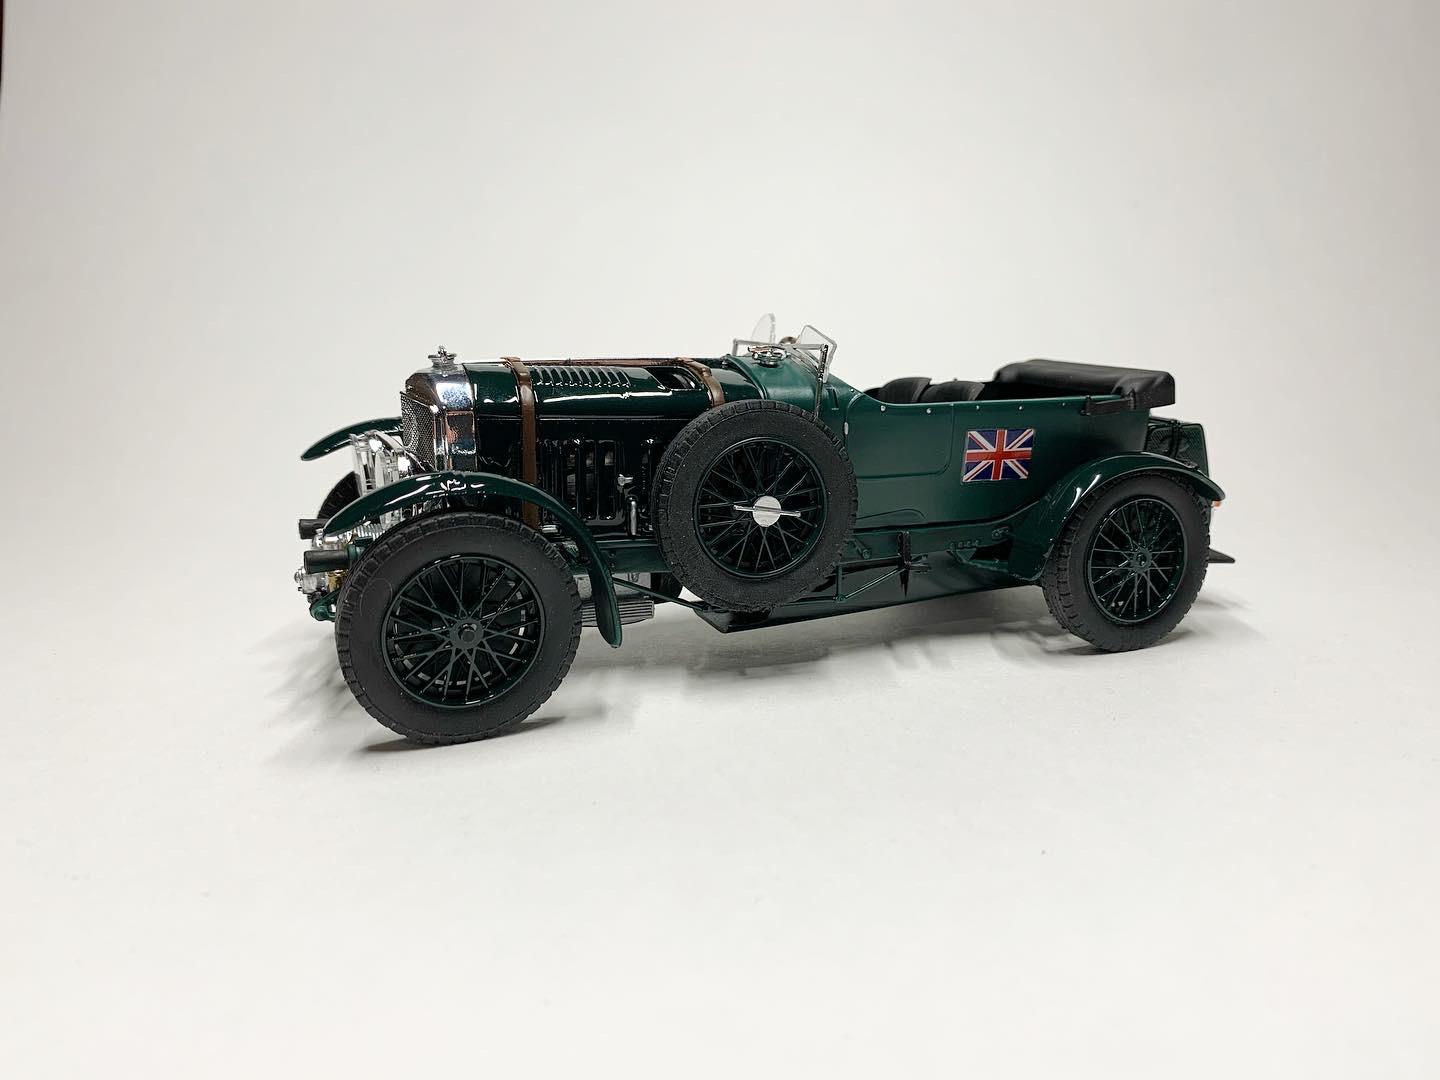
Hey Guys, Been a while since I’ve posted here but looks like this website is much more iPhone friendly to use now! This is my 1/24 Bentley Blower by Heller Keller that I just finished. Not everything on this kit fit how it was supposed to... or even remotely close at times... but I did what I could and here it is: Thanks for looking!
-
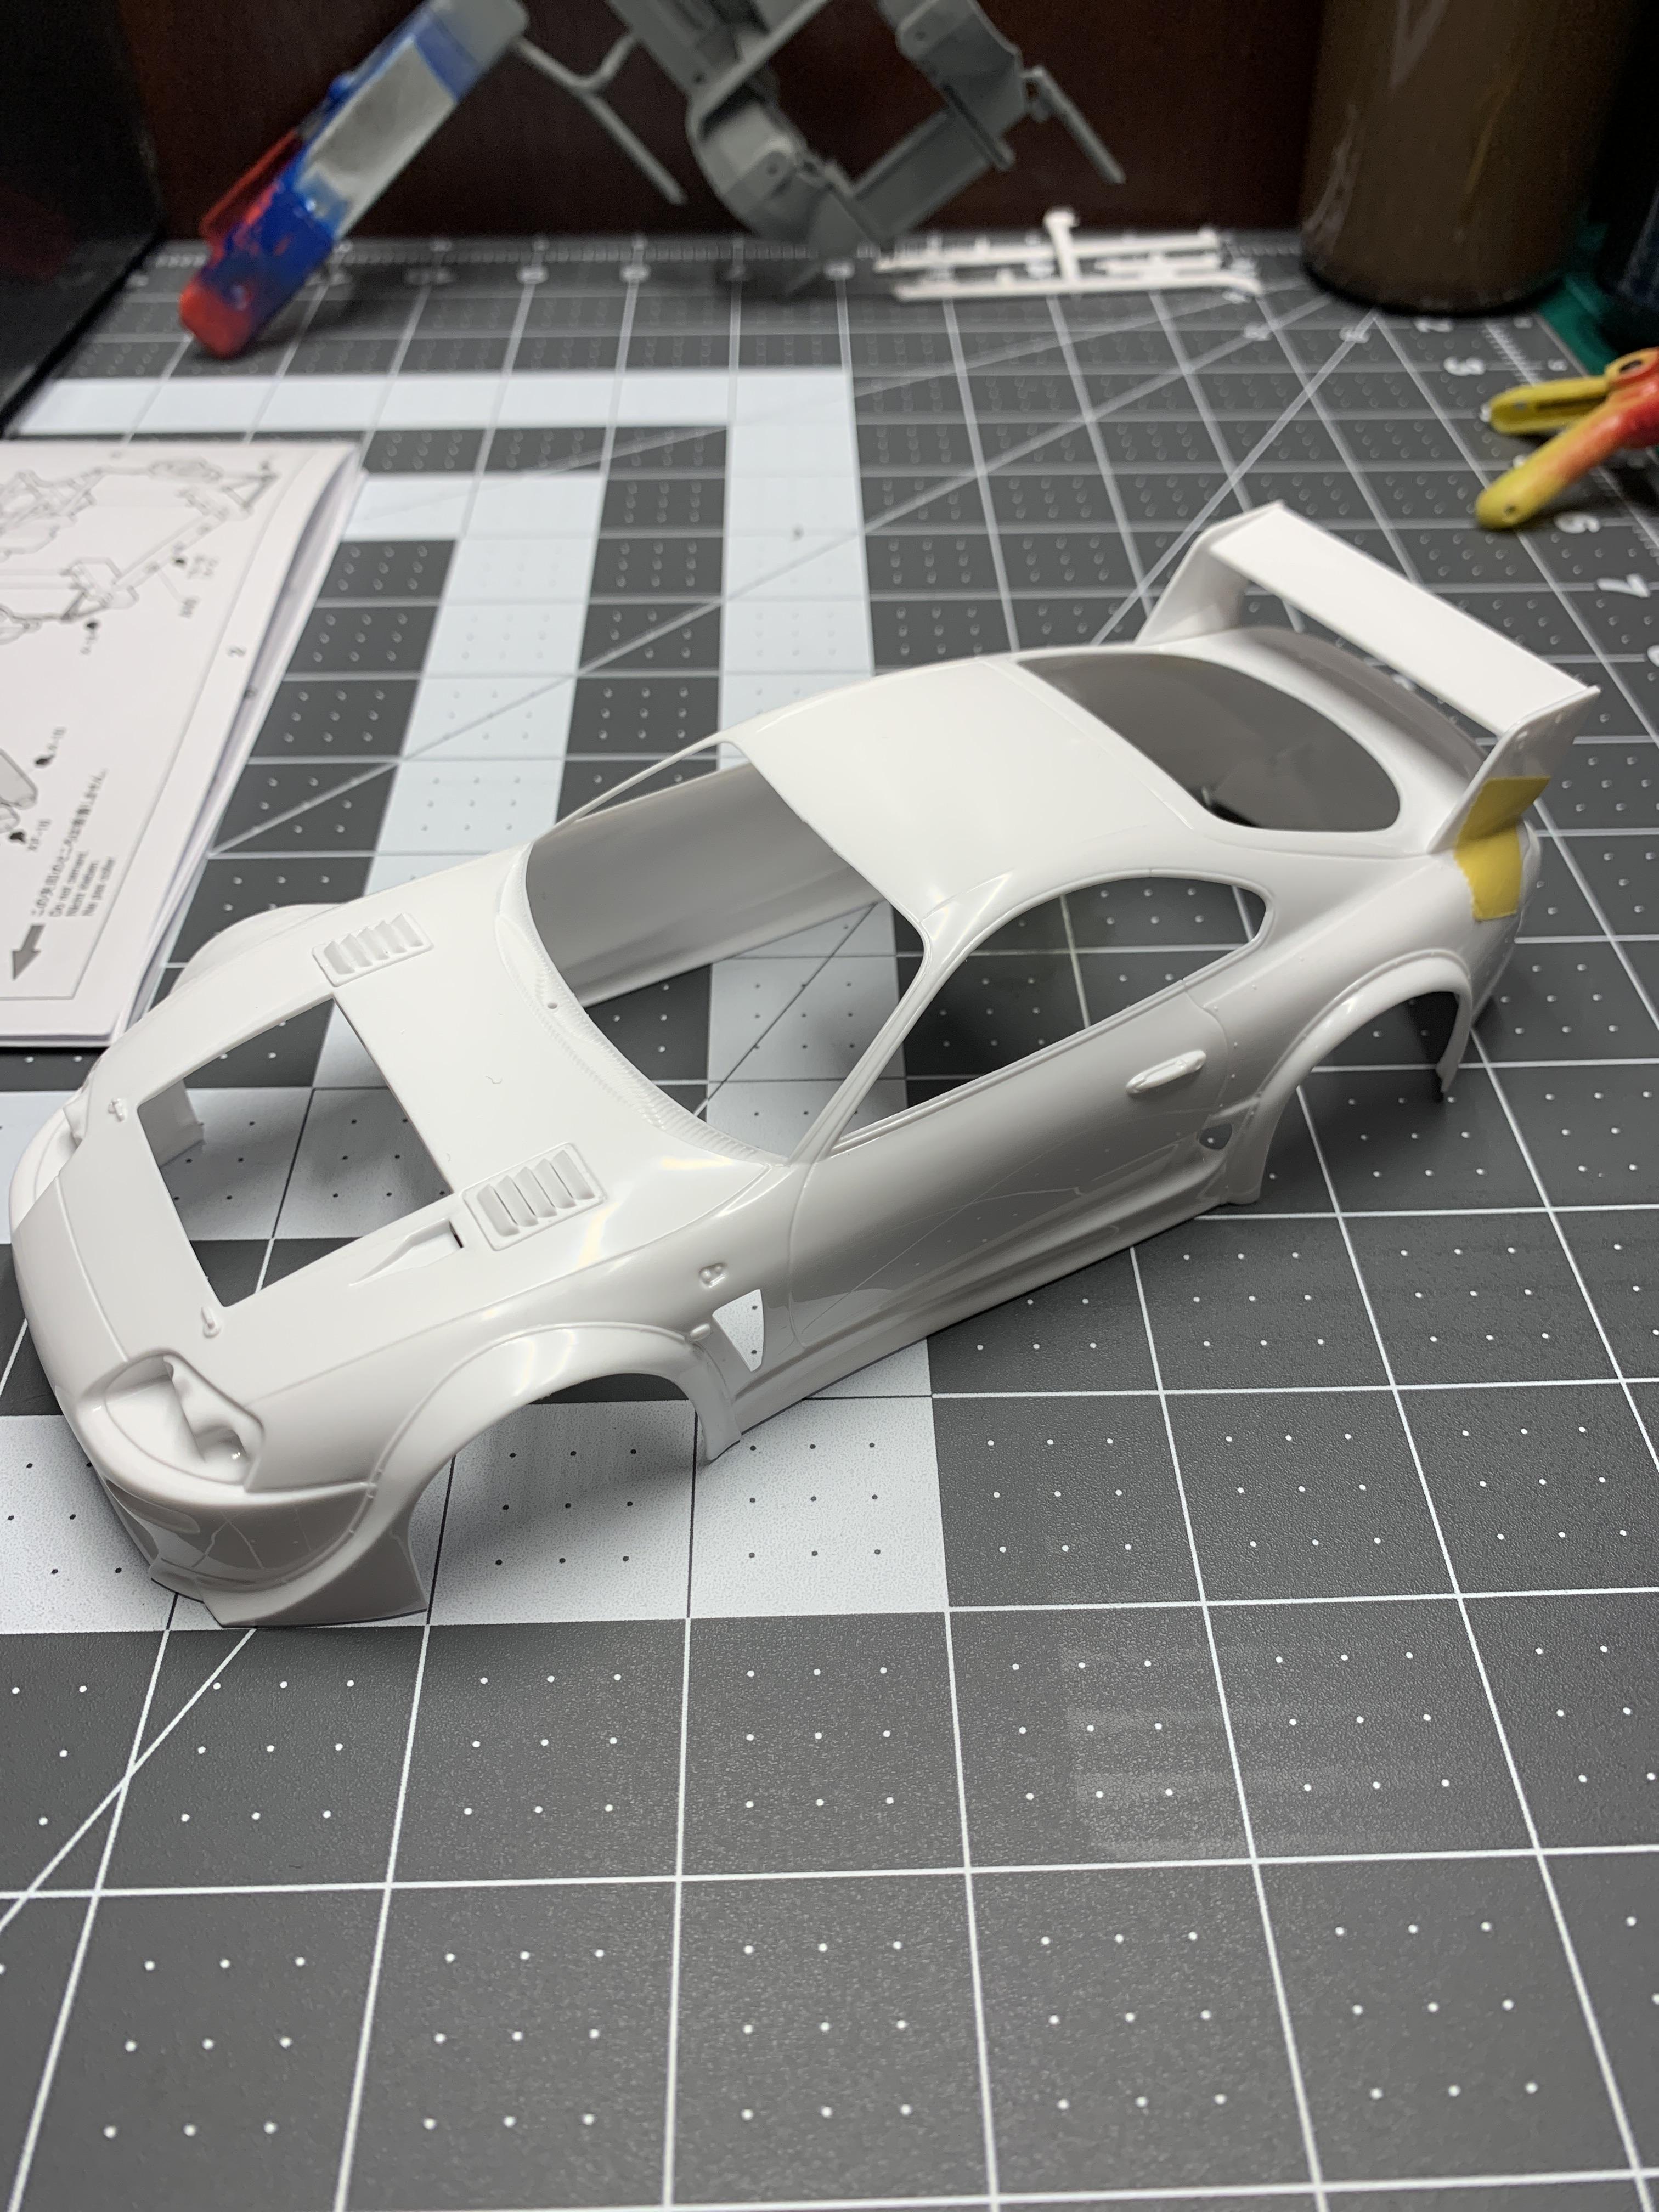
Hey guys - been a while since I’ve been here but I just started the Tamiya Toyota Supra GT and it is molded in white. I want to build the car as it is on the box and have all the race decals on it. The questions is, can I apply the decals on the box plastic and apply a clear coat without painting the body? Has anyone had success with clear coating the plastic out of the box?
-
hey guys, thank you for all the responses. I agree that using the same brand of products for the paint job is the best route. I tried this on a spoon test and it worked and actually the body held up fine after the first coat (I haven't put on any other coats since). debating on trying another coat on the body of clear. the only issues were on the hood, fenders, and only the back side of the bed. Nonetheless, my last build I used Gravity Colors from start to finish and was pleased with how it came out. The reason i tried these mixed matched products was because I have a good amount of small testors enamals and wanted to utilize them before switching to solely gravity color products. Anyways, i will not be using these products together again and thank you all for your input. how have your experiences been with ordering gravity colors lately? My first order went fine and i only ordered one paint color, however i heard they have had shipping issues and were taking over a month for products to arrive. thanks!
-
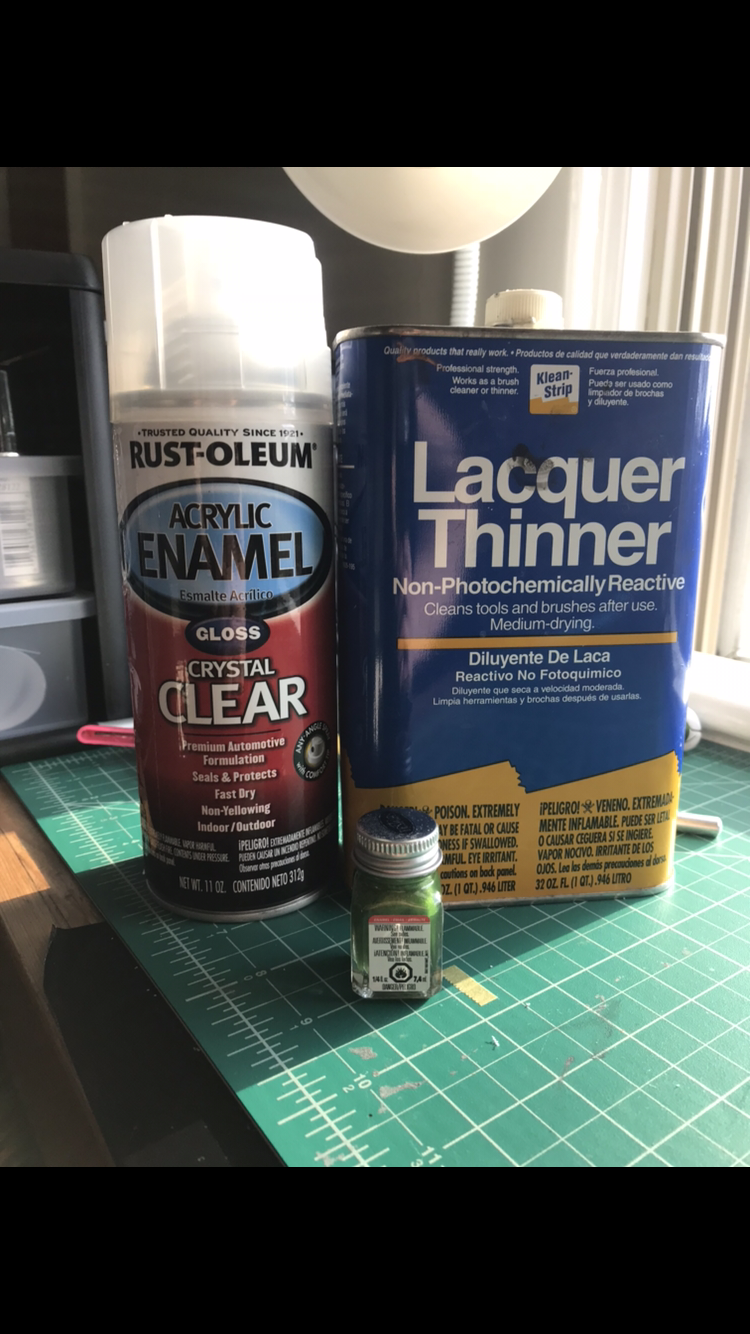
I waited about 4 Days. I wonder if this clear coat just isn’t friendly with this mixture of paint and thinner.
-
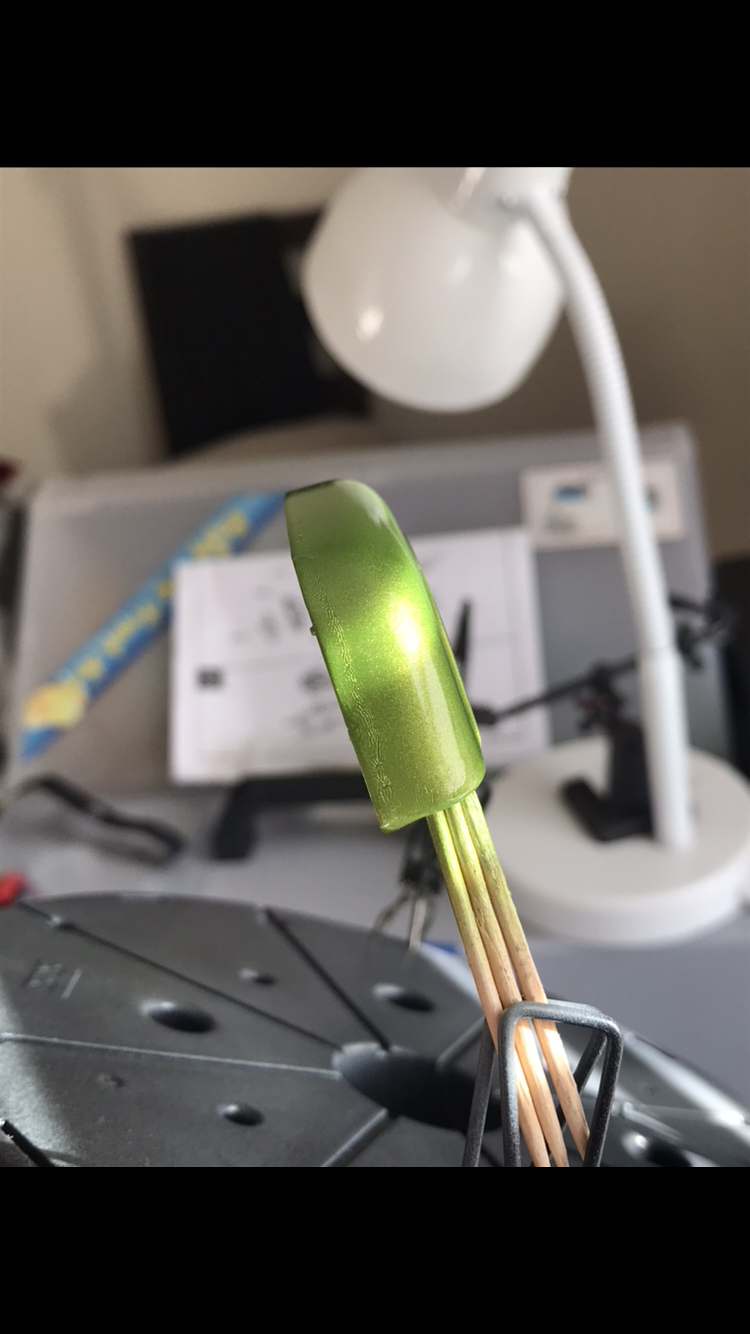
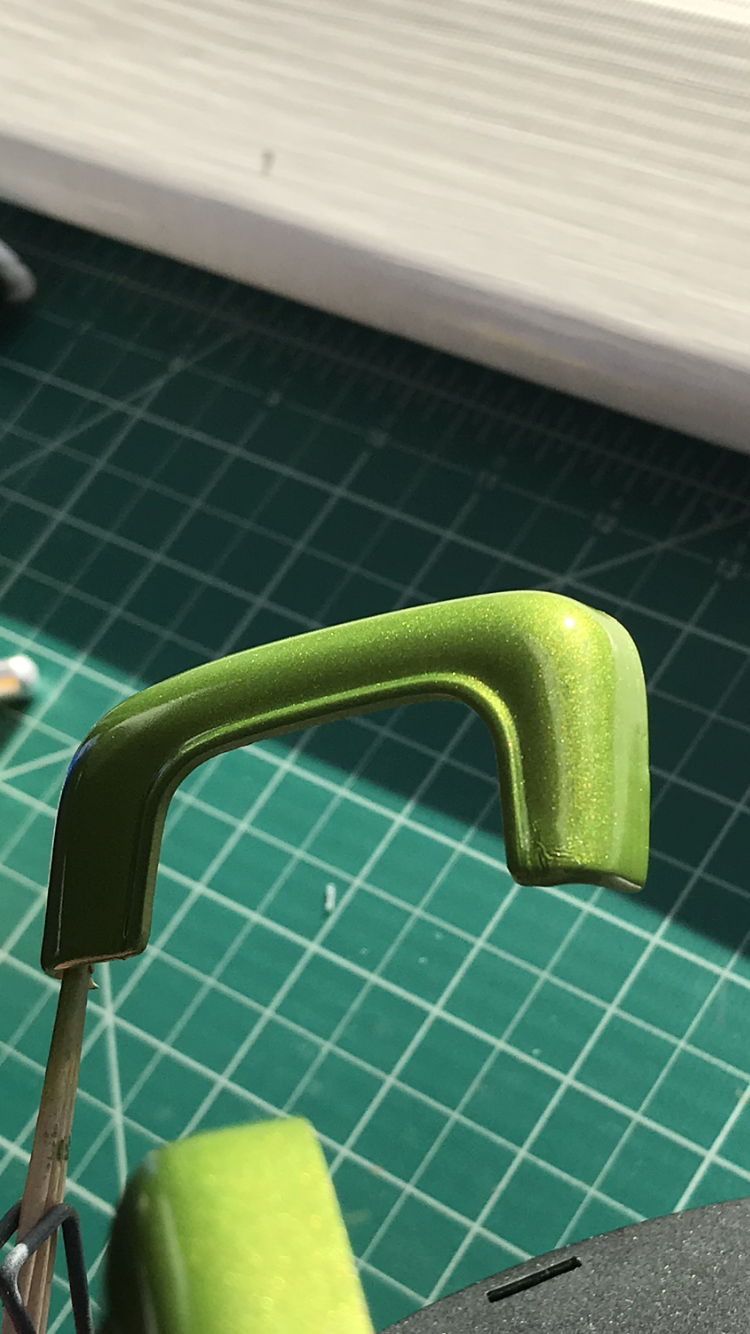
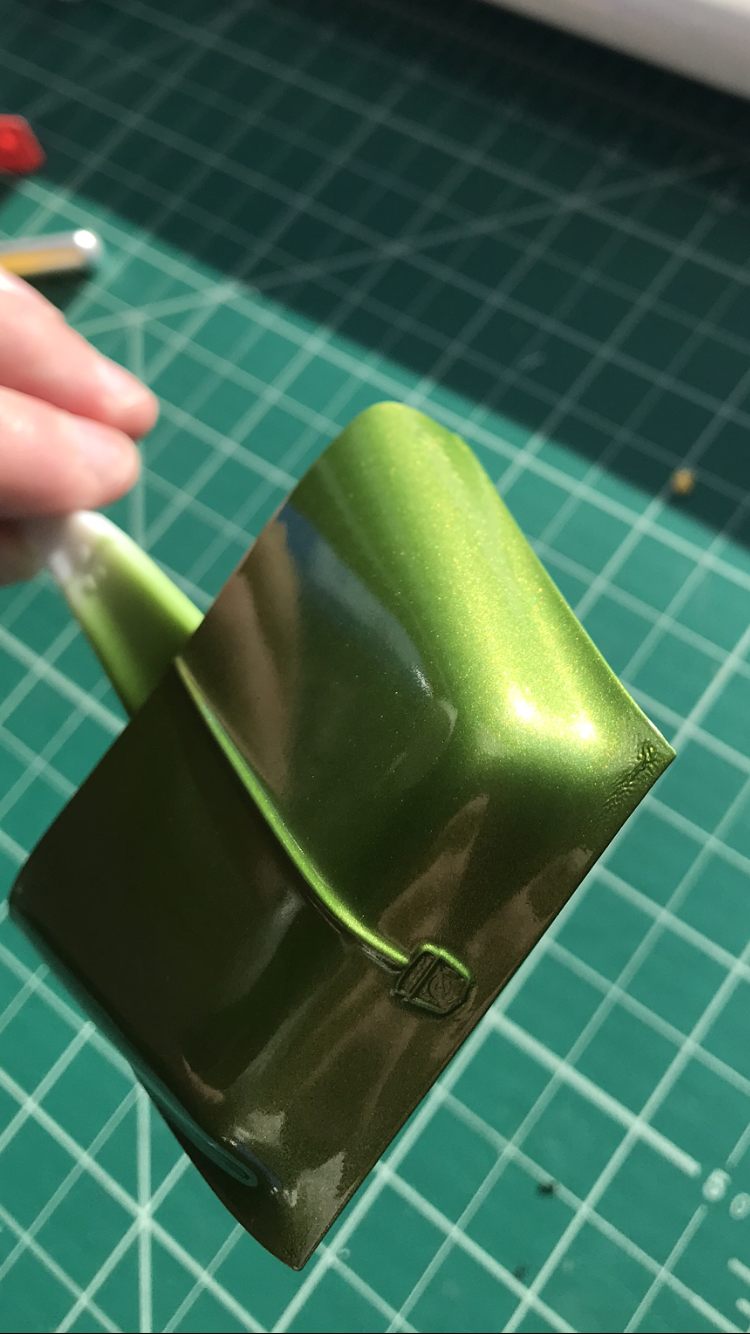
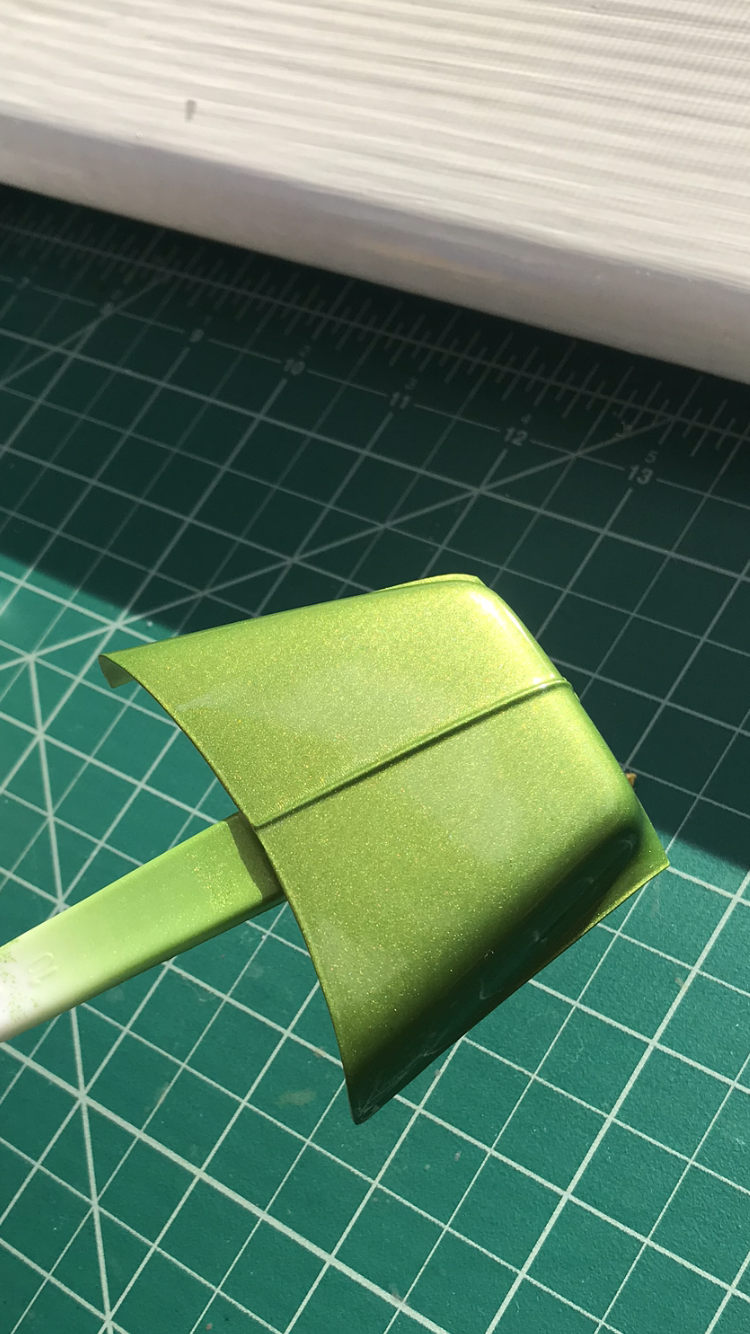
Hey everyone, So my clear coating was going great on my 1955 Ford pickup before it’s started to crinkle. This can also be a heads up for any new comers not to use these products together. For primer I used Touch n Tone Primer which is cheap stuff but works great and lays very smooth. For paint I used Testors enamel and sprayed 50/50 mix with lacquer thinner which came out great. Did 3 coats. For Clear I had some Rustoleum acrylic enamel laying around and figured this would shoot a nice coat and work with the paint for a glossy finish (as it passed the spoon test I had painted). When I started spraying, it laid down pretty smooth and I was actually really pleased with the results as you can see in one shot of the hood below.... until about 10min later when I noticed crinkles on certain edges. The body is still good and hasn’t crinkled yet so I think I can salvage that however the fenders, tail gate and hood I believe have to be stripped and pained again unless someone knows a way to salvage these pieces. If anyone has used the Testors enamel paint mixed with lacquer thinner 50/50, what clear coat do you suggest? Thank you! Steve
-
Enamel paint removal query
1hobby1 replied to HotRodaSaurus's topic in Model Building Questions and Answers
I will have to give super clean a try because you’re 100 percent with the inconvenience of brake fluid after using it. Disposing of brake fluid is a pain, I usually use cat litter to help dissolve it. -
Enamel paint removal query
1hobby1 replied to HotRodaSaurus's topic in Model Building Questions and Answers
Use Brake fluid, let it sit a couple days, and wipe off... just did it on a car that was painted in enamel and after wiping it clean it looked like it was never even painted. -
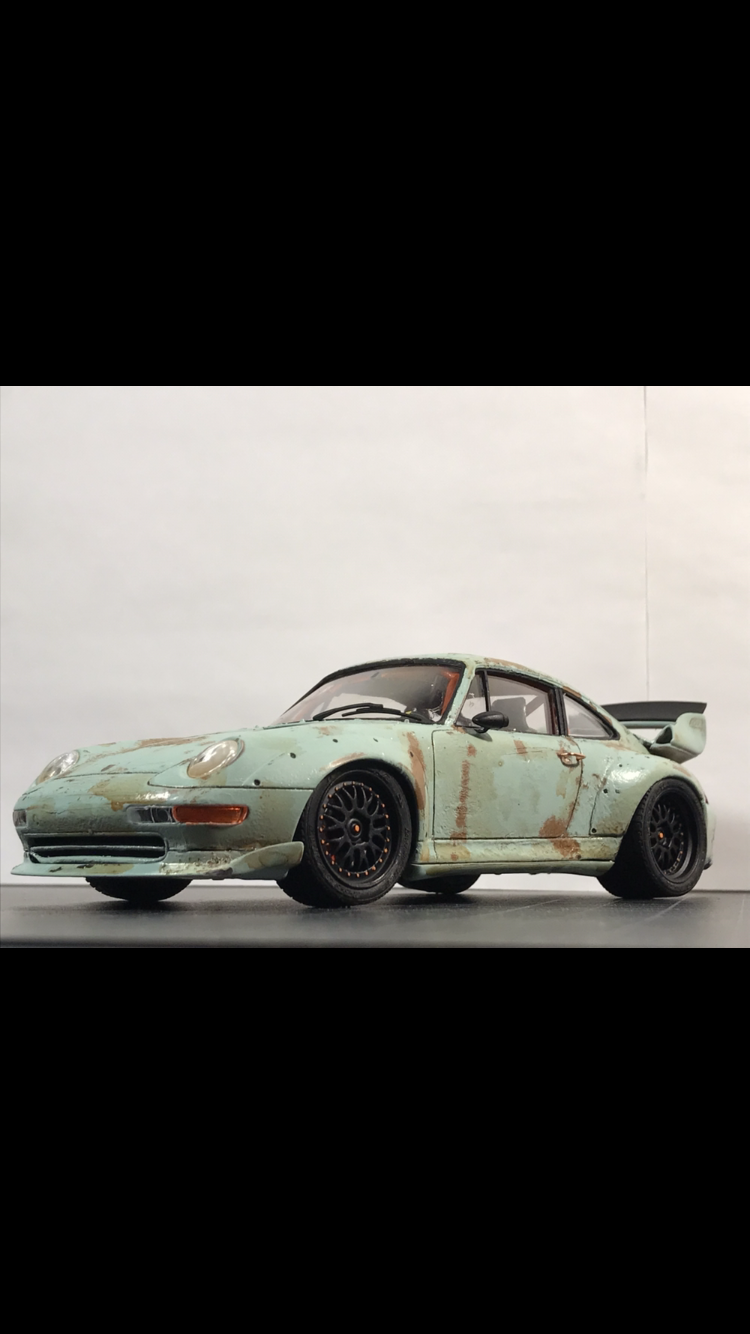
Here’s a rusty version of the Tamiya Porsche GT2 I recently finished!
-
New "material" for carpeting?
1hobby1 replied to Straightliner59's topic in Tips, Tricks, and Tutorials
I use this stuff all the time, they have some different colors also. Works well if you use a similar color paint underneath as the adhesive.
-
Testors Gloss Gray
-
Yea I ended up going with a dual cartridge 3M respirator I found on amazon for about $20/$25. Better safe than sorry! Thanks guys!
-
Great thank you!
-
Hello Everyone - I typically use the small testor bottles thinned with lacquer thinner or after my recent experience with gravity colors I will definitely like to use them again. My question here is , is a dust mask sufficient enough for my health when paining with these? If not which respirators do you recommend I purchase? I saw some on amazon from 3M for about $25 which I do not mind spending if it is what is needed. I purchased a $5 3M one from Walmart however Im not sure that will suffice. Thank you!
-
love it!
-
Beautiful!
-
Polishing paint without clear?
1hobby1 replied to 1hobby1's topic in Model Building Questions and Answers
So last week I went ahead and started wet sanding and polishing and I think it made a difference. On this picture I did not polish the trunk, but I did polish the space between the trunk line and where the back of the seats would be placed just to see the difference with the orange peel and small dust particles. I since then have washed the body and started to apply the stripe decals. Once I finish with the decals I move on to clear. I am thinking Testors Clear since I know it is decal friendly.... however I also have Rustoleum Clear that I might use, not sure how friendly it will be with the decals. Thank you all for advise and help!
-
Polishing paint without clear?
1hobby1 replied to 1hobby1's topic in Model Building Questions and Answers
Thank you for all the advice. I am definitely still going to try and polish it off. Just want sure if it has been done before without ruining the paint. More than likely I am going to mess up and that will lead to me stripping and removing the mold lines and repainting haha but at least this will be good practice for if it happens again. I greatly appreciate all the positivity on the post and the help. I will upload after photos of the process. Thank you once again! -
Hello All, So this is a question that I am sure has been asked before but I am looking for some advice on this. To start I use the Don Yost method, I use the small Testors enamel bottles mixed 50/50 with lacquer thinner and spray anywhere from 30-40psi through a Paasche model H and Harbor Freight compressor until the body is covered. I do have some spots that seem to have some orange peel and even some dust. Other spots look good, for me at least haha. I plan on clear coating the car with Rustoleum automotive enamel clear. My question is, is it ok to sand out the imperfections starting with 4,000 or 6,000 grit working up until 12,000? Or should I clear the vehicle as is and polish it after? Has anyone ever had this happen and resolve it? Thank you!
-
nice build!
-
That's correct!


.PNG.cfe687316a032b9d96fecca3ea51c417.PNG)