BDSchindler
-
Posts
387 -
Joined
-
Last visited
Content Type
Profiles
Forums
Events
Gallery
Everything posted by BDSchindler
-
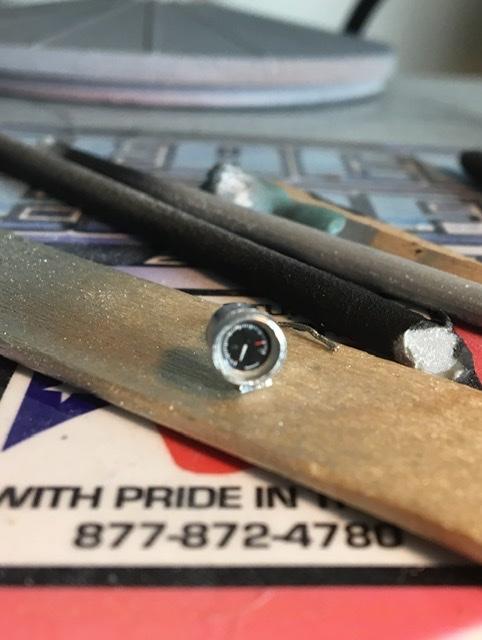
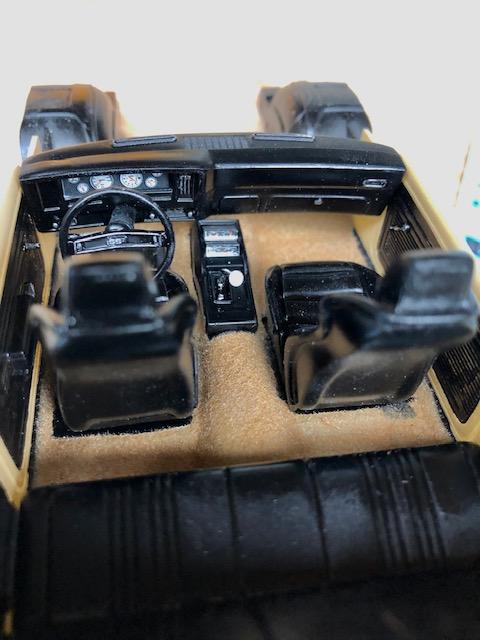
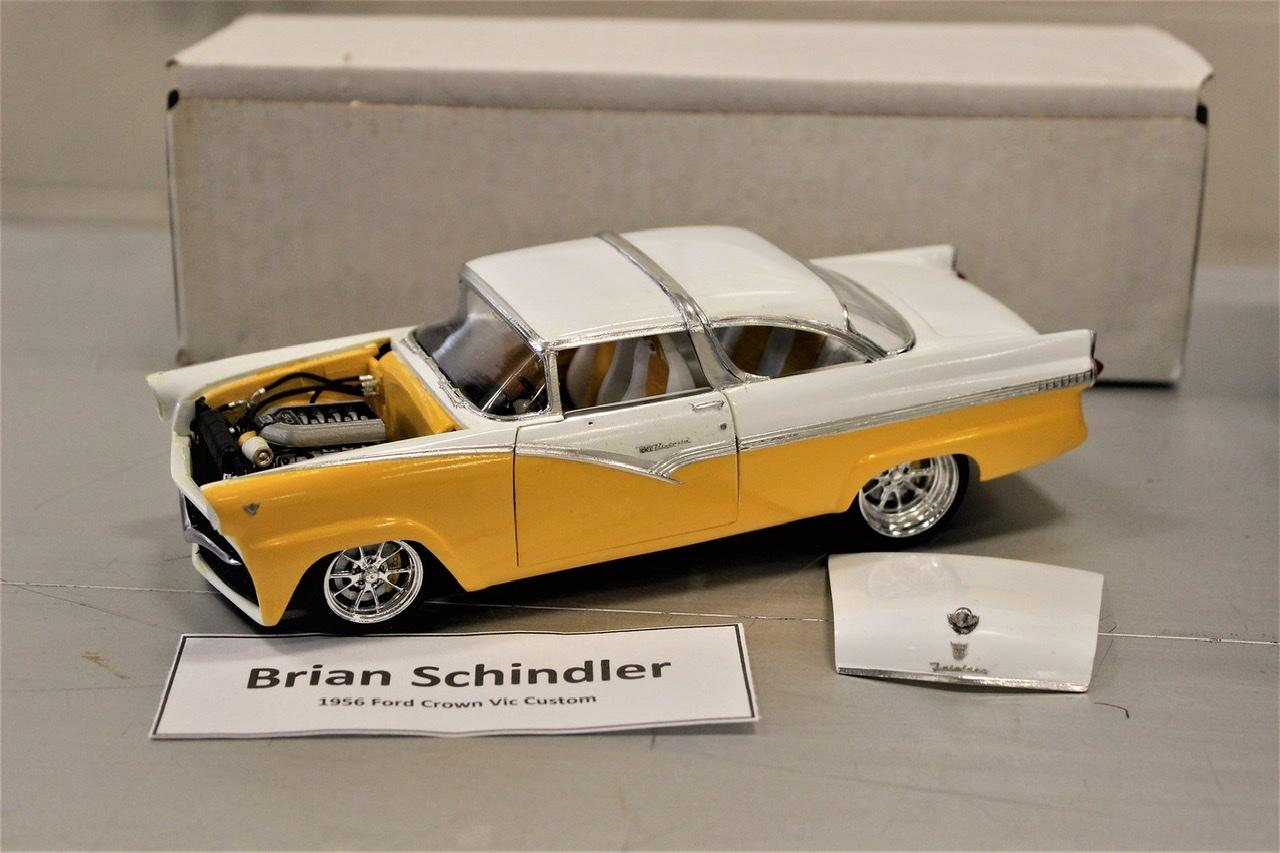
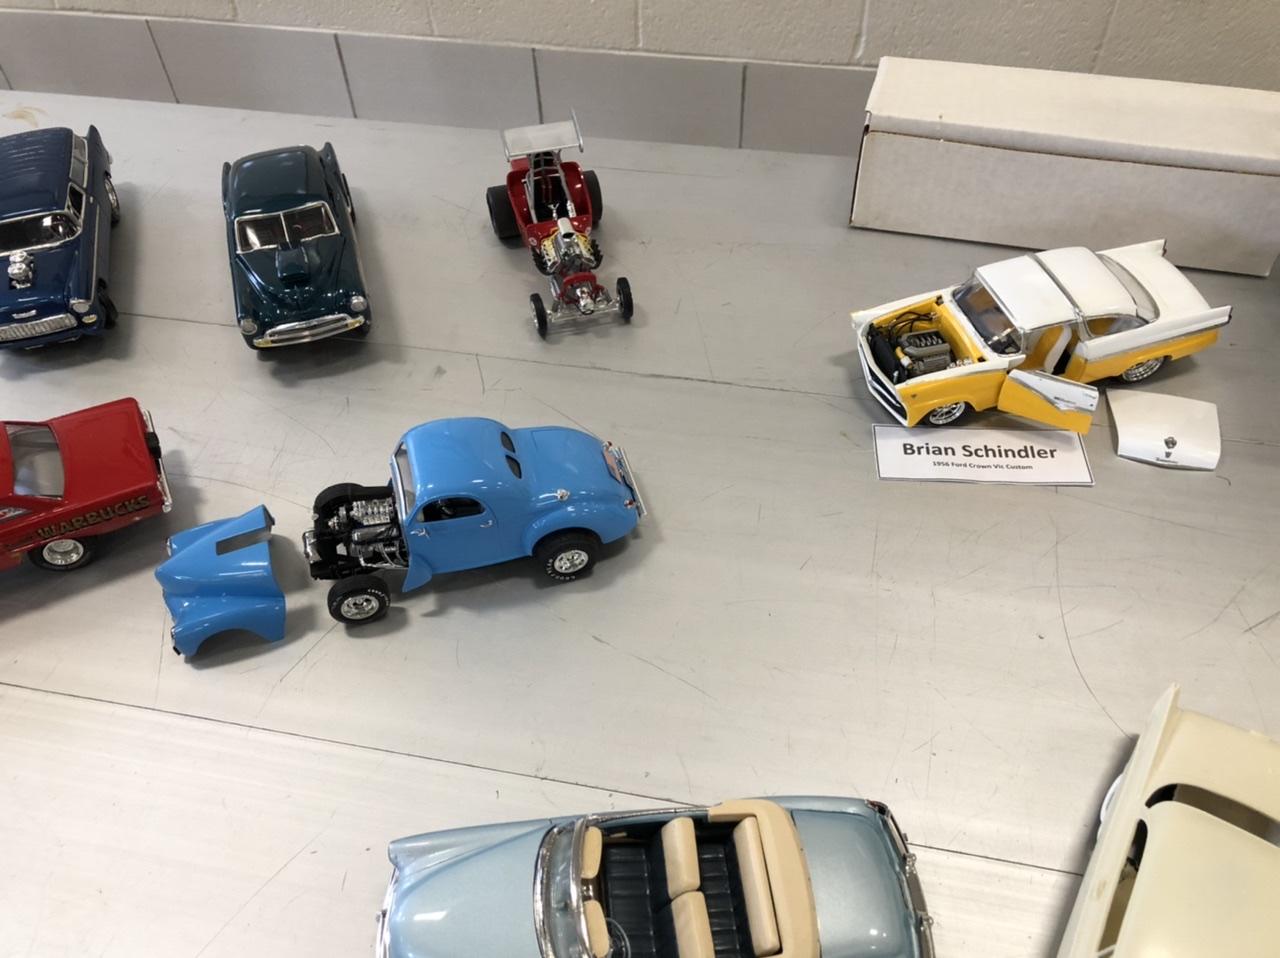
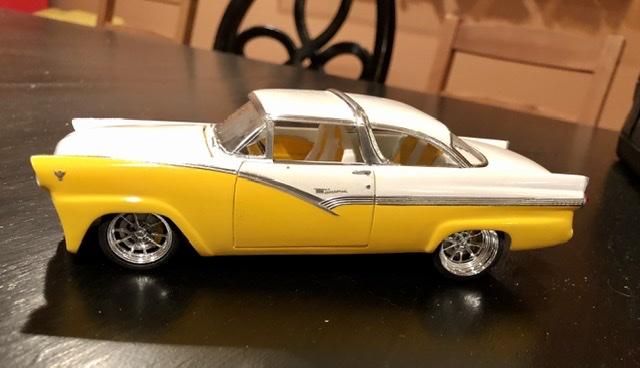
Here’s a couple of things I incorporated into the Crown Vic I built earlier this year tach fuel tank cobbled up the inner door panels of the Crown Vic and inserted the armrest from a 2014 Mustang Inner door panel. Scratch built? More like morphed together... completely scratch built custom console...

-
Thanks all for your feedback, greatly appreciated!
-
A little dab will do ya! Dab of black wash that is...
-
You're correct, Rex...most of the diecast companies DO believe the difference won't be noticed...or they just don't care. Most of them believe in the "Close is good enough" theory. GMP comes immediately to mind as they were always the biggest offenders of the "Close is good enough" concept. I wrote for a couple of different hobby magazines focusing on diecast reviews in a variety of scales. With much of the diecast manufacturing community like Maisto, where the price point is less than $30, you expect inconsistencies. Drive that price point up and collectors expectation go up as well. This is what killed Franklin Mint. When the attention to detail stopped being what it once was under the old guard, collectors complained. Even when I wrote about it in my articles, they did nothing to improve themselves. Even the then Director of the FM Diecast division called me to ask what could be done to save it and turn collectors around, I told him. I mean a '63 Corvette Stingray with a ride height of a 4X4 for $160? Really? So many of the GMP products were done with the idea of subsequent releases (variations on the existing or original tooling) was done in the Close is good enough design concept. In many cases, current iterations of a tool were done in a way to create subsequent releases as easily as possible. When I reviewed GMP's 1/24th scale white Mustang Shelby, the operations Manager for GMP, Mark Sanderson, called me with every sob story possible and finally blamed it all on the factory in china. The only company that understood from the very start was Danbury Mint. Excellent diecast but even at that, had issues from time to time. What killed DM was not the devotion by collectors or inconsistencies in accuracy...it was the manufacturing process where the factories in China drove the price through the roof. In the end, if you buy it, the company has your money and most people will not send it back. Modelers will fix issues for themselves and collectors (as in the case of diecast) will put it on their shelves without complaint. This is how the "Close is good enough" concept works.
-
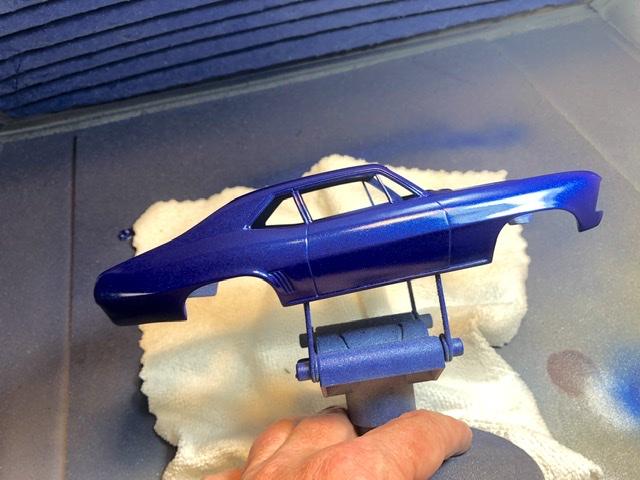
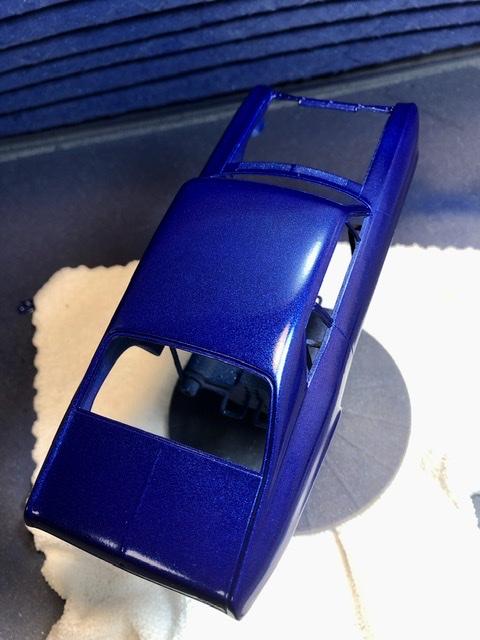
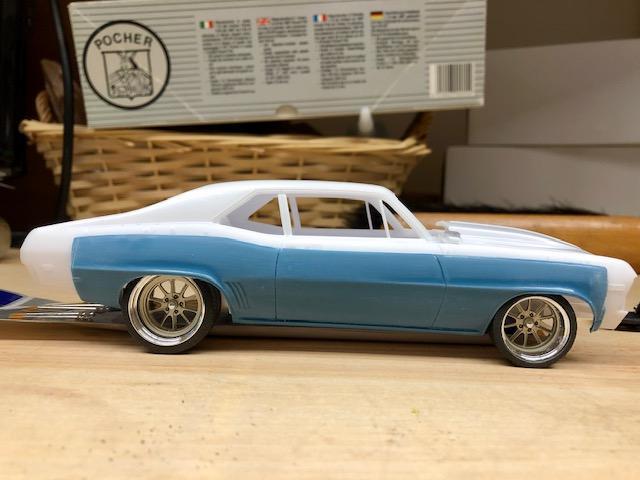
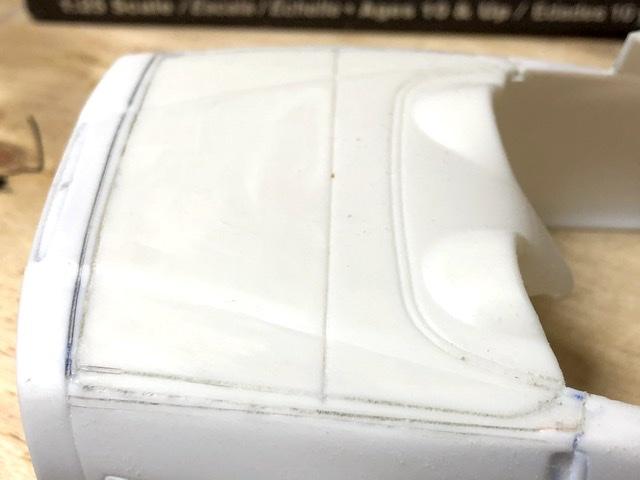
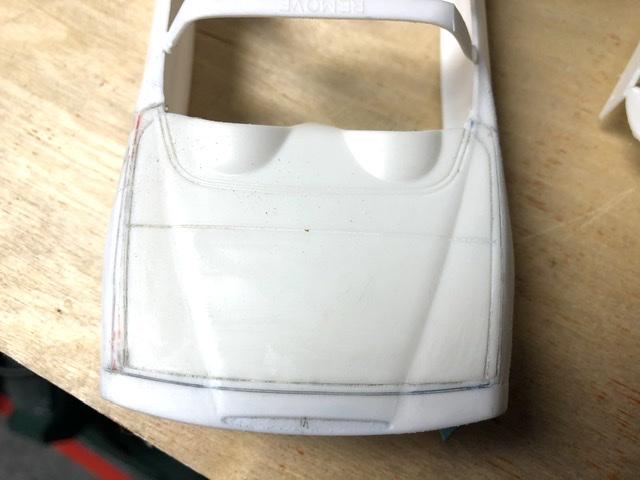
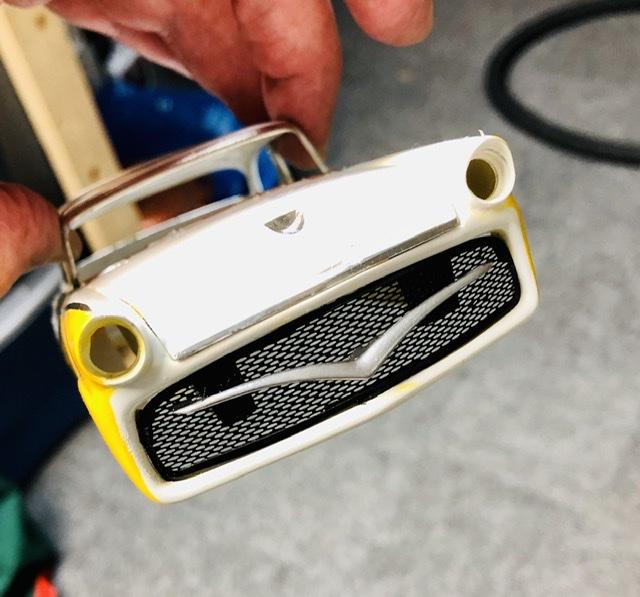
Well, it’s been a minute or 2 since any updates were made. I looked at the grill and wondered if I could open it. 5 hours later (after a ton light sanding) here we are... back side...this was seriously thick plastic. The resulting grill work is paper thin. Not perfect, but after a black wash, I think it’ll be fine. Next up, paint. 3 coats of rattle can Tester’s Extreme Lacquer deep blue (I forget the name of the color). H Set it up in my Dr. Dry Booth for a couple of rounds of drying, then a little wet sanding and clear it. I’m thinking of doing the trim work in black BMF as opposed to chrome. Thats it, so far.
-
I tried going to Dirtmodeler's site again and it seems the site has been removed. No posts have been made on Facebook in a long while. Does anyone have any additional info?
-
Lovin this build! Beautiful work! I'm gonna steal a couple of your tricks like the mini magnets. I ordered some off eBay (100 for less than $8) and promptly dropped one of them on the carpet ? . The good news is that I grabbed my steel Carpenter’s square and swept it over the area I dropped it on and found it fast! These are fairly strong! Now that’s a mini-magnet!
-
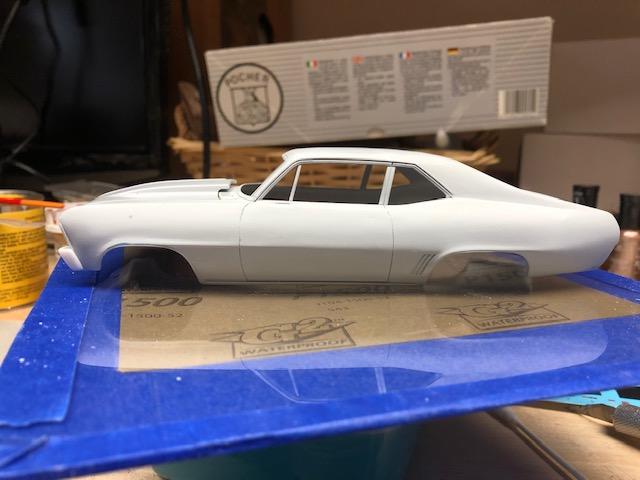
So I had a few issues with uneven body lines and paint blisters after laying down a base coat. So I grabbed the dremel and dug the seam where I had issues and layed down some USC Icing (I love this body filler!) and finally some primer. So, here’s the result...
-
where is that rim shot video when you need it?
-
Ken...I always prime...everything! Thanks for the comments, guys. BTW...mine won't have the rear spoiler on it. I think it detracts from the subtle coolness of the body lines.
-
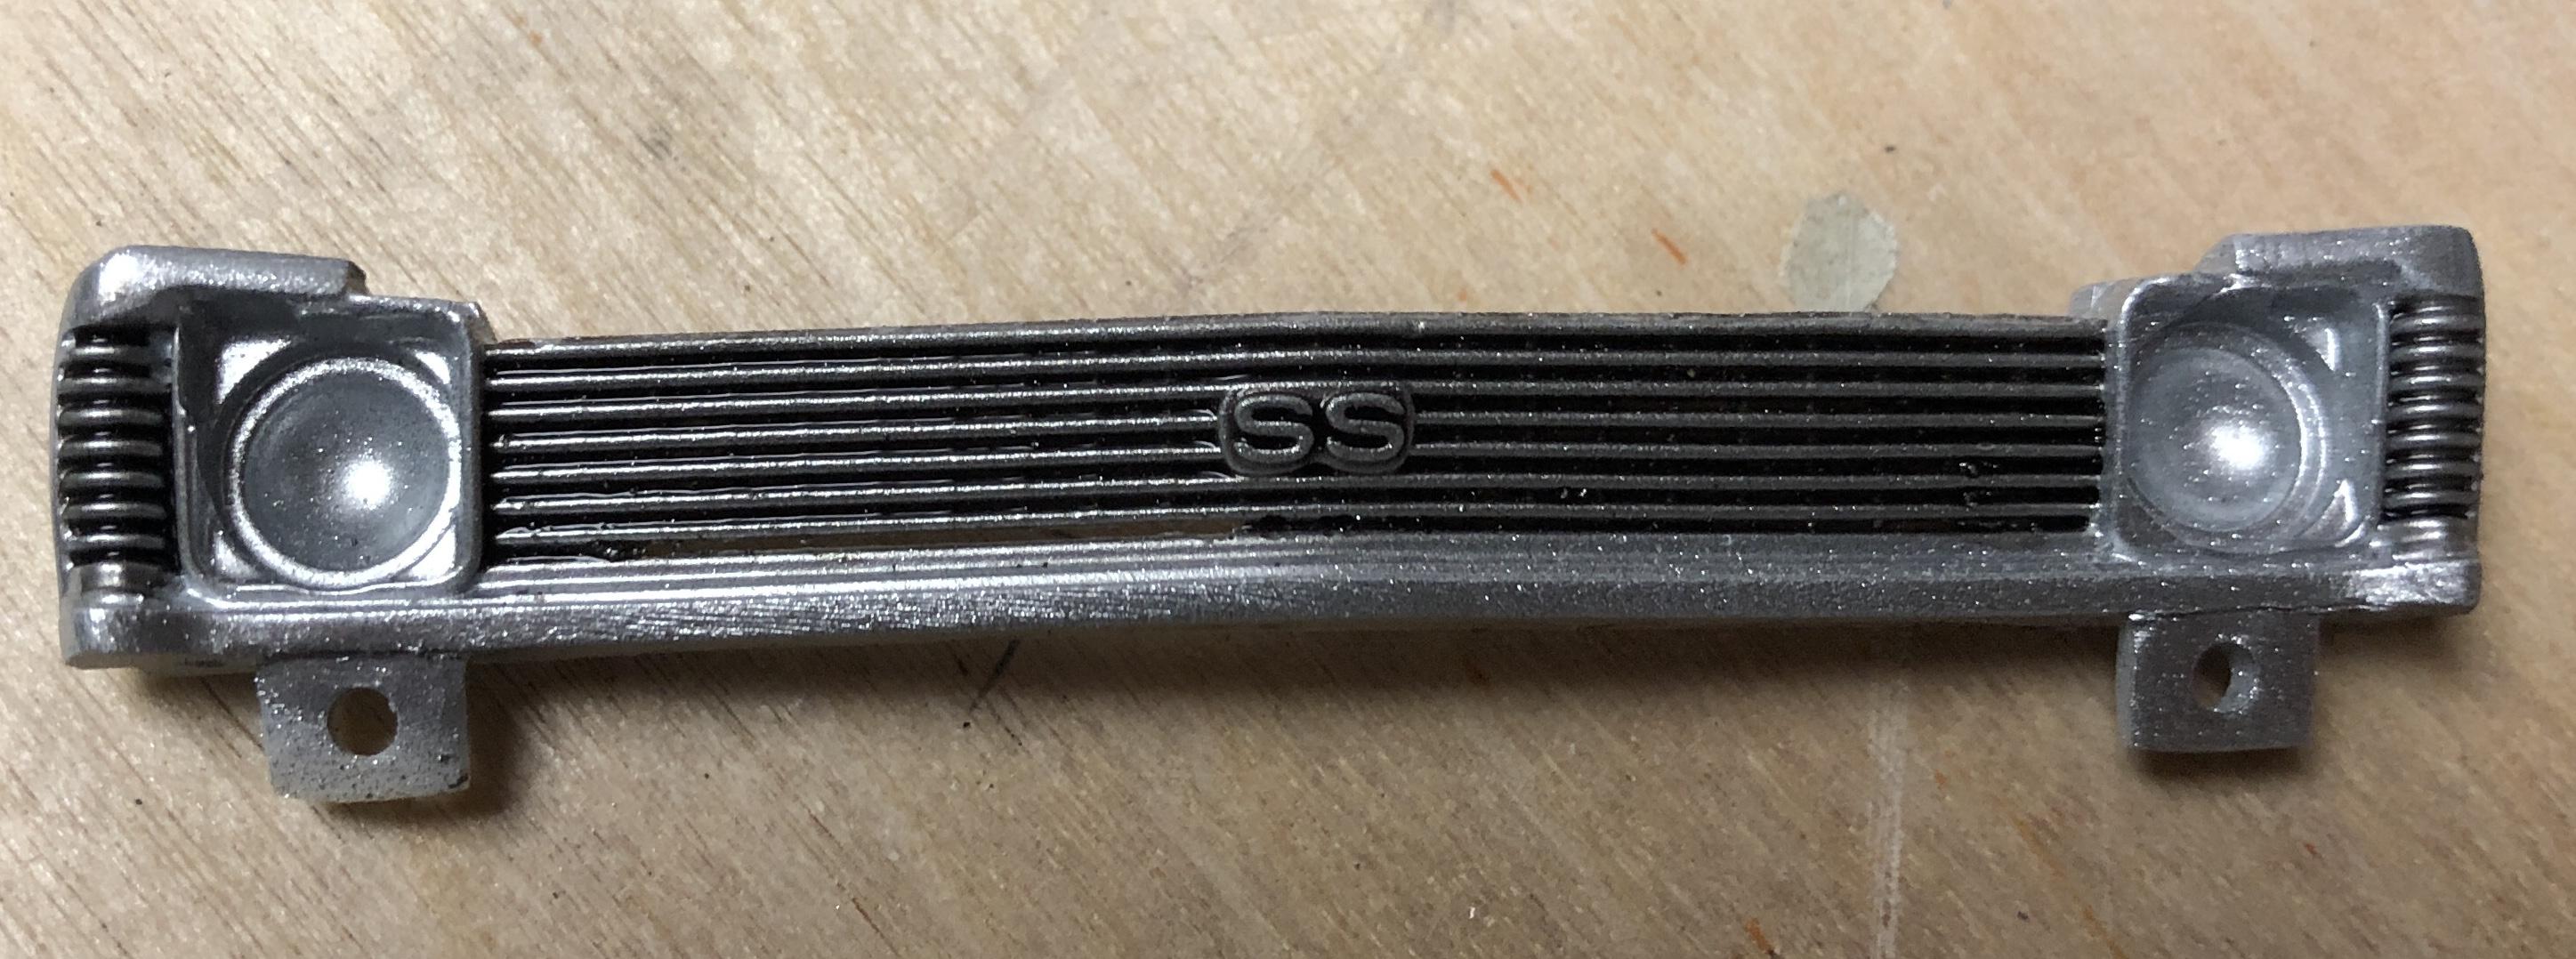
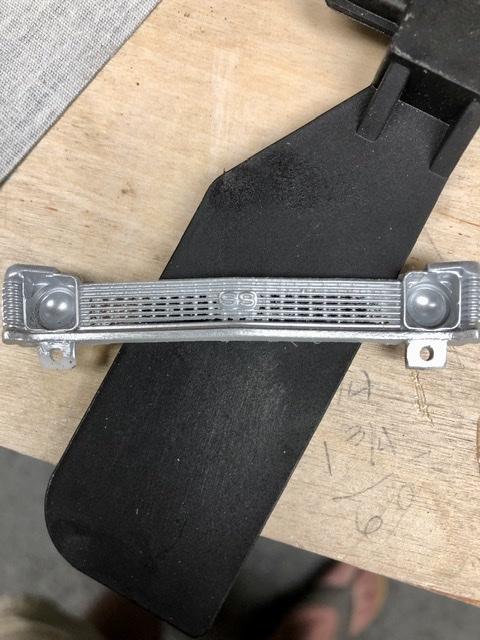
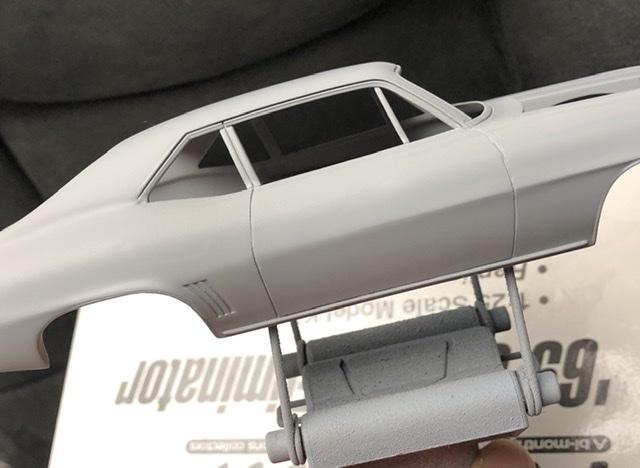
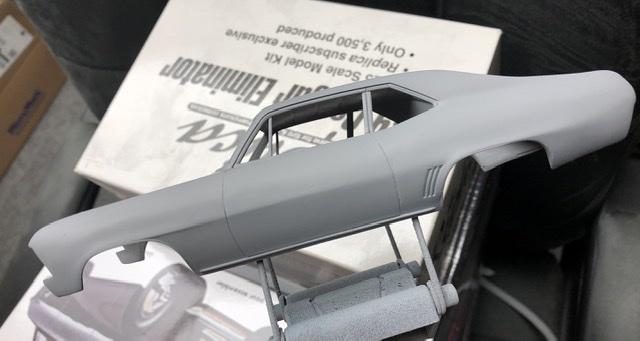
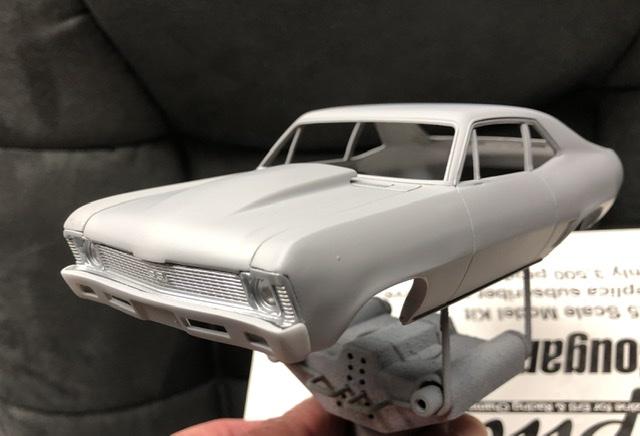
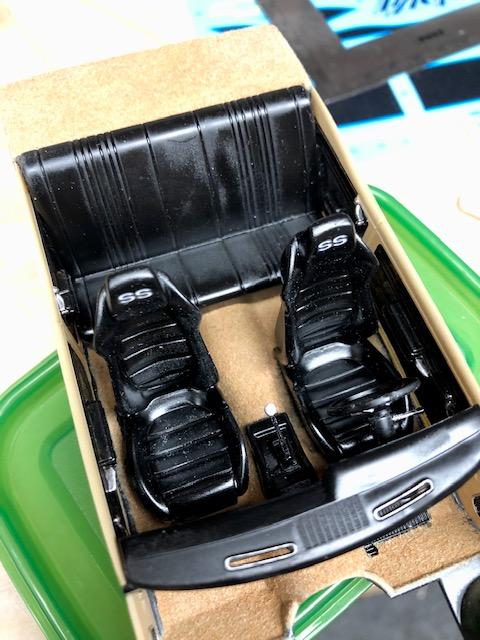
I was watching Motor Trend and one show had Steve Strope's crew at Pure Vision building a Nova with a twist for Joe Rogan. They had put Camaro side panels on Rogan's Nova and I thought it was a cool idea... I had Revell's 69 Nova and a 69 Camaro I bought for parts at a MAMA's club meeting and set to work. Note, I'm not replicating Rogan's car, just inspired by it. I removed the Camaro side panels and grafted them directly to the Nova pitching them just a tad lower. This will give the illusion of the car being lowered without having to adjust the suspension (Shown below with "ZWHEELZ")... Then came the tedious job of attaching plastic stock, shaping, filling, sanding, priming, fixing the rough spots, priming, more sanding, priming and...you get the picture! After the final primer, fixing what amounts to a pinhole in the front 1/4 panel and a bit of light wet sanding, well it looks pretty good to me... I left the Camaro gills in the rear 1/4's to give a subtle hint to what I did to the body as the average person will look at this and go "why does this look different?". The gills will be a huge clue. Since the fenders are a bit flared out now where the bumpers meet the body, I had to adjust the bumpers a bit to fit. I really disliked the overall shape and bulkiness of the bumpers so I made quick work of shaping and smoothing them to bring them in tighter to the body and remove the sharp curves. The grill also had to be smoothed ad tapered just a tad at outter edges. The bumpers and grill trim will also be color matched to the body so I was not concerned about the chrome. Once done and an overnight stay in Windex to remove the chrome, the bumpers fit right and tight and look sharp. The grill and hood trim also went into the Windex bath. I also took care of the interior somewhere in there...Ferrari seats with "SS" badging (who da thunk it) and a flocked floor. I was out of semi-gloss paint (both brush and spray) and being impatient since local hobby shops are all pandemically closed, used Krylon black semi-gloss warmed up purchased at Home Depot (note to self, develop more patience)... I should have mail ordered the right paint but I went with it as it won't be seen too clearly anyway in the long run. So that's where I'm at for now. Still deciding on color and if I want to do the stock engine or swap it out...who knows what I may do next with it.
-
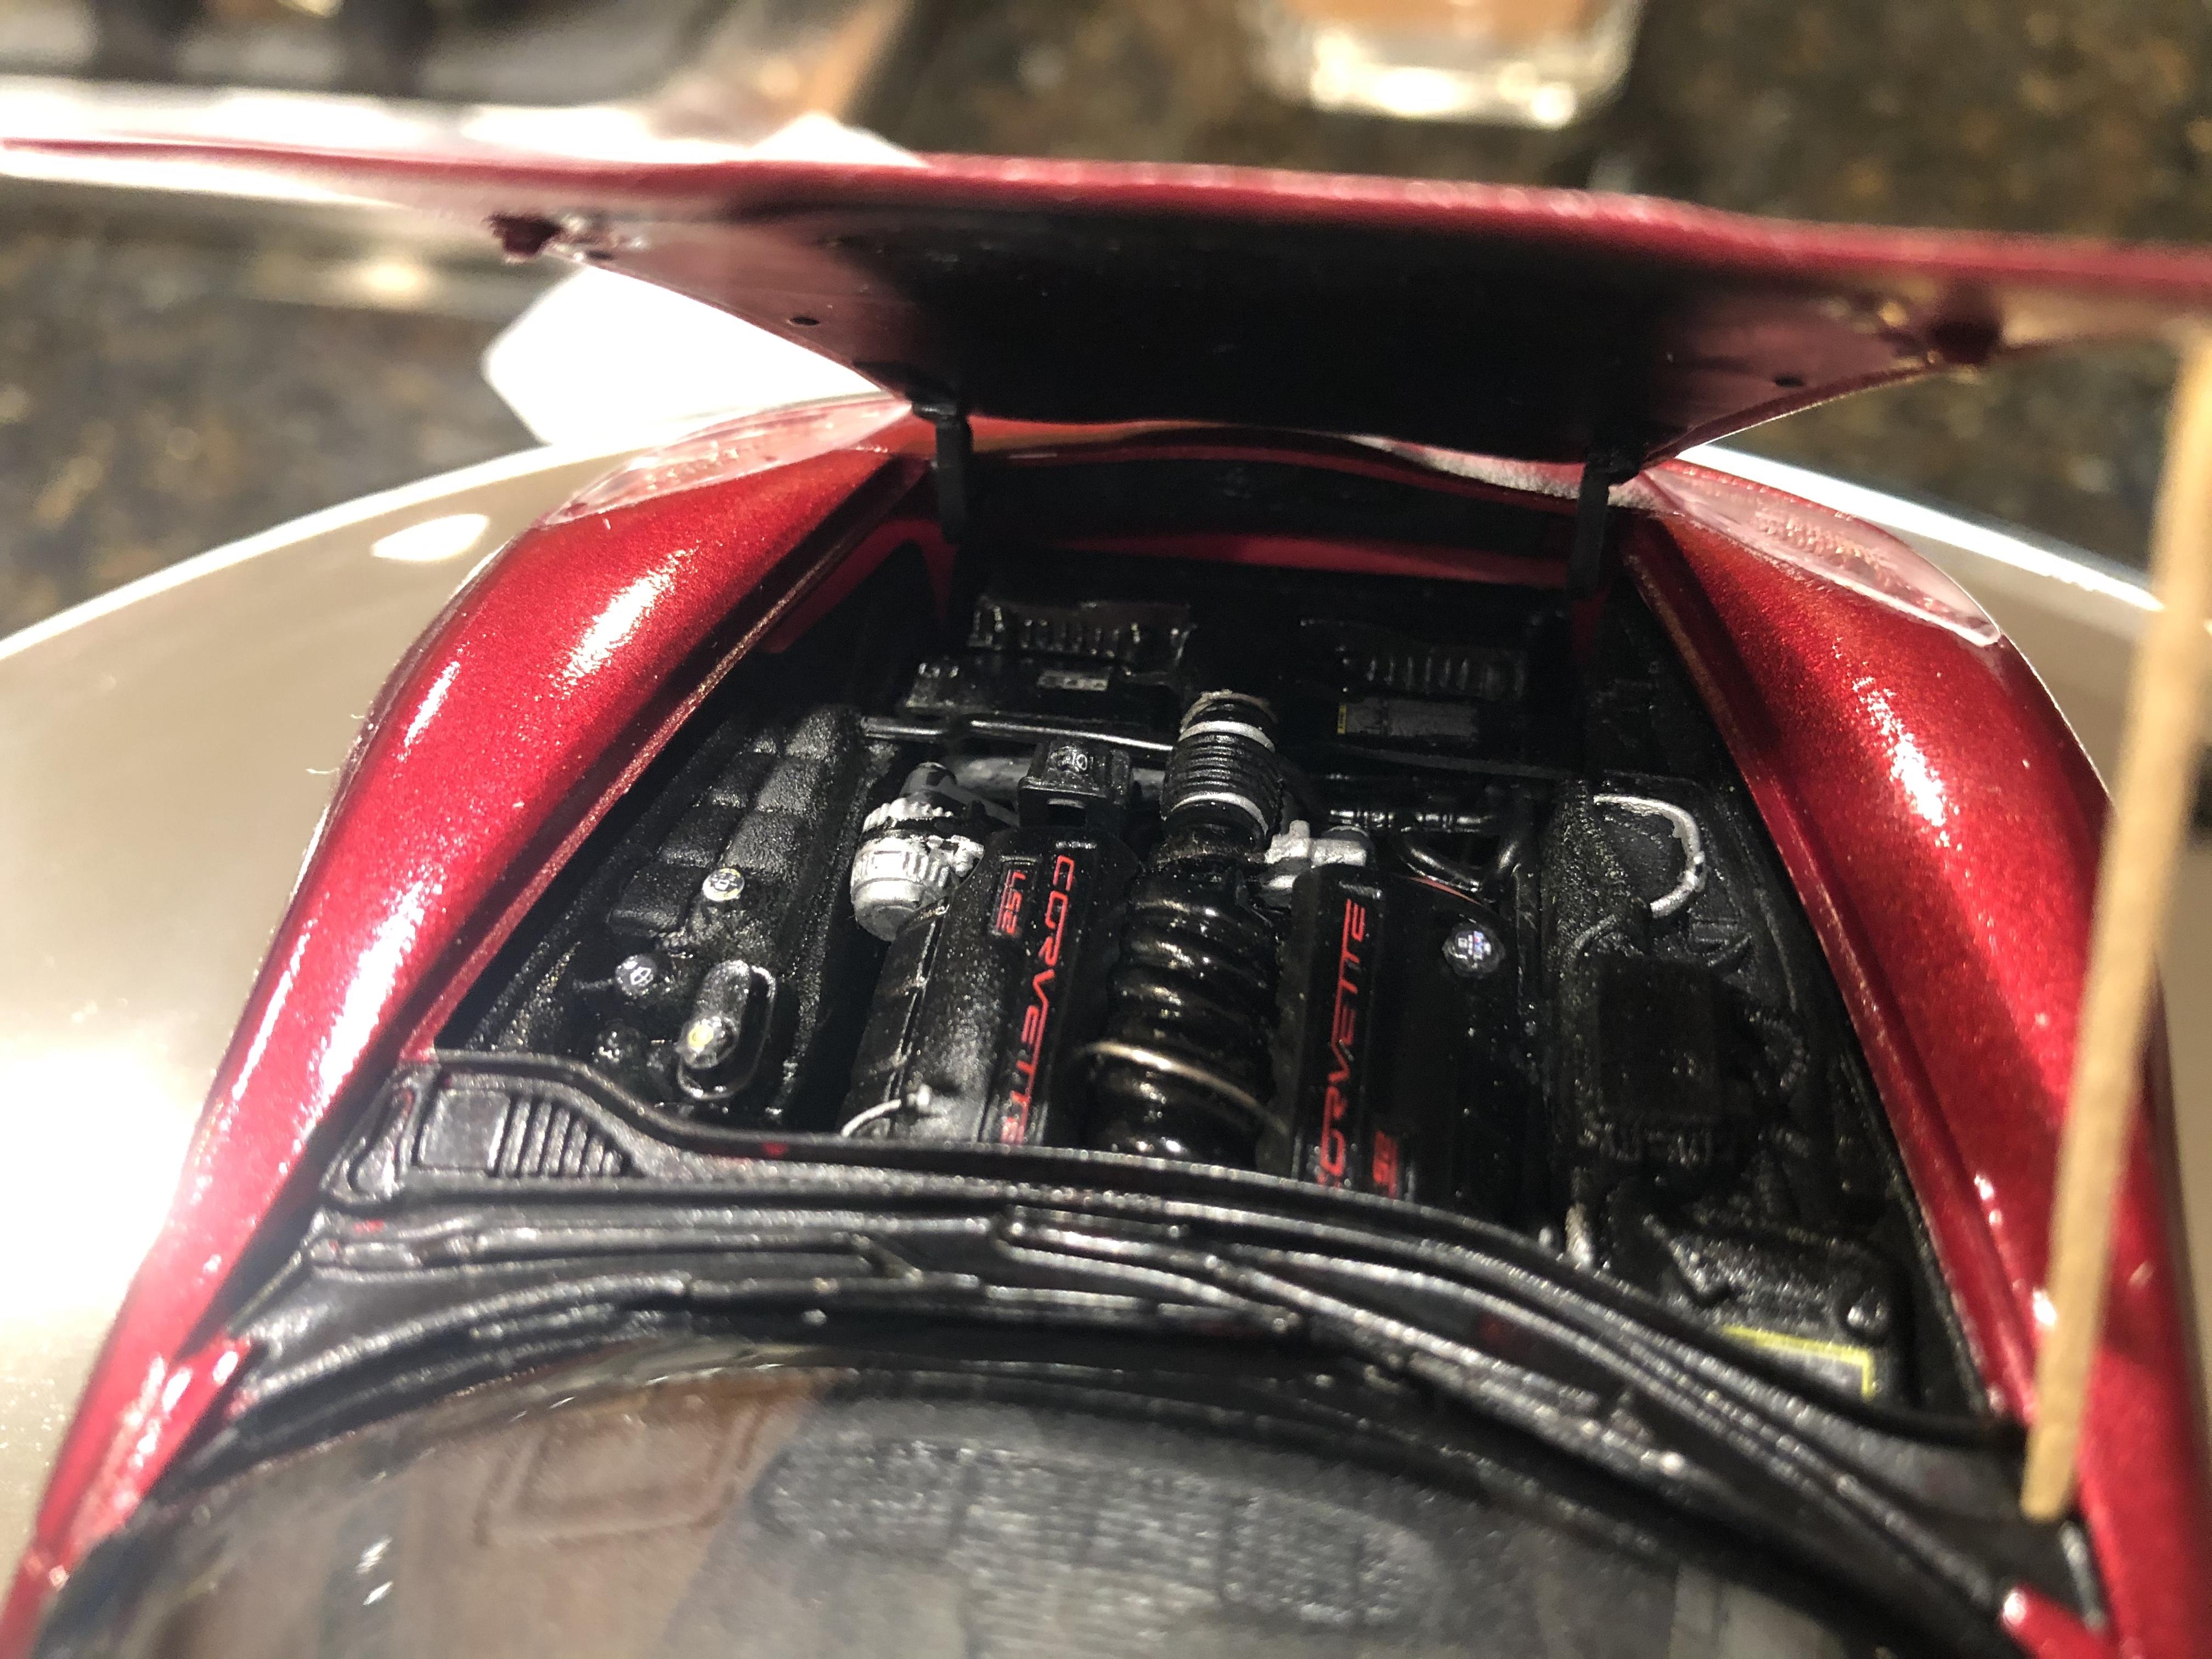
Mine came in today also from Mega Hobby. While I love the kit, I would have preferred it with an opening hood and fully detailed engine compartment. No regrets tho...I love it!
-
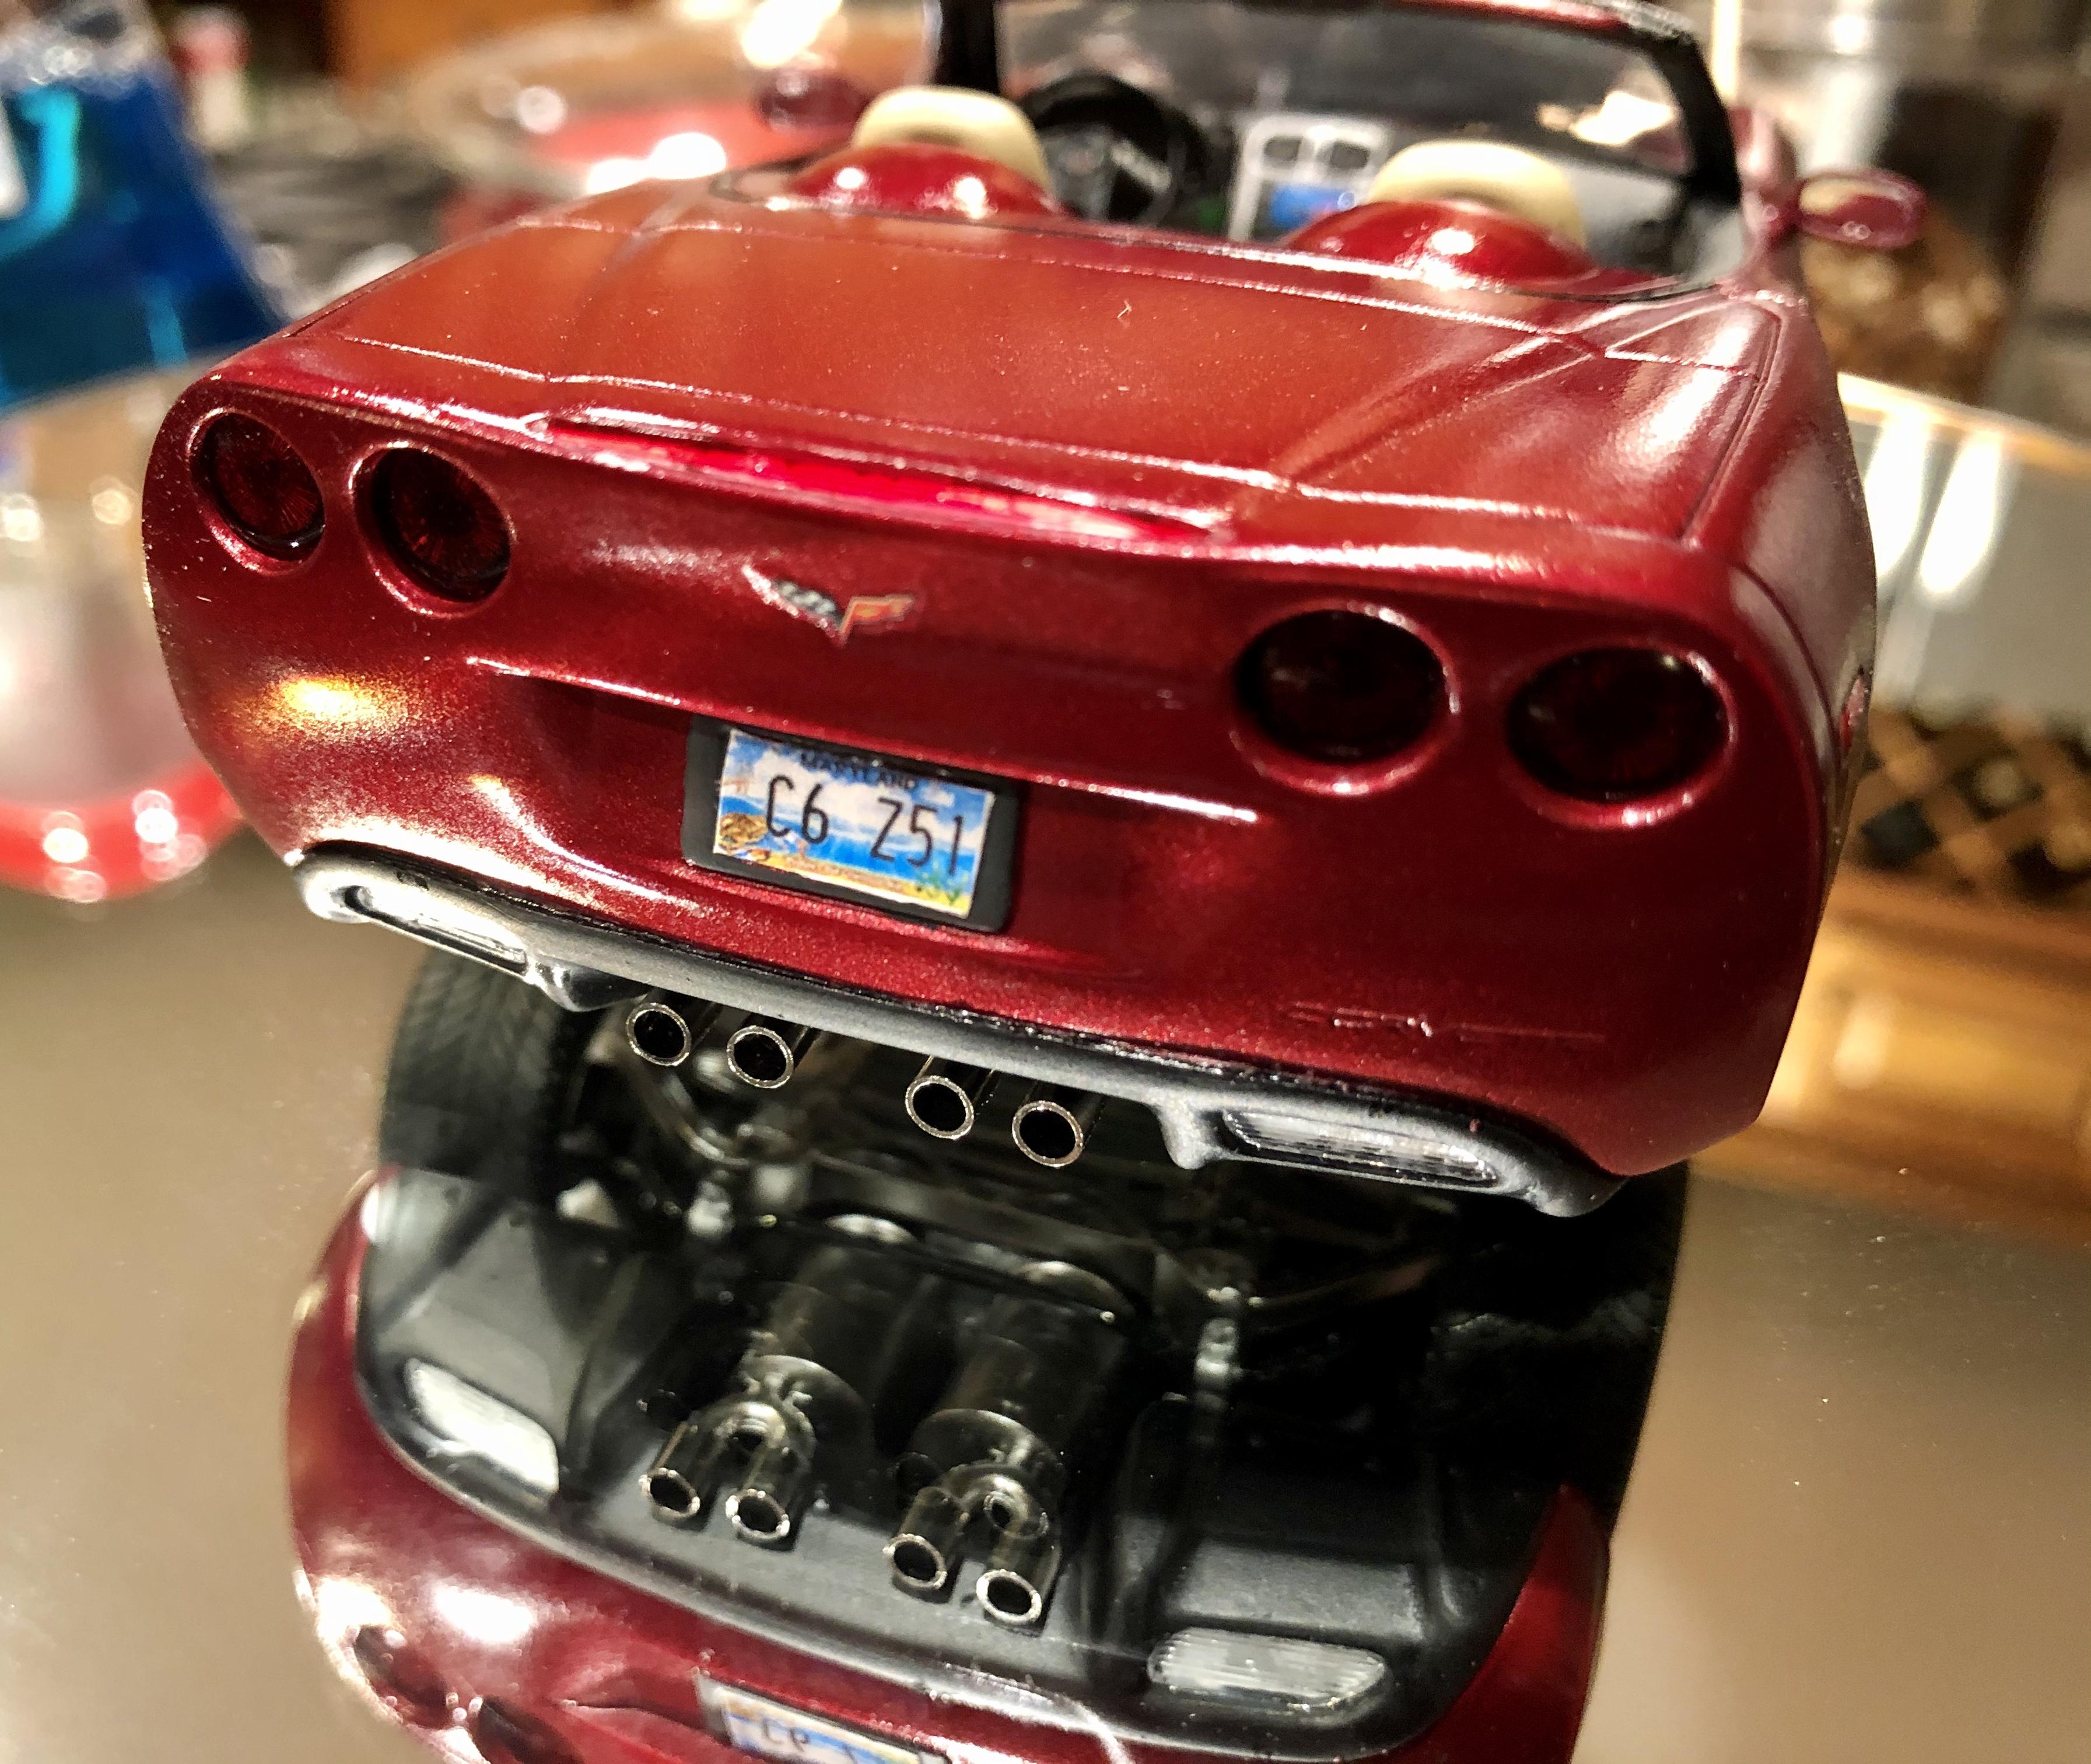
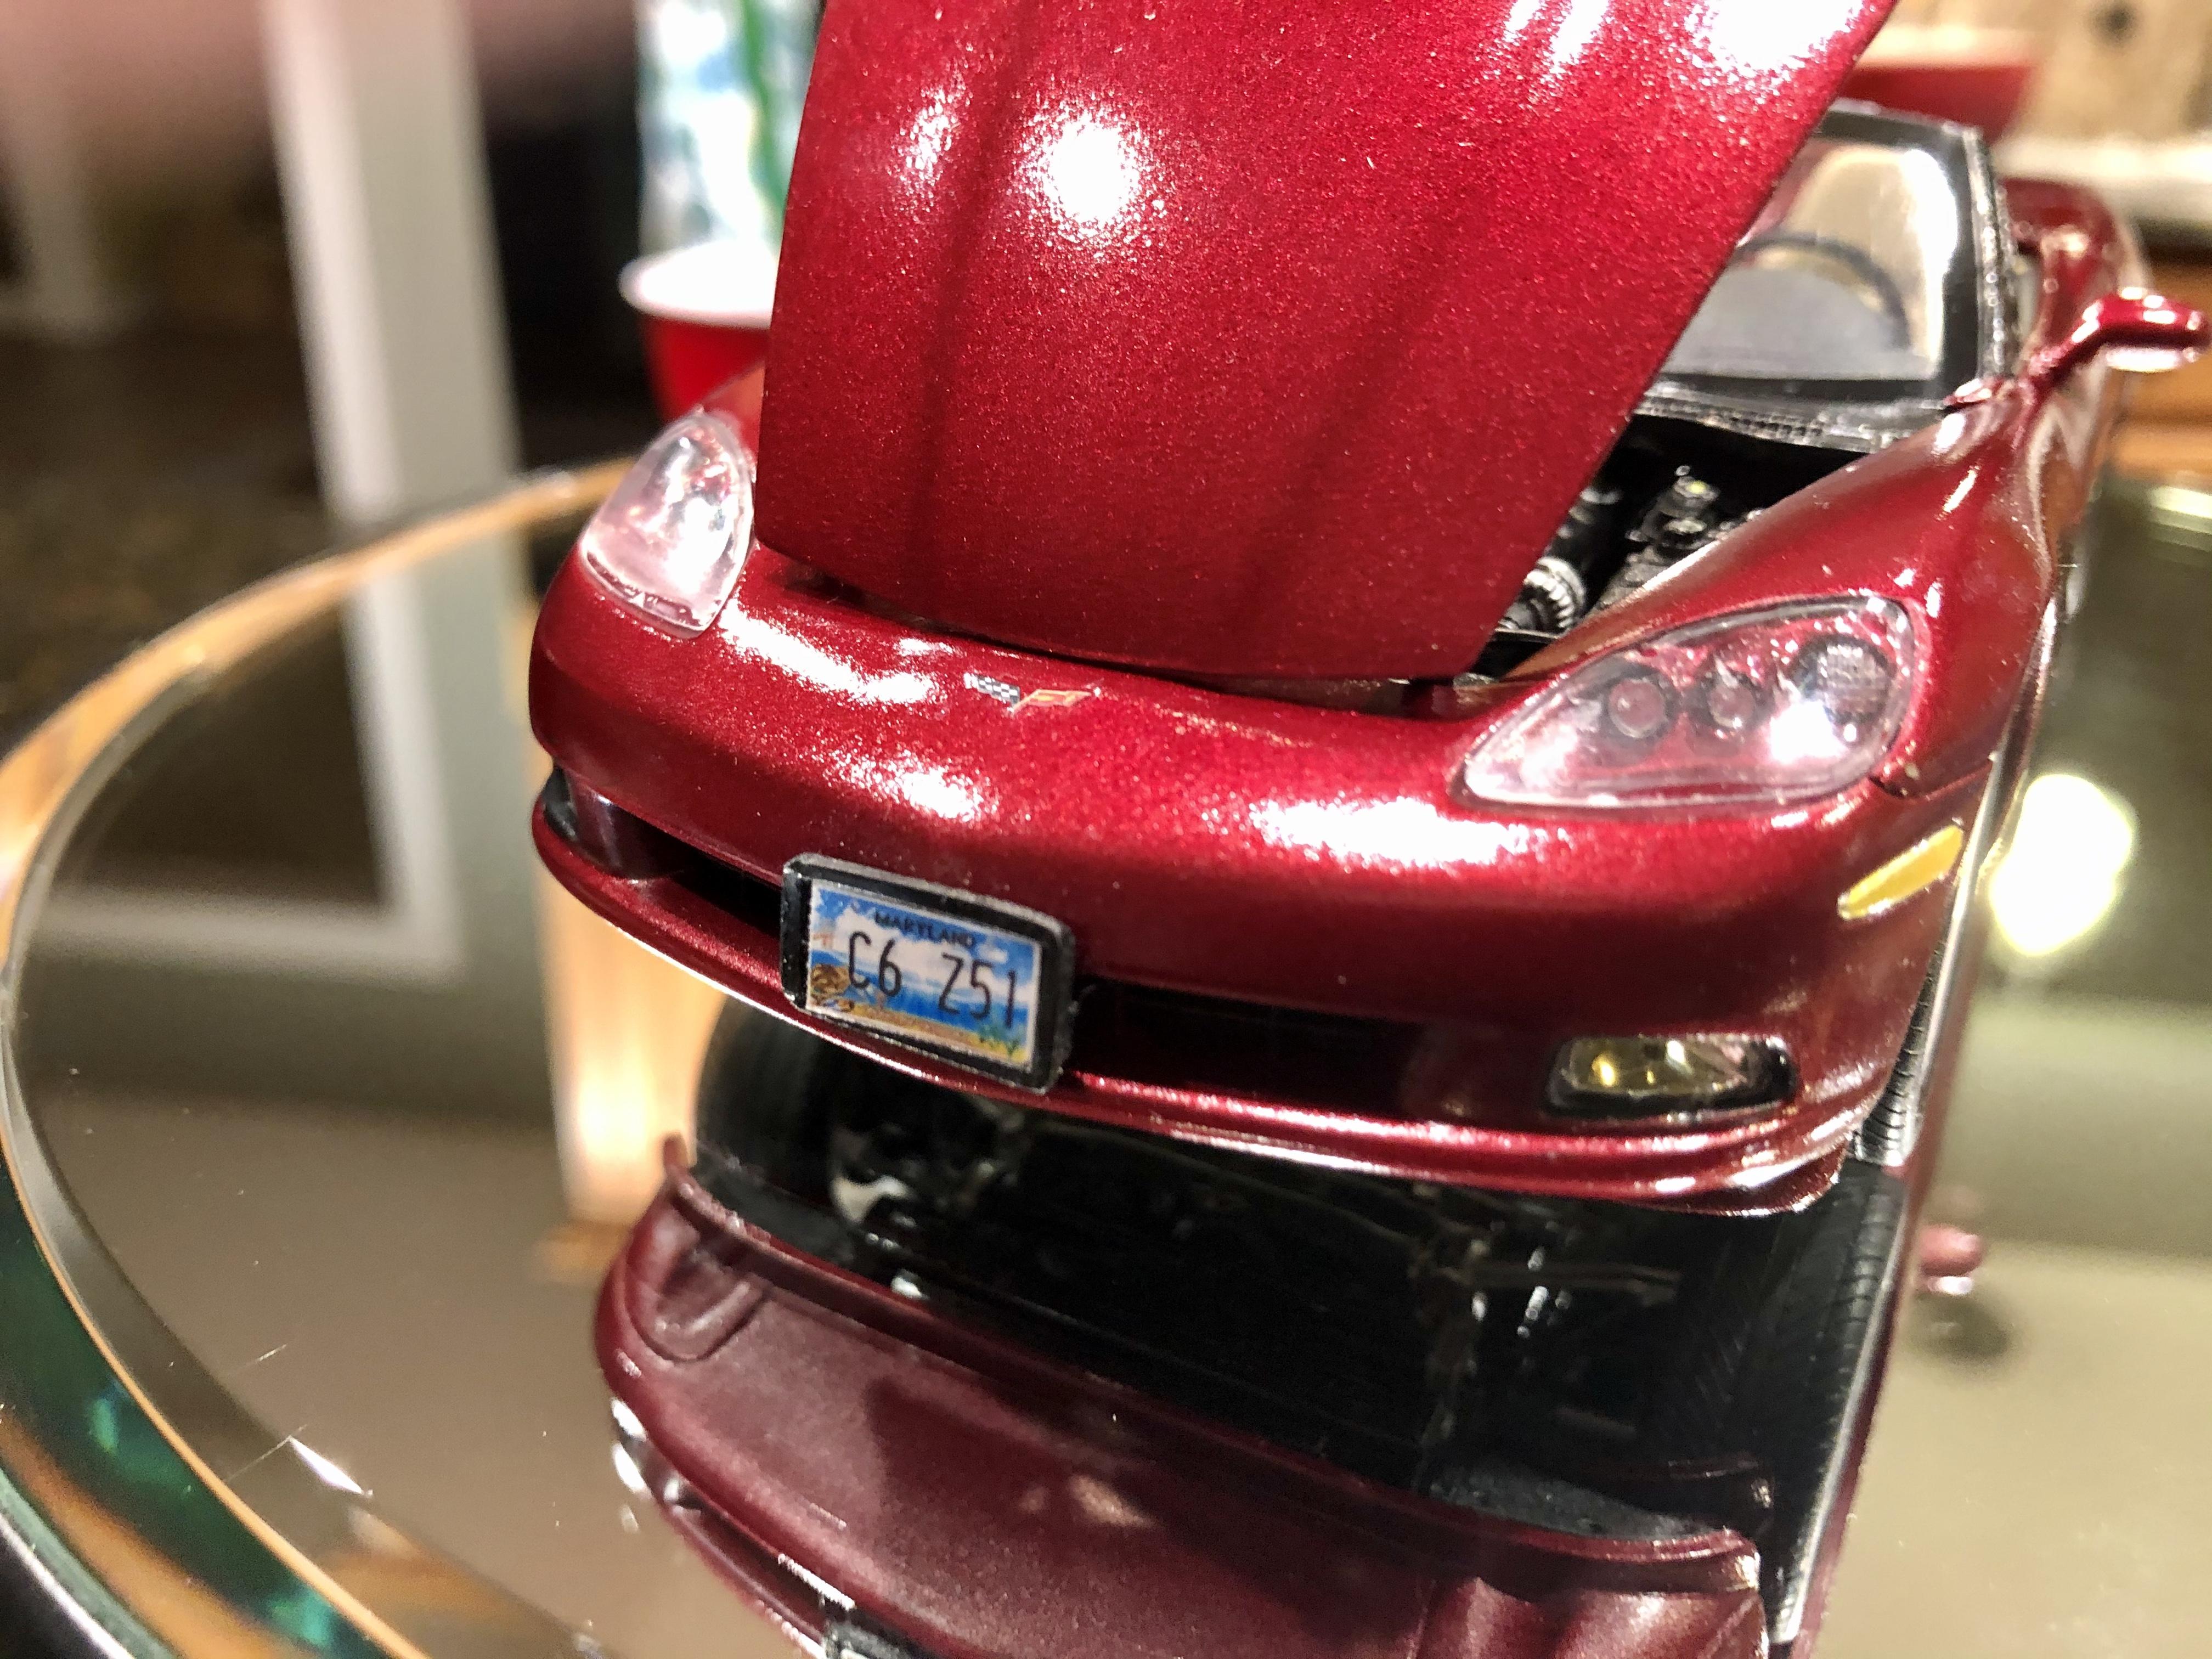
Well, this one is done, removed the greenhouse on the Revell 2005 and replaced it wit the deck and waterfall of A 2008 AMT. used my brother’s actual plates photo reduced a la George Bojaciuk. Aside from the rear deck, not a whole lot of tricks done. Drilled out each of the rotors, used Black BMF around window frame and trim on the rear deck behind the seats. Painted with Duplicolor red and also used their interior paint. The paint kinda orange peeled on me but was afraid to wet sand it too far so I just let it be. Now if we can get through this pandemic, he might even get to see it in person! IMG_2339.MOV
-
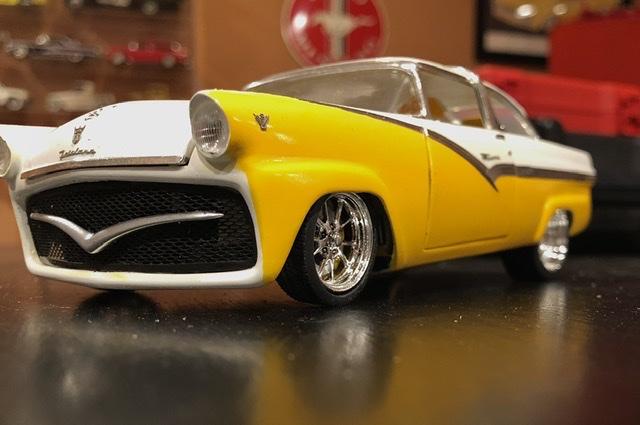
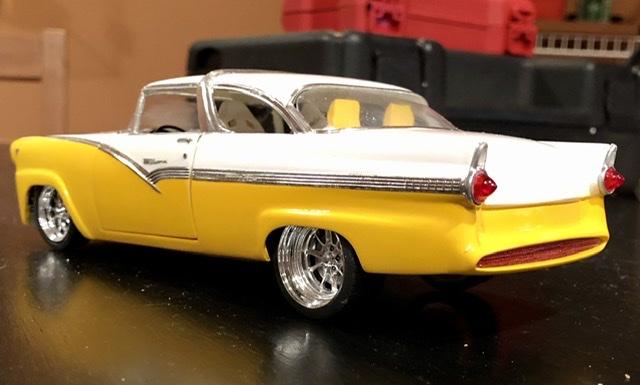
Finally finished! The kits hood ornament wasn’t working for me with its 2 pc. configuration that ended up looking like some weird gynocological instrument. So I stuck a piece of round plastic stock in the dremel and turned it to a bullet shape kinda like a 57 Chevy has. Coated it with malatow and glued it in place. It worked! Took it to the MAMA’s Club February meeting and to my surprise, it got the president choice (or whatever it was called) for pick of the month! LOL! I didn’t think it was that good especially with all of the veteran talent (like Lyle Willits at the bottom of the next picture) displaying other models! Very humbling! Thanks for all the feedback!
-
No and really does not need them. Actually, springier sand heads would probably get torn up. it requires a lighter touch than balls-to-wall sanding as it will melt plastic if held in one spot too long. I didn’t believe George at first about how well it works but as long as I’ve known George, he’s never let me down. It does a great job, honest!
-
I was interested in an opening hood that was not on the snap kit and could not find a Revell snap kit
-
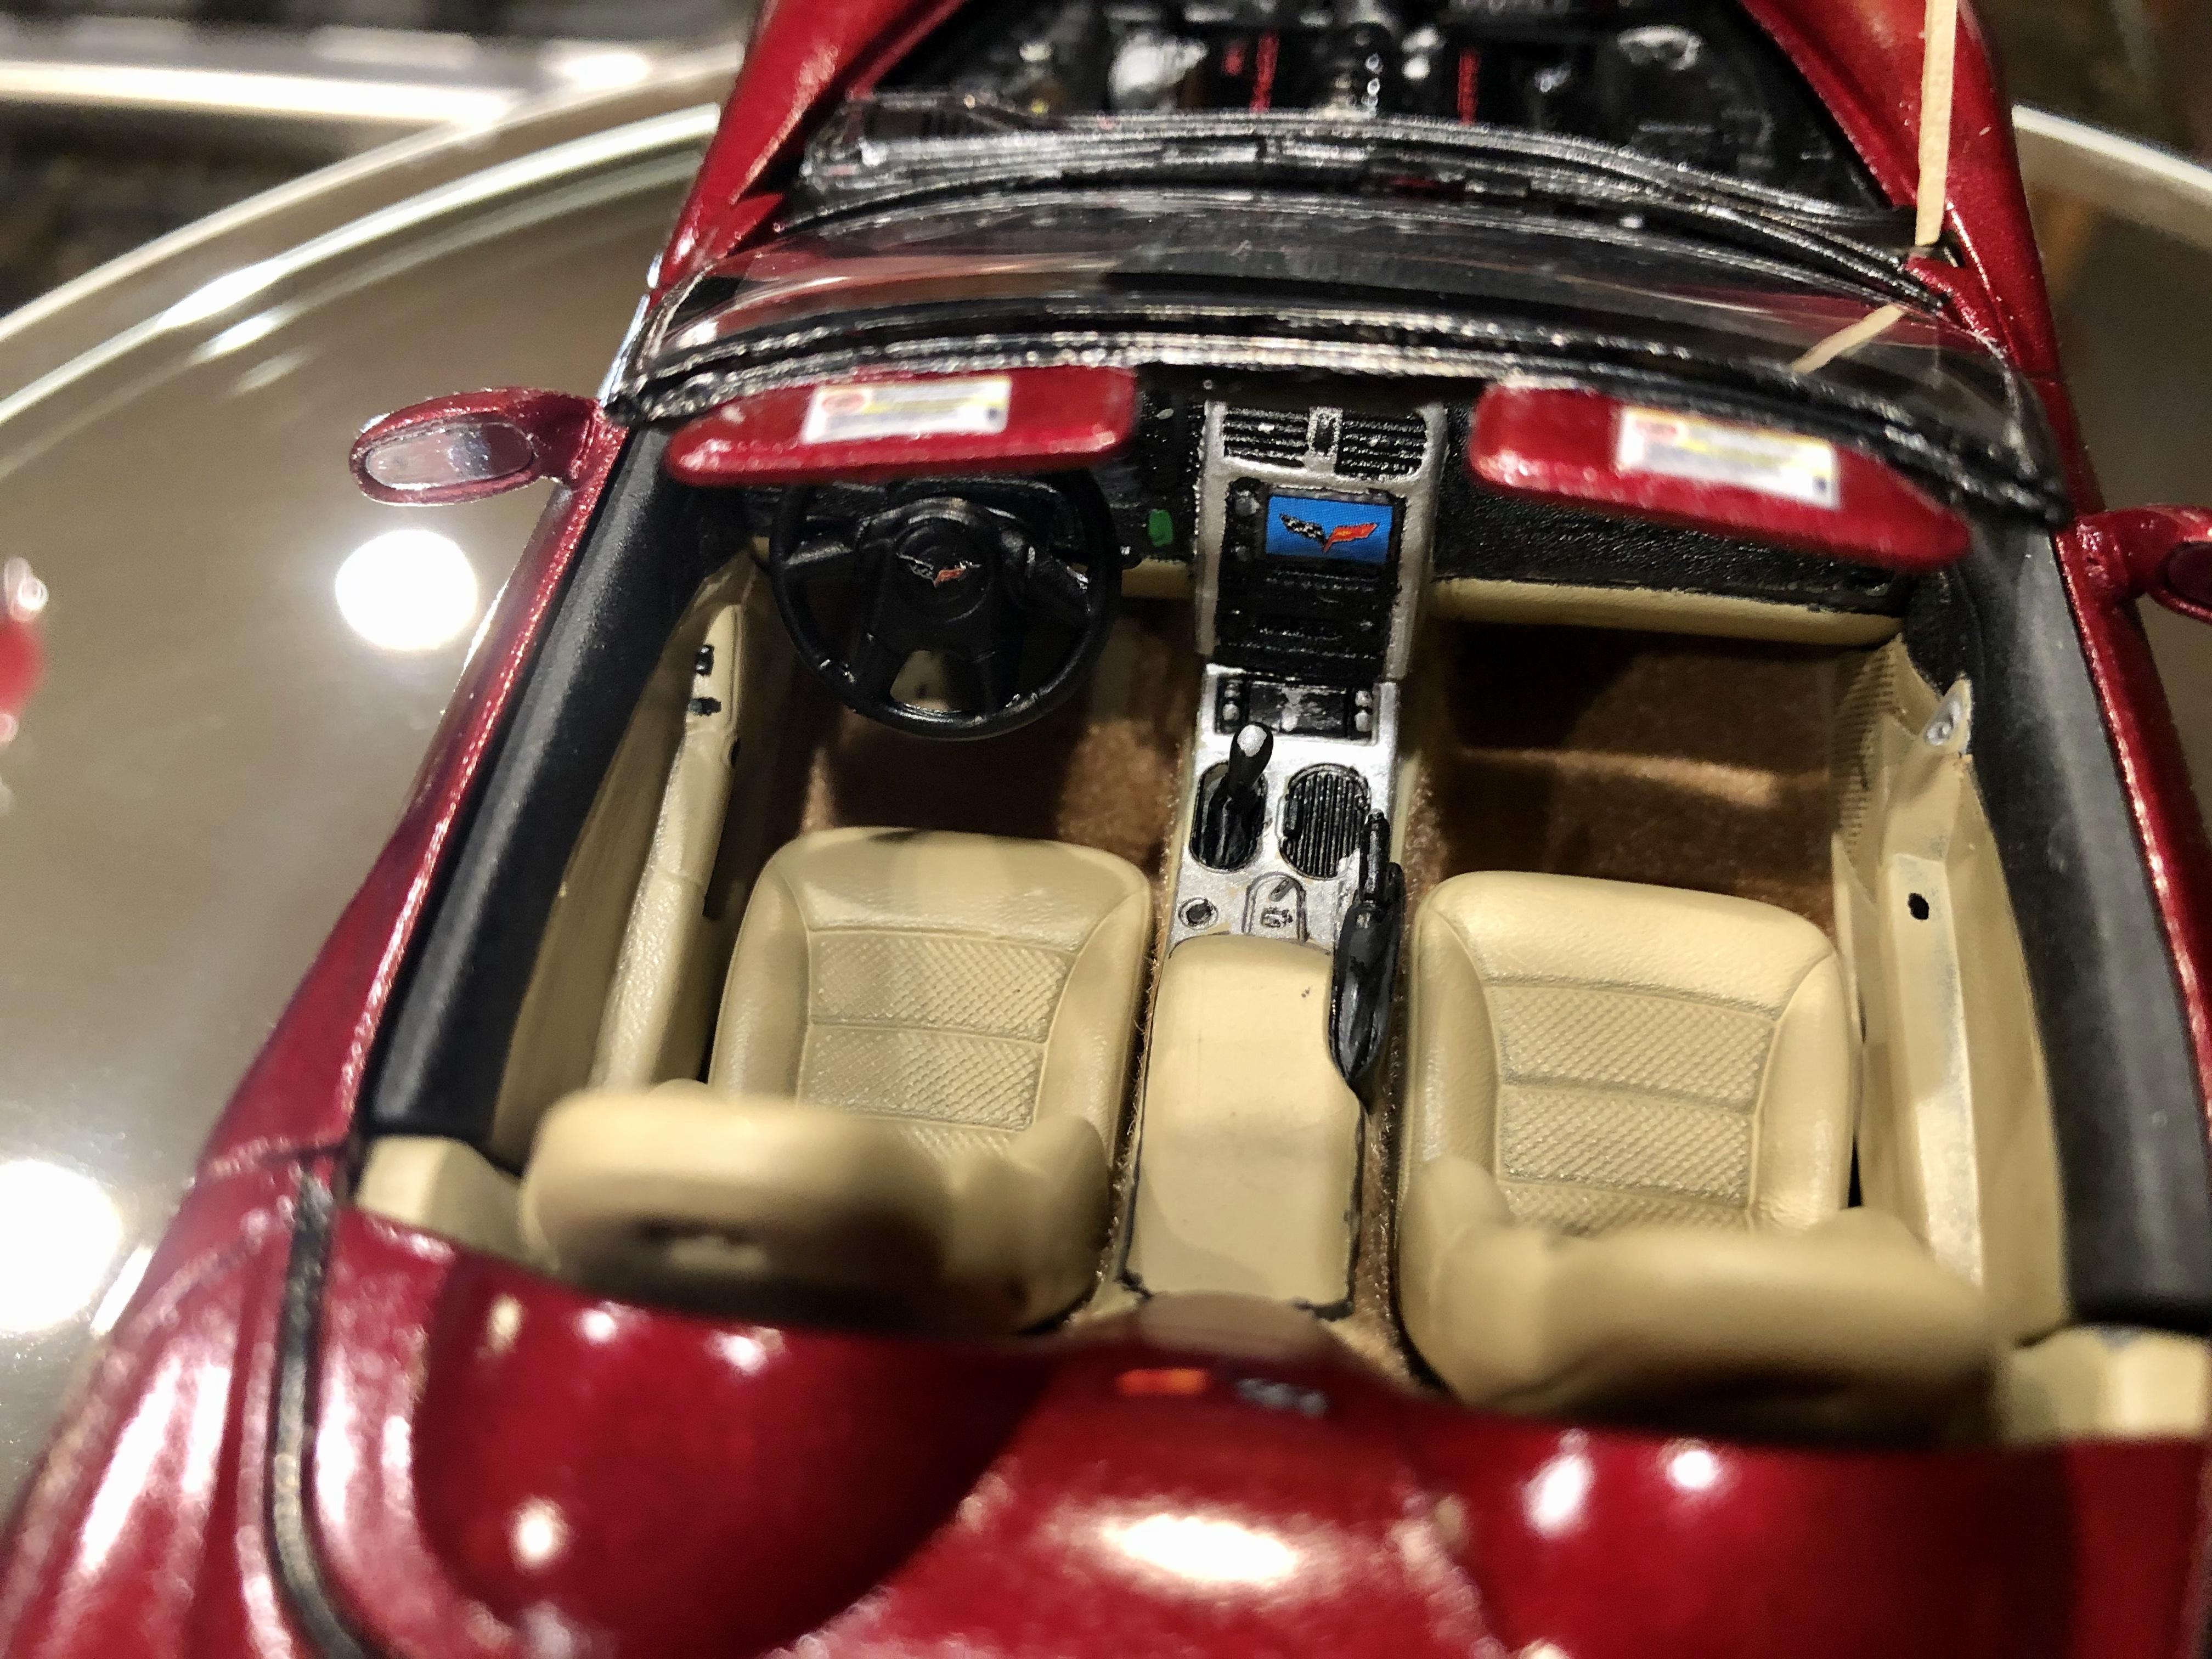
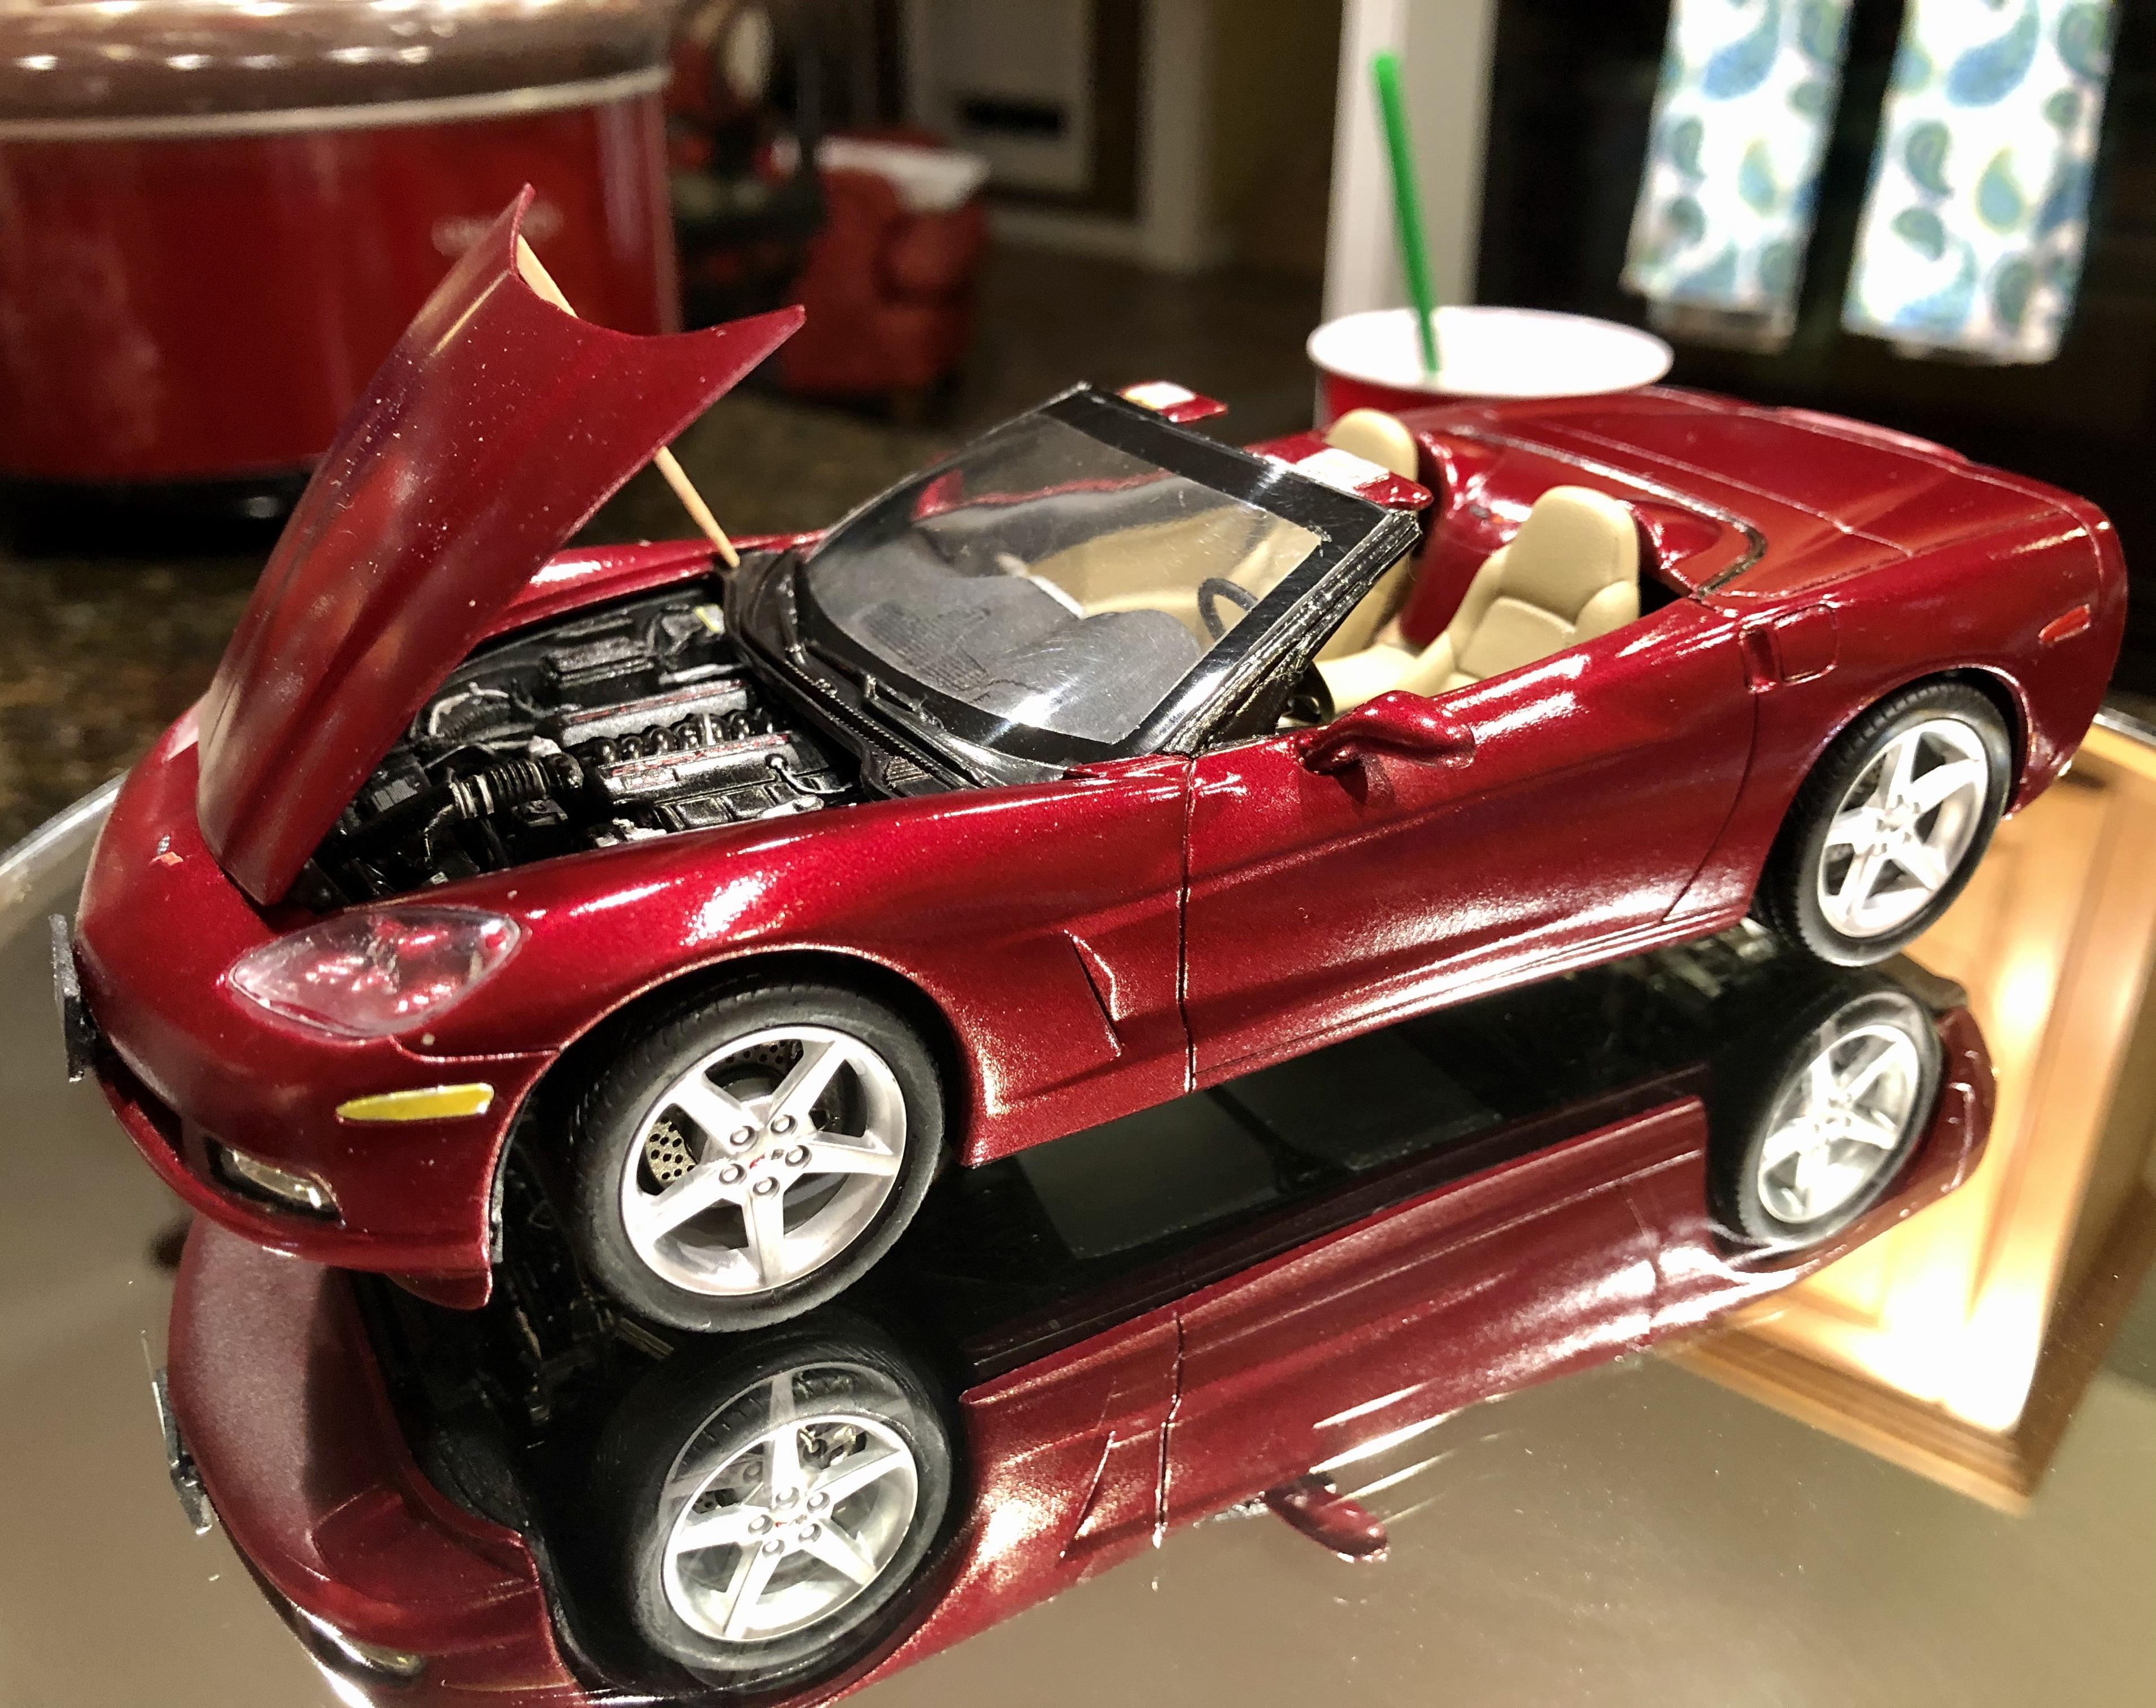
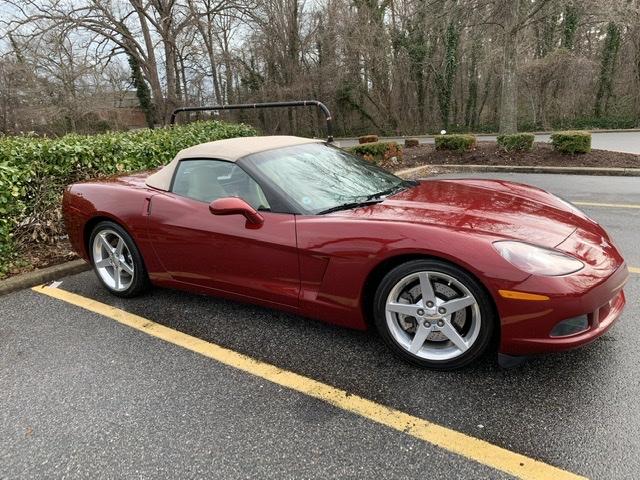
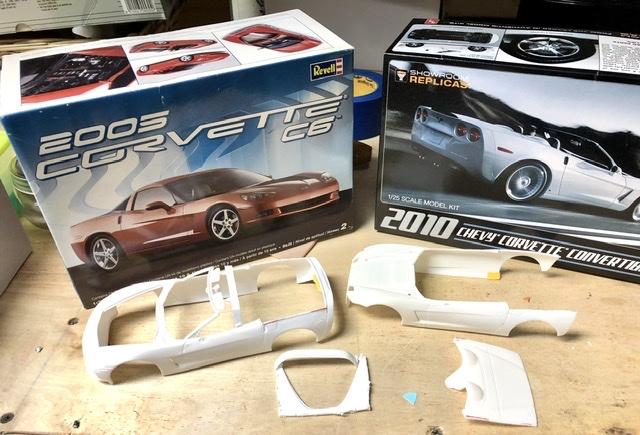
The goal...replicate my brothers new (used) 2005 C6 Corvette Convertible using a Revell 2005 C6. I know, I know...Revell only made a 2005 Corvette Coupe. So I grabbed a 2010 AMT convertible kit and did what any of us would do...cut out the coupe’s greenhouse/rear deck from the Revell kit and swapped out the waterfall/rear deck from the AMT. I was surprised that both kits were fairly close in so far as panel lines, dimensions, body contours and so on. After a little sanding, test fit, more sanding, test fit...wash, rinse, repeat and a fairly decent fit! I’ll let the plasti-weld set up and cure a bit before applying filler but it’s a good start for the time being. By the way, I took a suggestion from George Bojaciuk and purchased a power sander from Micromark. This thing is KILLER! Saved me a bunch of time in sanding as well as wear and tear on my otherwise arthritic thumb that makes holding/sand/filing difficult on a good day. Best $80 I’ve spent yet in so far as useful tools go.
-
An update...first real build in a long, long time! Currently about 95% done now; still have a bit more to do but here it is for the most part...
-
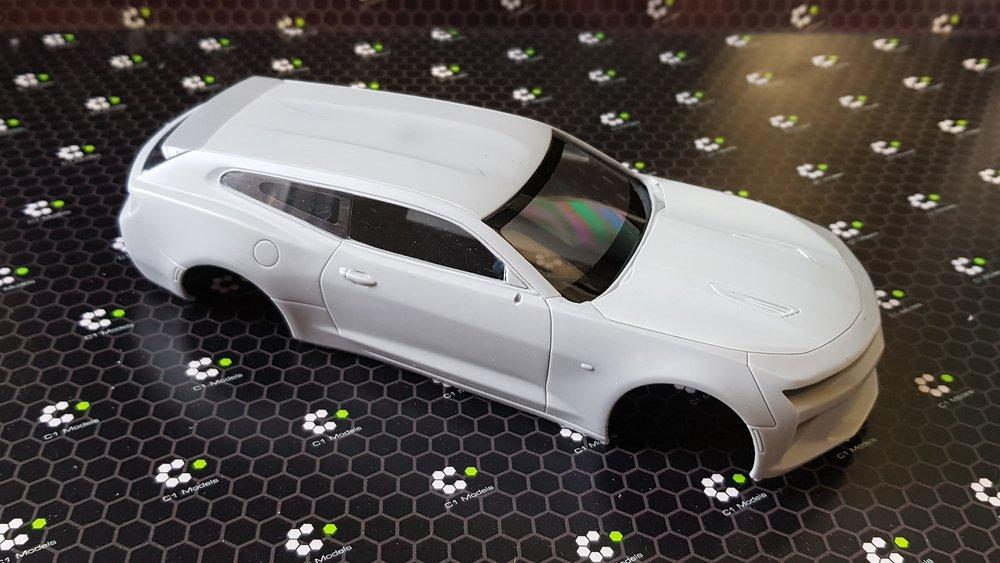
Well, I got the Camaro Wagon yesterday and I gotta say, the casting is really well done. Almost no flash and I went over the body with a magnifying glass to find air bubbles...NONE! No errant outcroppings of resin, no warping. If I didn't know better, I'd swear this was cast by R&R of MD or HRM. Outstanding!
-
Well, my checkbook thanks you for that recommendation! I went to C1 and looked over the Camaro Wagon and it was on sale! Chris popped it in the mail yesterday in the UK and it's already in the USA. That's fast service! I saw his products at the NNL in NJ a couple of years ago and they are nothing short of incredible. I also happen to have multiple 2017 Camaro kits available for donor vehicles.
-
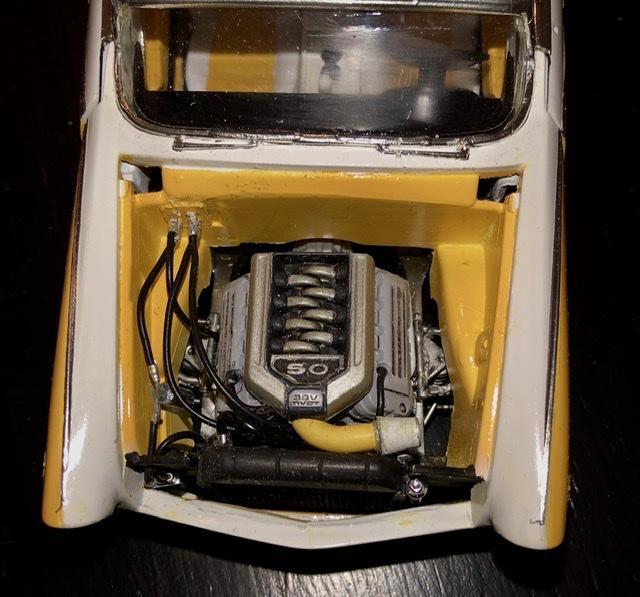
Duly noted I test fitted the radiator I had planned on using only to find out I had to make some changes... AGAIN! Took the radiator from the Foose Ford pick up and opened the radiator header under the hood. Scratch built a pair of brackets so it will fit as far forward in the engine bay as possible. Then altered the bottom of the radiator just enough so the hood would close. Still needs Final sanding, paint and appropriate plumbing but the pics are below (the engine is not permanently mounted yet)
-
Got some more done on this. I used the custom nose piece on this and puttied the resulting seam. Disliked the custom bumper/grill so I cut some mesh to fit, made a custom frame and epoxied the giant “V” in the grill. Added some trim to the inner door panels and flocked the lower portion... This was my first attempt at doing BMF. Pretty frustrating at first but it got easier as I got going with it. Still a lot of screw ups but it’ll work... still lots more to do. Stay tuned!
-
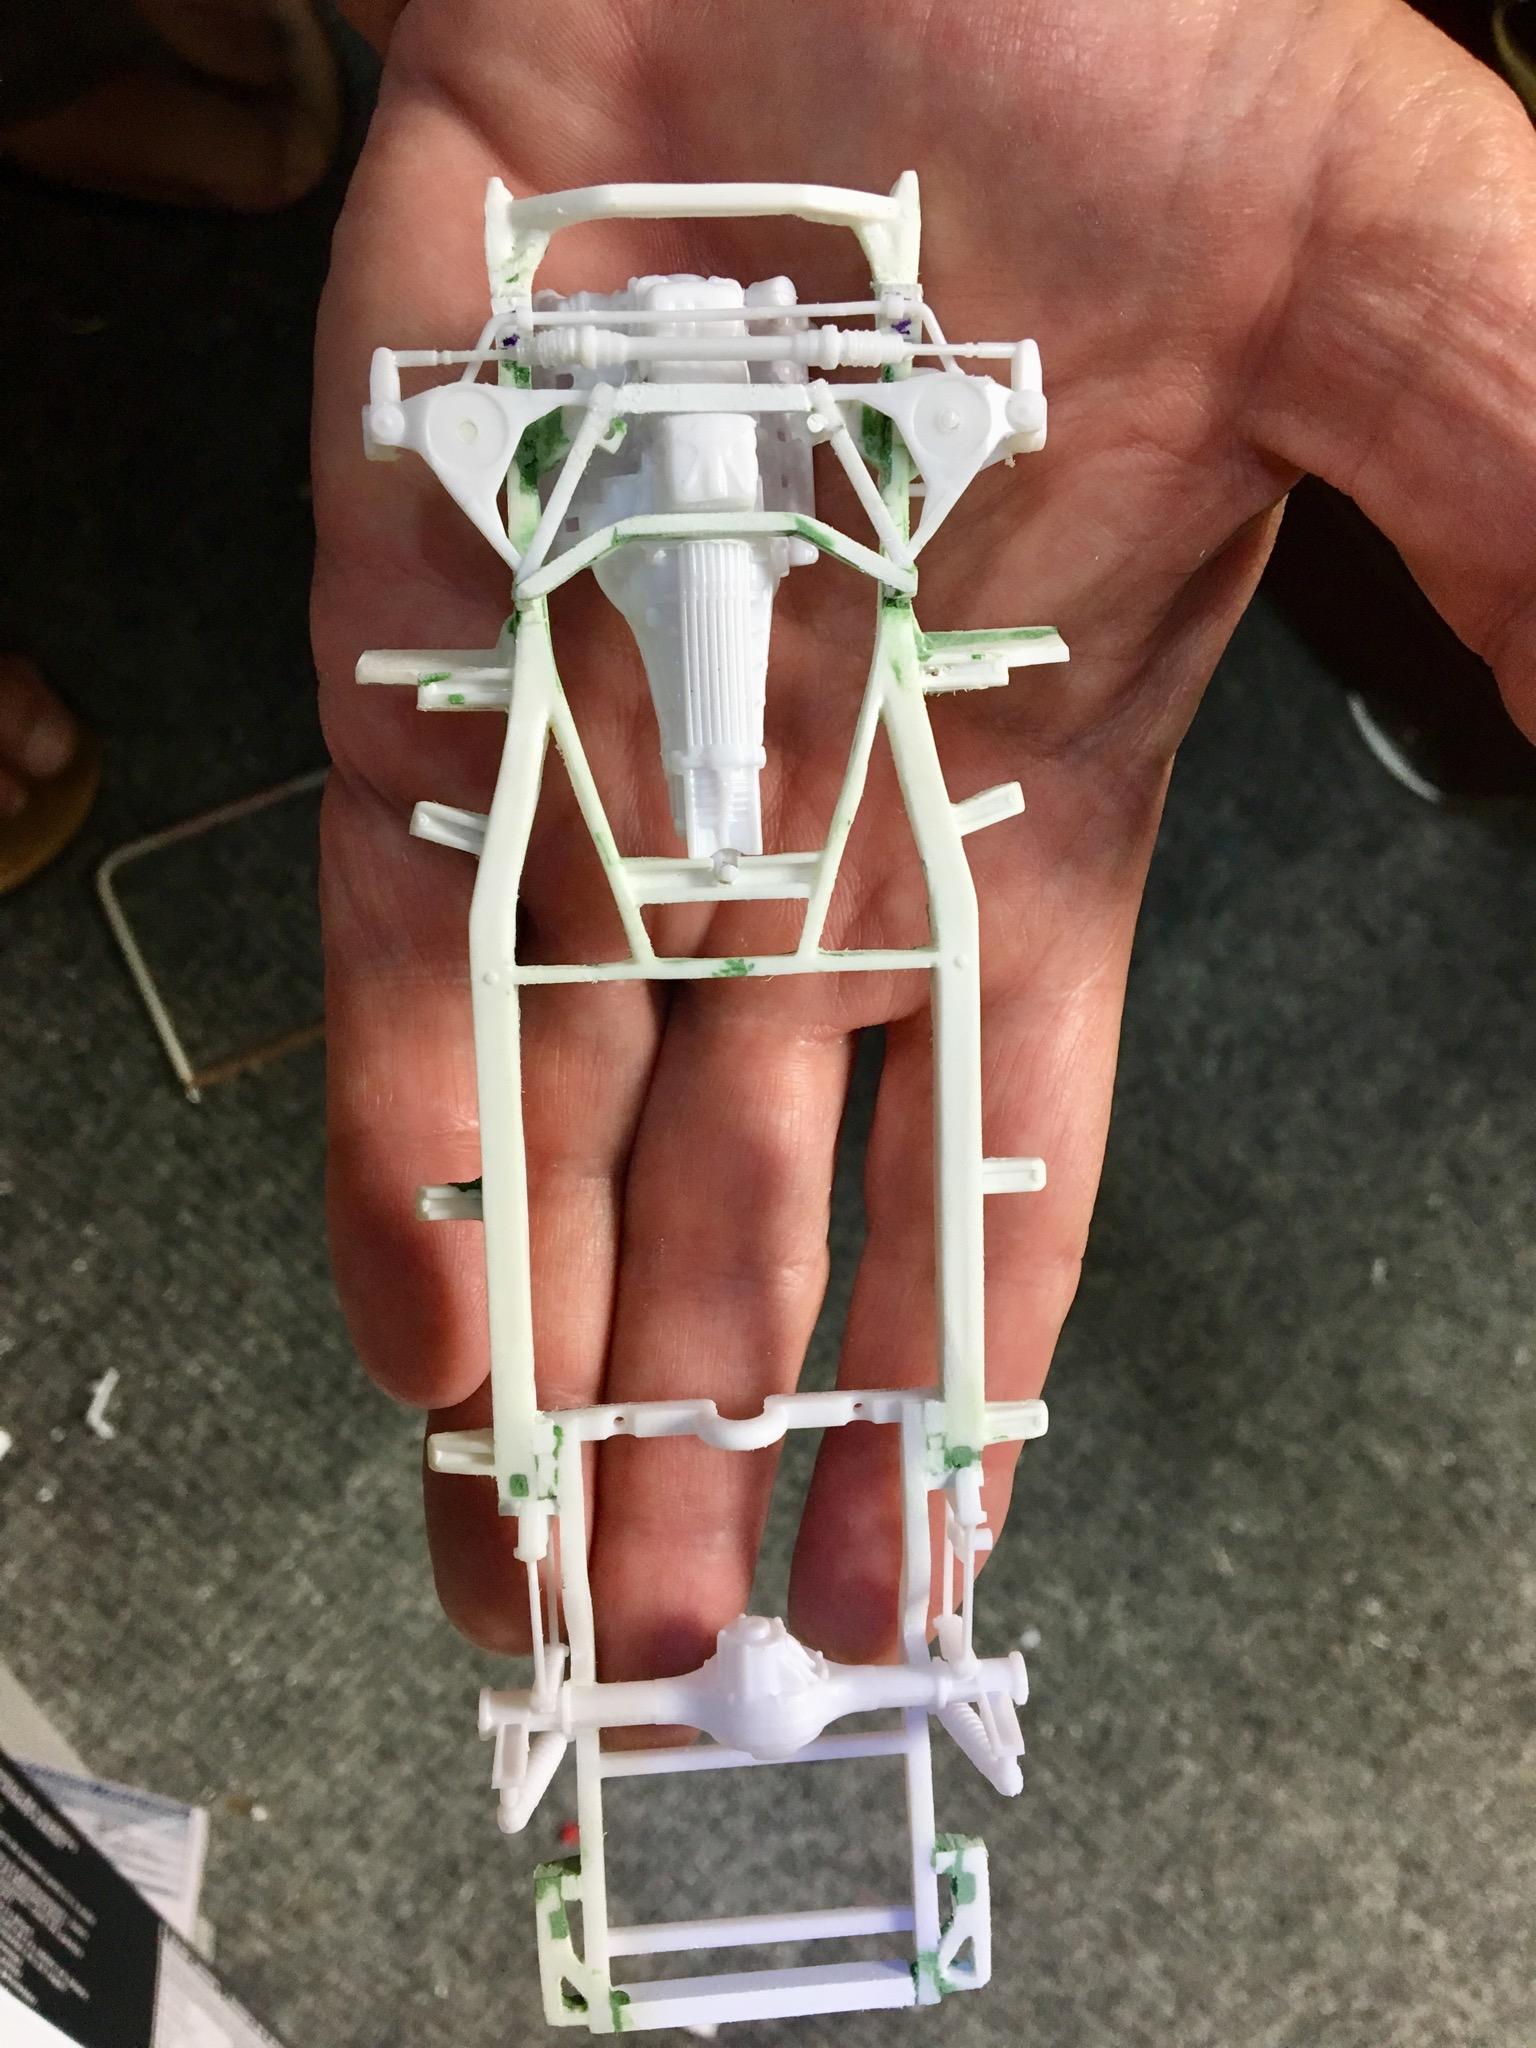
Unfortunately, I didn't get photos of the process so I'll try to explain what I did... This was the original issue Crown Vic and as such, the body was fairly thick. Using a dremel under slow speed to not melt the plastic, I ground down the inside of the fender-wells to see if I could gain whatever room I needed. Right idea but still needed more room. Z wheels are basically 3 pieces, an outer rim, the resin wheel and an inner rim. So I tried sanding down the inner and outer rims and offsetting the tire a bit but STILL not enough. So, I had to reinvent the wheel (eh...so to speak) I took a piece of paper and traced the flared part of the front and rear fenders, cut it out and traced it to a 0.030 sheet plastic. Next, opened the wheel well on the body just enough to let the outside dimension of the wheel/tire to fir...almost there. Glued the section of sheet plastic to the body just a tick lower than the original fender flair (going a tick lower gives the impression of the suspension being lowered without really lowering it) Sanded the sharp edges down of the extended fenders, filled and sanded smooth and contoured the new fenders into the original so it looked stock. Finally, got out the dremel and again removed plastic from the inside of the new fender-well. Sanded and primed as needed. Here's a diagram...the red line was what I removed from the original fender to let the tire fit. Primed
-
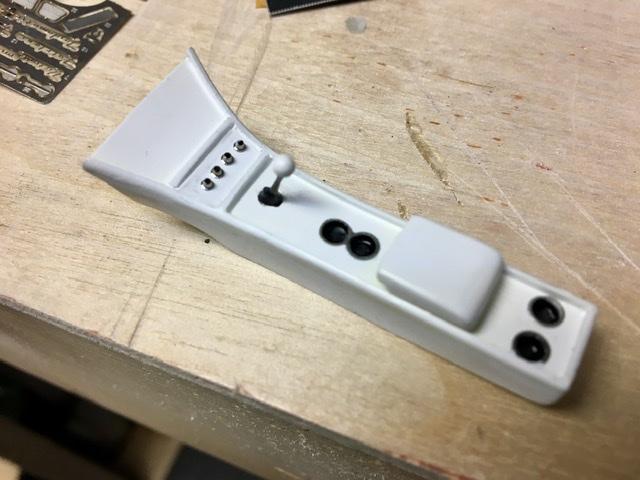
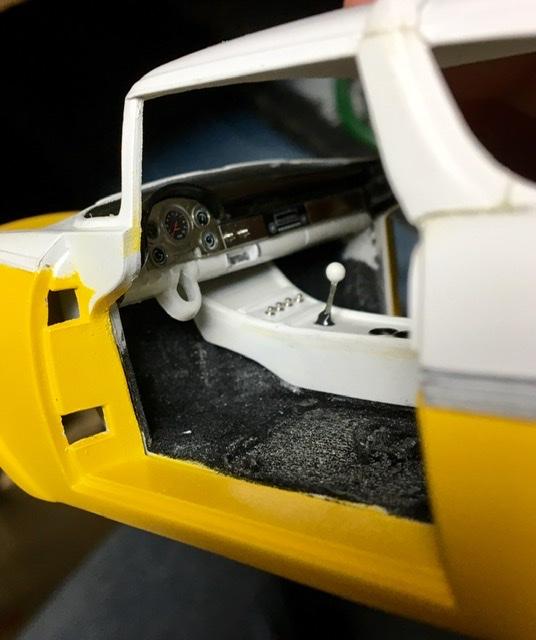
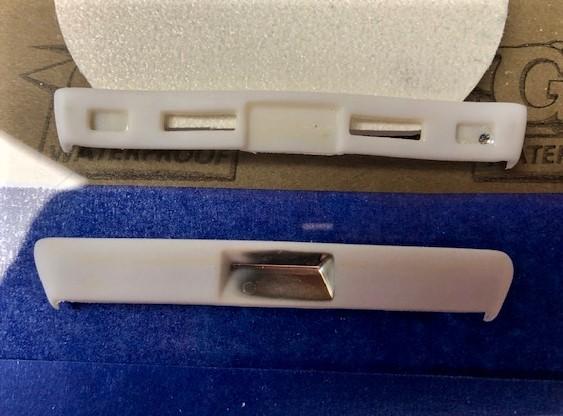
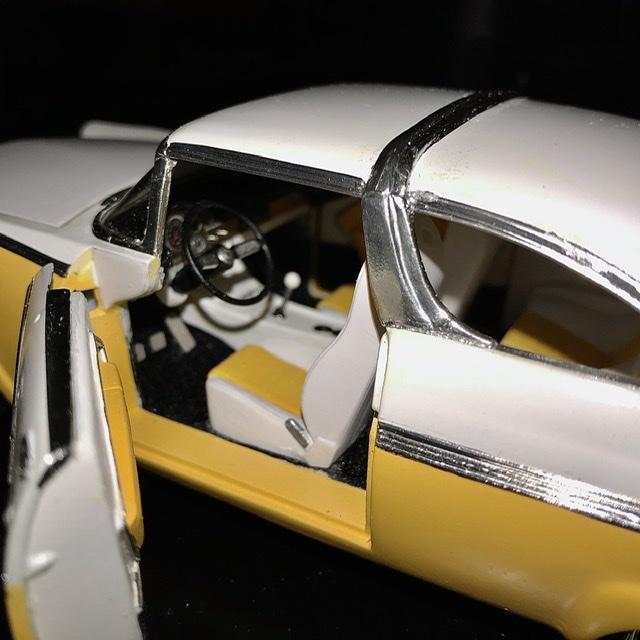
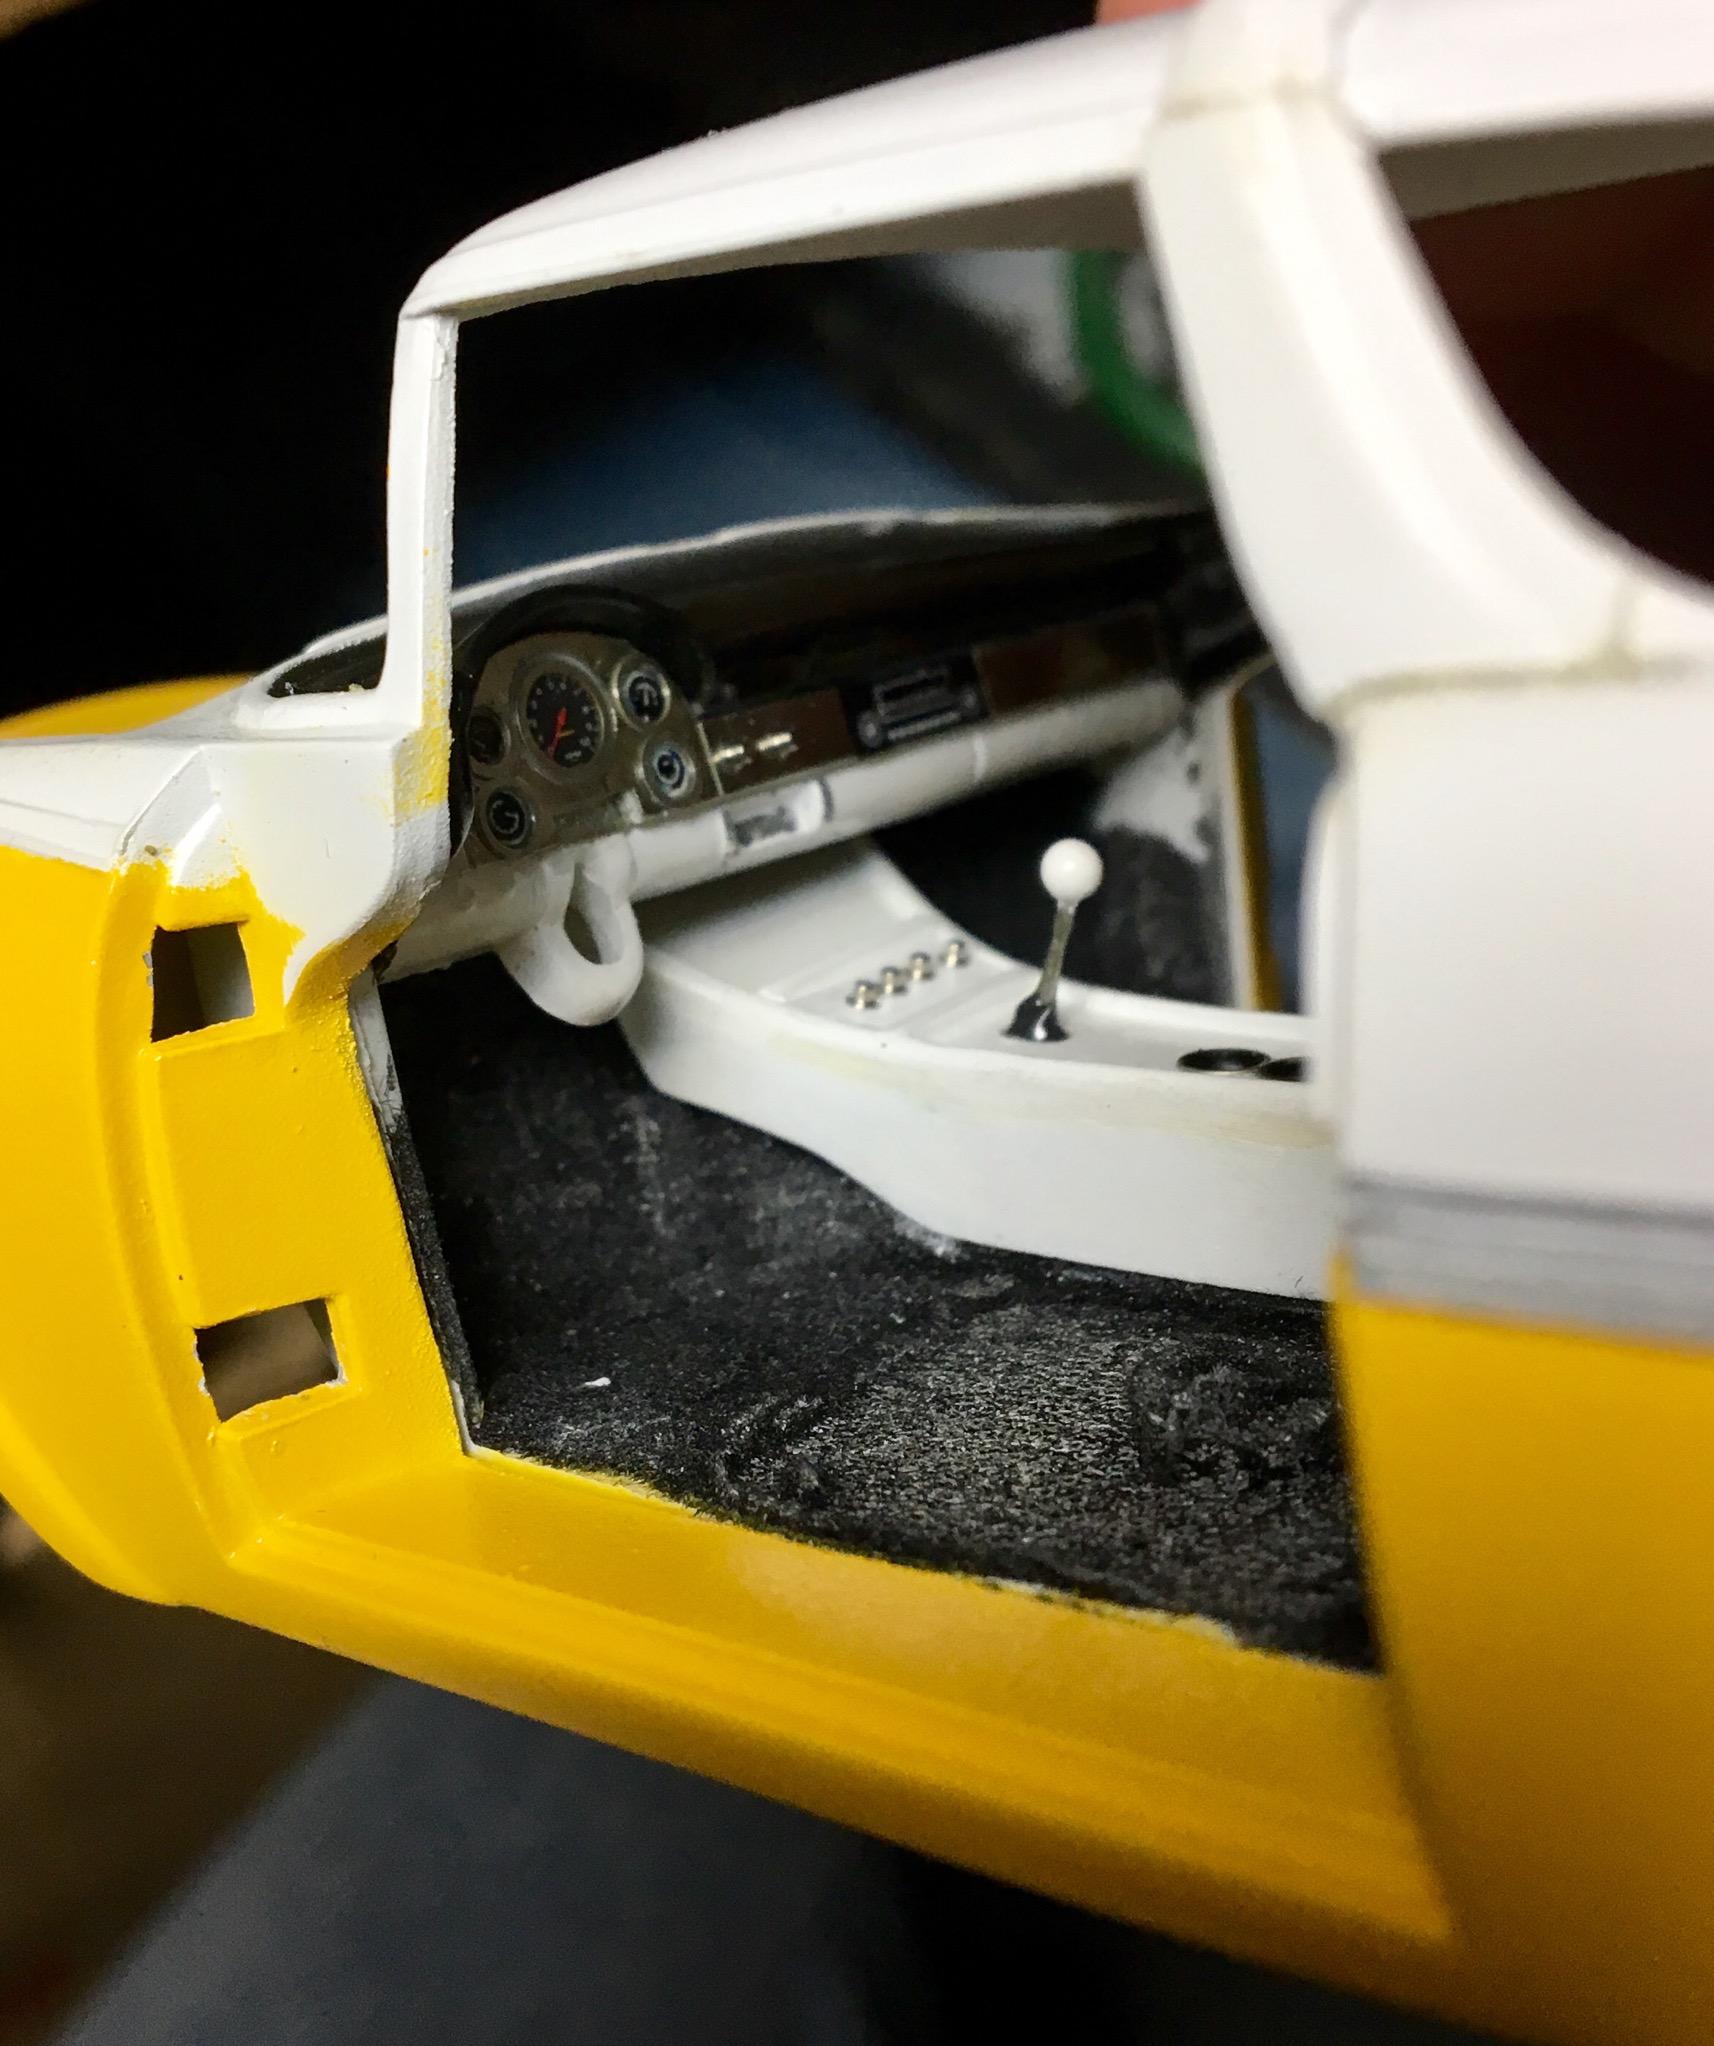
Something I’ve been working on for a bit and was inspired by an article in Street Rodder magazine. Steet Rodder Its been a work in progress with each modification being followed up with one or more. 1st order of the day was to remove the floor pans from the frame...which evolved into a change in the front and rear suspensions. Front was adapted from a nascar Ford while the rear came from the Foose pick up I planned on a set of Z wheels and soon realized it was going to be a tight fit. I had made all the changes I could in the suspension so the next step was to widen the the quarter panels just a bit. The end result looked pretty darned good to me as in this mock up i didn’t like the bench seat idea so looking at various kits/kit parts on the shelf, a 2014 Mustang appeared with a gleaming halo around it. I adopted the rear seats and front buckets then scratch built a center console... Basically, a stock dash... Then something hit me, I really disliked the inner door panels and since this will be an opening door model, I grafted in the centers of the mustang interior panels to the crown Vic’s The dash and console work well together... Still have a long way to go but it’s finally shaping up! Stay tuned!
-
I was going to title this "I need a little head" but thought better. I digress. Any Resin Casters or 3d printed by chance?