BDSchindler
-
Posts
470 -
Joined
-
Last visited
Content Type
Profiles
Forums
Events
Gallery
Everything posted by BDSchindler
-
Canadian 1961 Pontiac Laurentian conversion
BDSchindler replied to TheBEAUMONTGURU's topic in WIP: Model Cars
Very cool! -
Simply amazing!
-
well, it's done. I'm not happy with it as "the juice just wasn't worth the squeeze". But...it's done and at least that much I am happy with! This was such a frustrating build that it will be a while until I return to the bench...if at all. ☹️

-
So, new kit in hand but it’s the Revell American kit vs the German kit. My theory proved correct that the Revell American hood would fit and does amazingly with no mods to it! The hood from the Germany kit required copious amounts of sanding to fit. Painted black last week and went to put the hood stripe decal on it today but the friggin’ decal fragmented on me worse then the Germany (Italy printed decals) did… Frustrated as this kit has fought me EVERY step of the way that I said screw it! I masked off the hood, grabbed my Badger Patriot and Cortez Silver Splash Paint and sprayed the hood stripe… I was going to attempt the red pinstripes on the hood but I said no. They are much too thin and I just NEED to be done with this. So I’ll add the “L-82” graphics, clear it tomorrow and do the final assembly once the clear cures. It’s been a long few months with this…I wanna be done! Stay tuned, the finish line is in sight!
-
Thanks George! I know the fire LED that Evan's sells and to be honest, you could easily set the LED into the dumpster amongst the garbage and use a cotton batting to simulate smoke from the ensuing fire. The flickering of the LED will simulate the flames and will cast shadows from the garbage. Honestly, I don't think you'd need the clear printed flames at all. Evans Designs Flickering Fire LED Kit.
-
well...I am STILL using Firefox and I was able to page through this entire topic without having to Right Click on each page number and select open in new tab. That is the first time in about 2 years! Nice work Dave...my patience level is restored (or is it just because it's a full moon tonight?)
-
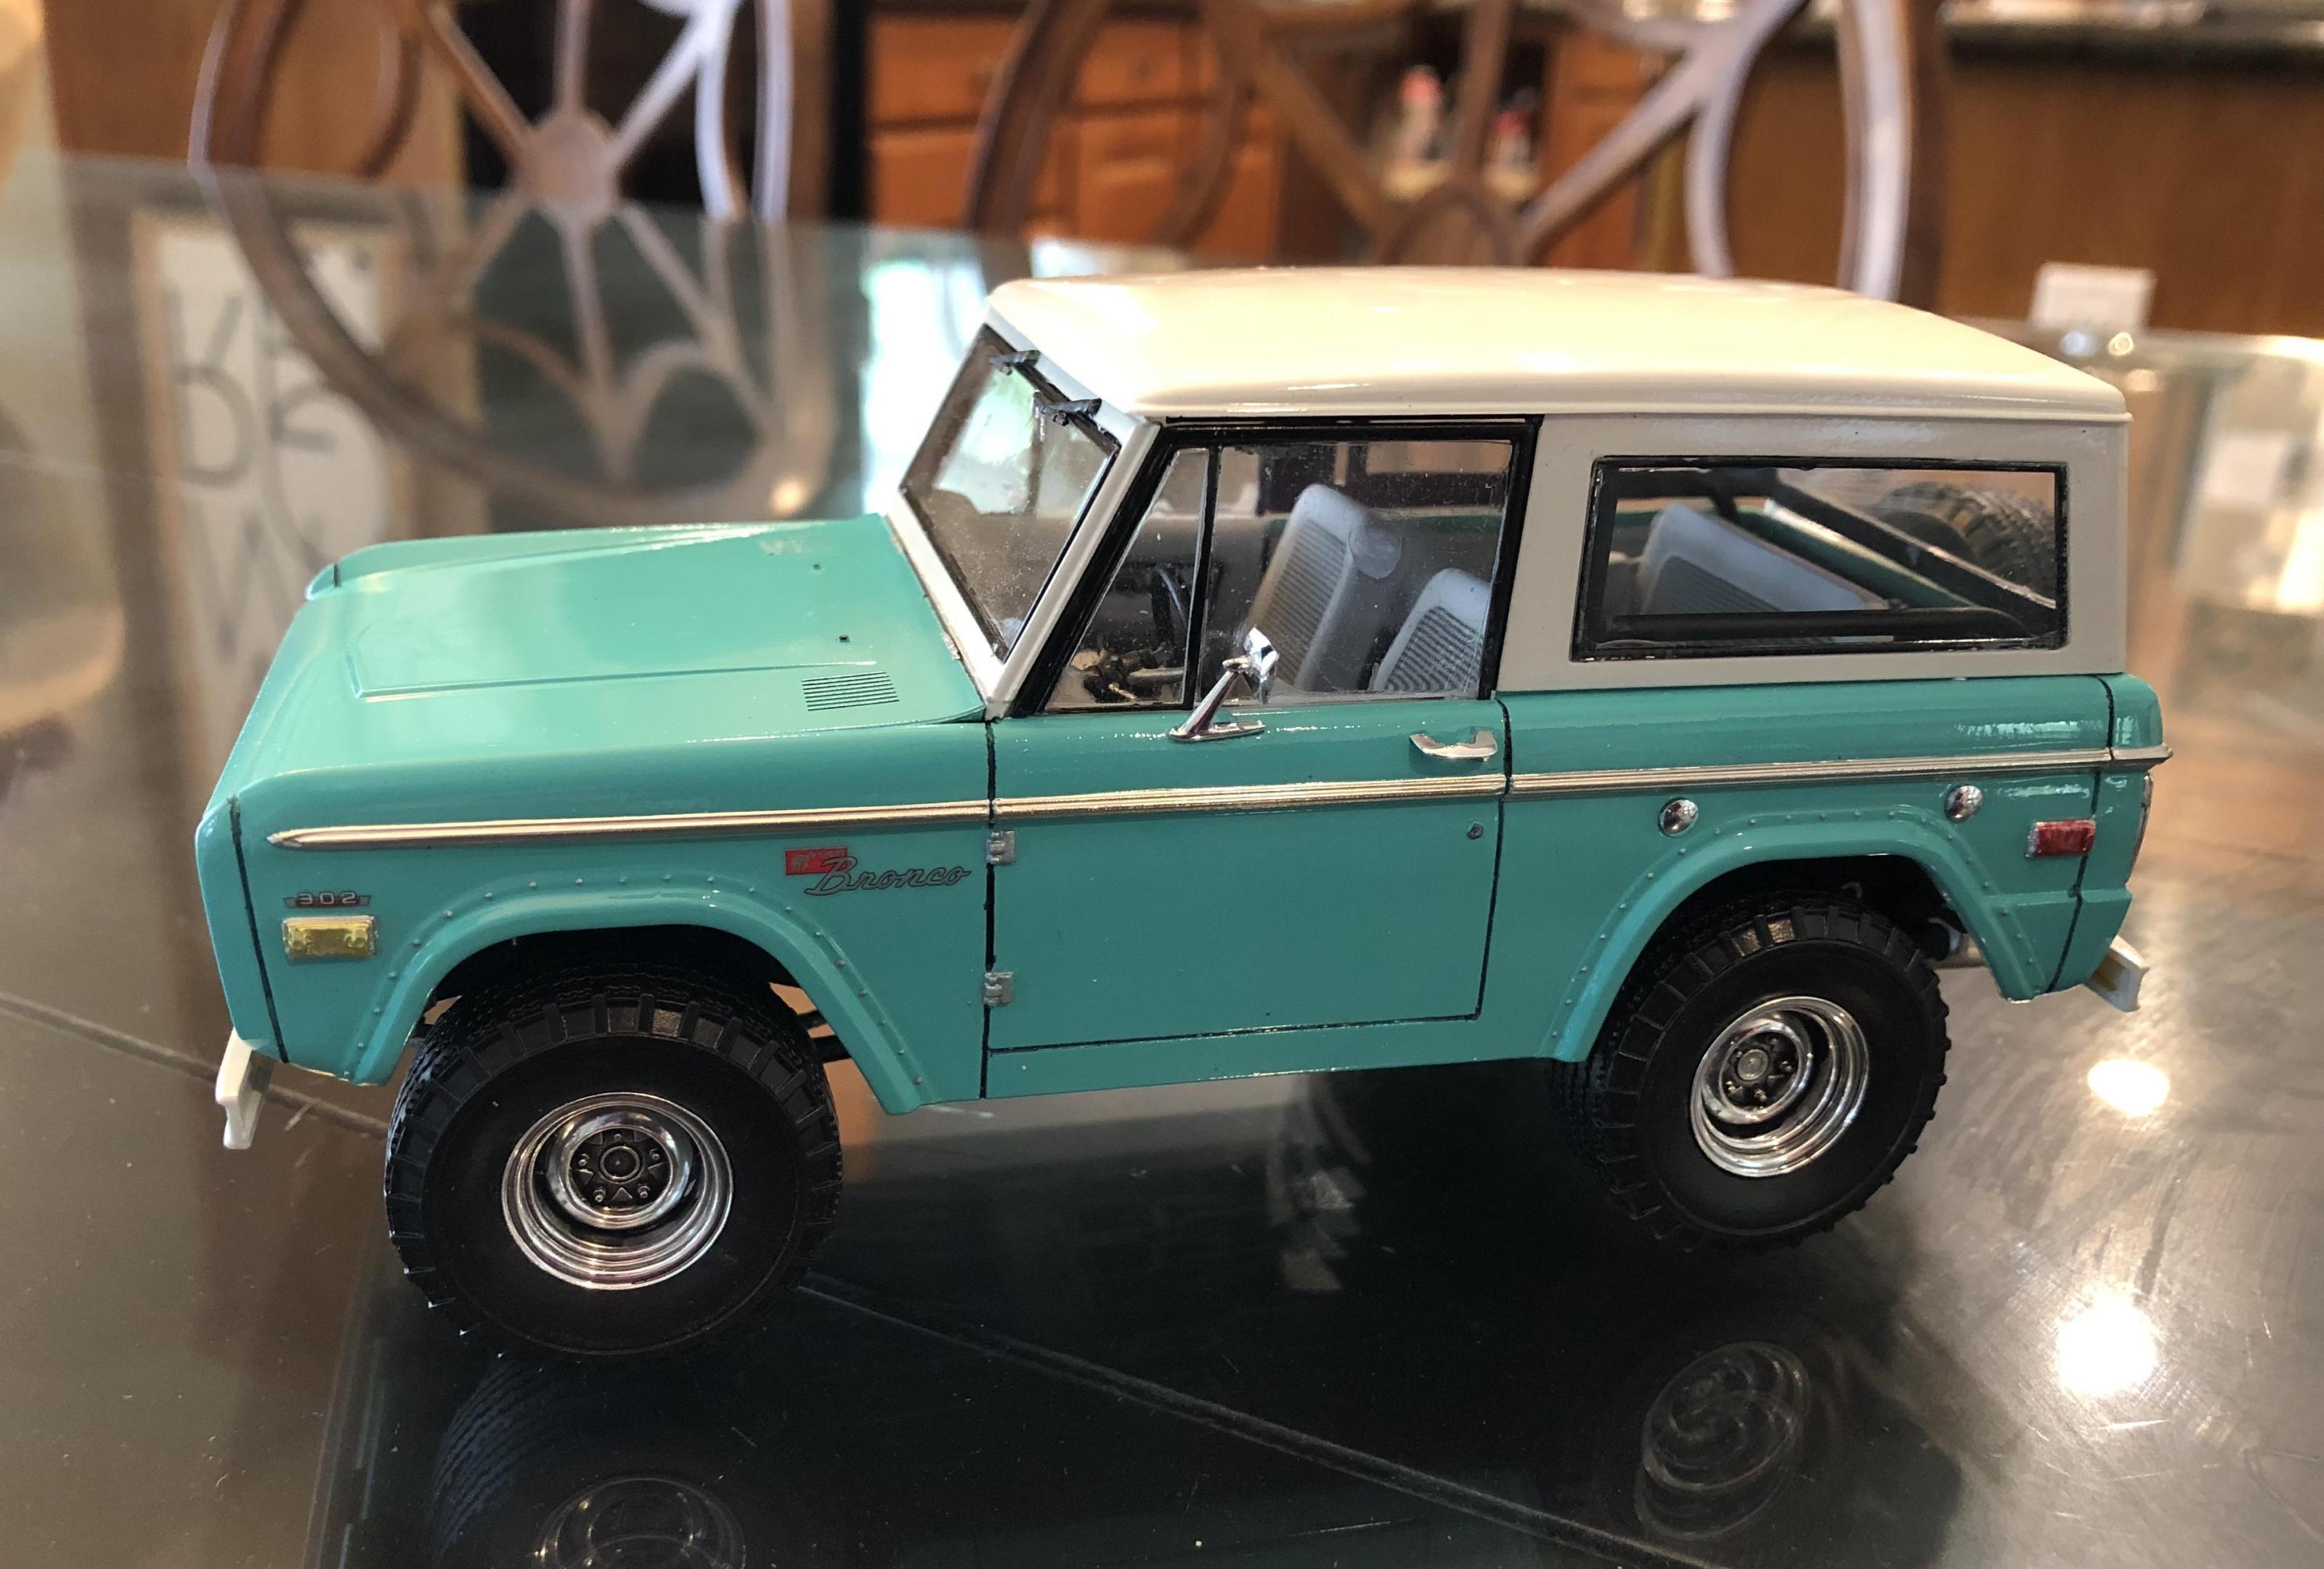
I use Splash Paints over Mr. Surfacer Primer for the most part. I have always applied decals first then Splash 2K Clear about a week later. Never had an issue...so far. I have also used Splash 2K Clear over buffed Bare Metal Foil and the BMF came out looking like chrome. The chrome trim on this Bronco was Splash 2K Clear over buffed BMF.
-
Using Firefox, I still have to right click and select "Open link in New Tab" to see additional pages of a topic. Lately, I am getting a message that the current page is slowing down Firefox with an option to stop it from loading. Essentially, I see no changes with Firefox but greatly appreciate the effort.
-
I know that feeling!
-
Loving it! I'll be watching!
-
I hate this kit...now more than ever but with easily 100 hours in it, I really don't want to bail on it completely. Unfortunately, I don't have another hood nor the decals for the hood stripe. Talked to my brother and he ordered another kit. Large price to pay for whatever happened but, poop happens. he'll have it by thanksgiving and bring it with him. It just sucks and I wish I knew what happened!
-
So this officially peed in my wheaties!!! after I painted the hood…and it was fine. It was primed and painted with Splash Paints. it was perfect! 2 weeks later I put the decals (yes, they fragmented too but I was able to align it) for the hood stripe on and I don’t know if it was the heat of my hands or the micro sol but the left side warped on me. Car is toast now… any thoughts other than a new kit for the hood and decals?
-
AMT 2021 Bronco….
BDSchindler replied to cruz's topic in Model Trucks: Pickups, Vans, SUVs, Light Commercial
All I can say is DDDAAAAAYYYYY-MMMMNNNN CRUZ! Can't wait to see this one in person at MAMA's! -
Revell ‘71 Ford Bronco
BDSchindler replied to NOBLNG's topic in Model Trucks: Pickups, Vans, SUVs, Light Commercial
Kinda looks familar...
-
Revell ‘71 Ford Bronco
BDSchindler replied to NOBLNG's topic in Model Trucks: Pickups, Vans, SUVs, Light Commercial
Very Sharp! I love it! -
Nice work, Greg! I'll be watching
-
yep...and it shows its age too!
-
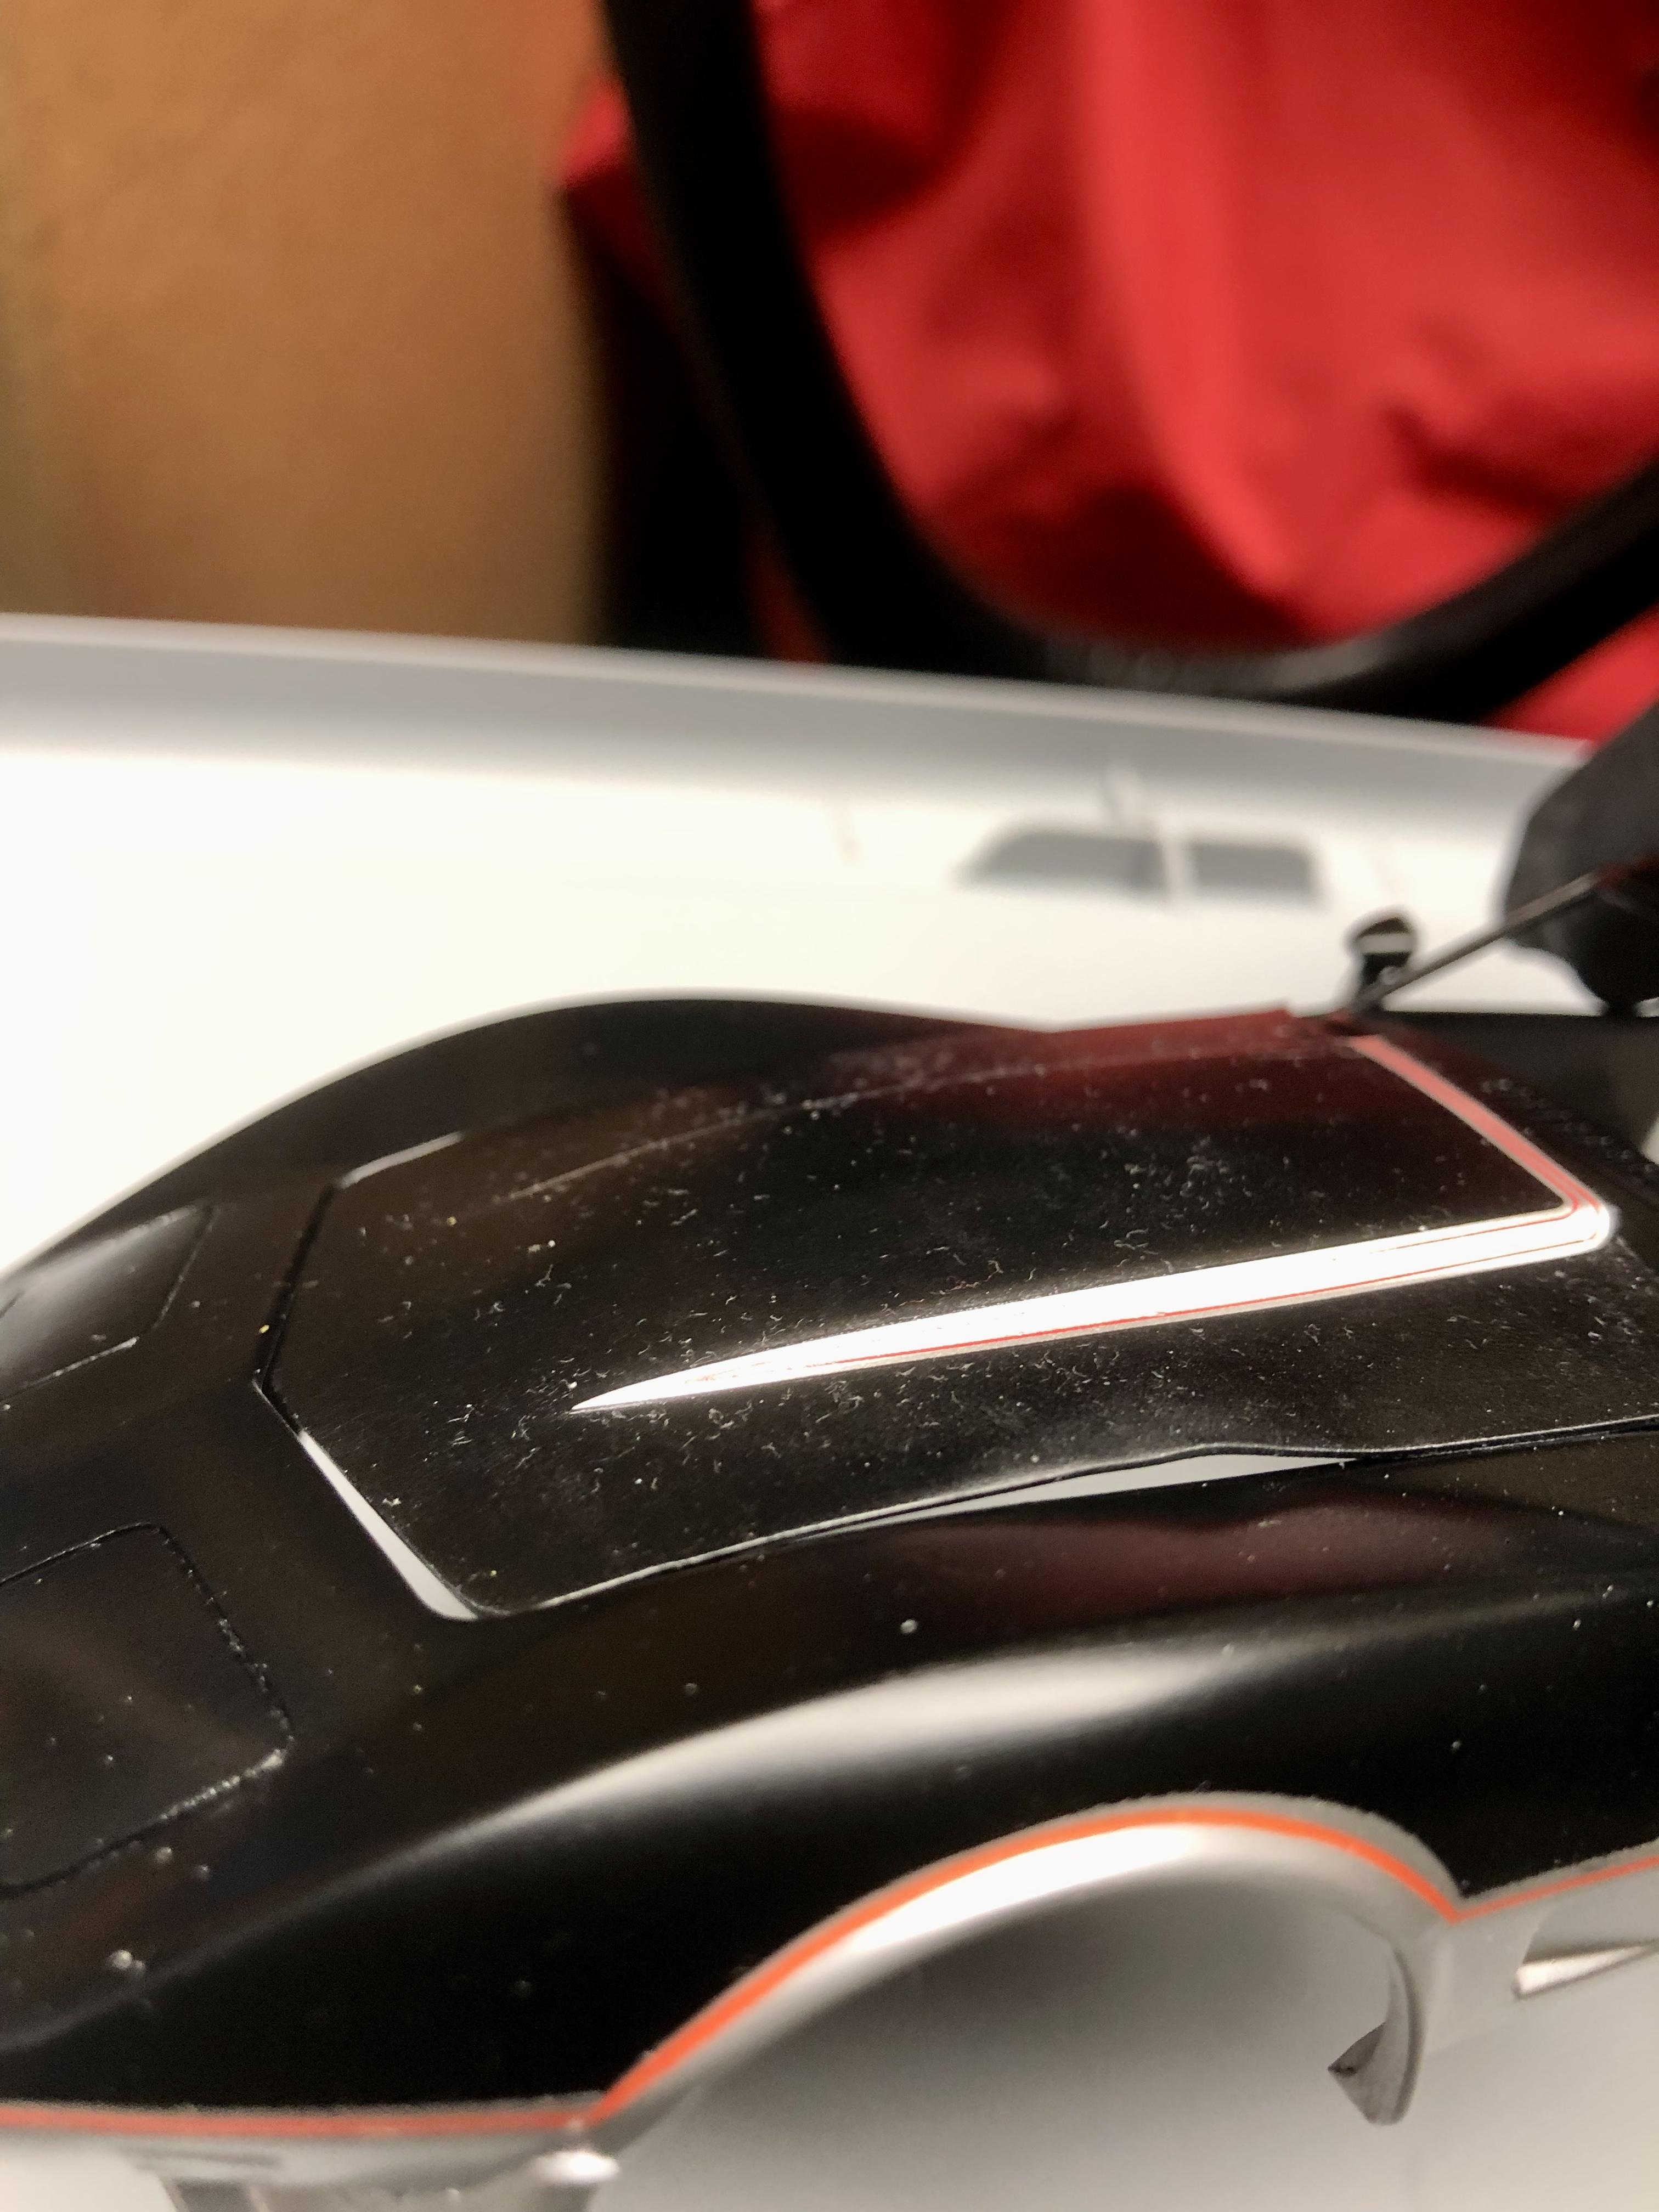
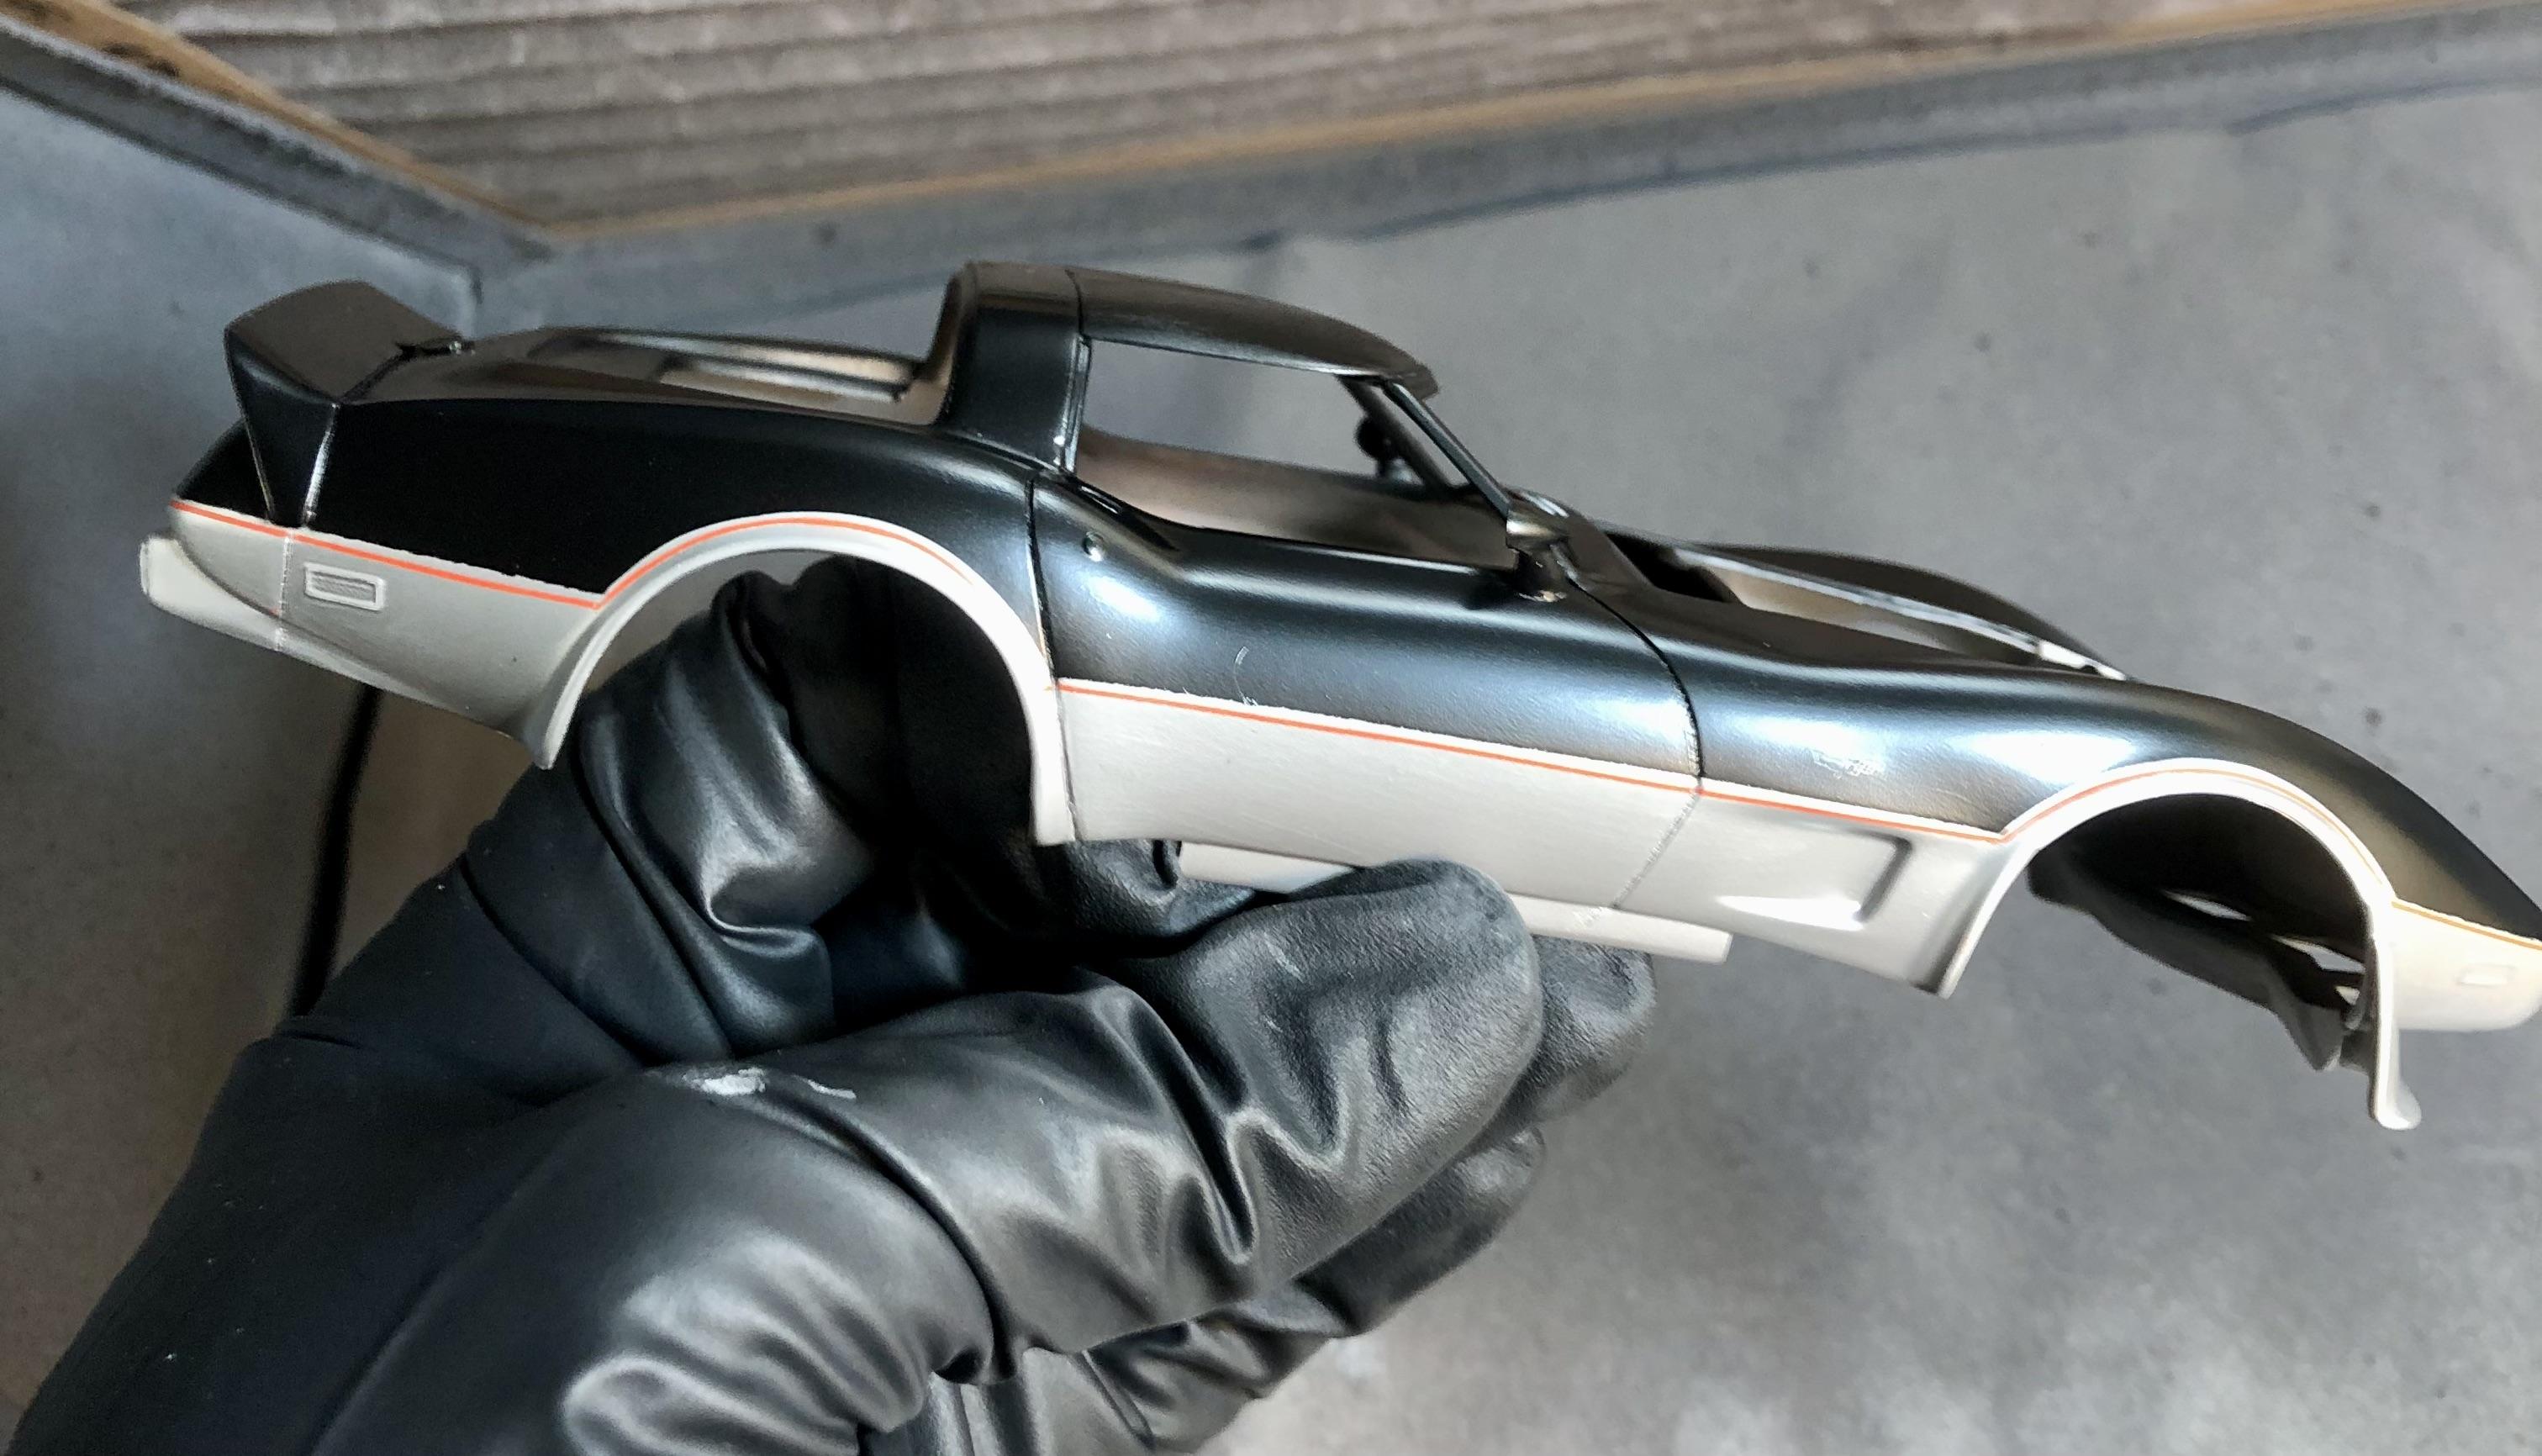
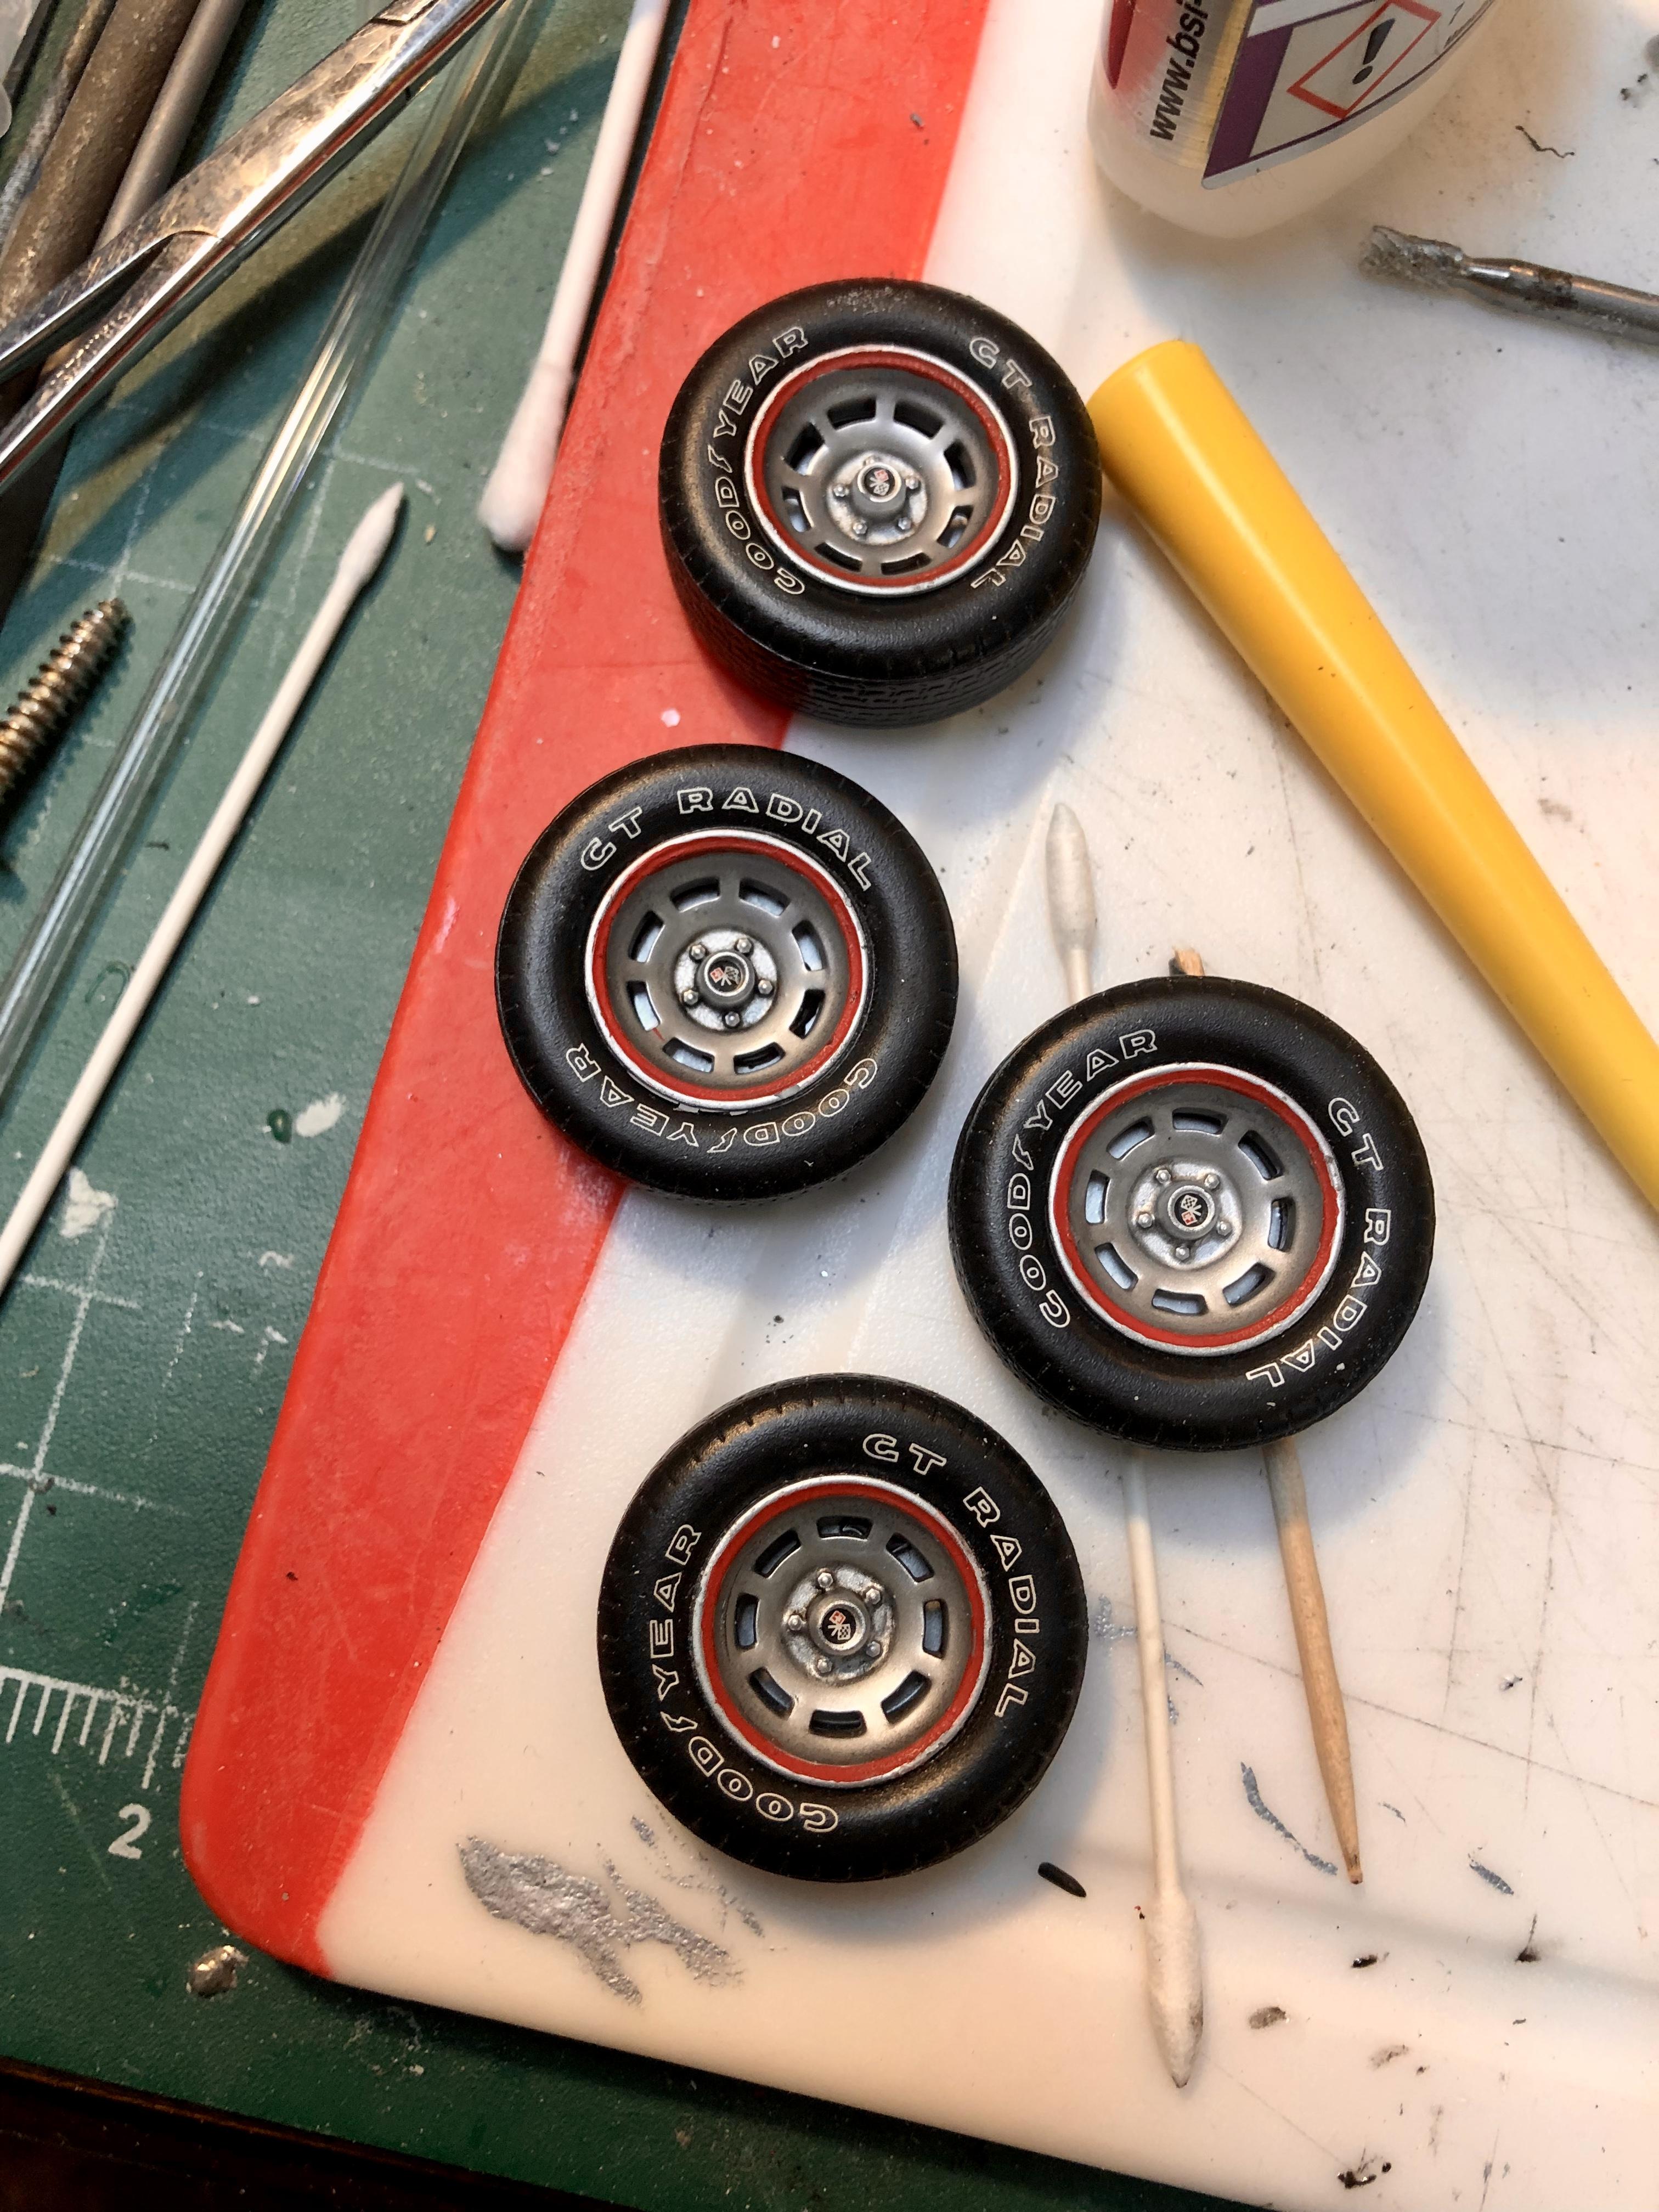
Got into the paint booth today. About an hour of careful masking to leave the thin silver band between the red pinstripe and upper body. I’m happy with it so far. It’s my most elaborate paint job yet! I love me some Splash Paints!!!!!! Next step is to let this cure a week or so and lightly wet sand, then decals and 2K clear. cleaned up the tires a bit also…
-
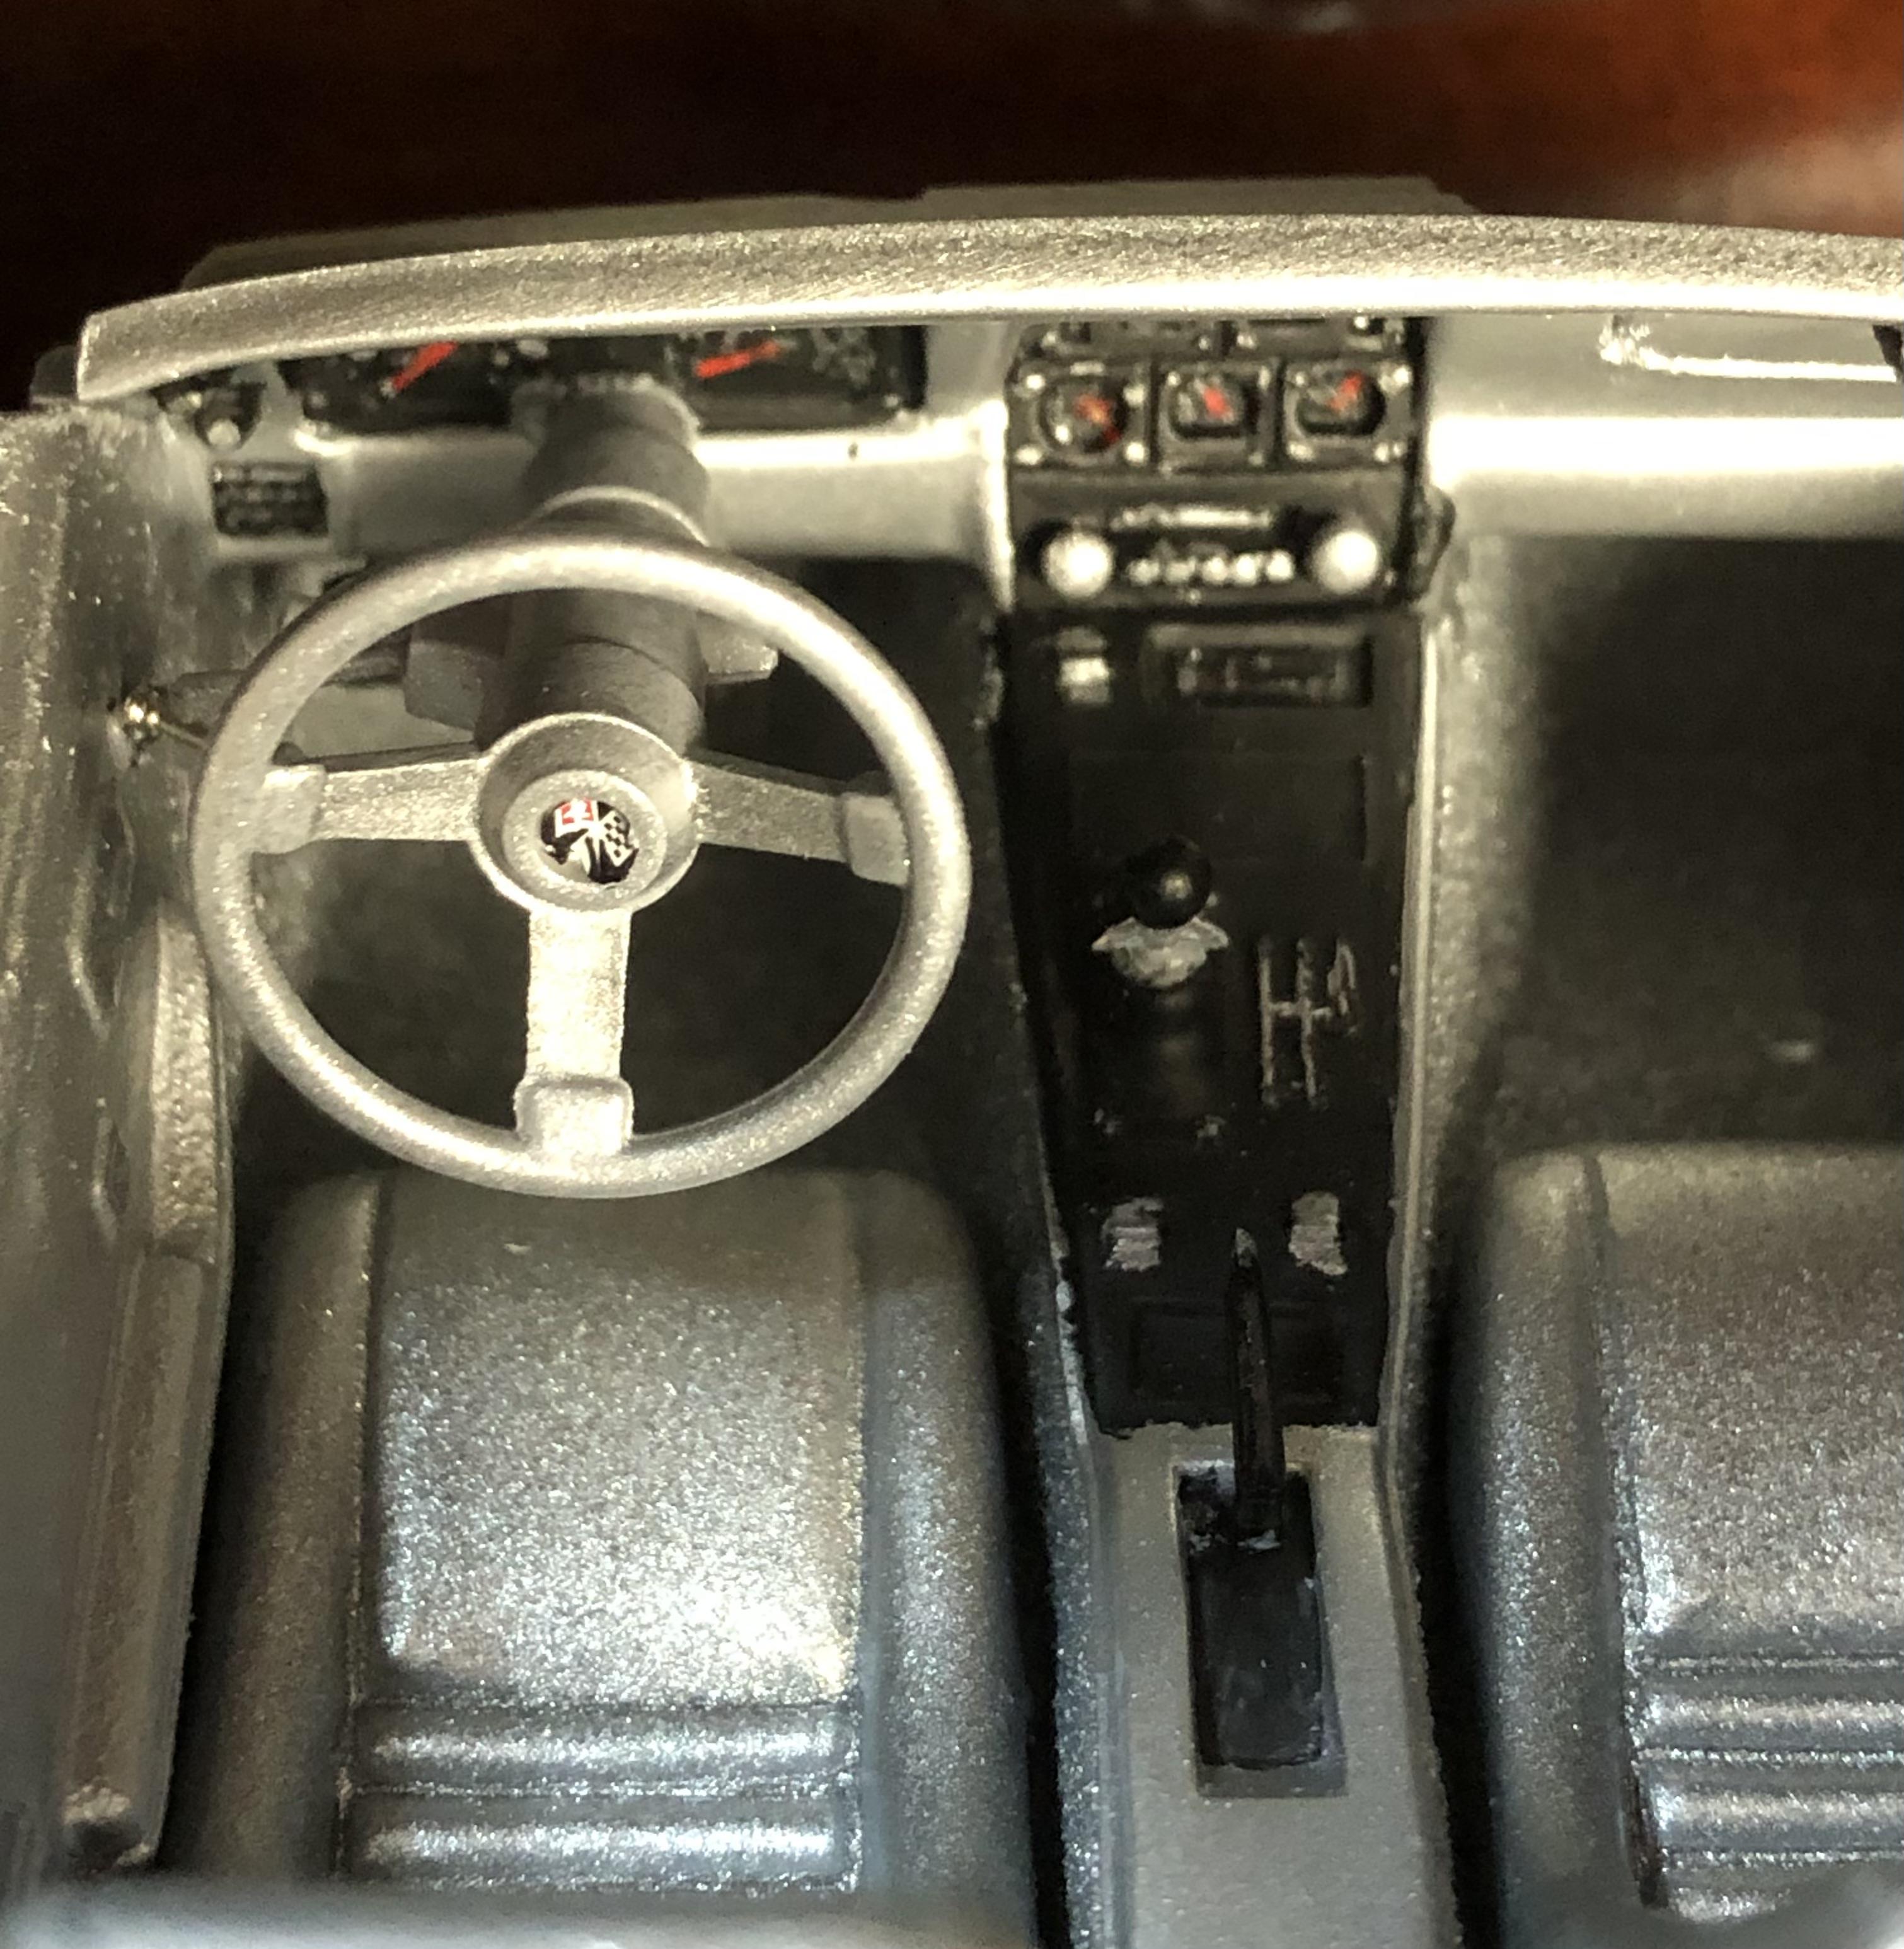
So I got some work done on the interior. Used silver embossing powder for carpet and the only decal I used was the cross flags on the horn button. Everything else was hand painted
-
Thanks for that tip. I have hit that with other models and have been able to get around it by trimming/sanding and buffing out the windshield. It's not easy but I think with patience, it can be minimized if not fixed. I will make sure to test fit and adjust as needed.
-
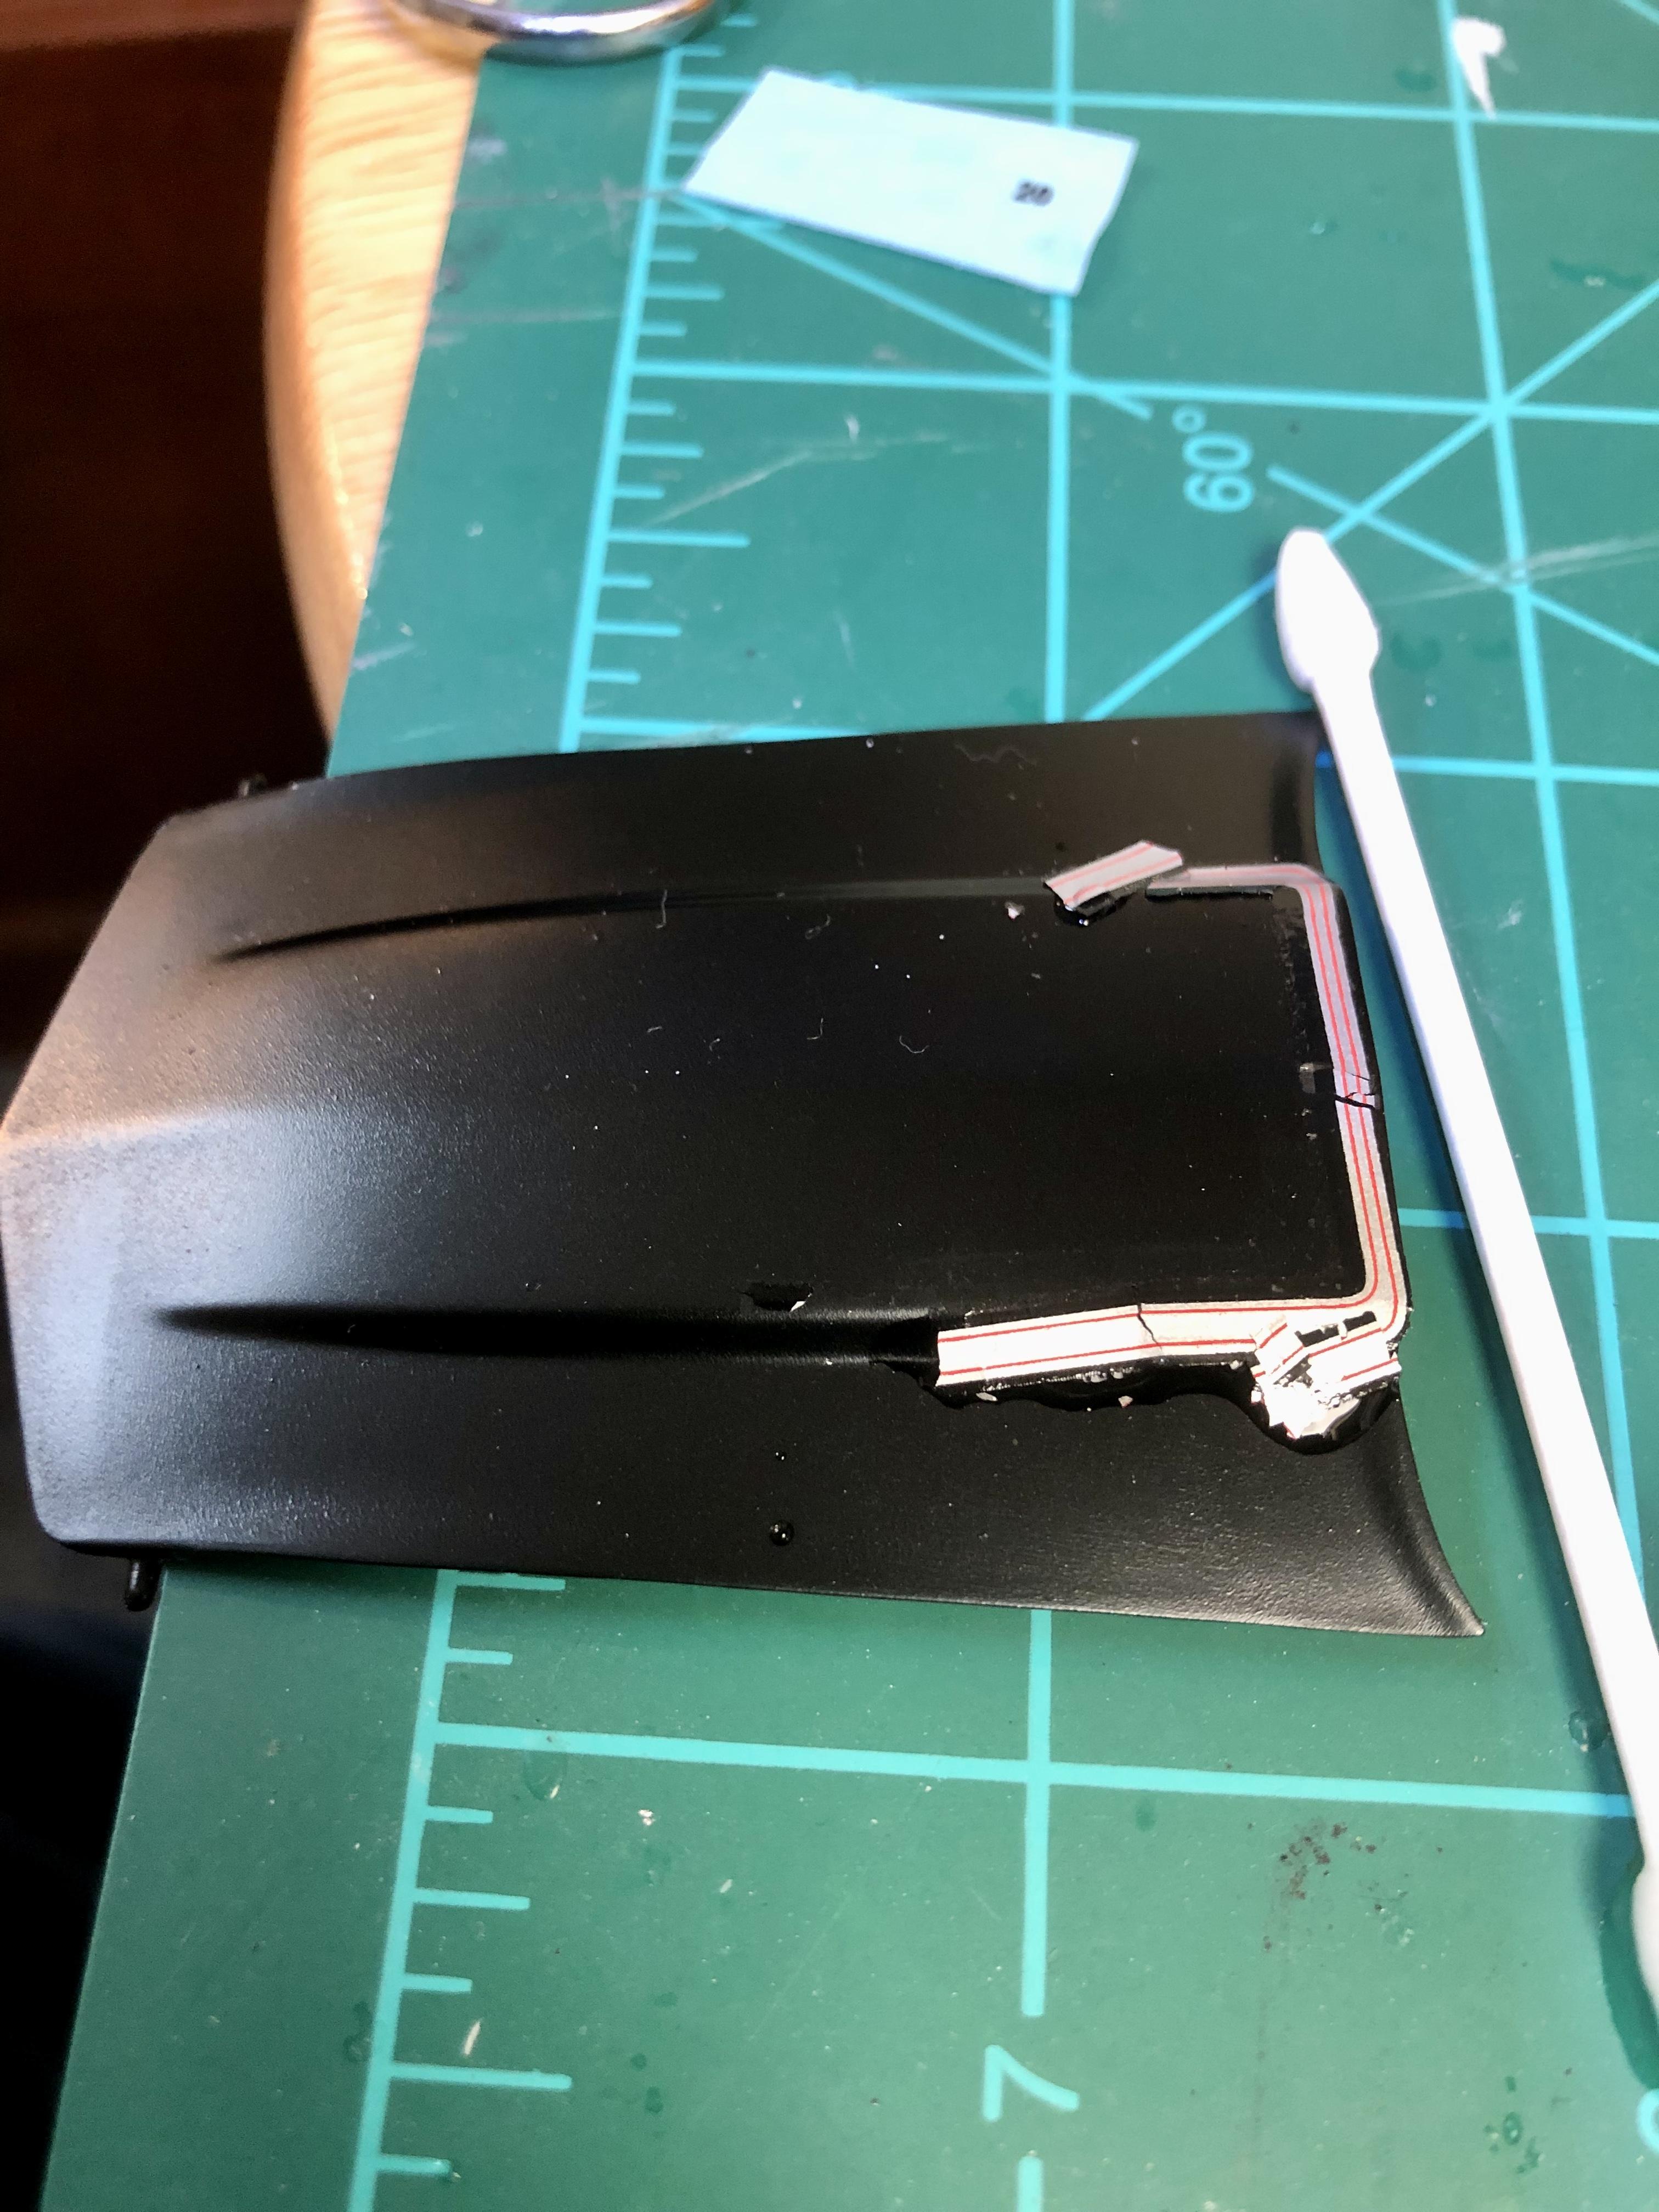
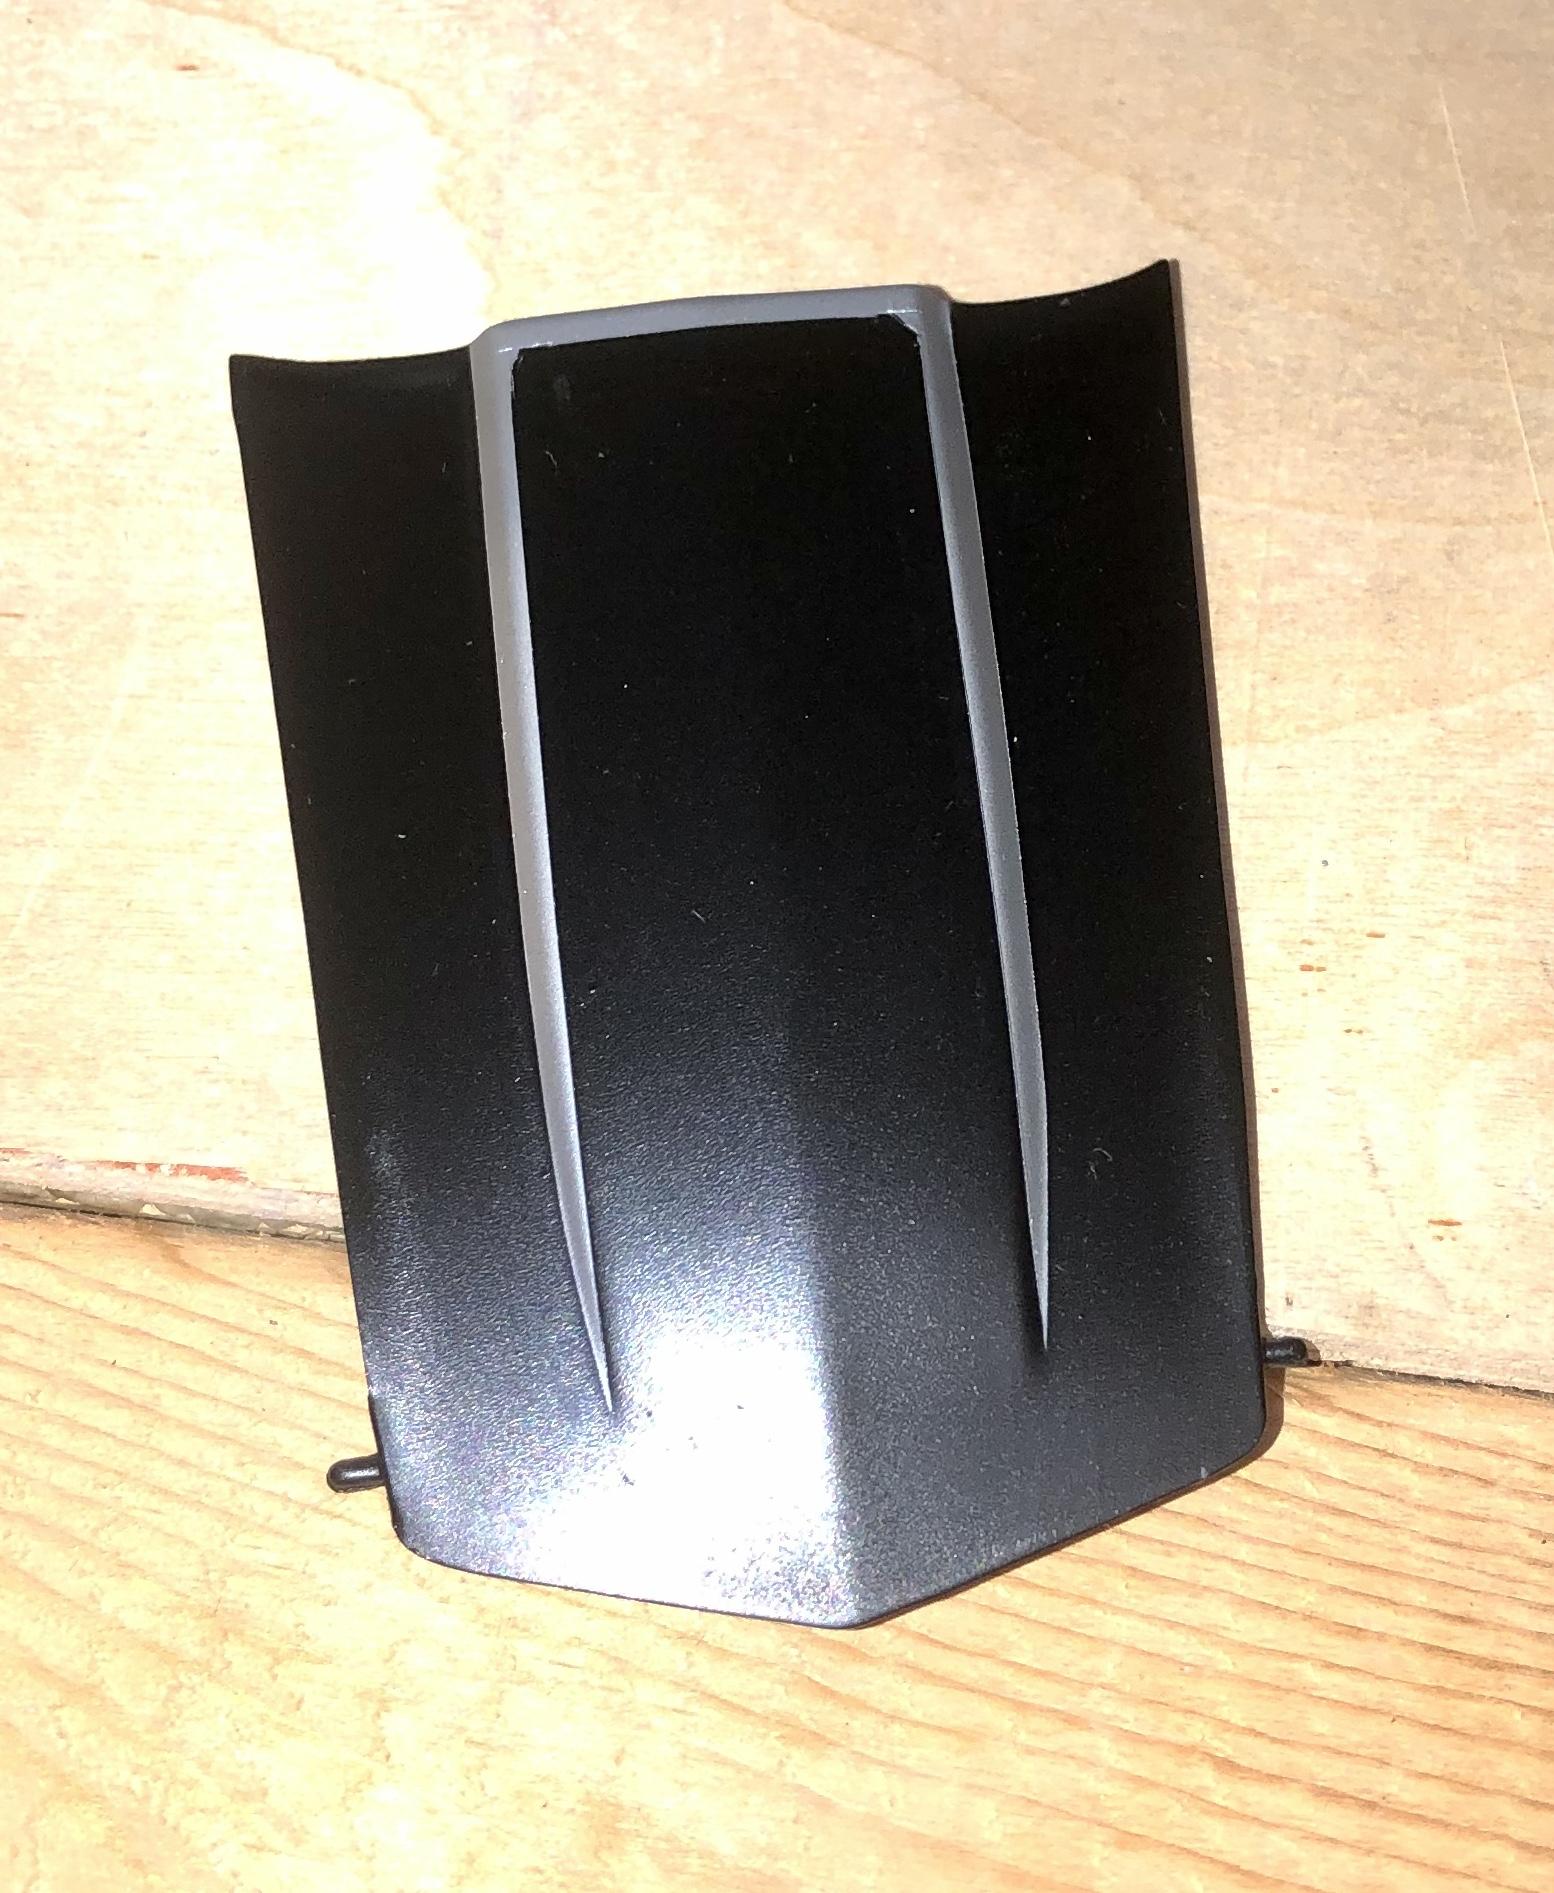
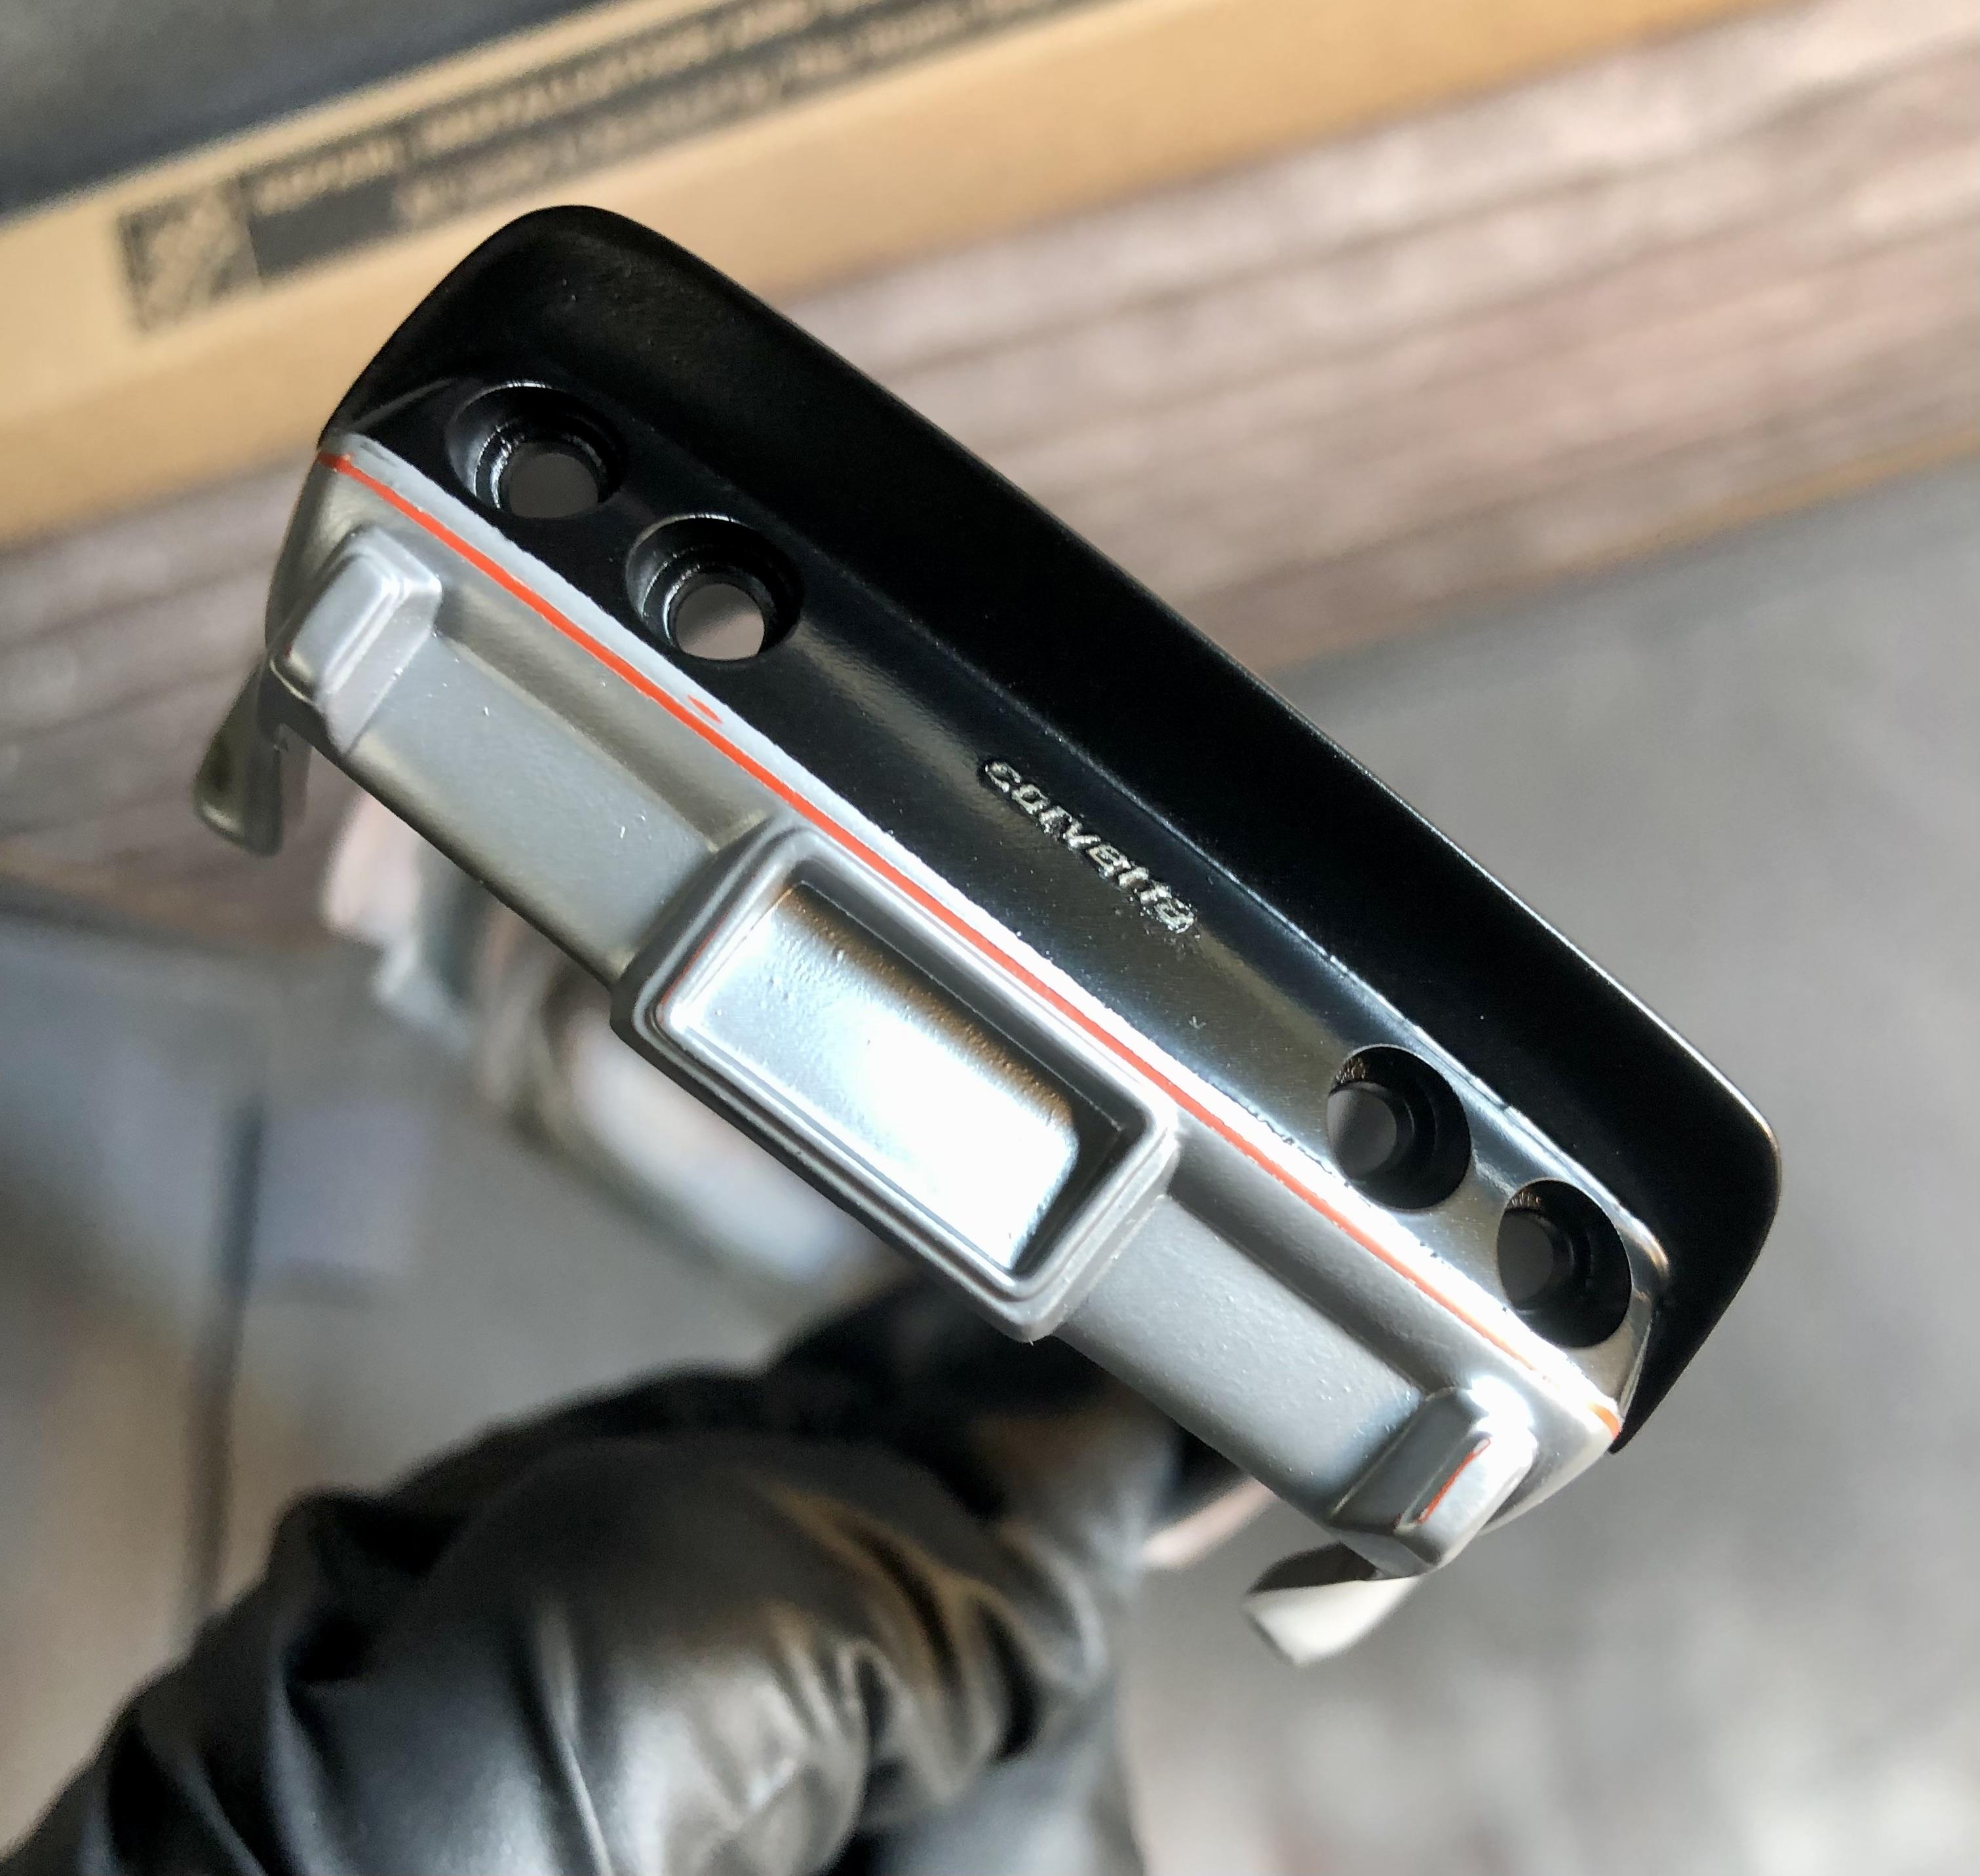
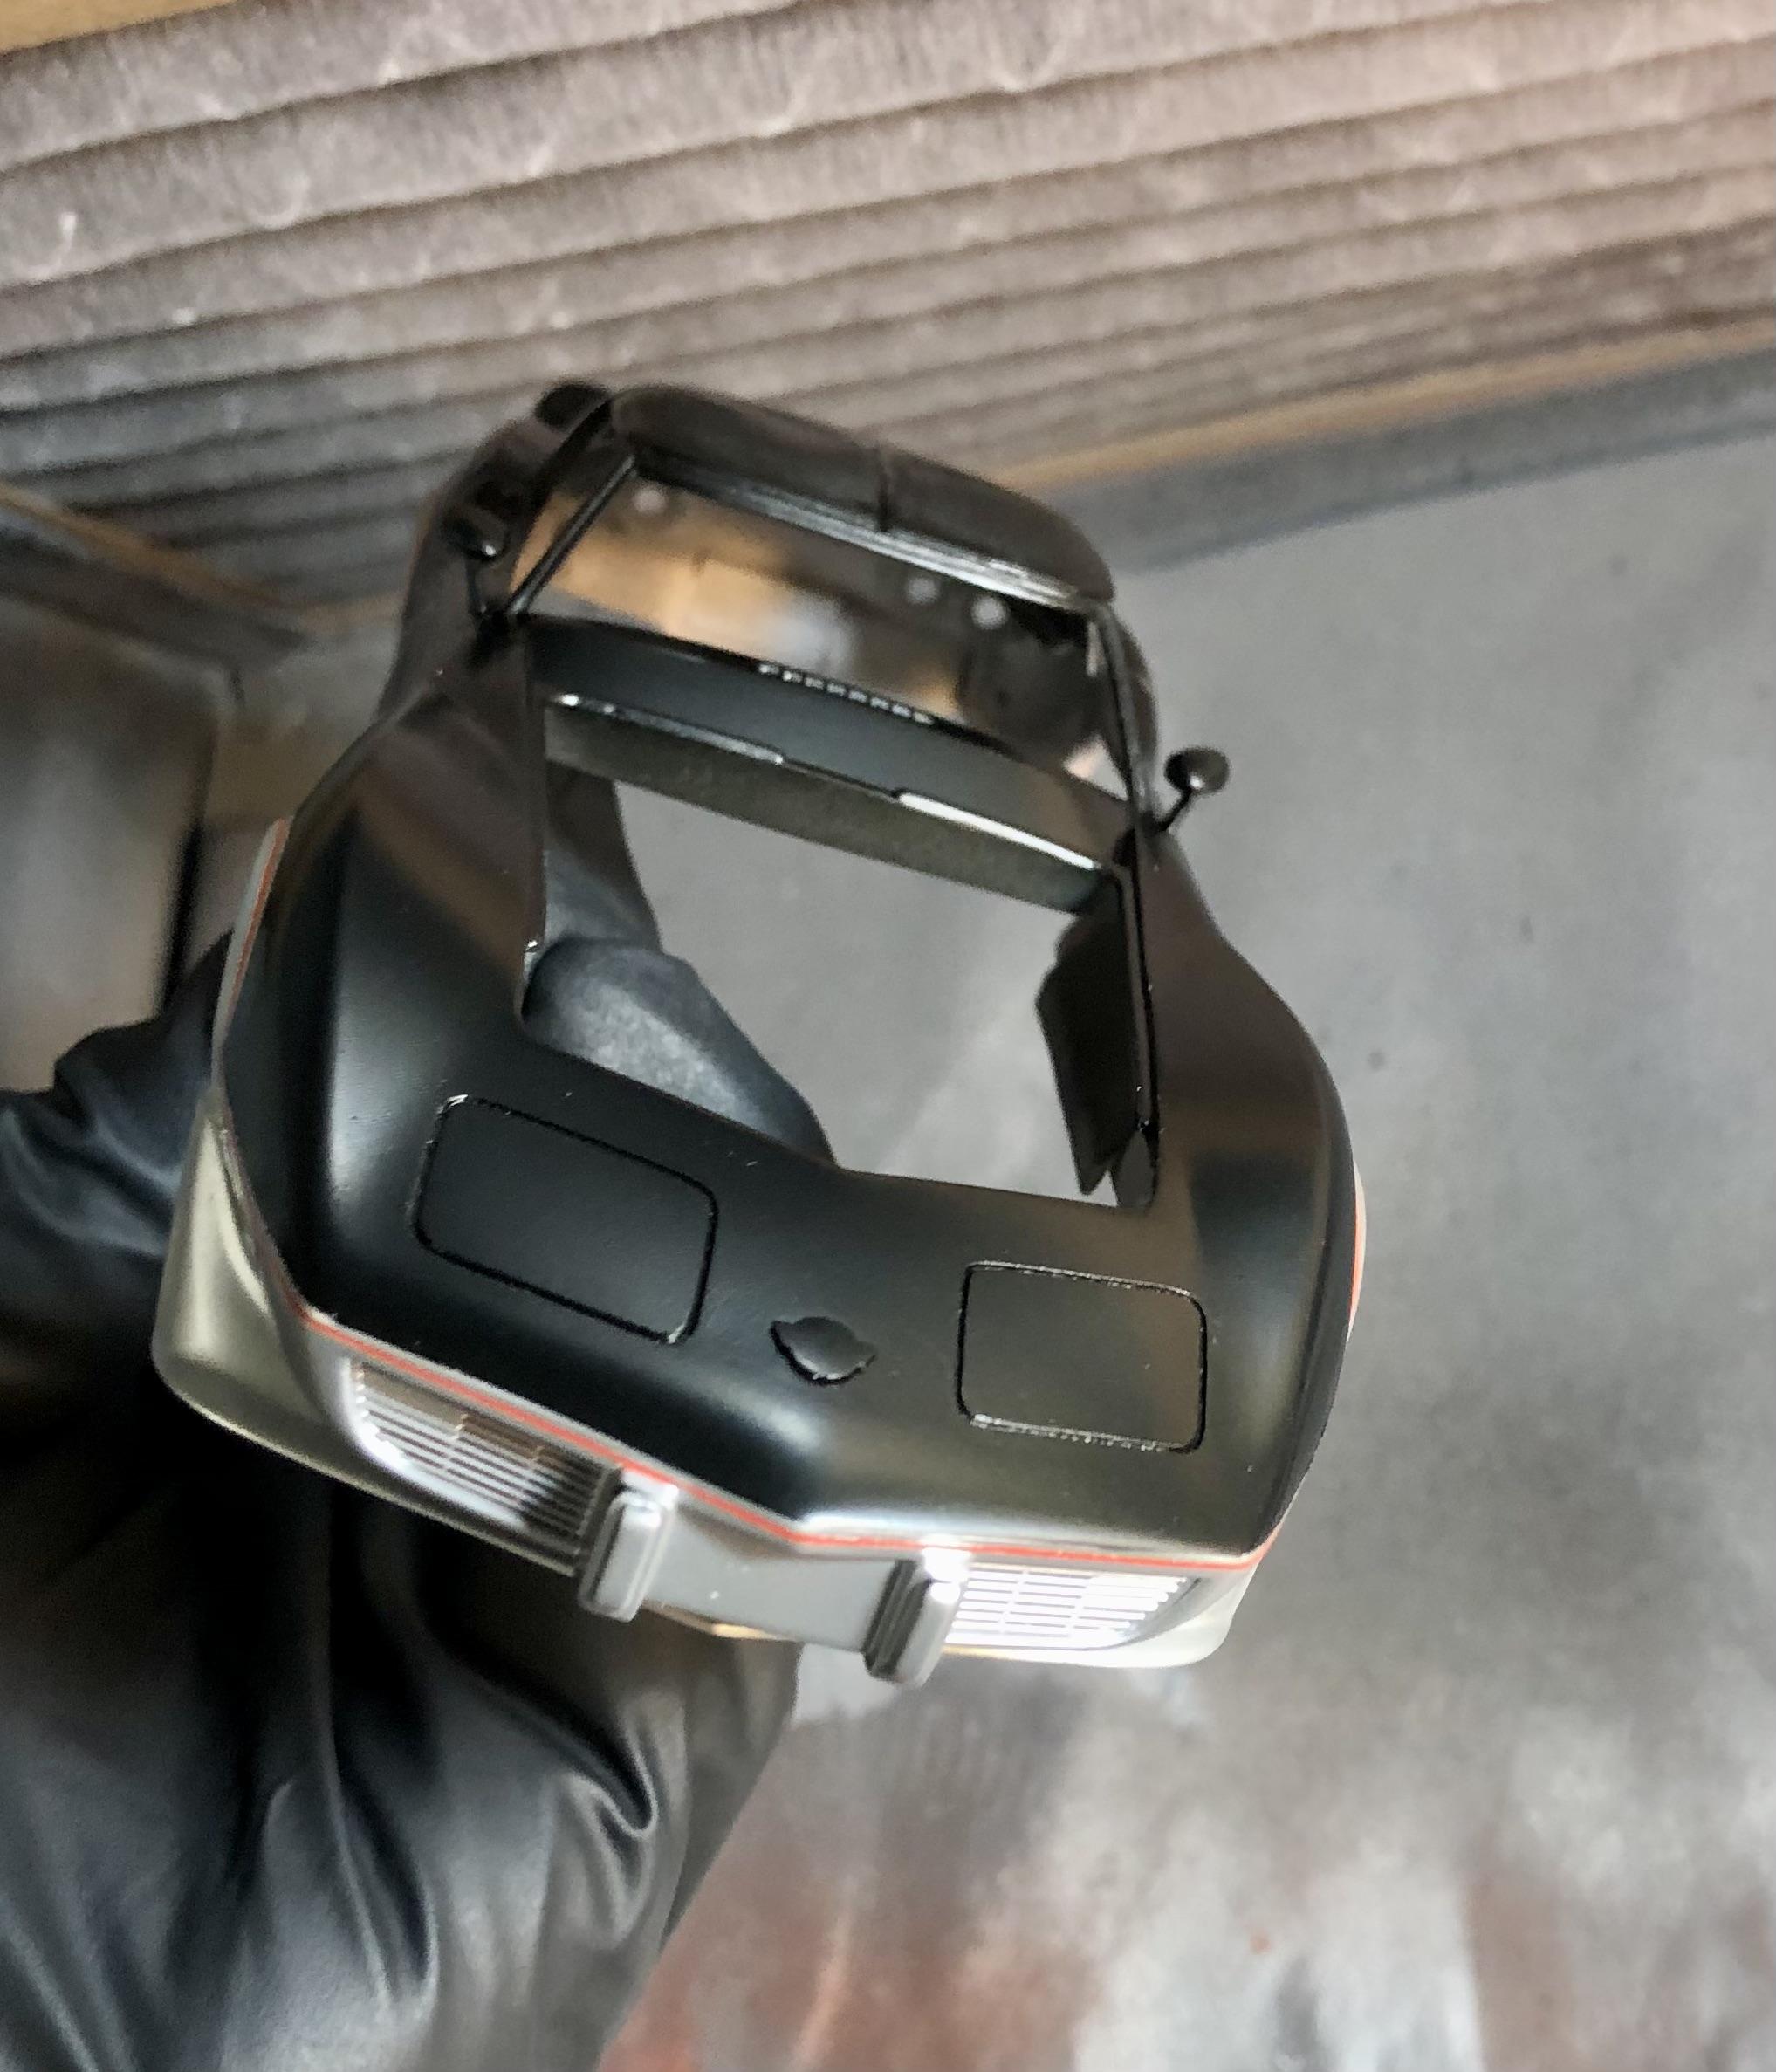
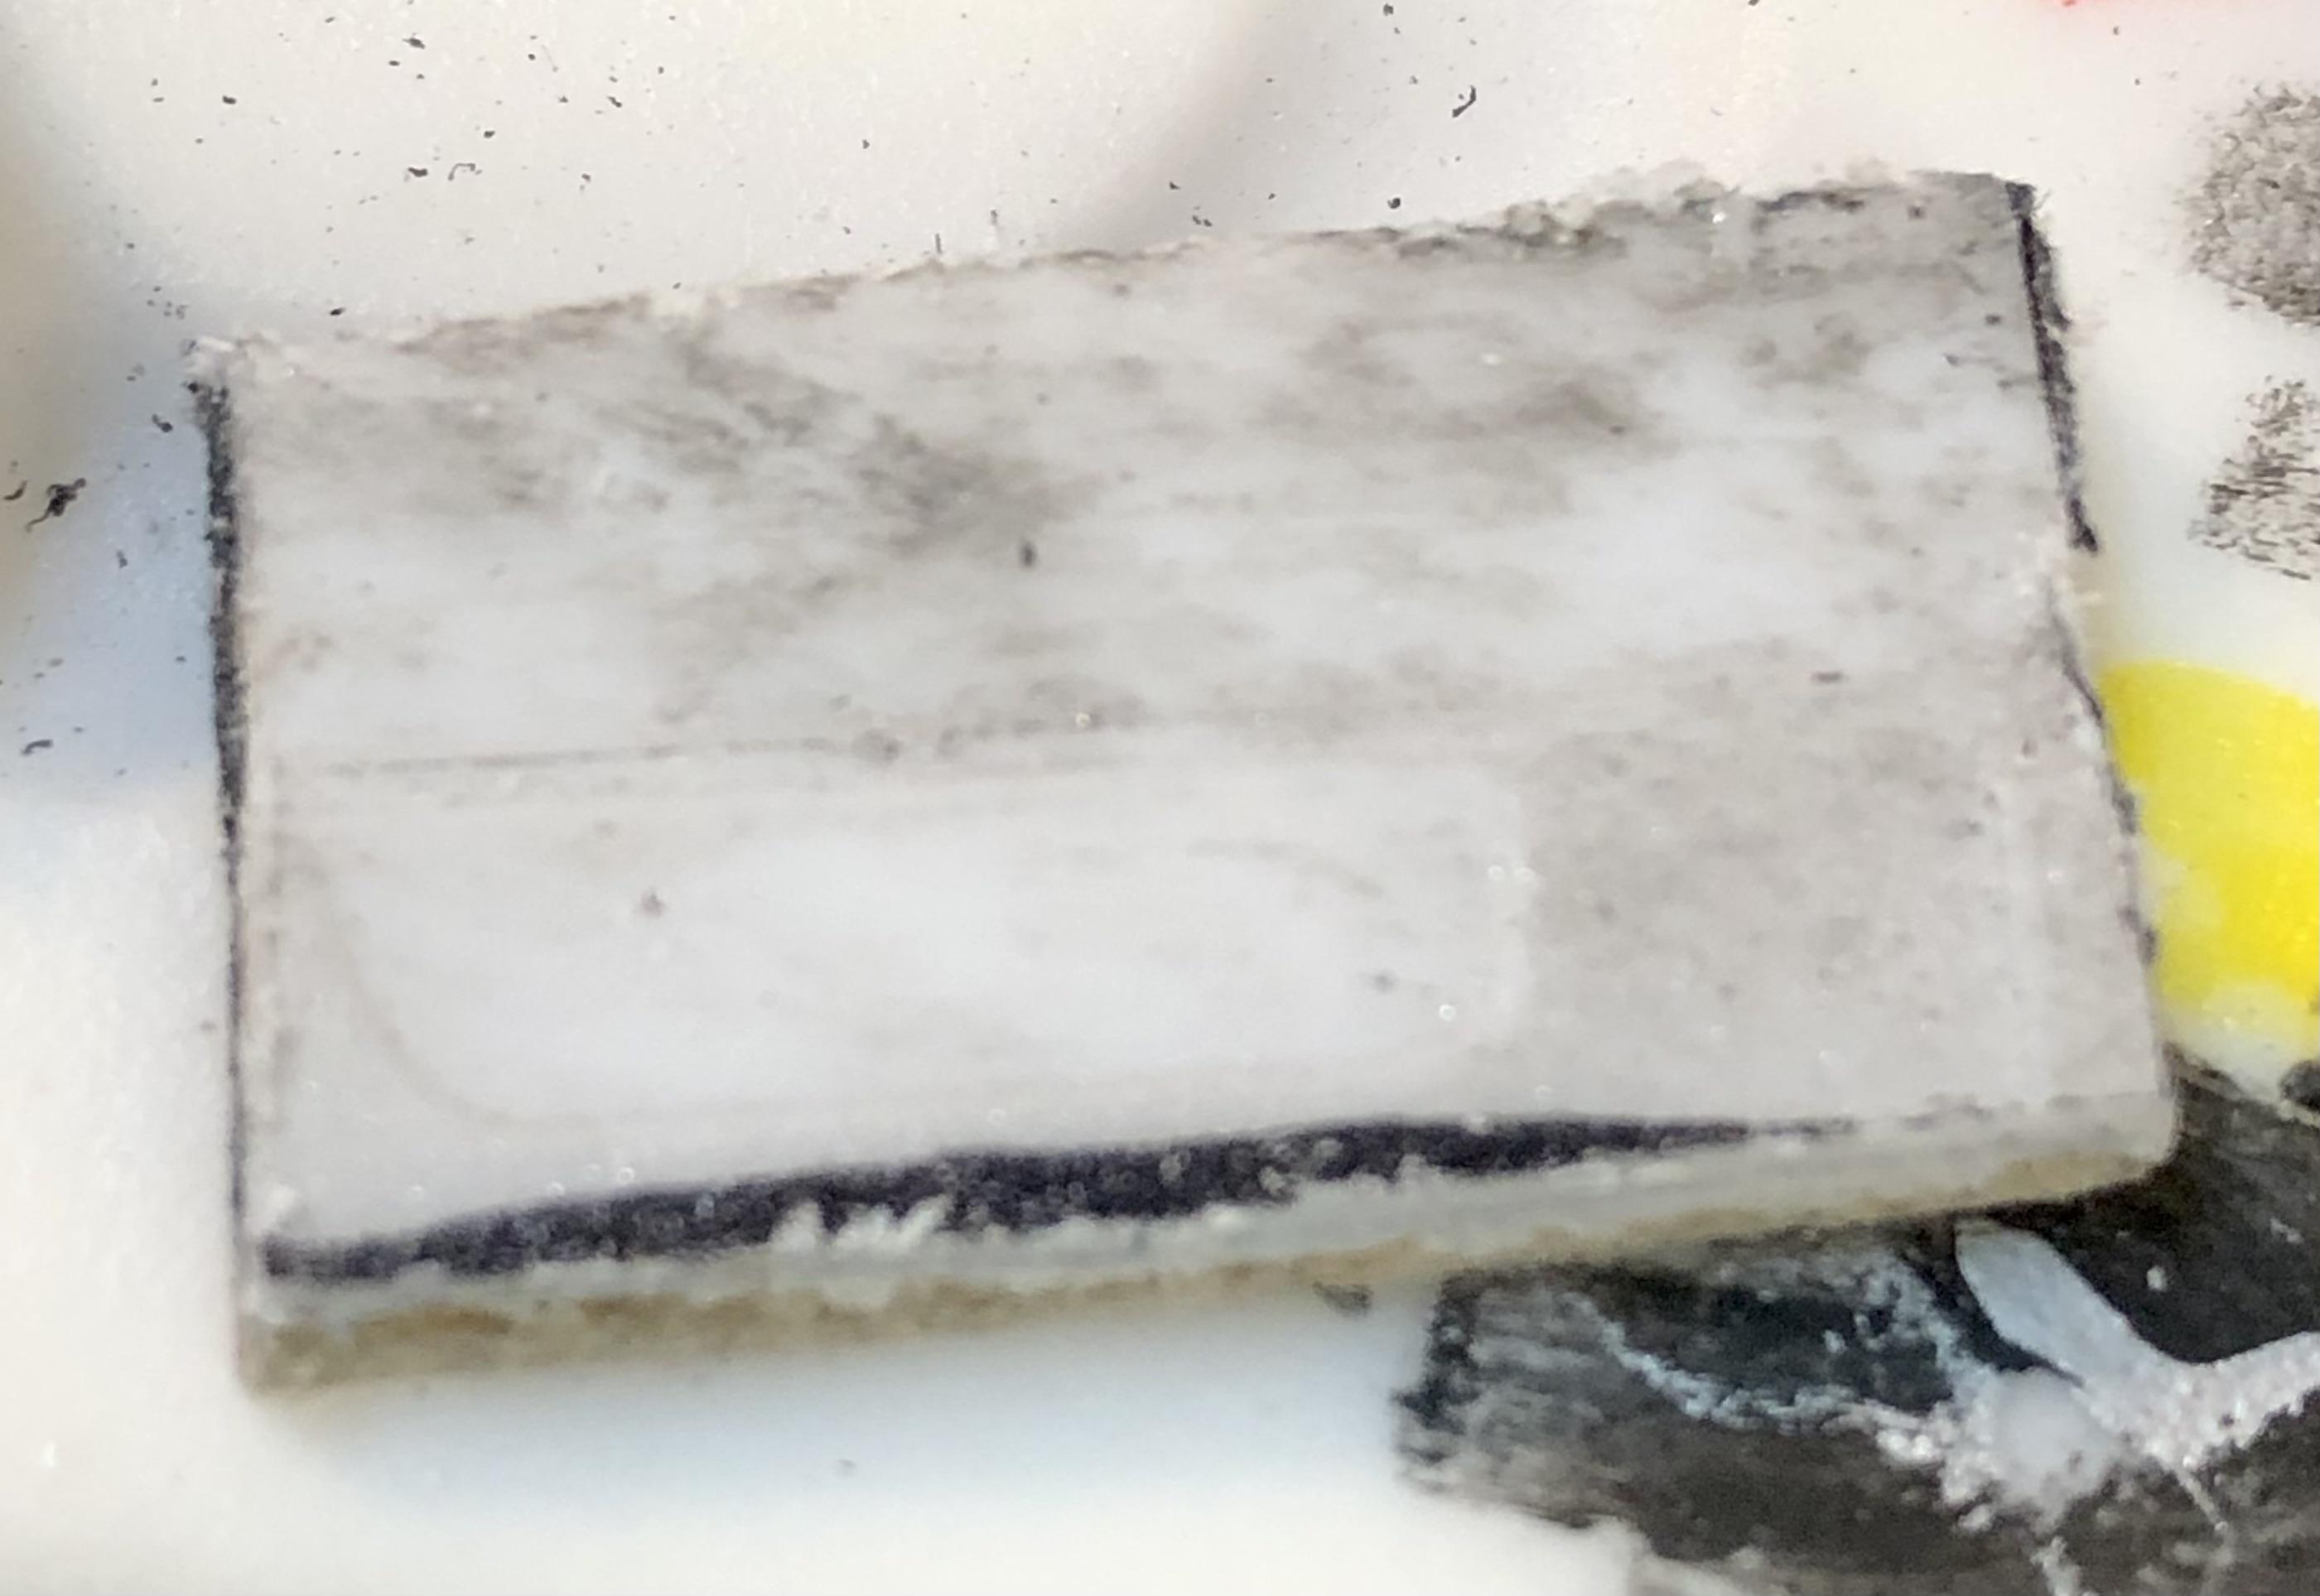
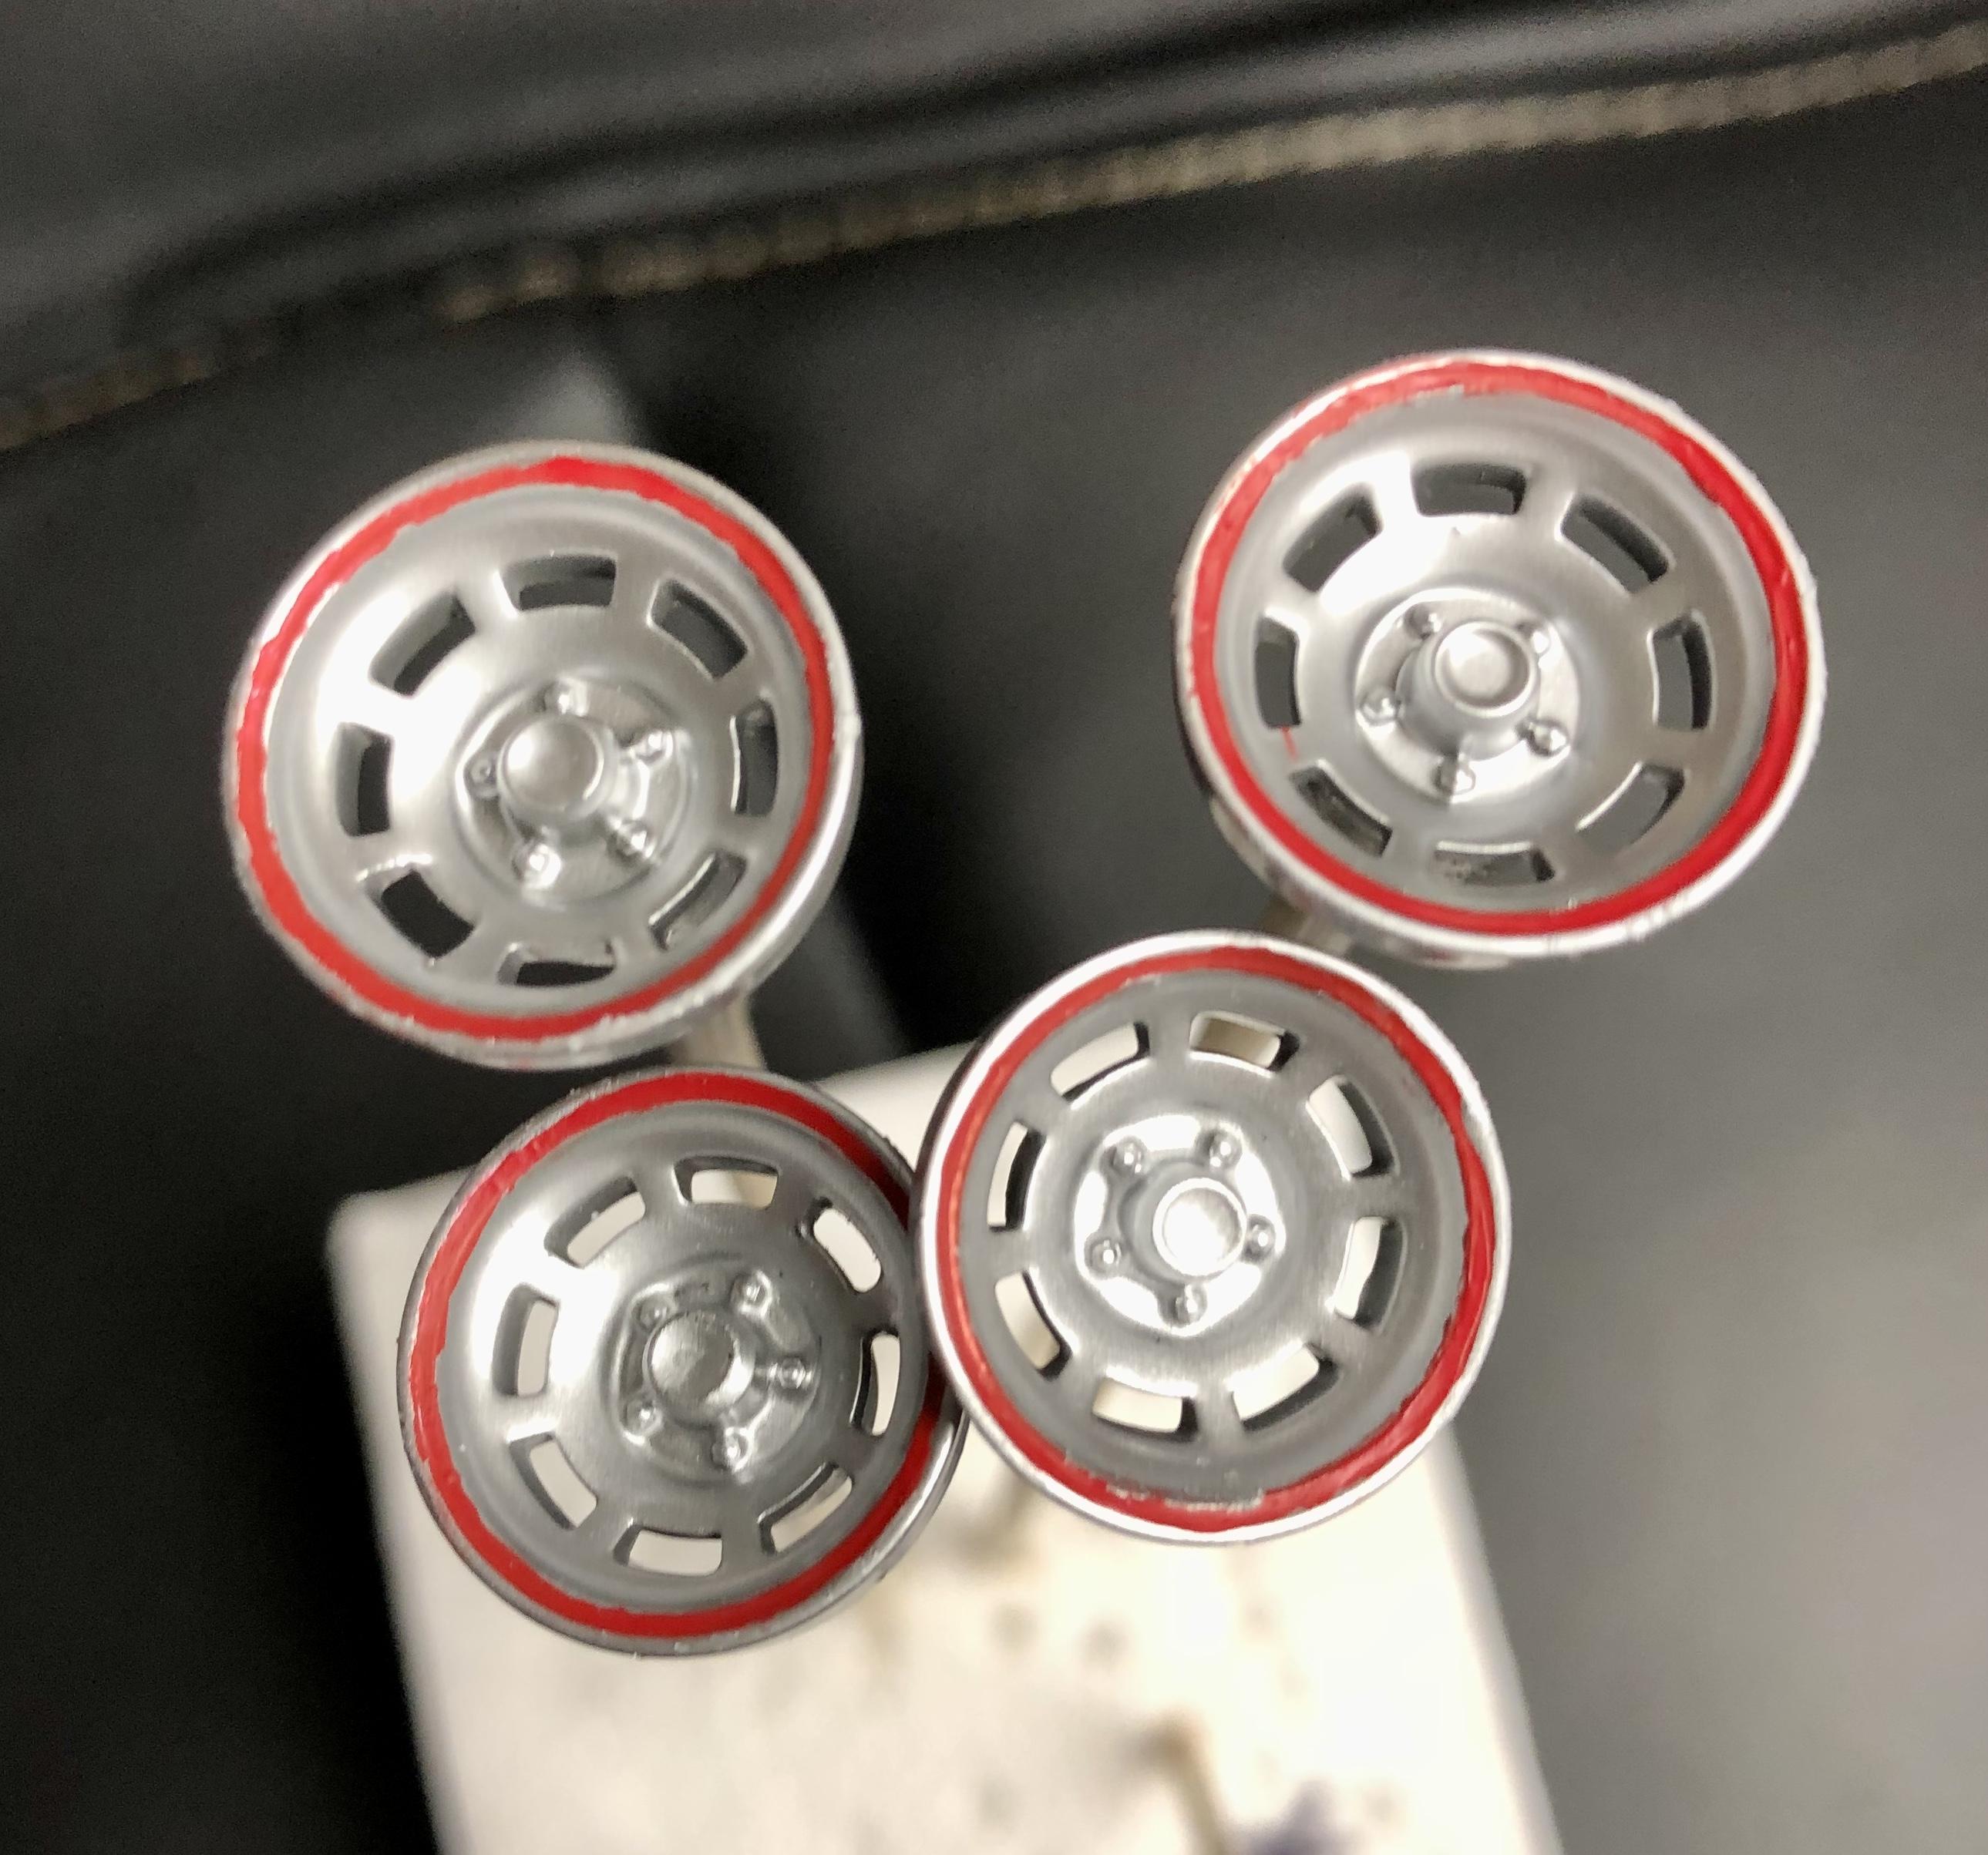
I’ve talked about this WIP in various areas of this forum and figured I’d start a thread. A little background…my brother handed me the Revell (Germany) kit and asked me to build it for him. Figuring the kit was the Germany kit, I thought it would be a good one…in theory, yes. Reality…what a pain in the backside! Nothing fit, everything was off just poorly engineered. So I had purchased a junk Danbury Mint 78 corvette for $10 and pirated a ton of parts like the twin snorkel air cleaner and the fan belt assembly since it had the Power Steering Pump and A/C units. The kit just had a floating alternator. I mocked up some resemblance of a PS rack… The interior door panels were barely noticeable so I cut the ones out of the kit and fit the interior of the door panels in place…yet to be finished. I also de-chromed the wheels and painted them Alclad bright aluminum then tried to apply the red trim to the wheel but those decals fragmented on me…so I hand painted them. They still require some touch up, add the center cap decals (provided they don't fragment on me) and clear them...but I’ll get it shortly. Figuring the rest of the decals would go the same route, after I primed the body, I sprayed the red on for the pin stripe about a week ago. Today I masked off the red with 1/64” tape and sprayed the silver lower body and removed the tape IMG_3376.mov That’s it so far. The black upper body will come next week after the paint cures a bit.
-
I have ordered from both TX3DCustoms and Iceman Collections and both companies have stellar products. Most recently, I ordered and received a 1/16th scale FORD FE Cobra 427 to drop into a Revell 1/16 Cobra from Charles at TX3DCustoms and I am completely blown away by it. Pictures coming in a separate thread. Although not a "parts" provider, I also need to give a shout out to Splash Paints! Some of the best paint products out there. I am not the world's greatest painter by a long shot but Splash Paints go on so effortlessly that I swear that even a kindergarten finger painter can get a professional looking finish with a decent airbrush
-
1/64" width tape (Masking?)
BDSchindler replied to BDSchindler's topic in Model Building Questions and Answers
thanks...I was trying to avoid cutting my own but that seems like the best option at this point. I'll attempt it with Tamiya tape. -
I'm working on a 78 Corvette Pace Car (1/24th Revell Germany) and I have a plan for the red pinstripe that encircles the body. I don't want to use the decals in it as so far, I am not too happy with the kit in general. Nothing fits correctly. When I tried using the red trim decals for the wheels, it was a fiasco. First wheel went "ok" but the decal for the next one fragmented and I ended up just hand painting the red wheel stripe. So I do not want to use the decals. I trust nothing on this kit So for the body, my plan is to spray the red for the pinstripe...let it cure then mask off the pinstripe and paint the lower body silver...then mask that off and paint the black upper body and use 2K clear. I'm using Splash Paints. But I need to find 1/64th" tape...I have 1/16th" but its too wide. 1/32nd is still too wide so if I can locate 1/64th", that will work. All help is appreciated
-
I use Firefox and have the same issues. Also, Firefox is set to automatically clear the cache every time I exit Firefox. Even if I do clear the cache manually, I still have those issues and have for close to 2 years now.