BDSchindler
-
Posts
468 -
Joined
-
Last visited
Content Type
Profiles
Forums
Events
Gallery
Everything posted by BDSchindler
-
@Dave Ambrose...just calling your attention to it since I think you worked it last time around
-
Interesting...I cannot even EDIT my post unless I quote it
-
OK, so a little more on this... If JavaScript is DIS-abled, then I CAN access Messages, Notifications and able to login...BUT, NO pictures show up in any postings. If JavaScript is EN-abled, then I CANNOT access Messages, Notifications and UNable to login...BUT, ALL pictures WILL show up in any postings. This has only been happening since the last round of server migrations. I'm not crazy...I spent 45 years in I.T. but very little of it was with online web applications (Mostly Mainframe Client/Server BLAH_BLAH_BLAH_BLAH). That said, I have seen so many weird things happen when upgrades took place (regardless of the platform), it would boggle even the most intelligent of Software Engineers!!! A similar situation occurred the last time this site went through a server upgrade until one day it was miraculously fixed. Even back then, some people had the issue with Firefox while others in firefox didn't. So somebody may want to go back through the maintenance history and find out what was done then. I'm sure it's similar.
-
I am on Firefox and noticed since the server migration the login ("Existing User? Sign In" prompt) at the top right of the page doesn't work. If I go to Microsoft Edge or Chrome it works fine. Just not with Firefox. Is anybody else using Firefox experiencing this?
-
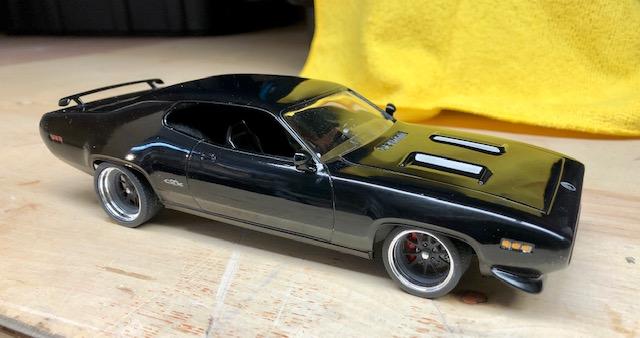
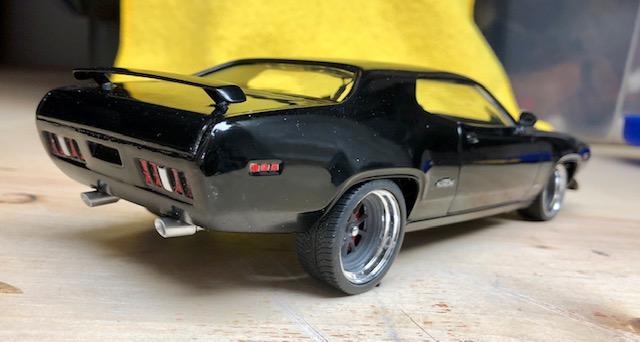
New project on the table, sure to be a “Thriller”
BDSchindler replied to BDSchindler's topic in WIP: Model Cars
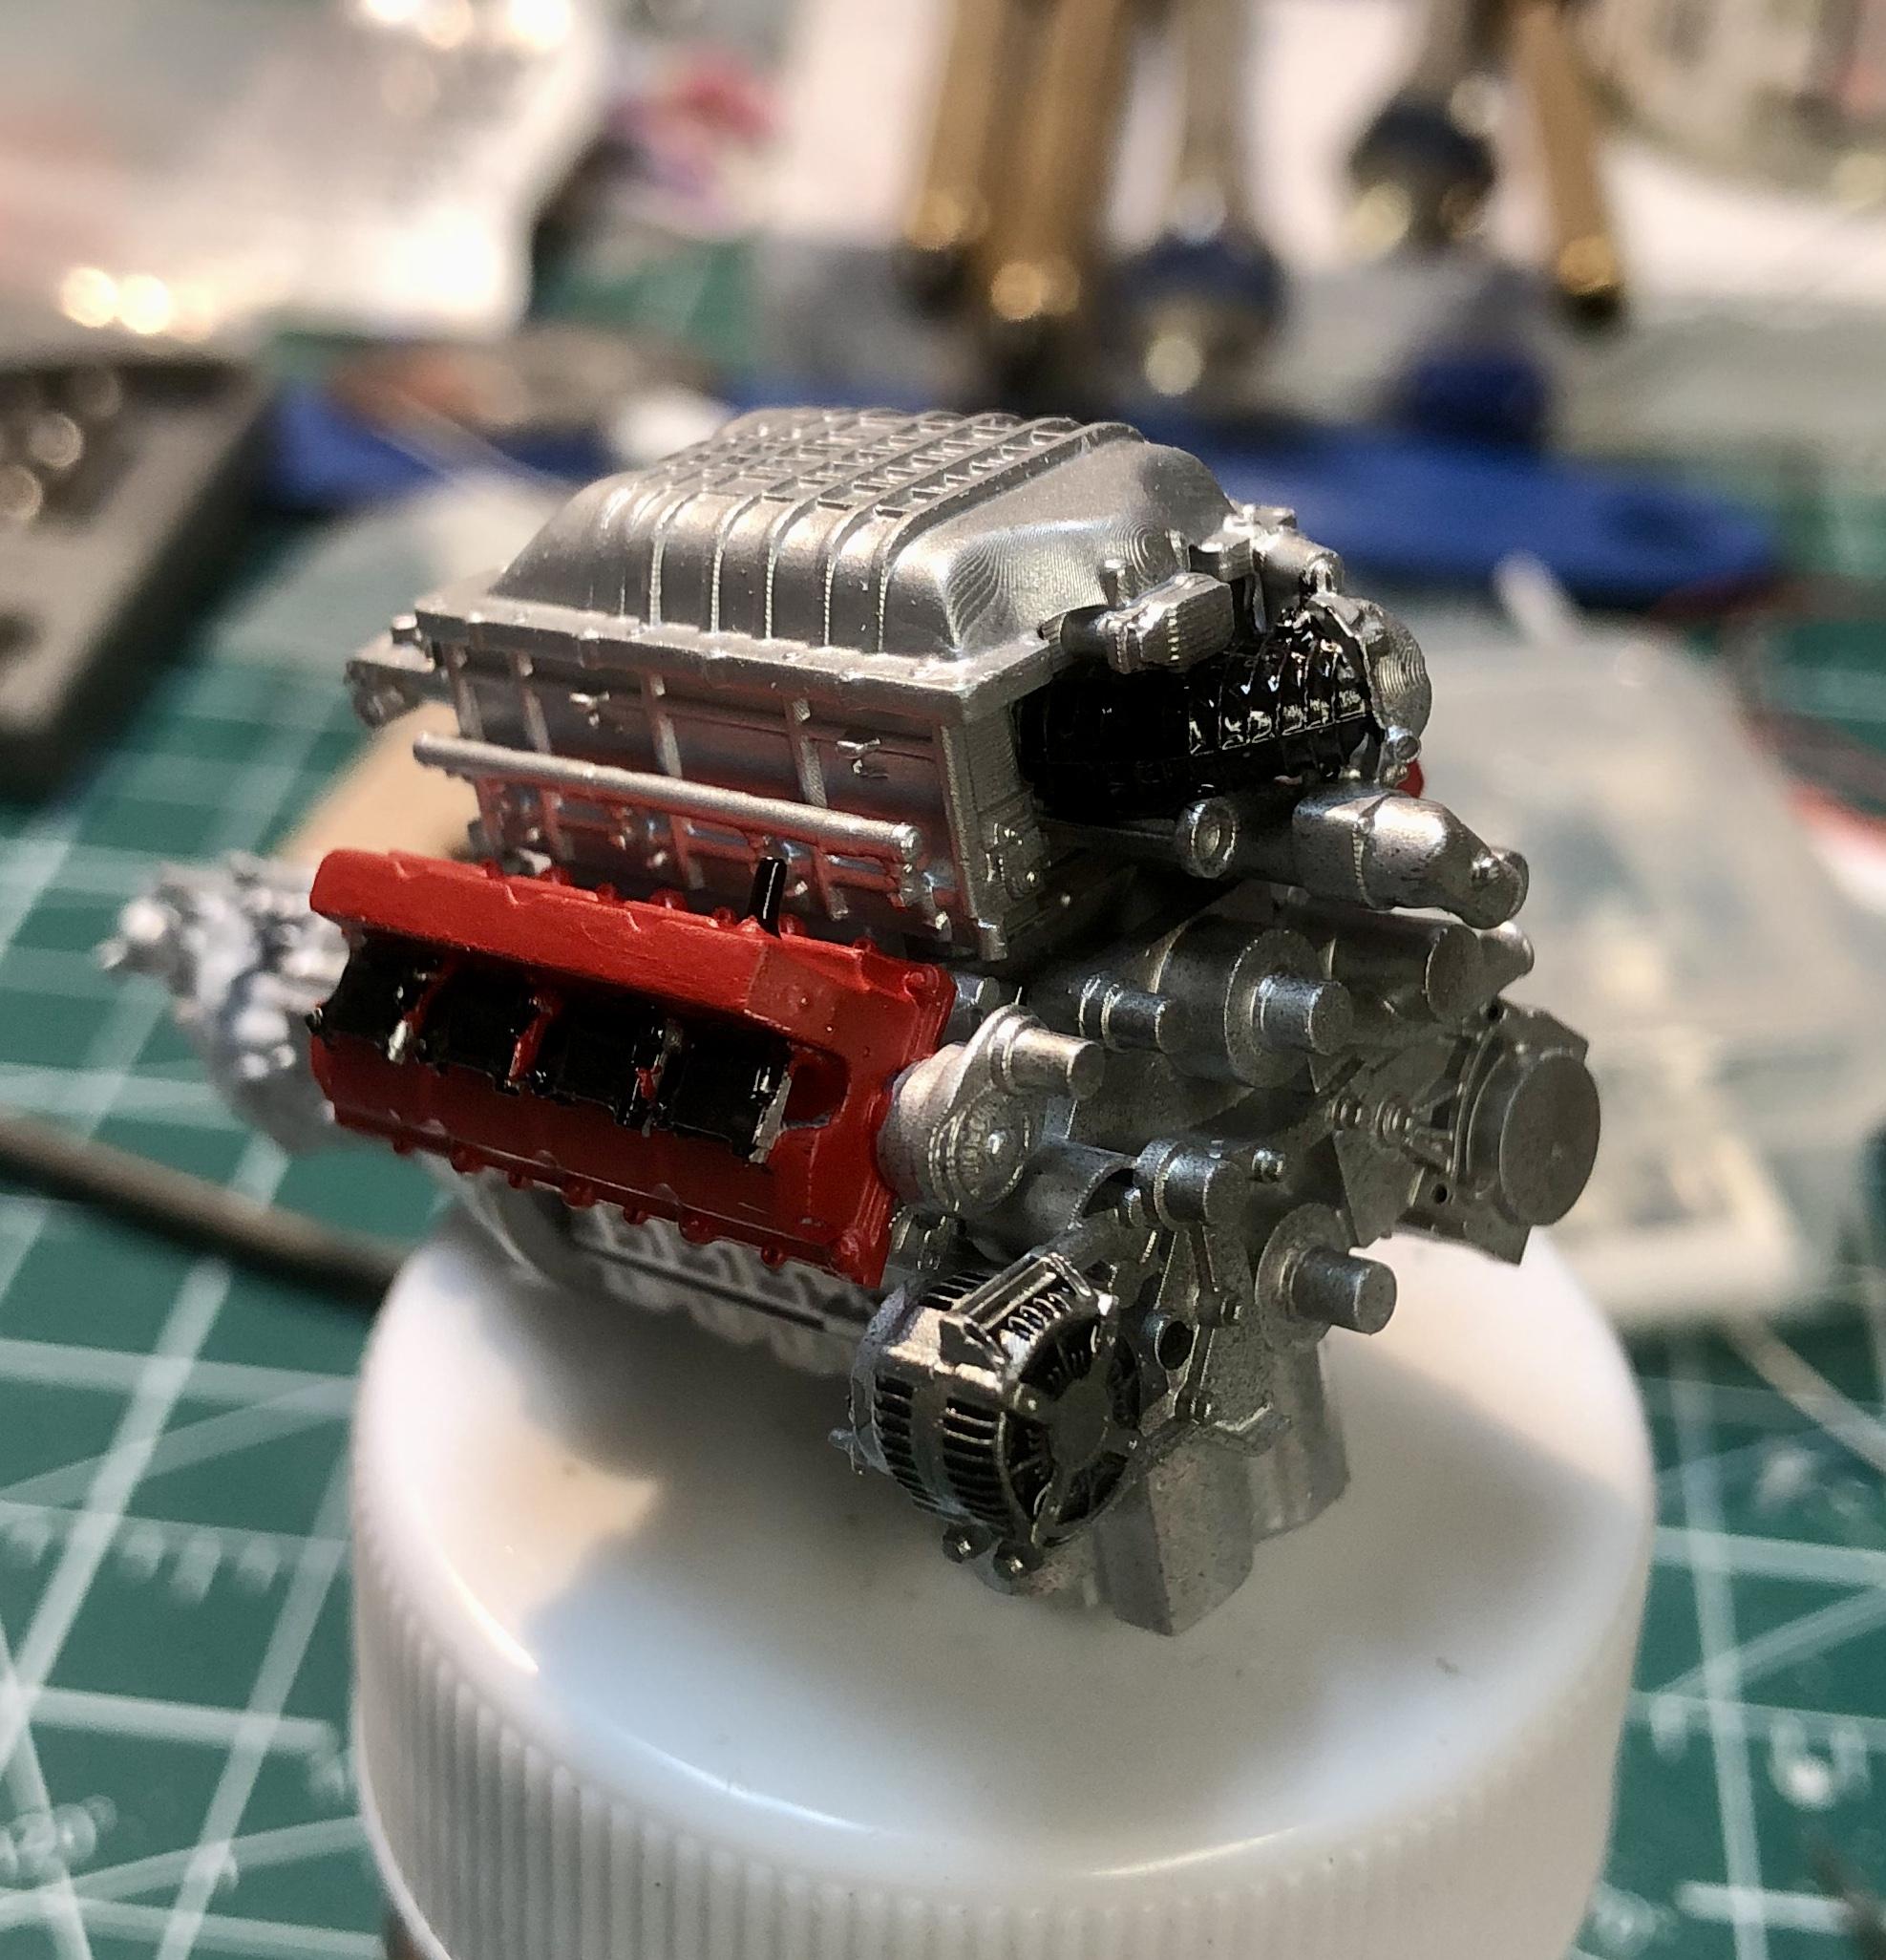
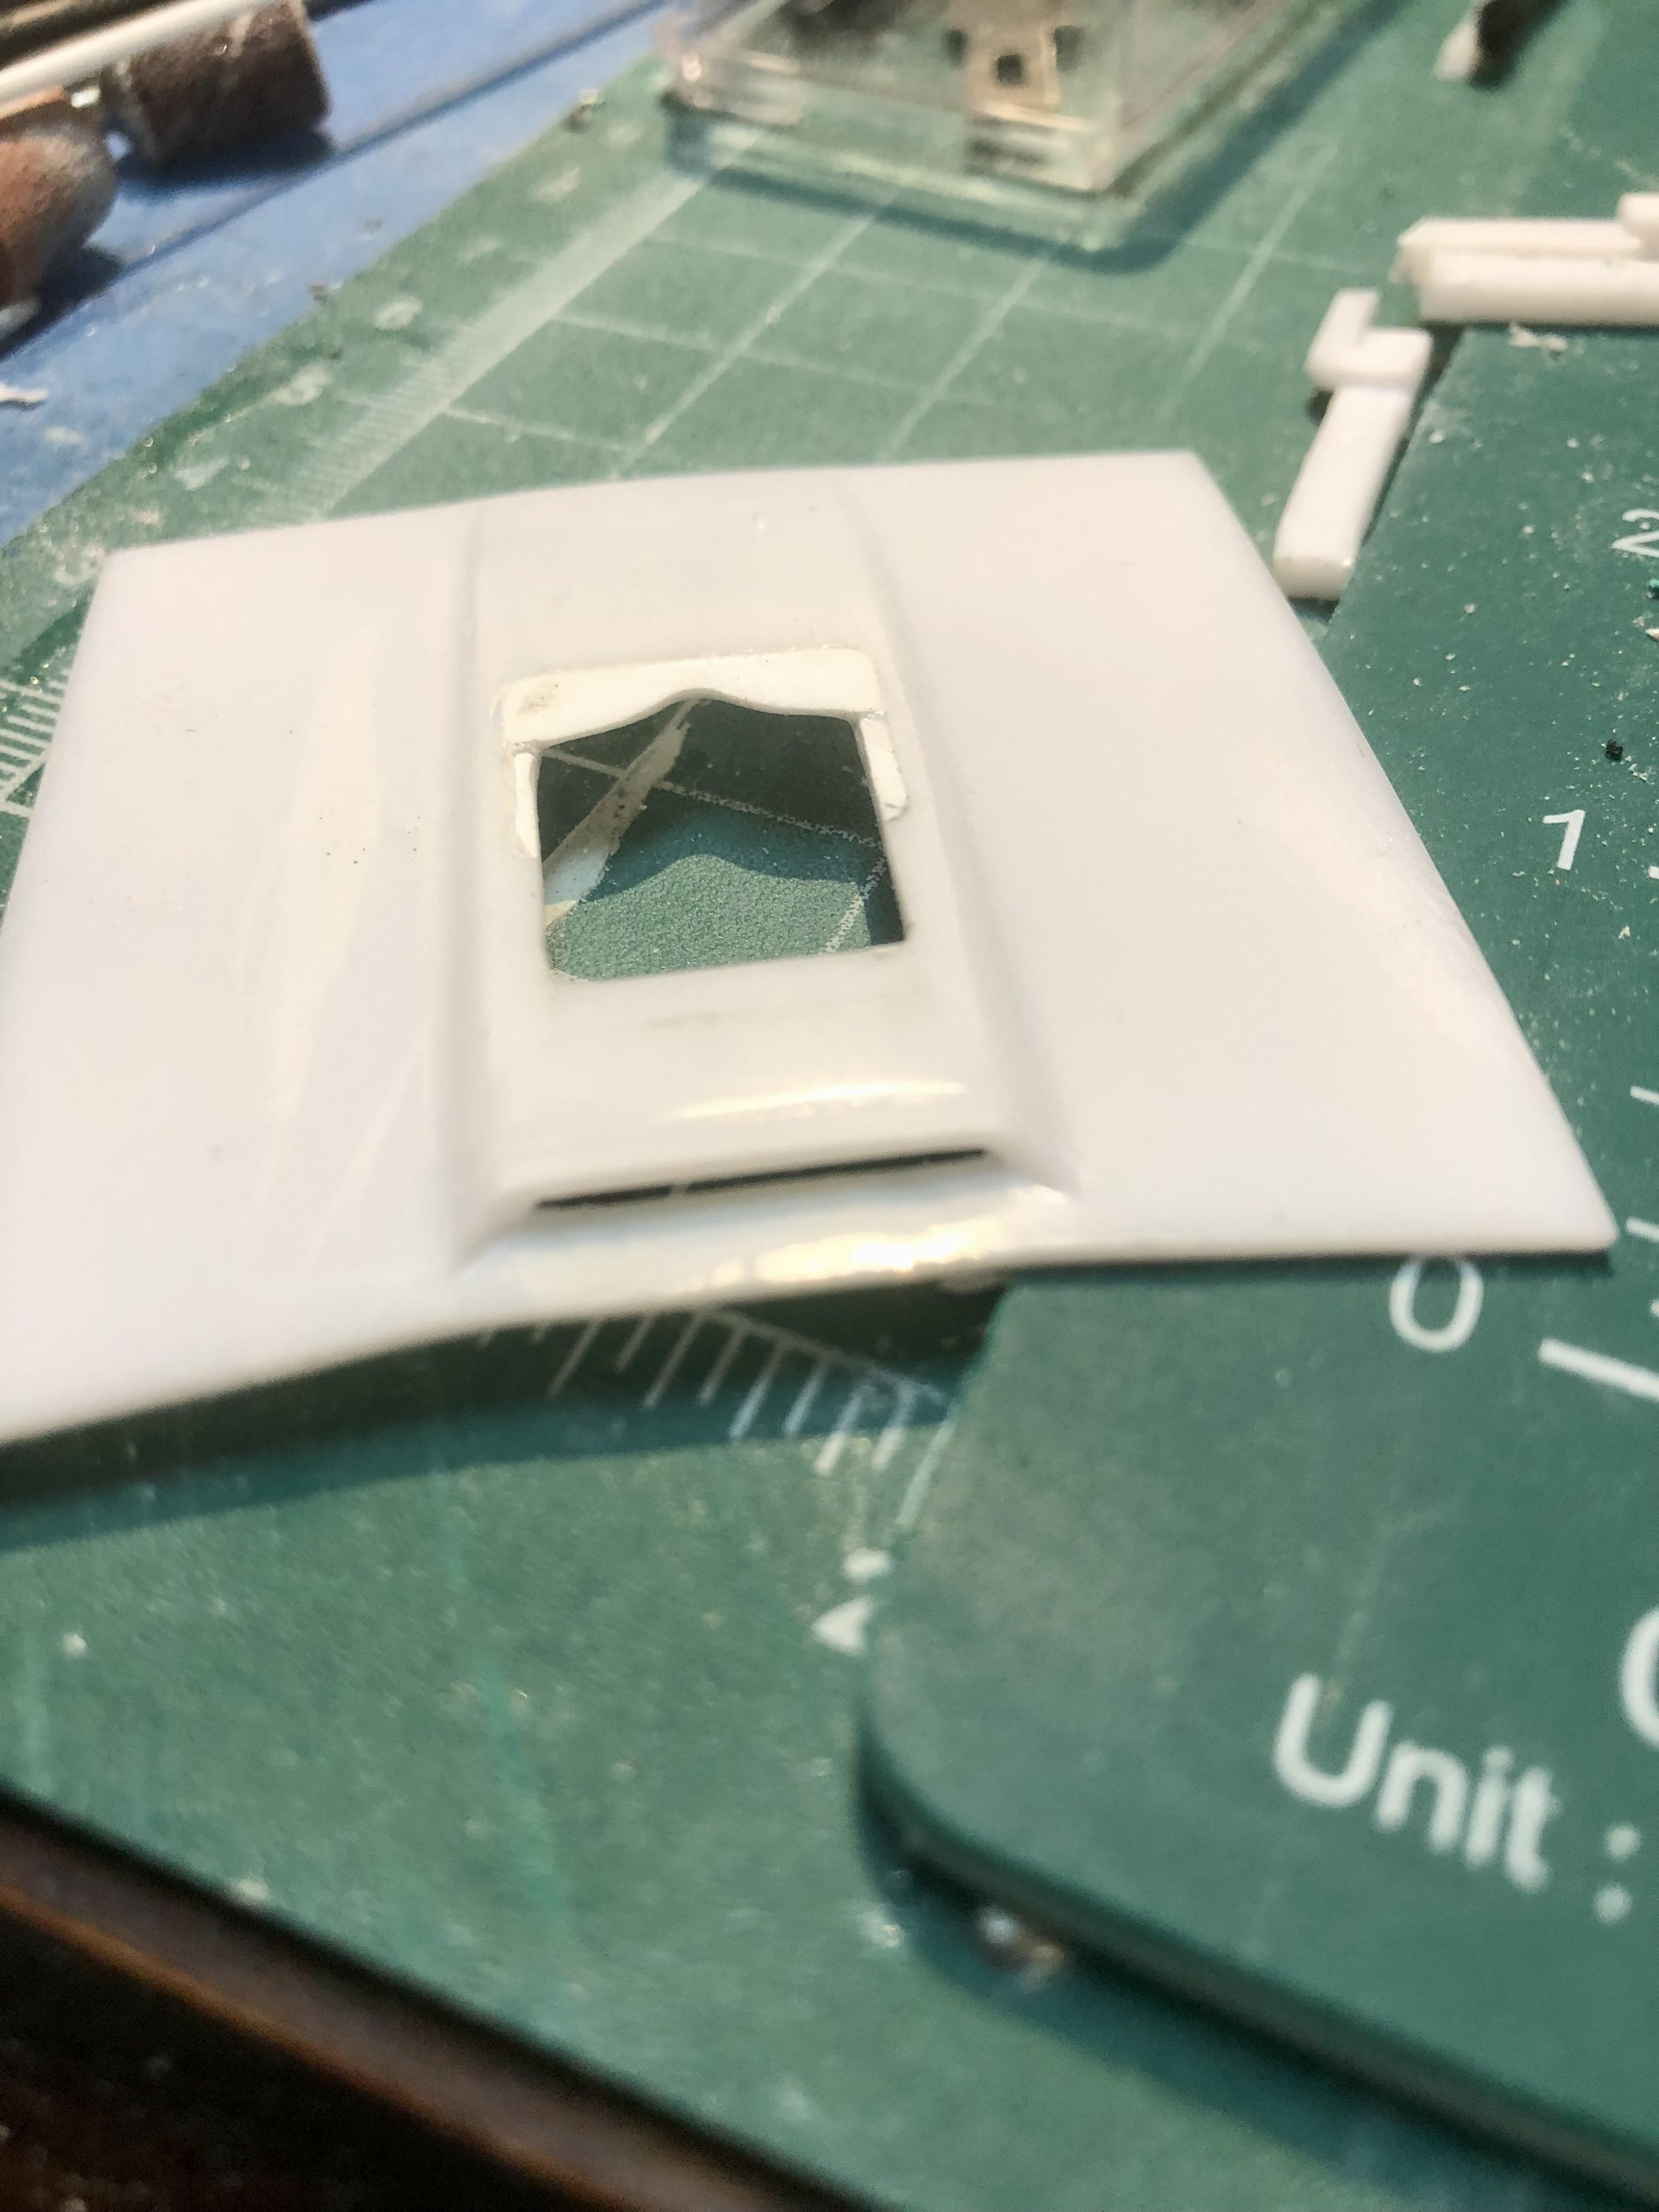
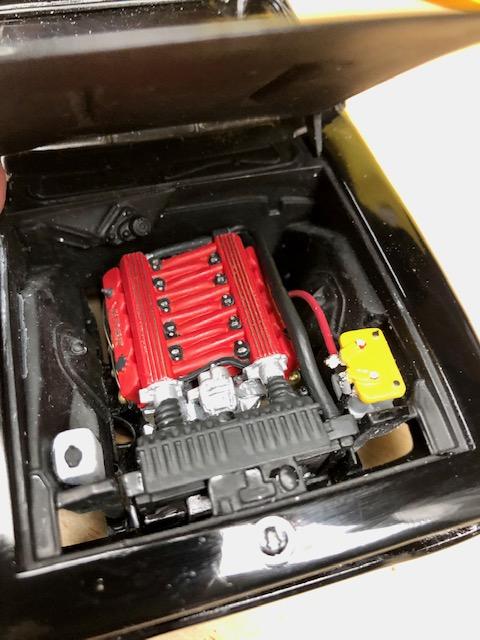
So, a little more progress… TX3DCustoms Hellcat is in the works… Did a little more mock up with the motor just sitting in the engine bay so I could get the opening in the hood laid out. Still needs to be puttied, sanded and primed Also opened the reverse hood scoop… Had to remove the horrible hunks of plastic that was considered hood hinges. Turns out the interior interferes with the lousy hinges and won’t let the hood sit proper. Debating if I want to attempt doing hinges or not. That’s it for now. Hopefully I’ll have more time to devote to this later this week.
-
Farm Floater Truck 1/24th scale
BDSchindler replied to Randy D's topic in WIP: Model Trucks: Big Rigs and Heavy Equipment
Thanks Randy...your work is just amazing. -
Farm Floater Truck 1/24th scale
BDSchindler replied to Randy D's topic in WIP: Model Trucks: Big Rigs and Heavy Equipment
Randy...are the lines for the Compressor and primary/secondary fuel filters have crimped connectors? How are they connected? Your work is simply amazing! -
New project on the table, sure to be a “Thriller”
BDSchindler replied to BDSchindler's topic in WIP: Model Cars
Thanks guys! Will it be an exact replica? Probably not but a helluva base for inspiration! For example, the wheels and tires will be different and not as wide as I wanted but what I found is close. I just really liked the original and that in itself is a lot for me as I was never really a huge MOPAR fan. That said, I do love custom modified cars. -
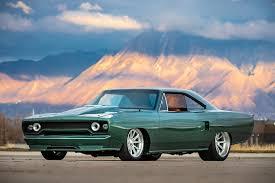
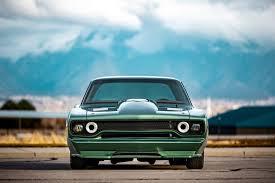
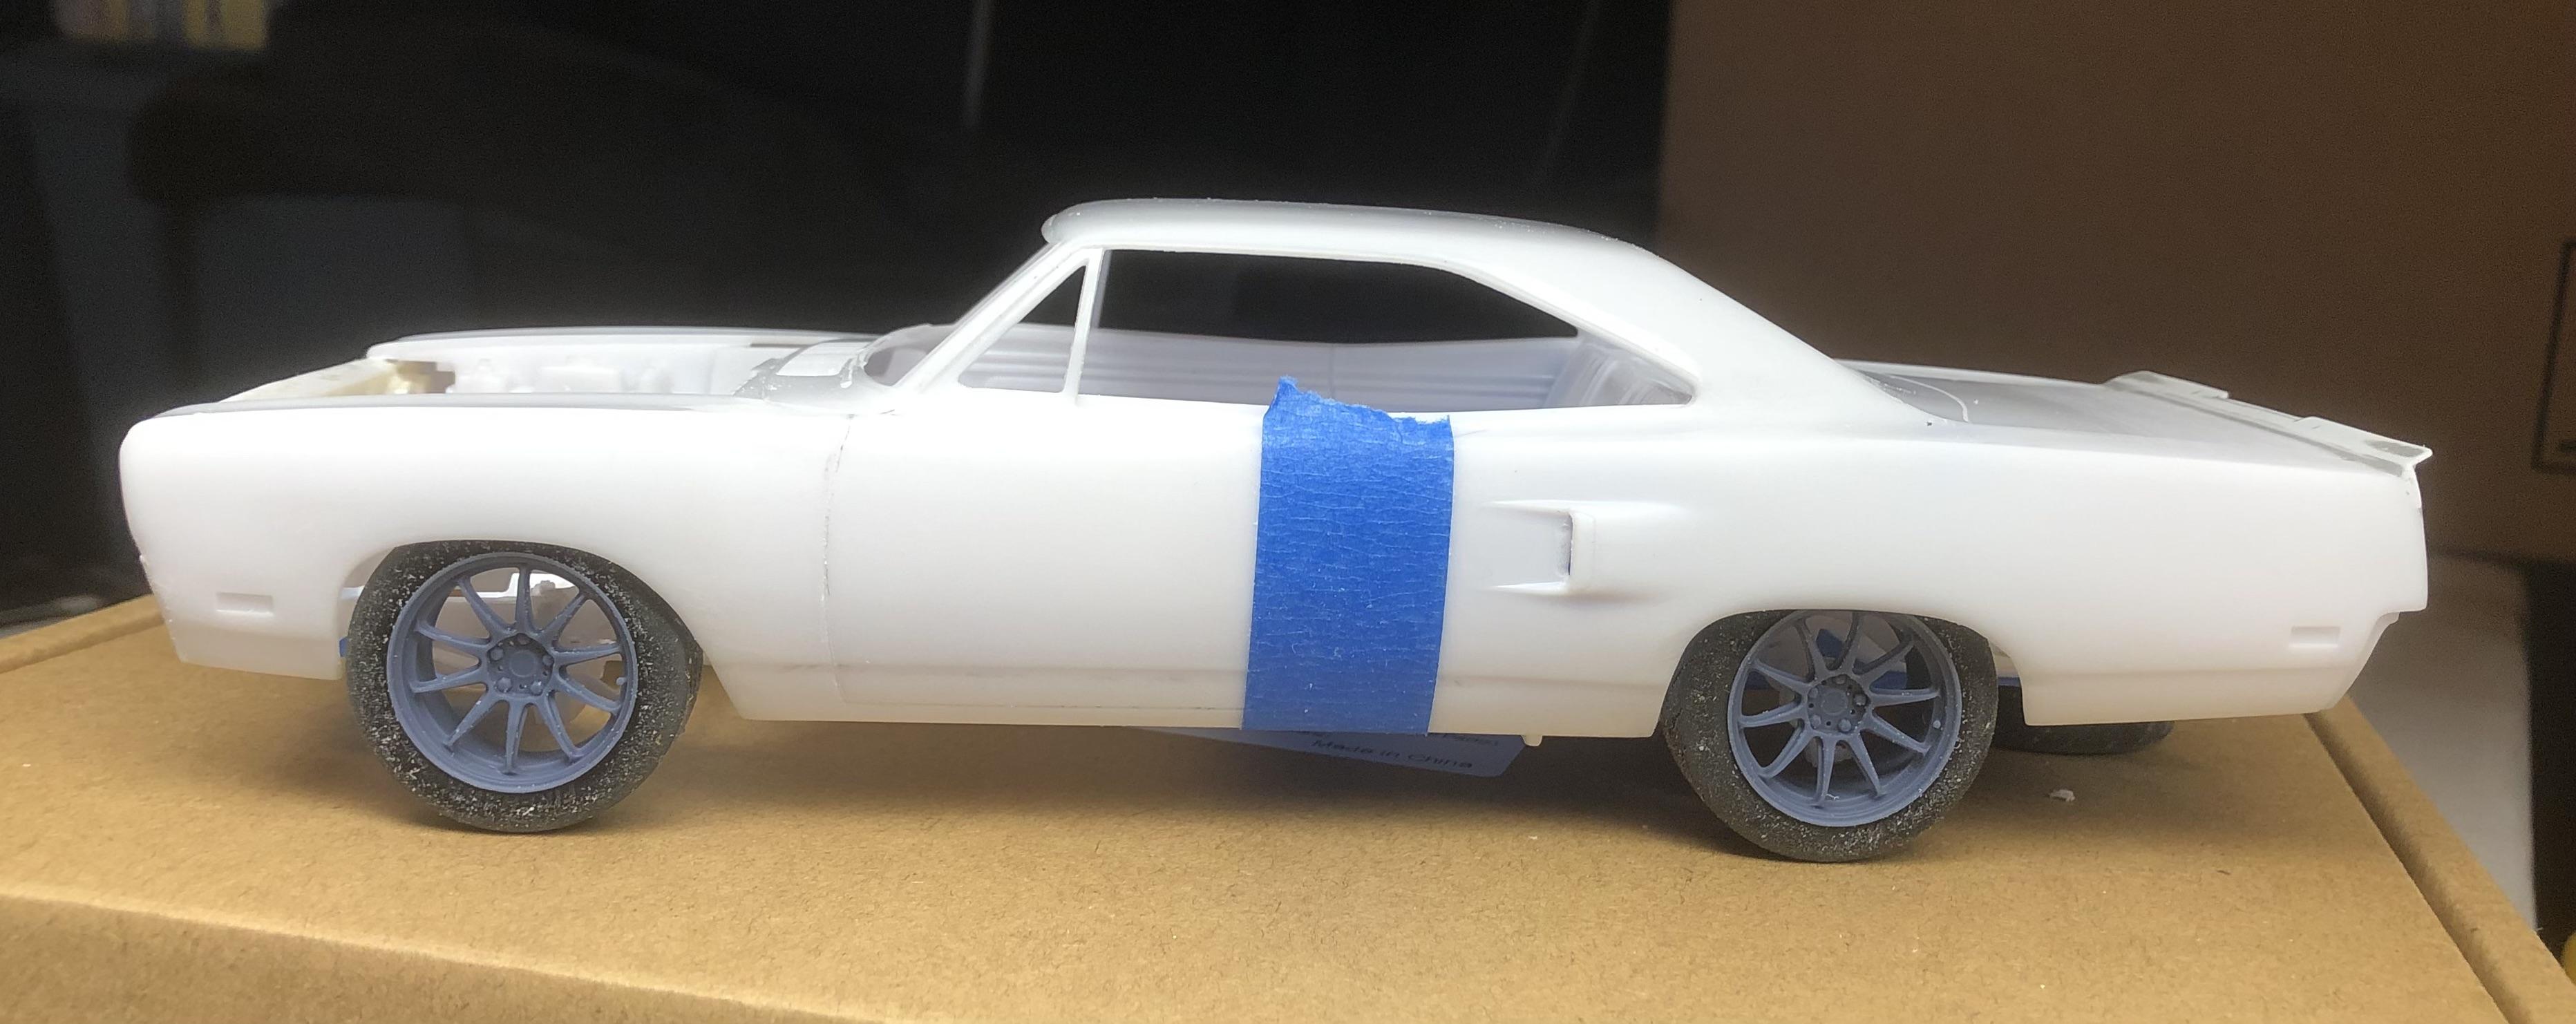
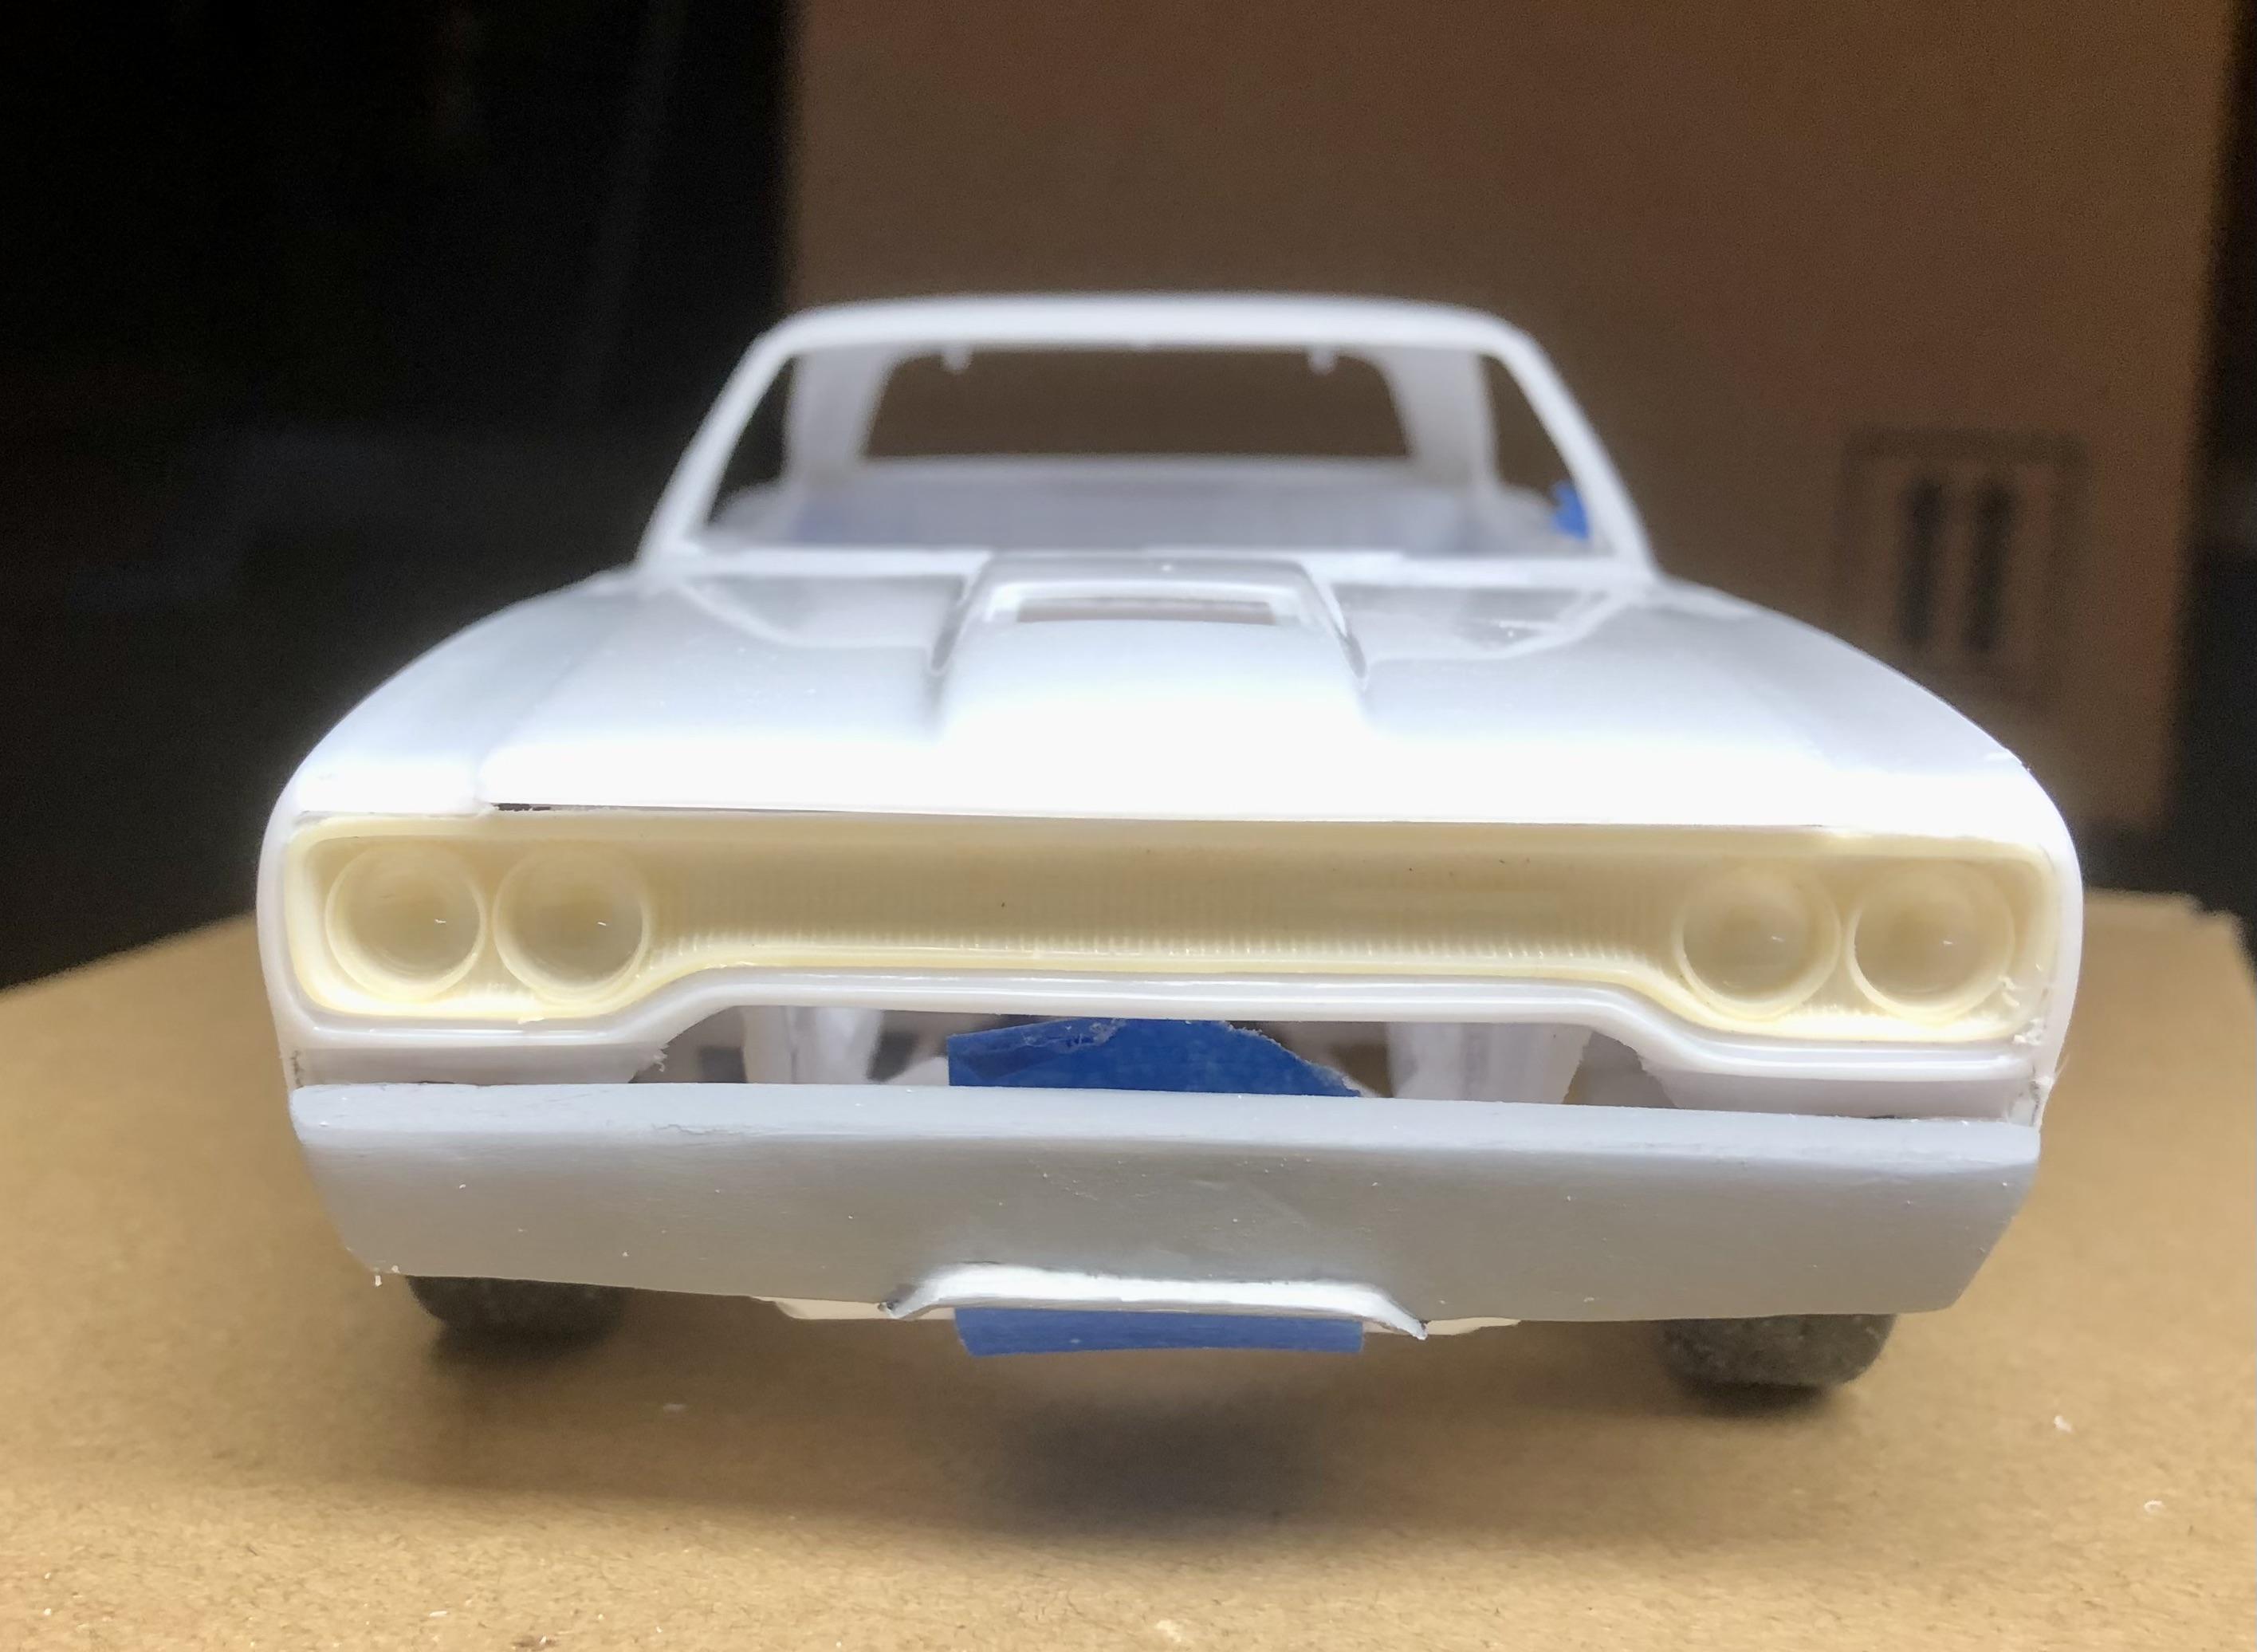
So I was thumbing through the latest issue of Modern Rodding and ran across an ad for Amsoil Motor Oil. The ad had a custom 70 Plymouth Satellite that tripped my trigger. A little digging through the innerwebs produced Weaver Customs “Thriller”… https://www.weavercustoms.com/thriller.php So, picked up the recent 70 Road Runner and set forth making a few changes. Changes so far include: Dechromed the bumpers and modified as needed Modified the grill area Added rear deck spoiler Opened the side vents on the rear quarters Lowered the front suspension Improvised the rear suspension Modified the rear wheel wells and that’s it…so far. Here’s some mock up photos using TX3DCustoms “Work Emotion” ZR10 20x8 up front and 20x10 on rear. I’ll also eventually be using TX3DCustoms Hellcat under the hood. still a lot to do!
-
Supercharged coyote, Hellcat or an LS? Hey...someone was going to ask it eventually!
-
2K Clear advice needed.
BDSchindler replied to Jon Haigwood's topic in Model Building Questions and Answers
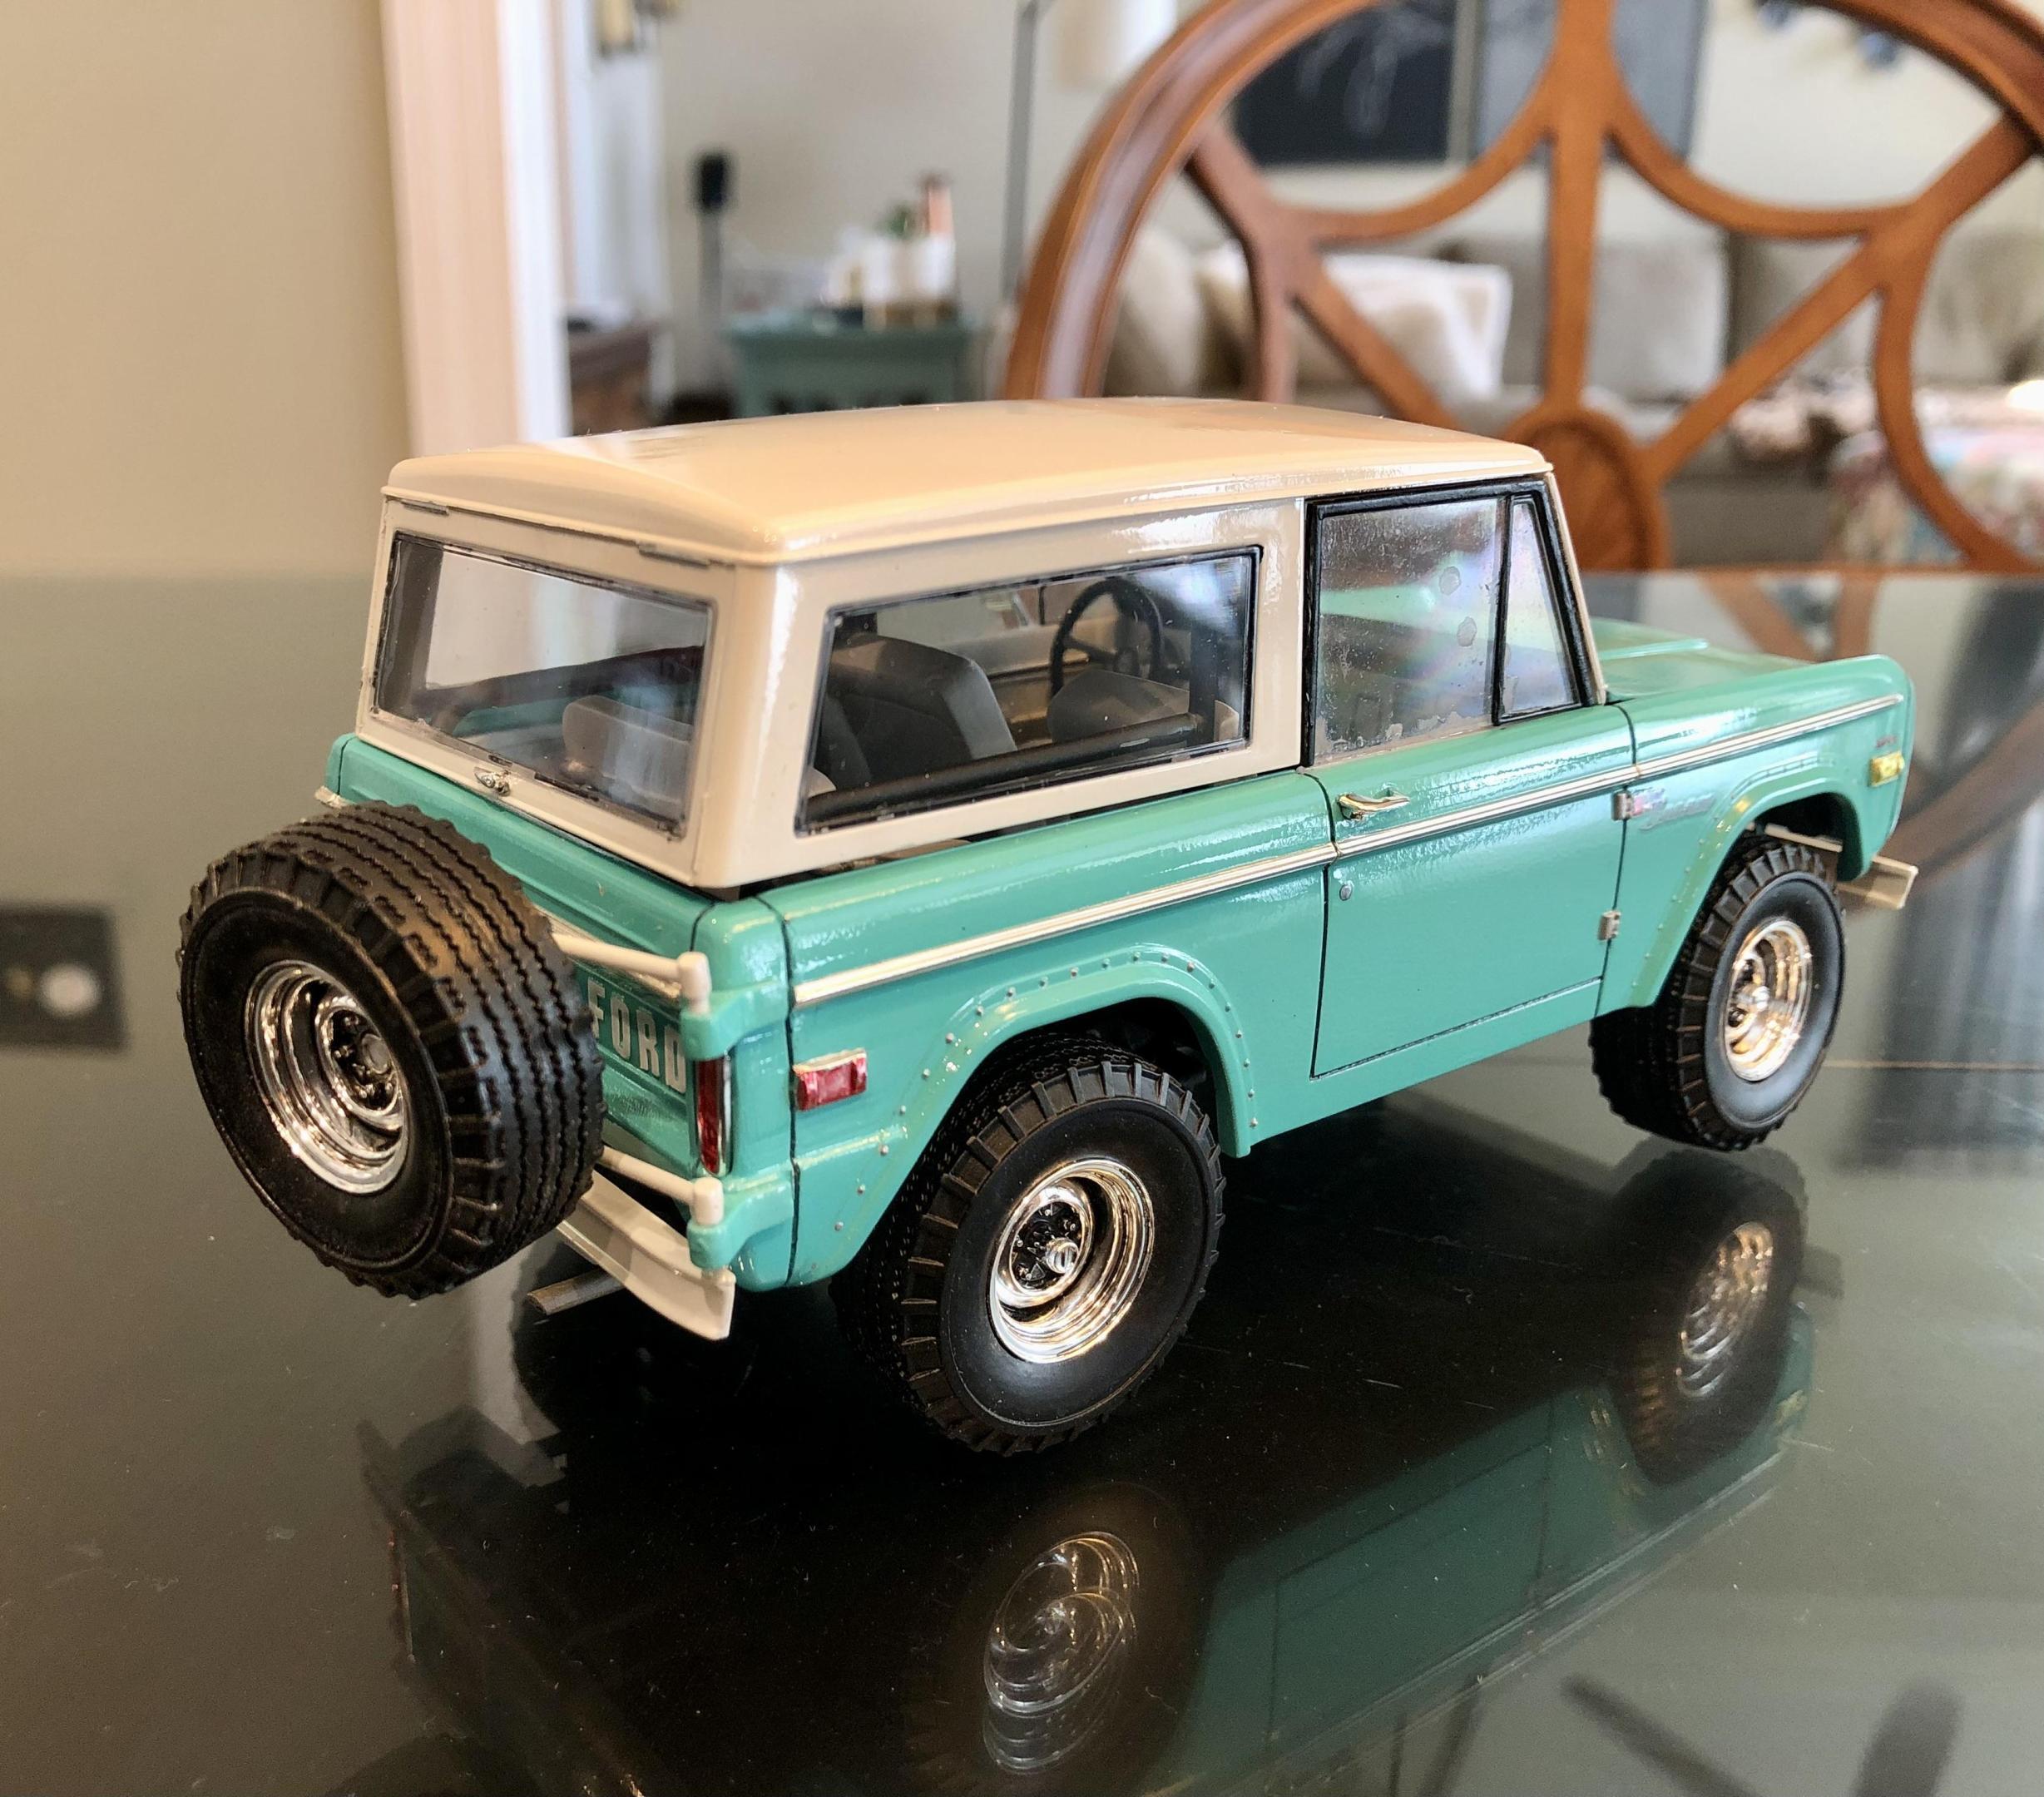
I had a similar situation once...I had mixed up too much Splash 2K clear for a project so I kept the mixed up remains. When I went to use it, I gave it a quick stir and decided it was going to be like trying to spray glue. I shot a quick email to Splash and they responded almost immediately. if I remember correctly, they said that 2K Clear (once mixed) needs to be used within a day or so or it will thicken. So this begs the question(s)... Was it already mixed and sitting a while? Have you used any or the contents of either jar? I'm thinking the exposure to air might have caused issues. How long ago did you purchase it? I don't know what the shelf life is and curious to know since I bought some about 6 months ago in an attempt to "stock up". Either way, I would contact Splash and ask them for advice. They are great people to deal with. Their product is so good that it's the only paint I use now for painting bodies. Here's my Bronco painted exclusively with Splash paint and 2K Clear through a Grex Tritium TG 0.3mm Fan Spray tip...no rubbing or buffing needed!
-
I'm thinking that would be a ton of work with BMF and potentially peel away from the body. Just a thought, not sure how the result would be but I was thinking that once you remove the seams and clean up the body...perhaps sand the body in the direction of the brushed aluminum marks on the real Delorean with a 200, 400 or maybe even a 600 grit sand paper then lightly prime it and paint it with Alclad aluminum (or some other aluminum color paint). You'd replicate the brushed aluminum texture/color and possibly come close to the real deal. I would try it on a spare/scrap body or hood from any other kit (not necessarily a Delorean kit) first before screwing up the Delorean. Try all 3 grits on separate parts of another scrap body to see what best replicates the original in scale. I'm just sayin!
-
MCW *Enamel* Paints
BDSchindler replied to 1972coronet's topic in Model Building Questions and Answers
I have some of their airbrush paints but I have not used them as of yet. Now I also purchased some of their "Brushable" enamel paints as I was assured they were equal to if not better than Model Master brush paints. Semi-Gloss black, Flat Black, Silver and a couple of others. After using them with a brush, I found them to be too thin over primer to be "brushed on" and too thick to be airbrushed without thinning. They are not, in my opinion, NOT brushable paints. So I won't be purchasing any more of their "brushable" enamels. BUT, that has been MY experience. There are other options readily available. -
I absolutely love custom builds like this! Only one word comes to mind with this Riv... "AMAZING!!!!!"
-
Thanks...been a minute since I viewed this topic. I went the opposite route with the suspension...rather than raising the rear of the leaf springs, I left those the stock height but removed material from the front suspension to lower it about a scaled 1.5". Using "Z" wheels meant a lower profile tire for the front and the lowered suspension along with the smaller tire profile gave it the stance I was looking for... I also did the BMF trick and removed the paint on the valve covers for the ribs and "Viper" of the Viper engine I used... Your build is looking great!
-
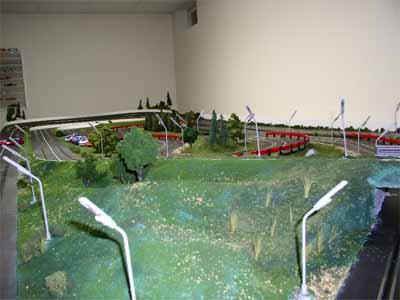
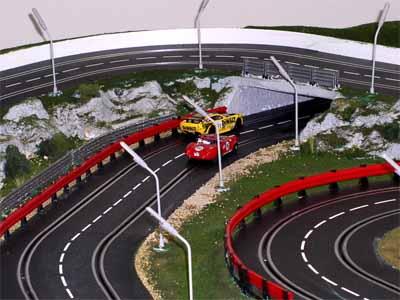
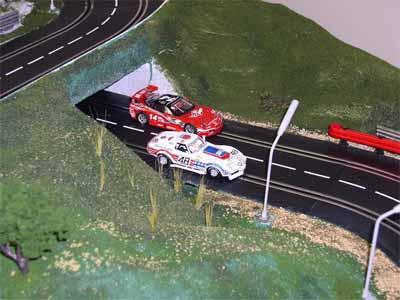
When I did our Racetrack in the basement, I used scrunched up newspaper and covered it with cheesecloth (about $6 for 45 yards) impregnated with Plaster of paris ($11 for 4 pounds dry). I just cut strips of the cheesecloth and once it dried painted it green or tan depending on what the surface of the landscape was to be (grass vs. dirt) then sprinkled Woodland Scenics grass or real dirt saturating it with thinned down Elmer's white glue. For chunks of rock, Woodland Scenics train track balast and in some cases. real pebbles The result...
-
not quite the same but similar... About 3 years ago, I posted a Danbury Mint Cadillac that I reviewed for a magazine for sale on Ebay. I included the review in the auction write-up to include my name. A week after that sold (for $900+, mind you), a friend notified me that someone had in fact copied my auction "word for word" including my name, pictures and all in a separate auction with the only difference being the state he was located in and his user info. I contacted Ebay and they took the auction down and kicked that user off ebay. Sucked for him as 3 days into a week long auction, it was already at $600+ That user had a repetitive habit of doing that with other auctions, in some cases never sending anything out. That was the last time I posted anything on Ebay
-
I seriously loved Scott Colmer's article regarding Monogram's Big and Little T's. With no offense to Scott, a little bit of background on how the Big T came to be. Years ago, I had a standing column in Toy Cars and Model Magazine that was called "A 1:24 Hour Hobby" that was centered around diecast cars and trucks...NOT models. I was also a collector of the Creative Masters Limited 1/20th scale diecast cars. The 7 models that were done for the series had detail that was unheard of in the diecast industry. It was also Monogram's first foray into highly detailed diecast. To make a long story short, I did a feature article on the Creative Masters (CM) Series and that led me to the telephone of Roger Harney, the same person that Scott Colmer mentioned in the "Honey, I shrunk the Big-T's" article. Roger not only provided me with info on the CM lineup gave me a ton of background on his career with Revell-Monogram. From that day forward until his untimely death in 2014...the same year that he had planned to retire...Roger and I became fast friends and would talk for hours when he wasn't in China. He was a master modeler that could build a model out of anything. According to his daughter, her parents house was filled with highly detailed models. I remember calling Roger once and he was in his office building a segment of a GATO Class sub that was to be over 5' long! Roger's first "real" job was building models as per the instructions contained in the kits when he was some 18 years old, if I remember correctly. His tenure at Monogram, and later with Revell-Monogram, would propel him through designing and later as the Excutive Vice President of RM Inc in charge of tooling and manufacturing. Somewhere into the late 90's, early 2000's, he and 12 other executives around the world became co-owners of Revell-Monogram Inc. Roger explained to me how the Big-T actually came to be...I think he said it was in 1960 or so, he was trying to sell the idea of 1/8th scale Hot Rod engines as a model kit in itself to the Monogram Marketing Team. With the model car market really starting to take off especially with the Custom and Hot Rod models, Roger had the idea that modelers would love to have a large scale detailed engine to display along with the smaller scale cars. Marketing didn't buy it, however, stating something to the fact that without the rest of the car, it just wouldn't sell. That was a Friday afternoon. Undeterred, Roger went home that night and by Monday morning, he had completed a full and accurate frame and driveline complete with suspension and articulating front end including wheels and tires. That same Monday morning, the Marketing Team didn't like the idea...they LOVED it and Roger was tasked with leading the design of the rest of the Big-T (Body and Interior)
- 1 reply
-
- 1
-

-
That is badass!
-
The link doesn't work
-
here's a couple of options from Micromark Strainer Funnels I have the Strainer Funnels and they work great, cleanable with anything including Acetone (my choice of airbrush cleaner...cleans anything from acrylic to lacquer including nail polish) Paasche in jar strainer
-
Tired of switching chucks in my pin vise
BDSchindler replied to Camaro lover's topic in Tips, Tricks, and Tutorials
I did something similar. At last years Mid-Atlantic NNL, there was a vendor in the corner of the main room that was selling various tools and supplies. I bought 6 pin vices for $10 from him and have various sized drill bits in each that are the most used on my bench. -
1986 Shelby Charger underbody color
BDSchindler replied to kurth's topic in Model Building Questions and Answers
I owned a Plymouth Turismo (Plymouth version of a Charger) and as far as I remember, flat black would be correct. But that is for the Plymouth variant of the Charger. The Charger may have been different. -
Ist time using 2k clear
BDSchindler replied to Mike 1017's topic in Model Building Questions and Answers
No offense but yes the mixture is indeed 3 parts clear to 1 part Catalyst...HOWEVER...there is no need to thin Splash 2K Clear. Once you mix it it is airbrush ready. Definitely wear a good respirator (not just a mask) as the catalyst WILL harm you. This Bronco was painted with Splash paints...primer, paint and gloss 2K Clear over decals and BMF
-
i think get what George is saying, Charles. Kinda like the Ford FE Cobra 427 engine I recently bought from you in 1/16 where you offered the transmission as either a C6 or Toploader. https://tx3dcustoms.com/products/ford-fe-cobra-427