BDSchindler
-
Posts
471 -
Joined
-
Last visited
Content Type
Profiles
Forums
Events
Gallery
Everything posted by BDSchindler
-
Thanks. Still debating on the engine...I was thinking Texas3DCustom's Shelby GT350 5.2L but I think it will be too big and not really interested in hacking up the chassis any further than I have already so I am leaning towards the Roush engine used in the Foose Ford Pickup. I dunno...kinda making this up as I go
-
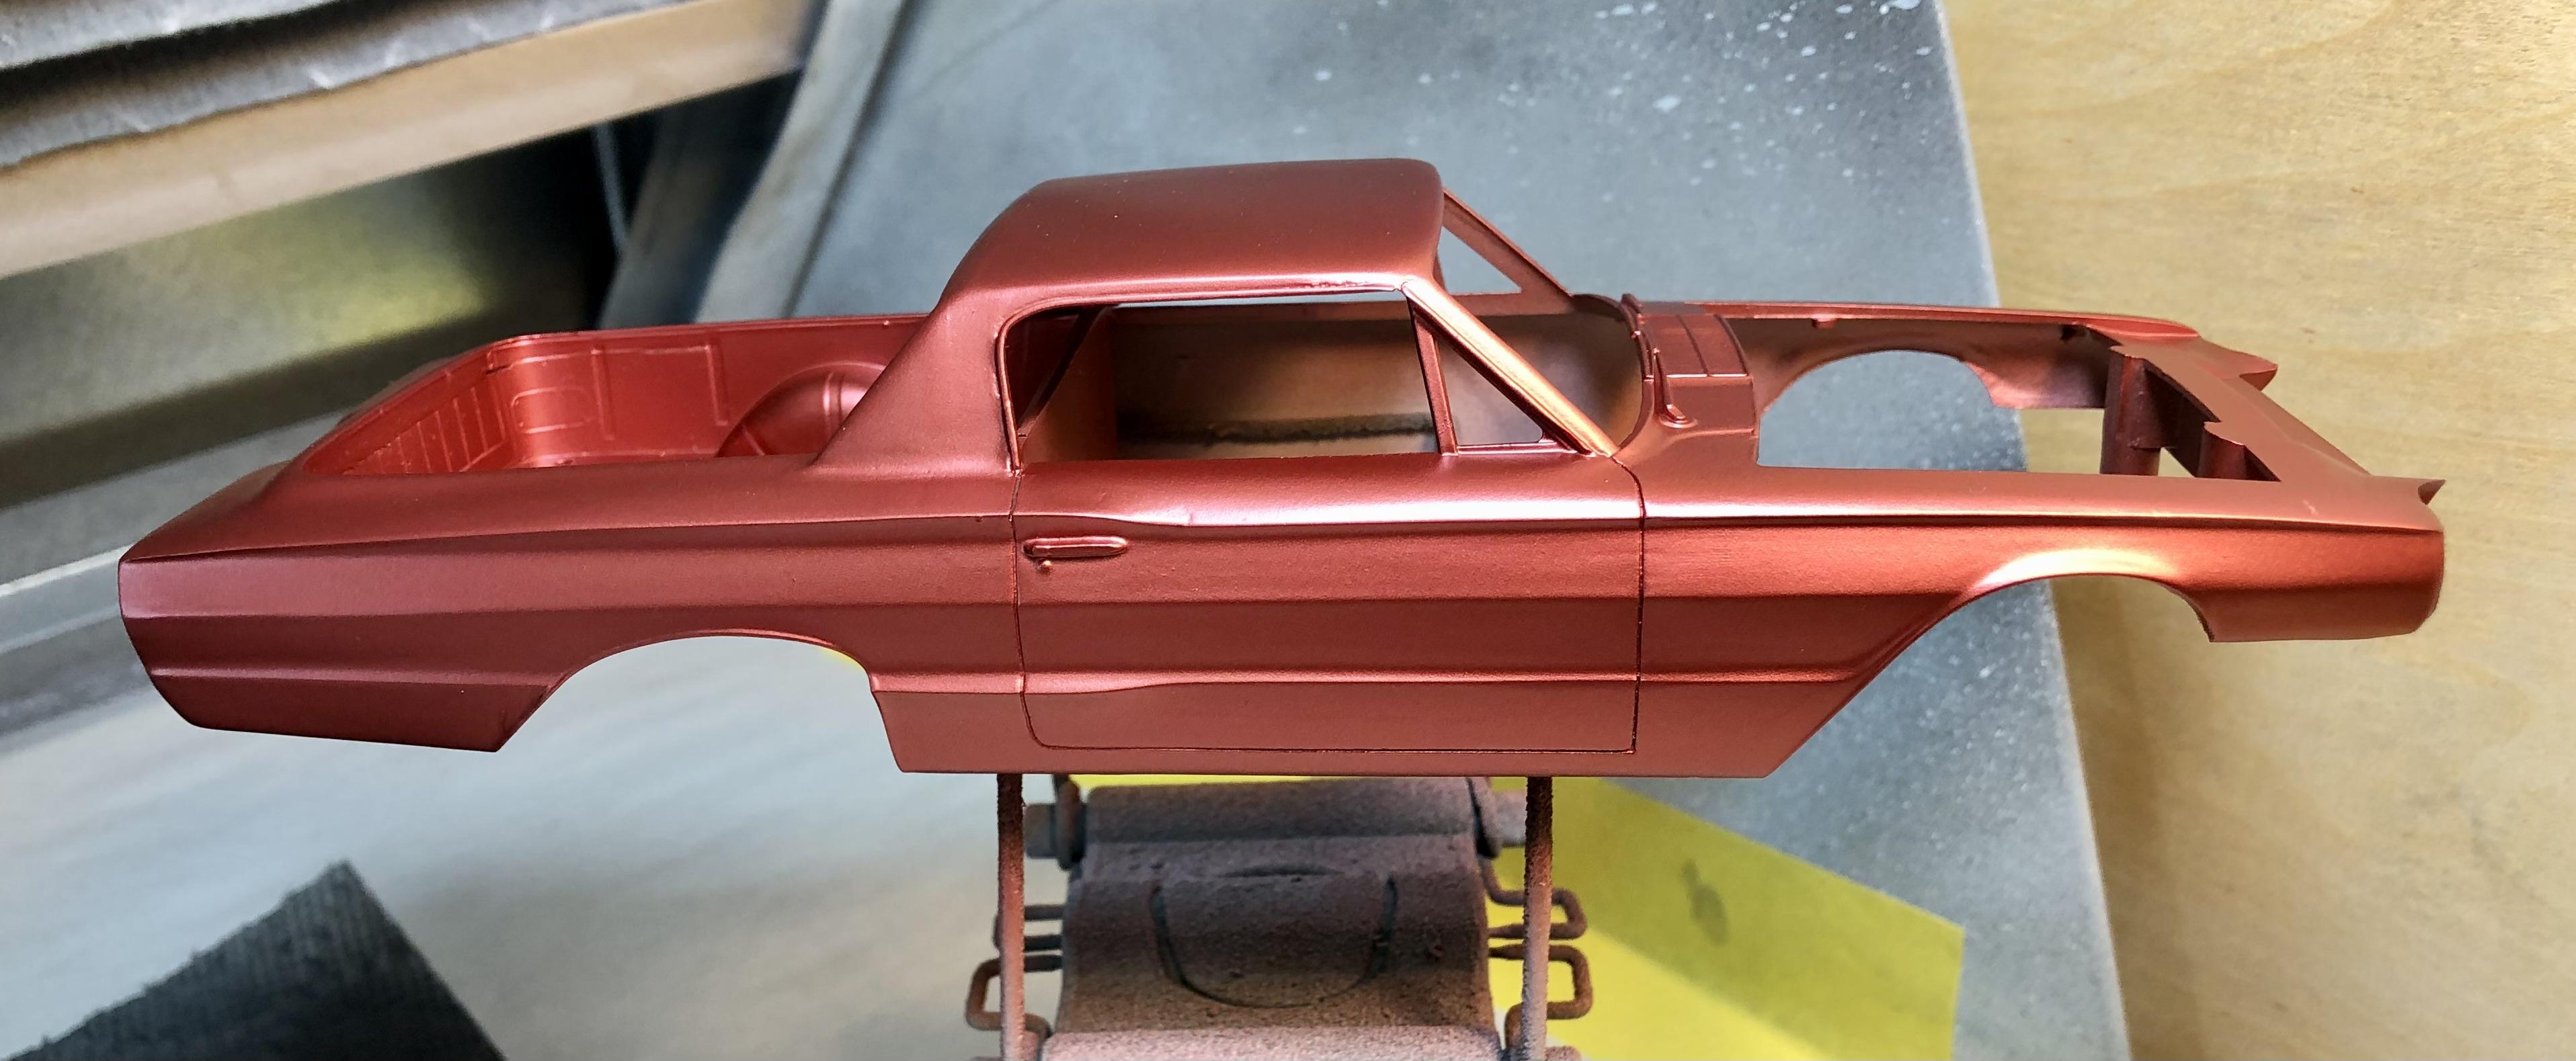
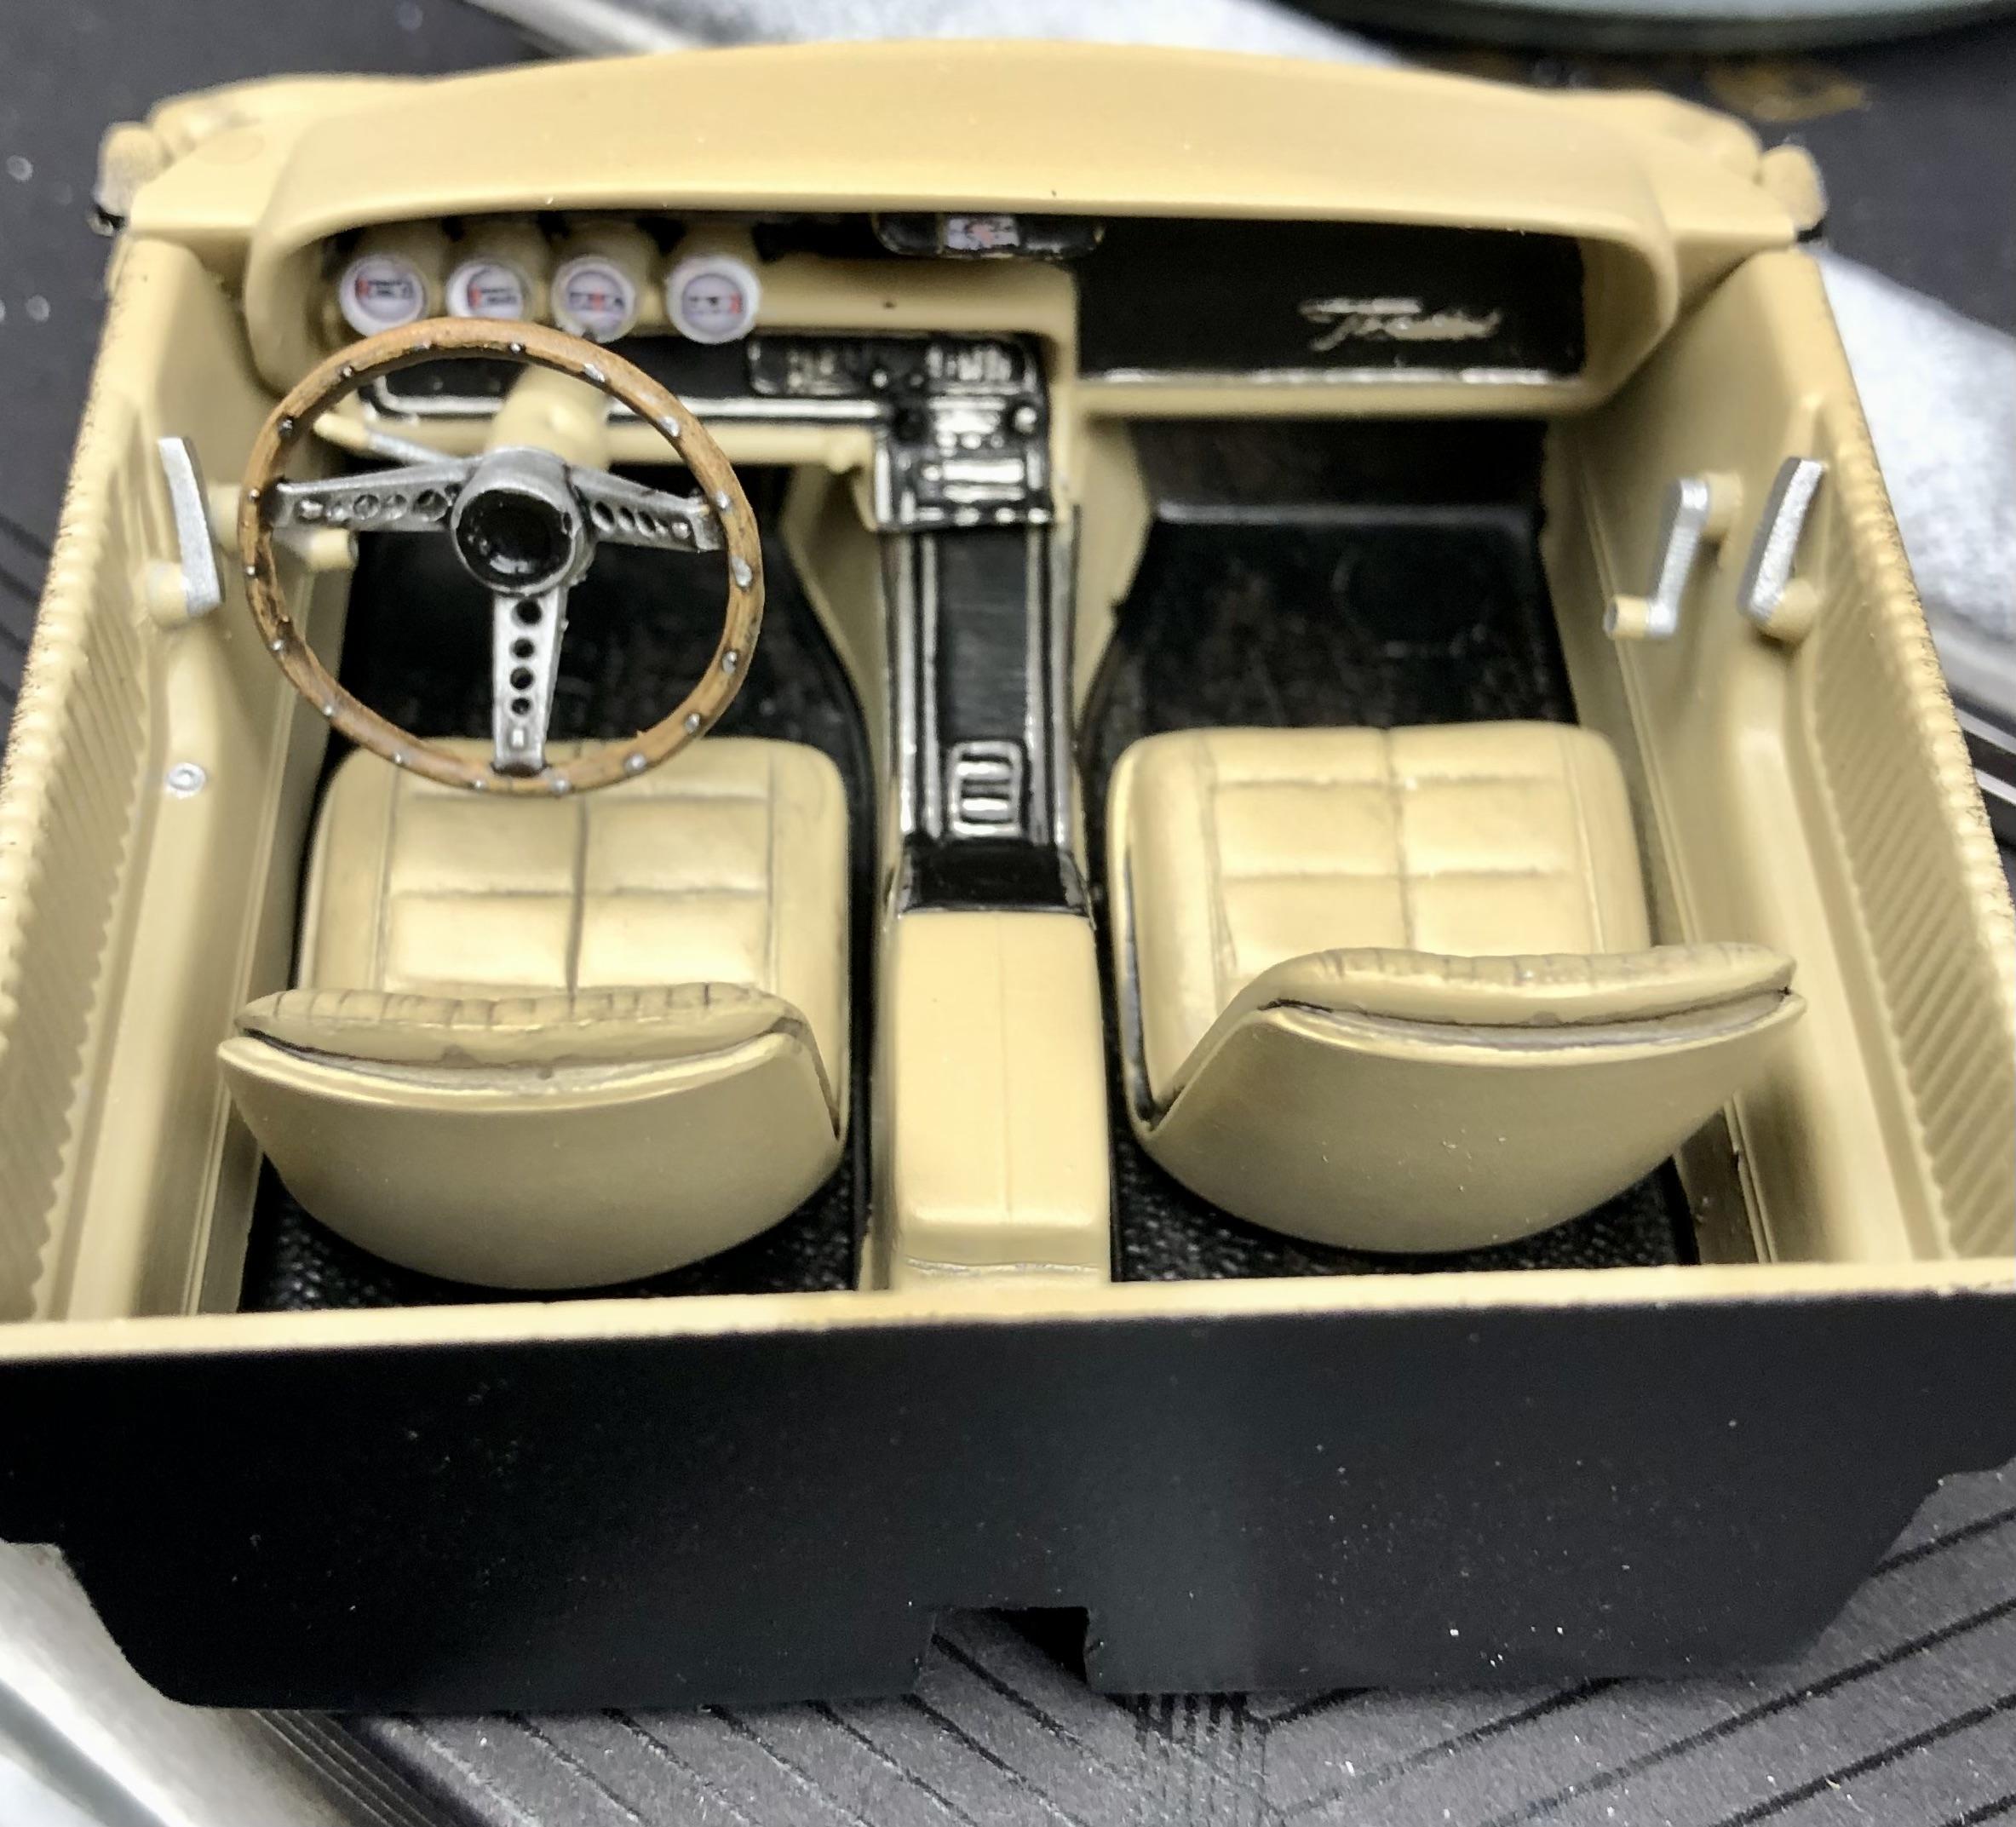
That was tires sitting under the body. finally got some color on it…Splash Paint “Soul Red Crystal” and the interior is done…

-
Don't give up on it...it'll be a cool custom truck. Go for it!
-
I agree…part of the reason I like doing customs, all you have to please is yourself! Your own imagination and creativity leads the way. Who cares if it’s correct as long as it’s cool!
-
Who doesn't love a mock-up? Let's see yours!
BDSchindler replied to Belairconvertable's topic in WIP: Model Cars
Also posted in another thread... Body (while still in primer) ironed out and now the chassis... I'll shift gears (pardon the pun) to the engine and interior.
-
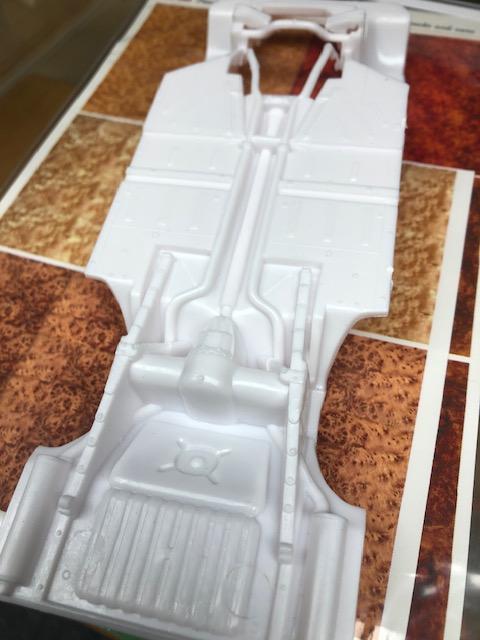
Well...it's been a bit since an update... Body has finally been hashed out so I turned my sights onto the chassis. The T-bird is an old school kit and the chassis left little to be desired as it was molded as one solid thick piece. I originally had thoughts of using a Revell GT-350 chassis and running gear. After a little work trying to make that all work...I aborted those thoughts. After copious amounts of work...I opted to just stick with the original chassis...but with some alterations... I cut out all of the superfluous chassis and tried to give the illusion that the rear end is actually somewhat feasible. I'm still debating if I want to take the time and effort to remove all of the plastic under the leaf springs or not. I plan to make my own driveshaft for it and the "floating" trans cross-member needs to be attached to the chassis yet. I also couldn't wait to see how the "Z-Wheelz" would look underneath so here is a mock-up minus the front lower valance.... wha-cha' think? All comments are welcome, as always!
-
yep...I do the same thing
-
So first shot of primer with lots of clean-up, body repair and sanding to go but I needed to see if this was headed in the right direction or not. So far, I like it and glad I changed the roofline. I’ll let it dry a couple of days before I mess with it. I opted for the kit supplied custom hood. Just something about it that I liked better than the stock one with chrome “V” in it. Comments are welcome!!!!
-
Small Part Attaching
BDSchindler replied to TransAmMike's topic in Model Building Questions and Answers
got it...it's a wax bead pick -
Small Part Attaching
BDSchindler replied to TransAmMike's topic in Model Building Questions and Answers
So what is that handy little gadget? -
Marvel's Hydra coupe 1/12 scale full scratch build
BDSchindler replied to François's topic in WIP: Model Cars
Excellent work! -
Thanks guys!
-
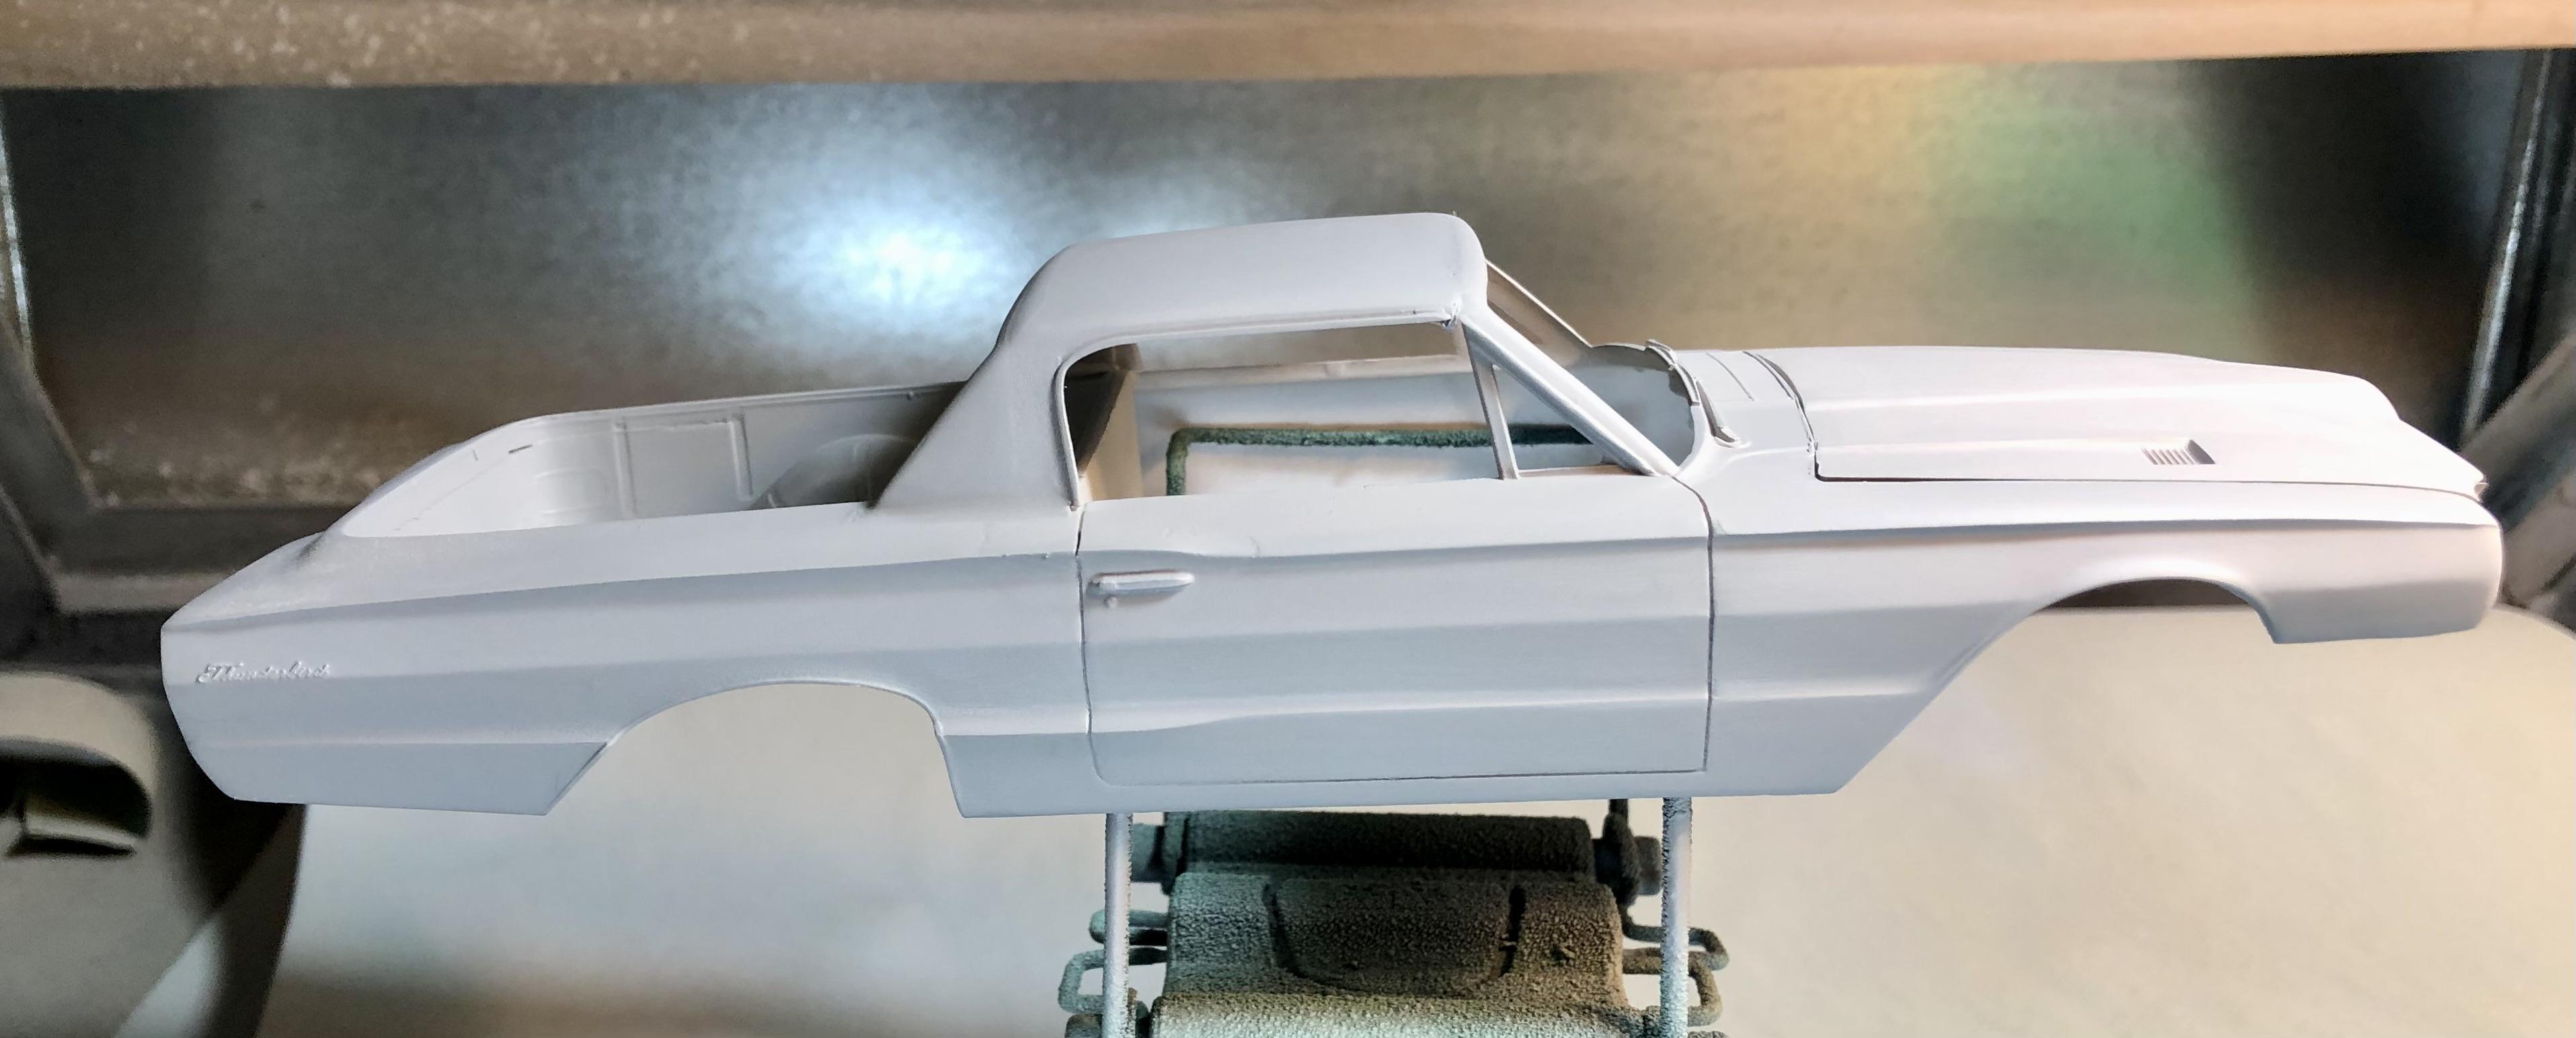
Thanks...I like it better also. I had to custom make a rear glass for it. Since it won't be flush mounted like the T-bird rear glass was, it will be set back at the front of the bed more like the original rendering from Kaucher Kustoms. Fortunately, back when this kit was designed/produced, they used some seriously thick plastic on the roof. I didn't have to worry about sanding through the roof or making the roof too thin when I sanded off the molded in vinyl top.
-
So…I wasn’t really happy with the way the roofline looked on the original mockup… So I took the T-bird hardtop (it was a separate part in the kit) and hacked it up and sanded it smooth to remove the molded in “vinyl” top look. Just a mock-up at this point as it is not attached yet but I like it better… the rear glass will be back set as opposed to being mounted at an angle. From here, I’ll start slinging mud on it and other than a different chassis, engine and wheels/tires, the body will be all t-bird from here on out.
-
I've had the Pace Mini for a few years now and love it!
-
Yeah...I've been looking at that also and to be honest...I'm not happy with the rake of the roof or the fact that its so straight at the rear. So I'm thinking of cutting that down just a tad before I start "slingin' mud" on it. Thanks for the input guys...it's definitely appreciated!
-
Thanks! It is tedious so say the least!
-
Uschi decals...They have many different styles but this the one I used...
-
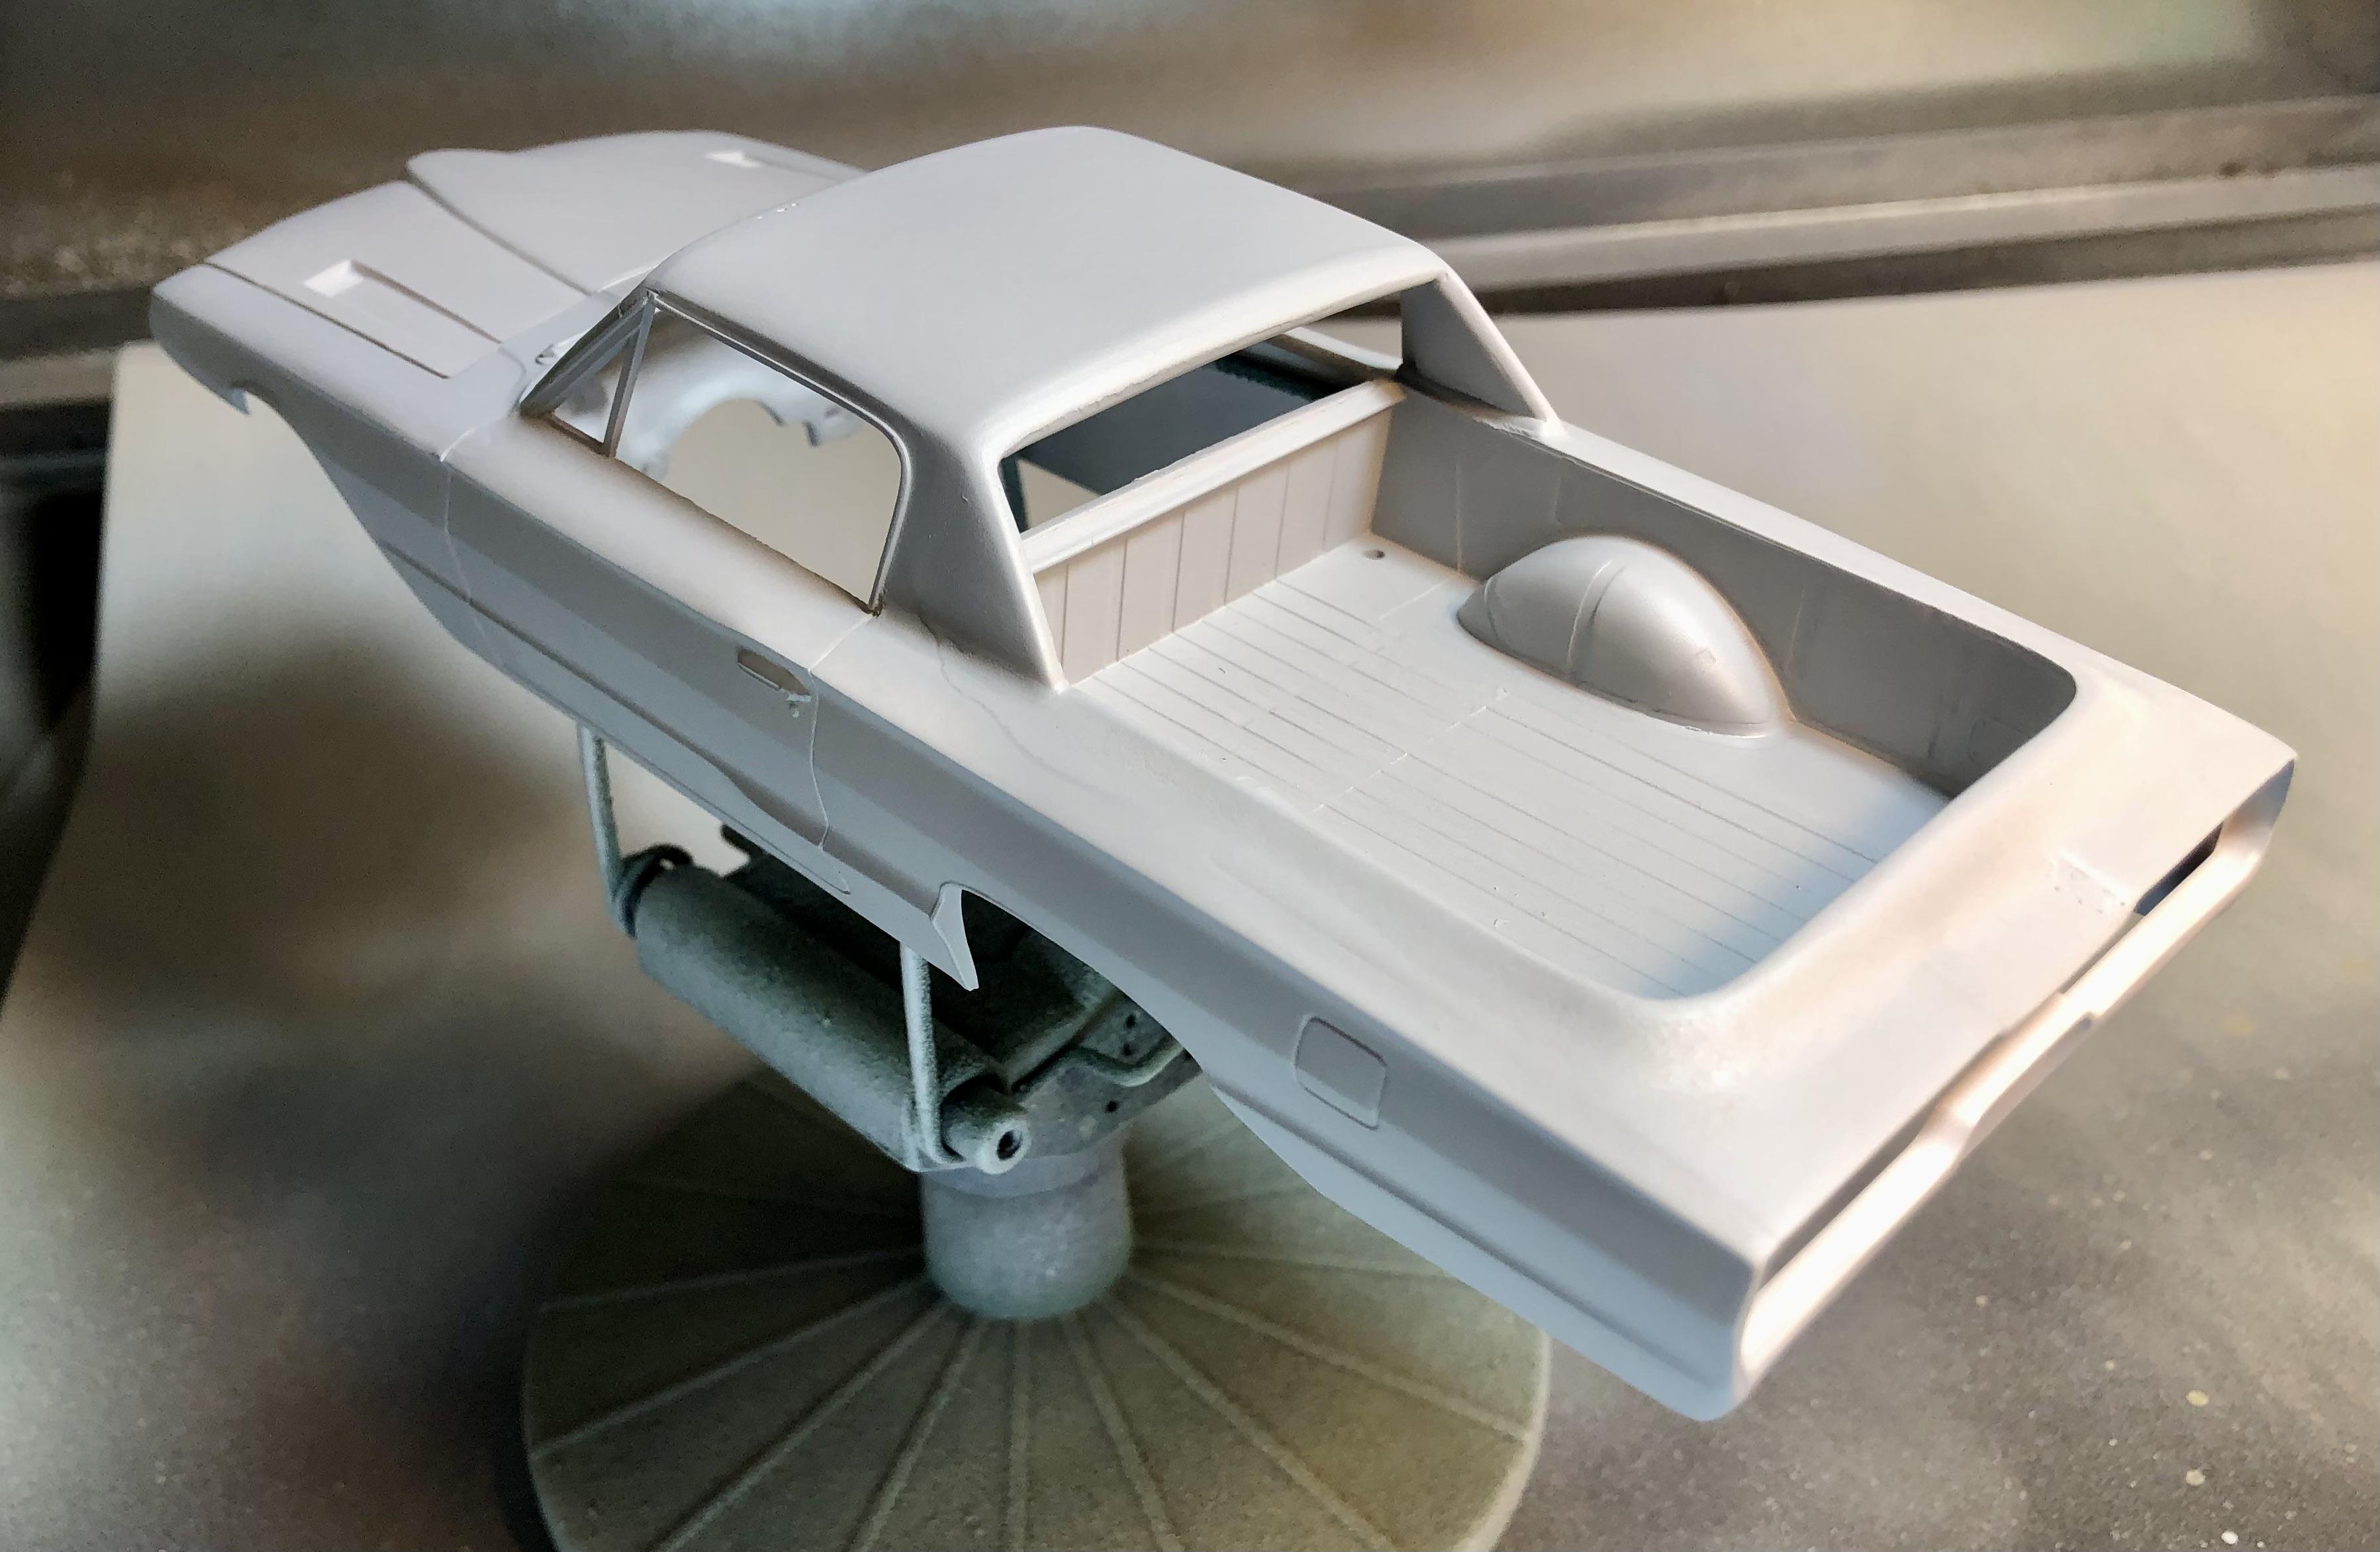
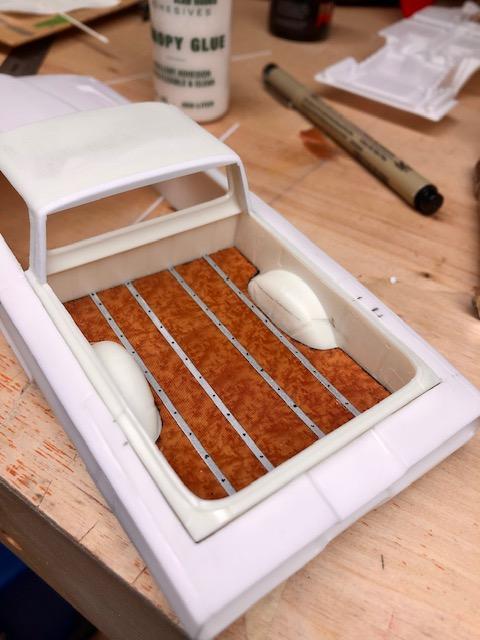
So there was some recent talk either here or on Facebook about the scale models that were once produced by Kaucher Kustoms. I've seen some of their stuff before and really liked them. I contacted them via FB to see if they were, in fact, planning on bringing out the kits again (they are apparently known for the real 1:1 customs) and yes they are in fact planning on doing them again. Not sure when but they are developing a list to see if it is feasible for them. This caught my eye...kind of the illegitimate offspring of a '66 Thunderbird and a Ranchero. Checking my stash, I had the '66 T-bird and the '60 Falcon derived Ranchero. I had never opened the T-bird and it is...well, very "old school" detail...or lack thereof. So I figured, WTH...lets use the '60 Ranchero bed and roof line (with some modifications) and the '66 T-bird Convertible and slice and dice the 2 together. Then I got carried away with the bed. One piece sheet plastic painted a light tan and cut and filed to fill the bed (primarily because there to so many nasty mold lines that were hard to remove so I opted to cover them). Using Burl Wood decals from Uschi, applied to the one piece plastic and trimmed to fit then Clearcoated after the decals were dry. The slats are silver painted thin evergreen strips attached with Canopy glue and a permanent marker dots for the attachment points then Clearcoated again and set aside. Back to the body/bed...Sanded and modified to get it to fit the way I wanted. The wooden bed is not attached yet...just lying there for the shot. Still lots of sanding and filling re-sanding and styling to go. These shots are simply a mock-up (aka...not glued down yet) to see what the '60 Ranchero bed will look like mated to the T-bird. Since I hate the chassis and it's lack of detail, I think the chassis, suspension (front and rear) from Revell's '66 Shelby GT-350H will work but will need to confirm that later down the road. That's all for now...thoughts are always welcome.
- 40 replies
-
- 17
-

-

-
Who doesn't love a mock-up? Let's see yours!
BDSchindler replied to Belairconvertable's topic in WIP: Model Cars
Very rough mock-up but so far coming along nicely...so far! Kinda like an illegitimate offspring of a '66 Thunderbird convertible and a '60 Ranchero. The bed is not officially joined to the t-bird yet as I have been trying to get the roof-line from the Ranchero to mate up with the windshield surround of the T-bird. Lots of filler, sanding and repeating the process but you get the jist... I mocked the bed using thin plastic sheet, BurlWood Decals from Uschi Woodgrain Decals. Clearcoated then added the slats via Evergreen plastic strip painted silver and a black marker to replicate the attachment points with Canopy Glue and clearcoated again. Done...setting that aside so I can get to work on the remaining body mods. Here's the inspiration for this build from Kaucher Kustoms...
-
same deal...made no changes whatsoever
-
How to Simulate tonneau snaps?
BDSchindler replied to Vince311's topic in Model Building Questions and Answers
I deleted it. -
Farm Floater Truck 1/24th scale
BDSchindler replied to Randy D's topic in WIP: Model Trucks: Big Rigs and Heavy Equipment
I wish I had a tenth of your talent, Randy. That is FANTASTIC! -
Thanks but I have no clue what's involved with 3D printing nor do I have the equipment to do so. I mean I get that you buy the files and then either print them yourself (IF you have a decent printer) or find someone to print what you want. Seems that very few people will print on demand these days without charging a ridiculous price. That's why I was looking for someone that already does the width that I want. Texas3Dcustoms goes out to about 10" and I have not really seen anything from Iceman that I'm looking for. I also am not a fan of 3D printed rubber tires as they are a bear to clean up the support blemishes that remain.
-
I typically do Hot Rod/Custom model cars and looking for rear wheels and tires that are 20" in diameter and 15" wide with corresponding tires that are NOT thin "rubber band" style tires. It can be either Resin Cast or 3D Printed to include the tires (not a fan of the 3D Printed Rubber tires). Here's an example of what I am talking about...