BDSchindler
-
Posts
473 -
Joined
-
Last visited
Content Type
Profiles
Forums
Events
Gallery
Everything posted by BDSchindler
-
here's a couple of options from Micromark Strainer Funnels I have the Strainer Funnels and they work great, cleanable with anything including Acetone (my choice of airbrush cleaner...cleans anything from acrylic to lacquer including nail polish) Paasche in jar strainer
-
Tired of switching chucks in my pin vise
BDSchindler replied to Camaro lover's topic in Tips, Tricks, and Tutorials
I did something similar. At last years Mid-Atlantic NNL, there was a vendor in the corner of the main room that was selling various tools and supplies. I bought 6 pin vices for $10 from him and have various sized drill bits in each that are the most used on my bench. -
1986 Shelby Charger underbody color
BDSchindler replied to kurth's topic in Model Building Questions and Answers
I owned a Plymouth Turismo (Plymouth version of a Charger) and as far as I remember, flat black would be correct. But that is for the Plymouth variant of the Charger. The Charger may have been different. -
Ist time using 2k clear
BDSchindler replied to Mike 1017's topic in Model Building Questions and Answers
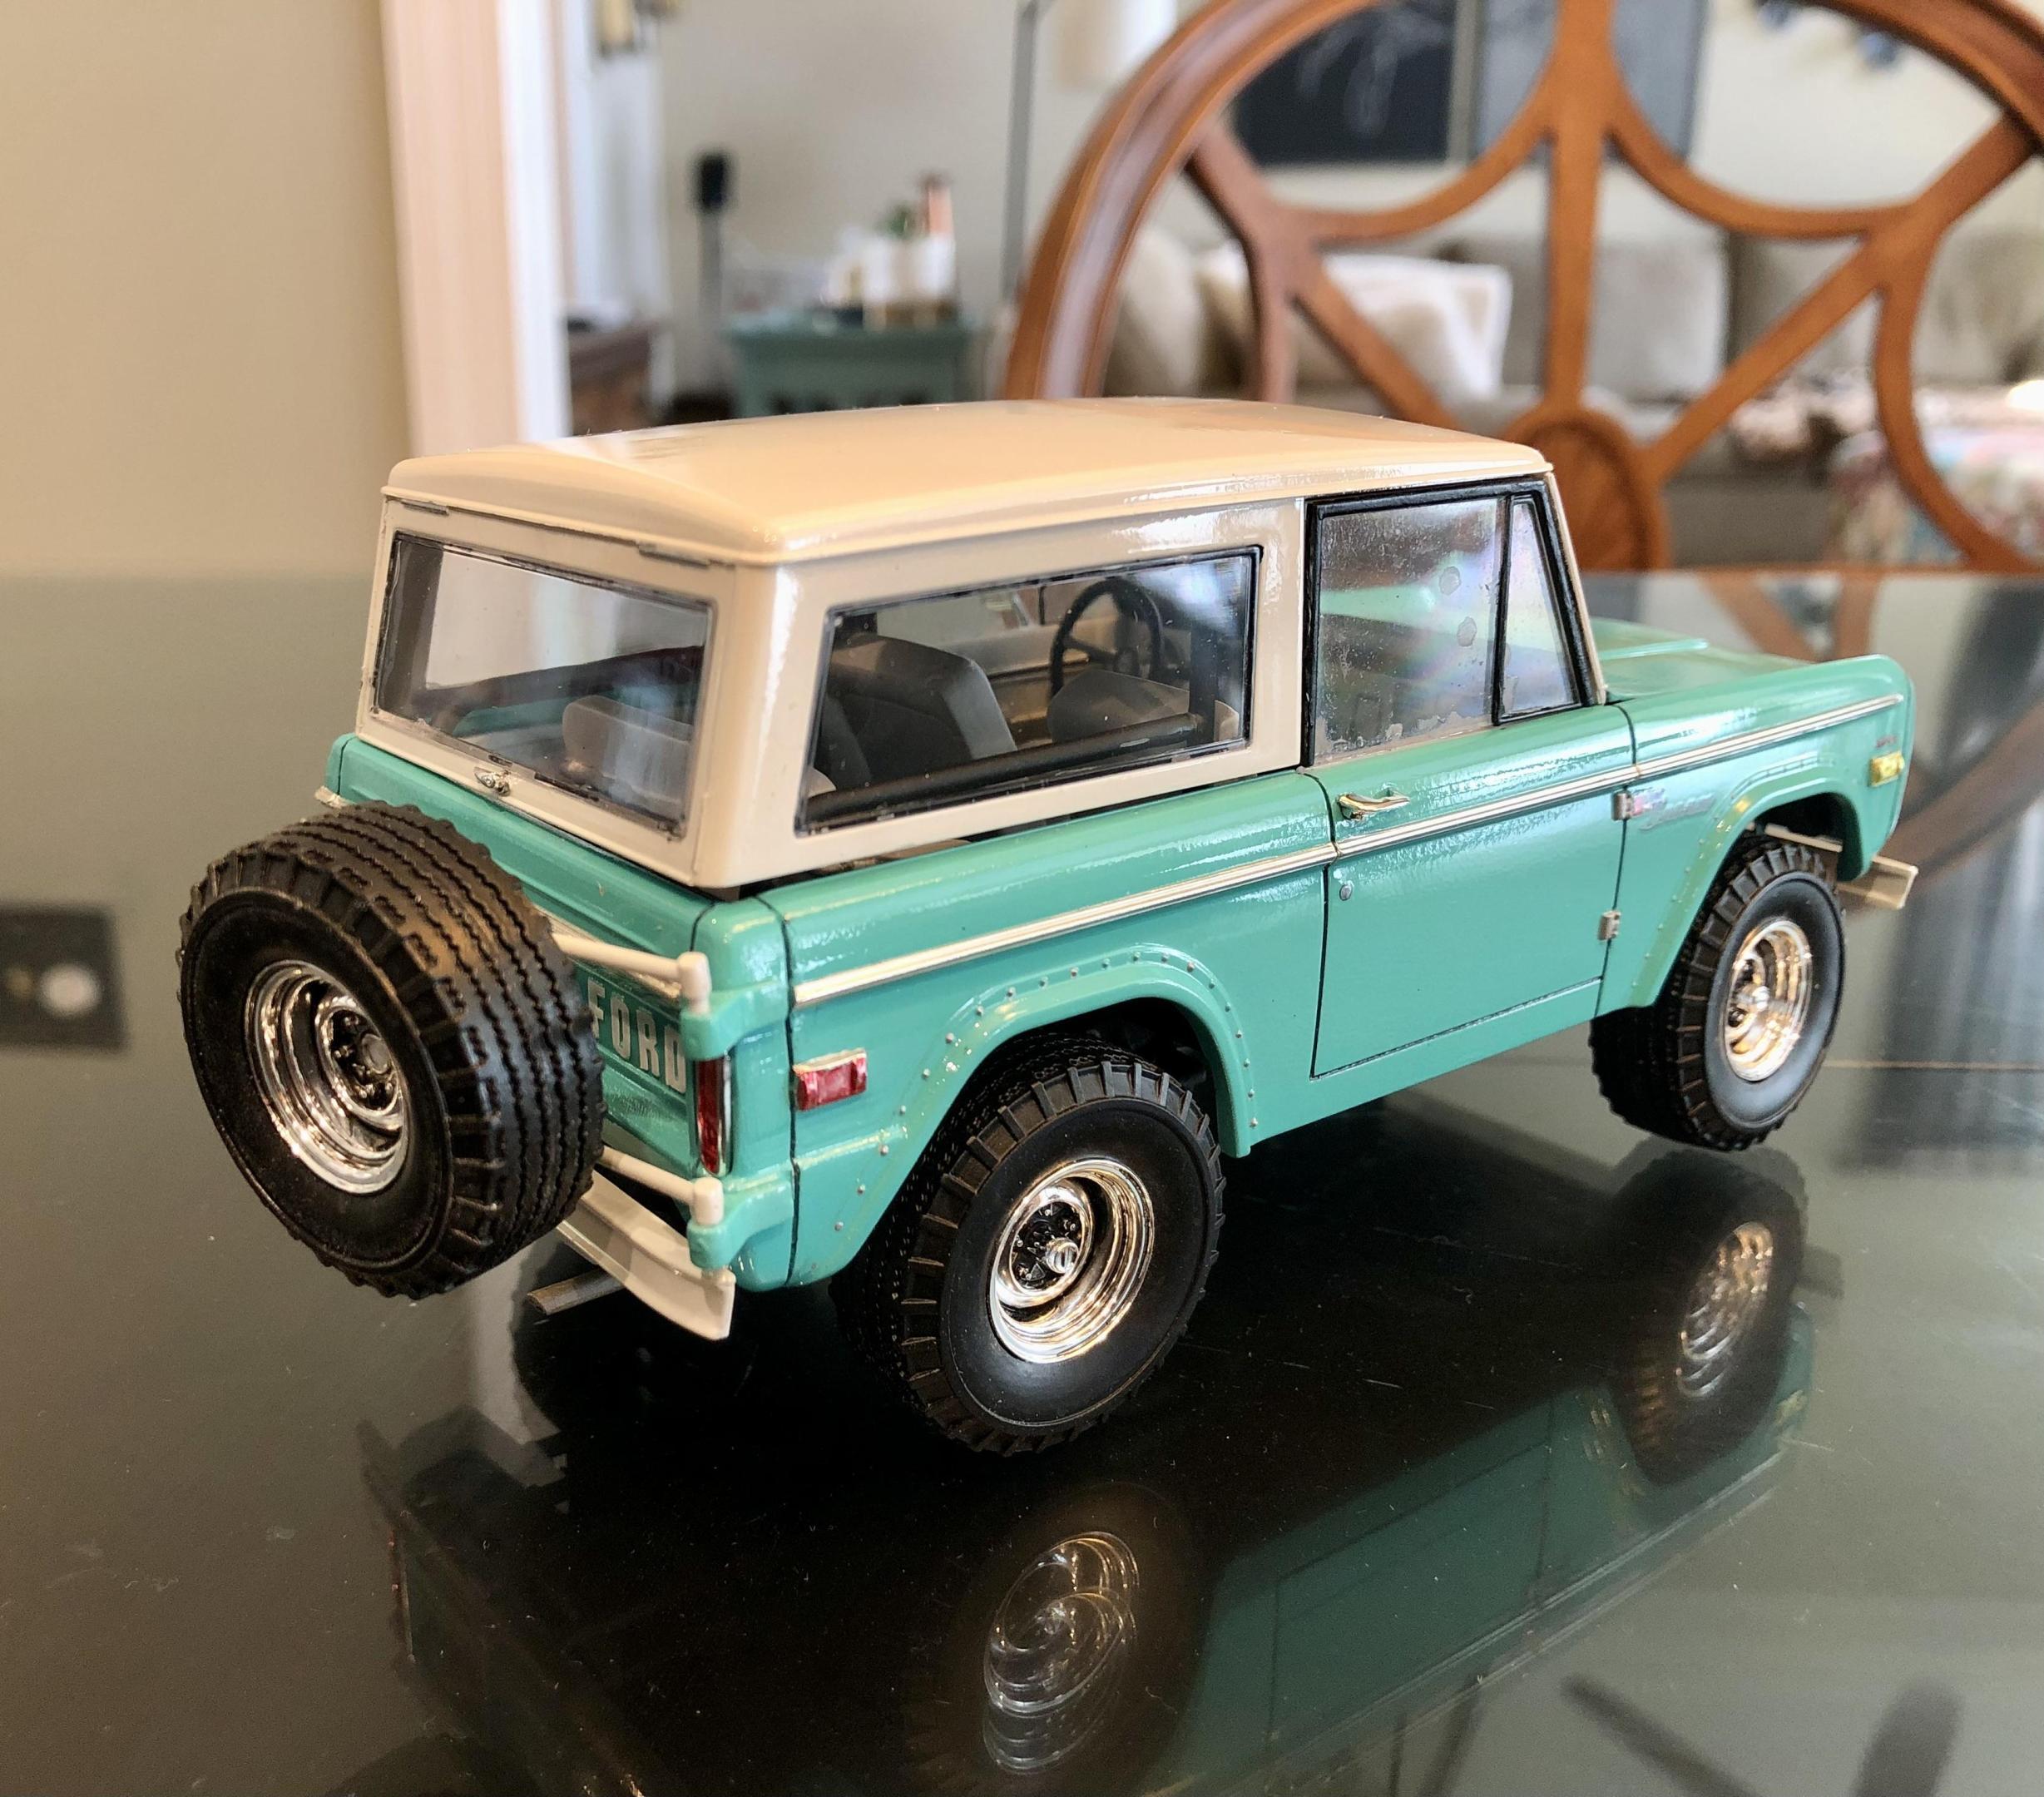
No offense but yes the mixture is indeed 3 parts clear to 1 part Catalyst...HOWEVER...there is no need to thin Splash 2K Clear. Once you mix it it is airbrush ready. Definitely wear a good respirator (not just a mask) as the catalyst WILL harm you. This Bronco was painted with Splash paints...primer, paint and gloss 2K Clear over decals and BMF
-
i think get what George is saying, Charles. Kinda like the Ford FE Cobra 427 engine I recently bought from you in 1/16 where you offered the transmission as either a C6 or Toploader. https://tx3dcustoms.com/products/ford-fe-cobra-427
-
9-Year Project - Chevy 3100
BDSchindler replied to BDSchindler's topic in Model Trucks: Pickups, Vans, SUVs, Light Commercial
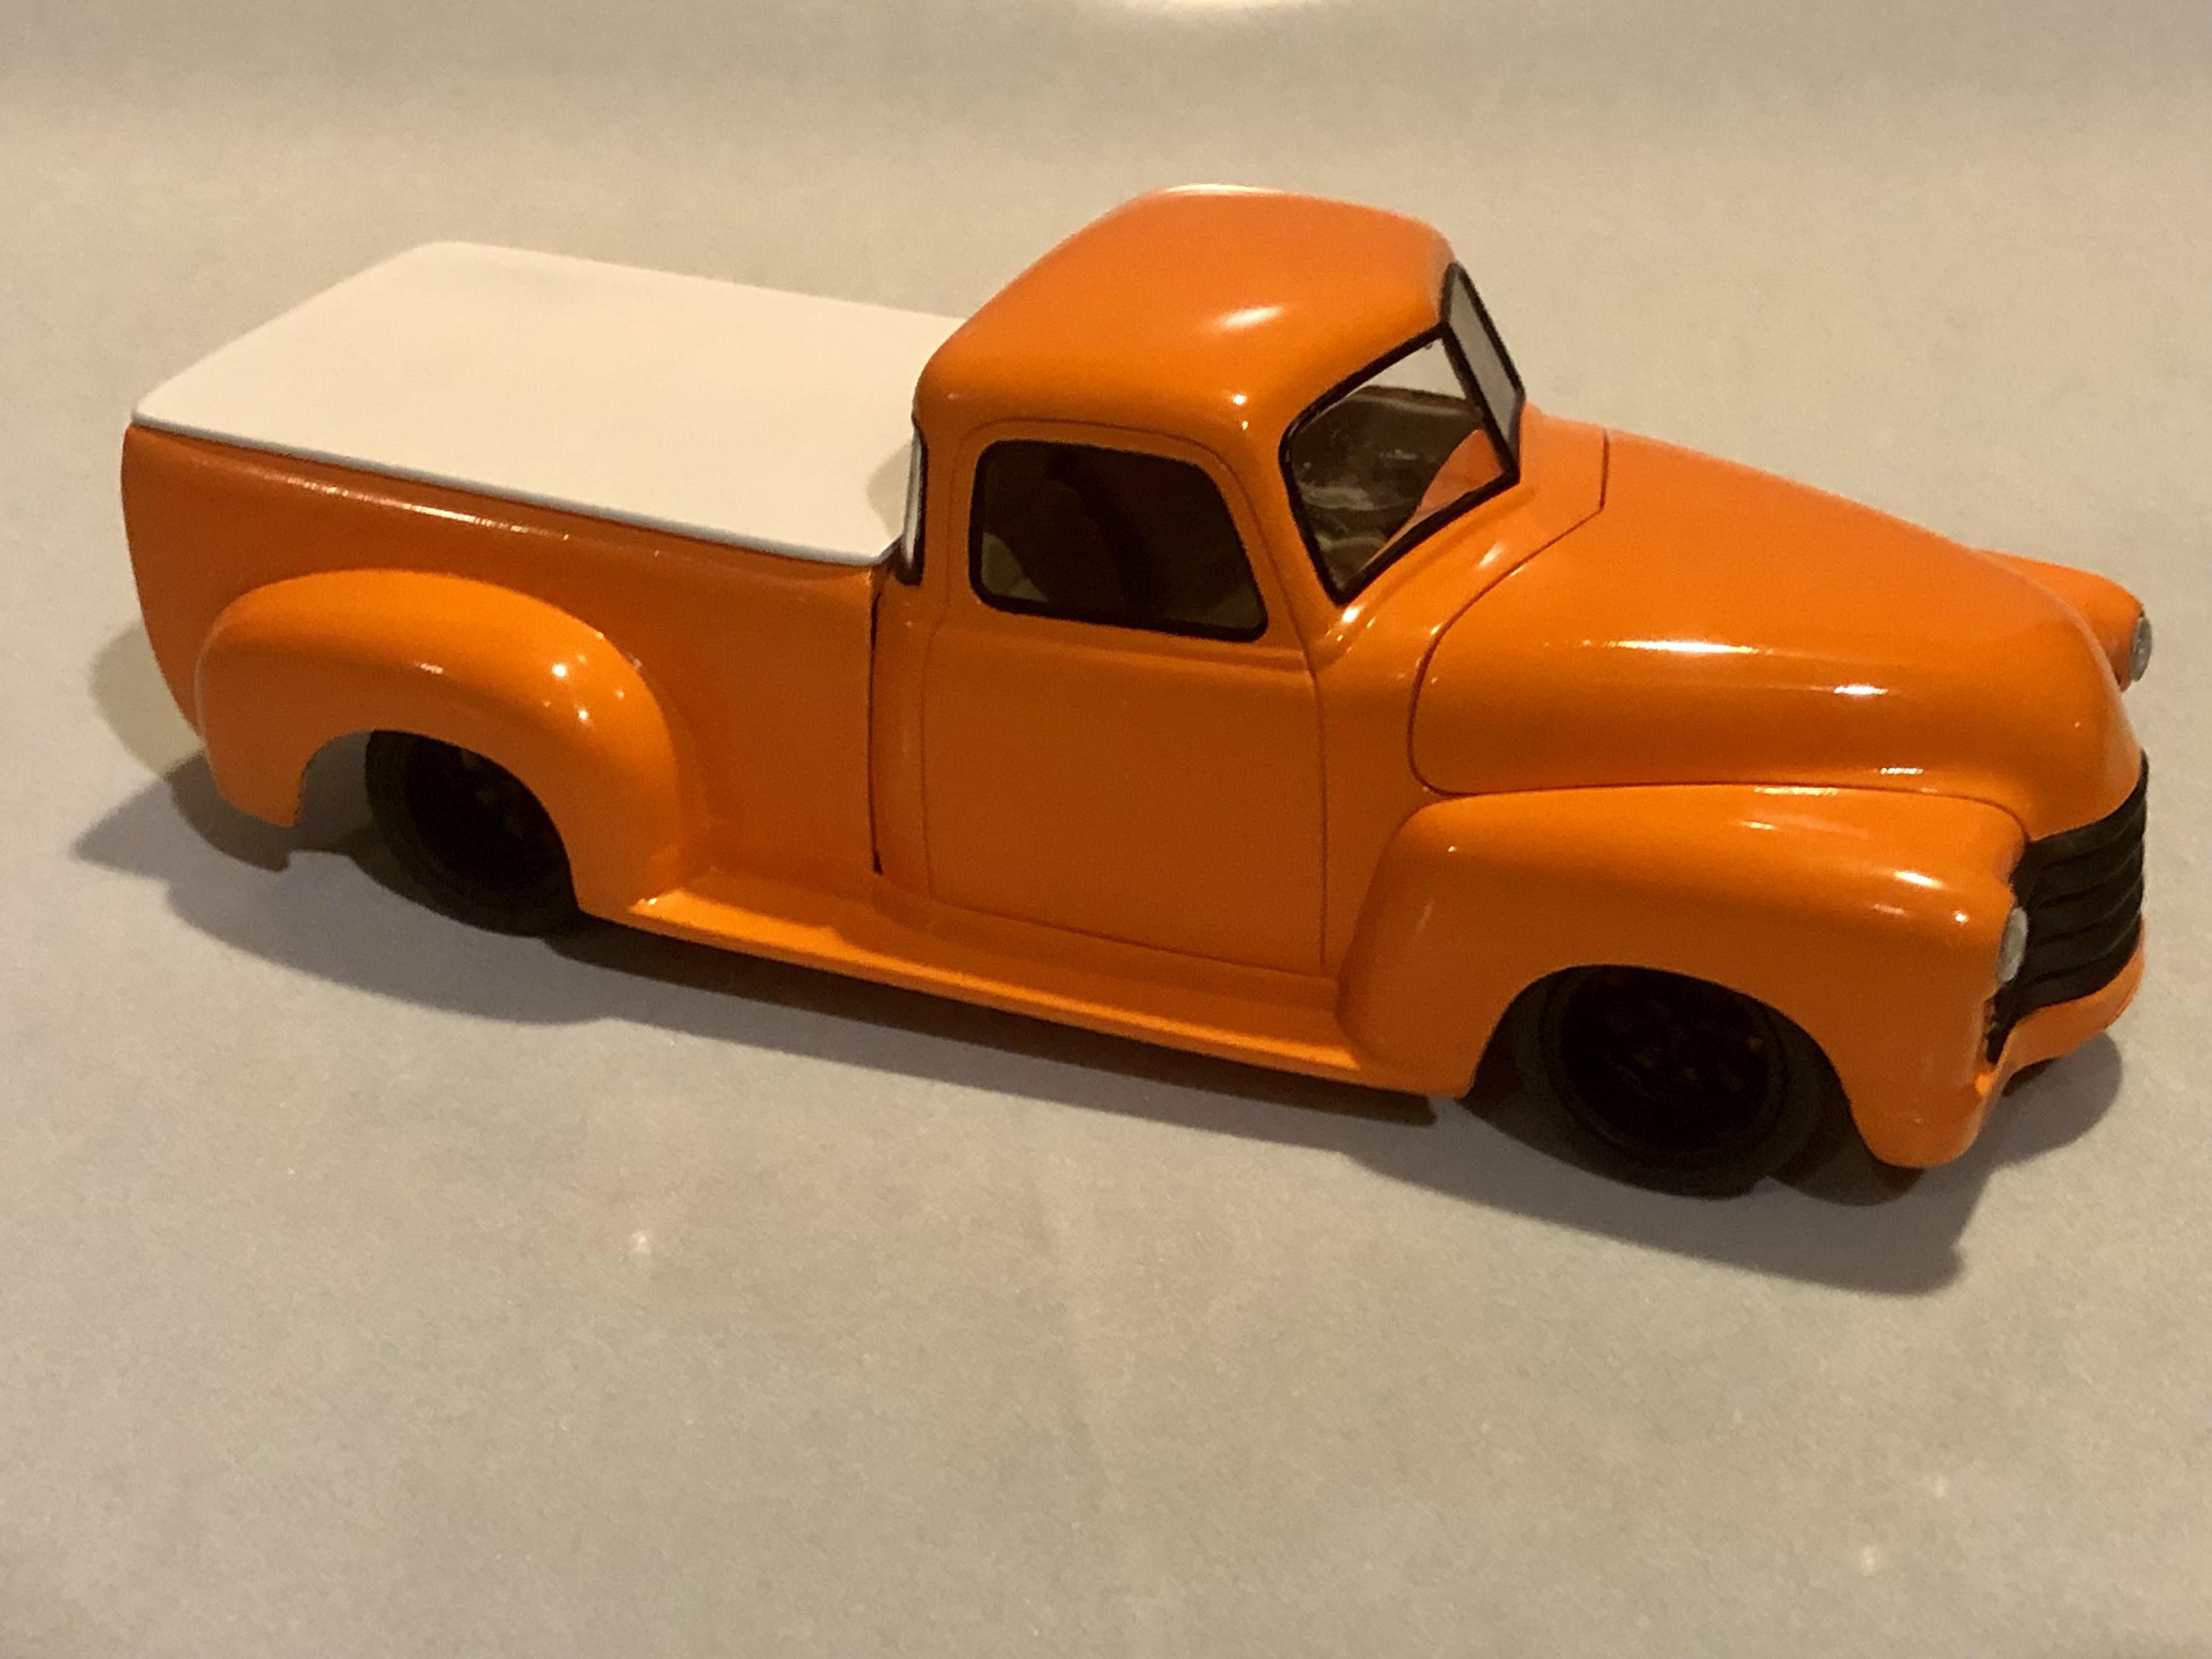
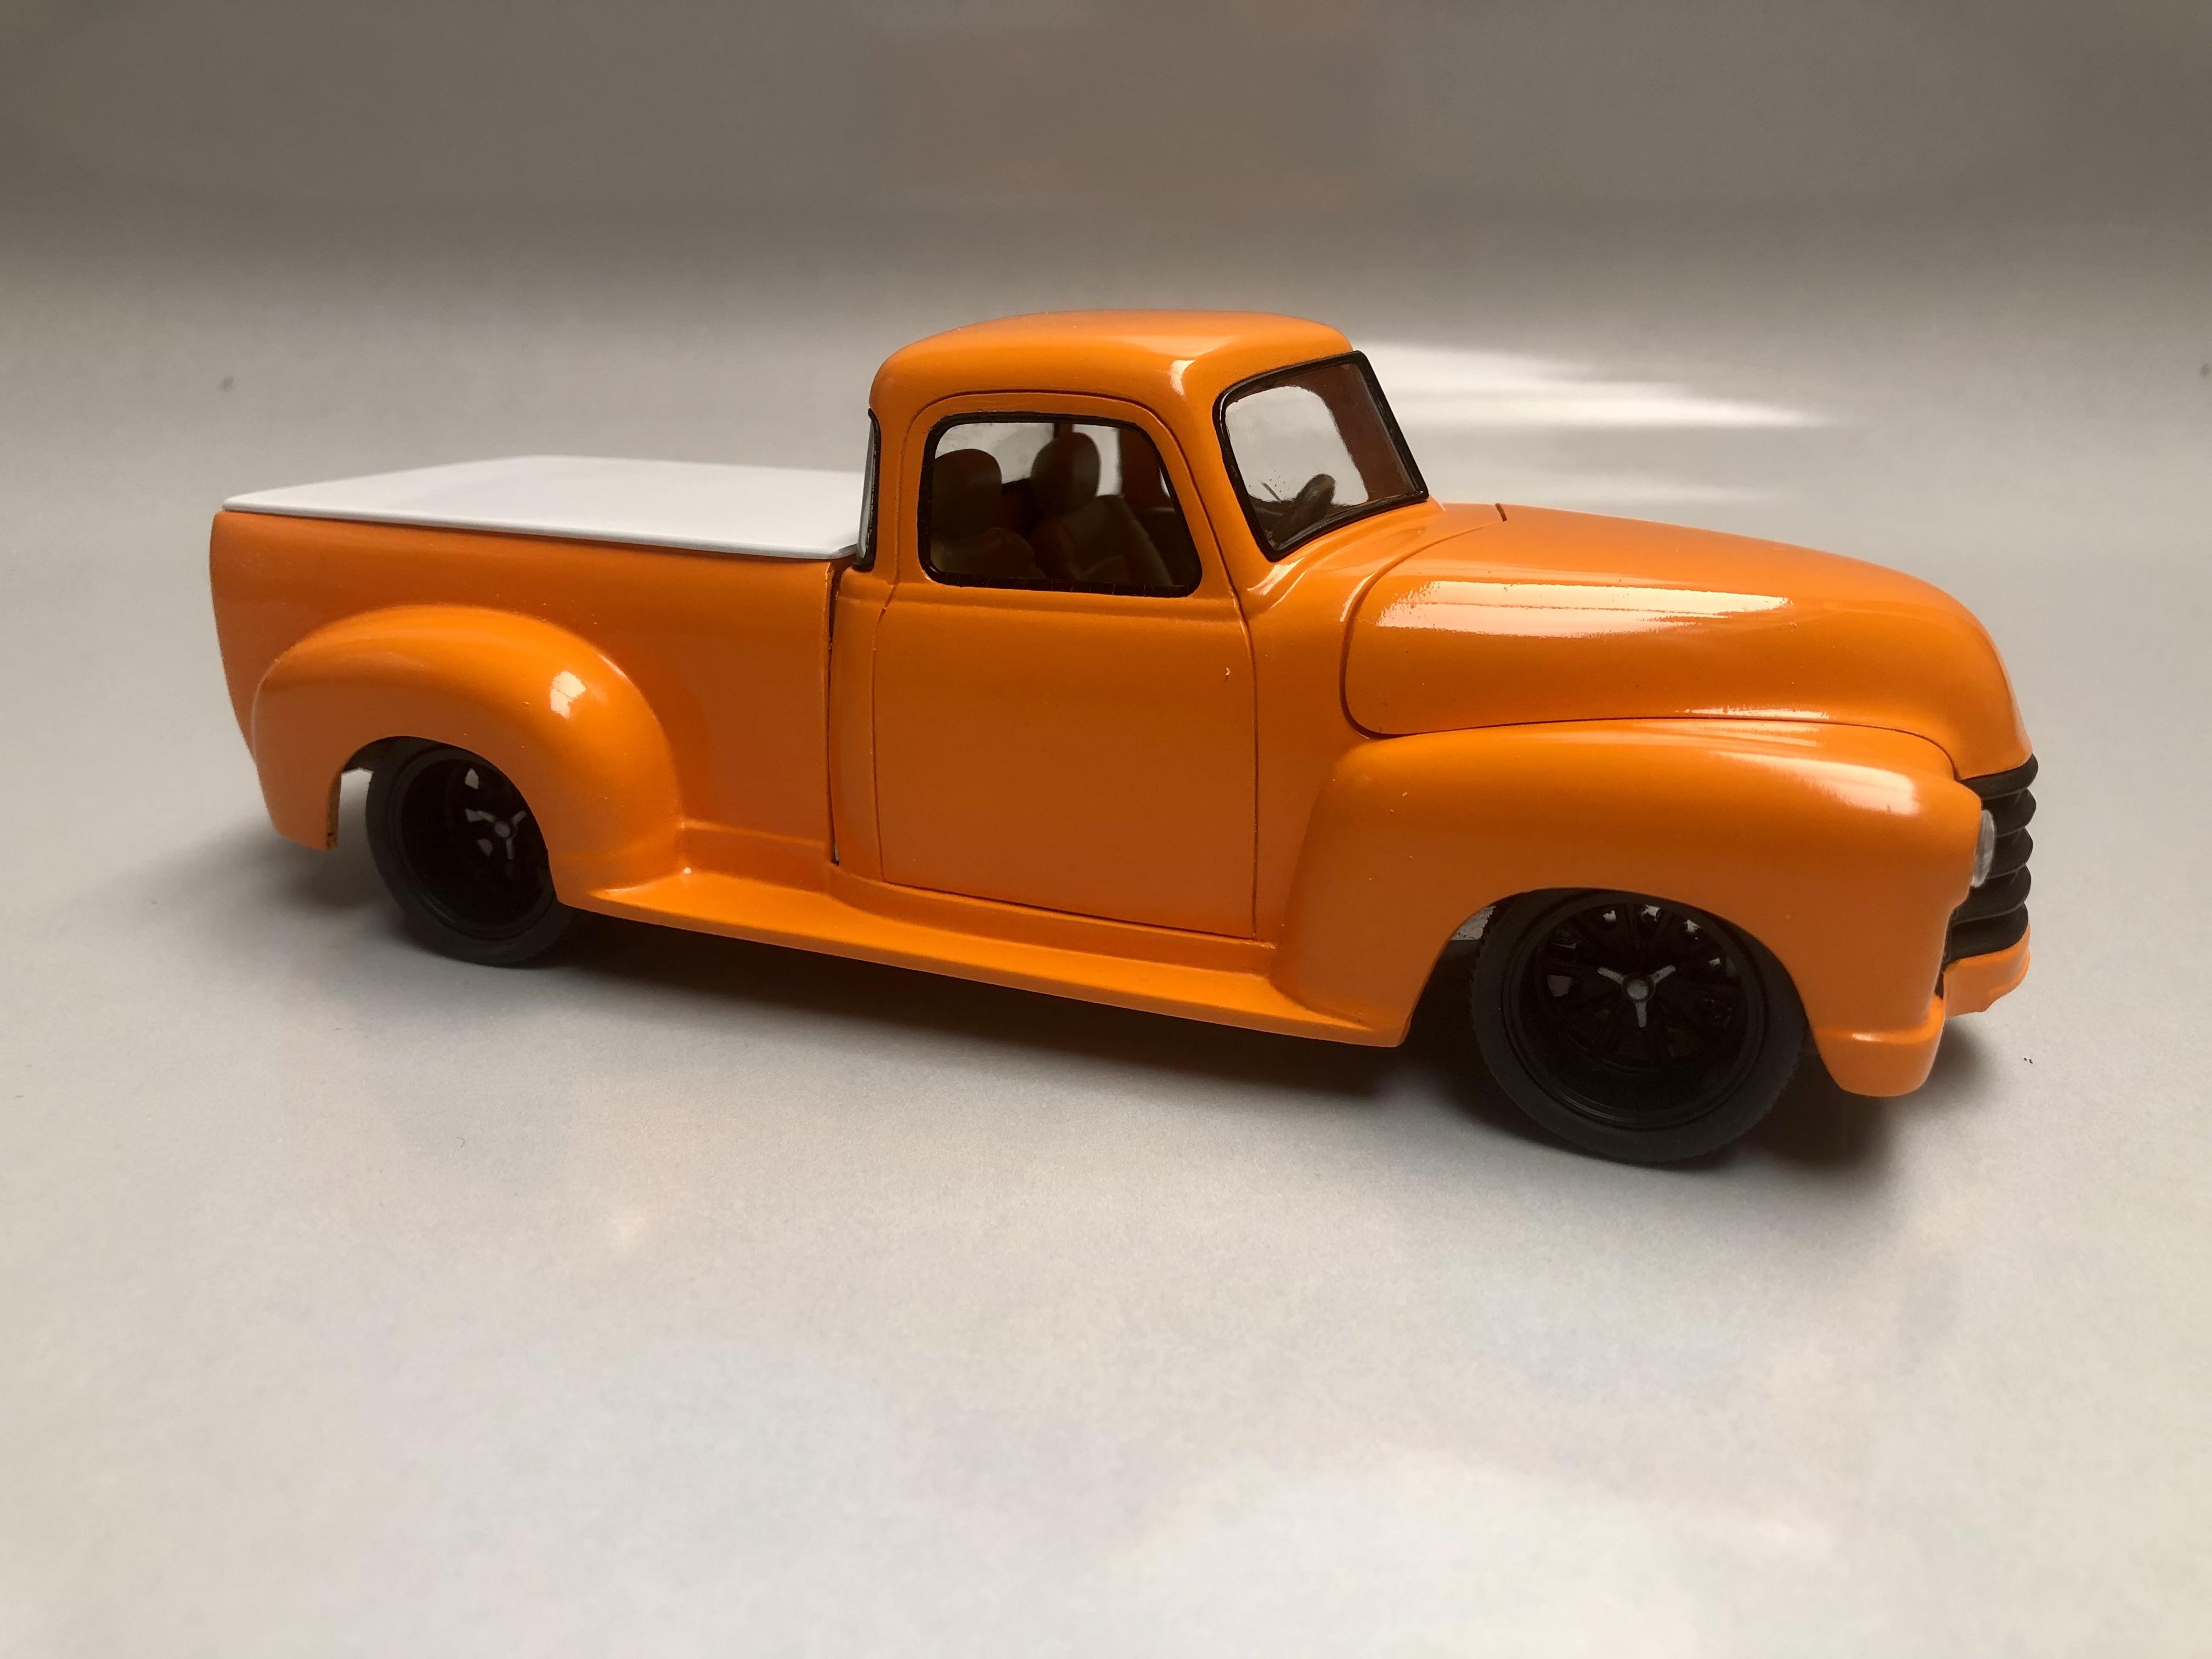
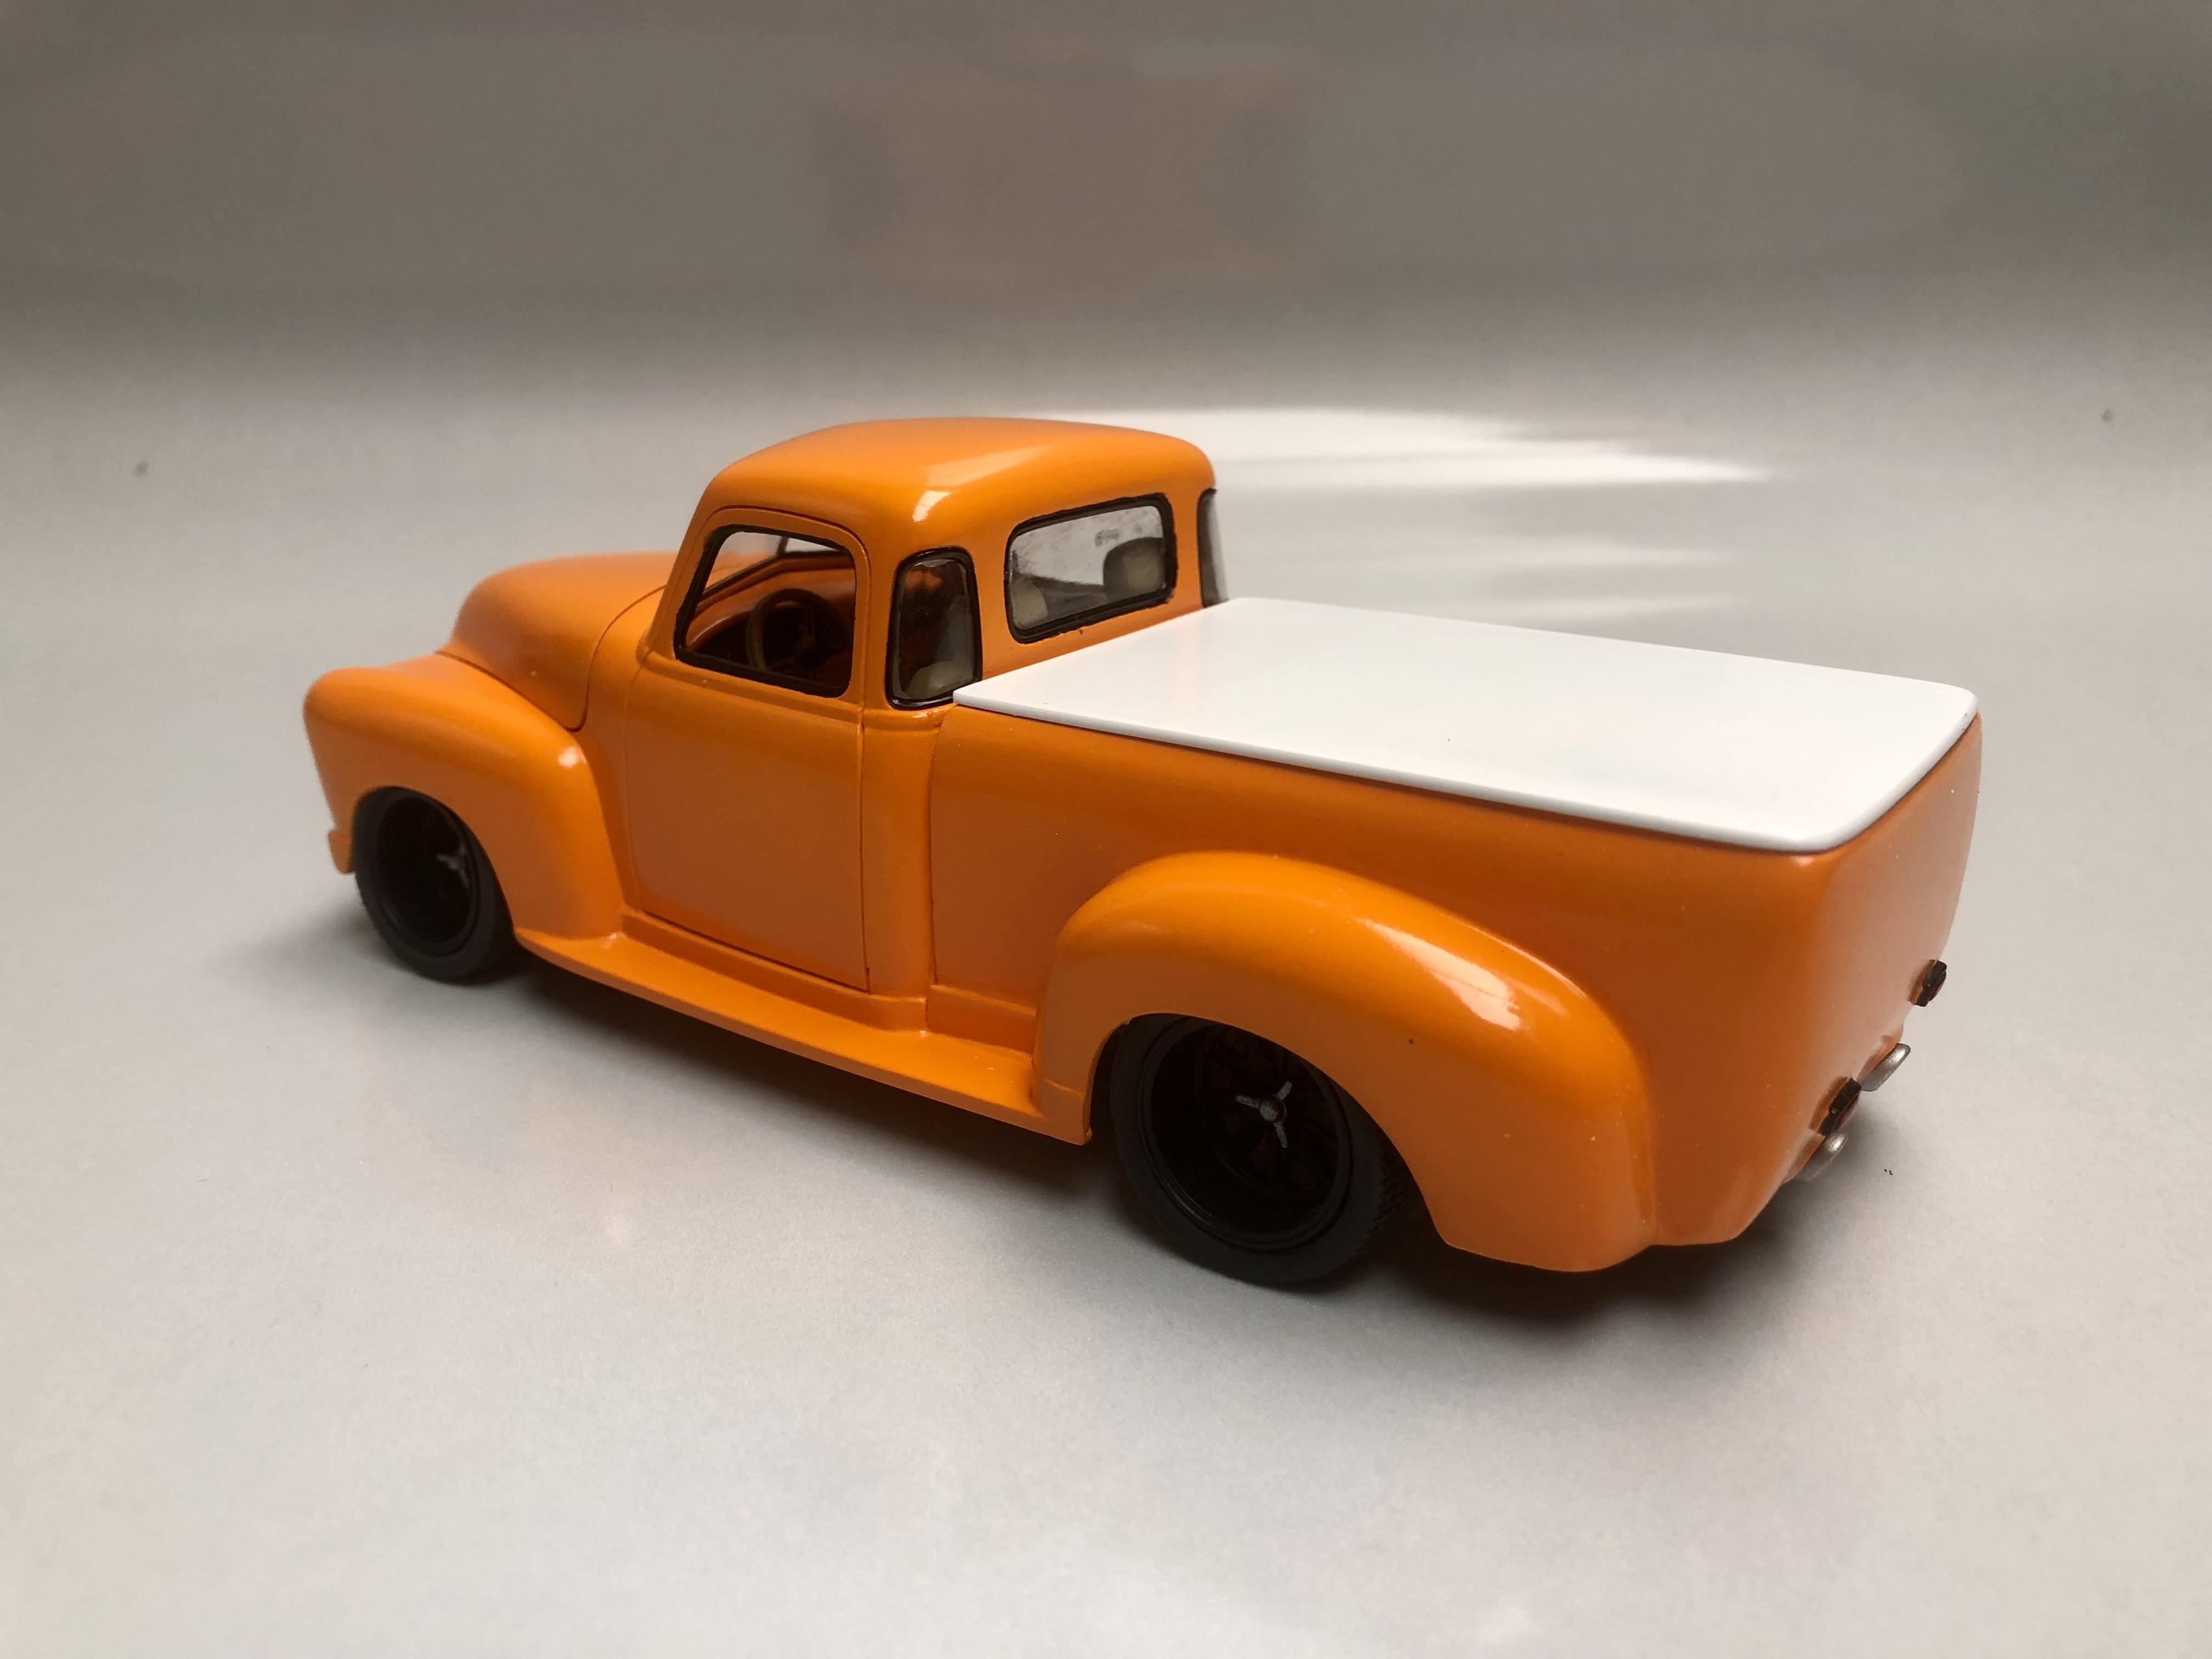
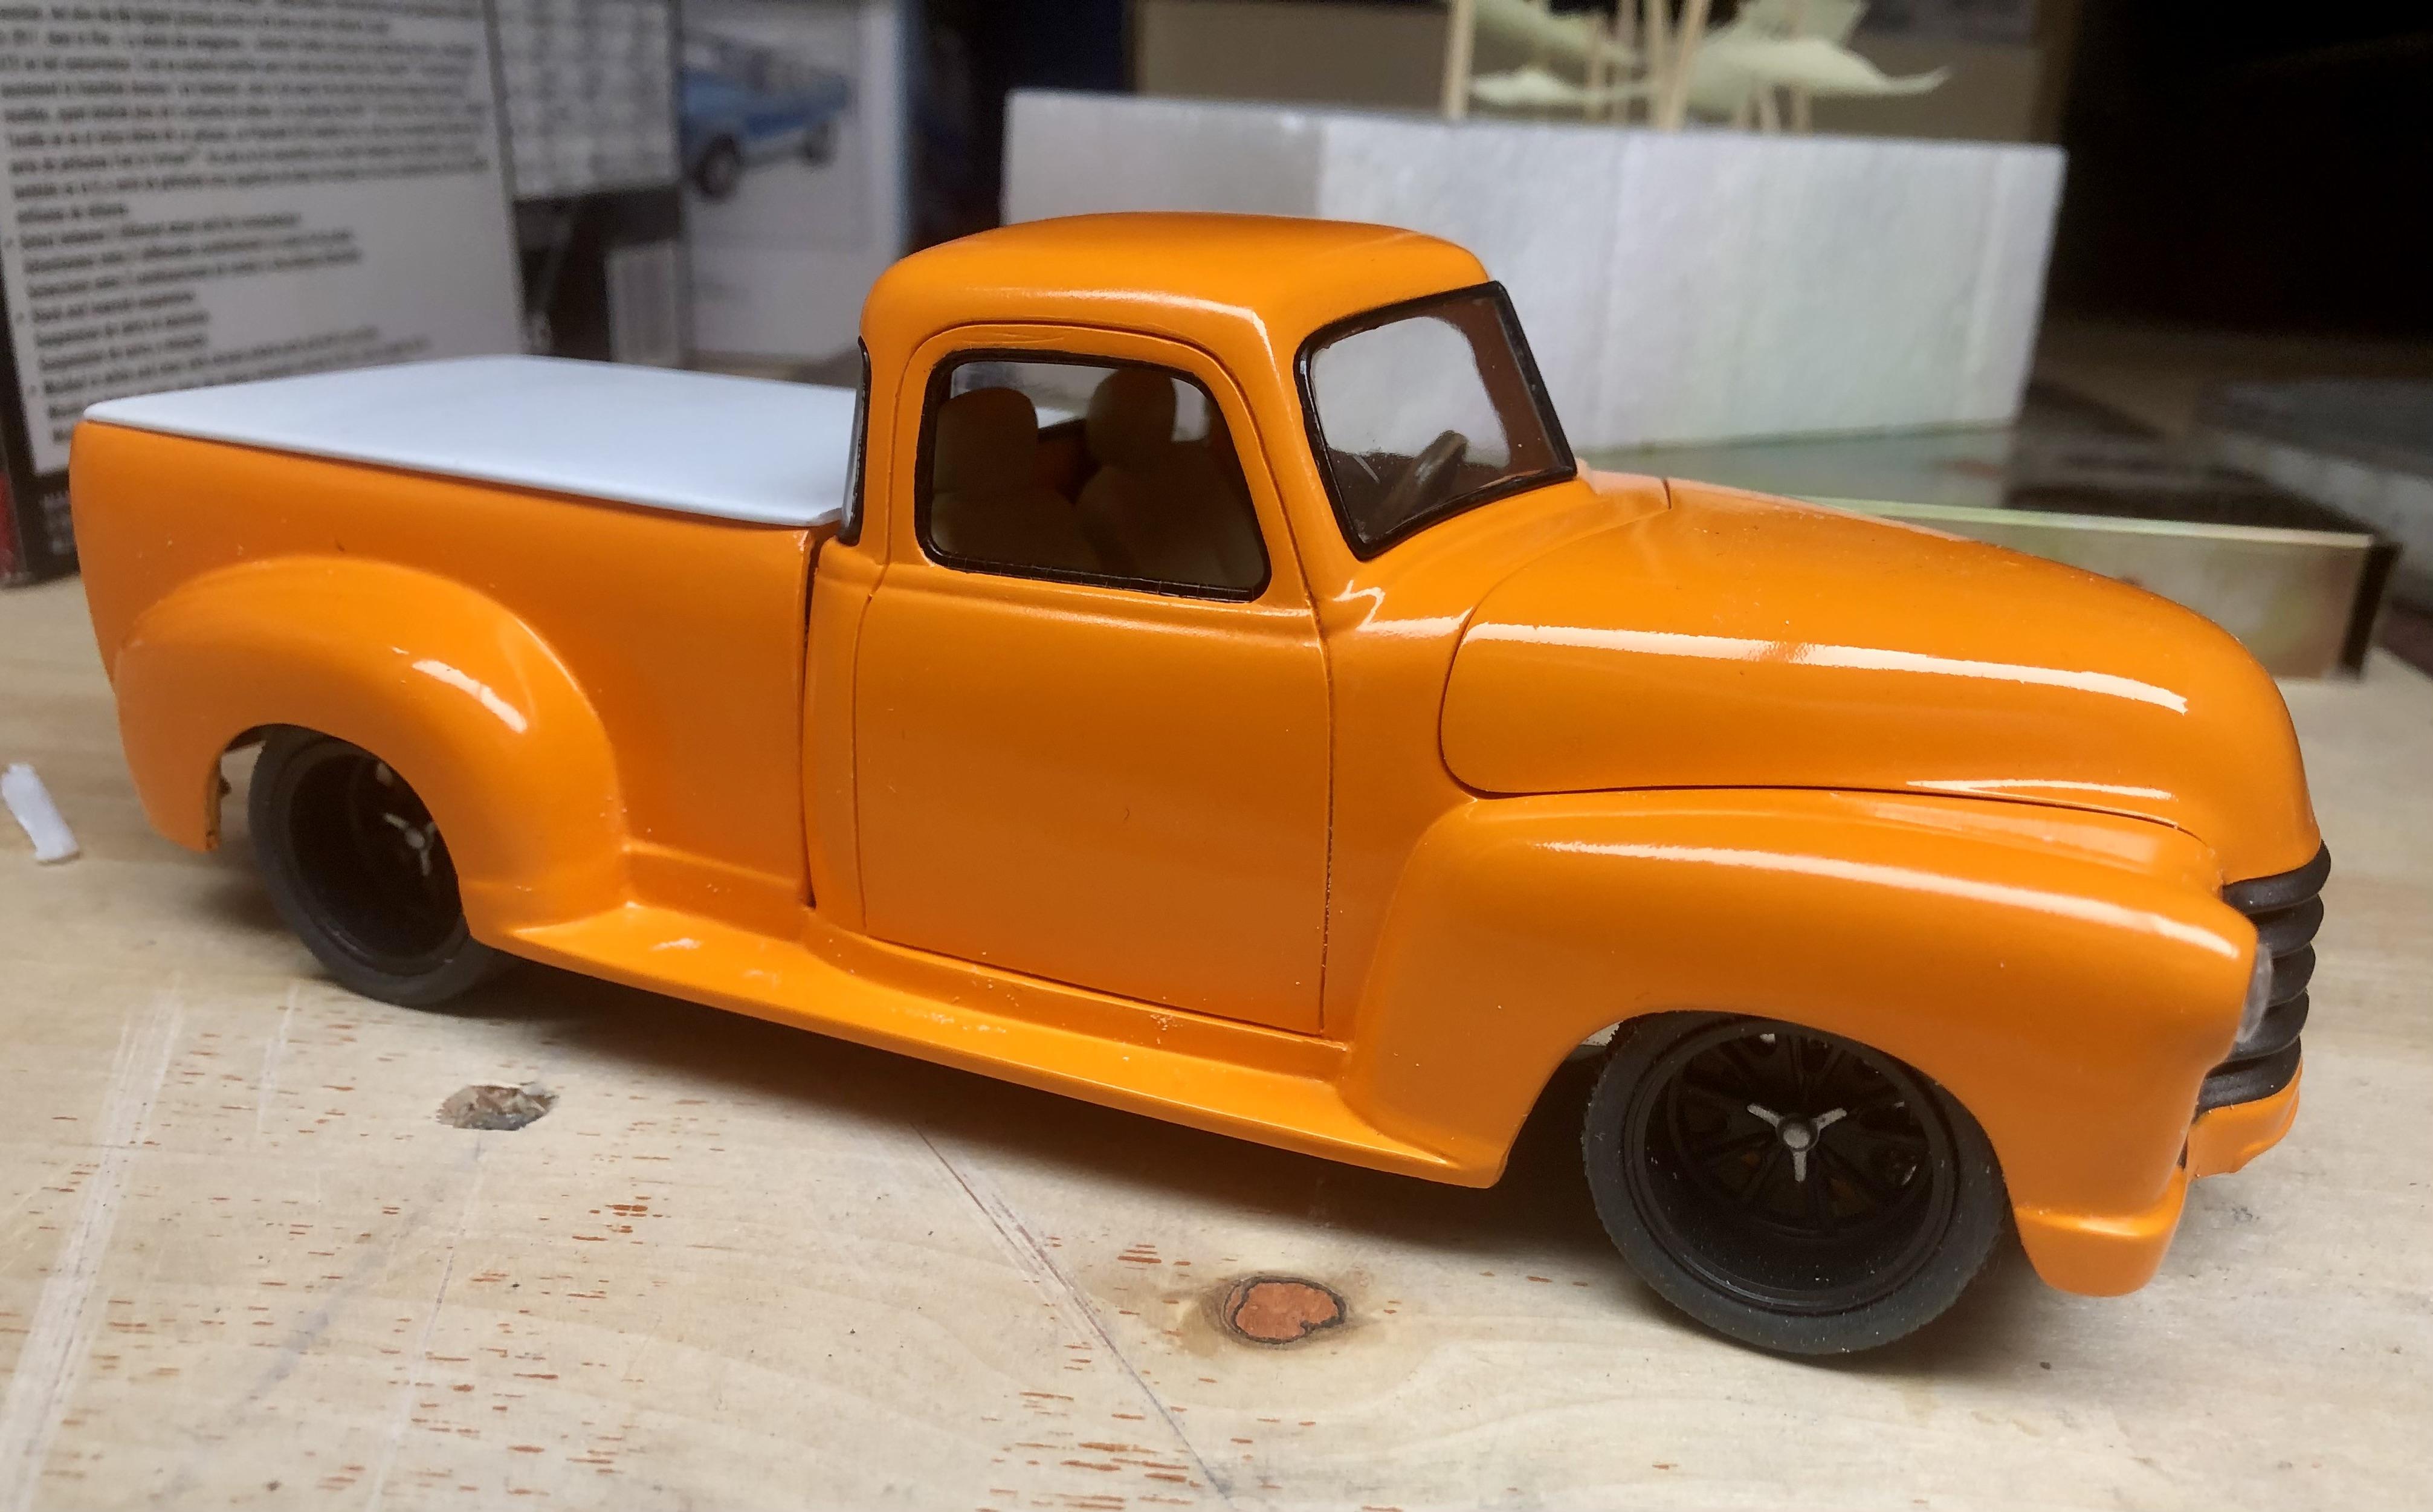
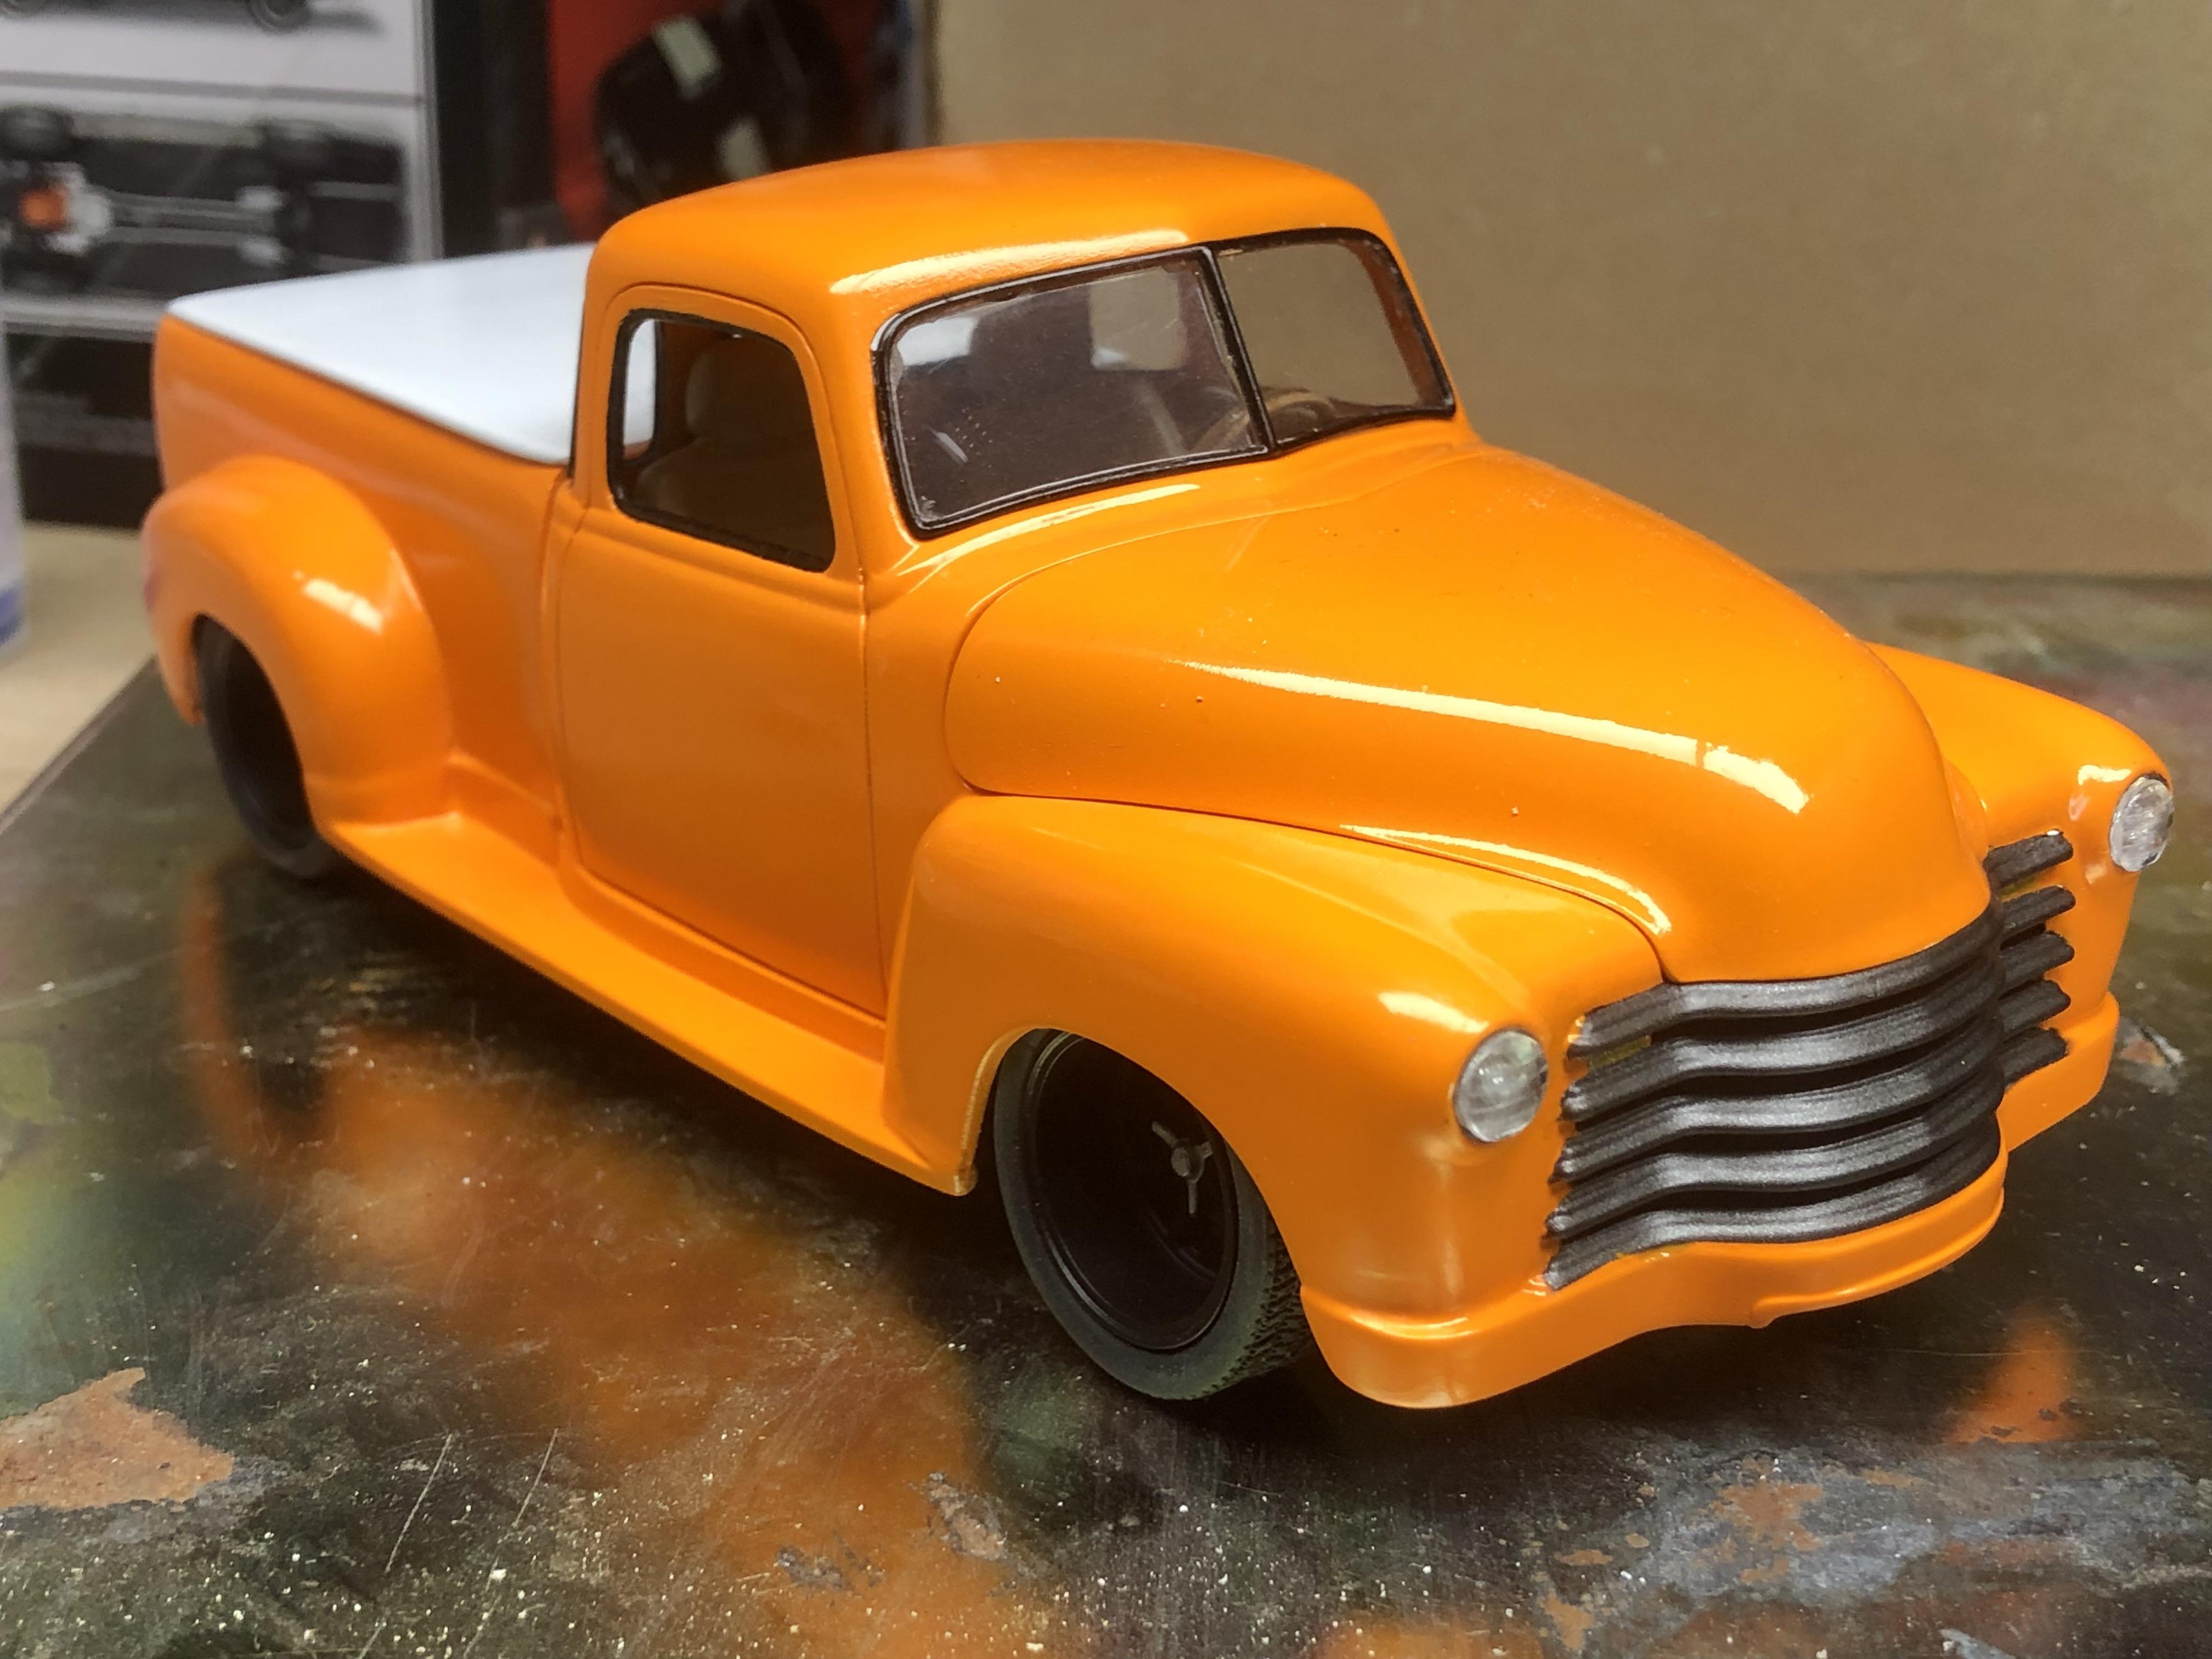
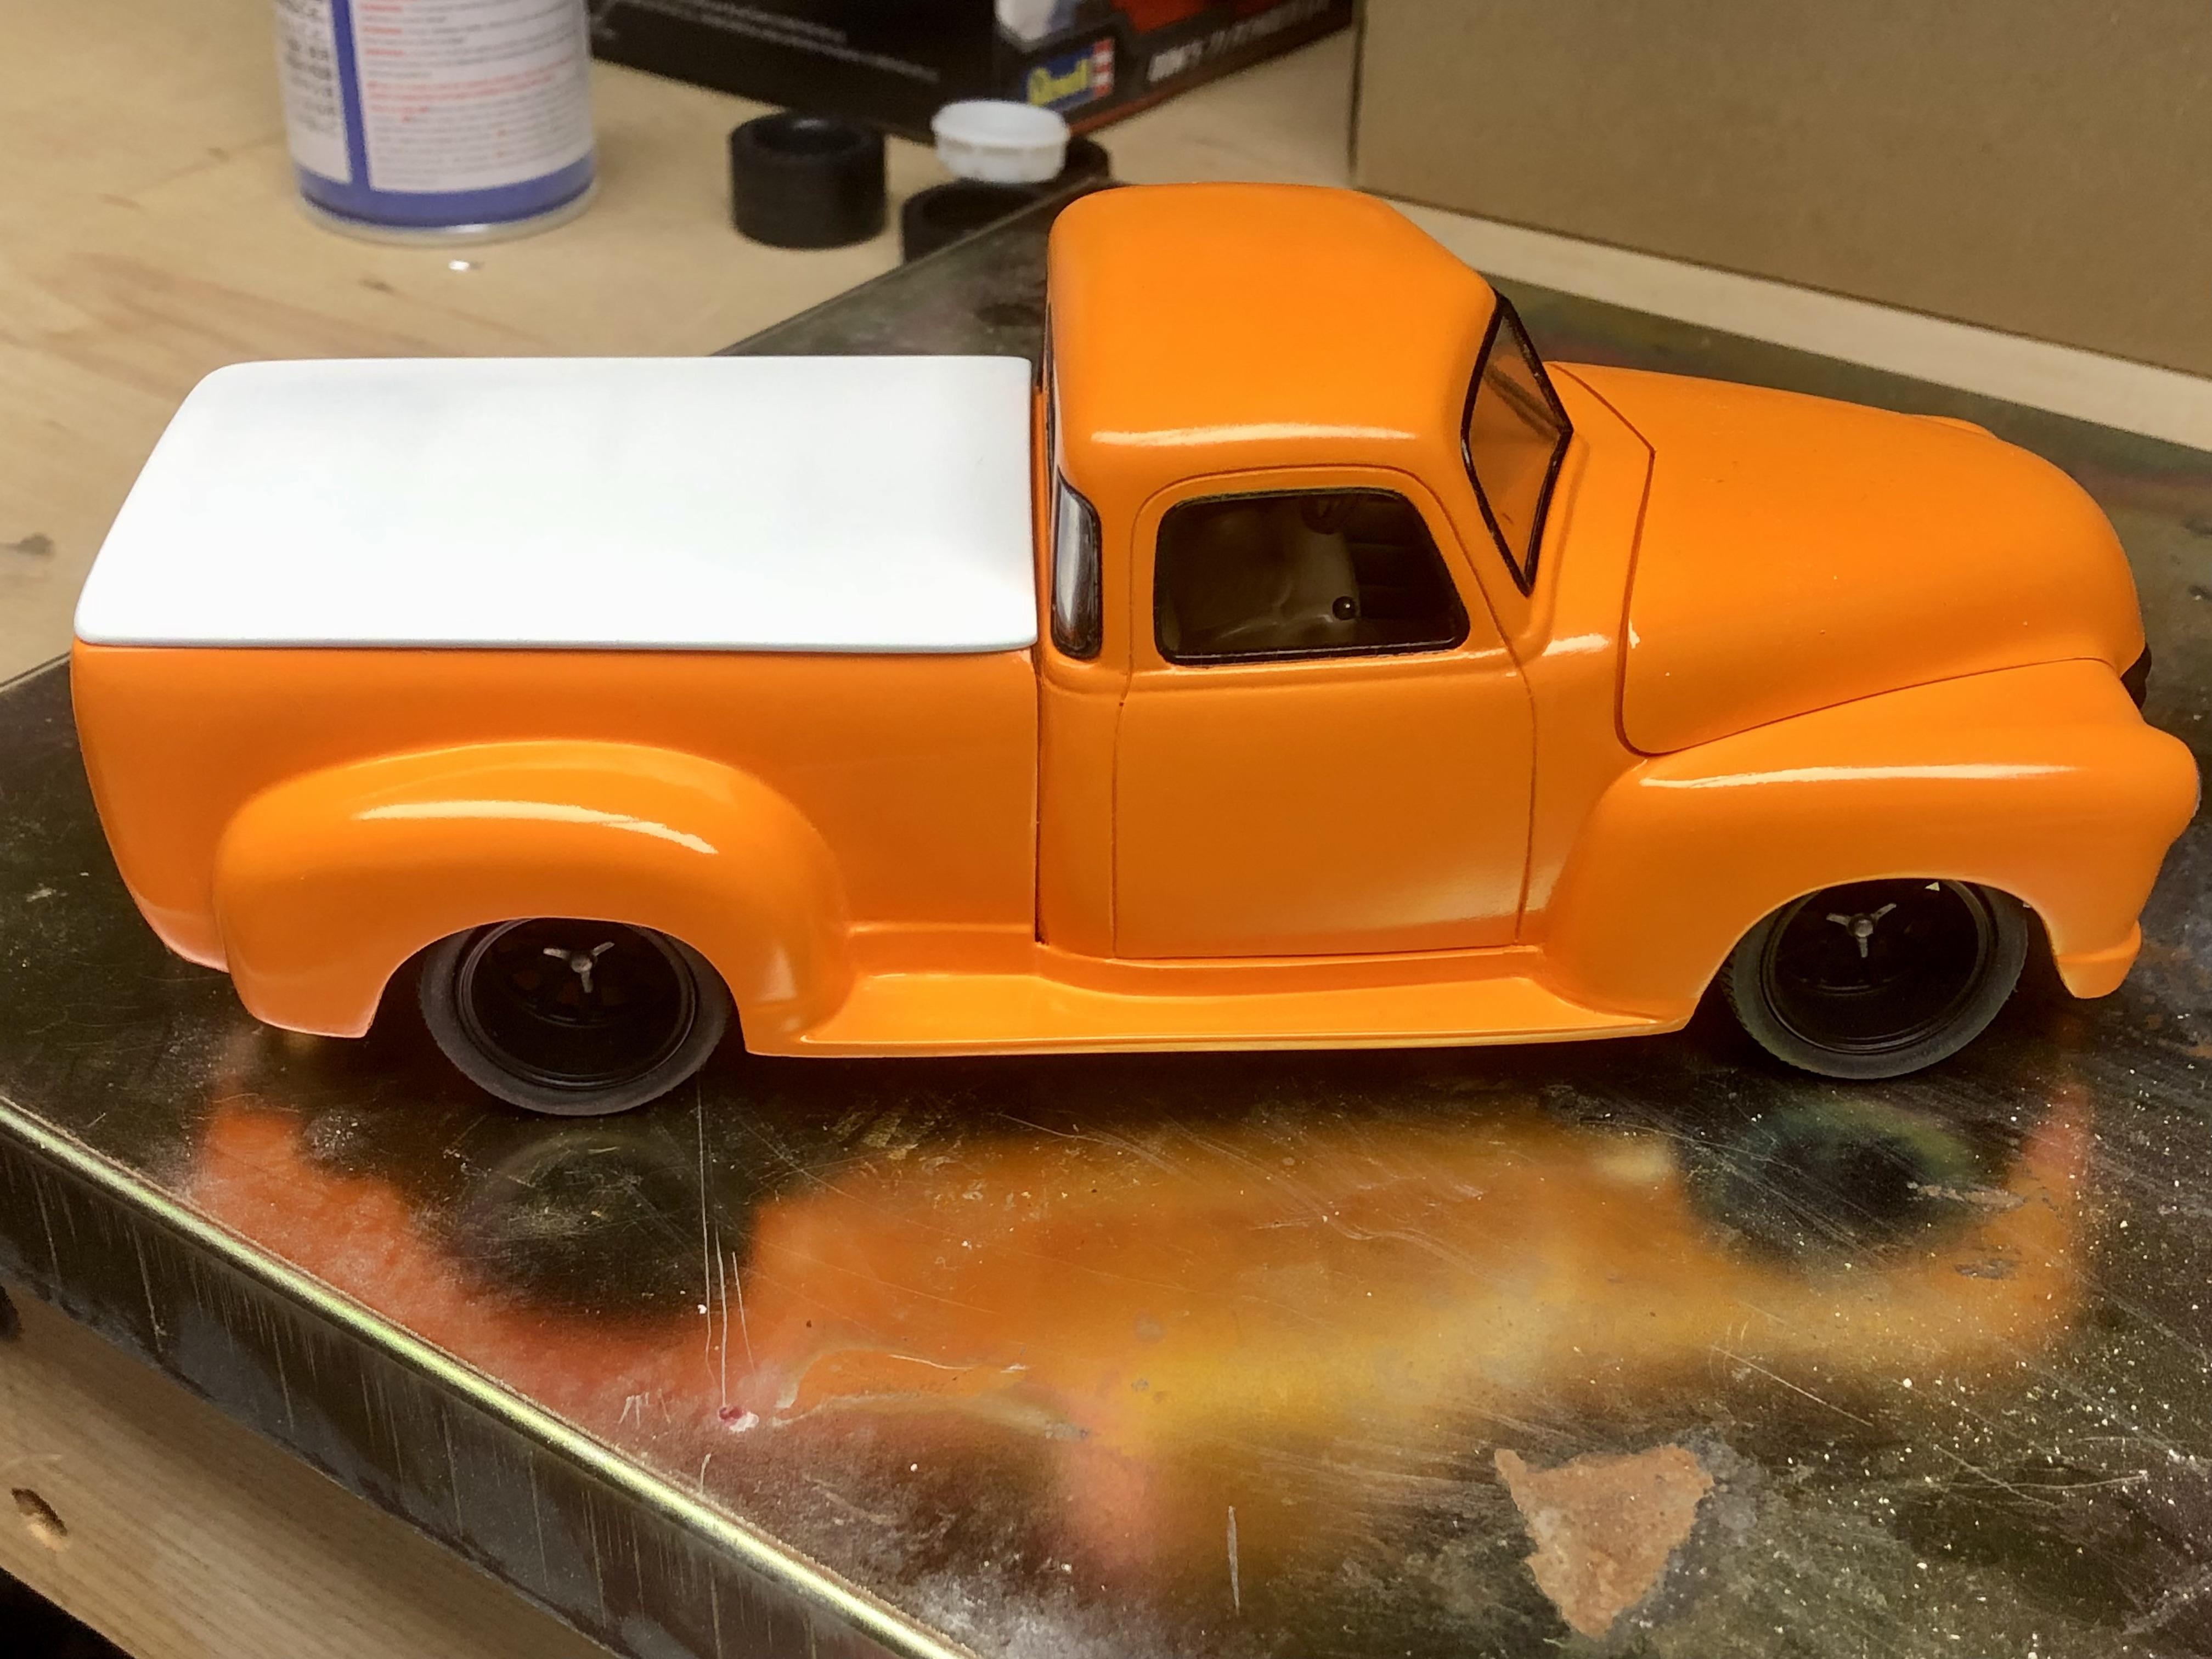
So I have had a couple of emails asking what paint and clear coat I used on this. The paint is Tamiya Acrylic Gloss orange thinned down and airbrushed. It is NOT clear coated, however. I buffed it with McGuire's #7 wax and a buffing pad on my dremel (link to that process is below) "The Schindler Method" (as named by George Bojacuik) What is important to note is to use a variable speed dremel or similar and dial it down as slow as you can get using light pressure. If not, you WILL burn through the paint...ask me how I know! -
9-Year Project - Chevy 3100
BDSchindler replied to BDSchindler's topic in Model Trucks: Pickups, Vans, SUVs, Light Commercial
Thanks guys. The longer it sat unfinished, the more it continued to gnaw at me to get it done. -
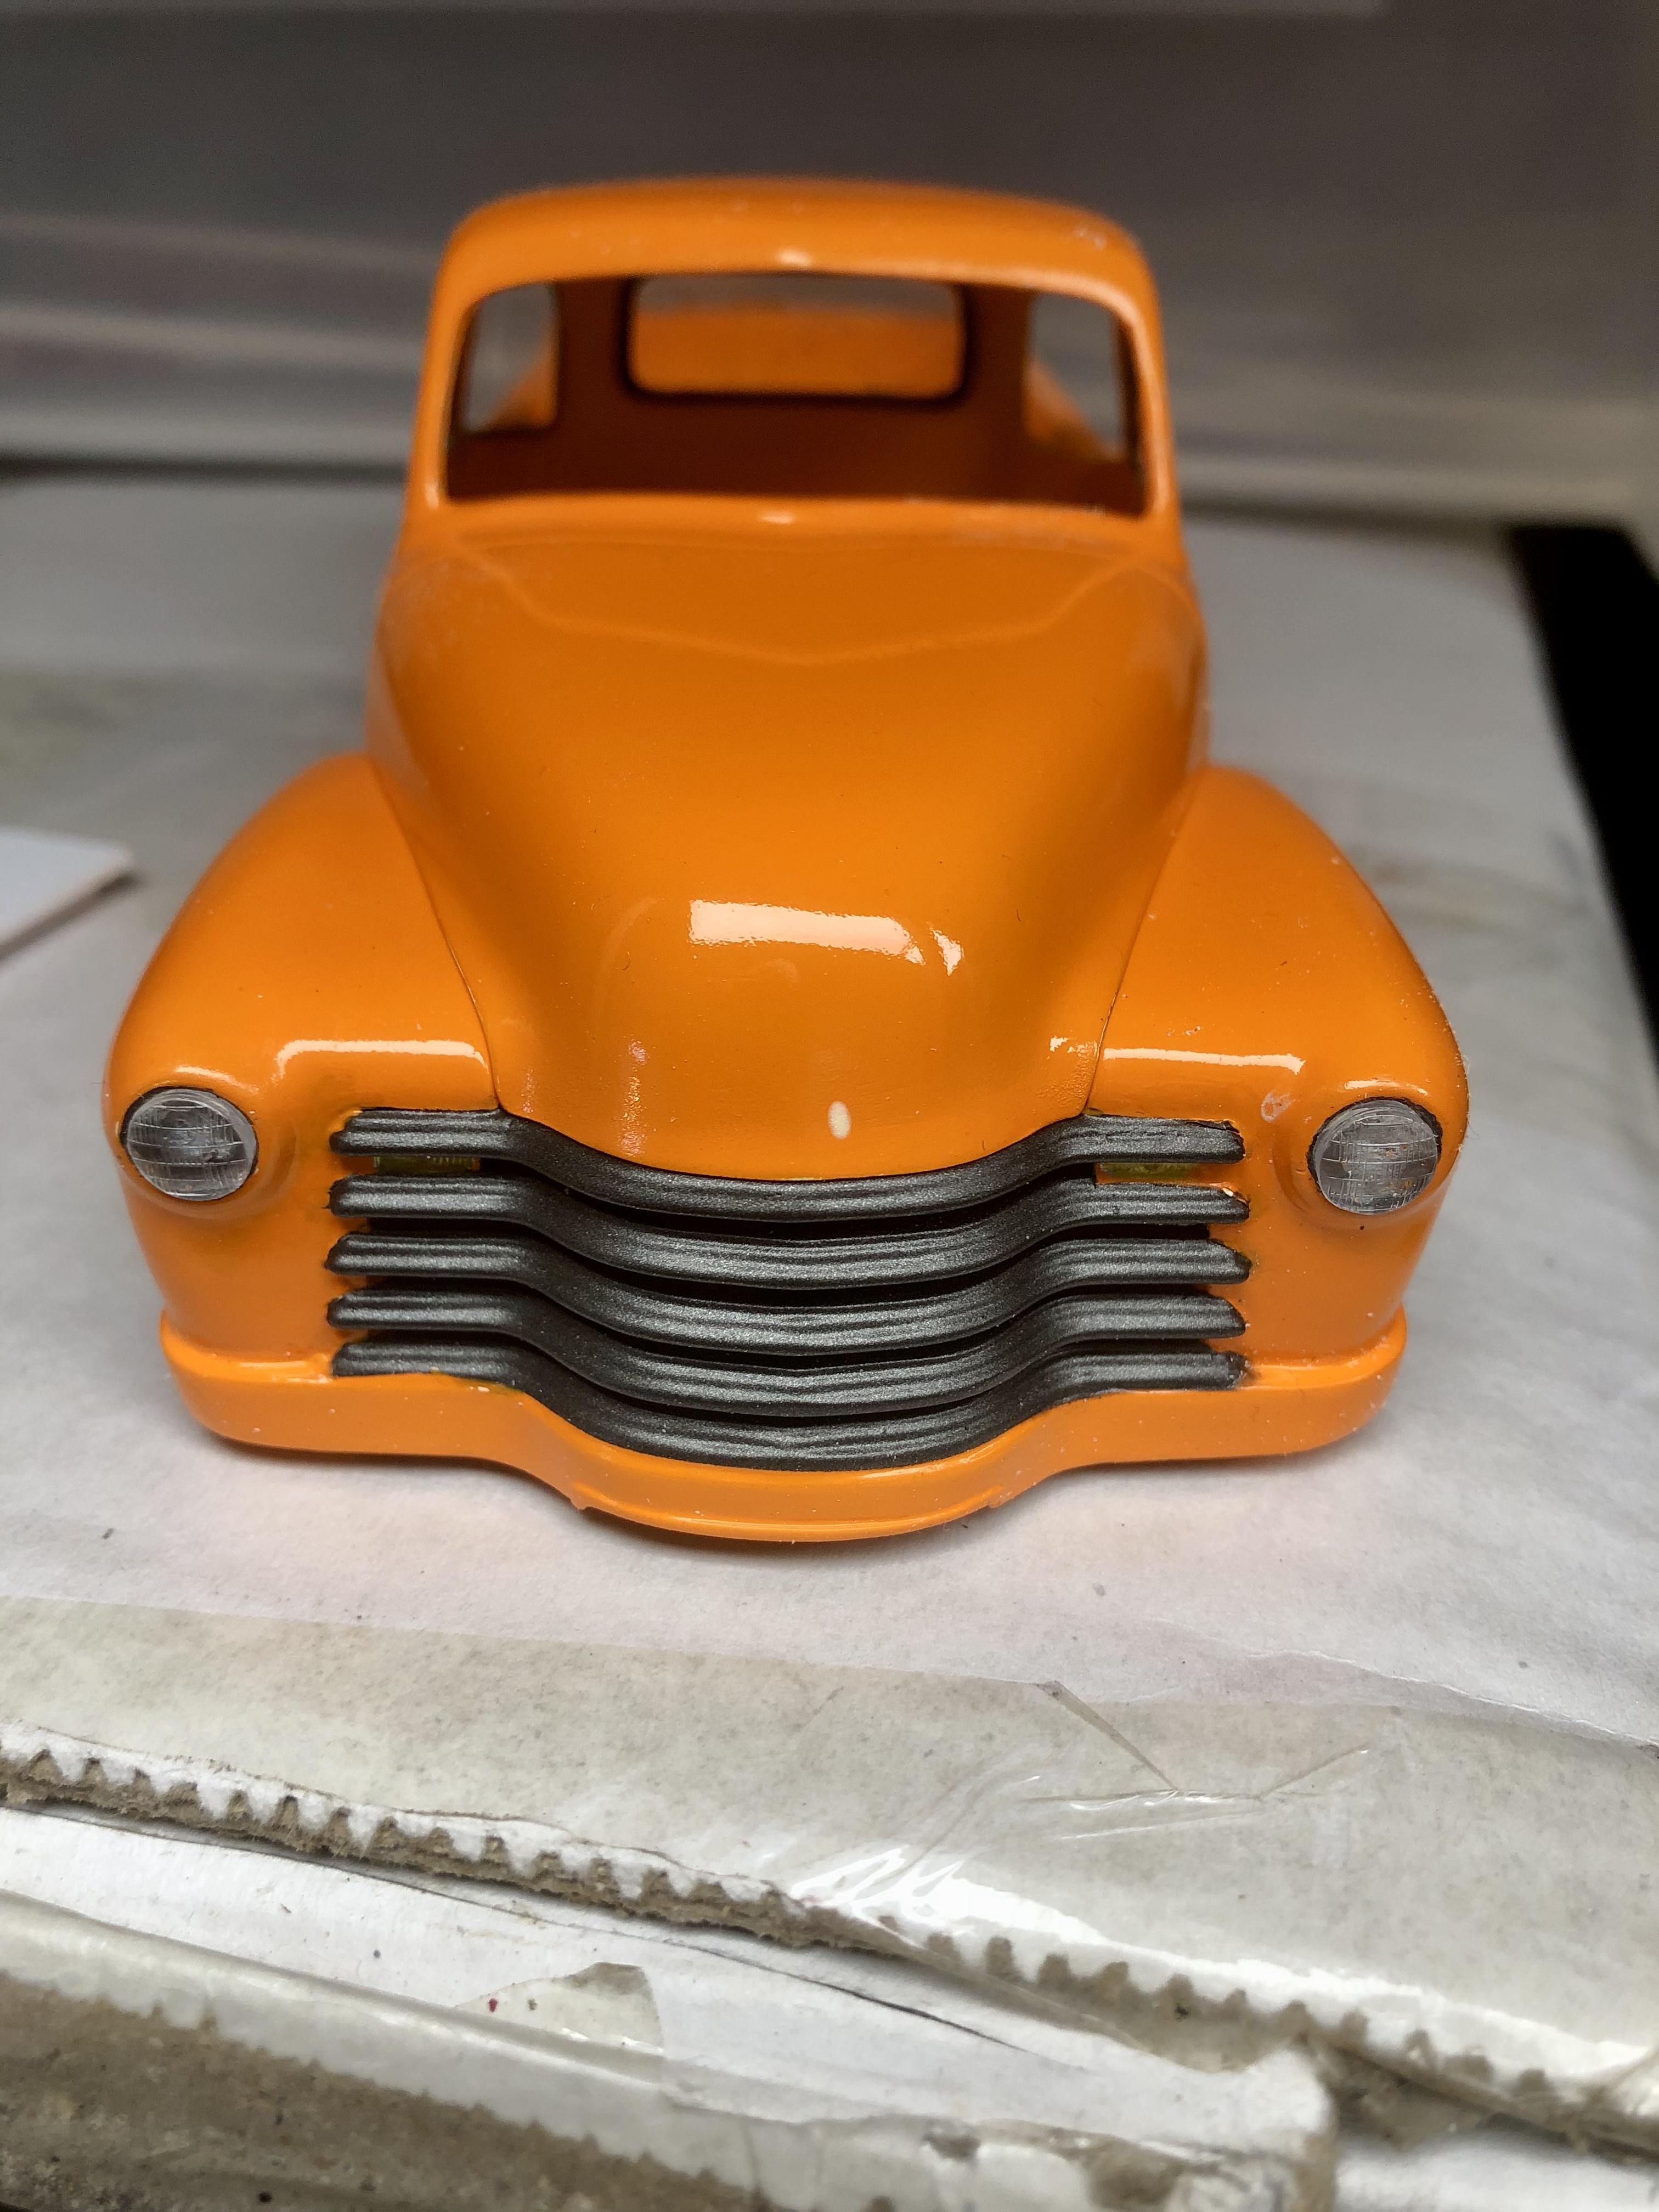
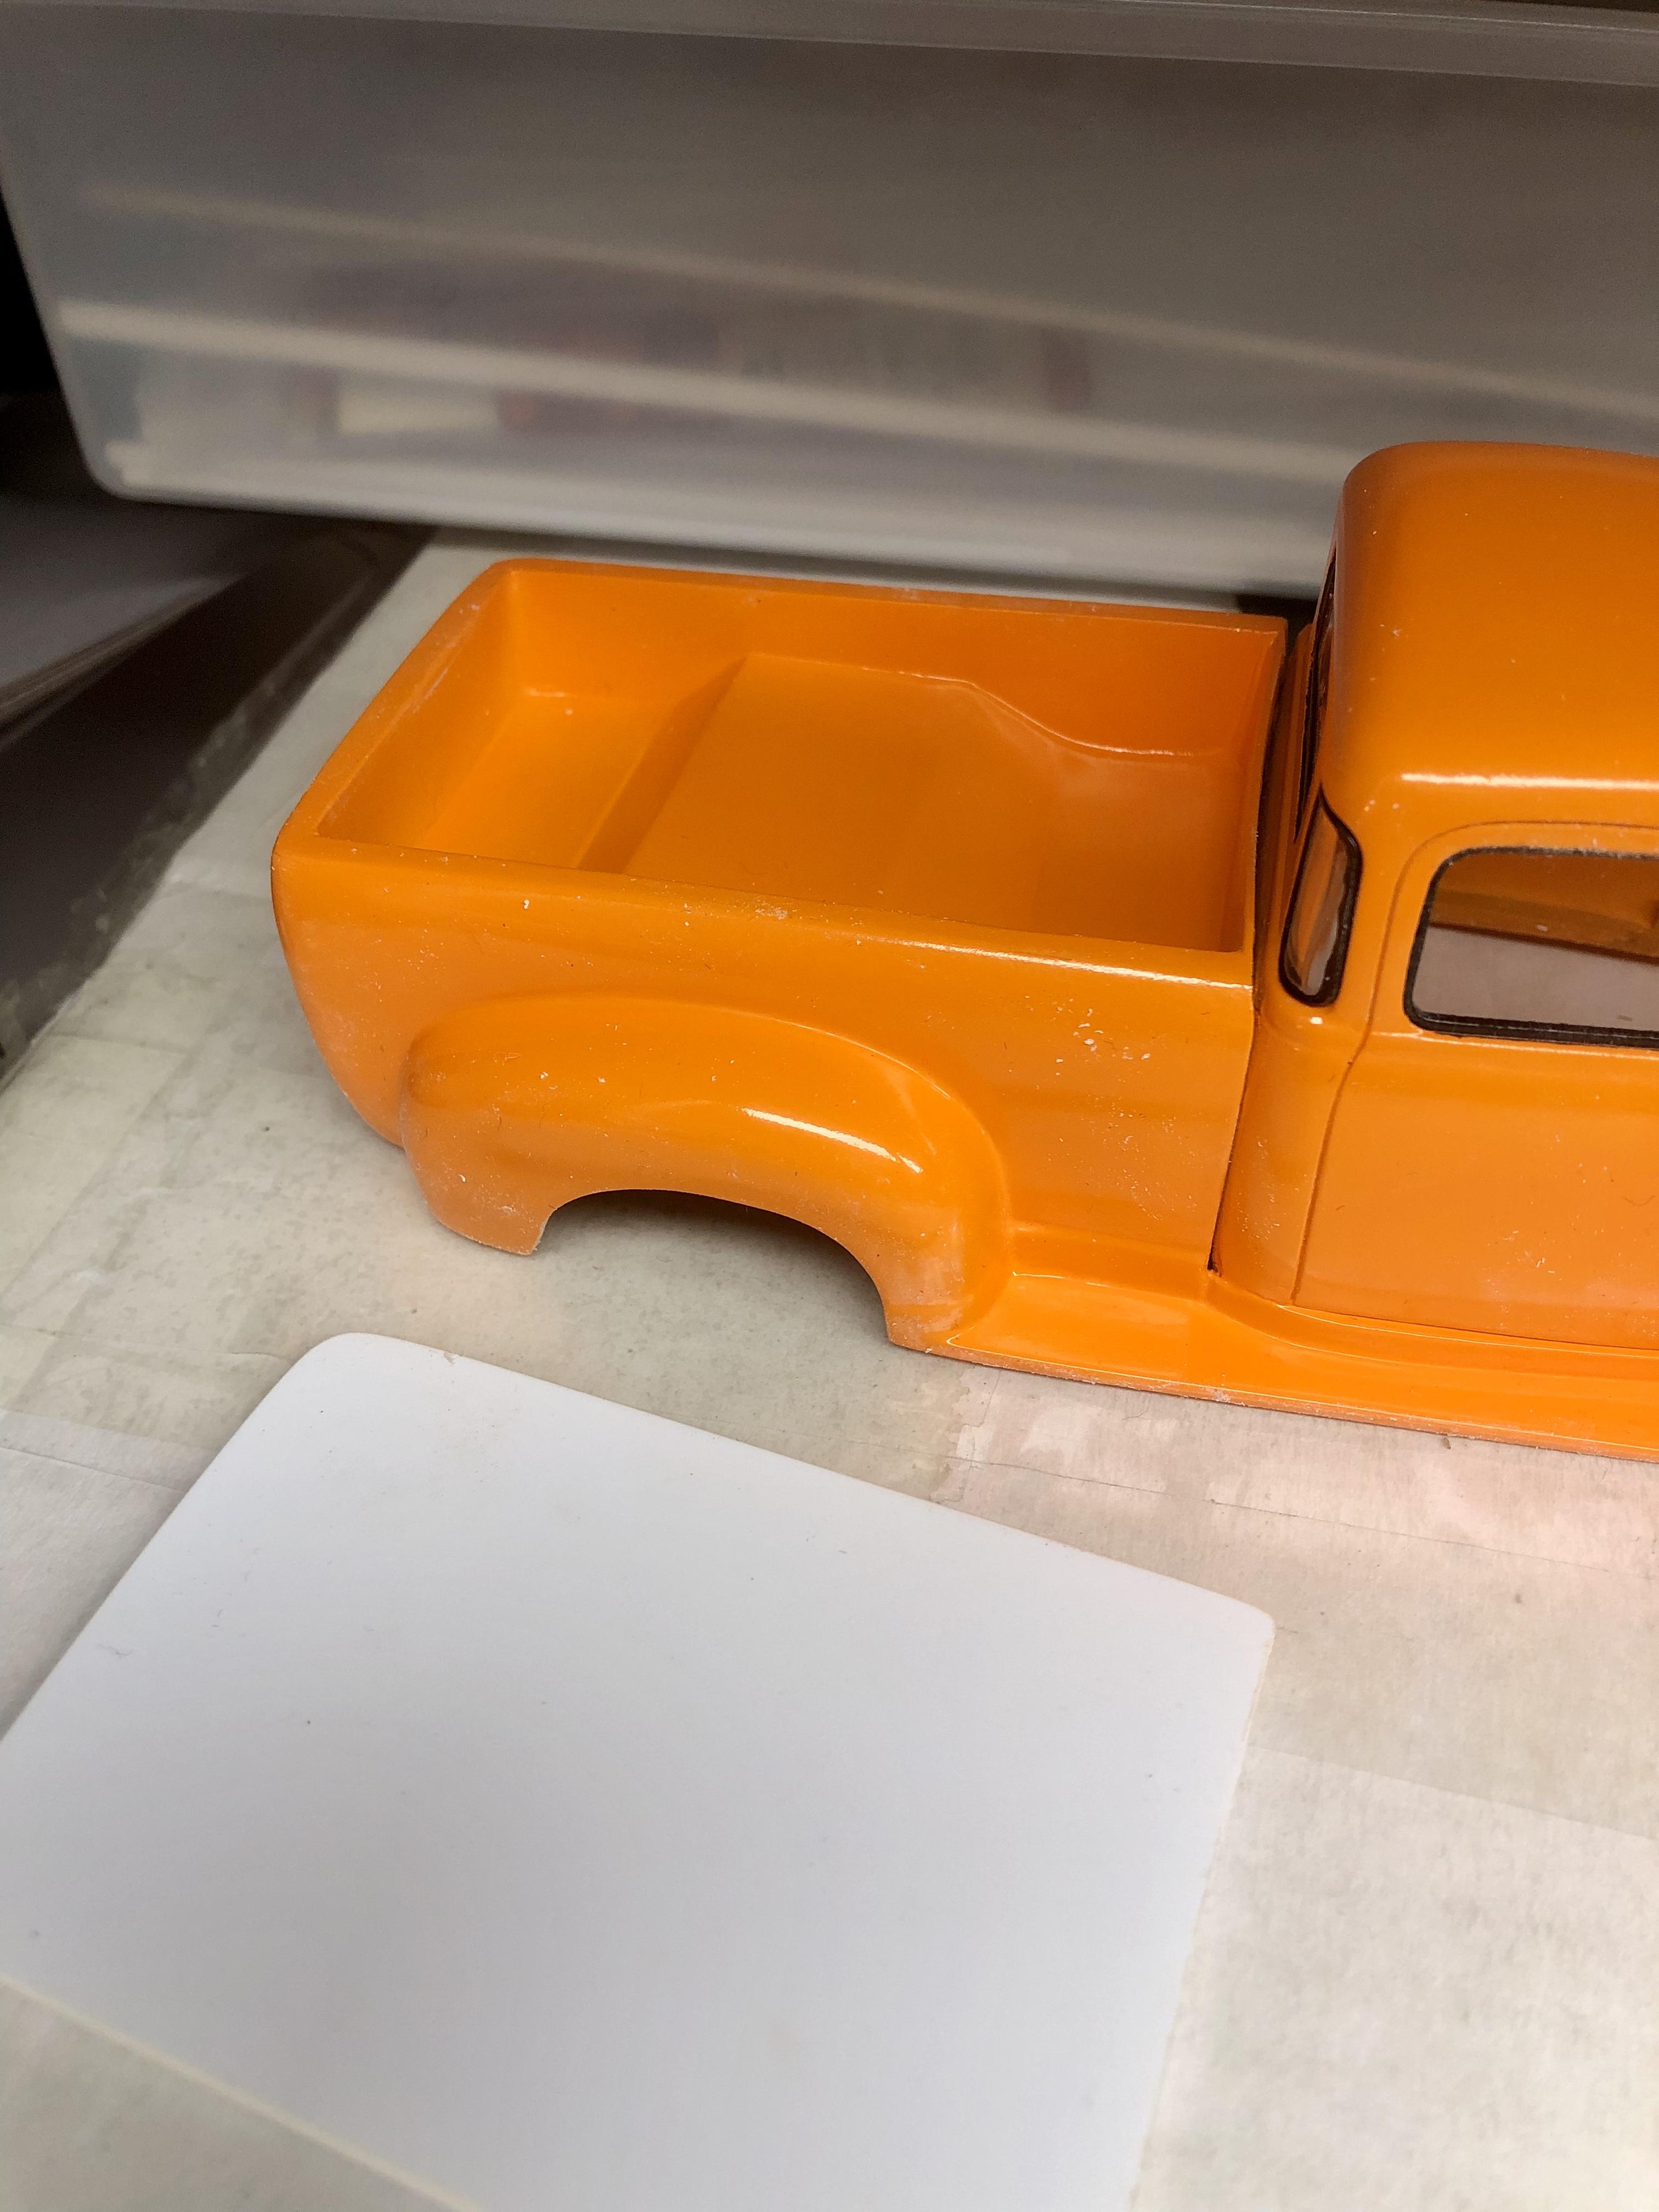
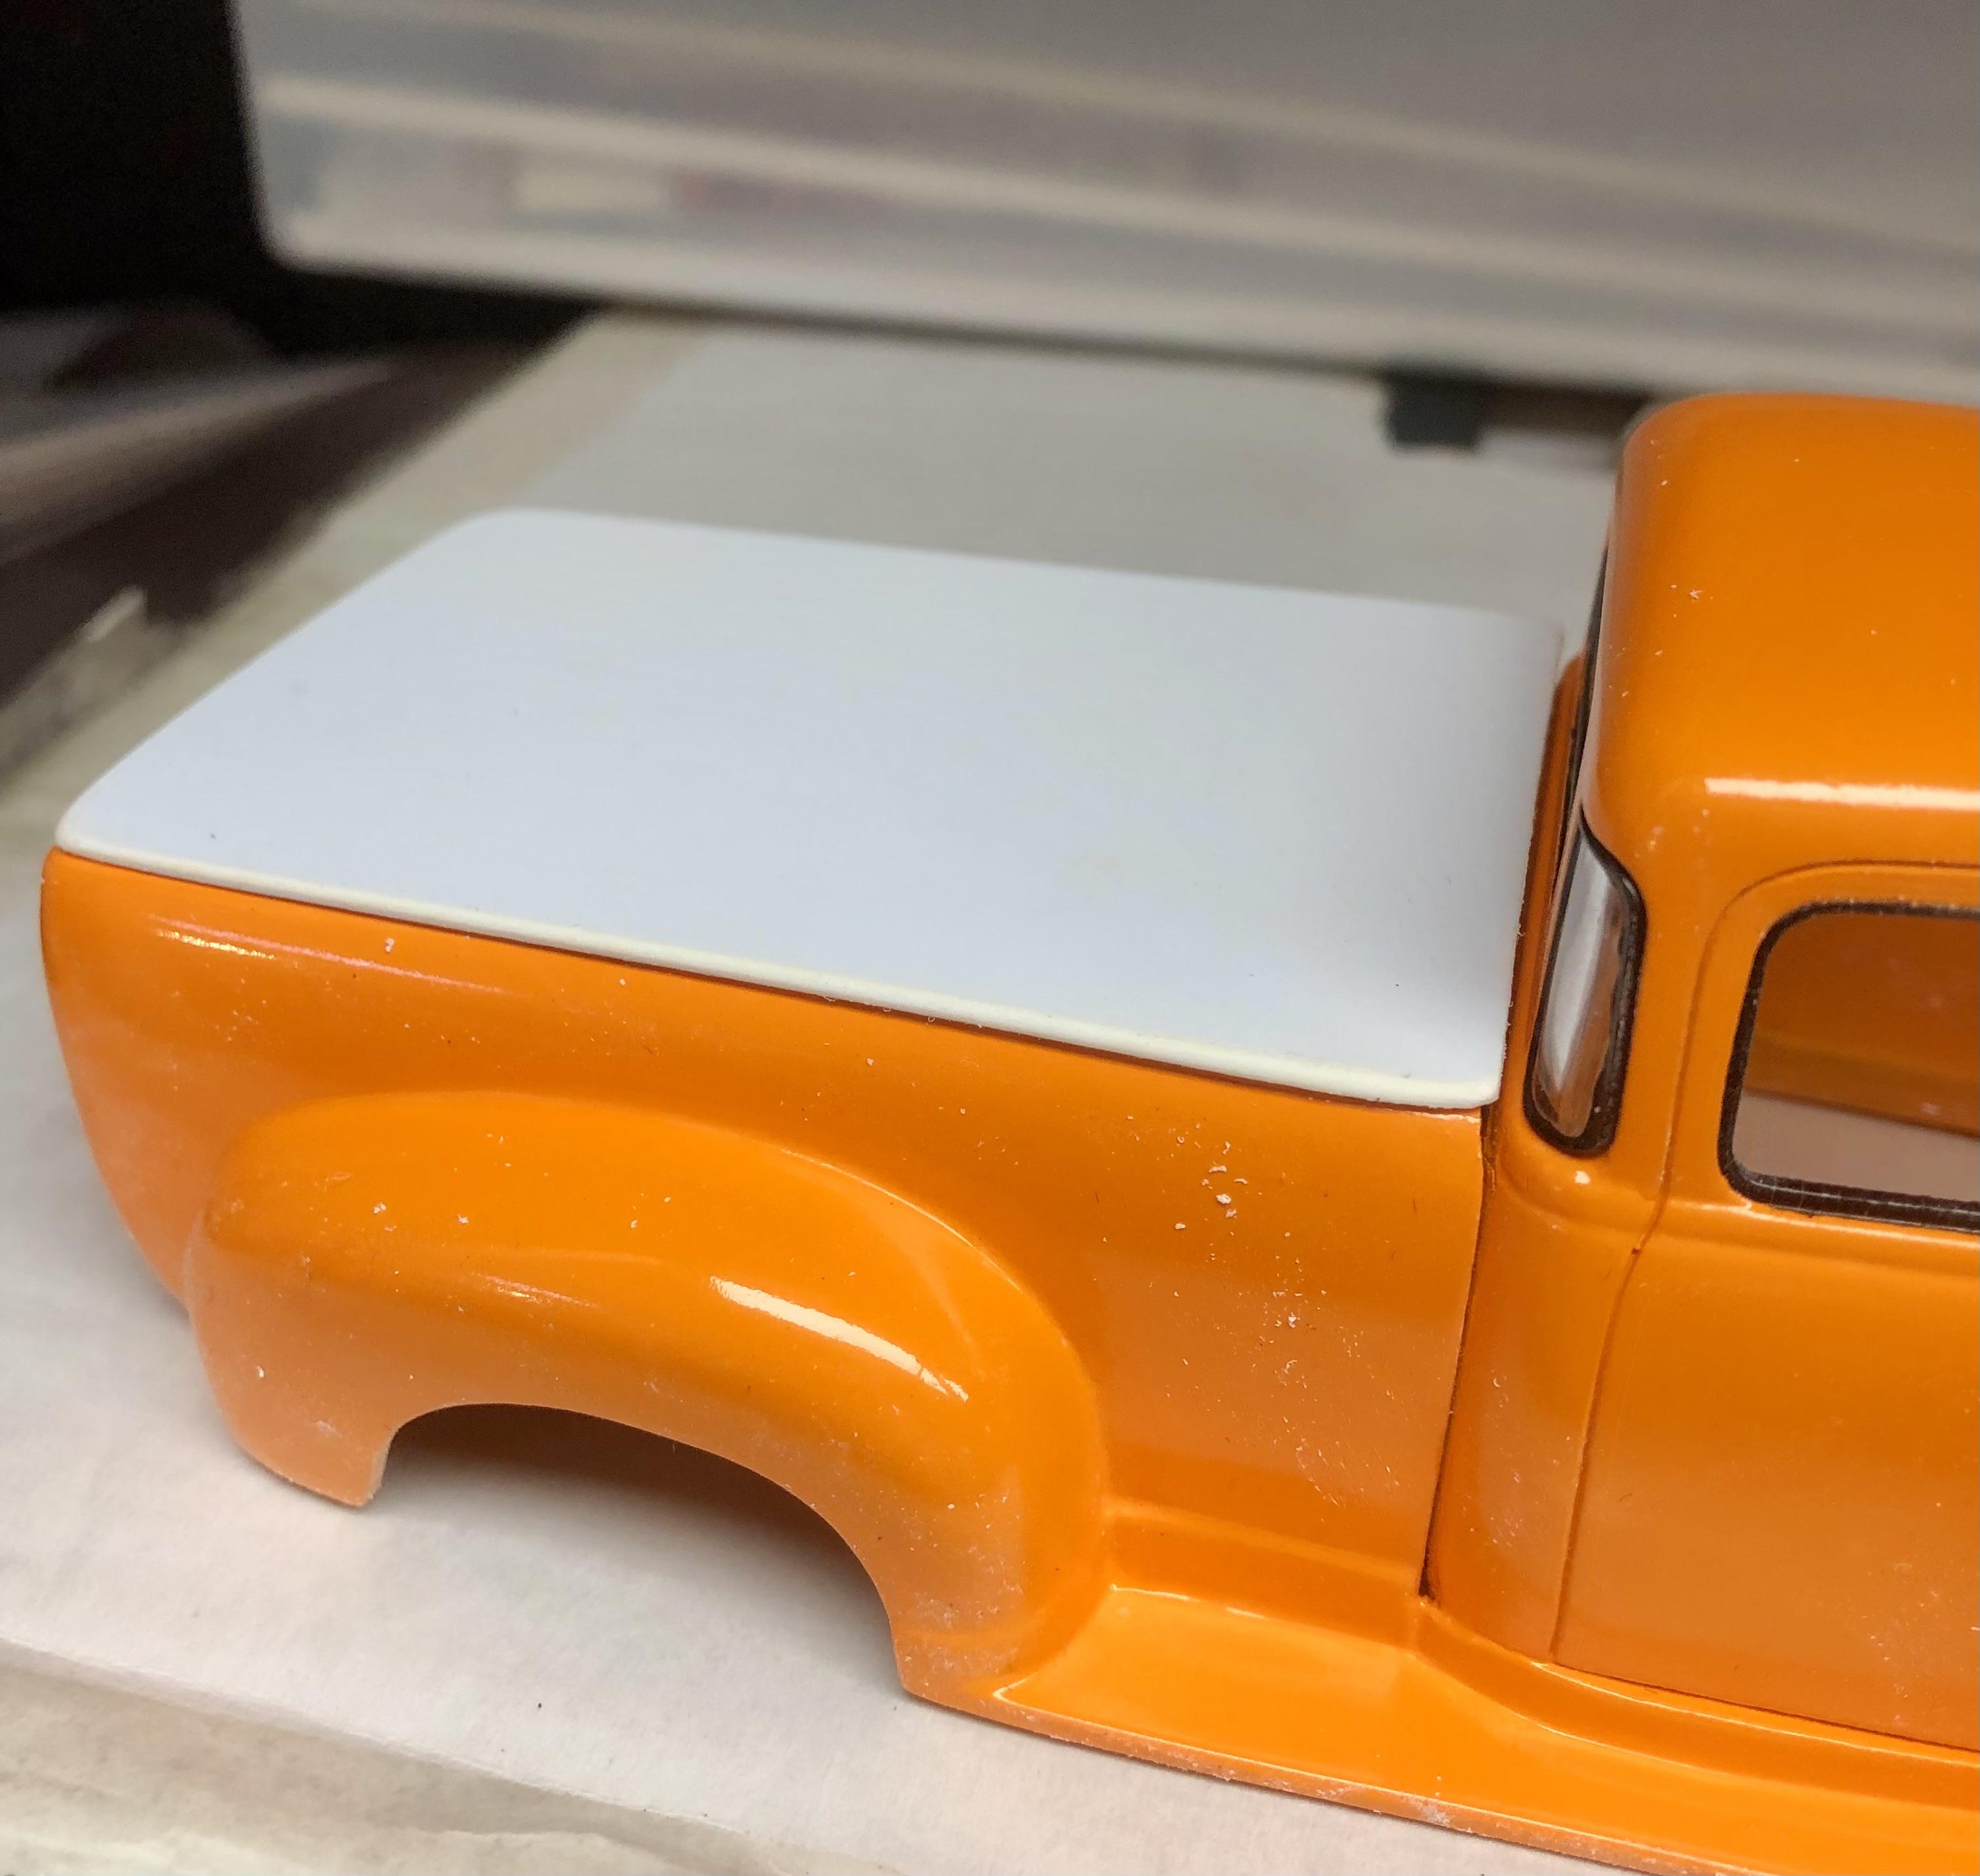
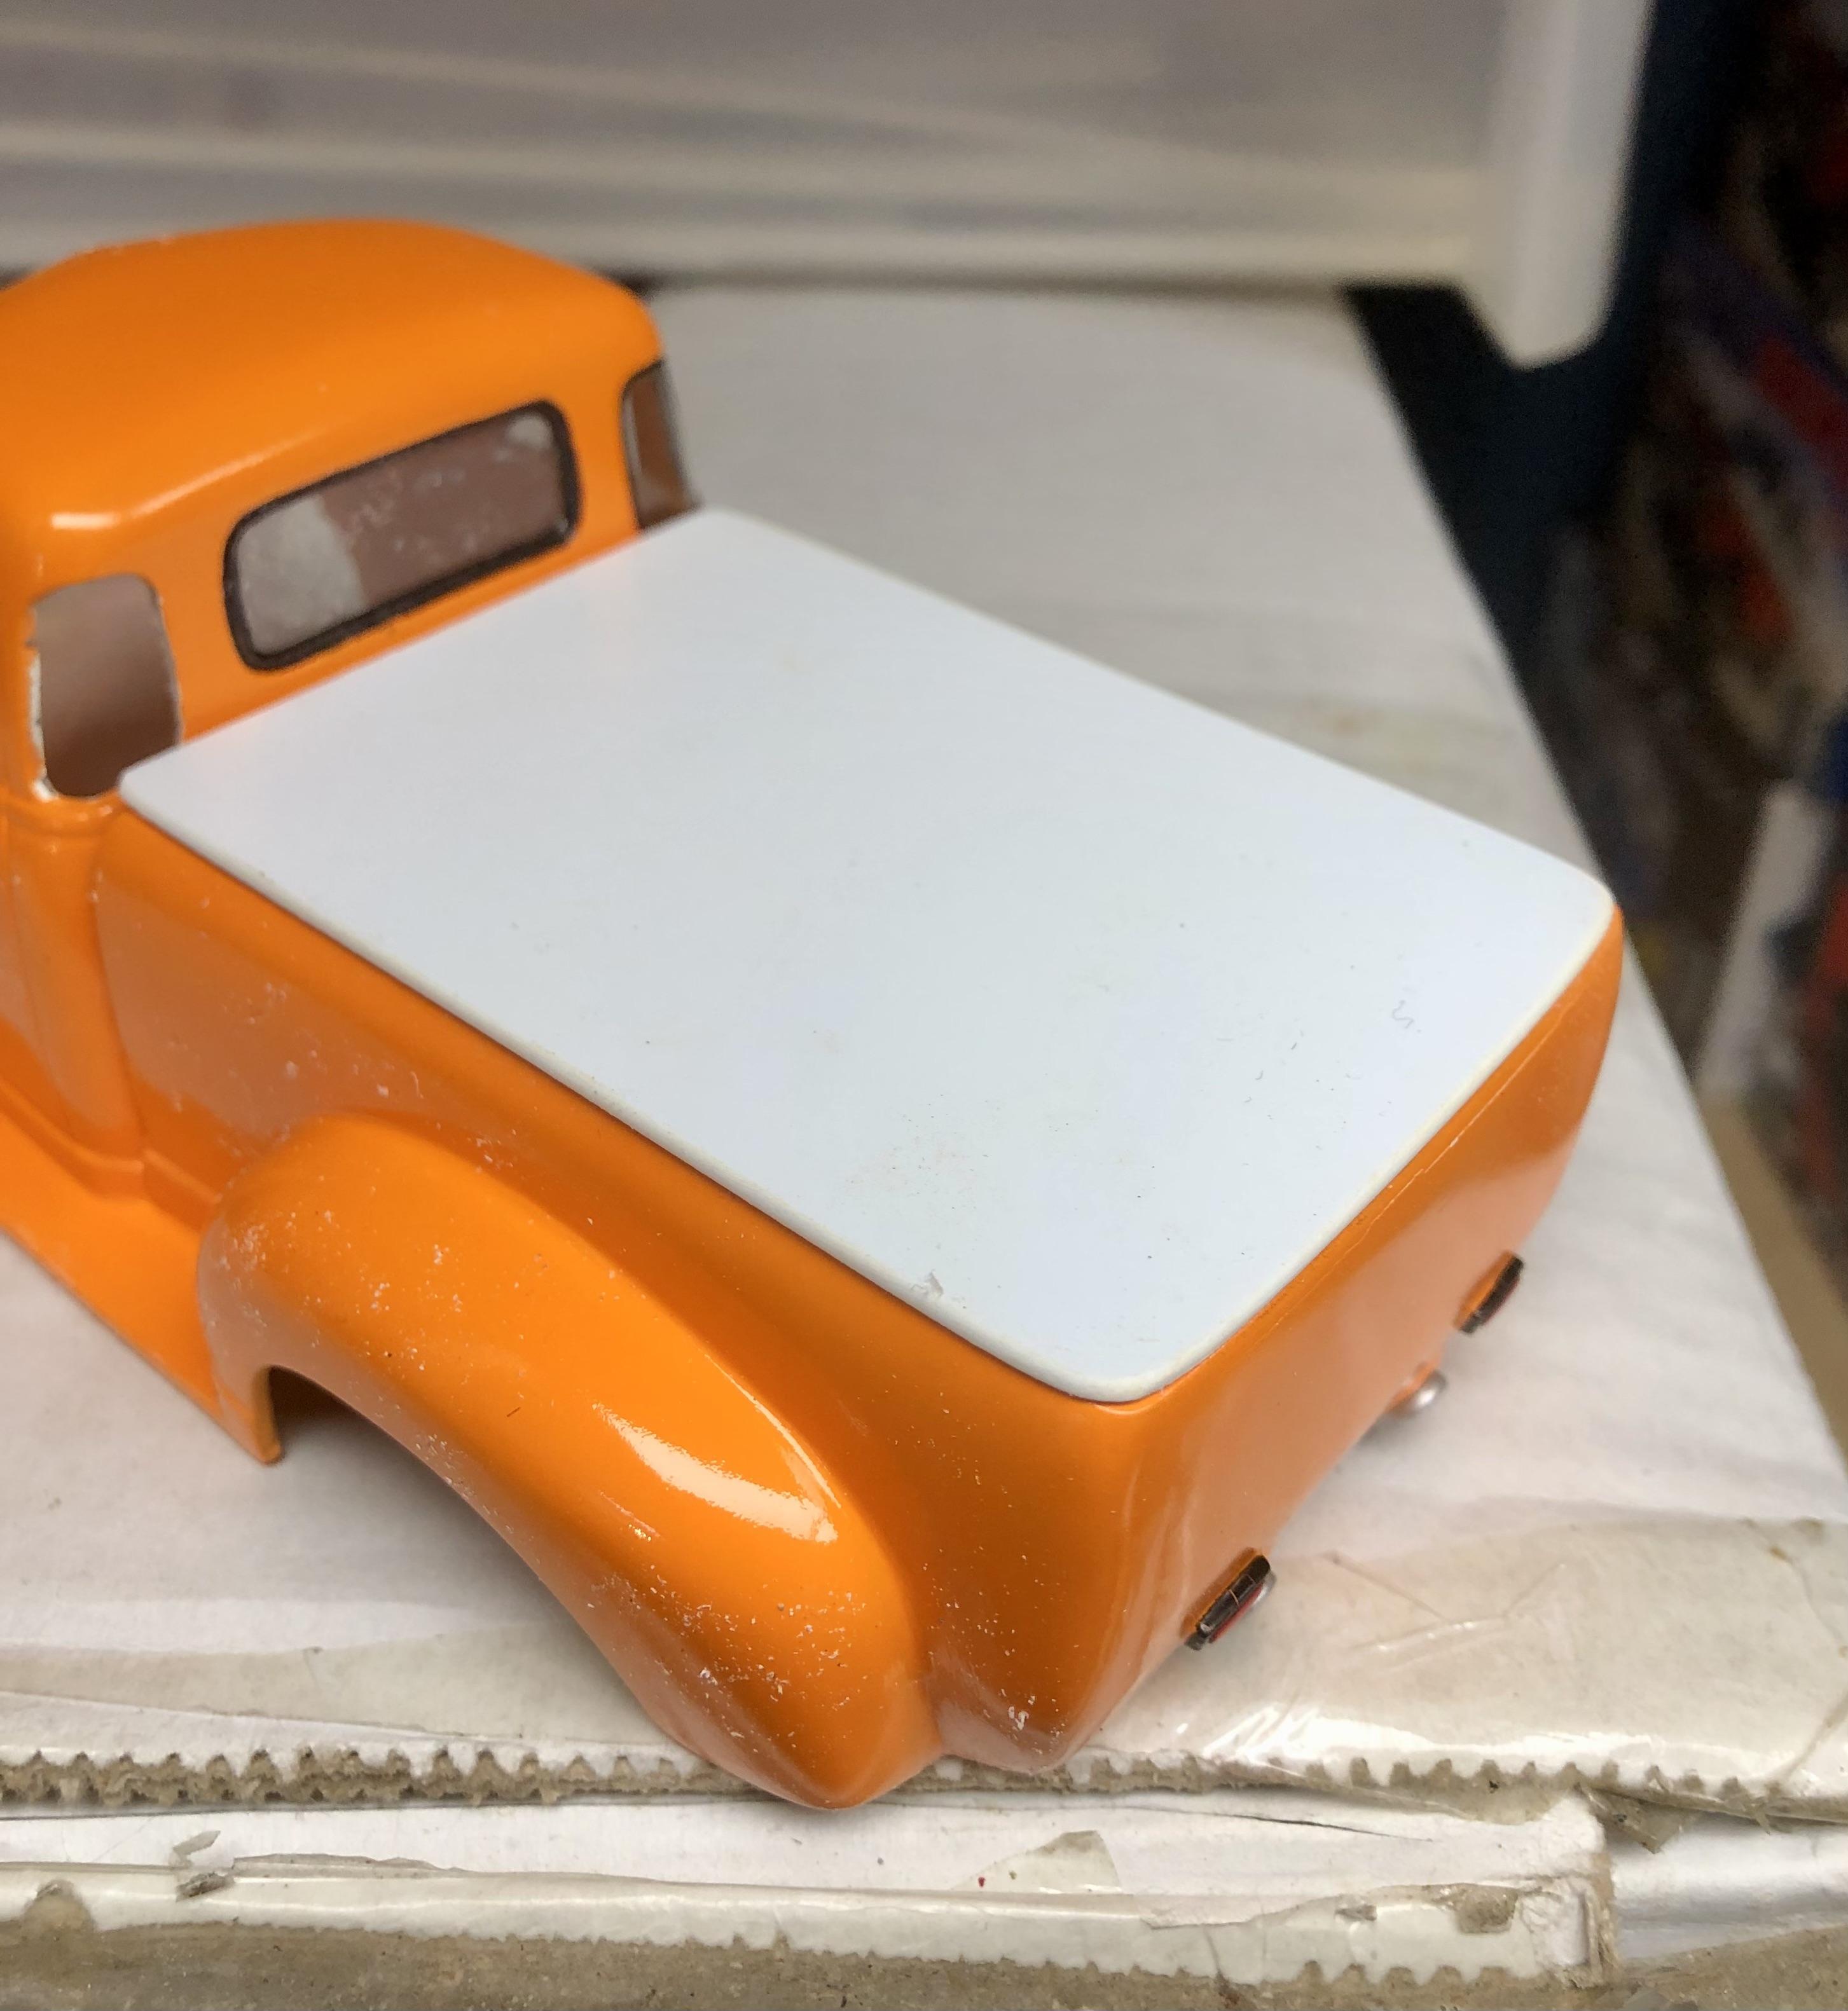
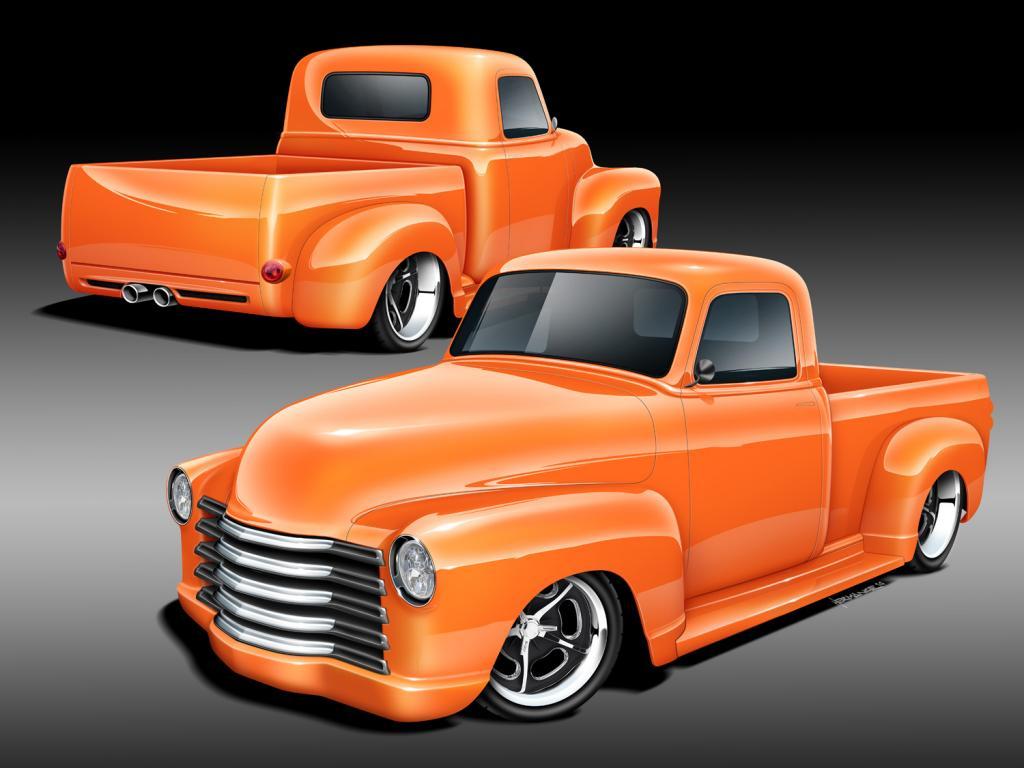
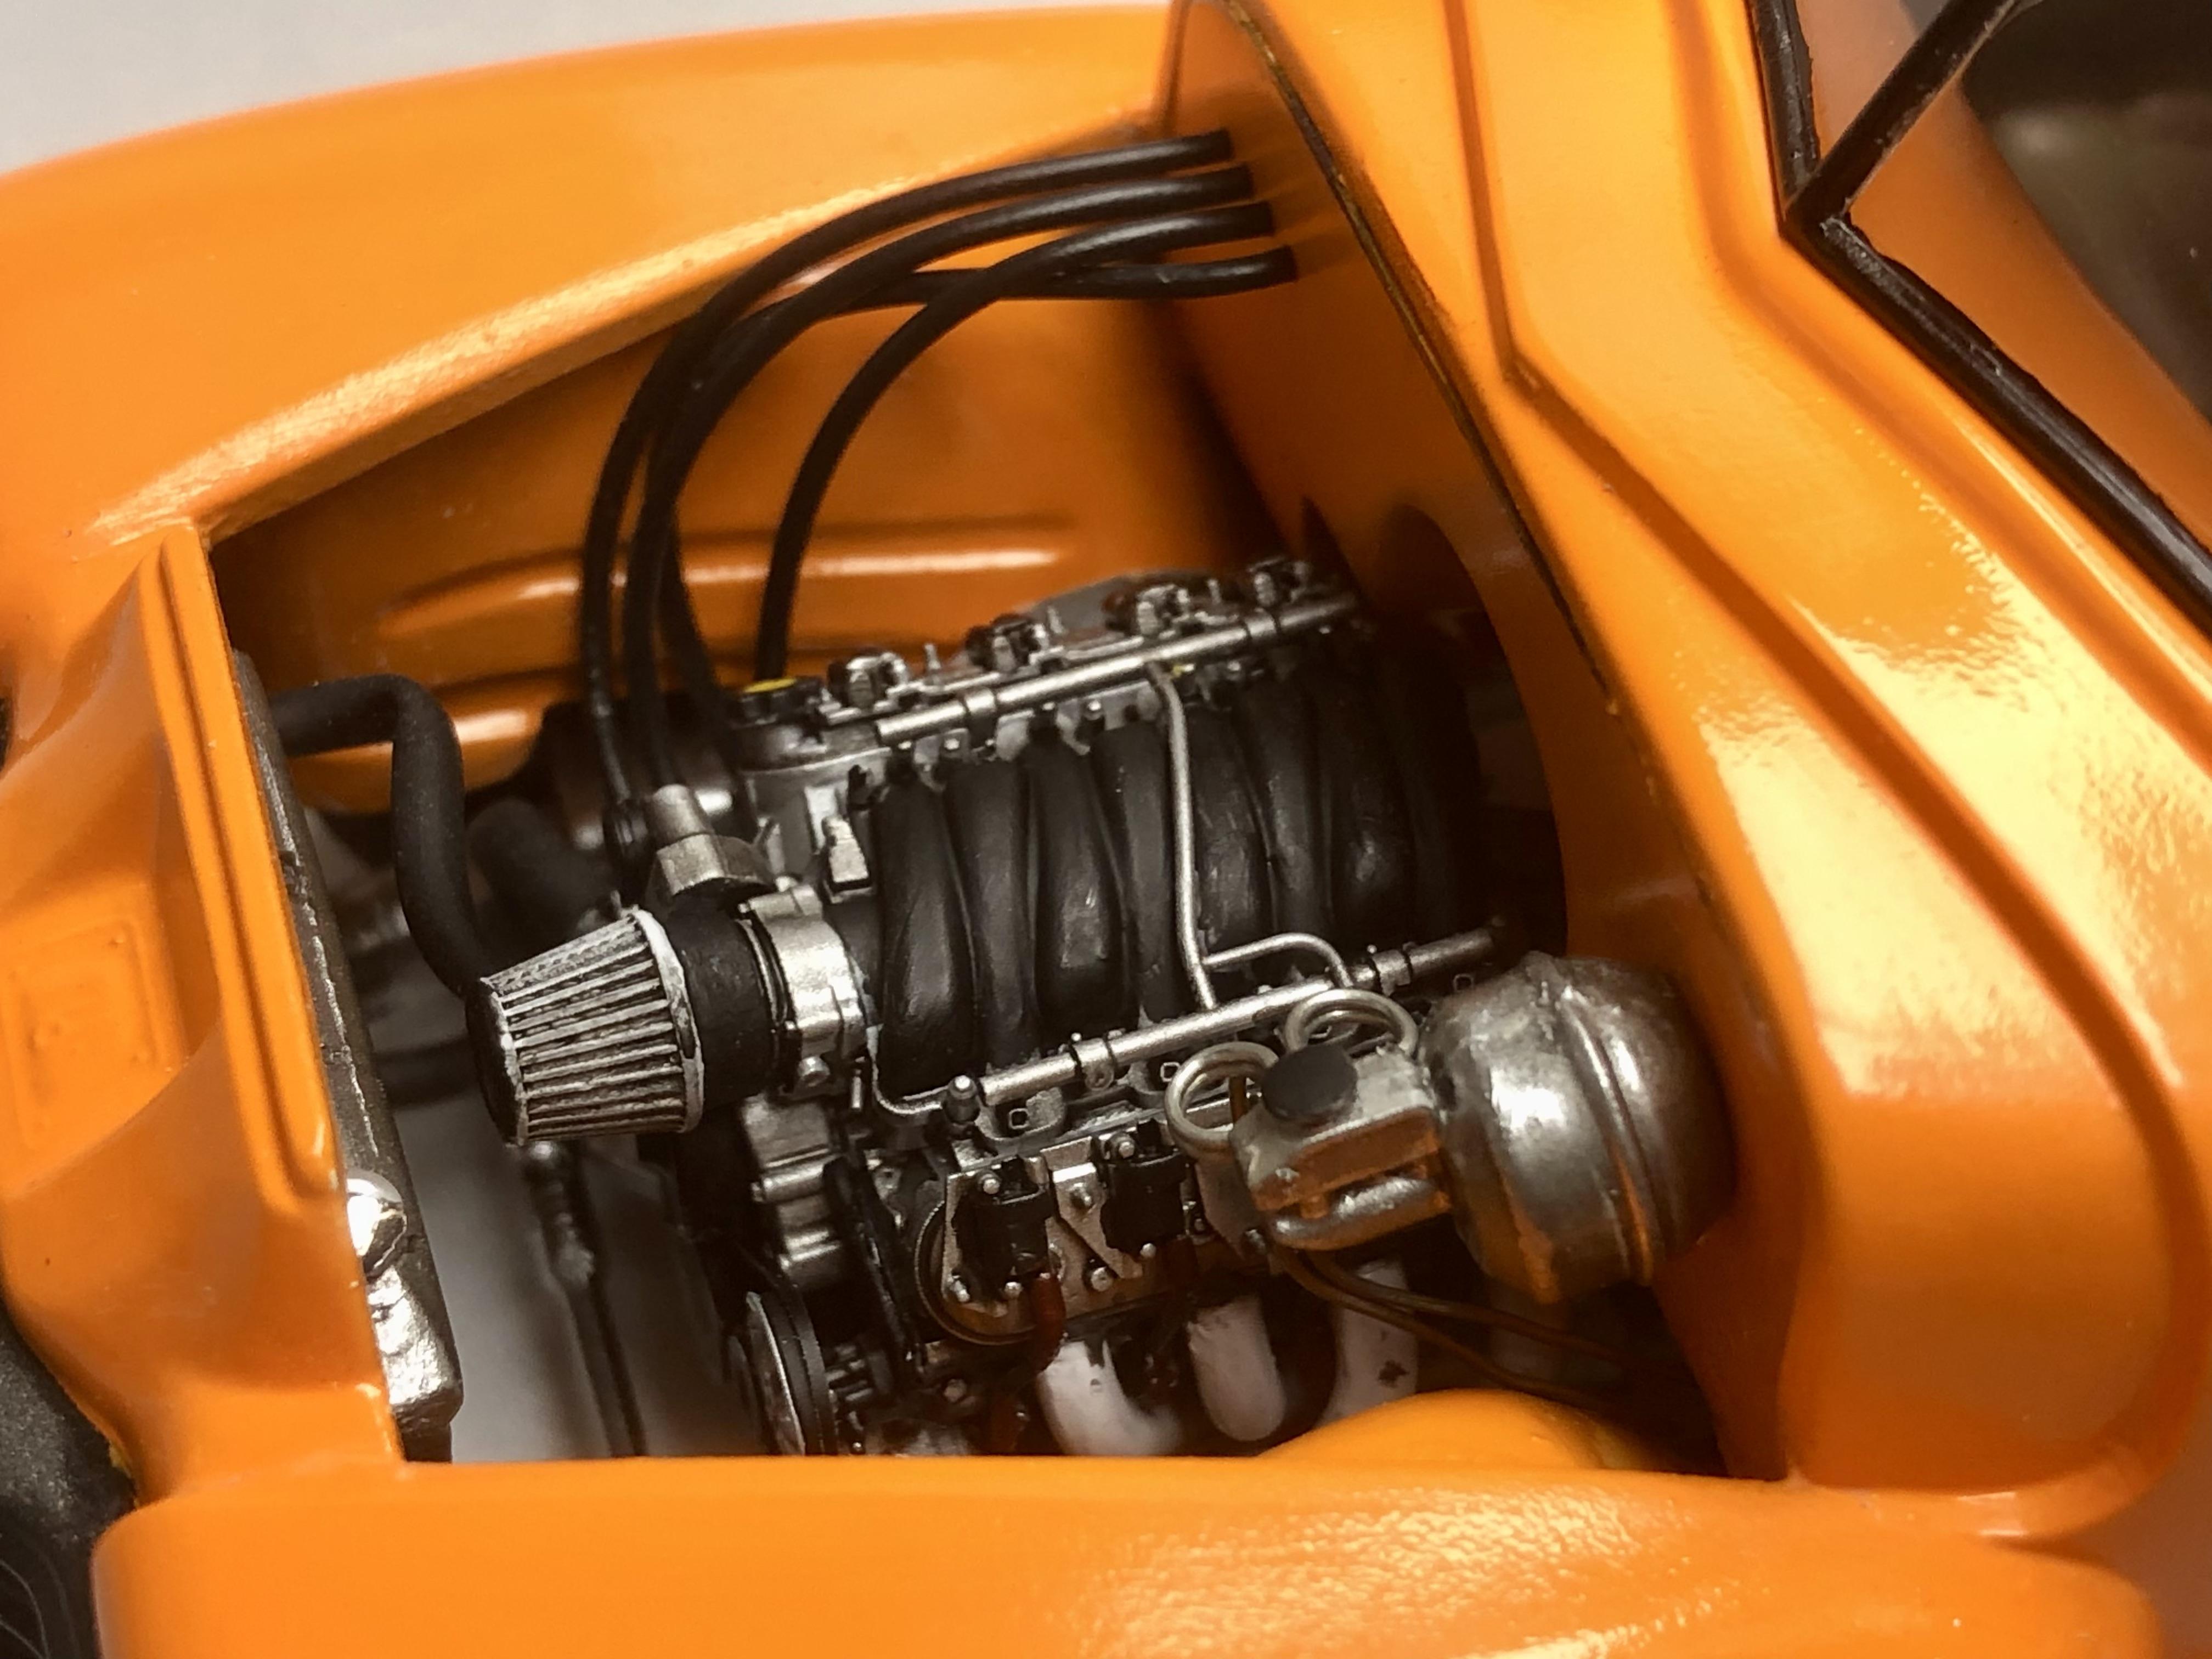
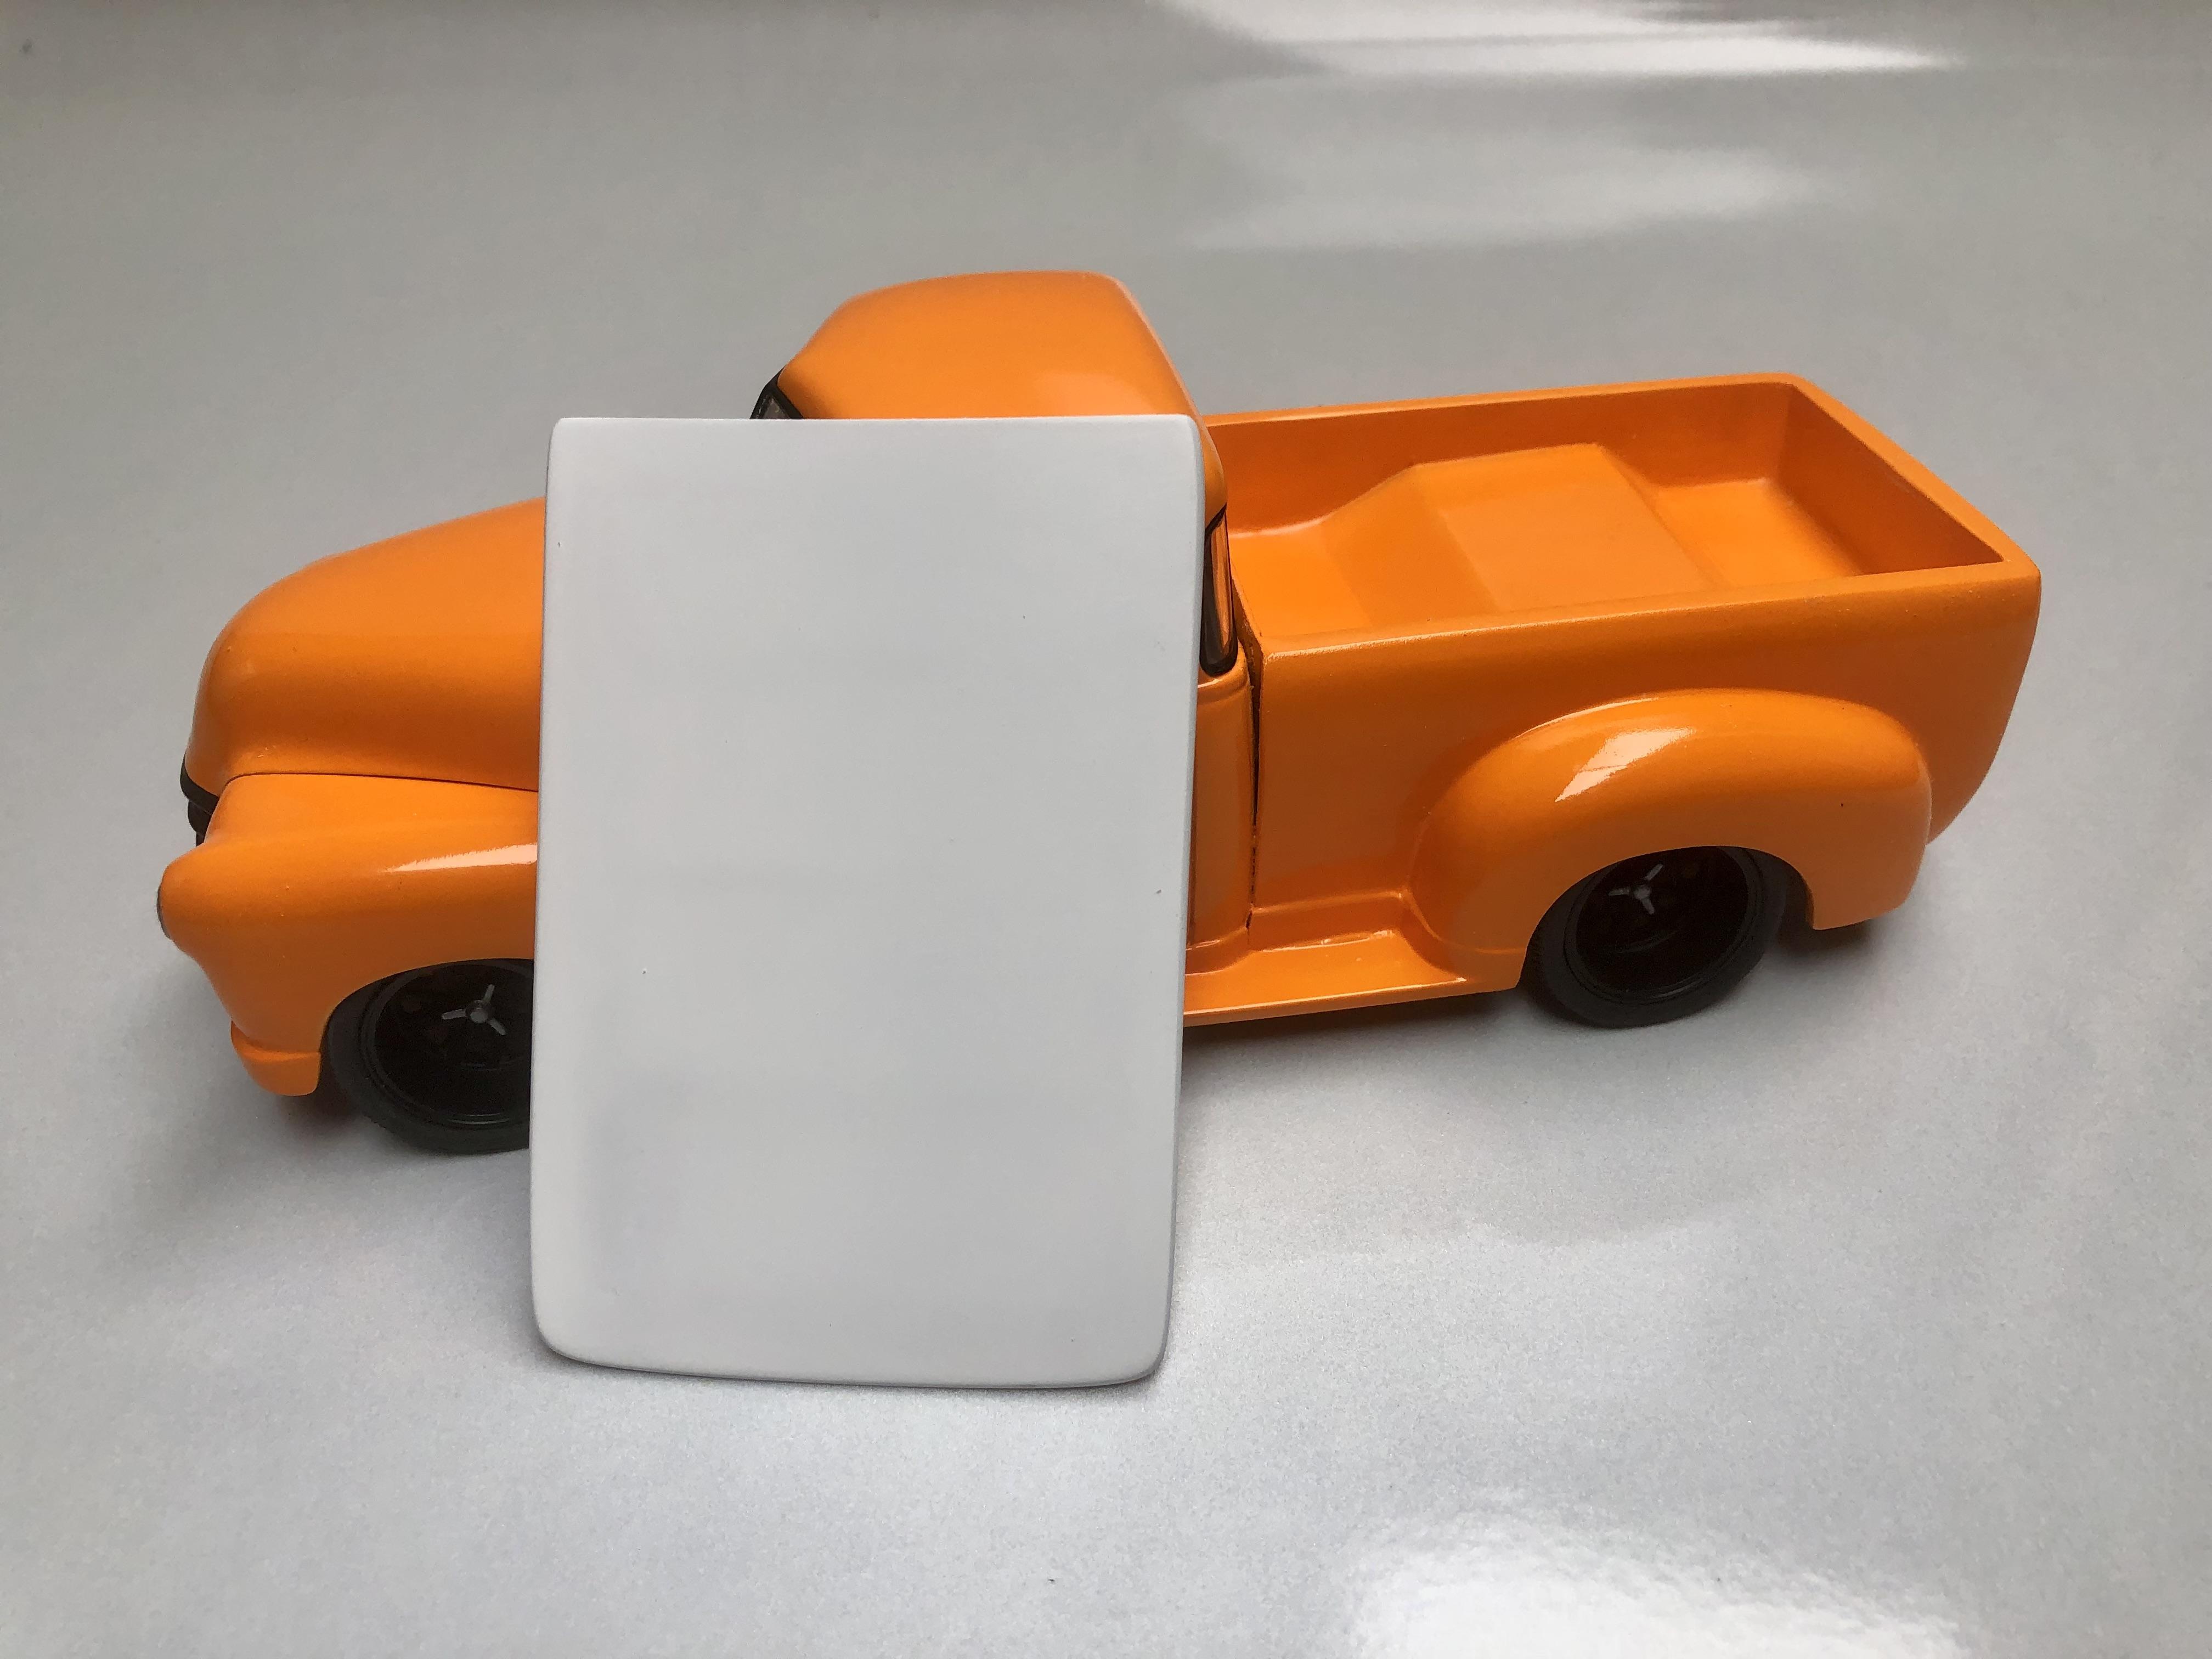
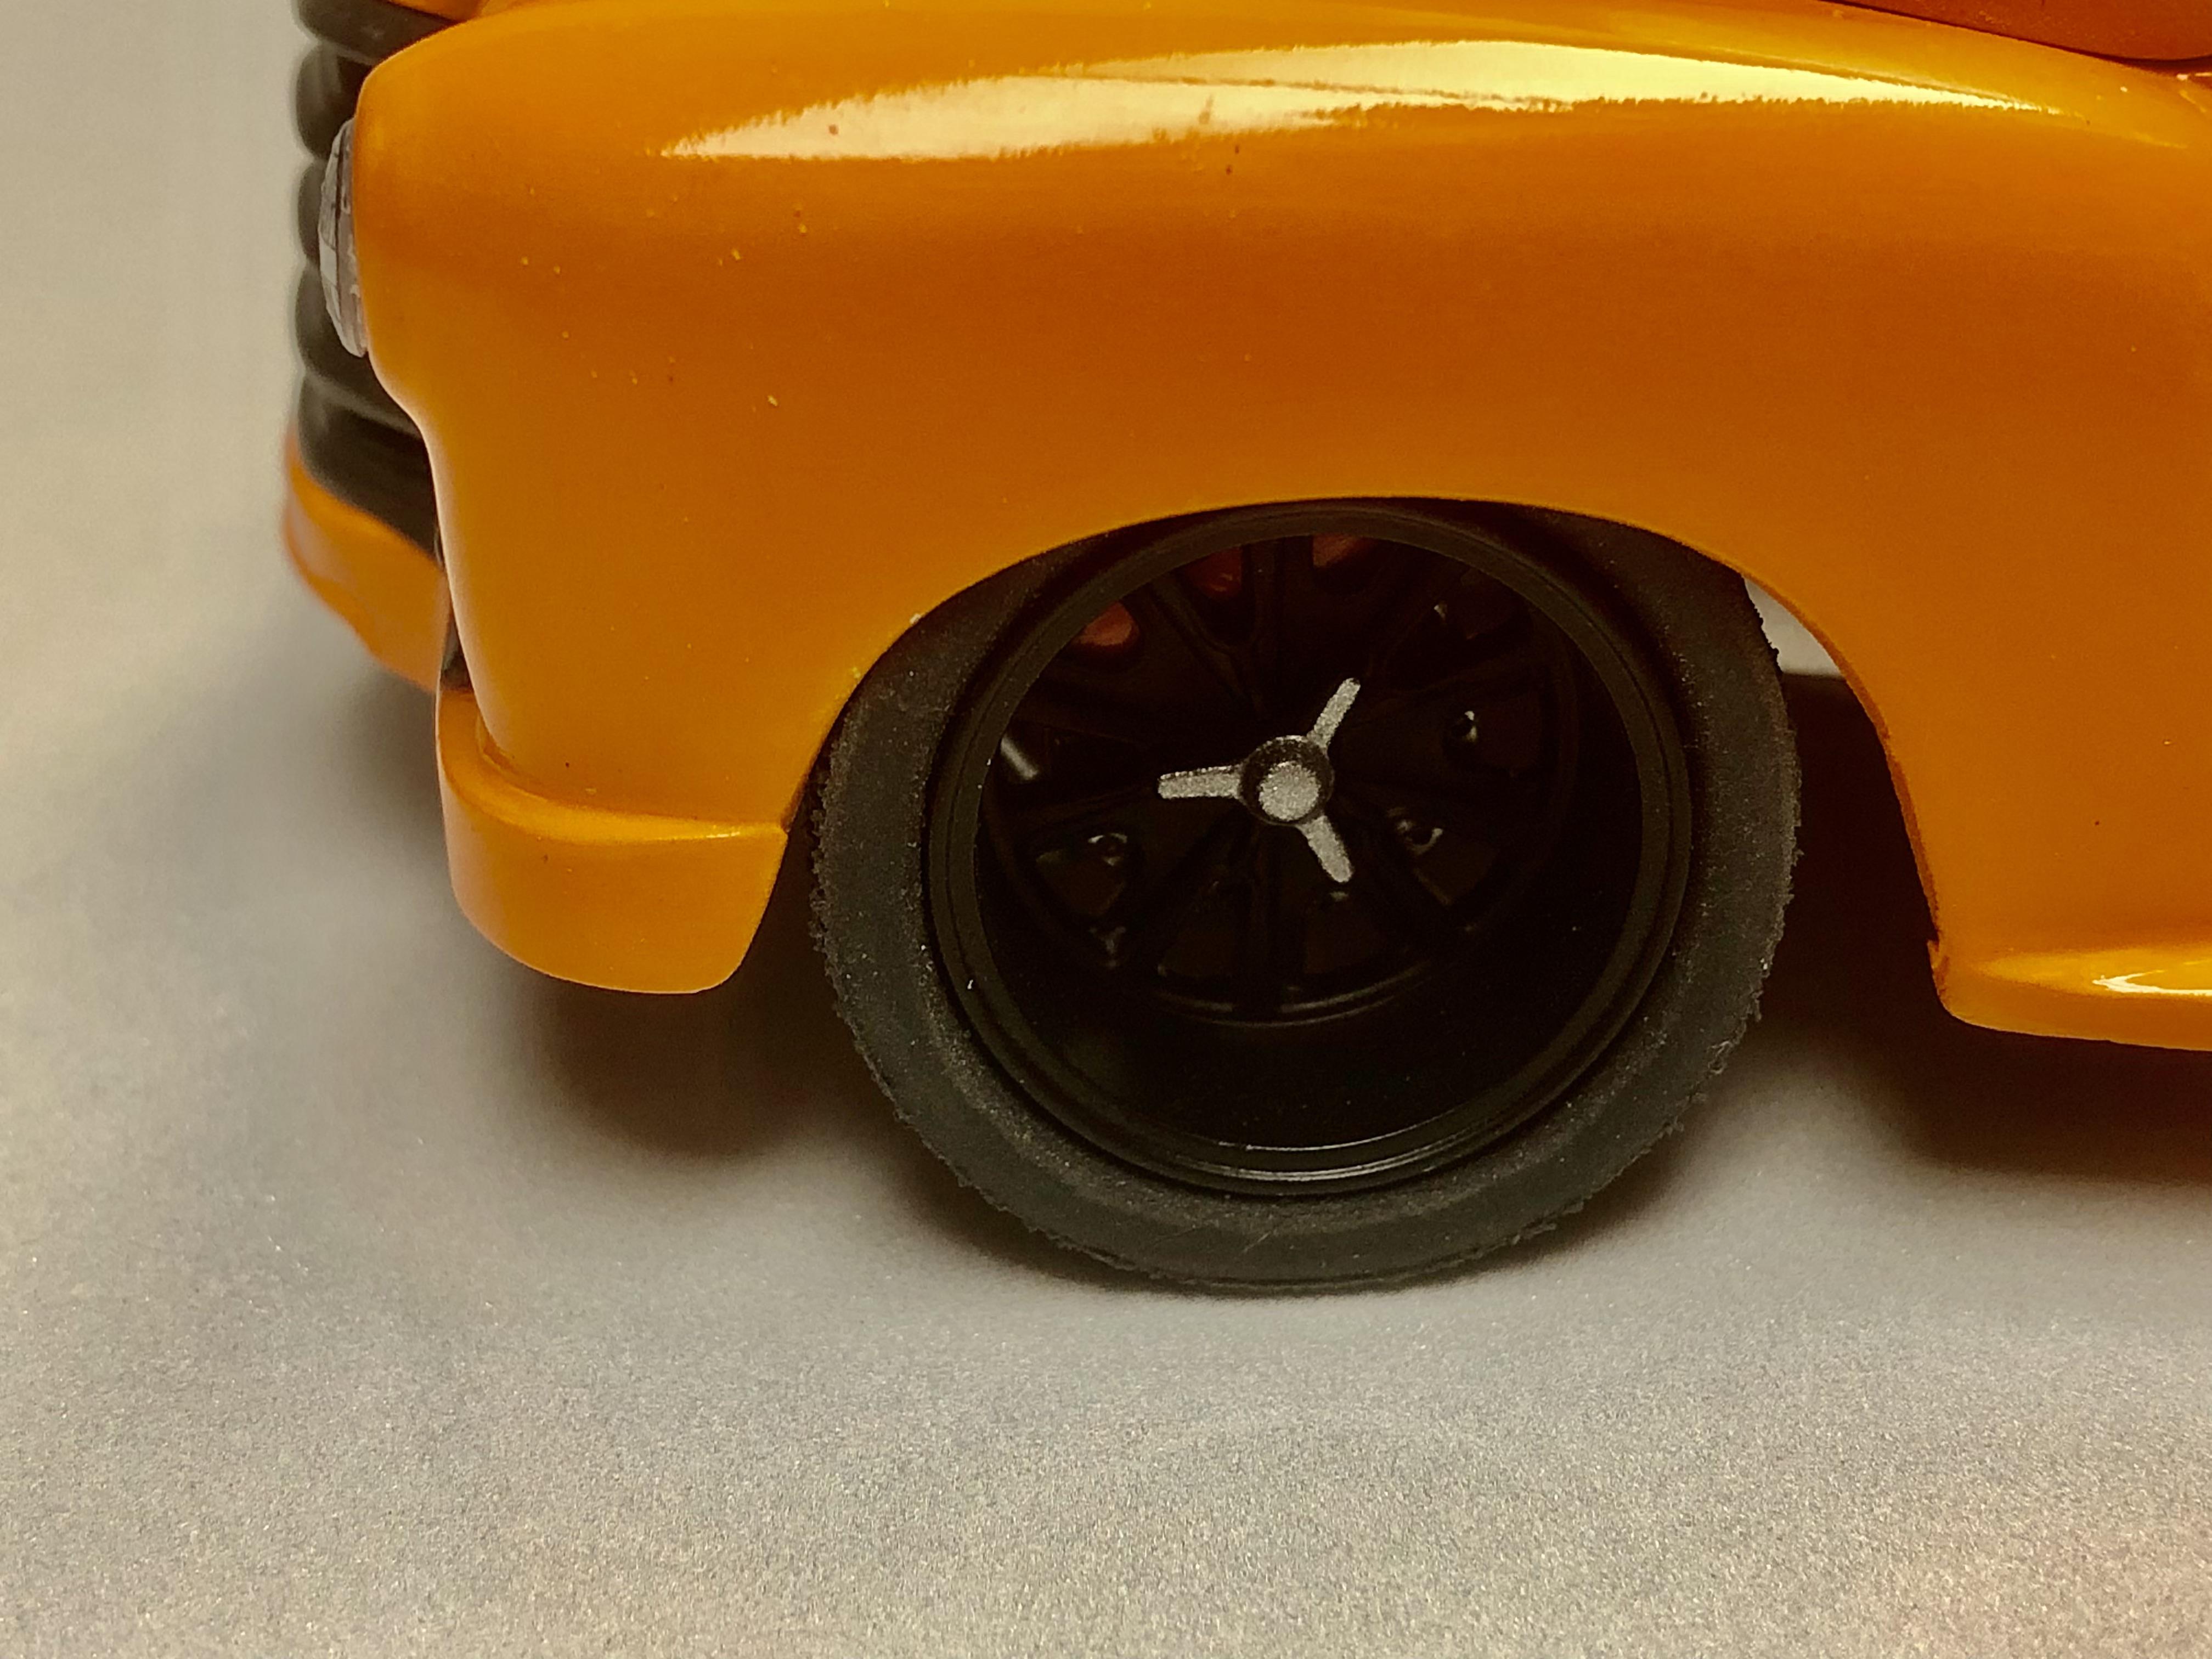
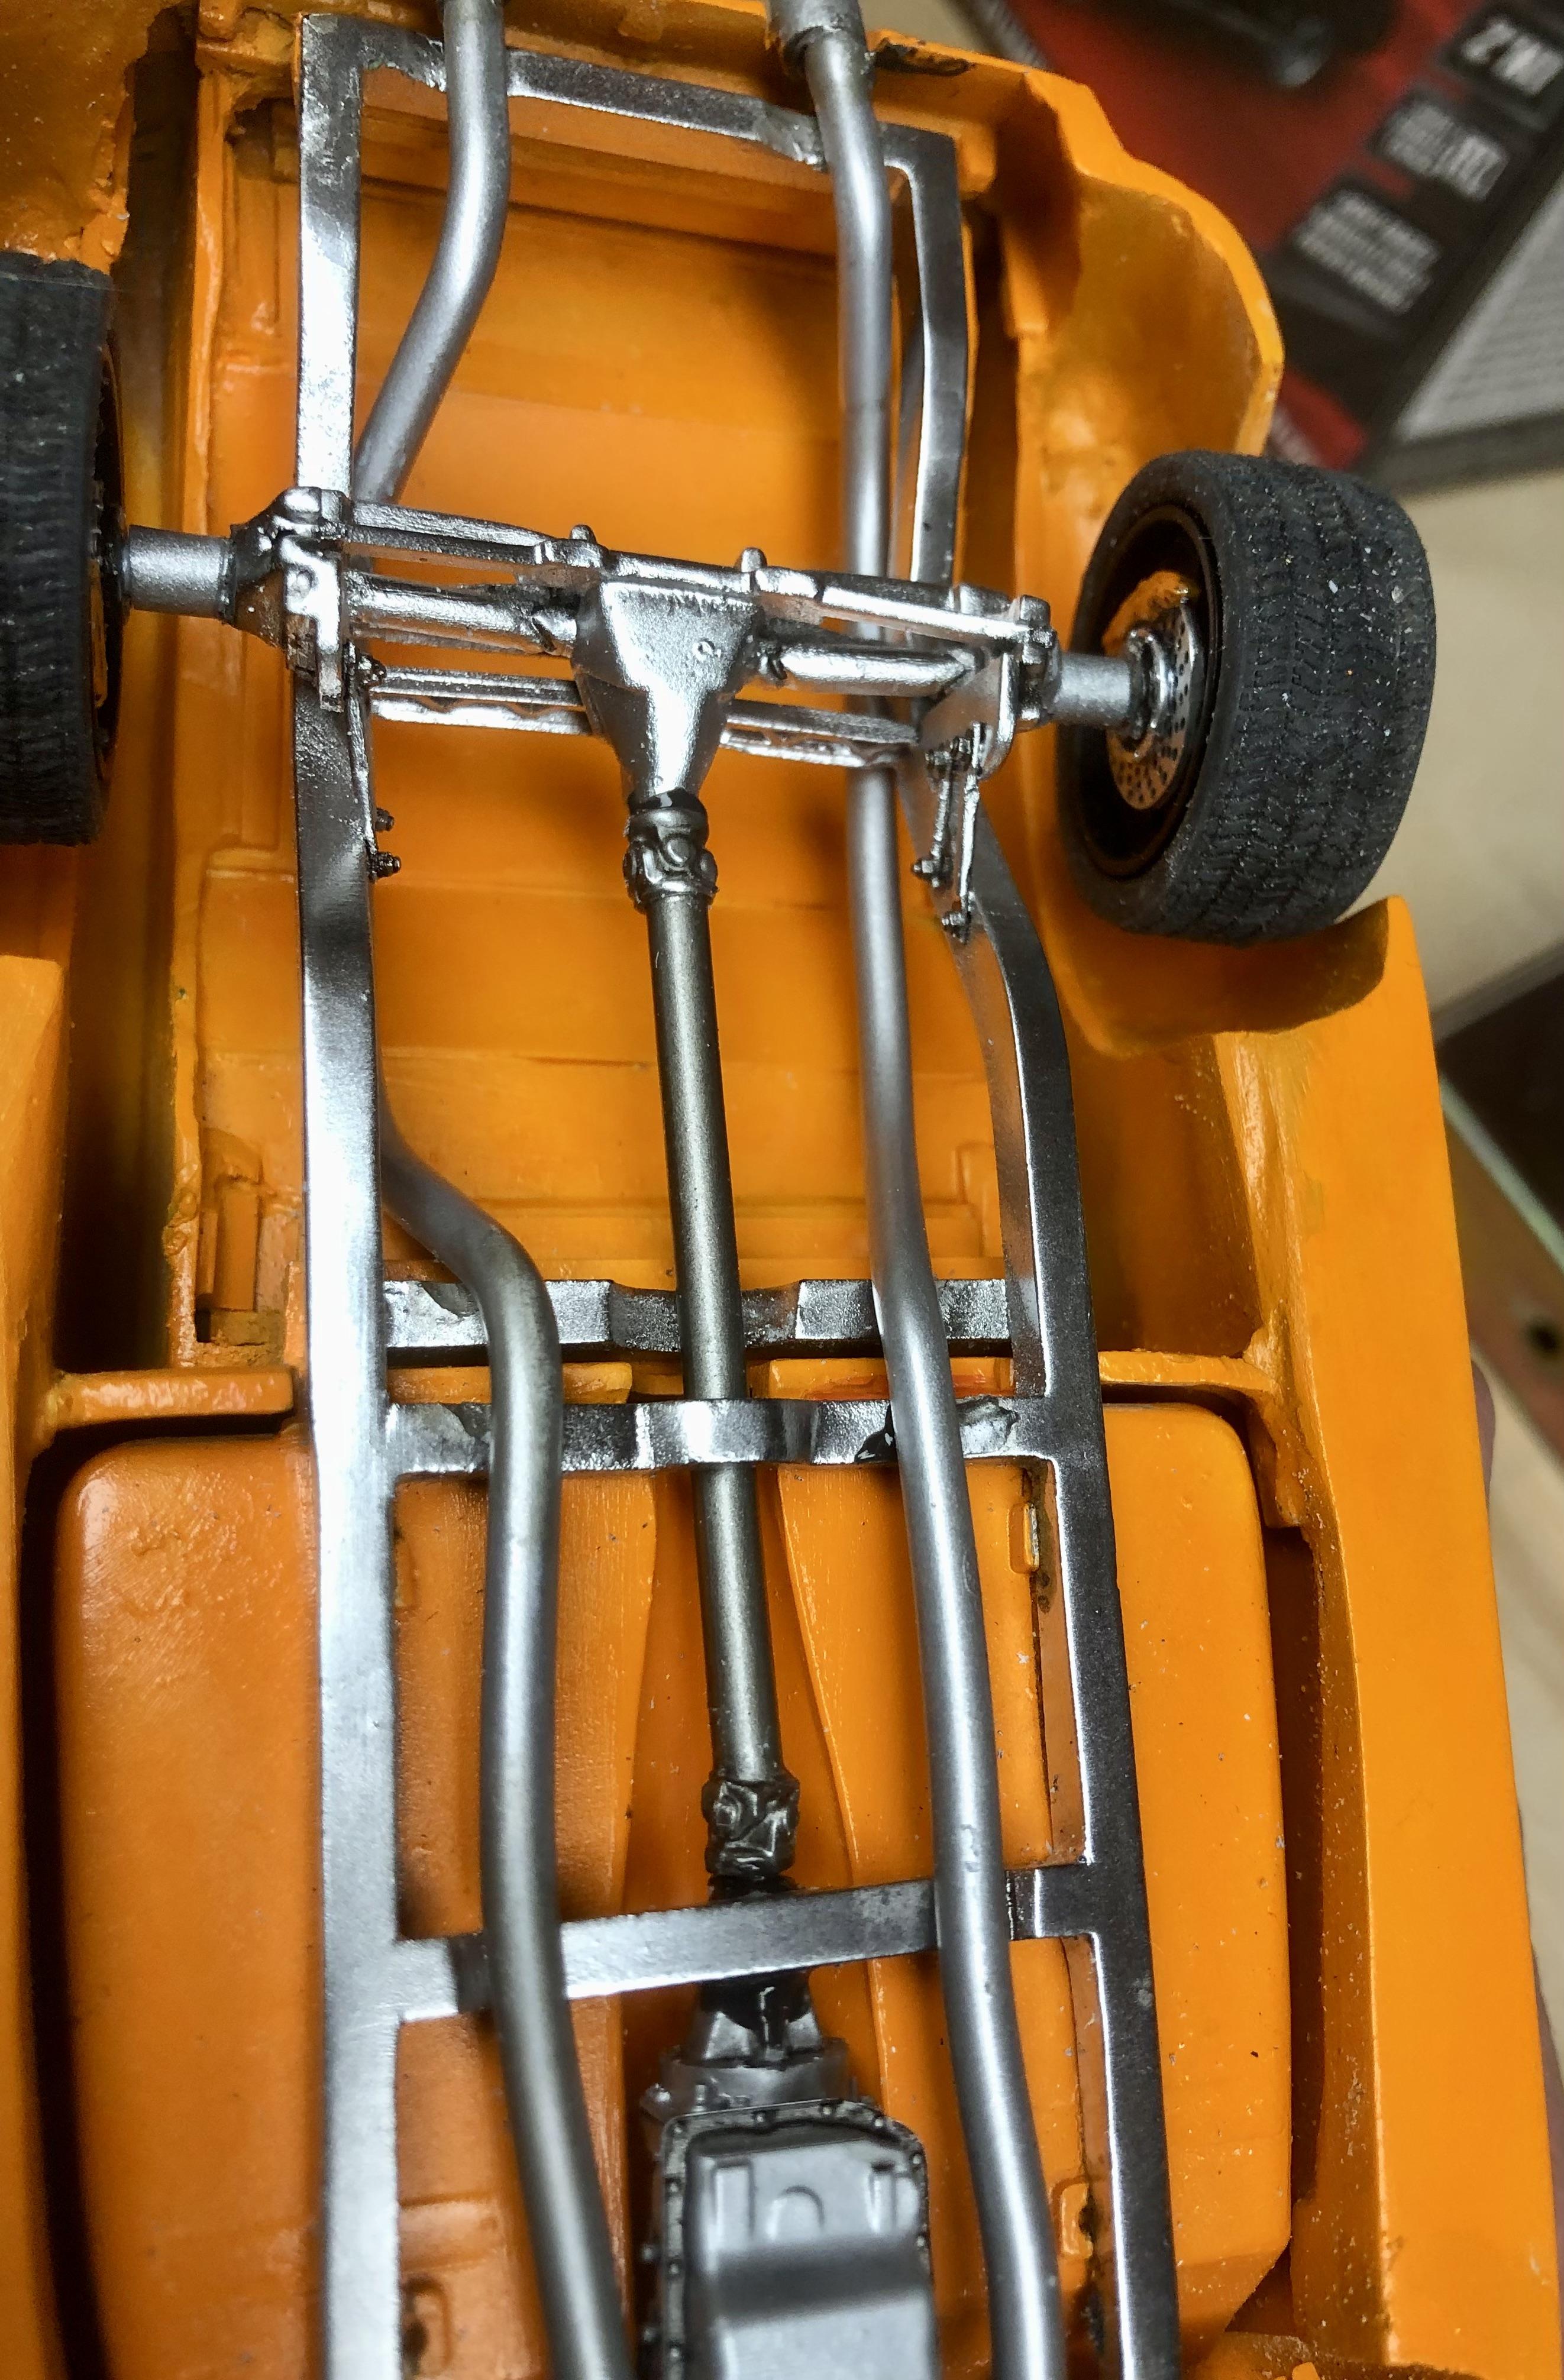
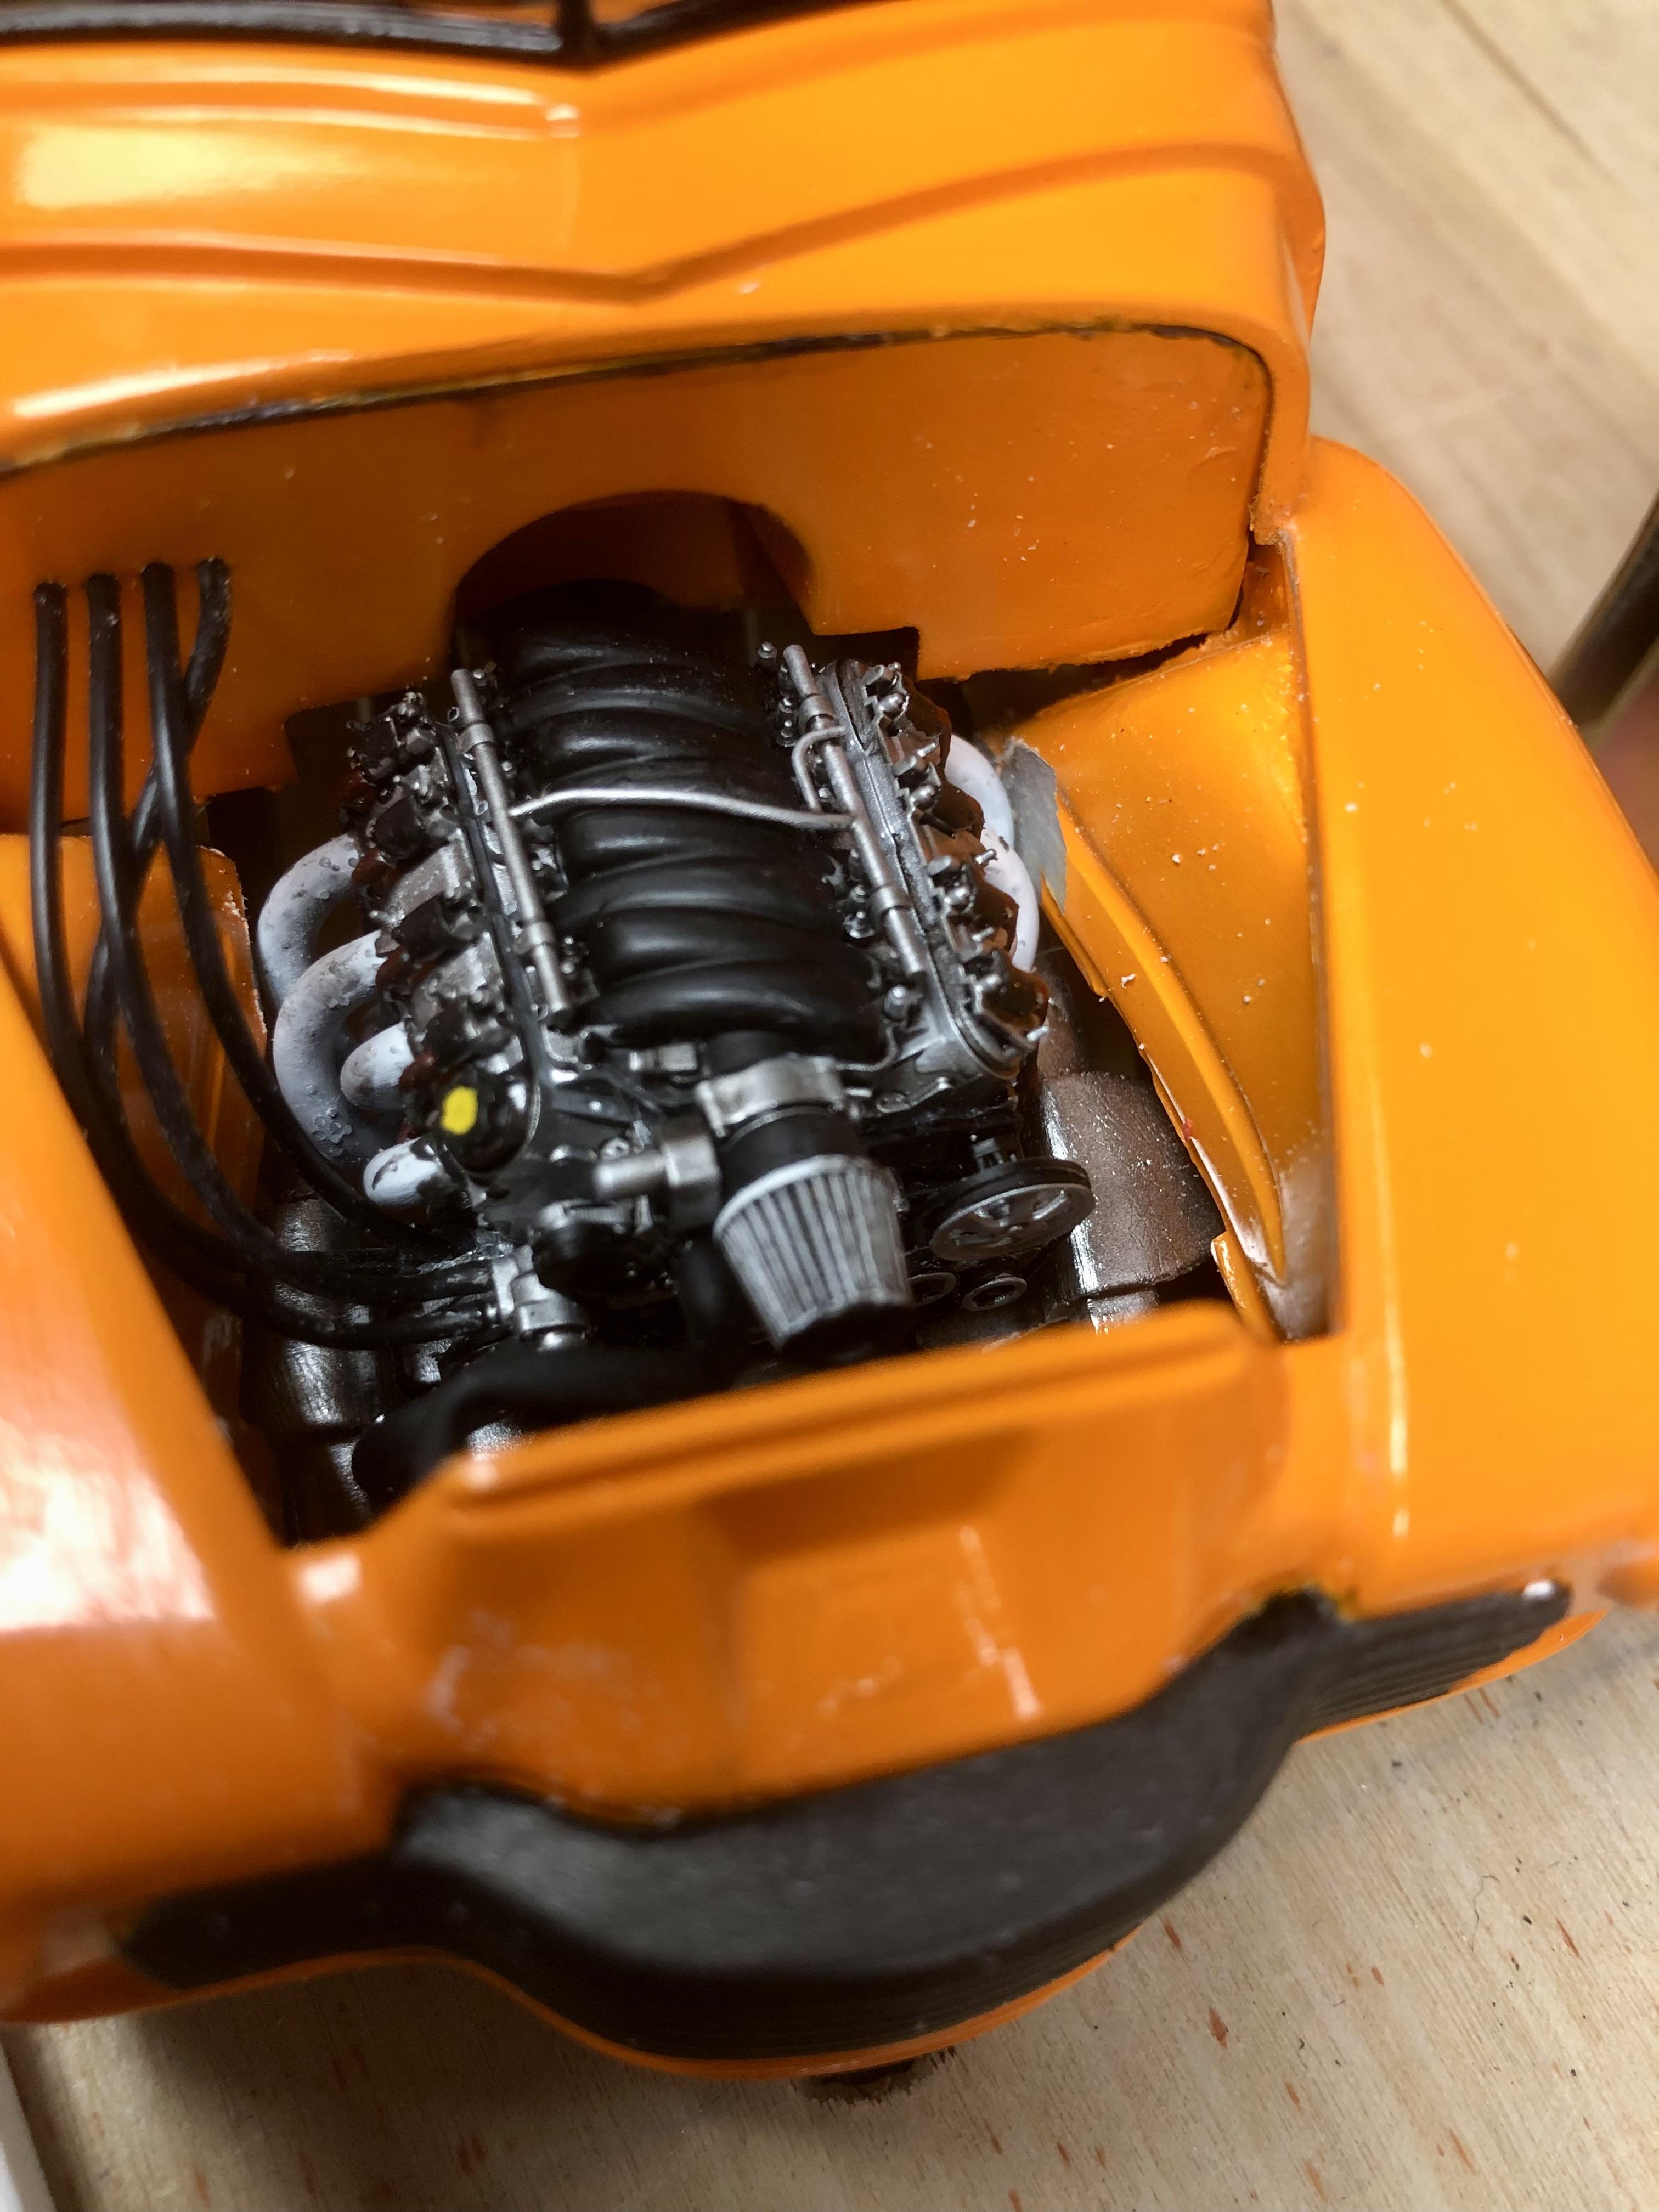
So I started this project 9 years ago after seeing an article for “Vicarious”, a 52 Chevy 3100 in a Street/Sport Truck magazine I spied on a grocery store shelf. The original artist rendering from HPI Customs out of Canada (no longer in business) is below… Below are pics of the real "Vicarious" Custom Chevy Pick Up... So off I went on this venture and for the next 1 1/2 years worked on it getting frustrated at times and finally shelved it after a repaint. I sealed everything up until about a month ago and finally got back to work on it. The pictures below are the finished product based on the original inspiration of “Vicarious” The engine is a straight stock LS1 from Texas3DCustoms. The bed is from a ‘96 Chevy P/U that was narrowed by .5” with a scratch built floor. I wasn’t happy with it so I made a cover for it. I also didn’t like the frame/floor pans so I scratch built the frame and used a corvette suspension front and rear. It’s nice to finally get this one completed. I’ve been kicking myself for not finishing it all the way. I had higher hopes of detailing this just a bit more but I just needed to get it done!!! Enjoy the pics
-
DONE! Under Glass!
-
Almost done now… Exhaust done (not too happy with it), drive shaft fabbed and installed, engine installed and plumbed as is the radiator but I still need to install the brake master cylinder and gas tank.
-
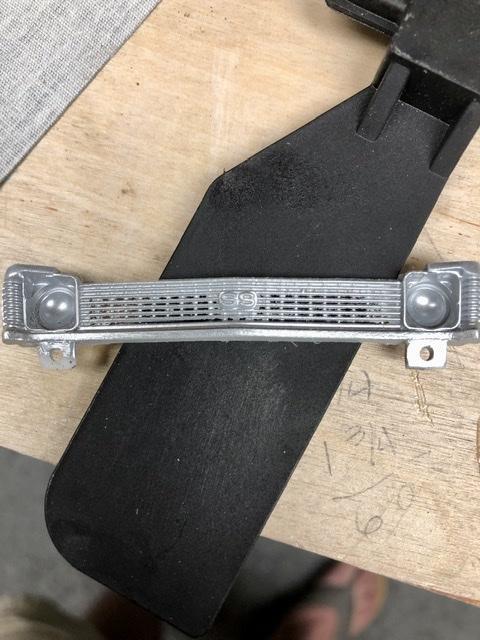
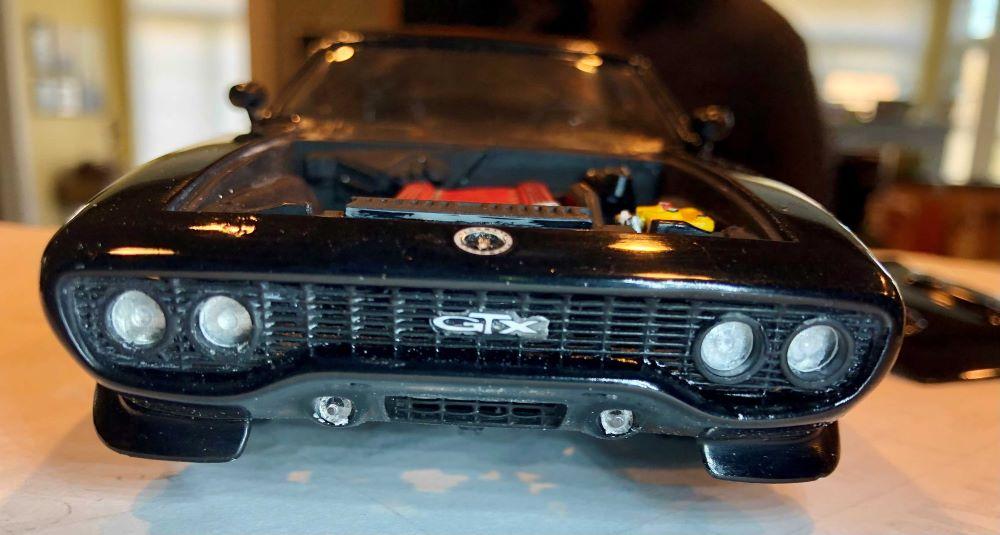
When I did my GTX, I also opened the grill. It was a long process but well worth it in the long run. I dechromed the front bumper and blended it into the body
-
Roll bar, roll cage material.....
BDSchindler replied to Allan31's topic in Model Building Questions and Answers
I do the exact same thing. Allows for bends from slight to radical without kinking the plastic. Works great for shaping plastic tube for exhaust systems. -
Thanks…still have more to go before it’s complete but it is getting there!
-
Thanks!
-
Well, rear wheels moved out to the wheel wells and interior completed and installed (with a REAL wood steering wheel). Engine is done but not installed yet and the inner fender wells, firewall, driveshaft and exhaust still need to be fabricated and/or installed.
-
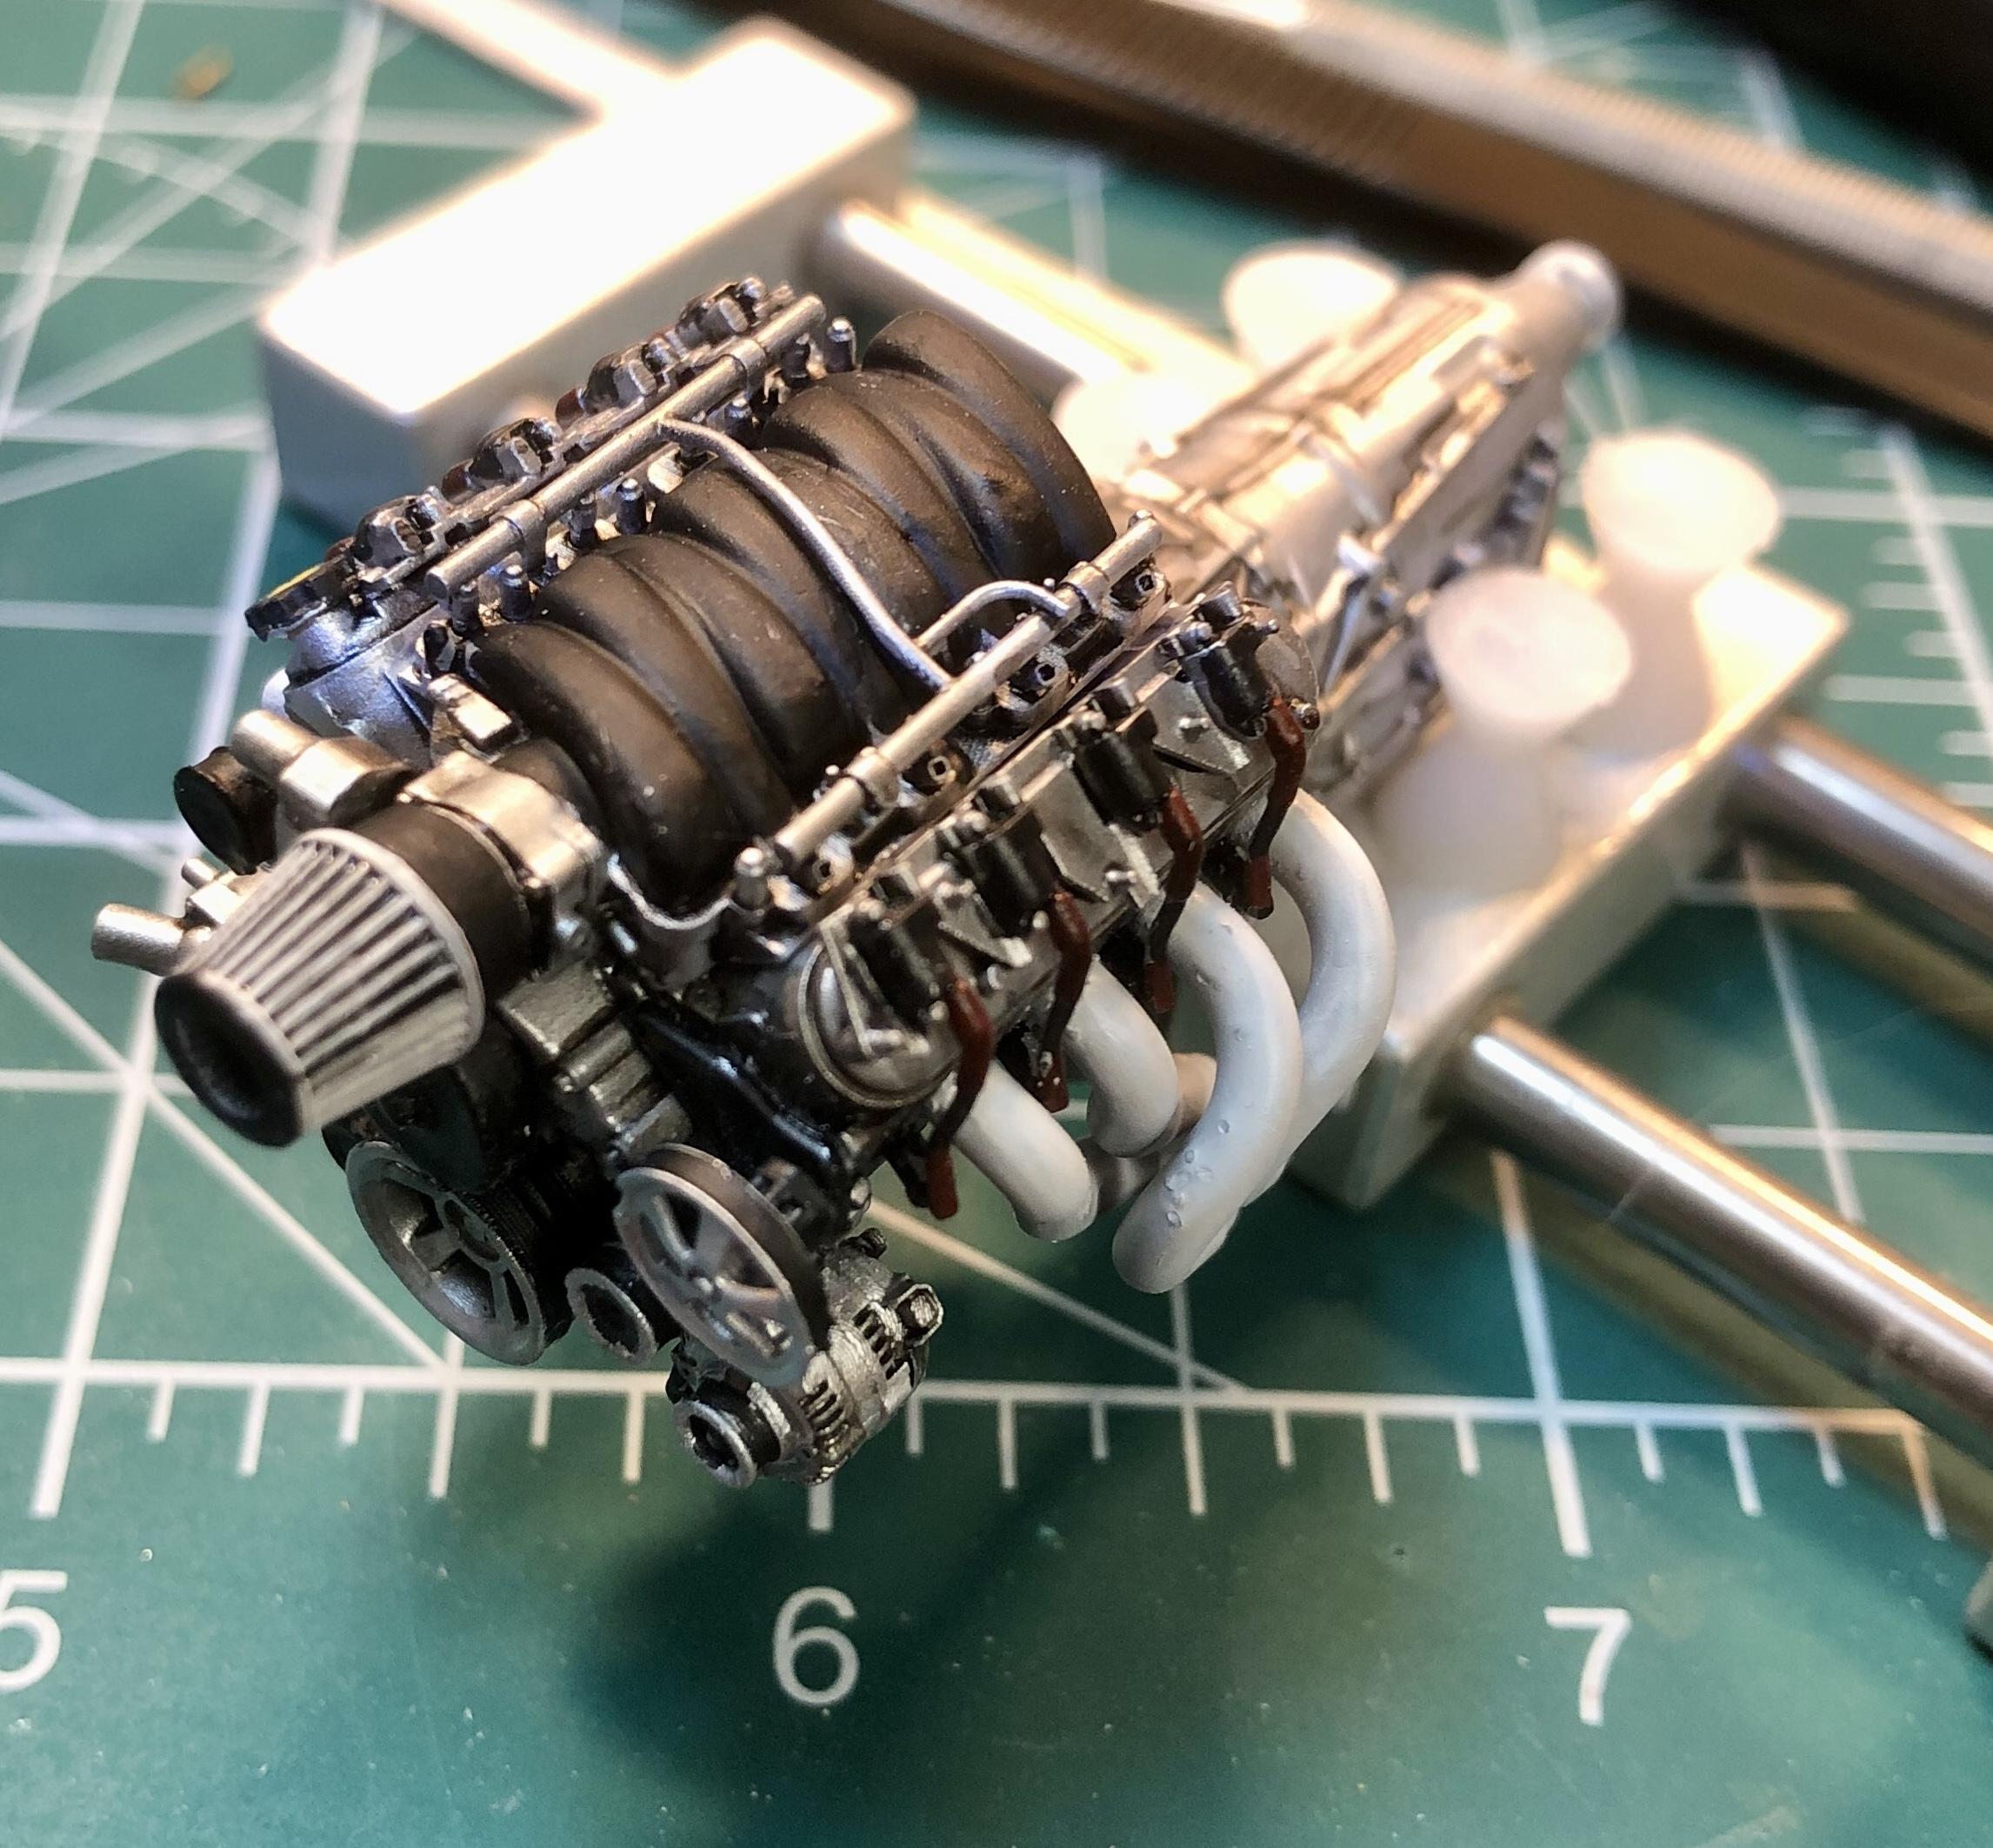
Small update…TX3DCustoms LS1 painted and assembled. Still need to do the belt and heater/radiator hoses and install it
-
Beautiful job!
-
Gallery pics - how I shoot mine
BDSchindler replied to harti20's topic in Tips, Tricks, and Tutorials
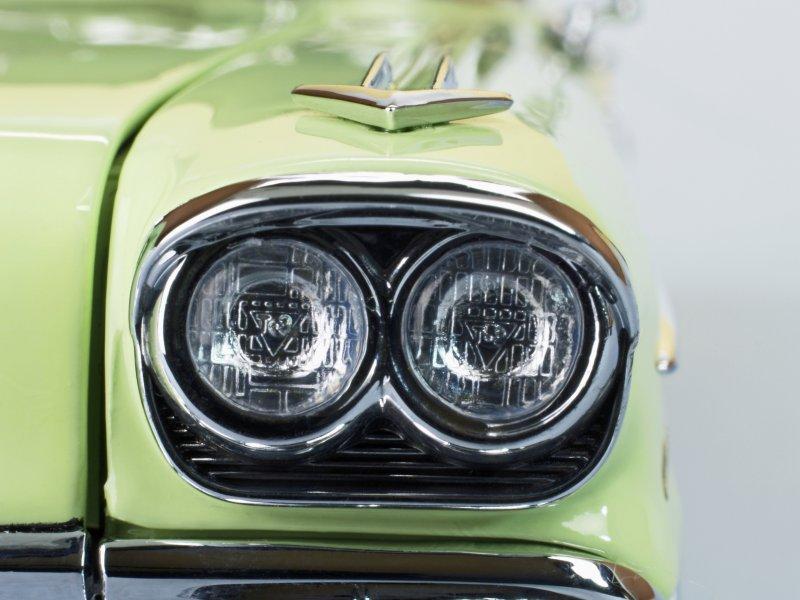
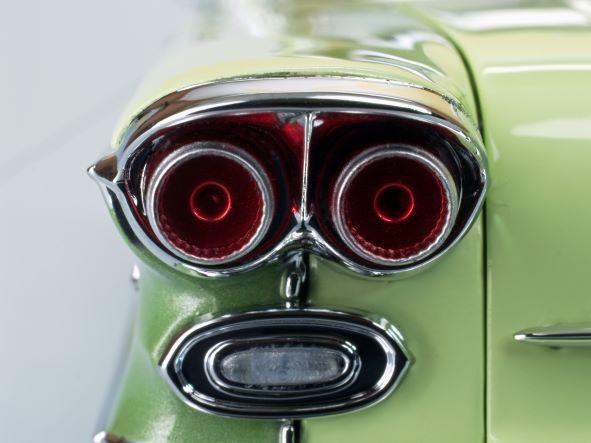
Your studio setup is very similar to one I used in my basement when I wrote for the ill-fated The Car Room Magazine some 15 years ago. The biggest difference was that I used continuous lighting as opposed to flash photography. I just never got the knack for Flash Photography (nor, as an amateur, did I want the expense!) The subject matter was 1/24th Diecast from primarily Danbury Mint and Franklyn Mint but the process was the same. I used an Olympus E500 digital with a macro lense on a tripod and battery operated remote shutter to prevent camera shake. I also would take numerous shots set at f22 focusing on various aspects of what was in front of the camera. This 53 Buick Estate Wagon is made up of 12 different photo each focusing on various points and then stitching them altogether in Adobe Photoshop One of the benefits of using a macro lens is in extreme closeup shots. This shot demonstrates the intense detail in a 1/24th scale head lamp lense of the 1958 Pontiac Bonneville...mind you, this lense is less than .25" in diameter... and then there is the associated rear taillight... The Macro also allows for some implied drama... The engine of Danbury's Little Deuce Coupe was also taken using several shots stitched together I also played with various backgrounds like metallics and using a good translucent photography table allowed for lighting from below for a dramatic effect also I think I actually had more fun taking pictures than I did the writing aspect.
-
Excellent! You're giving me ideas on what to do with a different kit.
-
That was what I was thinking, more or less
-
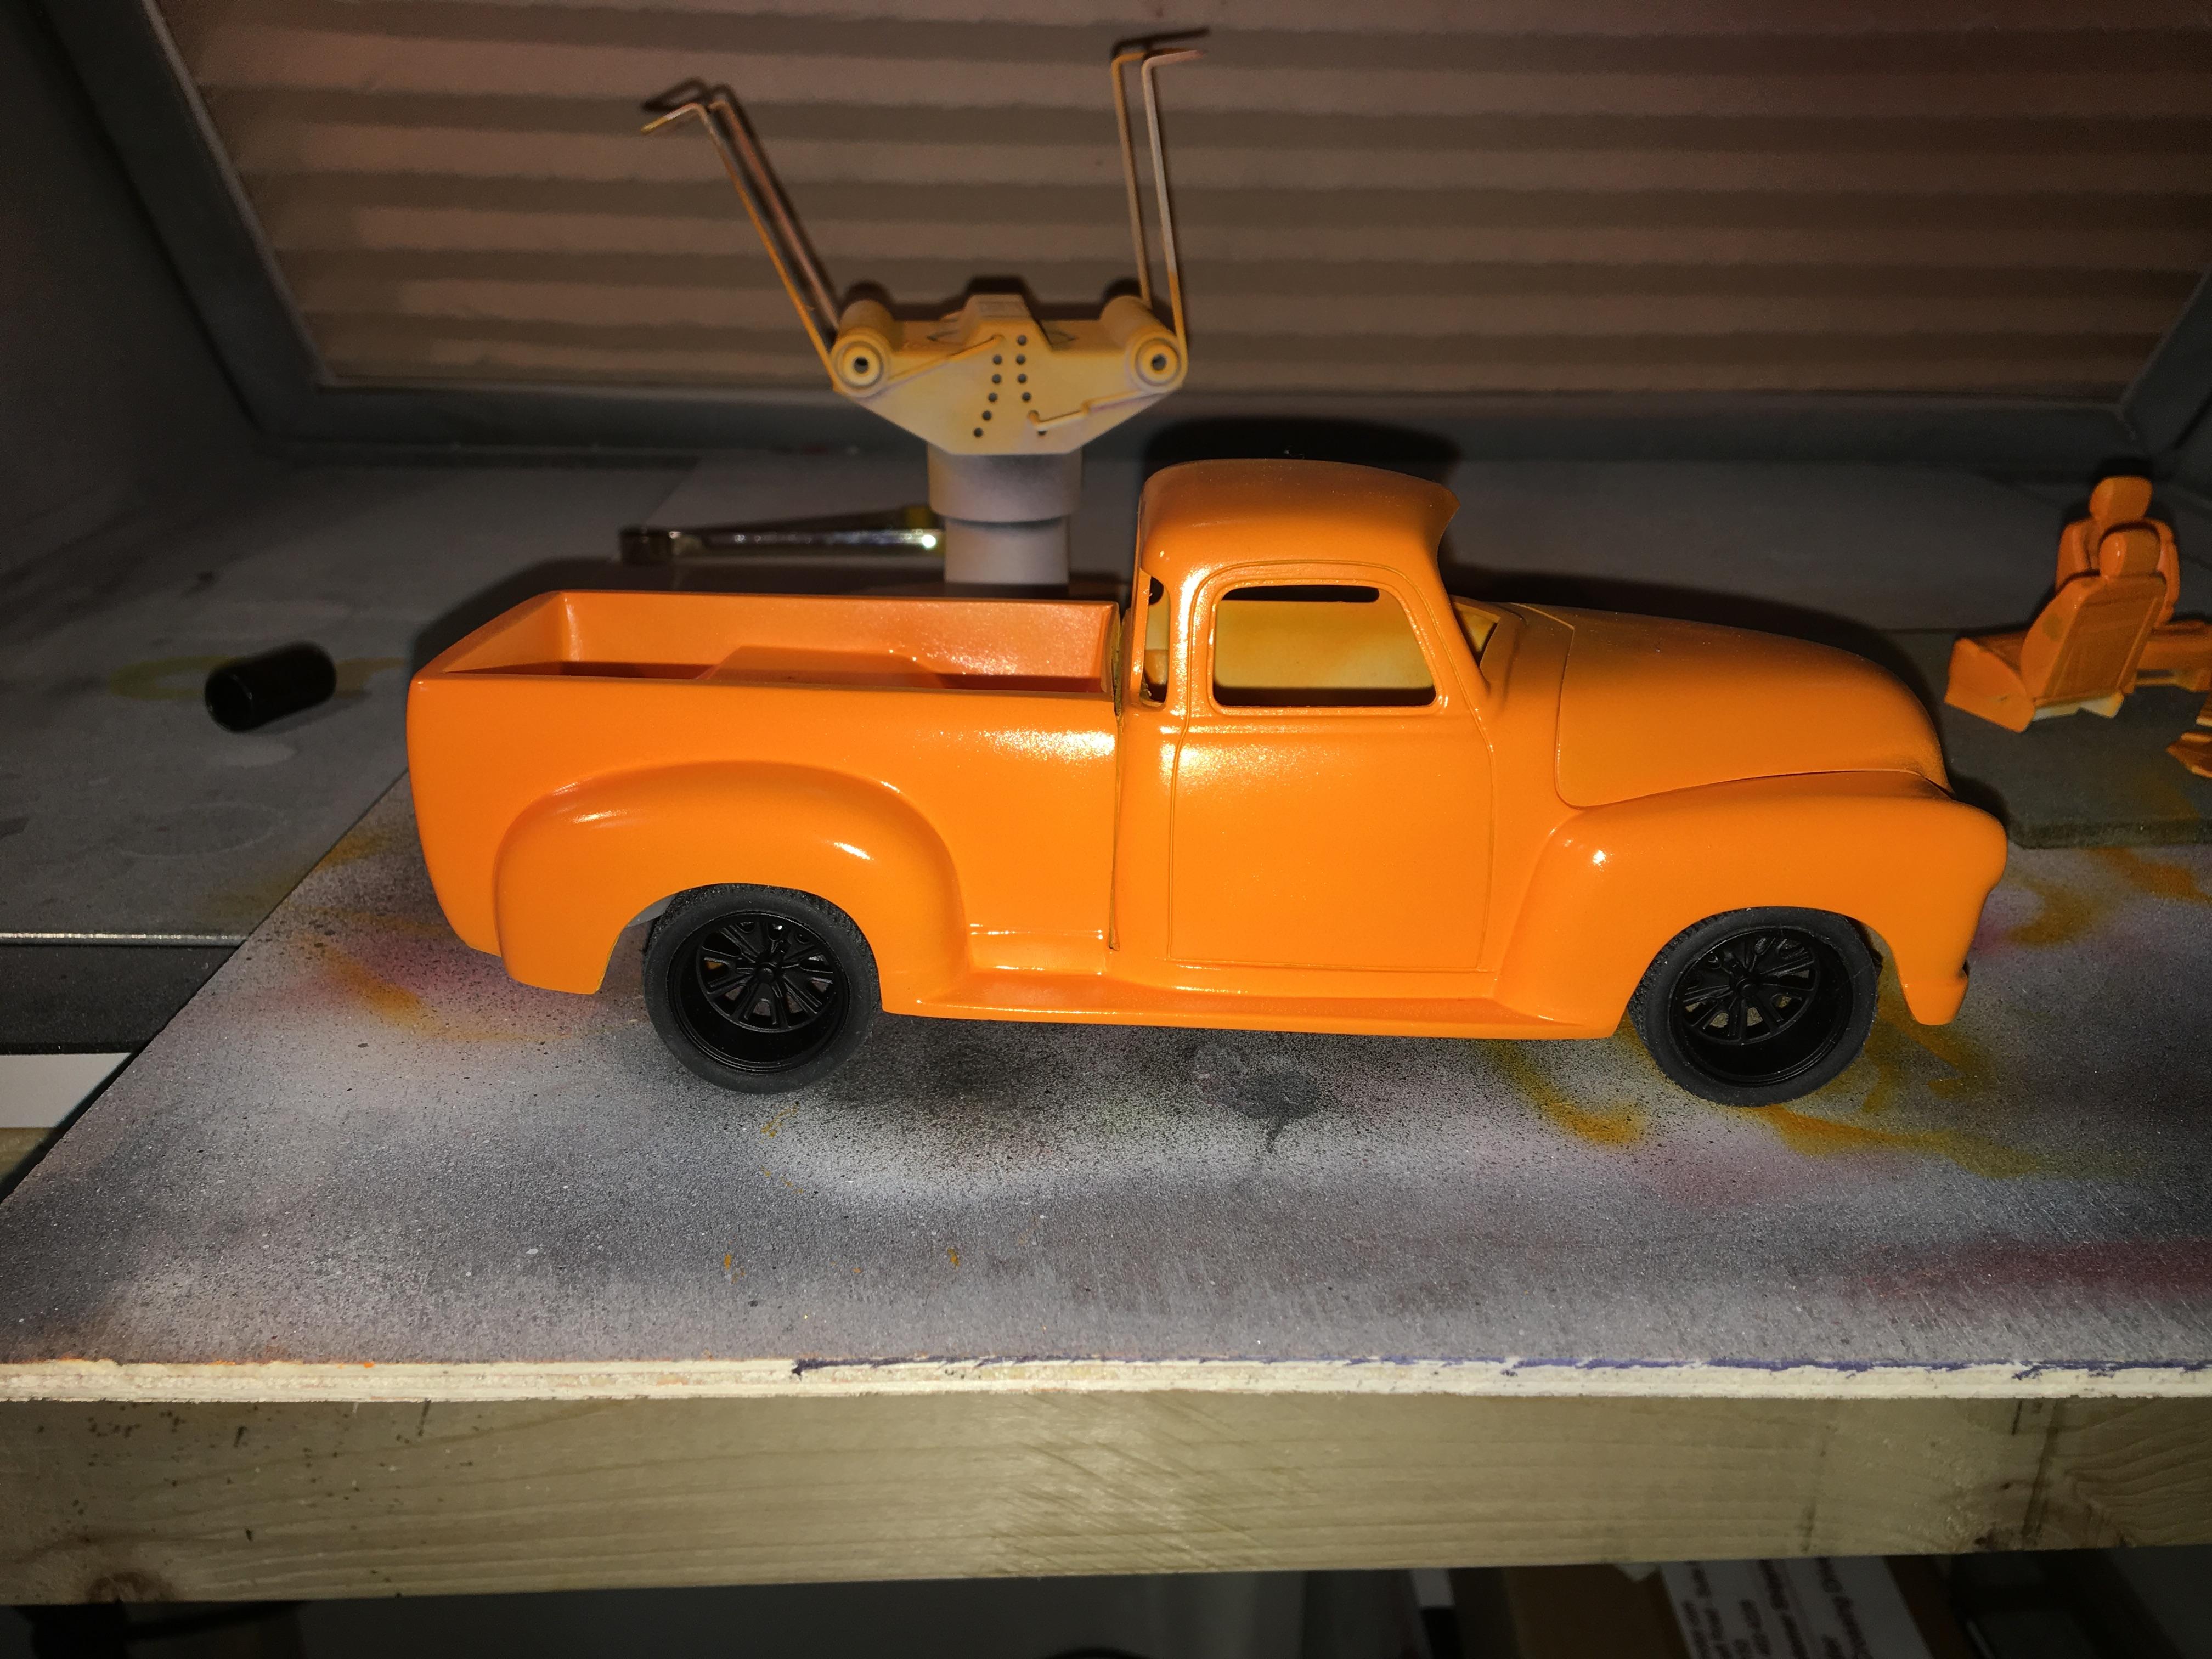
Well, it still doesn’t have an engine, exhaust or steering wheel yet but enough for a mock-up. The lighting sucks...really dark but these are 2 quick pics. Still need to do a lot like detailing the wheels and all under hood work but it’ll give you an idea of what I’m shooting for. When I started this 9 years ago, I don’t remember the rear wheels/tires being so far inboard of the wheel wells. I may have to see about moving them out a bit more.
-
Thanks for the comments guys...I always appreciate feedback, good or bad. Getting back to this build made me realize how much I have grown in my abilities. Now if I can just find all the parts I planned on using but I cannot remember where I put all of them! AAAARRRGGGHHH!!!!!! I thought I had them all together but apparently not. More work on this to come this week. I did find the wood rimmed steering wheel (yes, real wood!) but there is a lot of poo-poo I gotta figure out before I get to that point...like the friggin' engine that is going in this!!!! More to come! Stay tuned,
-
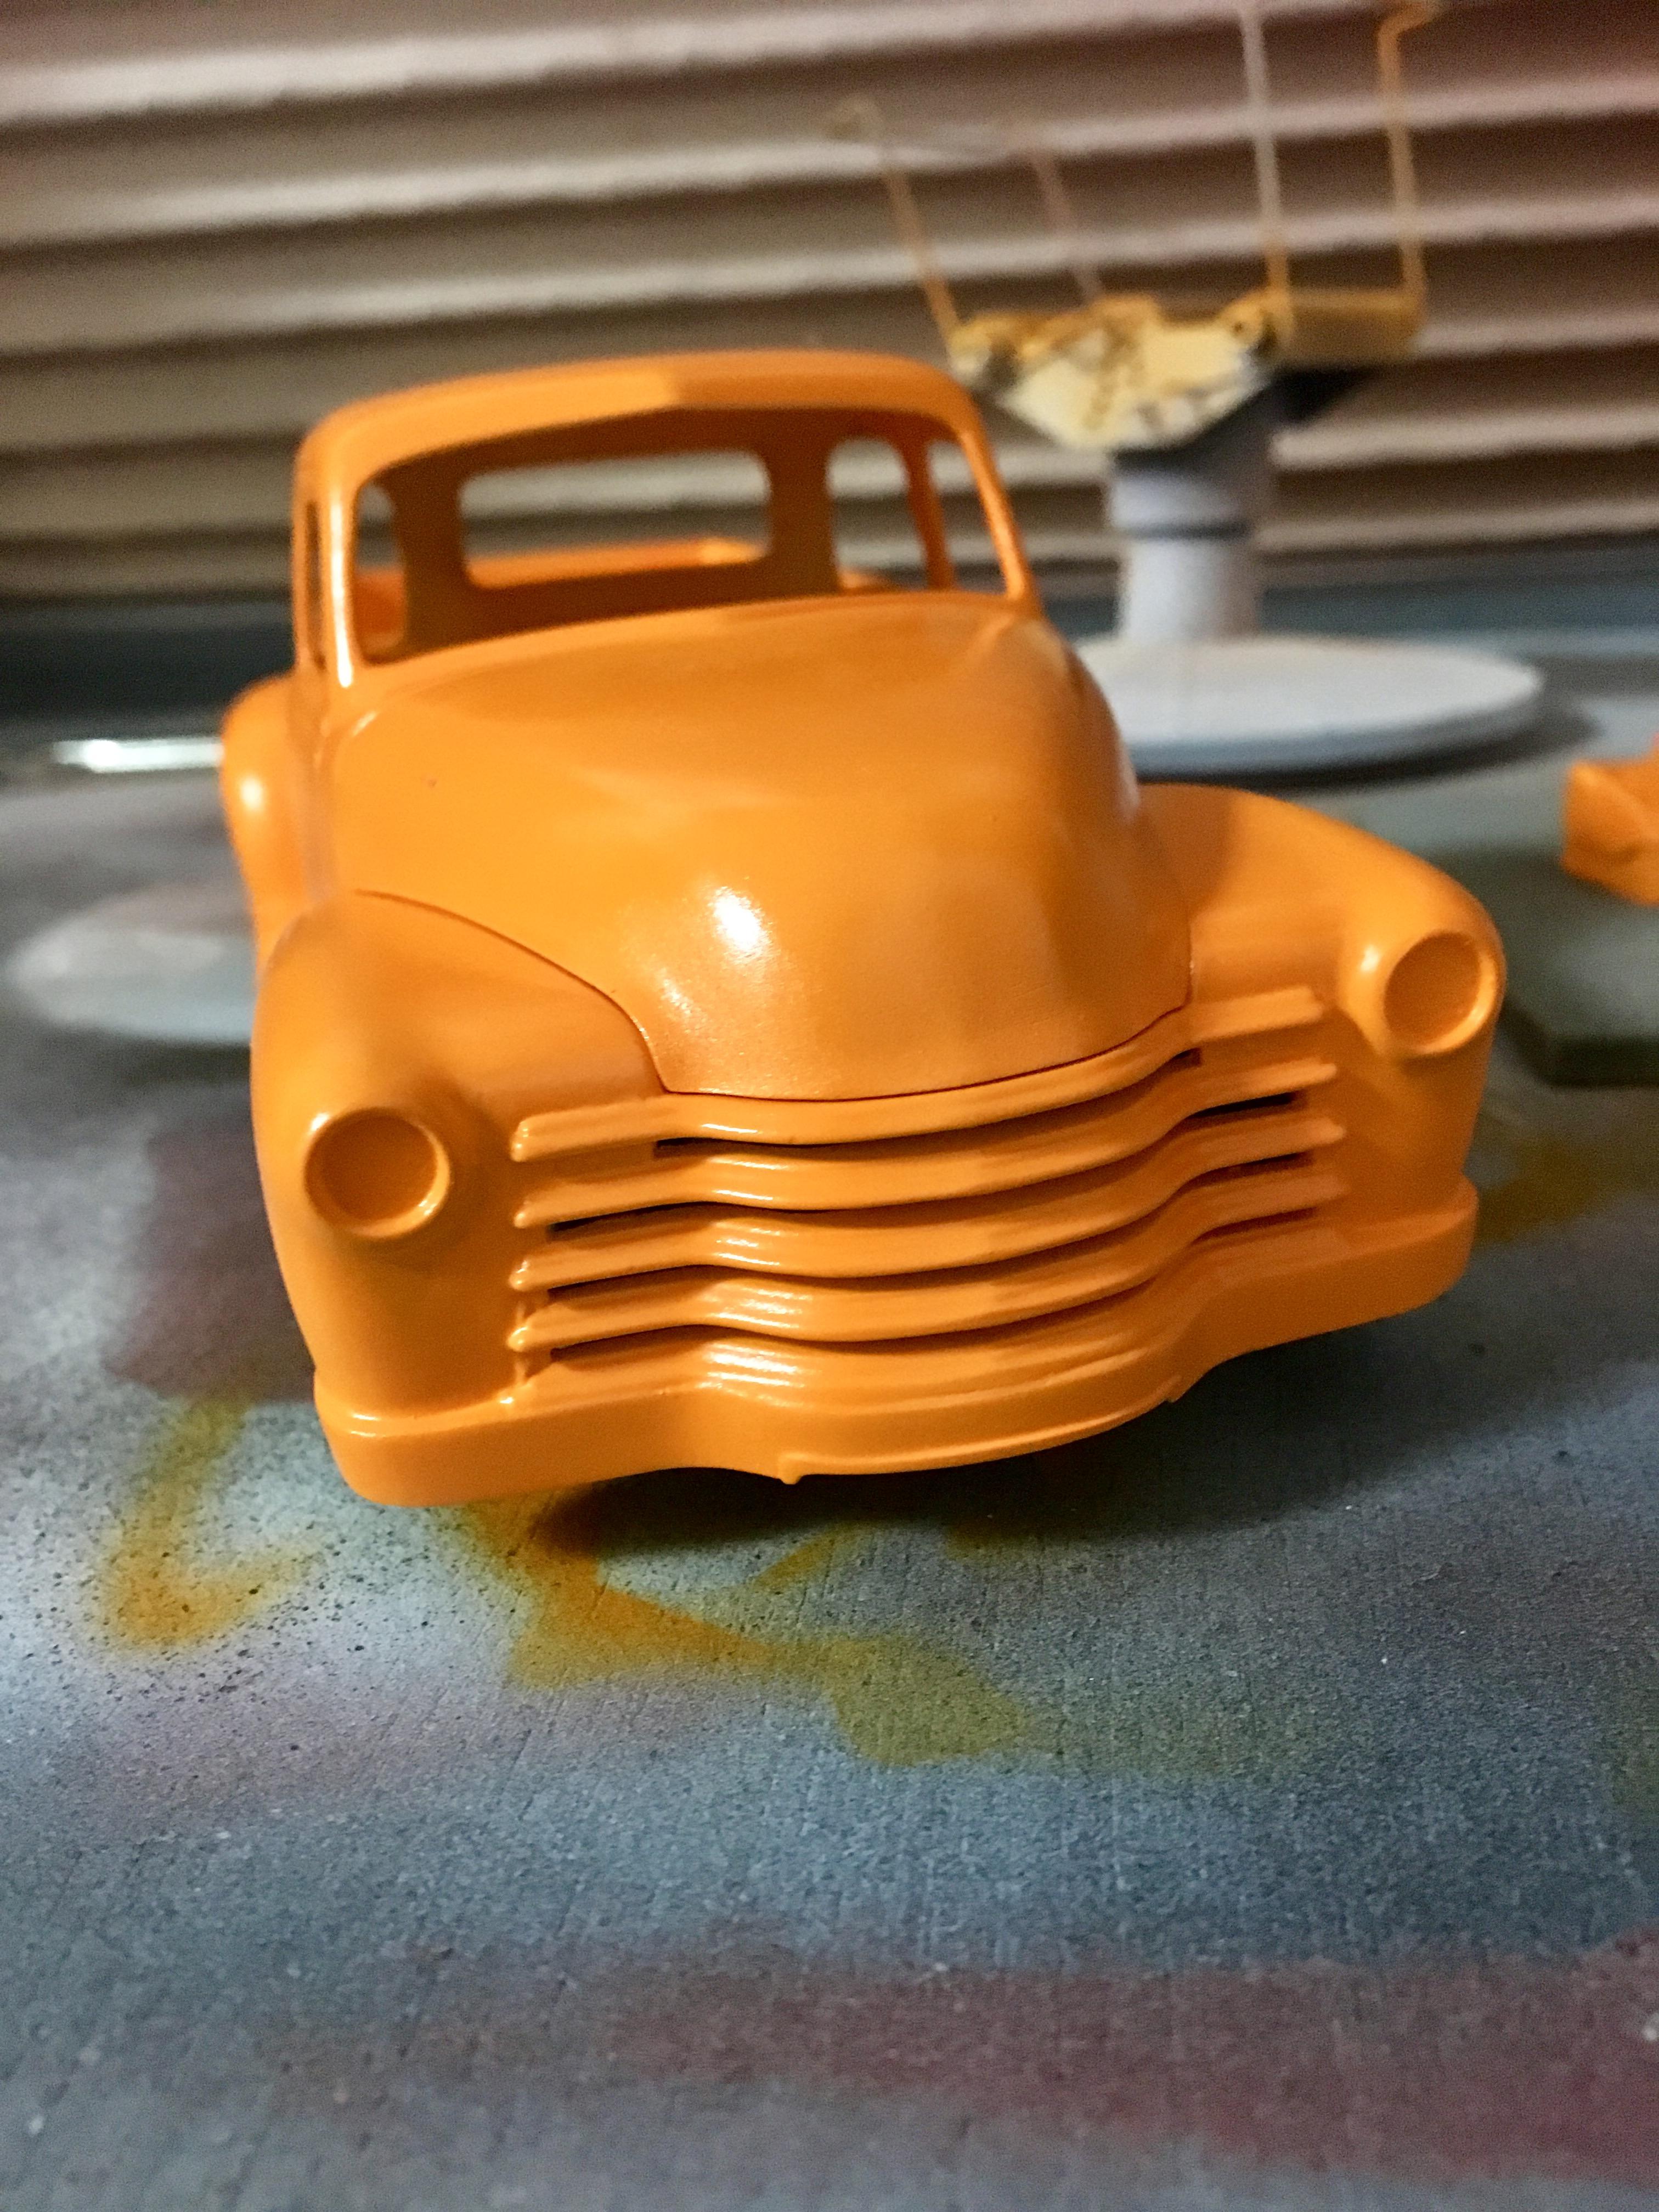
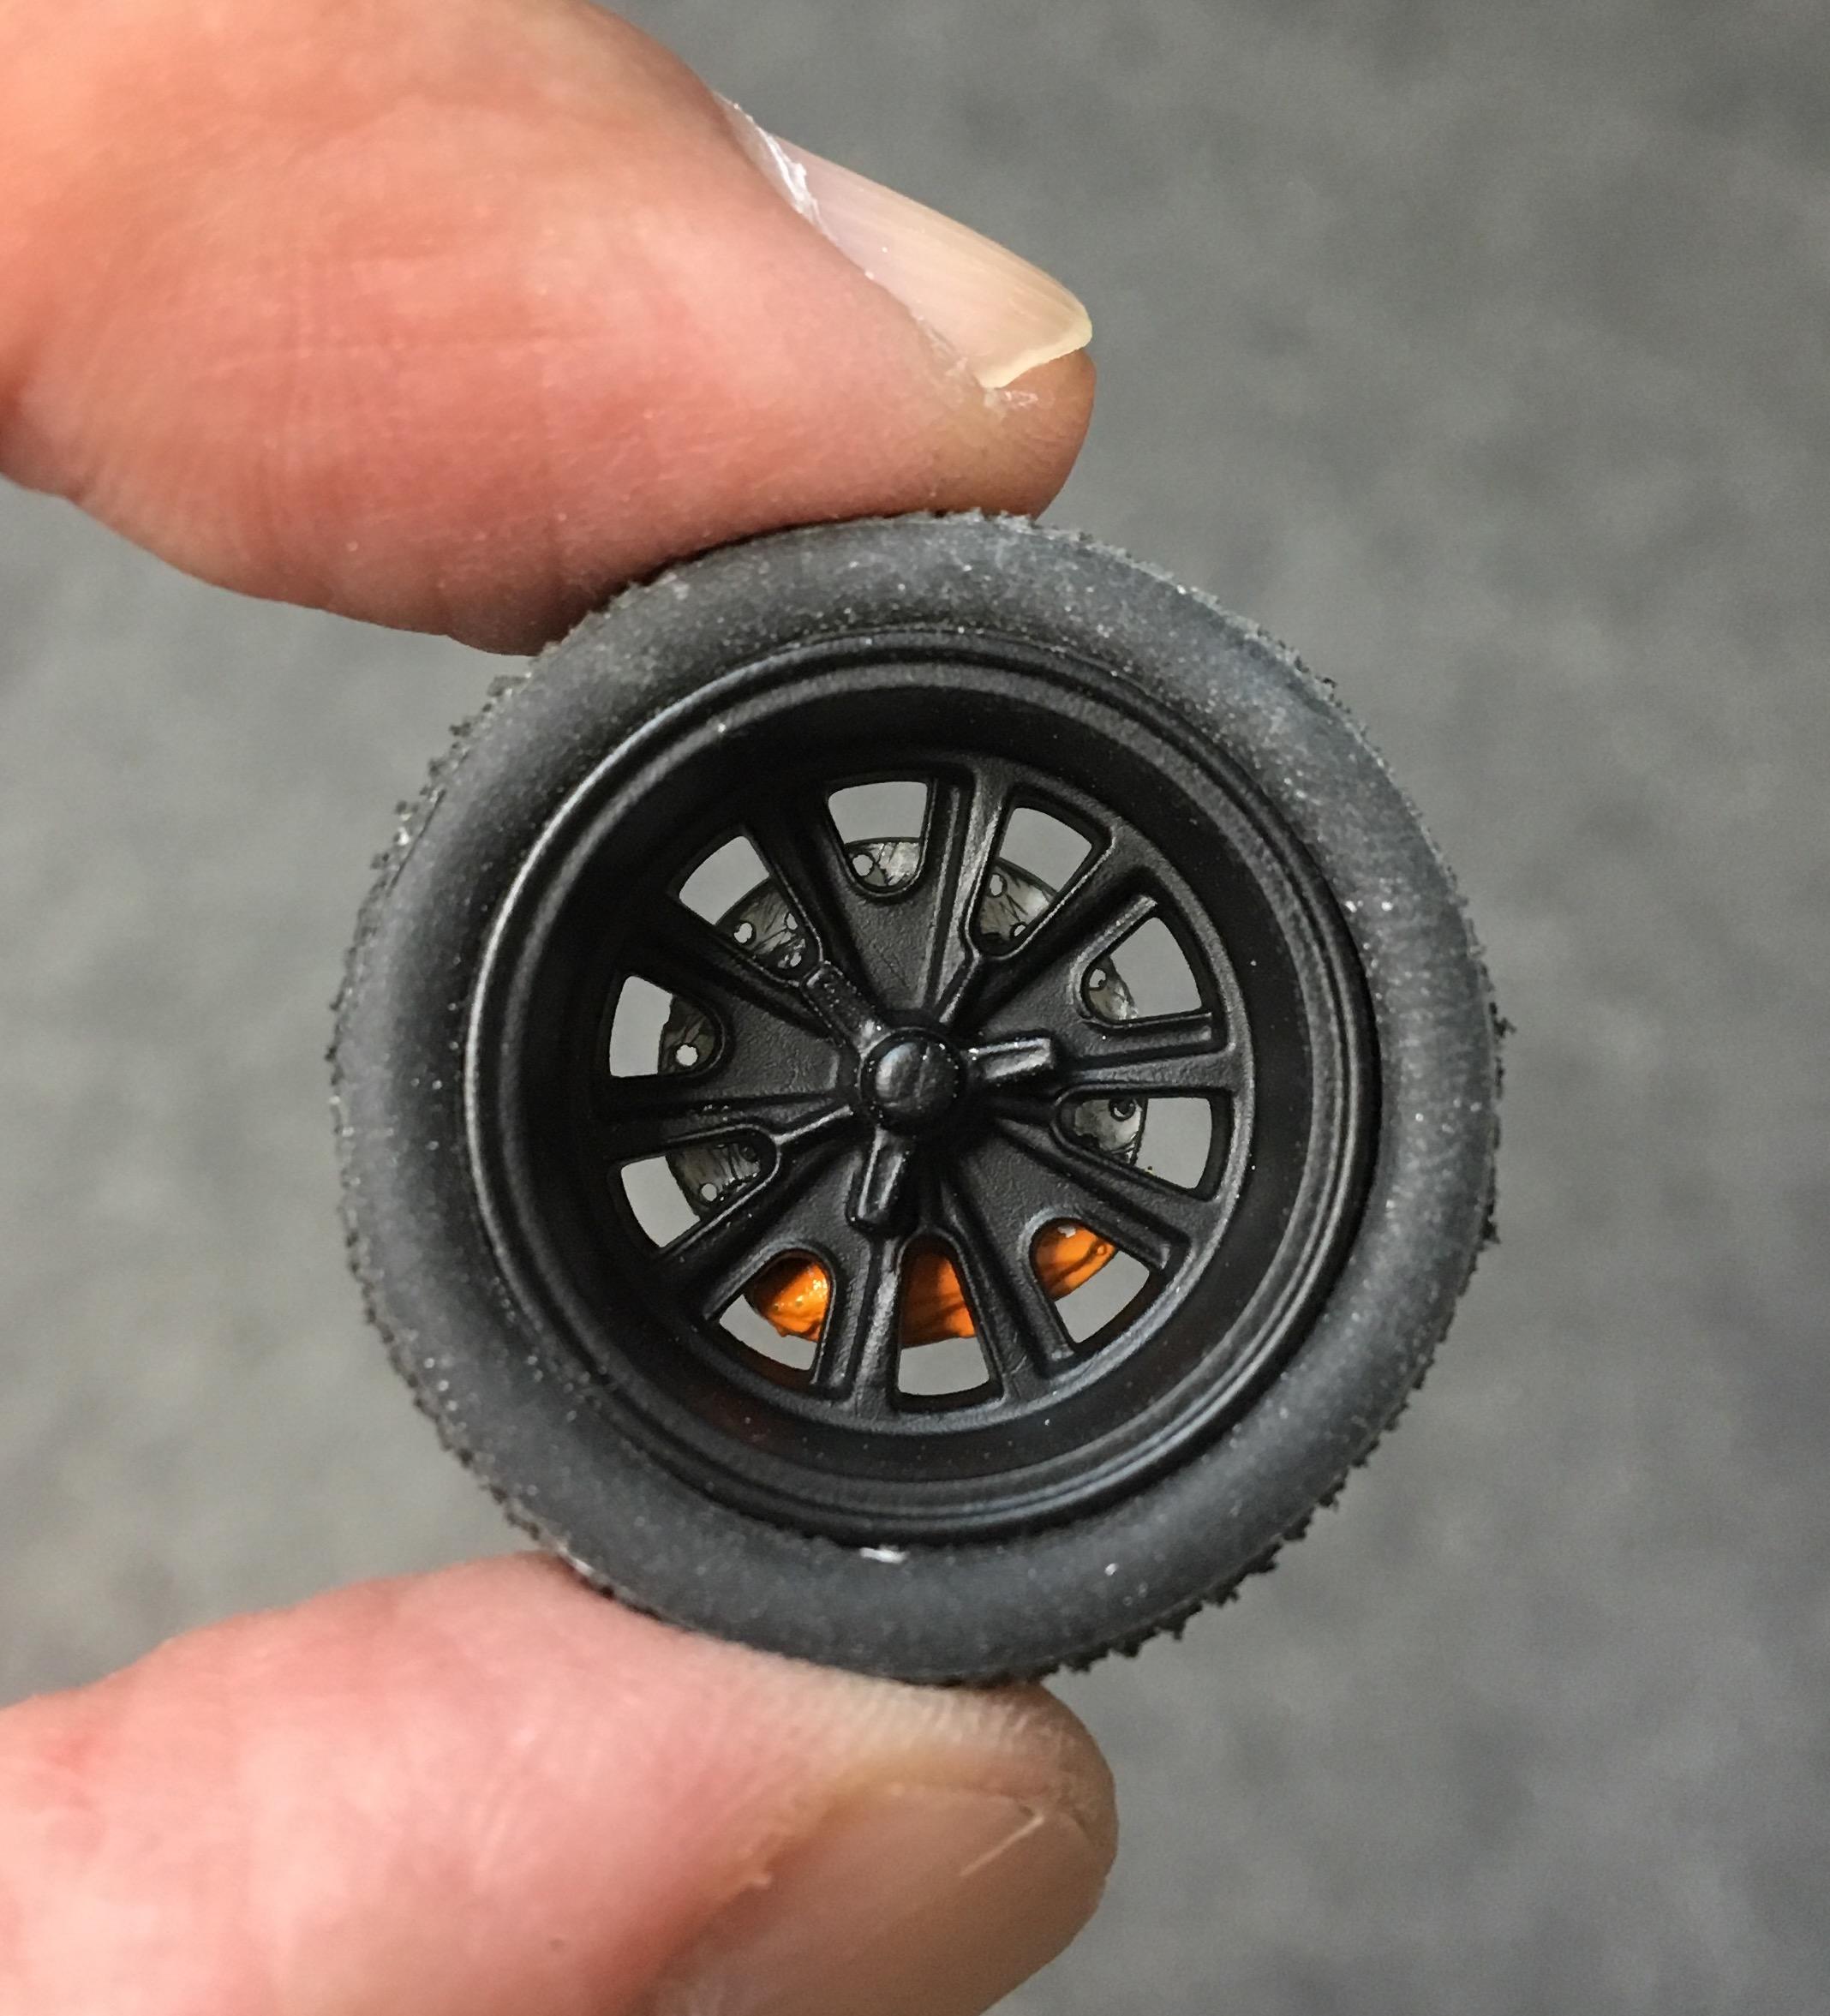
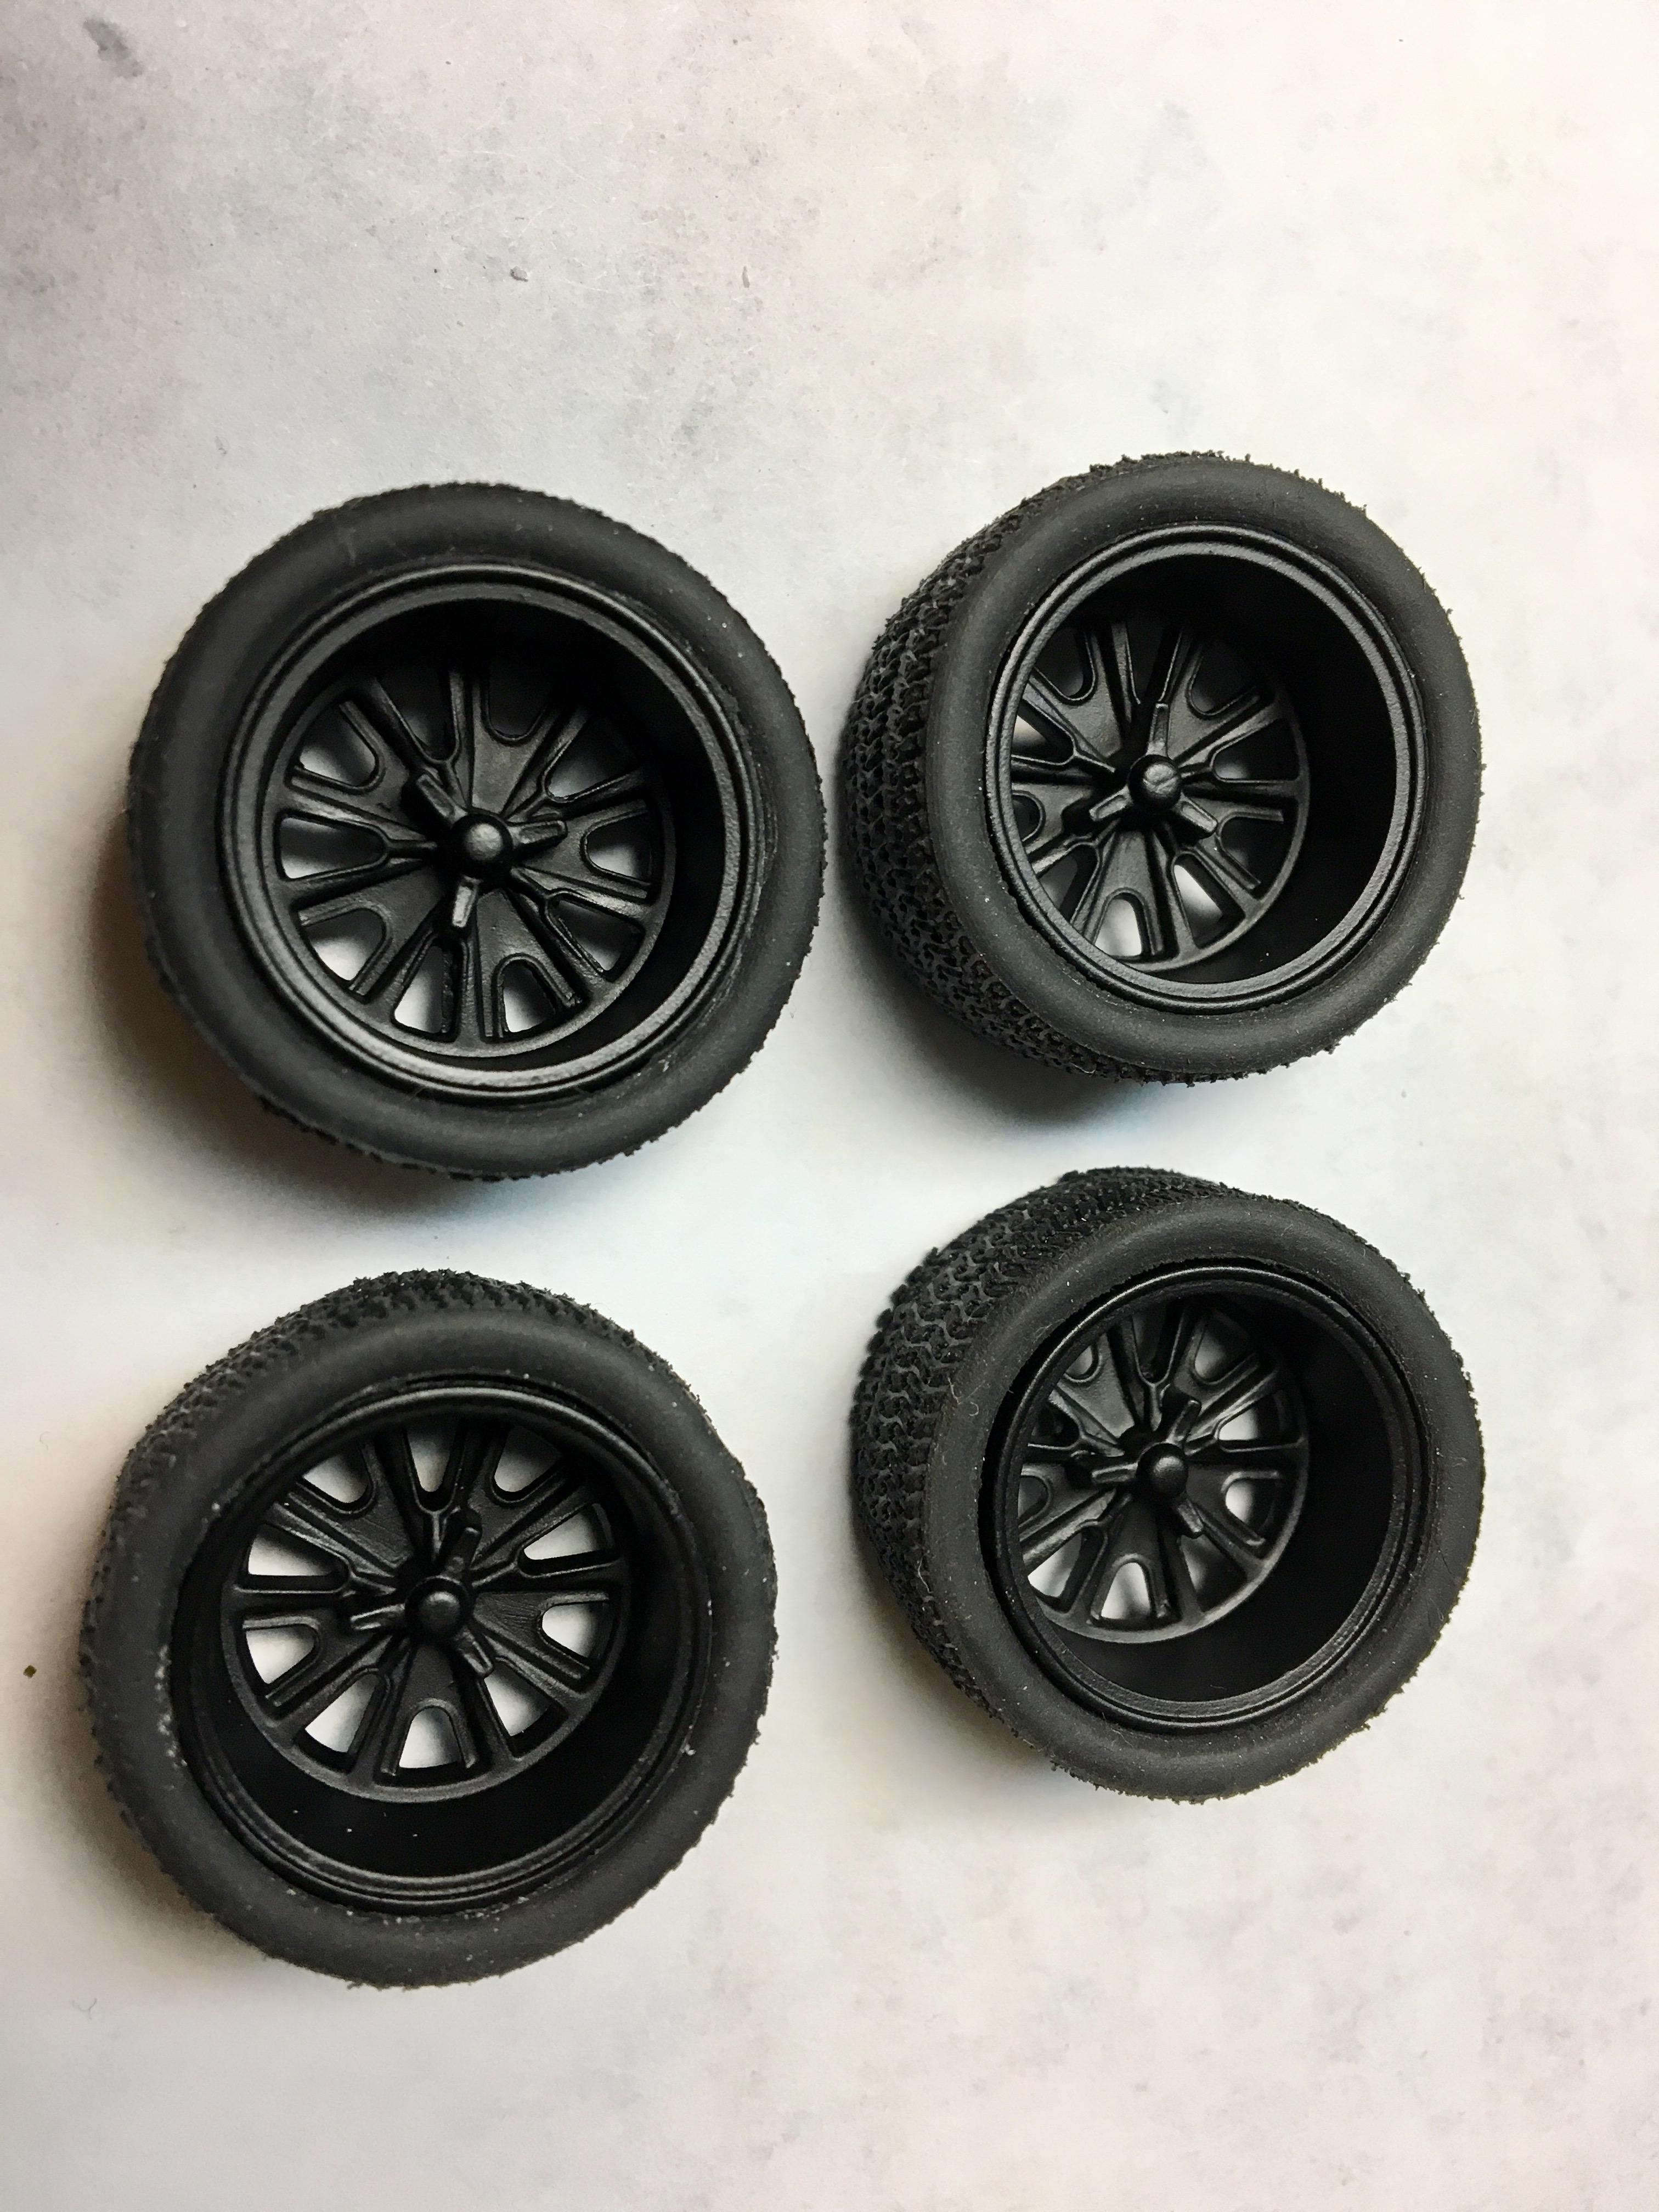
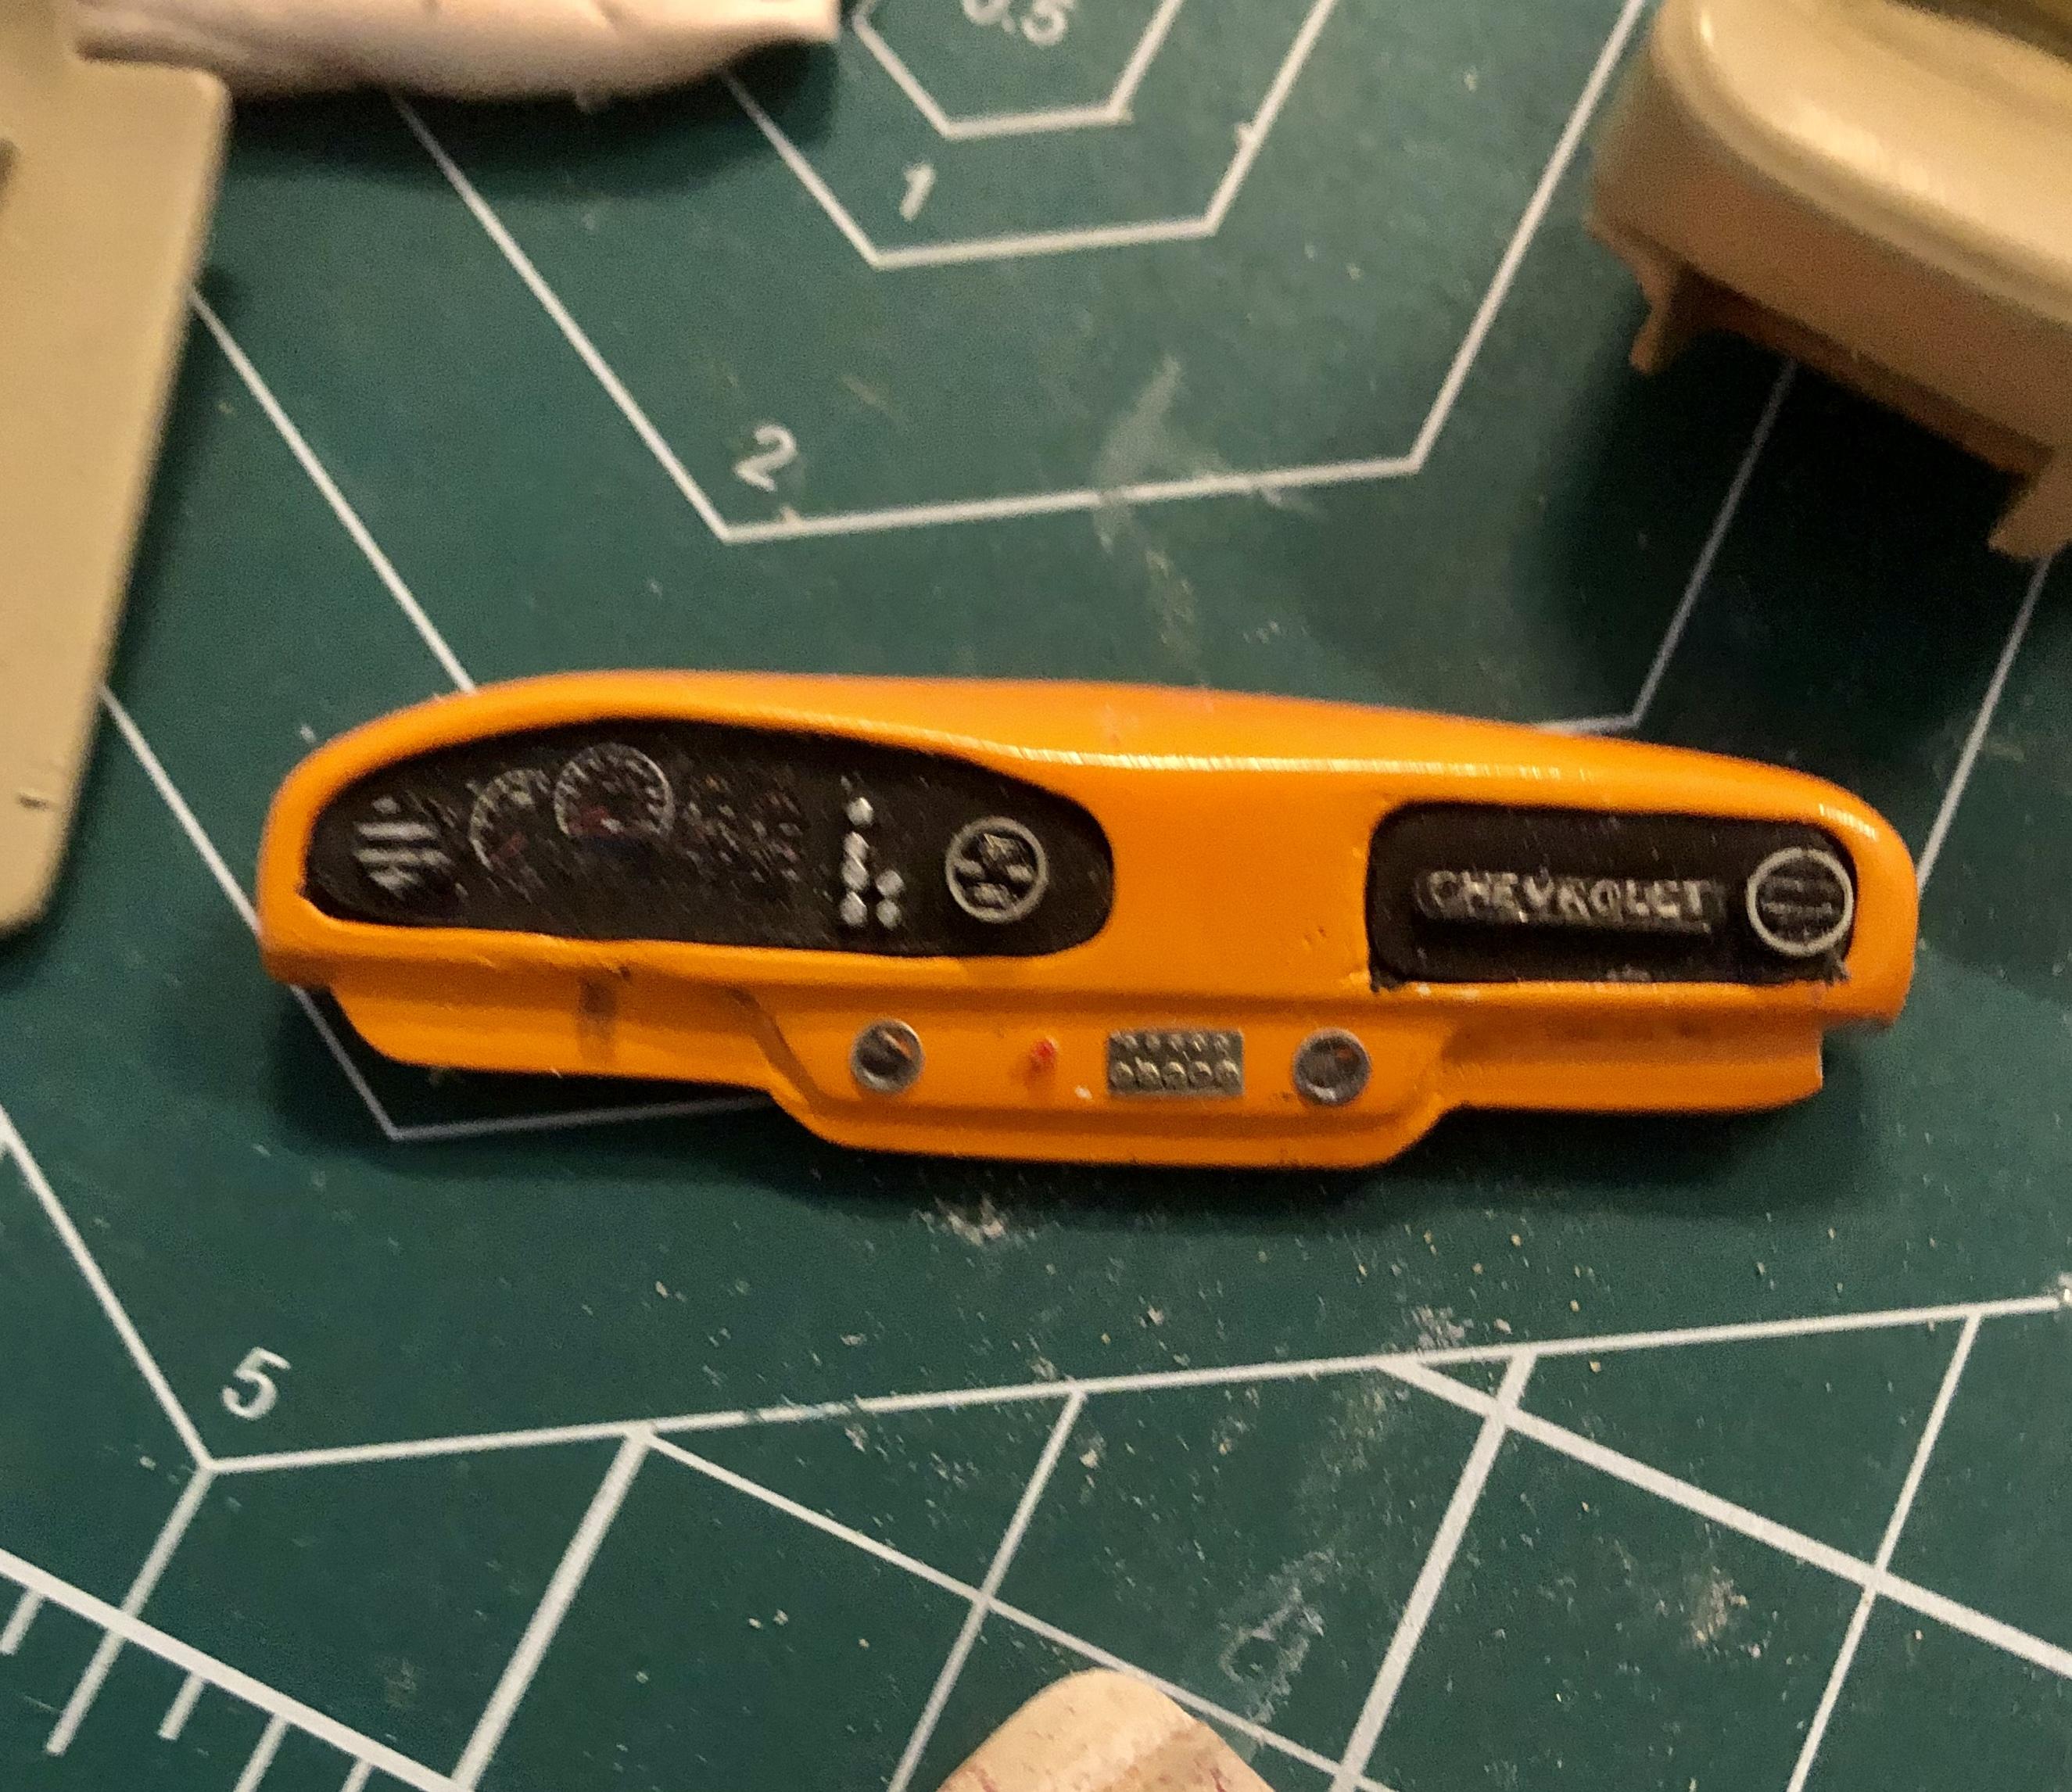
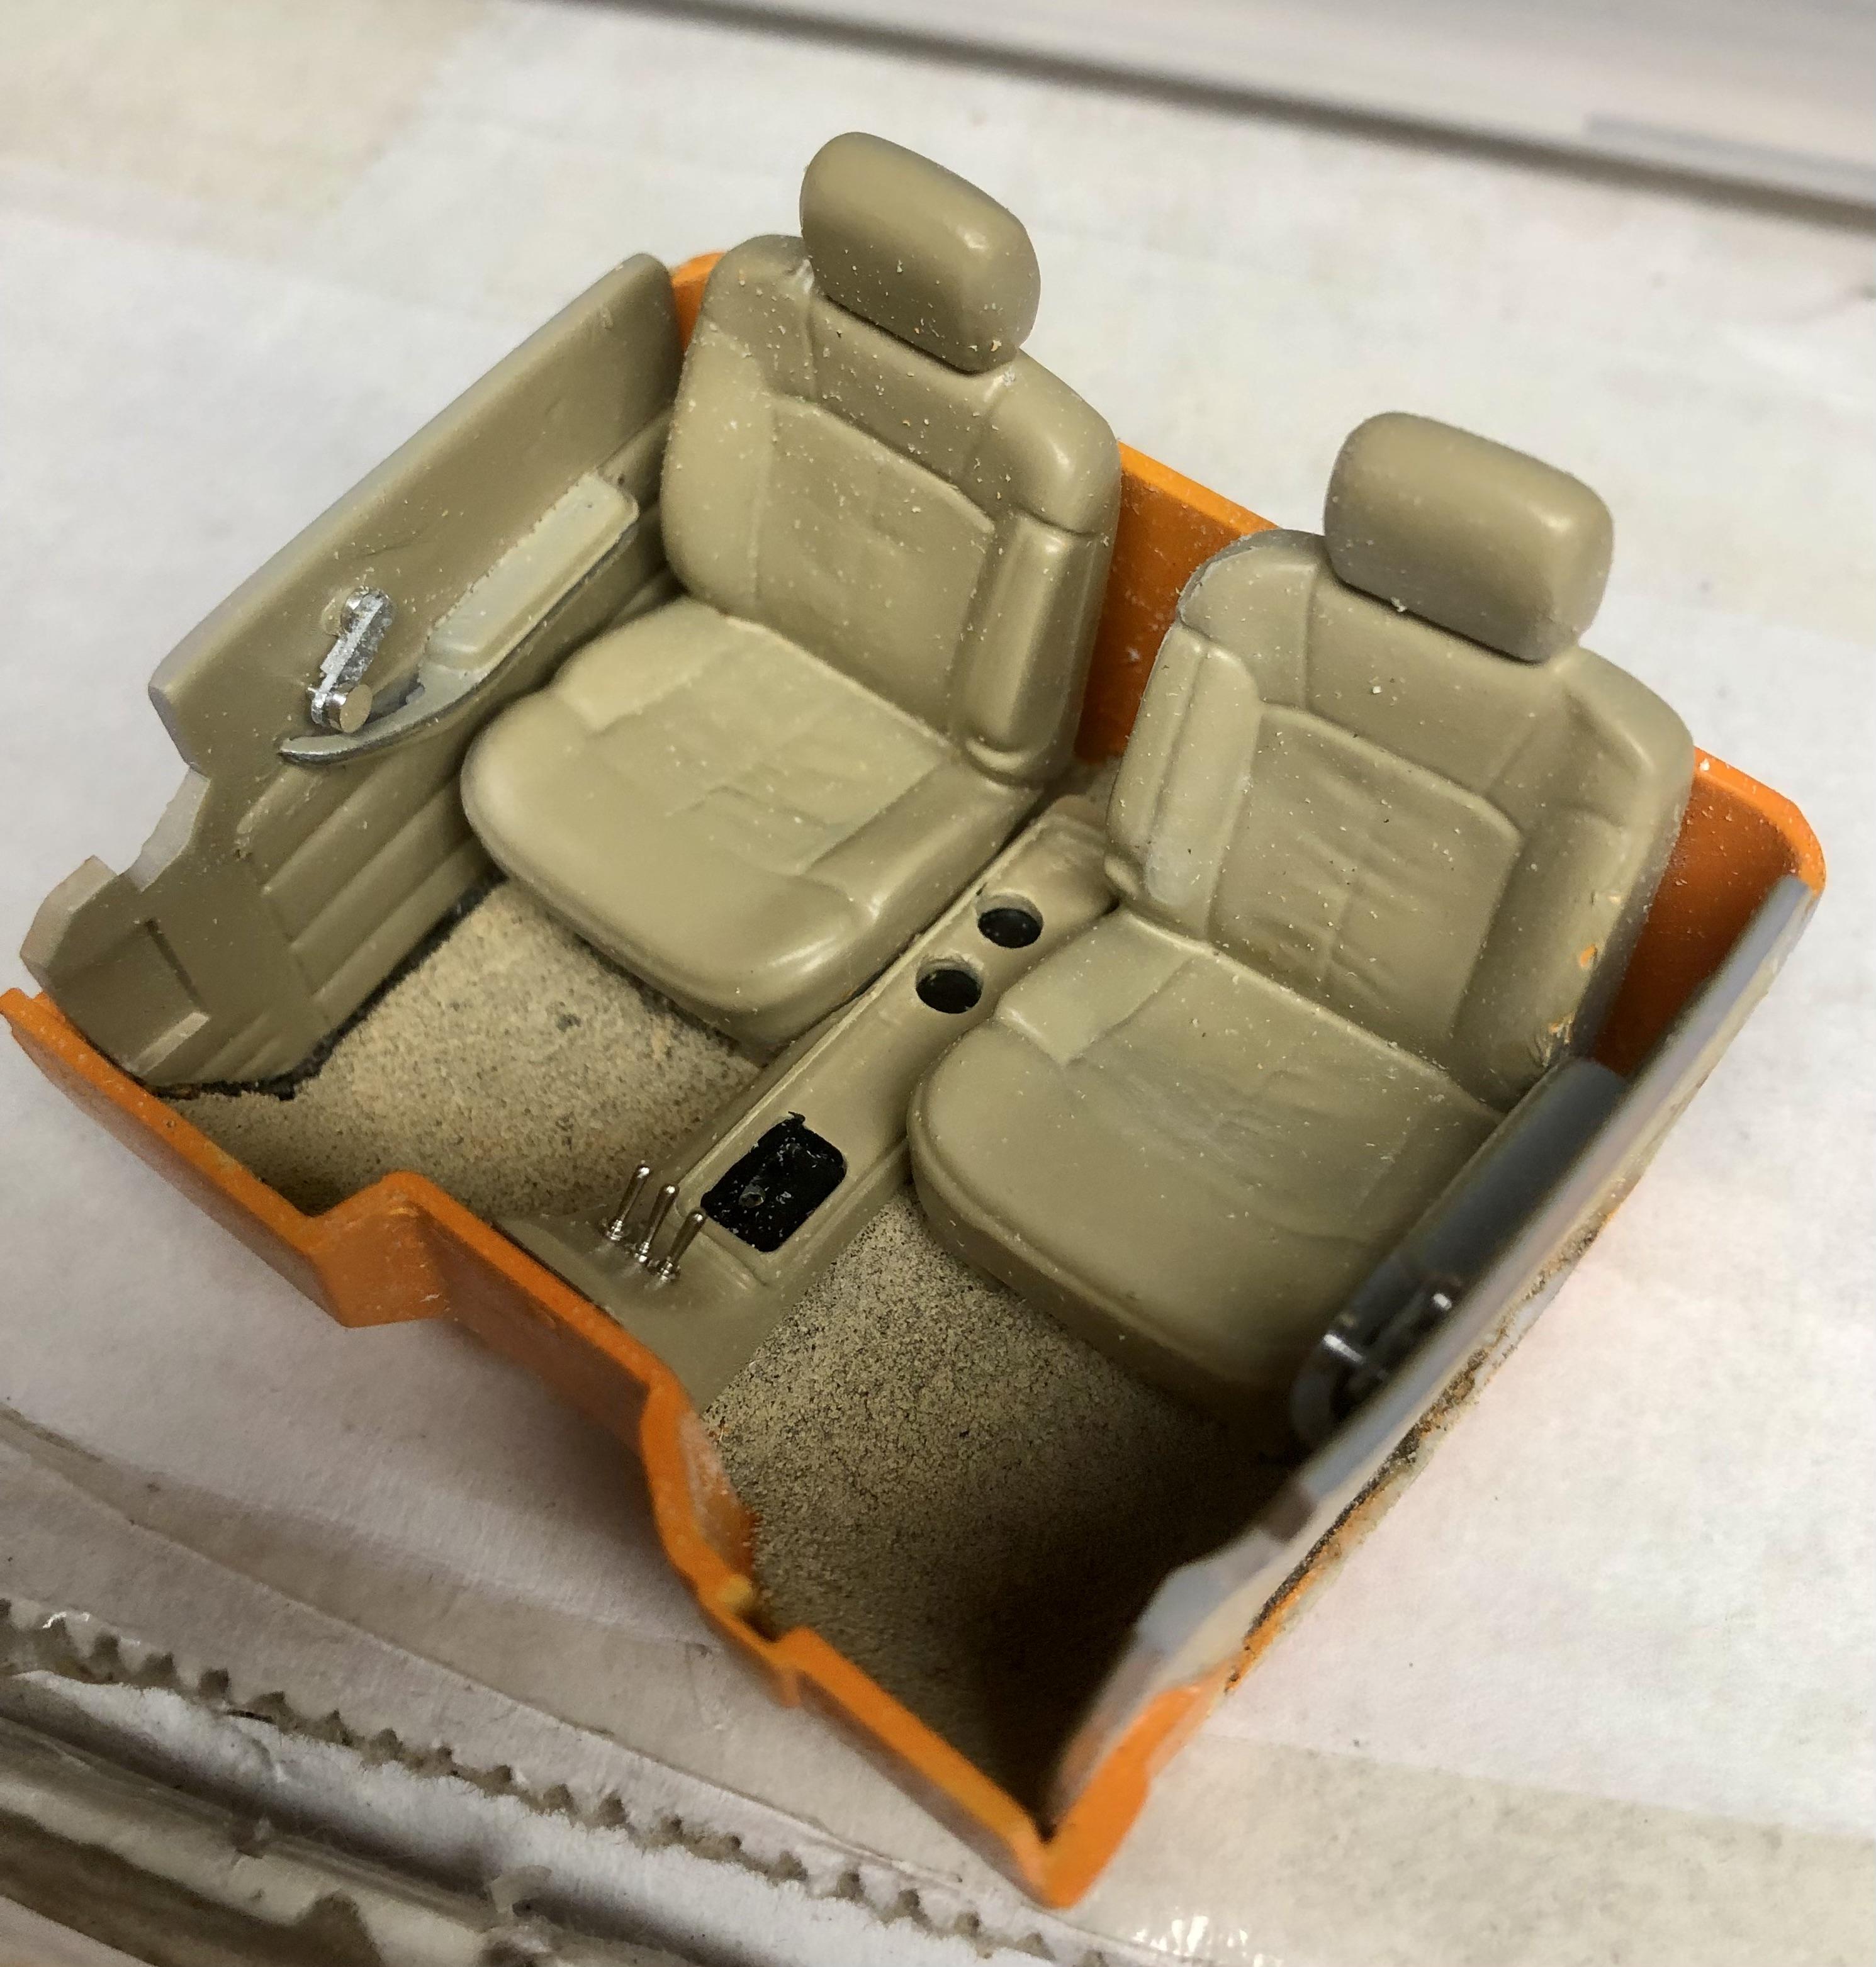
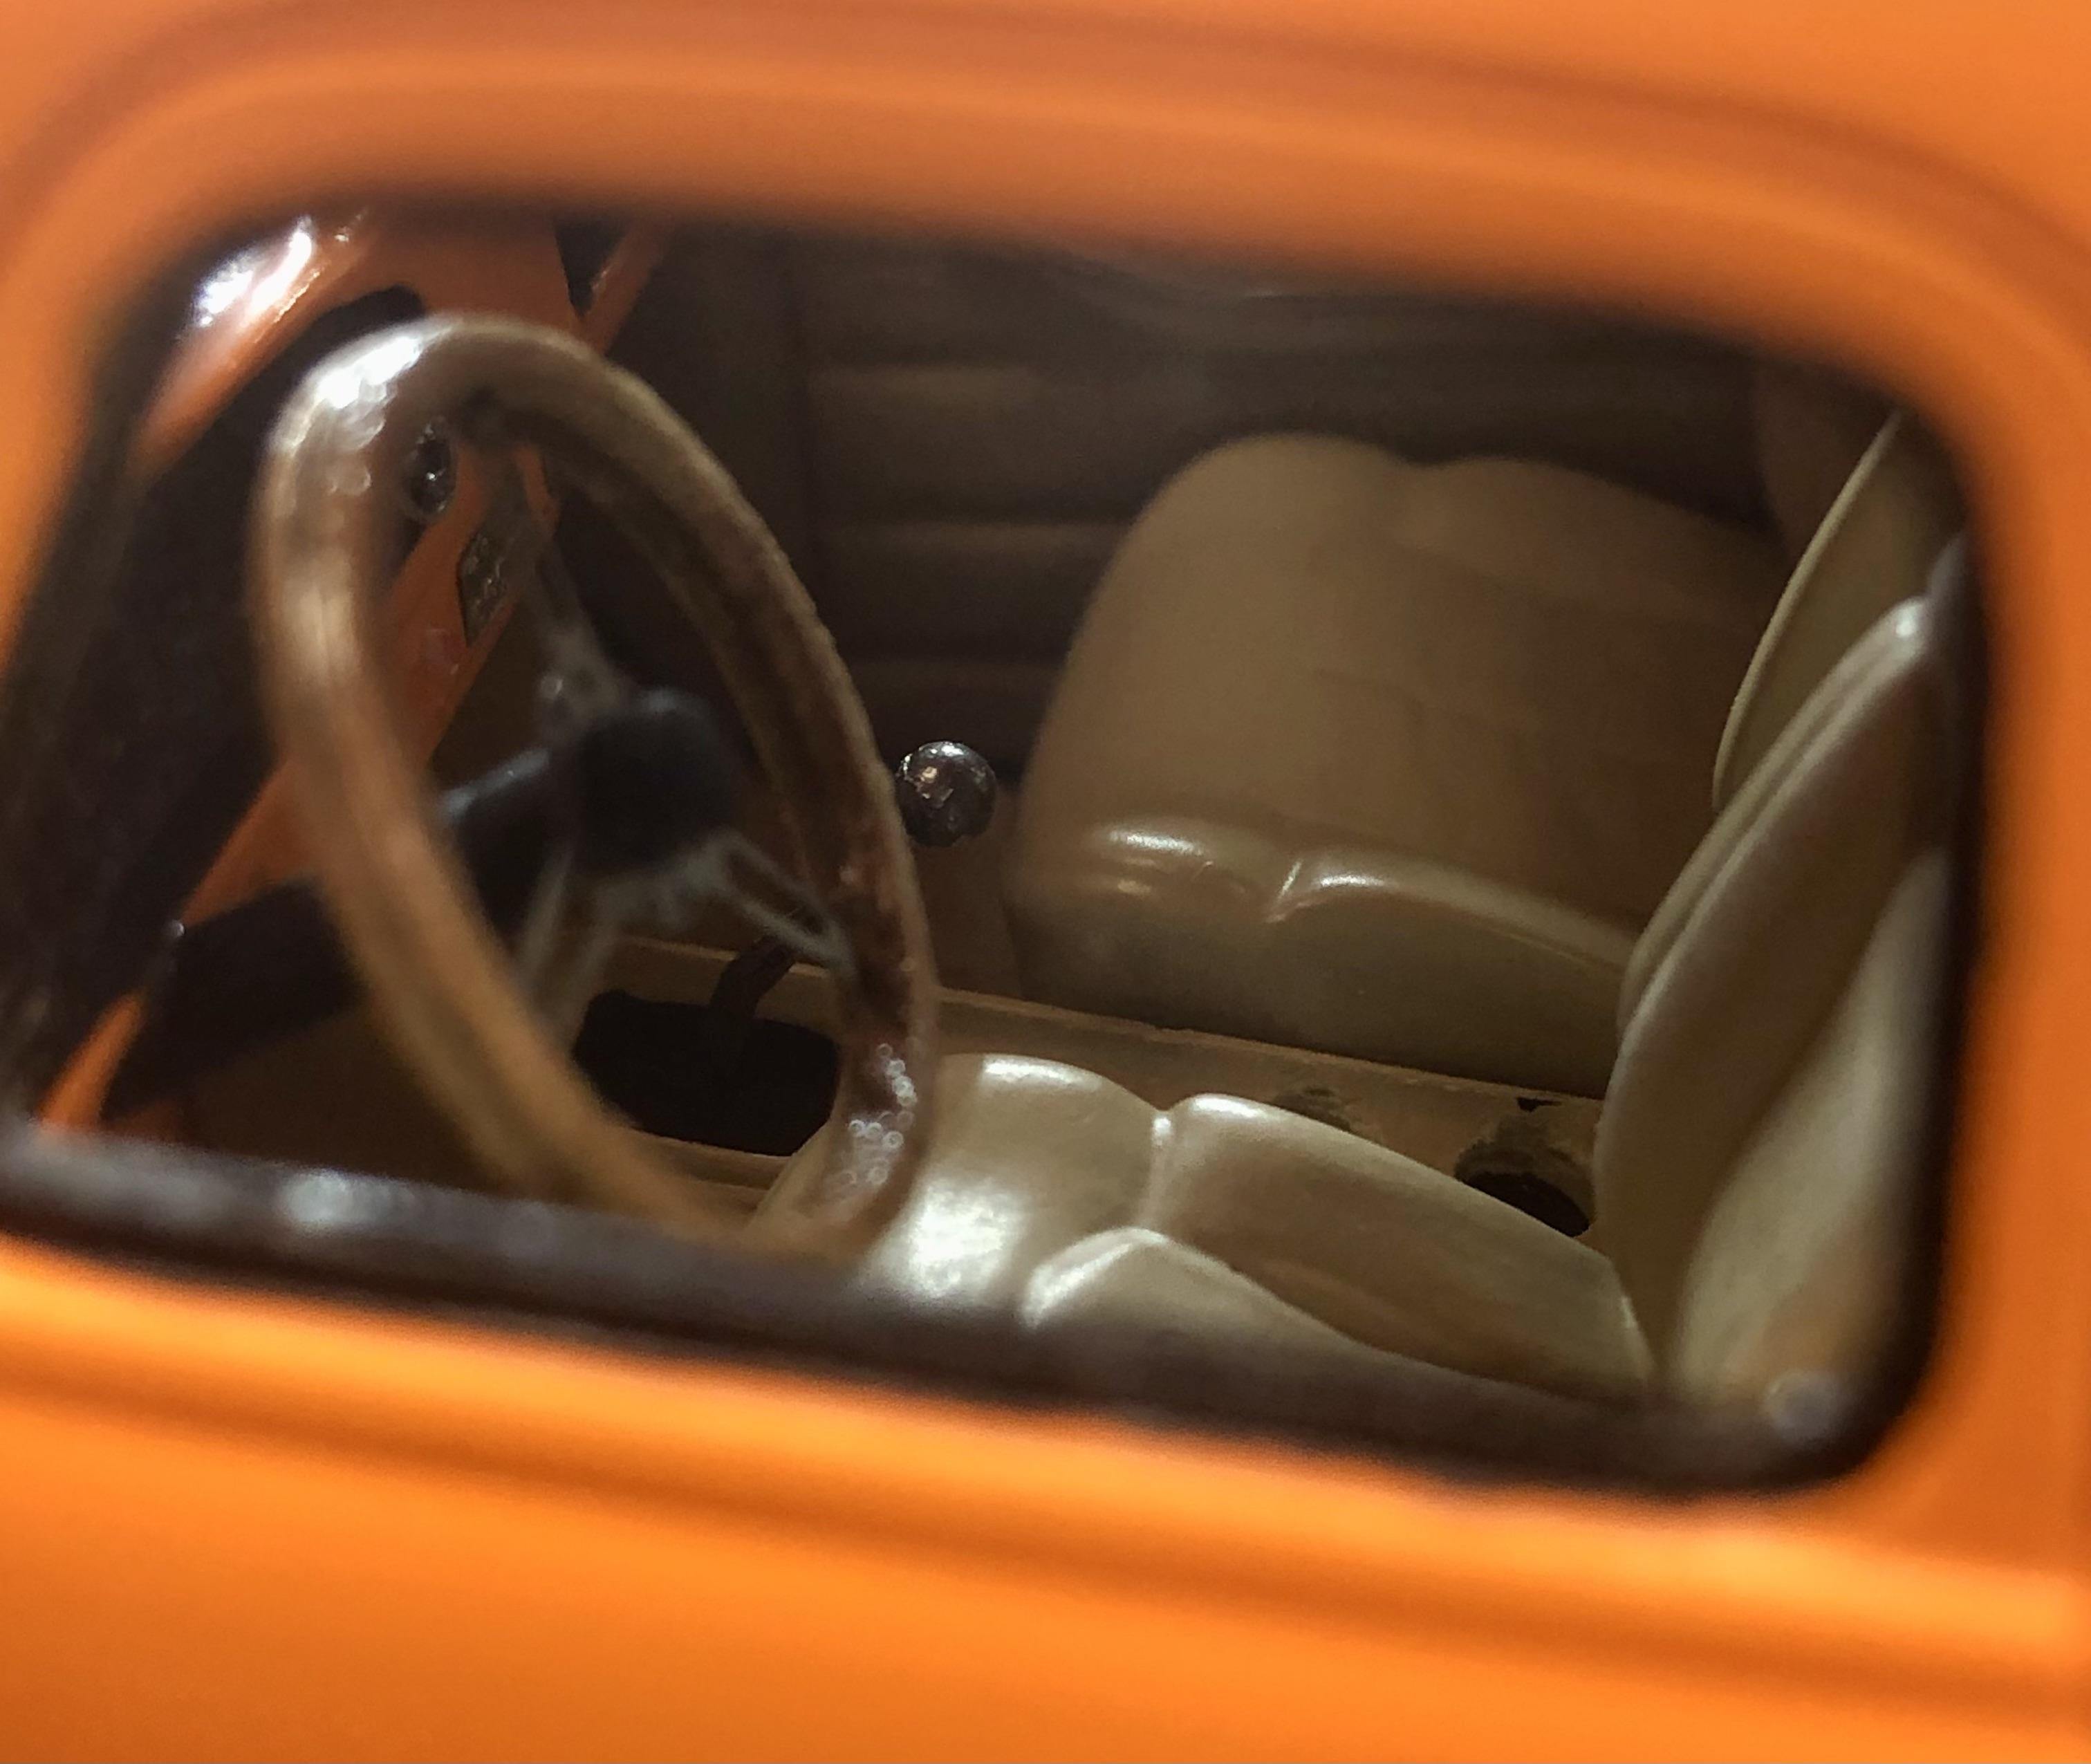
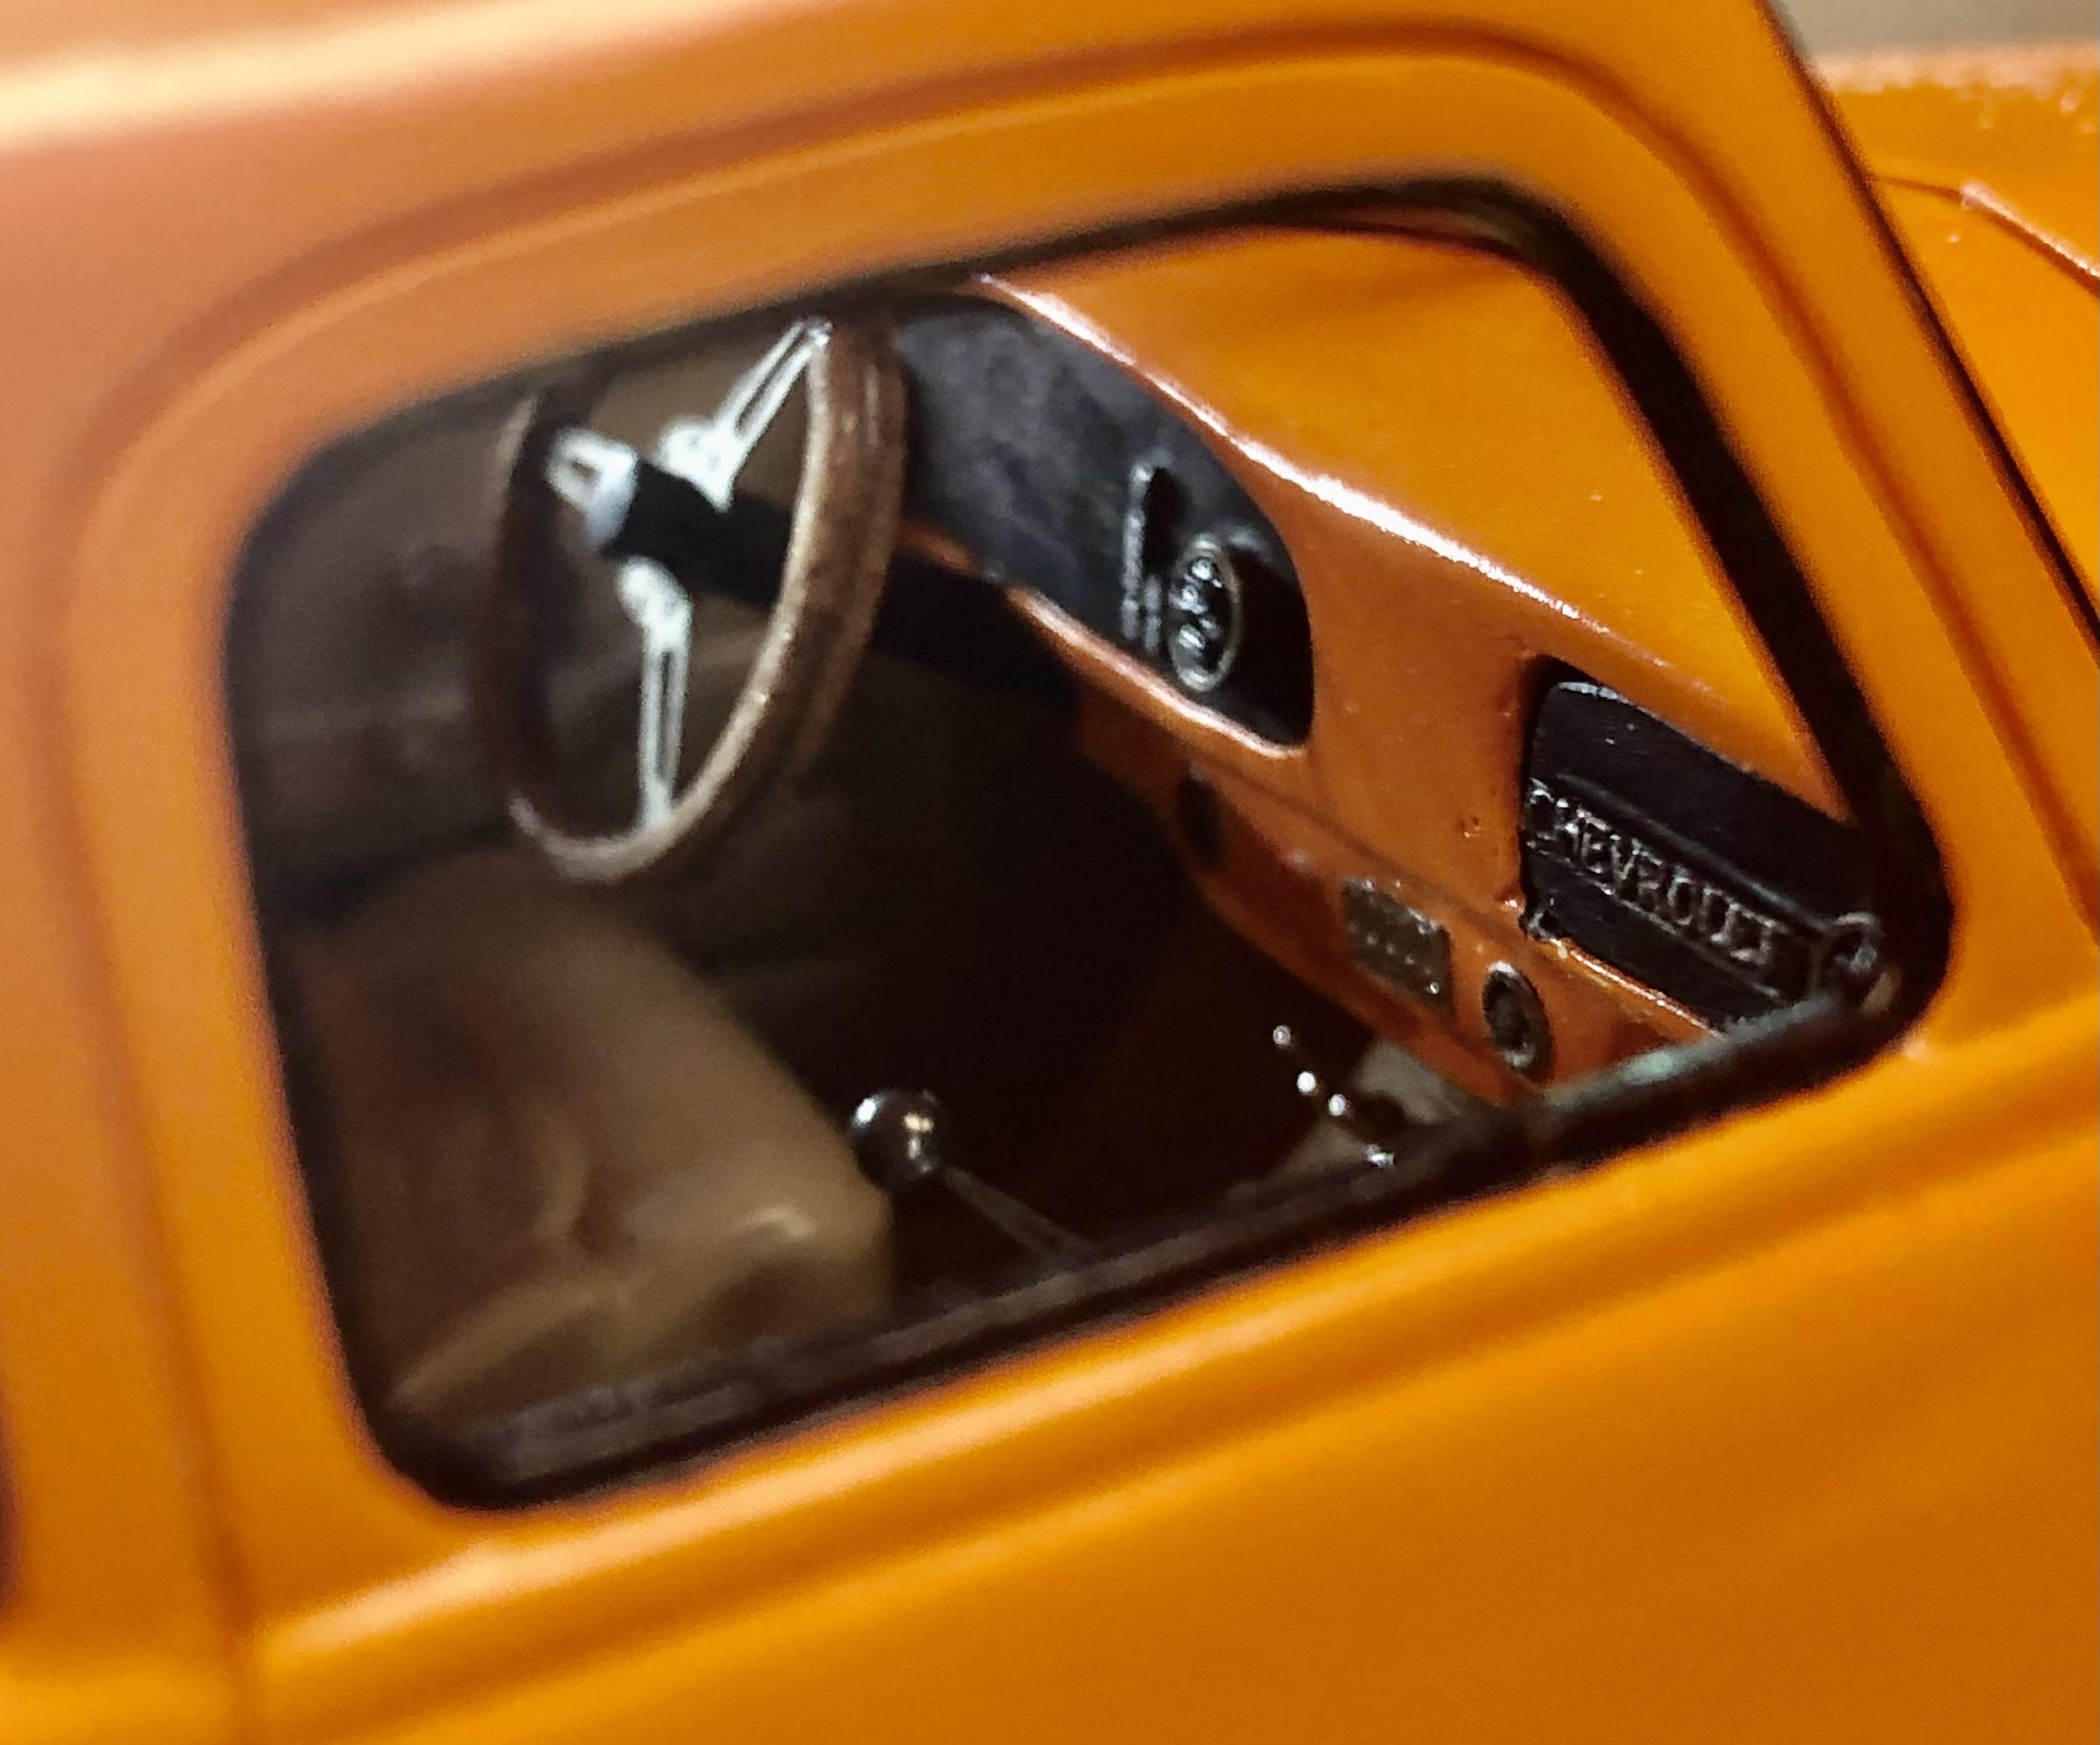
About 9 years ago, I was thumbing through a Street/Sport Truck magazine and fell in love with a truck customized by a Canadian custom shop. The truck was a 52 Chevy 3100 that they nicknamed “Vicarious”. So I picked up a 3100 kit and went to work. The body is complete as shown below… The bed is from a 99 Silverado that I removed the center 1/2” and “welded the 2 halves together then used the 3100’s rear fenders. Bumpers were removed and the nose was reworked. A bit of airbrushing to the grill after a lot of taping off… I scratch built the frame, the suspension came from a 96 corvette, I think (can’t remember…9 years ago!). Wheels and tires came from the rear of 2 1/32 scale "Muscle Machines Big Time Muscle" mustangs And that’s where it stalled…until last week. I kept thinking to myself that I need to finish this. I had nearly a year invested in this build so off the shelf and on the workbench once again! I finished the dash… and the interior complete with a heavily modified console from an unknown donor kit. Seats are from from the 99 Silverado. Tan embossing powder over flat black paint makes up the carpeting. I used duplicolor tan interior paint for the seats, console and interior door panels…pardon the sanding dust, To be removed! The floor of the bed I never liked so I decided that rather than tear it apart, I’d just cover it with a scratch built tonneau cover that fits tightly but can be removed The original engine I planned to use I’m on the fence about now. I picked an LS1 from TX3DCustoms but not sure which direction to go. And that’s all for now. I’ll post more as I get done but I am determined to finish this more than ever now
-
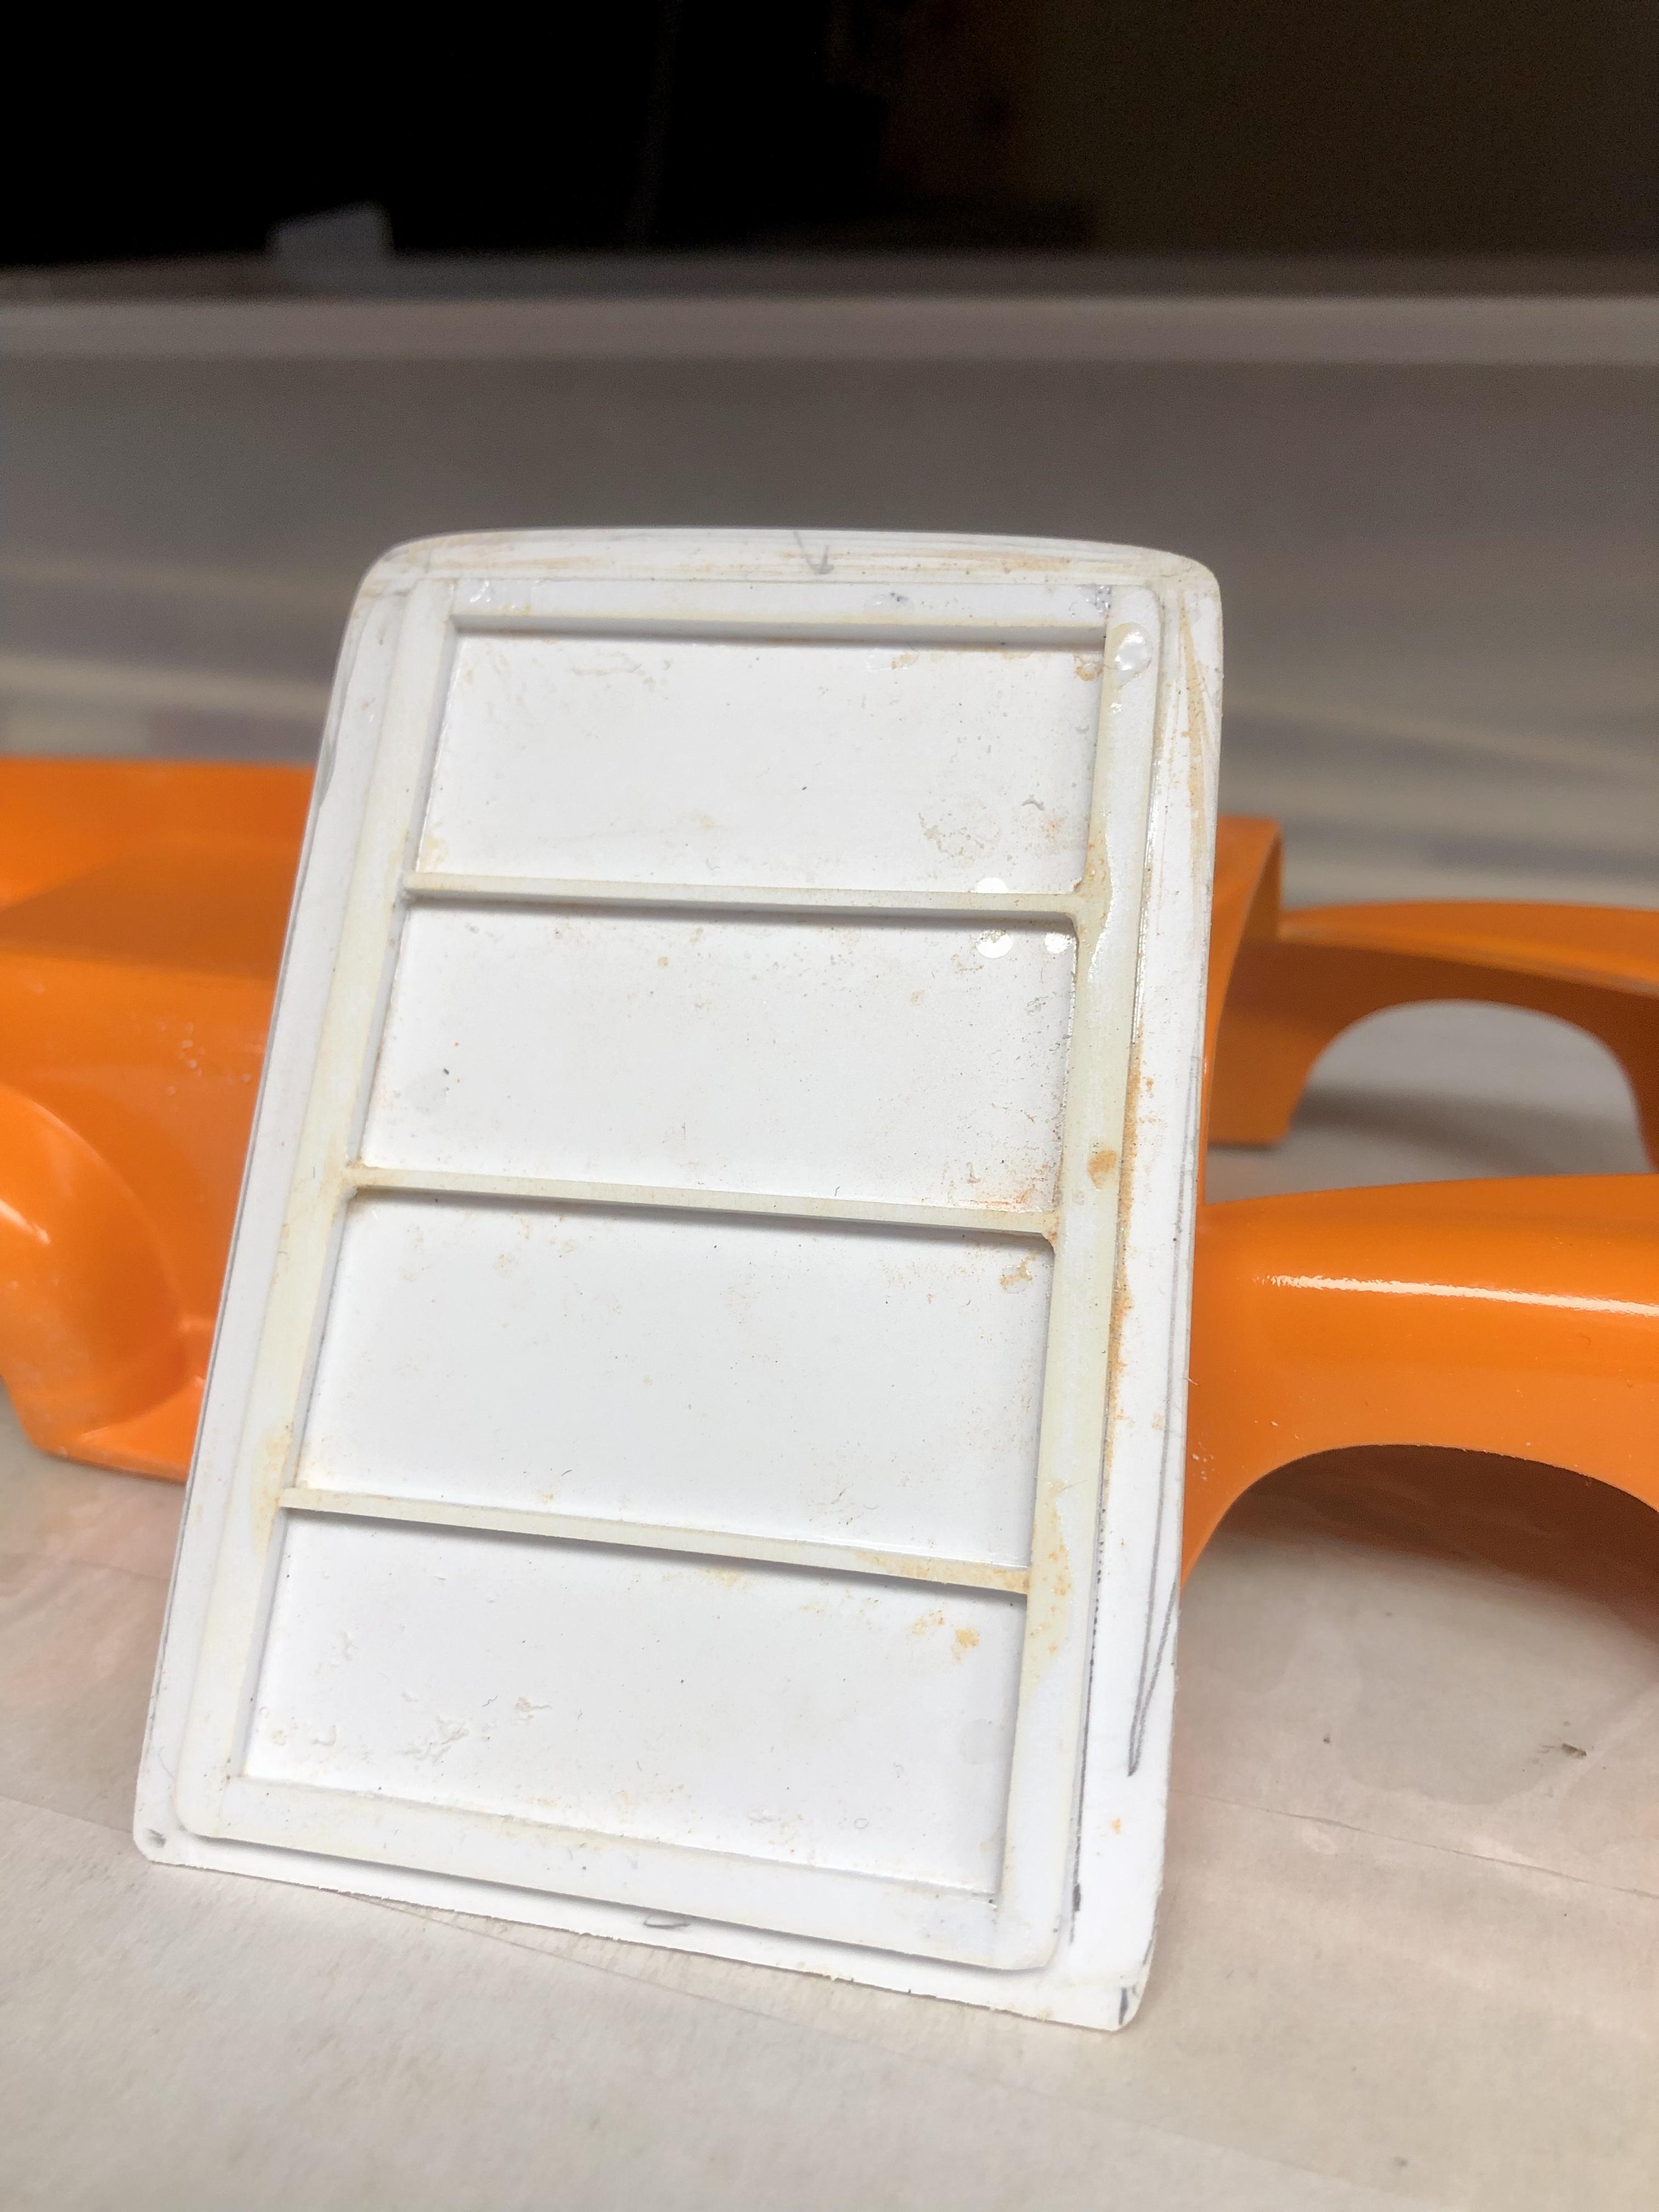
I have this very same kit but I haven’t started it yet. There’s a few issues with it…like the chromed side gill vents. The kit provided ones look cheap. I’ll prolly use styrene and fab my own. I also picked up TX3DCustom’s 427 for it with the webers. I modified the intake so the webers sit straight up as opposed to being canted inward at an angle. it’s in the queue to be built but I have other projects on the bench first.
-
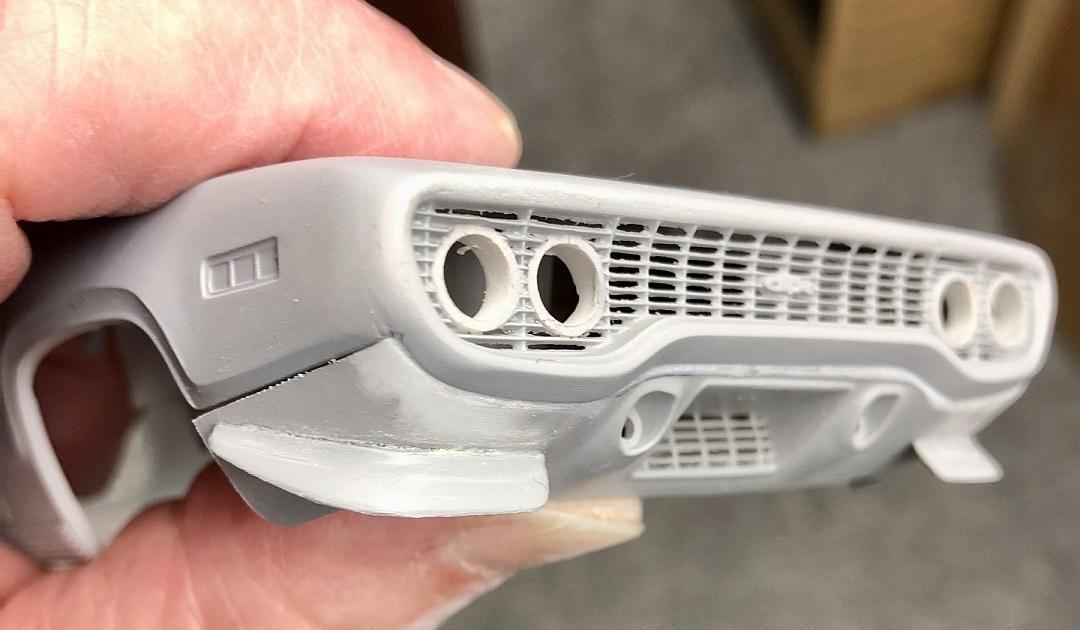
I haven't tried Greg's method but...I like it! I may have to use it. That said, I have used the Sharp Blade method, hand sanding and a Dremel ... My GTX was mostly done with a Dremel and some hand sanding... On the NovaCam, it was mostly hand sanding and a sharp blade...The result was a paper thin grill where part of it broke, however.


.jpg.0f5a779d8ee379f1b55e4b9e35705b57.jpg)