Kustom Steve
-
Posts
52 -
Joined
-
Last visited
Content Type
Profiles
Forums
Events
Gallery
Everything posted by Kustom Steve
-
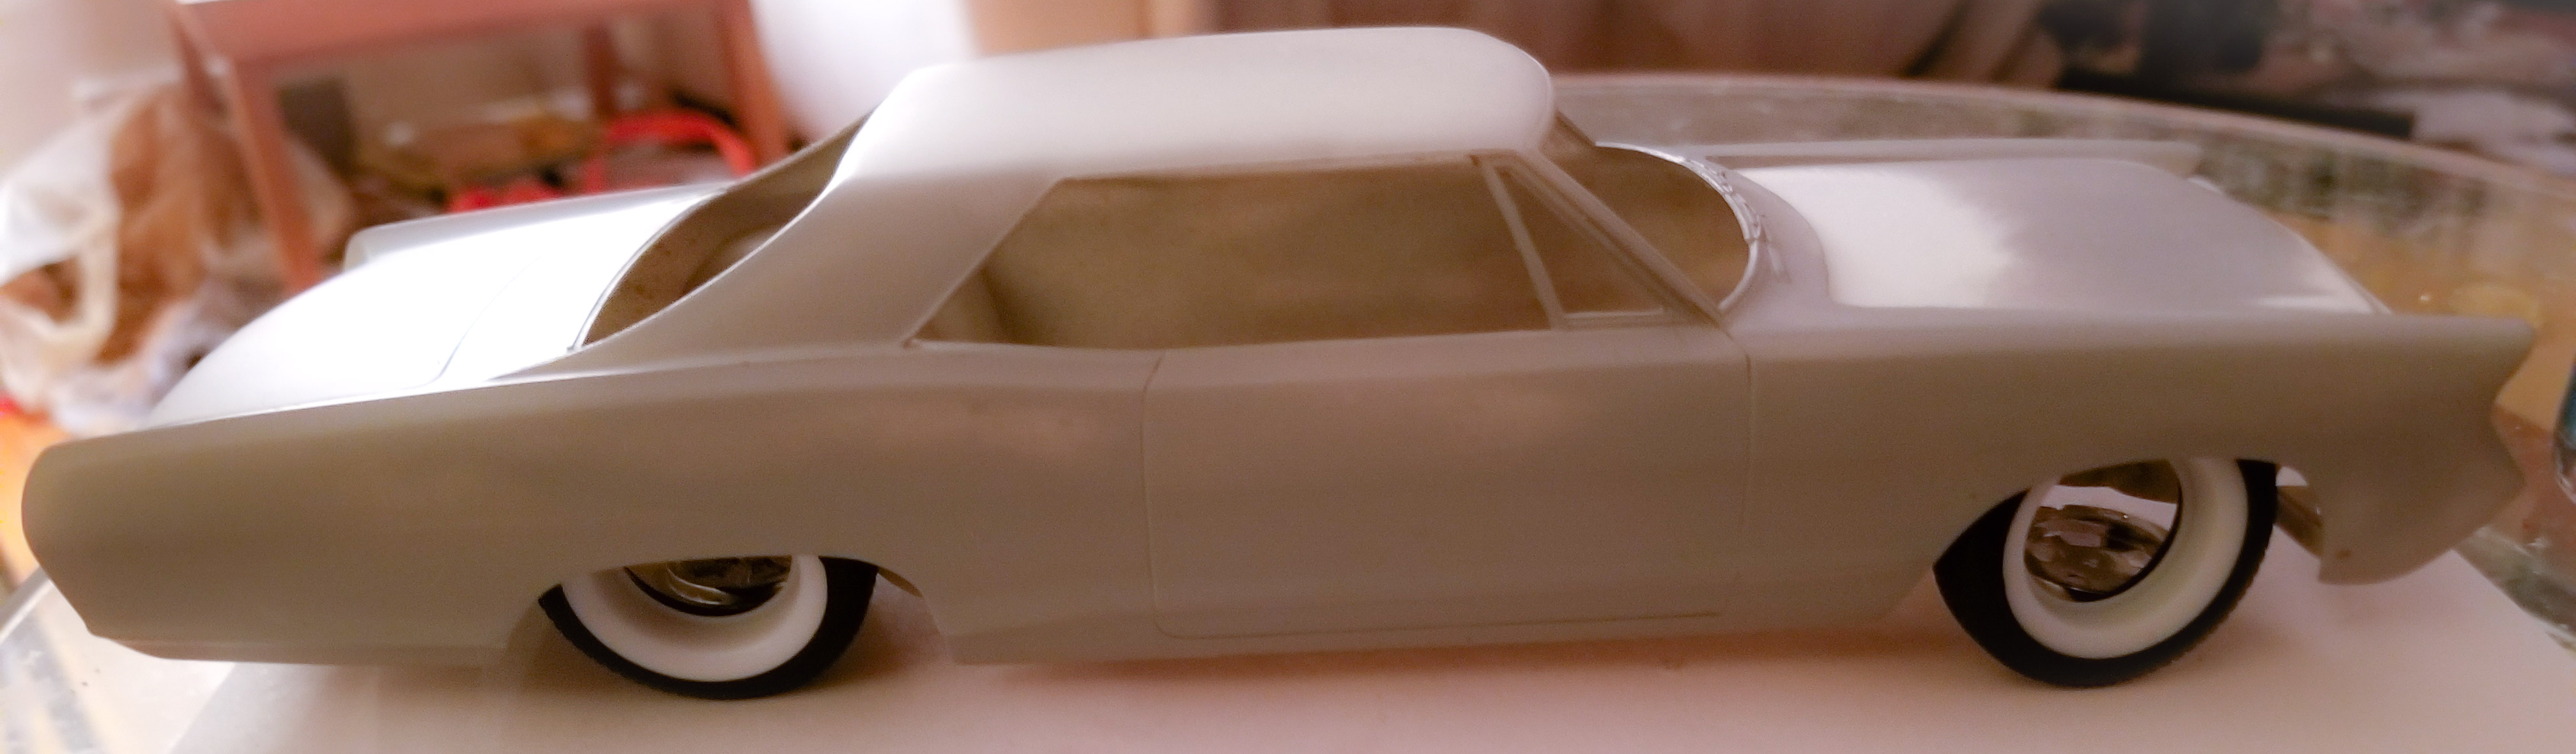
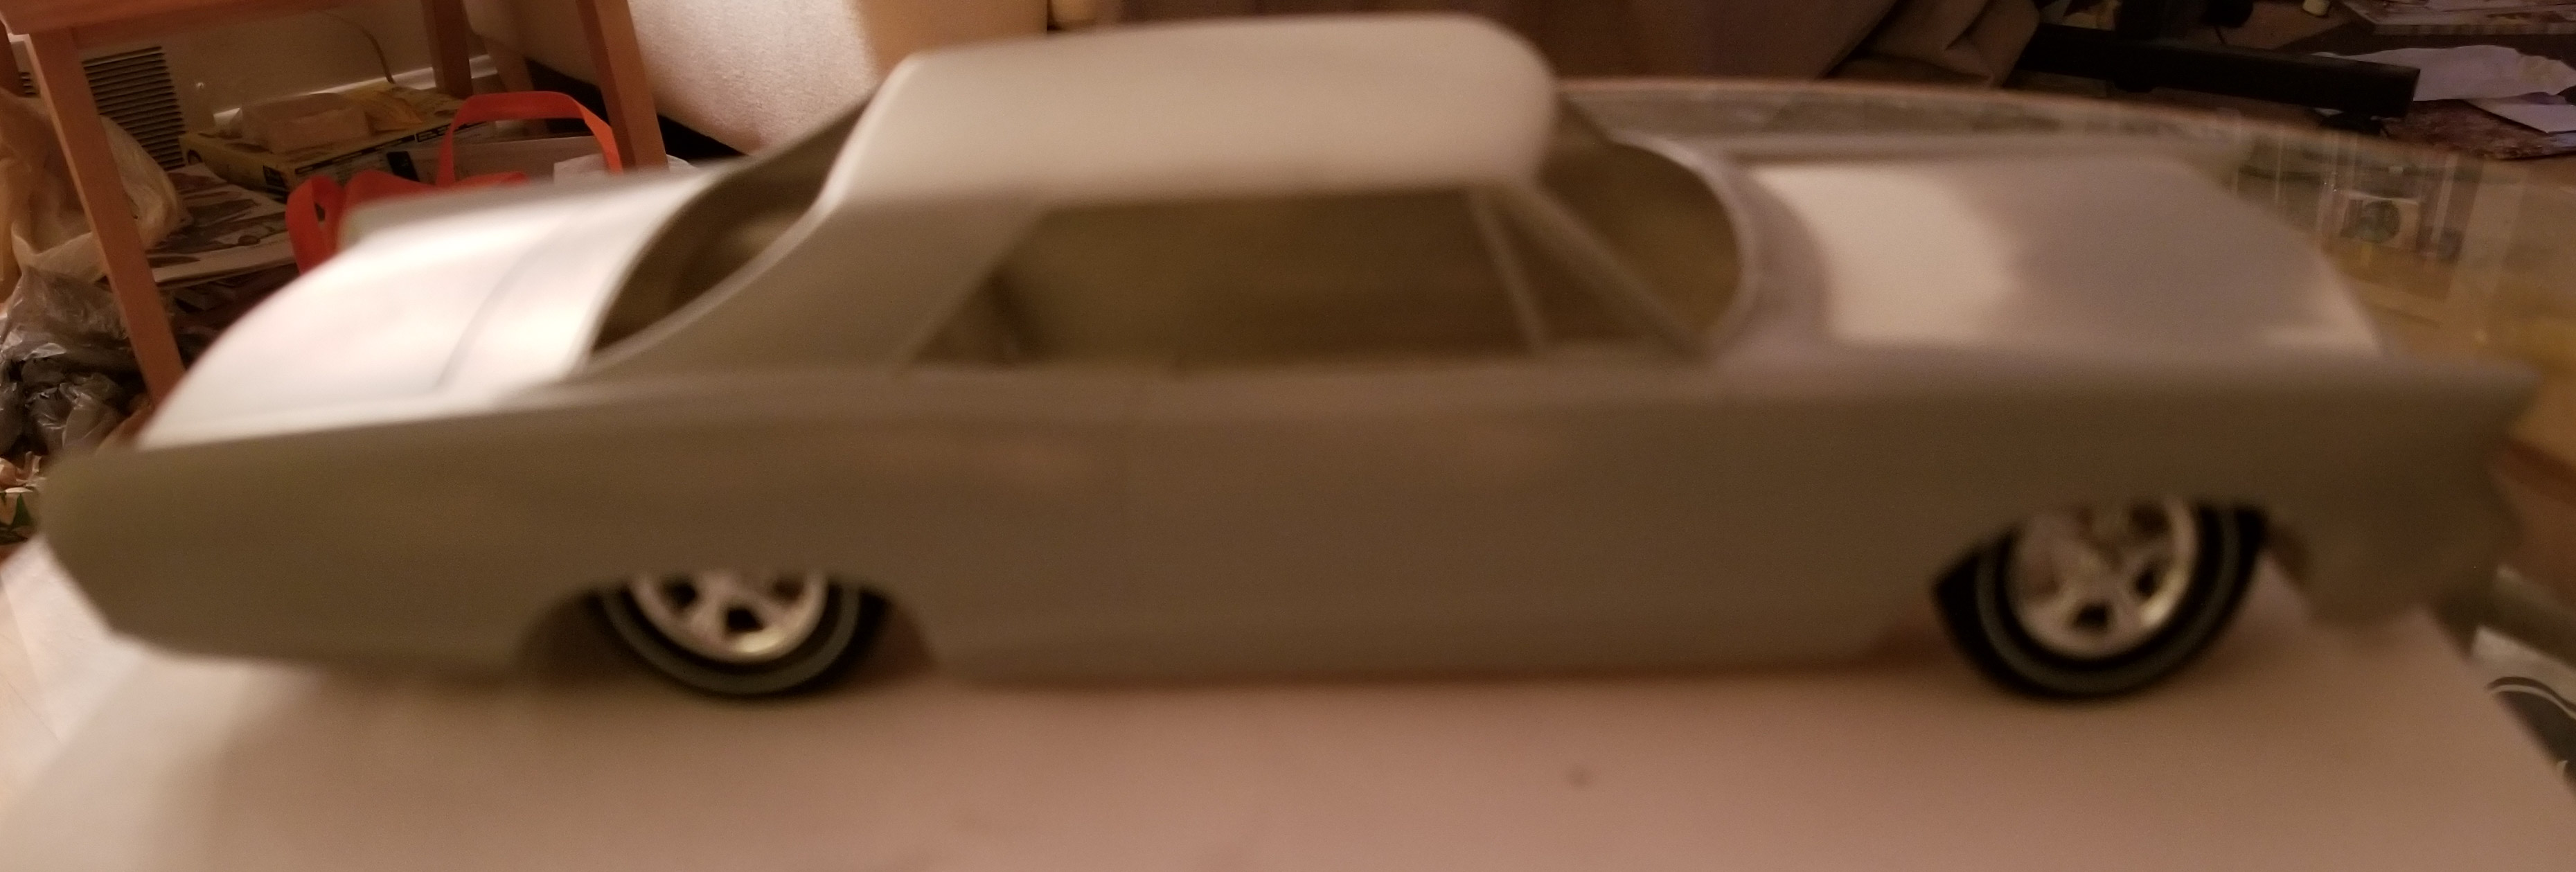
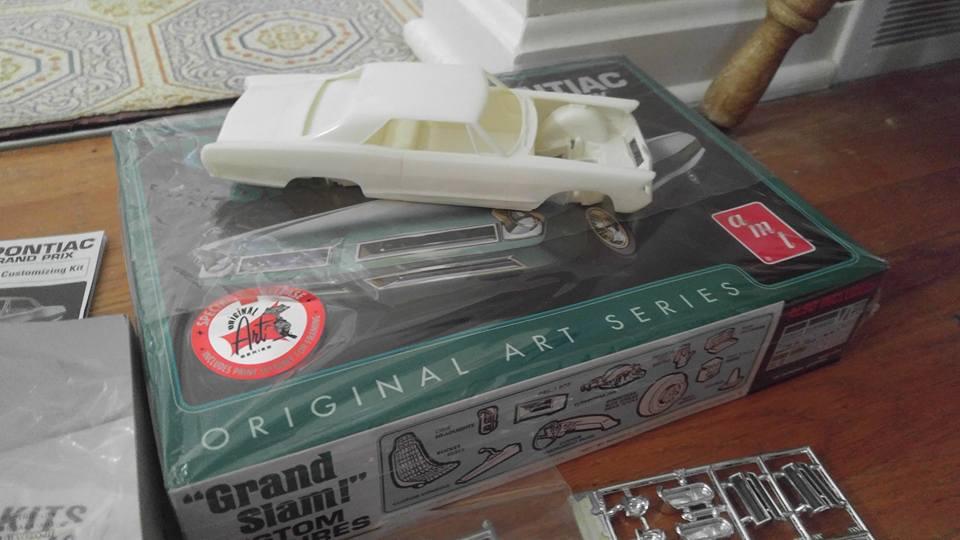
Well, I have been off for some time building other things. I am back working on the Grand Prix now. I got a 62 Poncho kit mint cheap, but the chassis was warped. I was going to use the chassis and engine for the model, and scratch build a lot of the interior around the custom dash and bucket seats. I have straightened out the chassis, and found a second set of custom bucket seats to make rear seats. The biggest thing holding this project back were what rims and tires to use. I think I got that figured out today. I am stealing the ployglass style wide whitewall tires from the 29 Model A Ford Pickup by Revell. The rims are from Polar Lights GTO optional wheels, radir style rims. Ford Gulf Stream Aqua from MCW is going to be the body color.

-
Excellent build!
-
Any progress on this build? love to see her done!
-
I found a Pearl Teal I may use with pearl white interior. I am going for the cover art vibe.
-
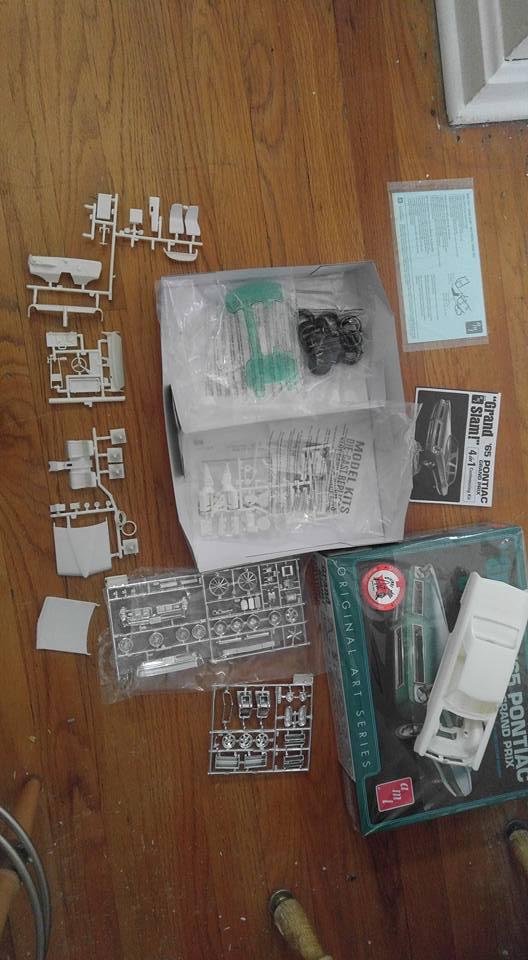
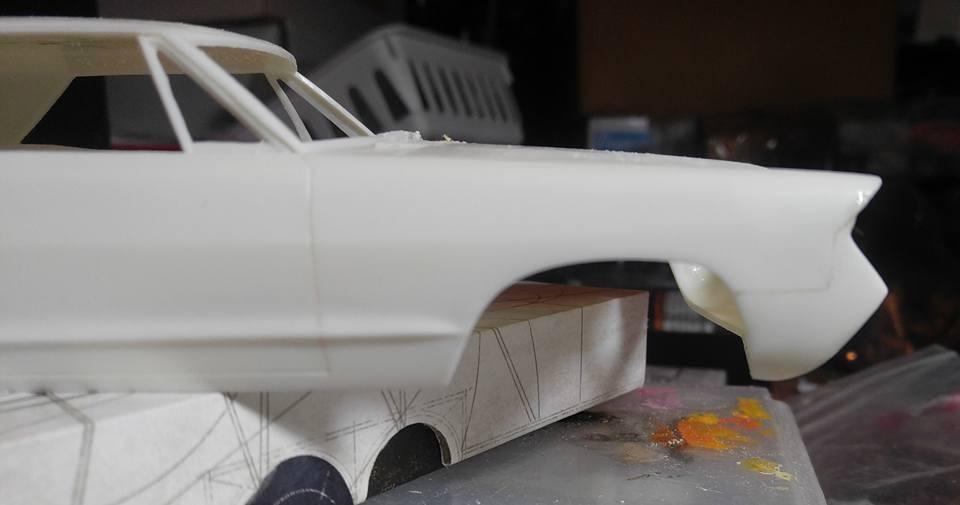
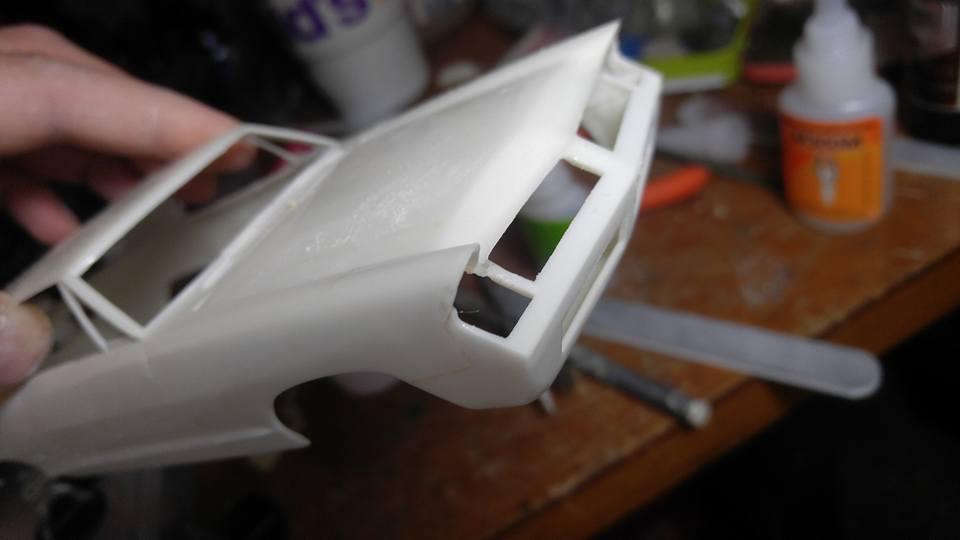
I just bought from my local hobby shop the flat box of the '65 Poncho. I had one as a kid in the late '70's and never finished it. I had trouble with the custom parts and old tube cement was not the best thing for this project. I got rid of it and now I have a fresh new one to screw up, lol! I always loved the cover box art. As I remembered, the custom front clip and hood have a horrible fit. Engine has an axle hole through it and some flashy parts. I got my trusty Zap A Gap out and accelerant and had at it last night and this morning. I trimmed 1mm off of the back of the hood to make it line up with the slant of the front clip. I glued the hood in place in the front and tacked it in the back. I plan on pancaking the hood. I smooth the fender tops to follow the artwork, dechromed and shaved the sides. I am not sure f I will use the skirts and I also shaved the handles. I removed the crease on the trunk declid and emblem. I used the custom rear pan and full tailight. both the front and back pins have a awful fit and a lot of super glue was used for filler.
-
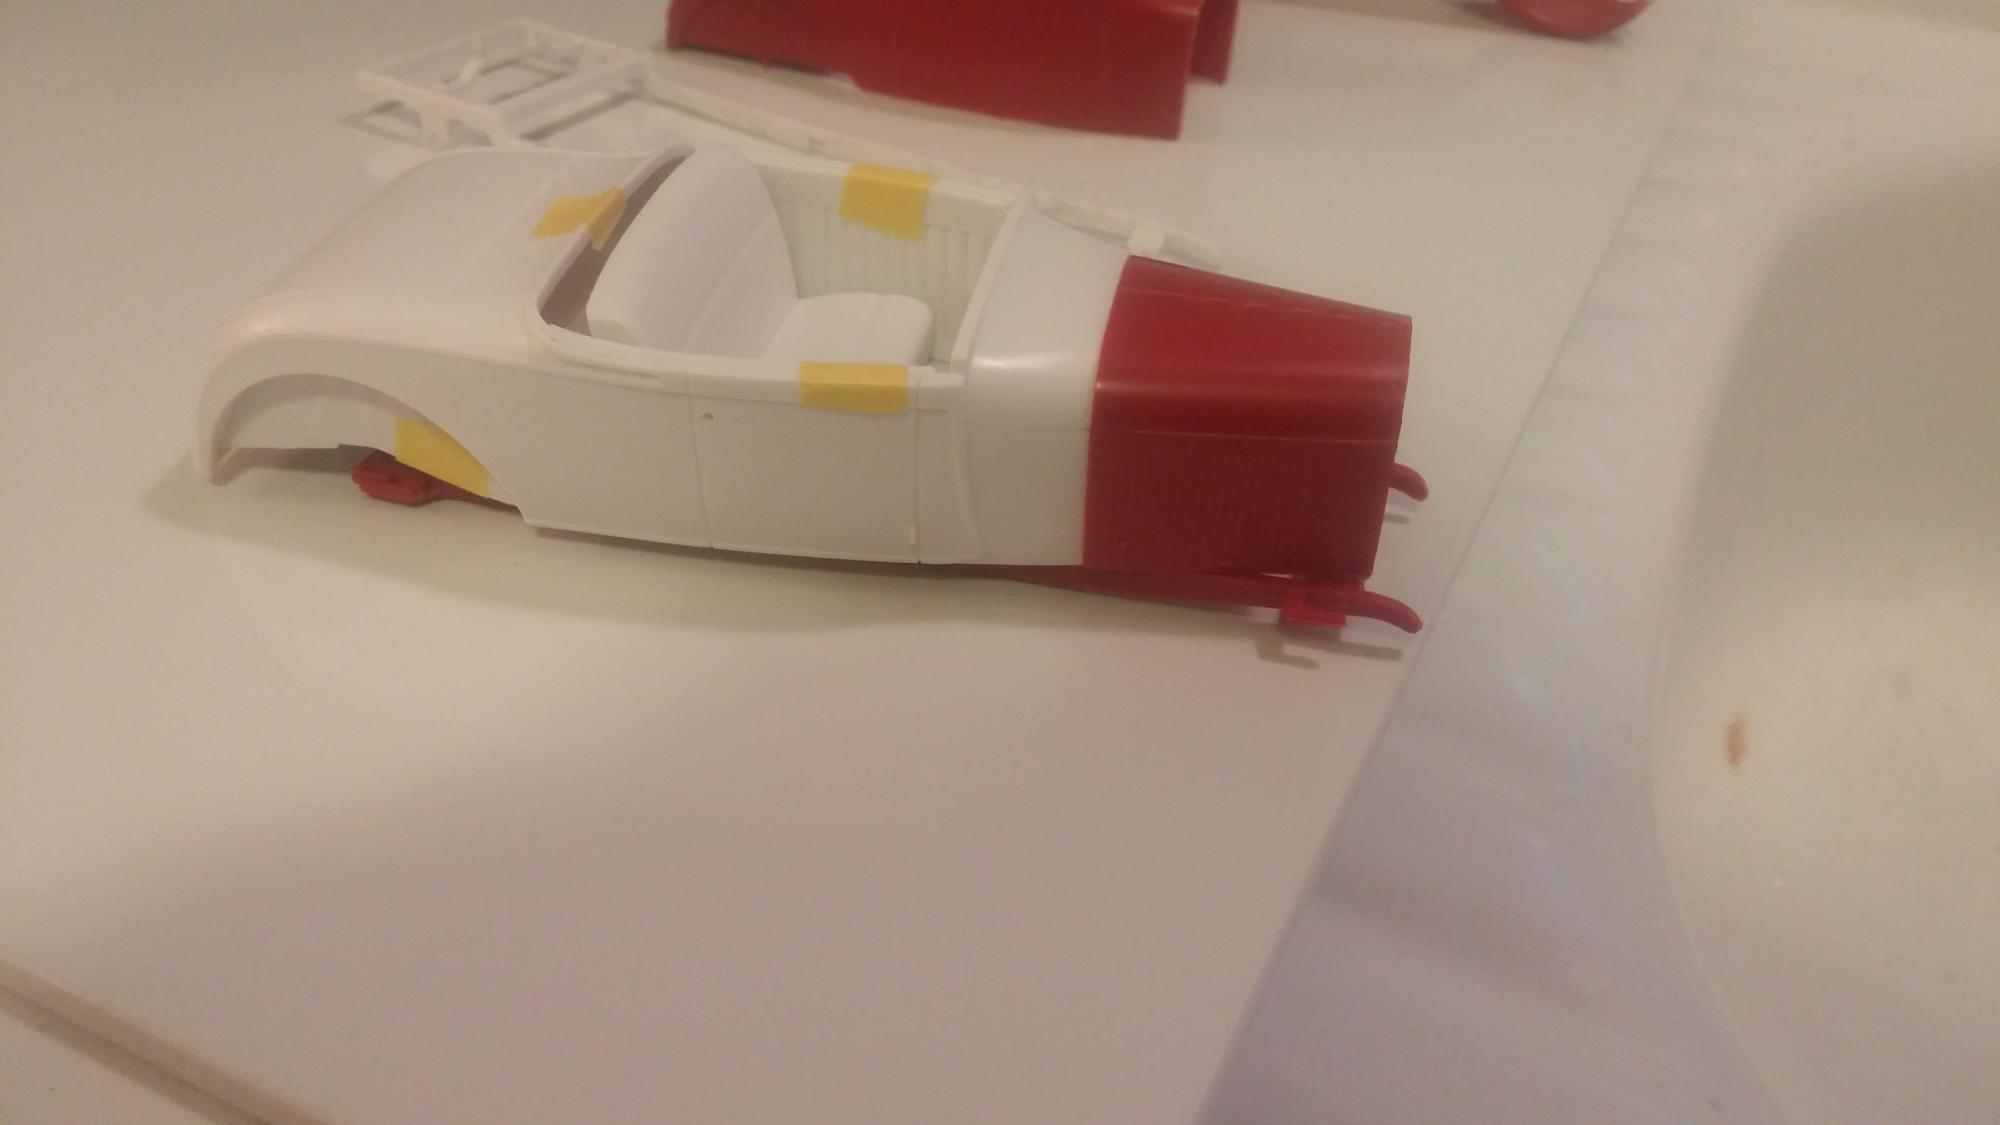
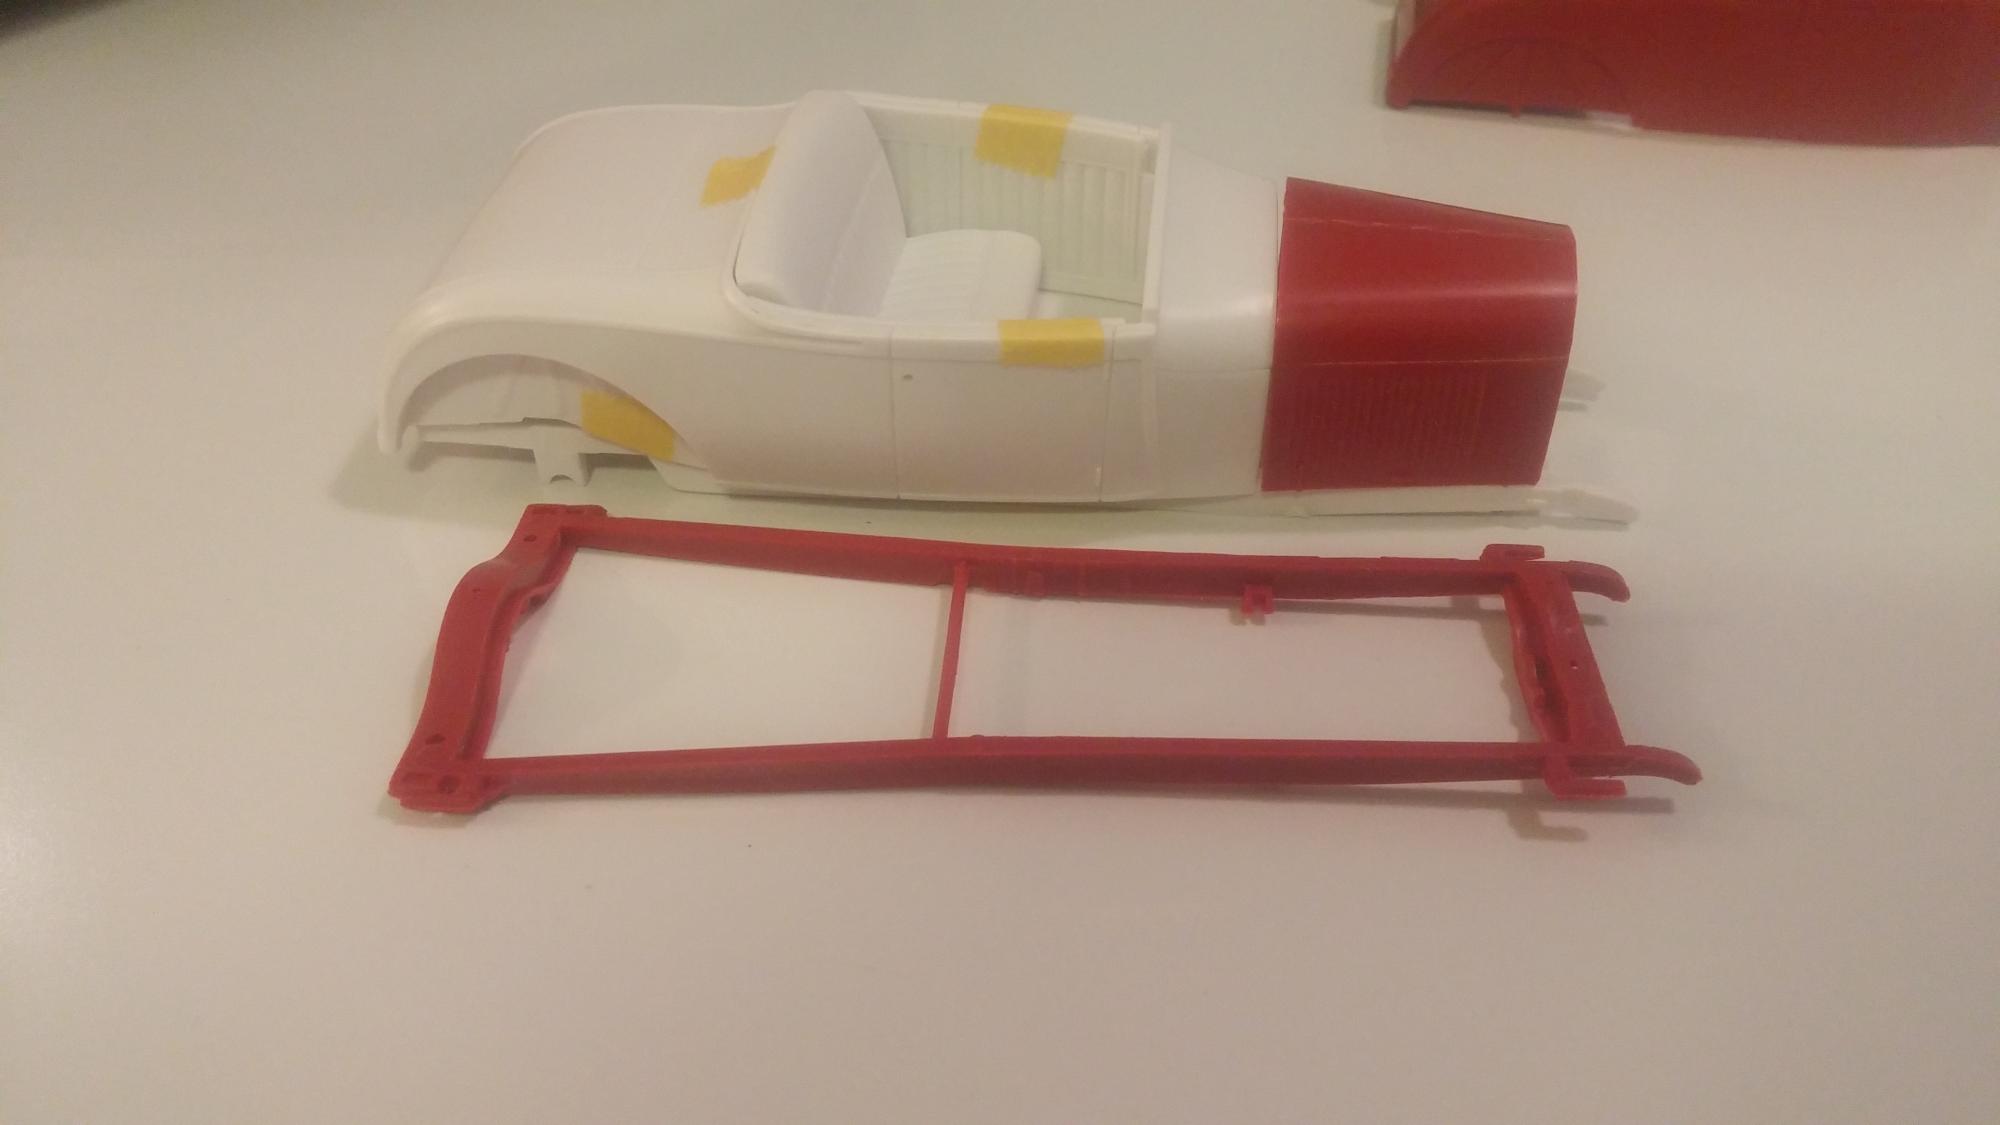
I am inspired by the cover car from Hot Rod Deluxe November 2014 issue, an old school highboy roadster with a model A frame, Olds engine, cycle fenders and Deuce grill. I have noticed that the front cross member is further forward as well as a longer wheelbase. My conclusion is that Revell used an old street rodder trick and lengthened the engine bay area for the larger engine. This I feel is the area that most people feel that makes it "feel" off. The pictures illustrate the difference in length and layout of an AMT frame and the new Revell. The engine will be from the Thames, manifold, carbs and fenders from the Tweedy Pie. The rear sliks are from thr parts box. I need a source for 50 Merc hubcaps though.
-
Ok, tires... one hin tire for the test equipment, 2 blue line drag slicks out of the parts pack kit, 4 wide radials with no sidewall detail with a thin whitewall - looks like the redlines but a whitewall anf four regular thin whitewalls. I haven't opened the decals yet. they are sealed white the protective paper as usual with current AMT kits.
-
I started the model late last night. I am now cleaning up some body lines. I took off the crease and emblem on the trunk lid, shaved the door handles and locks, fender badges, chrome off of the side body contour and the crease on the fender top over the headlights. the hood is too long compaired to the artwork and the front pan is too low. time for a trim.
-
I just got mine. It is the flat box with the black background and the road test parts. The model is for the most part as I remember it from the 70's. I had the white background with the teal custom on the lid. The model has a lot of little bits of flash. Chrome is good and plentifull with 3 wheel choices and a bag full of tires. for me is the color used on the second set of glass which is a faint tinted turquise /' teal color and should match the teal paint I want to use. It can be built stock, drag or two custom treatments, there are two front facias and two rear valances to mix and match. same custom parts for the interor. engine is fair but the chassis has all of the detail molded in. Typical mid 60's tooling. The instructions lack any insert to show how to work with the extra parts. Still trying to find all of the parts to gather them together. I am building the custom shown on the box. Teal with pearl white interior. Not sure on the wheels yet.
-
I really like the selection of parts used for this build. It has given me ideas for some of my model T kits in my stash!
-
Looking good Andy. Hope to see the model at the North Coast meeting Tuesday.
-
Hi Drew, I like the build. Where did you get the salt flat disks from? I love the color choices and overall feel of the model. As I mentioned in another thread, I still believe the front rails has been lengthened to accommodate the long nailhead engine. This is a hot rod trick usually done on T buckets. In the mock ups I have done you can see in the pictures how much longer the frame rails are in the new kit. I do not believe that is just lengthened horns but somewhere aft of the front cross member. I plan on building a model A framed highly like the yellow car found on the cover of Hot Rod Deluxe from a few months ago. I like the model, I won't ever build it straight out of the box and gives me great parts. That is how I look at and approach model cars today
-
The the build, and the color combo. The 'bashed parts make it stand out, especially the frame rail work.
-
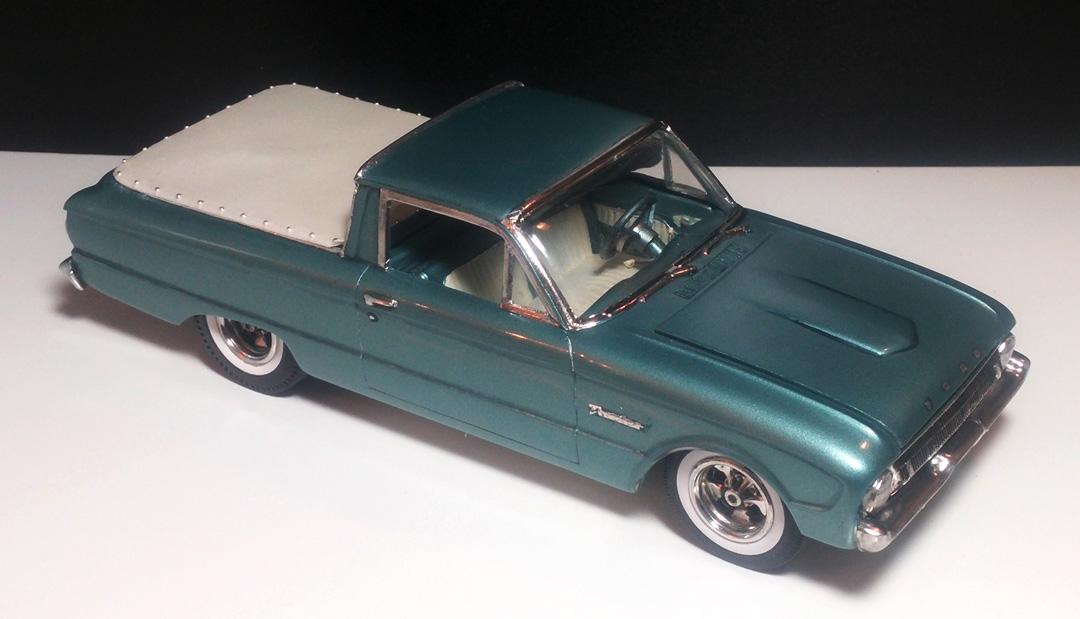
AMT '61 Ranchero Finally Done After Starting the Kit in 1981
Kustom Steve replied to Kustom Steve's topic in Model Cars
Here is the pic of the box art and the finished model.
-
AMT '61 Ranchero Finally Done After Starting the Kit in 1981
Kustom Steve replied to Kustom Steve's topic in Model Cars
Thanks everybody. I will be bringing this model to the Toledo NNL. This will be my first NNL since 1996. I went to Toledo this past spring and was shocked as to how small it has gotten. I agree, I wish there was a Ford engine in the kit as well. That's why I transplanted the '65 Galaxie engine. Round 2 would need to make a 6 cylinder engine and remove one exhaust pipe to make a corrected '60 Ranchers along with making proper 4 lug rims. -
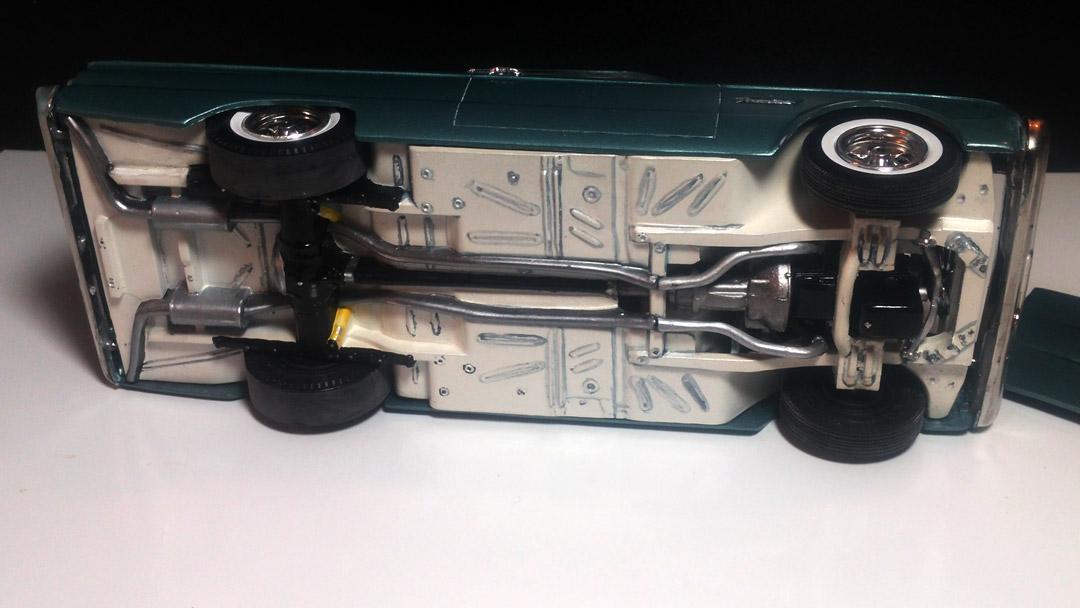
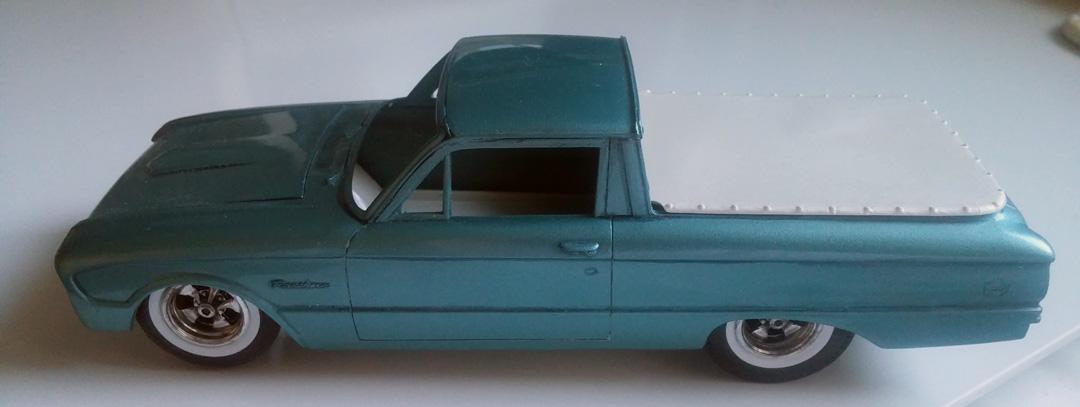
So when I was a kid I used to go to the Fea Markets with my Dad and I saw the AMT '61 Ranchero kit at a stall and wanted to get it for about three bucks. It was opened and my Dad talked me out of it and said it problem doesn't have all the parts and would not be fun to build a kit without all of the parts. So I held off. Some time later I found one on the self either at a KayBee Toy or on vacation with the family at Niagara Central Hobby Shop in St. Catherine, Ontario. My folks let me get it and I started painting the engine. Then the General Lee came out and this model was quickly forgotten until I got my first crappy, Taiwanese knock off of a Badger 350 in 1987. The first one in got the pin on the regulator for the propellant,broke off. My Dad drove me back to the store and we got a replacement. That one I got some of the Ditzler Tahoe Turquoise on the body but another part on the gun broke. My Dad told me to return it and take that money to save up for a "real" Badger and it should last. Well I did just that and put the model away into my stash and never did anything with it until last October . I was thinning the herd so to speak and really cutting things down to the bone and realized that no one was going to pay anything for a partially lacquer painted model car. I found at my folks house that my Dad still had the paint and it was still somewhat viable. My friend and coworker Chuck encouraged me to finish it and he would let me use his spray both to finish the painting. I decided to keep things somewhat simple, use it as a test bed for some new ideas and I had to ditch the Rat Motor with a hole through it for a Ford motor. I also used some of the new AMT wide white front and slicks out back. I decided to use the kit Keystone rims and make it look like a street machine from 1965 with the mags, wide whites and white chassis (I did it one up and made it pearl white). I used a 427 big block from the AMT '65 Galaxie and the carb is from the parts box and I think it was from a glue bomb '73 MPC Cougar and the air cleaner is off of the rat motor. Colors used: Ditzler Tahoe Turquoise Testors Ultra Gloss Testors Pearl White Testors Chrome Silver Lacquer Testors Tail Light Red Acryl Createx Pearl White Reaper Miniatures Linen White Citadel Drakenhof Nightshade Vallejo Model Air Steel Vallejo Model Air Chrome Vallejo Game Air Silver AK Interactive Dura Aluminum Tamiya Gloss Black Tamiya Semi Gloss Black Tamiya Yellow Tamiya Smoke - Applied over the chrome For the most part I did about everything wrong a modeler can do. There are many sins I committed in finishing (or lack of proper finishing technique) this model. I was frustrated by the lack of detail, the engine compartment and chassis pan. The bed drove me nuts with the huge mold line running across the bed floor (the tonneau cover is now glued in place). But the most important thing is that I did finally finish the model! This is the first model car I finished since 1997. I pretty much stopped and switched to miniature wargaming and figure painting since then.
-
Well, it is officially done as of 8:59 pm Eastern time! This is the first model car I have worked on as well as finished sine 1997. I figure I got he kit in 1981 probably from KayBee Toy or while on vacation in Canada at Niagara Central Hobby. I painted up part of the Chevy Rat motor and let it sit until 1987 when I got my first (and second) crappy knock off Badger 350 from Just Close Outs. When both broke, my Dad had me return the second airbrush and get a refund and put it towards a real Badger brush. This model then sat in my stash until last October when I was considering to sell it. With the goading of my fellow co-workers who are also model car builders I got it done. I did almost everything wrong with the build except for one thing... I finished it! I tried a few new techniques on it and I am happy with those results, and it will make a nice shelf model. I will have more photos in the Under Glass forum
-
My First Completed Kitbash of Revell's '29A Hot Rod Roadster Kit...
Kustom Steve replied to tim boyd's topic in Model Cars
Tim, great to see this version finished. Has anyone noticed and commented about the longer frameframe rails to accommodate the longer Buick engine? I tried an AMT hood and it came up way short. -
Toledo Toy Show and NNL is October 10th
Kustom Steve replied to GLMFAA1's topic in Contests and Shows
Howie, We have two "Greg Smith's" in our NCAM club... and he is one of 'em! -
I remember seeing this model in Scale Auto, Glad to see it still around.
-
1935 LaSalle convertible coupe - 3d printed at home Aug. 30
Kustom Steve replied to my66s55's topic in WIP: Model Cars
I know you want to print your own parts but www.tth.com has several 3d printers, They have a Viper printer that has high resolution and would need little finishing work. I had some parts printed for my scale wargaming miniatures I build as well. I can vouch for the quality since I work for the company as a finisher, The viper printer is better resolution than Shapeways and less brittle. -
Gremlin Street Freak / Gasser - Done!! 8/31
Kustom Steve replied to Impalow's topic in WIP: Model Cars
Looking good Eric, glad I was able to see the model at last Tuesday's NCAM meeting. -
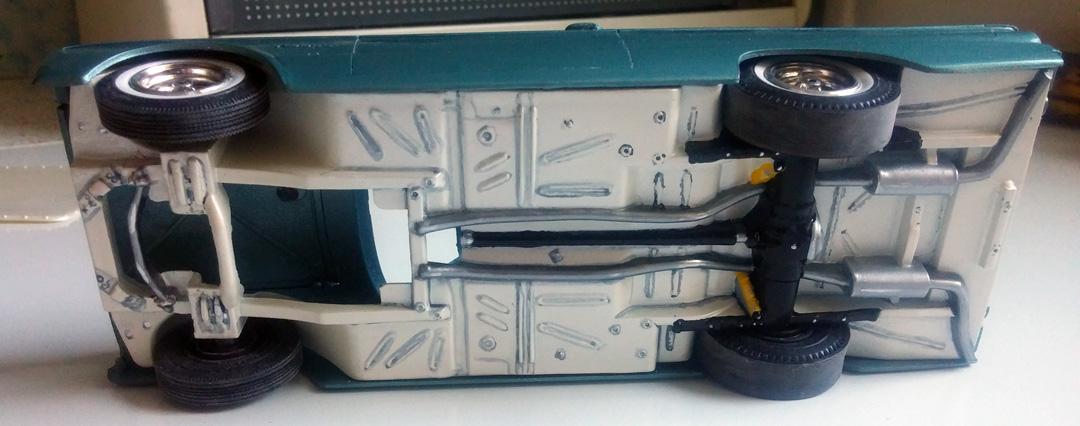
I have been away from the forum for awhile but I have been doing some building on this project. I have gloss coated the body with Testors gloss lacquer and later buffed out the body in June. In May I reprimed the chassis white and painted it and the tonneau cover Testors Pearl White. Yes, a white chassis. This was a short lived custom paint job from the mid '60's. My Dad painted his '65 Mustang Coupe chassis white which was his daily driver. So I went for a pearl color. I also applied more detailing washes to the floor panels and used multiple colors of metal in the exhaust and other parts. I would mix the ink with some acrylic medium and paint over the whole chassis so the ink would blend better. I also finished the Tamiya Smoke tint over the rims and painted the hub centers glass black for Keystones. I then sanded the tire treads and made the front axle not go through the engine block anymore...
-
I got most of the parts I need now: Monogram '30 Model A Coupe Parts Model A interior door panel Model A Seat & Dash Firewall Headlights Monogram '30 Model A Phaeton SBC Engine Block Heads 3 Carb Manifold 3 Stromberg Carbs Chrome I-Beam Monogram '32 Ford Roadster Parts Deuce Grill, Shell and Radiator Exhaust Headers Split Wishbone Front Suspension Monogram 'Lil Coffin Tires - Slicks and front tires wide whites Revell T-Bolt Radir Rims R&D Unique '32 Frame Rail Kit Front Suspension Kit Parts Box Valve Covers
-
I just checked my loca Discount Drug Mart store. They have a decent selection of Revellogram kits at good prices. They had the Monogram 32 Ford Roadster in 1/24th scale. The grill looks great but the valve covers aren't the finned Corvette script. Did Monogram ever produce that part in 1/24th scale?