DoctorLarry
-
Posts
1,135 -
Joined
-
Last visited
Content Type
Profiles
Forums
Events
Gallery
Everything posted by DoctorLarry
-
Wow. It really pops. How long did it take for the paint to dry before you could do the second color? In my experience Rust Oleum takes an eternity to dry.
-
Gray Ghost Done
DoctorLarry replied to DoctorLarry's topic in Stock Cars (NASCAR, Super Stock, Late Model, etc.)
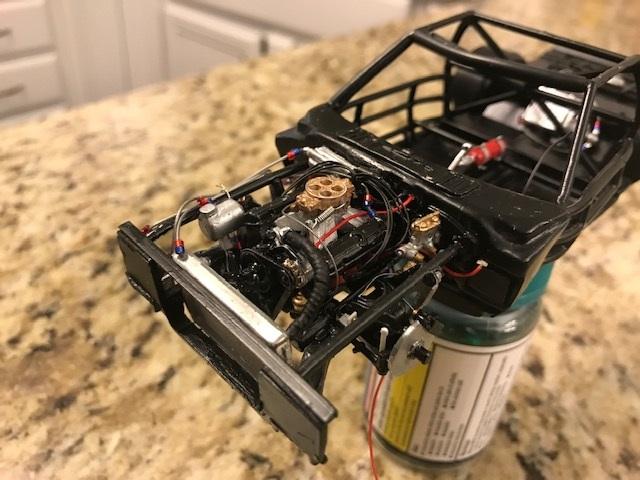
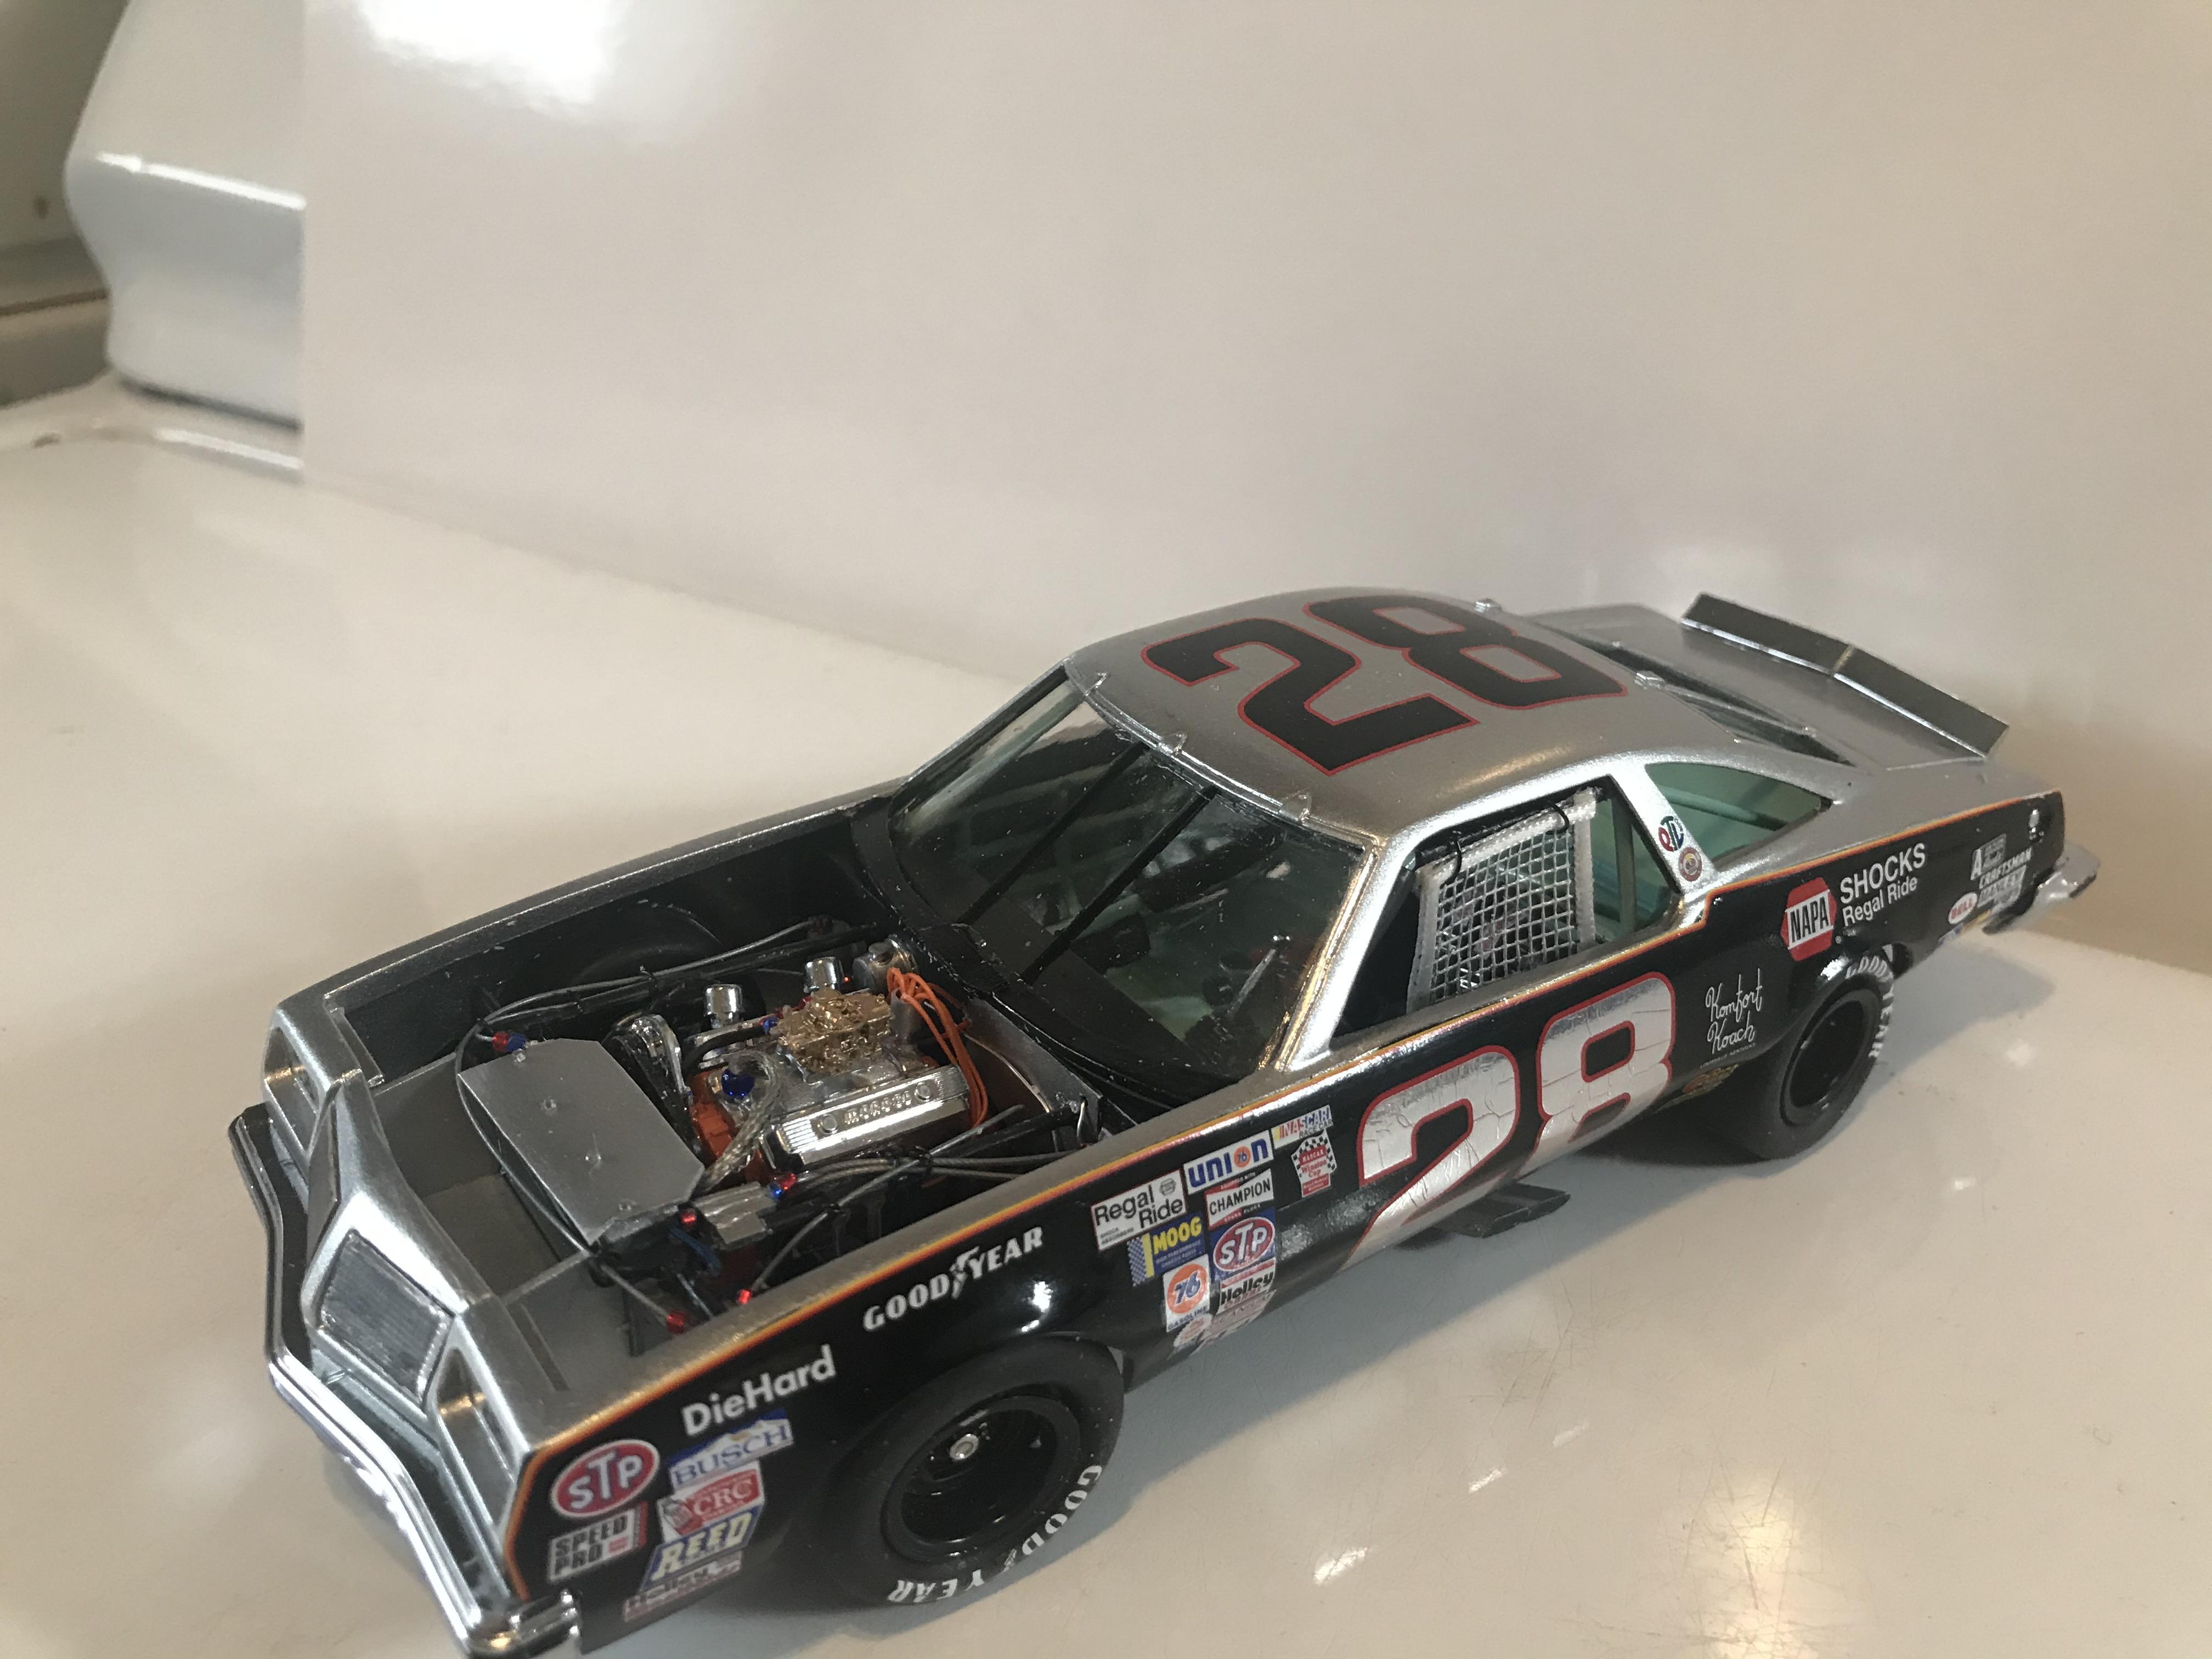
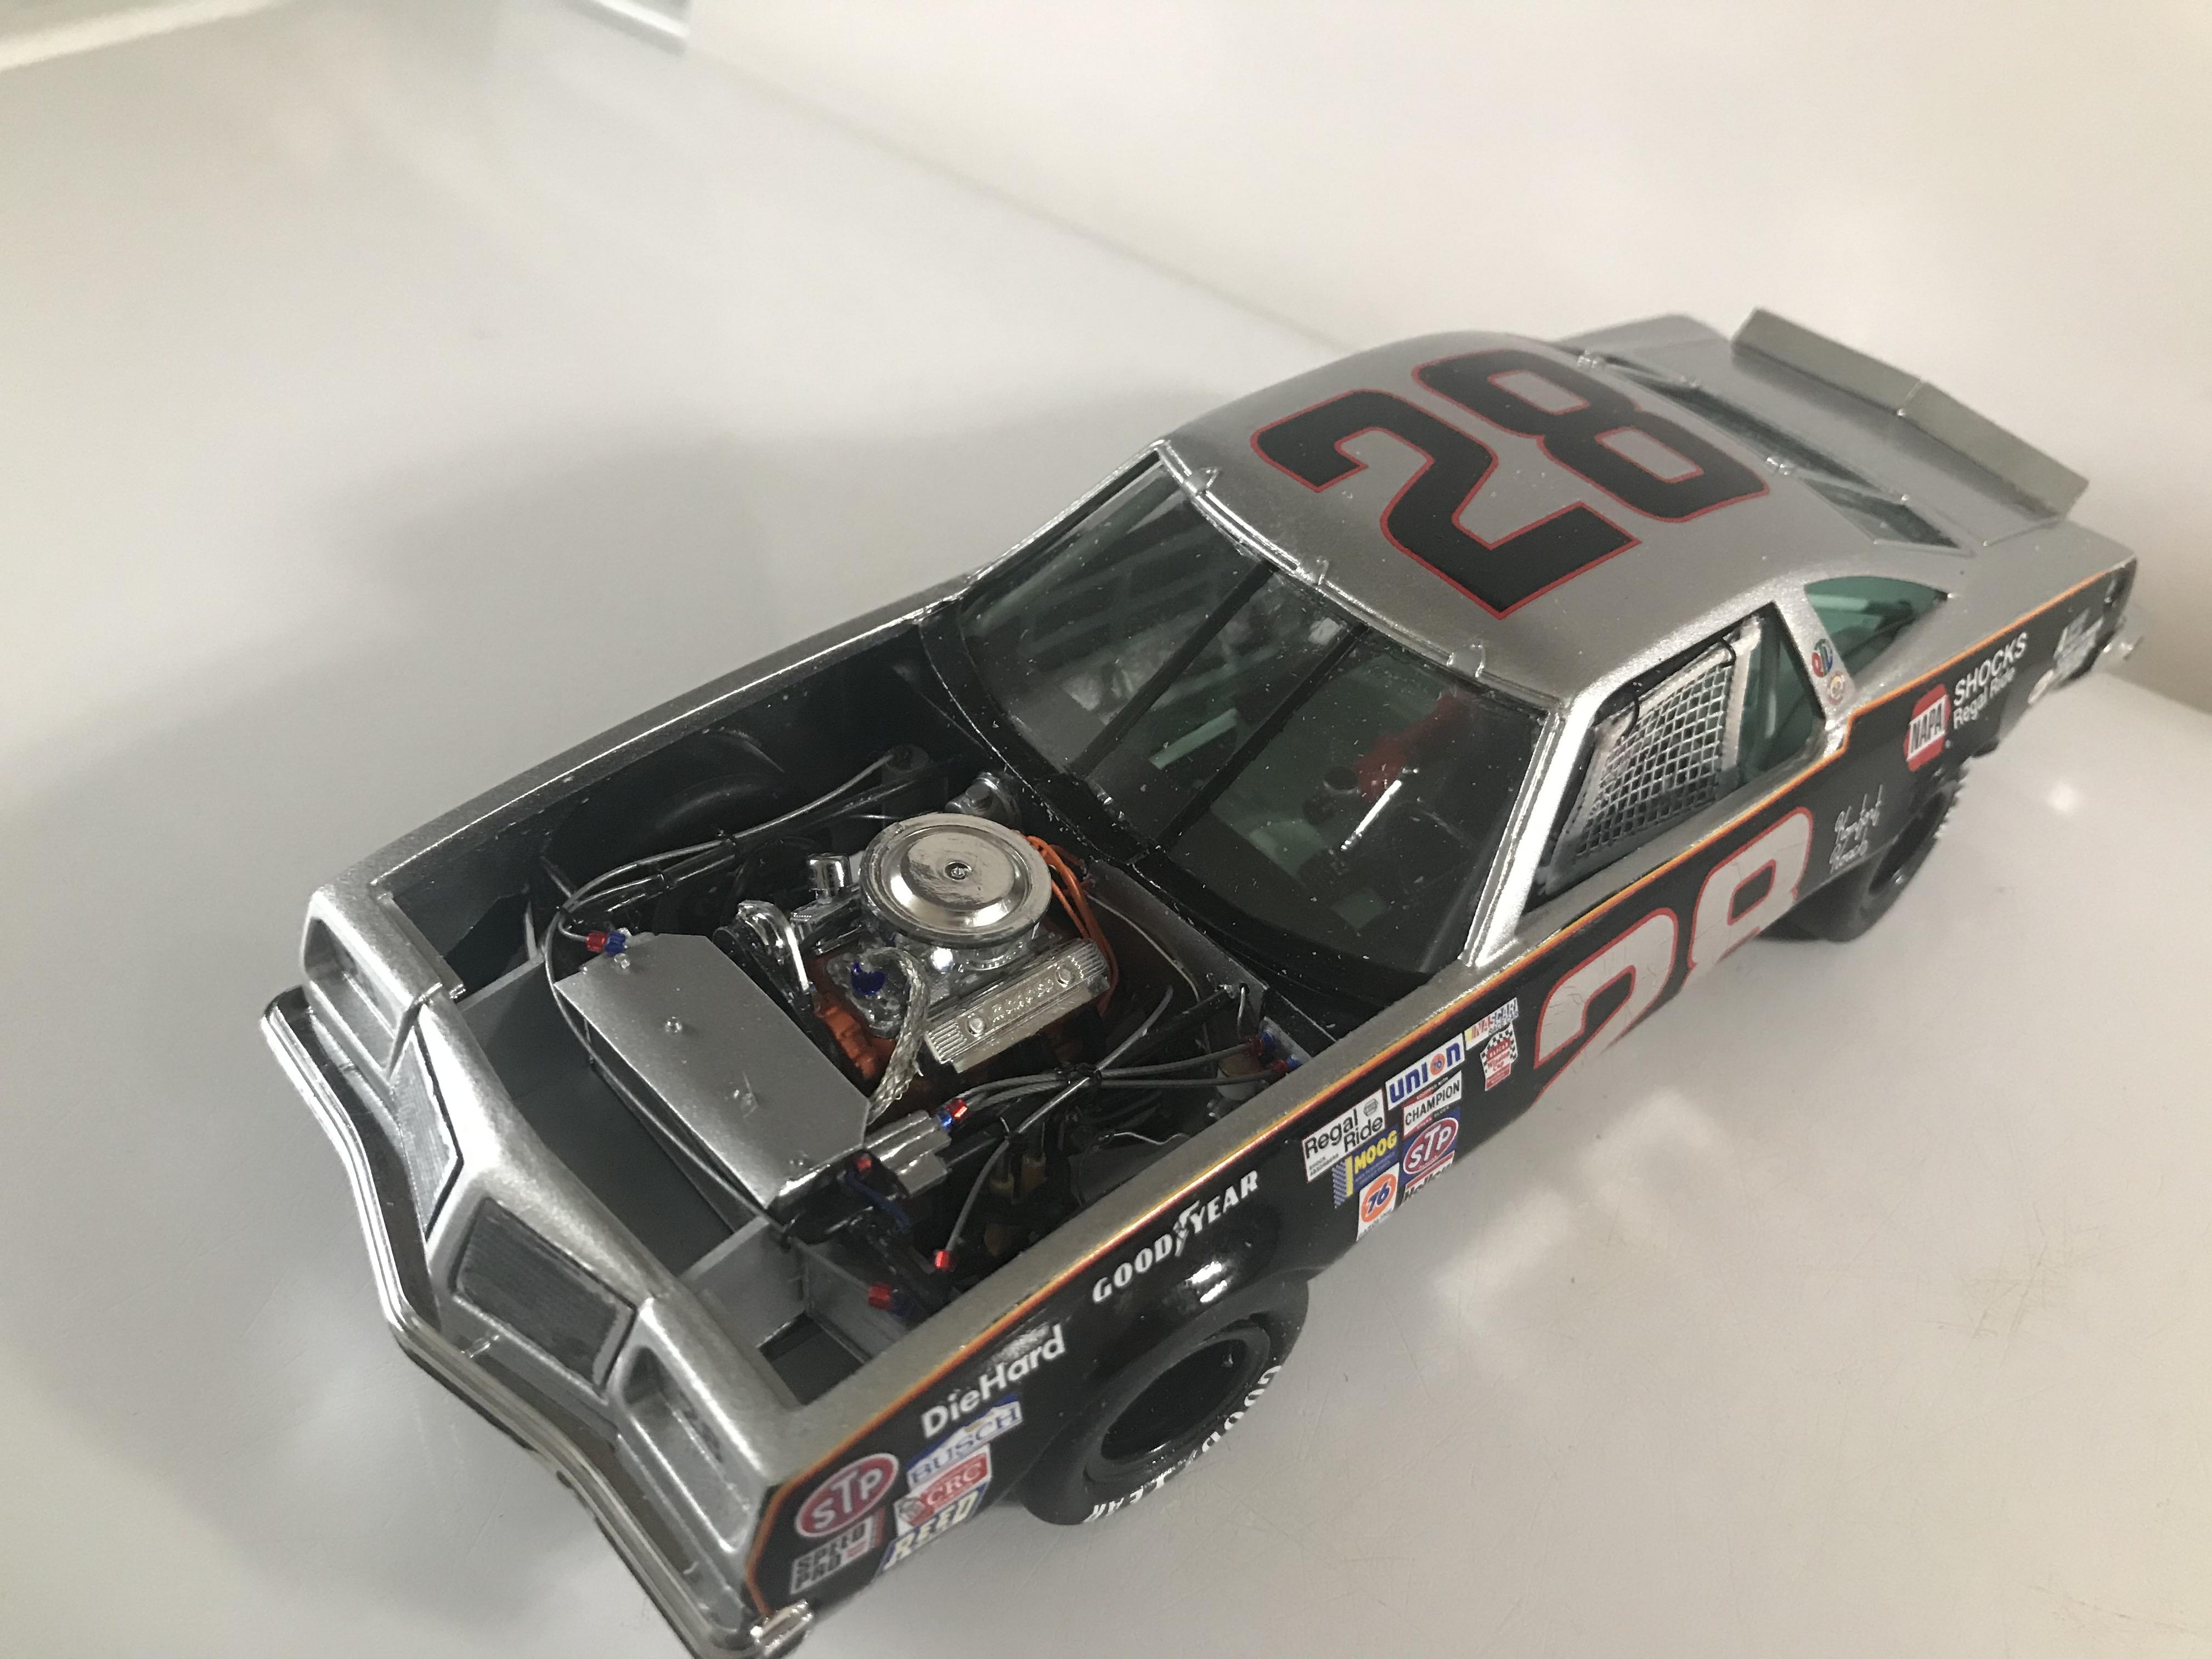
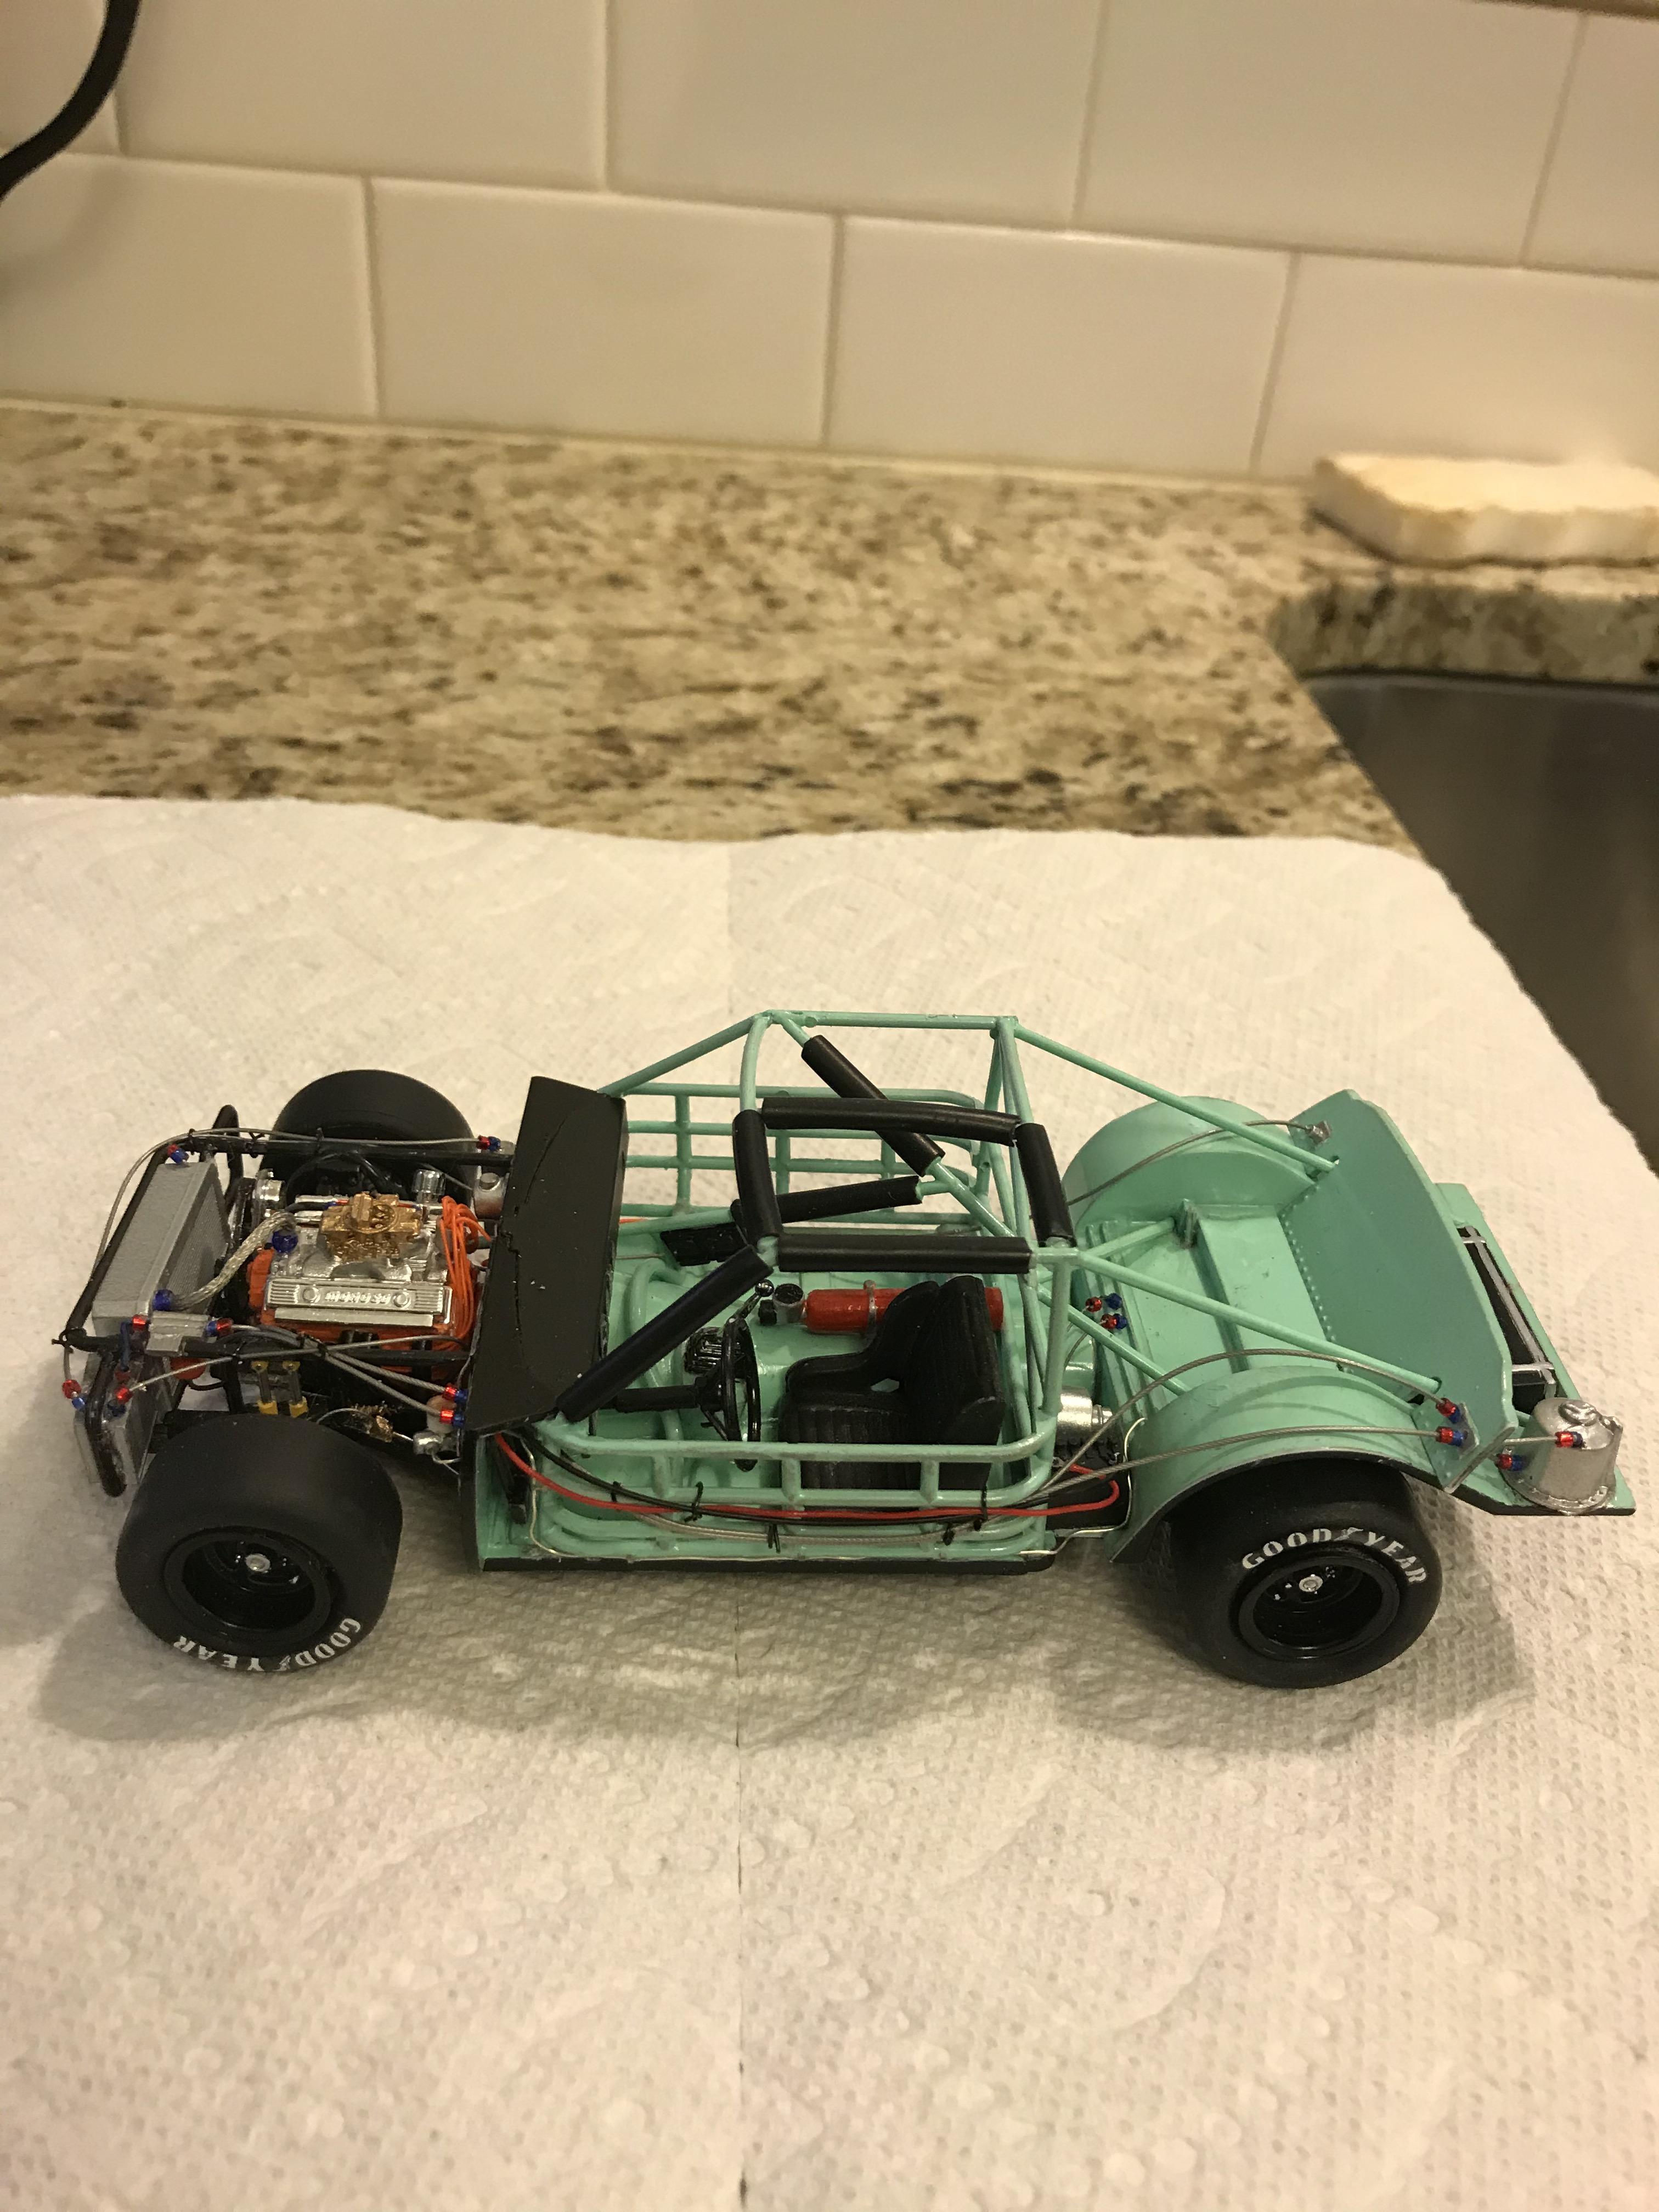
If you have not seen Fireball Motorworks resin carburetors, to call them a work of art is an understatement. I have bought Holley and Rochester Quadrajet carbs and the detail is mind-numbing. That is what I used on the Olds. The Pontiac was another resin copy of a Dominator. Much less detail on that one. -
Gray Ghost Done
DoctorLarry replied to DoctorLarry's topic in Stock Cars (NASCAR, Super Stock, Late Model, etc.)
Herb Adams' Pontiac Grand Am home built car did use a Dominator. When I was researching that build the pictures showed one so that's what I used on that one.
-
Dark Green, Verdant Green, Emerald Green. Typical manufacturers. Same code but different names across divisions.
-
Same color, different names but matches her car pretty well. Looks good.
-
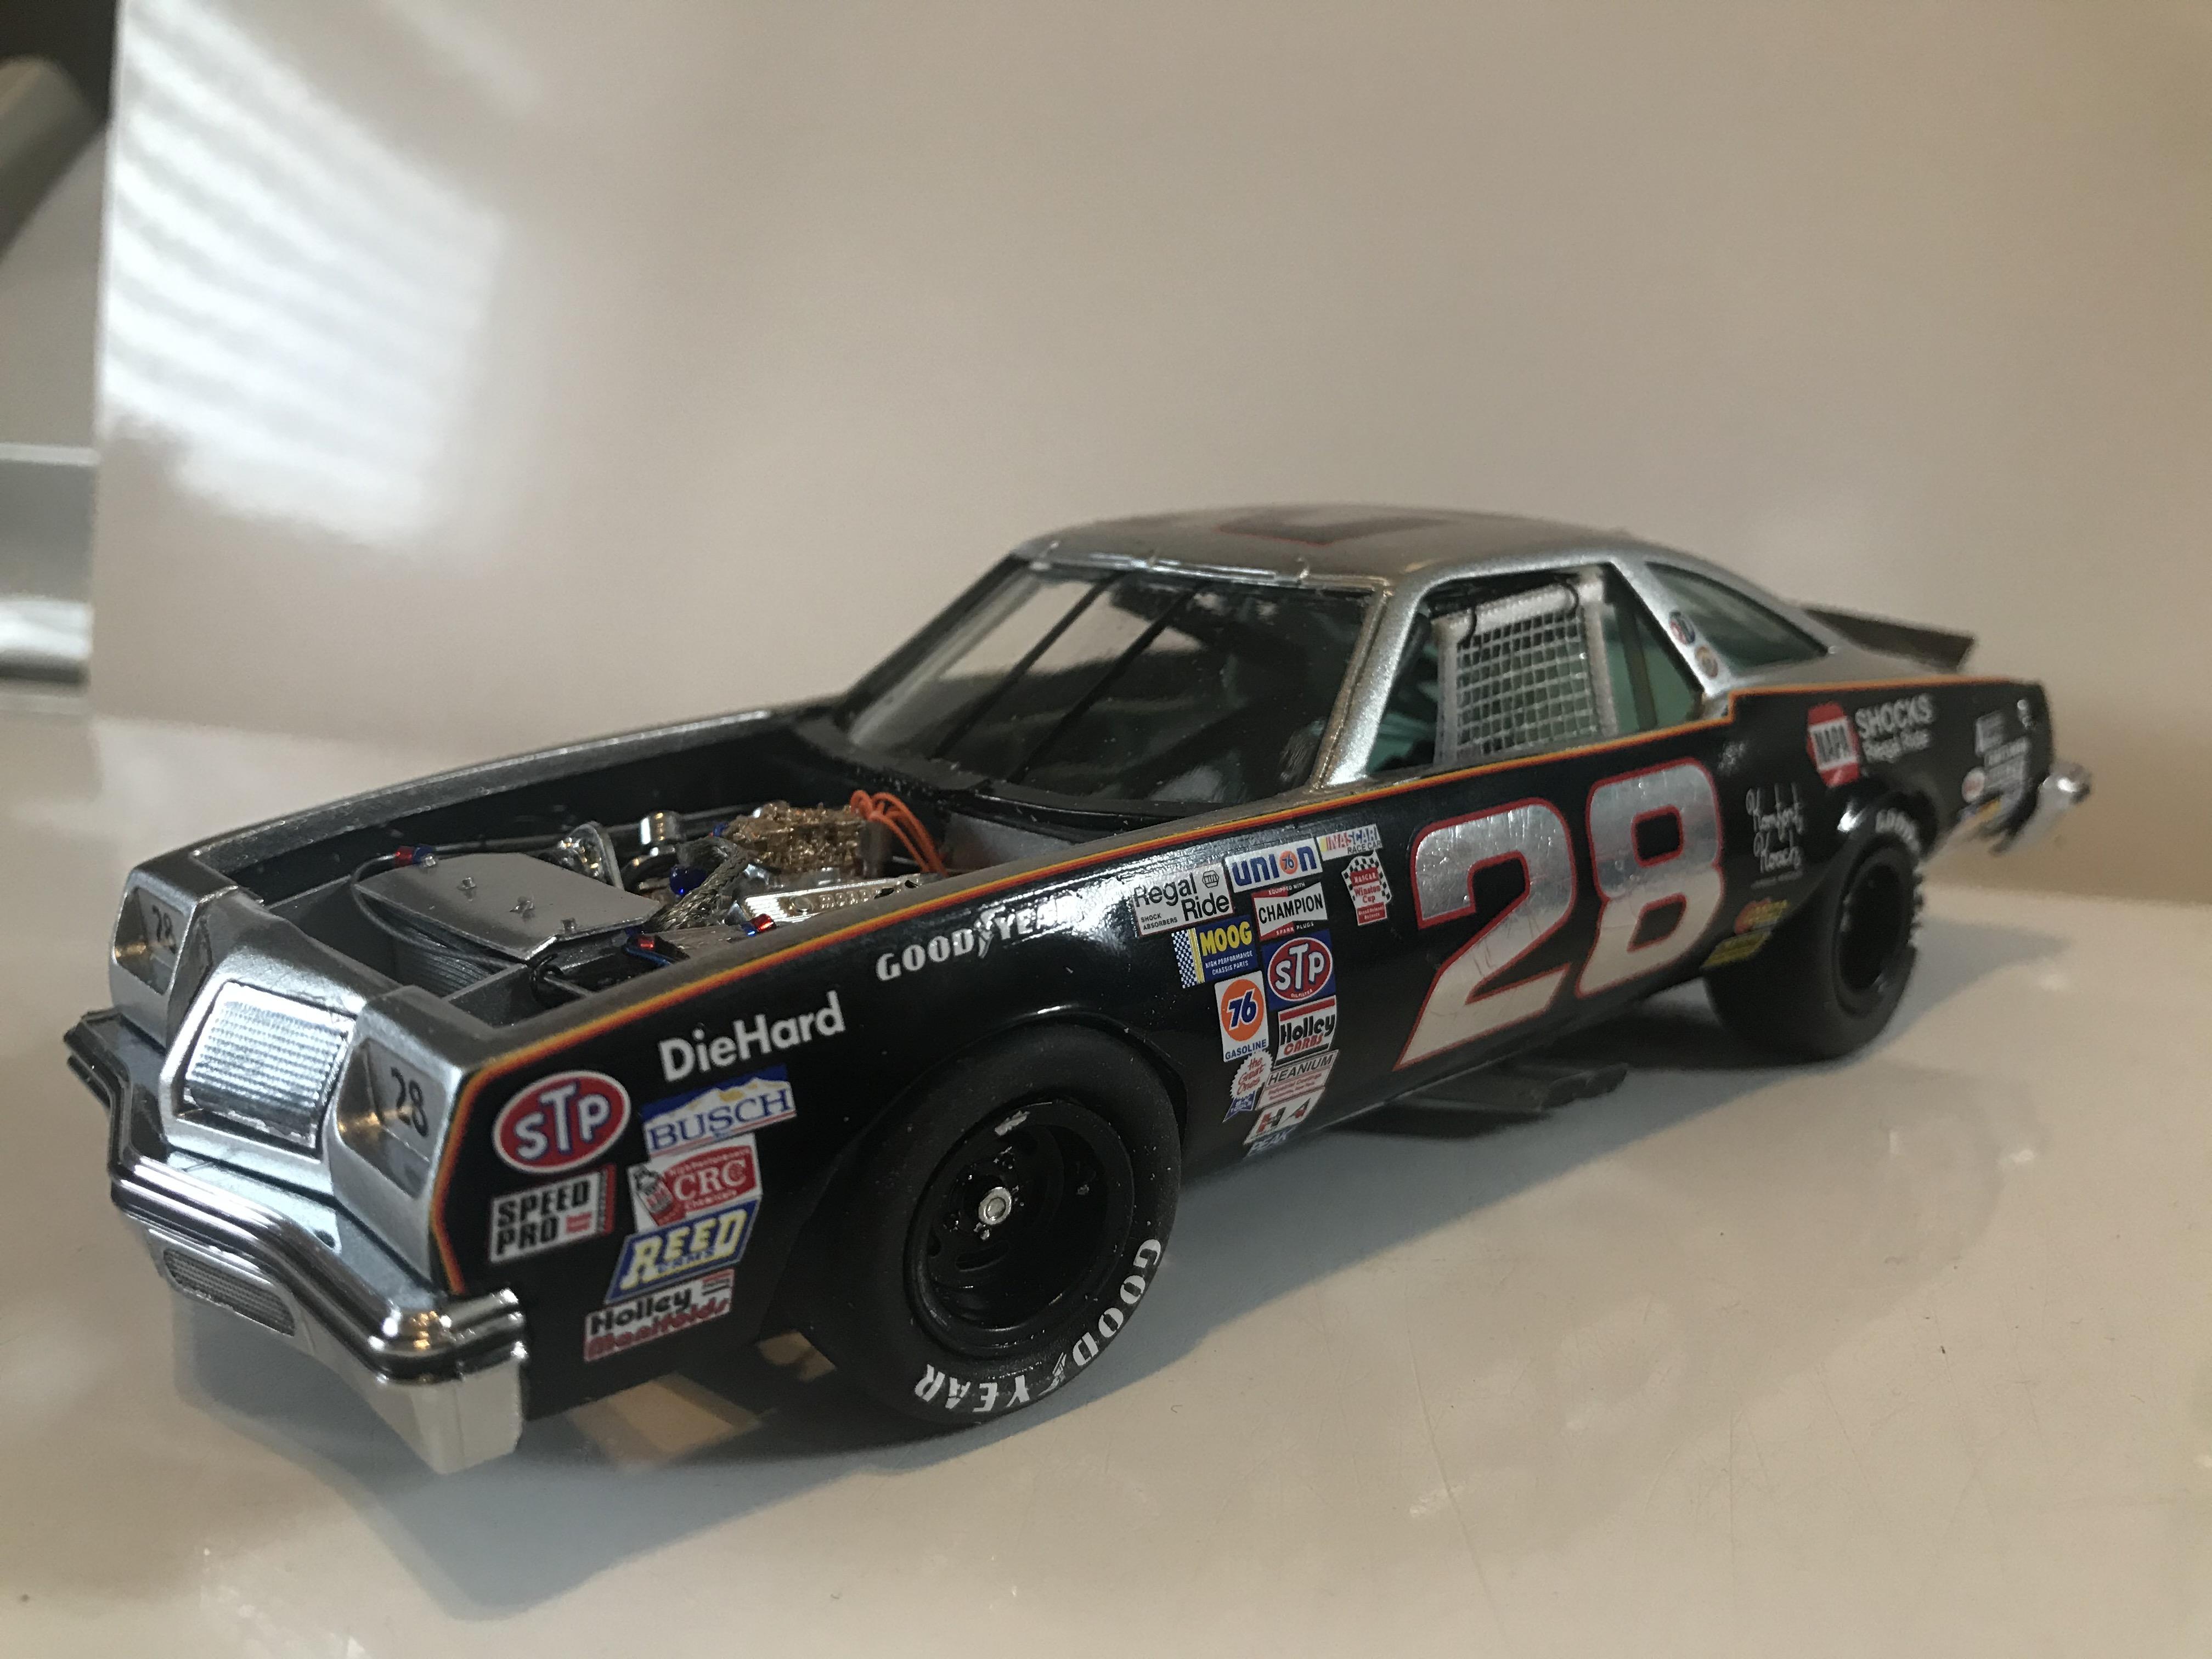
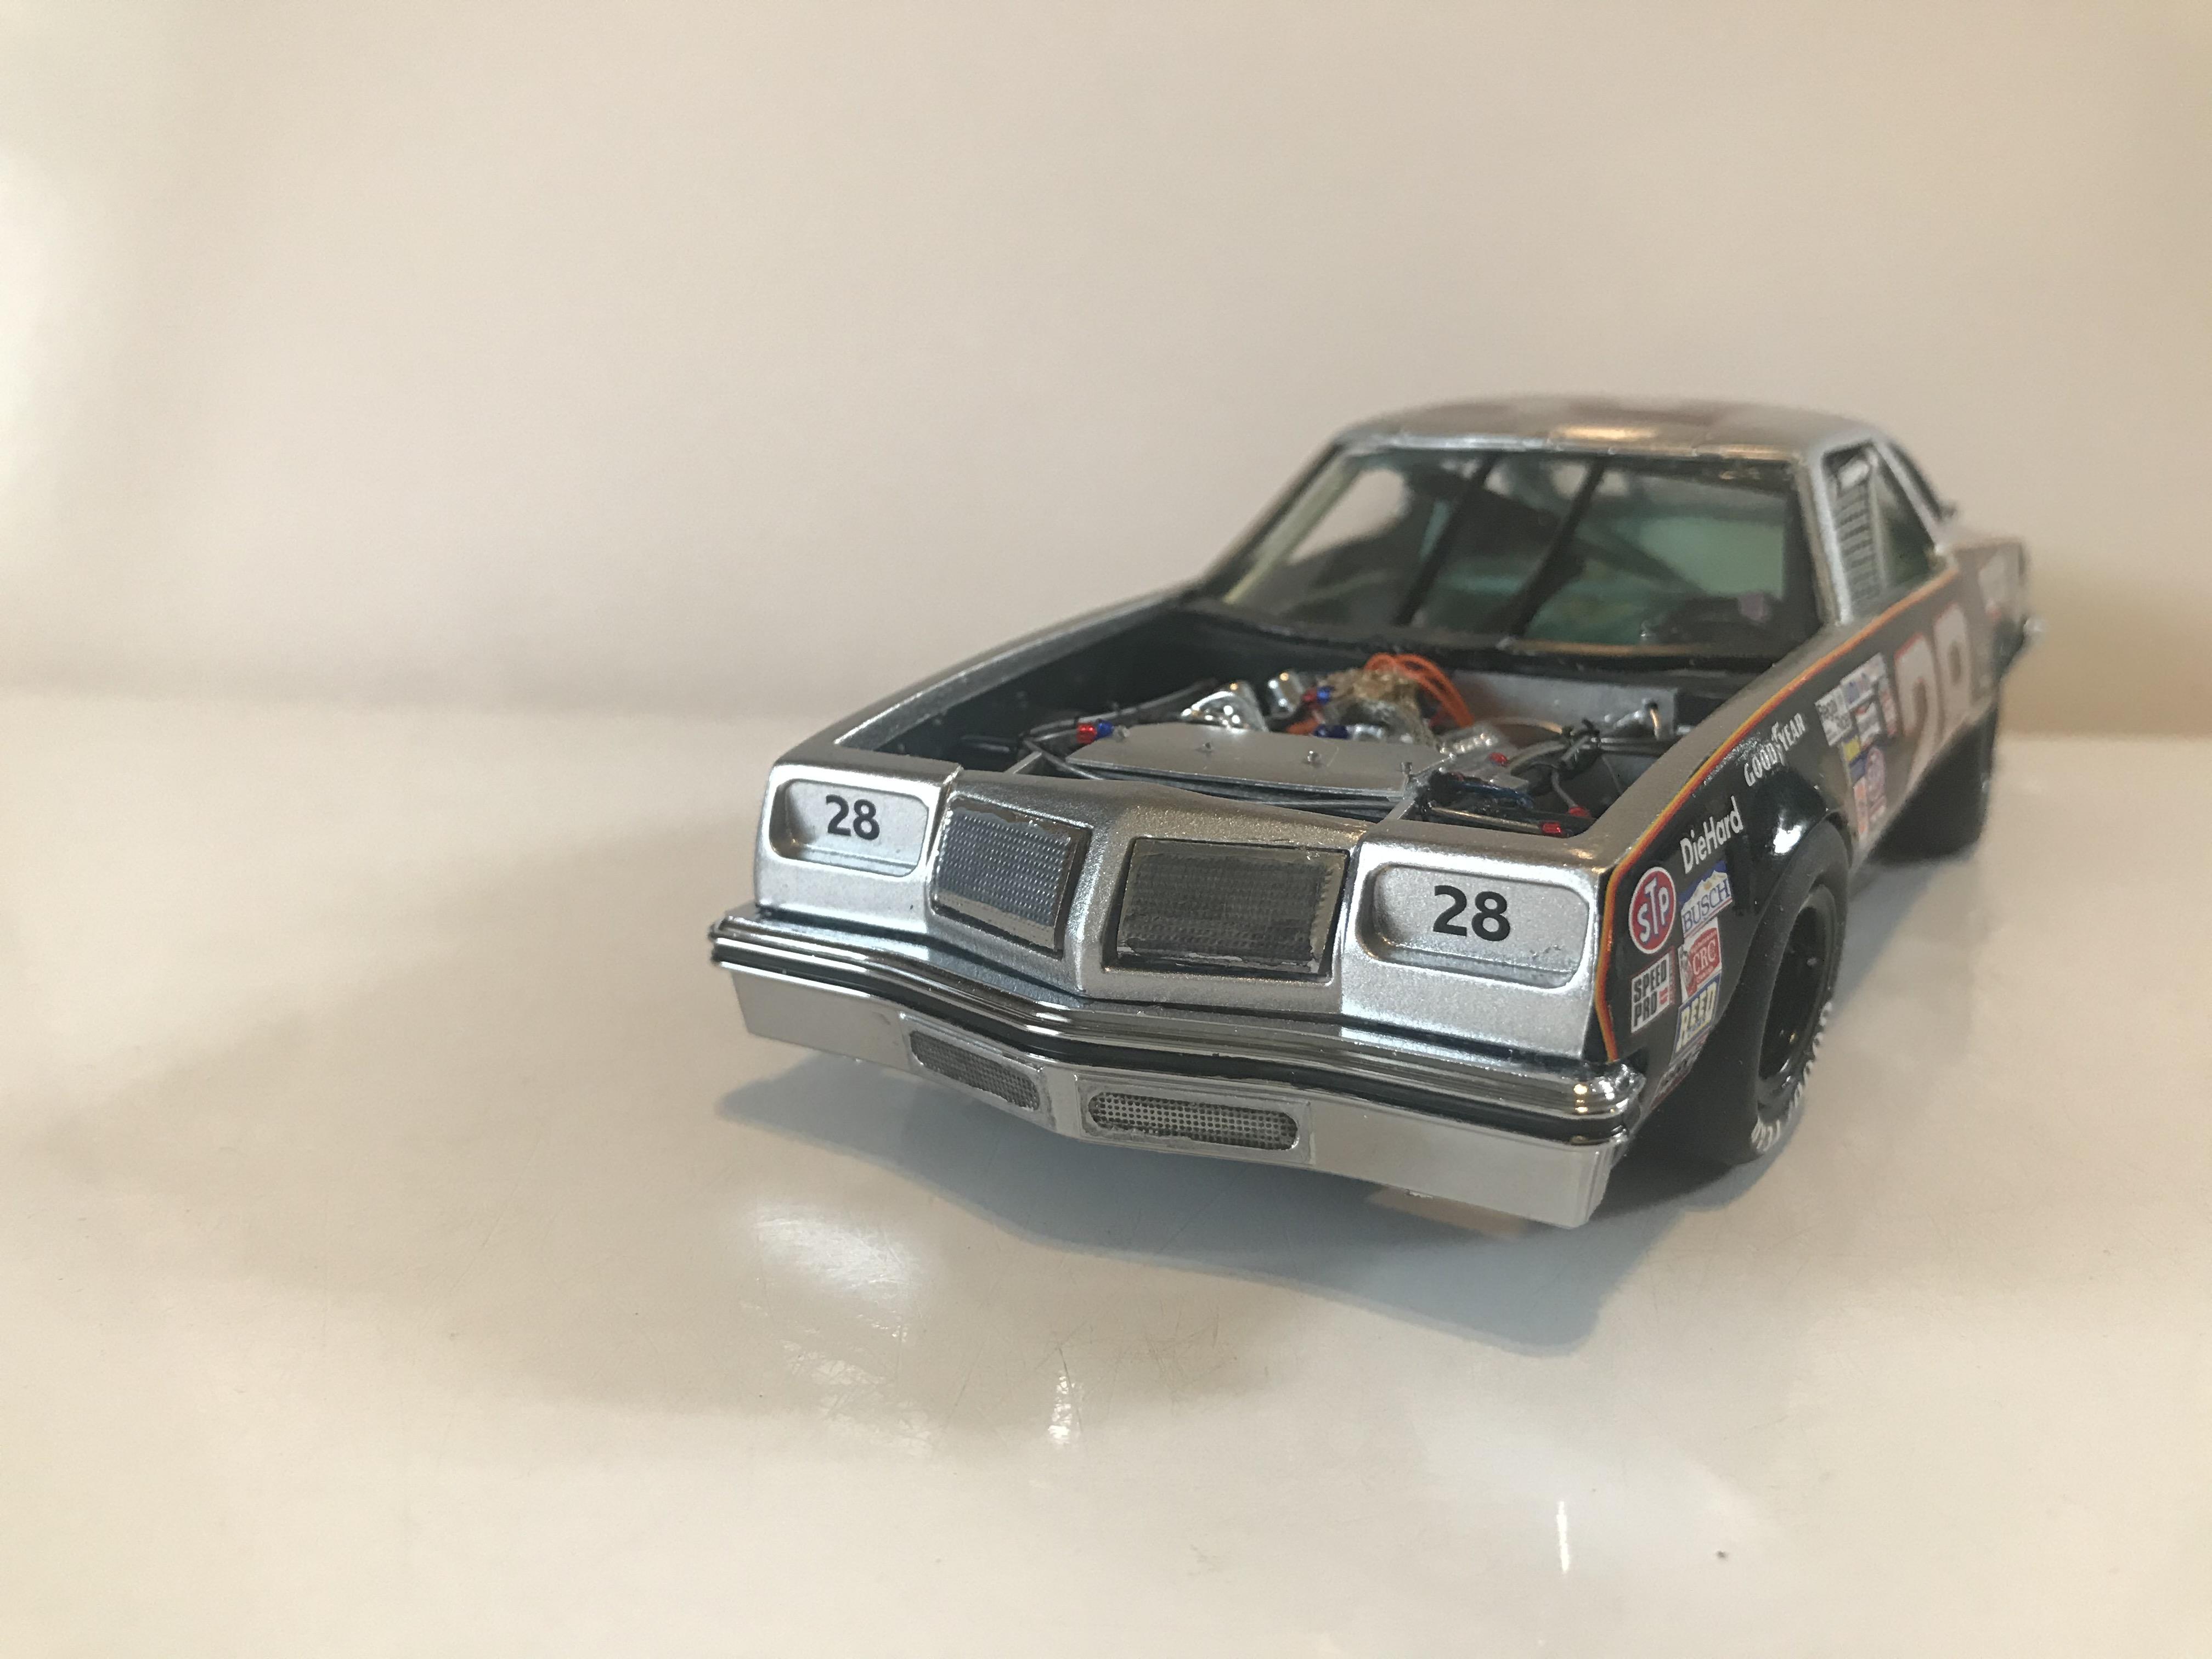
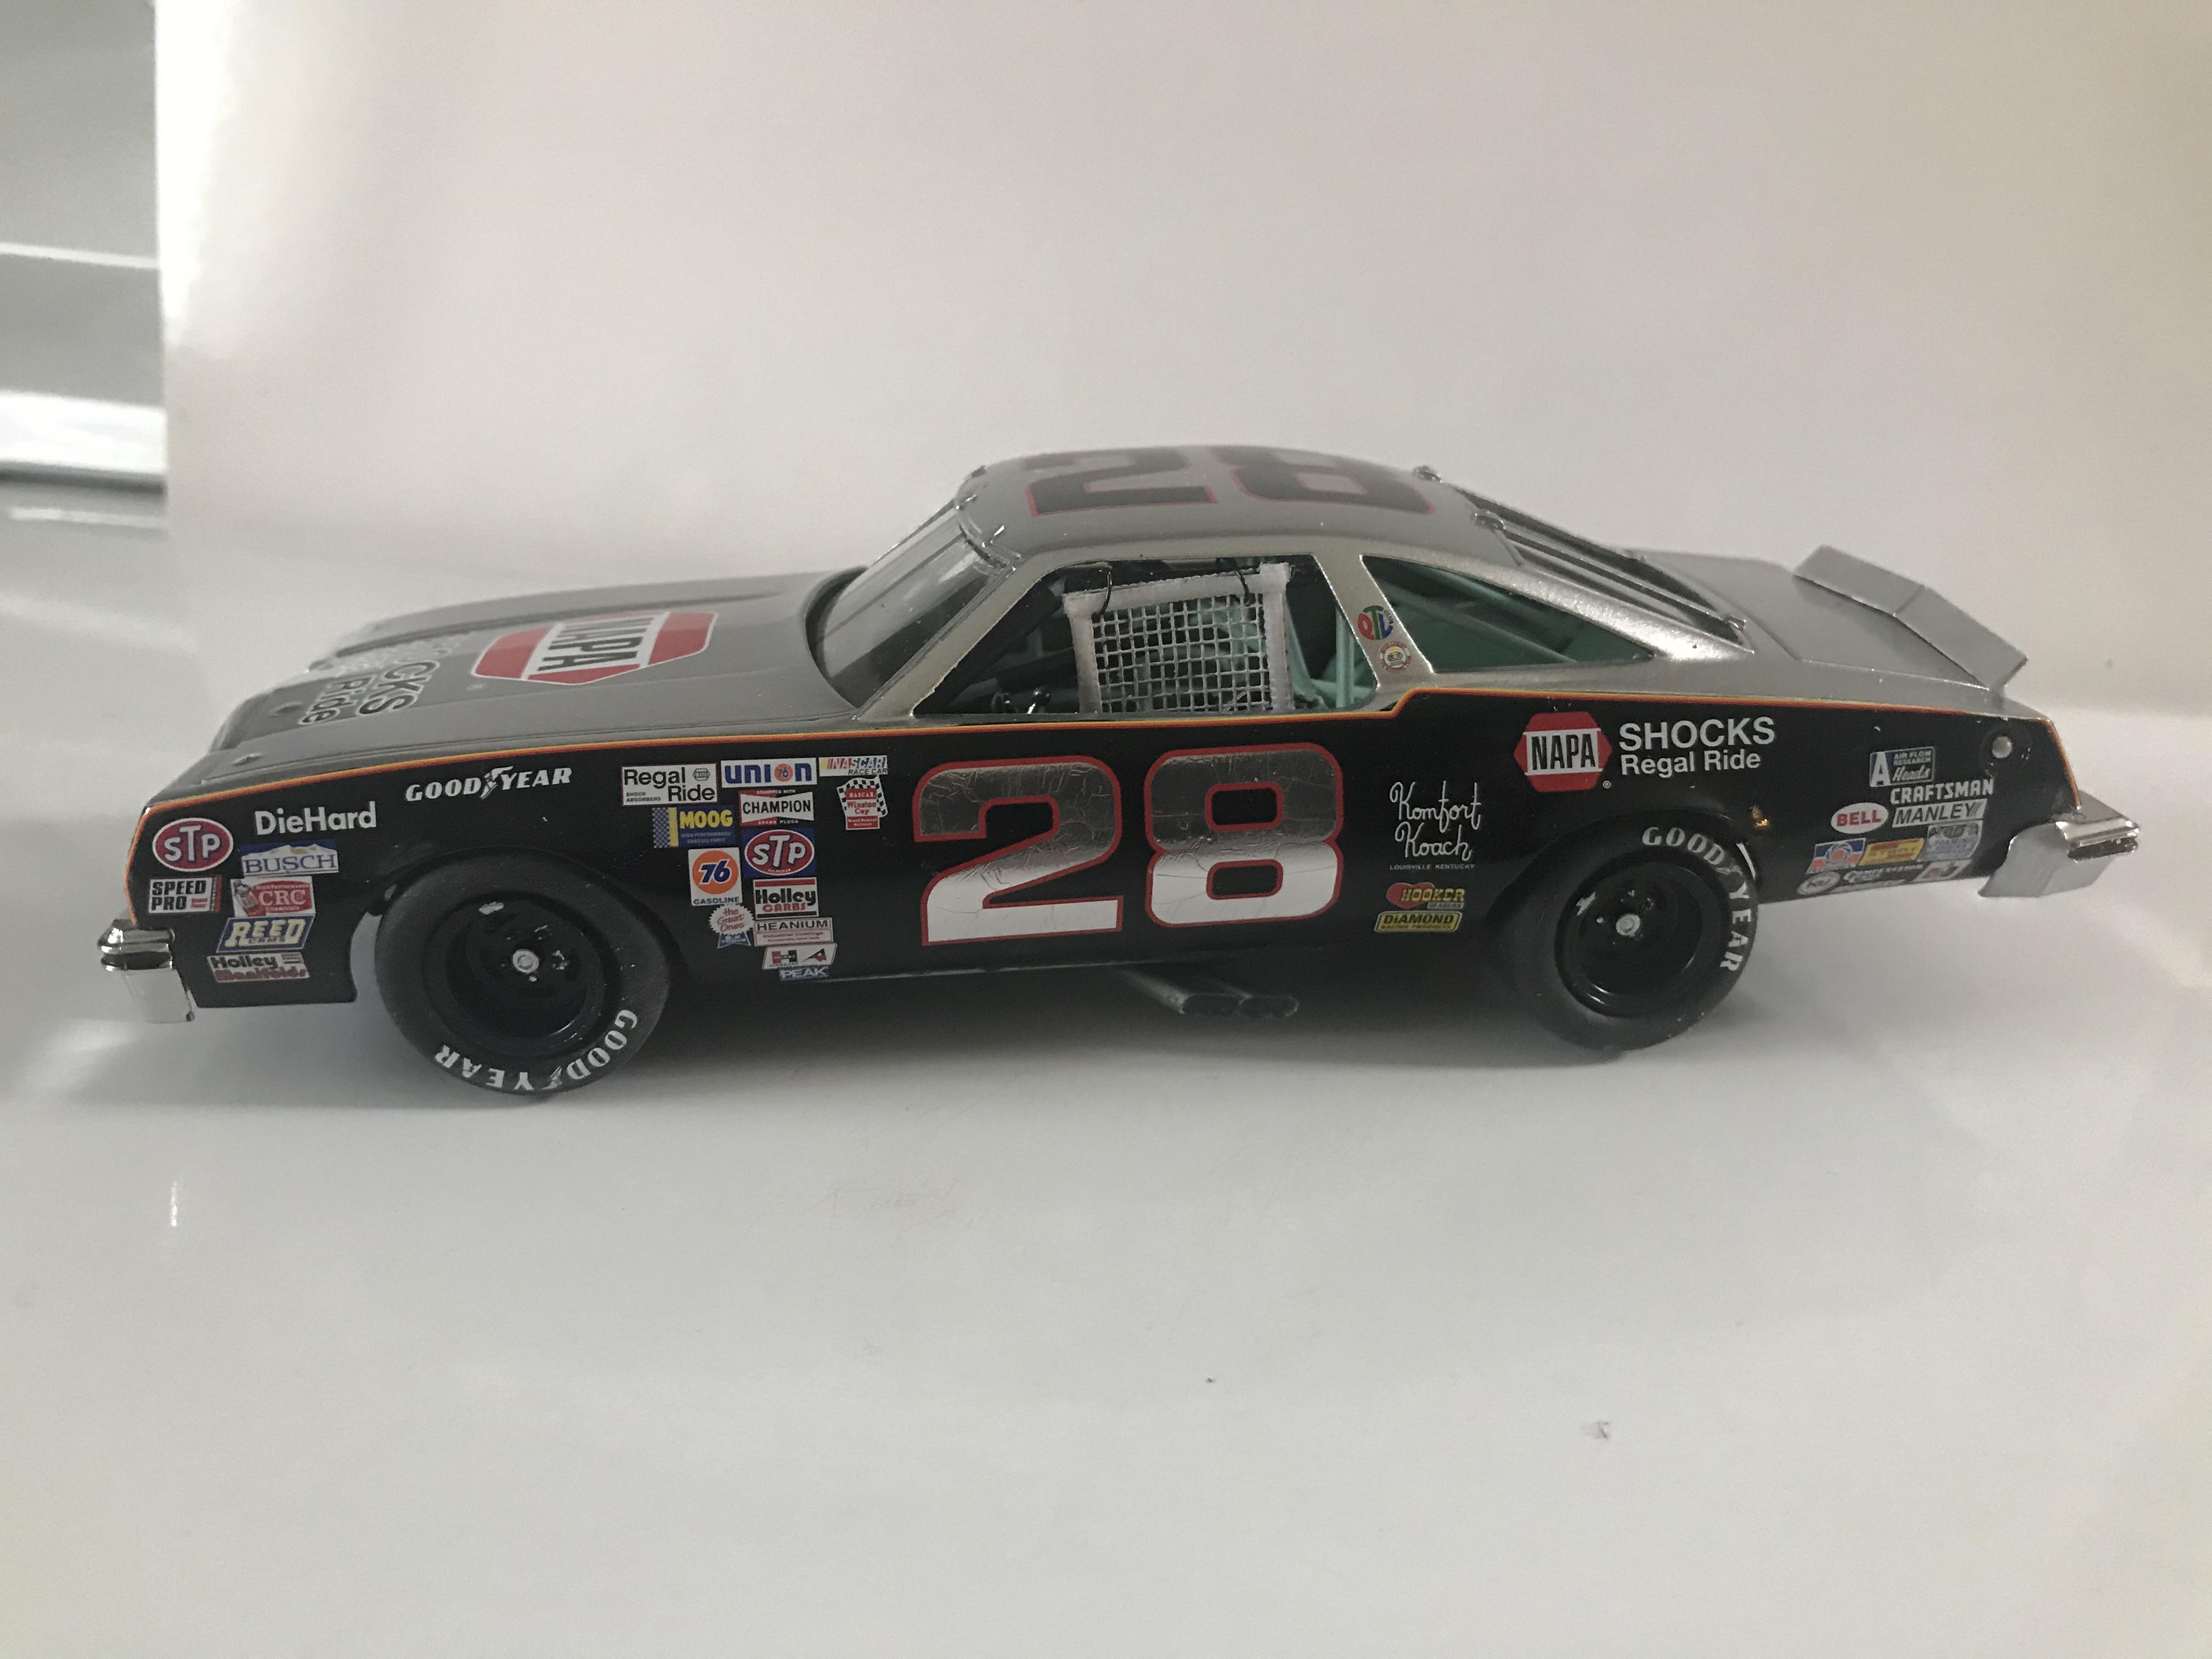
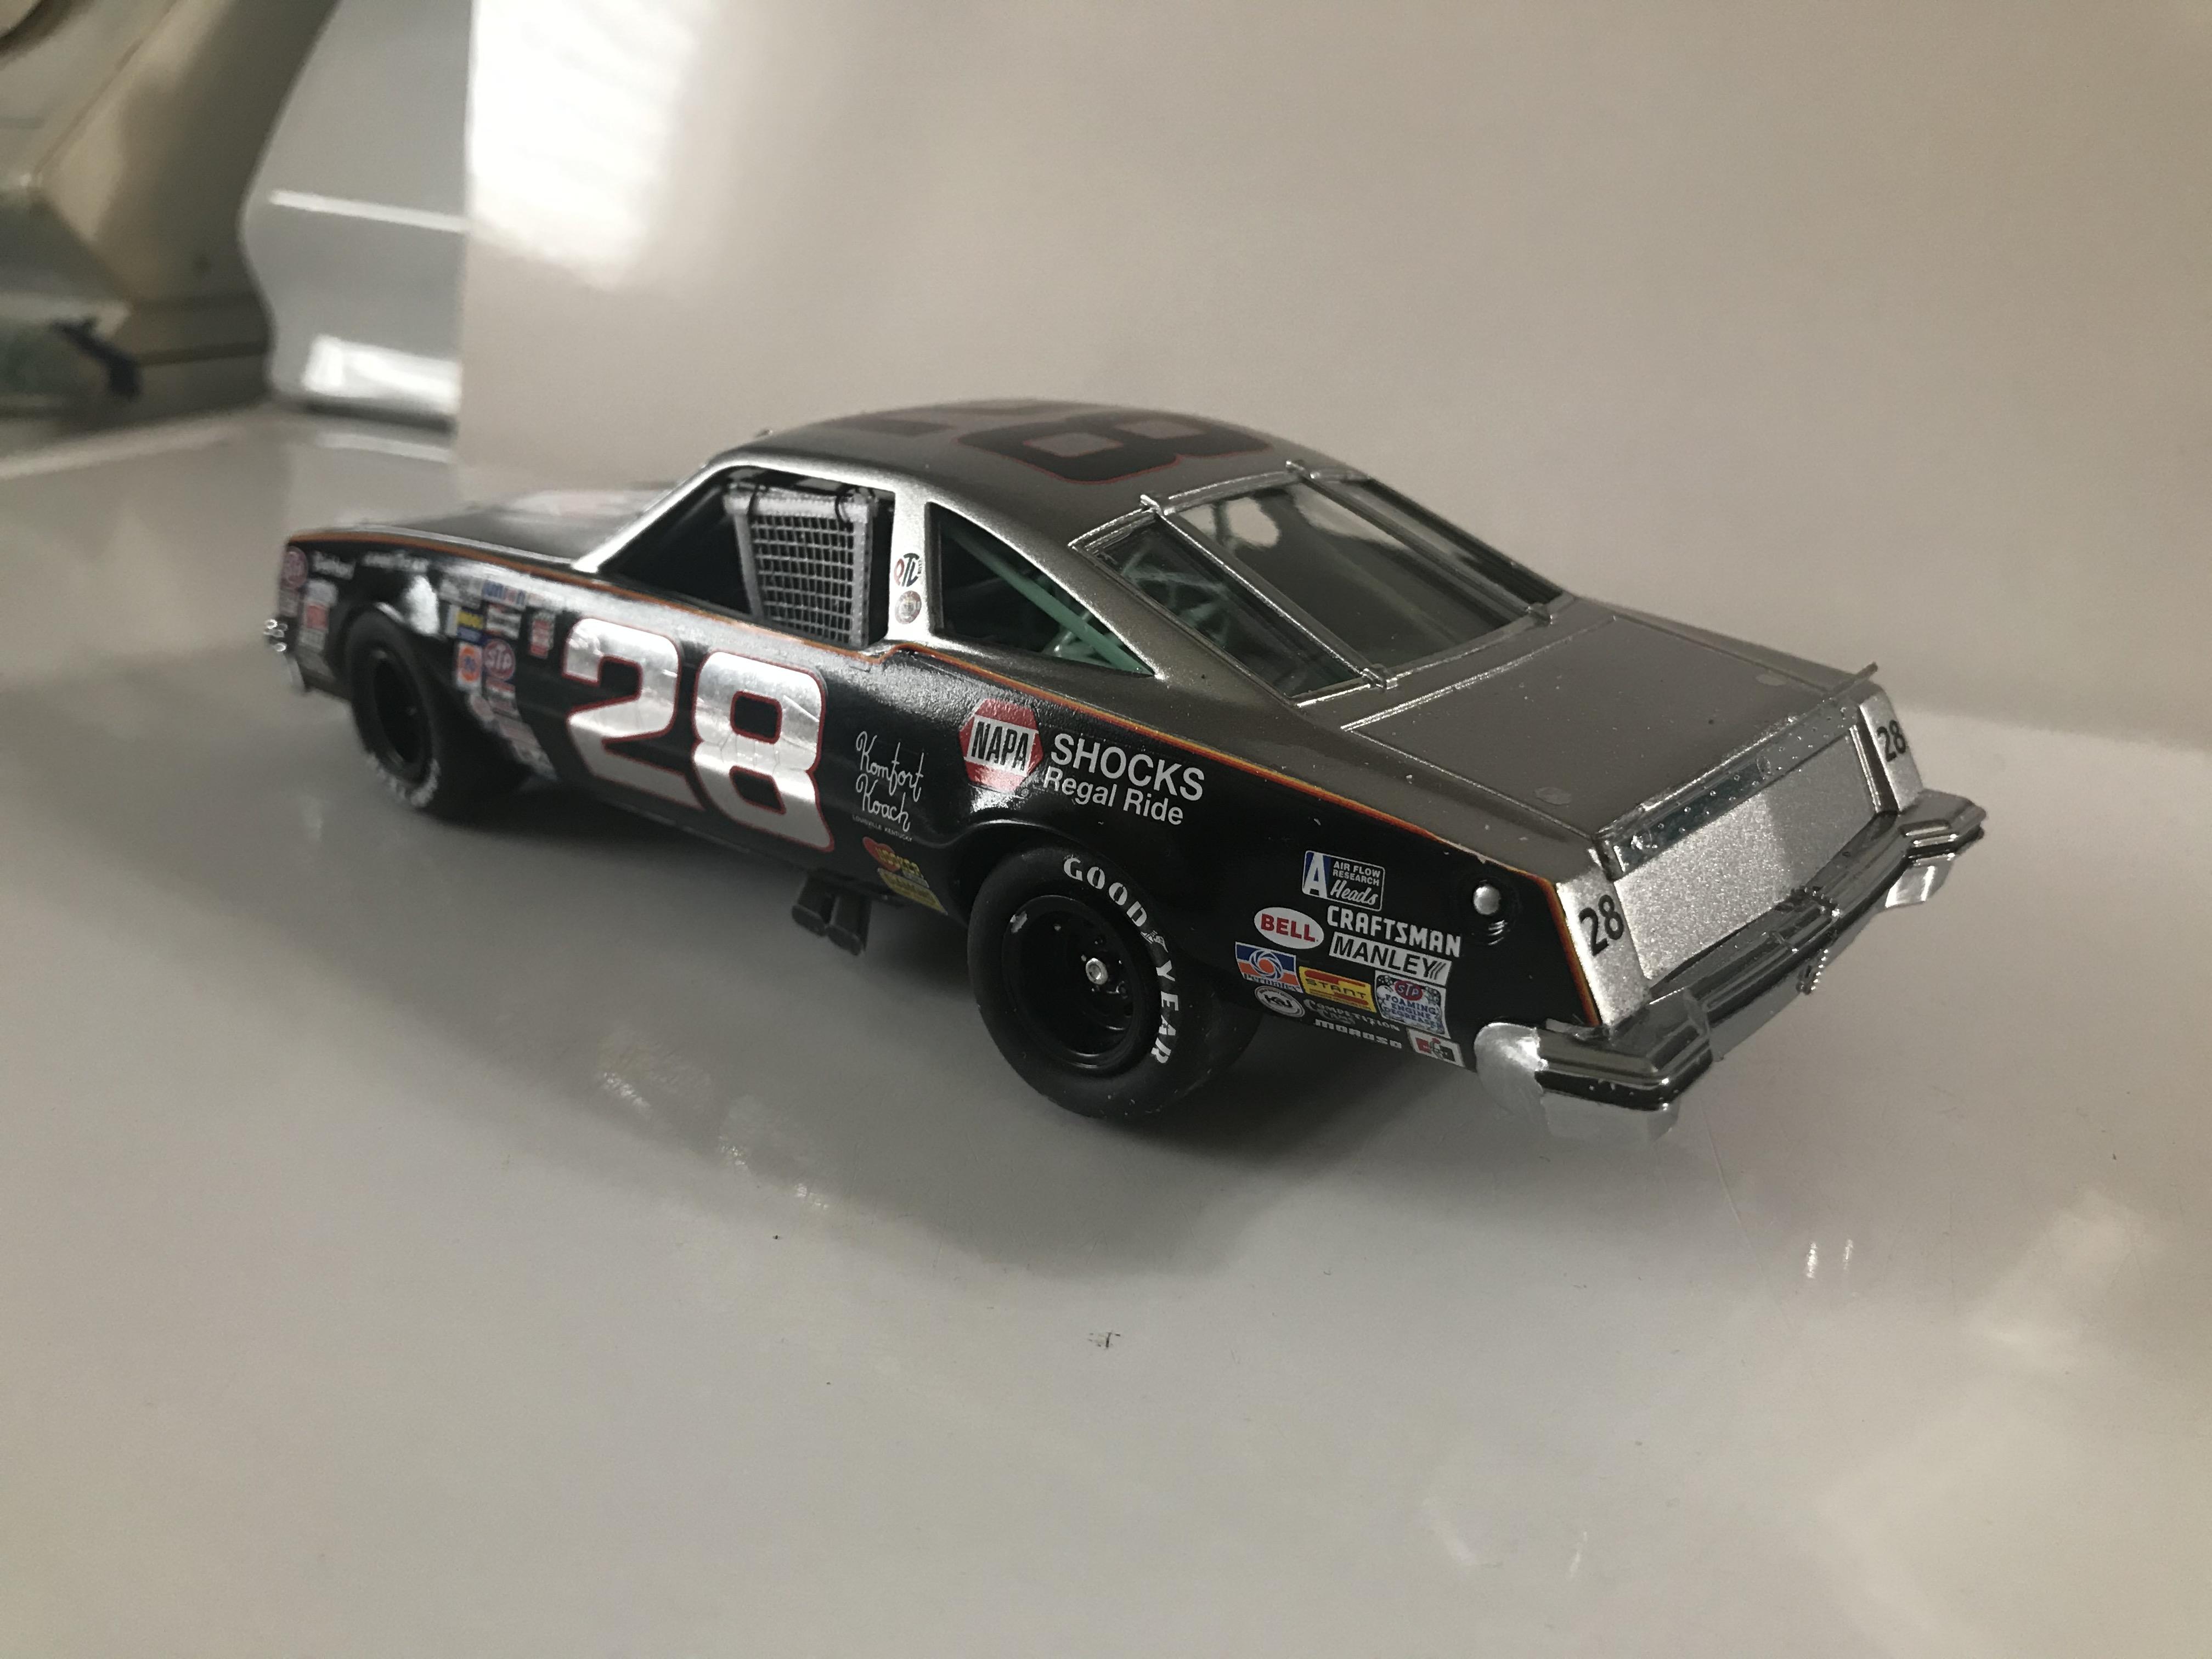
Since we have a new board format for "NASCAR Under Glass, I'll be a guinea pig and re-post my Baker Olds:
-
Code 42 Dark Green Metallic
-
Rallye Green? or is it a Caddy color? They had a similar color called Nottingham Green. My best fiend had a 66 Chevelle painted that color.
-
NASCAR window netting
DoctorLarry replied to Michael in Illinois's topic in Model Building Questions and Answers
I think around 82. It is an 81 LeMans body style. -
NASCAR window netting
DoctorLarry replied to Michael in Illinois's topic in Model Building Questions and Answers
Mark, you are probably right. This is early 80's.
-
NASCAR window netting
DoctorLarry replied to Michael in Illinois's topic in Model Building Questions and Answers
I'm sure the webbing was safer than using volleyball netting! -
NASCAR window netting
DoctorLarry replied to Michael in Illinois's topic in Model Building Questions and Answers
I don't know. I was just following pictures of the real cars on my builds. -
NASCAR window netting
DoctorLarry replied to Michael in Illinois's topic in Model Building Questions and Answers
You can buy 1 and 2 mm masking tape that might work. -
NASCAR window netting
DoctorLarry replied to Michael in Illinois's topic in Model Building Questions and Answers
I have done it two ways: using pieces from a large gauze pad if you want more of the "rope" look. I edge it with 1/8" white ribbon, which you can probably find at a craft store or on the internet. My last car I used common window screen painted white edged with the same ribbon. It looks good but not as "ropey". Grand Am is gauze, Cutlass is window screen. The screen is much easier to work with.
-
Nascar Dry Sump Oil System
DoctorLarry replied to gks1964's topic in General Automotive Talk (Trucks and Cars)
They would be a booger to make, though! -
Nascar Dry Sump Oil System
DoctorLarry replied to gks1964's topic in General Automotive Talk (Trucks and Cars)
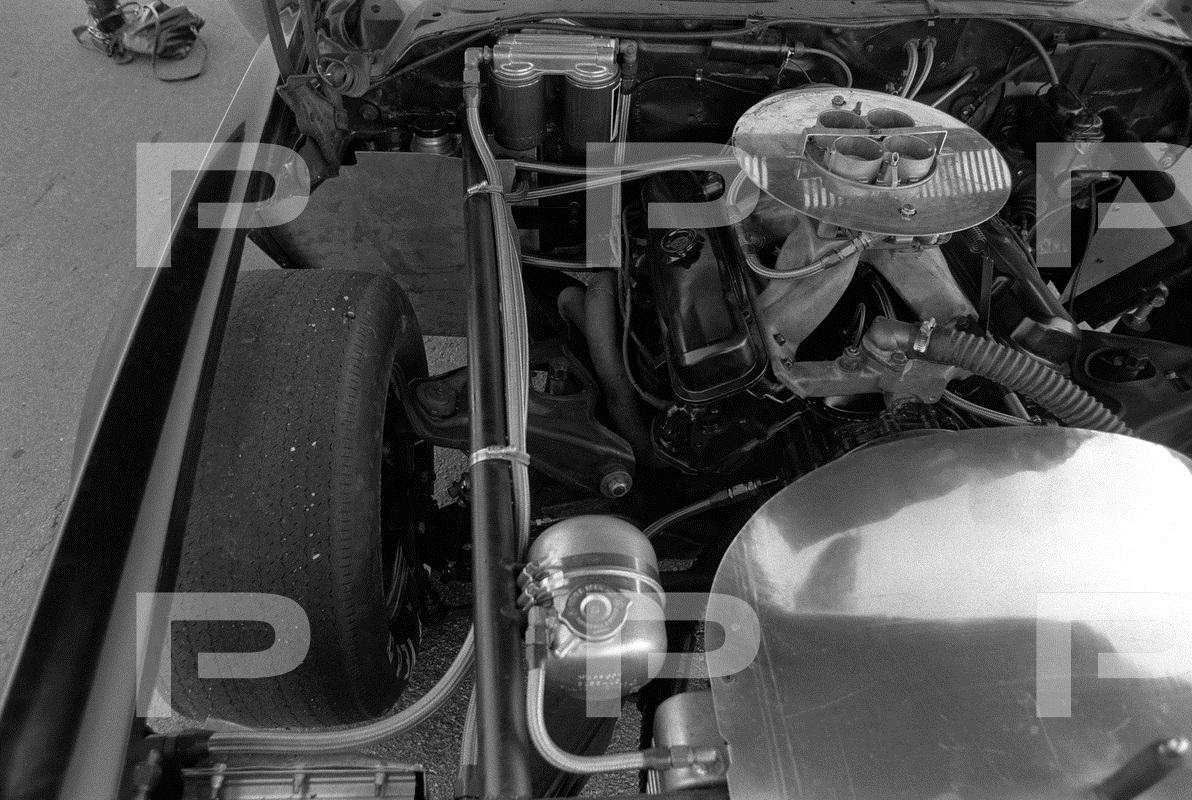
Oil pan in car, web site: https://canepa.com/photo-gallery/1975-ford-torino2244/
-
Nascar Dry Sump Oil System
DoctorLarry replied to gks1964's topic in General Automotive Talk (Trucks and Cars)
I found another
-
Nascar Dry Sump Oil System
DoctorLarry replied to gks1964's topic in General Automotive Talk (Trucks and Cars)
I found this. Not the best.
-
Nascar Dry Sump Oil System
DoctorLarry replied to gks1964's topic in General Automotive Talk (Trucks and Cars)
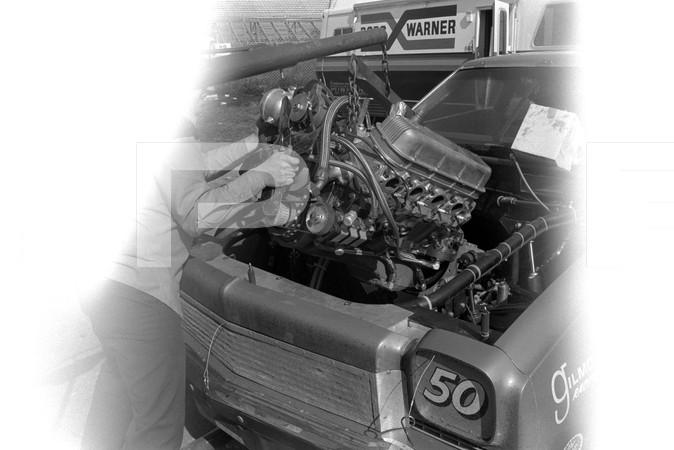
Here are shots from a 68 bot not Boss 9. Appears to be wet sump as well.
-
Nascar Dry Sump Oil System
DoctorLarry replied to gks1964's topic in General Automotive Talk (Trucks and Cars)
Typical setup:
-
Nascar Dry Sump Oil System
DoctorLarry replied to gks1964's topic in General Automotive Talk (Trucks and Cars)
73 Big Block Chevelle:
-
Paul, I saw the Can Am kit on EBAY. Body sort of looks like mine although there was another person doing a body before me. Inside of the body looks awful and the interior and chassis are castings directly from a Jo-Han 1975 Cutlass, not accurate at all for the Can Am. Thanks for the heads up.
-
Looks like you are a very quick learner. Very clean and represents the JDM look well!
-
There is aluminum there that was usually covered up by decals.
-
Paint question
DoctorLarry replied to Stryker3285's topic in WIP: Stock Cars (NASCAR, Super Stock, Late Model, etc.)
Generally I would use a light primer under lighter colors. Light gray for example. Under darker colors dark gray or red oxide. So for yellow I would personally use a light gray primer. It would cover much better than red oxide. Just my take.