jeffdeoranut
-
Posts
638 -
Joined
-
Last visited
Content Type
Profiles
Forums
Events
Gallery
Everything posted by jeffdeoranut
-
 that's awesome...feel free to post any pic u lijke
 -
thanks for the nice omments
-
im kool with it...that's y I draw my plans in pencil
-
did you scratch the bed? got any pics of it completed? that looks great
-
don't you love it when you carefully research and plan a project and then realize halfway through that its not gonna work? I realized I had the 2nd steering axle too far back which moving it forward will necessitate using the smaller fuel tanks pictured, fenders for this axle and steps for sleeper-maybe on the fender. ihad originally planned to have 2nd st axle centered under sleeper and using fuel tanks in the kit...oh well

-
my record is 13 yrs to build a kit...lol. years ago I started a fictional auto shop/race car owner group. my big wrecker project is to make a tow haul tow truck from the paystar 5000 dump truck kit...the can do would make a great flagship truck for your fleet...the can do kit will teach you patience.
-
build it, man!! its a great kit
-
i do have memory issues...didn't I get this kit from you? if so thanks again!
-
slow but steady progress...sleeper mostly assembled, boom mostly assembled and THE PILE OF PARTS THAT ARE PAINTED AND READY FOR ASSEMBLY IS GROWING. ALSO PRINTED OUT TEST OF DECALS...got the size right-just remains to see how they turn out when I print them on decal paper. have had 3 good temp days for painting so lots of parts painted and drying. one thing that's weird about this process is that IVE DISCOVERED PATIENCE-something ive never had. just for fun heres a cost breakdown: kit 100 2nd peterbilt kit for wheels, tires and steering axle 18 so 118 6 tubes of superglue so far 12 will use at least 5 more so 22 will use 4 complete cans of paint and 2 partial cans 16 1 roll of masking tape 2 partial bottle testors liquid cement 3 styrene sheet, tube and angle 8 aluminum tubing 3 craft beads .25 total 166.25 various sanding sticks. files, sandpaper, drill bits, sanding pads, dremel and attachments, machinists block, decal paper,printer ink, various pliers, and clamps... hard to put a price on these items as of course you use them many times time so far about 75 hours with estimated 25 to 30 to go (bout 30 hrs working on decal design) at least 15 hrs researching google images so total of 145 to 150 level of annoyance expressed by fiancé at me not spending every second with her 1 on a scale of 1 to 10 shes a keeper(my exwifes level of annoyance was a 10+) my sons girlfriend upon seeing my models for the first time asking him to build a kit of her Camaro(I just happened to have the kit) priceless fun and satisfaction priceless
-
now that im well into this kit-some general comments...before obtaining the kit I tried to find as much about it as possible as ive only built a few big rigs. several guys on youtube bashed this kit pretty bad so I was a little concerned going in. not really much flash and most parts go together well. maybe they wanted to have a huge parts count-seems to me some parts could have been molded together. I am having fitment issues with the forward outrigger cabinet doors but as I plan to display the outriggers out its not a huge thing. care must be taken to glue stuff at right angles or there will be big problems. I do have one complaint however-all of the components for outriggers, boom and rear lift will not slide in or out without lots of sanding. as far as the accuracy of the kit I cant comment on as I don't have the knowledge of semis. all in all, a fun, challenging kit to build. now, waiting for paint to dry and then the tedious touching up of the many chrome parts...the Molotov chrome pen is gonna get a workout. in days ahead ill post a few more in progress pics but not many as the custom parts are done, but will post in under glass...my goal is by Halloween...lol
-
any problem with gloss white enamel over krylon white primer?
-
Revell Shelby Series 1 top?
jeffdeoranut replied to aurfalien's topic in Model Building Questions and Answers
I forget where but I have seen pics of a model series 1 with a viper roof grafted on -
years ago I built the 67 and had so many problems with it that I refuse to attempt a nother mustang of that generation
-
How much have you spent on a build?
jeffdeoranut replied to Jantrix's topic in General Automotive Talk (Trucks and Cars)
my how the hobby has changed...I remember the days when I could afford the kit and a tube of glue and if lucky I had money for one bottle of paint...total cost around $2.50. -
Molotov liquid chrome pens
jeffdeoranut replied to smacky-t's topic in Model Building Questions and Answers
try bombingscience.com -
Rat Rod Pete 359
jeffdeoranut replied to Darren B's topic in WIP: Model Trucks: Big Rigs and Heavy Equipment
really glad I saw this...looks amazing so far...been collecting parts for one for a while. it is a rat rod so you cant go wrong with weathering...there are many how to's bout weathering here and youtube...I keep a jar with nails n water for real rust.illbe interested in how the interior works out -
while net surfing I ran across this...gm's frame straightness tolerance is 3/16 inch...in 1/25 scale my math says thats pretty much 1/100 inch...a cool thing to throw out to people who insist that building models is kids playing with toys...unfortunately none of my builds would be accepted by gm...lol
-
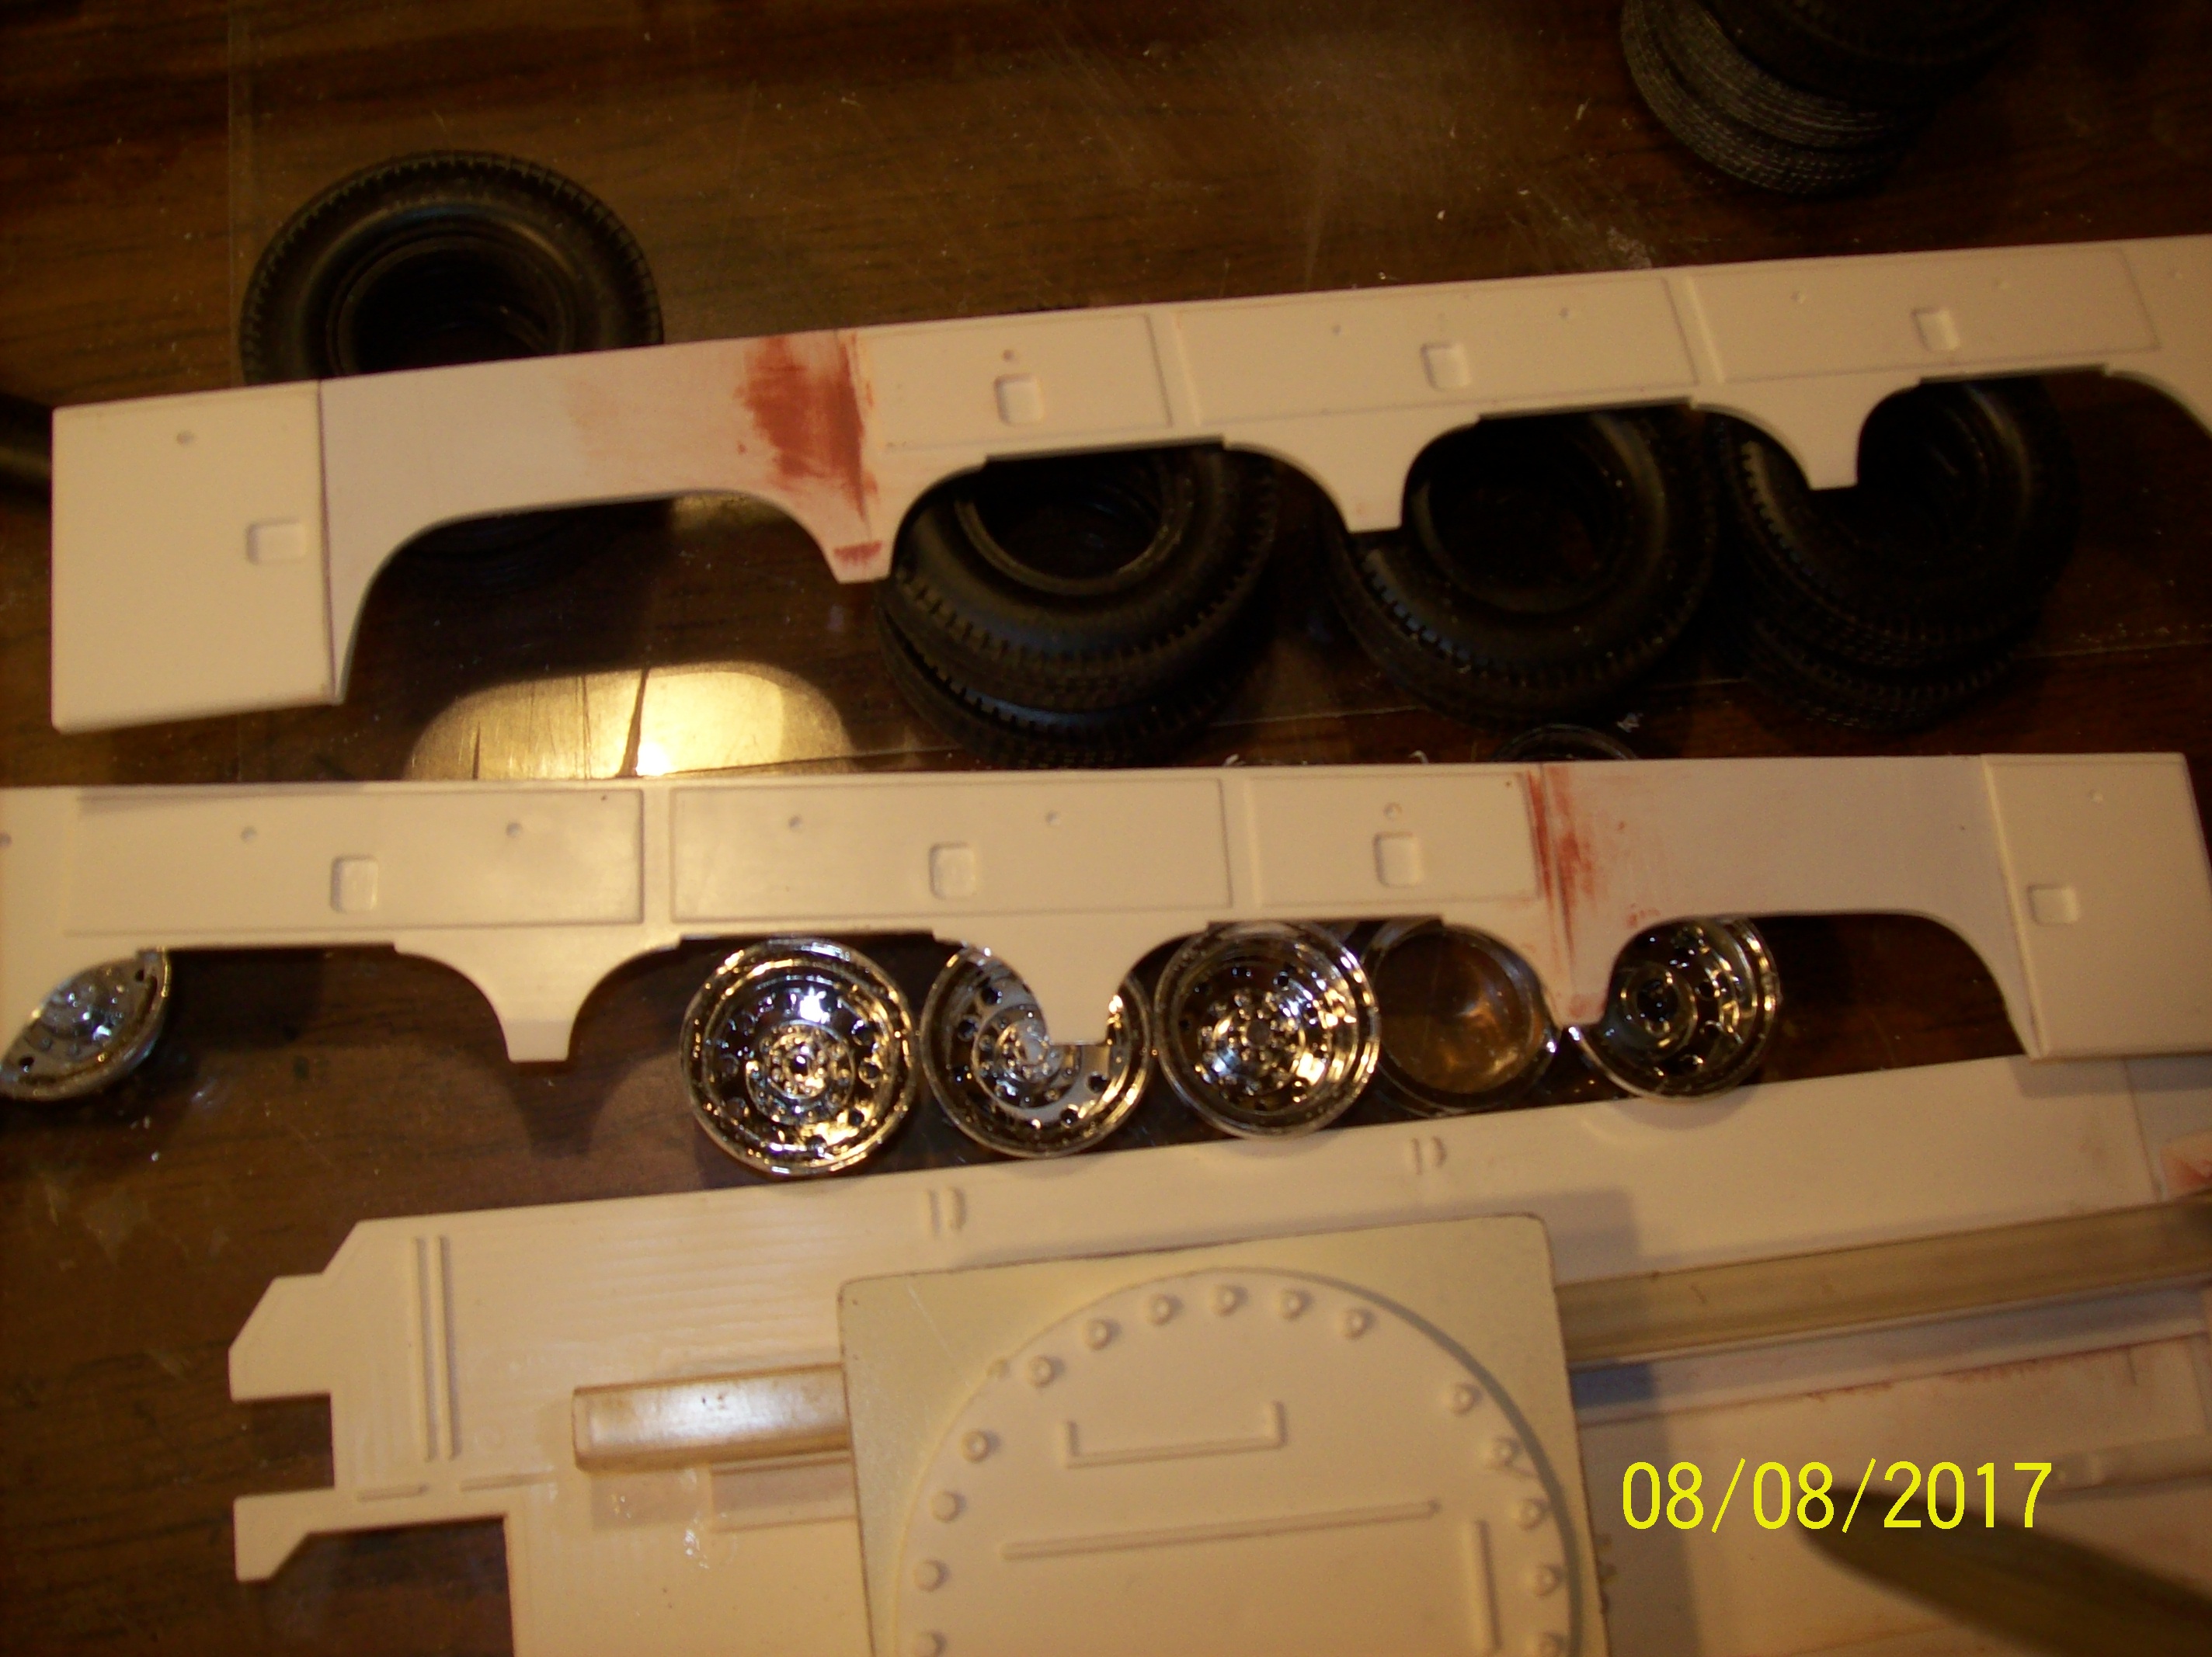
still many, many hours to go...I think the kit has 600 + parts and ive added about 80...lot of seams to fill n sand n putty n sand...still, so far ive completed every kit that has gotten ant paint on it at all except for one, so its a good sign.
-
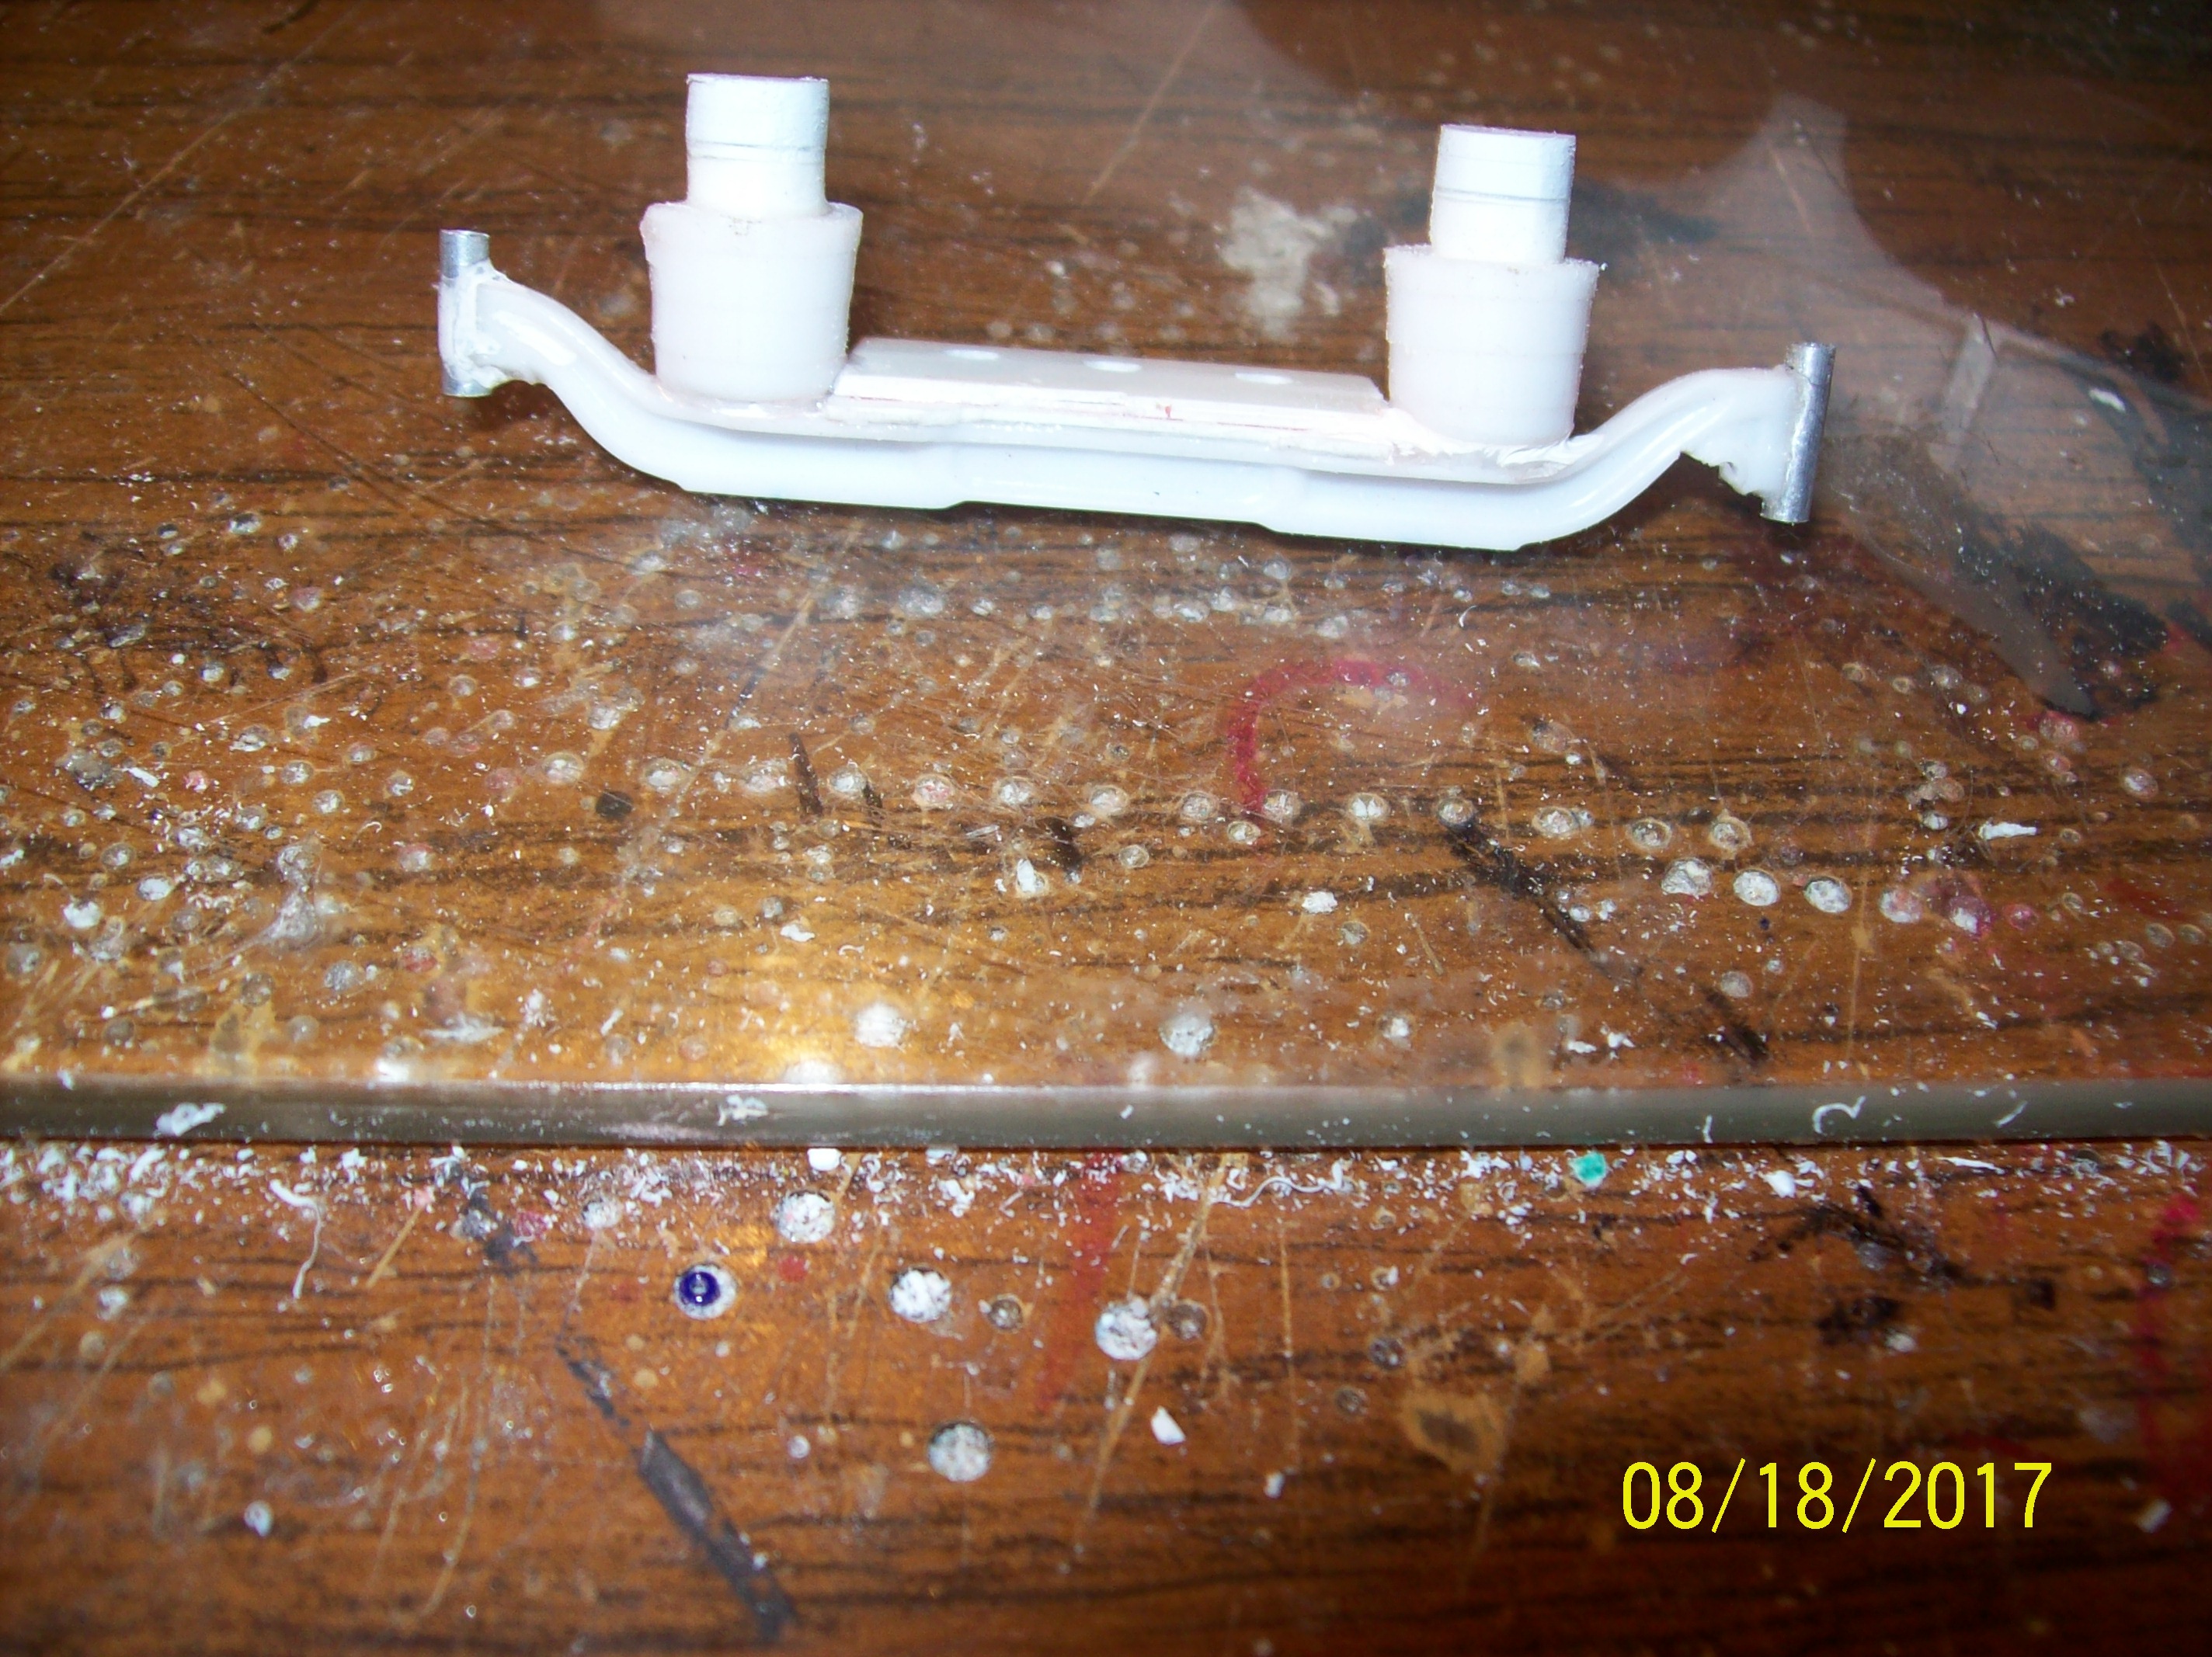
finally the bed is ready for paint...the chrome decking is just laying there after more googling I decided to mount the second steering axle on bags paint tomorrow on bed, engine parts and all the stuff hanging off the rear of bed hopefully in a few days ill have her up on wheels so i can adjust how warped the frame is sure to be...lol
-
a it more progress...2nd steering axle, stretched driveshaft and 2nd helper axle ready for paint!! just a few more things to do and I can start the plug n crank of glue,sand, paint and assemble!! still undecided about interior color-any suggestions?
-
I fear you guys r gonna b disappointed when you see more...its not gonna b one of those precision engineering masterpieces...my skills r not at that level...and SOMEDAY I plan on using a russian k537 as platform for a heavy duty wrecker
-
thanks...ive almost got the 2nd steering axle ready for paint...so 2 st axles,2 drive axles, 1 dual wheel helper and 1 single wheel helper....tho ive not ruled out losing the single wheel helper in favor of a rear steering axle behind the 2 drive axles...
-
finally at the bench...plan is a 6 axle sliding rotator using the can do kit. the kit has extra frame rails so stretching frame was not to bad. got the bed sides stretched and sliding mechanism done and working. last pic shows where im going graphically IF I CAN MANAGE TO PRINT USABLE DECALS. fenders, rear wheel flares and boom will be red...black frame...white cab, hood and bed...rear lift and outriggers will be black..not sure about interior-I don't want to just flat black it-maybe red and white with black seats? comments about colors especially interior are welcome. due to a stroke 3 yrs ago my abilities have declined so its far from perfect but is mostly straight and as close to square as I can get.
-
'35 Mercedes Benz Hot Rod - "Mad'am"- Update 01/10/18 Page 4
jeffdeoranut replied to Joca's topic in WIP: Model Cars
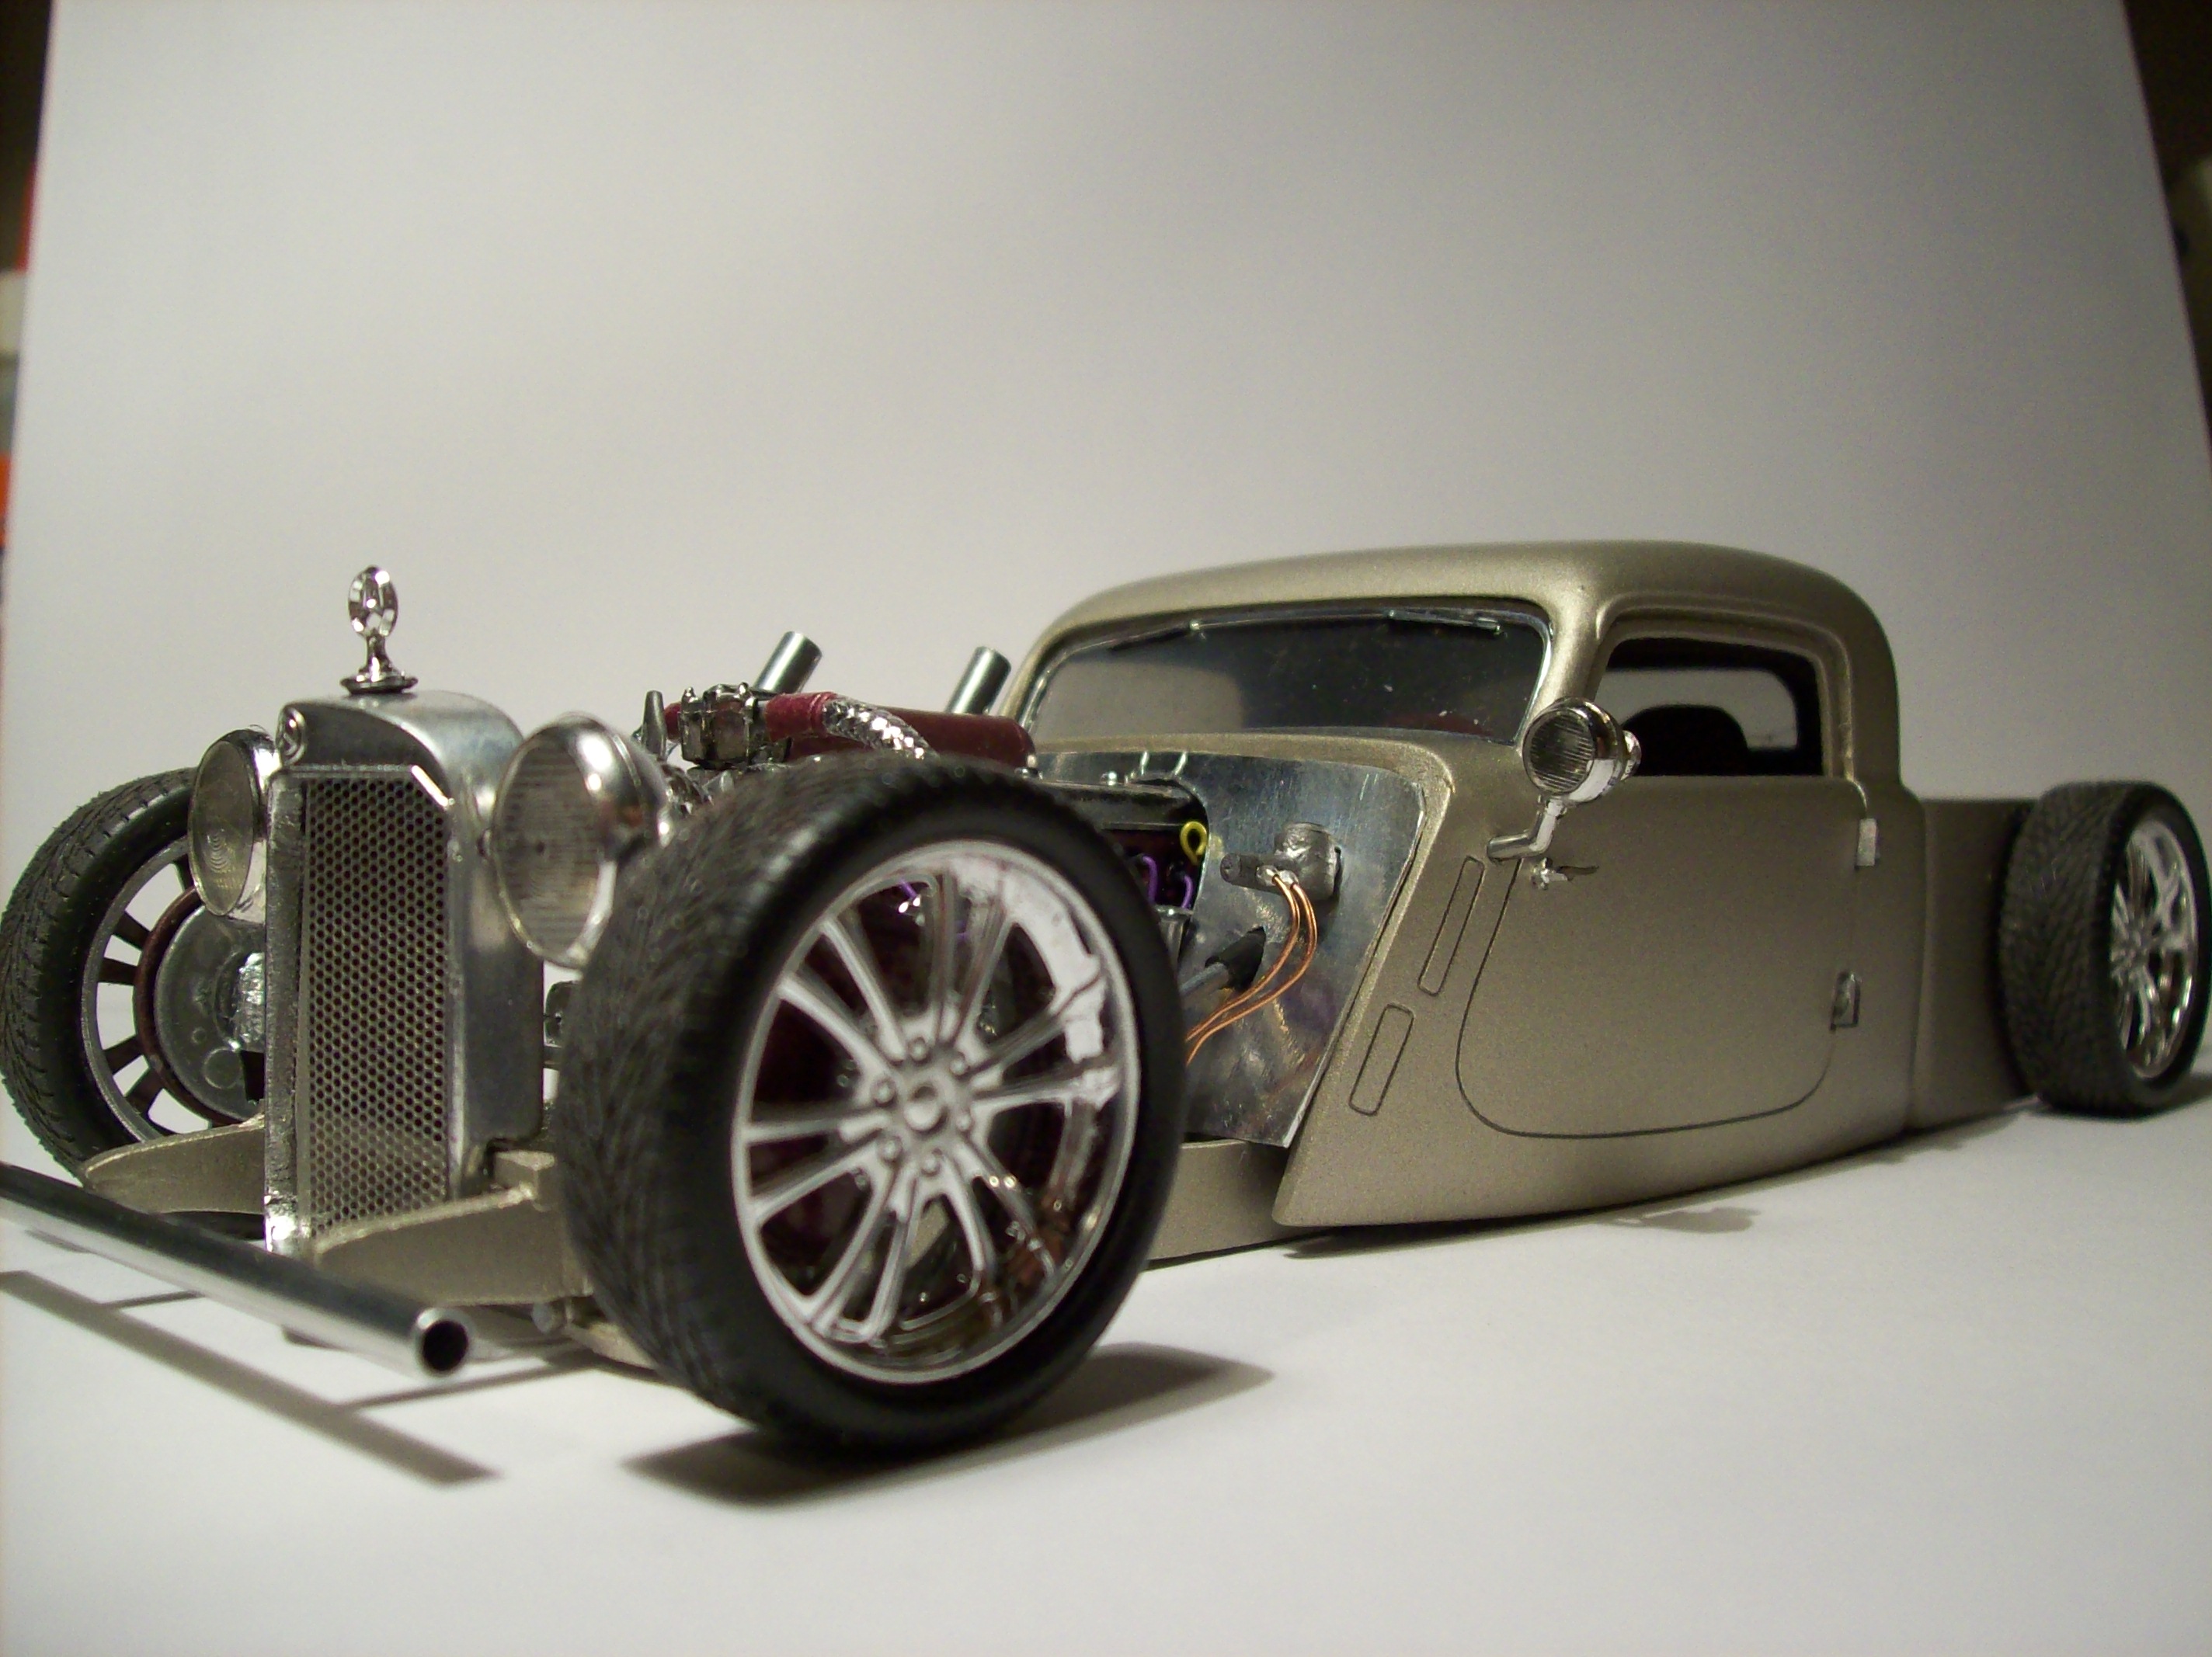
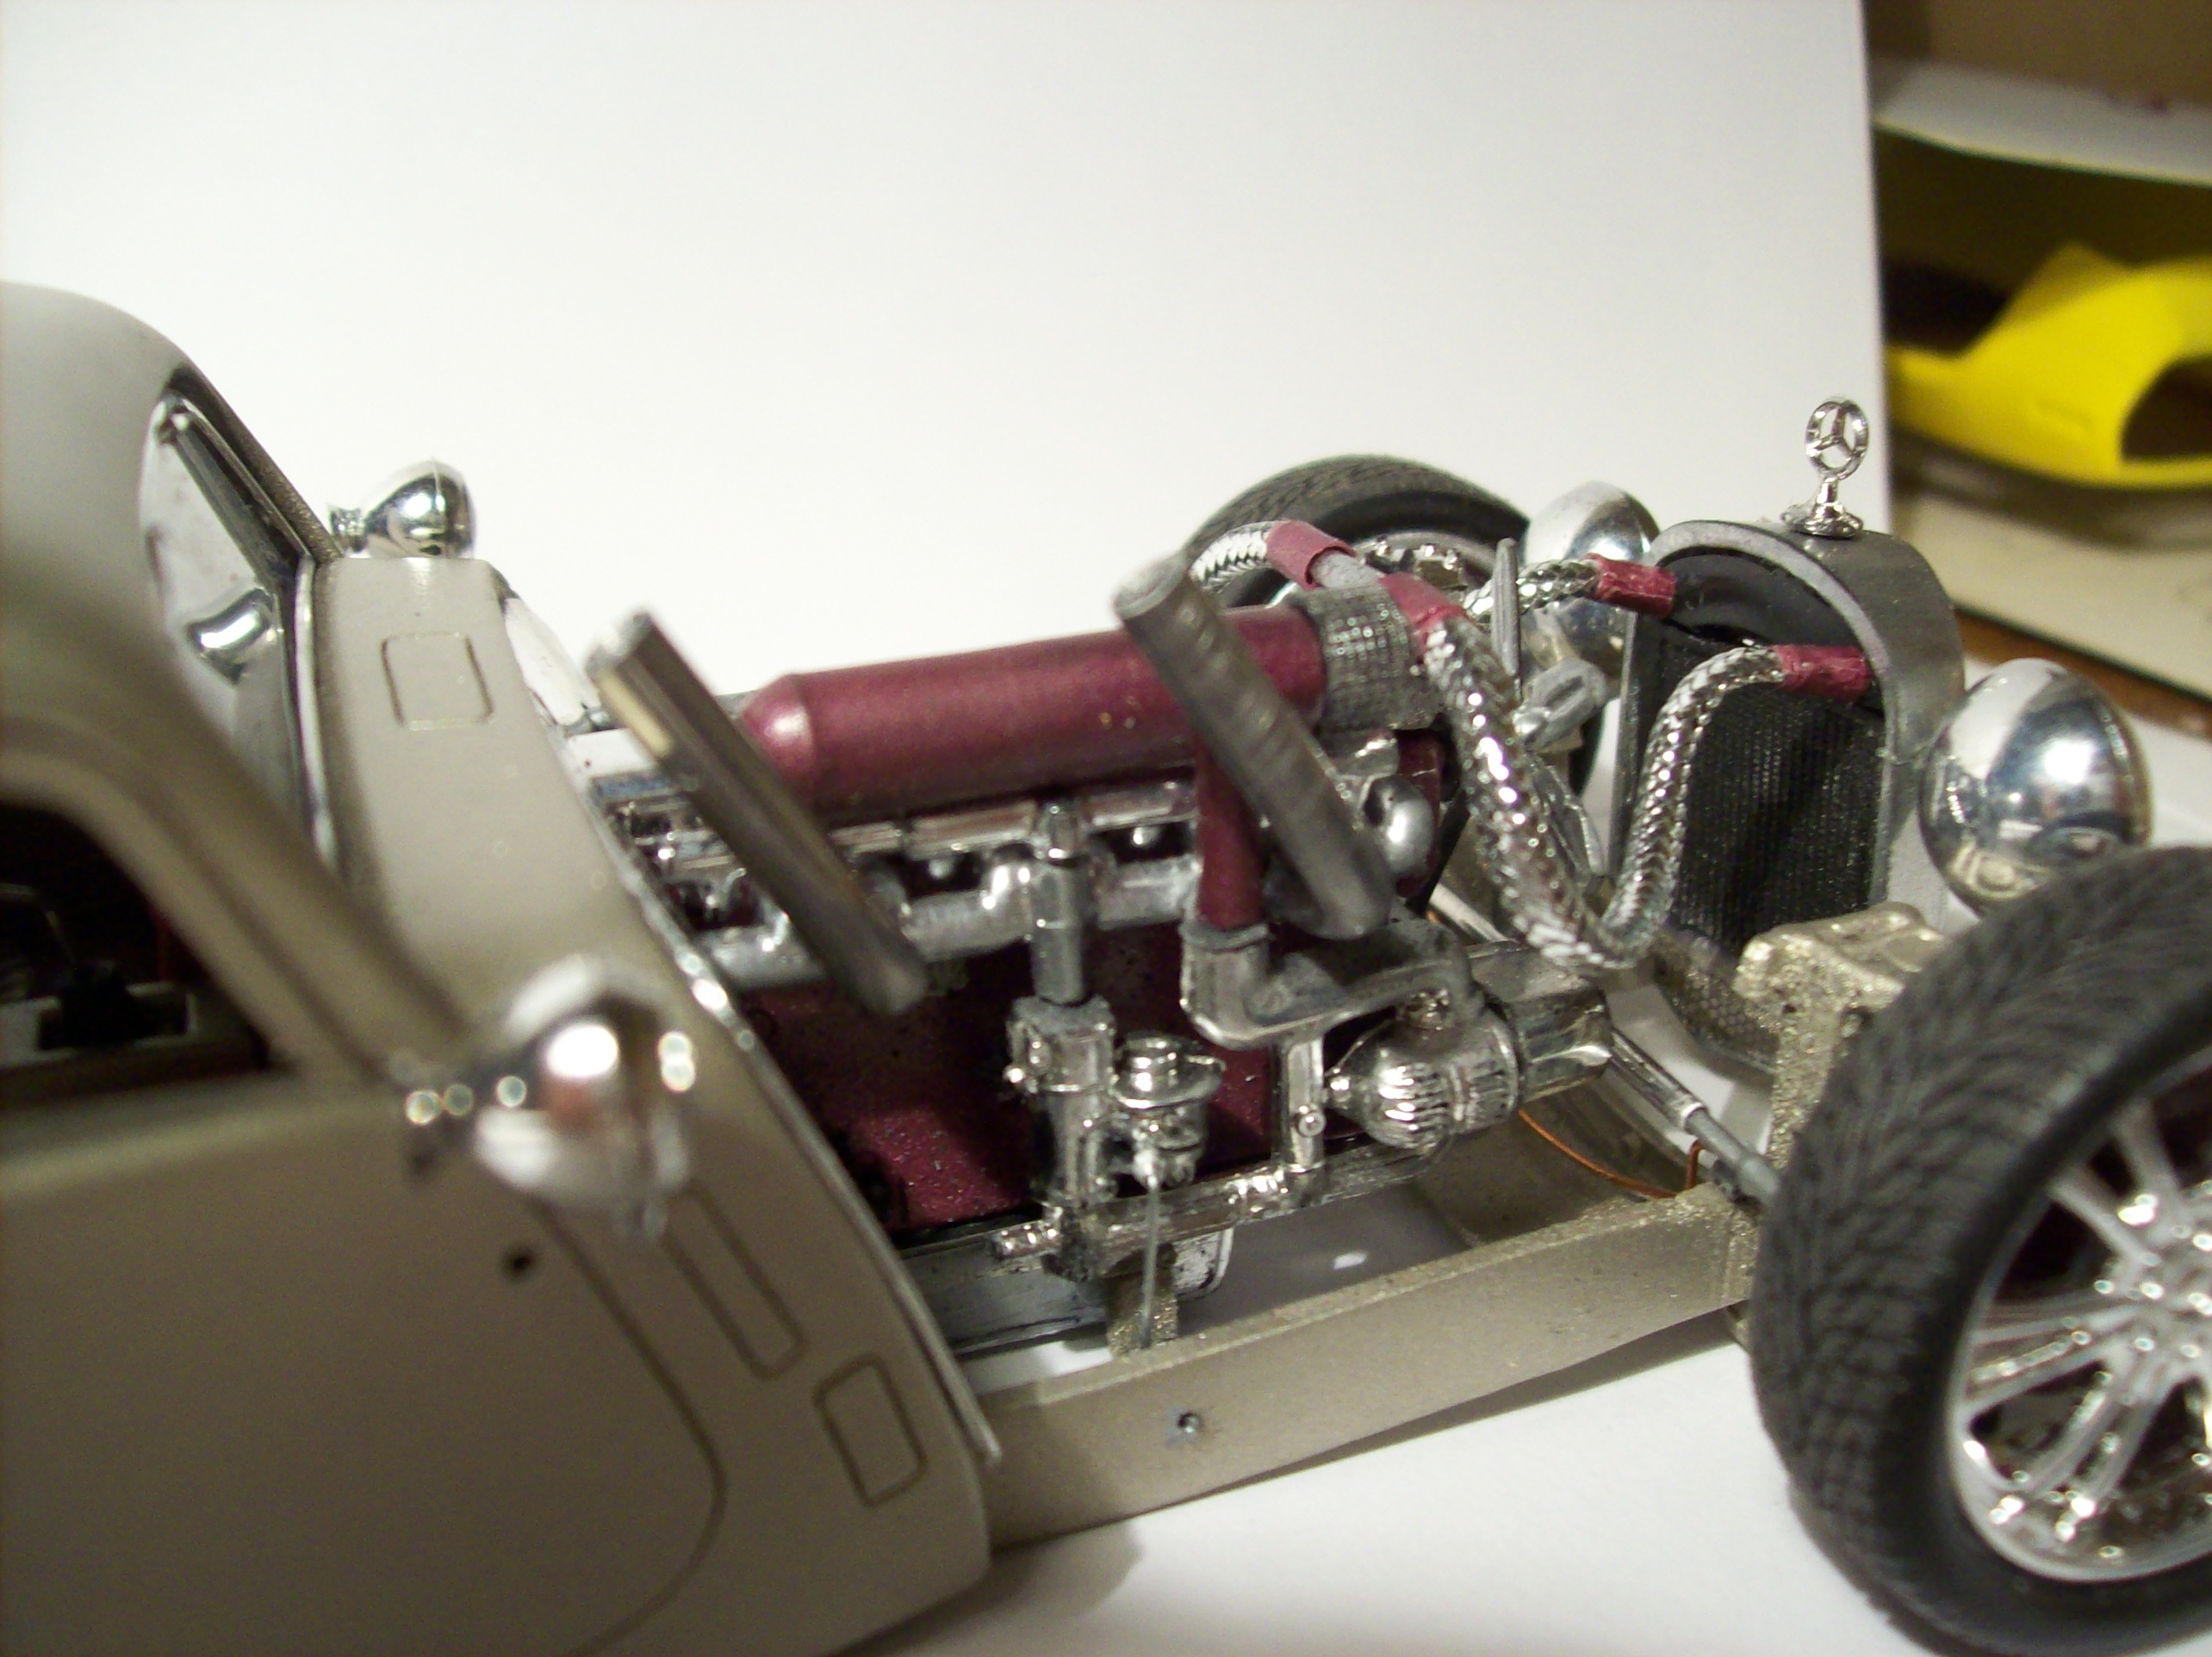
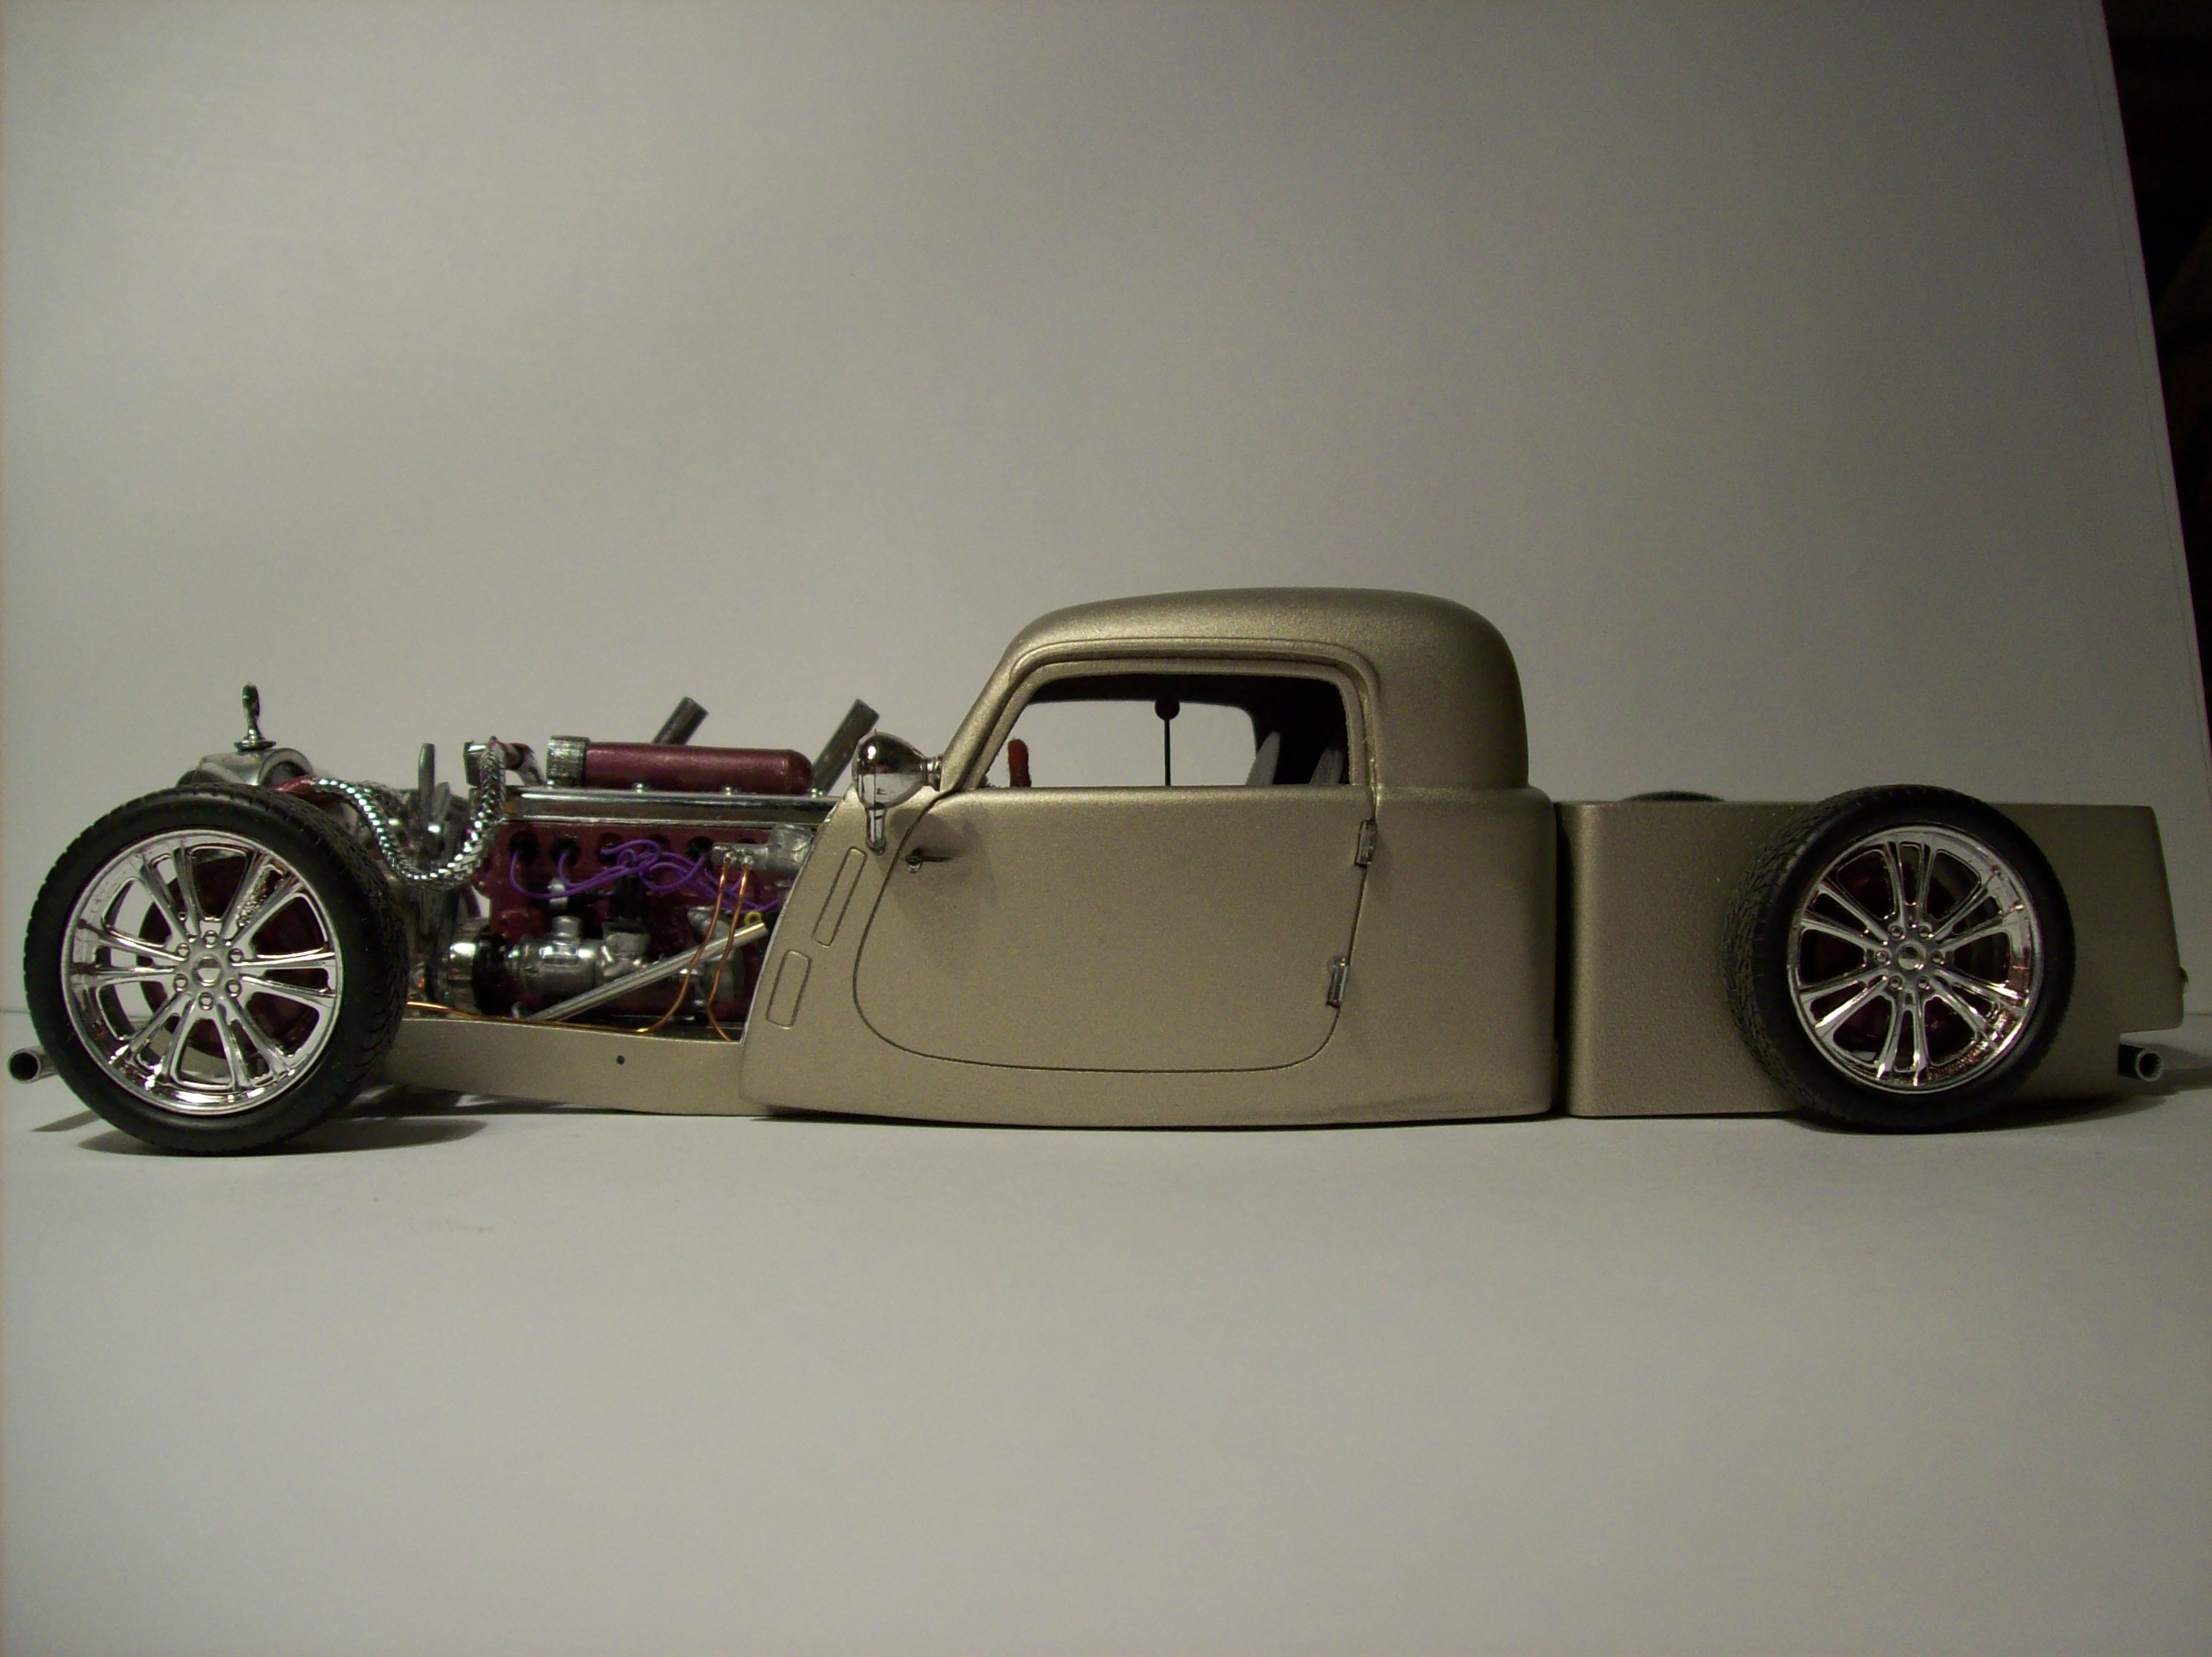
that will be cool!! hers the crazy 35 benz I did...
-
rotator wrecker questions
jeffdeoranut replied to jeffdeoranut's topic in General Automotive Talk (Trucks and Cars)
I have searched all over the net including the us patent office and haven't found much.ive stretched semis b4 so im cool with that. as far as strengthening goes after frame is assembled I think im gonna fill in the inside of frame rails with epoxy(not sure if I could place brass/styrene around all the crossmembers and it b effective). ill probably get one of the peterbilt snappers and use those wheels/tires. from an engineering standpoint it seems to me that the rotating mechanism would b mounted on a platform that slides in some type of grooved channel with serious roller bearings. or maybe a geared drive?