Dann Tier
-
Posts
8,151 -
Joined
-
Last visited
Content Type
Profiles
Forums
Events
Gallery
Everything posted by Dann Tier
-
Dont know how i missed this little gem, but i'm glad i found it! -Fantastic kolor!!!, and i love everything about how this is looking!!!!
-
This really does look Brilliant!!!!
-
Looking SWEEET!!!! -those wheels are Killer!!!!
-
Its so cool watching this one evolve!!!!.....its looking Brilliant, Bud!!!!...i'd just polish this one out too. Need to find this kit -thanks for sharing!!
-
Outstanding custom job!!!...looks right at home! Is that Metallic Pewter from Duplicolor?....love the kolor!!!!
-
Love the mock up, Bud!!!
-
First off, you're doing a great job, Bud!!, and you always find unique ways to build Cobras. Secondly, i agree with everybody else...Fujimi really dropped the ball on this one...having said that, i also agree that this is a Fun kit to build, and looks great on the shelf. I treat it like its a kit of one of the kit car offerings...thats how i can, and will build mine. Looking forward to more!!!
-
Looking GREAT!!!...love the SBing!!!!
-
Thanks, Bud! -i know....Pantera, lol
-
I prefer it now.
-
Glad you like it, Bud!....i am 3/4 German.
-
LOL!!!!, thanks alot, Bud!....yes they do!
-
Thanks again, bud! the gas tank goes right behind the seats...at the base. I'm glad you are liking it!...i have another pretty decent update to post momentarily. I use to use Plasti-Zap until the last two bottles i got were bad. Now i like to use Loctite -this one:

-
COOL!...i will have to check it out!!
-
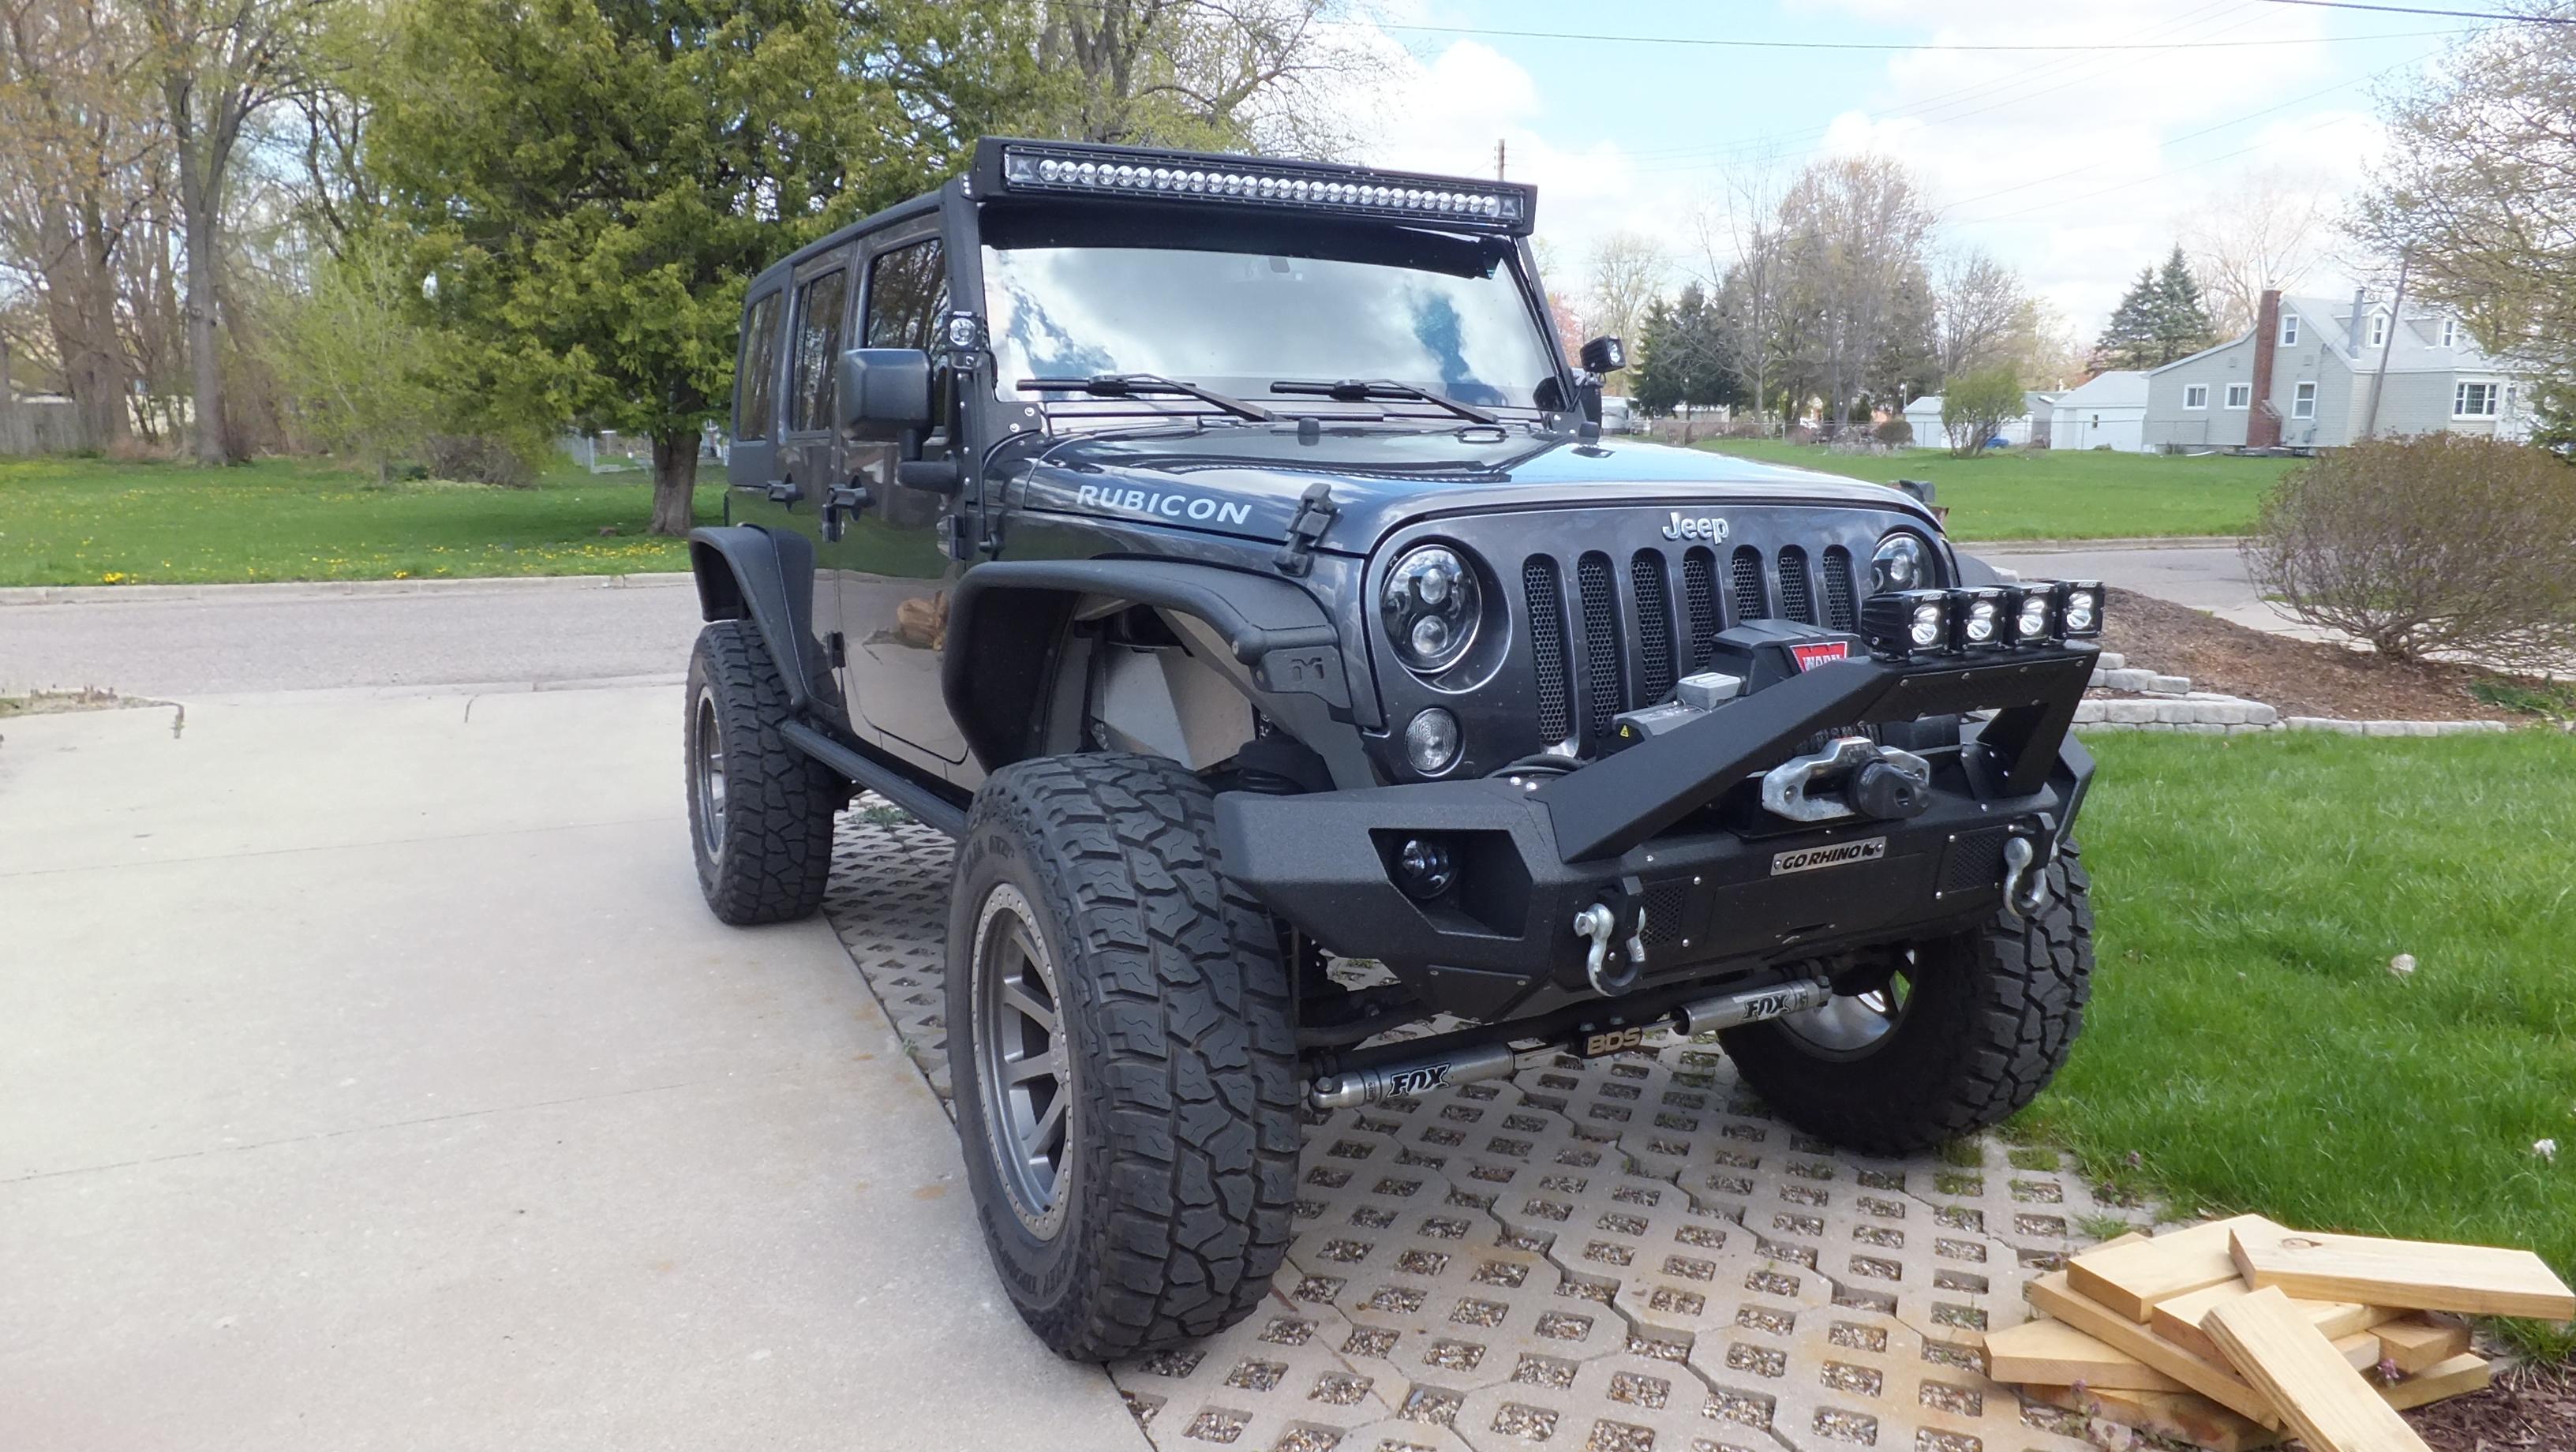
Much appreciated, Bud! I may go functional with the strut, not sure right now...i will give it a go whether i use them or not. By the way, have i ever told you that i like your avitar? we are a Jeep family as well....heres ours...we call him; Beast
-
Thanks, Bud!, unfortunately, its keeping me from my other builds that are waaay closer to being done....this bugger is just way too much fun right now, lol
-
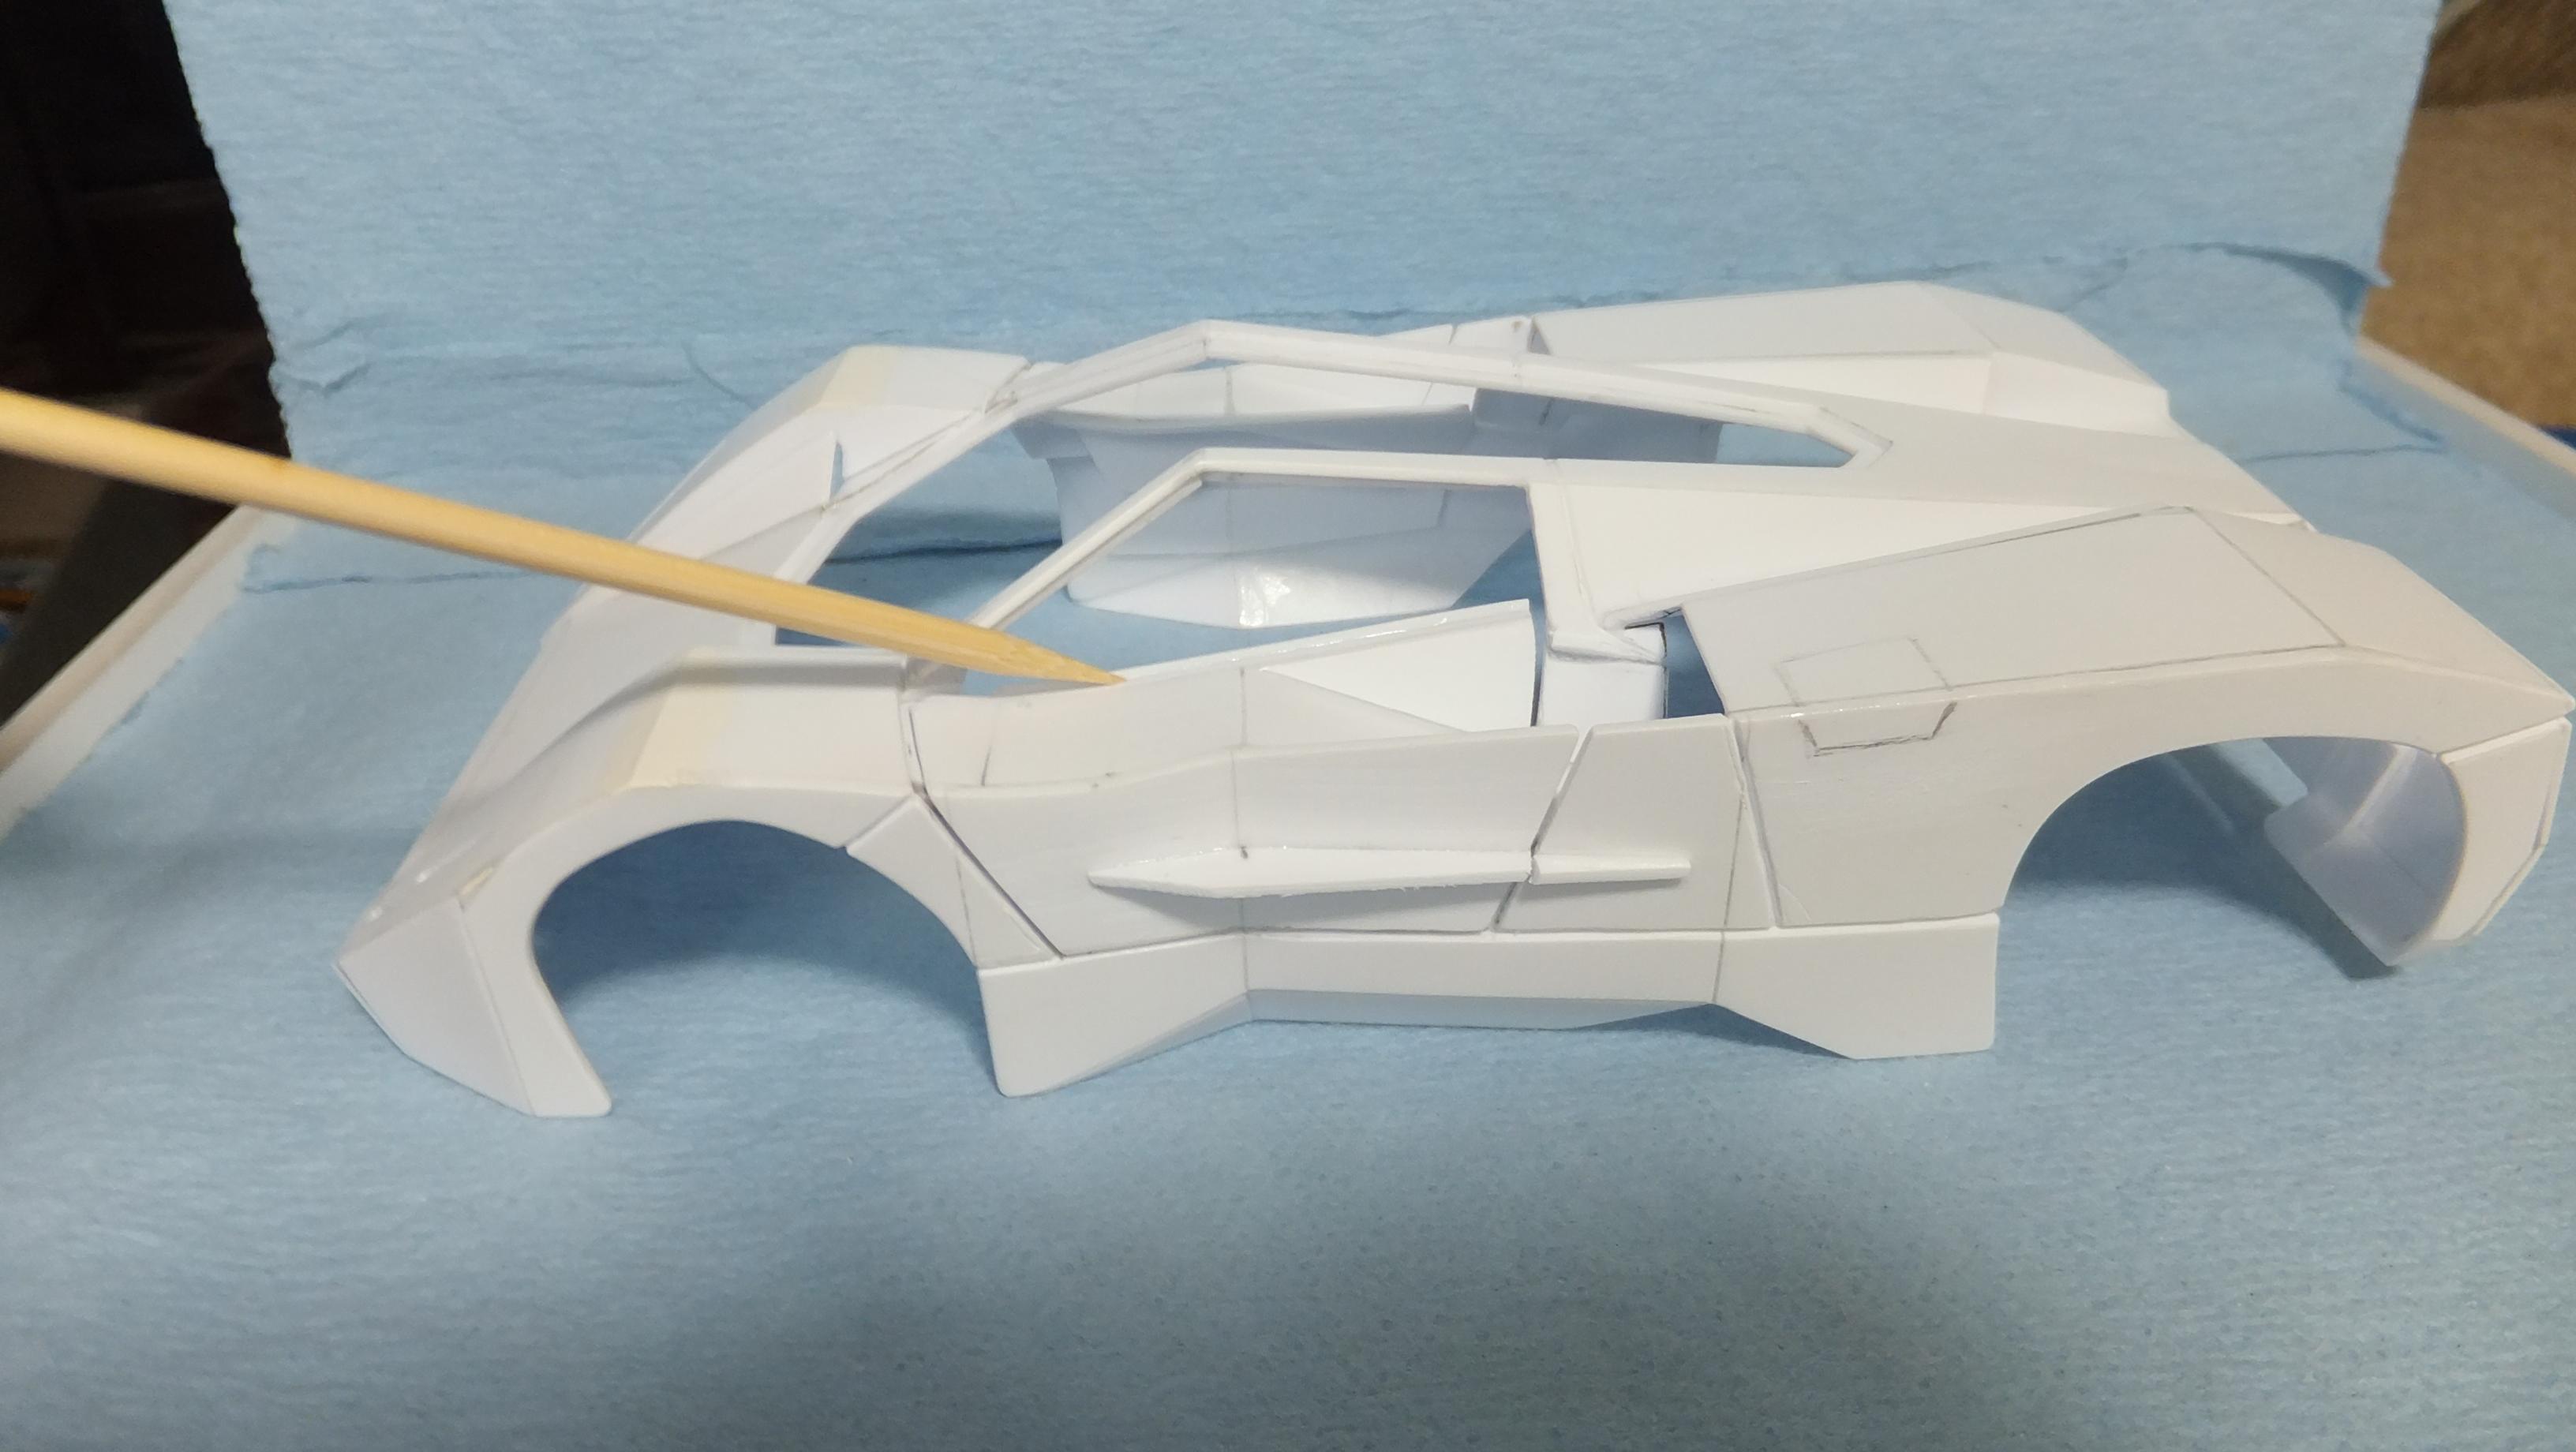
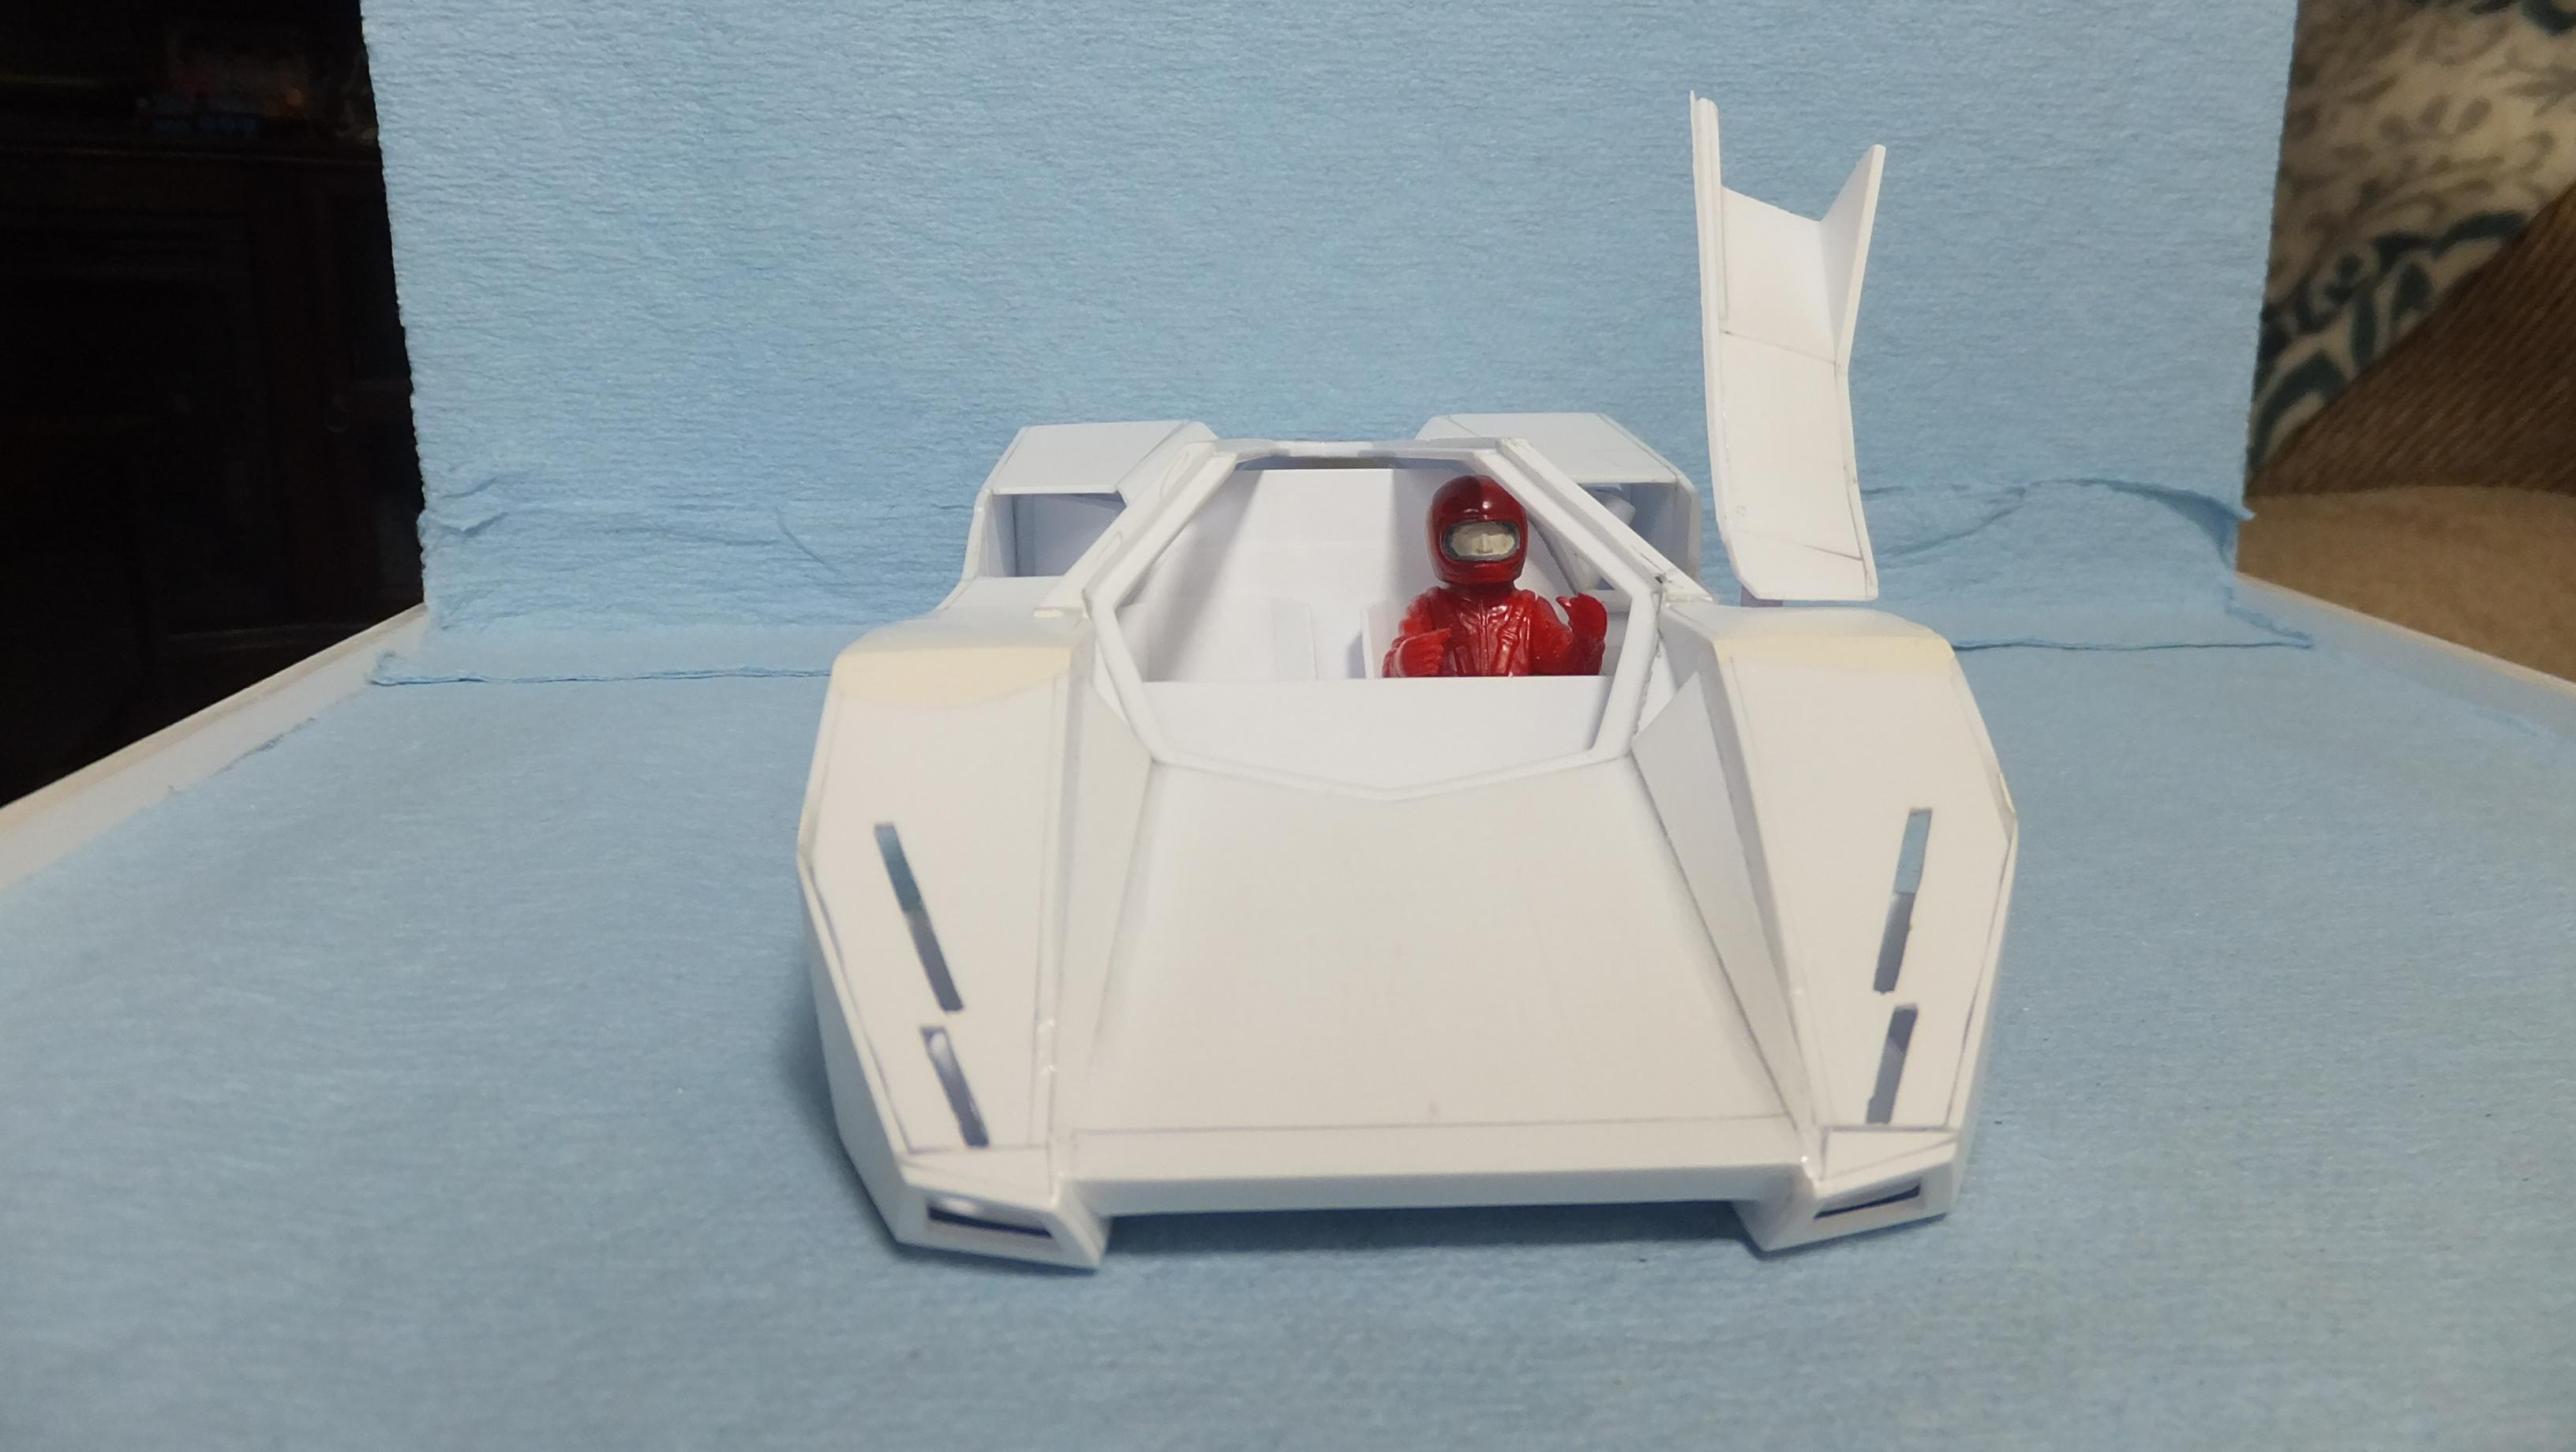
Okay, everyone, i have got quite a bit done to show you all. My main focus right now is to finish everything that has to do with, or is interactive with the body so that i can primer, and paint. The doors are functional now, but i still need to make the struts for them before i can paint. I also need to fix a drivers door gap issue, clean up the base of the A-pillars, and etch the gas filler door. Lots of little nit-picking bits to finish....it feels like the list never ends, lol -Photo 1; To break up the flat...boring side, i decided to take a note from Pagani, and Mclaren with these side fins...they still need shaping. -Photo 2; This seems to be the best spot for the petrol cap door. Still need to scribe it. -Photo 3; Heres the bit i need to add too to close the gap. -Photo 4; I needed to add a lip for the side glass to attach to. -Photo 5; Just a view of the doors, and hinge work. I prefer to make things as much as i can out of plastic, and my hinges are no exception. I've never been too keen on the not so realistic metal wire kind. I will show how plastic hinges can look the part better, and still be strong enough for use. As you can see, i used an angle rod that is glued to the body opposite the door side. The super glue is built up here a bit so that it can flex enough to slide the door-pin under it into place -works a treat, and is easy, and strong! -Photo 6; To me there is no point in having the passenger door open, since all the details are on the drivers side, so the hinge is just a location nub to help glue the door shut. -Photo 7; This is how the dash and seats look sofar. -Photo 8; The petrol filler tube. Now that it lines up with the door, i will snip it shorter for more realism. -Photo 9; Slots for the hinges. -Photo 10; Adding sheet styrene for more visual interest to a flat, boring firewall. -Photo 11; If you look at the original chassis, you will notice that i reworked the interior tub, and removed alot of rear bulkheads. Eventually there will be a motor, so i needed to do this now, rather than after its been painted. -Photo 12&13; The new footwell creates a great contact for the dash! -Photo 14; Another good view of the door hingework. -Photo 15&16; The door nub works well, and will look like the functional one in the end. -Photo 17-20; The door functions perfectly! Notice the shaded tip of the door fin...it will be cut away, and a side marker will take its place. -Photo 20; The filler tube lines up nicely.
-
BRILLIANT 55, bud!!!!
-
Nice Lotus!!!
-
Absolutely STUNNING!!!!!
-
Love the 55 Chevys, and this is looking GREAT so far!!!!
-
No....not bad at all, Bud!!!
-
 Moving along nicely!!!
 -
This is gonna be sweet!!! love the kolor!!!
-
Off to a great start!!!
.jpg.68633dfc9ad5fa0e6e8ee6daa154467c.jpg)