Dann Tier
-
Posts
8,151 -
Joined
-
Last visited
Content Type
Profiles
Forums
Events
Gallery
Everything posted by Dann Tier
-
This is looking SICK, bud!!!!....congrats!!!
-
I love these cars, and i will definitely be following, Bud!!!
-

Otaki 1/12 Lamborghini Countach Twin Turbo...Mission Statement
Dann Tier replied to Dann Tier's topic in WIP: Model Cars
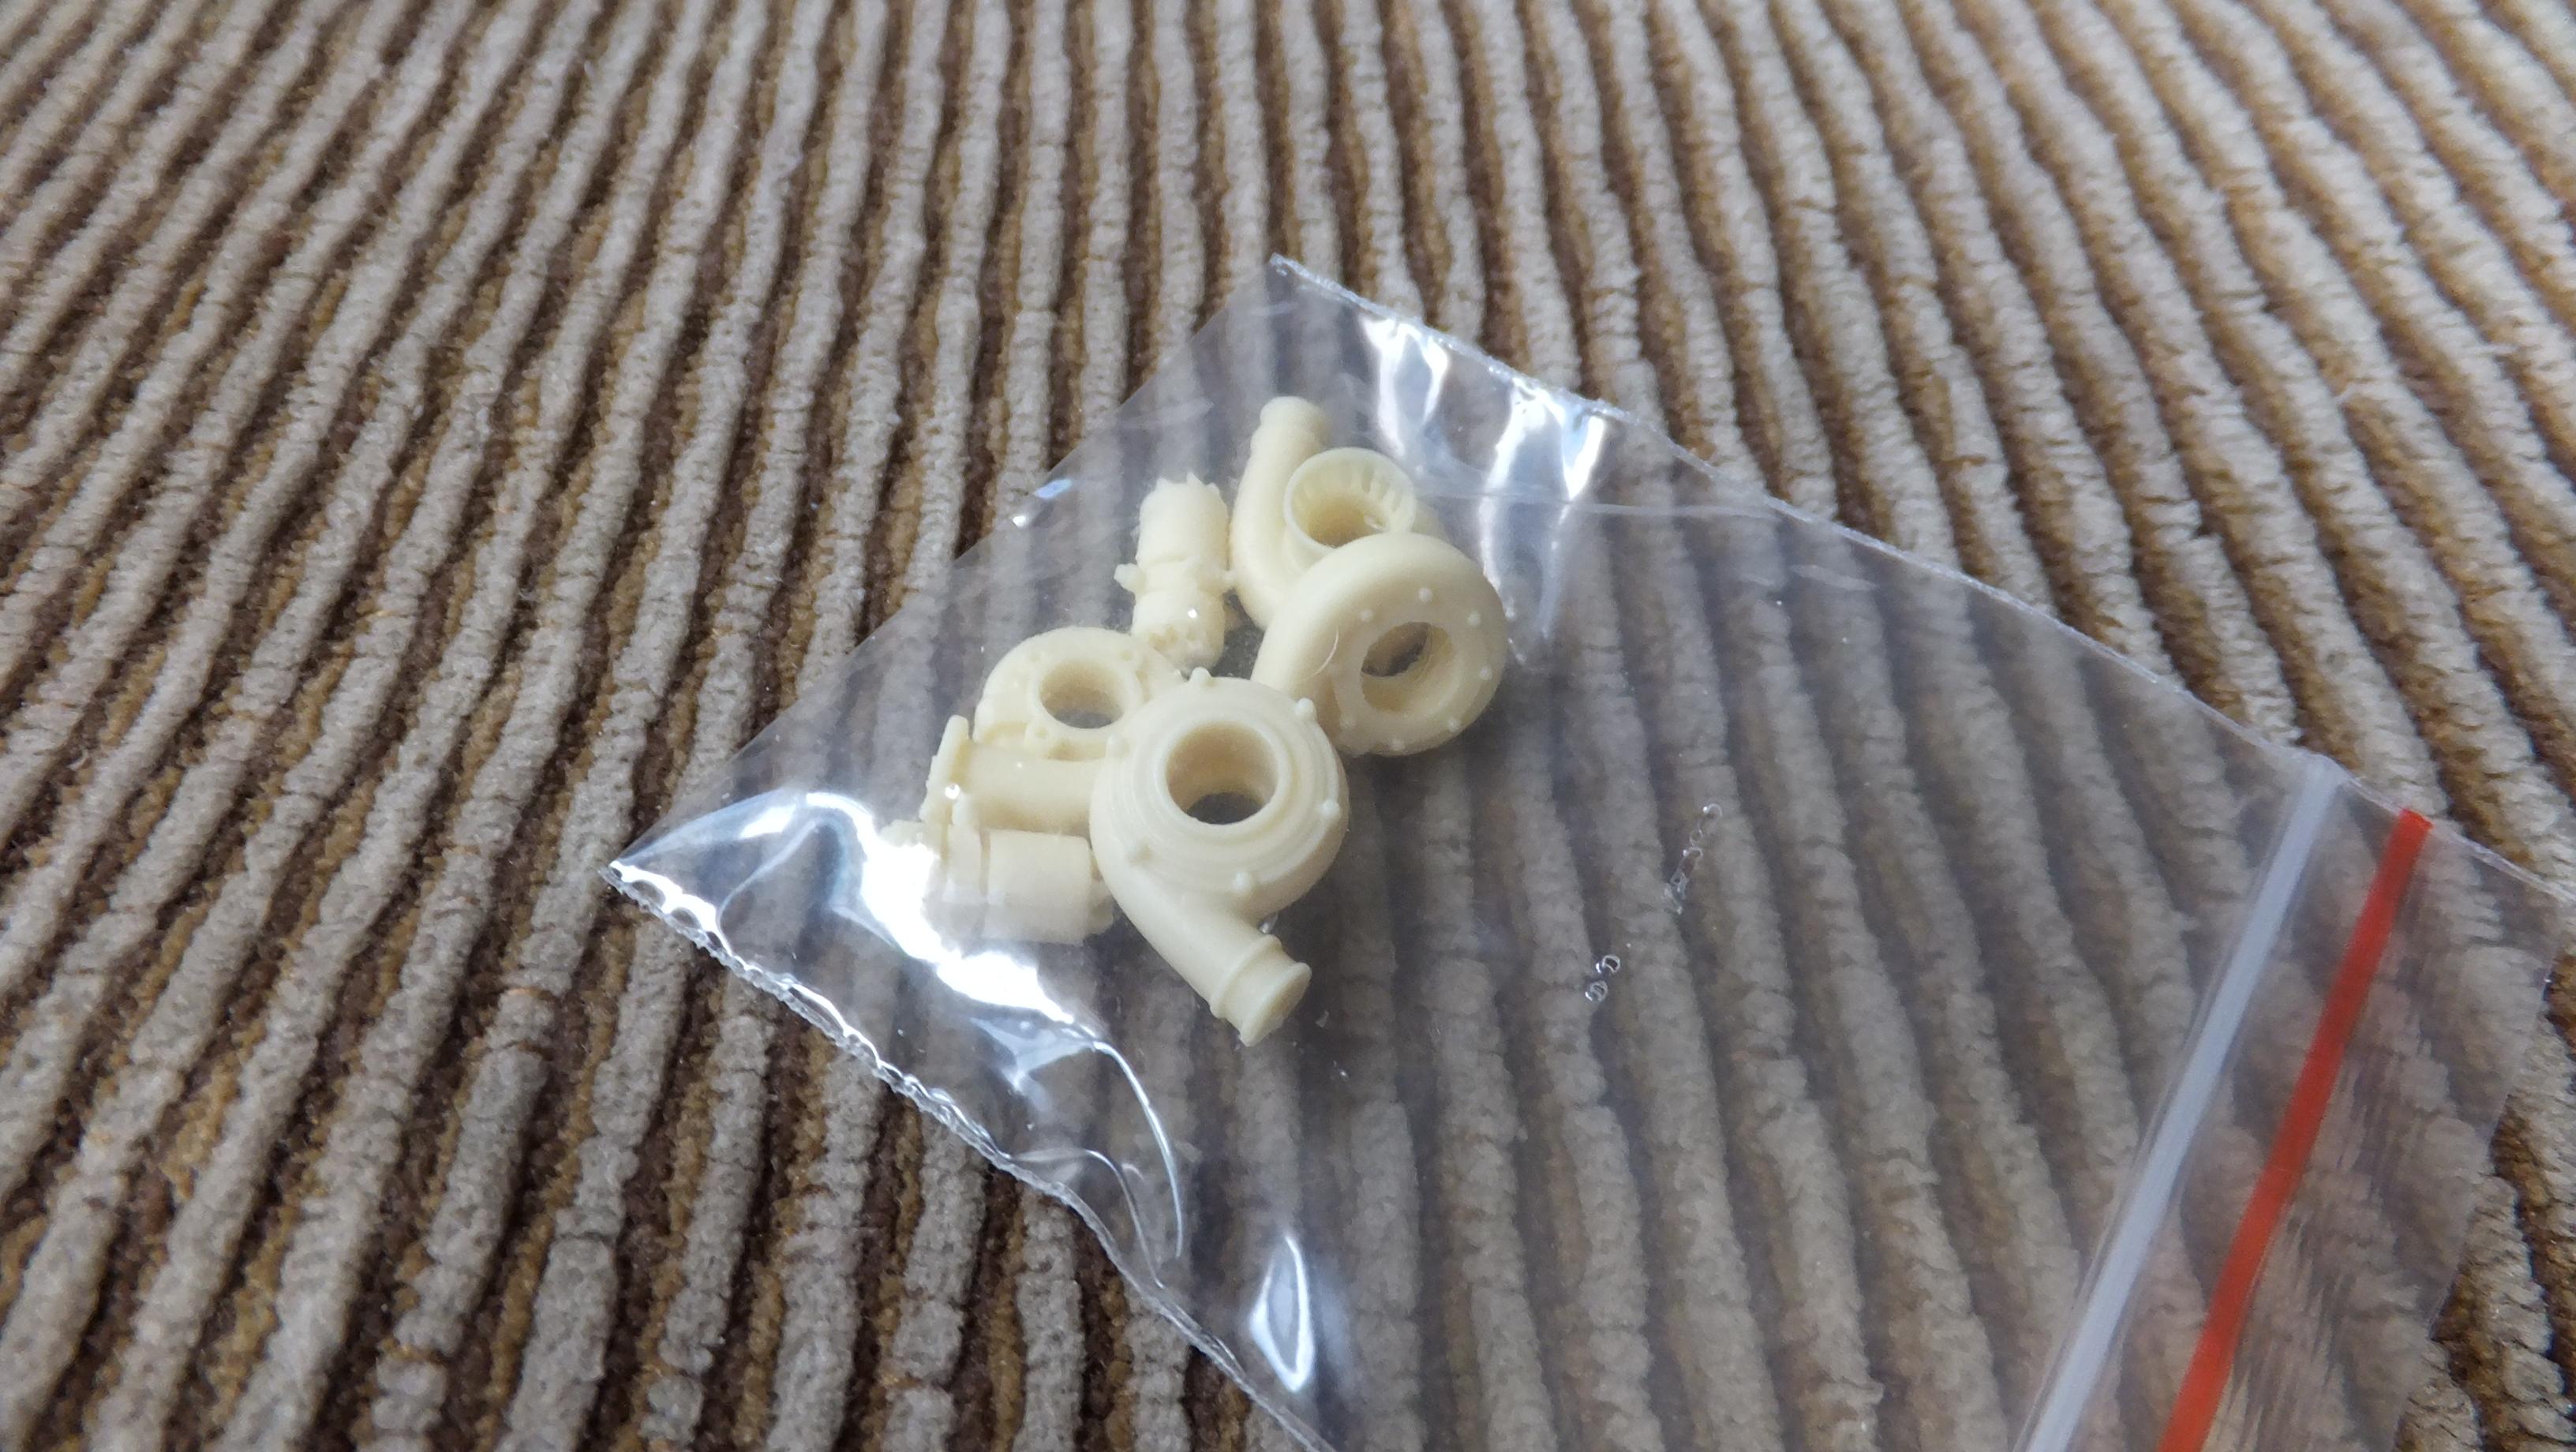
Hey, everyone!, i'm slowly getting back into it...heres an update on the brake system. they are all assembled, and slightly weathered...next step installation! I also have quite a bit of an update on things pertaining to the body, but dont have time to post it right now. -Photo 1; All i need to do is to hook up the lines, and wiring harness's, then i can perminantly attach everything. -Photo 2; I was gonna SB my own turbos, but i was tired of making things, so i bought these resin turbos from HD.
-
I've often thought of getting one, or a Stutz Bearcat....keep up the great work, Bud!!!
-
Even if they pop up after my first opaque coat of kolor, the fact that i sand between every coat with 2000grit, it disappears after my second of four coats.
-
thANKS AGAIN< Bud!
-
They arent too bad, lol
-
Thanks alot, Bud!
-
Testors (Gunze Sangyo) Lamborghini Spelling Bee Special (Silhouette)
Dann Tier replied to 89AKurt's topic in WIP: Model Cars
Thats already been done for a while now, lol. I was thinking about building it with its sister car; the Uracco. -
Glad to help, Bud!, I run a line of super glue along the entire edge of contact for strength while i work on the whole body. I have to snip them out, and sand the glue away IF its in a visible spot. Its a bit of work, but its well worth it!
-
Thank you so much, Bud...
-
Very much appreciated, Bud.
-
Thank you very much, Bud.
-
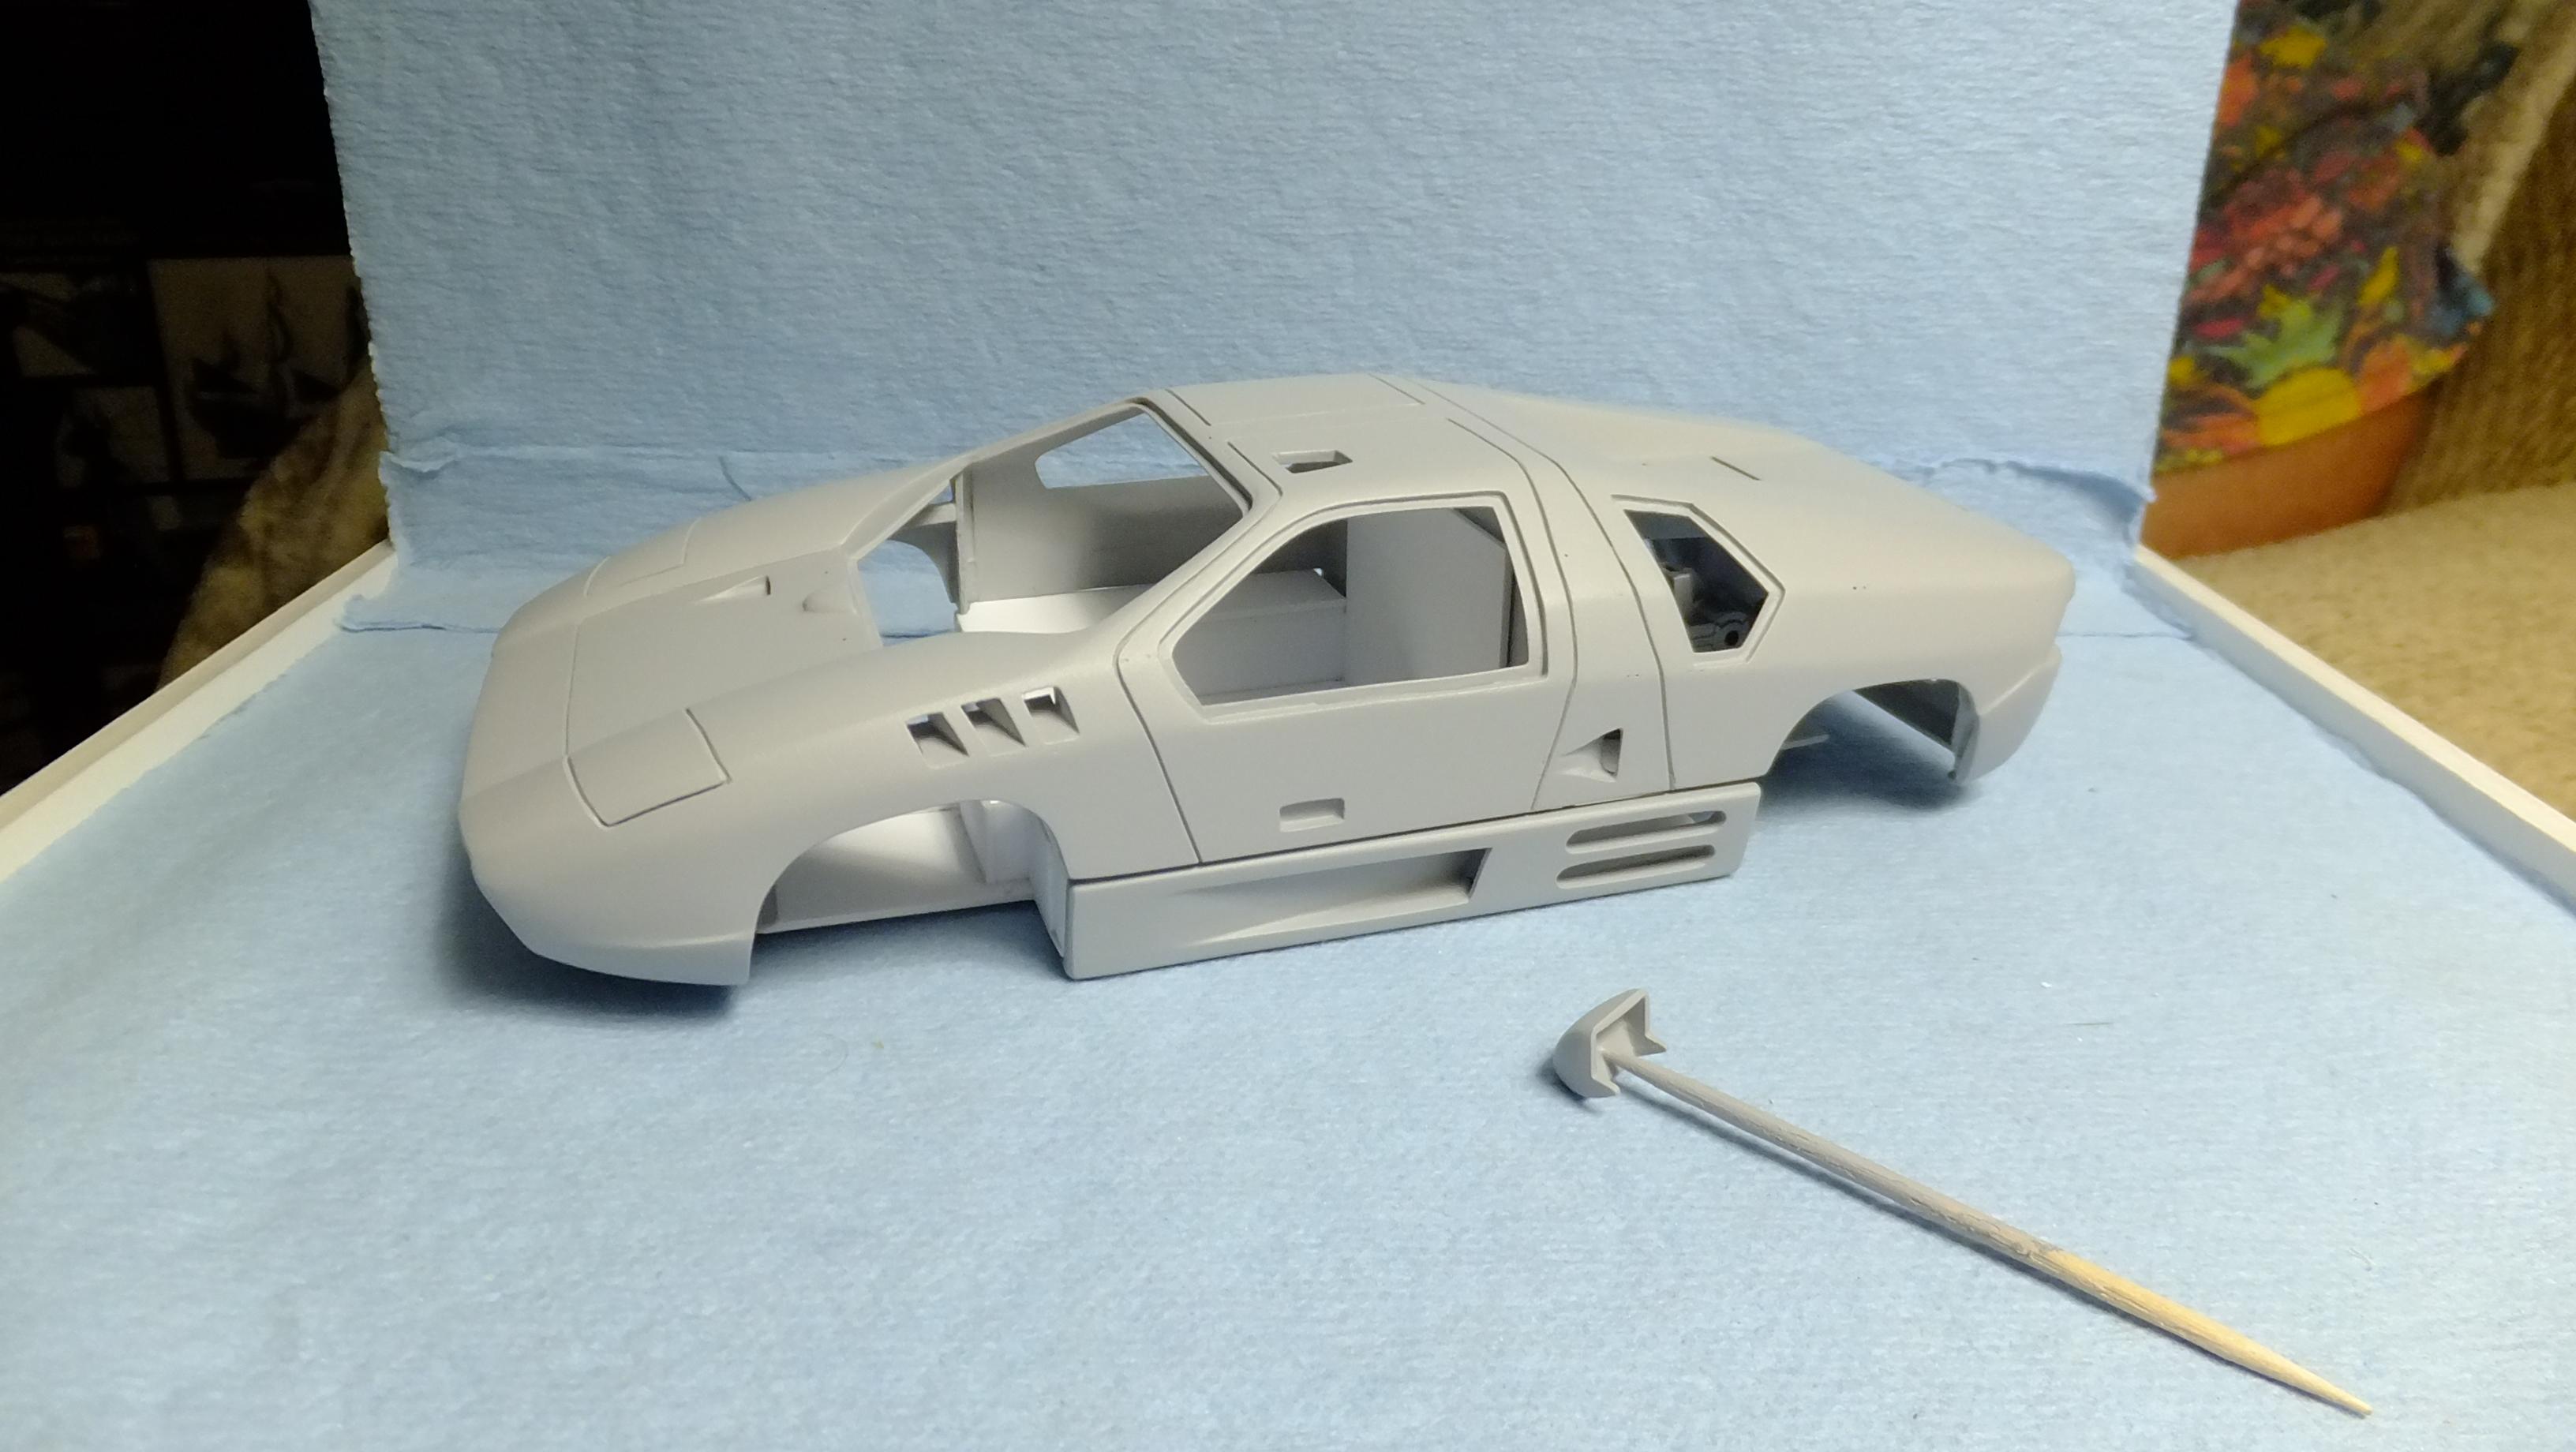
Here is how i did the body on my Blitzkrieg.....just like my Isdera Imperator, i start out drawing the side, front, rear, and top in 1/24, then use the drawings as stencils when needed. Other than that, i just take the basic measurements off the drawings, and let things evolve. Here is a consolidated example of how i like to do things; -Photo 1; After making a chassis plate, i attach bulkheads in several critical points. Then i cut out and glue down all the contour strips with copious amounts of super glue over all the joints. -Photo 2; Here are all the starting bulkheads...i will cut/adjust them as i move along. -Photo 3&4; For more gradual/gentle curves, i use my favorite; Milliput putty. I add two dams for the flat ends of the arches, then push the putty into the area masked off by the tape...shaping...tapering it with wet fingers until it is how i need it. -Photo 5; You can see 95% of the bulkheads were safe to remove now. -Photo 6; And heres where its at now....all ready for the doors, and cowl to be cut open -AFTER my next step of rear frame, and hinge work.
-
Hey, Bud! lol, no, havent watched them in a bit....a whole bunch of horrible happened in my life recently...we had five family members die in the last six months, and another fighting stage 4 cancer now, so i havent had very much motivation lately. I now have 29 open builds, and i seem to only bounce around puttering with them all. Not even enough for updates of any value here i dont think. Thank you for inquiring though, i will try to get to them as soon as i can -sorry for the wait.
-
OUTSTANDING!!!!
-
What a BRILLIANT custom job!!!!
-
Love all your added details!!
-
Lamborghini Silhouette by (Gunze - Sangyo) Testors
Dann Tier replied to 89AKurt's topic in Model Cars
Another crazy car from L.A. -nice job, Bud!!! -i've got some turd polish just for this build, lol....i love the car, and this kit! -
I dont like it -i LOVE it!!! absolutely stunning!!!!!
-
Freaking SWEET!!!....didnt even know there was a kit of this.
-
Congrats on getting this beauty done, Bud!!! -Love your wood details too!!!
-
Nice clean build!!
-
Porsche 918 by Revell in Holomatic Spectral Chrome
Dann Tier replied to carl63_99's topic in Model Cars
Now that is some crazy kolor!....Outstanding job on this Beast!!! -
VERY nice job on that display case!!!.....with such stunning collection of cars, they deserve to be displayed this way!!