talon63
-
Posts
269 -
Joined
-
Last visited
Content Type
Profiles
Forums
Events
Gallery
Everything posted by talon63
-
Along the lines that Spex84 was suggesting, if you have access to a Die Cutter like the Silhouette Curio or Cameo, or know someone who has one, with the embossing tool, you could reverse the image and import it and have those emblems done on heavy stock, really thin plastic, or the Silhouette Embossing foil in fairly short order. On foil, with a wash, it should come out fairly close the reference image. However you decide to go, this is one inspired build.
-
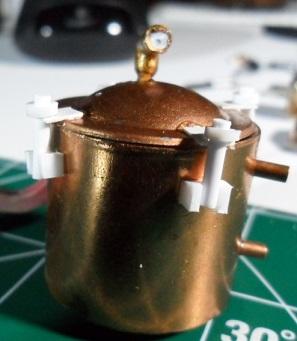
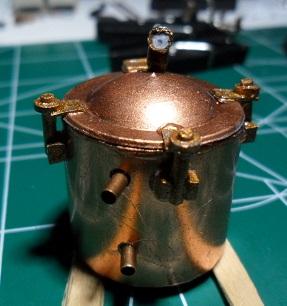
Small update to the ongoing construction. Color scheme of the dash, just need to do the gauges. got the window frames and the transition line between the nickel and the pewter done in brass, as well as the portaled visor. And finally, tidying up the boiler build with the hinge and latches. The copper clock hour hands will form part of the boiler mount to the frame. The more ornate minute hands will also be utilized in the construction of the front suspension, which I hope to start soon, so I can the frame kitted out with the boiler and the steam engine, and it's plumbing. More to come....

-
 Great build!
 -
I was considering either a liquid fuel system, or replacing the fuel tank with a battery bank for an immersion element type system, since there will be an axle driven generator (like the Stanley) for the electrics that could also recharge the batteries. The immersion system should allow for the initial steam build-up to occur a lot faster than a burner-type boiler.The radiator, and the return lines from the engine, become a condensate system to recycle the steam back into water to feed back into the boiler, hopefully minimizing water top-offs and extending range. The more I work on this, the greater a plumbing challenge it becomes to build a more efficient, but still theoretically practical, system. That's the plan anyway
-
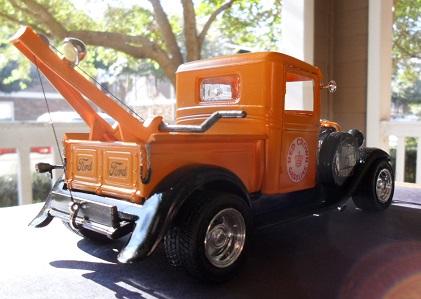
34 Ford Tow - quick knock together
talon63 replied to talon63's topic in Model Trucks: Pickups, Vans, SUVs, Light Commercial
That's the Testors' Grabber Orange rattle can over cheap store-brand gloss black rattle can. -
I kind of like it, if you are going for a "found object" look. something like
-
34 Ford Tow - quick knock together
talon63 replied to talon63's topic in Model Trucks: Pickups, Vans, SUVs, Light Commercial
Thanks, guys! -
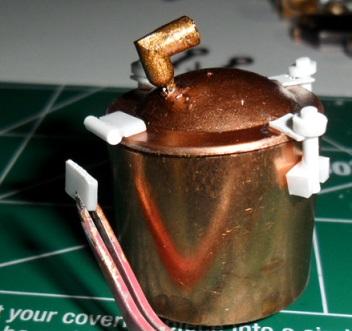
The boiler is coming along nicely, as is the frame. Also started work on the body color scheme. Satin Nickel over Oil Rubbed Bronze. The top is just temporary at this point, but will be black when done. Still working on creating a bunch of copper and brass parts to round out the build.
-
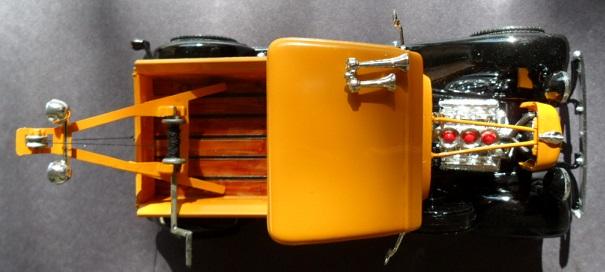
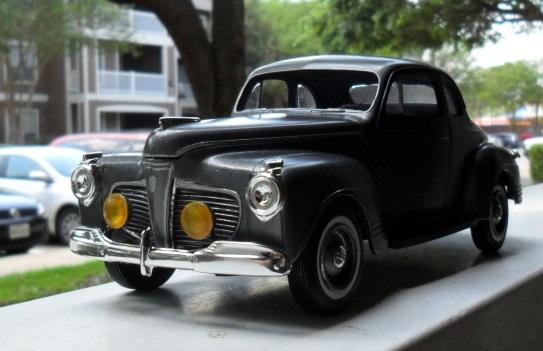
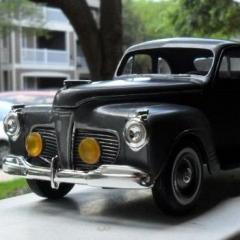
While waiting for parts of another project to come together, I thought I'd build a tow truck to fill the time. Except a few engine parts from spares, shortening of the bed, converting it to suicide doors, and the boom lights are filled with Glo-it, glow in the dark paint, this was pretty much a box build. As always, comments and feedback welcome.
-
Last update before this one goes under glass. Need to finalize the hood fit, and some under hood detail, as well as mirrors and door handles. Still laying out the pin-striping too. Thanks for the feedback during this build.
-
Finally located the cream paint I was looking for to complete the interior.
-
Looking forward to seeing this as it develops!
-
Great looking build! On the CSX3016, did they mount brake fluid and clutch cans on the drivers side inner fender wall or on the firewall?
-
Minor update - work on the steam engine progresses. need to add a linkage arm to piece sticking up at the top, and a couple of other detail pieces. Then will create the copper plumbing to run up to the boiler. Also starting work on the new frame.
-
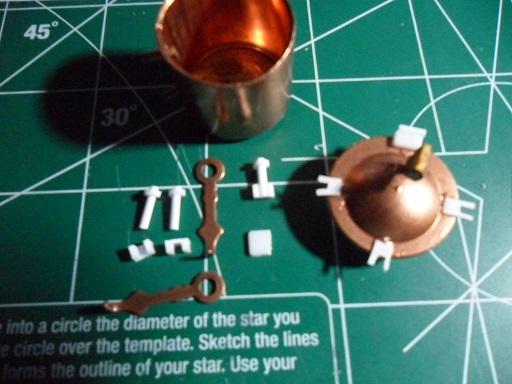
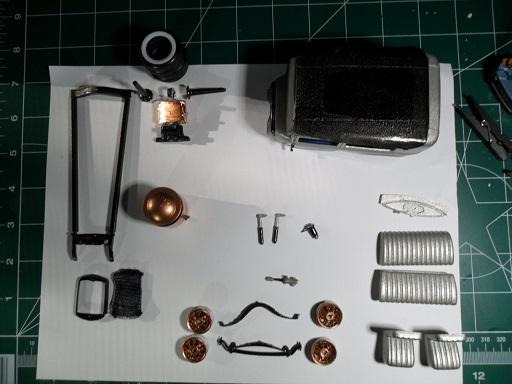
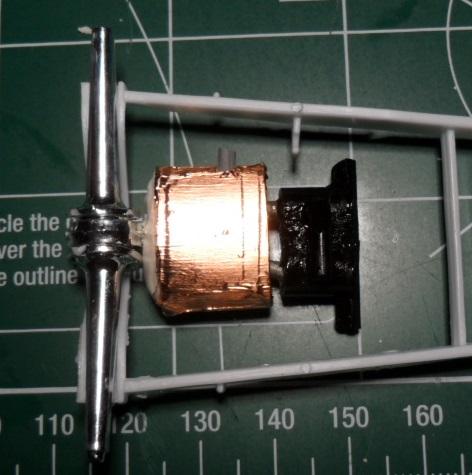
The body from this kit, and maybe a few more parts, are the basis of the next build. Mostly going to be scratch built, and in the vein of Steam Punk, will be steam powered. These are some of the bits and pieces I'm starting with. The frame in the picture will be used to donate cross members. The first thing I'm tackling is the Steam Engine, to be mounted directly to the rear end. This is the initial roughing out of the steam engine. These are views of what will be the bottom of the engine. The only detail on the top is a square raised area with a slightly domed cover between the cylinders. The top half (Piston cylinders) will be steel or black, the bottom (housing for the Stephenson gears) will be clad in copper. the tie-in to the rear end and axle is the bit resting on the mat. The horizontal black and white bit represents the steam feed from the boiler, which be located in the engine bay. Still a lot of clean up on this piece, and several detail pieces to complete. The interior will be kitted out with plenty of dials, gauges and levers. I look forward to your feedback as this experiment progresses.
-
masking w/SillyPutty, similar new product.
talon63 replied to fiatboy's topic in Model Building Questions and Answers
I'd avoid Play-doh, except maybe for the white. Any of the colored ones would be liable to stain the masked area, based on an experiment in using it for one-shot molds. -
Work is progressing on the interior and the undercarriage. Been distracted playing with the Silhouette Curio, doing parts mock-ups for another project to announced soon.
-
1926 Model T Sedan - SomesortaRod - Finally Done.. Only 2months late!
talon63 replied to Impalow's topic in WIP: Model Cars
That is looking fantastic. The work is really inspiring. So much so that I ordered a Silhouette Curio Cutting Tool to add to my arsenal. -
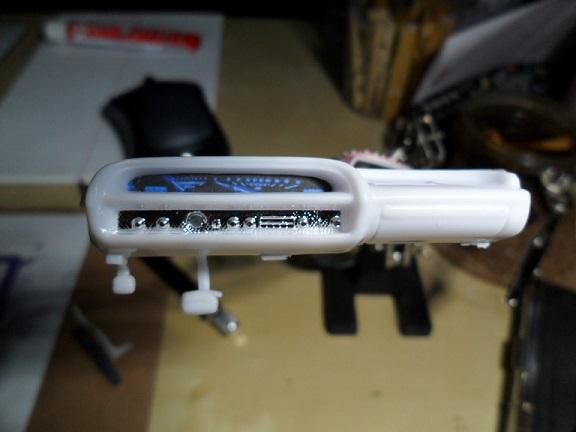
Step one of the dash rework, Digital dash pod. Reduced an image I liked, upped the resolution and printed. Here is the test fit without the clear insert. Next, the pedals are going to be liberated from the the dash, and the missing gas pedal will be created as well as a parking brake release. Then on to the build-up of the existing center console to flow into the dash.
-
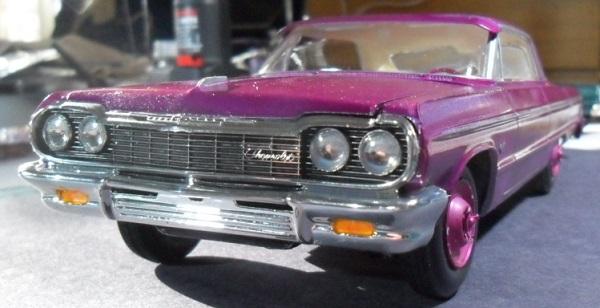
Thanks. Before I redid it, it had kind of a reddish cast to it. Over the silver, it's nice deep purple. It's Duplicolor from the local auto parts chain.
-
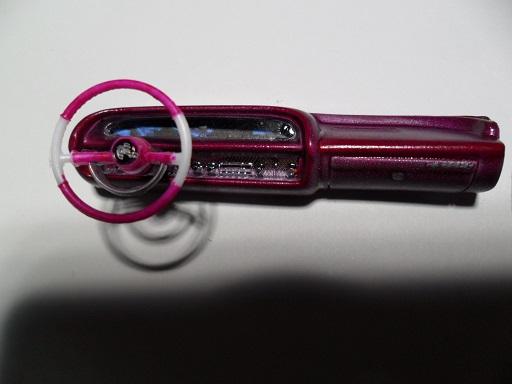
After finishing up the visor mod, decided the finish still wasn't quite right. Quick knock down, silver base coat, and two coats of the MetalCast later, the color has some depth and nice gloss. Got the exhaust mods completed. Liking the way the mufflers came out, and converted the side dump exhaust tips to straight using chrome sprue that had a slight flare to it. Lots of suspension detail left to do. Also started on the interior. Found this striped crafting tape (paper-base, not cello), letting it sit to see if I like it while deciding if the interior will be primarily white, or carry more of the exterior colors to the inside.
-
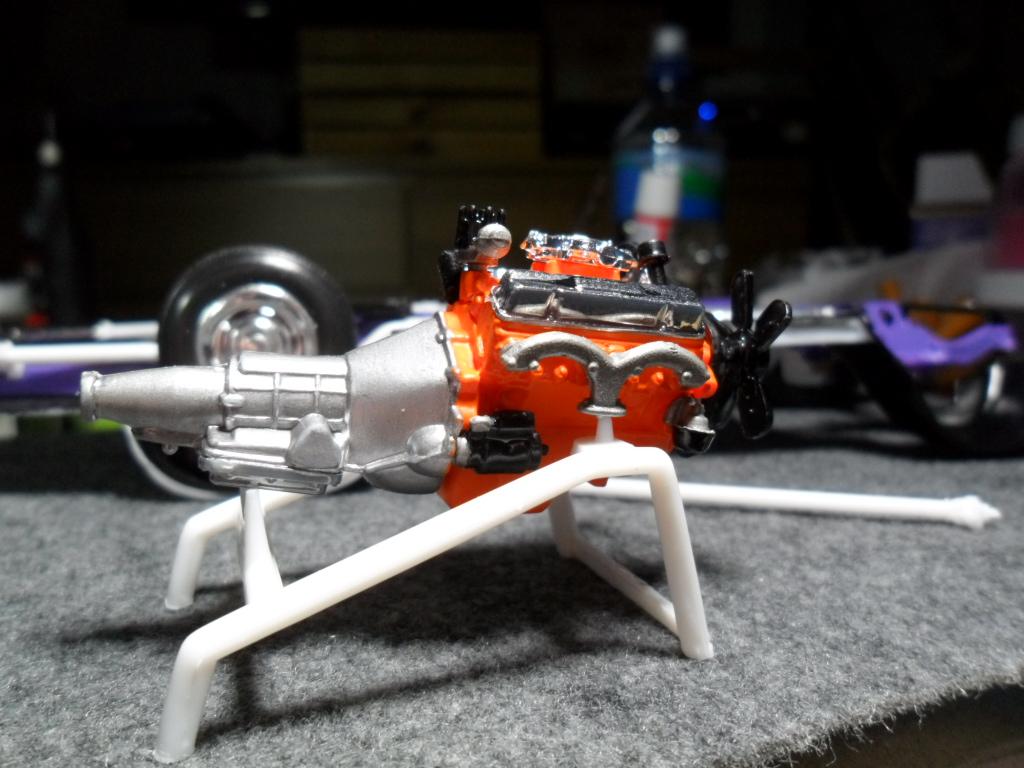
Small update. I can see why another poster turned his into a wrecked version. This had a warp in the floor pan, and an opposite warp in the frame. Was able to get the frame straightened out by finishing the boxing in and clamping it for while. Floor pan isn't that pronounced, so I should be able to work with it. Added the "visor" over the windscreen using the custom spoiler from the 70 Mustang kit, just had to trim off the mounts. And got the engine ready for wiring and plumbing. In the background is a dry fit of the frame, floor plan, and a re-worked exhaust.
-
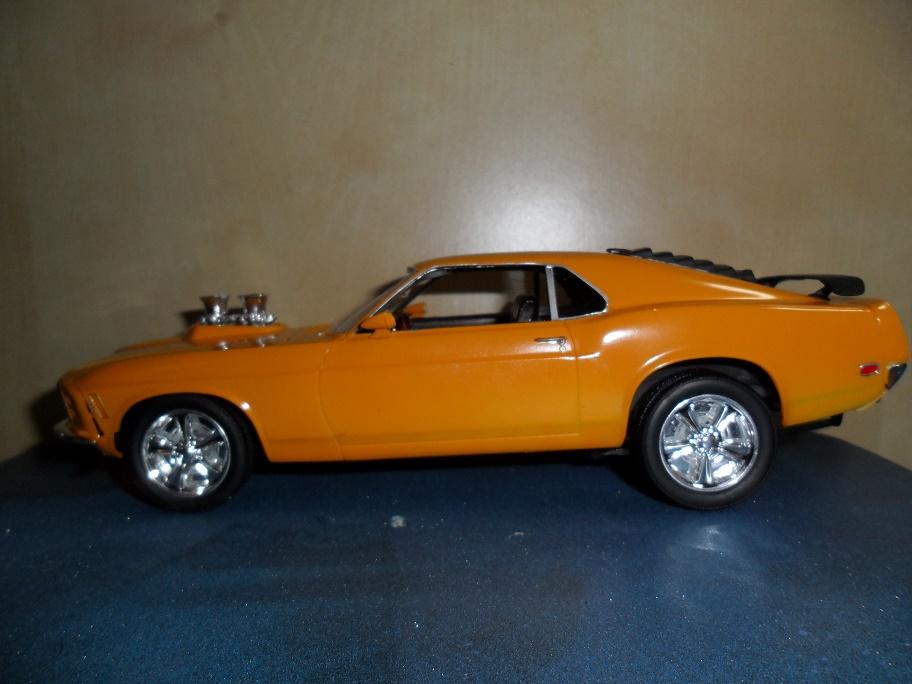
Looks good. I have an almost complete one in Grabber Orange that needs to be finished up. Looking forward to seeing how yours progresses.
-
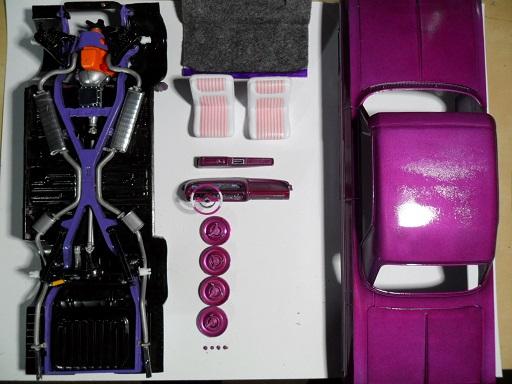
first pass at the body. The main body color is a Metalcast purple and the top, scoops and part of the rear end are a color called Watermelon. As it started drying, it appeared as though the purple paint went on really thin in spots. Even in this pic it looks a little mottled. I changed the lighting a little and realized the coat was good, it's an effect in the paint itself. Should pop with some buffing and a good clear coat. Decided to go with standard size tires, and these hub caps may get embellished with spinners.Also have a piece that is going to extend the roof line out over the windshield, kind of a vintage touch. Off to start planning the interior scheme.
-
Looks like cool project. The first thing I thought about that interior was some very thin, fine grained cork, slightly darkened, to replicate that center console and dash inserts. Looking forward to seeing more of this one.