Dave Darby
-
Posts
1,849 -
Joined
-
Last visited
Content Type
Profiles
Forums
Events
Gallery
Everything posted by Dave Darby
-
This started out as my entry for the 24 build, but as luck would have it, I wasn't able to finish it until this past Monday night. It's a 1985 issue Monogram 36 Ford, molded in garnet red pearl. Too pretty for paint, I've had it in the queue since the first Bush administration. The Fiesta disks and wide whites from the Revell Skyliner were part of the plan from the first time I gazed on that plastic and had the A-ha moment. Now this was no simple just polish the plastic and assemble it operation. Besides painting the engine, interior and roof insert, I also filled the engine block seams, removed the parting lines (very few) and leveled the sink and shrink marks (more than a few). I also detailed the gauges, and added some old school black corduroy to the package shelf. The steering wheel is from the AMT 50 Ford Convertible. Hope ya like it.
-
That build is a winner top to bottom. Pretty on top, and dead nuts accurate with the details and colors on the bottom. Nice, nice job.
-
I wonder if the earlier (pre 1965) 5 bolt bell housing windsor would have fit.
-
That's awesome. Even more awrsome that it's still around!
-
Way cool!
-
The 360 FE wasn't in production in 1966. For that series of trucks in 66, you had a choice of the 240 cu in 6 and the 352 FE.
-
The Edsel annual would be a great subject for an R2 style cloning. Because the Ertl Edsel is a hot mess.
-
Doesn't that body still exist? Isn't that why they tooled up the new stock body?
-
I've been playing with the 1985 issue, myself. The plastic polishes up insanely nice. Rolling stock is from Monogram Custom 58 Tbird/ Skips Fiesta 59 Skyliner.
-
 I don't know about better proportions. I've always found the Monogram grille too tall. The MPC kit has always looked more "right" to me.
 -
I guess your handle makes that clear enough. Like this post if you agree we should do a 71 and or 72 Roadrunner soon. -Steve Last issued in 1987, and now as I understand it, the tool is MIA. Maybe we should put it on a milk carton? I too would like to see it back.
-
'51 Chev replica of legendary Vancouver BC custom
Dave Darby replied to Phildaupho's topic in Model Cars
That is way cool. Uber nice job! -
Surf's Up! Monogram Early Iron Woody Wagon 1965 Style
Dave Darby replied to Dave Darby's topic in Model Cars
That's Hot Curl. He came with the MPC Wild Ones 29 Model A Woody/ Roadster Pickup. His history goes back just a bit farther though... https://surfsimply.com/surf-culture/the-legend-of-hot-curl/ -
Renwal Peirce Arrow Concept by Virgli Exner
Dave Darby replied to Scott Colmer's topic in Model Cars
If it does (and it just may) Atlantis will have it. Scott's build was featured of 3 consecutive issues of Model Cars magazine (211-213, I want to say?) And it's very inspirational reading. This is a seriously amazing build. -
Here's my first completion of 2023. I actually started it nearly 20 years ago, and worked on it in spurts last year and this past month. The yellow is polished plastic. The wood side panels are painted Tamiya Desert Sand, to match the original 1965 Woody Wagon color. The rolling stock and front axle are from the Blue Bandito. I made the license plate in Adobe Illustrator to match the vintage box art. The Deuce radiator shell is from one of the yellow Monogram 32 Roadsters. I actually backwashed a grille insert, but it looked better plain, so... You can't have a surf woody without a surfboard, so I grabbed one from the Bandito donor and smoothed the edges and pins off of it. It's painted with Duplicolor Pure White basecoat/clearcoat. I finished it off with a decal of my own design, created in Photoshop. (Actually, I re-did it after the below photo. The next one down shows the finished board.) This is my first attempt at making my own decals, using an Inkjet printer and decal paper from Hobby Lobby. I buried it in clear, but you can still see the edges. Surf's Up!
-
Took me a minute to get past the no wheel opening look, but this is a seriously stylish build. Looks it could have come out the GM styling center.
-
Looking good. Your color change is a vast improvement!
-
216 is a grand slam, but...
Dave Darby replied to W Humble's topic in Model Cars Magazine News and Discussions
Actually, Chevy would have had only to look at their Corvettes, by that logic. Corvettes had body exiting exhaust from 1953-55 (with the tips extended in 54 to keep the soot off the paint) and exhaust through the bumpers from 1956-60. So I doubt that was ever a consideration. -
Thanks Tim! I'm hoping to eke out a little more time to work on this one soon.
-
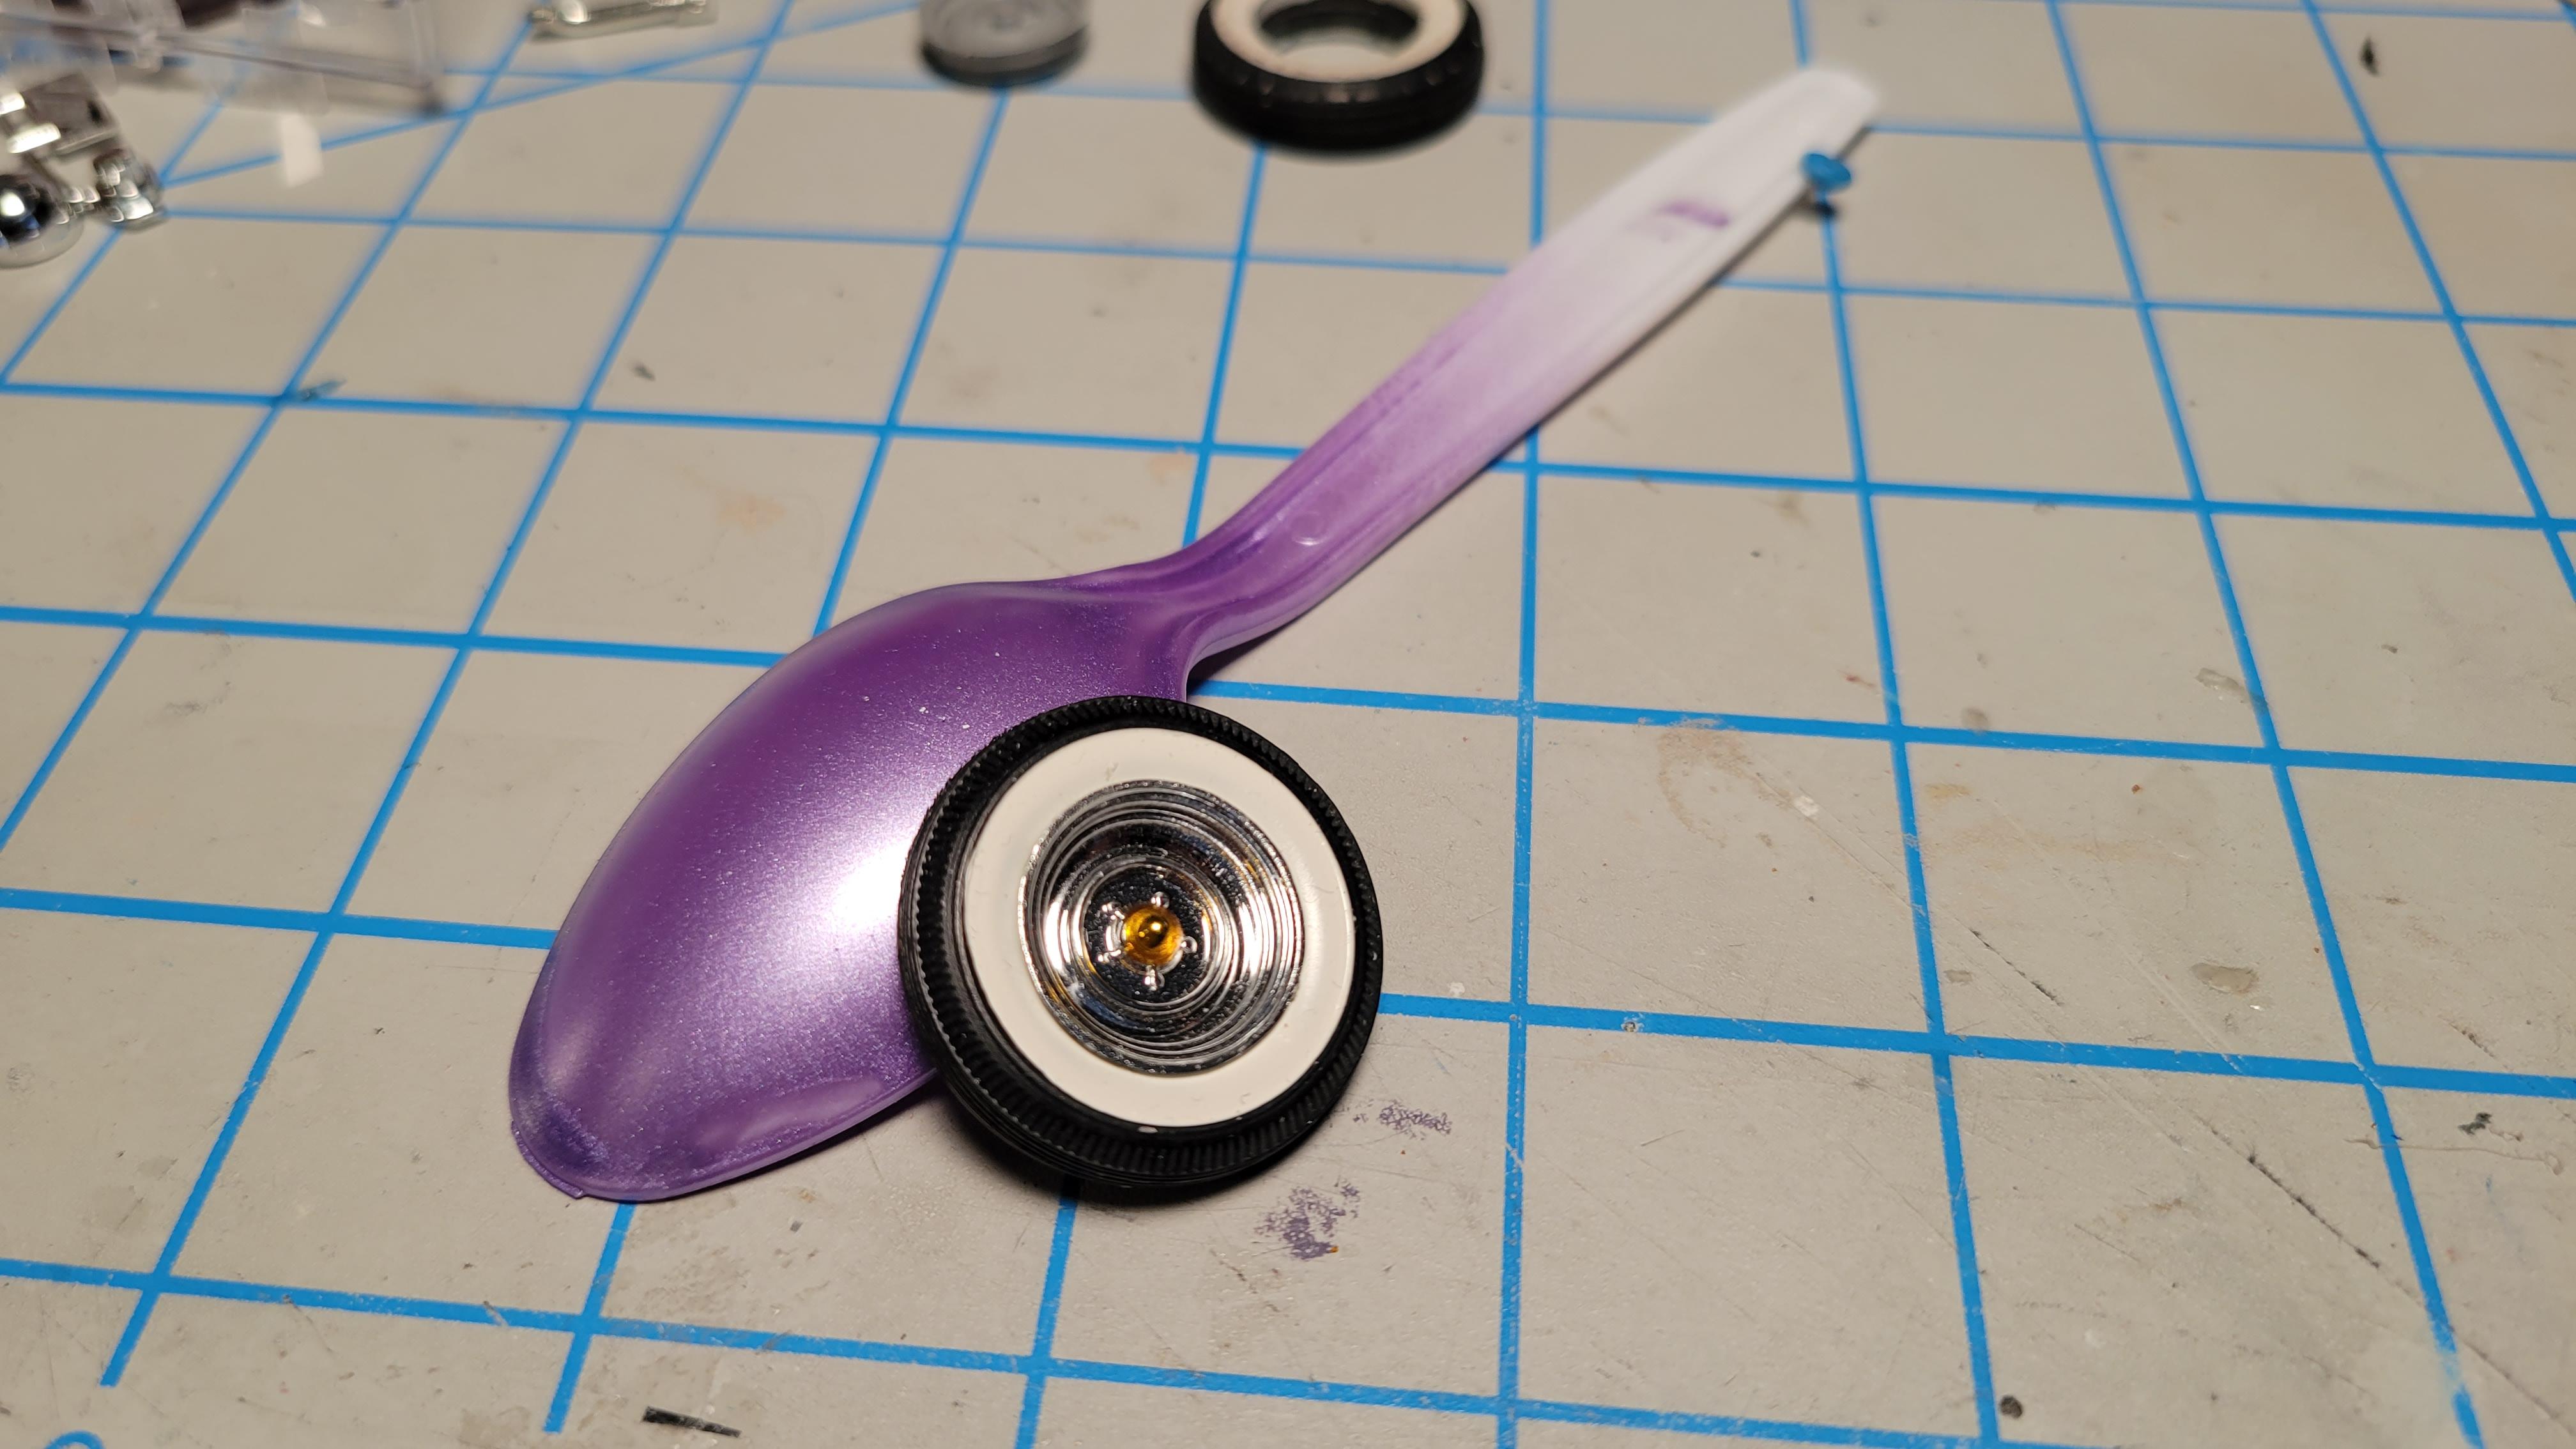
Not a lot to report here, but I did get some white corduroy (can you say "old school"?) for the interior and running boards. I test sprayed a spoon the other day with some cheap purple pearl acrylic. I think it was A. Too cold out, and B. A bit too thinned. I'll shoot a spoon again on a warmer day, and bury it in clear. Also tried out some Tamiya transparent yellow on a center hub a la Ala Kart. I think I like it. Oh, and I got some gold on the engine.

-
That is true with one caveat. You have to cut away the rumble seat floor from the roadster fender unit. This works great for the Woody and the Roadster Pickup. For the sedan, you'll also need to trim the inner portions of the rear fenders to match that of the old ex-MPC units to all the body and interior tub to clear. Here's a Woody body on the Roadster fenders. Using these also allows you to use the much nicer Roadster hood, radiator shell and headlights. I really need to finish this thing!
-
60s survivor
Dave Darby replied to junkyardjeff's topic in Model Trucks: Pickups, Vans, SUVs, Light Commercial
You did that survivor proud. I'm glad you saved the decals. -
Concept and execution are both exceptional. Very well done.
-
Love it! And the grail ram horn manifolds.
-
Looking gorgeous Gary! You gonna bring that to Spartanburg? I hope to make it there myself.