Chariots of Fire
-
Posts
2,788 -
Joined
-
Last visited
Content Type
Profiles
Forums
Events
Gallery
Everything posted by Chariots of Fire
-

Fire investigation unit
Chariots of Fire replied to Firebuilder's topic in WIP: Model Trucks: Big Rigs and Heavy Equipment
Dom: I checked out the Trumpeter ALF grill. It looks like the ALF headlight cluster would work for you. Difference is that the grill is not right. I'd cut the headlight cluster free and look for a new grill that would resemble the Ferrara. They would have to match the PVC radius so some adjustment might have to be made. -
Fire investigation unit
Chariots of Fire replied to Firebuilder's topic in WIP: Model Trucks: Big Rigs and Heavy Equipment
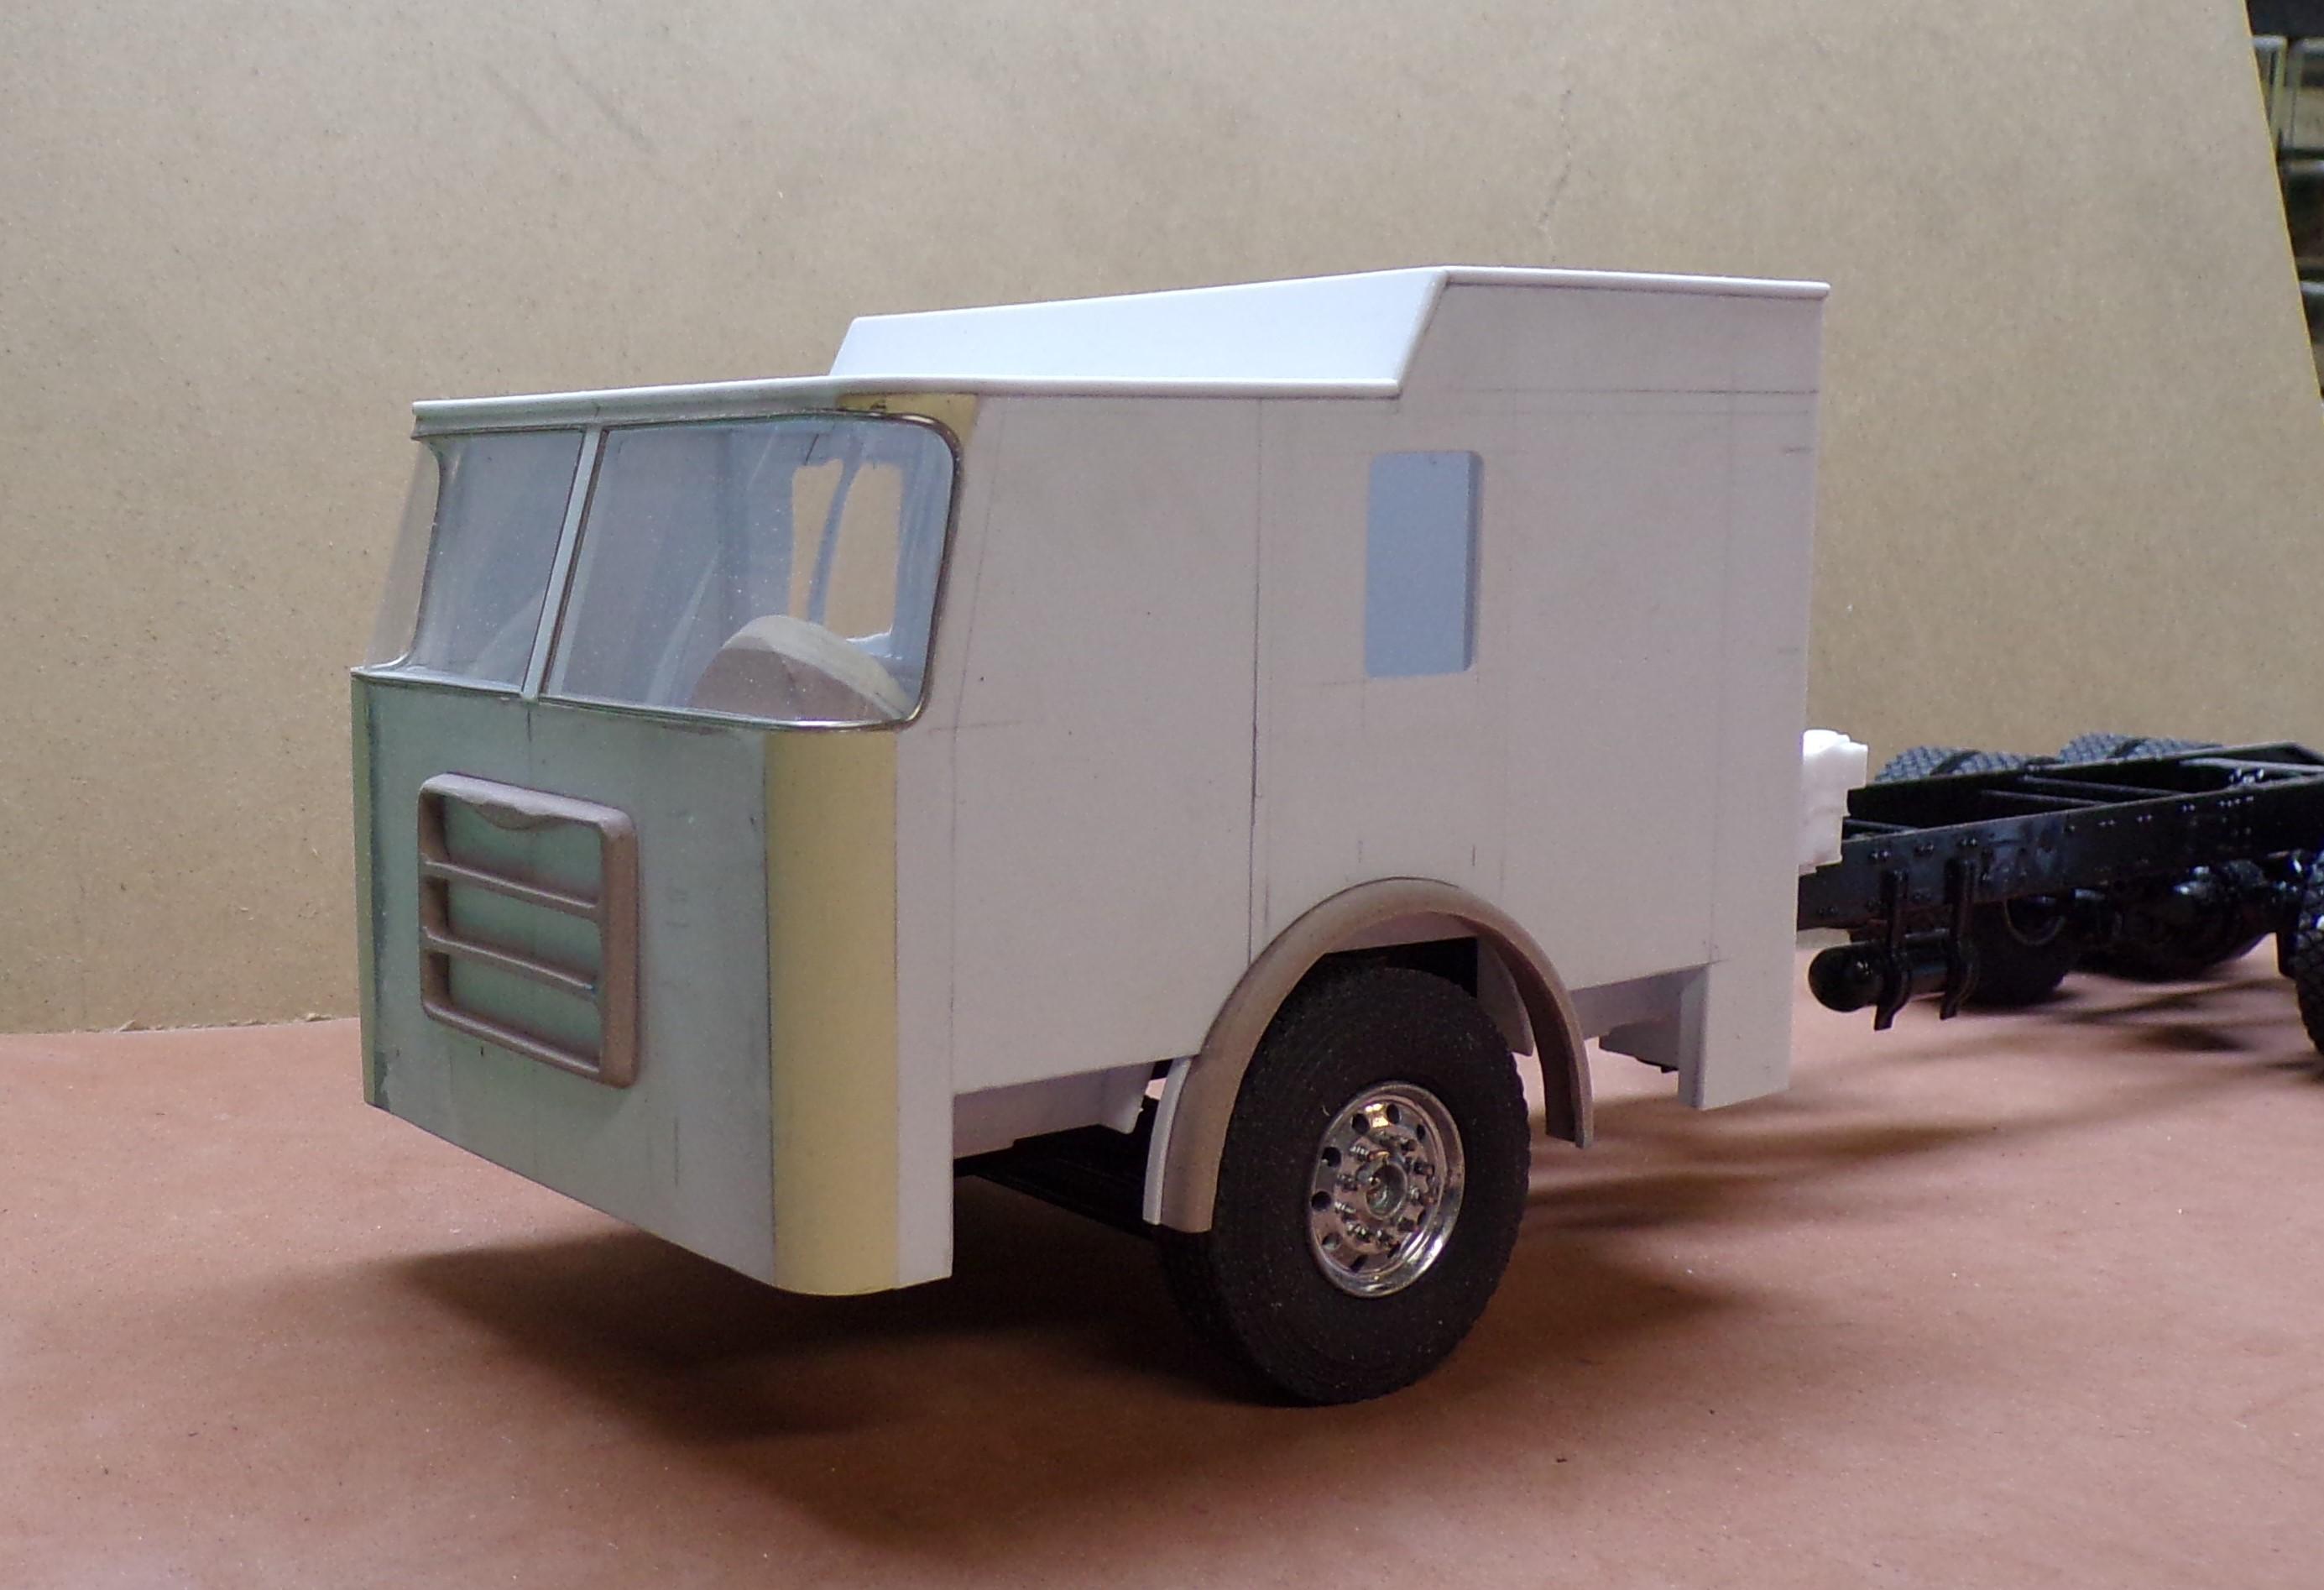
Here's the Pierce cab with the PVC corners
-
Fire investigation unit
Chariots of Fire replied to Firebuilder's topic in WIP: Model Trucks: Big Rigs and Heavy Equipment
Any particular cab that you are making? Replicas and Miniatures makes a lot of photoetch truck grill stock that you might use. I think it would be difficult to modify the Eagle grill and headlight assembly because of the curvature. The AMT LaFrance kit has separate headlight surrounds you might use. They are not square but still might work. Charlie -
Fire investigation unit
Chariots of Fire replied to Firebuilder's topic in WIP: Model Trucks: Big Rigs and Heavy Equipment
Dom: that is going to be a nice unit. Can I make a suggestion to you? I notice you are going to have to fill and sand the cab corners quite a bit. If you can get a piece of PVC pipe (3/4" diameter) you can slice it length wise into quarters and it will make a nice round corner that will be the same on both sides and you won't have to fill and sand to get smooth. Will be watching your progress! Looks like a lot of fun! If you check out the Pierce Tower in the WIP section you will see what I mean about using the pipe. -
How would you repair this?
Chariots of Fire replied to redscampi's topic in Model Building Questions and Answers
Teach them now how to use that stuff! Then there won't be anything for them to complain about!? -
How would you repair this?
Chariots of Fire replied to redscampi's topic in Model Building Questions and Answers
Looks to me like you have it almost there. Great job filling in the hole. -
How would you repair this?
Chariots of Fire replied to redscampi's topic in Model Building Questions and Answers
Put those is the parts box! Never enough headlights! -
Wish I could say the same, Steve! I think working on the military builds spoiled me. Getting back into shiny paint and chrome trim has been a bear!!! Too little time has been spent in prep for painting and it shows, maybe not so much in the photos but I notice it!?
-
Hey, Peter! Well I think I solved it. I glued a piece of thin plastic sheet stock onto the surface of the buck. Then I followed up with some very fine sanding and ended with Novus polishing. I think the secret is a very smooth surface in order to get a clear copy. There is also a small window of when the PETG is just right for forming. Too little softening and it does not form all the way. Too much and there is a chance it will bubble. Also if the buck is not absolutely clean of dust or dirt, the copy will pick up every piece. The windshield pieces have now been set and will post some photos soon. They are not perfect but are much better than the previous ones. Working on other parts of the cab that I want to get done first.
-
1926 Mack AC Stake Truck
Chariots of Fire replied to Chuck Most's topic in Model Trucks: Big Rigs and Heavy Equipment
What they said! Rreally nice!!?? -
Thanks, Greg (Noblng)! In the process of casting the lenses for the headlights and warning lights. When they are finished and set the lights can be mounted.
-
It's loooong for sure! Solved the windshield problem and got the chrome grill surround and headlight bezels done. Casting the lenses now so that I can get them mounted. I spent some time today correcting problems including the removal of the grill to reposition it more centered. Took off the striping also. There is an additional detail that needs to be added to the right side. One step forward, two back for a while now but things are looking better. Guess the elves finally got enough sleep to get them thinking straight again!?
-
Thanks for the tip, Greg. Will check it out. I'll take the buck. Clerks will probably wonder what I'm doing!?
-
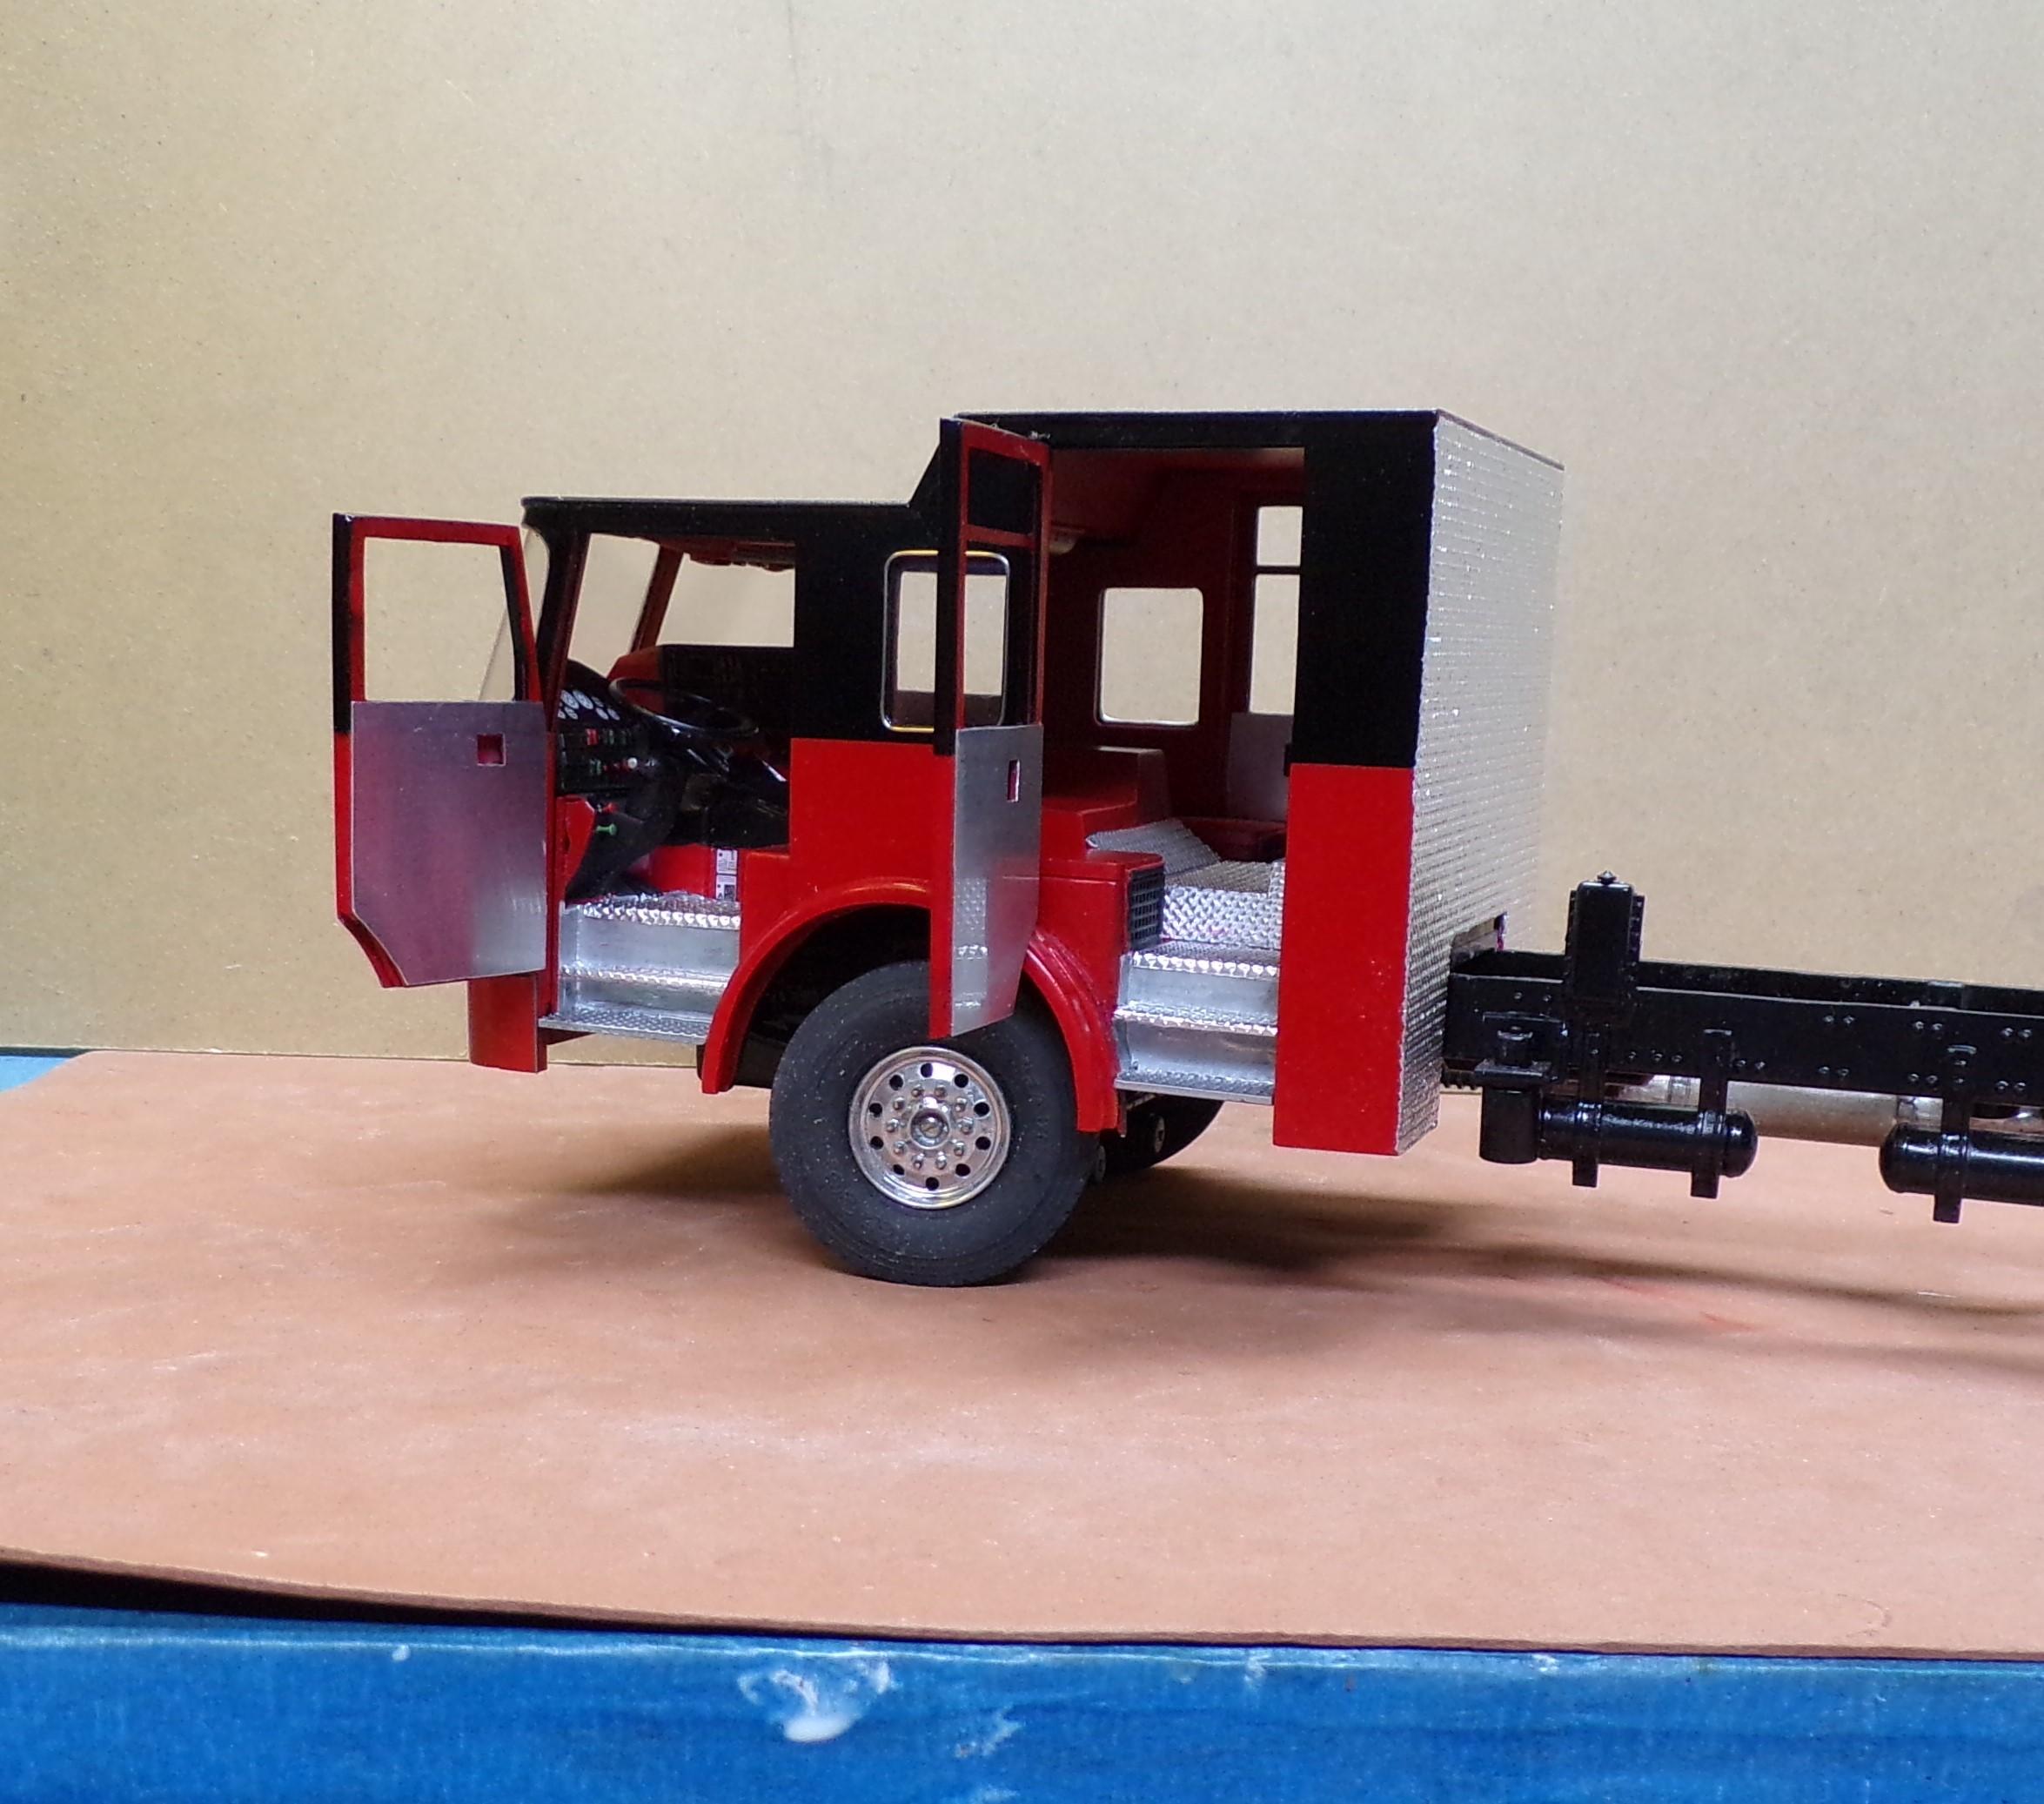
Got the elves back to work with a little coaxing but I'm still not happy with some of their stuff. The windshield pieces still bug me as to why I can't seem to get a clear vacu form of it. It has to be the buck not being perfectly smooth as it always tends to be a bit cloudy. The pieces are in place but are removable so I may try again. Interior continues to come along. The doors are nearly done and only need the latches and the new glass sections. Then I can snip off the excess pins in the hinges. Each inside door panel is aluminum. It will get a latch and grab handle before being completed. The right side has a ventilation panel that was made with a piece of sheet aluminum and a decal to represent the openings. The real one is a series of arrow cutouts and the letters XT. This cab is the "Arrow" that Pierce put out a short while ago. It's no longer being made as they have moved on to other designations. One more project to complete the steps on each side. But the interior needs to be set in place first. Also the wheel well surrounds need to be chromed up. The back cab diamond plate panel is now dressed in embossed aluminum foil that was set with 2 part epoxy.
-
How would you repair this?
Chariots of Fire replied to redscampi's topic in Model Building Questions and Answers
In that case I think it would be easy enough to cut a piece of plastic that would fit the opening and glue it in. You can build up the A post and trim with some strip stock and then with some putty clean up the seams. It seems a shame to ruin another model kit just for such a small area. -
How would you repair this?
Chariots of Fire replied to redscampi's topic in Model Building Questions and Answers
You didn't say if you have the missing piece or not. If you do I'd suggest gluing it back in and then just cleaning up the edges. ' -
Let me consult mit der elves. Perhaps dey vil share der secret.?
-
I'm still not seeing the responses to my posts even though it gives me a notice at the top of the page that there is one. Sometimes the response is just a heart image. Other times; nothing. Is there something I need to fix? It doesn't happen to all responses, just some. At other times they show up days later. Could use your help.
- 1 reply
-
- 1
-

-
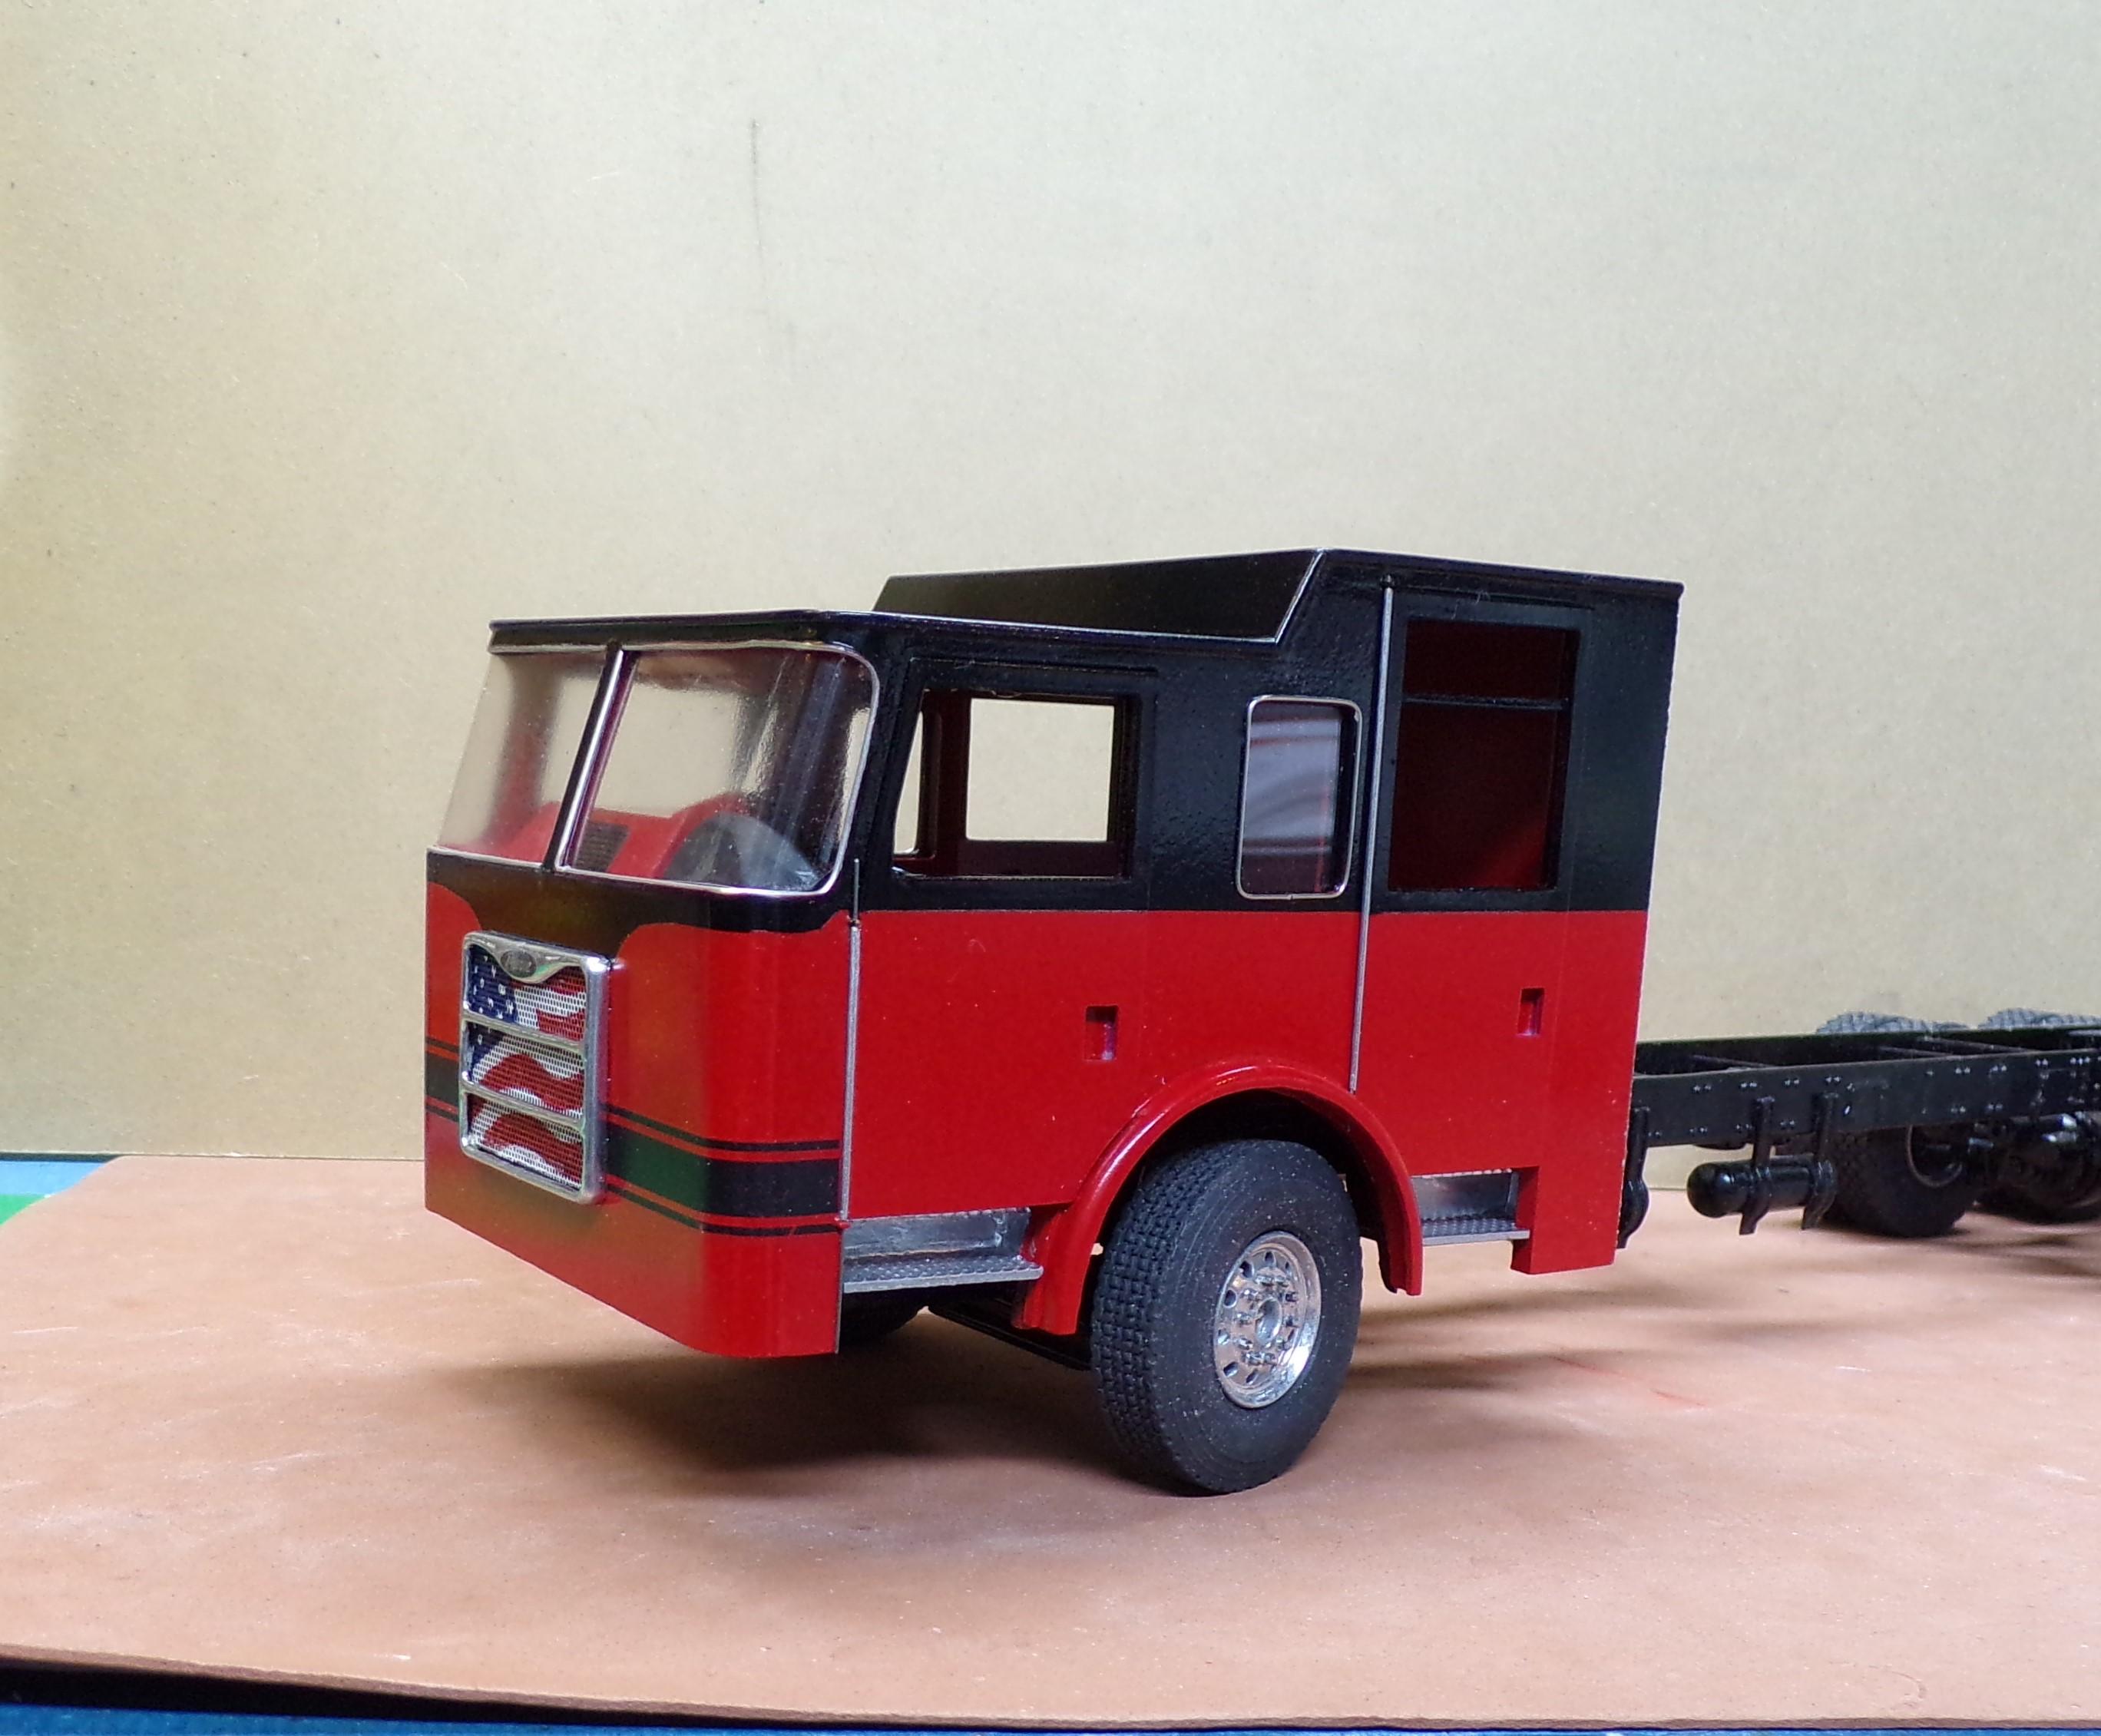
Got a bit of paint on the cab but there are a few small places that need some touchup. I used Duplicolor #398 red and Duplicolor Standard Black over Duplicolor gray primer. I painted the black directly over the red without any problems. The corner at the color line needs a small amount of straightening but that may be taken care of with a separation stripe. Not sure without looking if the actual truck has one. The back of the cab will get a full piece of aluminum embossed foil as a covering.
-
You did a great job on that truck! Super all the way around!?
-
Mack monogram fire truck
Chariots of Fire replied to Aerodyne03's topic in WIP: Model Trucks: Big Rigs and Heavy Equipment
The Providence, Rhode Island truck is made from the same Monogram kit used in this post. I extended the cab and added the extra doors. The body was modified to look like the Providence rig. -
Brake Line Junction Blocks?
Chariots of Fire replied to CaddyDaddy's topic in Model Building Questions and Answers
The suggestions above are all great. Done my own versions of them from time to time. One thing I try to remember, though, is that if the detail cannot be seen on the finished model, most of the time it is not worth the effort to try and construct. That is unless it is simply for one's personal satisfaction of knowing it is there. In the latter case that is what really counts!? -
They are a mix from various sources. The Trumpeter kit dash was used in part as well as portions of an old resin casting of a computer keyboard. The instrument panel in front of the driver was made from ALPS printed decals and a scratch built surround.
-
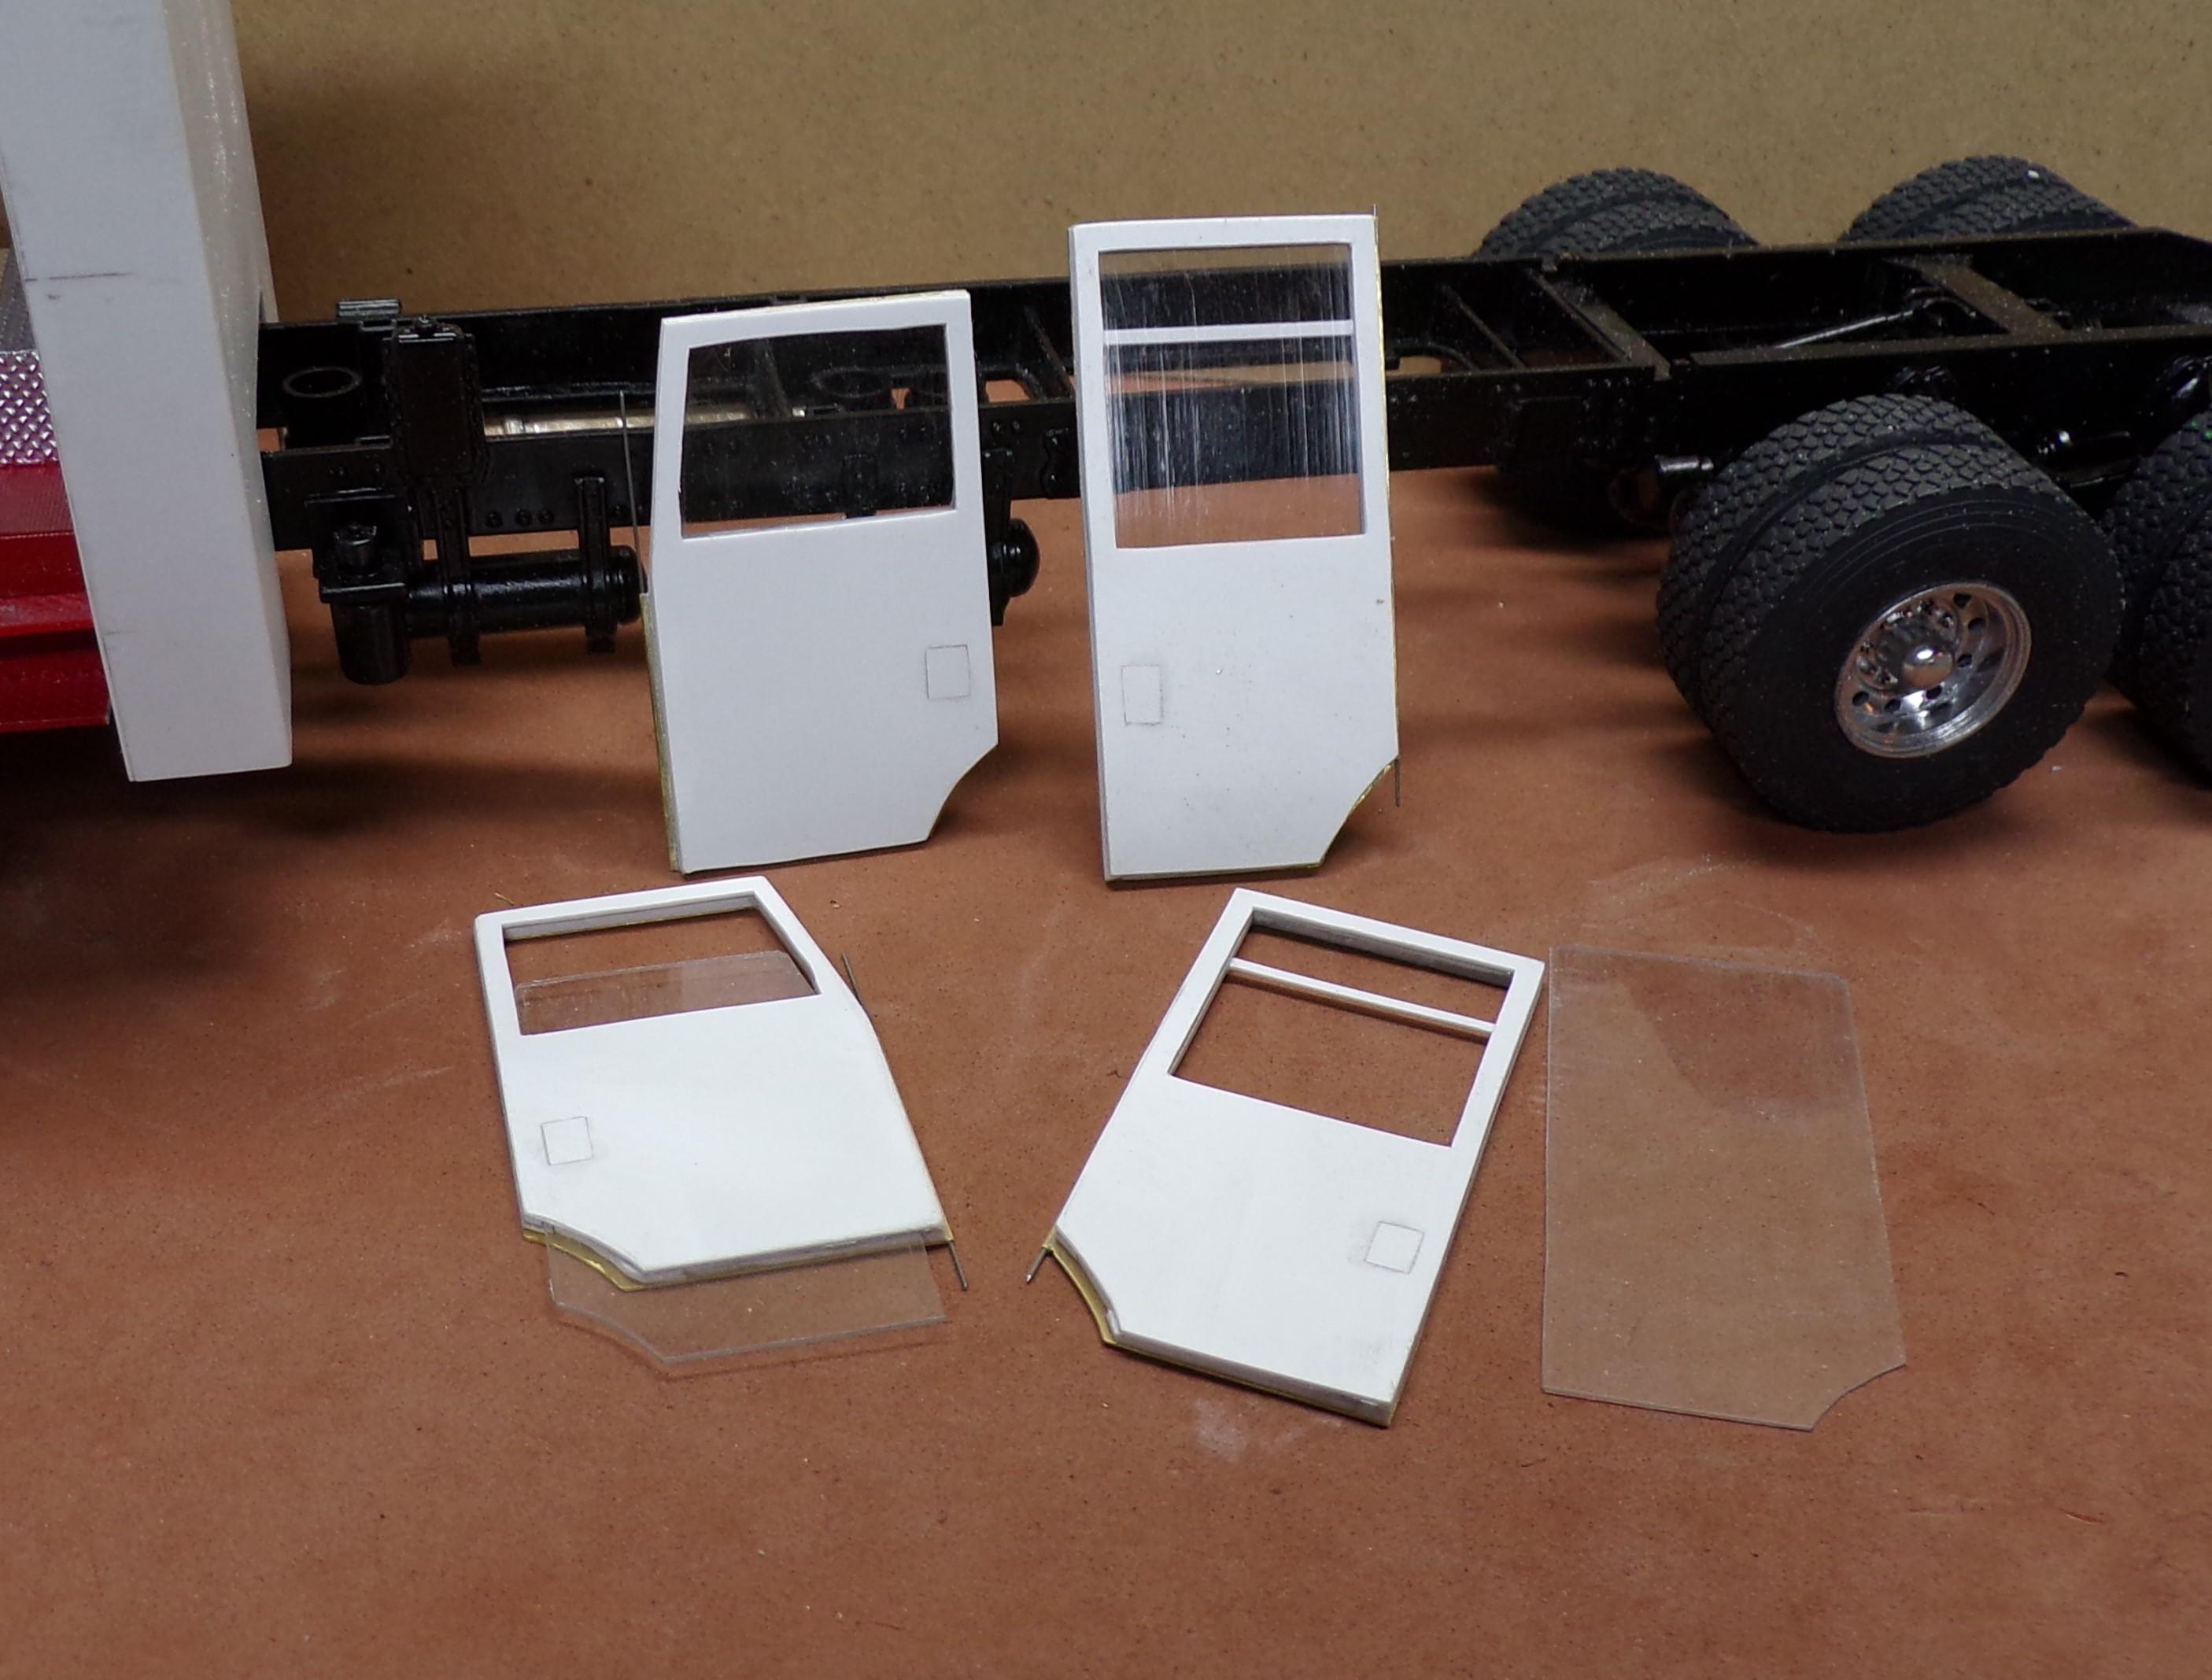
I've used that shirt collar plastic before and you are right! It works! Haven't bought a new shirt in a long time. Do they still use the plastic??? Here's an update on how the doors were constructed. First the 0.016" brass sheet. Then 0.040x0.10 strip stock around the edges. Then 0.020x0.060 strip stock on top of that leaving a ledge inside for the clear plastic to sit on. Last the full sheet to make up the inside panel of the door. Holes for the door latches were opened in the brass but I had to cut away the back panel in order to use files to clean up the holes. The plastic panels were then filled in and sanded smooth. The last photo shows the door in the clamp and the slot that the clear stock slides into from the bottom of the door. The piece of strip stock at the bottom of the window opening is 0.040x0.100 without the edging. The rear doors have a permanent piece of clear above the strip that runs from side to side. The opening portion of the window ends there.
-
Mr. Sheehy!? Glad to hear from you. Hope all is well. Any progress on your IH?? Or was it a Dodge? Memory fails me!! Here are some updates of progress as of today. The interior door panels have been finished and the interior tub has been painted. Some of the detailing there is done but there's lots to go. The "glass" can be removed for painting by sliding them out of the bottom of the door. The windows can be left open, partially open or closed all the way. The windshield was vacu-formed but I need some advice on how to keep the PETG clear. It seems to haze up some and cannot be polished out. Could it be that the buck I made is not smooth enough?