Chariots of Fire
-
Posts
2,788 -
Joined
-
Last visited
Content Type
Profiles
Forums
Events
Gallery
Everything posted by Chariots of Fire
-

MCW paint issues
Chariots of Fire replied to Jon Haigwood's topic in Model Building Questions and Answers
Did you happen to do anything to the primer coat on this one that you did not do on the first 4? It almost looks like there was a wax like coating on the surface that caused the paint not to smooth out. -
I'm sorry that it is not. AITM was doing resin castings but the master is no longer available for casting and AITM is out of business.
-
Going to have to put all of these great suggestions in my file for the next time. The brass tubing is already soldered to the edges of each door so it's either nickel plate the edges of the door or do the Molotow thing after the doors are painted. Will keep all posted with the results. I just put some primer on the inner tub and finished up the cab interior sheeting. The rest is now painting and adding decals and touchup to all of the gages and switches.
-
Nicely done, Warren! Great color and some very nice details. Clean 'n neat!!
-
No, Sir. Haven't thought of that. I'll catalog the info for the next build, though! Many thanks.
-
Not sure about soldering them to the brass doors, Peter. Have never done that. Will surely look into the information you included though! Thanks!
-
The one concern I have with BMF in this case is that it would be very narrow and subject to tearing with the movement of the tubing it would be covering. The tubing sits flush with the cab surface as it is.
-
The trick on those hinges, Bob is that they are supposed to be chromed! Not quite sure how that will get done. Nickel plating is one option. Painting with a Molotow Pen is another. Will see how things go.
-
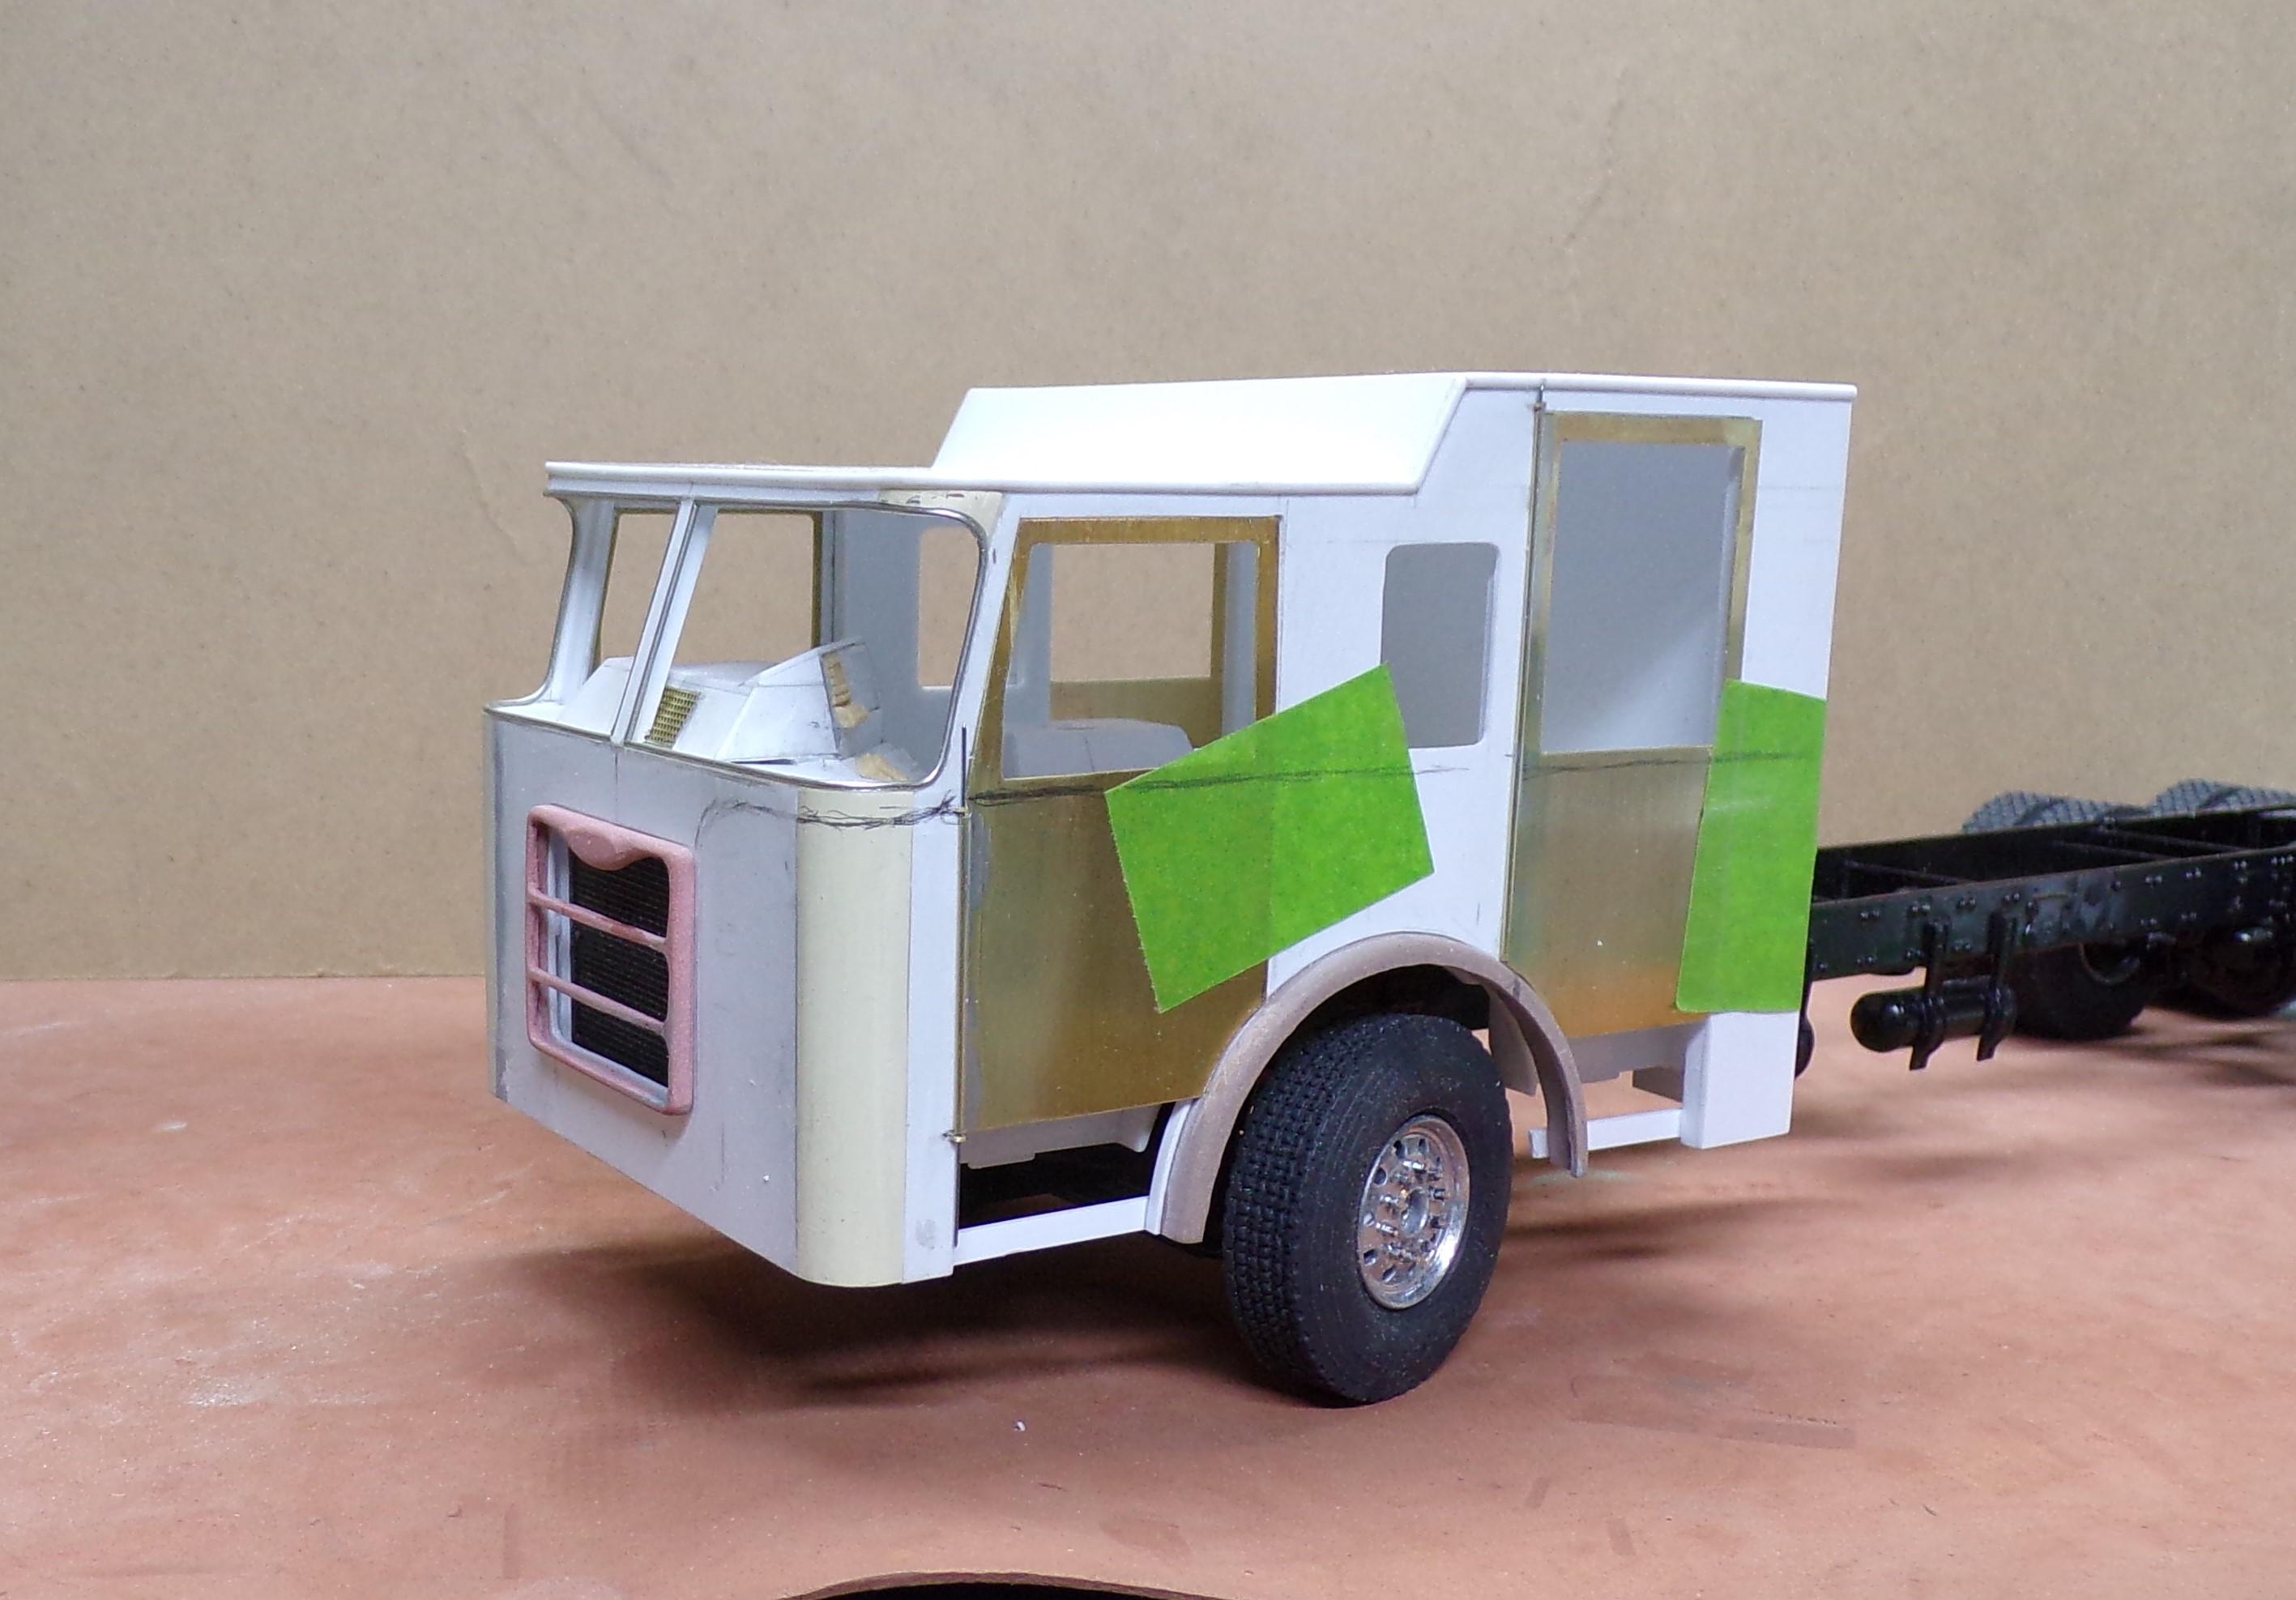
Been a few days since the last posting. It has taken some time to refine the fit of the interior tub, to temporarily lock the side and front in position for doing the doors and get things lined up. The doors have been cut from 0.016" brass sheet stock. The hinged part is 0.018" diameter brass tubing with a stainless steel pin that sits inside. At each end of the hinge, a small piece of receiving stock is inserted in the cab sides. Each small piece has a drilled out hole the same as the hinge tube. The steel pin slides into position with the receiving pieces glued in place after the door placement is set. For the rear doors a hole was drilled in the bottom of the fender and a similar brass tube was inserted and glued in place. The steel pin is inserted up through the bottom of the fender into the door and then up into the small receiver at the top of the cab. There is a bit of finishing work that needs to be done now with pieces added to thicken up the doors and provide for a small rare earth magnet that will help keep the doors closed. While it looks like there is a lot of glass area in the rear doors, there is a divider in the upper half that sits inside the opening. That will be provided once the door thickness is finished. The door glass will be slipped into position after the doors have been painted. Slots will be kept open at the bottom of each door to allow the glass to slide in. There will be steps at the bottom of each door that will enclose the body and that has to be worked out ahead of time. The pencil line below the windshield gives a hint as to where the black over red paint separation line will be.

-
Had this issue for a while now. At the top of the page is tells me that I have a response to my posts. However when I look at my post the response is not there. Some never seem to get added to the post no matter how long after the response has been up.
-
Autocar ACX 8 x 4 Cabover
Chariots of Fire replied to Jürgen M.'s topic in WIP: Model Trucks: Big Rigs and Heavy Equipment
Nice work! And a unique choice for a truck build. Rockford is right. Typical US trash truck chassis but perhaps without the second steering axle. -
My own Sundance
Chariots of Fire replied to Rockford's topic in WIP: Model Trucks: Big Rigs and Heavy Equipment
How about cutting the crossbar inside the frame and just leaving enough that you could slide a piece of tube on like a washer that you could glue to the frame. Would that give the mudflaps sufficient strength? -
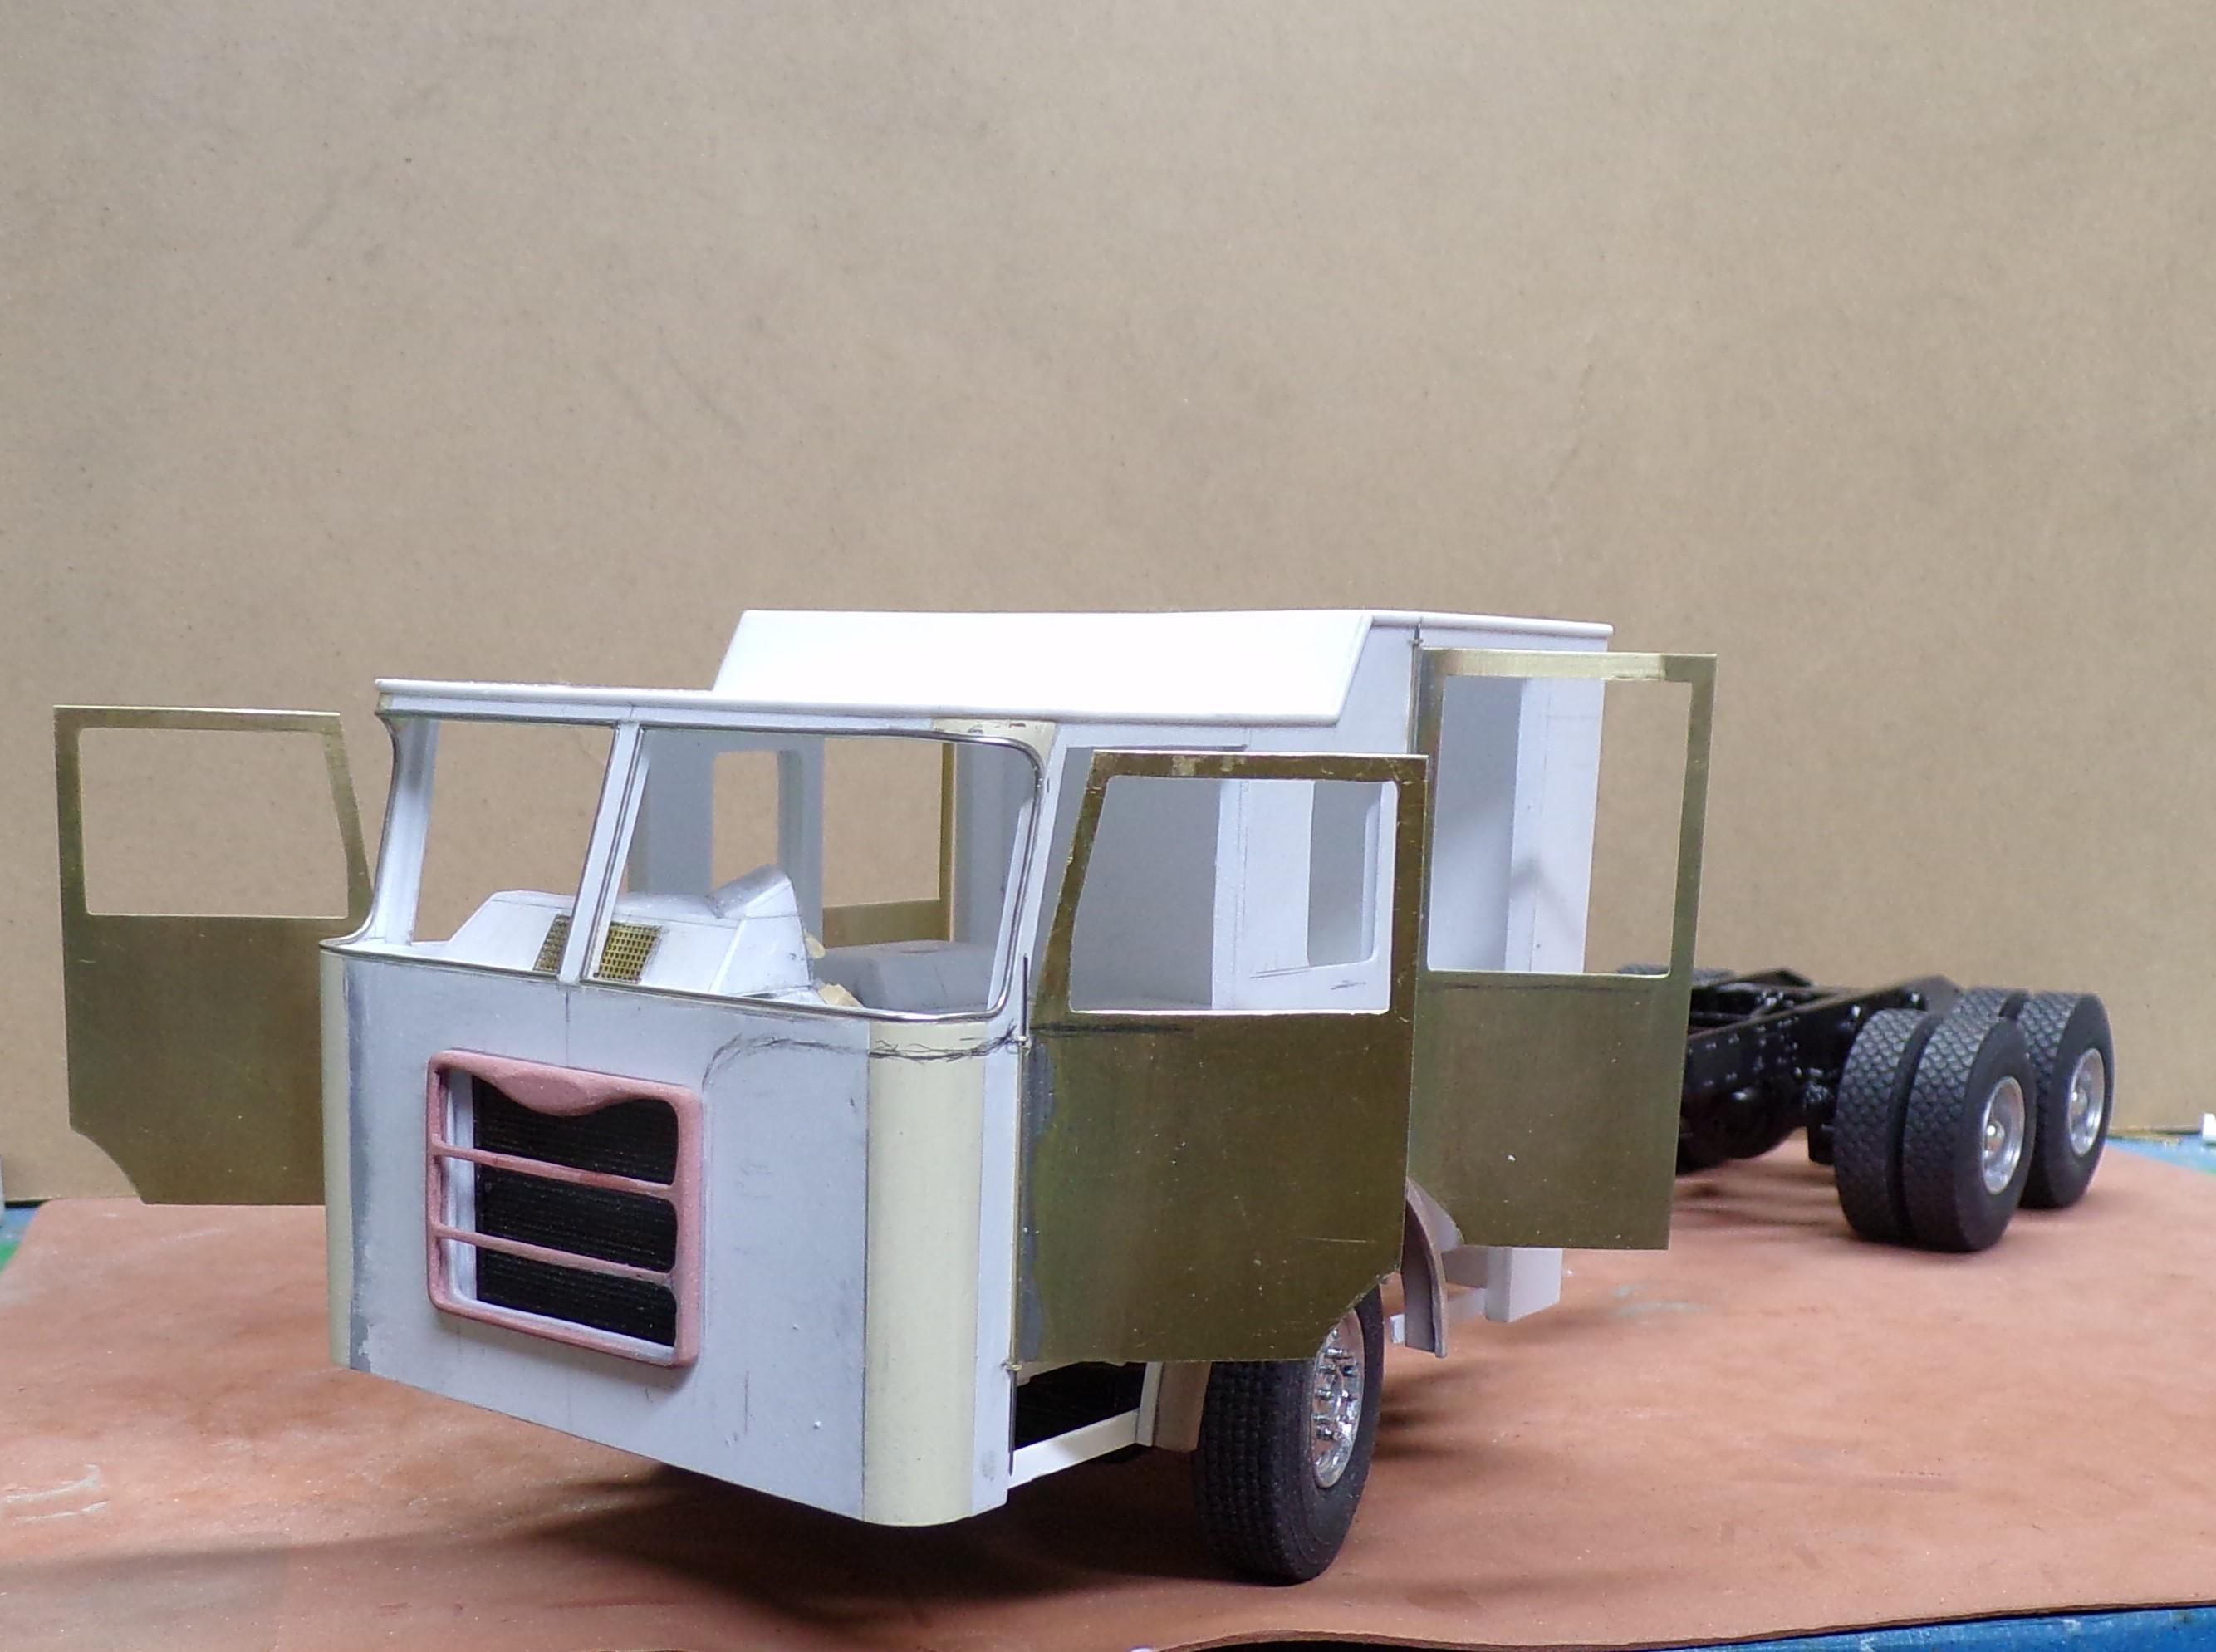
Found out I have some adjustments to do to the openings for the front doors. The rear edge needs to be made about 1/8" wider. I thought the doors front and rear were the same width but they are not. Glad the front doors have not been made yet! Will be using 0.015" brass sheet for the outer panels. That way I can solder a section of small tubing to the edge to act as a hinge.
-
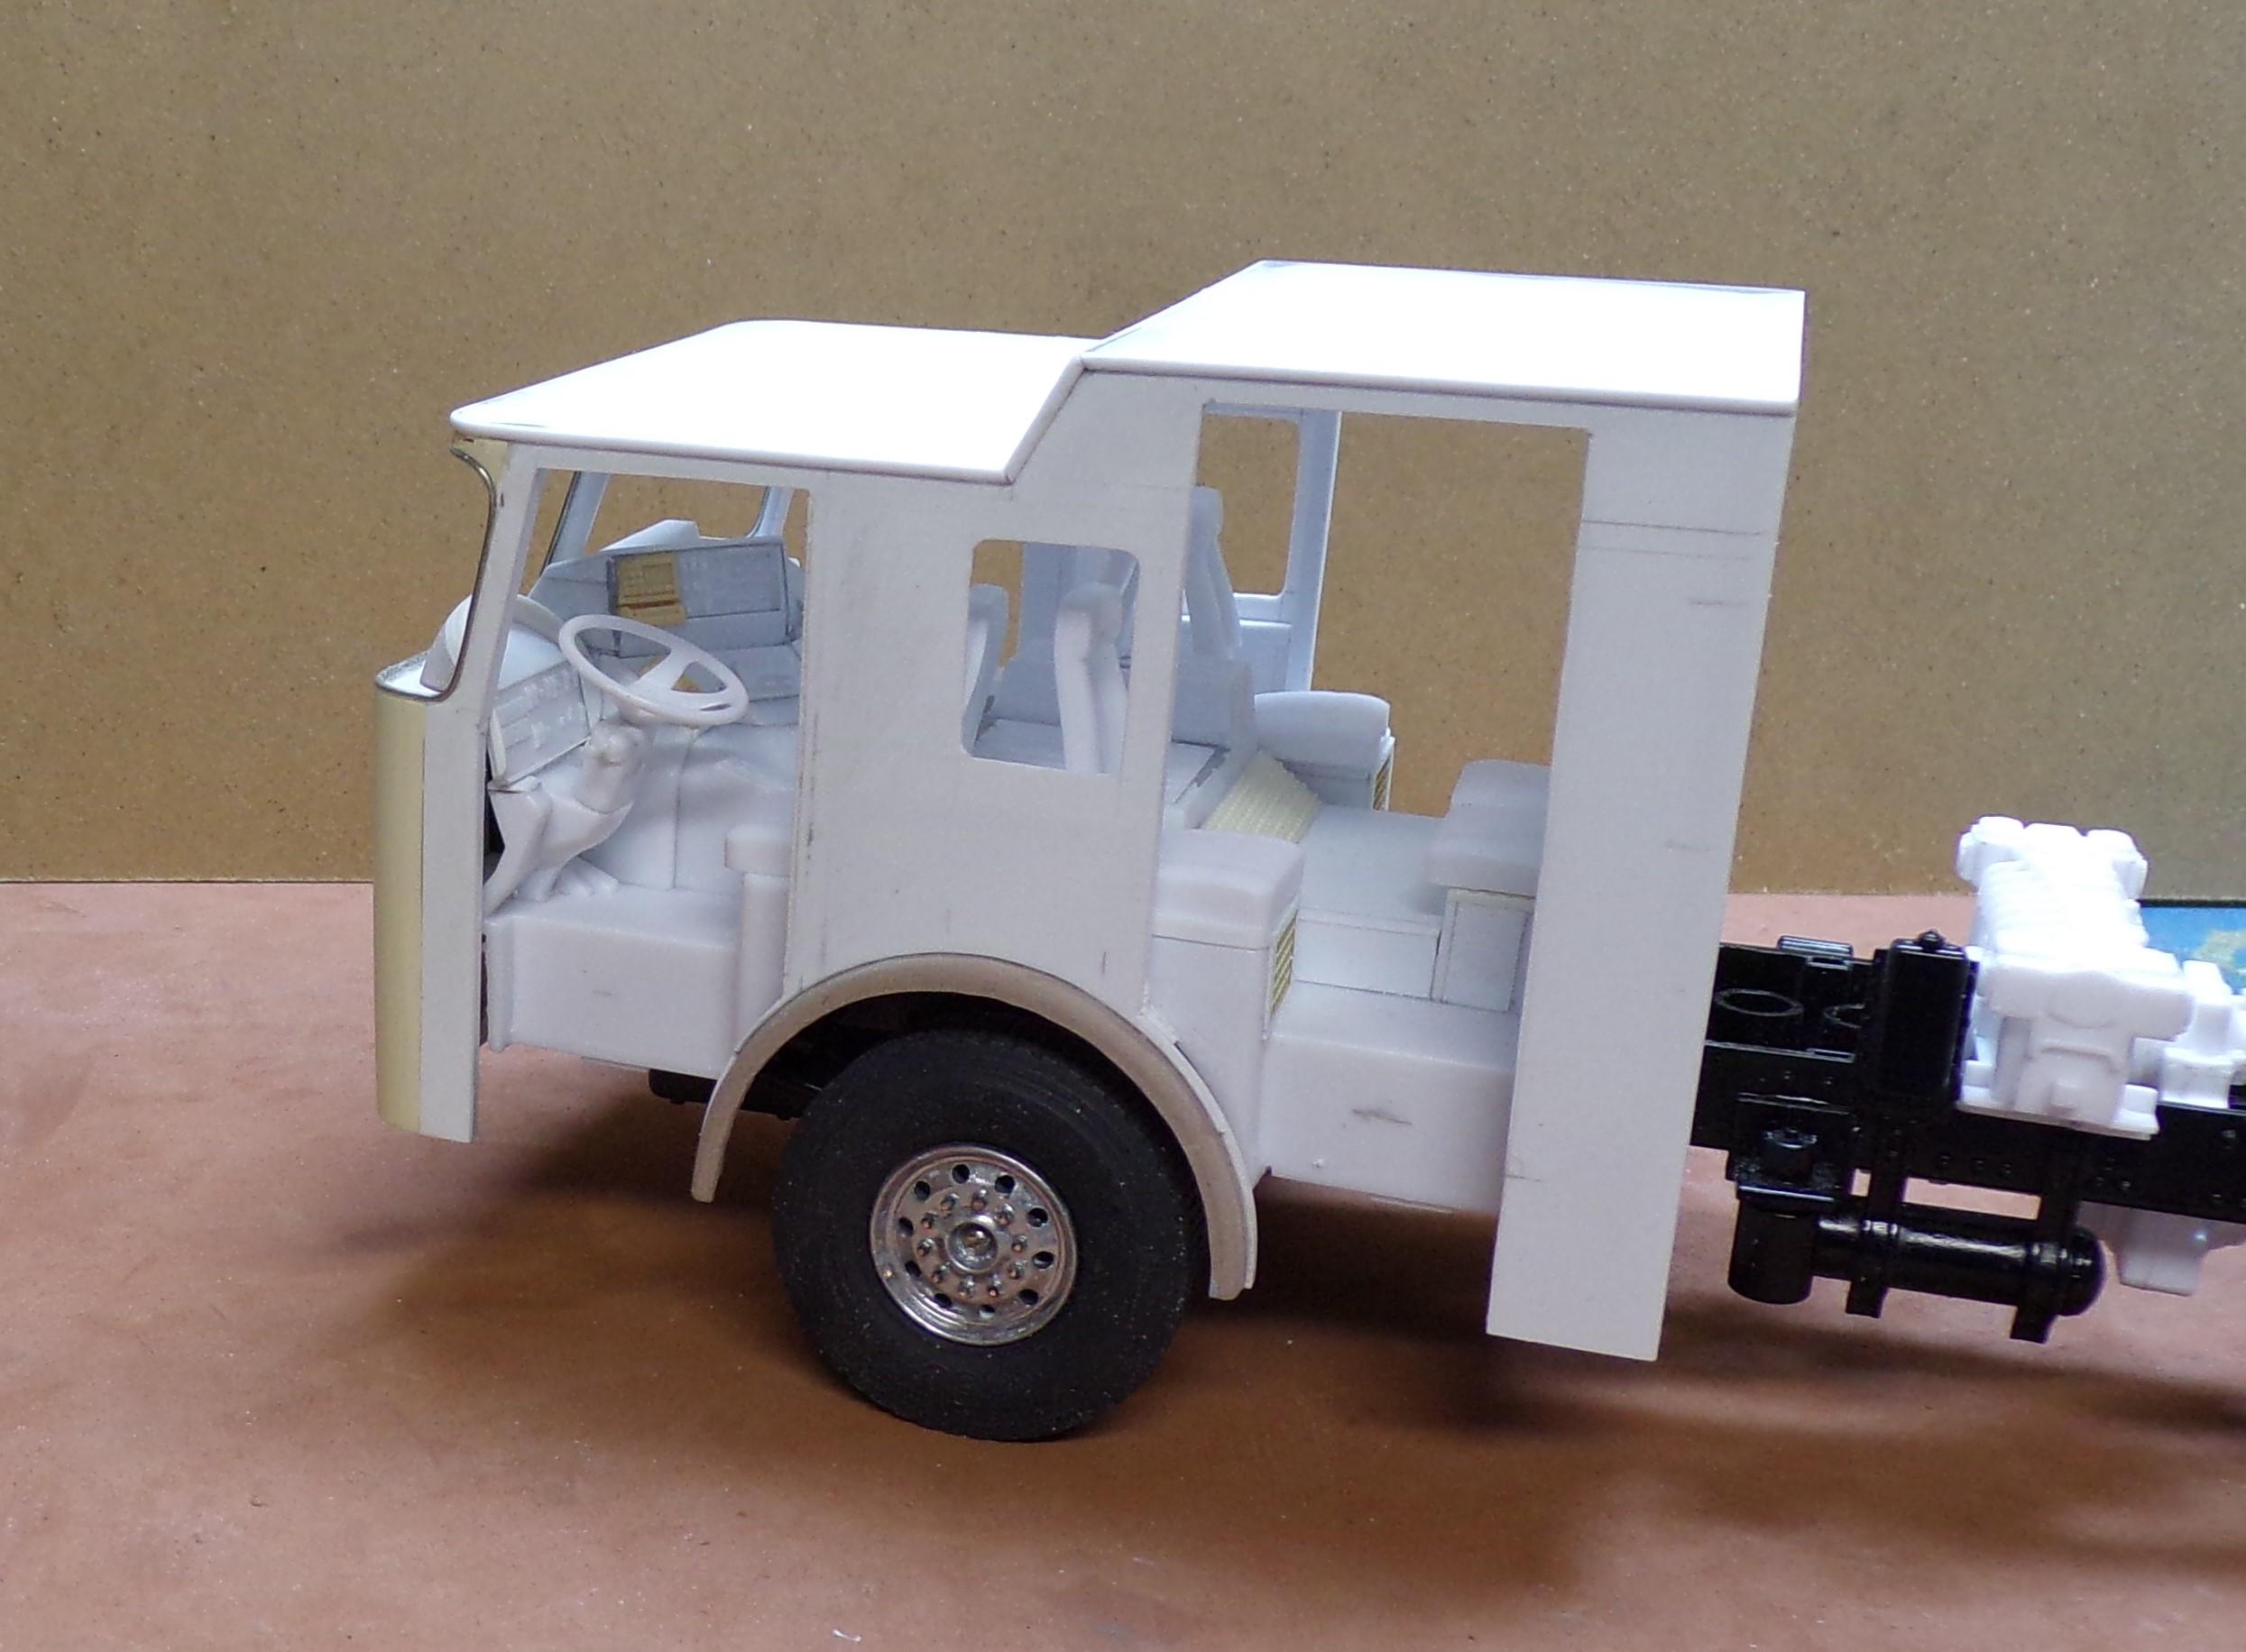
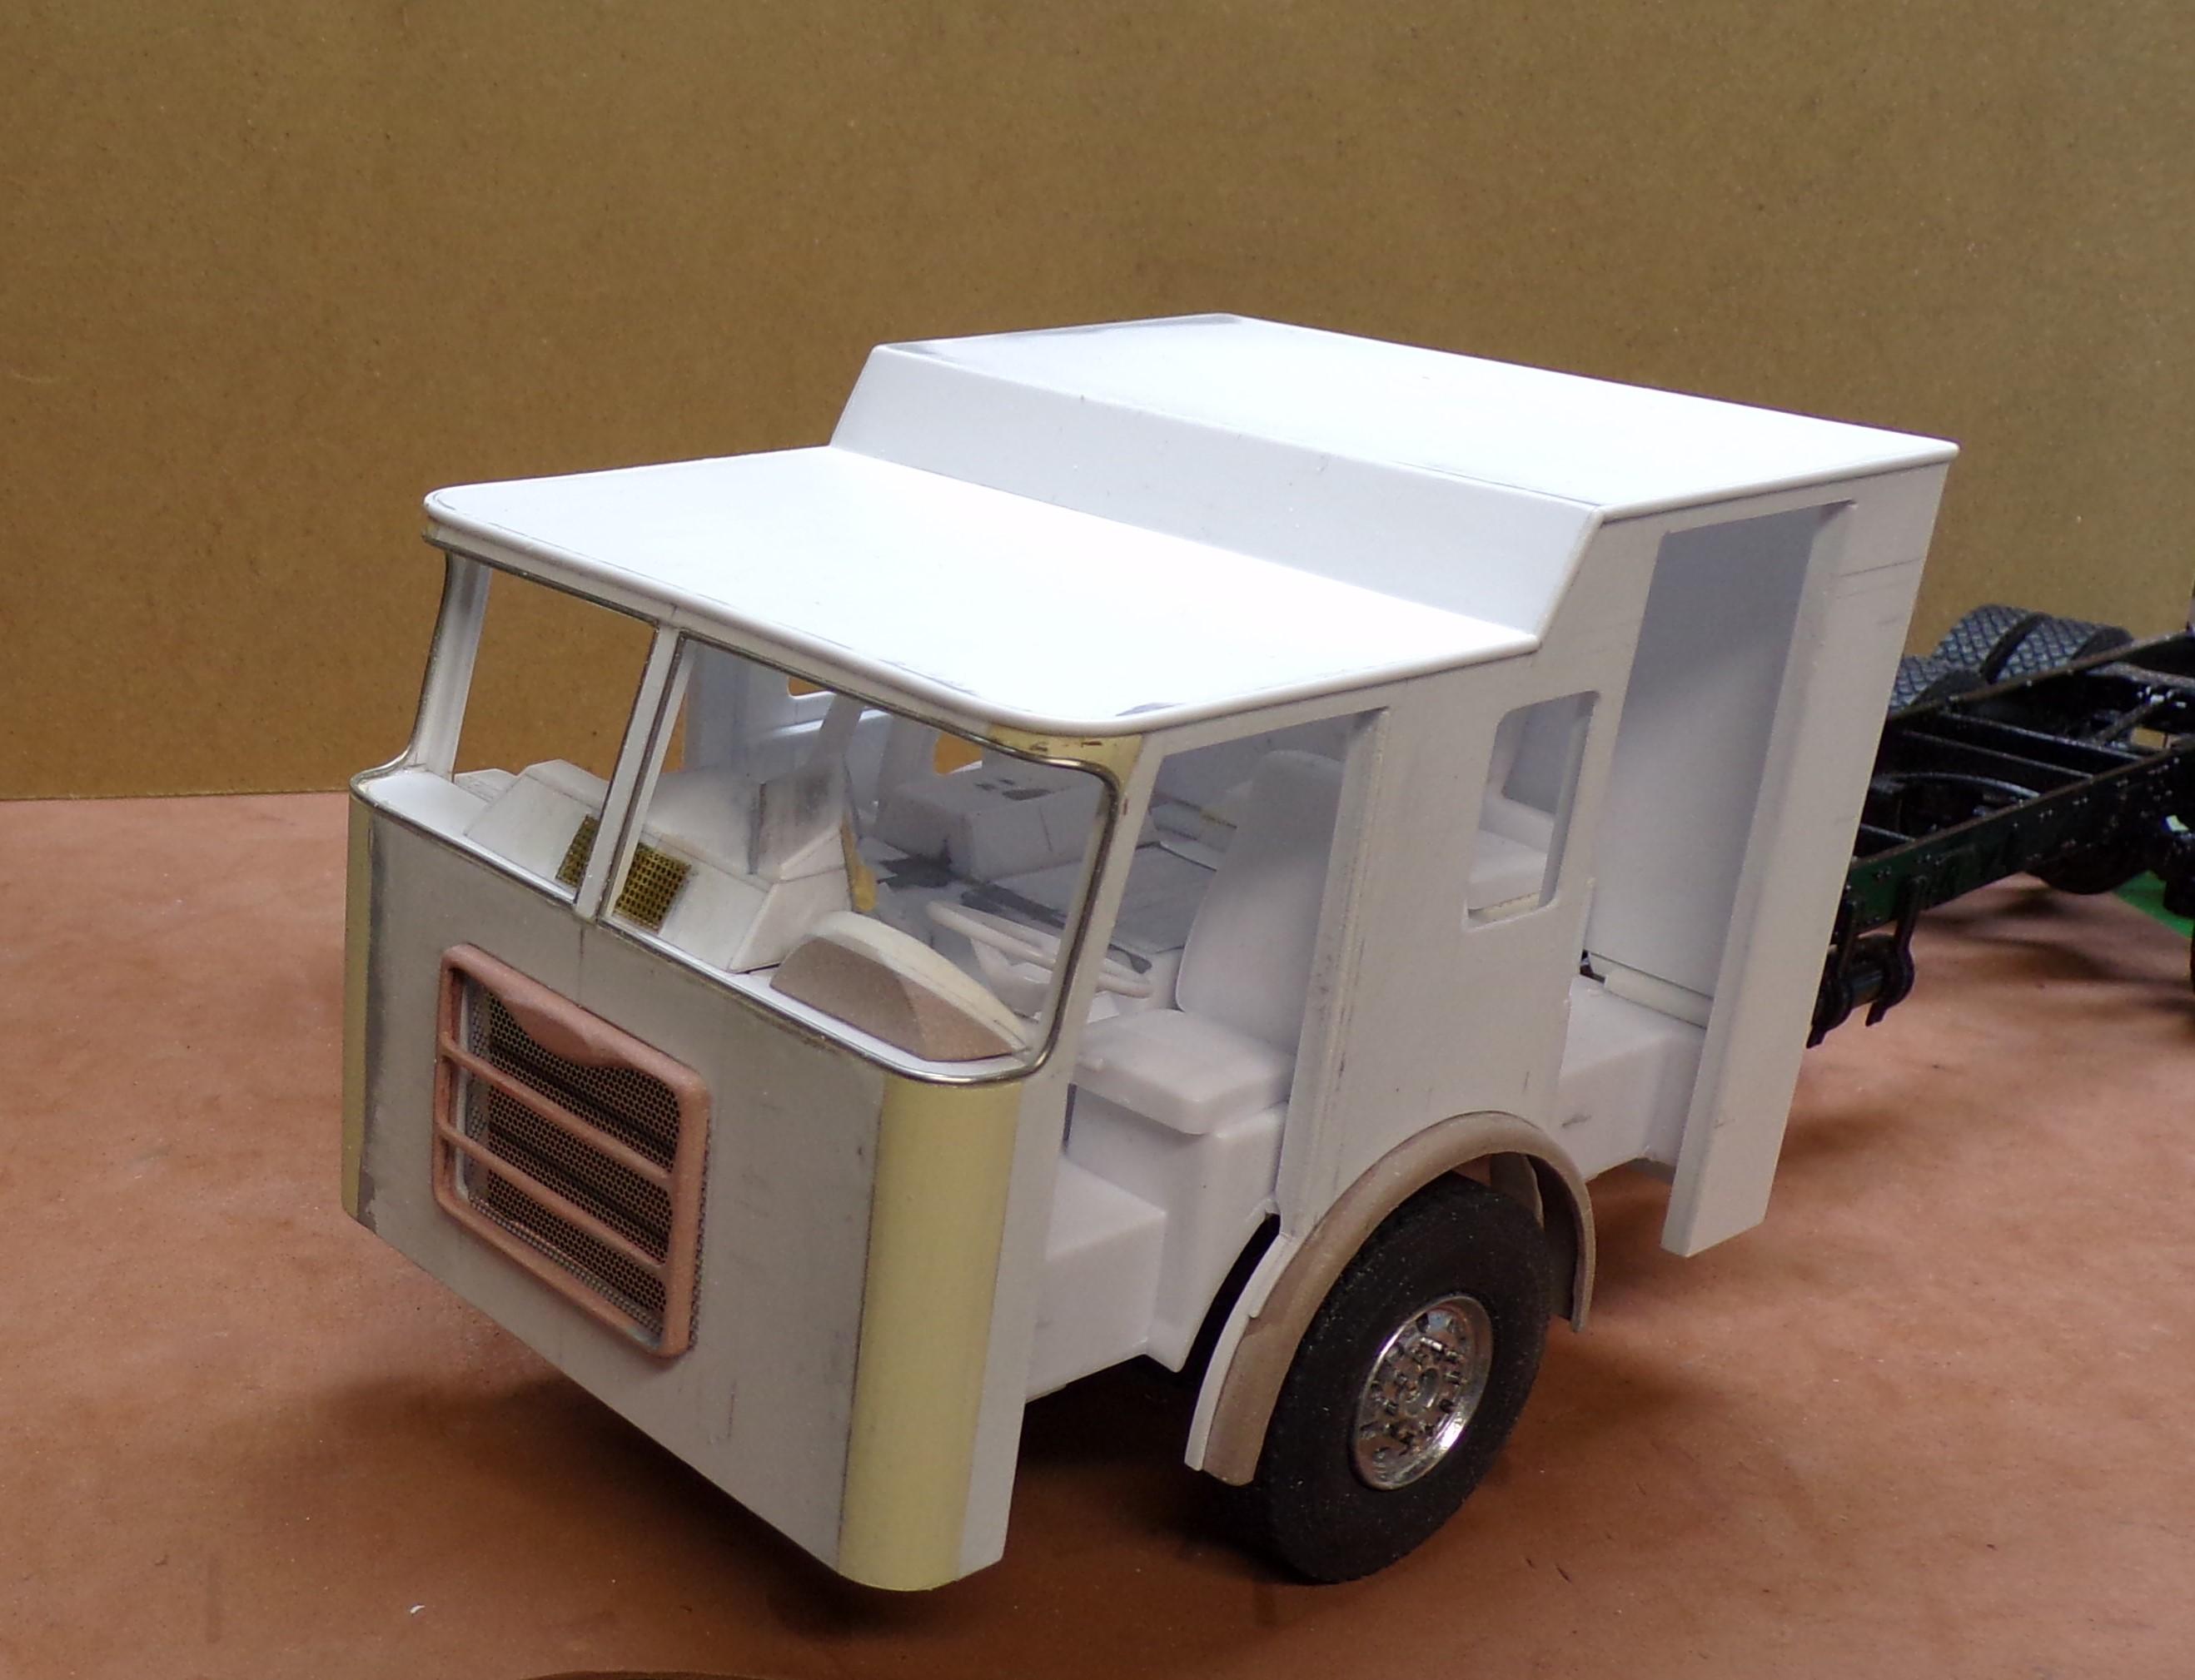
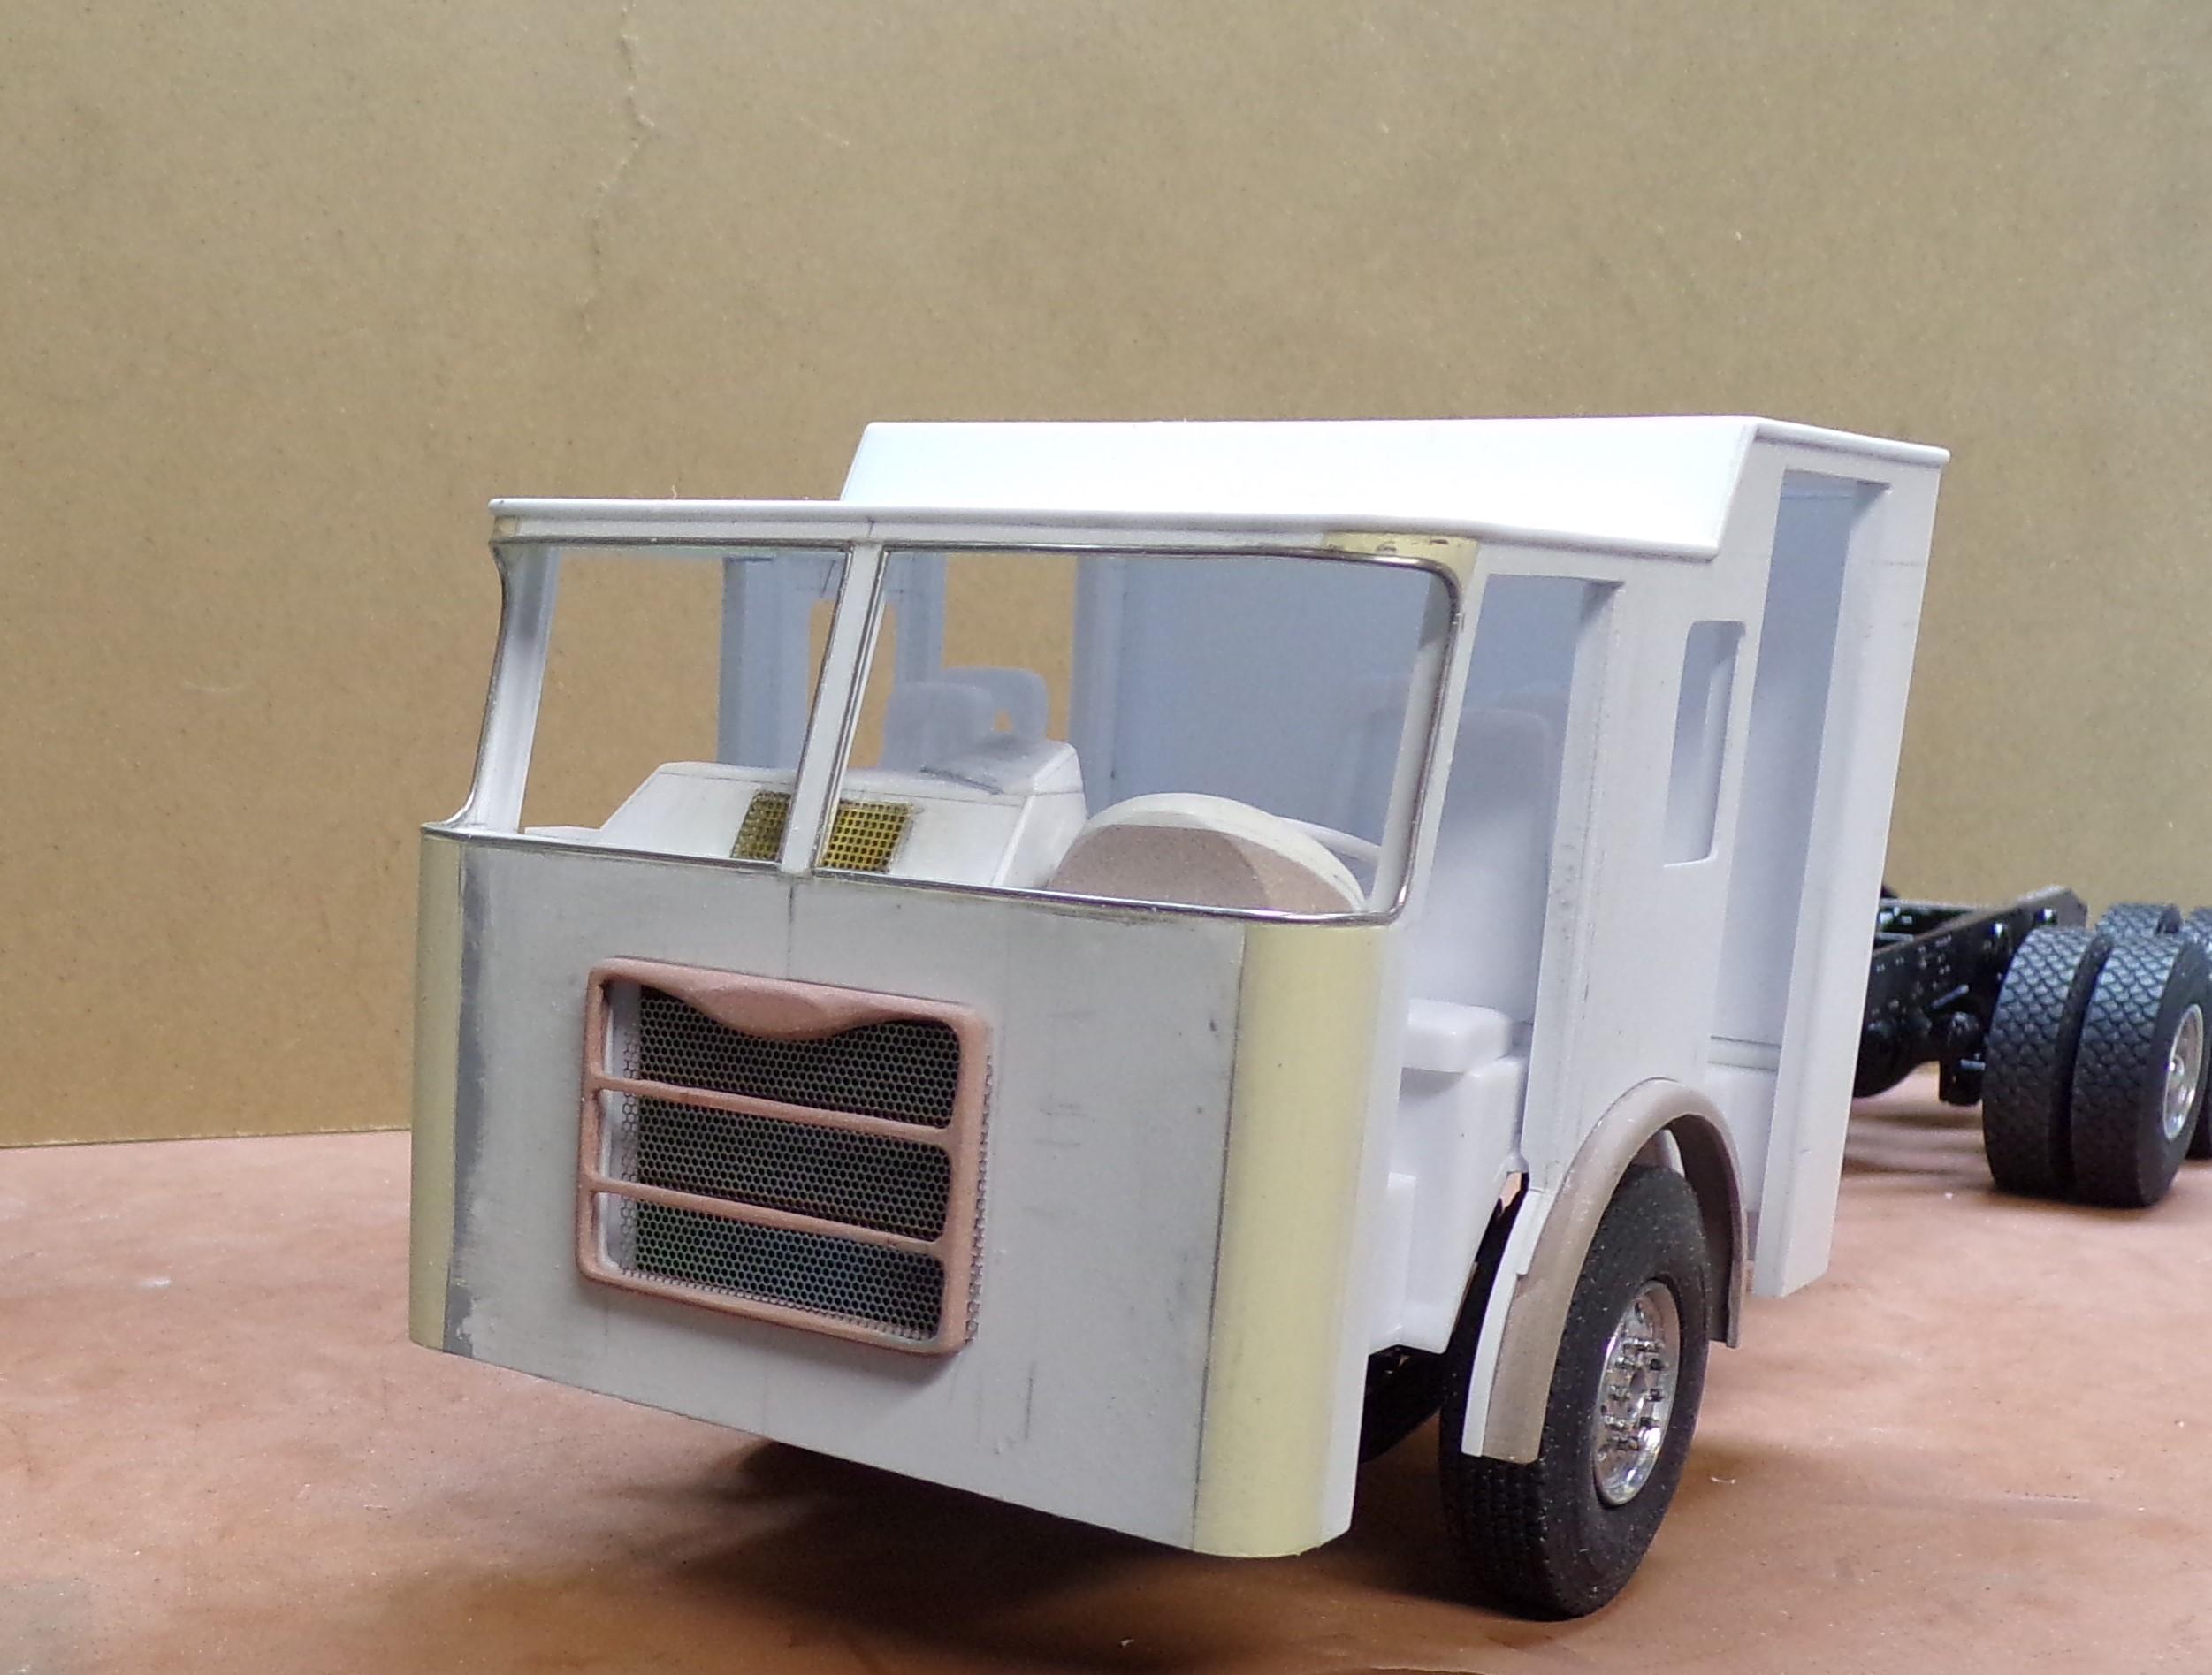
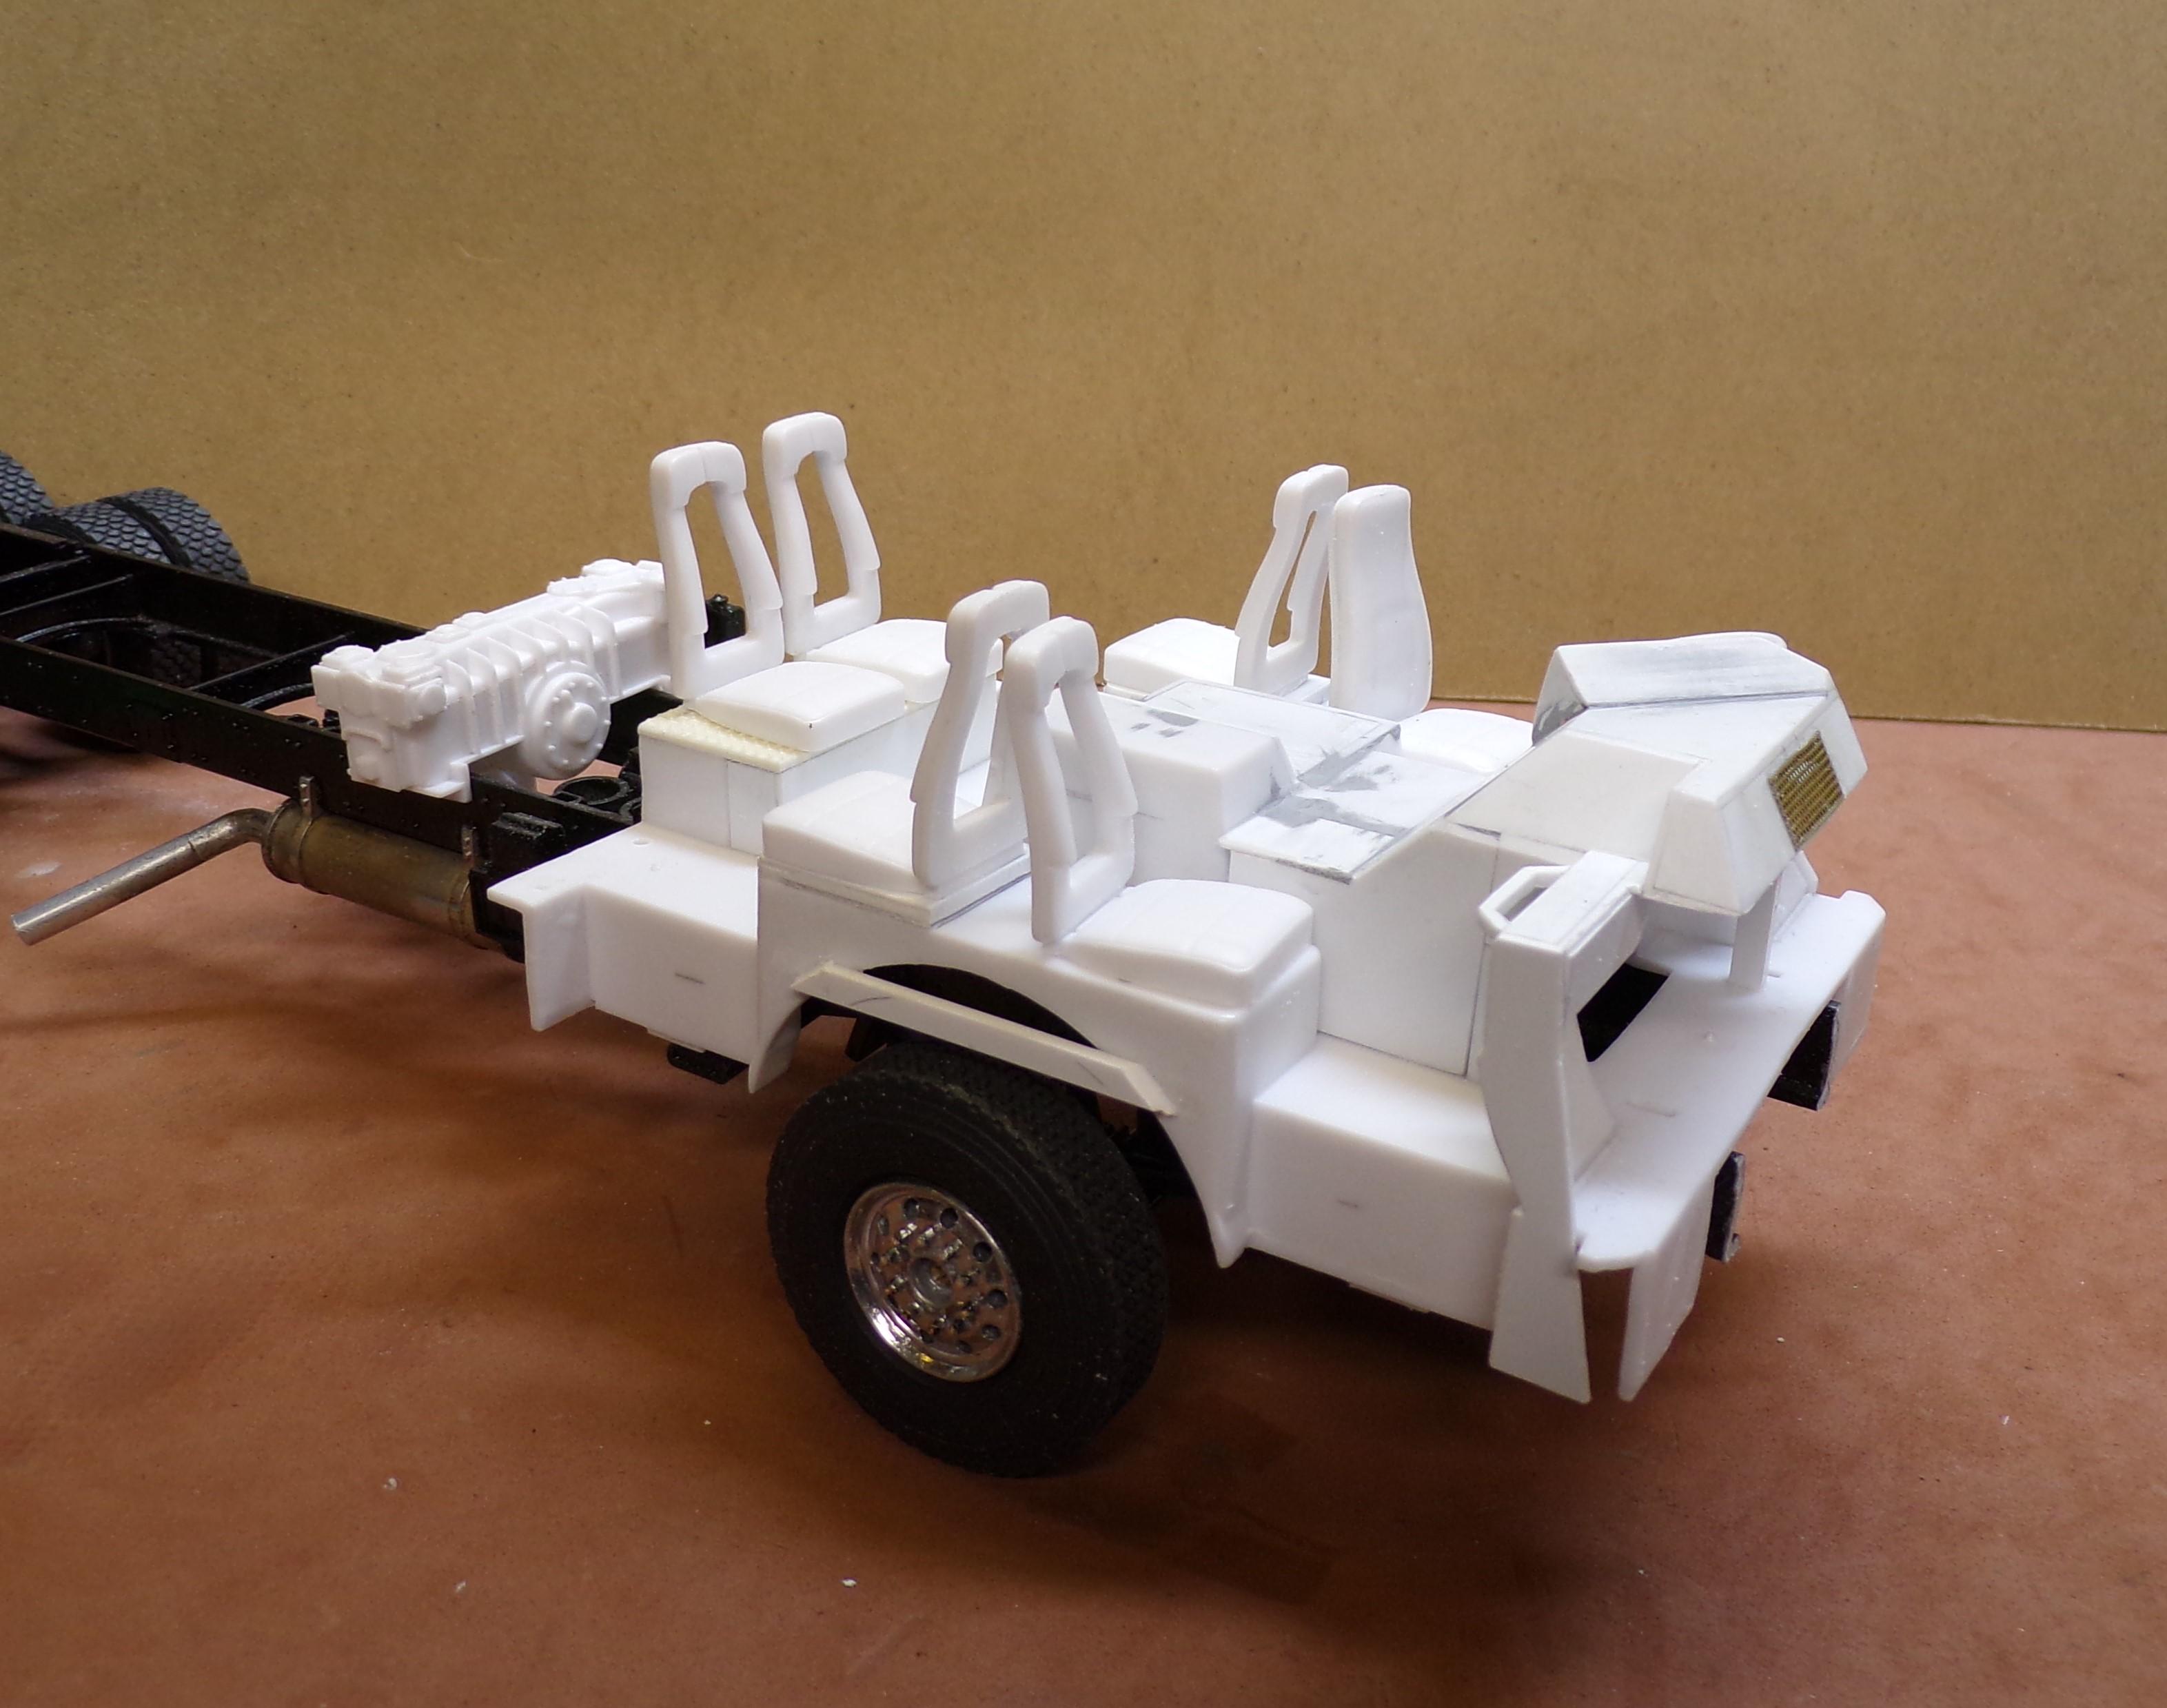
The interior tub is nearing completion of the basic build. Shimming was done to get it into final position. There will be some minor cleaning up of some of the vacant areas that should be filled in. Seats from the Trumpeter kit have been set up. The two rear ones were slightly modified to fit on the center back platform. The front grill has been done over and milled out from behind for the honeycomb style mesh that will be behind it. In the photo it is misaligned as there is no way to keep it from slipping. That will change once the grill is painted and chromed. Slight modifications were made to the front of the frame to accommodate the cab. Door openings have all be smoothed up, ready for doors. Each one has been made rigid with some strip stock surrounds. Interior panels for the cab will sit on the strips. Doors will be made of similar thickness with interior panels and places for the glass to drop in. That's it for now. More will come as the cab work moves ahead.
-
Some 80x100 strip stock was used to stiffen up the interior. It will also be the way to attach the interior panels so it is quite strong.
-
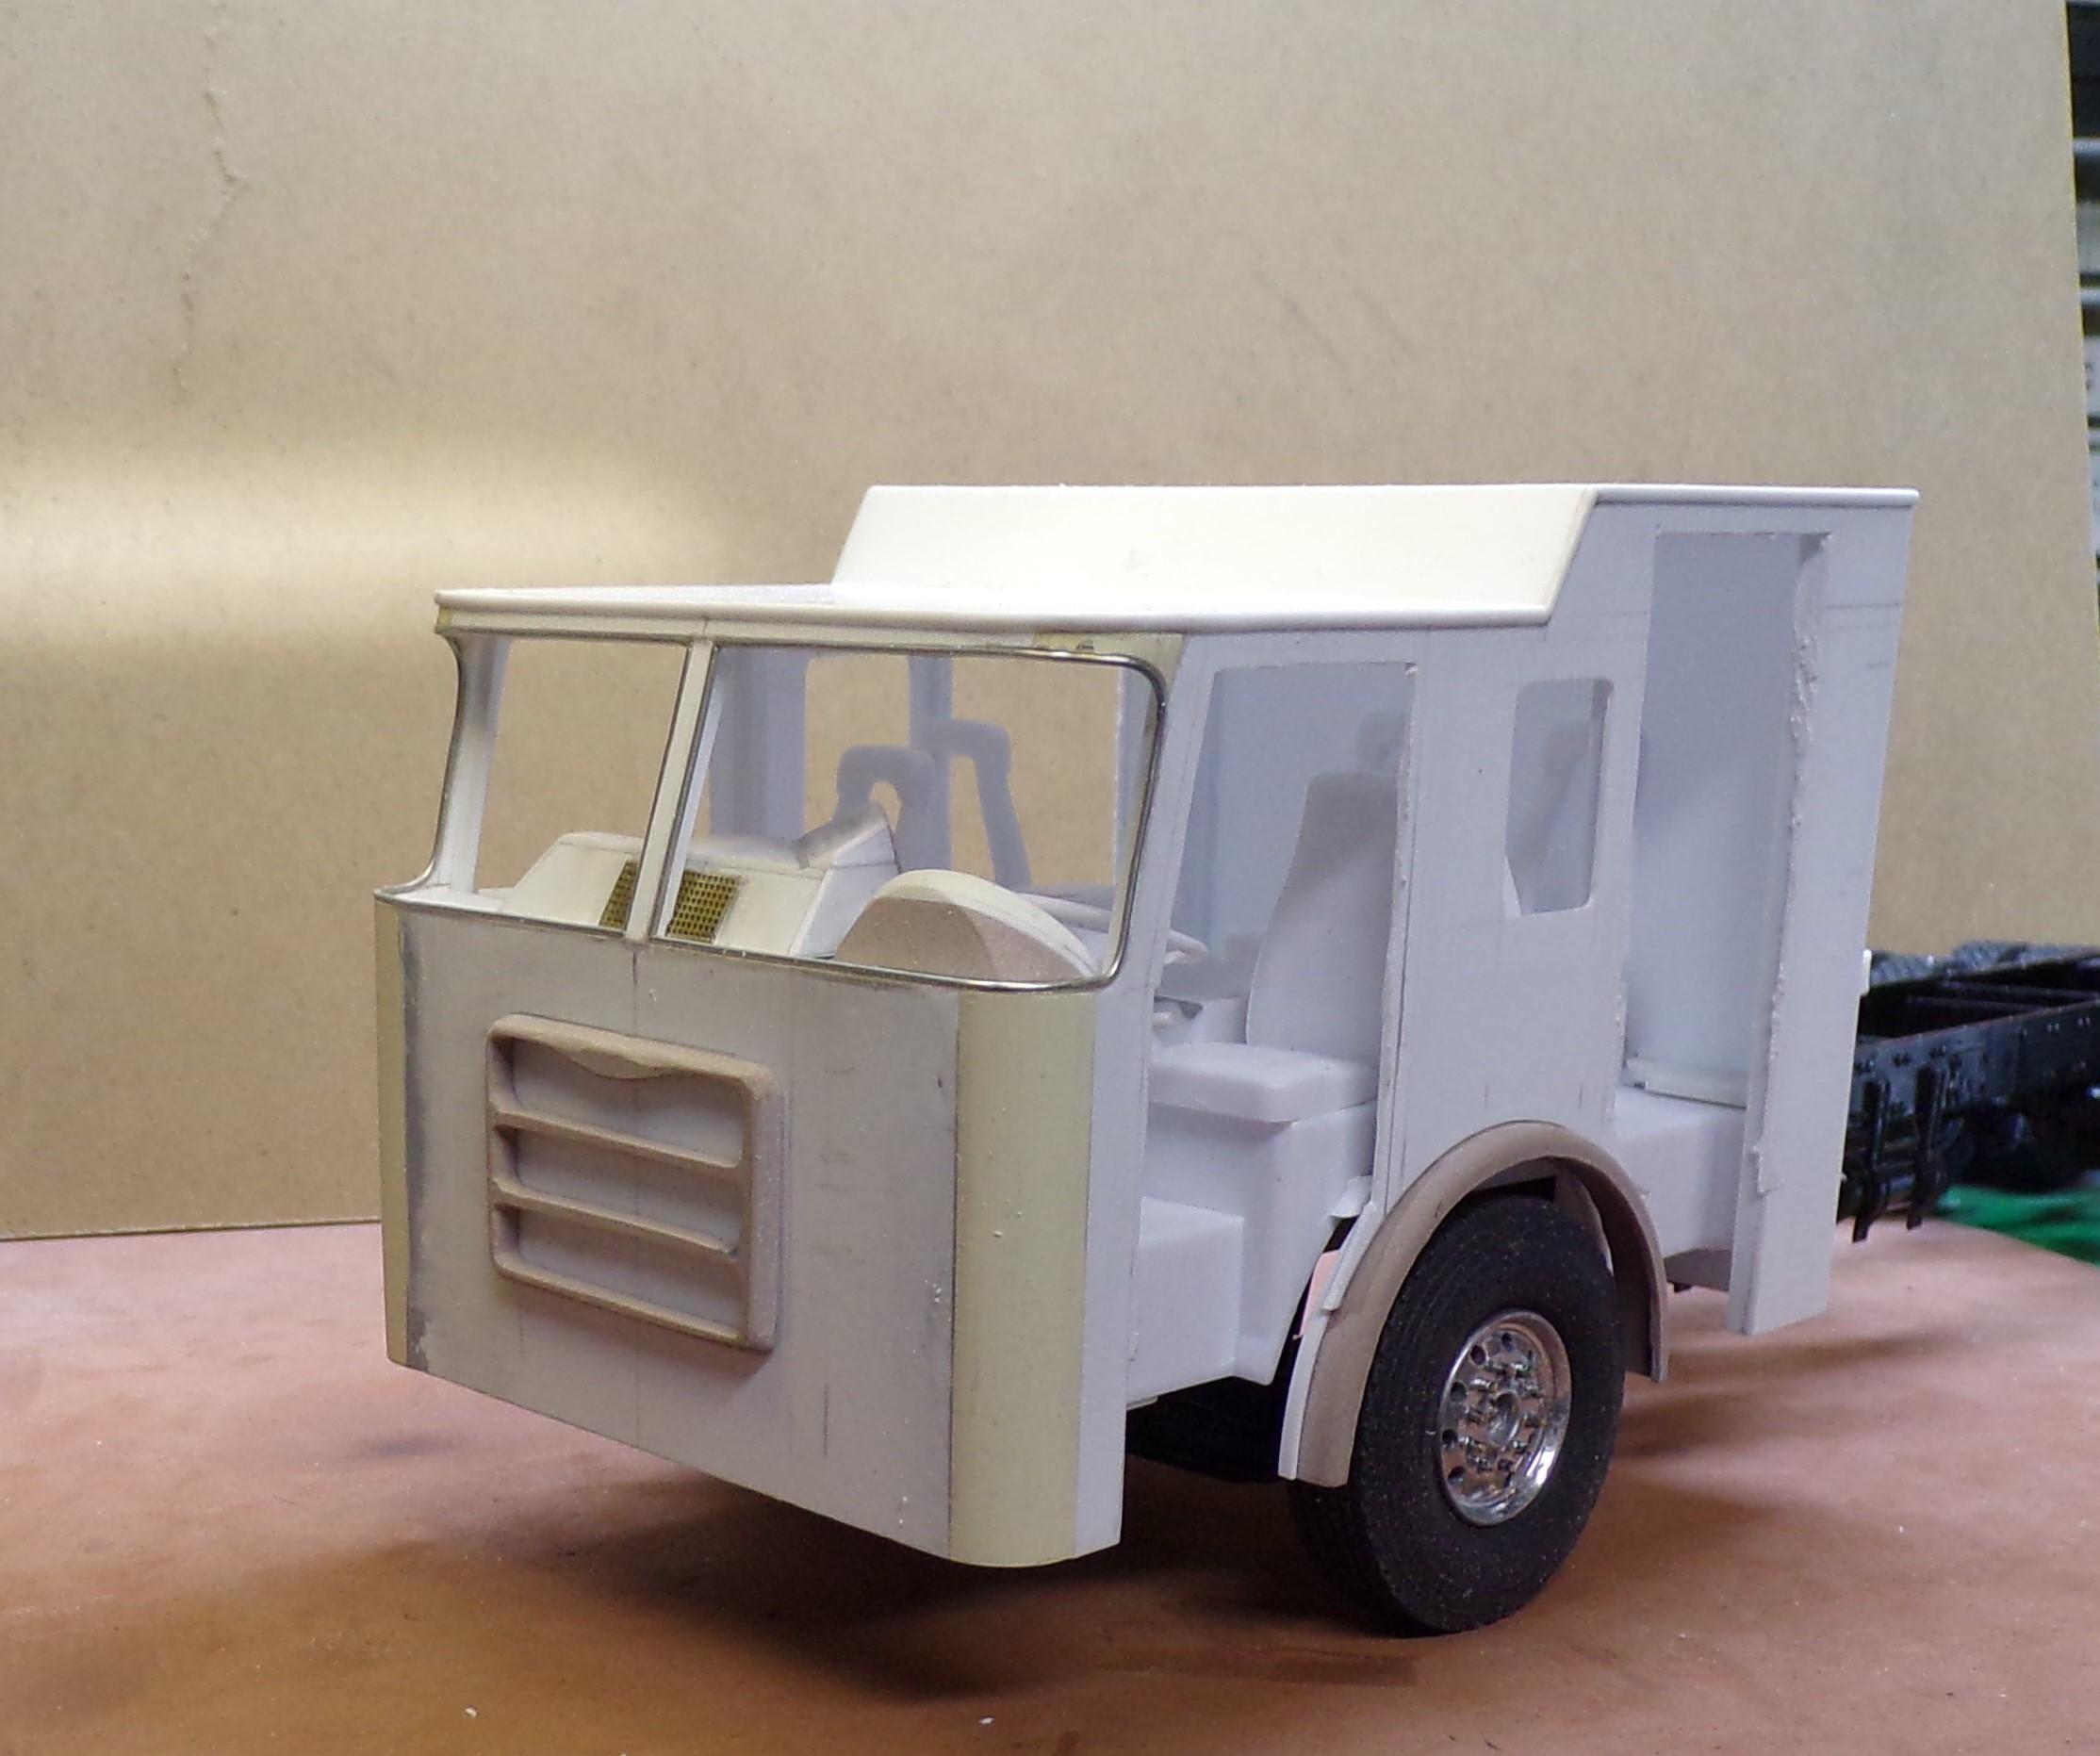
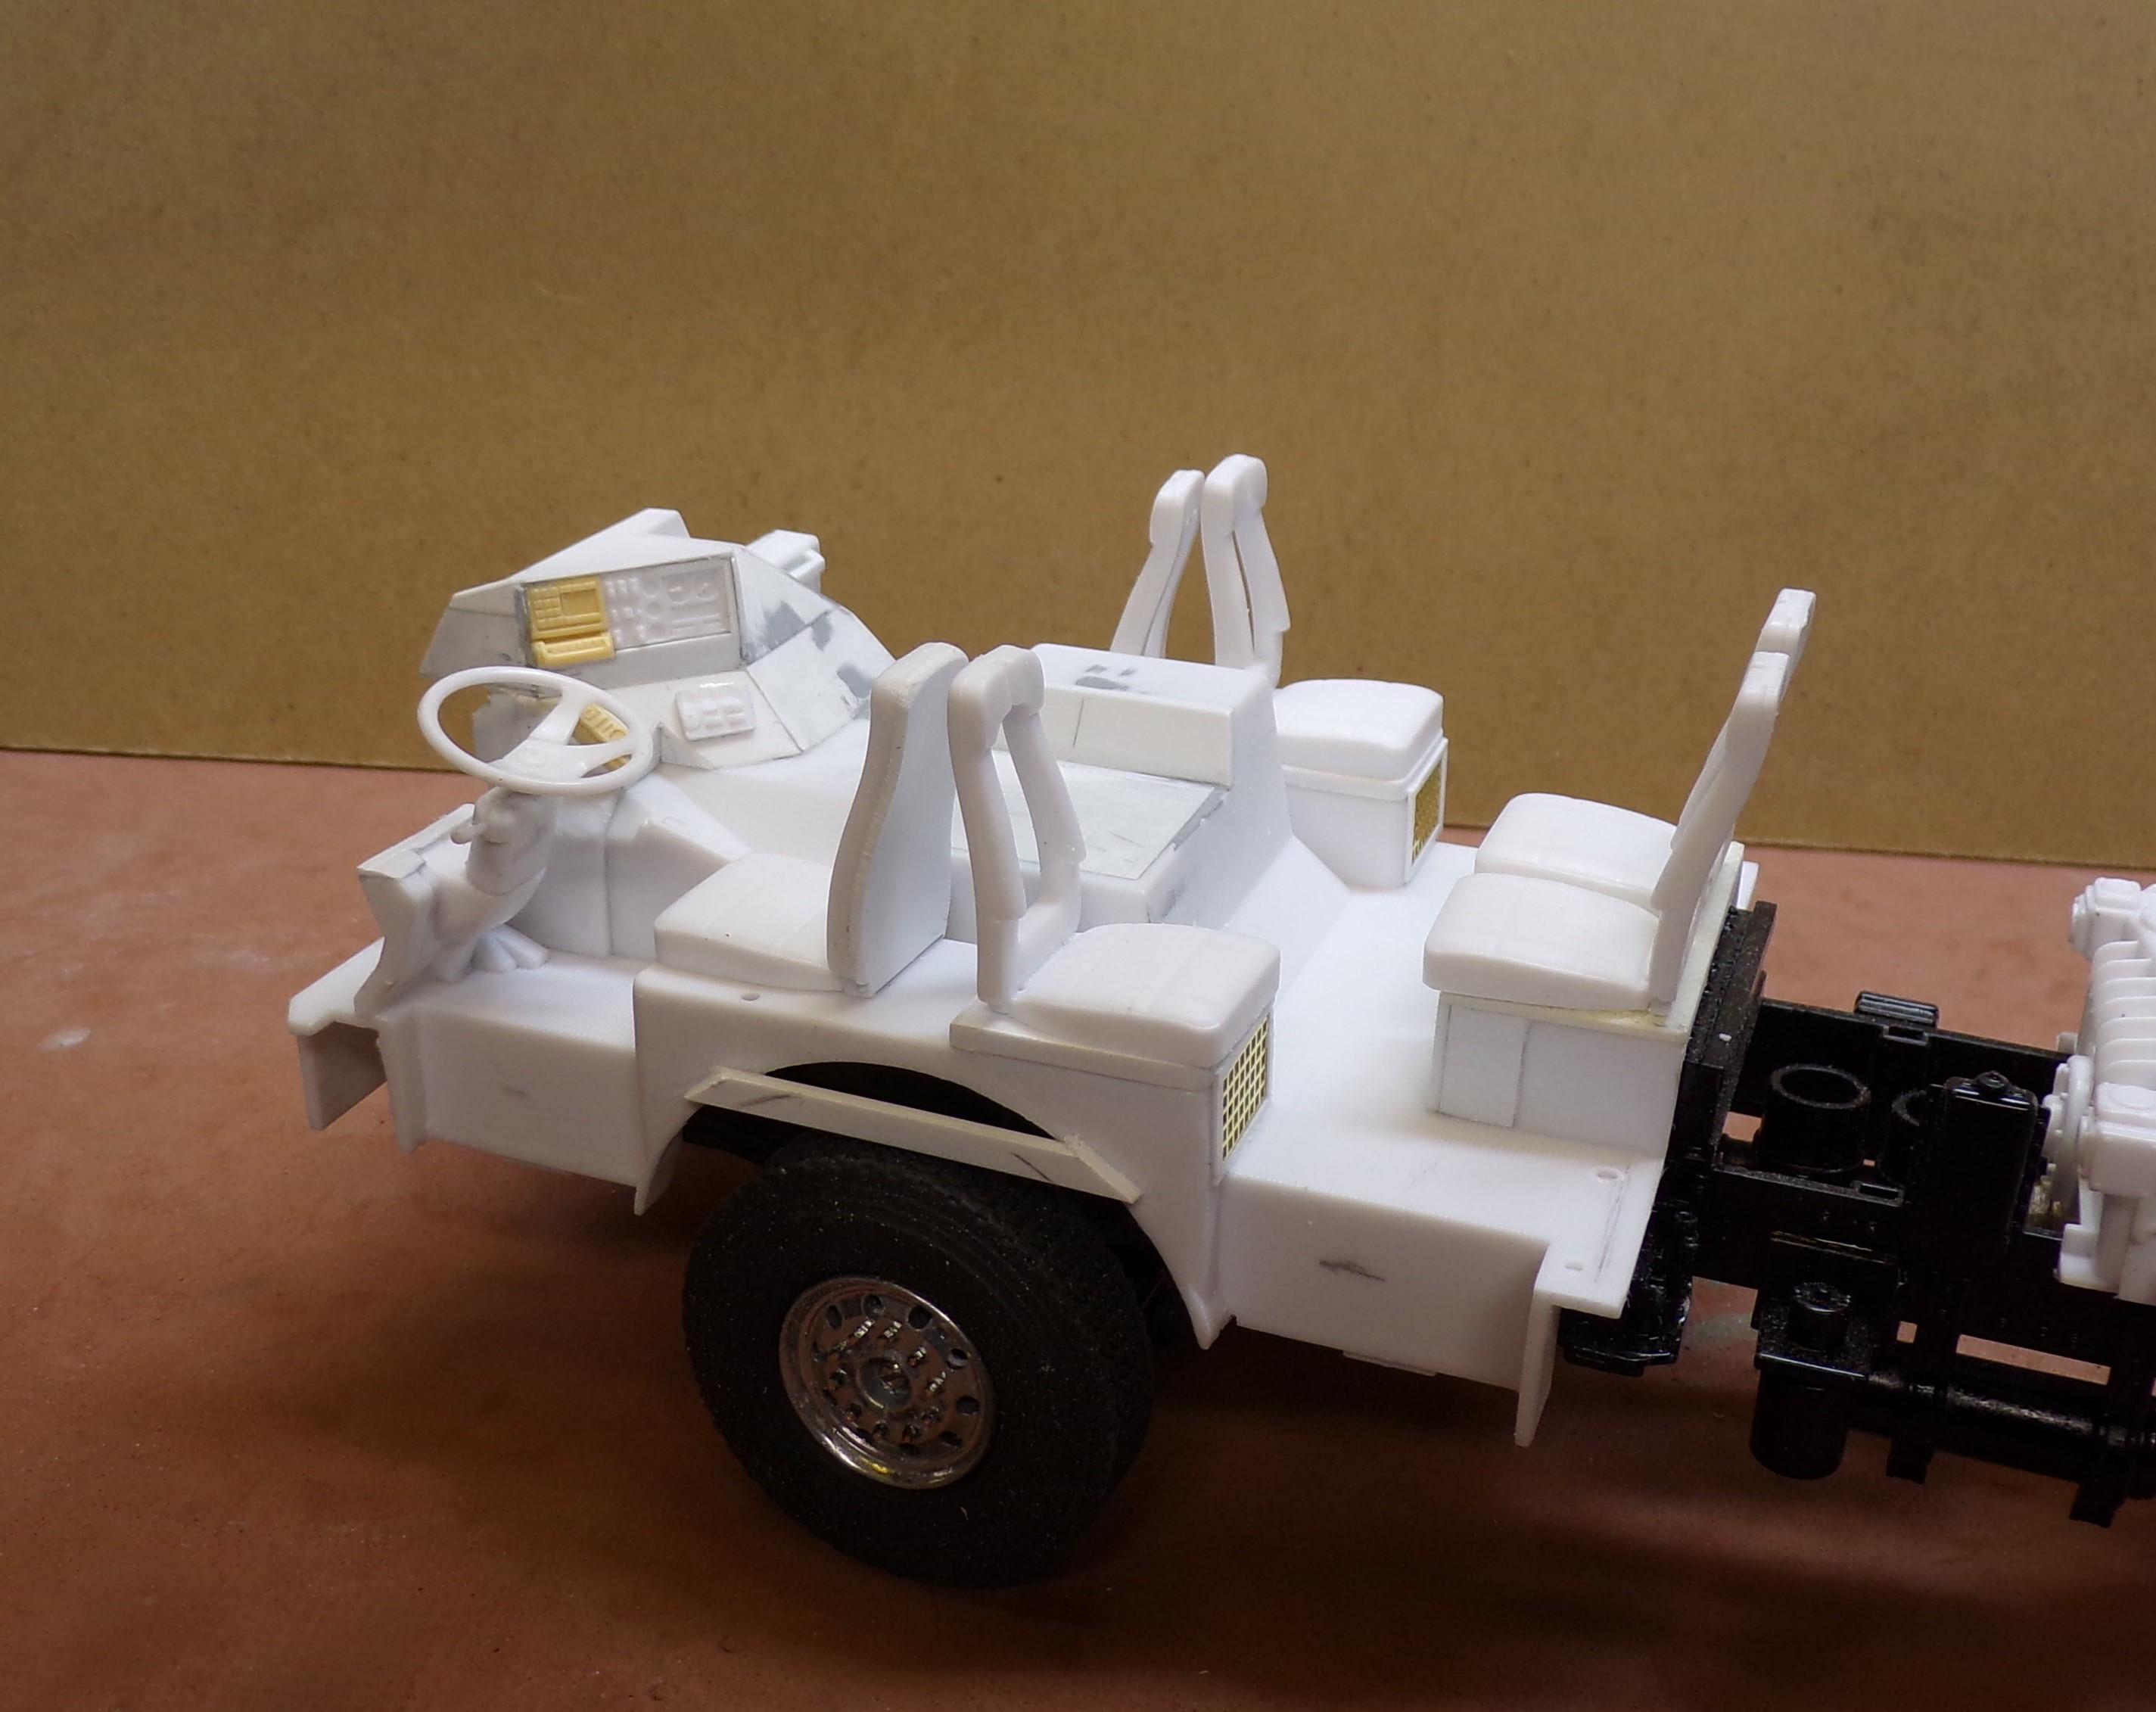
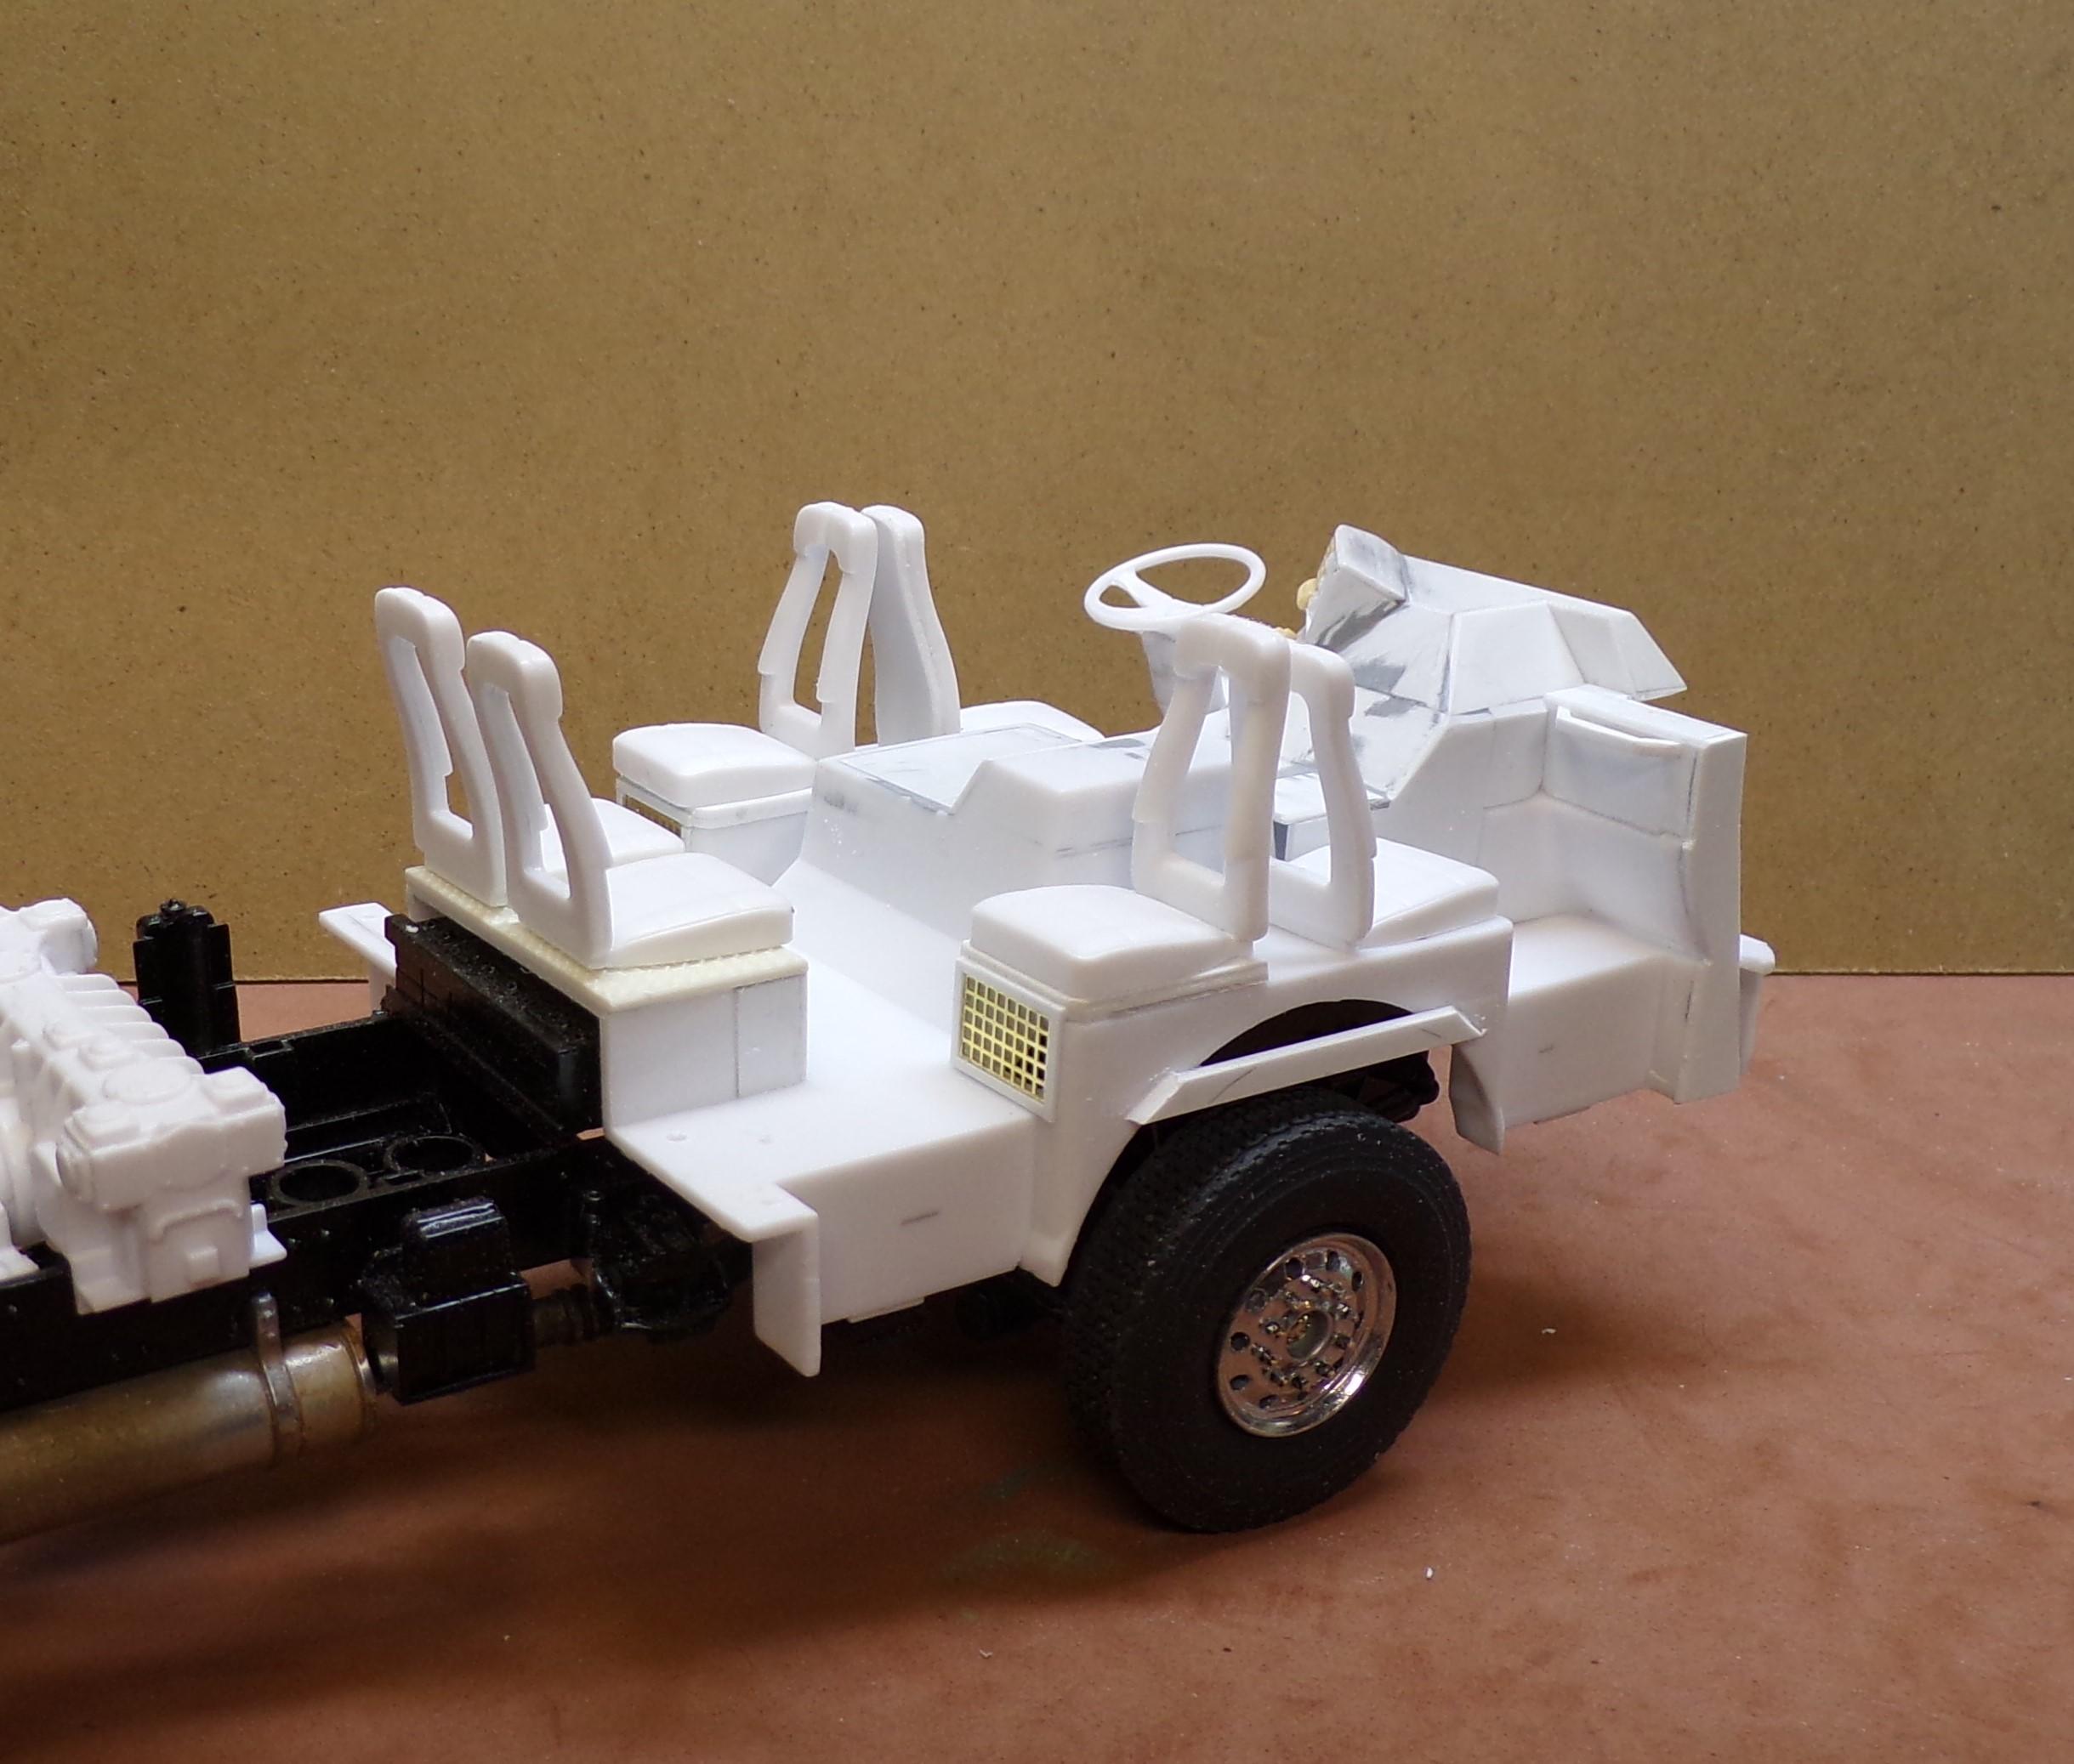
Been working on the interior of the cab with modifications to the Trumpeter tub. There has been a lot of cutting and re-working to get a semblance of the Pierce interior. Working with a different venue results in some minor differences but once all is done they won't be noticeable, (hopefully!) The cab doors have been roughed out, leaving material to be shaved away to get to straight and smooth surfaces. There will be some additional bracing for the inside as well to give the cab sides some depth. Doors will be similarly made thicker allowing for hinges, door latches, etc. as well as the window glass. The seats came directly from the Trumpeter ALF. Generic perhaps but with some "Pierce" logos and some paint they will be ok. There are some temporary stiffeners inside the wheel wells that will be trimmed after everything is fit. Those and additional pieces inside the cab help to locate the interior tub in the same place each time it is removed. Here's the interior tub sans cab. There are still some changes to make but the majority of the work is done and only needs some finishing. Seats will be glued down once they and the interior are painted. The section of dash board in front of the steering wheel will go in separate and will be glued in after it is painted.
-
Well, I can't wait for that to happen. Got too much to do on it!? Besides, I'm not getting any younger!
-
This project is proceeding very slowly. A couple of things have slowed it down including the windshield. To make a long story short, I'm waiting on some PETG 0.020 clear sheets to do some vacuforming of the windshield pieces. The buck is done after several failed attempts to make some good pieces to insert in the windshield area. The ones shown are only temporary and are not clean. The second was how to make up the interior to look like the real rig while using some of the ALF Trumpeter parts. the interior tub has been cut up in various ways to fit and to allow for additional sheet stock to be added where appropriate. The photos I have of the interior don't give me enough info to do things without a lot of checking. But we will get there all in good time! I can see that the surround I made for the driver's gauges sits too high so there will be some additional sanding to get it right!? I used some fine solder wire for around the windshield opening. It is just enough to provide a lip for the "glass" to sit against and makes a nice trim look around the outside.
-
Autocar Wrecker
Chariots of Fire replied to Warren D's topic in WIP: Model Trucks: Big Rigs and Heavy Equipment
That will be nice!! Love the Holmes wreckers. -
Square headlights needed.
Chariots of Fire replied to Chariots of Fire's topic in Model Building Questions and Answers
Wow! This conversation sure got a long ways away from square headlights!!? -
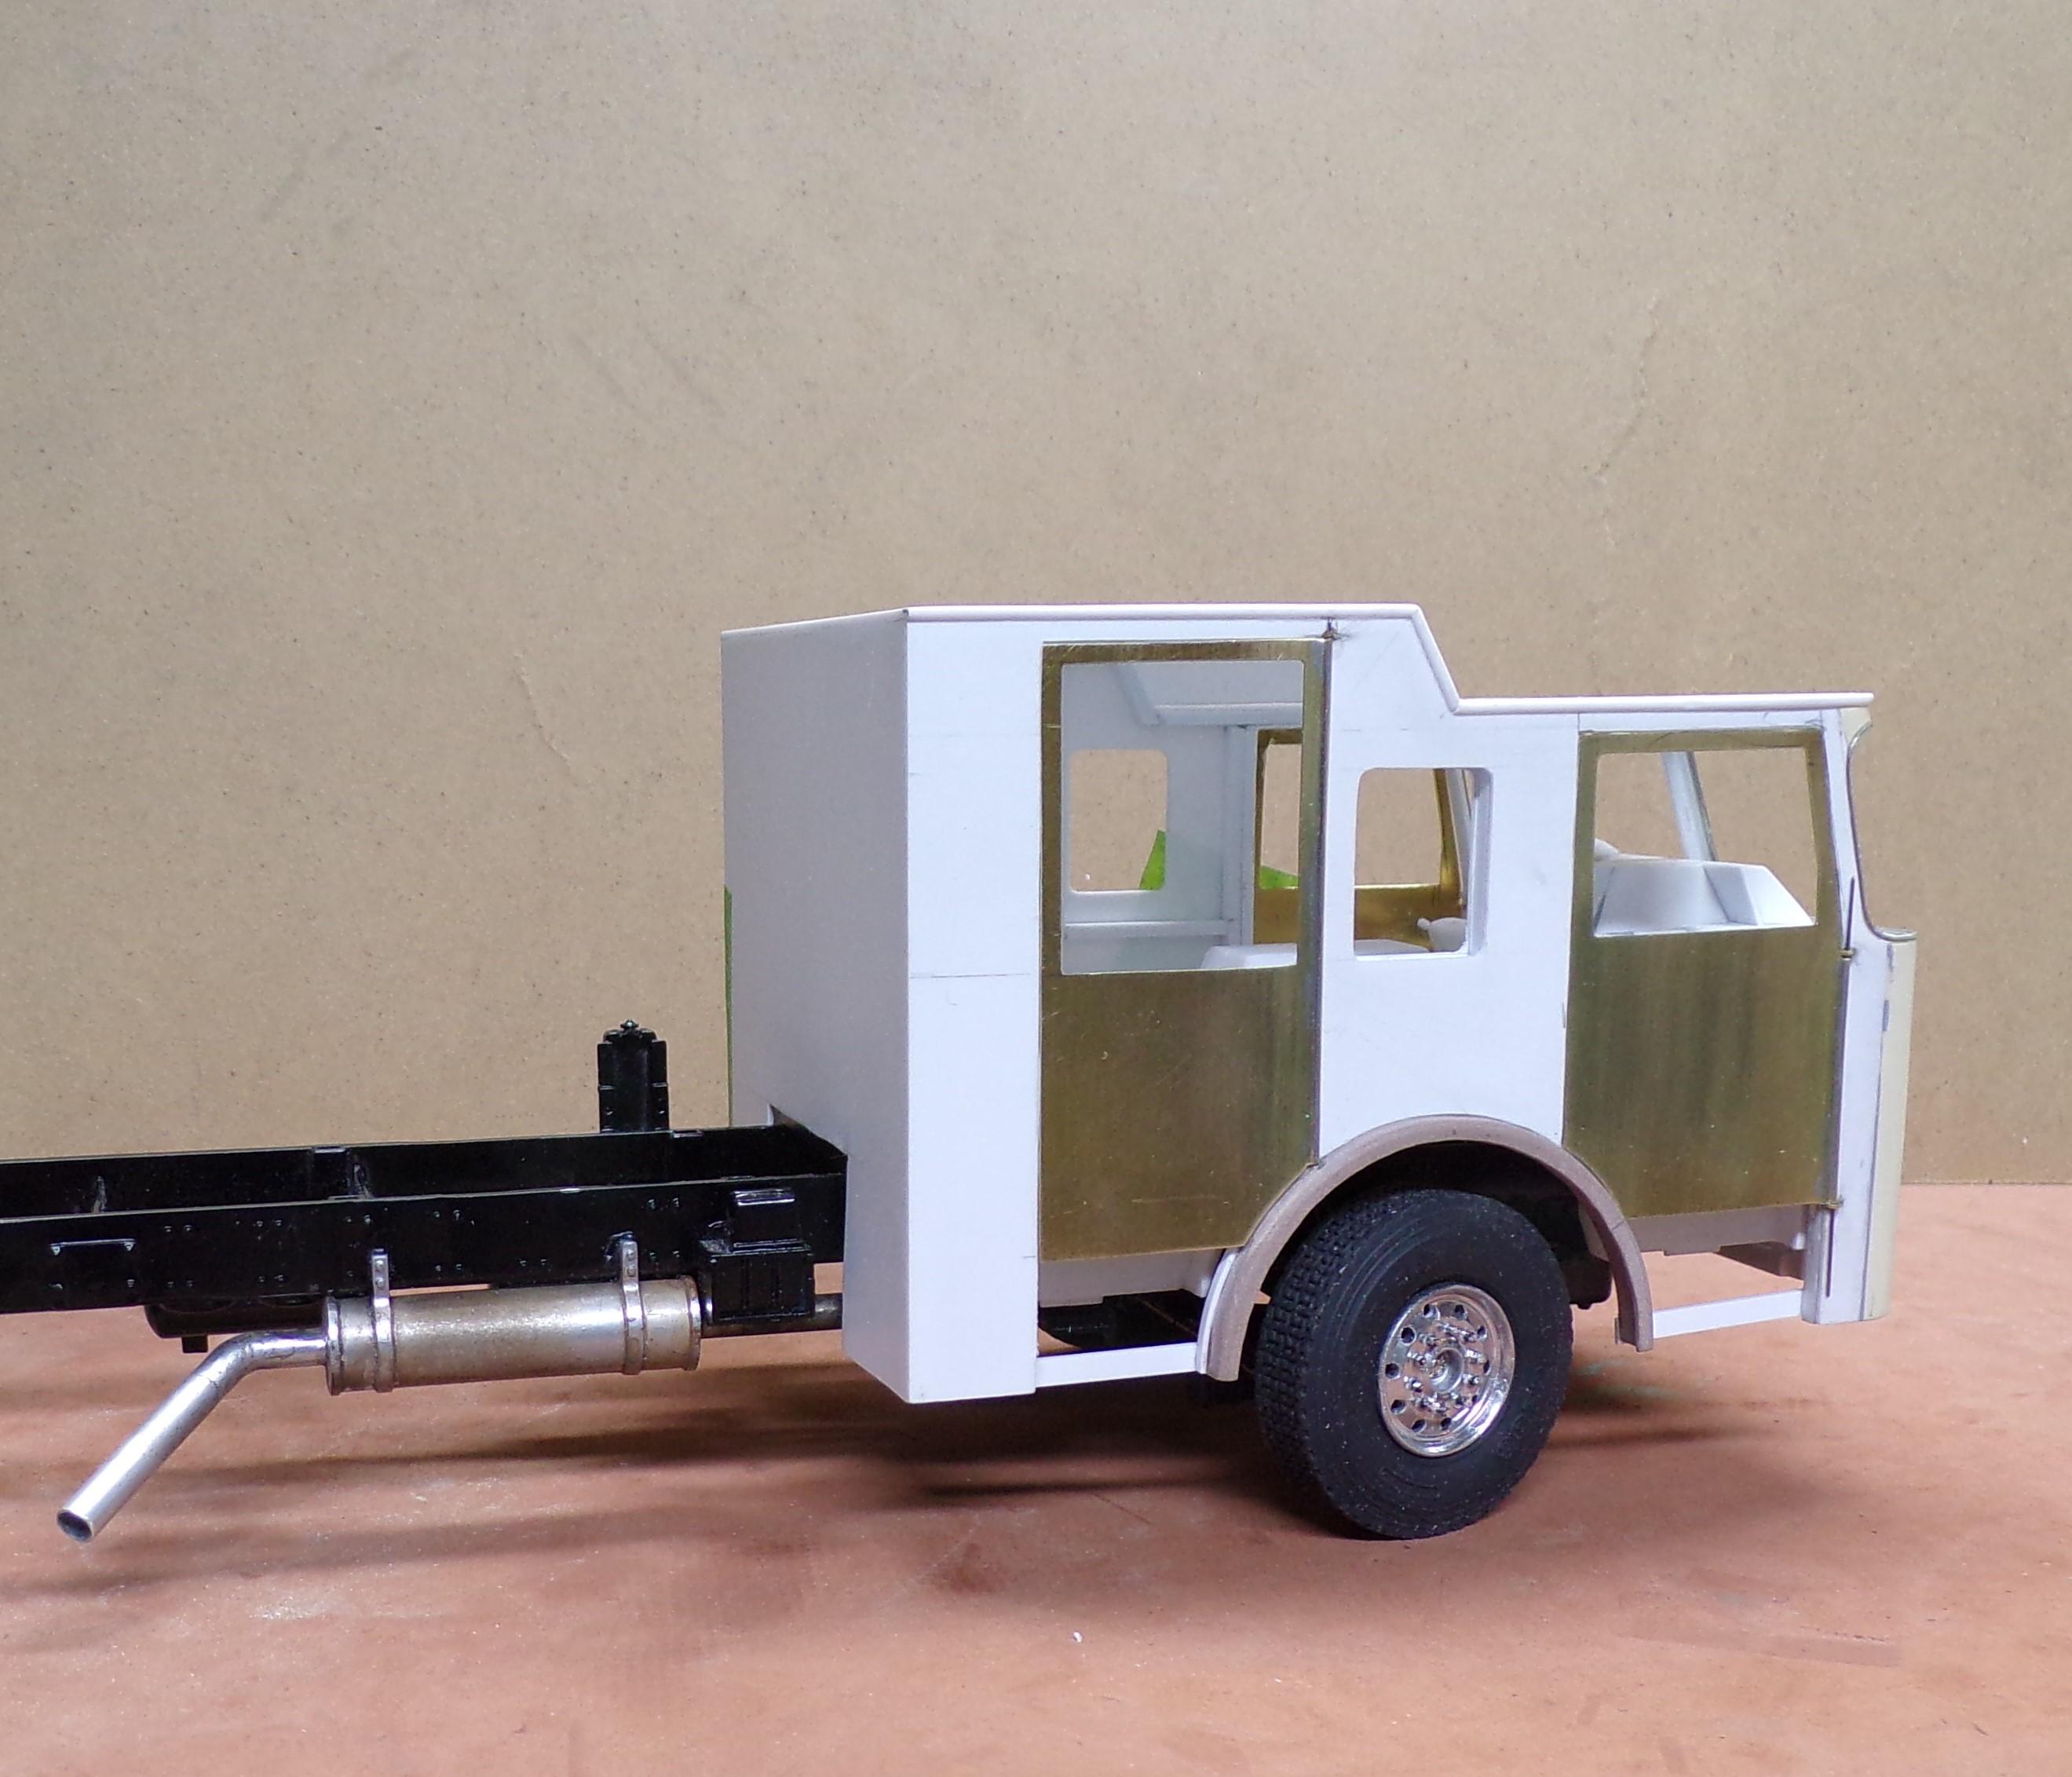
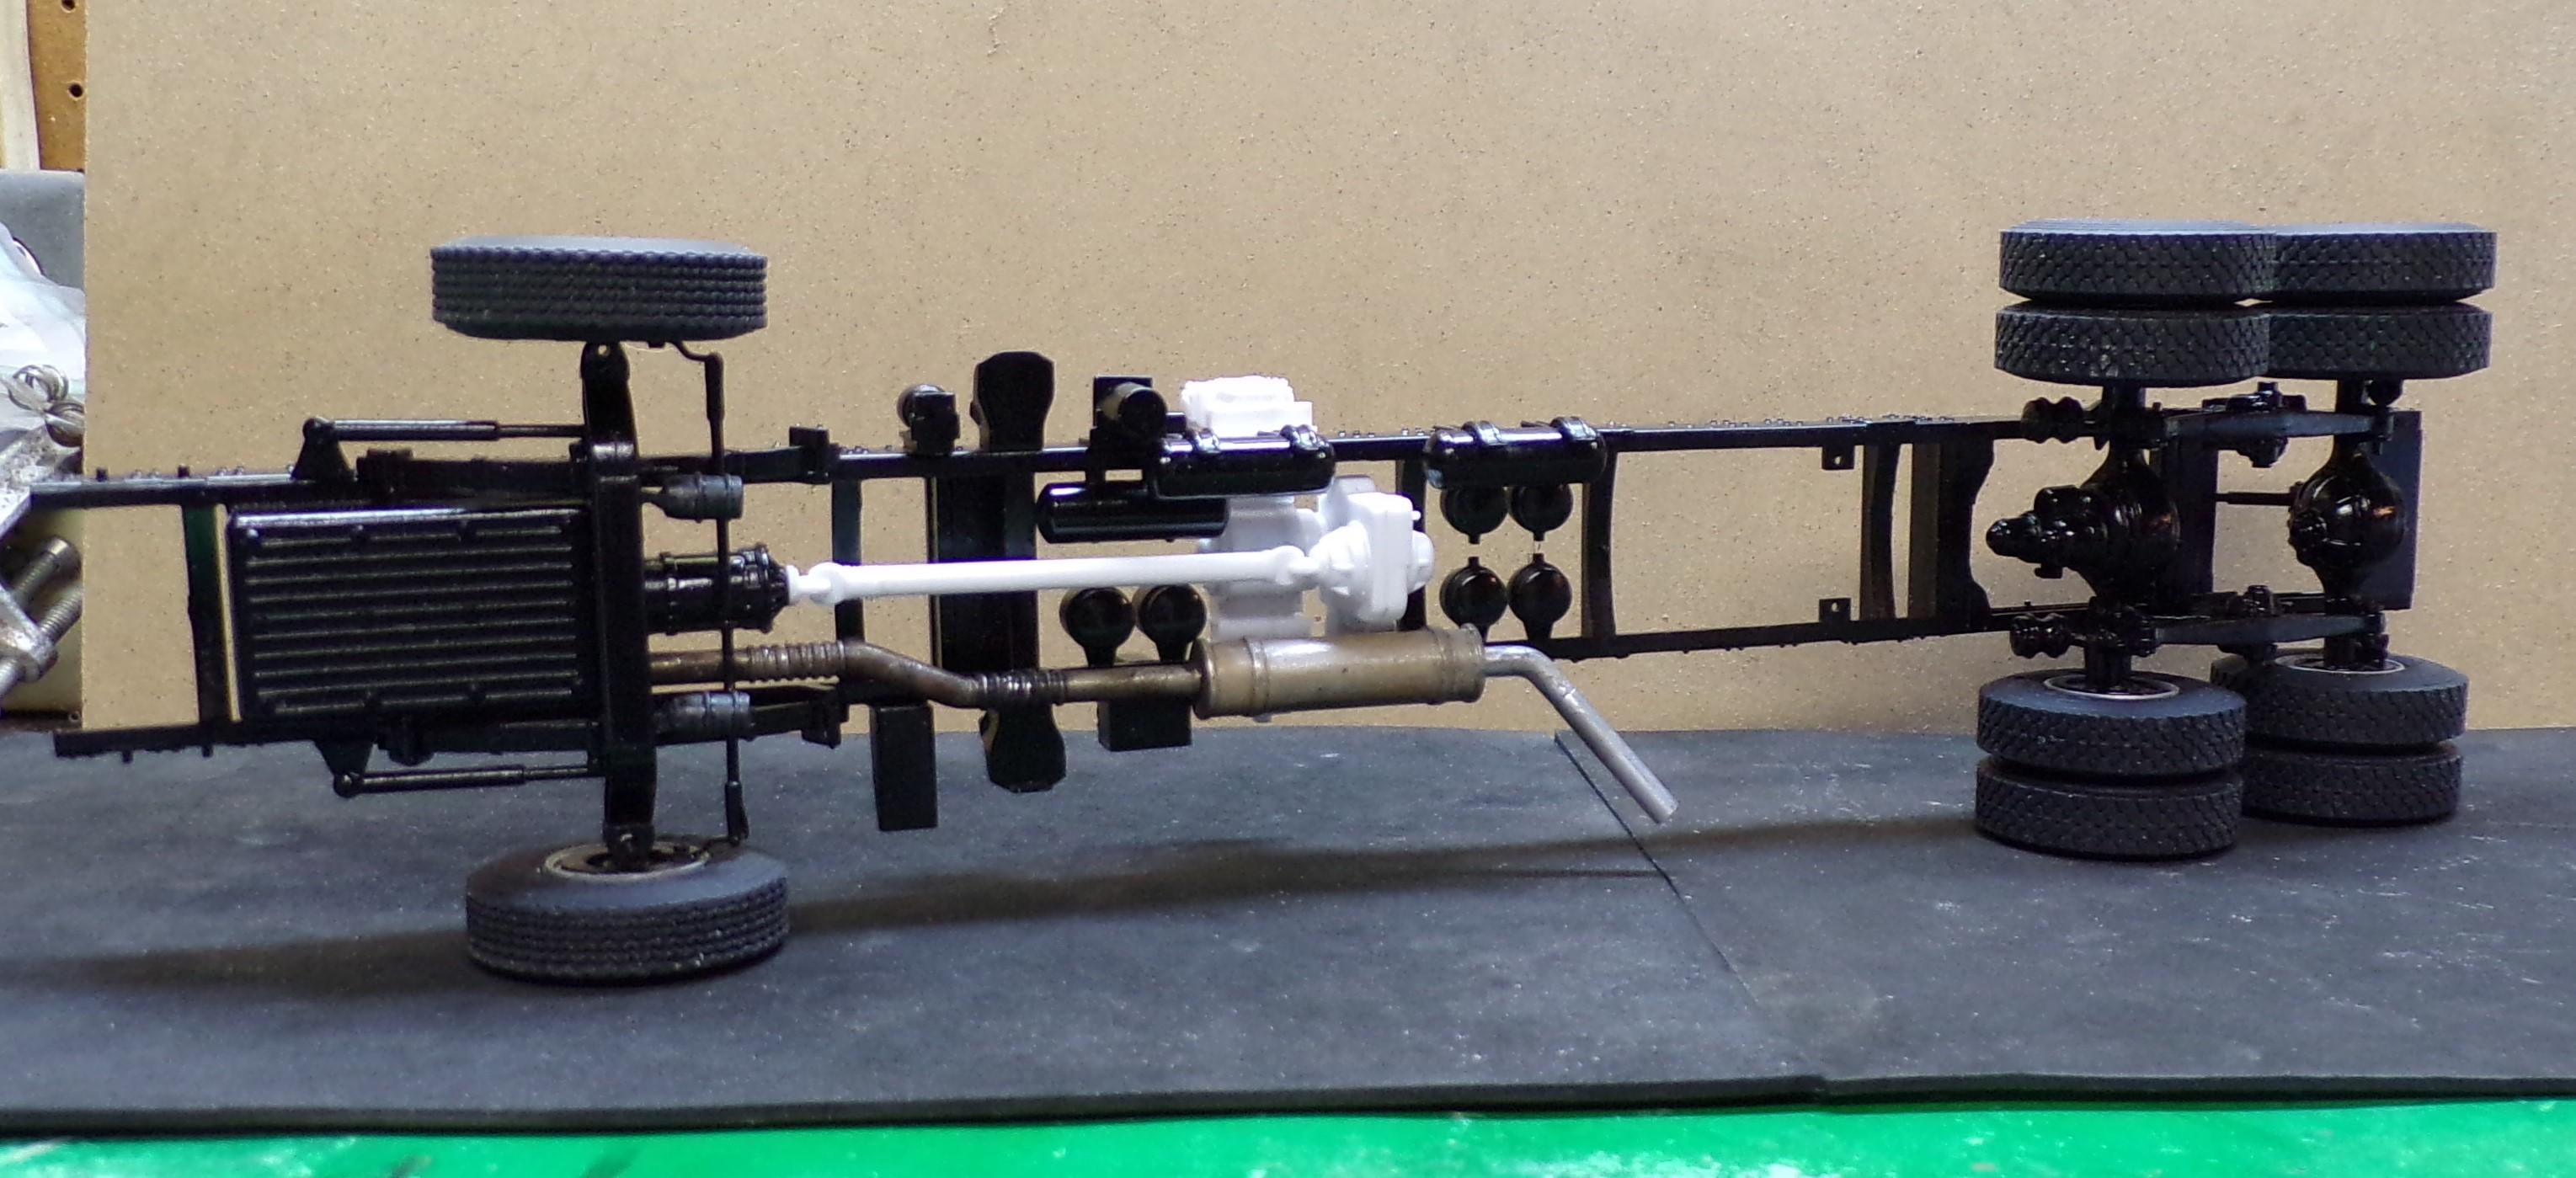
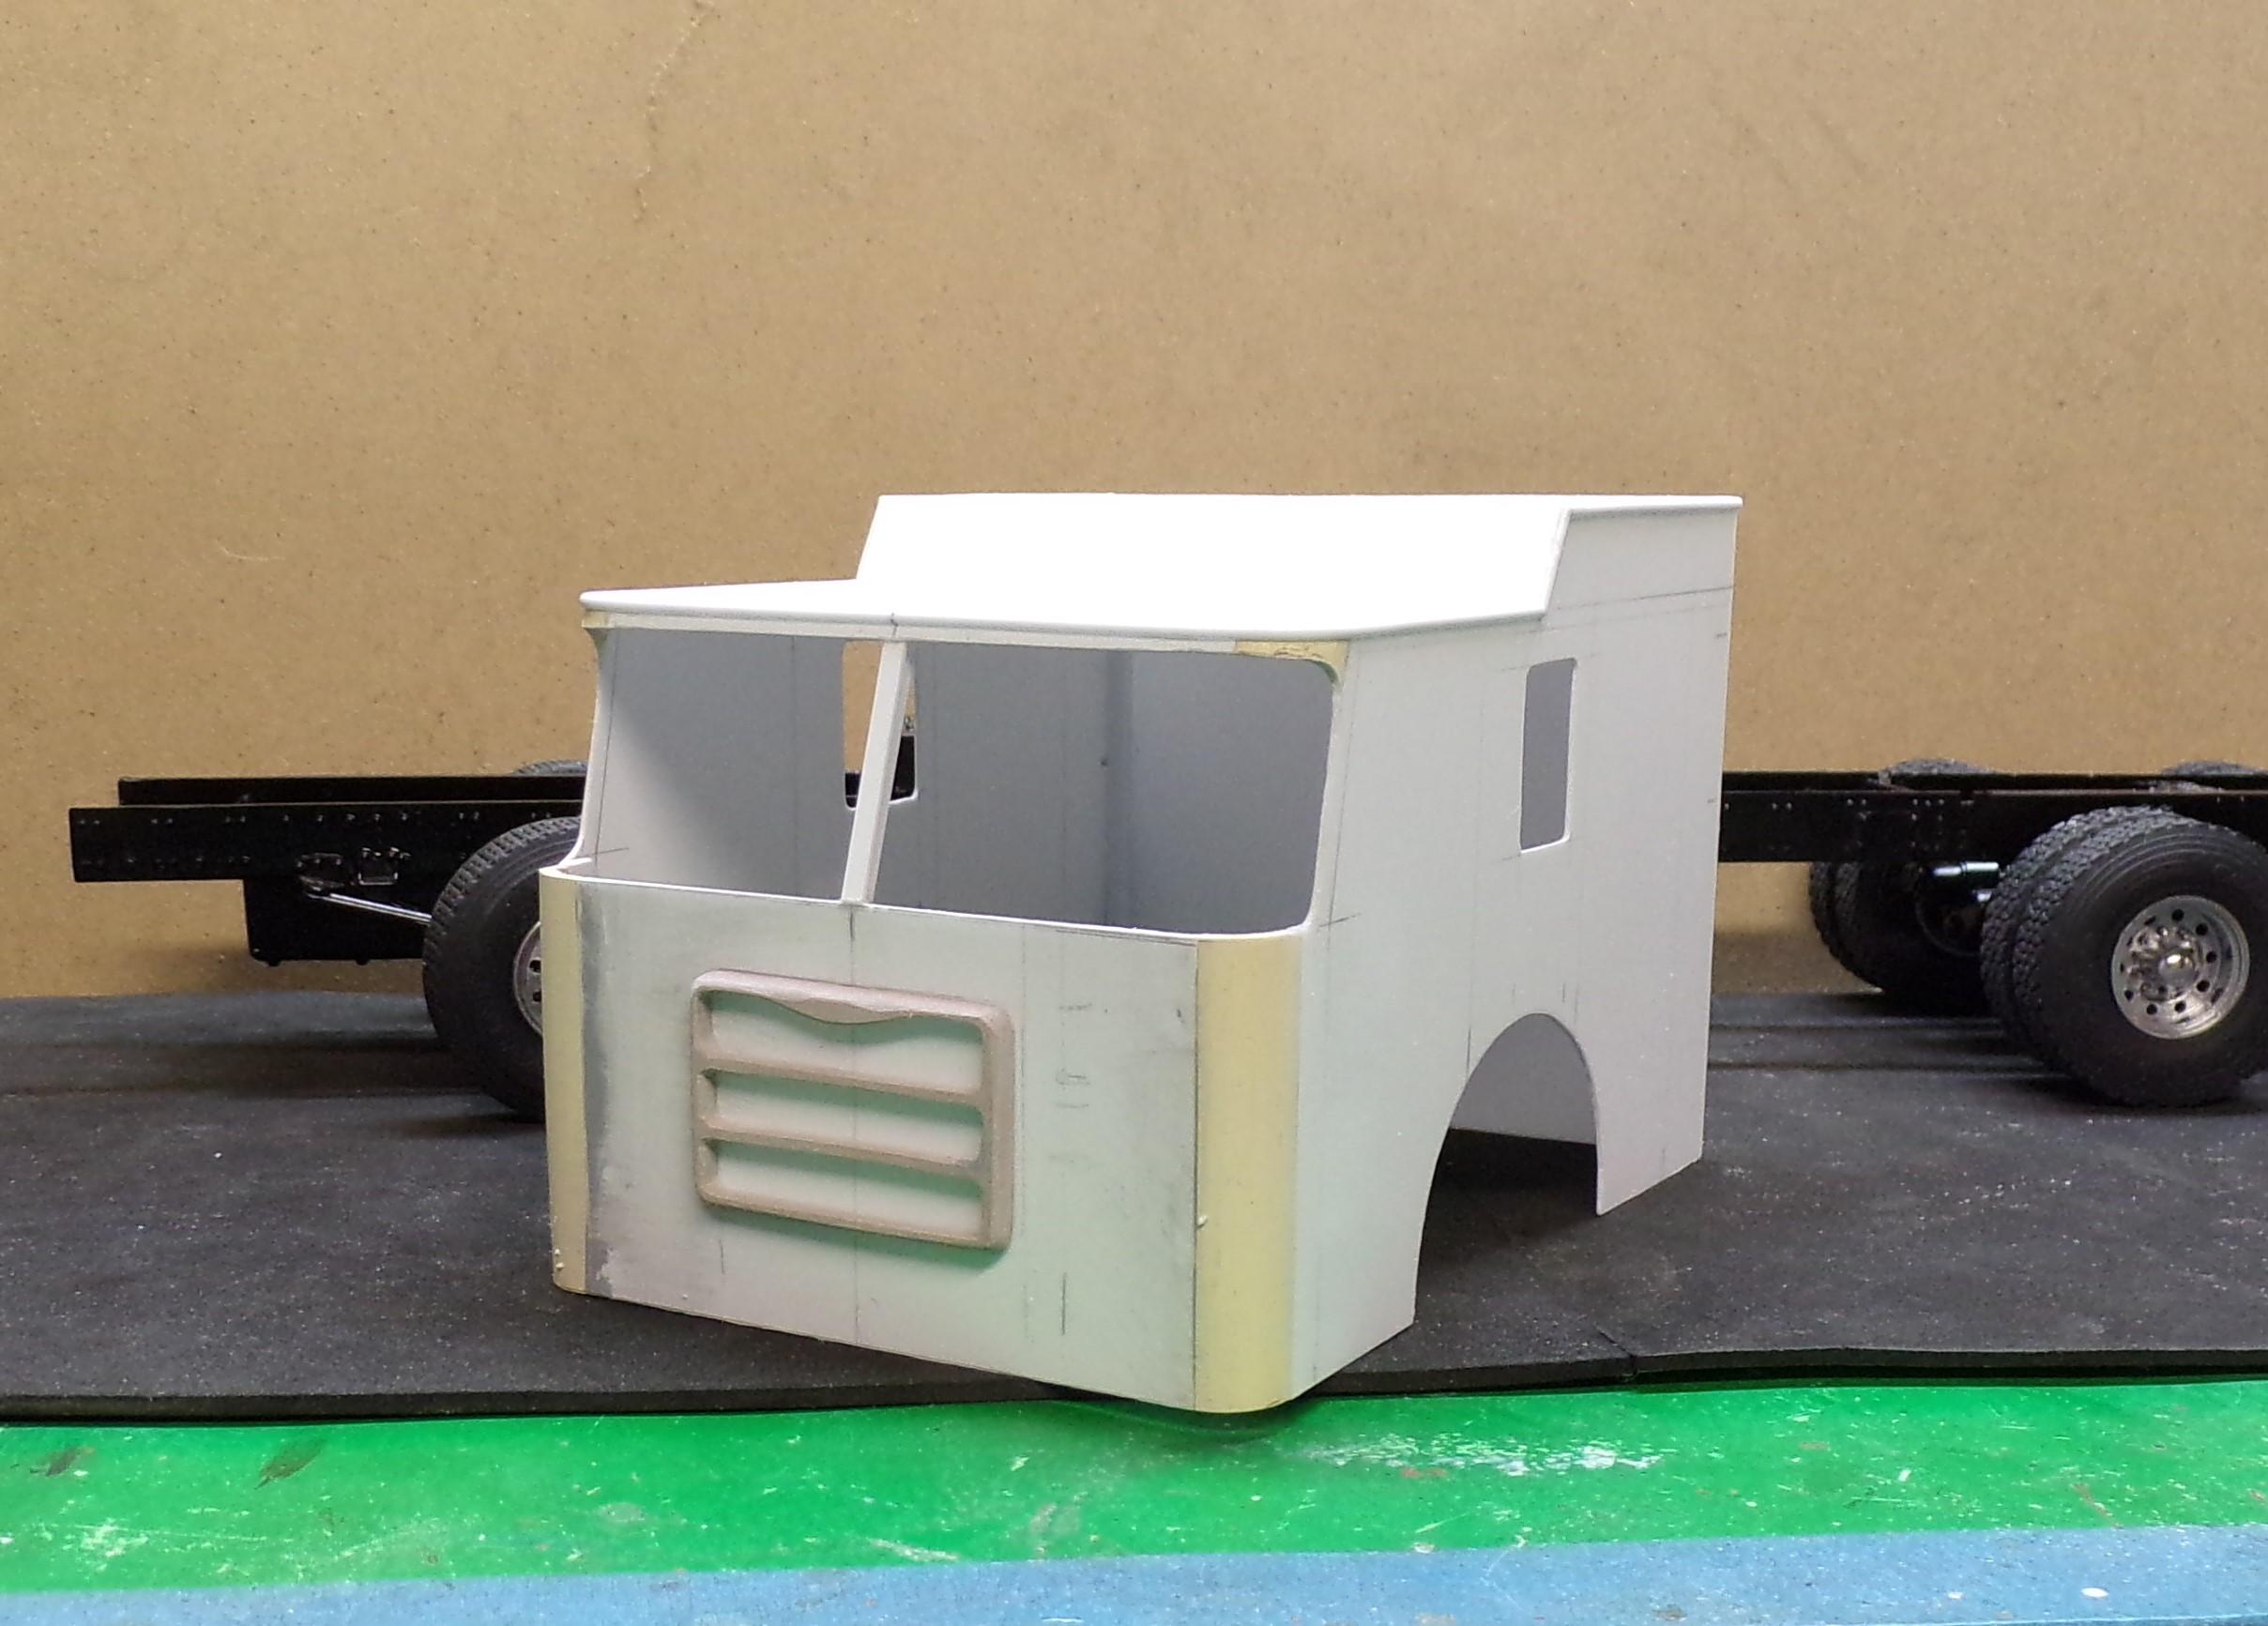
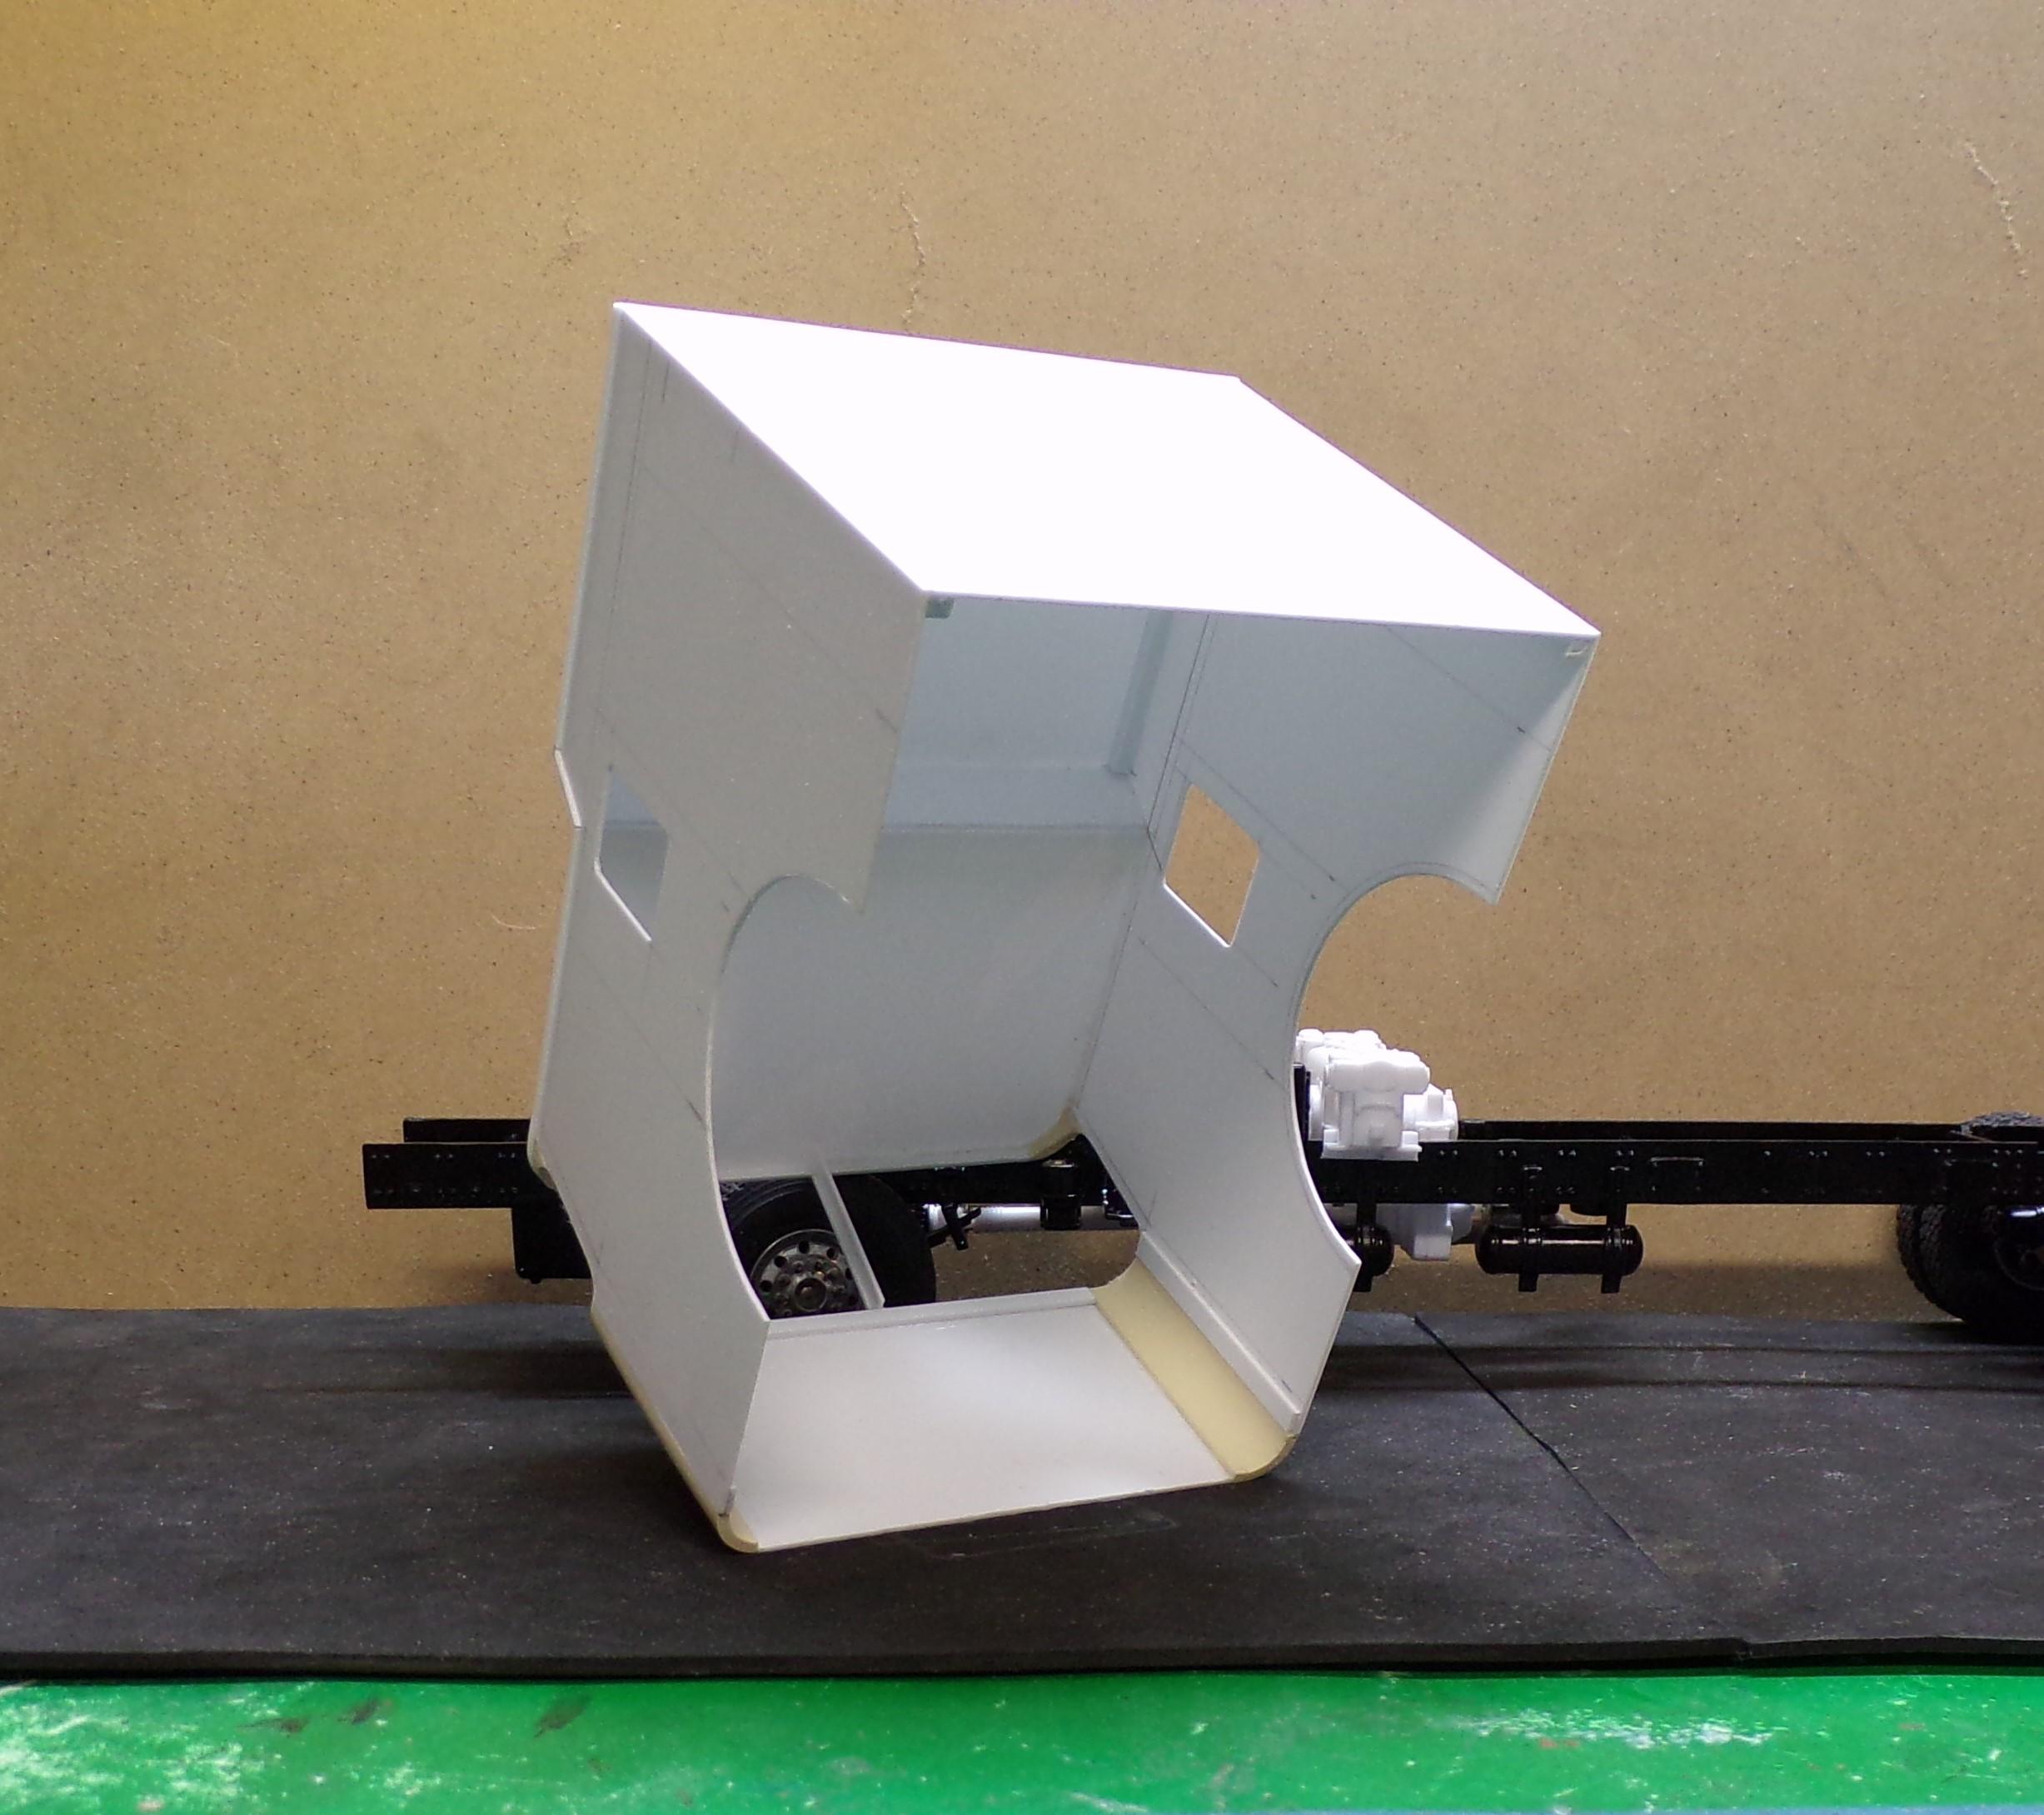
I don't know about the rivets, Bob but they are there and I'm not sanding them off except where I have to. Anyway here are some up to date photos of the progress on the build. The frame has been painted and the wheels and tires mounted. The wheels were done with Molotow chrome. Tires painted with Tamiya TS-82 rubber black. Still the best looking rubber simulation I have found yet. And it dries quite quickly. The pump is from the Trumpeter kit but I'm not mounting it until I'm sure where it needs to be. Here's the under side. The tie rod is fixed to the wheel backings and is made of strip brass and brass tubing. Exhaust is right from the kit, painted with Duplicolor chrome and then given a wash of black and brown acrylics. The cab has been started. It's a combination of 0.030 and 0.040 Evergreen sheet stock with strip stock stiffeners at the corners. The front corners are PVC pipe sections. The grill was done in Renshape but it needs to be done again. Studying the photo of the real truck the mesh grill sits real tight to the face of the grill surround and this one won't do that. I need to carve out the back first so that the mesh will have a place to sit and then sand down the front. Too late to do it on this one. Top edges of the cab are 0.060 half round strip stock. The cab interior needs some additional stiffening before the doors can be cut out. The kit interior tub will be used but modified to fit and more closely resemble the interior of a Pierce Arrow cab. The doors will be made of brass with brass tubing hinges. This is not where the cab will sit on the frame. The back needs to be notched out and the front of the frame needs to be shorted some.
-
Square headlights needed.
Chariots of Fire replied to Chariots of Fire's topic in Model Building Questions and Answers
Decided to mold my own since Daniel no longer does the chrome ones. Molotow or Alclad will do the trick. -
Square headlights needed.
Chariots of Fire replied to Chariots of Fire's topic in Model Building Questions and Answers
Well, I guess I'll take the two I have and make resin castings. Then coat them with Molotow chrome. ? -
The salamander Fahrenheit 451 fire truck
Chariots of Fire replied to GLMFAA1's topic in Model Building Questions and Answers
Was that rig electric, Greg? -
Got a bit more done on the frame, tires and wheels. The tires are mounted and painted. I used Tamiya TS-82 rubber black on the tires and Molotow chrome on the wheels. The wheels have to be super clean. Any tiny bit of dust particles gets picked up in it. But they didn't turn out too bad. I made the hubs of plastic tubing and gave them a chrome finish as well. The Trumpeter kit has two but I needed four for this project so they had to be made up. The tie rod is done and the frame is now painted black. Work has begun on the front of the cab. Will post some pix soon.