Chariots of Fire
-
Posts
2,788 -
Joined
-
Last visited
Content Type
Profiles
Forums
Events
Gallery
Everything posted by Chariots of Fire
-

1944 Autocar U-7144T
Chariots of Fire replied to Chariots of Fire's topic in WIP: Model Trucks: Big Rigs and Heavy Equipment
Thanks, Bob for the pix. I saved them for reference. My trailer will be single axle but the details will be very helpful. As far as the treadplate is concerned, I'll do a little tutorial here on it. All it takes is a piece of plastic treadplate, some aluminum foil and a pencil with an eraser on it. -
1944 Autocar U-7144T
Chariots of Fire replied to Chariots of Fire's topic in WIP: Model Trucks: Big Rigs and Heavy Equipment
Got a dilemma, Tom. I ordered a Tankograd book for trailers that the Autocar pulled thinking that it would have some photos and details of the fuel tankers. No such luck! The have the open box type trailers in two types, and other rigs but no fuel trailers. So I may end up doing the 25 foot wood sides general materials trailer. They were used in hauling goods from the beachfront to the troops after Normandy. I do have some basic fuel trailer photos but not much of the undersides. May have to wing it! BTW the fuelers were made by Heil. -
1944 Autocar U-7144T
Chariots of Fire replied to Chariots of Fire's topic in WIP: Model Trucks: Big Rigs and Heavy Equipment
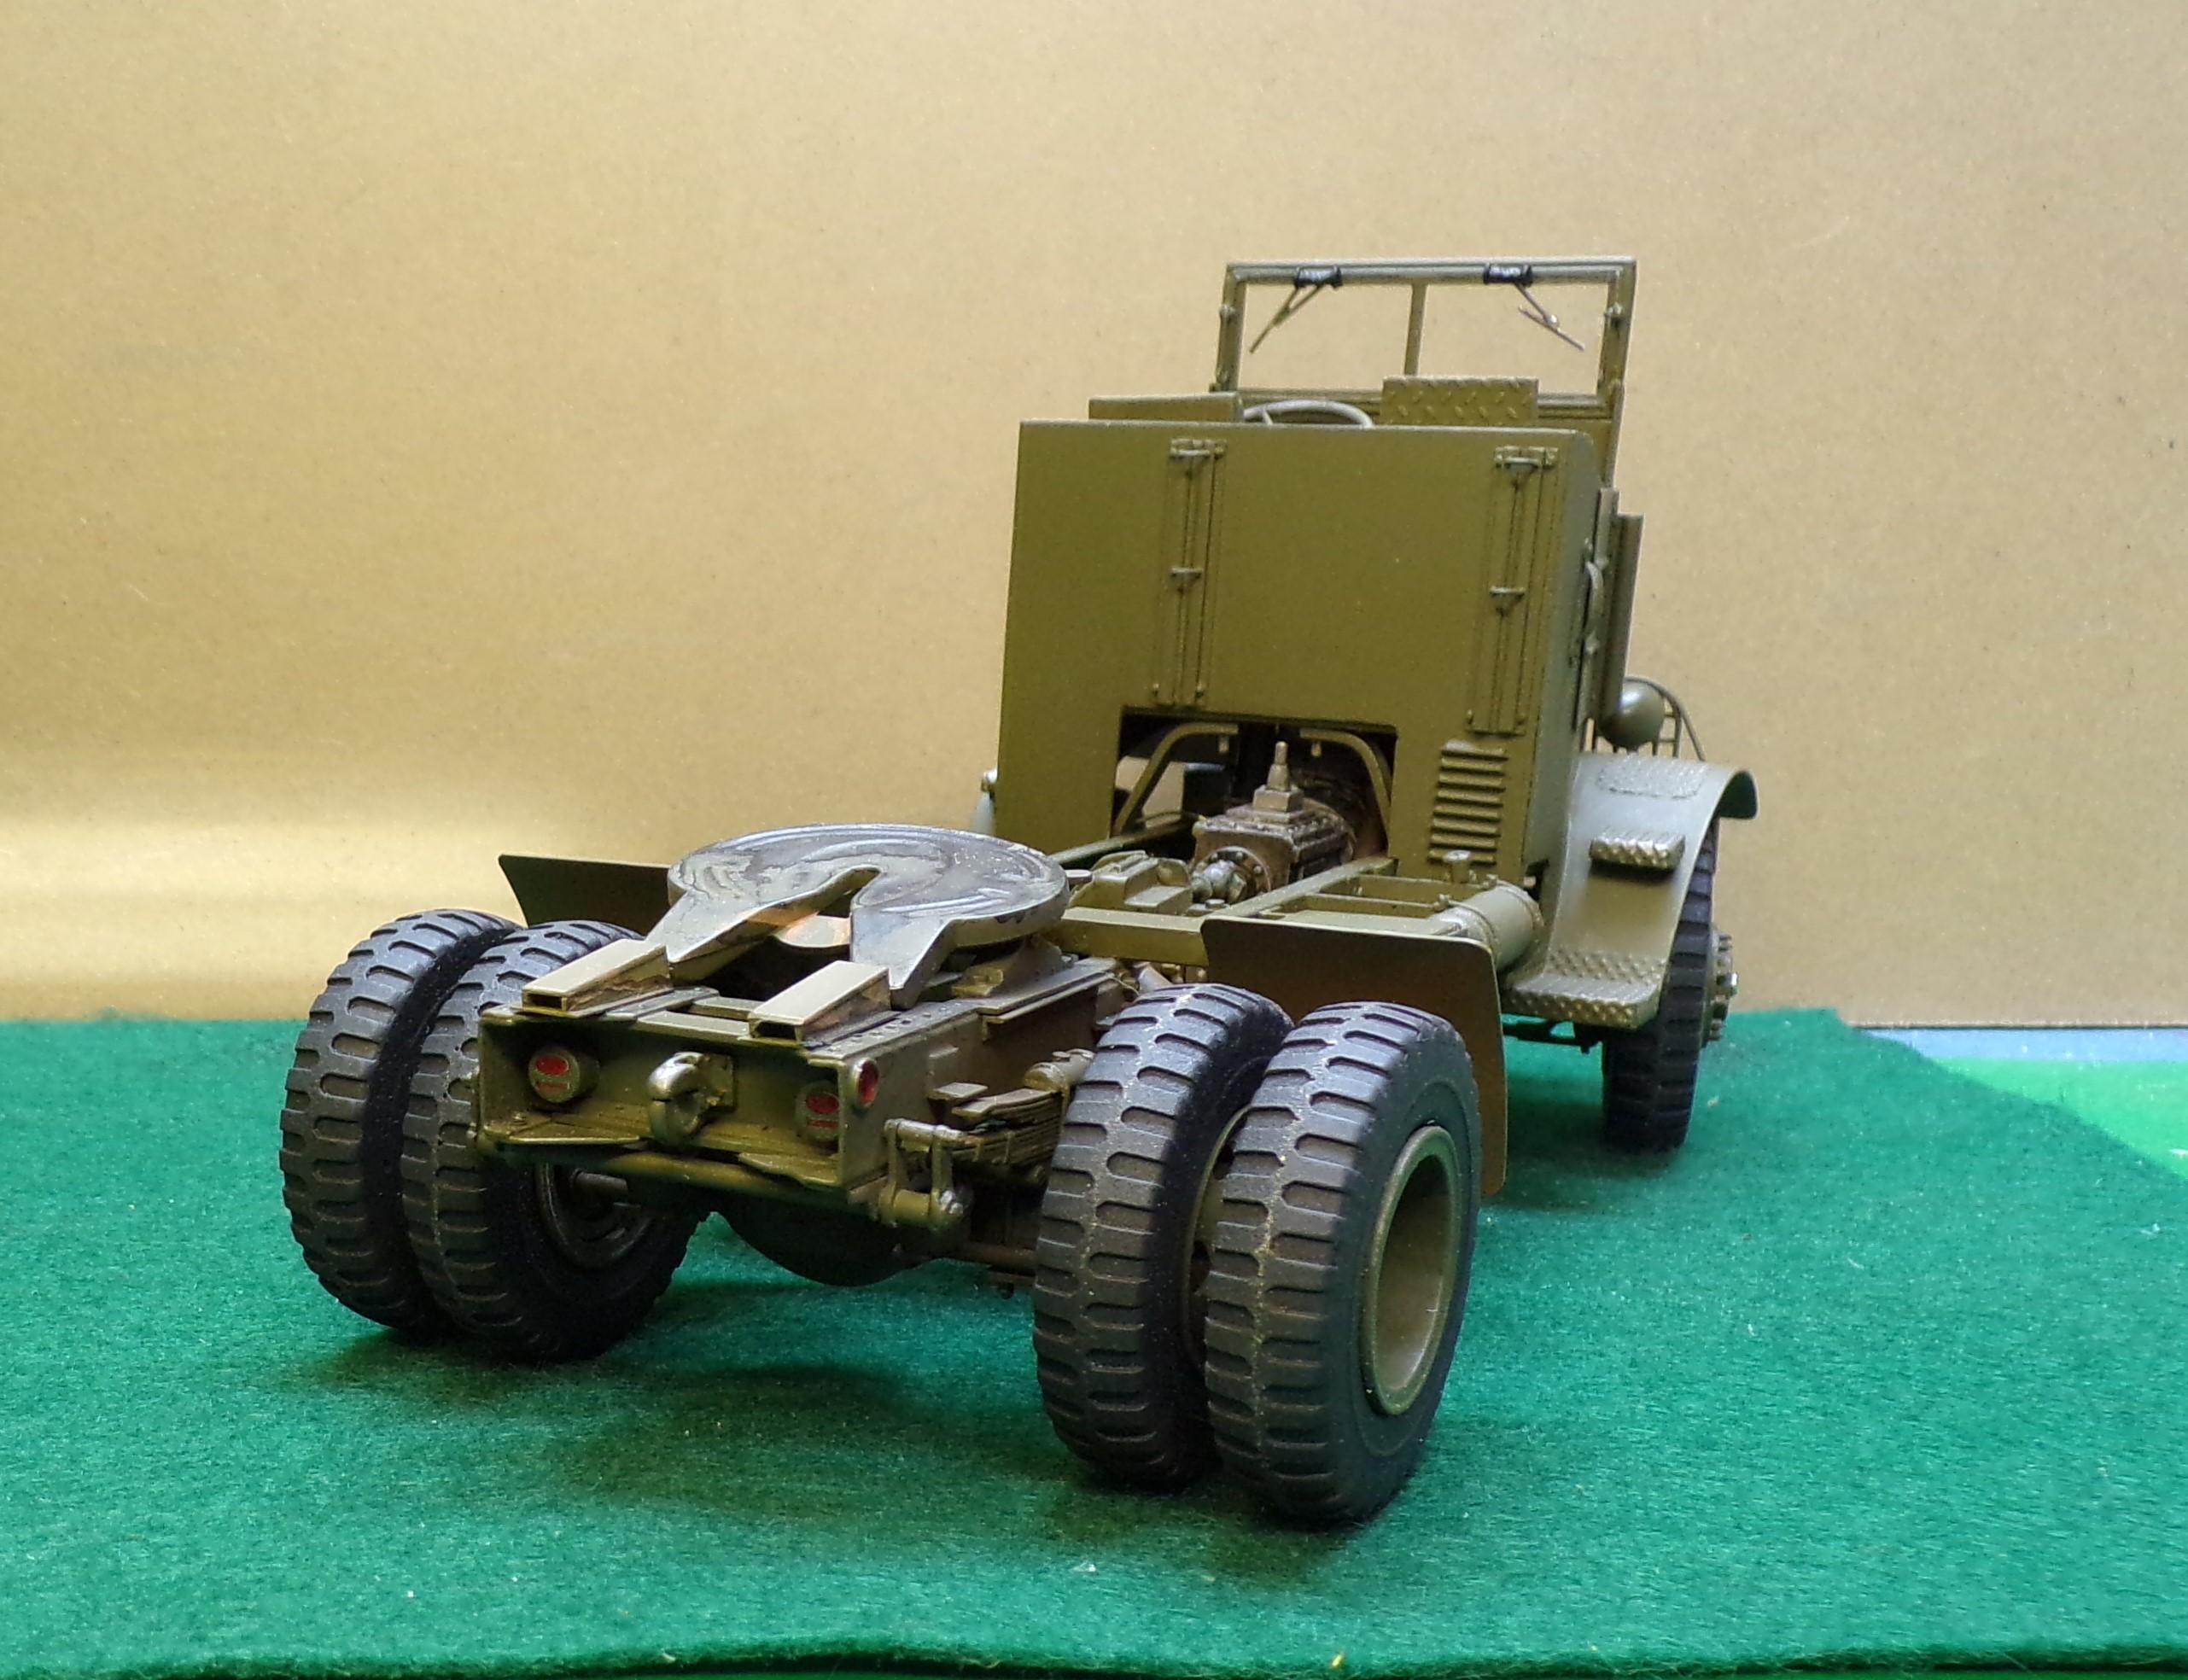
Here's the latest pics of progress. Some additional details have been added to the cab and the interior is done. Rear fenders are in place along with the 5th wheel and the plates that direct the trailer to it. Tail lights are installed on each side of the pintle hook. Reflectors are on the outside of the frame. Decision was made to keep the cab removable, otherwise the engine detail would never be seen. I jury rigged a stand to set the cab on for display purposes.
-
1944 Autocar U-7144T
Chariots of Fire replied to Chariots of Fire's topic in WIP: Model Trucks: Big Rigs and Heavy Equipment
Micro Mark items. Think they are actually made for doll houses but they fit the bill here. -
Lookin' GOOD!!! Beefy looking rig for sure!
-
Yes it did!
-
1944 Autocar U-7144T
Chariots of Fire replied to Chariots of Fire's topic in WIP: Model Trucks: Big Rigs and Heavy Equipment
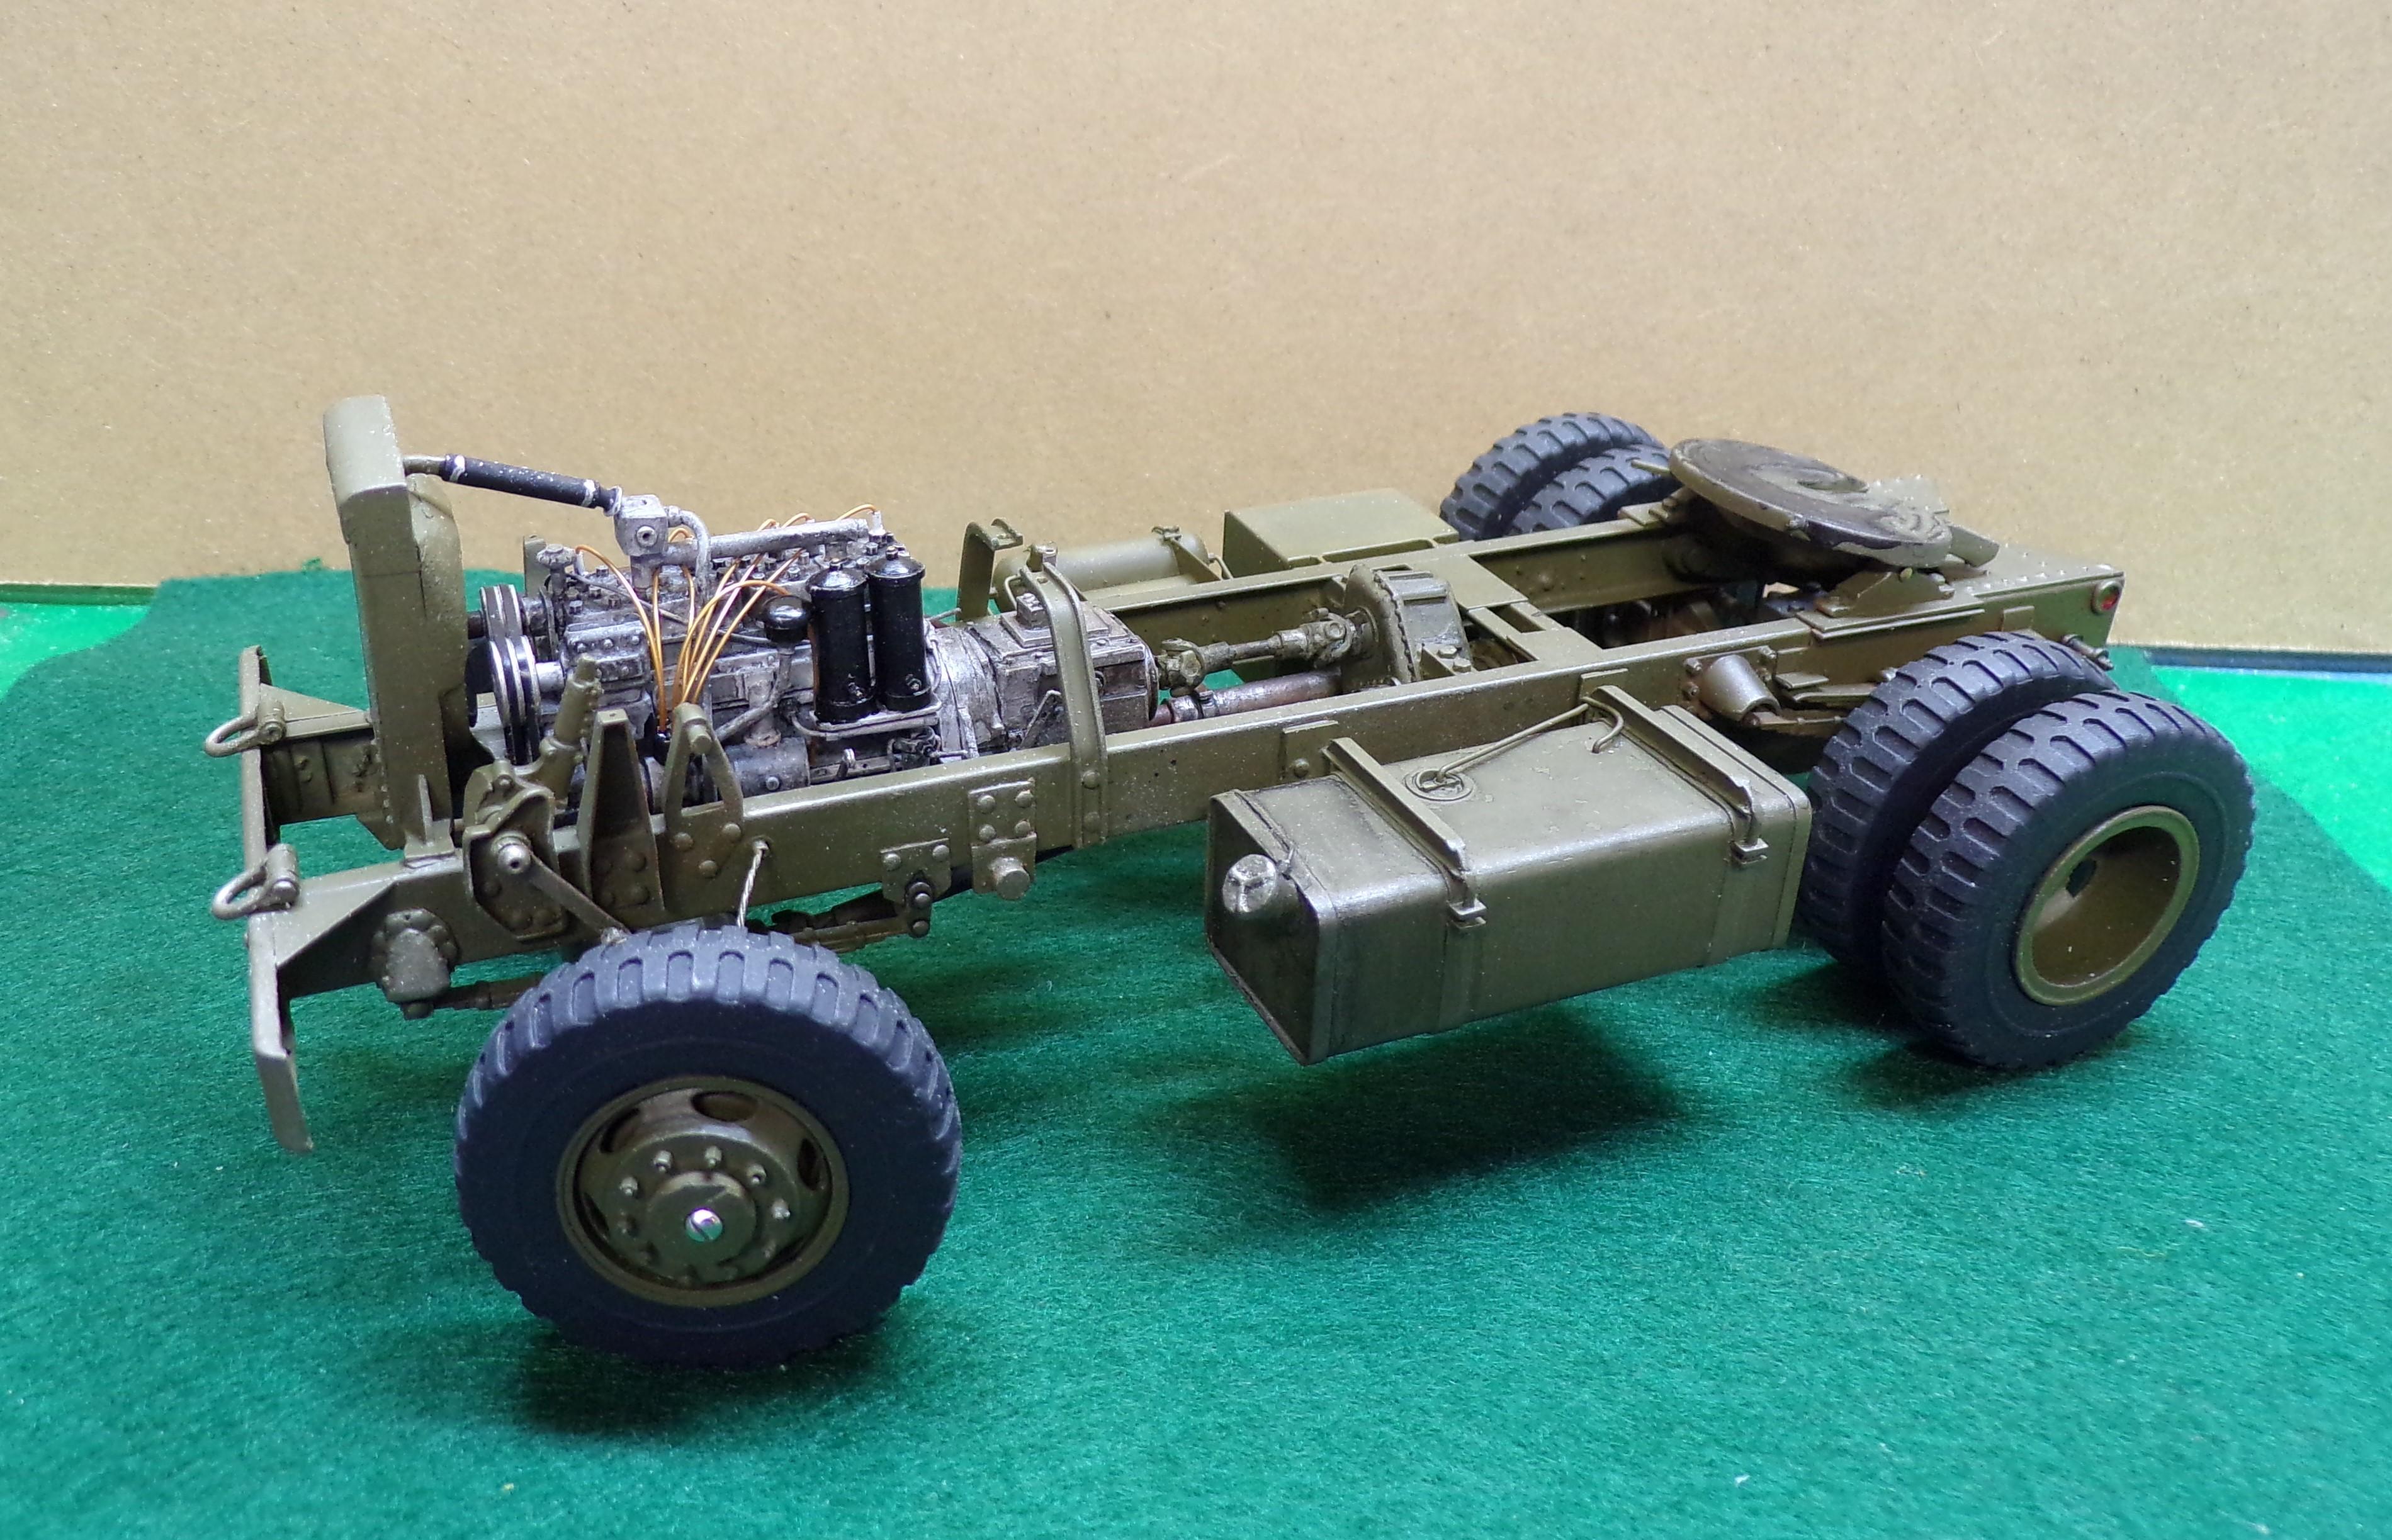
The elves continue to be busy. The frame and running gear have been painted and the engine is installed. Exhaust has been added. A tool compartment is now behind the air tanks and the fuel tank is on the left side just behind the cab. All of the driveshafts are in position. I was able to get some 3D printed U-joints and put them on sections of brass tubing. They are very well defined and are easy to use. The hand brake is also now behind the transfer case. Got a few details to go on the cab with the air cleaner, fuel pump, 50 cal. mounting brackets, windshield wipers and motors and finishing up all of the details inside the cab. Plenty on the plate still to go!?
-
When I did mine using the Eishhorn casting all I used was the front. I blended the casting with a kit cab and used the interior from the kit as well.
-
It looks like it, Greg but unless Jim Eishhorn made some changes in his master, I'd say its a copy or one close to it.
-
Cutting Styrene Round
Chariots of Fire replied to Horrorshow's topic in Model Building Questions and Answers
Simple tool. Take a piece of brass tubing and taper the ends so that it is thinnest on the inside. Use a piece that suits the diameter you need. Place it on a piece of flat thin evergreen and hit it with a hammer. You'll have a round headlight cover. -
1944 Autocar U-7144T
Chariots of Fire replied to Chariots of Fire's topic in WIP: Model Trucks: Big Rigs and Heavy Equipment
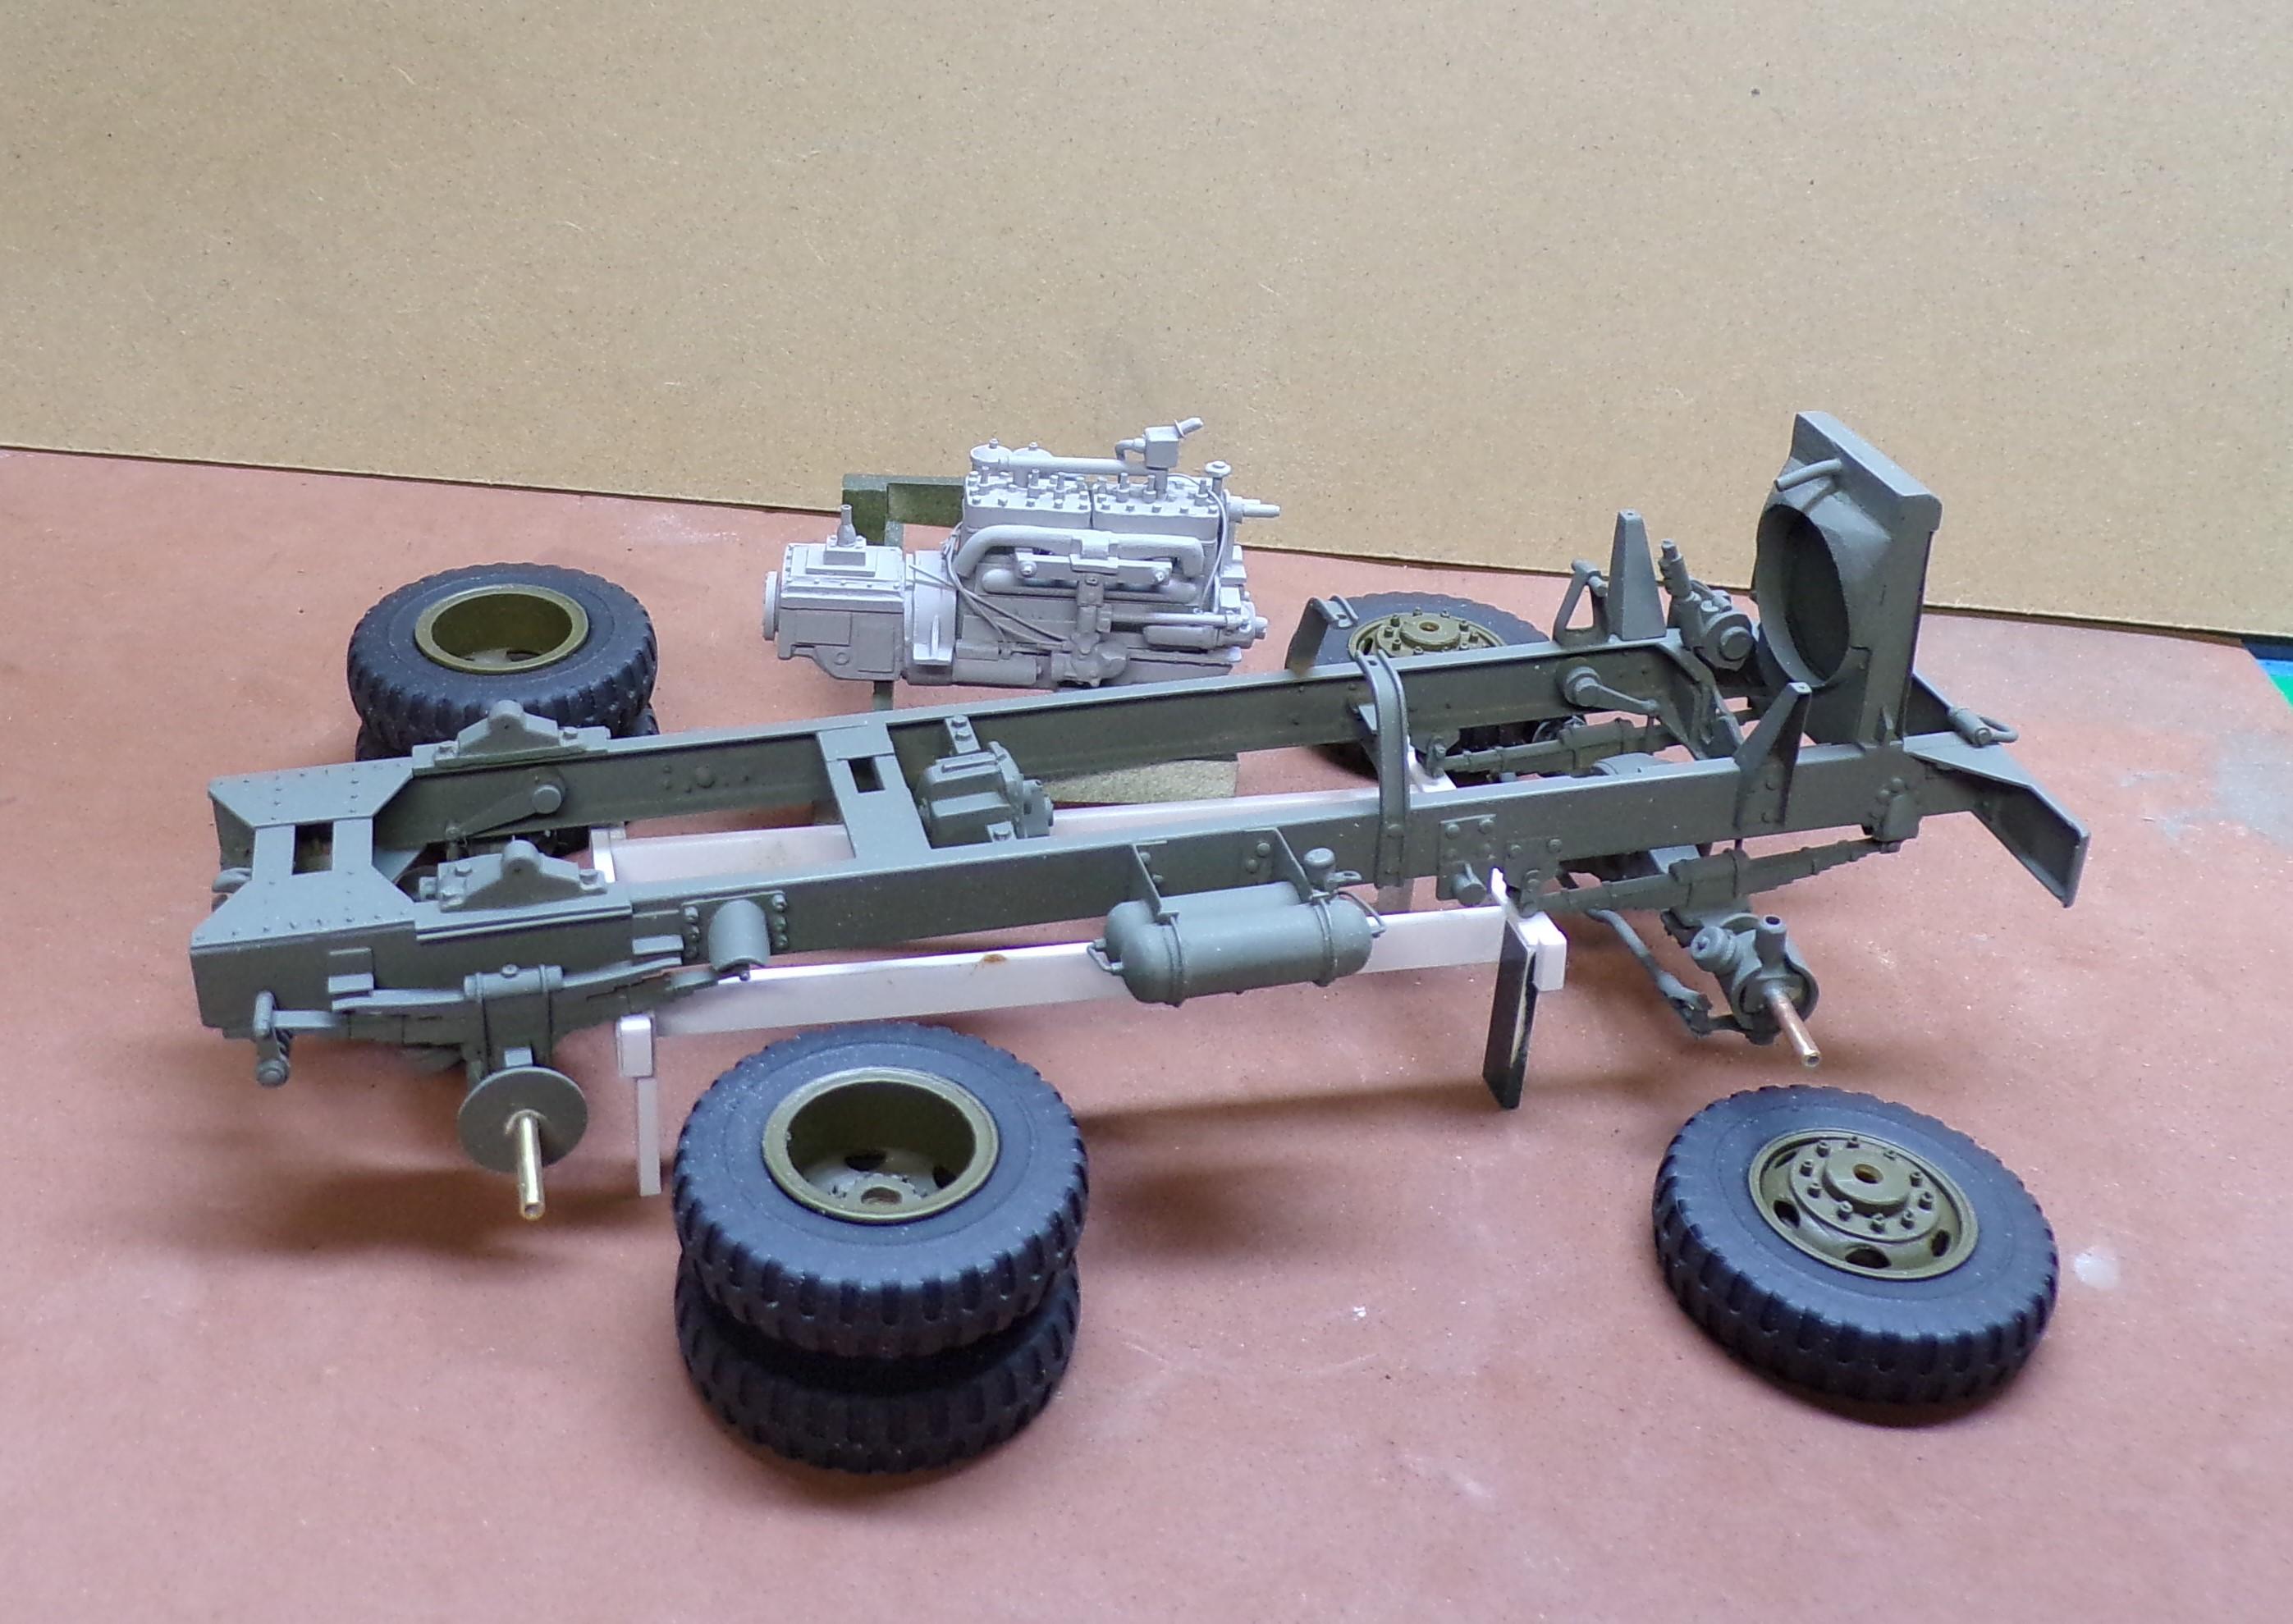
Finally got to the point of adding some paint. The frame has been sprayed with Rustoleum etching primer. Tires are painted with Tamiya TS-82 rubber black. Rims are Testors olive drab. The engine is Duplicolor gray primer which will be the base color. Detailing will bring out the hi-lights. Still have the fuel tank and tool compartment to add to the frame sides but painting it first helps keep the coats of paint lighter.
-
Dodge Cabover
Chariots of Fire replied to Repstock's topic in WIP: Model Trucks: Big Rigs and Heavy Equipment
That's pretty nice, Tom! Great work! -
Dupli Color and blushing
Chariots of Fire replied to atomicholiday's topic in Model Building Questions and Answers
Another experience with Duplicolor is that the more coats you put on, the brighter the color gets. Not saying it should be put on heavy but 3-4 coats is probably a good number. Duplicolor is a very fine spray that allows it to be done that way. Polish out the foggiest after the last coat. You should get super results. Never try polishing it out between coats or you will have a real mess on your hands. The paint will draw and bead up and Duplicolor is a hard paint to strip. -
Dupli Color and blushing
Chariots of Fire replied to atomicholiday's topic in Model Building Questions and Answers
I've had that happen to me a number of times. I just let it set up good and then polish it out. Doesn't ever seem to be a permanent problem. Sometimes it happens and sometimes it doesn't. -
1944 Autocar U-7144T
Chariots of Fire replied to Chariots of Fire's topic in WIP: Model Trucks: Big Rigs and Heavy Equipment
☺️ -
1944 Autocar U-7144T
Chariots of Fire replied to Chariots of Fire's topic in WIP: Model Trucks: Big Rigs and Heavy Equipment
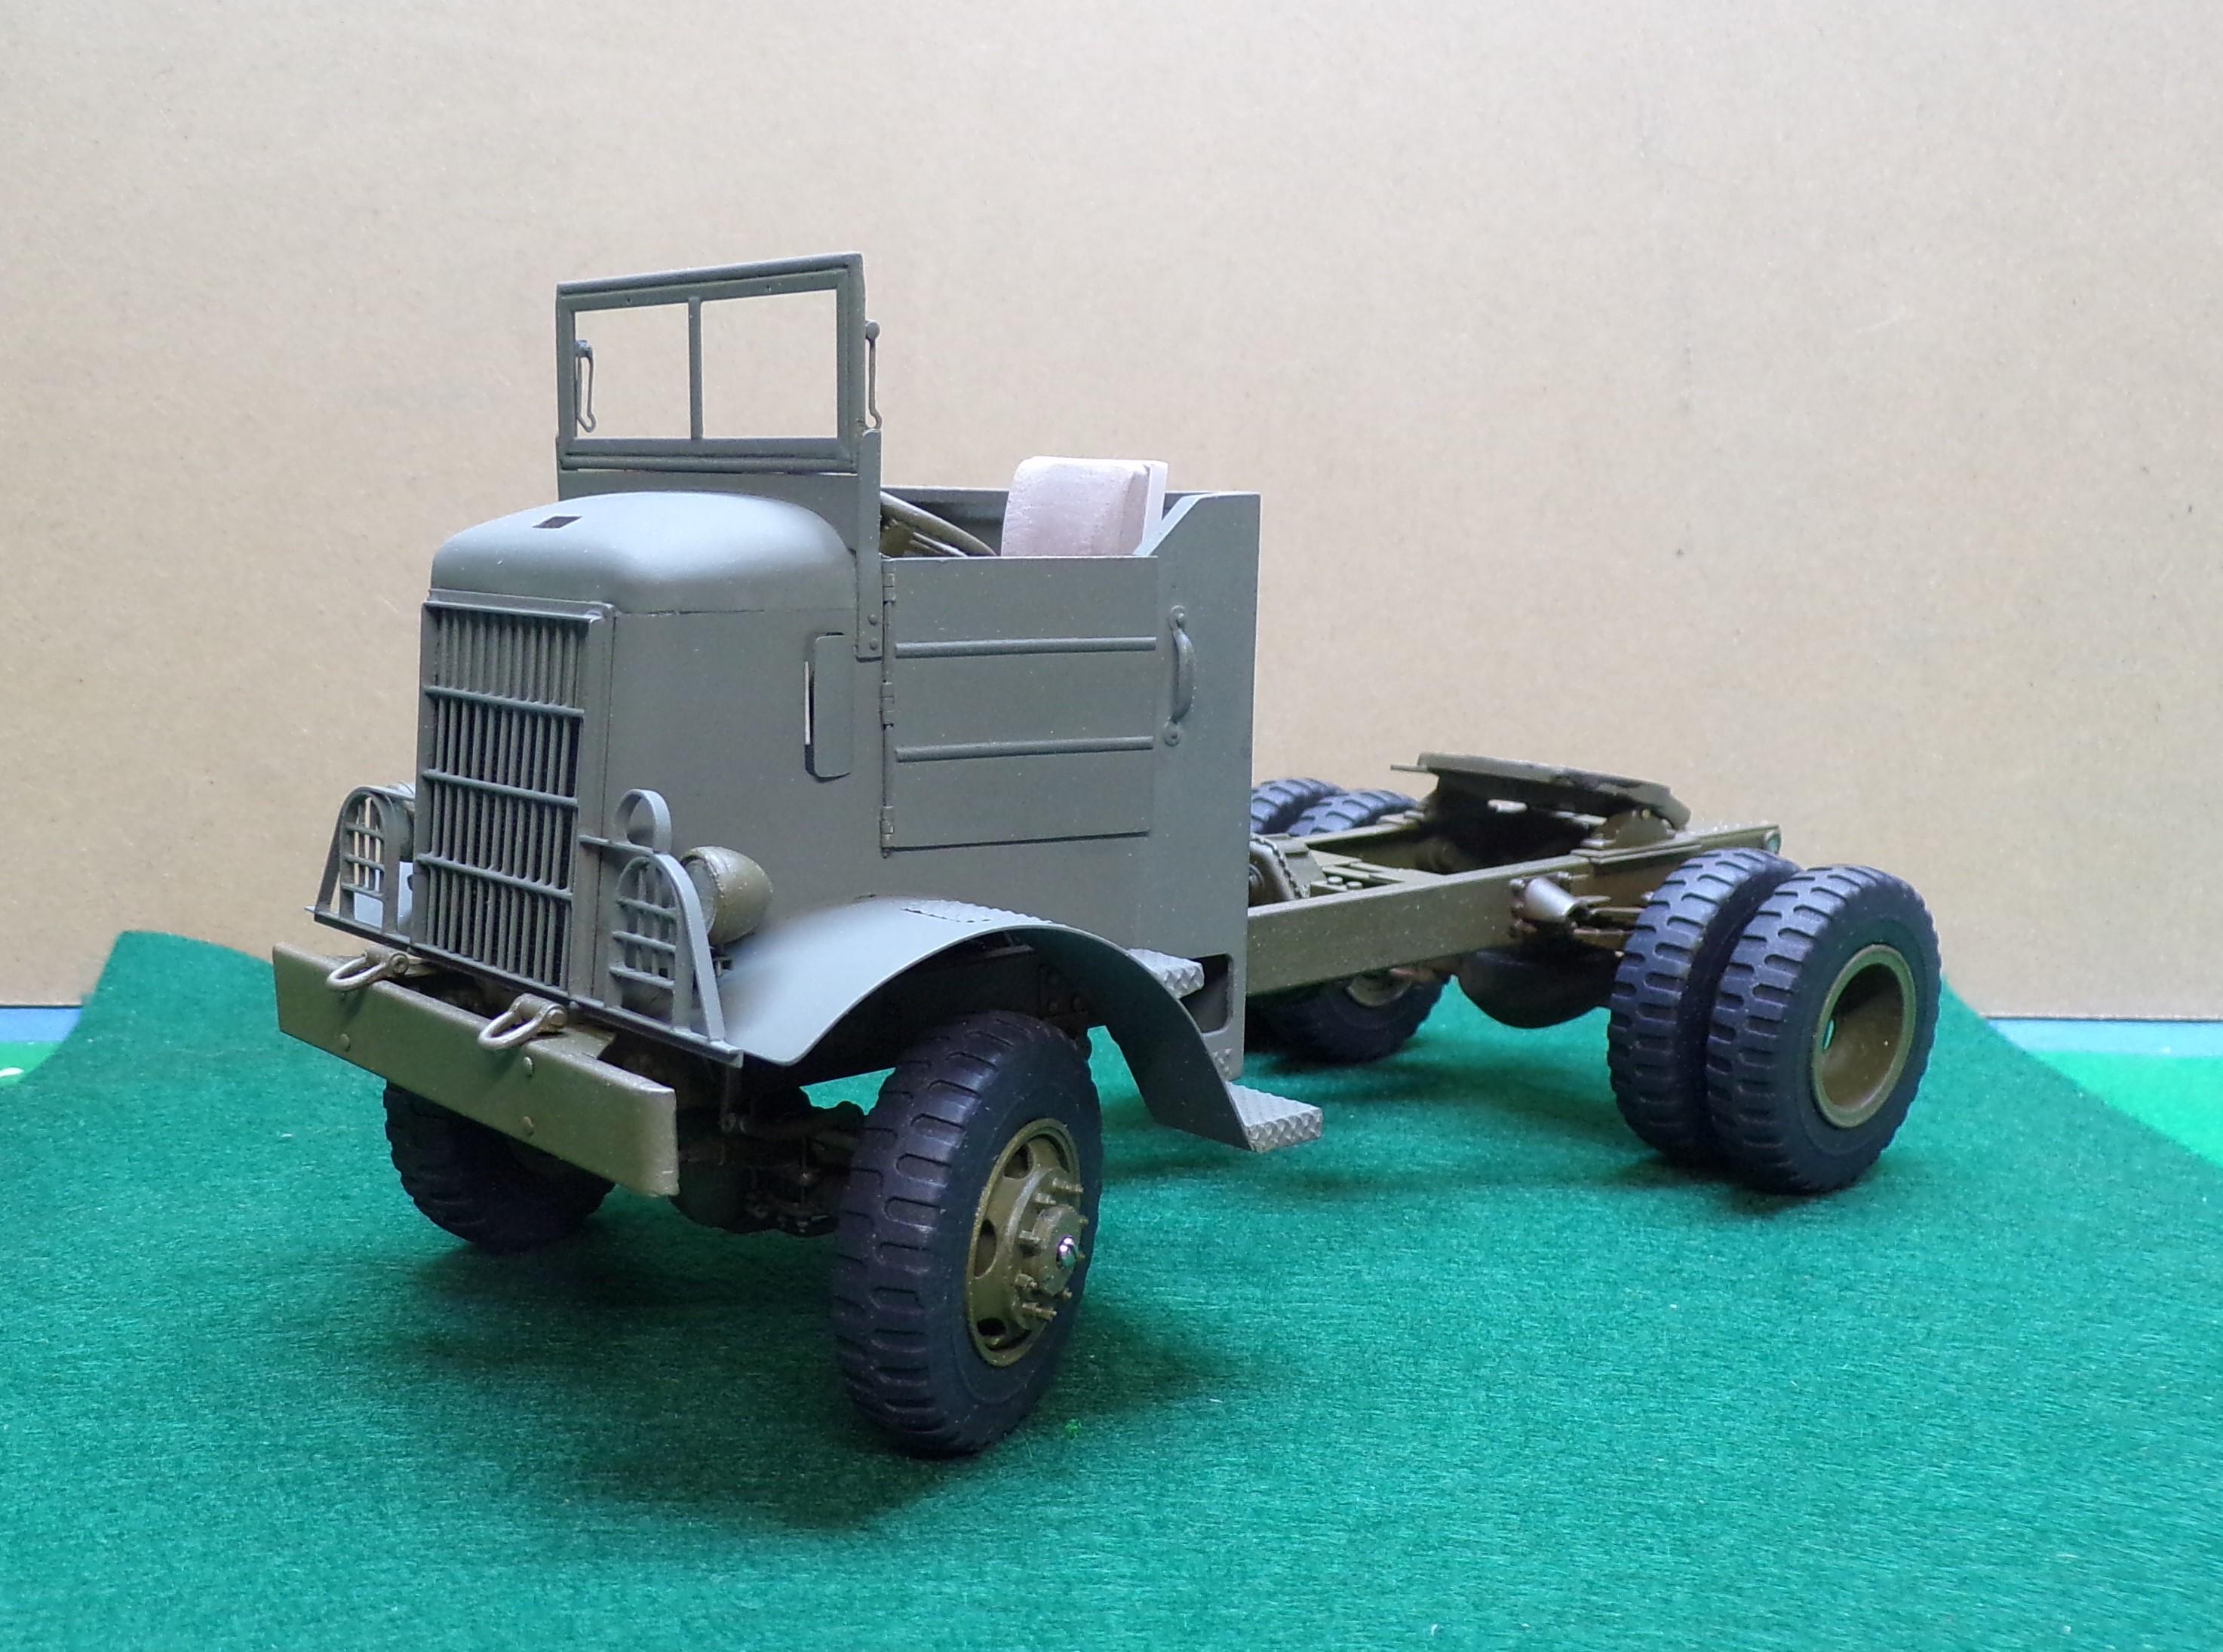
Fenders are secure to the cab sides. Lifting hooks added to the front bumper and brackets are installed for the headlights. Lights are there for location but won't be set permanently until they are painted, interiors done with Molotow chrome and covered with a clear lens. Tires were painted with Tamiya "rubber black". Best representation of a rubber color I have found yet.
-
1944 Autocar U-7144T
Chariots of Fire replied to Chariots of Fire's topic in WIP: Model Trucks: Big Rigs and Heavy Equipment
hey, Bob. I've tried styrene strips a couple of times but you have to roll the edges a little to maintain the look of individual leaves. That is the beauty of the brass in that the sides already have just the tiniest bit of roundness to them. Even painted the leaves still stand out. BTW, soldering the leaves is one of the easiest of things to do. I used a butane torch to heat just the ends one at a time to pull the solder in between them. Start with the shortest pieces first and build up from there. There's no solder in the middle at all. No sorcery in those steering knuckles. They all are made the same. Here's a pic of others that were used on a different build. One end goes into the axle and is secured with epoxy. The other end goes through the wheel that has a bushing in it. The wheel is secured with a small screw and washer. The screw goes into a plastic insert that is drilled out and threaded.
-
"No spray" decal paper
Chariots of Fire replied to Sidney Schwartz's topic in Tips, Tricks, and Tutorials
Only downside I see is that the images have to be trimmed right to the edge to avoid the white background. An advantage of using the ALPS and being able to put down a white background first. But this certainly is a good way to go in certain instances. -
Resin castings from a mold make solid tires but it avoids what happened here. I note also that the surface is real glossy. A different type of 3D material might be in order.
-
Changing Gears
Chariots of Fire replied to J.B. Customs's topic in WIP: Model Trucks: Big Rigs and Heavy Equipment
Good advice on the hard suction. Impressed by the "postS"? -
1944 Autocar U-7144T
Chariots of Fire replied to Chariots of Fire's topic in WIP: Model Trucks: Big Rigs and Heavy Equipment
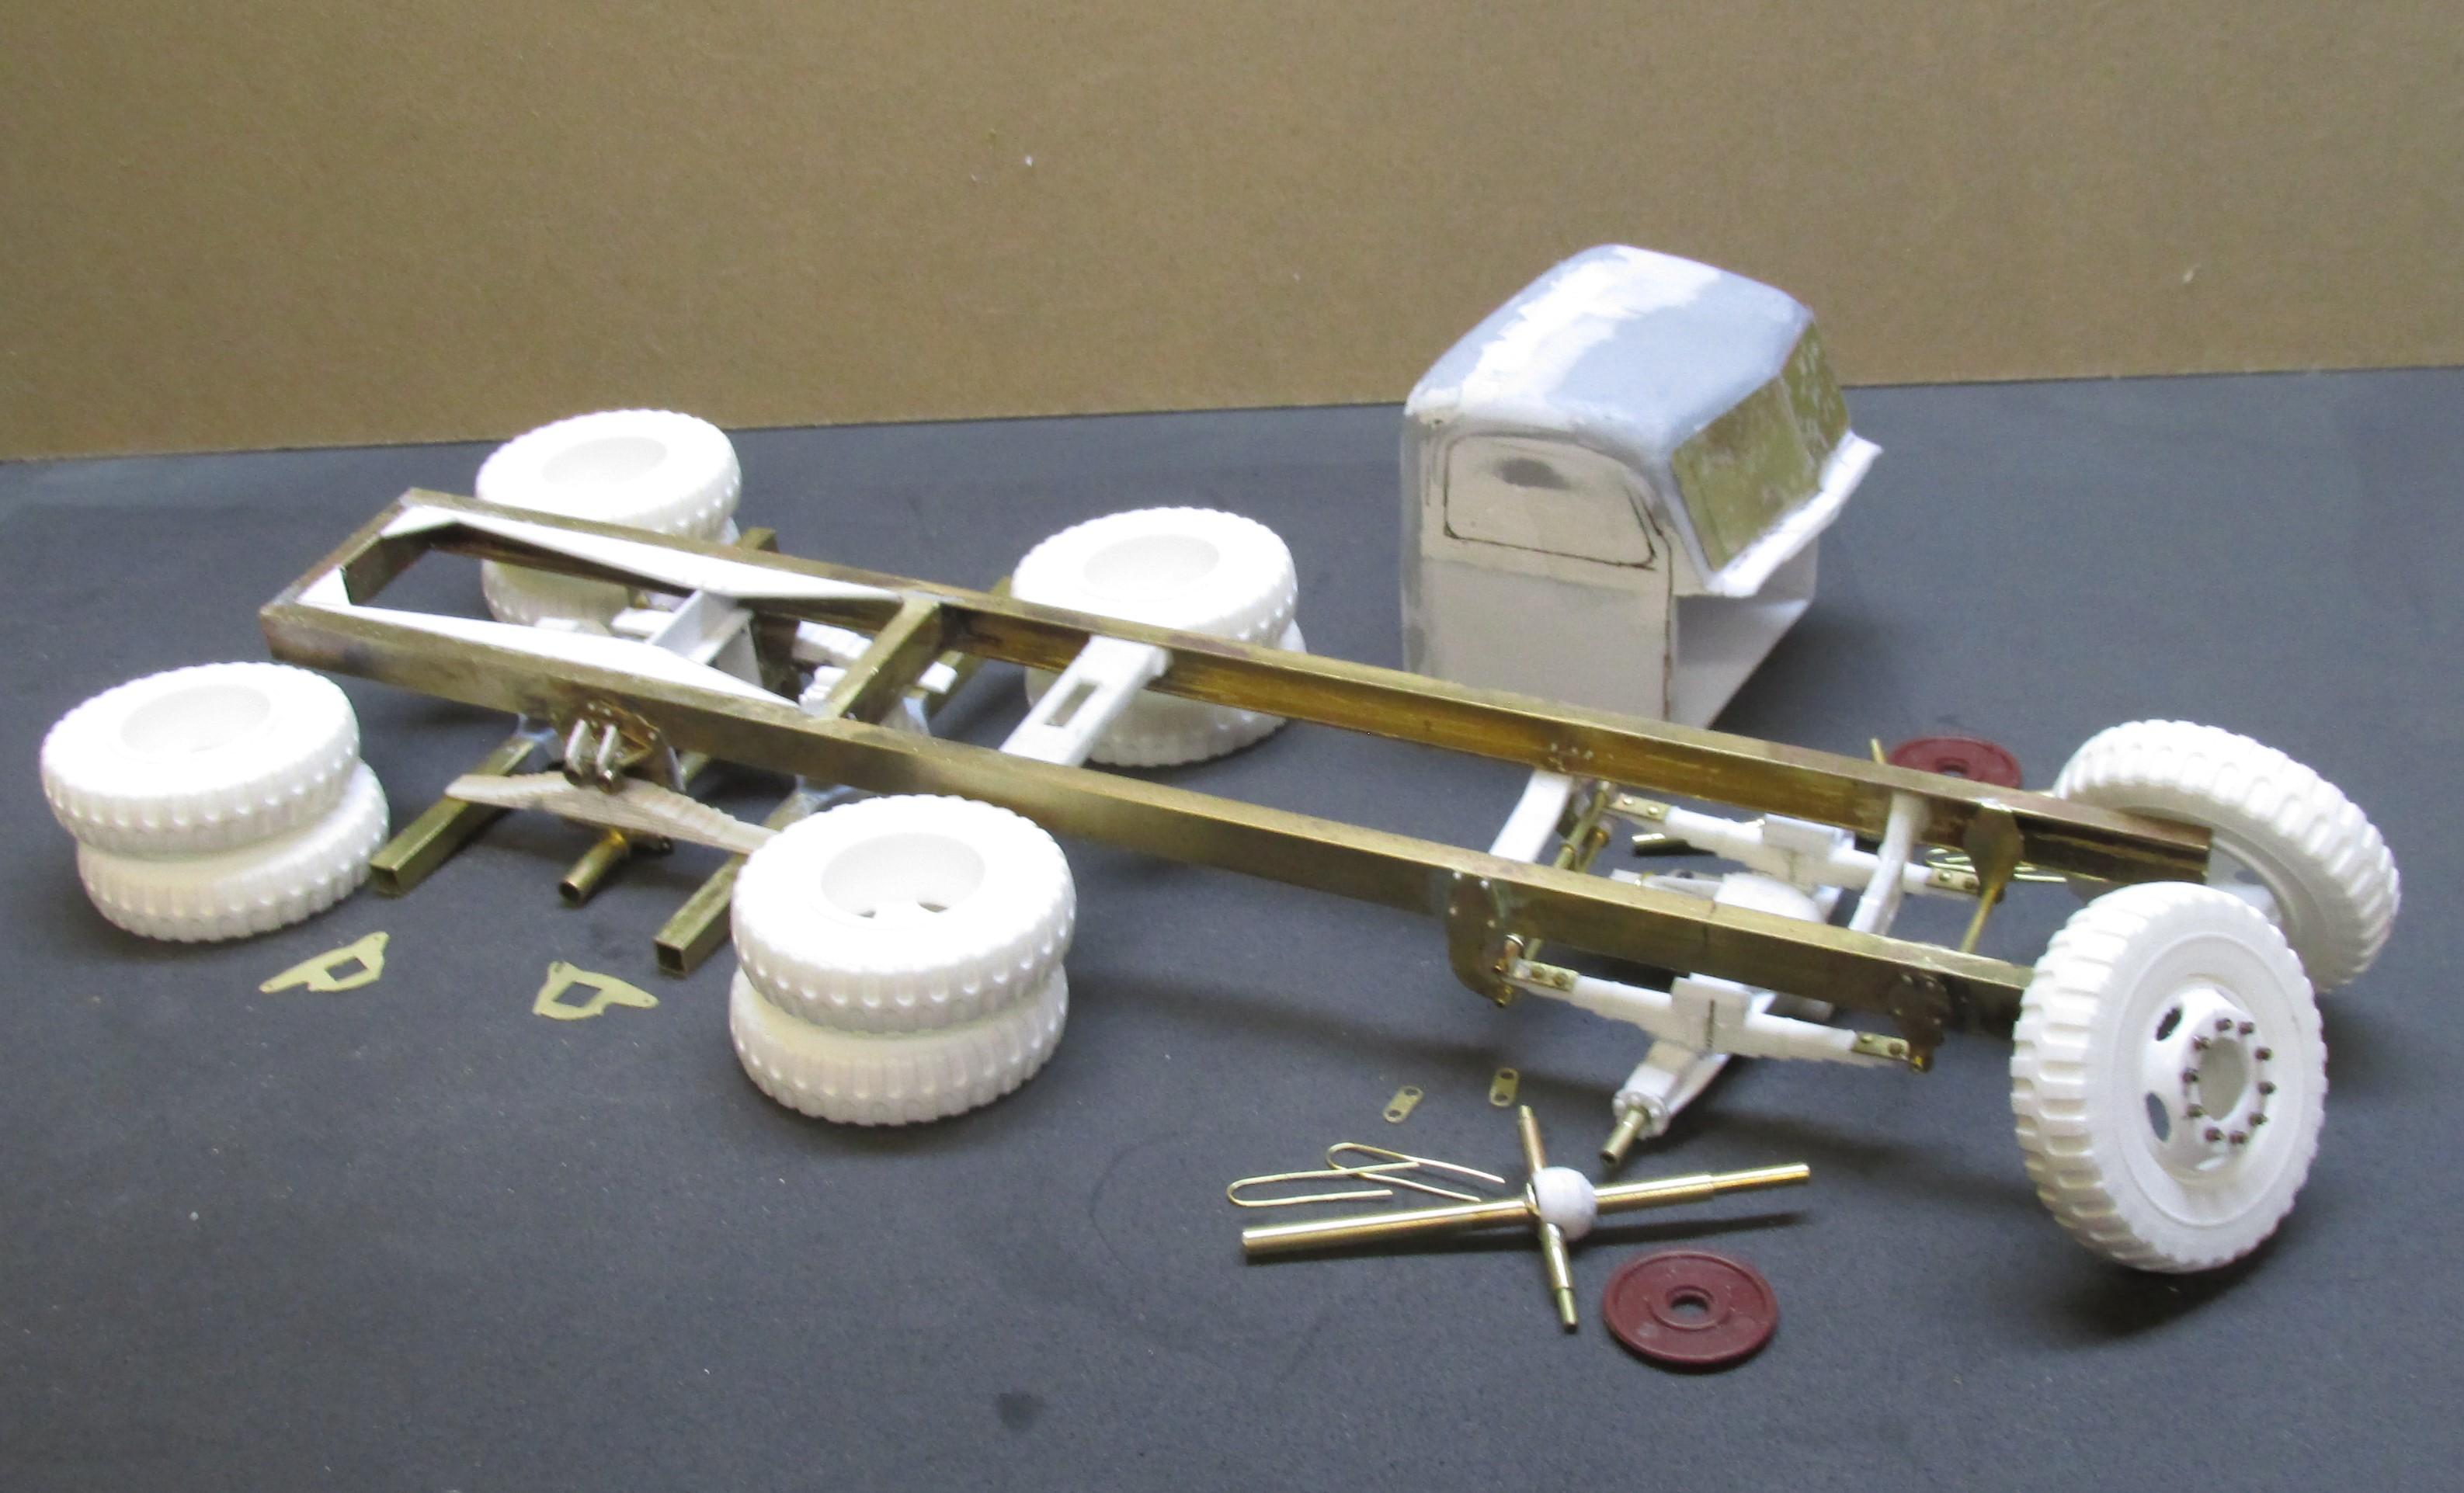
Another update. The front end is built up with the kingpins in place so that the front wheels turn. Tie rod is done except for final securing to align the front wheels. A few little things to secure before getting to that.
-
1944 Autocar U-7144T
Chariots of Fire replied to Chariots of Fire's topic in WIP: Model Trucks: Big Rigs and Heavy Equipment
Used what I had which is a tad narrow but it worked out ok. The real springs would require a 3mm width but all I had was 2.38 mm. -
Your tire fix is spot on. I did the same thing with some of the 1/32 scale trucks as well, shaving off the back of a spare Monogram tire and glueing it to the open part of the plastic tire. Worked like a charm.
-
1944 Autocar U-7144T
Chariots of Fire replied to Chariots of Fire's topic in WIP: Model Trucks: Big Rigs and Heavy Equipment
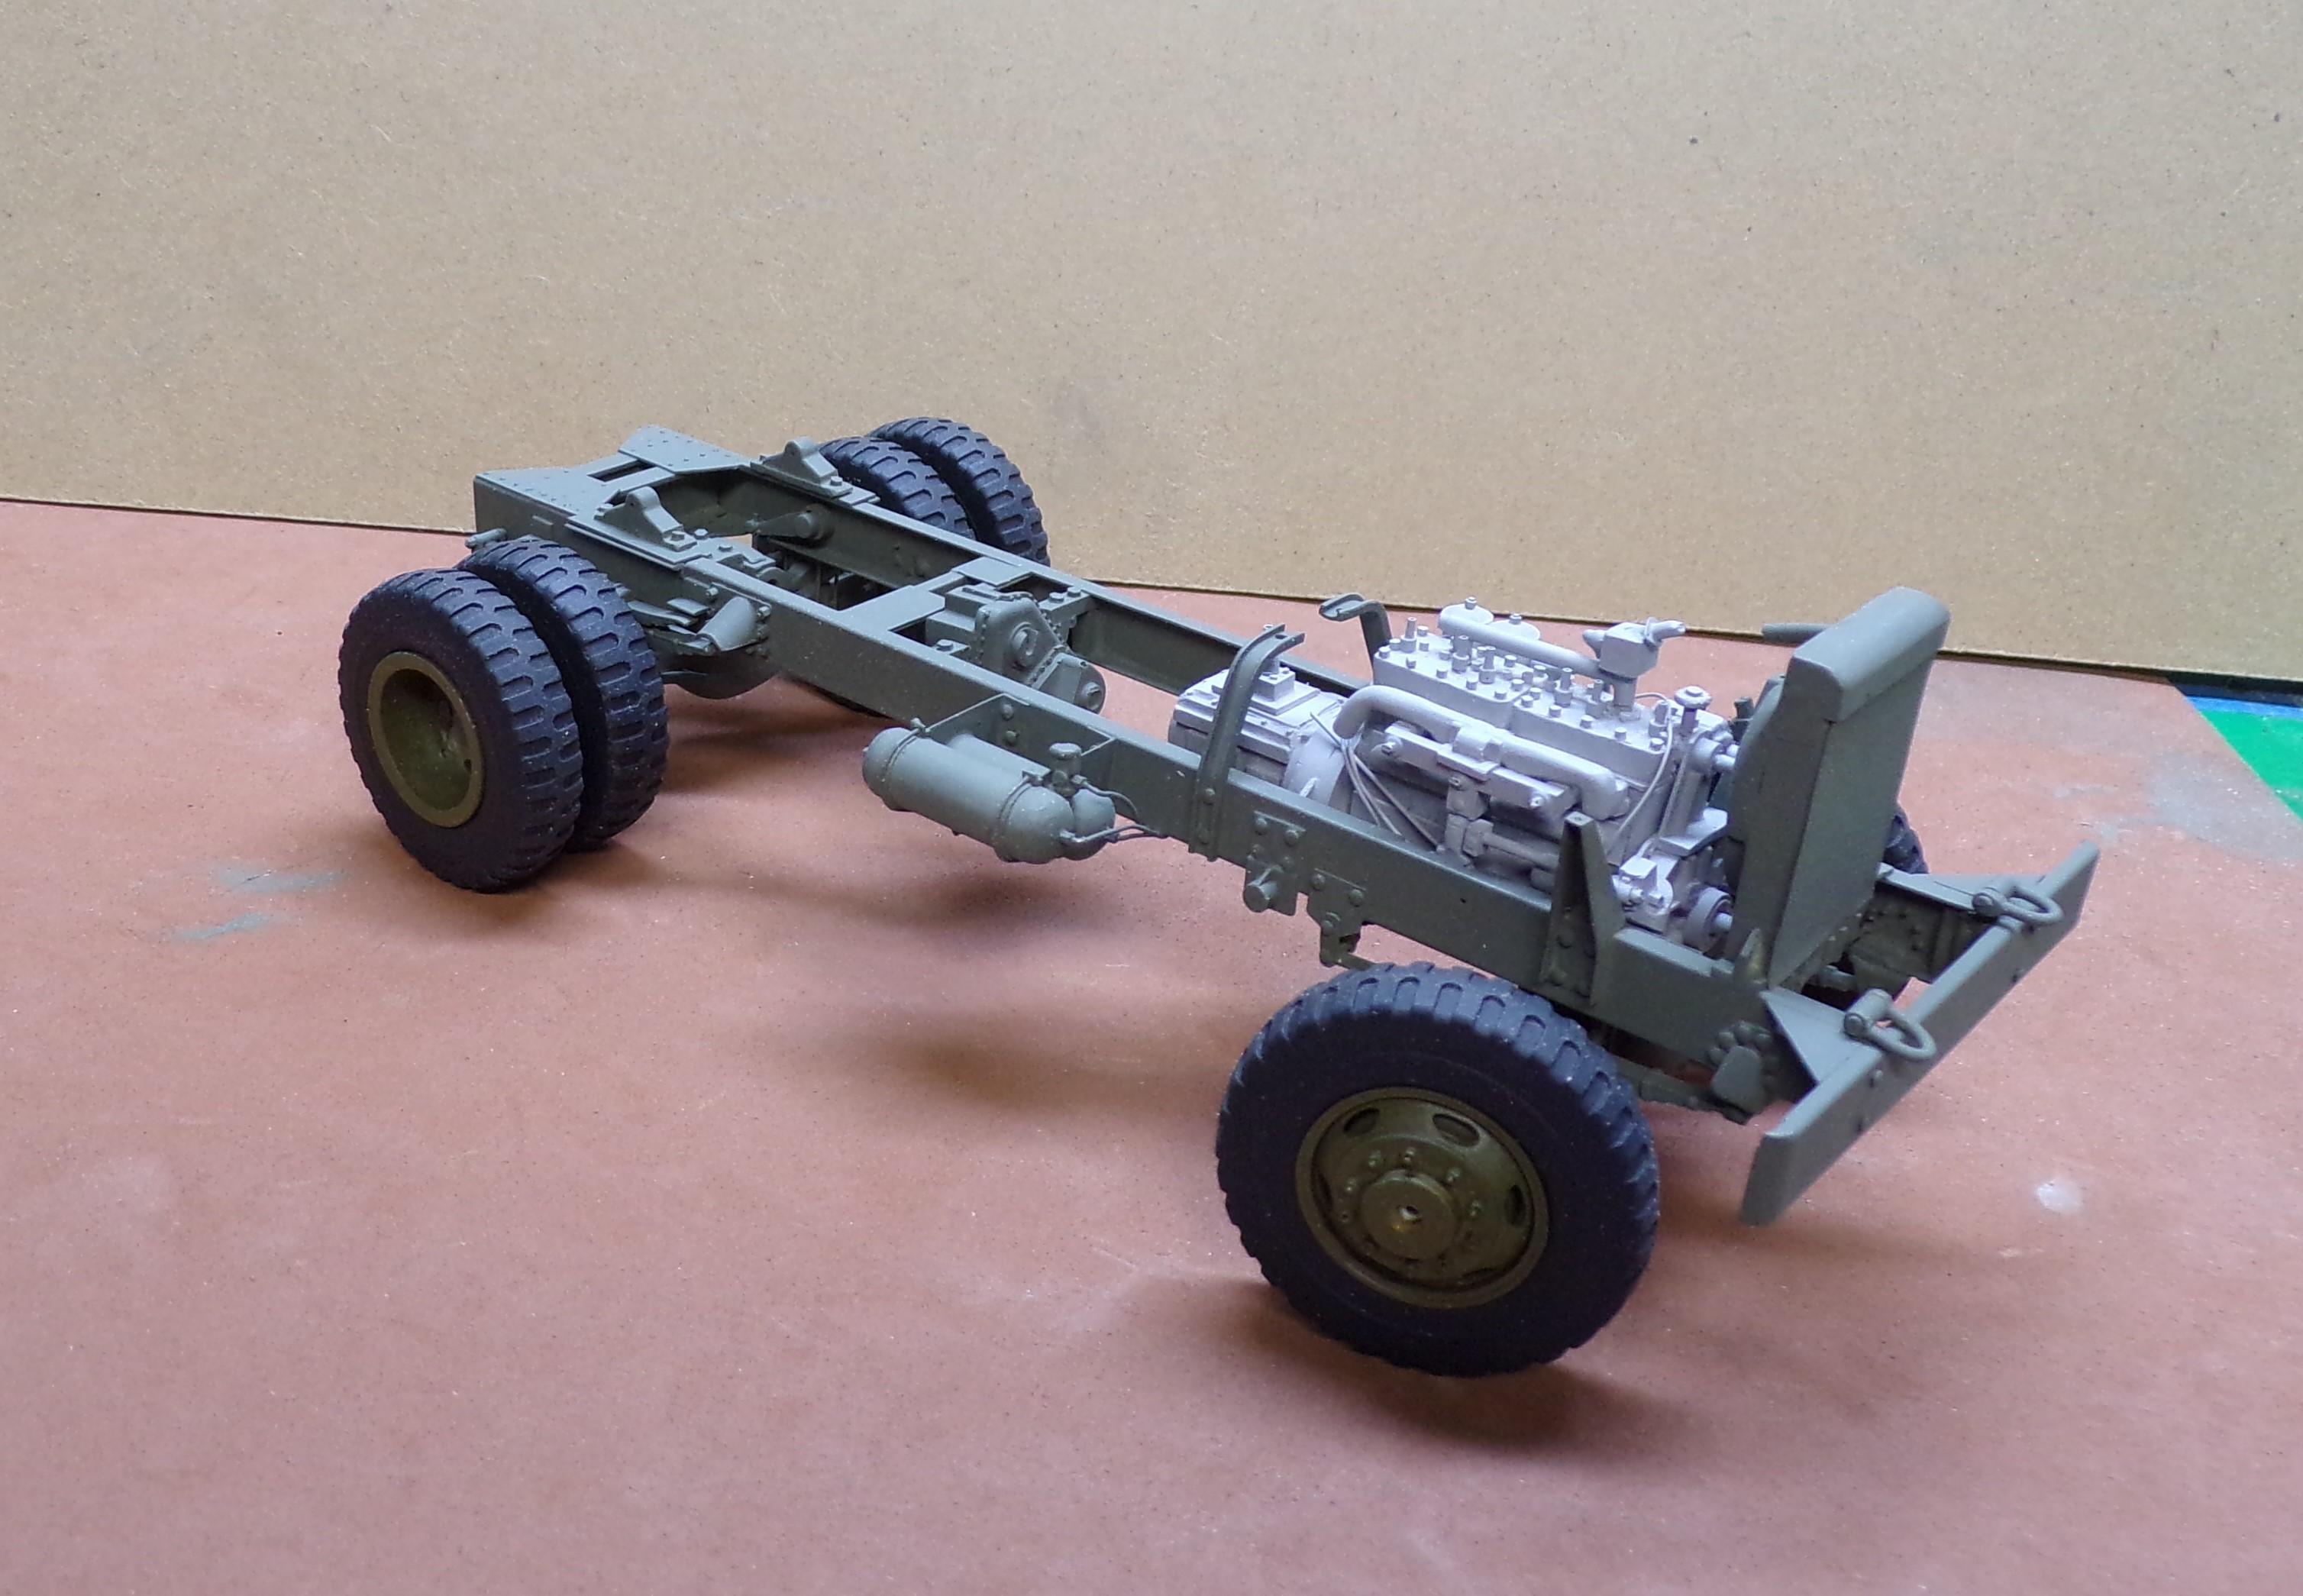
Springs are now mounted on the frame and the rear axle is set at the proper height. Still work on the front axle to do in order to get the right location and wheel track. Here is where we are now.
-
Been so long since I did the work I don't remember. Going back and looking at your resin casting, it may be a re-pop by someone else. My headlights don't look anything like yours and the hood on mine has a small rectangular cutout in the front of the center ridge. The ridge is about 6 mm wide. Mine also does not have the vertical marker lights on the front of the fenders. The headlight lenses on mine have yellowed with time so they probably were clear resin.