Chariots of Fire
-
Posts
2,783 -
Joined
-
Last visited
Content Type
Profiles
Forums
Events
Gallery
Everything posted by Chariots of Fire
-

Marmon 57P Conventional
Chariots of Fire replied to Jürgen M.'s topic in WIP: Model Trucks: Big Rigs and Heavy Equipment
USA!! USA!! Well done!! -
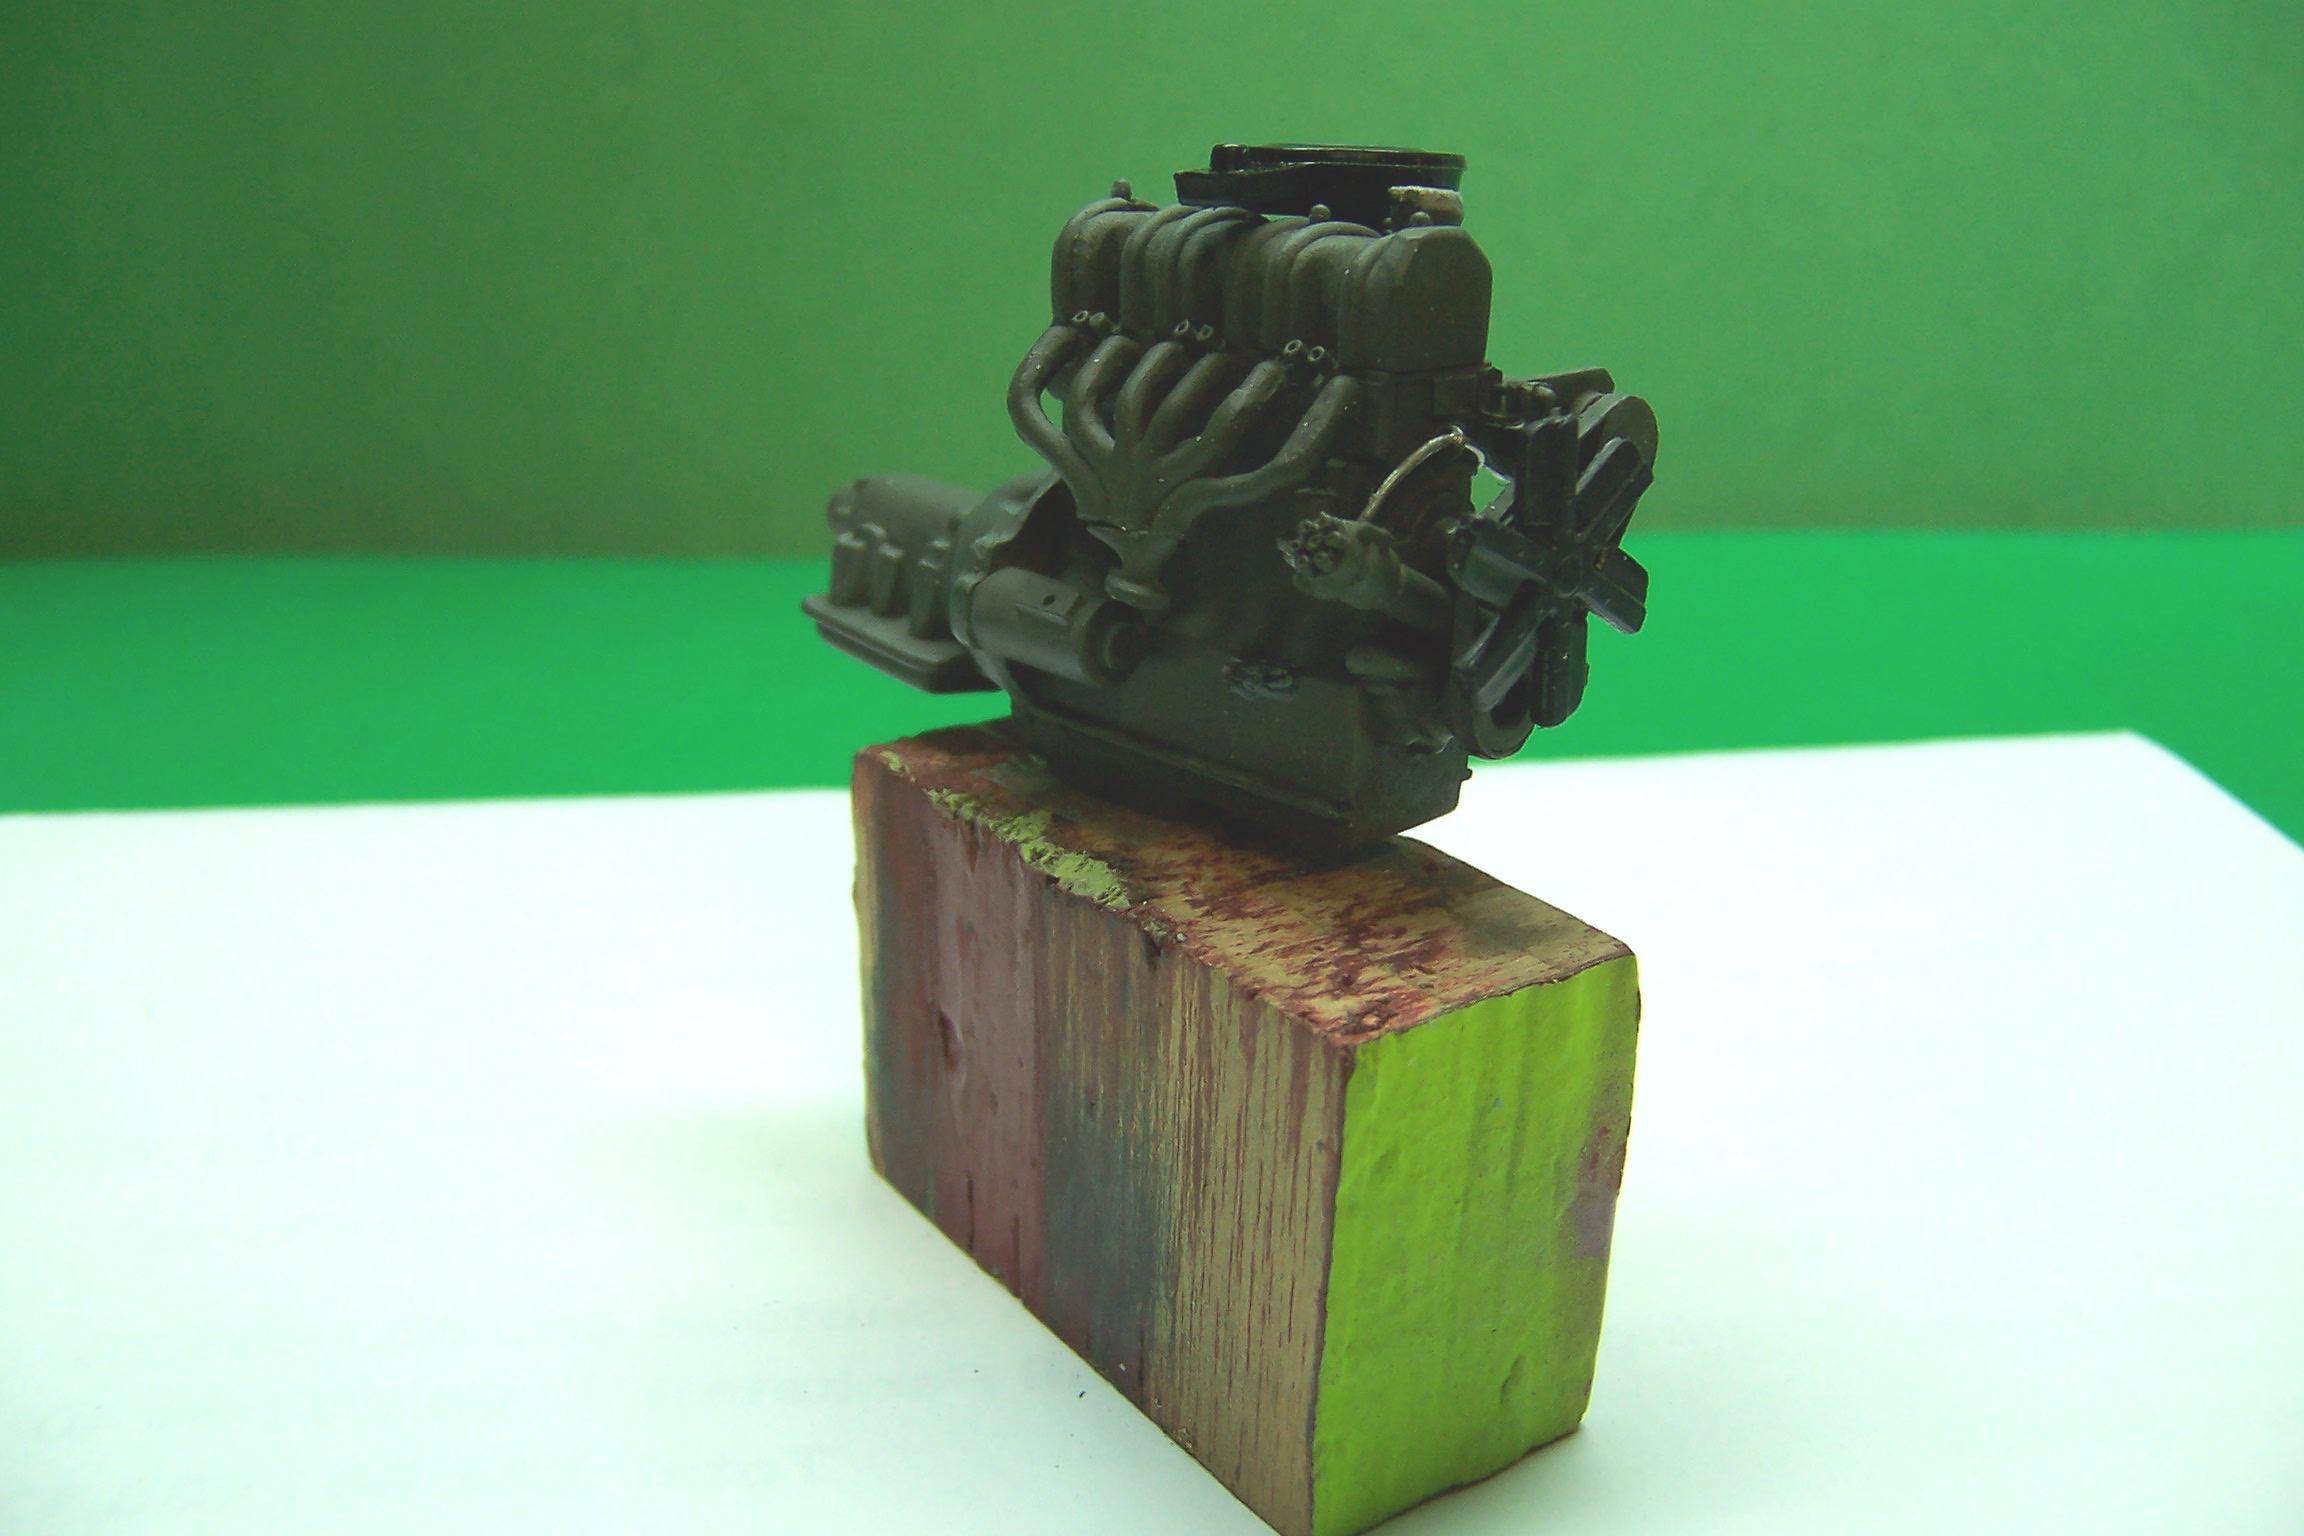
Source for a flathead 6 engine?
Chariots of Fire replied to PHPaul's topic in Model Building Questions and Answers
If your Willys is 1970's or so it may have had the Hurricane 6 or possibly the Tornado 6. Both were overhead cam engines so a flathead would have to be altered a bit on the top. Here's a look at one I did for an M-725 USAF ambulance.
-
CCKW
Chariots of Fire replied to Chariots of Fire's topic in WIP: Model Trucks: Big Rigs and Heavy Equipment
The elves have been working hard to get some parts built up and prepared for the frame. Here's a look at what is on the work bench today. Resin castings, brass springs, 3D printed masters and a few kit parts are all part of the mix.
-
I've had mixed results. I used Duplicolor gray primer on both yellow and red plastic from the 1/32 scale Monogram Snap Kits. I think it has more to do with the plastic than Duplicolor. Sometimes the color showed through and on others it did not. It was strange.
-
I agree. Preparation is necessary but that begins right at the beginning after opening the box. Not just for paint but for all aspects of any build. Try covering up a blemish or poor gluing, not removing parting lines, etc and it won't matter much how much prep goes into the rest of the project. I try and think of each task as just as important as the next and make all of the build a fun thing to do.☺️
-
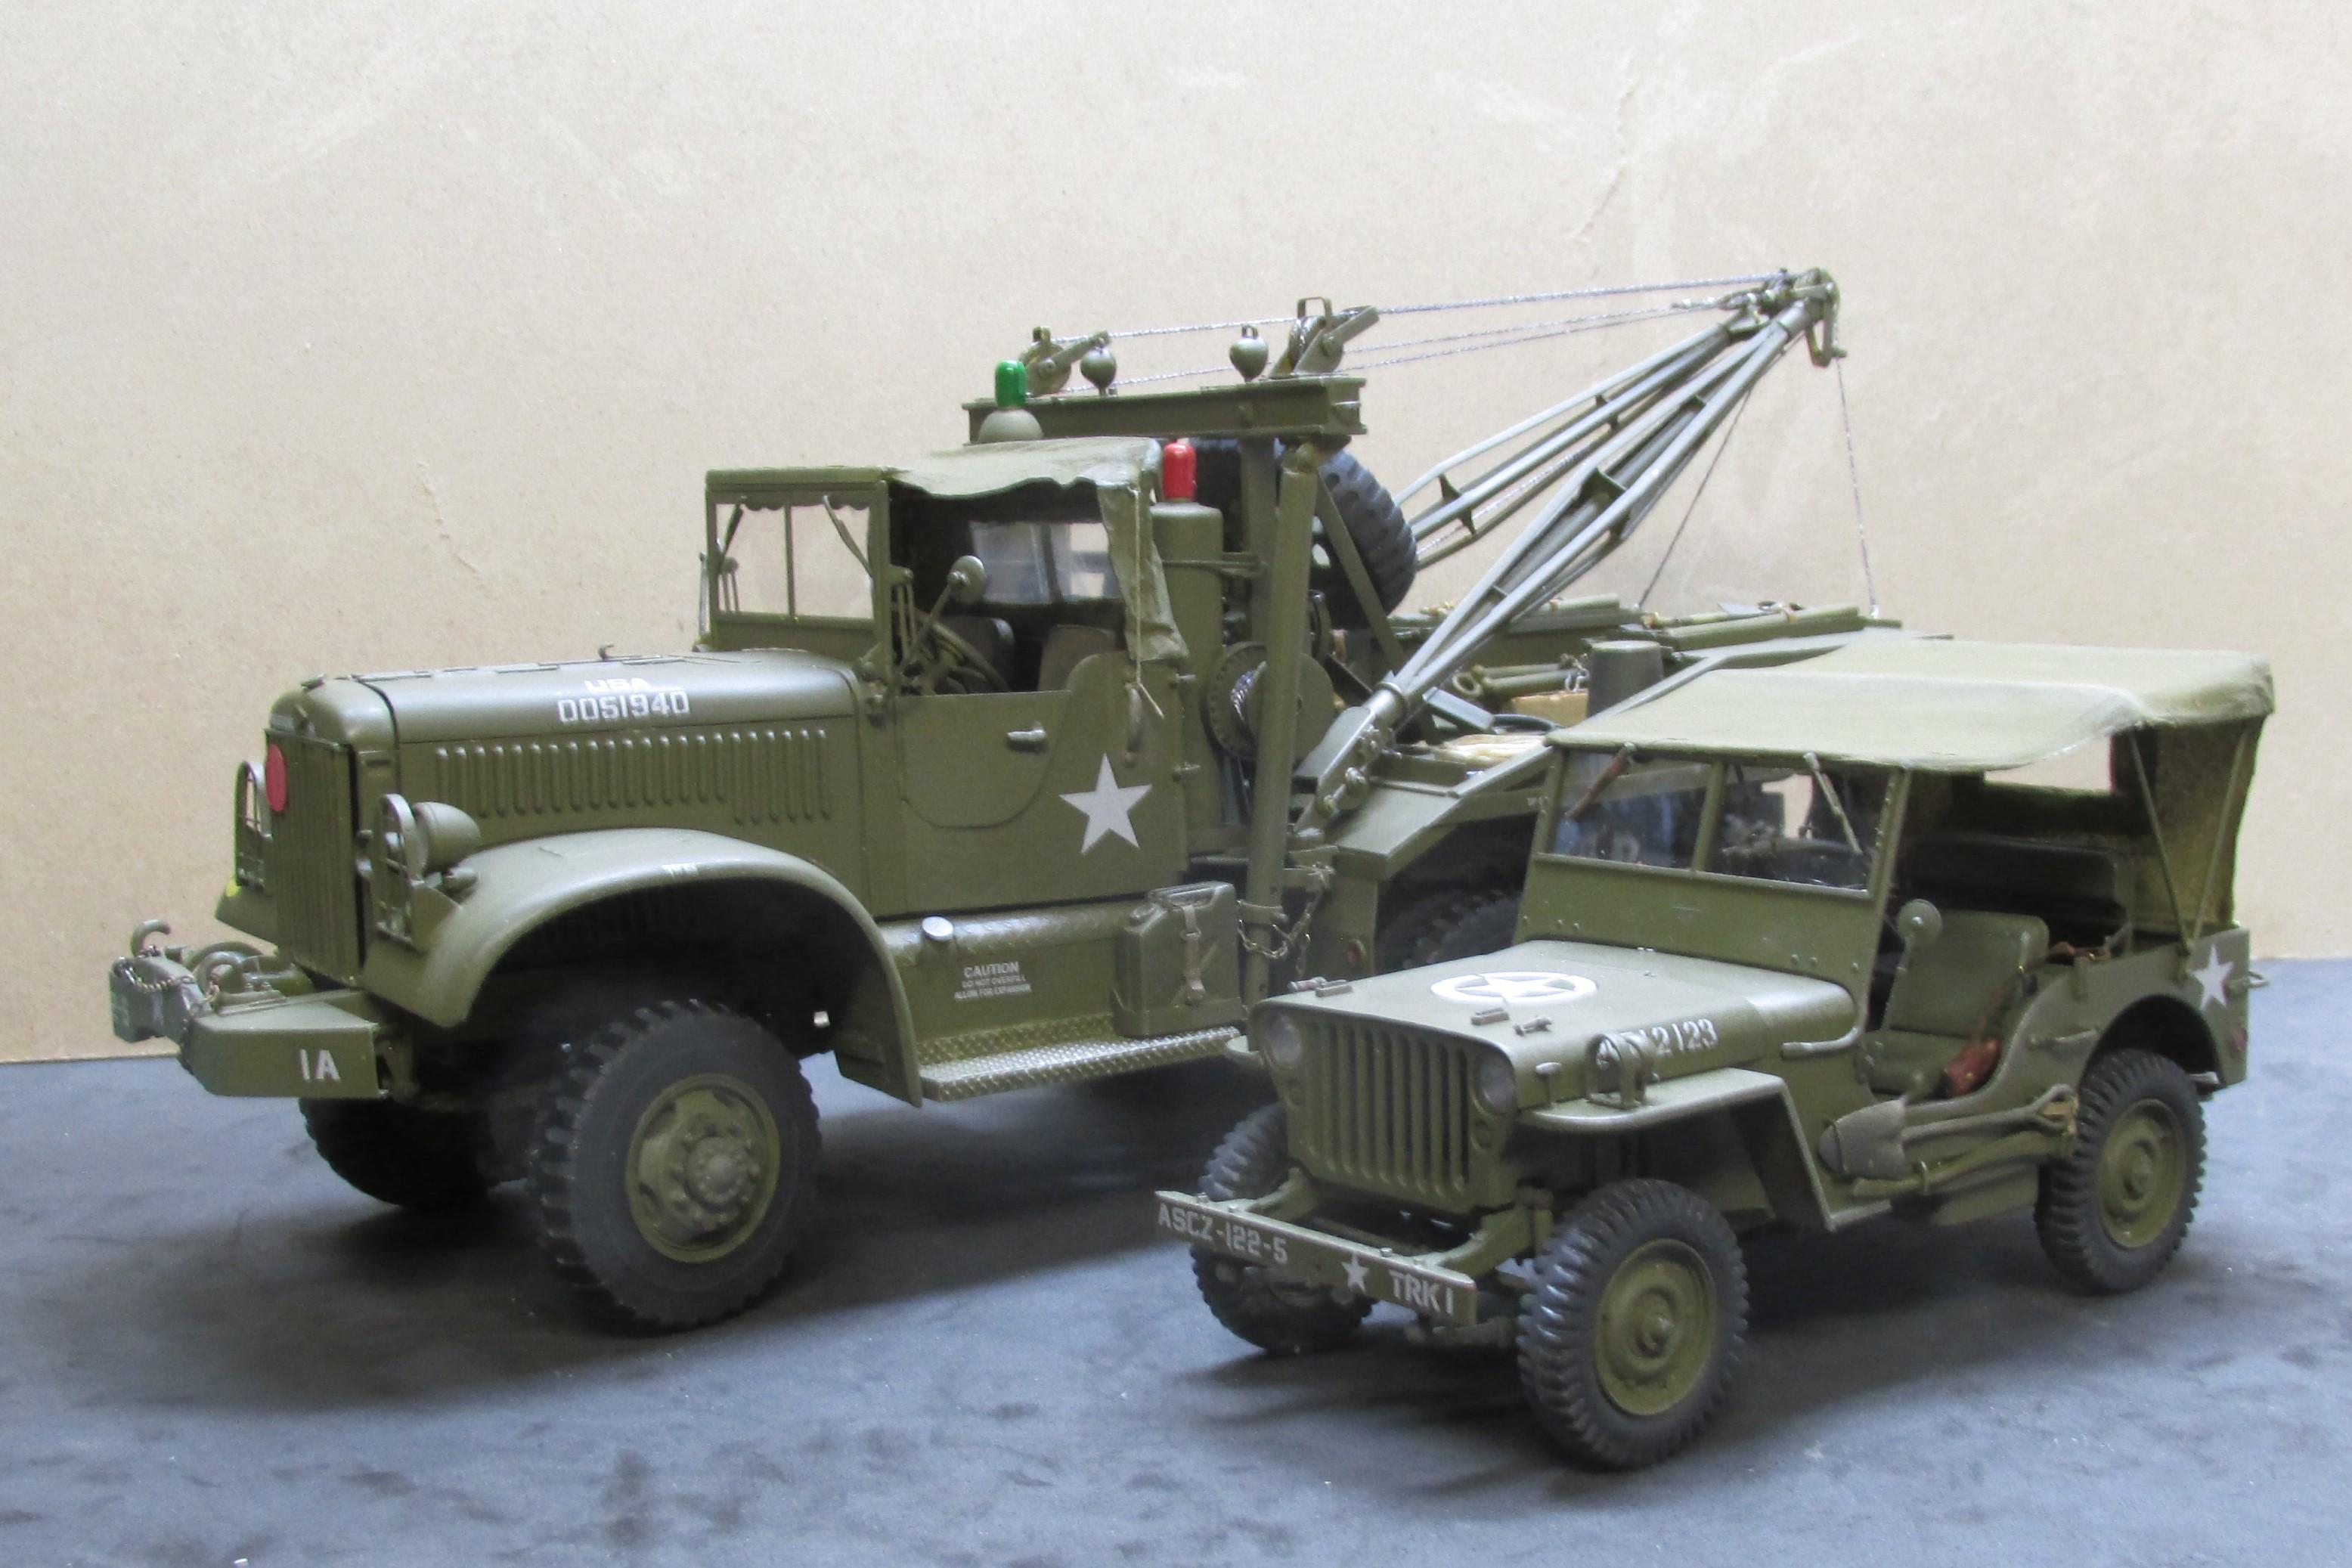
1944 Diamond T wrecker
Chariots of Fire replied to Chariots of Fire's topic in Model Trucks: Big Rigs and Heavy Equipment
Thanks, Bob. Here's a little one to go with it! Finished it about 3 weeks ago. Working on a CCKW (deuce and a half) now. Frame is coming along.
-
CCKW
Chariots of Fire replied to Chariots of Fire's topic in WIP: Model Trucks: Big Rigs and Heavy Equipment
? Right you are. The only way they could get them inside a C-47 was to cut them in half and transport one half in one plane and the second half in another plane. Even at that they had to unbolt one front spring to lower one part of the cab so it would fit into the cargo bay. -
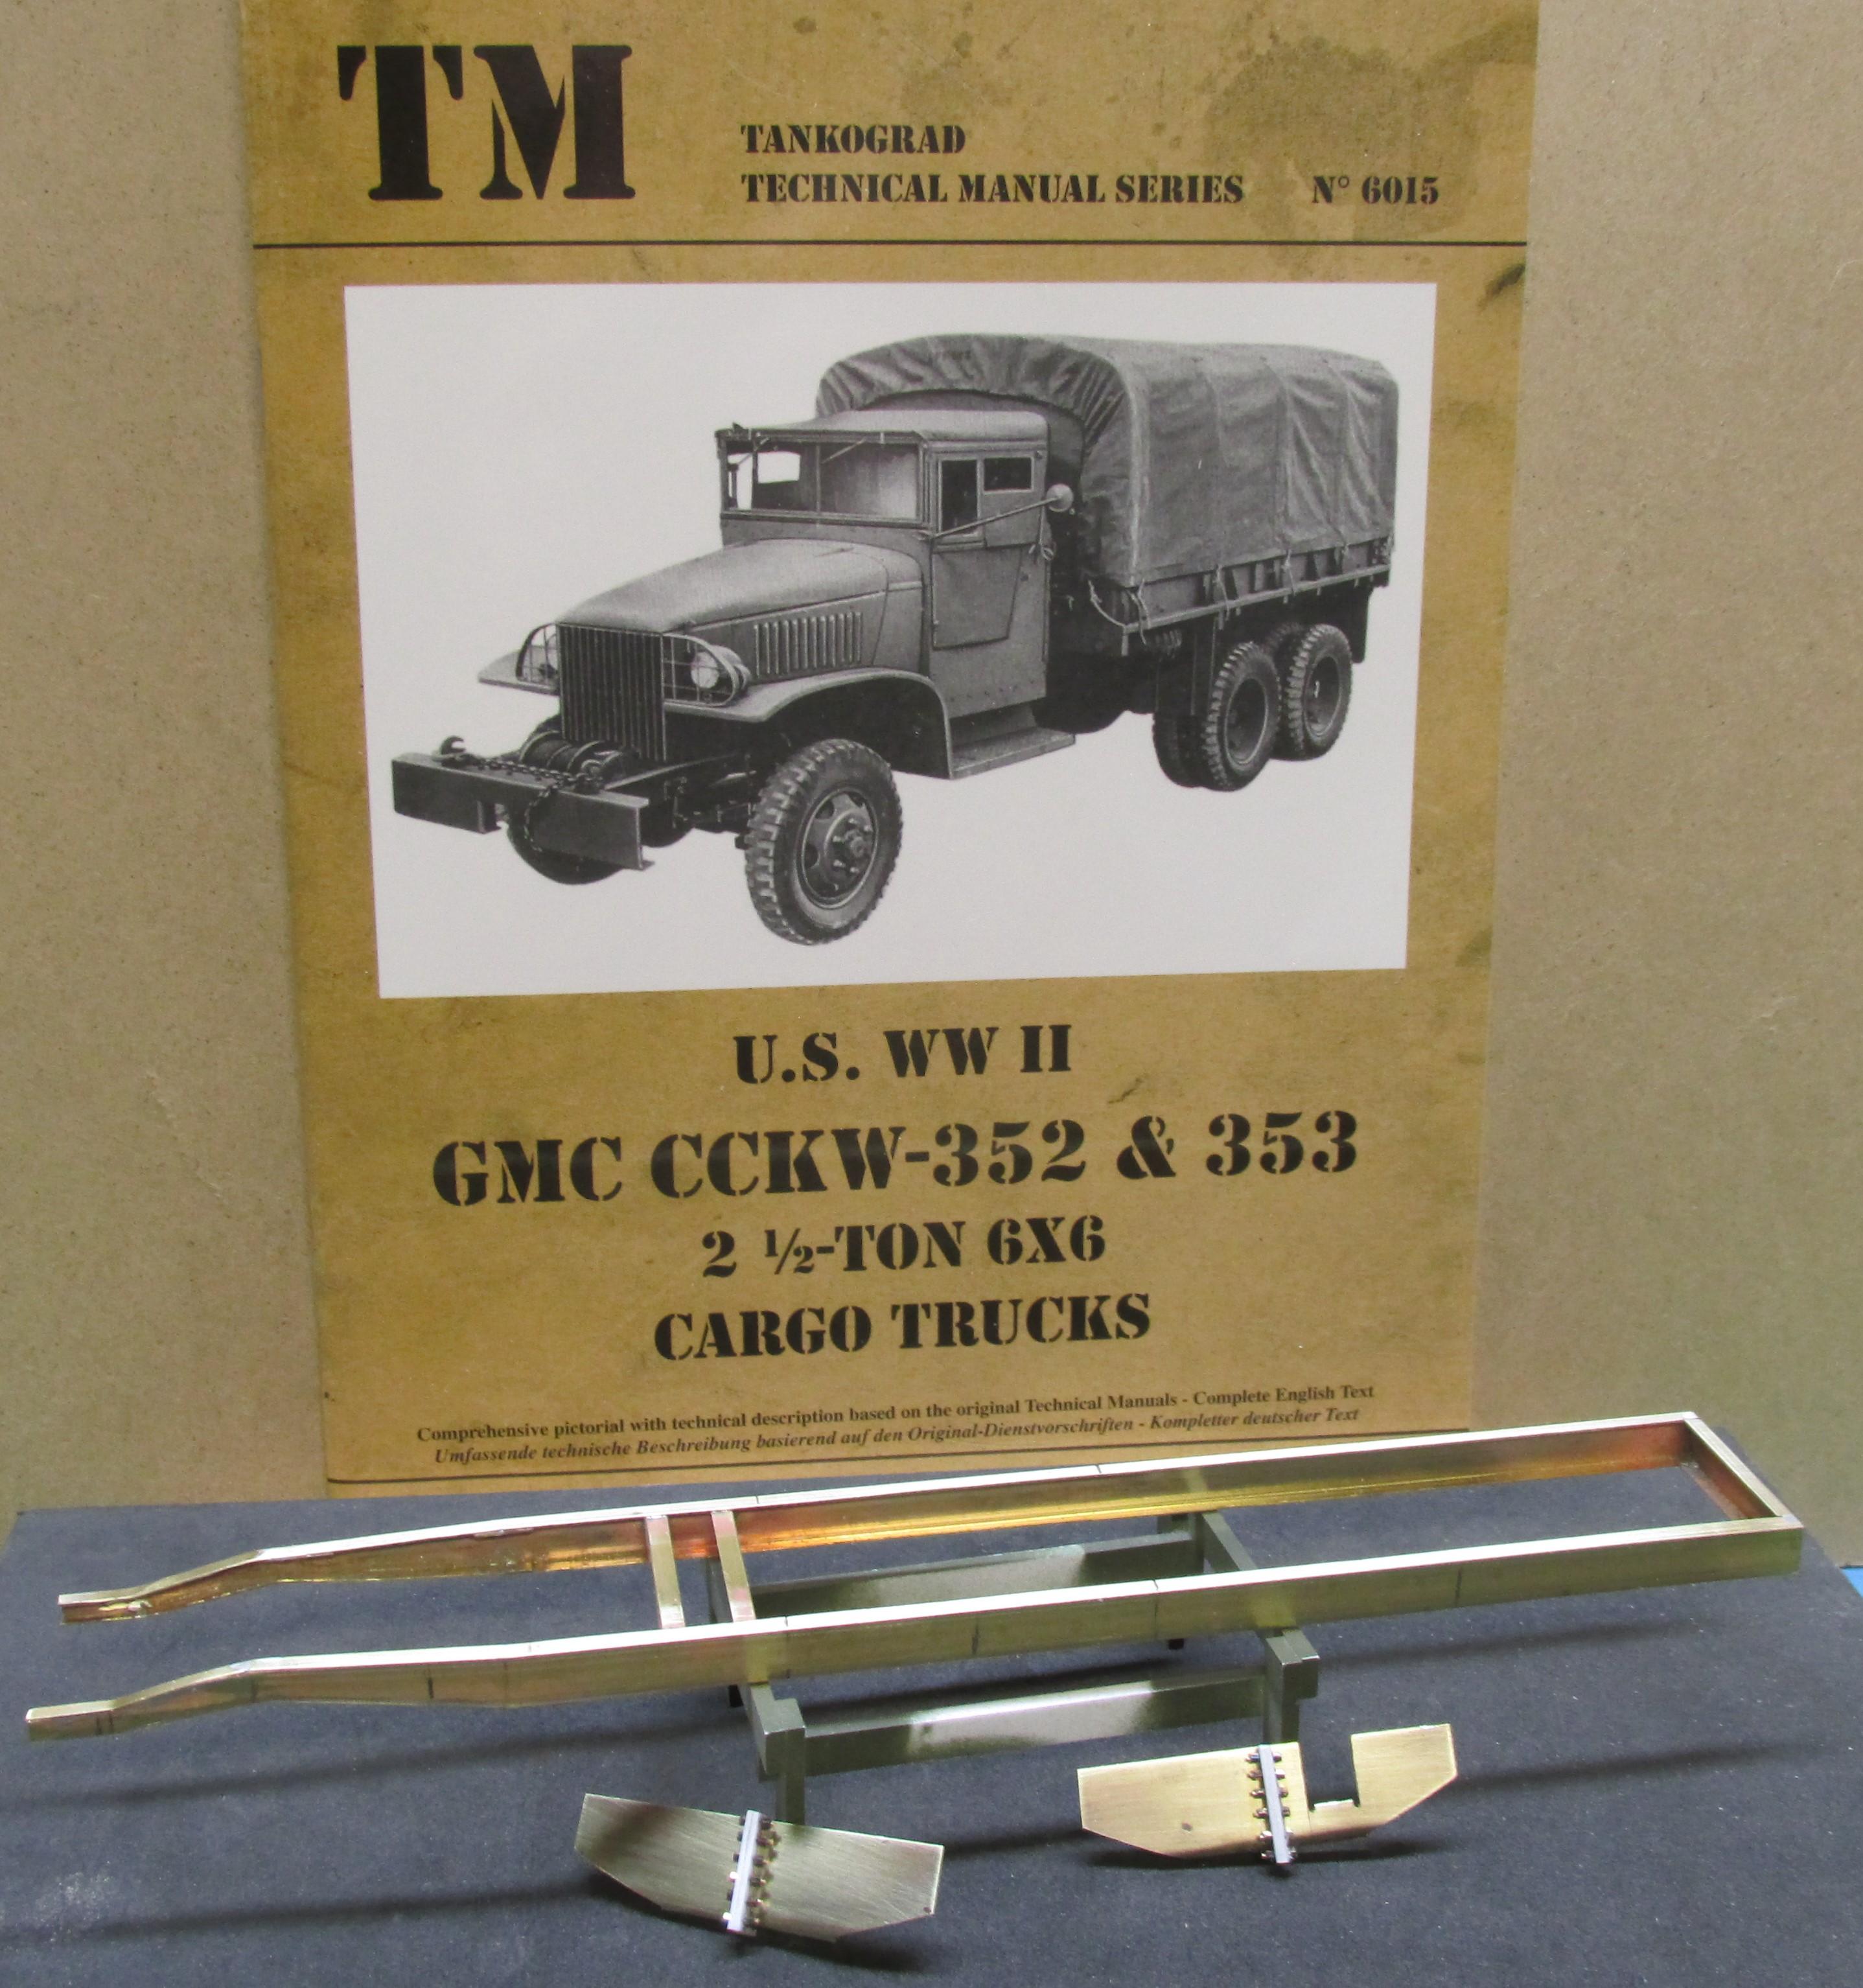
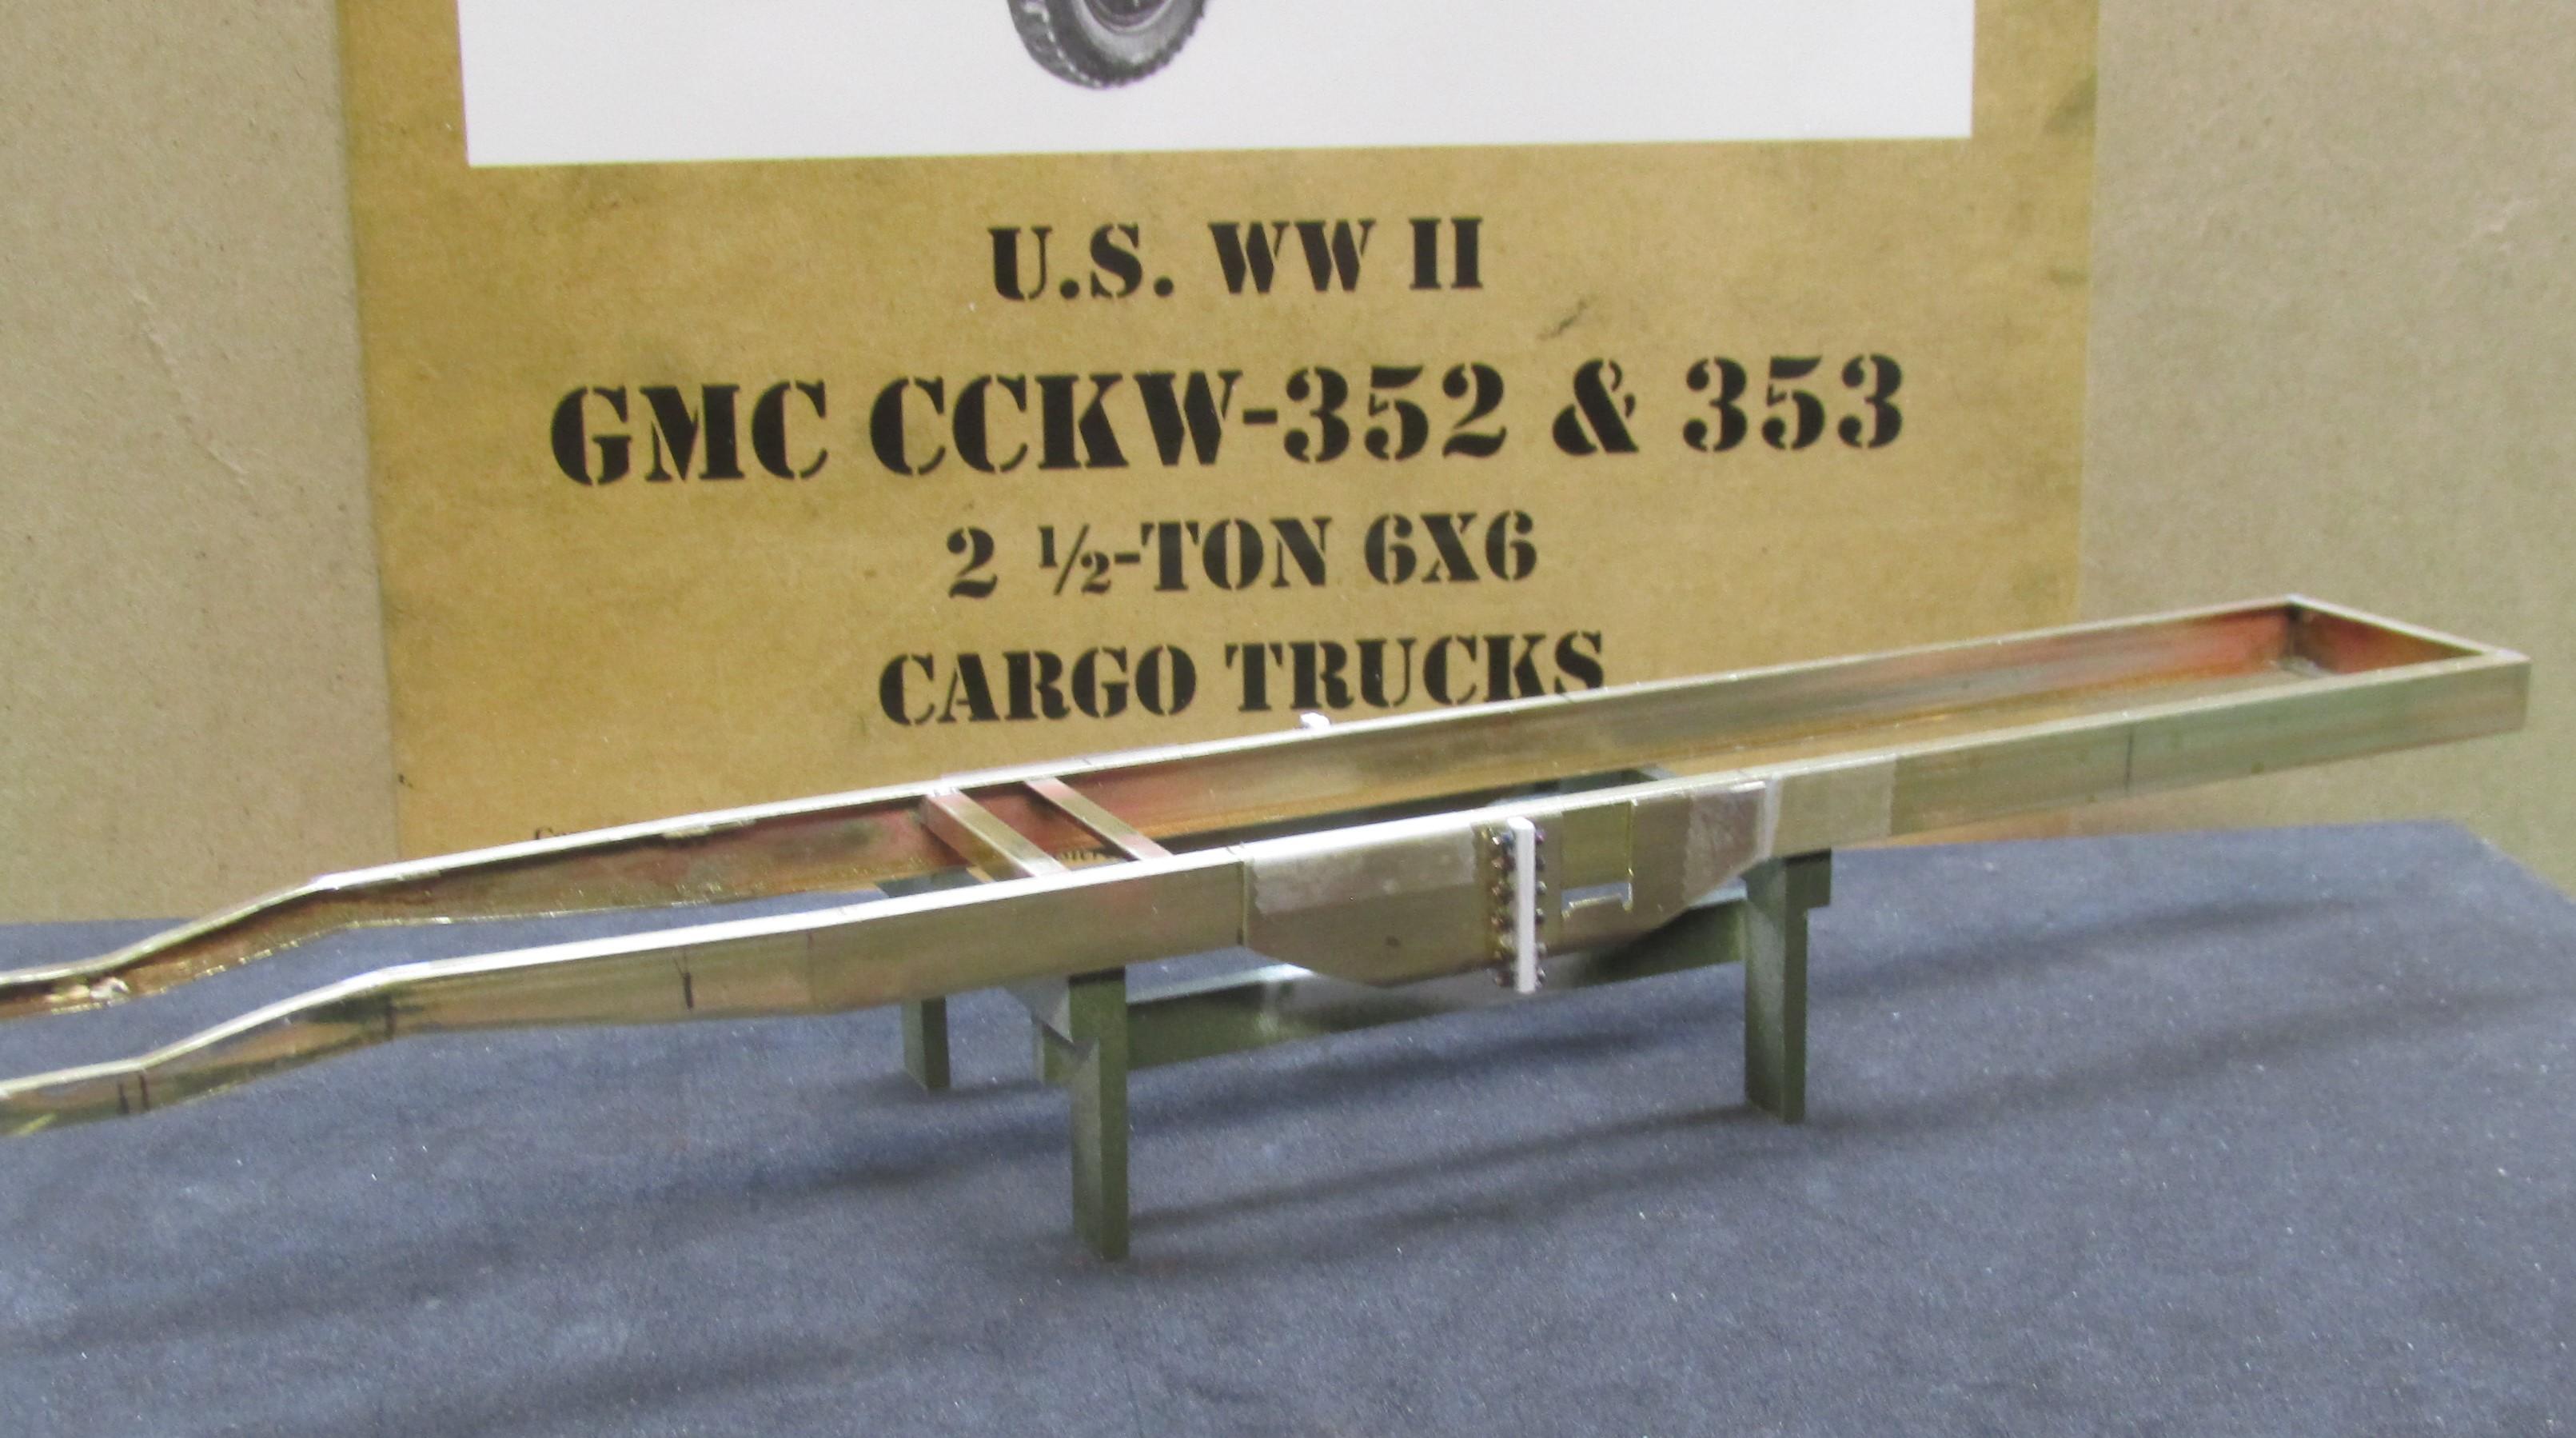
The next build is started. It took a while to find the right information to begin the frame. Three books of photos did not have the necessary look to identify what I was after. Searching on line, I found a side shot of the truck with sufficient detail of the front of the frame for it to be copied and resized to 1/25 scale. So the frame rails are done along with two fishplates that will be added to the center of it. Some of you probably know why but for others, I'll let you ponder for a while and see if you can come up with the answer. ?
-
GMC General Wrecker
Chariots of Fire replied to Warren D's topic in Model Trucks: Big Rigs and Heavy Equipment
Agree what everyone else said. Color is great and the wrecker GMC combo is just right. -
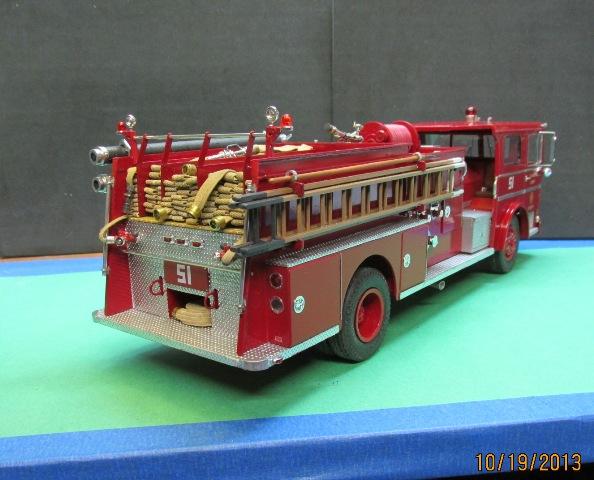
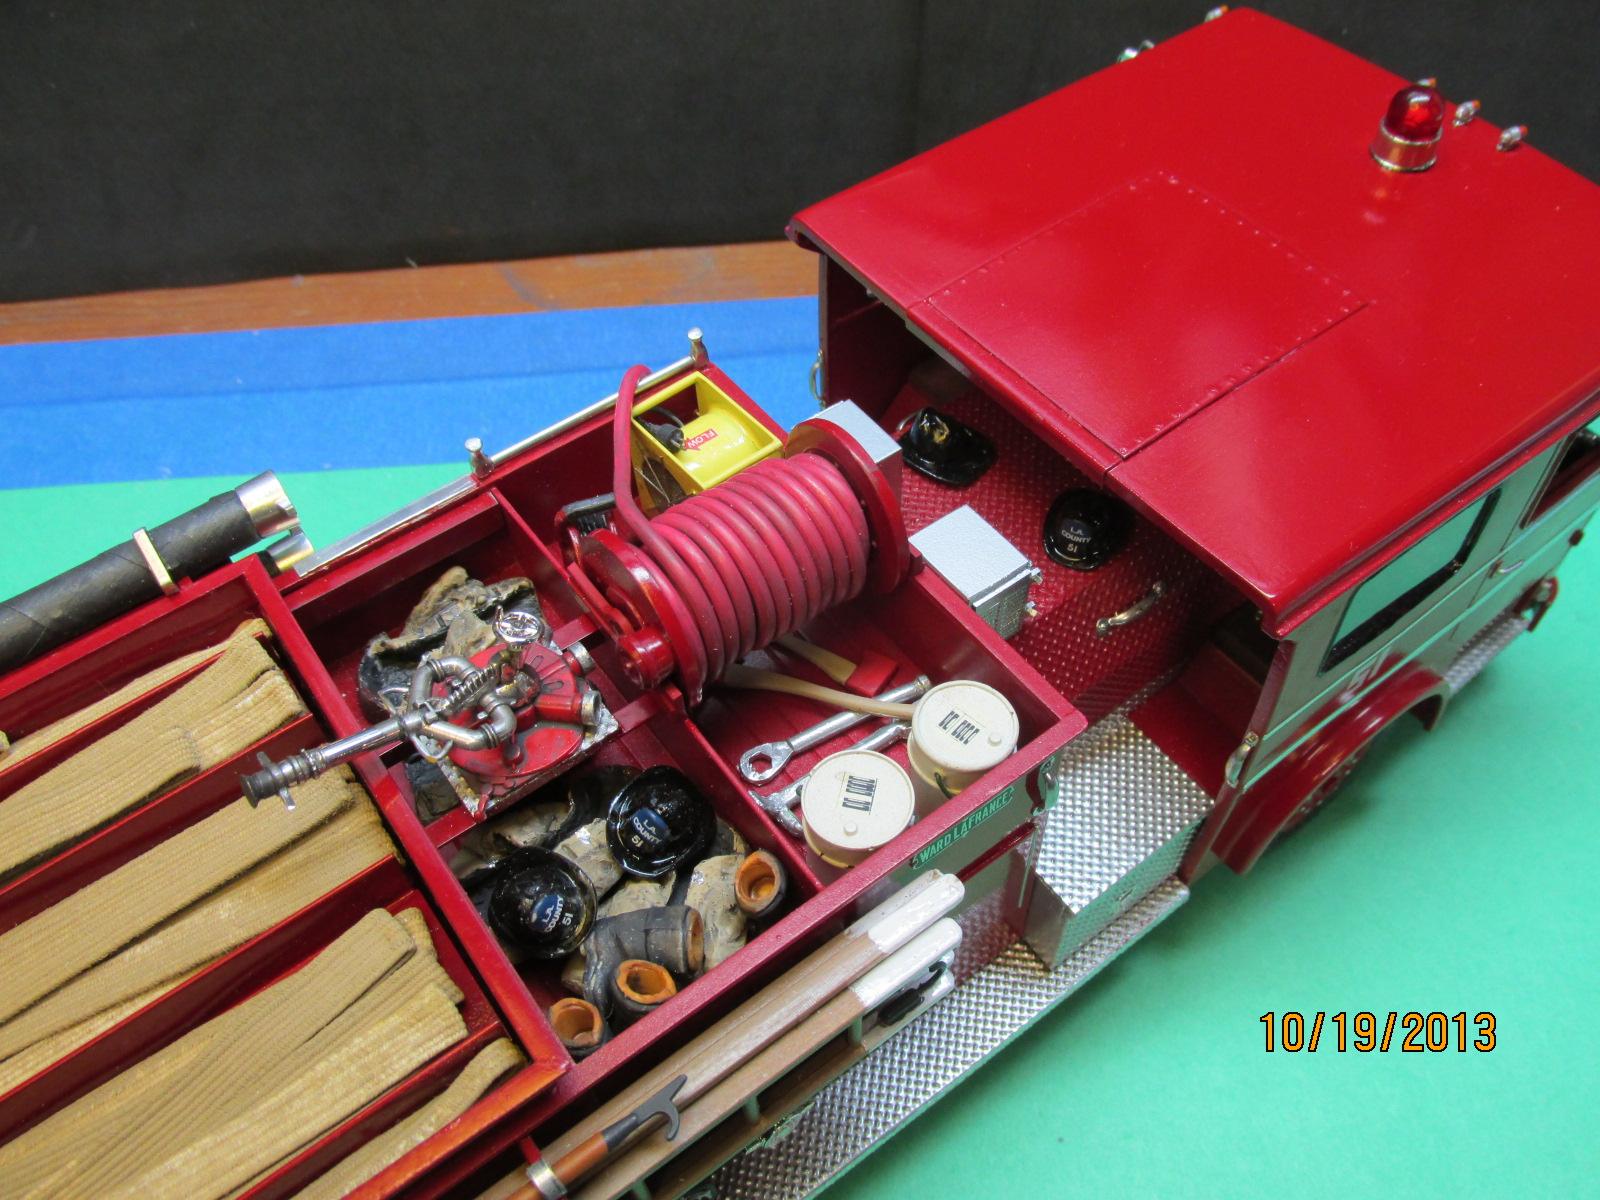
Nice stuff, Greg! I have those LA County decals. When my children were growing up that was a Sunday nite fare to sit and watch Emergency! before they went to bed. The show was pretty close to being responsible for the development of EMS services we have today. I just may have to build the rescue! I did Engine 51 a few years ago.
-
Hey Brian. I'd check to see if the Rustoleum and Duplicolor paints are compatible before putting them on that nice cab. I don't have any experience with combining them to see if one is hotter than the other.
-
Tamiya putty in very thin layers works well. Mixing superglue with sanding residue works also but the difficulty with using CA as a filler except in cracks is that it is much harder than the surrounding plastic. As a result it is very difficult to sand it smooth with the surrounding plastic unless great care is taken. Sanding sticks are a must.
-
1944 GMC CCKW
Chariots of Fire replied to Warren D's topic in WIP: Model Trucks: Big Rigs and Heavy Equipment
HI, Warren. I now have a Tankograd book on the CCKW and have ordered another one with different info. If you need any technical info give a shout. I might be able to help in the placement of certain things. Track of the front wheels is 60" if that gives you any help on the axle length up front. The rear track is 67" according to the specs. -
That kit and the ladder and Aero Chief kits have been the source of a lot of frame and running gear parts for my builds. All are basically good kits except for some of the details which are a bit on the klunky side. Greg knows this but on the box art, they turned the hard suction ends wrong end in. The Hale pump is great. I have two builds done; one of the pumper and another of the rear mount aerial. They can be kit bashed all kinds of ways.
-
How Do You Cut Brass Tube?
Chariots of Fire replied to Bill Eh?'s topic in Model Building Questions and Answers
Using the KS cutter on 1/8" stock is hard because you are near the end of the line for the size. I have had the same difficulty with the cutter but if you go slow and watch the line you may be able to guide it around. It takes some practice. The other way is with a dremel and cutting wheel but be careful not to bind the cutting wheel or it will either shatter or go zipping across the stock. Go slow with it and then use a file to smooth up the cut edge. -
Using an Italeri kit to start, this WW II Jeep was made up with a hinged top, radio, GI gas can and a soft top of facial tissue. The top braces are brass. And here it is beside the Diamond T. A wee bit smaller!
-
If you are doing the hose reel consider using some red or brown small insulated wire for the hose. It would have been either 3/4" or 1" diameter rubber in real life. An alternative would have been cotton jacket forestry hose of 1-1/4" diameter.
-
That's some nice work. I agree with Greg. Probably a Darley pump. But it could also have been a Barton American. For that scale consider using some 1/4" sewing elastic for the cotton jacket hose. Stain it light tan with a weathering powder to dirty it up a bit and add your nozzles.
-
Well done for sure. ?
-
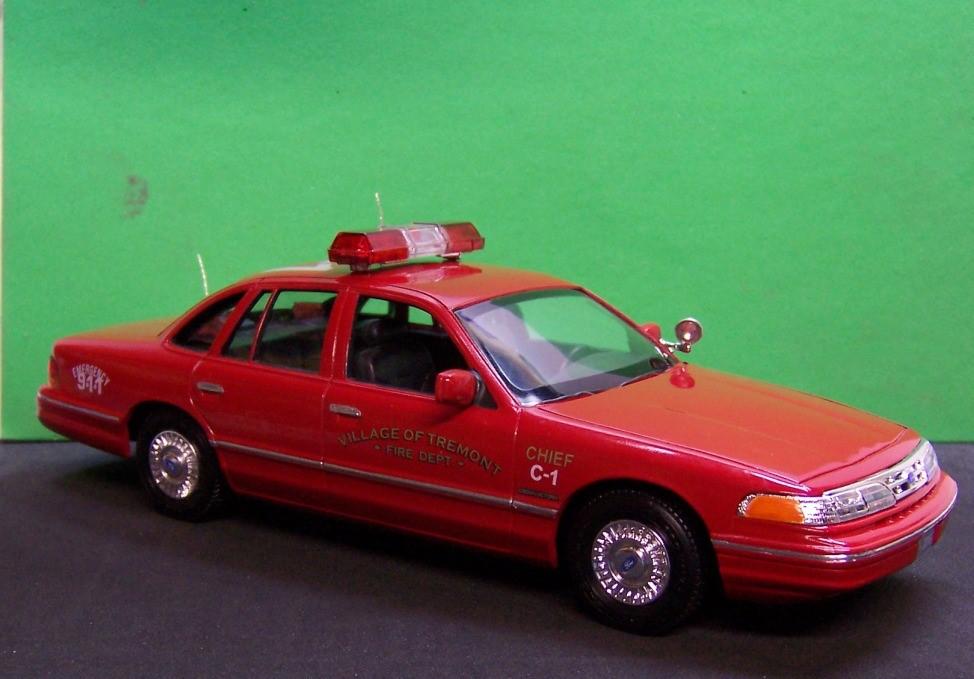
Windshield gaskets
Chariots of Fire replied to Chariots of Fire's topic in Tips, Tricks, and Tutorials
Plain old black Magic Marker. Try darkening it up a second time around, Jim. The purplish color may dissipate. -
Windshield gaskets
Chariots of Fire replied to Chariots of Fire's topic in Tips, Tricks, and Tutorials
Amen to that! -
When getting ready to create the rubber gasket around windshields try a chisel point black permanent marker instead of trying to paint it. It's almost a guarantee that the lines will be nice and smooth. It also works on windshields on more modern vehicles that have the tinted glass around the edges. Run the marker around the inside of the glass (this takes a bit more practice) but the results again are great. Magic marker was used to create the gasket around the windshield. Note that the whole gasket was not done. Helps to keep things in scale. Magic marker used around the inside of the windshield , rear and side windows on the Crown Vic.
-
Rustoleum paints are terrible.
Chariots of Fire replied to James Maynard's topic in General Automotive Talk (Trucks and Cars)
Rustoleum paints are the worst you can use in model painting. It's too thick, doesn't spray finely and takes forever to adequately dry. Try Duplicolor or some of the new Tamiya model paints. Real good success with both. -
I agree with Rick L. If you have a desire to do some casting start with something simple that only takes a one part mold. Get the hang of mixing up the mold material first and then move on to making more sophisticated ones. It took me a while but now I can make most anything I need in my projects. Micro-Mark sells good RTV and casting supplies. Just for simplicity sake I use small plastic cups to mix the RTV in 50/50 proportions and small communion cups for the casting resin. I mark one with how much of Part A I want, then drop the cup inside the second cup, taking into account the thickness of the cups and mark the second one for Part B the same way. Results are positive just about every time. Give a shout if you have any questions.
-
Oh, my! What a flurry of activity this produced!! I have to admit it had me guessing as to what it was all about until I read the actual inquiry!?

.JPG.66e2d1a34a712b8bea70d57d275d29f3.JPG)